
MCD301 - Cd player/recorder MCINTOSH - Free user manual and instructions
Find the device manual for free MCD301 MCINTOSH in PDF.


| Product Type | CD Player/Recorder |
| Brand | McIntosh |
| Model | MCD301 |
| Color | Black with silver knobs and logo |
| Dimensions (W x H x D) | 17.5" x 5.5" x 16.5" (44.5 x 14.0 x 41.9 cm) |
| Weight | 28 lbs (12.7 kg) |
| Power Supply | 100-120V / 220-240V, 50/60 Hz (switchable) |
| Power Consumption | 50 watts (maximum) |
| Disc Compatibility | CD, CD-R, CD-RW, MP3 CD |
| Recording Formats | CD-R, CD-RW (finalized in Red Book CD format) |
| Audio Outputs (Analog) | 1x unbalanced RCA, 1x balanced XLR |
| Digital Outputs | 1x coaxial (RCA), 1x optical (Toslink) |
| DAC Type | Quad-balanced 32-bit/192kHz DAC |
| Frequency Response | 4 Hz – 20 kHz (±0.5 dB) |
| Signal-to-Noise Ratio | >110 dB |
| Total Harmonic Distortion | <0.005% at 1 kHz |
| Remote Control | Included (battery-operated, IR) |
| Display | Blue LED vacuum fluorescent display |
| Headphone Output | 1/4" TRS with dedicated amplifier |
| Inputs for Recording | 1x unbalanced RCA, 1x balanced XLR |
| Features | Play, Pause, Stop, Track Skip, Program Play, Repeat, Random, Record, Time Edit |
| Accessories Included | Remote control, power cord, mounting screws for rack (optional) |
| Maintenance | Keep away from moisture and dust. Clean with a soft dry cloth. Do not use solvents. |
| Safety | Do not open. Use only in a well-ventilated area. Avoid direct sunlight. |
Frequently Asked Questions - MCD301 MCINTOSH
User questions about MCD301 MCINTOSH
0 question about this device. Answer the ones you know or ask your own.
Ask a new question about this device
Download the instructions for your Cd player/recorder in PDF format for free! Find your manual MCD301 - MCINTOSH and take your electronic device back in hand. On this page are published all the documents necessary for the use of your device. MCD301 by MCINTOSH.
USER MANUAL MCD301 MCINTOSH
McIntosh Laboratory, Inc. 2 Chambers Street Binghamton, New York 13903-2699 Phone: 607-723-3512 www.mcintoshlabs.com
MCD301
SACD/CD Player
Owner's Manual


The lightning flash with arrowhead, within an equilateral triangle, is intended to alert the user to the presence of uninsulated "dangerous voltage" within the product's enclosure that may be of sufficient magnitude to constitute a risk of electric shock to persons.
WARNING - TO REDUCE RISK OF FIRE OR ELECTRICAL SHOCK, DO NOT EXPOSE THIS EQUIPMENT TO RAIN OR MOISTURE.

AVIS RISQUE DE CHOC ELECTRIQUE - NE PAS OUVRIR.
NO USER-SERVICEABLE PARTS INSIDE. REFER SERVICING TO QUALIFIED PERSONNEL.
The exclamation point within an equilateral triangle is intended to alert the user to the presence of important operating and maintenance (servicing) instructions in the literature accompanying the appliance.
To prevent the risk of electric shock, do not remove cover or back. No user-serviceable parts inside.
CAUTION
Invisible Laser Radiation when open. DO NOT stare into the beam or view directly with optical instruments. Use of controls or adjustments or performance of procedures other than those specified in the Owners Manual may result in Hazardous Radiation Exposure.
LUOKAN 1 LASERLAITE KLASS 1 LASER APPARAT
VAROITUS!
This product incorporates an embedded CLASS 3R Laser (IEC60825-1).


IMPORTANT SAFETY INSTRUCTIONS!
PLEASE READ THEM BEFORE OPERATING THIS EQUIPMENT.
- Read these instructions.
- Keep these instructions.
- Heed all warnings.
- Follow all instructions.
- Do not use this apparatus near water.
- Clean only with a dry cloth.
- Do not block any ventilation openings. Install in accordance with the manufacturer's instructions.
- Do not install near any heat sources such as radiators, heat registers, stoves, or other apparatus (including amplifiers) that produce heat.
- Do not defeat the safety purpose of the polarized or grounding-type plug. A polarized plug has two blades with one wider than the other. A grounding type plug has two blades and a third grounding prong. The wide blade or the third prong are provided for your safety. If the provided plug does not fit into your outlet, consult an electrician for replacement of the obsolete outlet.
- Protect the power cord from being walked on or pinched particularly at plugs, convenience receptacles, and the point where they exit from the apparatus.
-
Only use attachments/accessories specified by the manufacturer.
-
Use only with the cart, stand, tripod, bracket, or table specified by the manufacturer, or sold with the apparatus. When a cart is used, use caution when moving the cart/apparatus combination to avoid injury from tip-over.
- Unplug this apparatus during lightning storms or when unused for long periods of time.
- Refer all servicing to qualified service personnel. Servicing is required when the apparatus has been damaged in any way, such as power-supply cord or plug is damaged, liquid has been spilled or objects have fallen into the
apparatus, the apparatus has been exposed to rain or moisture, does not operate normally, or has been dropped.
- Do not expose this equipment to dripping or splashing and ensure that no objects filled with liquids, such as vases, are placed on the equipment.
- To completely disconnect this equipment from the a.c. mains, disconnect the power supply cord plug from the a.c. receptacle.
- The mains plug of the power supply cord shall remain readily operable.
- Do not expose batteries to excessive heat such as sunshine, fire or the like.
- Connect mains power supply cord only to a mains socket outlet with a protective earthing connection.

Table of Contents
Safety Instructions ....2
Table of Contents 3
Thank You and Please Take a Moment 4
Technical Assistance and Customer Service ....4
General Information 4
Connector and Cable Information ....4
Disc Information 5
Introduction 5
Performance Features ....5
Dimensions 6
Installation 7
Connections:
Rear Panel Connections 8
How to Connect Control, Analog and Digital Audio 10
How to Connect Directly to a Power Amplifier .....11
Front Panel Features:
Front Panel Displays, Controls, Push-buttons
and Jack 12
Front Panel Information Displays ....13
Remote Control:
Remote Control Push-buttons ....14
How to use the Remote Control ....15
Operation:
How to Operate the MCD301 ....16
Additional Information:
Specifications....22
Packing Instruction 23
Copyright 2009 © by McIntosh Laboratory, Inc.

Thank You
Your decision to own this McIntosh MCD301 SACD/CD Player ranks you at the very top among discriminating music listeners. You now have “The Best.” The McIntosh dedication to “Quality,” is assurance that you will receive many years of musical enjoyment from this unit.
Please take a short time to read the information in this manual. We want you to be as familiar as possible with all the features and functions of your new McIntosh.
Please Take A Moment
The serial number, purchase date and McIntosh Dealer name are important to you for possible insurance claim or future service. The spaces below have been provided for you to record that information:
Serial Number:
Purchase Date:
Dealer Name:
Technical Assistance
If at any time you have questions about your McIntosh product, contact your McIntosh Dealer who is familiar with your McIntosh equipment and any other brands that may be part of your system. If you or your Dealer wish additional help concerning a suspected problem, you can receive technical assistance for all McIntosh products at:
McIntosh Laboratory, Inc.
2 Chambers Street
Binghamton, New York 13903
Phone: 607-723-1545
Fax: 607-724-0549
Customer Service
If it is determined that your McIntosh product is in need of repair, you can return it to your Dealer. You can also return it to the McIntosh Laboratory Service Department. For assistance on factory repair return procedure, contact the McIntosh Service Department at:
McIntosh Laboratory, Inc.
2 Chambers Street
Binghamton, New York 13903
Phone: 607-723-3515
Fax: 607-723-1917
General Information
- For additional connection information, refer to the owner's manual(s) for any component(s) connected to the MCD301 SACD/CD Player.
- The Super Audio Compact Discs Audio Signals are converted internally from Digital to Analog. There is no Digital Audio Signal present at the MCD301 Coaxial and Optical Output Connectors during playback of a SACD Disc.
- A PCM version of the decoded MP3 and WMA Signals is available at the Digital Audio Outputs.
- When discarding the unit, comply with local rules
or regulations. Batteries should never be thrown away or incinerated but disposed of in accordance with the local regulations concerning battery disposal. - For additional information on the MCD301 and other McIntosh Products please visit the McIntosh Web Site at www.mcintoshlabs.com.

Connector and Cable Information
XLR Connectors
Below is the Pin configuration for the XLR Balanced Output Connectors on the MCD301. Refer to the diagram for connection:
PIN 1: Shield/Ground
PIN 2: + Output
PIN 3: - Output

Power Control Connector
The MCD301 Power Control Input/Output Jacks re-
ceive/send Power On/Off Signals when connected to other McIntosh Components. A 1/8 inch stereo mini phone plug is used for connection to the Power Control Input/Output on the MCD301.

Note: The Data and Power Control Connecting Cable is available from the McIntosh Parts Department:
Data and Power Control Cable Part No. 170-202
Six foot, shielded 2 conductor, with 1/8 inch stereo mini phone plugs on each end.
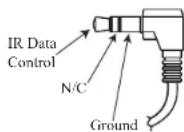
Data and IR Input Port Connectors
The MCD301 Data In Port receives Remote Control Signals. A 1/8 inch stereo mini phone plug is used for connection. The IR Ports also use a 1/8 inch stereo mini phone plug and allow the connection of other brand IR Receivers to the MCD301.

Disc Information
- Compact Discs that are not round (e.g. Novelty discs with octagonal or heart shapes) will not play properly in the MCD301 and should not be tried, as possible damage may occur.
- The MCD301 SACD/CD Player is designed to play all standard CD Audio Dises that conform to the Official Compact Disc Standards which is indicated by the Symbol. It will also play most CD-R and CD-RW discs, however some recorded discs may not be able to play due to the condition of the recording.
- CD Audio Discs recorded in the MP3 and WMA Formats will playback on the MCD301, except discs that contain multi-session recordings. Some MP3 or WMA recorded discs may not be able to play due to the condition of the recording. When ever possible, set the writing software to the ISO9660 Level 1 standard.
- The CD audio side of the Dual Disc does not meet the Compact Disc Digital Audio specifications found in the industry "Redbook"; the MCD301 may not read Dual Discs.
- Several of the SACD performance features available on the MCD301 are active only if the SACD Disc includes the supporting encoded information.
Introduction
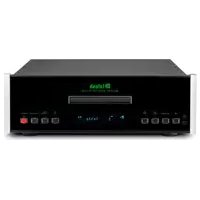
The McIntosh MCD301 SACD/CD Player offers the latest in audio technology, providing state of the art reproduction of audio program sources. A full complement of performance features allows for the enjoyment of the SACD special audio format available on discs. Audio CDs are also reproduced with flawless realism. The advanced mechanical design of the transport ensures many years of smooth trouble free operation.
Performance Features
- Twin Laser Pickup
The MCD301 incorporates two laser elements, with different wavelengths, that are focused through one lens assembly. This unique design allows reading both the CD and Super Audio Compact Disc (SACD) Discs Formats.
- Advanced Transport
The MCD301 has a new transport with a Die Cast Mechanism Base and Disc Tray. It has the latest in advanced digital servo for faster, quieter and accurate operation. The Disc Audio Data is read at twice the normal rate insuring better disc tracking and error correction processing.
• Super Audio Disc Playback
The MCD301 plays the higher resolution SACD Discs with extreme precision and musical elegance.
- Multi-Bit Digital to Analog Converter
The 24-bit, 192kHz Digital to Analog Converter has a wide dynamic range and extremely low distortion.
• Front Panel Level Control
The Level Control allows varying the music volume level with headphones, matching the volume level of the MCD301 with other components in a system and can drive any Power Amplifier directly.
- Multi-Function Front Panel Display
The MCD301 Front Panel display indicates the current disc playback status and the variable audio output volume level at the same time on a continuous basis.
- Drive a Power Amplifier Directly
The Variable Output Connections provide up to 6 Volts. This is more than enough signal to drive any Power Amplifier directly; forming a high quality SACD/CD Disc Playback System.
• Balanced Outputs
The MCD301 has both variable and fixed Balanced Outputs, permitting long cable lengths without a loss in sound quality.
• Digital Audio Outputs
There are Coaxial and Optical Digital Outputs for external decoding of the PCM Signal.
- Power Control and Full Function Remote Control The Power Control Input connection provides convenient Turn-On/Off of the MCD301 when connected to a McIntosh System. The Remote Control with illuminated push-buttons provides complete control of the MCD301 operating functions.
• Special Power Supply
The Linear Power Supply has both a special R-Core Power Transformer and Multiple Regulators to ensure stable noise free operation even though the power line varies.
• Fiber Optic Solid State Front Panel Illumination
The Illumination of the Glass Front Panel is accomplished by the combination of custom designed Fiber Optic Light Diffusers and extra long life Light Emitting Diodes (LEDs). This provides even Front Panel Illumination and is designed to ensure the pristine beauty of the MCD301 will be retained for many years.
Dimensions
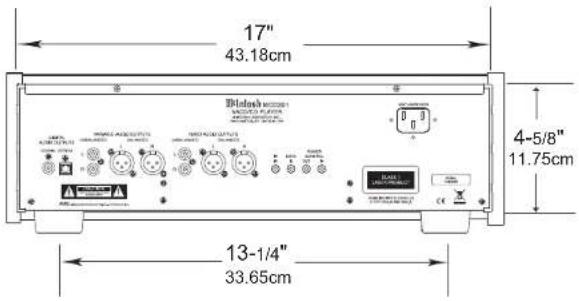
The following dimensions can assist in determining the best location for your MCD301.
Front View of the MCD301

Side View of the MCD301

Rear View of the MCD301
Installation
The MCD301 can be placed upright on a table or shelf, standing on its four feet. It also can be custom installed in a piece of furniture or cabinet of your choice. The four feet may be removed from the bottom of the MCD301 when it is custom installed as outlined below. The four feet together with the mounting screws should be retained for possible future use if the MCD301 is removed from the custom installation and used free standing. The required panel cutout, ventilation cutout and unit dimensions are shown.
Always provide adequate ventilation for your MCD301. Cool operation ensures the longest possible operating life for any electronic instrument. Do not install the MCD301 directly above a heat generating component such as a high powered amplifier. If all the components are installed in a single cabinet, a quiet running ventilation fan can be a definite asset in maintaining all the system components at the coolest possible operating temperature.
A custom cabinet installation should provide the following minimum spacing dimensions for cool operation.
Allow at least 2 inches (5.08cm) above the top, 2 inches (5.08cm) below the bottom and 1 inch (2.54cm) on each side of the SACD/CD Player, so that airflow is not obstructed. Allow 17 inches (43.18cm) depth behind the front panel. Allow 1-1/8 inch (2.9cm) in front of the mounting panel for knob clearance. Be sure to cut out a ventilation hole in the mounting shelf according to the dimensions in the drawing.


Notes
How to Connect Control, Analog and Digital Audio
- Connect a Power Control Cable from the MCD301 POWER CONTROL IN jack to the POWER CONTROL ACC Output jack of a McIntosh Preamplifier/Control Center.
- Connect a Data Cable from the MCD301 DATA IN jack to the CD2 DATA jack on the McIntosh Preamplifier/Control Center.
- Connect an Optical Cable from the MCD301 OPTICAL DIGITAL AUDIO OUTPUT to the CD2 Optical DIGITAL INPUT of a McIntosh Preamplifier/Control Center.
Note: An optional connecting method is to use a coaxial cable from the MCD301 COAXIAL DIGITAL AUDIO OUTPUT to the Coaxial Digital Input of a McIntosh Preamplifier/Control Center.
- Connect XLR Cables from the MCD301 BALANCEDFIXED AUDIO OUTPUTS to the Balanced Inputs on a McIntosh Preamplifier/Control Center.
Notes: 1. The Unbalanced Audio Outputs may be used instead of the Balanced Outputs.
2. The VARIABLE AUDIO OUTPUTS, Balanced or Unbalanced outputs, may used instead of the FIXED AUDIO OUTPUTS.
5. Connect the supplied AC Power Cord between the MCD301 AC Power Cord Socket and a live AC outlet.

How to Connect Directly to a Power Amplifier
The MCD301 SACD/CD Player has Variable Output Connections and a Front Panel Level Control making it possible to form a high performance Disc Playback System. This system consists of a MCD301 directly connected to a McIntosh Power Amplifier.
- Connect a Power Control Cable from the MCD301 POWER CONTROL OUT jack to the POWER CONTROL IN jack of a McIntosh Power Amplifier.
- Connect XLR Cables from the MCD301 BALANCED VARIABLE AUDIO OUTPUTS to the Balanced Inputs on a McIntosh Power Amplifier. Note: The Unbalanced Audio Outputs may be used instead of the Balanced Outputs.
- Connect the supplied AC Power Cord between the MCD301 AC Power Cord Socket and a live AC outlet.


flowchart
graph TD
    A["Indicates when in the Pause Mode"] --> B["SA-CD"]
    C["Indicates the type of disc loaded, CD or SACD"] --> B
    D["Indicates the Random Play Mode is active"] --> E["PROG RND"]
    F["Indicates the number of tracks on the Disc, Programmed Tracks, the current Track Time, Remaining Track Time, Total Disc Playing Time, Text and various other Information"] --> G["ALL1"]
    H["Indicates the volume level available at the variable outputs and headphone jack"] --> I["MP3 WMA"]
    J["Indicates the Repeats Mode selected; Repeat All (Tracks), Repeat 1 (Track) or Repeat from point A to point B in the selected Track"] --> K["..."]
    L["LEVEL 31%"] --> M["..."]
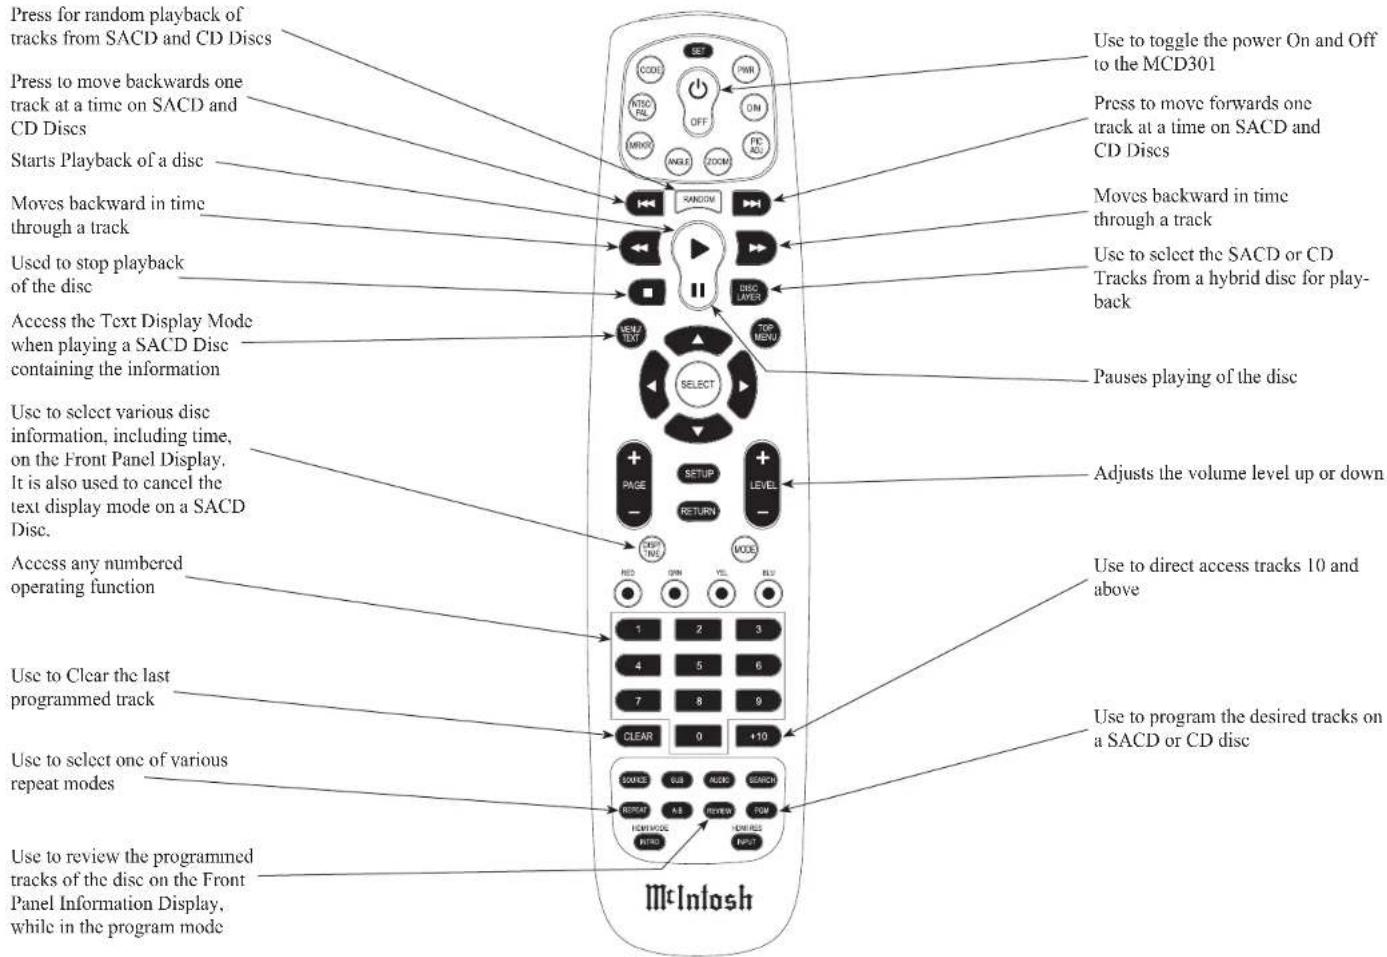
Note: The Remote Control Push-buttons not identified are for use with other McIntosh Products
How to use the Remote Control
The Remote Control is capable of performing most Operating Functions for the MCD301 SACD/CD Player.
Note: Refer to the "How to Operate" Section of this manual for additional information using this Remote Control.
Play
With a disc loaded, press the PLAY▶ Push-button to start the disc playing.
Note: The Play and Pause Push-buttons have been combined into a single rocker type push-button. Press the upper portion where the ▶ symbol is for playback and press the lower portion where the Ⅱ symbol is for pausing the playback of a disc.
Stop
Press the STOP ■ Push-button to stop disc playback and return to displaying the table of contents of the disc.
Numbered Push-buttons
Press 1 through 9 to directly access one of the first nine Disc Tracks using the Front Panel Information Display. For track numbers greater than 10, press the +10 Push-button followed by the 0-9 Push-button. For example, to access Disc Track 23, press the +10 Push-button twice and then the 3 Push-button.
Pause
Press the PAUSE II Push-button to temporarily stop disc playback at any time. Press the PLAY ▶ Push-button to resume playback.
Note: The Play and Pause Push-buttons have been combined into a single rocker type push-button. Press the upper portion where the ▶ symbol is for
playback and press the lower portion where the II symbol is for pausing the playback of a disc.
Reverse and Fast Foward
Press the (Reverse) or (Fast Forward) Push-button to start moving rapidly through a track on the disc. When the desired location is reached release the (Reverse) or (Fast Forward) Push-button to resume normal playback.
Back and Next
Press the ▶ (Next) Push-button to move forward one track or the ◀ (Back) Push-button to move back to the beginning of the current track playing.
Note: If the ⬆ (Back) Push-button is pressed during playback of the first three seconds of the track, the MCD301 will start playing back the previous track from the beginning. If the Front Panel Information Display is indicating time, the display will momentarily indicate the track number.
SACD or CD Track Selection
Press the DISC LAYER Push-button to select the SACD or CD Tracks from a hybrid disc for playback.
Display/Time
Press the DISPLAY/TIME Push-button to access various disc times. It is also used to return the Front Panel Information Display to indicating time instead of text information on a SACD Disc.
Menu/Text
Press to MENU/TEXT Push-button to select the various text information on a SACD Disc such as Album, Artist and Track Titles (disc dependent).
Repeat Modes
Press the REPEAT Push-button to select either One Track, All Tracks or cancel the Repeat Mode.
Program
Press the PGM (Program) Push-button to activate the Program Mode to playback only certain disc tracks in the desired order.
Review
Press the REVIEW Push-button to review the Programmed Tracks from the disc on the Front Panel Information Display, while in the Program Mode.
Clear
Press the CLEAR Push-button to erase a program track(s).

How to Operate the MCD301
Power On
The Red LED above the STANDBY/ON Push-button lights to indicate the MCD301 is in Standby mode. To Switch ON the MCD301, press the STANDBY/ON Push-button on the Front Panel or the ⏻ (Power) Push-button on the Remote Control. Refer to figures 6 and 16.
Note: When AC Power is initially applied to the MCD301 the unit will momentarily switch On and then go into the Standby Mode.
How to Load a Disc
- Press the OPEN/CLOSE Push-button. The disc tray
will slide out allowing a disc to be loaded. Refer to figure 1.
-
Press the OPEN/CLOSE Push-button and the disc tray will close. Refer to figures 6, 2, 3 and
-
Loading of disc's Table of Contents (number of tracks) will be indicated on the Front Panel Information Display. When
a SACD Disc is loaded the Front Panel Display will scroll the Album Title
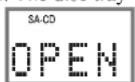
Figure 1

Figure 2

Figure 3
first and then display the number of tracks. Refer to figures 4 and 5.
Note: When a Disc is placed in the tray and the PLAY Push-button is pressed, the tray will close and the first track will start playing.

Figure 4

Figure 5
How to Play a SACD Disc
With a disc already loaded into the MCD301, press the PLAY▶ Push-button on the Front Panel of the MCD301 or Remote Control. Refer to figures 6 and 16. The Disc will start playing the first track of the SACD Layer.
To change from the default SACD Layer to CD Layer, press the SACD/CD Push-button (on the Front Panel or the DISK LAYER Push-button on the Remote Control) once to see the current selection and a second
time to change the selection. Refer to figures 6, 7, 8 and 16.
The Player will load the CD Table of Contents (Number of tracks

Figure 7

Figure 6
and Total Playing Time) at this time.
To start playing the CD Layer press the PLAY▶ Push-button.

Figure 8
Notes: 1. Changing between the SACD and CD Layer can be accomplished at any time by perform procedure.

Figure 9
- The default setting for SACD/CD Hybrid is to play the SACD Layer. The default setting may be changed to play the CD Layer instead. With the MCD301 On and no disc loaded, press the SACD/CD Push-button uti
the Front Panel Display indicates CD. Refer to figures 6, 9, 7 and 8.
- Some SACD Disc(s) have the ability of displaying the Album Title and Artist. With the disc loaded, SACD Table of Contents read and the disc stopped, press the MENU/TEXT Push-button once for scrolling the Title and
twice for scrolling the Artist Name. Display of the Artist information is not available during playback of the disc. Refer to figures 10 and 11.

Figure 10
- In a similar manner, some SACD Disc(s) have the ability of scrolling the Track Number and Title by pressing the MENU/TEXT Push-
button after
the Track has started to play. Refer to figure 12.

Figure 11
er, some SACD Disc(s) have
lling the Track Number and
the MENU/TEXT Push-
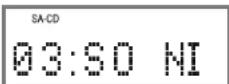
Figure 12
-
The Text Display Mode may be canceled by pressing the DISP/TIME Push-button on the Remote Control. Refer to figure 16.
-
One of the Track Time Modes may also be displayed instead of the Track Number, by pressing the DISP/TIME Push-button on the
Remote Control. Refer to figure 13. For additional information on the Time
Display Modes refer to "Display Modes" on page 19.

Figure 13
How to Play a CD Disc
With a disc already loaded into the MCD301, press the
PLAY▶ Push-button on the Front Panel of the MCD301 or Remote Control. Refer to figures 6, 14 and 16.

Figure 14
How to Pause a Disc
This feature allows for the temporary stopping of disc
playback. Refer to figures 6, 15 and 16.
-
When playing a Disc, press the PAUSE II Push-button to temporarily stop playback.
-
Press the PLAY▶ Push-button to resume playing the disc.

Track Back
Return to the beginning of the Track currently playing by rotating the MCD301 Front Panel TRACK BACK
Control counterclockwise and then releasing the control or momentarily pressing the Push-button
on the Remote Control. Rotate and hold the TRACK BACK ▶ Control or press and hold the ▶ Push-button on the Remote Control for rapid selection of the desired previous Tracks. Refer to figures 6 and 16.
Track Next
Advance to the next Track by rotating the MCD301 Front Panel TRACK NEXT ▶ Control clockwise and then releasing the control or momentarily pressing the ▶ Push-button on the Remote Control. Rotate and hold the TRACK NEXT ▶ Control or press and hold the ▶ Push-button on the Remote Control for rapid selection of the next desired Track. Refer to figures 6 and 16.
Fast Forward or Reverse
Using the Remote Control, press the (Fast Forward) or (Reverse) Push-button to search back and forth rapidly through a Track on a disc. To return to normal playback release the same (Fast Forward) or (Reverse) Push-button. Refer to figure 16.
Stop Mode
Press the STOP ■ Push-button at any time to stop Playback. To listen to the disc again, press the PLAY ▶ Push-button and playback will start from the beginning of the disc.
Volume Level
The MCD301 has both Fixed and Variable Output Level Connections. The Variable Output Level Connections (Rear Panel and Front Panel Headphone
Jack) are controlled by the Front Panel Level Control and the LEVEL (+/-) Push-button on the Remote Control. Refer to figures 6, 16 and 17. The Front

Figure 17
Panel Volume Level Information Display will indicate the Volume Level from 0 - 100%.
Note: When the Volume Level is 81%, the Rear Panel Variable Outputs will be at the same volume level as the Fixed Outputs.
Mute
Press the MUTE Push-button to mute the audio (-50dB down in level) at both the Fixed and Variable Output Connections on the Rear Panel. Refer to figure 6. The LED above the MUTE Push-button will illuminate. Pressing the MUTE Push-button a second time restores the audio at the output connections and the LED will no longer be illuminated.
Note: The Headphone Jack is not affected by the Mute Function.
Direct Track Selection
The MCD301 Front Panel Display indicates the Disc Track currently playing. Use the Remote Control NUMERIC Pushbutton(s) to enter the desired Track Number. Refer to pages 14 and 15 for additional information using the Remote Control.

Figure 16

How to Operate the MCD301, con't
Repeat
This allows repeating a Track, Disc, Program Mode or Random Play Mode on a continuous basis. Refer to figures 6 on page 16 and figure 36.
- With the disc playing (Regular, Program or Random Playback Modes), press the REPEAT Push-button once to activate the Track Repeat ( 1); press the REPEAT Push-button twice to activate
the Disc Repeat (All). Refer to figures 18 and 19.
- To cancel the previously selected Repeat Mode, press the REPEAT Push-button until the word "1" or the word "ALL" in the Front Panel Information Display is extingu

Figure 18

Figure 19
Random Playback
This feature allows for listening to Tracks of a Disc in a Random Order. Refer to figure 6 on page 16 and figure 36.
Note: The MCD301 must be in STOP Mode with the Disc Loaded and the Table of Contents read before the Random Playback Mode Feature can be activated.
- With the MCD301 in the STOP ■ Mode press the Random Push-button. The word RANDOM will
be indicated in the Information Display. Refer to figure 20.
- Press the PLAY ▶
Push-button to start

Figure 20
Random Playback. After all the tracks have been played the MCD301 will stop.
Notes: 1. To provide continuous playback of the disc, press the REPEAT Push-button twice to activate the Disc Repeat ( All) after the Random Playback Mode has started. If Repeat ( 1) is selected, the current track will repeat.
-
The BACK TRACK ◀ function will begin playback from the beginning of the current track.
-
The NEXT TRACK ▶ function will advance to the next random selection and start playing.
-
To cancel the Random Playback Mode, press the STOP ■ Push-button, then press the RANDOM Push-button.
Program Playback
This feature allows for playback of selected Tracks on a Disc in the desired order. In the following example, a Disc is programmed to play Track 6 followed by Track 4 and then Track 2.
Notes: 1. The MCD301 must be in STOP Mode with the Disc TOC (Table of Contents) read before the Program Playback Mode Feature can be activated.
-
When programming Hybrid SACD Discs, first choose the layer (SACD or CD) so the correct TOC can be read, as some discs have different selections for the SACD and CD Tracks.
-
Press the PGM (Program) Push-button to access
the Program Mode. Refer to figures 36 and 21.
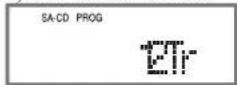
Figure 21
-
Enter the first desired selection using the Numeric Push-buttons. Refer to figures 36 and 22.
-
In a similar manner, enter the remaining Tracks. Refer to figures 23 and 24.
Note: To view and/or delete the selections programmed, use the REVIEW
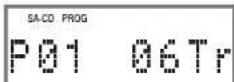
Figure 22

Figure 23

Figure 24
Push-button to step through programmed tracks and the CLEAR Push-button to remove any unwanted selections.
- To start playback of the just entered program, press the PLAY ▶ Push-button. The Repeat Mode can be activated to provide continuous playback
of the Programmed Track(s). Refer to figure 25.
Note: To momentarily stop playback,
press the PAUSE || Push-button. To resume Program Playback press the PLAY▶ Push-button.

Figure 25
- To cancel the Program Playback Mode press the STOP ■ Push-button followed by pressing the PGM (Program) Push-button.
Once the Program Playback Mode is active, tracks may be added or deleted by first pressing the STOP ■ Push-button followed by entering the additional tracks using the Numeric Push-buttons or deleting tracks by using the CLEAR Push-button. Press the PLAY ▶ Push-button to resume Program Playback Mode.
MP3/WMA Disc Playback
The MCD301 has the ability of playing back MP3 and WMA encoded discs. MP3/WMA allow more tracks on the Disc by using the technique of lossy compression applied to the original audio information. The MP3/WMA Track has lower audio quality than the
original recording. Load a MP3/WMA disc into the MCD301. Refer to figure 26.

Figure 26
1. Press the PLAY▶
Push-button to start Playback. Refer to figures 27
and 28. After all the tracks have been played the MCD301 will stop.
Notes: 1. The
MCD301
will indi-
cate either
elapsed
time or
remaining
time for each track when playing MP3/WMA Discs.
- When playing MP3/WMA Discs, the left side of the Front Panel Information Display indicates the total number of folders on the disc followed by the Track Number or the Track Time.
Display Modes
The MCD301 Front Panel Information Display allows for either Track or Time indications. To change from the default setting of Track indication to Time, press the TIME Push-button on the Front Panel or the DISP/TIME Push-button on the Remote Control. Refer to figures 6 on page 16 and figure 36.
The Time Display Choices are Single Track Elapse Time (figures 29 and 30), Single Track Remaining Time (figures 31 and 32) or Total Tracks Remaining Time (figures 33 and 34).
Display Brightness
The MCD301 Front Panel Information Display has two brightness settings. To change from the default setting (brightest of the two) perform the following:
-
If the MCD301 is playing a disc press the STOP ■ Push-button.
-
Press and hold the PAUSE II Push-button until the brightness level of the two Front Panel Displays changes, then release the
PAUSE II Push-button.

Figure 29

Figure 30

Figure 31

Figure 32

Figure 33
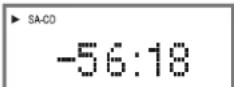
Figure 34
Note: Depending on the brightness setting before pressing the push-button, the intensity will go from high to low or low to high.
Resetting the MCD301
In the unlikely event the MCD301 stops functioning, the microprocessors can be reset by performing the following:
- Press and hold in the STOP ■ Push-button for ap-
proximately three seconds. The Front Panel Display on the Left side will indicate "INI-
INITIAL
Figure 35
TIAL", release your finger from STOP ■ Push-button. Refer to figure 35.
-
Press and hold in the STAND-BY/ON Push-button for approximately five seconds. Refer to figure 6 on page 16.
-
When the STANDBY/ON LED is no longer illuminated, release the STANDBY/ON Push-button.
-
When the STANDBY/ON LED is illuminated press the STANDBY/ON Push-button, the MCD301 will resume normal operation.
Note: This can be performed with the MCD301 On or in the Standby Mode.
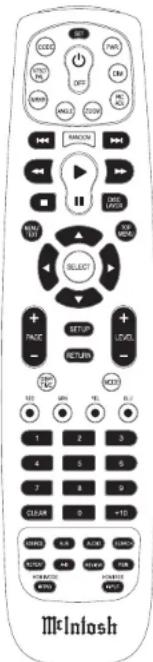
Figure 36

How to Operate the MCD301, con't
Operation in a McIntosh System
The MCD301 basic transport functions may also be controlled by using the Remote Control that comes with a McIntosh Control Center or Preamplifier. McIntosh Keypads can also be used to remotely control the basic transport functions of the MCD301. The labeling of Push-buttons on some McIntosh Remote Controls and Keypads are different from the supplied MCD301 Remote Control. Refer to the listing below and figures 37 and 38:
MCD301 Remote Control McIntosh Remote Control/ Push-button Keypad Push-button
II (Pause) E/Enter
Disc Layer (SACD/CD) Review
Level (-) Channel/Seek Down
Level (+) Channel/Seek Up
+10 FM
Intro AM

Figure 42

Figure 43
Notes
Audio Specifications General Specifications
Fixed Output level
2.0Vrms Unbalanced
4.0Vrms Balanced
Variable Output level
0 - 6.0Vrms Unbalanced
0-12.0Vrms Balanced
Output Impedance
600 ohms Unbalanced and Balanced
Frequency Response
4Hz to 40,000Hz, +0.5, -3dB (SACD)
4Hz to 20,000Hz, ±0.5dB (CD)
Signal to Noise Ratio
Better than 110dB (A-weighted)
Dynamic Range
Better than 100dB
Harmonic Distortion
0.002% @ 1000Hz (SACD)
0.003% @ 1000Hz (CD)
Channel Separation
Better than 98dB (1,000Hz)
Digital Output
Optical: - 15dbm to -21dbm (PCM)
Coaxial: 0.5V p-p/75 ohm (PCM)
Sampling Frequencies: 44.1kHz (PCM)
Transport
Laser Type: Twin Beam
Laser Beam Wavelength: 650nm (SACD)/790nm (CD)
Laser Power: CLASS IIa/CLASS I
Power Requirements
100 Volts, 50/60Hz at 35 watts
110 Volts, 50/60Hz at 35 watts
120 Volts, 50/60Hz at 35 watts
220 Volts, 50/60Hz at 35 watts
230 Volts, 50/60Hz at 35 watts
240 Volts, 50/60Hz at 35 watts
Standby: Less than 1 watt
Note: Refer to the rear panel of the MCD301 for the correct voltage.
Overall Dimensions
Width is 17-1/2 inches (44.45cm)
Height is 6 inches (15.24cm)
Depth is 16-1/2 inches (41.91cm)
Note: When the Disc Tray is opened, the panel clearance required in front of mounting panel is 6-3/4 inches (17.2cm).
Weight
28.2 pounds (12.8Kg) net, 44.6 pounds (20.2Kg) in shipping carton
Shipping Carton Dimensions
Width is 26-1/2 inches (67.3cm)
Depth is 24-1/4 inches (62.2cm)
Height is 11-3/4 inches (29.9cm)
Packing Instructions
In the event it is necessary to repack the equipment for shipment, the equipment must be packed exactly as shown below. It is very important that the four plastic feet are attached to the bottom of the equipment.
This will ensure the proper equipment location on the bottom pad. Failure to do this will result in shipping damage.
Use the original shipping carton and interior parts only if they are all in good serviceable condition. If a shipping carton or any of the interior part(s) are needed, please call or write Customer Service Department of McIntosh Laboratory. Refer to page 4. Please see the Part List for the correct part numbers.
Quantity Part Number Description
1 033838 Shipping carton only
4 033837 End cap
1 033836 Inside carton only
1 034414 Inner carton foam
top pad
1 034301 Bottom pad
2 034446 Foam plug
4 017937 Plastic foot
4 400159 #10-32 x 3/4" screw
4 404080 #10 Flat washer


McIntosh Laboratory, Inc.
2 Chambers Street
Binghamton, NY 13903
www.mcintoshlabs.com
The continuous improvement of its products is the policy of McIntosh Laboratory Incorporated who reserve the right to improve design without notice. Printed in the U.S.A.


- WARNING - TO REDUCE RISK OF FIRE OR ELECTRICAL SHOCK, DO NOT EXPOSE THIS EQUIPMENT TO RAIN OR MOISTURE.
- NO USER-SERVICEABLE PARTS INSIDE. REFER SERVICING TO QUALIFIED PERSONNEL.
- To prevent the risk of electric shock, do not remove cover or back. No user-serviceable parts inside.
- CAUTION
- LUOKAN 1 LASERLAITE KLASS 1 LASER APPARAT
- VAROITUS!
- IMPORTANT SAFETY INSTRUCTIONS!
- PLEASE READ THEM BEFORE OPERATING THIS EQUIPMENT.
- Table of Contents
- Connections:
- Front Panel Features:
- Remote Control:
- Operation:
- Additional Information:
- Thank You
- Please Take A Moment
- Technical Assistance
- Customer Service
- General Information
- Connector and Cable Information
- XLR Connectors
- Power Control Connector
- Data and IR Input Port Connectors
- Disc Information
- Introduction
- Performance Features
- - Twin Laser Pickup
- - Advanced Transport
- • Super Audio Disc Playback
- - Multi-Bit Digital to Analog Converter
- • Front Panel Level Control
- - Multi-Function Front Panel Display
- - Drive a Power Amplifier Directly
- • Balanced Outputs
- • Digital Audio Outputs
- • Special Power Supply
- • Fiber Optic Solid State Front Panel Illumination
- Dimensions
- Installation
- How to Connect Control, Analog and Digital Audio
- How to Connect Directly to a Power Amplifier
- How to use the Remote Control
- Play
- Stop
- Numbered Push-buttons
- Pause
- Reverse and Fast Foward
- Back and Next
- SACD or CD Track Selection
- Display/Time
- Menu/Text
- Repeat Modes
- Program
- Review
- Clear
- How to Operate the MCD301
- Power On
- How to Load a Disc
- How to Play a SACD Disc
- How to Play a CD Disc
- How to Pause a Disc
- Track Back
- Track Next
- Fast Forward or Reverse
- Stop Mode
- Volume Level
- Mute
- Direct Track Selection
- How to Operate the MCD301, con't
- Repeat
- Random Playback
- Program Playback
- MP3/WMA Disc Playback
- Press the PLAY▶
- Display Modes
- Display Brightness
- Resetting the MCD301
- Operation in a McIntosh System
- MCD301 Remote Control McIntosh Remote Control/ Push-button Keypad Push-button
- Audio Specifications General Specifications
- Fixed Output level
- Variable Output level
- Output Impedance
- Frequency Response
- Signal to Noise Ratio
- Dynamic Range
- Harmonic Distortion
- Channel Separation
- Digital Output
- Transport
- Power Requirements
- Overall Dimensions
- Weight
- Shipping Carton Dimensions
- Packing Instructions
Brand : MCINTOSH
Model : MCD301
Category : Cd player/recorder