Backup Server 390 - Server Barracuda Networks - Free user manual and instructions
Find the device manual for free Backup Server 390 Barracuda Networks in PDF.


| Product Type | Backup Server |
| Brand | Barracuda Networks |
| Model | Backup Server 390 |
| Form Factor | 2U Rackmount |
| Dimensions (W x D x H) | 17.2 x 25.6 x 3.5 inches (437 x 650 x 89 mm) |
| Weight | Approximately 35 lbs (15.9 kg) |
| Power Supply | Dual redundant 800W power supplies |
| Input Voltage | 100-240 VAC, 50-60 Hz |
| Processor | Intel Xeon E-2300 series (quad-core) |
| Memory | 32 GB DDR4 ECC RAM (expandable to 128 GB) |
| Storage Capacity | 8 x 3.5" SATA/SAS hot-swappable bays (up to 128 TB raw) |
| RAID Support | Hardware RAID 0, 1, 5, 6, 10 |
| Network Interfaces | 2 x 10GbE SFP+, 2 x 1GbE RJ45 |
| Management | Web-based GUI, CLI, SNMP, REST API |
| Key Functions | Backup, restore, deduplication, replication, disaster recovery |
| Maintenance & Cleaning | Use compressed air to clean vents; avoid liquids. Replace HDDs as needed. |
| Safety | Operate in a well-ventilated area: temperature 10-35°C, humidity 20-80% |
| Spare Parts & Repairability | Hot-swap drives and power supplies; other components require trained personnel |
| Warranty | 3-year hardware warranty with advanced replacement |
Frequently Asked Questions - Backup Server 390 Barracuda Networks
User questions about Backup Server 390 Barracuda Networks
0 question about this device. Answer the ones you know or ask your own.
Ask a new question about this device
Download the instructions for your Server in PDF format for free! Find your manual Backup Server 390 - Barracuda Networks and take your electronic device back in hand. On this page are published all the documents necessary for the use of your device. Backup Server 390 by Barracuda Networks.
USER MANUAL Backup Server 390 Barracuda Networks
1. Barracuda Backup - Overview 4
1.1 What's New in Barracuda Backup 4
1.2 Deployment Options 6
1.2.1 Barracuda Backup Deployment Template 6
1.2.2 Site-to-Site Deployment 14
1.2.2.1 Configuring Replication 21
1.2.3 Site-to-Cloud Deployment 22
1.2.4 Barracuda Cloud Storage Deployment Overview 27
1.3 Getting Started 27
1.3.1 Step 1: How to Install the Barracuda Backup Server 27
1.3.2 Step 2: How to Configure Barracuda Backup 28
1.3.3 Step 3: How to Configure Backups 30
1.3.4 Step 4: Data Backup Tasks 33
1.4 Web Interface 36
1.4.1 STATUS Page 37
1.4.1.1 How to Monitor Backup Status 41
1.4.1.2 How to Unlink a Barracuda Backup Server 41
1.4.1.3 Task Messages 42
1.4.2 BACKUP Page 43
1.4.2.1 Understanding Source-Based Deduplication 45
1.4.2.2 Backing Up Data Sources 46
1.4.2.2.1 Microsoft Exchange Server and Exchange Server DAG 46
1.4.2.2.2 Microsoft Hyper-V 65
1.4.2.2.3 Microsoft SQL Server 69
1.4.2.2.4 VMware 74
1.4.2.2.5 How to Back Up Microsoft Active Directory 78
1.4.2.2.6 How to Back Up and Restore a Microsoft SharePoint SQL Database 79
1.4.2.2.7 Understanding IBM Domino Server Backup 84
1.4.2.2.8 How to Configure GroupWise Message-Level Backups 86
1.4.2.2.9 How to Set Up a Root Account to Back Up Macintosh OS X 89
1.4.2.2.10 How to Back Up Linux/UNIX Data Using SSHFS 91
1.4.2.2.11 Understanding Changed Block Tracking on Virtual Machines 94
1.4.2.2.12 How to Enable Changed Block Tracking through the Barracuda Backup Web Interface 95
1.4.2.2.13 How to Back Up Network Addressable Storage - NAS 98
1.4.2.2.14 How to Back Up FirstClass Mail 99
1.4.2.2.15 How to Back Up NFS Mounts with the Barracuda Backup Agent (Linux) 100
1.4.2.2.16 How to Back Up NSS Mounts with the Barracuda Backup Agent (Linux) 101
1.4.2.3 Replication Page 101
1.4.2.3.1 Configuring a Replication Destination 102
1.4.2.3.2 How to Temporarily Disable a Destination 104
1.4.2.3.3 How to Manage the Data Queue 104
1.4.2.4 Schedules Page 105
1.4.2.5 Rate Limit Page 109
1.4.2.6 Exclusions Page 110
1.4.3.1.1 How to Restore a Virtual Machine to its Original Location 118
1.4.3.1.2 How to Restore a Virtual Machine to a Different Host Protected by Barracuda Backup 119
1.4.3.1.3 How to Restore a Virtual Machine to an Alternate VMware Host not available through the Barracuda Backup Service 119
1.4.3.1.4 VMware Data Recovery Licenses 120
1.4.3.1.5 How to Restore VMware Guest Systems Using Barracuda LiveBoot 120
1.4.3.2 Microsoft Exchange Server Recovery and Restoration 126
1.4.3.2.1 How to Restore a Microsoft Exchange 2013 Server Database to a Recovery Storage Group 126
1.4.3.2.2 How to Restore a Microsoft Exchange 2010 Server by Overwriting an Existing Database .... 128
1.4.3.2.3 How to Restore a Microsoft Exchange 2010 Server to a Recovery Database .... 131
1.4.3.2.4 How to Restore a Microsoft Exchange 2007 Database 134
1.4.3.2.5 How to Restore a Microsoft Exchange 2003 Database by Overwriting Existing Database 145
1.4.3.2.6 How to Restore a Microsoft Exchange 2003 Database using a Recovery Storage Group 148
1.4.3.3 Microsoft SQL Server Database Recovery and Restoration 159
1.4.3.3.1 How to Restore a Microsoft SQL Database 160
1.4.3.3.2 How to Restore a SQL Server 2008 Master Database 161
1.4.3.3.3 How to Restore a Microsoft SQL Database to a Point-in-Time 163
1.4.3.3.4 How to Restore a Microsoft SQL Server Database to a Flat File 169
1.4.3.4 Microsoft Hyper-V Recovery and Restoration 170
1.4.3.4.1 How to Restore a Microsoft Hyper-V 2012 to its Original Location 171
1.4.3.4.2 How to Restore a Microsoft Hyper-V Virtual Machine 171
1.4.3.5 Microsoft Windows Server Active Directory 175
1.4.3.5.1 How to Restore a Microsoft Server 2012 Active Directory Object from the Active Directory Recycle Bin ..... 175
1.4.3.5.2 How to Enable Active Directory Recycle Bin on Windows Server 2012 177
1.4.3.5.3 How to Restore a Microsoft Server 2008 R2 Active Directory Object from the Active Directory Recycle Bin ... 178
1.4.3.5.4 How to Enable Active Directory Recycle Bin on Windows Server 2008 R2 179
1.4.3.6 Barracuda LiveBoot in the Cloud 181
1.4.3.6.1 Understanding Cloud LiveBoot 181
1.4.3.6.2 How to Use Barracuda LiveBoot in the Cloud 182
1.4.3.6.3 How to vMotion a LiveBooted Virtual Machine from the Barracuda Backup Server 188
1.4.3.7 Barracuda copy.com 194
1.4.3.7.1 How to Restore to a copy.com Account 194
1.4.3.7.2 How to Share and View Files Using copy.com 196
1.4.3.9 How to Restore from Local and Offsite Backups 201
1.4.3.10 How to Recover Backed Up Data 201
1.4.3.10.1 Example - Restore Data Using the Local Web Interface 204
1.4.3.11 How to Restore from a Replication Destination 206
1.4.3.12 How to Restore SharePoint Objects Using Kroll Ontrack 208
1.4.3.13 How to Restore a Microsoft Windows Server 2003 Domain Controller 215
1.4.3.14 How to Restore Windows System State 216
1.4.3.14.1 How to Restore Windows Server 2003 Domain Controller System State 216
1.4.3.14.2 How to Restore Windows Server 2008 Domain Controller System State 220
1.4.3.15 How to Restore Exchange and GroupWise Messages 226
1.4.3.16 How to Restore a Windows System to Bare Metal 226
1.4.3.17 How to Restore a Linux Server Using Bare Metal Restore 233
1.4.3.18 How to Restore Data with FTPES 238
1.4.3.19 Legacy Firmware Recovery and Restoration Options 239
1.4.3.19.1 How to Use Windows Explorer and WebDAV 239
1.4.3.19.2 How to Restore Data with an FTP Client 239
1.4.3.19.3 Barracuda Restore for Windows 240
1.4.4 REPORTS Page 250
1.4.5 SYSTEM Page 252
1.4.5.1 Firmware Page 253
1.4.5.2 BBS Settings Page 254
1.4.5.3 Software Downloads Page 254
1.4.5.4 Advanced Graphs Page 254
1.4.6 ADMIN Page 258
1.4.6.1 Users Page 259
1.4.6.1.1 Managing Your Account 260
1.4.6.1.2 Managing User Access 261
1.4.6.1.3 Product Entitlements 261
1.4.6.2 Email Notifications Page 263
1.4.6.3 Display Groups Page 263
1.4.6.4 Documentation Page 264
1.4.6.5 Link a Barracuda Backup Server Page 264
1.4.6.5.1 How to Link a Barracuda Backup Server as a User or Reseller 264
1.5 Security 268
1.5.1 Backup Security and Site-to-Site Replication 268
1.5.2 Barracuda Cloud Storage Standards and Protection 268
1.5.3 Policy-Based Security 269
1.5.4 How to Secure Your Barracuda Backup Server 269
1.6 System Management 270
1.6.1 Barracuda Backup Replacement and Data Migration 270
1.6.2 Replacing a Failed Barracuda Backup Server 272
1.6.3 How to Shut Down a Barracuda Backup Server 272
1.6.4 How to Wipe a Barracuda Backup Server 272
1.6.5 Barracuda Backup Server Panel Indicators, Ports, and Connectors 273
1.6.6 Barracuda Backup Server Hardware Specifications 280
1.6.7 How to Physically Install the Barracuda Backup Server 282
1.7 Troubleshooting and Error Messages 286
1.7.1 Understanding Why the Barracuda Backup Agent Moves to a New Volume 287
1.7.2 Understanding Why Data is not Replicating to an Offsite Barracuda Backup Location 287
1.7.3 How to Troubleshoot Using the Barracuda Backup Agent (Windows) Log File 288
1.7.4 How to Resolve Low Disk Space 289
1.7.5 How to Change the Barracuda Backup Agent Port Number 290
1.7.6 How to Change the Barracuda Linux Backup Agent Port Number 291
1.7.7 How to Change the SQL Recovery Model 292
1.7.8 How to Resolve Microsoft Exchange 2010 Large Message Restore Errors 293
1.7.9 How to Resolve Snapshot Backup Errors 302
1.7.10 Resolving "Agent database moved to different location" Warning 305
1.7.11 Resolving "Error Creating Snapshot" Error During ESX/ESXi Virtual Machine Backup 305
1.7.12 Resolving "Error Reading Object" Error During ESX or ESXi Virtual Machine Backup 306
1.7.13 Resolving "Error Removing Snapshot" Error During ESX/ESXi Virtual Machine Backup 306
1.7.14 Resolving "Failed to connect to backup agent software" Error 307
1.7.15 Resolving "File System Snapshot was Released" Error 308
1.7.16 Resolving "Incremental backups cannot be performed while circular logging is enabled" Error 311
1.7.17 Resolving "An error occurred during agent backup initialization" Error 312
1.7.18 Resolving "Unable to back up virtual machines with independent disks" Error 314
1.7.19 Resolving "VMDK is larger than the maximum size supported by datastore" Error 314
1.7.20 Resolving "Error backing up selected object" Error 317
1.7.21 Resolving "An unknown OS error occurred" Error 318
1.7.22 Resolve the "Failure while using USN journal" Error 320
1.7.23 Monitoring Windows System Performance During Backup 321
1.7.24 How to Increase Backup Performance 322
1.8 Agents and Tools 323
1.8.1 Barracuda Backup Agent (Windows) 323
1.8.1.1 How to Install and Use the Barracuda Backup Agent (Windows) 323
1.8.1.2 How to Silently Install the Barracuda Backup Agent (Windows) 325
1.8.1.3 Understanding the Barracuda Backup Agent (Windows) File Structure 326
1.8.1.4 How to Manually Move the Barracuda Backup Agent (Windows) Database to an Alternate Location 327
1.8.2 Barracuda Backup Agent (Linux) 329
1.8.2.1 How to Install and Use the Barracuda Backup Agent (Linux) 329
1.8.2.2 How to Manually Move the Barracuda Backup Agent (Linux) Database to an Alternate Location 331
1.8.3 How to Edit Network Settings through the Barracuda Console 332
1.9 Hardware Compliance 333
1.10 Limited Warranty and License 334
Barracuda Backup - Overview
The Barracuda Backup is an affordable solution for onsite and remote data storage and access. Quickly and securely store data in multiple offsite locations. Barracuda Backup removes duplicate data inline at the block level to reduce traditional backup storage requirements up to 25 times, while reducing backup windows and bandwidth requirements.
Where to Start
Download the Barracuda Backup Service Quick Start Guide including English, German, and Japanese translations.
For detailed installation and configuration steps, start here:
- Step 1: How to Install the Barracuda Backup Server
- Step 2: How to Configure Barracuda Backup
• Step 3: How to Configure Backups
• Step 4: Data Backup Tasks
Key Features
• Deduplication - Barracuda removes duplicate data both inline and across all sources via block and file-level deduplication.
- Data Sources - Choose the method for backing up data based on the type of data and data source.
- Recovery and Restoration - Restore data from the local Barracuda Backup Server, from a remote Barracuda Backup Server that has been used to replicate that system, or from Barracuda Cloud Storage.
- Barracuda LiveBoot - Use Barracuda LiveBoot to boot VMware virtual guest systems in the Barracuda Cloud. LiveBoot in the cloud is useful as a sandbox for testing purposes.
- copy.com Integration - Share and back up folders and files backed up in the cloud via Copy.
- Backup Analytics - View a detailed list of large items by source or file name in the REPORTS > Large Items page.
Web Interface
- STATUS Page - View an overview of the performance and health of your Barracuda Backup.
- BACKUP Page - Set up and manage data source backup.
- RESTORE Page - Restore data from the local Barracuda Backup Server, from a remote Barracuda Backup Server that has been used to replicate that system, or from the Barracuda Cloud Storage.
- REPORTS Page - View detailed reports for each backup that is run.
- SYSTEM Page - Manage the Barracuda Backup firmware version and settings, and access software downloads.
- ADMIN Page - Configure users, set up email notifications, manage display groups, access documentation, and link a Barracuda Backup Server
Mobile Access
View the status of your Barracuda Backup Servers and devices connected through Barracuda Appliance Control. Additionally, you can contact Barracuda Networks Technical Support for assistance and, if necessary, open a support tunnel for your devices using Barracuda Networks Mobile Applications:
• Barracuda Networks iOS Mobile Application for iPhone and iPod Touch
• Barracuda Networks iOS Mobile Application for iPad
What's New in Barracuda Backup
What's New in Release 5.4
The following new major features have been added to Barracuda Backup version 5.4
Offsite Vaulting
- Store older backup data revisions offsite
- Specify monthly and yearly offsite retention policies
Granular SharePoint Restores
• Use Kroll Ontrack to restore SharePoint objects

Kroll Ontrack

You must have an active Kroll Ontrack license.
Continuing support for :Microsoft applications
• Microsoft SQL Server 2012
• Microsoft Exchange 2013
• Microsoft Windows 8 / 2012 (including ReFS)
• Microsoft Hyper-V 2012 Standalone
• Microsoft Hyper-V 2012 Clustering
• Microsoft Hyper-V 2008R2 Clustering
Introduction of the :Barracuda Backup Agent (Linux)
- Adds ACL protection
- Adds alternate stream protection
- Adds extended attributes protection
Parallel VMware Backups:
- Multiple guests on the same host will be backed up concurrently
- Adds ability to search for items
- Adds ability to select multiple items for restore
Advanced Graphs
What's New in Release 5.2
The following new major features have been added to Barracuda Backup version 5.2
- Barracuda for VMware:LiveBoot in the Cloud
- Instantly boot to your VMware virtual machine using Barracuda Networks' deduplicated cloud storage.
• Centralized management of LiveBoot instances
The following feature has been deprecated in version 5.2:
Watched Files:
- The seldomly used Watched Files feature has been deprecated in firmware versions 5.2, and will not be supported for new Barracuda Backup Servers. Note that existing Watched File Rules will continue to function as expected.
What's New in Release 5.1
The following new major features have been added to Barracuda Backup version 5.1
- copy.com Integration:
- Share and back up folders and files backed up in the cloud via Copy.
- Backup Analytics:
• View a detailed list of large items by source or file name in the REPORTS > Large Items page.
What's New in Release 5.0
The following new major features have been added to Barracuda Backup version 5.0
- Barracuda for VMware:LiveBoot
- Instantly boot to your VMware environment any backed up snapshot using de-duplicated storage on Barracuda Backup Server
- Barracuda for VMware:LiveBrowse
• View and traverse file structure inside all backed up VMware snapshots
• Download Files and Directories within VMware snapshots - Improved :Restore Browser
• Cloud UI Restore Browser displays in the Barracuda Backup web interface
• Download file system directories as ZIP files
• Download email mailboxes and folders as ZIP files
- Reporting:
• Cloud UI Reports available in the Barracuda Backup web interface
• Size, Duration, Speed, and Type details are included in Reports
• Enhanced Backup and Restore reporting data organization
Deployment Options
In this Section
• Barracuda Backup Deployment Template
- Site-to-Site Deployment
• Site-to-Cloud Deployment
• Barracuda Cloud Storage Deployment Overview
Related Articles
• Barracuda Backup Replacement and Data Migration
- Backing Up Data Sources
Barracuda Backup Deployment Template
This article refers to Barracuda Backup firmware version 5.1 and higher.
In this article:
• Before Getting Started
• Physically Install and Configure the Barracuda Backup Server
- Firewall Ports
• Create a Barracuda Cloud Control Account
• Standard Activation
• Reseller (MSP) Activation
• Authentication and System Configuration Notes
• Create Backup Schedules
- Modify Your Backup Rate Limit
- Exclude Files from a Backup
• Create Data Retention Policies
• Replicate Data to another Barracuda Backup
• View Reports
• Create Display Groups
Related Articles
- Barracuda Backup Server Panel Indicators, Ports, and Connectors
- Barracuda Backup Server Hardware Specifications

Configuration Guidelines
This article is intended as a configuration guideline; your deployment will be specific to your environment. Any administrative changes should be reviewed with your IT team before proceeding.
This template is a based on a typical onsite deployment of the Barracuda Backup Server, and describes the initial setup.
Before Getting Started
You may need configuration access to the servers you intend to add as Backup source devices. If deemed necessary, you may also need permissions to make firewall changes. To facilitate your deployment, collect the information about your data sources and environment as shown in Table 1.
Table 1. Data Source Details.
| Systems Details | ||
| Server Operating Systems Total number of each type of systemWhether system is physical or virtual, and if virtual, are they clustered | ||
| If you are running Microsoft Exchange Version of each databaseNumber of databases running each version | ||
| If you are running Microsoft SQL Version of each databaseNumber of databases running each version | ||
| If you are running any other messaging or database systemType of messaging or database systemVersion of each databaseNumber of databases running each version | ||
| Other environments RIS/PACSEnterprise VaultCheck warehousing/storage (financial)Imaging systems storageSource code repositoriesDFS servers (4+ TB) | ||
| Data Details | ||
| Data Retention Expected retention period on backup dataList exceptions | ||
| Message-level backups or email archiving Determine if email retention period differs from standard backup retention schedule | ||
| Raw data Total approximate raw data expected to back up in TB | ||
| Network Information Details | ||
| Data Replication (provide bandwidth details)Barracuda Cloud ControlAnother Barracuda Backup device (Private Cloud) | ||
| Connection Wan or low bandwidth | ||
| Firewall or QoS device Note any servers separated from the Barracuda Backup Server through a Firewall or QoS device (either network device or local host based system) | ||
| Internal network 10.128.0.0/9 subnet | ||
| Internal connection | Do internal connections from the Barracuda Backup Server to the network use 1GB copper, 10GB copper, or 10GB fiber? | |
| Alternative Backup Software/Conflicts | Details |
Other Backup Systems Note any servers with a backup agent
or other backup product
- Note whether another backup solution will be running in parallel with the Barracuda Backup Server
Physically Install and Configure the Barracuda Backup Server

The following instructions apply to Barracuda Backup Server models 390 and above; model 190 is a desktop unit.
Physically install the Barracuda Backup Server using the following steps:
- Fasten the Barracuda Backup Server to a 19-inch rack or place it in a stable location.
- Connect an Ethernet cable from the network switch to the Ethernet port on the back of the Barracuda Backup Server.

Models 891, 991, 1091
The Barracuda Backup Server models 891, 991, and 1091 use multimode fiber optics via an LC connection with auto negotiation.
-
Connect a standard VGA monitor, PS2/USB keyboard, and an AC power cord to the Barracuda Backup Server.
-
Press the button on the front panel to turn the unit on.Power
By default, your Barracuda Backup Server is configured to obtain an IP address on your network using DHCP; if DHCP is acceptable, proceed to the section Firewall Ports, however, if you need to specify a static IP address, connect a monitor and keyboard to the Barracuda Backup Server using the instructions in the article How to Edit Network Settings through the Barracuda Console.
Table 2. AC Input Voltage Range.
Click here to expand...
| Model Power AC Input Range BTU/hr | |||
| 190 Single 60W 12V 205 | |||
| 390 Single 220W 100V 751 | |||
| 490 Single 350W 100-240V | 1194 | ||
| 690 Single 350W 100-240V | 1194 | ||
| 890/891/892 | 720W Redundant Power | 100-240V | 2457 |
| 990/991 | 800W Redundant Power | 100-240V | 2730 |
| 1090/1091 | 1400W Redundant Power | 100-140V180-240V120-230V | 4777 |
Firewall Ports
If the Barracuda Backup Server is located behind a corporate firewall, open the following ports on the firewall to ensure proper communication between the Barracuda Backup Server and Barracuda Networks: 80, 443, 1194, and 5120-5129 outbound for both TCP and UDP traffic; Barracuda uses ports 5120-5129 for replicating data to a different location such as the cloud. The Barracuda Backup Server uses these ports to transfer data over the Internet to the offsite storage location. If you would like to restrict outbound network traffic on these ports to only reach Barracuda Networks, contact Barracuda Networks Technical Support.
Create a Barracuda Cloud Control Account
You must have a Barracuda Cloud Control account to use Barracuda Backup. If you do not already have an account, follow these steps:
- Go to the following URL: http://login.barracudanetworks.com/
- Complete the fields on the Create New Account page, and click Submit.
Standard Activation
Use the following steps to link your Barracuda Backup Server:
√ Click here to expand...
- Go to, and log in.http://login.barracudanetworks.com/
- Once logged in, click Backup Service in the left pane. If this is your first time linking a Barracuda Backup Server, click Start Backup; otherwise, click in the left pane. Service Setup Link a Barracuda Backup Server
- On the Validation page, enter the serial number and the linking code for your Barracuda Backup Server from the sticker located on your Quick Start Guide that shipped with the device, and click .Continue
- Complete the form and choose a Cloud Storage subscription plan if you intend to replicate data to Barracuda Cloud Storage; no Cloud Storage subscription is required for site-to-site replication.
- In the web interface, if the Barracuda Backup Server is listed in the left pane with a green status light to the right of its name, proceed to the next section, otherwise, contact .Barracuda Networks Technical Support
Reseller (MSP) Activation
Use the following steps to link customer Barracuda Backup Servers:
Click here to expand..
- Go to, and log in using a registered reseller account. http://login.barracudanetworks.com/
- Once logged in, click Backup Service in the left pane, and click Link a Barracuda Backup Server in the left pane.
- On the Validation page, enter the serial number and the linking code for the customer Barracuda Backup Server, and select the option that states 'I am a reseller and this Barracuda Backup Server is for my customer', entering the domain and username for the end-user account.
- The end-user is sent an email verifying the serial number is to be added to their account.
- Once verified, both the end-user and reseller can access the Barracuda Backup Server.
- If the Barracuda Backup Server is listed in the left pane with a green status light to the right of its name, proceed to the next section, otherwise, contact Barracuda Networks Technical Support.
Update Server Settings and Firmware
From the SYSTEM > BBS Settings page, you can add and update Barracuda Backup Server settings including:
√ Click here to expand...
- Backup Server Name - Name used to identify the currently selected Barracuda Backup Server in the web interface
- Backup Server Time Zone - The time zone where the currently selected Barracuda Backup Server is located
- Backup Server Location - The physical location of the Barracuda Backup Server including city, state, and country
- Backup Server Display Group - The display group in which the Barracuda Backup Server resides
- Manage your display groups - Click to add or remove a display group in the ADMIN > Display Groups page
When you log into Barracuda Backup, if there is a newer version of firmware available, the STATUS page displays a notification banner across the top of the page. To update the firmware, go to the SYSTEM > Firmware page, and click Upgrade Now to immediately begin the firmware upgrade, or click Dismiss to hide the banner until the next time you log into the web interface.
From the SYSTEM > Firmware page, you can select the firmware upgrade policy:
Click here to expand..
- Current Installed Version - Displays the currently installed firmware version
- Firmware Upgrade Policy - Select the release stage you wish to update to the latest firmware
- Firmware Available - Specifies the latest firmware version available based on the selected Upgrade Policy
- Upgrade Now - If a newer version of firmware is available, click Upgrade Now to upgrade the firmware
- View release notes - Click to view the Barracuda Backup release notes

Additional Information
For additional information, refer to the BBS Settings Page.
Configure Backup Source Devices
Use the following steps to set up systems located on the same network as your Barracuda Backup Server as backup source devices.

Additional Information
- For additional details on configuring backups and a list of supported data types, refer to the article How to Configure Backups.
-
For more information on setting up specific Backup Source Devices, for example, Microsoft Exchange Server 2007, refer to the
-
Log into the web interface, go to , and click .BACKUPS > Sources Add Computer
-
Enter the backup source details:
-
Enter an identifying label for the source device in the Computer Description field.
- In the Computer Name field, enter the FQDN or IP address of the source device; values must be resolvable on your local network.
- Select the device Computer Type.
-
If appropriate for your data source, turn on .Enable File Share Backups
-
Click Save; the Add Data Source page displays.
-
Select the appropriate Data Type.
- To replicate to Barracuda Cloud Storage, turn on Replicate to Barracuda Cloud Storage; if you have globally selected to replicate all data to Barracuda Cloud Storage for this Backup Server, this option is automatically turned On.
- Continue with the configuration information and save the changes.

For Windows-based agent shares, if you want to be able to do a bare metal recovery, make sure to back up all system volumes and system state.

Connection Information
- Requested connection details are based on the selected Server Type.
- The Barracuda Backup Agent (Windows) is enabled by default for Windows Servers; install the Agent from the SYSTEM > Software Downloads page in the web interface.
• To back up network file shares, turn on Enable File Share Backups, and enter your credentials.
Authentication and System Configuration Notes
Click here to expand.
• Backups for Mac OS X/Linux/UNIX (SSH Connections)
Barracuda Backup uses an SSH (Secure Shell) client to access data contained on Mac OS X or Linux / Unix based computers running an SSH daemon. The SSH client uses public key cryptography to establish a secure connection to the SSH daemon. You must configure SSH access to any Mac OS X or Linux / UNIX computer you want to back up. Follow the on-screen instructions on the BACKUP > Sources > Add Computer page according to the operating system.
• Directory-Based File Shares
When you back up a file share you must specify the share name on the network before you can select the folders to be backed up. On a Windows machine, a share name can be a drive volume such as "C\$", or a folder and its associated subfolders such as "My Documents". At a minimum you will need Read access to the data that you are backing up and Change Access or Full Control to the shares in order to perform a restore. For Mac OS X and Linux / Unix-based computers with SSH connections, the share name should be the entire path to the directory you would like to back up, e.g., /home/
When you select folders for backup you should begin by selecting the folders at the top of the folder tree hierarchy, and then deselect folders lower in the hierarchy that you do not want to back up. You can also specify an optional exclusion rule, which is applied when the backup runs to rule out files that do not meet your back up criteria.
- Message-Level Backup: Microsoft® Exchange and Novell® GroupWise™
When you select the Message-Level Backup data type, you must supply the authentication information to access your mail server before you can select which mailboxes to back up. In addition to the authentication information provided on the Barracuda Backup web interface, you must configure the Message-Level settings on your Exchange or GroupWise server.
For Microsoft Exchange servers, refer to Exchange Message-Level Backups for detailed instructions for configuring message-level backups.
For GroupWise 8 and above, refer to GroupWise Message-Level Backups for detailed instructions for configuring message-level backups.

Create Backup Schedules
Note that schedules are automatically created (with the default set to back up every day at 8:00PM) when a data source is created except if a schedule specifying all data sources already exists.
Now that you have configured your computers and data sources, you can create backup schedules, either individually or for all sources. If no schedule is created for a data source then it will not be backed up.
To create a backup schedule:
Click here to expand.
Go to the BACKUP > Schedules page of the Barracuda Backup web interface. Click Add a Schedule and fill in the information on the Add page:Backup Schedule
- Schedule Name - Enter a label to identify the backup schedule.
- Items to Back Up - Turn Apply to All Computers and Data Sources for this Barracuda Backup Server on to back up all content, or turn off, then expand and select the items you want to back up.
- Schedule Timeline - Turn on the days you want the back up to run.
• Daily Backup Timeline - Enter the start time; turn on Repeat if you want to specify a time period and end date to repeat the backup
If the backup schedule is for Microsoft SQL or Microsoft Exchange, you must specify the type of backup to run:
• Full - This backup type performs a full backup of data, including the transaction logs.
- Log - This backup type only backs up transaction logs created since the last full backup.
- Smart - This backup type is a combination of the full backup and the transaction log backup, minimizing the impact of backups on network resources necessary to transfer data offsite. Barracuda Networks recommends this backup type for SQL and Exchange servers.
With the Smart Backup type, threshold values are used to determine when to switch between full and log backups. The minimum threshold value specifies how many days Barracuda Backup continues to back up transaction logs before another full backup is run. After the minimum threshold value is met, Barracuda Backup determines whether to perform another backup based on the binary data queue. If the binary data queue size exceeds 1 GB, Barracuda Backup continues the transaction log backup until:
• the maximum threshold level is met, or
• the queue size drops below 1 GB
Modify Your Backup Rate Limit
This step is optional. Rate limits control the data replication rate to Barracuda Cloud Storage or other offsite storage locations. You can limit Internet bandwidth consumption during peak usage times, and schedule backups for non-peak hours.
Your initial offsite backup may take on the order of days to complete but all of the data is backed up locally on the Barracuda Backup Server during this period. After the initial large transfer is complete, replicating your data offsite should complete with only a few hours of transfer each day. By default, Barracuda Backup is configured to run full speed data transfers at night so that bandwidth is not affected while most people are at work. An alternate rate limit allows you to adjust the limit speed and time interval.
The length of transfer time it will take to get your data offsite is impacted by the compression and deduplication rates on your data, the uplink speed of your Internet connection, the amount of data that changes every day, and any speed limits you apply to Barracuda Backup.
To adjust the backup rate limit:
Click here to expand..
- On the BACKUP > Rate Limit page, select a Barracuda Backup Server on the left menu and create or edit the rate limit.
- You can specify a default rate limit and an alternate rate limit which is maintained only during the specified time periods.
Exclude Files from a Backup
This step is optional. You can create exclusion rules that use pattern matching to identify directory or file names that are not to be backed up. Files which are typically excluded from backups include temporary files, music, movies and other files which are not essential for business needs.
Use the following steps to create an exclusion rule:
Click here to expand...
- Go to the BACKUP > Exclusions page of the Barracuda Backup web interface. Click Add an Exclusion.
-
Fill in the information on the page: Add an Exclusion
-
Exclusion Rule Name - Enter a descriptive label to identify the exclusion rule.
- Add Exclusions to Reports - Turn on to include exclusions in reports, and turn off if you do not want to include exclusions in the reports.
- Apply Recursively to Sub Directories - Specify whether to apply the exclusion rule recursively to sub directories.
-
Where to Exclude - Turn Apply to All Computers and Data Sources for this Barracuda Backup Server on to apply the exclusion rule to all computers and data sources for the selected Barracuda Backup Server, or turn off, then expand and select the items to which to apply the exclusion rule.
-
In the section, specify what to exclude: What to Exclude
-
From the Preset Expressions menu, select the content you want to exclude, for example, Video files, then click Add.
-
In the Expressions field, enter a search string to exclude, for example, *.mp3, then click Add.
-
Click Save at the top of the page to add the exclusion rule.
To edit an existing exclusion rule, go to the BACKUP > Exclusions page of the Barracuda Backup web interface, and click Edit following the exclusion rule you want to edit. Make the necessary changes, then click Save.
To delete an exclusion rule, go to the BACKUP > Exclusions page of the Barracuda Backup web interface, and click the Delete icon following the exclusion rule you want to remove. Click OK to remove the rule.
Create Data Retention Policies
Data is retained based on a traditional grandfather-father-son (daily-weekly-monthly) rotation model. You can specify how long to keep daily, weekly, monthly, and yearly backups by creating data retention policies. Different retention policies can be created for different sets of data including files, data backed up by the Barracuda Backup Agent (Exchange, SQL, System State), and email messages.
You can create one policy for all of the computers and data sources on a Barracuda Backup Server or multiple policies that each include some subset of the data.
To set retention policies:
Click here to expand...
- Go to the BACKUP > Retention Policies page, click Add a Retention Policy, and enter a name to identify the policy.
- In the Items to Retain section, specify the data sources to which the retention policy applies; the Retention Timeline section displays. Select a timeline template on which to base your retention policy, or specify your own revision timeline.
- Select the desired Removed Files Rule setting, and click Save.
When data is removed according to a retention policy, it is deleted from both the local Barracuda Backup Server and the offsite storage locations. Removed files that have been backed up using Network File Shares Protocol or SSHFS may be retained for a longer period of time, according to the configuration. Otherwise, once your data has been purged, it is gone forever. Purging applies to historic file revisions only; your current data is not impacted by a retention policy.
Replicate Data to another Barracuda Backup
Before configuring a backup destination, verify the following:
- Make sure that your retention policies are configured before configuring replication. Otherwise you may waste bandwidth copying data that does not need to be replicated.
- Verify Internet connectivity between the local and remote Barracuda Backup Server(s). Configuring a secure VPN connection between multiple Barracuda Backup Servers ensures the highest level of security possible.
- You must have the serial number and replication code of the destination Barracuda Backup Server. Go to the destination Barracuda Backup Server, and go to the BACKUP > Replication page. The serial number and replication code display at the top right of the page.

Important
- Only the Barracuda Backup Server 490 and higher can act as a backup to other Barracuda Backup Servers, although any Barracuda Backup Server can send data.
- Data can be backed up to both a second Barracuda Backup Server and to Barracuda Cloud Storage. Data that is backed up on a second Barracuda Backup Server cannot be backed up yet again onto another Barracuda Backup Server.
- For every Terabyte of data replicated, Barracuda Networks recommends a 1.5 Mbps or T1 connection.
- You must have the serial number and replication code of the destination. These can be found by selecting the destination Barracuda Backup Server and looking at its BACKUP > Replication page.
Barracuda Backup Servers that are used to back up the data from one or more Barracuda Backup Servers are known as destinations. Data from one Barracuda Backup Server can be replicated to one or more destinations.
To configure where data is replicated to from a Barracuda Backup Server,
- Select the Barracuda Backup Server in the list to which you wish to add a replication destination, and go to the BACKUP > Replication page.
- To add a replication destination, click .Add a Target
- In the page, select from one of the following options: Add Destination
- From the Backup Server list, select a Barracuda Backup Server from your account to automatically load the required destination details, or
- Enter the following details in the associated fields:
- Enter the destination hostname or IP address
- Enter the Serial Number from the Barracuda Backup Serverdestination
- Enter the Replication Code from the Barracuda Backup Serverdestination
4. Click .Save
Once a destination is added, it appears in the Sending Data To table. If the status displays as online (Online ●), the two systems are able to communicate with each other.
On the BACKUP > Replication page, there is a global flag to replicate all data to either Barracuda Cloud Storage or to Barracuda Backup Servers:
√ Send All Local Backups
If you wish to send data from diverse sources to both of these options, then do not set this flag on any items in the Target List. Instead, edit each data source on the BACKUP > Sources page, and specify where its data is to be replicated.
Edit Replication Server Settings
To edit the replication target settings, click Settings in the Target List. In the Replication Target Settings list, you can modify the destination IP address, disable data replication, and specify whether to send all data on the Barracuda Backup Server to this target.
Remove a Barracuda Backup Server
To permanently remove a replication destination, click Remove in the Target List.
Send Data To/Receiving Data From
Destination Barracuda Backup Servers display in the Sending Data To table. If a Barracuda Backup Server is acting as a destination for another Barracuda Backup Server, it displays in the Receiving Data From table.
View Reports
Barracuda Backup provides detailed reports including:
Click here to expand..
- Backup Reports - From the REPORTS > Backup page, you can view detailed reports for each backup that is run including any back up process that is currently running. Backup reports include details about the backup such as when the backup started, duration, size, if there were any errors or warnings, and any new, changed, or removed items. Reports also include links to each backed up file to view or download the item from the report.
Click Details to view recent activity in chart form. You can also view a list of backed up files including the number of new, changed, and removed files, as well as a list of any errors encountered during backup. If a backup is currently in progress, the REPORTS > Backup page displays this information and allows you to cancel the backup.
Click View Past Reports to access archived backup reports in the Backup (Archived) page. You can specify the number of reports you wish to display on the page, or enter a date range and click Update to display the archived reports.
- Restore Report - View restoration details in the REPORTS >Restore page. Click Details to view all details for the selected restoration including any encountered errors. Expand the detail tabs to view specific file errors and a list of restored files.
- Large Items Report - View a detailed list of large items by source or file name in the REPORTS > Large Items page. From the Sources drop-down menu, you can select to view large items by individual sources or for All sources. To further refine the report, enter a string in the Filename contains field, and click Filter. The report displays only those large items matching the filename content for the selected Source.
Create Display Groups
If you have multiple Barracuda Backup Servers, you can manage them through display groups. Go to the ADMIN > Display Groups page, and follow the on-screen instructions.

Additional Information
For additional information, refer to .Display Groups Page
Site-to-Site Deployment
This article assumes each Barracuda Backup Server in the deployment is physically installed and connected to the network.
In this article:
- Configure the Barracuda Backup Server
• Create a Barracuda Cloud Control Account
- Configure the IP Address and Network Settings
- Configure Your Corporate Firewall
- Link Your Barracuda Backup Server to an Account
- Add the Server Name and Location
• Create Display Groups
- Configure Data Sources
- Add Systems and Select Data Sources
• Create Backup Schedules
• Create Data Retention Policies - Modify Your Back Up Rate Limit
- Secure the Barracuda Backup Server
• Communication and Configuration
• Data Transmission and Storage
• Management Access
- Encryption
- Configure Replication
- Restore Data from Replication Destinations
In a site-to-site deployment, a Barracuda Backup Server acts as a backup or "private cloud" to replicate data from one or more Barracuda Backup Servers. Each Barracuda Backup Server can send data to one or more other Barracuda Backup Servers. In the following image, a target Barracuda Backup Server acts as a backup to two other Barracuda Backup Servers:
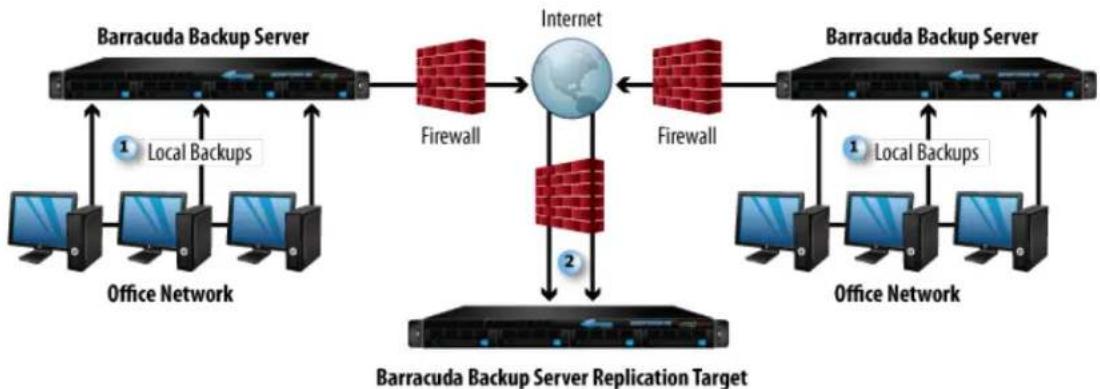
flowchart
graph TD
    A["Barracuda Backup Server"] -->|Local Backups| B["Office Network"]
    A --> C["Firewall"]
    C --> D["Internet"]
    D --> E["Firewall"]
    E --> F["Barracuda Backup Server"]
    F -->|Local Backups| G["Office Network"]
    F --> H["Firewall"]
    H --> I["Barracuda Backup Server Replication Target"]
    I --> J["Firewall"]
    J --> D
    style A fill:#f9f,stroke:#333
    style F fill:#f9f,stroke:#333
    style I fill:#f9f,stroke:#333
1 Backup data sent from network to local Barracuda Backup Server.
2 Data securely replicated to remote target Barracuda Backup Server (private cloud).
Configure the Barracuda Backup Server
Use the following steps to configure your Barracuda Backup Server.
Create a Barracuda Cloud Control Account
You must have a Barracuda Cloud Control account to use Barracuda Backup. If you do not already have an account, follow these steps:
- Go to the following URL: http://login.barracudanetworks.com/
- Complete the fields on the page, and click .Create New Account Submit
Configure the IP Address and Network Settings
By default, the Barracuda Backup Server is configured to obtain an IP address on your network using DHCP. If you want to assign it a static IP address instead, you can configure it using the console administration interface. If not, skip the following steps:
To configure the Barracuda Backup Server to use a static IP address:
- Connect a monitor and keyboard to the Barracuda Backup Server.
- Use your arrow keys to highlight the field.DHCP/Static
- Using the spacebar select for your IP address assignment preference.Static
- Enter the IP Address, Netmask, Default Gateway, Primary DNS Server, and Secondary DNS Server (optional) as appropriate for your network.
- Click on the box.Enter Commit Changes
Once changes are committed, the Barracuda Backup server attempts to connect to Barracuda Networks.
The LAN and Internet boxes on the console administration interface are green when the Barracuda Backup Server is determined to be online. The Barracuda box remains red until it is linked to an account later in the installation process.
Configure Your Corporate Firewall
If the Barracuda Backup Server is located behind a corporate firewall, you may need to open the following ports to allow communication between the Barracuda Backup Server and the Internet. In site-to-site deployment, you can specify the ports to use for replication on the BACKUP > page, or optionally, you can replicate over ports 5120-5129. Replication
- Ports 1194 and 5120-5129 outbound for both TCP and UDP traffic. The ports are used to transfer data to either Barracuda Cloud Storage or to another Barracuda Backup Server over the Internet.

Cloud Replication
If you would like to restrict the outbound network traffic on these ports to Barracuda Cloud Storage, contact Barracuda Networks Technical Support for a list of the IP addresses to allow.
Link Your Barracuda Backup Server to an Account
Your Barracuda Backup Server must be linked to your Barracuda Cloud Control Account before you can initiate data backups.
To link your Barracuda Backup Server:
- Go to this URL: http://login.barracudanetworks.com/
- Sign in with your Username and Password.
- If Barracuda Backup is your default or only Barracuda Networks product, then the Barracuda Backup web interface appears. If not, click Backup Service at the top of the screen.
- Click Start Backup Service Setup, and then select the STATUS tab.
- Click Link a Barracuda Backup Server.
- Enter your Serial Number and Linking Code from the sticker attached to the Quick Start Guide that shipped with your Barracuda Backup Server. These values are case sensitive. The Serial Number can also be found on a sticker on the back of the unit. Follow the on-screen prompts to complete linking and to supply your account information.
- The linking process may take a few minutes to complete. Wait until the STATUS page appears, indicating that the Barracuda Backup Server is successfully linked to your account. A green light next to the Barracuda Backup Server on the STATUS page indicates that your Barracuda Backup Server has successfully connected.
Add the Server Name and Location
Use the SYSTEM > BBS Settings page to view or modify the Barracuda Backup Server details including server name, time zone, physical location, and display group:
- Backup Server Name - Name used to identify the currently selected Barracuda Backup Server in the web interface
- Backup Server Time Zone - The time zone where the currently selected Barracuda Backup Server is located
- Backup Server Location - The physical location of the Barracuda Backup Server including city, state, and country
- Backup Server Display Group - The display group in which the Barracuda Backup Server resides
- Manage your display groups - Click to add or remove a display group in the ADMIN > Display Groups page
Create Display Groups
This step is optional. If you have multiple Barracuda Backup Servers, you can manage them by creating display groups on the ADMIN > Display page.Groups

Additional Information
See the for more information.Display Groups Page
Configure Data Sources
This section describes how to configure backups.
Add Systems and Select Data Sources
There may be more than one data source on each server, and each can have unique back up characteristics.

Additional Information
• See for details by data source type.Backup Up Data Sources
• See for step-by-step instructions on setting up data sources.Data Backup Tasks
Create Backup Schedules

Note that schedules are automatically created (with the default set to back up every day at 8:00PM) when a data source is created except if a schedule specifying data sources already exists. pt all
Now that you have configured your computers and data sources, you can create backup schedules, either individually or for all sources. If no schedule is created for a data source then it will not be backed up.

Additional Information
Schedule See Page for more information.
Create Data Retention Policies
Data is retained based on a traditional grandfather-father-son (daily-weekly-monthly) rotation model. You can specify how long to keep daily, weekly, monthly, and yearly backups by creating data retention policies. Different retention policies can be created for different sets of data including files, data backed up by a , and email messages.Barracuda Backup Agent
You can create one policy for all of the computers and data sources on a Barracuda Backup Server or multiple policies that each include some subset of the data.

Additional Information
Retention Policy See Page for more information.
• See Creating Effective Retention Policies for revision timelines, removed file rules, and removed email timelines.
Modify Your Back Up Rate Limit
This step is optional. Rate limits control the data replication rate to Barracuda Cloud Storage or other offsite storage locations. You can limit Internet bandwidth consumption during peak usage times, and schedule backups for non-peak hours.

Additional Information
See the Rate Limit Page for more information.
Exclude Files from a Backup
This step is optional. You can create exclusion rules that use pattern matching to identify directory or file names that are not to be backed up. Files which are typically excluded from backups include temporary files, music, movies and other files which are not essential for business needs in the page.BACKUP > Exclusions

Additional Information
See the Exclusions Page for more information.
Check Backup Reports
View reports on an ongoing basis as needed. The REPORTS > Backup page contains detailed backup reports. A list of in progress backups displays at the top of the page, and once a backup is complete, a detailed report displays in a table by device. Click Details following the report you want to view.

Additional Information
See the Reports Page for more information.
Secure the Barracuda Backup Server
This section describes how to secure your Barracuda Backup Servers.
Communication and Configuration
Administration and backup configuration that is set using the Barracuda Backup web interface is sent to the Barracuda Backup Server via a 256-bit encrypted VPN tunnel. The Barracuda Backup Server uses HTTPS port 1194 to send status updates to Barracuda Backup. Data transfers are initiated by the Barracuda Backup Server rather than by Barracuda Cloud Storage or a remote Barracuda Backup Server.
Data Transmission and Storage
Data transferred between your network and Barracuda Cloud Storage, or between your network and a remote Barracuda Backup Server, is always encrypted. File parts are AES 256-bit symmetrically encrypted before they are stored, and they remain encrypted until a restore is requested.
Management Access
- Monitor Activity - You can check the user activity page periodically for authentication attempts, changes to settings, and updates to account information. Go to the ADMIN > User Activity Reports page to see all activity for an account, including logins and when a user has enabled or disabled replication.
- Restrict Logins by IP Address - You can restrict access to Barracuda Backup to one or more IP addresses. On the ADMIN > Users page, click the graphic ( ) to edit a user account; enter an IP address or a range.Edit
- Secure Network Access - HTTPS is always used for secure web browser communication with Barracuda Backup.
Encryption
Data transfers from the local Barracuda Backup Server to a receiving Barracuda Backup Server are always encrypted. Data is stored compressed and encrypted at rest on the receiving Barracuda Backup Server; the local Barracuda Backup Server does not store in an encrypted or compressed state. The most aggressive combination of symmetrical and asymmetrical encryption in the industry keeps your data stored in a format that nobody but you can access. The United States government recently approved 192-bit AES encryption as the preferred method for protecting top-secret information. The Barracuda Backup solution starts with even higher 256-bit AES encryption.
In addition, Barracuda Networks has developed a proprietary advanced digital cataloging system that breaks down your data into small pieces and tracks the changes of these parts over time, and strips the original meta identifiers from your files.
As data is transmitted to the remote Barracuda Backup Server, your symmetrically-encrypted data parts are compressed and sent over your Internet connection with an asymmetrically-encrypted key.
Configure Replication
This section describes how to configure replication.

Important
- Only the Barracuda Backup Server 490 and higher can act as a backup to other Barracuda Backup Servers, although any Barracuda Backup Server can send data.
- Data can be backed up to both a second Barracuda Backup Server and to Barracuda Cloud Storage. Data that is backed up on a second Barracuda Backup Server cannot be backed up yet again onto another Barracuda Backup Server.
- For every Terabyte of data replicated, Barracuda Networks recommends a 1.5 Mbps or T1 connection.
- You must have the serial number and replication code of the destination. These can be found by selecting the destination Barracuda Backup Server and looking at its BACKUP > Replication page.
Barracuda Backup Servers that are used to back up the data from one or more Barracuda Backup Servers are known as destinations. Data from one Barracuda Backup Server can be replicated to one or more destinations.
To configure where data is replicated to from a Barracuda Backup Server,
- Select the Barracuda Backup Server in the list to which you wish to add a replication destination, and go to the BACKUP > Replication page.
- To add a replication destination, click .Add a Target
- In the page, select from one of the following options: Add Destination
- From the Backup Server list, select a Barracuda Backup Server from your account to automatically load the required destination details, or
- Enter the following details in the associated fields:
- Enter the destination hostname or IP address
- Enter the Serial Number from the Barracuda Backup Serverdestination
-
Enter the Replication Code from the Barracuda Backup Serverdestination
-
Click .Save
Once a destination is added, it appears in the Sending Data To table. If the status displays as online (Online), the two systems are able to communicate with each other.
On the BACKUP > Replication page, there is a global flag to replicate all data to either Barracuda Cloud Storage or to Barracuda Backup Servers:

Send All Local Backups
If you wish to send data from diverse sources to both of these options, then do not set this flag on any items in the Target List. Instead, edit each data source on the BACKUP > Sources page, and specify where its data is to be replicated.
Edit Replication Server Settings
To edit the replication target settings, click Settings in the Target List. In the Replication Target Settings list, you can modify the destination IP address, disable data replication, and specify whether to send all data on the Barracuda Backup Server to this target.
Remove a Barracuda Backup Server
To permanently remove a replication destination, click Remove in the Target List.
Send Data To/Receiving Data From
Destination Barracuda Backup Servers display in the Sending Data To table. If a Barracuda Backup Server is acting as a destination for another Barracuda Backup Server, it displays in the Receiving Data From table.
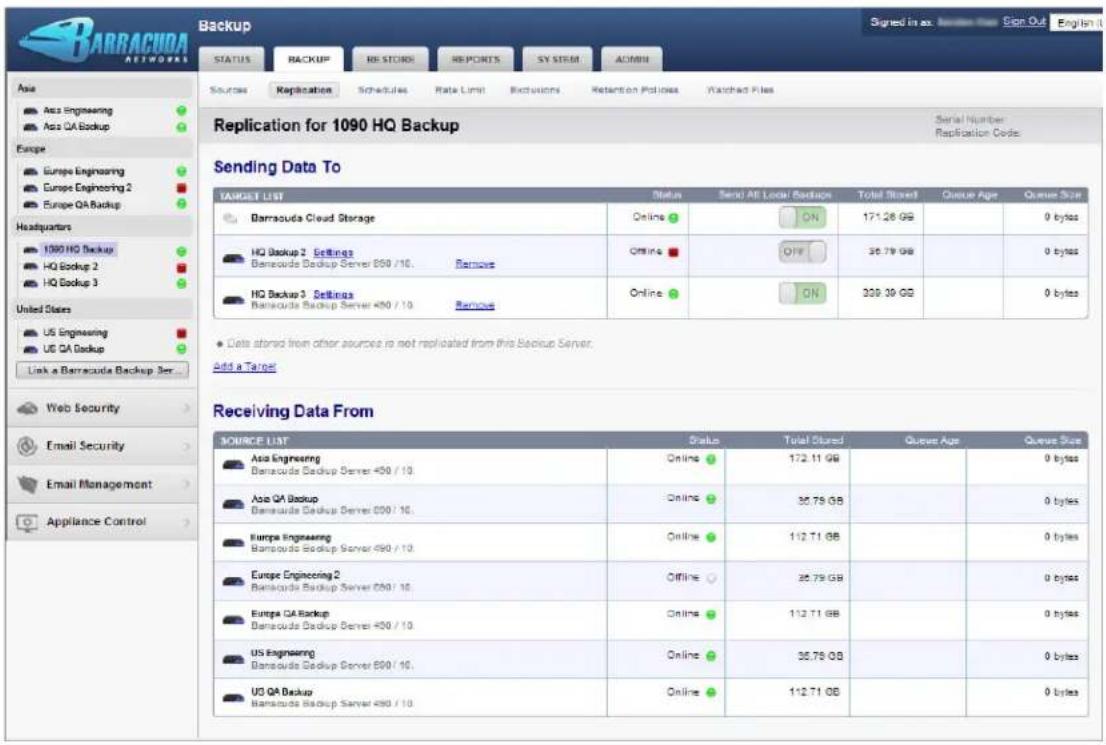

Additional Information
See the for more information. Replication Page
Restore Data from Replication Destinations

Only the Barracuda Backup Server 490 and higher can act as a backup to other Barracuda Backup Servers, although any Barracuda Backup Server can send data.
To restore from a replication destination,
- Log into the Barracuda Backup web interface, and select the receiving Barracuda Backup Server from which to restore.
- Go to the Restore>Restore Browser page, and in the left pane select the sending Barracuda Backup Server that you are receiving data from:
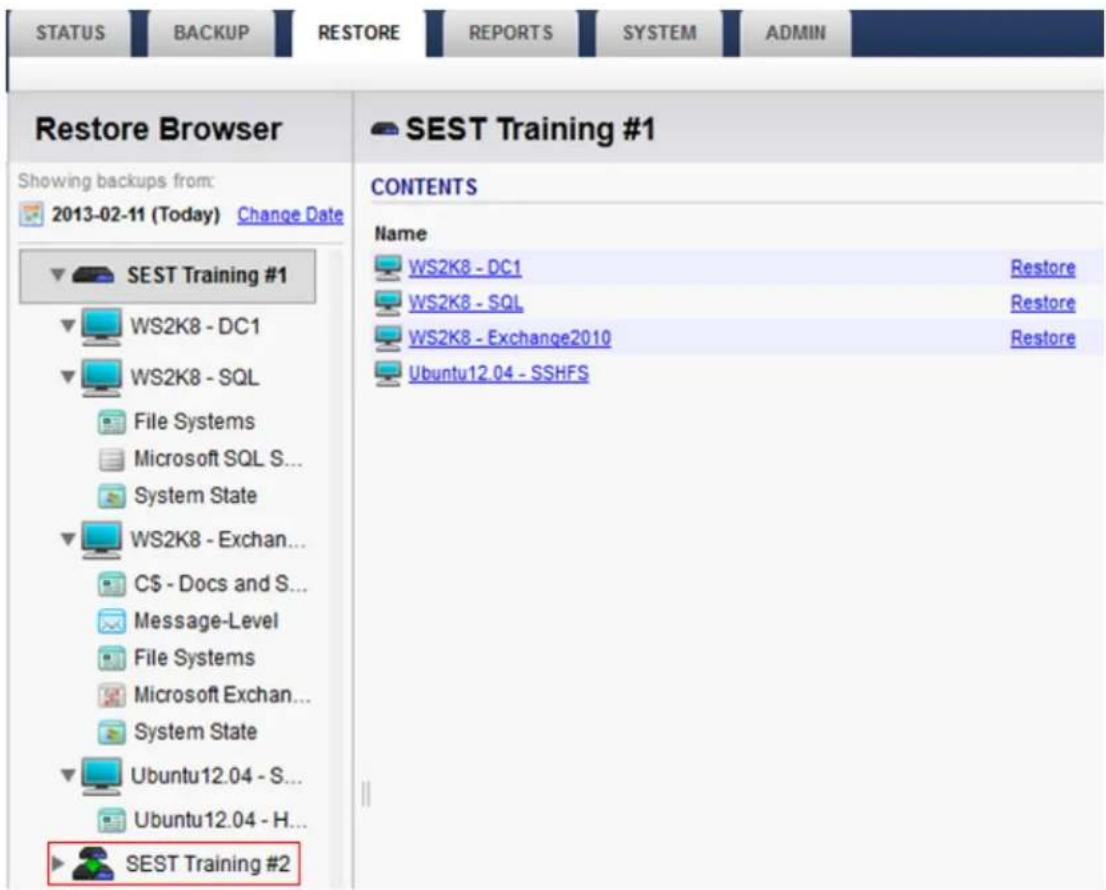
- Expand the sending Barracuda Backup Server to review its backup sources, and click on the server or computer from which to restore; the contents displays in the right pane:
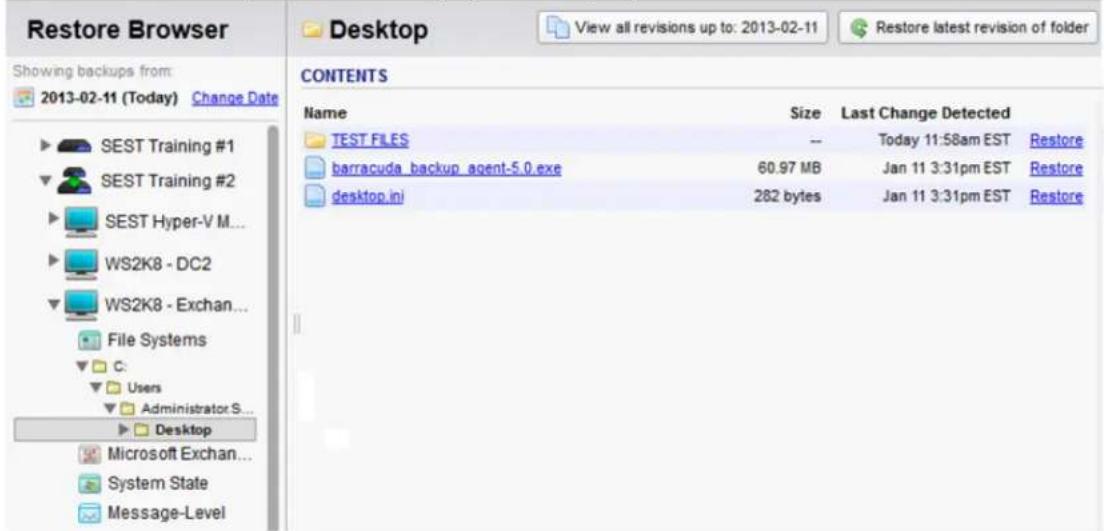
- In the Contents section, click Restore next to the file or directory for restore. The Restore window displays.
- In the Restore to field, enter the hostname or IP address of the restore to location. In the Path section, select the Original Path, or you can designate a new location:
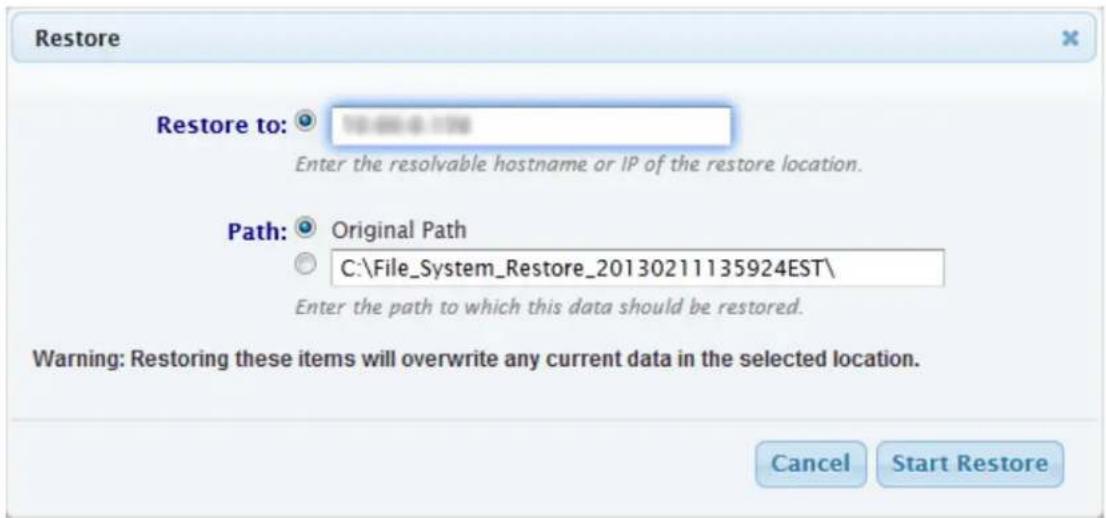
- Click Start Restore. Once the restore is complete, go to REPORTS >Restore to verify the restore completed successfully.
Configuring Replication
Any Barracuda Backup Server can send data to another Barracuda Backup Server, however, only Barracuda Backup Servers 490 and higher can act as a backup to other Barracuda Backup Servers.
For every Terabyte of data replicated, Barracuda Networks recommends a 1.5 Mbps or T1 connection.
In this article:
• Before Starting Replication
- Verify Retention Policies
- Configure Destinations
- Specify Data Replication Destination
• Temporarily Disable a Destination
- Remove a Destination
- Loss of Communication
Related Articles
- Replication
- Site-to-Site Deployment
- Setting Up Site-to-Site Replication
Before Starting Replication
Verify Internet connectivity between the local and remote Barracuda Backup Server(s). Configuring a secure VPN connection between multiple Barracuda Backup Servers ensures the highest level of security possible.
Verify Retention Policies
Make sure that your retention policies are configured before configuring replication. Otherwise you may waste bandwidth copying data that does not need to be replicated. On the Barracuda Backup Server, go to the BACKUP > Retention Policies page and verify that the retention policies are configured before configuring replication to avoid copying data that does not need replication.
Verify Internet connectivity between the local and remote Barracuda Backup Server(s). Configuring a secure VPN connection between multiple Barracuda Backup Servers ensures the highest level of security.
Configure Destinations
Barracuda Backup Servers that are used to back up the data from one or more Barracuda Backup Servers are known as destinations. Data from one Barracuda Backup Server can be replicated to one or more destinations.
Note: Before you can configure a destination, you must have the target Barracuda Backup Server serial number and replication code. To locate these values, select the target Barracuda Backup Server in the list, and go to the BACKUP > Replication page. The serial number and replication code display to the right of the target Barracuda Backup Server name.
- Select the Barracuda Backup Server in the list, and go to the page.BACKUP > Replication
- Click the .Add a Target link
- Enter the target Barracuda Backup Server IP address or hostname, serial number, and replication code. Click Save.
- The server displays in the table. Sending Data To
When the status displays as the two systems are able to communicate with each other. Online
Specify Data Replication Destination
- Select the Barracuda Backup Server in the list, and go to the page.BACKUP > Replication
- In the Sending Data To table, in the Global Setting column, you specify whether to replicate all data to Barracuda Cloud Storage or to a Barracuda Backup Servers. To send data from diverse sources to both of these options, do not turn on the flag. Instead, edit each data source on the BACKUP > Sources page, and specify where its data is replicated.
Temporarily Disable a Destination
You can temporarily disable site-to-site replication for one or more destinations. If it is disabled, nothing is sent from the Barracuda Backup Server to the destination until the feature is enabled or until 24 hours have passed. This allows you to move the destination system to a remote location, say, without getting backup errors. If the 24 hours pass and site-to-site replication is not manually re-enabled, the Barracuda Backup Servers attempt to communicate with each other and, if successful, perform the backups.
- Select the Barracuda Backup Server in the list, and go to the the BACKUP > Replication page.
- In the Sending Data To table, click on the Settings link beside the destination Barracuda Backup Server.
- On the Replication Target Settings page, turn off Enable Data Replication.
Remove a Destination
- Select the Barracuda Backup Server in the list, and go to the the BACKUP > Replication page.
- In the Sending Data To table, click on the Remove link beside the destination Barracuda Backup Server.
Loss of Communication
If there is a loss of communication between the Barracuda Backup Server and its back up destinations, the data to be backed up is queued and errors are generated. Data is queued until the issue is resolved. The queue size in the table on the BACKUP > Replication page indicates how much data is waiting to be replicated. Not all of this data is actually copied to the destination; some of it is deduplicated as the replication proceeds. Only those parts that are not already stored in the remote location are sent over the Internet.
Site-to-Cloud Deployment
In this article:
- Configure the Barracuda Backup Server
- Configure Data Sources
- Secure the Barracuda Backup Server
- Configure Replication
Barracuda Cloud Storage subscription plans provide diverse offsite storage that scales to meet your changing data requirements. Barracuda Cloud Storage includes secure backup to two separate data centers. Storage is allocated in 200 gigabyte increments and is all disk-based. The following image shows two Barracuda Backup Servers replicating data to Barracuda Cloud Storage:
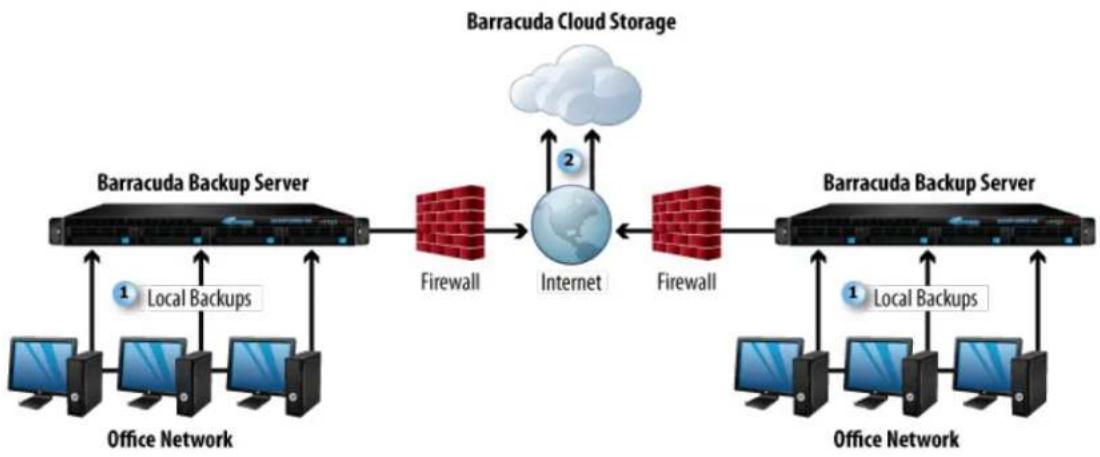
flowchart
graph LR
    A["Barracuda Backup Server"] -->|Local Backups| B["Office Network"]
    A --> C["Firewall"]
    C --> D["Internet"]
    D --> E["Barracuda Cloud Storage"]
    E -->|Local Backups| F["Office Network"]
    E --> G["Firewall"]
    G --> H["Barracuda Backup Server"]
    H -->|Local Backups| I["Office Network"]
1 Backup data sent from network to local Barracuda Backup Servers.
2 Data replicated to Barracuda Cloud Storage.
Configure the Barracuda Backup Server
Use the following steps to configure your Barracuda Backup Server.
Create a Barracuda Cloud Control Account
You must have a Barracuda Cloud Control account to use Barracuda Backup. If you do not already have an account, follow these steps:
- Go to the following URL: http://login.barracudanetworks.com/
- Complete the fields on the page, and click .Create New Account Submit
Configure the IP Address and Network Settings
By default, the Barracuda Backup Server is configured to obtain an IP address on your network using DHCP. If you want to assign it a static IP address instead, you can configure it using the console administration interface. If not, skip the following steps:
To configure the Barracuda Backup Server to use a static IP address:
- Connect a monitor and keyboard to the Barracuda Backup Server.
- Use your arrow keys to highlight the DHCP/Static field.
- Using the spacebar select for your IP address assignment preference.Static
- Enter the IP Address, Netmask, Default Gateway, Primary DNS Server, and Secondary DNS Server (optional) as appropriate for your network.
- Click on the box.Enter Commit Changes
Once changes are committed, the Barracuda Backup server attempts to connect to Barracuda Networks.
The LAN and Internet boxes on the console administration interface are green when the Barracuda Backup Server is determined to be online. The Barracuda box remains red until it is linked to an account later in the installation process.
Configure Your Corporate Firewall
If the Barracuda Backup Server is located behind a corporate firewall, you may need to open the following ports to allow communication between the Barracuda Backup Server and the Internet.
- Ports 1194 and 5120-5129 outbound for both TCP and UDP traffic. The ports are used to transfer data to either Barracuda Cloud Storage or to another Barracuda Backup Server over the Internet. In site-to-site deployment, data can be replicated either over ports 5120-5129 or over a set of ports you specify on the BACKUP > Replication page.

Cloud Replication
If you would like to restrict the outbound network traffic on these ports to Barracuda Cloud Storage, contact Barracuda Networks Technical Support for a list of the IP addresses to allow.
Link Your Barracuda Backup Server to an Account
Your Barracuda Backup Server must be linked to your Barracuda Cloud Control Account before you can initiate data backups.
To link your Barracuda Backup Server:
- Go to this URL: http://login.barracudanetworks.com/
- Sign in with your and .Username Password
- If Barracuda Backup is your default or only Barracuda Networks product, then the Barracuda Backup web interface appears. If not, click at the top of the screen.Backup Service
- Click, and then select the tab.Start Backup Service Setup STATUS
- Click .Link a Barracuda Backup Server
- Enter your Serial Number and Linking Code from the sticker attached to the Quick Start Guide that shipped with your Barracuda Backup Server. These values are case sensitive. The Serial Number can also be found on a sticker on the back of the unit. Follow the on-screen prompts to complete linking and to supply your account information.
- The linking process may take a few minutes to complete. Wait until the STATUS page appears, indicating that the Barracuda Backup Server is successfully linked to your account. A green light next to the Barracuda Backup Server on the STATUS page indicates that your Barracuda Backup Server has successfully connected.
Add the Server Name and Location
Use the SYSTEM > BBS Settings page to view or modify the Barracuda Backup Server details including server name, time zone, physical location, and display group:
- Backup Server Name - Name used to identify the currently selected Barracuda Backup Server in the web interface
- Backup Server Time Zone - The time zone where the currently selected Barracuda Backup Server is located
- Backup Server Location - The physical location of the Barracuda Backup Server including city, state, and country
- Backup Server Display Group - The display group in which the Barracuda Backup Server resides
- Manage your display groups - Click to add or remove a display group in the ADMIN > Display Groups page
Define Display Groups
This step is optional. If you have multiple Barracuda Backup Servers, you can manage them by creating display groups on the ADMIN > Display Groups page.

Additional Information
See the Display Groups Page for more information.
Configure Data Sources
This section describes how to configure backups.
Add Systems and Select Data Sources
Set up your data sources on the BACKUP > Sources page, and specify that you want to Replicate to Barracuda Cloud Storage on the Add Data Source page. You may have more than one data source on each server, and each can have unique back up characteristics. For set up details by data source type, see Backup Up Data Sources.

Additional Information
See Data Backup Tasks for more information.
Create Backup Schedules

Note that schedules are automatically created (with the default set to back up every day at 8:00PM) when a data source is created except if a schedule specifying all data sources already exists.
Now that you have configured your computers and data sources, you can create backup schedules, either individually or for all sources. If no schedule is created for a data source then it will not be backed up.

Additional Information
See the for more information.Schedules Page
Create Data Retention Policies
Data is retained based on a traditional grandfather-father-son (daily-weekly-monthly) rotation model. You can specify how long to keep daily, weekly, monthly, and yearly backups by creating data retention policies. Different retention policies can be created for different sets of data including files, data backed up by a , and email messages.Barracuda Backup Agent
You can create one policy for all of the computers and data sources on a Barracuda Backup Server or multiple policies that each include some subset of the data.

Additional Information
• See the for more information. Retention Policies Page
• See Creating Effective Retention Policies for revision timelines, removed file rules, and removed email timelines.
Modify Your Backup Rate Limit
This step is optional. Rate limits control the data replication rate to Barracuda Cloud Storage or other offsite storage locations. You can limit Internet bandwidth consumption during peak usage times, and schedule backups for non-peak hours.

Additional Information
See the Rate Limit Page for more information.
Exclude Files from a Backup
This step is optional. You can create exclusion rules that use pattern matching to identify directory or file names that are not to be backed up. Files which are typically excluded from backups include temporary files, music, movies and other files which are not essential for business needs in the page.BACKUP > Exclusions

Additional Information
See the Exclusions Page for more information.
Check Backup Reports
View reports on an ongoing basis as needed. The REPORTS > Backup page contains detailed backup reports. A list of in progress backups displays at the top of the page, and once a backup is complete, a detailed report displays in a table by device. Click Details following the report you want to view.

Additional Information
See the Reports Page for more information.
Secure the Barracuda Backup Server
This section describes how to secure your Barracuda Backup Servers.
Communication and Configuration
Administration and backup configuration that is set using the Barracuda Backup web interface is sent to the Barracuda Backup Server via a 256-bit encrypted VPN tunnel. The Barracuda Backup Server uses HTTPS port 1194 to send status updates to Barracuda Backup. Data transfers are initiated by the Barracuda Backup Server rather than by Barracuda Cloud Storage.
Data Transmission and Storage
Data transferred between your network and Barracuda Cloud Storage is always encrypted. File parts are AES 256-bit symmetrically encrypted
before they are stored, and they remain encrypted until a restore is requested.
Management Access
- Monitor Activity - You can check the user activity page periodically for authentication attempts, changes to settings, and updates to account information. Go to the ADMIN > User Activity Reports page to see all activity for an account, including logins and when a user has enabled or disabled replication.
- Restrict Logins by IP Address - You can restrict access to Barracuda Backup to one or more IP addresses. On the ADMIN > Users page, click the graphic () to edit a user account; enter an IP address or a range.Edit
- Secure Network Access - HTTPS is always used for secure web browser communication with Barracuda Backup.
Encryption
Data transfers between the local Barracuda Backup Server and a remote Barracuda Backup Server are always encrypted. Data is stored compressed and encrypted at rest. The most aggressive combination of symmetrical and asymmetrical encryption in the industry keeps your data stored in a format that nobody but you can access. The United States government recently approved 192-bit AES encryption as the preferred method for protecting top-secret information. The Barracuda Backup solution starts with even higher 256-bit AES encryption.
In addition, Barracuda Networks has developed a proprietary advanced digital cataloging system that breaks down your data into small pieces and tracks the changes of these parts over time, and strips the original meta identifiers from your files.
As data is transmitted to the remote Barracuda Backup Server, your symmetrically-encrypted data parts are compressed and sent over your Internet connection with an asymmetrically-encrypted key.
Configure Replication
This section describes how to configure replication to Barracuda Cloud Storage.
Globally Replicate Data
You can select to globally replicate all data from all data sources for the currently selected Barracuda Backup Server to Barracuda Cloud Storage on the page:Replication
- Select the Barracuda Backup Server in the left pane, and then go to the BACKUP > Replication page.
- In the Sending Data To section, turn On Send All Local Backups:
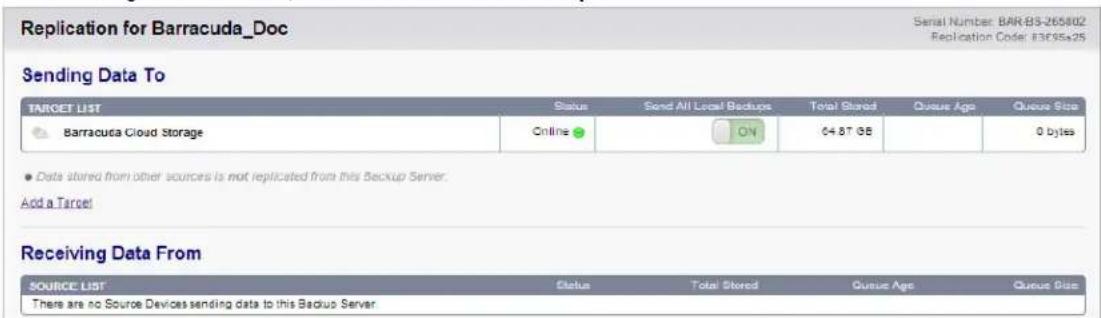
Selectively Replicate Data
You can specify which data sources are replicated to the cloud for the currently selected Barracuda Backup Server:
- Select the Barracuda Backup Server in the left pane, and then go to the BACKUP > Replication page.
- In the Sending Data To section, set Send All Local Backups to Off.
- Go to the BACKUP > Sources page, and click Edit next to the data sources listed in the right section of the page.
- On the Edit page, turn on Replicate to Barracuda Cloud Storage, and then click Save.

Data Sources
You can specify Replicate to Barracuda Cloud Storage when setting up your data sources as described in the section Add Systems and Select Data Sources.

Additional Information
Barracuda Cloud Storage Deployment Overview
You can deploy a Barracuda Backup Server with backups stored on Barracuda Cloud Storage.
In the following image, a Barracuda Backup Server is located in a network and its backups are stored on Barracuda Cloud Storage:

flowchart
graph LR
    A["Computer 1"] -->|Data| B["Barracuda Backup Server"]
    C["Computer 2"] -->|Data| B
    D["Computer 3"] -->|Data| B
    B -->|Encrypted Data| E["Firewall"]
    E --> F["Barracuda Cloud Storage"]
Storage Plans
Barracuda Cloud Storage is available through either a subscription plan or by purchasing Unlimited Cloud Storage. In firmware release 5.4 and higher, you can enable offsite vaulting which leverages Barracuda's Cloud Storage service to offload up to twelve monthly and seven yearly revisions to strictly cloud storage, freeing up disk space on your local Barracuda Backup Server.
- Cloud Storage subscription – Barracuda's Cloud Storage subscription plans provide diverse offsite storage options that scale to meet your changing data requirements. Storage plans are purchased in 200 GB increments and are all disk-based, allowing you to scale up or down depending on your organizations' needs.
- Unlimited Cloud Storage - Unlimited Cloud Storage allows you to store all of your content without having to manage storage usage limits.
Unlimited Cloud Storage mirrors content offsite based on your retention policies. As noted above, in firmware release 5.4 and higher, you can enable offsite vaulting to purge data from the local cache.
Contact your Barracuda Sales Representative for subscription plan and Unlimited Cloud Storage pricing.
Getting Started
Recommended Steps
• Step 1: How to Install the Barracuda Backup Server
• Step 2: How to Configure Barracuda Backup
• Step 3: How to Configure Backups
- Step 4: Data Backup Tasks
Alternatively, you can download the Barracuda Backup Service Quick Start Guide from the Barracuda Backup Overview page.
Step 1: How to Install the Barracuda Backup Server
Before installation, determine the best type of deployment for your Barracuda Backup Server; refer to the Deployment section for a list of options.
In this article:
• Create a Barracuda Cloud Control Account
- Verify the Equipment
- Connect to Network
Related Articles
• Replacement and Data Migration
• How to Configure Barracuda Backup
Create a Barracuda Cloud Control Account
You must have a Barracuda Cloud Control account to use Barracuda Backup. If you do not already have an account, follow these steps:
- Go to the following URL: http://login.barracudanetworks.com/
- Complete the fields on the page, and click .Create New Account Submit
Verify the Equipment
Verify you have the necessary equipment:
- Barracuda Backup Server (check that you have received the correct model)
- AC power cord
- Ethernet cables
• VGA monitor (recommended) - Keyboard (recommended)
- Barracuda Backup Server serial number and linking code (available on both the side of the Barracuda Backup Server and the Quick Start Guide card)
- Connectivity and access information for servers you want to back up
- All necessary cables, e.g., multi-mode fiber optic cable is necessary for models 891, 991, and 1091
Connect to Network
- Fasten the Barracuda Backup Server to a standard 19-inch rack or other stable location.

Caution
Do not block the cooling vents located on the front and rear of the unit.
- Connect an Ethernet cable from your network switch to the Ethernet port on the back panel of the Barracuda Backup Server.
- Connect the power cord, VGA monitor, and a keyboard to the Barracuda Backup Server. The AC input voltage range is 100-240 volts at 50/60 Hz.
- Press the button on the front panel to turn on the unit. POWER
Continue with .Step 2: How to Configure Barracuda Backup
Step 2: How to Configure Barracuda Backup
Before configuring the IP address and network settings, complete Step 1: How to Install a Barracuda Backup Server.
In this article:
- Configure the IP Address and Network Settings
- Configure Your Corporate Firewall
- Link Your Barracuda Backup Server to an Account
• Enter Server Name and Location - Define Display Groups
- Add a Barracuda Backup Server to a Group
Related Articles
• Replacement and Data Migration
• How to Link a Barracuda Backup Server
• How to Unlink a Barracuda Backup Server
• How to Edit Network Settings through the
Barracuda Console
• How to Configure Backups
• Hardware Specifications
• Panel Indicators, Ports, and Connectors
Configure the IP Address and Network Settings
By default, the Barracuda Backup Server is configured to obtain an IP address on your network using DHCP. If you want to assign it a static IP address instead, you can configure it using the console administration interface. If not, proceed to the section Configure Your Corporate Firewall:
To configure the Barracuda Backup Server to use a static IP address:
- Connect a monitor and keyboard to the Barracuda Backup Server.
- Use your arrow keys to highlight the field.DHCP/Static
- Use the spacebar to select Static for your IP address assignment preference:
![Barracuda Console - Serial INFO - Firmware Version 4.2.02.43161 DHCP/Static [ ] DHCP [X] Static Commit Changes OK LAN IP 28.2.79.45 Netmask 288.298.298.4 Gateway 28.2.79.4 Secondary DNS 28.2.79.3 Internet Barracuda Primary DNS 28.2.79.298 Activity Log - 2012-02-23 15:11:40 2012-02-23 14:57:55 Connection to Barracuda is still healthy 2012-02-23 15:02:55 Polling Barracuda connection 2012-02-23 15:02:57 Connection to Barracuda is still healthy 2012-02-23 15:07:57 Polling Barracuda connection 2012-02-23 15:07:58 Connection to Barracuda is still healthy](/content/2026/06/1260286/images/f285abf858bb4fe4537ddfefd9c8cfec3bcf0f34f3a14d2732067616a7c0247a.jpg)
- Enter the IP Address, Netmask, Default Gateway, Primary DNS Server, and Secondary DNS Server (optional) as appropriate for your network.
- Click on the box.Enter Commit Changes
Once changes are committed, the Barracuda Backup server attempts to connect to Barracuda Networks.
The LAN and Internet boxes on the console administration interface are green when the Barracuda Backup Server is determined to be online. The Barracuda box remains red until it is linked to an account later in the installation process.
For additional information, refer to the article How to Edit Network Settings through the Barracuda Console.
Configure Your Corporate Firewall
If the Barracuda Backup Server is located behind a corporate firewall, open the following ports on the firewall to ensure proper communication between the Barracuda Backup Server and Barracuda Networks: 80, 443, 1194, and 5120-5129 outbound for both TCP and UDP traffic; Barracuda uses ports 5120-5129 for replicating data to a different location such as the cloud. The Barracuda Backup Server uses these ports to transfer data over the Internet to the offsite storage location. If you would like to restrict outbound network traffic on these ports to only reach Barracuda Networks, contact .Barracuda Networks Technical Support
Link Your Barracuda Backup Server to an Account
Your Barracuda Backup Server must be linked to your Barracuda Cloud Control Account before you can initiate data backups.
To link your Barracuda Backup Server:
- Go to this URL: http://login.barracudanetworks.com/
- Sign in with your and .Username Password
- If Barracuda Backup is your default or only Barracuda Networks product, then the Barracuda Backup web interface appears. If not, click at the top of the screen.Backup Service
-
Click Start Backup Service Setup, and then select the STATUS tab.
-
Click .Link a Barracuda Backup Server
- Enter your Serial Number and Linking Code from the sticker attached to the Quick Start Guide that shipped with your Barracuda Backup Server. These values are case sensitive. The Serial Number can also be found on a sticker on the back of the unit. Follow the on-screen prompts to complete linking and to supply your account information.
- The linking process may take a few minutes to complete. Wait until the STATUS page appears, indicating that the Barracuda Backup Server is successfully linked to your account. A green light next to the Barracuda Backup Server on the STATUS page indicates that your Barracuda Backup Server has successfully connected.

For additional information, refer to the following articles:
• How to Link a Barracuda Backup Server as a User or Reseller
• How to Unlink a Barracuda Backup Server
Enter Server Name and Location
In the SYSTEM > Barracuda Backup Server Settings page, enter a name for your Barracuda Backup Server, the associated time zone, and server location.
Define Display Groups
If you have multiple Barracuda Backup Servers, you can manage them through display groups:
- Log into Barracuda Backup, and go to the page.ADMIN > Display Groups
- All display groups active on your account display in the section.Current Display Groups
- To add a new display group, enter a name for the group of devices, and click Add. For example, if you want to group all Barracuda Backup Servers by location, you might create groups by geographic location: Engineering - Asia, Engineering - US, Engineering - Europe.
- The display group name appears in the section. Current Display Groups
- IfTo remove a display group, click Remove following the name of the group you want to remove; click OK to remove the group.

If you delete a display group that contains devices, those devices are moved to the default group.
Add a Barracuda Backup Server to a Group
Once you create display groups, you can add a Barracuda Backup Server to the group using the following steps:
- In the left pane, select the desired Barracuda Backup, and go to the SYSTEM > BBS Settings page.
- In the Backup Server Display Group section, choose from the Current Display Group drop-down list, select the desired display group name.
- To add or remove display groups, click Manage your display groups to go to the ADMIN > Display Groups page.
- Click Save.
Continue with Step 3: How to Configure Backups.
Step 3: How to Configure Backups
Before configuring the web interface, complete Step 2: How to Configure Barracuda Backup.
You can configure where your data is backed up and in what manner. This article refers to data sources, which are subsets of data on each server that is to be backed up.
In this article:
• Where Data is Backed Up
• Supported Data Types
• Microsoft Server Applications
• Microsoft Exchange Storage Group Backup
• Microsoft Exchange Server Message-Level Backups
• Message-Level Backup Novell GroupWise
• Microsoft SQL Server Backup
• Microsoft Hyper-V Virtual Machines
• Windows System State Backup
- VMware Host Storage
• Linux File Systems using the Barracuda Backup Agent (Linux)
• Macintosh OS X, Linux/Unix, and Novelle NetWare
• Network Addressable Storage
Related Articles
- Backing Up Data Sources
- Replicating Data
- Deployment Options
Where Data is Backed Up
You configure how and when your data is to be backed up. All data is first backed up to a local Barracuda Backup Server. If you have more than one local Barracuda Backup Server, you must decide which one backs up which systems.
Data on the local Barracuda Backup Server can then be backed up, or replicated, to another Barracuda Backup Server in a remote location, to the Barracuda Cloud Storage, or to a combination of the two. See Site-to-Site Deployment or Site-to-Cloud Deployment for deployment options. The location of the replicated data is specified for each data source. You can also choose to not replicate the backed-up data at all.
Supported Data Types

Configuration Details
For system-specific configuration details, refer to .Backing Up Data Sources
Choose the method for backing up data based on the type of data. The Barracuda Backup Server supports the following data sources:
• Microsoft Exchange Server and Exchange Server DAG
- Microsoft Hyper-V
- Microsoft SQL Server
VMware
• How to Back Up Microsoft Active Directory
• How to Back Up and Restore a Microsoft SharePoint SQL Database
• Understanding IBM Domino Server Backup
• How to Configure GroupWise Message-Level Backups
• How to Set Up a Root Account to Back Up Macintosh OS X
• How to Back Up Linux/UNIX Data Using SSHFS
• Understanding Changed Block Tracking on Virtual Machines
• How to Enable Changed Block Tracking through the Barracuda Backup Web Interface
• How to Back Up Network Addressable Storage - NAS
• How to Back Up FirstClass Mail
• How to Back Up NFS Mounts with the Barracuda Backup Agent (Linux)
• How to Back Up NSS Mounts with the Barracuda Backup Agent (Linux)
Review the following sections for more information about specific data types.
Microsoft Server Applications
The Barracuda Backup Agent (Windows) provides application-aware backups for Microsoft® SQL Server, Microsoft Exchange Server (including message-level backup of mailboxes and messages), Microsoft System State, and Microsoft Hyper-V Server. The Agent also provides support for open file backups, and file attributes and permissions.
Install the Agent on every Microsoft Server that you want to back up; you can download and install the Barracuda Backup Agent (Windows) from
the SYSTEM > Software Downloads page. Data sources that can be backed up using the Agent are automatically detected after the computer is identified on the pageBACKUP > Sources
The Agent searches the NTFS change journal to track modified, added, or deleted files rather than searching the entire volume to improve Agent backup speed.
Microsoft Exchange Storage Group Backup
The Barracuda Backup Agent (Windows) provides a full backup of the Exchange storage group for Exchange Server 2003 and 2007. An Exchange storage group is a container for your email database and its associated system and transaction log files.
Microsoft Exchange uses transaction logging to commit new and changed data to the database, and to ensure that records of the transactions exist if a store is damaged between backups. The Exchange storage group, and its associated transaction logs, is the most important data to back up on your Exchange Server to ensure your email database is available in the event it becomes damaged or unrecoverable. If you must rebuild a server, you can use the latest transaction log files plus the last full backup to recover your database.
The Barracuda Backup Agent (Windows) backs up and restores the entire storage group; it allows for the storage group to be restored to a storage group or to an alternate Microsoft Exchange Server.
Microsoft Exchange Server Message-Level Backups
Message-level backup provides a quick way to restore single email messages to the original location or to an alternate mailbox. Message-level backup is not intended to be a disaster recovery option for your Microsoft Exchange environment. The Barracuda Backup Agent (Windows) allows you to back up the entire Exchange Information Store and should be used for disaster protection.
Novell GroupWise Message-Level Backup
Barracuda Backup connects directly to Novell® GroupWise to back up individual emails stored within user mailboxes.
Microsoft SQL Server Backup
The Barracuda Backup Agent (Windows) provides a complete backup of the Microsoft SQL Server including the master, user, model, msdb, and pubs databases.
Barracuda Networks recommends that all of the Microsoft SQL Server user databases be configured for full recovery model so that transaction logs can be backed up. This allows you to restore a user database to any point of time that is contained within a transaction log backup.
Some versions of the Microsoft SQL Server, such as SQL Express database, do not support full recovery model. If the full recovery model cannot be used, the Barracuda Backup Agent (Windows) performs full backups of the database each time a backup runs.
The Microsoft article Recovery Models (SQL Server), provides more information about the Microsoft SQL Server and its three database recovery models, and how to change the recovery model of a database.

Important
Do not use other methods to back up Microsoft SQL Server databases, such as Microsoft or third-party utilities, when using the Barracuda Backup Agent (Windows). If you use more than one back up method on the same database, one or more of those methods causes the Microsoft SQL Server to truncate the transaction logs. This forces a full backup of the database every time, and can result in data that cannot be restored.
Barracuda Networks recommends that you back up the master database each time it is changed. The master database contains configuration information that is required to restore an instance of SQL Server.
Microsoft Hyper-V Virtual Machines
The Barracuda Backup Agent (Windows) provides application-aware backups for Microsoft Hyper-V hypervisor-based virtualization systems, and provides support for open file backups, file attributes, and permissions as well as automatic data source detection.
Windows System State Backup
The Barracuda Backup Agent (Windows) can back up and restore the Microsoft Windows System State. Microsoft Windows System State backups allow backup of critical system related components, including the local Registry, COM+ Class Registration Database, the System Boot Files, Active Directory Database Files (NTDS.DIT) for Domain Controllers, and the SYSVOL folder. A System State backup can be used to recover to a known good system state after a hardware or software crash.
System State data might not include all of the information required to recover a system from a failure. Barracuda Networks recommends that all boot and system volumes be backed up in addition to System State.
VMware Host Storage
Add VMware® host storage, including host configuration and virtual machine images, as data sources for backup and restoration through Barracuda Backup. You must be running a licensed copy of ESX, ESXi, or vCenter version 4.0 or later, and the VMware license must include access to the vSphere Data Recovery API. For details on CBT, refer to the article Understanding Changed Block Tracking on Virtual Machines.
Note that the entire VMware image is backed up each time back up is run.
Linux File Systems using the Barracuda Backup Agent (Linux)
Use the BarracudaBackup Agen (Linux) to back up Linux file systems such as Red Hat, Ubuntu, or SUSE. The Agent can back up open files, permissions, soft and hard links, and supports multiple data streams.
Macintosh OS X, Linux/Unix, and Novelle NetWare
Mac OS X, Linux/Unix, and Novell NetWare ^® systems are backed up using File Share. This method refers to the mechanism that uses standard network protocols, such as CIFS/Samba or SSHFS, to access your servers.
You can use the Barracuda Backup Agent (Linux) to back up Linux/UNIX-based file systems, such as Red Hat, Ubuntu, or SUSE. Use the Barracuda Backup Agent (Linux) to back up the selected items and protect any open files and permissions.
Network Addressable Storage
You can back up network addressable storage (NAS) data sources with CIFS and back up access control lists (ACL).
Continue with or go to .Step 4: Data Backup Tasks Backing Up Data Sources
Step 4: Data Backup Tasks
Before configuring the web interface, complete .Step 3: How to Configure Backups
Perform these tasks to configure your data for backup:
• Identify Systems to be Backed Up
- Select Type of Data to be Backed Up
• Create Backup Schedules
- Modify Your Backup Rate Limit
- Exclude Files from a Backup
• Create Data Retention Policies
- Check Backup Reports
Related Articles
- Sources Page
- Replication Page
- Schedules Page
- Rate Limit Page
- Exclusions Page
• Retention Policies Page - Reports Page
Identify Systems to be Backed Up
For each local Barracuda Backup Server, identify the data sources that are to be backed up. There may be more than one data source on each server, and each can have unique backup characteristics.
- Log in to Barracuda Backup, and select the associated Barracuda Backup Server in the left pane.
- Go to the BACKUP > Sources page, and click Add Computer to identify the system; when you enter a set of user credentials on this page, the specified username is used for network file systems and must have at least read access to the data you intend to back up.
For Microsoft Windows and Novell Netware, you must enter both a username and password. For Mac OSX, Linux and UNIX (SSHFS), enter a username after you set up your SSH key.

Alternately, you can download the Barracuda Backup Agent software from the SYSTEM > Software Downloads page (or in releases prior to 5.0, the SUPPORT > Software Downloads page), and install it on every computer to be backed up. For more information, refer to Barracuda Backup Agent (Windows) and Barracuda Backup Agent (Linux).
Note that you must have 1 GB of free space to install the Barracuda Backup Agent software.
- Once a computer is added, click Save. The Add Data Source page displays. Enter the data description and select the appropriate data type. For Windows-based agent shares, if you want to be able to do a bare metal recovery, make sure to back up all system volumes and system state.
- Turn on, and click .Replicate to Other Barracuda Backup Servers Save
- Complete steps 1 through 4 for each system and data source you want to back up.

- If this is a Mac, UNIX, or Linux system, follow the instructions on the Add Computer page to install a public key so that the Barracuda Backup Server is able to securely connect to it, then you can configure the data sources.
- If this is a Novell Netware system, enter the system information on the Add Computer page. When that is done, on the Add Data Source page you will be able to specify the data location. CIFS or SSHFS is used to back up the Netware data.
- For all systems, when you enter a set of user credentials on this page, the specified username is used for network file systems and must have at least read access to the data you intend to back up. For Microsoft Windows and Novell Netware you must enter both a username and password. For Mac OSX, Linux and UNIX (SSHFS), you only need to enter a username after you set up your SSH key.
- For Active Directory users, add the domain and then a \ in the username field. For example: Username = cuda\jsmith
Select Type of Data to be Backed Up
After a computer has been added, select the data source(s) to be backed up on that computer:
- From the BACKUP > Sources page, click Add Data Source next to the associated device from which you want to back up.
- On the Add Data Source page, select the appropriate data type. For Windows-based agent shares, if you want to be able to do a bare metal recovery, make sure to back up all system volumes and system state.
- To replicate to Barracuda Cloud Storage, turn on Replicate to Barracuda Cloud Storage; if you have globally selected to replicate all data to Barracuda Cloud Storage for this Backup Server, this option is automatically turned On.
- Continue with the configuration information and save the changes.
Authentication and System Configuration Notes
Click here to expand.
• Backups for Mac OS X/Linux/UNIX (SSH Connections)
Barracuda Backup uses an SSH (Secure Shell) client to access data contained on Mac OS X or Linux / Unix based computers running an SSH daemon. The SSH client uses public key cryptography to establish a secure connection to the SSH daemon. You must configure SSH access to any Mac OS X or Linux / UNIX computer you want to back up. Follow the on-screen instructions on the BACKUP > Sources > Add Computer page according to the operating system.
• Directory-Based File Shares
When you back up a file share you must specify the share name on the network before you can select the folders to be backed up. On a Windows machine, a share name can be a drive volume such as "C\$", or a folder and its associated subfolders such as "My Documents". At a minimum you will need Read access to the data that you are backing up and Change Access or Full Control to the shares in order to perform a restore. For Mac OS X and Linux / Unix-based computers with SSH connections, the share name should be the entire path to the directory you would like to back up, e.g., /home/
When you select folders for backup you should begin by selecting the folders at the top of the folder tree hierarchy, and then deselect folders lower in the hierarchy that you do not want to back up. You can also specify an optional exclusion rule, which is applied when the backup runs to rule out files that do not meet your back up criteria.
- Message-Level Backup: Microsoft® Exchange and Novell® GroupWise™
When you select the Message-Level Backup data type, you must supply the authentication information to access your mail server before you can select which mailboxes to back up. In addition to the authentication information provided on the Barracuda Backup web interface, you must configure the Message-Level settings on your Exchange or GroupWise server.
For Microsoft Exchange servers, refer to Exchange Message-Level Backups for detailed instructions for configuring message-level backups.
For GroupWise 8 and above, refer to GroupWise Message-Level Backups for detailed instructions for configuring message-level backups.

Supported Data Types
For additional information, refer to the section.Supported Data Types
Create Backup Schedules

Note that schedules are automatically created (with the default set to back up every day at 8:00PM) when a data source is created except if a schedule specifying all data sources already exists.
Now that you have configured your computers and data sources, you can create backup schedules, either individually or for all sources. If no schedule is created for a data source then it will not be backed up.
To create a backup schedule:
Click here to expand..
Go to the BACKUP > Schedules page of the Barracuda Backup web interface. Click Add a Schedule and fill in the information on the Add page:Backup Schedule
- Schedule Name - Enter a label to identify the backup schedule.
- Items to Back Up - Turn Apply to All Computers and Data Sources for this Barracuda Backup Server on to back up all content, or turn off, then expand and select the items you want to back up.
- Schedule Timeline - Turn on the days you want the back up to run.
• Daily Backup Timeline - Enter the start time; turn on Repeat if you want to specify a time period and end date to repeat the backup.
If the backup schedule is for Microsoft SQL or Microsoft Exchange, you must specify the type of backup to run:
• Full - This backup type performs a full backup of data, including the transaction logs.
- Log - This backup type only backs up transaction logs created since the last full backup.
- Smart - This backup type is a combination of the full backup and the transaction log backup, minimizing the impact of backups on network resources necessary to transfer data offsite. Barracuda Networks recommends this backup type for SQL and Exchange servers.
With the Smart Backup type, threshold values are used to determine when to switch between full and log backups. The minimum threshold value specifies how many days Barracuda Backup continues to back up transaction logs before another full backup is run. After the minimum threshold value is met, Barracuda Backup determines whether to perform another backup based on the binary data queue. If the binary data queue size exceeds 1 GB, Barracuda Backup continues the transaction log backup until:
• the maximum threshold level is met, or
• the queue size drops below 1 GB
Modify Your Backup Rate Limit
This step is optional. Rate limits control the data replication rate to Barracuda Cloud Storage or other offsite storage locations. You can limit Internet bandwidth consumption during peak usage times, and schedule backups for non-peak hours.
Your initial offsite backup may take on the order of days to complete but all of the data is backed up locally on the Barracuda Backup Server during this period. After the initial large transfer is complete, replicating your data offsite should complete with only a few hours of transfer each day. By default, Barracuda Backup is configured to run full speed data transfers at night so that bandwidth is not affected while most people are at work. An alternate rate limit allows you to adjust the limit speed and time interval.
The length of transfer time it will take to get your data offsite is impacted by the compression and de-duplication rates on your data, the uplink speed of your Internet connection, the amount of data that changes every day, and any speed limits you apply to Barracuda Backup.
To adjust the backup rate limit:
Click here to expand...
- On the BACKUP > Rate Limit page, select a Barracuda Backup Server on the left menu and create or edit the rate limit.
- You can specify a default rate limit and an alternate rate limit which is maintained only during the specified time periods.
Exclude Files from a Backup
This step is optional. You can create exclusion rules that use pattern matching to identify directory or file names that are not to be backed up. Files which are typically excluded from backups include temporary files, music, movies and other files which are not essential for business needs.
Use the following steps to create an exclusion rule:
Click here to expand...
- Go to the BACKUP > Exclusions page of the Barracuda Backup web interface. Click Add an Exclusion.
-
Fill in the information on the page: Add an Exclusion
-
Exclusion Rule Name - Enter a descriptive label to identify the exclusion rule.
- Add Exclusions to Reports - Turn on to include exclusions in reports, and turn off if you do not want to include exclusions in the reports.
- Apply Recursively to Sub Directories - Specify whether to apply the exclusion rule recursively to sub directories.
-
Where to Exclude - Turn Apply to All Computers and Data Sources for this Barracuda Backup Server on to apply the exclusion rule to all computers and data sources for the selected Barracuda Backup Server, or turn off, then expand and select the items to which to apply the exclusion rule.
-
In the section, specify what to exclude: What to Exclude
-
From the Preset Expressions menu, select the content you want to exclude, for example, Video files, then click Add.
-
In the Expressions field, enter a search string to exclude, for example, *.mp3, then click Add.
-
Click Save at the top of the page to add the exclusion rule.
To edit an existing exclusion rule, go to the BACKUP > Exclusions page of the Barracuda Backup web interface, and click Edit following the exclusion rule you want to edit. Make the necessary changes, then click Save.
To delete an exclusion rule, go to the BACKUP > Exclusions page of the Barracuda Backup web interface, and click the Delete icon following the exclusion rule you want to remove. Click OK to remove the rule.
Create Data Retention Policies
Data is retained based on a traditional grandfather-father-son (daily-weekly-monthly) rotation model. You can specify how long to keep daily, weekly, monthly, and yearly backups by creating data retention policies. Different retention policies can be created for different sets of data including files, data backed up by the Barracuda Backup Agent (Exchange, SQL, System State), and email messages.
You can create one policy for all of the computers and data sources on a Barracuda Backup Server or multiple policies that each include some subset of the data.
To set retention policies:
Click here to expand...
- Go to the BACKUP > Retention Policies page, click Add a Retention Policy, and enter a name to identify the policy.
- In the Items to Retain section, specify the data sources to which the retention policy applies; the Retention Timeline section displays. Select a timeline template on which to base your retention policy, or specify your own revision timeline.
- Select the desired Removed Files Rule setting, and click Save.
When data is removed according to a retention policy, it is deleted from both the local Barracuda Backup Server and the offsite storage locations. Removed files that have been backed up using Network File Shares Protocol or SSHFS may be retained for a longer period of time, according to the configuration. Otherwise, once your data has been purged, it is gone forever. Purging applies to historic file revisions only; your current data is not impacted by a retention policy.
Check Backup Reports
View reports on an ongoing basis as needed. The REPORTS > Backup page contains detailed backup reports. A list of in progress backups displays at the top of the page, and once a backup is complete, a detailed report displays in a table by device. Click Details following the report you want to view.
Web Interface
This section describes each page in the Barracuda Backup web interface.
In this Section
- STATUS Page
- BACKUP Page
- RESTORE Page
- REPORTS Page
- SYSTEM Page
- ADMIN Page
STATUS Page
This article refers to firmware version 5.0 and higher, except where noted.
In this article:
- Backup Activity Section
• Storage Efficiency Statistics - Local Storage
- Transfer History
- Status Indicators
Related Articles
- Advanced Graphs (firmware version 5.3.00 and higher)
• Task Messages (Local UI login)
The STATUS page provides an overview of the performance and health of your Barracuda Backup. If you have more than one Barracuda Backup Server linked to your account, you can select a specific server and view its individual statistics. Click on a graph to view a larger display of the data.

Mobile Access
You can also view Barracuda Backup Server status using Barracuda Networks Mobile Applications:
• Barracuda Networks iOS Mobile Application for iPhone and iPod Touch
• Barracuda Networks iOS Mobile Application for iPad
Backup Activity Section
These two graphs displays backup activity for local locations and cloud storage, indicating the size and the number of backup items and data added by date including the number of files and messages backed up:
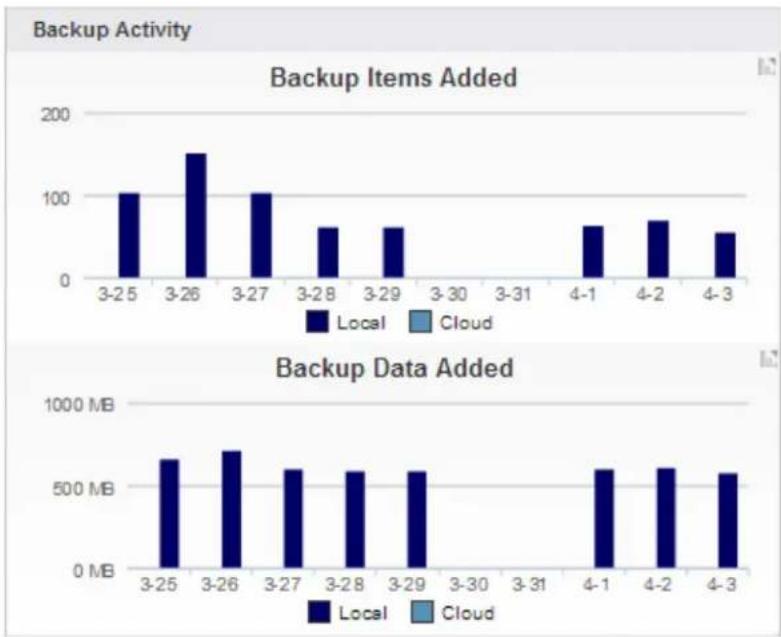
bar
Backup Activity | Backup Activity | 3-25 | 3-26 | 3-27 | 3-28 | 3-29 | 3-30 | 3-31 | 4-1 | 4-2 | 4-3 | |---|---|---|---|---|---|---|---|---|---|---| | Backup Items Added | Local (100) | Local (150) | Local (105) | Local (65) | Local (65) | Local (65) | Local (65) | Local (65) | Local (65) | Local (60) | | Backup Data Added | Local (650 MB) | Local (700 MB) | Local (600 MB) | Local (600 MB) | Local (600 MB) | Local (600 MB) | Local (600 MB) | Local (600 MB) | Local (600 MB) | Local (600 MB)Storage Efficiency Statistics
This section displays storage efficiency statistics:
| Storage | Local | Cloud | Efficiency | Local | Cloud | Backup Statistics | |
| Raw Data | 23.12 GB | 0 bytes | Actual Storage | 12.81 GB | 0 bytes | CPU | 0% |
| Items | 296,694 | 0 | Snapshot Equivalent | 40.09 GB | 0 bytes | Disk | 2% |
| Messages | 0 | 0 | Deduplication Ratio | 1.80x | 0x | Ethe... | 0% |
Table 1. Storage Efficiency Statistics.
| Table Value Description | |
| Raw Data | Total amount of data sent to Barracuda Backup including revisions. |
| Items | Total items sent to Barracuda Backup. |
| Messages | Total messages sent to Barracuda Backup. |
| Actual Storage | The amount of actual storage space being used. |
| Snapshot Equivalent | The amount of space that would be required to back up your data based on your retention policies projected over the next three years, without deduplication and compression. |
| Deduplication Ratio | The overall amount of space savings with deduplication and compression compared to the snapshot equivalent. |
| Backup Statistics | Displays performance statistics for the Barracuda Backup Servers, including percentage of CPU, disk, and Ethernet usage. Performance statistics displayed in red signify that the value exceeds the normal threshold. These values fluctuate based on the amount of data that is being backed up, but if any setting remains consistently red for a long period of time, contact .Barracuda Networks Technical Support |
Local Storage
If you have one Barracuda Backup Server selected in the left pane of the web interface, this table displays the Storage History for that Barracuda Backup Server. View current, historic, and actual data storage size on the local and cloud locations by date.
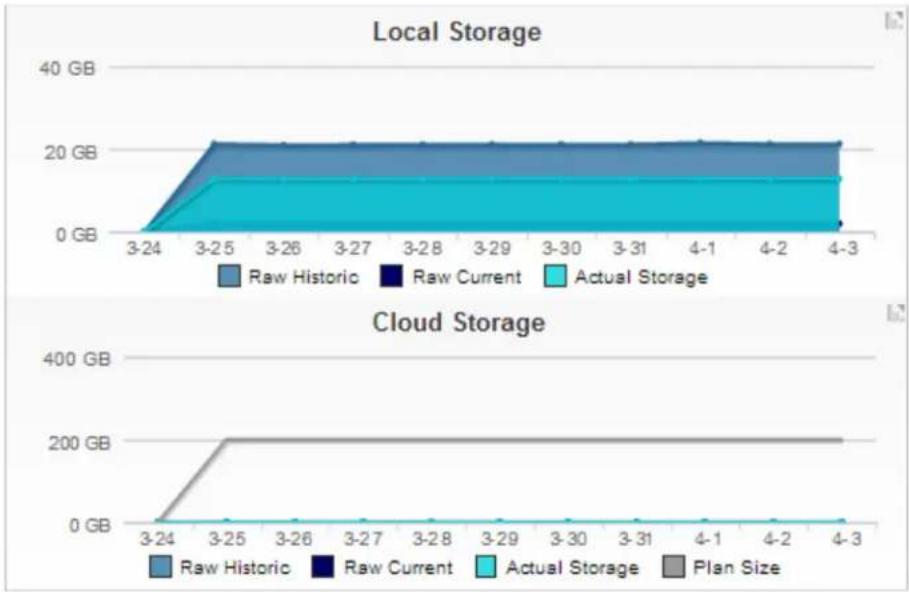
area
| Time | Local Storage - Raw Historic | Local Storage - Raw Current | Local Storage - Actual Storage | Cloud Storage - Raw Historic | Cloud Storage - Raw Current | Cloud Storage - Actual Storage | Cloud Storage - Plan Size | |------|------------------------------|----------------------------|--------------------------------|-----------------------------|---------------------------|------------------------------|--------------------------| | 3-24 | 0 GB | 0 GB | 0 GB | 0 GB | 0 GB | 0 GB | 0 GB | | 3-25 | 20 GB | 0 GB | 15 GB | 200 GB | 0 GB | 0 GB | 200 GB | | 3-30 | 20 GB | 0 GB | 15 GB | 200 GB | 0 GB | 0 GB | 200 GB | | 4-3 | 20 GB | 0 GB | 15 GB | 200 GB | 0 GB | 0 GB | 200 GB |Table 2. Local Storage.
| Table Value Description | |
| For local storage, stored content displays in GB by: | |
| Raw Current | Represents current content sent to the Barracuda Backup before deduplication processing. |
| Raw Historic | Represents all content up to the current date that has been sent to the Barracuda Backup. |
| Actual Storage | Represents the total content currently stored on Barracuda Backup. |
| For cloud storage, stored content displays in GB by: | |
| Raw Current | Represents current content sent to the Barracuda Backup before deduplication processing. |
| Raw Historic | Represents all content up to the current date that has been sent to the Barracuda Backup. |
| Actual Storage | Represents the total content currently stored on Barracuda Backup. |
| Plan Size | Indicates total data storage based on your subscription plan size |
Transfer History
If you have one Barracuda Backup Server selected in the left pane of the web interface, this table displays efficiency of your data transfer and the size of the file parts yet to be transferred offsite, organized by date, for that Barracuda Backup Server.
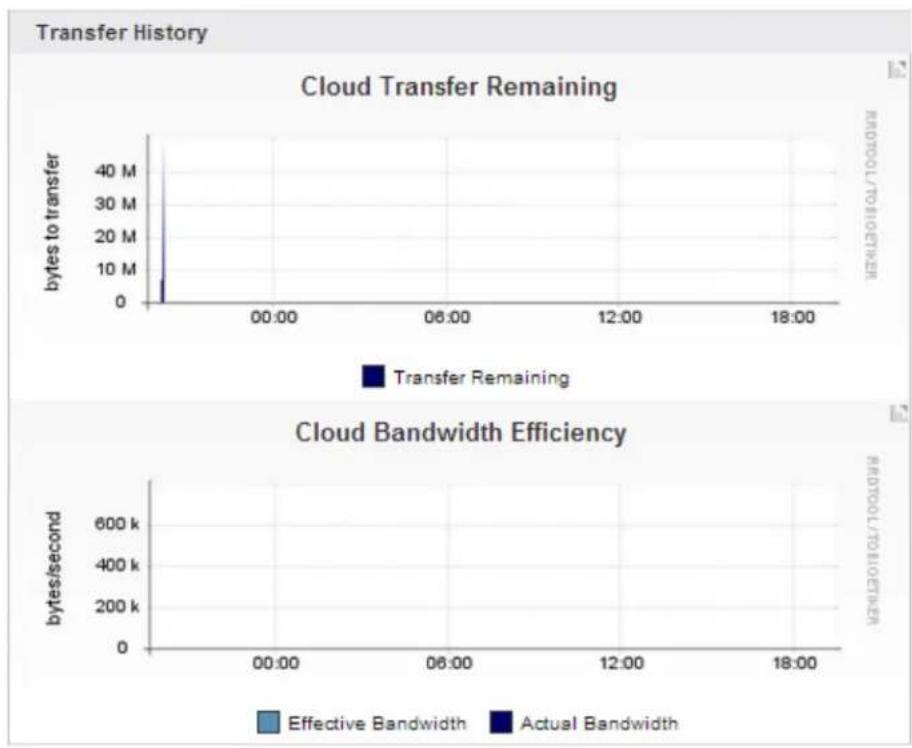
other
| Time | Cloud Transfer Remaining (bytes to transfer) | Effective Bandwidth (bytes/second) | Actual Bandwidth (bytes/second) | | -------- | --------------------------------------------- | ----------------------------------- | -------------------------------- | | 00:00 | 40 M | 0 | 0 | | 06:00 | 0 | 0 | 0 | | 12:00 | 0 | 0 | 0 | | 18:00 | 0 | 0 | 0 |Table 3. Transfer History.
| Table Value Description | |
| Cloud Transfer Remaining | Displays any content waiting to transfer to the Barracuda Cloud Storage in bytes. |
| Cloud Bandwidth Efficiency | Represents all content up to the current date that has been sent to the Barracuda Backup based on the maximum data transfer rate of your connection. To limit Internet bandwidth consumption during peak usage times, set and for non-peakrate limits schedule backups hours. |
| Actual Storage | Displays effective and actual bandwidth efficiency in bytes per second. |
Status Indicators
Status indicators for the health of the Barracuda Backup Servers, local and offsite backups, and data sources display in the right pane of the web interface. Green shows that your servers are online and that no errors have
been encountered as a result of your backup. Red indicators display when a local server is offline or when errors were generated during a backup. Mouse-over the indicators to see more details:
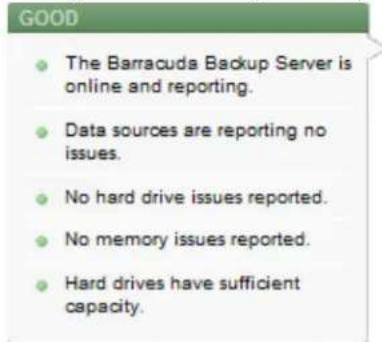
How to Monitor Backup Status
To check whether a Barracuda Backup Server is operating correctly, select it from the list of Barracuda Backup Servers in the left pane, and click .STATUS
The STATUS page displays the following Barracuda Backup Server statistics:
- Backup activity
• Device and backup source status
• Storage, efficiency, and performance statistics
• Storage history for both local and cloud storage - Transfer History
Click on a graph to view a closeup of the details and immediately update the data displayed in the graph.
The Transfer History section displays the amount of bytes remaining to be transferred. If there is a large amount of data there (80 GB or more), there are a number of things to check, all under the tab:BACKUP
- Adjust the rate limit
- Check the amount of data being backed up nightly to ensure the Barracuda Backup Server is doing transaction log backups for Exchange and SQL
- Check to ensure that too much historic data is not being transferred retention policies
To check the status of all of your Barracuda Backup Servers at once, click Backup at the top of the left pane, and go to the STATUS page. If the status of a Barracuda Backup Server is yellow or red, there is a problem with connectivity or the health of the Barracuda Backup Server. If you mouse over the various indicators, the condition details display:
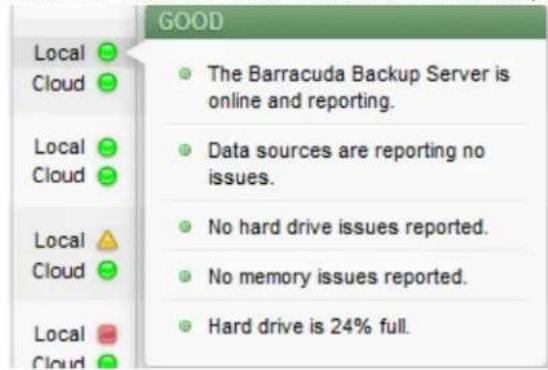
Additional information can be found Repbets page.
How to Unlink a Barracuda Backup Server
This article refers to Barracuda Backup firmware version 3.0 or higher.
If you need to link a Barracuda Backup Server to a different account, use the following steps to unlink the Barracuda Backup Server from the current account:
- Enter the Barracuda Backup Server IP address to log in to the local web interface.
- Go to the STATUS page, and in the Server Actions section, click Wipe Backup Server:
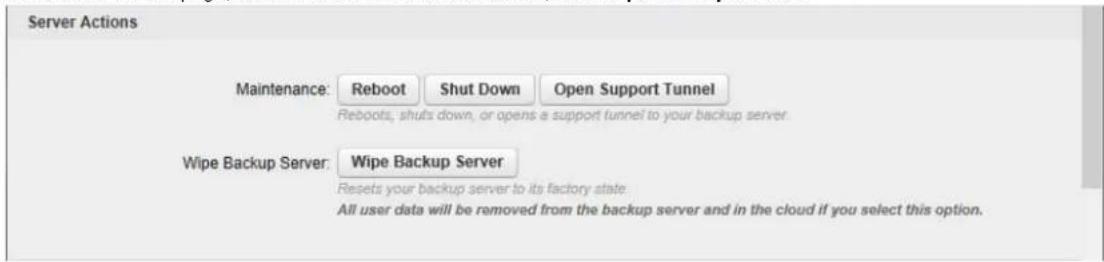
- The message Wipe Started Successfully displays in the web interface. Once the unlinking process is in progress, a warning message displays:
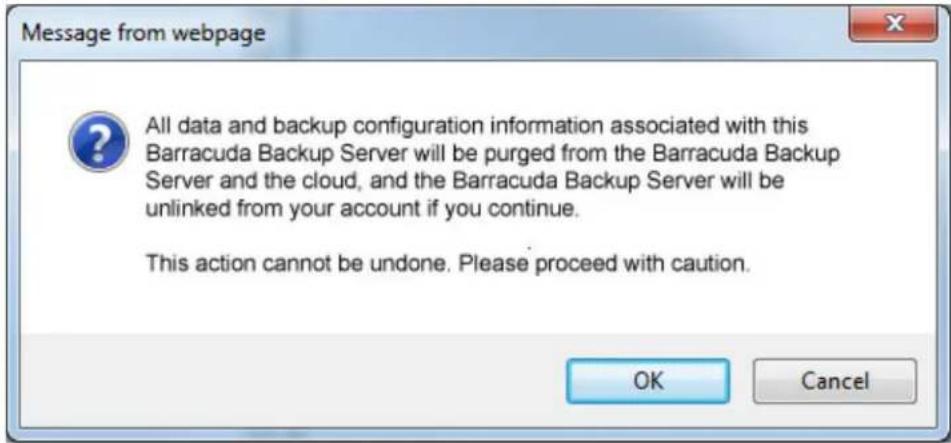
- Click OK to complete the unlinking process. Once the Barracuda Backup Server is unlinked from the account, the Backup Server Wipe page displays, including the Serial Number and Linking Code: Successful
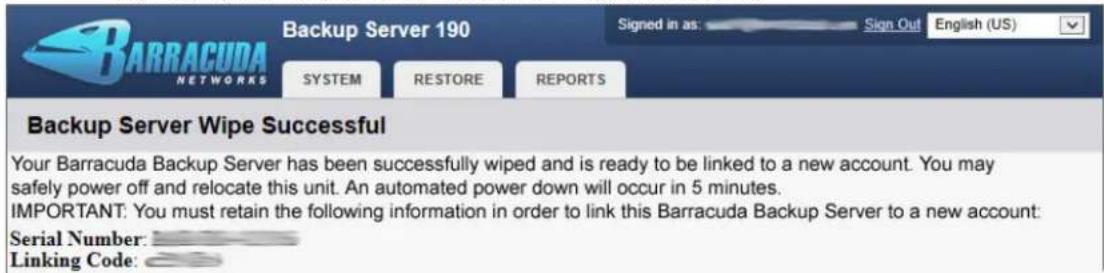
- Make note of the serial number and linking code. You can now link the Barracuda Backup Server to a new account. For details, see How .to Link a Barracuda Backup Server as a User or Reseller
Task Messages
This article refers to Barracuda Backup firmware version 5.0 or higher.
Use the following steps to view the STATUS page in the Barracuda Backup local web interface:
- Open a web browser, and enter the Barracuda Backup Server IP address.
- Log in to the Barracuda Backup local web interface; the page displays.System
- In the Task Manager section, Running Tasks and Queued Tasks display:
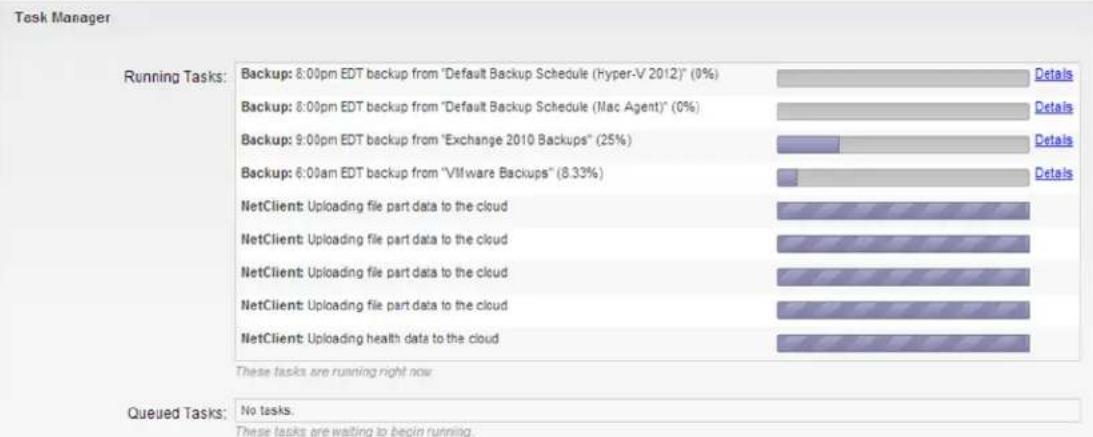
bar
| Task Manager | Details (%) | Updates (pm) | | :--- | :--- | :--- | | Running Tasks: Backup | 8.00pm EDT backup from "Default Backup Schedule (Hyper-V 2012)" | 0 | | Running Tasks: Backup | 8.00pm EDT backup from "Default Backup Schedule (Mac Agent)" | 0 | | Running Tasks: Backup | 9.00pm EDT backup from "Exchange 2010 Backups" | 25 | | Running Tasks: Backup | 6.00am EDT backup from "VMware Backups" | 8.33 | | NetClient: Uploading file part data to the cloud | 100 | | | NetClient: Uploading file part data to the cloud | 100 | | | NetClient: Uploading file part data to the cloud | 100 | | | NetClient: Uploading file part data to the cloud | 100 | | | NetClient: Uploading health data to the cloud | 100 | | These tasks are running right now. Queued Tasks: No tasks. These tasks are waiting to begin running.4. Click to toggle additional information on or off.Details
Processes and Services
The following table describes the processes and services that display on the page:SYSTEM
| Backup Daemon responsible for performing backup functions. | |
| Restore Daemon responsible for performing restore functions. | |
| Netclient Process used to replicate data to another location. | |
| Netserver Process that receives data from netclient for box-to-box replication. | |
| Purger Deletes files that fall outside of the retention policy, and shares | removed from the configuration. |
BACKUP Page
This article refers to firmware version 5.0 and higher.
Use the page to manage how data is backed up. From this BACKUP page you can back up data locally then replicate the data offsite with complete control over where data is stored. Barracuda Backup offers a full line of servers for local backup that can be configured to support offsite replication to the cloud, private locations, or a combination of both.
Related Articles
• How to Increase Backup Performance
• Understanding Source-Based Deduplication
Location Description Related Articles
| BACKUP > Sources | Use this page to configure where data is backed up and in what manner:Identify systems to be backed upSelect the type of data to be backed upSpecify where data is backed up | How to Configure BackupsData Backup TasksBacking Up Data SourcesBarracuda Backup AgentBarracuda Linux Backup Agent |
| BACKUP > Replication | Configure backup data replication to one or more other Barracuda Backup Servers.From this page you can view:- Displays where data fromTarget Listthe selected Barracuda Backup Server is sent- Displays a list of devices sending data to the selected Barracuda backup Server | Getting Started with ReplicationConfiguring a Replication DestinationHow to Temporarily Disable a DestinationHow to Manage the Data QueueHow to Configure Barracuda BackupSource List |
| BACKUP > Schedules | Once you configure computers and data sources, use this page to create backup schedules. | Backup Schedules |
| BACKUP > Rate Limit | Rate limits control the data replication rate to Barracuda Cloud Storage or other offsite storage locations. Use this page to limit Internet bandwidth consumption during peak usage times, and schedule backups for non-peak hours. | Setting Up Rate Limits |
| BACKUP > Exclusions | Create exclusion rules that use pattern matching to identify directory or file names you do not want to back up. Files which are typically excluded from backups include temporary files, music, movies and other files which are not essential for business needs. | Backup Exclusions |
| BACKUP > Retention Policies | Specify how long to keep daily, weekly, monthly, and yearly backups by creating data retention policies. Different retention policies can be created for different sets of data including files, data backed up by the Barracuda Backup Agent (Exchange, SQL, System State), and email messages.You can create one policy for all of the computers and data sources on a Barracuda Backup Server or multiple policies that each include some subset of the data. | Backup Retention PoliciesCreating Effective Retention Policies |
| BACKUP > Watched Files | Use this page to add files to watch on a particular Barracuda Backup Server. File watch rules are used to monitor and send email alerts when specified files have not been changed often enough or appear smaller than expected. | • Setting Up Watched Files |
| i The seldomly used Watched Files feature has been deprecated in firmware versions 5.2, and will not be supported for new Barracuda Backup Servers. Note that existing Watched File Rules will continue to function as expected. |
Understanding Source-Based Deduplication
Barracuda's source deduplication method deduplicates local data on the client-side, removing redundancies from the data before transmission, and then sends that data to the Barracuda Backup Server in deduplicated form, minimizing LAN bandwidth and data sent to the local server.
Source deduplication is implemented through the Barracuda Backup Agent. During Agent installation, a small database is created on the server to keep track of data chunks so only unique data is compressed and sent to the Barracuda Backup appliance for processing, reducing network traffic and the backup window, as shown in Figure 1.
Figure 1. Source Deduplication.
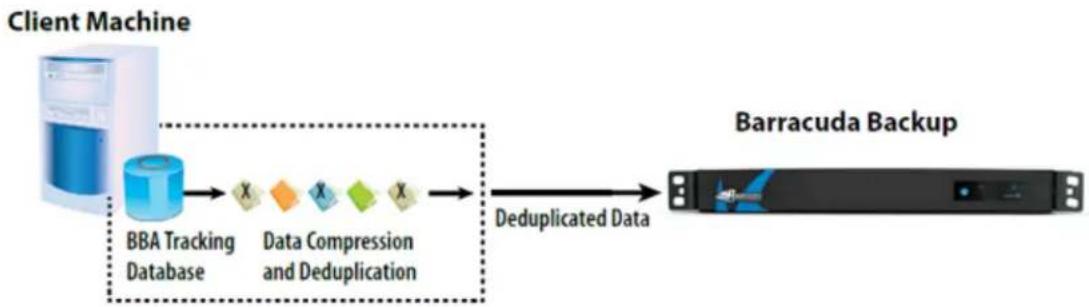
flowchart
graph LR
    A["Client Machine"] --> B["BBA Tracking Database"]
    B --> C["X Data Compression and Deduplication"]
    C --> D["Deduplicated Data"]
    D --> E["Barracuda Backup"]
For VMware backups, Barracuda leverages VMware's vStorage APIs for Data Protection (VADP) to back up virtual disks, utilizing Changed Block Tracking (CBT) to send only unique chunks to the Barracuda Backup Server, as shown in Figure 2.
Figure 2. Changed Block Tracking.
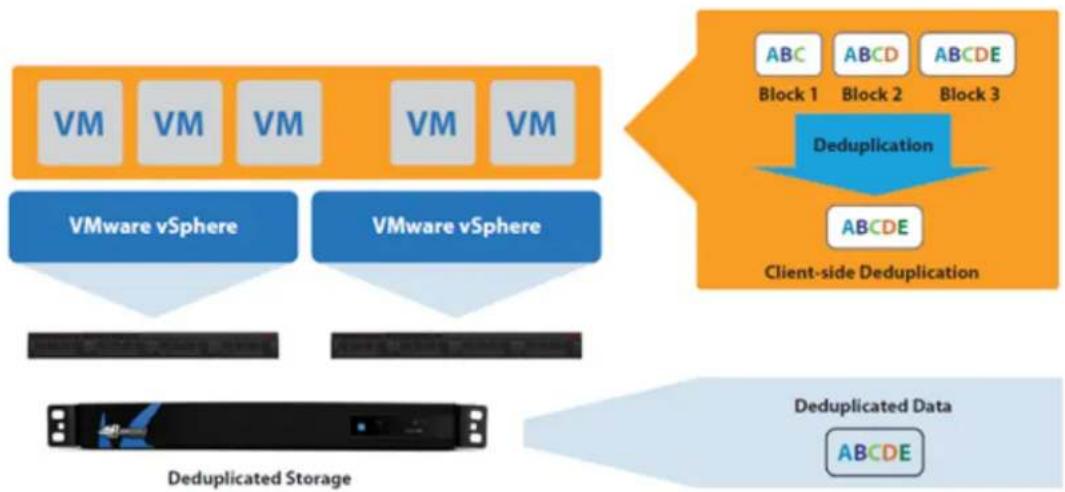
flowchart
graph TD
    A["VM"] --> B["VMware vSphere"]
    C["VM"] --> D["VMware vSphere"]
    E["VM"] --> F["Deduplicated Storage"]
    G["VM"] --> H["Deduplicated Data"]
    I["ABC Block 1"] --> J["Deduplication"]
    K["ABCD Block 2"] --> J
    L["ABCDE Block 3"] --> J
    M["ABCDE"] --> N["Client-side Deduplication"]
With source deduplication, organizations running Microsoft Hyper-V also benefit from Barracuda Backup. The Barracuda Backup Agent reduces the backup window by minimizing the amount of data sent to the Barracuda Backup Server by deduplicating the VHD files on the host server.
Backing Up Data Sources
In this Section
• Microsoft Exchange Server and Exchange Server DAG
- Microsoft Hyper-V
- Microsoft SQL Server
- VMware
• How to Back Up Microsoft Active Directory
• How to Back Up and Restore a Microsoft SharePoint SQL Database
• Understanding IBM Domino Server Backup
• How to Configure GroupWise Message-Level Backups
• How to Set Up a Root Account to Back Up Macintosh OS X
• How to Back Up Linux/UNIX Data Using SSHFS
• Understanding Changed Block Tracking on Virtual Machines
• How to Enable Changed Block Tracking through the Barracuda Backup Web Interface
• How to Back Up Network Addressable Storage - NAS
• How to Back Up FirstClass Mail
• How to Back Up NFS Mounts with the Barracuda Backup Agent (Linux)
• How to Back Up NSS Mounts with the Barracuda Backup Agent (Linux)
Related Articles
• Barracuda Backup Agent (Windows)
• Barracuda Backup Agent (Linux)
• Monitoring Windows System Performance During Backup
Microsoft Exchange Server and Exchange Server DAG
In this Section
• How to Set Up Microsoft Exchange Server 2003, 2007, 2010 Message-Level Backups
• Understanding Microsoft Exchange Server 2003 and 2007 Storage Group Backup
• How to Back Up Microsoft Exchange Server 2010 DAG
• How to Back Up Microsoft Exchange Server 2010 DAG Passive Database
• How to Back Up Microsoft Exchange Server 2013
• How to Set Up Microsoft Exchange Server 2013 Message-Level Backup
How to Set Up Microsoft Exchange Server 2003, 2007, 2010 Message-Level Backups
This article refers to Barracuda Backup firmware version 4.3 and higher, and Microsoft® Exchange Server 2003, 2007, and 2010.
For details on setting up Microsoft Exchange Server 2013 message-level backup, refer to the article How to Set Up Microsoft Exchange Server 2013 Message-Level Backup.
In this article:
- Requirements
• Barracuda Backup Server DNS Settings - Step 1. Determine the Exchange Server Version and Build
• Exchange Server 2003 Version and Build
• Exchange Server 2007 Version and Build
• Exchange Server 2010 Version and Build
- Step 2. Set Up Your Exchange Server
- Set Up Exchange Server 2003 (Service Pack 1 or Above)
- Set Up Exchange Server 2007 (Service Pack 1 or Above)
• Set Up Exchange Server 2010
- Step 3. Add the Exchange Server to the Barracuda Backup Web Interface
Related Articles
- Backing Up Data Sources
- Configuring Backups
• Restoring Exchange and GroupWise Messages
• Exchange 2013 Message-Level Backup
Additional Resource
• The Barracuda Networks Knowledgebase Solution #00003906

Message-Level Backup
Message-level backup provides a quick way to restore single email messages to the original location or to an alternate mailbox. Message-level backup is not intended to be a disaster recovery option for your Microsoft Exchange environment. The Barracuda Backup Agent (Windows) allows you to back up the entire Exchange Information Store and should be used for disaster protection.
Requirements
You must be running one of the following Microsoft Exchange Servers:
• Microsoft Exchange Server 2003 Service Pack 1 or above; or
• Microsoft Exchange Server 2007 Service Pack 1 or above; or
• Microsoft Exchange Server 2010
In addition, you must have the following:
- Outlook Web Access (with WebDAV enabled)
• Primary and Secondary DNS setting on the Barracuda Backup Server must be DNS servers which participate in Active Directory
• Service account for access that has an Exchange mailbox and SMTP address
Barracuda Backup Server DNS Settings
For Exchange messagelevel backups to work properly, it is very important that DNS is set up correctly. DNS servers on the Barracuda Backup Server must be DNS servers that participate in Active Directory. The simplest way to determine which DNS servers to use is to use the IP addresses of your Active Directory Domain Controllers.
Step 1. Determine the Exchange Server Version and Build
Before setting up your Exchange Server, it is important to know what version, including the build number, is running to verify your Exchange
Server is running the minimum requirement for Exchange messagelevel backups. Locate the version and build number for your Exchange Server, then refer to the Microsoft knowledgebase article Build numbers and release dates for Exchange Server to verify you are running the correct version, and if applicable, service pack:
• Exchange Server 2003 Version and Build
• Exchange Server 2007 Version and Build
• Exchange Server 2010 Version and Build
Exchange Server 2003 Version and Build
Use the following steps to determine the version and service pack number on Exchange Server 2003.
Click here to expand...
- Open the Exchange System Manager on the Exchange Server, expand Servers folder, right-click on the server name, and click Properties
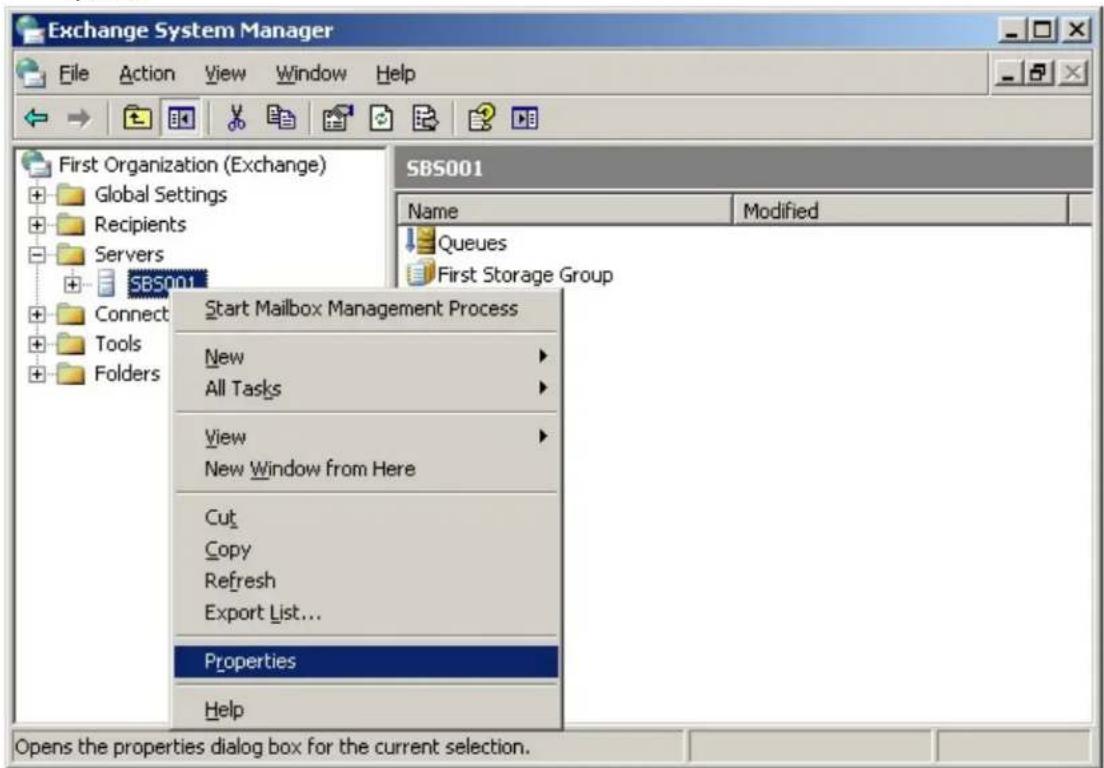
- The version and build number display in the tab:General
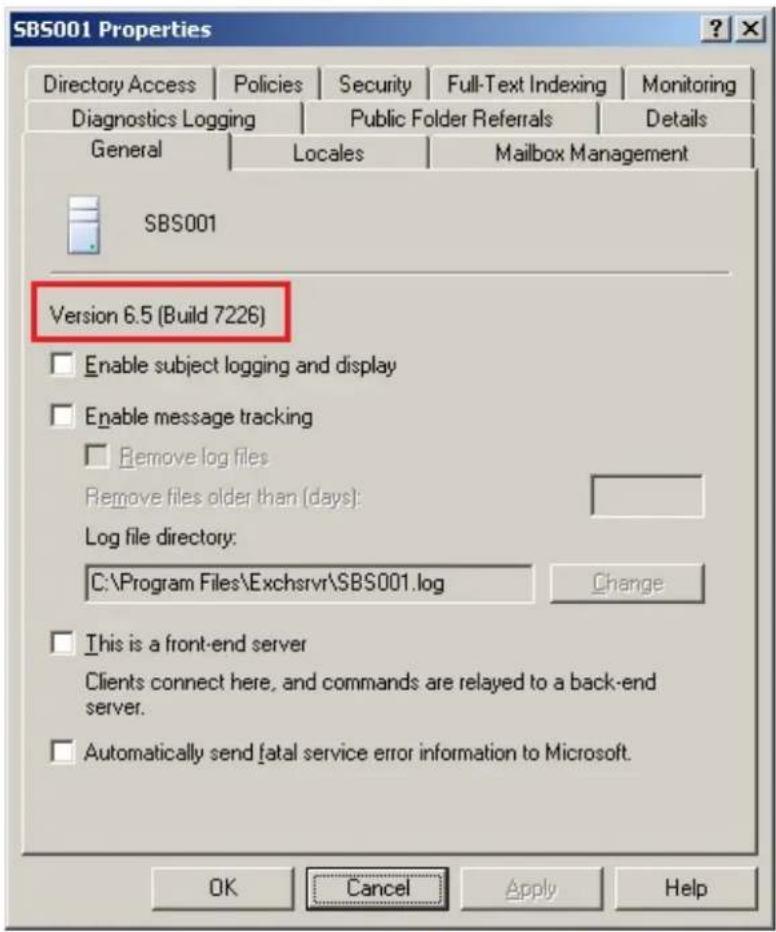
- Open the Microsoft knowledgebase article Build numbers and release dates for Exchange Server to determine the version and service pack level the Exchange Server is running; the minimum requirement for Exchange Server 2003 with Service Pack 1 is Version 6.5, Build 7226.
- Go to .Step 2
Exchange Server 2007 Version and Build
Use the following steps to determine the version and service pack number on Exchange Server 2007.
Click here to expand..
- Open the Exchange System Manager on the Exchange Server, and click Server Configuration:
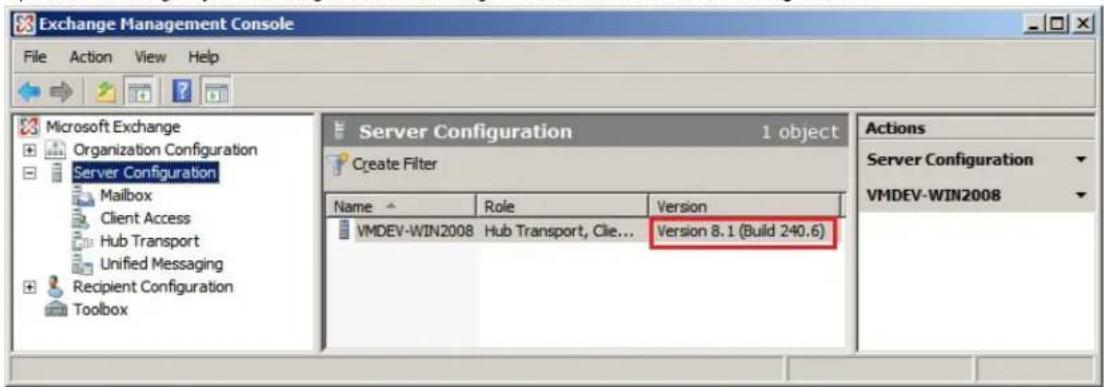
- Open the Microsoft knowledgebase article Build numbers and release dates for Exchange Server to determine the version and service pack level the Exchange Server is running.
- Go to .step 2
Exchange Server 2010 Version and Build
If you are running Exchange Server 2010, use the following steps to determine the version number.
Click here to expand...
- Open the Exchange System Manager on the Exchange Server, expand Server Configuration, and click Mailbox; the Exchange Server version displays in the center pane:
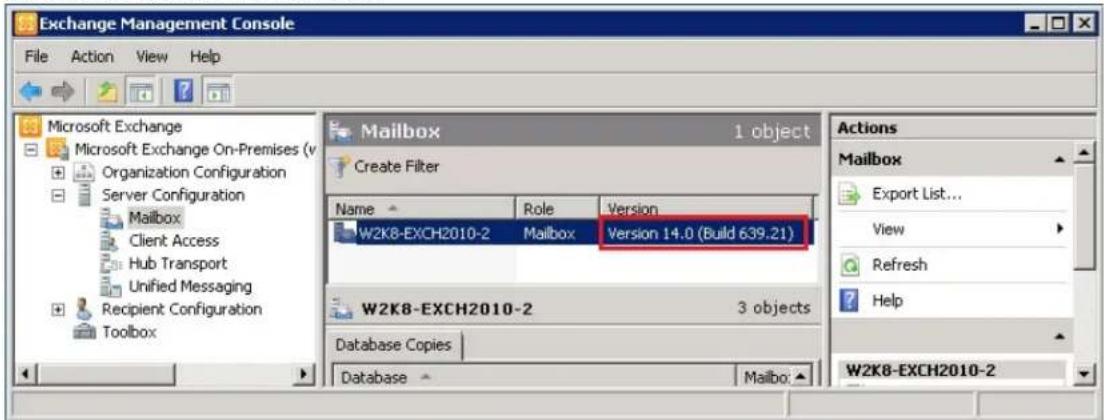
- Open the Microsoft knowledgebase article Build numbers and release dates for Exchange Server to determine the version the Exchange Server is running.
- Go to Step 2.
Step 2. Set Up Your Exchange Server
Select the applicable steps based on your Exchange Server version:
- Setting Up Exchange Server 2003
• Setting Up Exchange Server 2007 - Setting Up Exchange Server 2010
Set Up Exchange Server 2003 (Service Pack 1 or Above)
Use the following steps to set up your Exchange Server 2003 for message-level backups.
√ Click here to expand...
- Create an account to be used by Barracuda Backup to access emails in each mailbox:

Service Type Account
It is strongly recommended that you use a service type account and not your administrator account to prevent inherited deny permissions from causing issues. This service account requires an Exchange mailbox and SMTP address and must be a member of either the Enterprise Admins group or Domain Admins group.
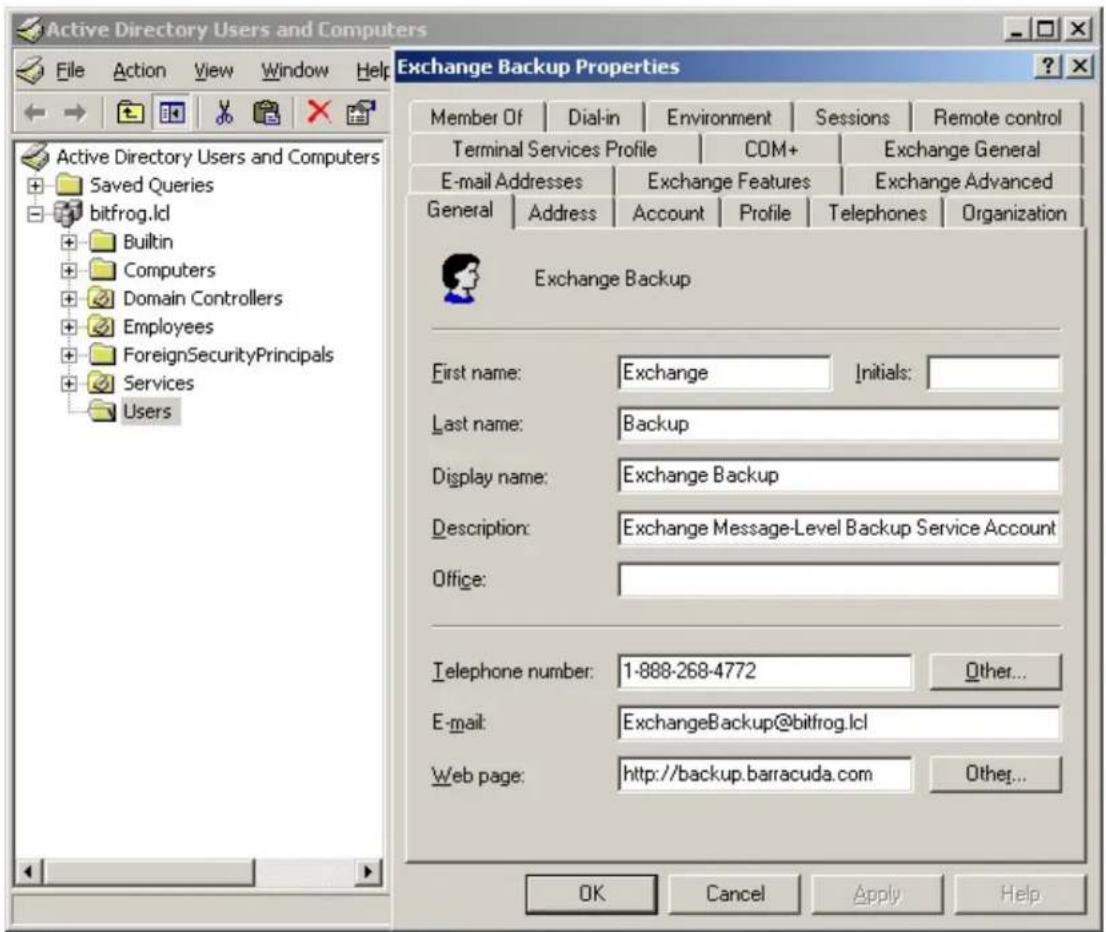
- Assign the service account permissions on the Storage Groups on your Exchange Server.
- Open the Exchange System Manager, click , and then expand your server.Servers
- Right-click First Storage Group, and click Properties on the Mailbox Store in the first storage group.
- Click on the Security tab, and add your backup service account to the Group or user names section of the Mailbox Store; click on the backup service account name.Properties
- In Permissions for Exchange Backup, turn on Allow for both Receive As and Send As permissions:
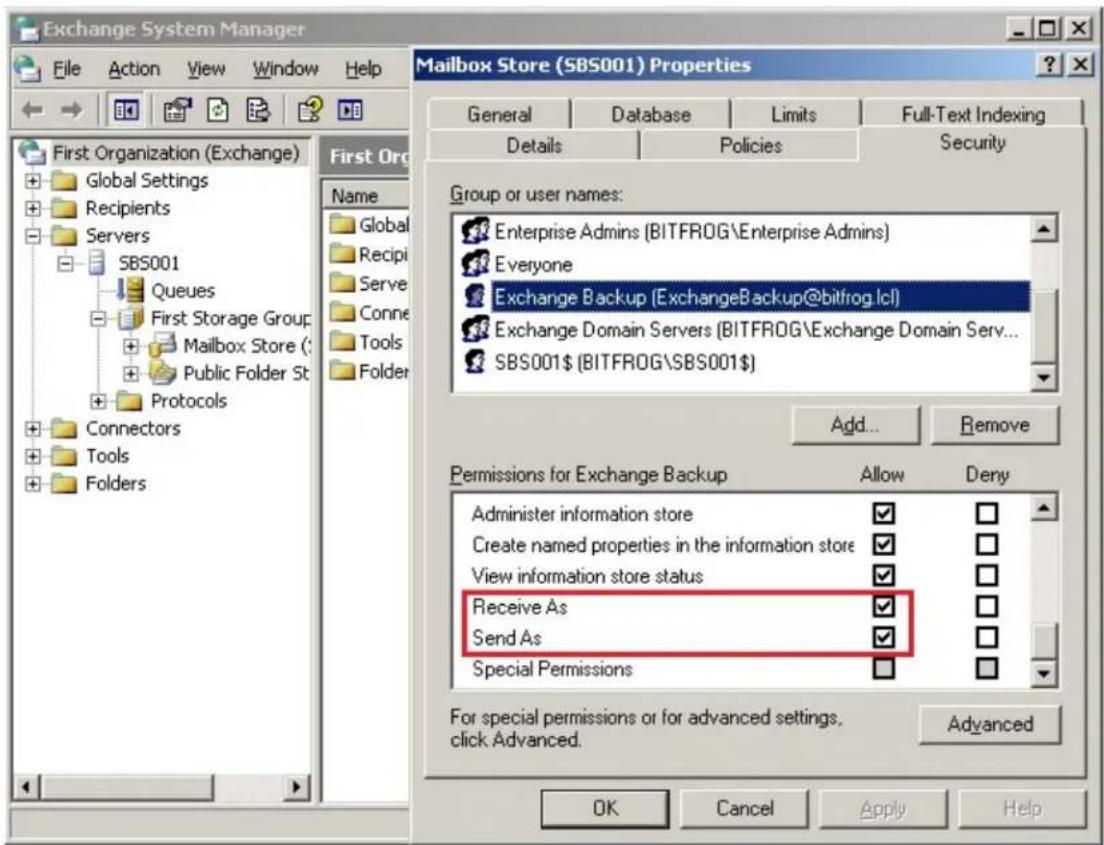
- Depending on replication policies and Exchange Server activity, it may be helpful to perform a group policy update on the Exchange Server to help replicate permissions. To do so, run the following command from the command line:
gpupdate /force
![C:\WINDOWS\system32\cmd.exe Microsoft Windows [Version 5.2.3790] (C) Copyright 1985-2003 Microsoft Corp. C:\Documents and Settings\Administrator>gpupdate /force Refreshing Policy... User Policy Refresh has completed. Computer Policy Refresh has completed. To check for errors in policy processing, review the event log. C:\Documents and Settings\Administrator>](/content/2026/06/1260286/images/063fe6febcb50c2099dda5e00a99a082b6f14c9617c2bfbefb5702dc9444f0b3.jpg)
- Go to to complete the set up.Step 3
Set Up Exchange Server 2007 (Service Pack 1 or Above)
Use the following steps to set up your Exchange Server 2007 to do message-level backups.
√ Click here to expand...
- Create an account to be used by Barracuda Backup to access emails in each mailbox:

Service Type Account
It is strongly recommended that you use a service type account and not your administrator account to prevent inherited deny permissions from causing issues. This service account requires an Exchange mailbox and SMTP address and must be a member of one of the following groups: Exchange View Only Administrators, Exchange Organization Administrators, Enterprise Admins, or Domain Admins.
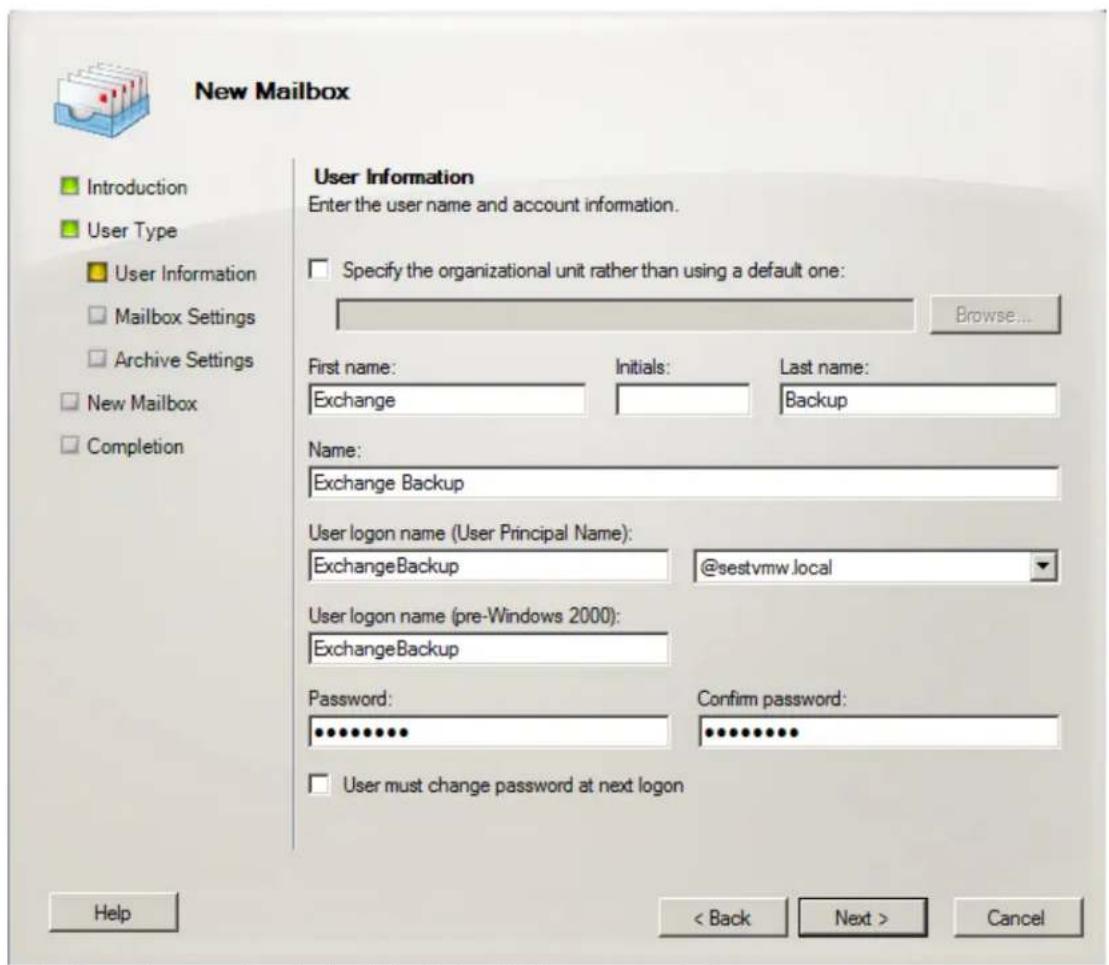
- Assign the service account permissions to the Mailbox Databases on your Exchange server.
- Open the Exchange Management Shell, and run the following command replacing
with the Service Account username:
Get-ClientAccessServer | Add-AdPermission -User
Get-MailboxDatabase | Add-AdPermission -User
![[PS] C:\Windows\System32>Get-ClientAccessServer ! Add-AdPermission -User exchange backup -ExtendedRights ms-Exch-EPI-Impersonation Identity User Deny Inherited Rights W2K8-EXCH1 BBSDEV\exchangeba... False False ms-Exch-EPI-Impers... [PS] C:\Windows\System32>Get-MailboxDatabase ! Add-AdPermission -User exchange backup -ExtendedRights ms-Exch-EPI-May-Impersonate Identity User Deny Inherited Rights W2K8-EXCH1\First ... BBSDEV\exchangeba... False False ms-Exch-EPI-May-Im... W2K8-EXCH2\First ... BBSDEV\exchangeba... False False ms-Exch-EPI-May-Im... [PS] C:\Windows\System32>](/content/2026/06/1260286/images/3f57216e072c6d637a8a73eb7b4c31895b391f13ef6f09157ef32b3c0770c605.jpg)
- Depending on replication policies and Exchange Server activity, it may be helpful to perform a group policy update on the Exchange Server to help replicate permissions. To do so, run the following command from the command line:
gpupdate /force
![C:\WINDOWS\system32\cmd.exe Microsoft Windows [Version 5.2.3790] (C) Copyright 1985-2003 Microsoft Corp. C:\Documents and Settings\Administrator>gpupdate /force Refreshing Policy... User Policy Refresh has completed. Computer Policy Refresh has completed. To check for errors in policy processing, review the event log. C:\Documents and Settings\Administrator>](/content/2026/06/1260286/images/0f62a5a1ef81071e562c4fd18351d4b3710739e50686b281a73e6404ab7fd971.jpg)
- Go to to complete the set up.Step 3
Set Up Exchange Server 2010
Use the following steps to set up your Exchange Server 2010 to do message-level backups.
Click here to expand...
- Create an account to be used by Barracuda Backup to access emails in each mailbox:

Service Type Account
It is strongly recommended that you use a service type account and not your administrator account to prevent inherited deny permissions from causing issues. This service account requires an Exchange mailbox and SMTP address and must be a member of one of the Domain Users group; adding the service account to any administrative groups may cause .issues with access to user mailboxes
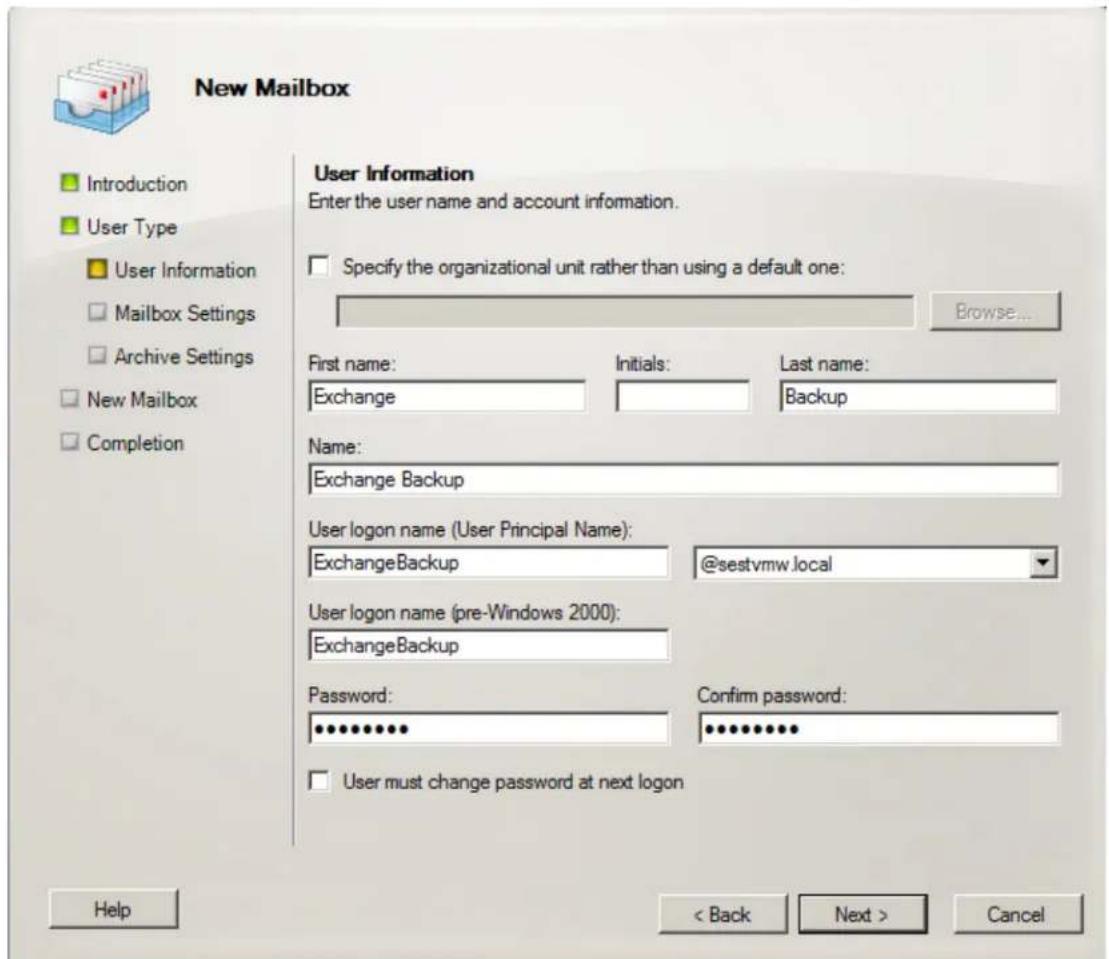
- To assign the service account impersonation rights for Exchange, open the Exchange Management Shell, and run the following command, replacing
with the Service Account username:
![[PS] C:\Windows\system32>New-ManagementRoleAssignment -Name:BarracudaBackup -Role:ApplicationImpersonation -User:exchangebackup Name Role RoleAssigneeName RoleAssigneeType AssignmentMethod EffectiveUserName BarracudaBackup Applic... Exchan... User Direct [PS] C:\Windows\system32>](/content/2026/06/1260286/images/88e4021dbef3720f39d1076b87008d2416fe52addc298aa3314ade575b1f938d.jpg)
- Depending on replication policies and Exchange Serer activity, it may be helpful to perform a group policy update on the Exchange Server to help replicate permissions. To do so, run the following command from the command line:
gpupdate /force
![C:\WINDOWS\system32\cmd.exe Microsoft Windows [Version 5.2.3790] (C) Copyright 1985-2003 Microsoft Corp. C:\Documents and Settings\Administrator>gpupdate /force Refreshing Policy... User Policy Refresh has completed. Computer Policy Refresh has completed. To check for errors in policy processing, review the event log. C:\Documents and Settings\Administrator>](/content/2026/06/1260286/images/27f8e59c17f0b1a33732fa16f26977d47df09d2e95a58239c6c4673cf90ff218.jpg)
- Go to to complete the set up.Step 3
Step 3. Add the Exchange Server to the Barracuda Backup Web Interface
Once you set up your Exchange installation to allow the Barracuda Backup Server to access it, use the following steps to add the Exchange Server to the web interface:
- Log in to Barracuda Backup, and go to on the page. BACKUP > Sources
- Click Add Computer; in the Add Computer page, add the Exchange Server details including the hostname or IP address, and click Save.e
- In the Add Data Source page, select Message-Level Backup (Exchange) as the Data Type. In the Message-Level Backup (Exchange) Information section, select the Exchange Server version, and enter the Server details.

Base DN Field
The Base DN field is optional; enter the Base Distinguished Name only if directed to do so by Barracuda Networks Technical Support.
- Click Test Exchange Connectivity to verify the Server credentials.
- If the connectivity test returns OK, you can now select the mailboxes you want to back up in the Mailbox Selection section.
- Click Save to add the data source.
Understanding Microsoft Exchange Server 2003 and 2007 Storage Group Backup
This article refers to Barracuda Backup firmware version 3.1 or higher, and Microsoft® Exchange Server 2003 or 2007.
In this article:
• Exchange Storage Group
- Backup Process
• Operation 1. Cache is Flushed and Checkpoint is
Halted
• Operation 2. Back Up Database Files
• Operation 3. Transaction logs
• Operation 4. Log Files are Truncated
• Operation 5. Backup Operation Complete
Related Articles
- Restore an Exchange 2007 Database
- Restore an Exchange 2003 Database by Overwriting Existing Database
- Restore an Exchange 2003 Database using a Recovery Storage Group
Exchange Storage Group
The Barracuda Backup Agent for Microsoft Exchange Server provides a full backup of the Exchange storage group. An Exchange storage group is a logical container for your email database and its associated system and transaction log files.
Microsoft Exchange uses transaction logging to commit new and changed data to the database, and to ensure that records of the transactions exist if a store is damaged between backups. The Exchange storage group, and its associated transaction logs, is the most important data to back up on your Exchange Server to ensure your email database is available in the event it becomes damaged or unrecoverable. If you must rebuild a server, you can use the latest transaction log files plus the last full backup to recover your database.
The Barracuda Backup Agent for Microsoft Exchange Server backs up and restores the entire storage group; it allows for the storage group to be restored to a storage group or to an alternate Microsoft Exchange Server.
Backup Process
Several important operations occur at the start of the Exchange storage group backup process. Here is the overview of the backup process:
Operation 1. Cache is Flushed and Checkpoint is Halted
When a full backup operation is initialized, the Exchange Server Extensible Storage Engine (ESE) first flushes its cache to disk and halts the checkpoint. The checkpoint cannot advance until the backup operation is complete. It is important to note that when a partial backup such as a differential, incremental, or copy backup runs, ESE allows the checkpoint to advance because the backup operation does not touch the databases.
Operation 2. Back Up Database Files
The backup application uses backup API calls to pass a list of databases to ESE for back up. ESE sends the backup application chunks of database pages in sequential order, and performs a checksum on each page. The backup operation is terminated if an error is encountered.

When a database is backed up using the Exchange streaming backup API, each page in the database is read in turn, and the checksum integrity of each page is verified. Additionally, transaction log file checksum integrity is confirmed before they are backed up.
Operation 3. Transaction logs
ESE stores the transaction logs to the backup set, and halts the checkpoint at the beginning of the backup. To back up the log files, the backup application uses the appropriate API call to request a list of log files (and patch files, if applicable) from ESE. When ESE receives this call, it closes the current log file, saves the file as the next log generation in a sequential list, and opens a new E0n.log file where n represents the storage group instance of the log file.
- In the case of a full backup, ESE then returns a list of log files to the backup application; this list starts with the current log generation in which the checkpoint was halted, and ends with the log generation that ESE just closed (i.e., E0n.log minus 1).
- In the case of an incremental or differential backup, ESE returns a list beginning with the oldest log generation on disk and ending with the most recently closed log generation. Using this list, the backup application can open file handles to the log files and copy them to the backup set. During this operation, ESE ensures that no log generation is missing from the sequence passed to the backup application.
Operation 4. Log Files are Truncated
Once the log files are stored to the backup set, they are no longer needed on disk. During full and incremental backup operations, ESE truncates the log files on disk once transaction log back up is completed. The lower of either the checkpoint log generation or the log generation listed in the database header for the current full backup determines which log files ESE truncates.
Operation 5. Backup Operation Complete
After the log files are truncated, the backup operation is complete and the backup application closes the backup set. ESE returns to normal database-engine operations and permits the checkpoint to advance.
How to Back Up Microsoft Exchange Server 2010 DAG
This article refers to Barracuda Backup firmware 5.1 and higher, and Microsoft Exchange Server 2010 DAG.
Install the Barracuda Backup Agent
Use the following steps to install the Barracuda Backup Agent (Windows) on all Exchange Servers configured in DAG:
- Log in to Barracuda Backup, and select the associated Barracuda Backup Server in the left pane.
- Go to the page.SYSTEM > Software Downloads
- Download and install the Barracuda Backup Agent (Windows) on all Exchange Servers configured in DAG
Set Up the Exchange Servers
Use the following steps to set up an Exchange Server 2010 DAG backup on the Barracuda Backup Server:
- Log in to Barracuda Backup, and select the associated Barracuda Backup Server in the left pane.
- Go to the page, and click to identify the system.BACKUP > Sources Add Computer
- Add the Exchange Server with the proper hostname or IP address and description.
- Select as the , and click .Microsoft Windows Computer Type Save
- In the Add Data Source page, select Barracuda Agent Software as the Data Type, and click Test Software Connectivity to verify the Barracuda Backup Server can communicate with the installed Agent.
- In the Item Selection section, choose to back up all items or specified items (Exchange Databases).
- Click Save. The Exchange Server is added as a data source:
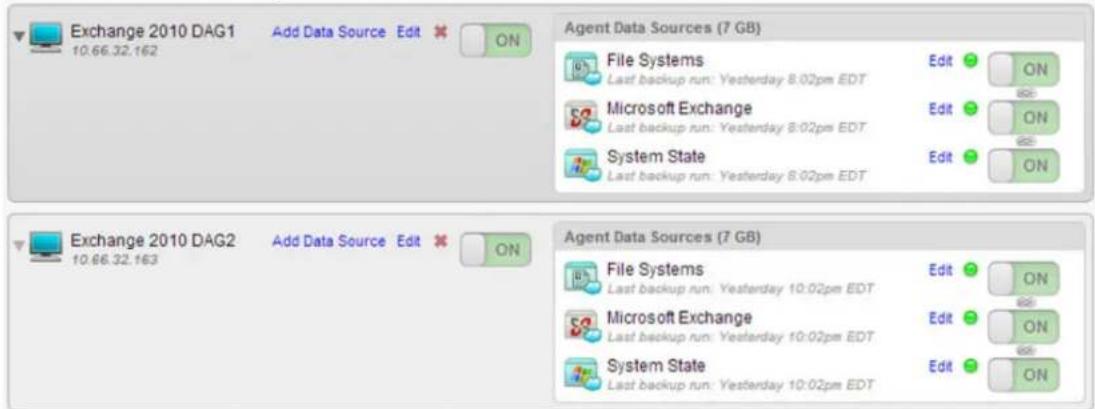
- Repeat steps 2 through 7 for each Exchange Server configured in DAG.
How to Back Up Microsoft Exchange Server 2010 DAG Passive Database
This article refers to Barracuda Backup firmware version 5.0 or higher, and Microsoft Exchange Server 2010 in a Database Availability Group (DAG). This article assumes that you have the Barracuda Backup Agent (Windows) installed on the Exchange Server.
Step 1. Configure the Barracuda Backup Agent
Use this section to configure the Barracuda Backup Agent (Windows) to detect passive databases.
- Log in to the Exchange Server where the passive database to be backed up resides.
- Go to to open the Services console.Start > Administrative Tools > Services
- Right-click the service, and click : Barracuda Backup Agent Stop
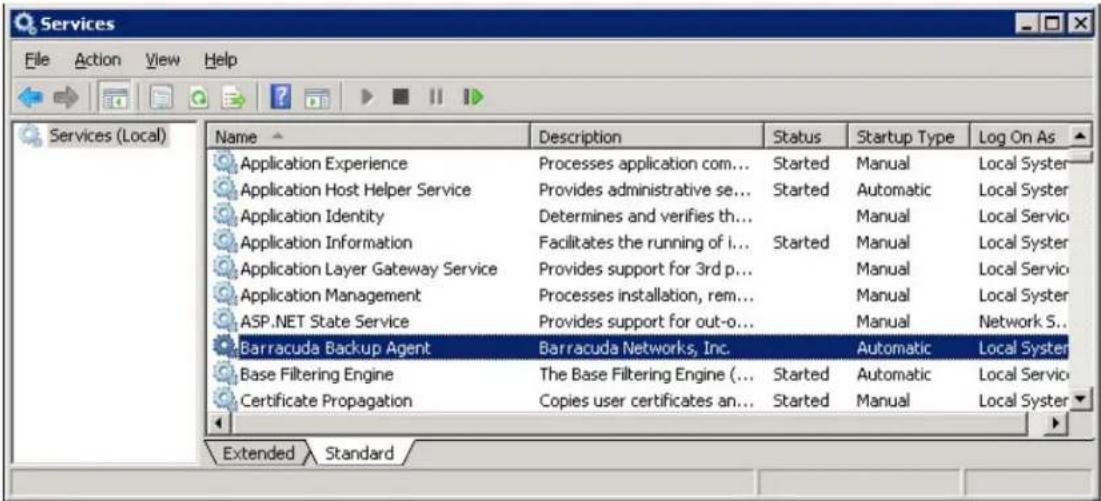
- On the Exchange Server, navigate to the Barracuda Backup Agent installation directory; the default location is C:\Program
:Files\Barracuda\Barracuda Backup Agent\config
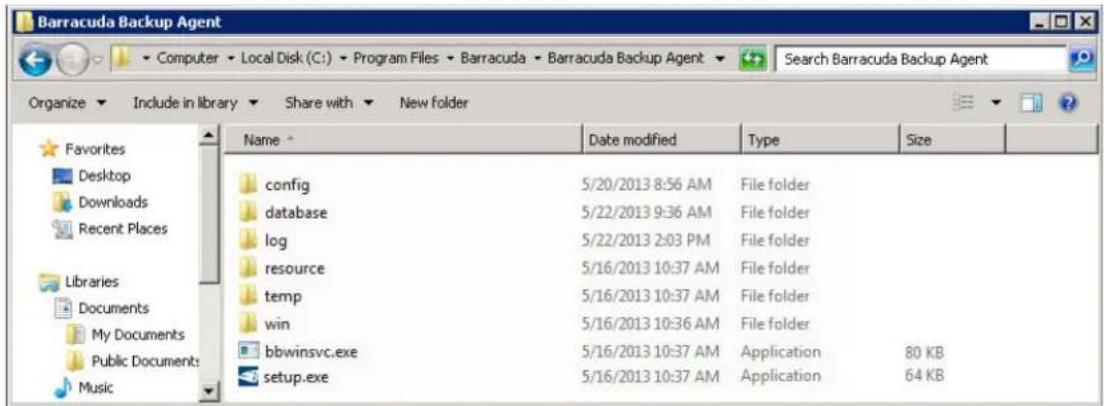
- Open the folder, and open file in .config bbconfig.ini Notepad
- Add the following content beneath the configuration section:
[Windows Agent Manager.Mic
enableReplicationService=true
![[installControl] buildNumber=82926 installedversion=5.1.00-rel [configuration] nodeGuid={00001001-C2D780BE-C2D780BE-C2D780BF} [windows Agent Manager.Microsoft Exchange Replication] enableReplicationService=true](/content/2026/06/1260286/images/a8d80179c5343d02a556d0a00291d86bc8d6f38152ca2b9a2b5300848ab7d7cf.jpg)
- Save the file and close Notepad.
- In the Services Console, right-click the Barracuda Backup Agent service, and click Start to restart the service:
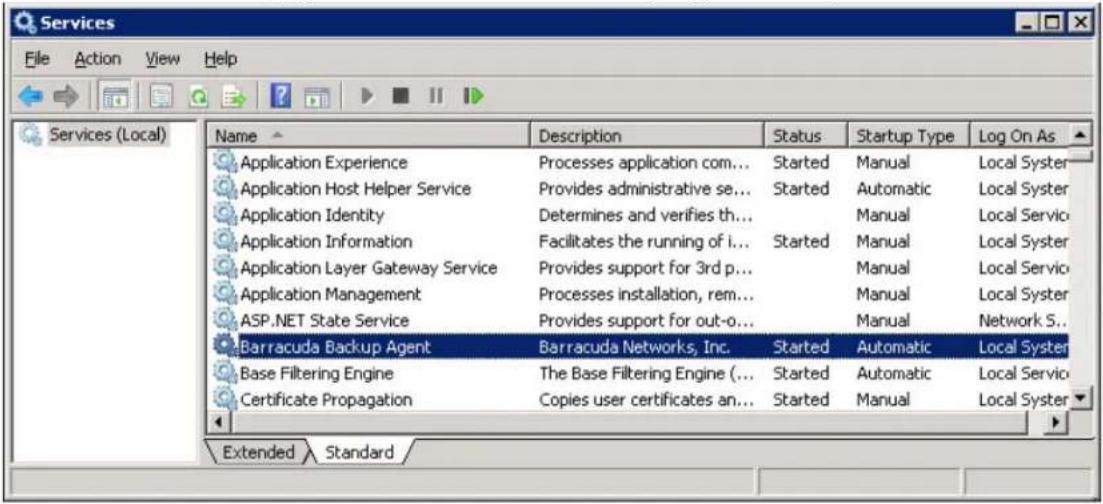
Step 2. Configure the Data Source
Use this section to configure data sources on the Barracuda Backup Server.
- Log in to the Barracuda Backup web interface, and select the associated Barracuda Backup Server in the left pane.
- Go to the BACKUP > Sources page, and locate the Exchange Server data sources.
- Click Edit to the right of the Microsoft Exchange Server containing the passive database to be backed up:
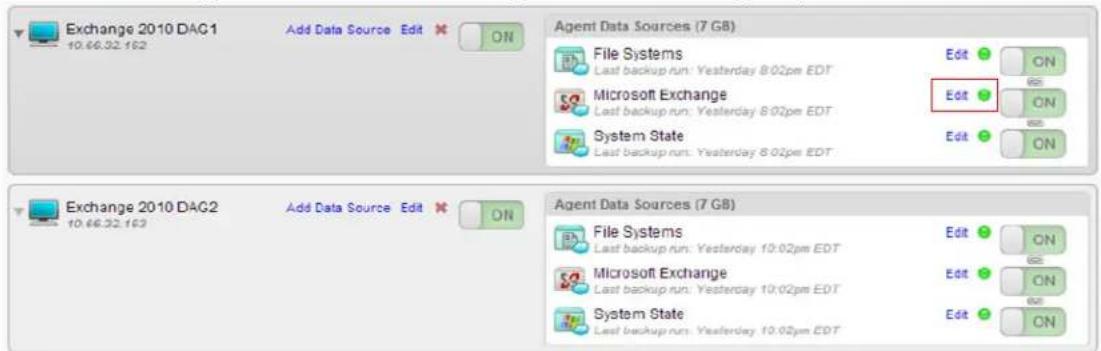
- In the Edit Data Source page, in the Item Selection section, click Select Specific Items; the Microsoft Exchange Replication item displays. Expand Microsoft Exchange Replication to access the passive
database:
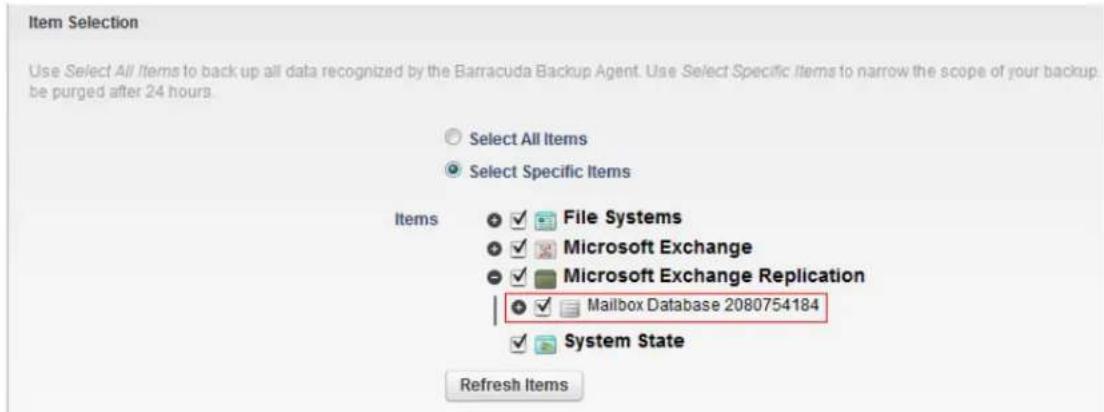
5. Click Save. The Exchange Server passive database is added as a data source. The Sources page now displays the Microsoft item as a data source to be backed up:Exchange Replication
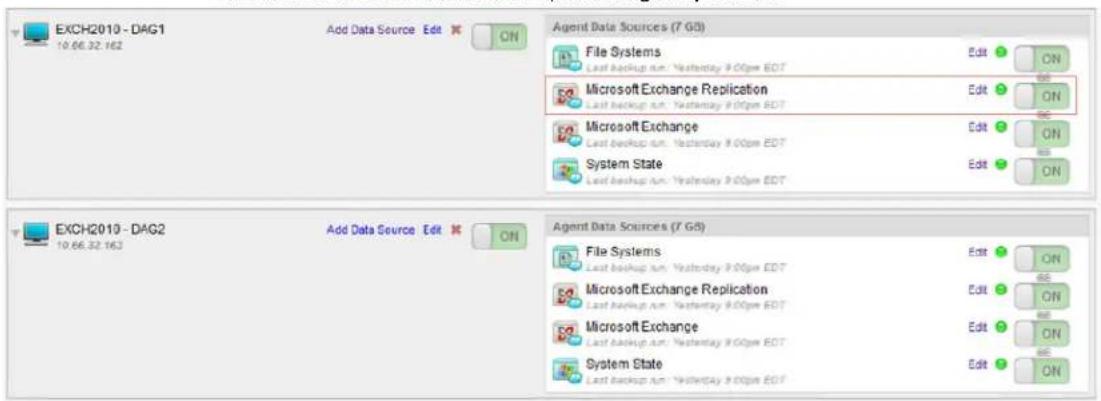
How to Back Up Microsoft Exchange Server 2013
This article refers to Barracuda Backup firmware 5.3 and higher, and Microsoft®Exchange Server 2013.
In this article:
• Install the Barracuda Backup Agent
- Set Up the Exchange 2013 Server
Related Articles
- How to Set Up Exchange 2013 Message-Level Backup
Install the Barracuda Backup Agent
Use the following steps to install the Barracuda Backup Agent (Windows) on the Exchange Server 2013:
- Log in to Barracuda Backup, and select the associated Barracuda Backup Server in the left pane.
- Go to the page.SYSTEM > Software Downloads
- Download and install the Barracuda Backup Agent (Windows) on the Exchange Server 2013; you do not need to reboot.
Set Up the Exchange 2013 Server
Use the following steps to set up an Exchange Server 2013 DAG backup on the Barracuda Backup Server:
- Log in to Barracuda Backup, and select the associated Barracuda Backup Server in the left pane.
- Go to the page, and click .BACKUP > Sources Add Computer
- Add the Exchange Server with the proper hostname or IP address and description.
- Select Microsoft Windows as the Computer Type, and click Save.
- In the Add Data Source page, select Barracuda Agent Software as the Data Type, and click Test Software Connectivity to verify the
Barracuda Backup Server can communicate with the installed Agent.
- In the Item Selection section, choose to back up all items or specified items (Exchange Databases):
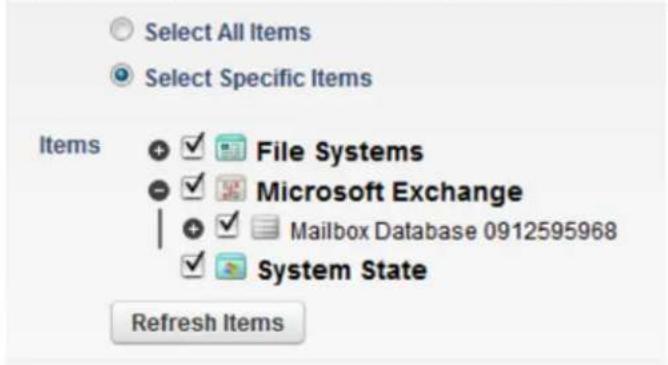
- Click . The Exchange Server is added as a data source:Save

How to Set Up Microsoft Exchange Server 2013 Message-Level Backup
This article refers to firmware version 5.3 and higher, and Microsoft®Exchange Server 2013.
In this article:
• Create an Account On the Exchange Server
- Assign Impersonation Rights to the Account
- Add the Exchange Server to Barracuda Backup

Message-Level Backup
Message-level backup provides a quick way to restore single email messages to the original location or to an alternate mailbox. Message-level backup is not intended to be a disaster recovery option for your Microsoft Exchange environment. The Barracuda Backup Agent allows you to back up the entire Exchange Information Store and should be used for disaster protection.
Create an Account On the Exchange Server
Use the following steps to create an account to be used by Barracuda Backup:

Barracuda Networks recommends using a service-type account rather than an administrator account.
- Log in to the Exchange Server, click the down arrow next to the plus (+) symbol, and click User mailbox to create an account to be used by Barracuda Backup to access the emails in each mailbox:
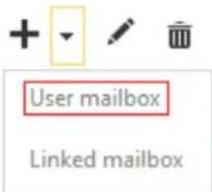
- In the window, enter the new user details, and click .new user mailbox Save
- Double-click the new user mailbox to open the :Properties
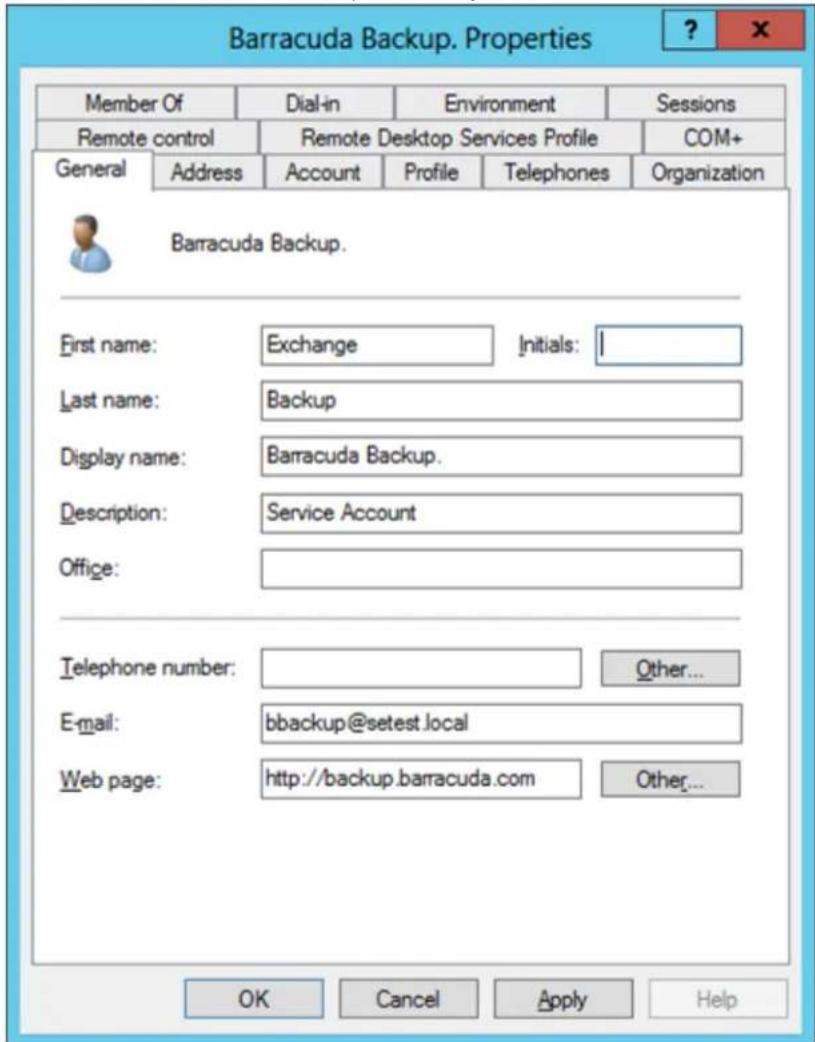
- Click the Member Of tab, and add the user as a member of the Domain Users group; this is required:
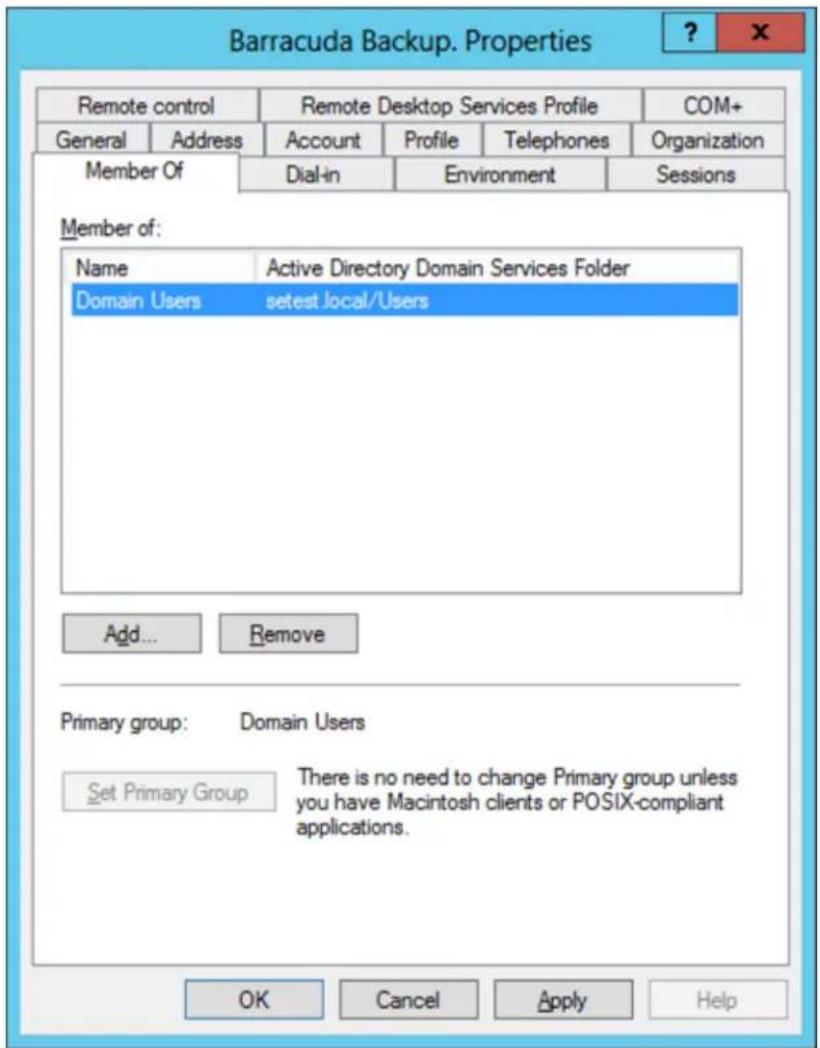
Assign Impersonation Rights to the Account
To assign the account impersonation rights for Exchange:
- Open the Exchange Management Shell and run the following command, replacing
with the Service Account username created in the previous section:
New-ManagementRoleAssignment -Name:BarracudaBackup
-Role:ApplicationImpersonation -User: <Serv
![Machine: WIN-M48GAUBRC34.setest.local Cmdlets that match a specific string: Help Get general help: Help Get help for a cmdlet: Help or -? Show quick reference guide: QuickRef Exchange team blog: Cet-ExBlog Show full output for a command: ; Format-List Tip of the day #12: Pushd and Popd work the same way in the Exchange Management Shell as they do in cmd.exe. Type: Pushd VERBOSE: Connecting to WIN-M48GAUBRC34.setest.local. JERBOSE: Connected to WIN-M48GAUBRC34.setest.local. [PS] C:\Windows\system32\New-ManagementRoleAssignment -Name:BarracudaBackup -Role:ApplicationImpersonation -User:bbackup Name Role RoleAssigneeName RoleAssigneeType AssignmentMethod EffectiveUserNanc BarracudaBackup ApplicationImp... Barracuda Backup. User Direct [PS] C:\Windows\system32_](/content/2026/06/1260286/images/021413f884e0455a77b000977af0a84743f5d9c1e114fd660cac004f7fc65ade.jpg)
- Optional. It is good practice to perform a group policy update on the Exchange Server to replicate permissions. Run the following command either using PowerShell or at a command line:
gpupdate /force
Add the Exchange Server to Barracuda Backup
- Log in to the Barracuda Backup web interface, go to the BACKUP > Sources page, and click Add Computer.
- Enter the Exchange Server details:
a. Computer Description - Enter a label to identify the system.
b. Computer Name - Enter the Exchange Server IP Address or FQDN.
c. From the drop-down menu, select .Computer Type Microsoft Windows
d. Specify whether to enable file share backup:
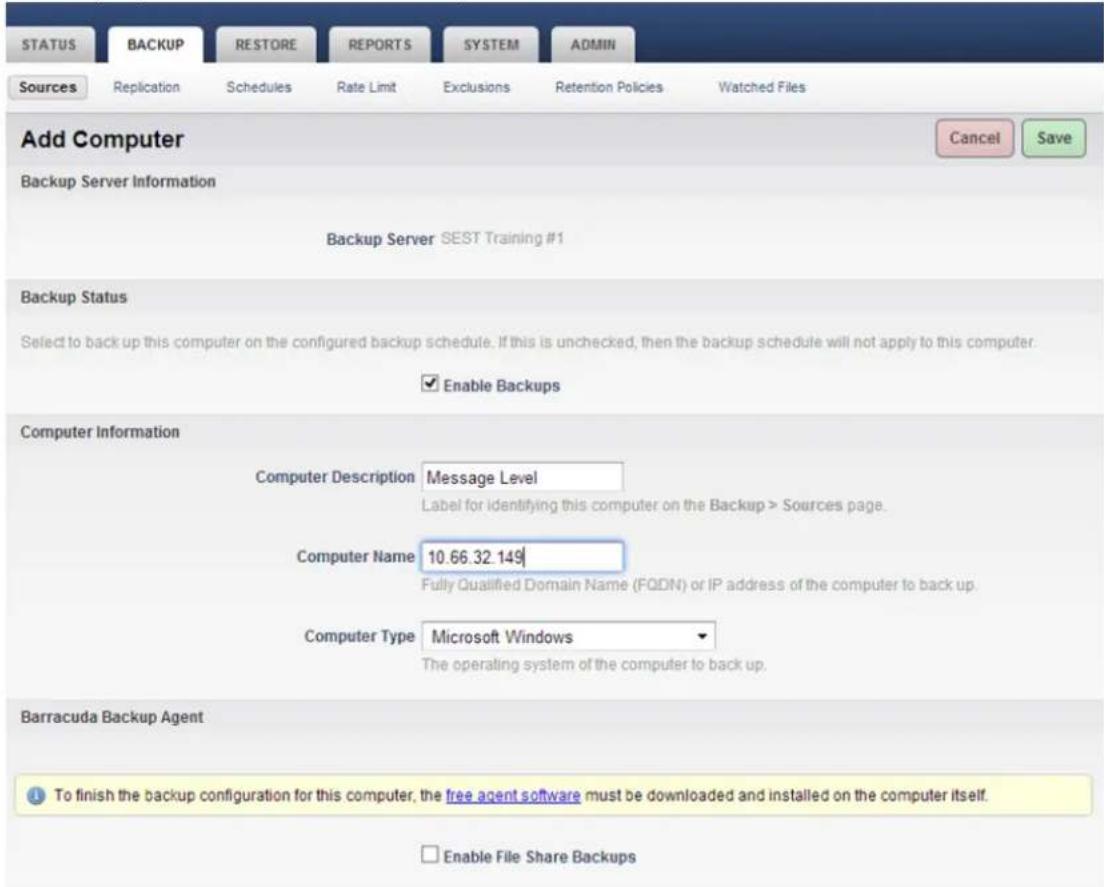
- Click . The page displays.Save Add Data Source
- From the drop-down menu, select :Data Type Message-Level Backup (Exchange)

- In the Message-Level Backup (Exchange) Information section, enter the following details:
a. From the Exchange Version drop-down menu, select Exchange 2013.
b. In the Username and Password fields, enter the user login details for the user created in the section Creating an Account On the Exchange Server.
c. Enter the Windows Domain Name.
-
Click Test Exchange Connectivity to verify you can connect to the Exchange Server using the entered details.
-
In the Mailbox Selection section, select Select All Mailboxes:
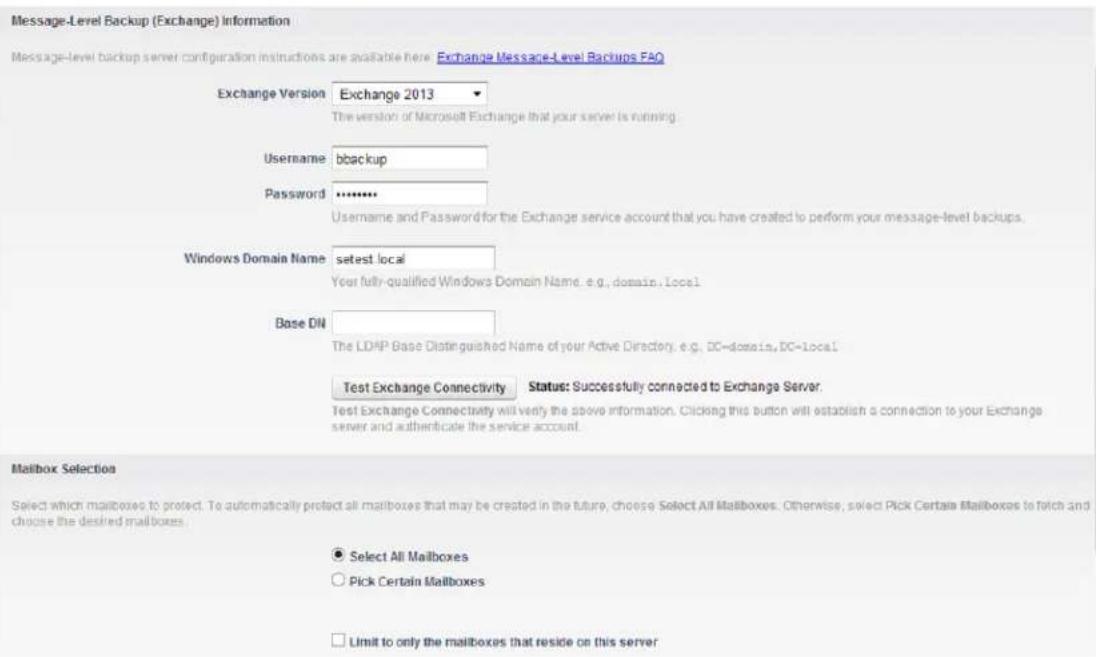
- Click .Save
Microsoft Hyper-V
In this Section
• How to Set Up Microsoft Hyper-V Virtual Machine Backups
• How to Set Up Hyper-V 2008 Clustering
• How to Exclude Individual Virtual Machines from a Hyper-V 2008 Cluster Backup
How to Set Up Microsoft Hyper-V Virtual Machine Backups
This article refers to Barracuda Backup Server firmware version 5.0 and higher, and Microsoft® Hyper-V 2008, 2008 R2, 2012, and 2012 R2.
In this article:
• Install the Barracuda Backup Agent
- Run the Barracuda Backup Agent as a Service
- Set Up Child Partition Snapshot
- Add the Hyper-V Server
- Set Up Data Sources
Related Articles
• How to Set Up Hyper-V 2008 Clustering
• How to Exclude VMs from a Hyper-V 2008 Cluster Backup
- How to Restore a Microsoft Hyper-V Virtual Machine
The Barracuda Backup Agent provides application-aware backups for Microsoft Hyper-V hypervisor-based virtualization systems and provides support for open file backups, file attributes, and permissions, as well as a automatic data source detection.

Hyper-V 2012 Management Console
Hyper-V 2012 Management Console tasks are disabled during backups.
Install the Barracuda Backup Agent
Use the following steps to install the Barracuda Backup Agent (Windows) on the Hyper-V Server.
-
Log into the Barracuda Backup web interface.
-
On the SYSTEM > Software Downloads page, download Barracuda Backup Agent (Windows) to each Hyper-V Server you want to back up.
- On the Hyper-V Server, double-click the Agent program to launch the installer.
- In the Installation Manager, click the icon.Install
- Click to install the software in the installation directory.Next
- When installation is complete, click to close the window.OK
Run the Barracuda Backup Agent as a Service
Once installed, complete the following to run the service:
- On the Hyper-V server, click , and type:Start > Run services.msc
- Press to run the serviceEnter.
Set Up Child Partition Snapshot
In the Hyper-V console, navigate to the Settings on each virtual machines, and under Integrations settings, select Backup (Volume Snapshot); if you do not turn on this option, the default backup is set to Saved State which can cause issues during restoration.

A Child Partition Snapshot backs up the virtual machine by building an .avhd snapshot file by using the guests operating system (the virtual machine) VSS writers to read the files internally without having to pause the system. Conversely, a Saved State backup uses the host system (physical machine) VSS writers only and pauses the guest system to build a backup.
The Saved State backup is not recommended as it temporarily stops the virtual machine to back it up, which can cause issues when restoring virtual SQL or Exchange environments from such a backup.
Add the Hyper-V Server
Use the following steps to add Hyper-V Server data sources.
- Once the agent is installed, select the Barracuda Backup Server in the left pane, and on the BACKUP > Sources page, click Add Computer.
-
Enter the following details for the Hyper-V Server:
-
Enable Backups - Turn on to back up the Hyper-V Server based on the configured backup schedule, or turn off if the backup schedule does not apply.
- Computer Description - Enter a name to identify the server on the BACKUP > Sources page.
- Computer Name - Enter the fully qualified domain name (FQDN) or IP address of the Hyper-V Server.
-
Computer Type - Select Microsoft Windows from the drop-down menu.
-
Click Save. The Add Data Source page displays.
Set Up Data Sources
In the BACKUP > Sources > Add Data Source page, enter the following details:
- Select Barracuda Agent Software from the Data Type drop-down menu.
- The Backup Status section displays based on your selection when setting up the server.
- Click Test Software Connectivity to verify the Barracuda Backup Server can communicate with the Barracuda Backup Agent (Windows).
- If the test is not successful, click Cancel and verify the following:
- The FQDN or IP address was entered correctly.
• The Barracuda Backup Agent (Windows) is installed and running on the server.
- If the test returns successful, continue to step 4.
- In the Item Selection section, select whether to Select All Items or click Select Specific Items to select individual files and folders for backup.
- If you are backing up to Barracuda Cloud Storage, turn on Replicate to Barracuda Cloud Storage.
- If you want to replicate data to another Barracuda Backup Server, turn on Replicate to Other Barracuda Backup Servers, and click Add a new Backup Server.
- In the Add Destination page, enter the details for the Barracuda Backup Server to which you wish to replicate, and click Save.
How to Set Up Hyper-V 2008 Clustering
This article refers to Barracuda Backup firmware version 5.3 and higher, and Microsoft ^® Hyper-V 2008 and 2008 R2 hypervisor-based virtualization systems. This article assumes Hyper-V is installed and configured.
In this article:
• Install the Barracuda Backup Agent
• Run the Barracuda Backup Agent as a Service
- Set Up Child Partition Snapshot
- Add the Hyper-V Server
Related Articles
• How to Restore a Microsoft Hyper-V Virtual Machine
• How to Set Up Microsoft Hyper-V Virtual Machine Backups
- How to Exclude Individual Virtual Machines from a Hyper-V 2008 Cluster Backup
The Barracuda Backup Agent provides application-aware backups for Microsoft Hyper-V hypervisor-based virtualization systems and provides support for open file backups, file attributes, and permissions, as well as a utomatic data source detection.

CSV Utilization
Because of the Microsoft feature Redirected access, in cases where cluster shared volumes (CSVs) are being utilized, you must stagger backup schedules, or schedule backups for each source/host at separate times. For more information, refer to the Microsoft TechNet article Event ID 5136 - Cluster Shared Volume Functionality.
Install the Barracuda Backup Agent
Use the following steps to install the Barracuda Backup Agent on the Hyper-V Server.
- Log in to the Barracuda Backup web interface, and select the associated Barracuda Backup Server in the left pane.
- On the SYSTEM > Software Downloads page, download Barracuda Backup Agent (Windows) to each Hyper-V Server you to want to back up.
- On the Hyper-V Server, double-click the Agent program to launch the installer.
- In the Installation Manager, click the icon.Install
- Click to install the software in the installation directory.Next
- When installation is complete, click to close the window.OK
Run the Barracuda Backup Agent as a Service
Once installed, complete the following to run the service:
- On the Hyper-V server, click Start > Run, and type: services.msc
- Press Enter to run the service.
Set Up Child Partition Snapshot
In the Hyper-V console, navigate to the Settings on each virtual machines, and under Integrations settings, select Backup (Volume Snapshot); if you do not turn on this option, the default backup is set to Saved State which can cause issues during restoration.

A Child Partition Snapshot backs up the virtual machine by building an .avhd snapshot file by using the guests operating system (the virtual machine) VSS writers to read the files internally without having to pause the system. Conversely, a Saved State backup uses the host system (physical machine) VSS writers only and pauses the guest system to build a backup.
The Saved State backup is not recommended as it temporarily stops the virtual machine to back it up, which can cause issues when restoring virtual SQL or Exchange environments from such a backup.
Add the Hyper-V Server
Use the following steps to add Hyper-V Server data sources.
- Once the agent is installed, select the Barracuda Backup Server in the left pane, and on the BACKUP > Sources page, click Add Computer.
- Enter the following details for the Hyper-V Server:
- Enable Backups - Turn on to back up the Hyper-V Server based on the configured backup schedule, or turn off if the backup schedule does not apply.
- Computer Description - Enter a name to identify the server on the BACKUP > Sources page.
• Computer Name - Enter the fully qualified domain name (FQDN) or IP address of the Hyper-V Server.
- Computer Type - Select from the drop-down menu. Microsoft Windows
- Click . The page displays.Save Add Data Source
- Select Barracuda Agent Software as the Data Type, and click Test Software Connectivity to verify connection to the Backup Agent:
Add Data Source
Backup
Data Type Barracuda Agent Software Identify the backup method to use.
Backup Status
Select to back up this data source on the configured backup schedule. If this is unchecked, then the backup schedule will not apply to this data source.
Enable Backups
Agent Software
Download a copy of the Barracuda Backup Agent from the software page Test Software Connectivity to verify that the Barracuda Backup Server can communicate with the Barracuda Backup Agent.
Test Software Connectivity Status: Successfully connected to Backup Agent software.
- In the Item Selection section, click Select All Items to back up all content, or click Select Specific Items, and specify the items to be backed up:
Item Selection
Use Select All Items to back up all data recognized by the Barracuda Backup Agent. Use Select Specific Items to narrow the scope of your backup. De-selecting an item will cause that to be purged after 24 hours.
○ Select All Items
Select Specific Items
Items

File Systems

Hyper-V Virtual Machines

17 Amarr (Sharepoint 07)

17 Caldari (SP 2010)

17 Gallente (Sharepoint 01)

17 Jove (Sharepoint 13)

17 Minmatar (Sharepoint 03)

Important
In cases where virtual machines have the potential of moving between hosts, you must:
- Click Select All Items in the Item Selection section of the web interface to select the entire host.
-
Edit the Barracuda Agent bbconfig.ini file to exclude certainly virtual machines.
-
Click Save.
- Repeat steps 1 through 6 for each host in the cluster.
This article refers to Barracuda Backup firmware version 5.3 and higher, and Microsoft Hyper-V 2008 and 2008 R2
hypervisor-based virtualization system
Related Articles
• How to Set Up Hyper-V 2008 Clustering
- How to Set Up Microsoft Hyper-V Virtual Machine Backups
In some instances it may be necessary to exclude certain virtual machines from backup when implementing a clustered Hyper-V environment. To do so, you must configure the Barracuda Backup Agent (Windows) to ignore those virtual machines you wish to exclude from backup. Edit the Barracuda Backup Agent
Use the following instructions to edit the Barracuda Backup Agent on the Hyper-V Server:
- On the , open Services.Hyper-V Server where you installed the Barracuda Backup Agent (Windows)
- Right-click on the Service Barracuda Backup Agent, and click Stop. The Service is now stopped.
- Open the file in Notepad; the file is located in the following directory:bbconfig.ini
/Program Files/Barracuda/Barracuda Backup Agent/conf
- Add the following lines to the end of the file:
ignorelist=VMname1, VMname2, VMname3
For example:
![[installControl] buildNumber=84705 installedVersion=5.3.00-rel [configuration] nodeGuid={00001001-DEF99082-DEF99082-DEF99083} [Hyper-V Virtual Machines] ignorelist=VMname1,VMname2,VMname3](/content/2026/06/1260286/images/9f5665844b59d64aa75f4948c132d141ce7d648ae0659f5b69dd63fea9b6c47a.jpg)
- Save and close the file.
- Open Services once again.
- Right-click on the Service Barracuda Backup Agent, and click Start. The Status field should display as Started.
Microsoft SQL Server
In this Section
• How to Back Up Microsoft SQL Server Databases
• How to Enable VSS Backups for Microsoft SQL Server
How to Back Up Microsoft SQL Server Databases
This article refers to Barracuda Backup firmware 5.0 and higher, and Microsoft SQL Server running the Barracuda Backup Agent (Windows).
In this article:
-
Add the SQL Server as a Data Source
• Create Backup Schedules -
Modify Your Backup Rate Limit (Optional)
- Exclude Files from a Backup (Optional)
• Create Data Retention Policies - Check Backup Reports
Related Articles
- Schedules Page
• Retention Policies Page - Backing Up a SQL Server Database Using VSS
Add the SQL Server as a Data Source
Use the following steps to configure the SQL Server and data sources using the Barracuda Backup Agent (Windows):
- Log in to Barracuda Backup, and select the associated Barracuda Backup Server in the left pane.
- Go to the page.SYSTEM > Software Downloads
- Download and install the Barracuda Backup Agent (Windows) on the SQL Server.
- Go to the page, and click to identify the system.BACKUP > Sources Add Computer
- Enter the details for your SQL Server, and click .Save
- In the Data Sources page, select Barracuda Agent Software as the Data Type, and click Test Software Connectivity to verify the Barracuda Backup Server can connect to the Agent installed on the SQL Server.
- In the Items Selection section, click Select All Items to backup the entire Server, or click Select Specific Items to select individual items for backup.
- To back up to Barracuda Cloud Storage, turn on Replicate to Barracuda Cloud Storage.
- Click Save. The SQL Server is added as a data source.
Create Backup Schedules

Note that schedules are automatically created (with the default set to back up every day at 8:00PM) when a data source is created except if a schedule specifying all data sources already exists.
Now that you have configured your computers and data sources, you can create backup schedules, either individually or for all sources. If no schedule is created for a data source then it will not be backed up.
To create a backup schedule:
Click here to expand...
- Log in to the Barracuda Backup web interface, and select the associated Barracuda Backup Server in the left pane.
- Go to the BACKUP > Schedules page. Click Add a Schedule and fill in the information on the Add Backup Schedule page:
- Schedule Name - Enter a label to identify the backup schedule.
- Items to Back Up - Turn on Apply to All Computers and Data Sources for this Barracuda Backup Server to back up all content, or turn this option off to expand and select individual items for backup.
- Schedule Timeline - Turn on the days on which the back up is to run.
-
Daily Backup Timeline - Enter the start time; turn on Repeat if you wish to specify a time period and end date to repeat the backup.
-
If the backup schedule is for Microsoft SQL or Microsoft Exchange, you must specify the type of backup to run:
• Full - This backup type performs a full backup of data, including the transaction logs.
- Log - This backup type only backs up transaction logs created since the last full backup.
- Smart - This backup type is a combination of the full backup and the transaction log backup, minimizing the impact of backups on network resources necessary to transfer data off site. Barracuda Networks recommends this backup type for SQL and Exchange servers. With the Smart Backup type, threshold values are used to determine when to switch between full and log backups. The minimum threshold value specifies how many days Barracuda Backup continues to back up transaction logs before another full backup is run. After the minimum threshold value is met, Barracuda Backup determines whether to perform another backup based on the binary data queue. If the binary data queue size exceeds 1 GB, Barracuda Backup continues
the transaction log backup until the maximum threshold level is met, or the queue size drops below 1 GB.
Modify Your Backup Rate Limit (Optional)
Rate limits control the data replication rate to Barracuda Cloud Storage or other offsite storage locations. You can limit Internet bandwidth consumption during peak usage times, and schedule backups for non-peak hours.
Your initial offsite backup may take on the order of days to complete but all of the data is backed up locally on the Barracuda Backup Server during this period. After the initial large transfer is complete, replicating your data offsite should complete with only a few hours of transfer each day. By default, Barracuda Backup is configured to run full speed data transfers at night so that bandwidth is not affected while most people are at work. An alternate rate limit allows you to adjust the limit speed and time interval.
The length of transfer time it will take to get your data offsite is impacted by the compression and de-duplication rates on your data, the uplink speed of your Internet connection, the amount of data that changes every day, and any speed limits you apply to Barracuda Backup.
To adjust the backup rate limit:
Click here to expand..
- Log in to the Barracuda Backup web interface, and select the associated Barracuda Backup Server in the left pane.
- On the BACKUP > Rate Limit page, select a Barracuda Backup Server on the left menu and create or edit the rate limit.
- You can specify a default rate limit and an alternate rate limit which is maintained only during the specified time periods.
Exclude Files from a Backup (Optional)
You can create exclusion rules that use pattern matching to identify directory or file names that are not to be backed up. Files which are typically excluded from backups include temporary files, music, movies and other files which are not essential for business needs.
Use the following steps to create an exclusion rule:
Click here to expand...
- Log in to the Barracuda Backup web interface, and select the associated Barracuda Backup Server in the left pane.
- Go to the BACKUP > Exclusions page of the Barracuda Backup web interface. Click Add an Exclusion.
-
Fill in the information on the Add an Exclusion page:
a. Exclusion Rule Name - Enter a descriptive label to identify the exclusion rule.
b. Add Exclusions to Reports - Turn on to include exclusions in reports, and turn off to exclude the rules from reports.
c. Apply Recursively to Sub Directories - Specify whether to apply the exclusion rule recursively to sub directories.
d. Where to Exclude - Turn Apply to All Computers and Data Sources for this Barracuda Backup Server on to apply the exclusion rule to all, or turn off, then expand and select individual items to which to apply the exclusion rule. -
the Specify what to exclude in What to Exclude section:
a. From the Preset Expressions menu, select the content to exclude, for example, Video files, then click Add.
b. In the Expressions field, enter a search string to exclude, for example, *.mp3, then click Add.
- Click Save at the top of the page to add the exclusion rule.
To edit an existing exclusion rule, go to the BACKUP > Exclusions page of the Barracuda Backup web interface, and click Edit following the exclusion rule you wish to edit. Make the desired changes, then click Save.
To delete an exclusion rule, go to the BACKUP > Exclusions page of the Barracuda Backup web interface, and click the Delete icon following the exclusion rule you wish to remove. Click OK to confirm you wish to remove the rule.
Create Data Retention Policies
Data is retained based on a traditional grandfather-father-son (daily-weekly-monthly) rotation model. You can specify how long to keep daily, weekly, monthly, and yearly backups by creating data retention policies. Different retention policies can be created for different sets of data including files, data backed up by the Barracuda Backup Agent (Exchange, SQL, System State), and email messages.
You can create one policy for all of the computers and data sources on a Barracuda Backup Server or multiple policies that each include some subset of the data.
To set retention policies:
Click here to expand...
- Log in to the Barracuda Backup web interface, and select the associated Barracuda Backup Server in the left pane.
- Go to the BACKUP > Retention Policies page, click Add a Retention Policy, and enter a name to identify the policy.
- In the Items to Retain section, specify the data sources to which the retention policy applies; the Retention Timeline section displays. Select a timeline template on which to base your retention policy, or specify your own revision timeline.
4. Select the desired setting, and click .Removed Files Rule Save
When data is removed according to a retention policy, it is deleted from both the local Barracuda Backup Server and the offsite storage locations. Removed files that have been backed up using Network File Shares Protocol or SSHFS may be retained for a longer period of time, according to the configuration. Otherwise, once your data has been purged, it is gone forever. Purging applies to historic file revisions only; your current data is not impacted by a retention policy.
Check Backup Reports
View reports on an ongoing basis as needed. The REPORTS > Backup page contains detailed backup reports. A list of in progress backups displays at the top of the page, and once a backup is complete, a detailed report displays in a table by device. Click Details following the report you wish to view.
How to Enable VSS Backups for Microsoft SQL Server
This article refers to firmware version 5.3 or higher, and Microsoft®SQL Server®2012, 2008, 2008 R2, and 2005 SP1 or higher databases.
Related Articles
• How to Back Up Microsoft SQL Server Databases
• Barracuda Backup Agent File Structure
Barracuda Backup protects Microsoft SQL Server 2012 using the Microsoft Volume Shadow Copy Service (VSS). With VSS, Barracuda Backup is able to perform full and differential database backups.
In Barracuda Backup firmware version 5.2 and earlier, the Barracuda Backup Agent utilized the SQL Server Virtual Device Interface (VDI) to implement SQL database backup and restore operations. The VDI technology provides the ability to backup and restore full and incremental backups of the SQL databases and is enabled by default on the Barracuda Backup Agent. In firmware 5.3 and higher, the Barracuda Backup Agent can leverage VSS for other versions of SQL.
i Requirements
Verify the following is true on the Microsoft SQL Server:
- Barracuda Backup Agent is installed, and
- The SQL Server has been added as a Barracuda Backup data source.
Edit the Barracuda Backup Agent
Use the following instructions to edit the Barracuda Backup Agent installed on the SQL Server:
- On the SQL Server where the Barracuda Backup Agent is installed, open Services.
- Right click on the Service Barracuda Backup Agent, and click Stop. The Service is now stopped.
- Open the file in Notepad; the file is located in the following directory:bbconfig.ini
/Program Files/Barracuda/Barracuda Backup Agent/conf
- Add the following lines to the end of the file based on the installed version of SQL Server.
- For SQL Server 2012: [configuration] vssSqlVersion=11

SQL Server Version
In the line vssSqlVersion=11, the number 11 represents the major release version of your SQL Server; replace this number accordingly. For example, the major release number for both SQL Server 2008 and SQL Server 2008 R2 is 10
![[installControl] buildNumber=84705 installedversion=5.3.00-rel [configuration] nodeGuid={00001001-E38CF7F1-E38CF7F1-E38CF7F2} [Microsoft SQL Server Agent] restoreToFilePath=C:\testing [configuration] vssSqlVersion=11](/content/2026/06/1260286/images/347aad8dbd4ebf0747b631f45b52404f9ce27fc12b02c464f0c629c4c14c2caa.jpg)
• For SQL Server 2008 or 2008 R2:
[configuration]
vssSqlVersion=10
![[installControl] buildNumber=84705 installedversion=5.3.00-rel [configuration] nodeGuid={00001001-E38CF7F1-E38CF7F1-E38CF7F2} [Microsoft SQL Server Agent] restoreToFilePath=C:\testing [configuration] vssSqlVersion=10](/content/2026/06/1260286/images/479398ffd09f4cdf1f519dee8c6884a36ccce001e552ccc3e68bc806733207f7.jpg)
• For SQL Server 2005 SP1 or higher:
[configuration]
vssSqlVersion=9
![[installControl] buildNumber=84705 installedversion=5.3.00-rel [configuration] nodeGuid={00001001-E38CF7F1-E38CF7F1-E38CF7F2} [Microsoft SQL Server Agent] restoreToFilePath=C:\testing [configuration] vssSqlVersion=9](/content/2026/06/1260286/images/93329c895e6eb9252303a2476febd4c93c7fae7b2e375db975d6d0ac5c26d505.jpg)
-
Save and close the file.
-
Open Services once again.
- Right click on the Service Barracuda Backup Agent, and click Start. The Status field should display as Started.
VSS is now enabled to implement full and differential SQL database backup and restore operations.
VMware
In this Section
• How to Set Up a VMware Server and Guests
• VMware Data Recovery Backup and Restore Permissions
How to Set Up a VMware Server and Guests
This article applies to Barracuda Backup firmware version 4.2 or higher, and VMware® 4.0 and above with the VMware license which includes access to vSphere® Data Recovery API. Note that in Barracuda Backup firmware version 5.4 and higher, you can back up parallel VMware virtual machines (VMs)—up to five VMs per ESX/i host.
In this article:
• Parallel VMware Backup
- Changed Block Tracking
- Configure the Data Source
- Modify the Data Source
Related Articles
• How to Restore a Virtual Machine to its Original Location
• Understanding Changed Block Tracking on Virtual Machines
• VMware Data Recovery Backup and Restore Permissions
Barracuda Backup utilizes the vSphere Data Recovery API to backup and restore the VMware Host configuration as well as VMware guests. VMware host backup provides a comprehensive disaster recovery option for VMs and provides the ability to recover VMs to any VMware host accessible by the Barracuda Backup Server.

Best Practices
To prevent errors and warnings, and to improve performance when setting up a VMware backup:
- Ensure the has sufficient space;datastore
- Enable ; andchanged block tracking
- Uninstall any third-party backup agents.
Parallel VMware Backup
In firmware realease 5.3 and higher, you can back up multiple guests on the same host concurrently. The following table lists the default number of guest machines that you can back up simultaneously during a VMware backup by device:
| Barracuda BackupDevice Number | Default Number of Guest Machines |
| 190 3 | |
| 390 5 | |
| 490 7 | |
| 690 8 | |
| 890 10 | |
| 990 15 | |
| 1090 20 |
Changed Block Tracking
To avoid warning messages when setting up a VMware backup, you can enable Changed Block Tracking (CBT). When enabled, CBT displays in the data source list:
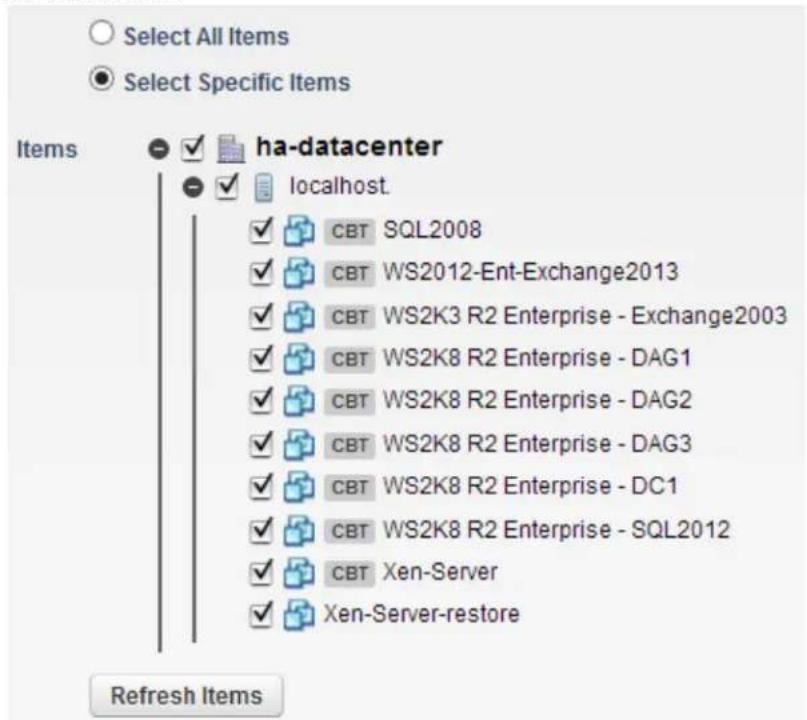
Configure the Data Source
Use the following steps to add a computer and configure the data source through Barracuda Backup:
- Log in to Barracuda Backup as the administrator, and go to the page.BACKUPS > Sources
-
Click Add Computer, and complete the details for the data source:
-
Enable Backups - Turn on to enable backups for the VMware host; this option is turned on by default
- Computer Description - Enter a name to identify the host (for example, ESX, ESXi, vCenter) field
• Computer Name - Enter the name or IP address of the VMware host on the network
• Computer Type - Select from the drop-down menuVMware -
Username/Password - Enter the credentials to access the VMware host
-
Click Test Credentials to verify the Barracuda Backup Server can communicate with the VMware host.
- Click Save to save the configuration for the new data source; the VMware host data source is detected and added automatically.
- In the page, select the virtual machines you wish to backup: Add Data Source
- Click Select All Items to back up all data recognized by the VMware host, or
- Click Select Specific Items and expand the tree to view the virtual machines available for backup on the VMware host; turn on those virtual machines you wish to back up
- Save to save the configuration for the data source.
The VMware data source displays in the Data Sources page.
Modify the Data Source
Use the following steps to modify the VMware data source:
- Log in to Barracuda Backup web interface, and select the associated Barracuda Backup Server in the left pane.
- Go to the BACKUP > Sources page.
- To the right of the VMware data source name, click Edit.
- Make the desired changes, and click Save.
This article refers to Barracuda Backup firmware version 5.0 or higher, and VMware® ESX/ESXi host machines, or vCenter Server version 4.0 or higher with vSphere except where noted.
In this article:
• ESX/ESXi Host Machine Permissions
• vCenter Server Role for Backup and Recovery
• vCenter Server Role for Scheduled Backup Operations Permissions
• Barracuda Backup Set Up and Restore Permissions
| Related ArticlesVMware Data Recovery Licenses |
| Additional ResourcesVMware Data Recovery Administration Guide |
ESX/ESXi Host Machine Permissions
At a minimum, you must have the following permissions assigned to the user role on an ESX/ESXi virtual machine:
Table 1. ESX/ESXi User Role Permissions.
| System Configuration Disk Change Tracking | ||
| Virtual Machine Provisioning Allow read-only disk access | Allow virtual machine download | |
| Virtual Machine State Create snapshot | Remove snapshot | |
| Global DisableMethods | EnableMethodsLicense | |
If you are using SCSI hot-adding on an ESX/ESXi virtual machine, the user role must have the following permissions:
• All of the permissions listed in Table 1, and
- The Barracuda Backup must have all of the permissions listed in Table 2:
Table 2. Barracuda Backup Minimum Permissions.
| System Configuration Permissions | ||
| Datastore Allocate space | • | |
| Virtual Machine Configuration Add existing disk | • | |
| • Add new disk | ||
| • Add or remove device | ||
| • Change resource | ||
| • Remove disk | ||
| • Settings | ||
vCenter Server Role for Backup and Recovery
If you wish to assign privileges to a vCenter Server user or a user in Active Directory (AD), you can create a new user with the VMware vCenter roles.

The recovery operation requires privileges for operations on hosts, networks, and datastores. You must apply this new role to the Datacenter object or higher in the VMware vCenter Server hierarchy for the user specified in the VMcuser option and Propagate to Child Object must be turned on when adding the permission.
To create a vCenter Server role for backup and recovery operations, log in to the vCenter Server using the vSphere Client, and add the permissions listed in Table 3:
Table 3. vCenter Server Role Permissions.
| Location Configuration Permissions | ||
| Datastore Allocate space | Browse datastoreLow-level file operations | |
| Global Licenses | Guest Operation ModificationsGuest Operation Program ExecutionGuest Operation Queries | |
| Guest Operations^(1)(2) | ||
| Network Assign network | • | |
| Resource Assign virtual machine to | ||
| vApp Add virtual machine | Assign resource poolCreate | |
| Virtual Machine Configuration | Add existing/new diskAdd/remove deviceAdvancedChange CPU countChange resourceDisk change trackingDisk LeaseHost USB deviceMemoryModify device settingRaw deviceReload from path(4)Remove diskRenameReset guest informationSettingsSwapfile placementUpgrade virtual hardware | |
| Virtual Machine Inventory Create new | RegisterRemoveUnregister | |
| Virtual Machine Provisioning Allow disk access | Allow read-only disk accessAllow virtual machine download | |
| Virtual Machine^(2) | Snapshot Management(2)(State | Create snapshotRemove snapshotRevert to snapshot |
| Virtual Machine^(3) | State^(3) | Create snapshotRemove snapshotRevert to snapshot |
| Notes:(1) Guest Operations permissions are necessary only if you are using Data Protection for VMware to protect Microsoft Exchange Server or Microsoft SQL Server applications running inside a virtual machine guest.(2) vSphere 5.0 only.(3) vSphere 4.0 only.(4) vCenter Server 4.1 only. | ||
vCenter Server Role for Scheduled Backup Operations Permissions
To add a vCenter Server role for backup operations only, add a role using the vSphere Client, and add the permissions listed in Table 4.

You must apply this new role to the target host (ESX/ESXi) object or higher in the VMware vCenter Server hierarchy for the user specified in the VMcuser option, and Propagate to Child Object must be turned on when adding the permission.
Table 4. vCenter Server Role for Backup Operations Permissions.
| Location Configuration Permissions | ||
| Guest Operations ^(1)(2) | Guest Operation ModificationsGuest Operation Program ExecutionGuest Operation Queries | |
| Virtual Machine Configuration | Disk change trackingDisk Lease | |
| Virtual Machine Provisioning | Allow read-only disk accessAllow virtual machine download | |
| Virtual Machine ^(2) | Snapshot Management ^(2),(3) State | Create snapshotRemove snapshot |
| Virtual Machine ^(3) | State ^(3) | Create snapshotRemove snapshot |
| Notes:(1) Guest Operations permissions are necessary of you Microsoft SQL Server for VMware to protectMicrosoft SQL Server applications running inside a virtual machine gue(2) vSphere 5.0 only.(3) vSphere 4.0 only. | ||
Barracuda Backup Set Up and Restore Permissions
To set up and restore a VMware virtual machine as a data source in the Barracuda Backup web interface, you must have administrator privileges to the virtual machine. Once your credentials are verified and the data source is set up and backups are enabled, use the RESTORE page to restore a virtual machine. For more information on this VMware requirement, refer to the VMware Data Recovery Administration Guide available on the VMware website.
How to Back Up Microsoft Active Directory
This article refers to Barracuda Backup firmware version 5.0 or higher, and Microsoft®Active Directory (AD).
Barracuda Networks recommends enabling Active Directory Recycle Bin before backing up content. Refer to the Microsoft TechNet article for details. Enable Active Directory Recycle Bin
Controllers, and is performed by backing up the System State on those
servers. Barracuda Backup utilizes the Barracuda Backup Agent
to back up and restore the Microsoft Windows System State.(Windows)
Back up the System State to have a backup of critical system-related components.
The System State backup contains the following:
- Local Registry
• COM+ Class Registration Database - System Boot Files
• Active Directory Database File (NTDS.DIT) for Domain Controllers - SYSVOL folder
Related Articles
- Restore a Windows Server 2012 AD Object from the AD Recycle Bin
- Enable AD Recycle Bin on Windows Server 2012
- Restore a Windows Server 2008 R2 AD Object from the AD Recycle Bin
- Enable AD Recycle Bin on Windows Server 2008 R2
A System State backup allows you to recover to a known "good" system state after a hardware or software crash.
Use the following steps to add a computer and configure the data source on Barracuda Backup:
- Log in to the Barracuda Backup web interface, and select the associated Barracuda Backup Server in the left pane.
- Go to the BACKUP > Sources page, and click Add Computer to identify the system.
- Enter the data description, and select the appropriate data type; click .Save
- The page displays. Choose to select all items or specified items.Add Data Source

System State must be selected to restore AD.
-
Turn on Replicate to Other Barracuda Backup Servers, and click Save.
-
Once configured, create a schedule to define how often the data is to be backed up on the BACKUP > Schedules page, and define a policy for how long the data is to be retained on the BACKUP > Retention Policies page.

Tombstone Lifetime
To ensure a good backup you should be aware of the tombstone lifetime. The tombstone lifetime is the number of days before a deleted object is removed from the directory services. A backup that is older than the tombstone lifetime (the default is 60 days) set in Active Directory is not a good backup. At a minimum, perform at least two backups within the tombstone lifetime. Active Directory incorporates the tombstone lifetime into the backup and restore process as a means of protecting itself from inconsistent data.
How to Back Up and Restore a Microsoft SharePoint SQL Database
This article refers to Barracuda Backup firmware version 5.0 and higher, and Microsoft® SharePoint 2003, 2007, and 2010.
In this article:
• Install the Barracuda Backup Agent
- Add SharePoint as a Data Source
• SharePoint Backup Considerations
- Site Recycle Bin
• SharePoint Backup Best Practices
• Backing Up SharePoint using STSADM
- Restore SharePoint using STSADM
• PowerShell and STSADM Backup Commands
Related Articles
• How to Create a Pre- or Post-Agent Backup Command Batch File or Script
- Configuring a Replication Destination
- Backing Up Using PowerShell and STSADM
Additional Resource
- Back up a farm configuration (SharePoint Foundation 2010)
• SharePoint Governance and Manageability - Backup: Stsadm operation (Office SharePoint Server)
You can back up Microsoft SharePoint databases using Barracuda Backup for storage. The Barracuda Backup Agent provides a complete backup of Windows SharePoint Services (WSS).

Important
Do not use other methods to back up Microsoft SharePoint databases, such as Microsoft or third-party utilities, when using the Barracuda Backup Agent. If you use more than one back up method on the same database, one or more of those methods may cause truncation of the transaction logs. This forces a full backup of the database every time, and can result in data that cannot be restored.
If you wish to run pre or post Barracuda Backup Agent commands, you can edit the bbconfig.ini file. For details, refer to How to Create a Pre- or Post-Agent Backup Command Batch File or Script.
To perform a consistent restore of the WSS, ensure that the following components are included in the SharePoint back up; if you select the entire system, the backup automatically includes all of these components:
- Windows SharePoint Services Installation Directory - This directory and its sub directories contain WSS installation and configuration files including binaries, site templates, style sheets, customization information for site definitions, etc.
- Microsoft Internet Information (IIS) Virtual Servers - WSS uses one or more virtual servers to host websites. In SharePoint 2003 and WSS 2.0 the entire configuration for the IIS website is stored in the configuration and content databases.

SharePoint 2003/WSS 2.0
In SharePoint 2003 and WSS 2.0 the entire configuration for the IIS website is stored in the configuration and content databases.
- Windows SharePoint Services Databases - By default WSS installs a Microsoft SQL Server Desktop Engine/SQL Server Embedded Edition (WMSDE/SSEE) called SHAREPOINT or Microsoft SSEE and creates a configuration and content database.
- Usage Analysis Logs - Enable usage analysis logging to generate daily WSS log files to track website usage.
Install the Barracuda Backup Agent
Use the following steps to install the Barracuda Backup Agent (Windows) on the SharePoint server:
- Log in to the Barracuda Backup web interface, and select the associated Barracuda Backup Server in the left pane.
- Go to the SYSTEM > Software Downloads page, and download the Barracuda Backup Agent (Windows) to each SharePoint server you want to back up.
- Once downloaded, install the Agent.
Add SharePoint as a Data Source
Use the following steps to add the SharePoint database as a data source:
- Log in to the Barracuda Backup web interface, and go to the BACKUP > Sources page.
- Click, and enter the details for your SharePoint database, and click .Add Computer Save
- In the Data Sources page, select Barracuda Agent Software as the Data Type, and fill in the details for the SharePoint database.
- Click Test Software Connectivity to verify the Barracuda Backup Server can connect to the Agent installed on the SharePoint server.
- In the Items Selection section, click Select All Items to back up the entire database, or click Select Specific Items to select individual items for backup.
- To back up to Barracuda Cloud Storage, turn on Replicate to Barracuda Cloud Storage.

Backup Schedules
To replicate to another Barracuda Backup Server, refer to Configuring a Replication Destination.
7. Click .Save

Backup Tasks
Once you add the SharePoint database as a data source, complete the following data backup tasks:
• Task 3: Create Backup Schedules
• Task 4: Create Data Retention Policies
• Task 5: Modify Your Back Up Rate Limit (Optional)
- Task 6: Exclude Files from a Backup (Optional)
- Task 7: Create Rules to Watch Important Backup Files (Optional)
• Task 8: Check Backup Reports
SharePoint Backup Considerations
In SharePoint 2007 and WSS 3.0 you must stop the server farm to create a valid backup. The built-in tools do not recover these databases when restoring a server farm due to data synchronization issues with other SharePoint databases.
In SharePoint 2010 and higher you can backup and restore a server farm configuration. For more information, refer to the Microsoft SharePoint TechNet article Back up a farm configuration (SharePoint Foundation 2010). In SharePoint 2010 and higher you can back up the configuration database in PowerShell using the Backup-SPConfigurationDatabase command oBackup-SPFarm with the SPConfigurationOnly switch.

Important
You can only restore to a SharePoint environment with the same configuration.
Site Recycle Bin
In SharePoint 2010 SP1 and higher the Administrator can use the Site Recycle Bin to create a snapshot of subscriptions and site collections deleted through the SharePoint user interface or SharePoint tools. For more information, including set up instructions, refer to SharePoint Governance and Manageability. Additionally, refer to this article for details on adding similar functionality in SharePoint 2007 and WSS 3.0.
SharePoint Backup Best Practices
Schedule routine SharePoint server farm backups for consistent configuration and Central Administrator database recovery using the following steps:
- Log into the server running SharePoint Central Administration, open Microsoft SQL Server Management Studio.
- Navigate to, and stop the following services: Services and Applications > Services
| SharePoint 2010 | SharePoint 2007 | WSS 3.0 |
| SharePoint 2010 Administration | Microsoft Single Sign-On | Windows SharePoint Services Administration |
| SharePoint 2010 Timer | Office Document Conversions Launcher | Windows SharePoint Services Search |
| SharePoint 2010 Tracing | Office SharePoint Server Search | Windows SharePoint Services Timer |
| SharePoint 2010 User Code Host | Windows SharePoint Services Administration | Windows SharePoint Services Tracing |
| SharePoint 2010 VSS Writer | Windows SharePoint Services Search | Windows SharePoint Services VSS Writer |
| SharePoint Foundation Search | Windows SharePoint Services Timer | |
| World Wide Web Publishing Service | Windows SharePoint Services Tracing | |
| SharePoint Server Search | Windows SharePoint Services VSS Writer | |
| Web Analytics Data Processing Service | ||
| Web Analytics Web Service |
- At a command prompt, enter the following command, and then press :Return iisreset /stop
- Use the Barracuda Backup Agent to back up the server farm Configuration, Central Administration, Service Applications and Search databases.
- At a command prompt, enter the following command, and then press :Return iisreset /start
- Start the following services:
| SharePoint 2010 SharePoint 2007 WSS 3.0 | ||
| SharePoint 2010 Administration Microsoft Single Sign-On Windows SharePoint Services | Administration | |
| SharePoint 2010 Timer Office Document Conversions Launcher Windows SharePoint Services Search | ||
| SharePoint 2010 Tracing Office SharePoint Server Search Windows SharePoint Services Timer | ||
| SharePoint 2010 User Code Host Windows SharePoint Services Administration | Windows SharePoint Services Tracing | |
| SharePoint 2010 VSS Writer Windows SharePoint Services Search Windows SharePoint Services VSS Writer | ||
| SharePoint Foundation Search V4 Windows SharePoint Services Timer | ||
| World Wide Web Publishing Service | Windows SharePoint Services Tracing | |
| SharePoint Server Search 14 | Windows SharePoint Services VSS Writer | |
| Web Analytics Data Processing Service | ||
| Web Analytics Web Service | ||
-
Document any other configuration settings and customization for use if you need to recreate the configuration and Central Administration databases in the future.
-
You can export your alternate access mapping (AAM) settings to a text file using the stsadm -o enumalternatedomains command. You can then back up this file on the same schedule as the server farm.
- You can export Information Management Policies to an XML file through the Site Collection home page.
Backing Up SharePoint using STSADM
Use the following steps to back up a SharePoint database using STSADM:
- Create a backup folder on the server, for example, add a folder to drive F: F:\backup
- Go to Start > Run > cmd, and at the command prompt, enter the following to change the directory to the SharePoint BIN folder, and then press :Return
cd C:\program Files\Common Files\Microsoft Shared\web server\extensions\12\BIN

The folder '12' refers to SharePoint 2007; for SharePoint 2003, replace '12' with '11', and for SharePoint 2010, replace '12' with '14'.
- At the command prompt, enter the stsadm.exe command followed by the content location you wish to back up and the location and filename to which you wish to back up, and then press .Return
To back up the site collection, use the url parameter:
stsadm.exe -o backup -url
For example:
stsadm.exe -o backup -url https://sharepointserver:8090 - filename "F:\backup\Sharepointbackup .dat"
For a full or differential back up of an individual database, web application, or the entire SharePoint farm, use the backupmethod parameter:
stsadm.exe -o backup -directory<directory path> -BackupMethod [Full | Differential] -Item <content path >
- Allow the backup to complete.
- Go to the location where you backed up your content; the backup file should display in the folder.

Additional Information
For more information on STSADM back up operations, refer to the Microsoft TechNet article Backup: Stsadm operation (Office SharePoint Server).
See Backing Up Using PowerShell and STSADM for STSADM commands to back up specific types of content in a SharePoint server farm.
Restore SharePoint using STSADM
Use the following steps to restore a SharePoint database using STSADM:
- On the SharePoint server, go to Start > Run > cmd, and at the command prompt, change the directory to the SharePoint BIN folder, and then press :Return
- cd C:\program Files\Common Files\Microsoft Shared\web server\extensions\12\BIN

The folder '12' refers to SharePoint 2007; for SharePoint 2003, replace '12' with '11', and for SharePoint 2010, replace '12' with '14'.
- At the command prompt, enter the stsadm.exe command followed by the restore and overwrite parameters, and the location you wish to restore and from where you wish to restore, and then press :Return
stsadm.exe -o restore -url<location of the site to restore> - filename <backup location>.dat
-overwrite
For example:
stsadm.exe -o backup -urlhttps://sharepointserver:8090 - filename "F:\backup\Sharepointbackup.dat" -overwrite
- This overwrites the site with the backed up content.

Backup Tasks
Once you add the SharePoint database as a data source, complete the following data backup tasks:
• Task 3: Create Backup Schedules
• Task 4: Create Data Retention Policies
• Task 5: Modify Your Back Up Rate Limit (Optional)
- Task 6: Exclude Files from a Backup (Optional)
- Task 7: Create Rules to Watch Important Backup Files (Optional)
• Task 8: Check Backup Reports
PowerShell and STSADM Backup Commands
In addition to the Barracuda Backup Agent, you can back up using PowerShell and STSADM.
Click here to expand...
Content Database Backup - PowerShell Command
At a command prompt enter the following command, and then press :Return
Backup-SPFarm -Directory -BackupMethod [Full | Differential] -Item [-Verbose]
Content Databases Backup - STSADM Command
At a command prompt, enter the following command, and then press :Return
stsadm.exe -o backup -directory "F:\SharePointBackup" -backupmethod [Full | Differential] -overwrite -item databasename
Site Collection Backup - PowerShell Command

Site Lock
For a site collection, you must manage the site lock to block updates or deletions to the site collection during a backup.
At a command prompt enter the following command, and then press :Return
Backup-SPSite -Identity -Path [-Force] [-NoSiteLock] [-UseSqlSnapshot] [-Verbose] Site Collection Backup - STSADM Command
At a command prompt, enter the following command, and then press :Return
stsadm.exe -o setsitelock -url url_of_sitecollection -lock readonly stsadm.exe -o backup -filename "F:\SharePointBackup\filename_for_sitecollection" -overwrite -url sitecollection_url
stsadm.exe -o setsitelock -url sitecollection_url -lock none Export Site, List or Document Library Backup - PowerShell Command
At a command prompt enter the following command, and then press :Return
Export-SPWeb -Identity -Path [-ItemUrl] [-IncludeUserSecurity] [-IncludeVersions] [-NoFileCompression] [-GradualDelete] [-Verbose] Export Site Backup - STSADM Command
At a command prompt enter the following command, and then press :Return
stsadm -o export -url -filename [-overwrite] [-includeusersecurity] [-haltonwarning] [-haltonfatalerror] [-nologfile] [-versions] <1-4> [-cabsize] [-nofilecompression] [-quiet]

Use the NoFileCompression parameter to specify no file compression during export to reduce resource usage.
Service Application and Shared Services Provider Backup - PowerShell Command
At a command prompt enter the following command, and then press :Return
Backup-SPFarm -Directory -BackupMethod [Full | Differential] -Item [-Verbose] Service Application and Shared Services Provider Backup - STSADM Command
At a command prompt enter the following command, and then press :Return
stsadm -o backup -directory F:\backup -backupmethod [Full | Differential] -item SSP_NAME Web Application Backup - PowerShell Command
At a command prompt enter the following command, and then press :Return
Backup-SPFarm -Directory -BackupMethod [Full | Differential] -Item [-Verbose] Web Application Backup -STSADM Command
At a command prompt enter the following command, and then press :Return
stsadm.exe -o backup -directory "F:\SharePointBackup" -backupmethod [Full | Differential] -overwrite -item web_application_name
This article refers to Barracuda Backup firmware 3.0 and higher.
The Barracuda Backup Agent does not support IBM ^® Domino or IBM Notes, however, the Barracuda Backup Agent (Windows) protects IBM Domino databases on a Microsoft Windows 2003 or Windows 2008 platform using File System backup. Barracuda Backup does not support IBM Domino transaction logging.
In this article:
• IBM Domino Server Databases
• IBM Domino Server Backup
• Windows Volume Shadow Copy Service
Related Articles
- Create a Pre- or Post Agent Backup Command Batch File
Additional Resource
Barracuda Networks knowledgebase solution #0000 5950
An IBM Domino server is a collection of databases using a flat file structure. A review of the database files in an IBM Domino environment reveals that each user has a unique database for email, and that they may share application databases. This can result in hundreds or even thousands of smaller, unique database files in the IBM Notes /data directory. In comparison, an Exchange deployment has relatively few databases supporting an entire organization.
IBM Domino Server Databases
IBM Domino databases are accessed using IBM Notes clients. Within the database file there can be data, design elements, and programming code, and each database file has its own security in the form of an Access Control List (ACL). A IBM Domino database has a file extension of .nsf
IBM Domino Server Backup
A complete backup of an IBM Domino Server includes:
- IBM Domino Server data files
- All databases
- Template files
- Notes.ini file
- ID files

Before you begin a backup, verify the following files are open and running on the IBM Domino Server:
- Logs.nsf
- names.nsf
- mail.box
- Server ID file
Windows Volume Shadow Copy Service
Through the use of the Windows Volume Shadow Copy Service (VSS), the Barracuda Backup Service can consistently capture the open database files. Using VSS, the Barracuda Backup Service can perform both full and incremental backups of the IBM Domino server. Because the data may be made up of many small database files that can change daily, the incremental/differential backup can be very close to the master database in size. Due to the manner in which IBM Domino writes the changes to the end of the files, a large amount of deduplication occurs on these backups.
When using the VSS backup method, it is recommended that you execute the following two commands prior to the backup:
- nserver -c "drop all"
- nserver -c "dbcache flush"
This releases all open sessions and closes most open files. See How to Create a Pre- or Post-Agent Backup Command Batch File or Script if you wish to create a pre-backup command batch file.
How to Create a Pre- or Post-Agent Backup Command Batch File or Script
This article refers to firmware 5.3 and higher. This articles apply to the Barracuda Backup Agent (Windows) and BarracudaBackup Agent (Linux).
In this article:
- Barracuda Backup Agent Running on a Microsoft Windows System
- Stop a Process
- Start a Process
- Barracuda Linux Backup Agent Running on a Linux/Unix-Based System
Related Articles
• Understanding IBM Domino Server Backup
• How to Restore from Local and Offsite Backups
- Barracuda Backup Agent
Barracuda Backup Agent Running on a Microsoft Windows System
You can run a pre- or post-Agent backup command batch file by editing the bbconfig.ini fileThis enables you to stop and start certain processes on the host computer where the Barracuda Backup Agent (Windows) is installed. This can allow you to stop conflicting processes during the time that the Agent is backing up files.
Stop a Process
To automatically stop a specific process before starting the backup job, you can specify the batch file to stop the service.
- Navigate to the file on the server in the following location:bbconfig.ini
C:\Program Files\Barracuda\Barracuda Backup Agent\config\ - Open the bbconfig.ini file in a text editor, and in the[ configuration ] section, add two lines like:
the batch file to stop the process
preExecuteScript=c:\stop.bat
- Save and close the file.
Start a Process
To automatically start a specific process after completing the backup job, you can specify the batch file to start the service.
- Navigate to the file on the server in the following location:bbconfig.ini
C:\Program Files\Barracuda\Barracuda Backup Agent\config\ - Open the bbconfig.ini file in a text editor, and in the[ configuration ] section, add two lines like:
# the batch file to start the process
postExecuteScript=c:\start.bat
- Save and close the file.

If the pre-backup batch commands fail, the backup may not run.
Barracuda Linux Backup Agent Running on a Linux/Unix-Based System
You can run a pre- and post-Agent backup command script by editing the Linux bbconfig.ini file to run pre- or post-commands to stop and start certain processes on the Linux/Unix-based system where the Barracuda Backup Agent (Linux) is installed, For example, script.sh:
- Navigate to the bbconfig.ini file on the system where the Barracuda Linux Backup Agent is installed.
- Open the bbconfig.ini file in a text editor, and below the [ configuration ] section, enter:
• preExecuteScript=/root/script.sh
• postExecuteScript=/root/script.sh
- Save and close the file.
How to Configure GroupWise Message-Level Backups
This article refers to Barracuda Backup firmware 4.2 and higher, and Novell®NetWare®Server and GroupWise™.
In this article:
- Requirements
- Configure the GroupWise Server
- Generate a GroupWise Trusted Key
- Add the GroupWise Server as a Data Source
- Retain Emails
| Related Articles |
| • How to Restore Exchange and GroupWise Messages |
| Additional Resource |
| • GroupWise Administration Guide |
Set up your Novell NetWare Server to complete GroupWise message-level backups with a Barracuda Backup Server.
Requirements
• NetWare Server 6.5 or greater
• GroupWise Server version 8 or greater
Configure the GroupWise Server
Use the following steps to configure the GroupWise Server:
- On a Microsoft® Windows® workstation where the Novell Client is installed, log in with an account that has access to the GroupWise primary domain database file :wpdomain.db
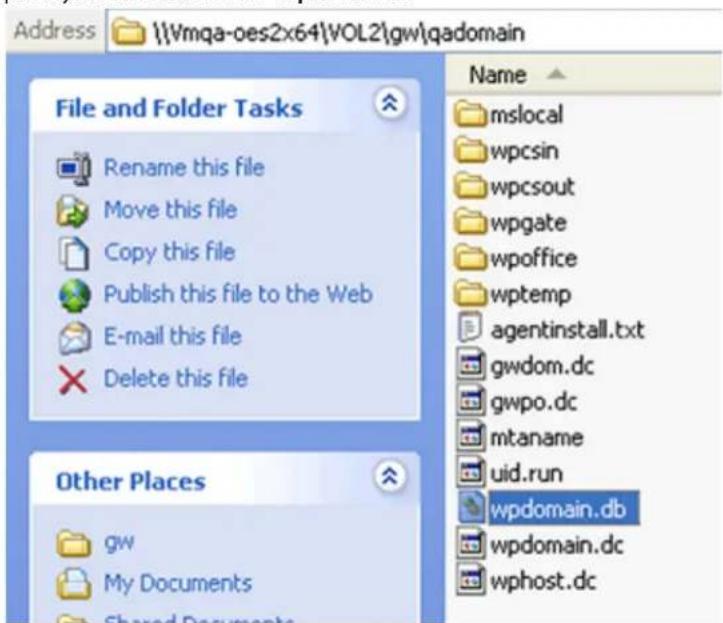
- Create an account to be used by the Barracuda Backup Server to access the email in each mailbox; the service account must be a member of either the or group.Enterprise Administrators Domain Administrators
Generate a GroupWise Trusted Key
A trusted application key allows a third-party program to authenticate to the post office agent (POA) or the Internet Agent and obtain GroupWise information that would otherwise be available only by logging in to GroupWise mailboxes. Starting with GroupWise 8 Support Pack 1, you can
create a trusted application and its associated key in ConsoleOne for use with both Linux and Windows trusted applications.
Use the following steps to generate a trusted key:
- Open ConsoleOne. From the Tools menu, point to GroupWise System Operations, and click Trusted Applications:
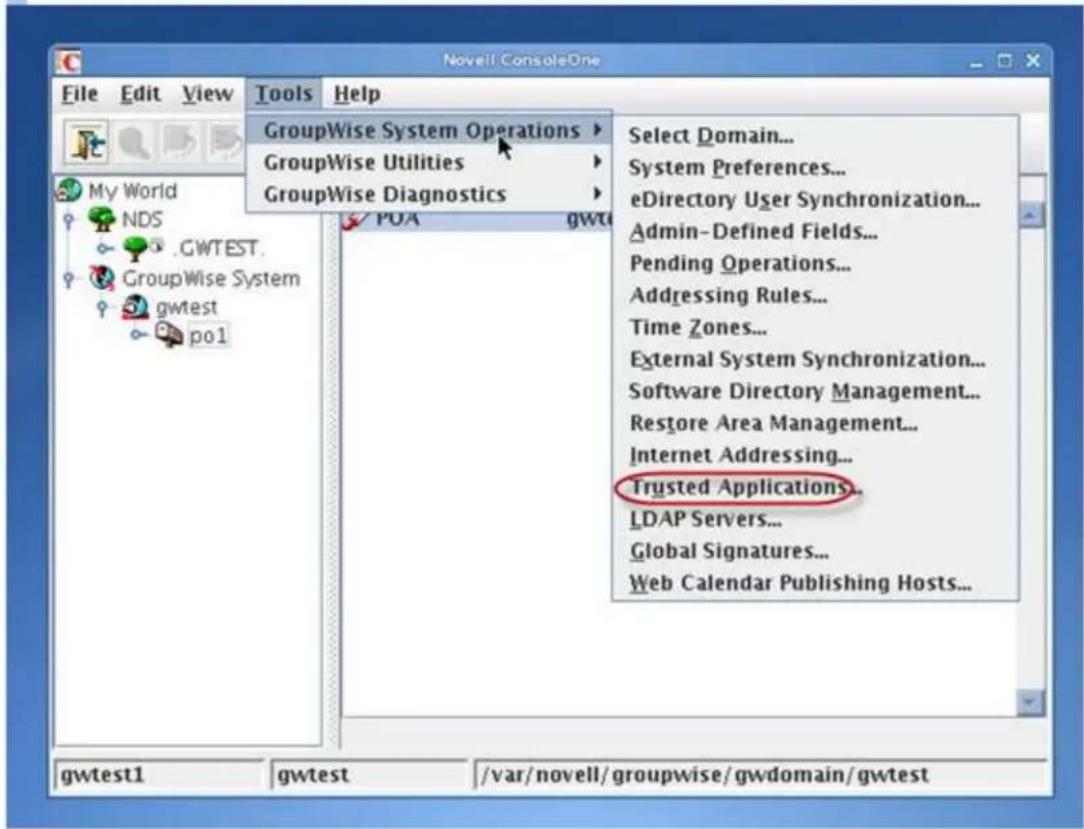
- The dialog box displays. Click :Configure Trusted Applications Create
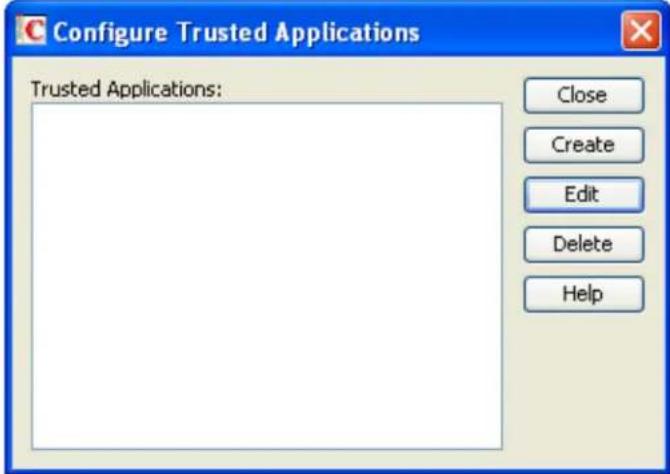
- The dialog box displays: Edit Trusted Application
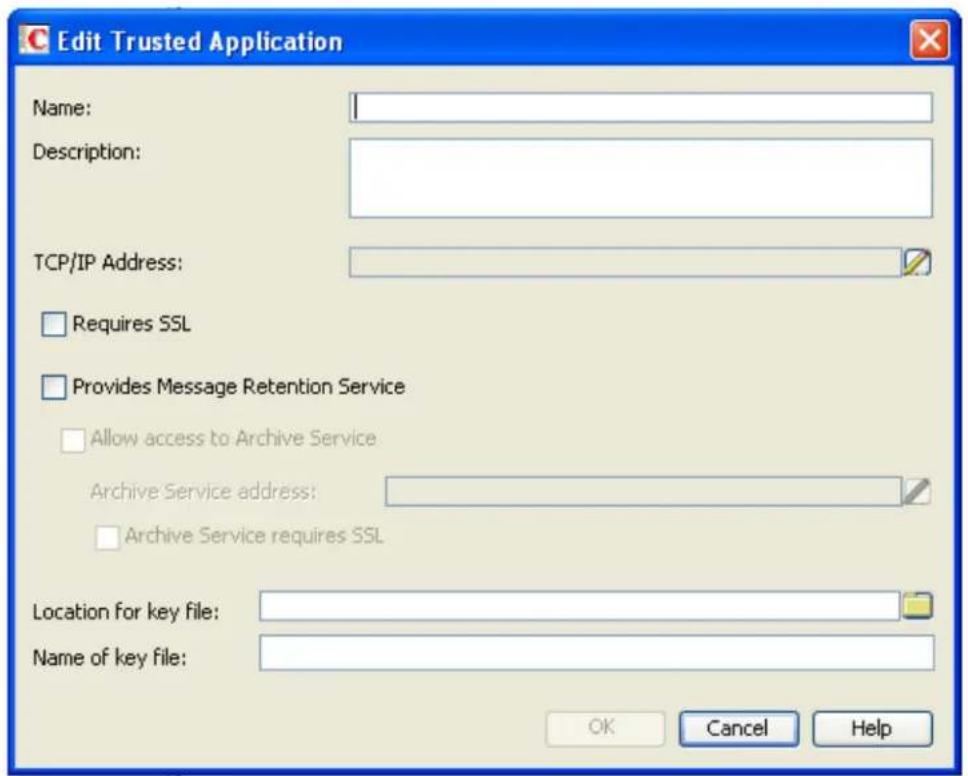
- In the Name field, type BitLeap Backup, and enter a description for the trusted application in the Description field.
- Leave the TCP/IP Address field blank to allow the trusted application from any server, or, to restrict the location from which the trusted application can run, click the Edit icon to the right of the field, and in the Edit Network Address dialog box, specify the IP address or DNS hostname of the trusted application server. Click OK to save your settings and close the dialog box.
- To require a secure (SSL) connection between the trusted application, POAs, and Internet Agents, select the Requires SSL check box.
- Click the Browse icon to the right of the Location for key file field, and browse to and select the directory where you want to create the trusted application key file.
- In the Name of Key File field, enter the trusted application key file name.
- CIOK to save the trusted application configuration information.
Add the GroupWise Server as a Data Source
- Log in to Barracuda Backup web interface, and select the associated Barracuda Backup Server in the left pane.
- Go to the BACKUP > Sources page, and click Add Computer; the Add Computer page displays.
- In the Computer Information section, enter the Netware Server description and hostname or IP address.
- From the Computer Type drop-down menu, select Novell.
- In the Novell Computer Information section, enter the Server username and password credentials.
- Click Save.
- On the Add Data Source page, enter a description for the data source, and from the Data Type drop-down menu, select Message-Level Backup (GroupWise).
- In the Message-Level Backup (GroupWise) Information section, enter the GroupWise mailbox location in the Base Context field.
- In the Trusted Application Key field, paste the Trusted Application Key created in the previous section.
- You can optionally enter the e-Directory Server hostname or IP address.
- Click the Test GroupWise Connectivity to verify the connection.
- Once the connection is verified, select the mailboxes you wish to backup.
- Click Save.
Retain Emails
This step is optional. You can optionally set up GroupWise to have all emails backed up by Barracuda Networks. This feature instructs GroupWise to not purge emails until Barracuda Backup has a backup copy of the email. For information on how to set up this feature, please view the Group Wise Administration Guide - Environment Options: Retention section available on the Novell website.
How to Set Up a Root Account to Back Up Macintosh OS X
In this article:
• Create a Root Account
- Log in as the Root User
- Set up SSH Key for Mac
Additional Resource
- Enabling and using the "root" user in Mac OS X
By default, the root account on Macintosh OS X Servers is disabled. If a user uses the admin account to back up content to Barracuda Backup, they may encounter a warning message stating that some files cannot be backed up. To resolve this issue, Barracuda Networks recommends using the root account for backups as the root account has full permission on the disk and is able to back up the server with limited warnings.
Create a Root Account
Set up a root account based on your software release.
OS X Lion
- From the menu, click .Apple System Preferences
- From the menu, click .View Users & Groups
- Click the lock and authenticate as an administrator account.
- Click, and click at the bottom right of the screen. Login Options Edit
- Click, and in the, click the lock.Open Directory Utility Directory Utility
- Enter the administrator account name and password, and click OK.
- From the Edit menu, click Enable Root User.
- Enter the root password you wish to use in both the Password and Verify fields, and click OK.
Mac OS X v10.6.x
- From the menu, click .Apple System Preferences
- FromView Accountsk
- Click the lock and authenticate as an administrator account.
- Click, and click at the bottom right of the screen. Login Options Edit
- Click, and in the, click the lock.Open Directory Utility Directory Utility
- Enter the administrator account name and password, and click OK
- From the Edit menu, click Enable Root User.
- Enter the root password you wish to use in both the Password and Verify fields, and click OK.
Mac OS X v10.5.x
- From the Finder's Go menu, choose Utilities, and open Directory Utility.
- ClicDirectorlyibility window.
- Enter an administrator account name and password, and click OK.
- From the Edit menu, click Enable Root User.
- Enter the root password you wish to use in both the Password and Verify fields, and click OK.
Mac OS X v10.4.x or earlier - Click the Finder icon in the Dock.
- From the Go menu, click Applications.
- Open the Utilities folder.
- Open the NetInfo Manager utility.
- Click the lock in the NetInfo Manager window.
- Enter the administrator account name and password, and click OK
Mac OS X 10.2 and Later
For Mac OS X 10.2 and later, choose Enable Root User from the Security menu.
Mac OS X 10.0 and 10.1
- From the Domain menu, point to Security, and click Enable Root User.
- If you have not previously set a root password, an alert box displays the message NetInfo Error, indicating that the password is blank. Click OK.
-
Enter the root password you wish to use, and click Set.
-
Enter the password again, and click .Verify
- Click the lock to prevent changes.
Log in as the Root User
Log in using the root account based on your software release.
Mac OS X v10.2 or Later
- If you are logged in, choose from the menu.Log Out Apple
- If you are logging in from a list of usernames with pictures, click .Other
- In the field, type: Name root
- In the field, type the password you defined earlier.Password Mac OS X v10.0 to v10.1.5
After enabling the root user, you must log out from Mac OS X and log back in as the root user. Logging in to Mac OS X from a list of usernames is the default behavior for later versions of Mac OS X. Logging in by typing your username in a text entry field is the default behavior in earlier versions of Mac OS X. You can choose either method in Login preferences. The root user does not appear in the list, so you need the text entry option. If necessary, follow these steps to change the login method to text entry:
- From the Apple menu, click System Preferences.
- From the View menu, click Login.
- Click the Login Window tab.
-
Select Name and password entry fields, and complete the steps in the next section to log in as root account.
-
If you are logged in, choose from the menu.Log Out Apple
- In the field, type: Name root
- In the field, type the password you defined earlier.Password
Set up SSH Key for Mac
For each local Barracuda Backup Server, identify the data sources that are to be backed up. There may be more than one data source on each server, and each can have unique backup characteristics.
- Log in to the Barracuda Backup web interface, and select the associated Barracuda Backup Server in the left pane.
- Go to the BACKUP > Sources page, and click Add Computer to identify the computer.
- Enter the IP address of the Mac Server.
- From the Computer Type drop-down menu, select Mac OS X.
- In the Mac OS X Information section, enter root in the Username field.
- Download the SSH Key installer, and run the setup.
- Once the key is installed, save the settings. Click Save in the web interface.
- In the Add Data Source page, enter the remaining system details.
- In the Folder Selection section, you can Select All Folders for backup, or click Pick Certain Folders to specify individual folders for backup.
- Click Save.
How to Back Up Linux/UNIX Data Using SSHFS
This article refers to Barracuda Backup firmware 4.3 and higher. Barracuda Backup uses the SSH Filesystem (SSHFS) and public key authentication to connect and back up Linux data.
In this article:
- Add the Linux Server
- Add Linux Server Data Sources
- Set Up Backup Schedules and Retention Policies
Related Articles
• Barracuda Backup Agent (Linux)
Additional Resource
- Ubuntu OpenSSH Server sshd Installation

Backed Up Content
This article describes how to back up Linux/UNIX-based file systems, such as Red Hat, Ubuntu, or SUSE, using SSHFS. Before backing up data, verify that you have adequate permissions to the folder you intend to back up. Note that SSHFS cannot back up open or locked files.
Add the Linux Server
Use the following steps to add the Linux Server to Barracuda Backup.

Before adding the Linux Server to Barracuda Backup, notify users that their Secure Shell (ssh) session may be lost during set up.
- Log in to the Barracuda Backup web interface, and select the associated Barracuda Backup Server in the left pane.
- Go to the page, and click .BACKUP > Sources Add Computer
- Enter a computer description and enter the IP address or fully qualified domain name in the Computer Name field.
- From the operating system drop-down menu, select :Linux / Unix
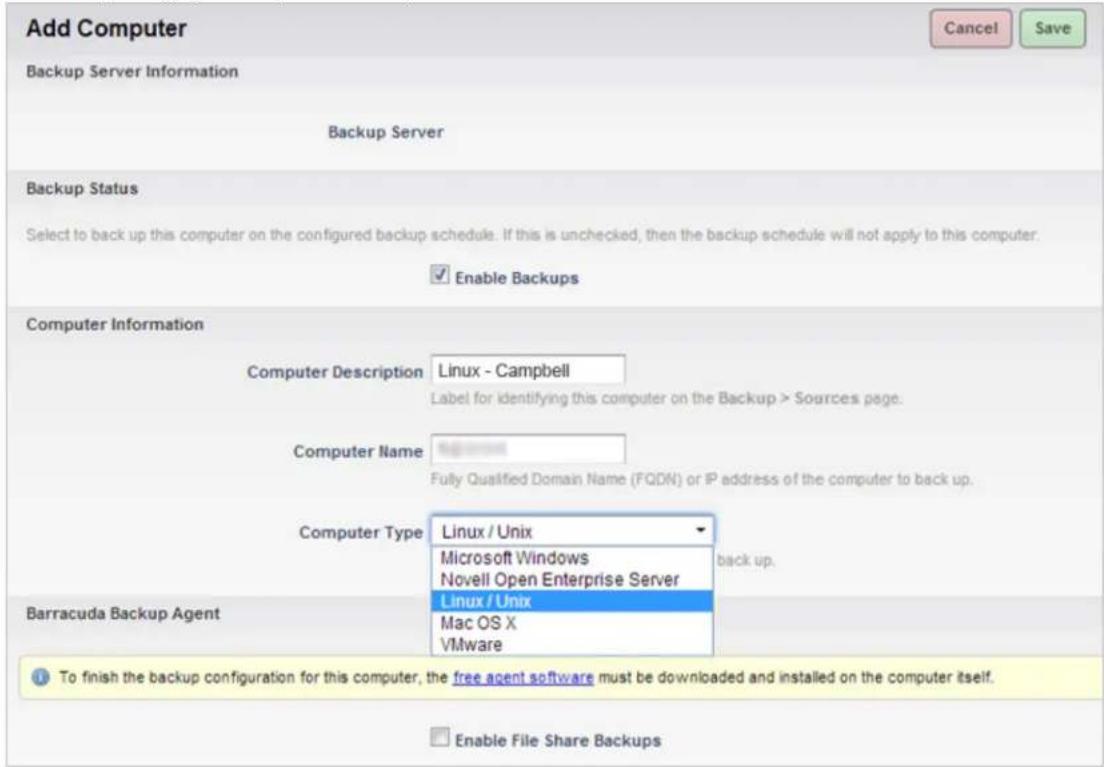
- Turn on ; the section displays: Enable File Share Backups Linux/Unix (SSHFS) Information

Enable File Share Backups
Linux/Unix (SSHFS) Information
SSHFS allows Barracuda to backup any data that is contained on a Unix-based computer running an SSH daemon. To allow your Backup Server to securely connect to your computer, you must use a public key (provided by Barracuda). Username specifies the system account that will have access to back up data.
Username
To backup data on Linux or Unix based servers:
Enter the following commands inside of the user's home directory to setup the public key provided by Barracuda:
mkdir .ssh;
echo "ssh-rsa AAAAB3NzaC1yc2EAAAABIwAAAQEAoOclBLv5Bq6ofLe0pm+CwYo9uGrJZO4+cW/2Z1w
" >> .ssh/authorized_keys;
chmod 600 .ssh/authorized_keys;
chmod 700 .ssh;
Make sure that the PubkeyAuthentication option is set to yes in your /etc/ssh/sshd_config file.
- Enter the for the system account that is to have access to back up data.Username
- In the To backup data on Linux or Unix based servers section, copy the commands to your clipboard.
-
On the Linux Server, determine the location of the ssh directory, including the authorized_keys file, in the user's home directory:
-
If a username different than root is used, place the ssh directory, including the authorized_keys file, in the user's home directory.
-
If the root account is used, place the ssh directory, including the authorized_keys file, in the root home directory
-
Log in to the Linux Server using an ssh client such as PuTTY, and paste and run the commands copied in step 6 into the appropriate directory based on step 7 to set up the public key provided by Barracuda Networks:
[root@localhost homes] *ekdir,ash
[root@localhost homes] *shr*kan, ASAAETVnoctyCRAAAH,WAAGQaywchingTlEicMtyfcrChuQlQlkaKloukPwJWtNtO2040000gqYdAaHn Tse: twwt20001110ddayvda34130000e87d36298yIwAaHc
chikakoRPODcyl2twpCR35DeBC1eJWJAYZB74bGgTTf5neFzef665cFAAlyToTcTTTgblU57ECK207GcX1460ePPPP13pduKVjYIFZ+Ufe/BspJpRaY1EMDc05CCGc3uThkRcCR5Ru4068371[MeAAT5cV/AM
yc@localhost homes]
- On the Linux Server, navigate to /etc/ssh and open the file sshd_config :
[root@localhost mhaag]# vi /etc/ssh/sshd\_config
![Barracuda Networks Backup Server 390 - [root@localhost mhaag]# vi /etc/ssh/sshd\_config - 1](/content/2026/06/1260286/images/56db4f2f2632e7ff1c4d9dd4d2074dab5ec99c30d1266d6c4e67969ddd7630f2.jpg)
If an error message stating that no sshd_config file could be found displays, the ssh daemon may not be installed. In some Linux installations, the ssh client is installed without the ssh daemon.
For more information, refer to the documentation available online or included with your version of Linux for the proper procedures to install the ssh daemon on your server. For your reference, the following link is provided to show an example of sshd installation instructions.
https://help.ubuntu.com/10.04/serverguide/openssh-server.html
- In the file sshd_config, locate the line PubkeyAuthentication yes, and remove the pound sign "#":
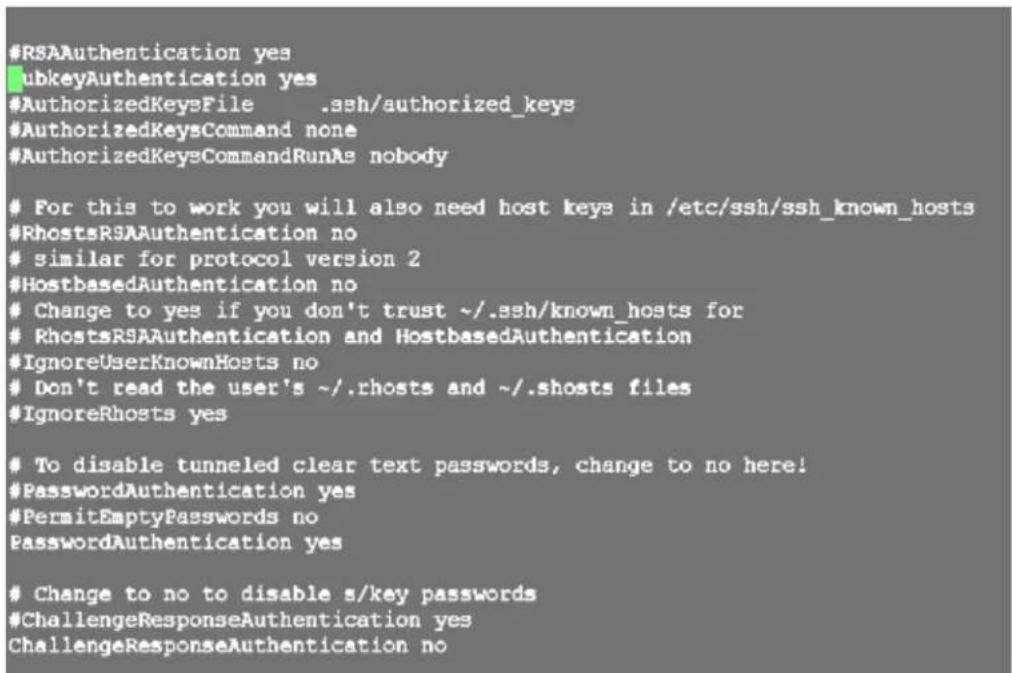
12.
Run the following command to restart sshd:
/etc/init.d/sshd restart
![Barracuda Networks Backup Server 390 - [root@localhost mhaag]# vi /etc/ssh/sshd\_config - 3](/content/2026/06/1260286/images/93ed3a123a3c029caa7c219d4fc13d63631b750638f0212c15f07450284e9a49.jpg)
Depending on the Linux Server distro, it may be necessary to disable SELinux enforcement using the command: echo 0 > /selinux/enforce
- In the Barracuda Backup web interface, click Save at the top of the page; the Add Data Source page displays.
Add Linux Server Data Sources
Use the following steps to select the Linux Server folders you wish to back up.
- In the Add Data Source page, enter a Data Description for the data source.
- From the Data Type drop-down menu, select File Share - SSHFS
- In the File Share Information section, enter the full path of the directory to be backed up in the Share Name field, and click Test Share; if the connection is successful, a message displays the connection status, for example, Status: Successfully connected to computer. If the connection is not successful, return to the Add Computer page and verify the IP address is correct before continuing.
- In the Folder Selection section, select Select All Folders to back up all data, or select Pick Certain Folders to select individual the items for back up.

Important
If you are backing up root or /, you must uncheck the proc and sys directories.
- Click Save at the top of the page.
Set Up Backup Schedules and Retention Policies
Once you have your Linux data source items set up for backup, you can set up schedules and retention policies.
Understanding Changed Block Tracking on Virtual Machines
This article applies to Barracuda Backup Server firmware version 5.0 and higher, and VMware® 4.0 and above with the VMware license which includes access to vSphere® Data Recovery API.
Related Articles
- Enable Changed Block Tracking through the Barracuda Backup Web Interface
• Getting Started with Replication - Restore a VM to Original Location
- Restore a VM to Alternate VMware Host not available through the Barracuda Backup Service
Additional Resource
- Changed Block Tracking (CBT) on virtual machines
- Enabling Changed Block Tracking (CBT) on virtual machines
Use Changed Block Tracking (CBT) to perform incremental backups on virtual machines running on VMware ESX/ESXi. CBT identifies and tracks block changes since the last backup, and stores these changes in log form, greatly reducing the number of backup windows and improving backup window times. Additionally, subsequent replication efficiency and speed are improved.

Barracuda Backup automatically leverages CBT when CBT is enabled for the virtual machine being backed up.
Setting Up Changed Block Tracking
For details on setting up and enabling CBT on virtual machines, refer to the VMware Knowledge Base articles available from the VMware website:
- Changed Block Tracing (CBT) on virtual machines
- Enabling Changed Block Tracking (CBT) on virtual machines

Contact Barracuda Networks Technical Support for information on enabling CBT from the VMware API.
How to Enable Changed Block Tracking through the Barracuda Backup Web Interface
This article applies to Barracuda Backup Server firmware version 5.4 and higher, and VMware ^® 4.0 and above with the VMware license which includes access to vSphere ^® Data Recovery API.
In this article:
- Requirements
- Enable Changed Block Tracking
- Set Up Changed Block Tracking
Related Articles
• Understanding Changed Block Tracking on Virtual Machines
• Getting Started with Replication
- Restore a VM to Original Location
- Restore a VM to Alternate VMware Host not available through the Barracuda Backup Service
Additional Resource
- Changed Block Tracking (CBT) on virtual machines
- Enabling Changed Block Tracking (CBT) on virtual machines
Use Changed Block Tracking (CBT) to perform incremental backups on virtual machines running on VMware ESX/ESXi. CBT identifies and tracks block changes since the last backup, and stores these changes in log form, greatly reducing the number of backup windows and improving
backup window times. In Virtual Machine File system (VMFS) partitions, CBT can identify all disk sectors that are in use. Additionally, subsequent replication efficiency and speed are improved. Barracuda Backup access CBT through the vSphere APIs for Data Protection (VADP) by requesting the changed VMkernel return blocks of data on the virtual disk since the last backup snapshot.
Requirements
To enable CBT, verify the following is true for your environment:
• The host must be ESX/ESXi 4.1 or later;
• The virtual machine owning the disks to be tracked must be hardware version 7 or later;
- Snapshots exist on the virtual machine; and
• Virtual machine storage is not (persistent or non-persistent) independent disk, therefore it is unaffected by snapshots.
Enable Changed Block Tracking
Use the following steps to enable Changed Block Tracking (CBT) through Barracuda Backup:
- Log in to Barracuda Backup, and select the associated Barracuda Backup Server in the left pane.
- Go to the BACKUP > Sources page, and click Edit next to your VMware data source:

- Click Select Specific Items in the Item Selection section, and expand the VMware environment to locate your virtual machines:
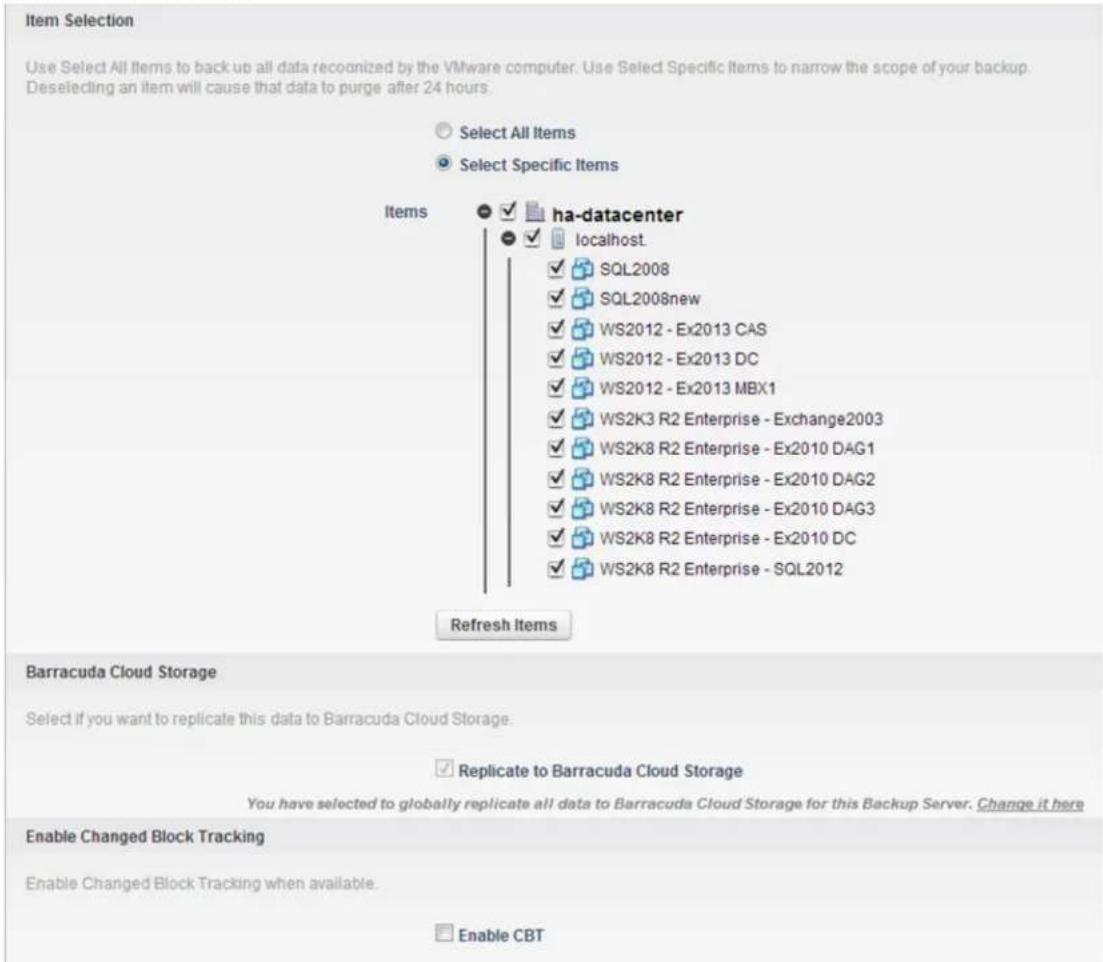
- When is turned, displays to the left of the virtual machine name: Enable CBT On CBT
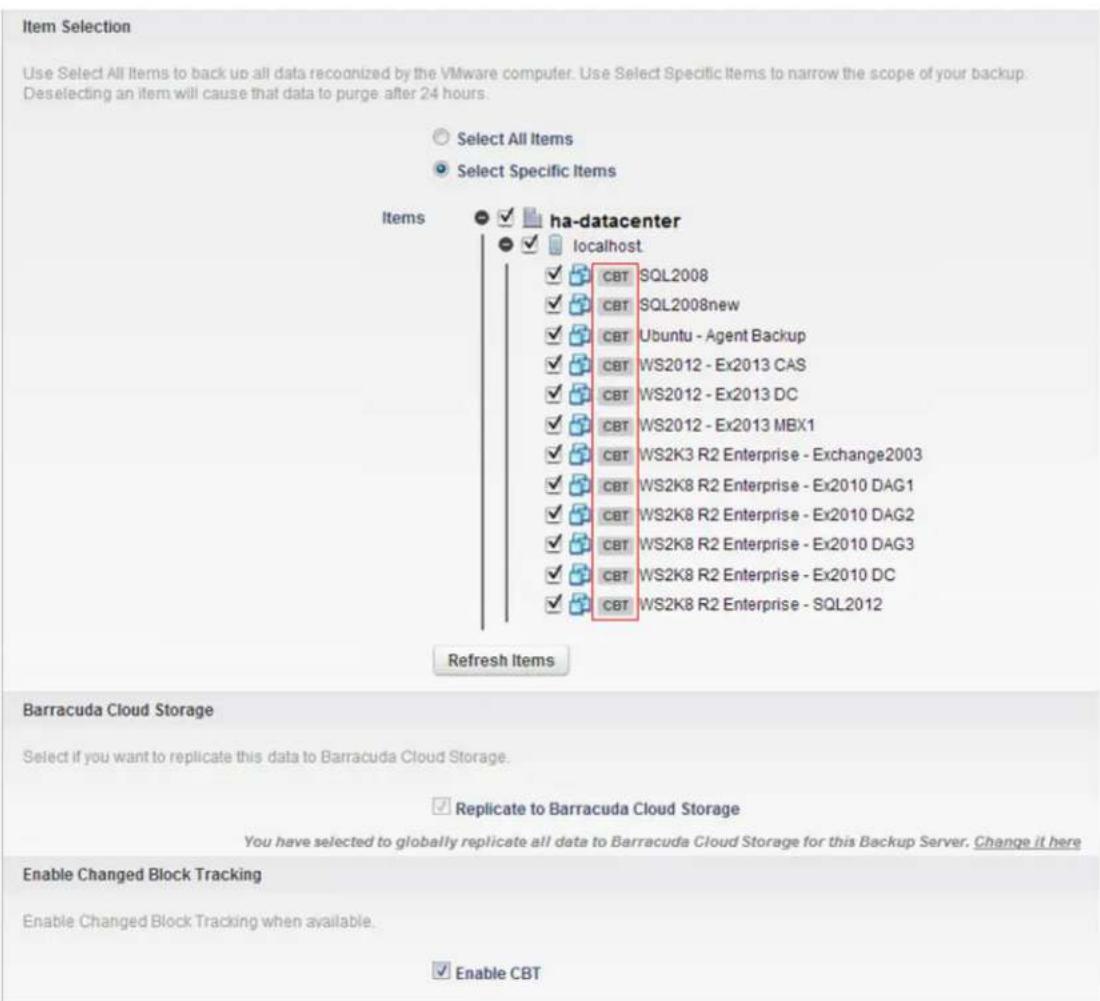
- When Enable CBT is turned Off, then CBT does not display next to the virtual machine name. Click Enable CBT to turn enable Changed Block Tracking :On
Enable Changed Block Tracking
Enable Changed Block Tracking when available.
Enable CBT
- Click to save your backup settings.Save
Use Changed Block Tracking (CBT) to perform incremental backups on virtual machines running on VMware ESX/ESXi. CBT identifies and tracks block changes since the last backup, and stores these changes in log form, greatly reducing the number of backup windows and improving backup window times. Additionally, subsequent replication efficiency and speed are improved.
Barracuda Backup automatically leverages CBT when it is enabled for the virtual machine being backed up.
Set Up Changed Block Tracking
For details on setting up and enabling CBT on virtual machines, refer to the VMware Knowledge Base articles available from the VMware website:
- Changed Block Tracking (CBT) on virtual machines
- Enabling Changed Block Tracking (CBT) on virtual machines
Contact Barracuda Networks Technical Support for information on enabling CBT from the VMware API.
How to Back Up Network Addressable Storage - NAS
This article refers to firmware version 4.3 and higher.
In firmware version 5.0 and higher, with CIFS backups, Barracuda Backup is able to back up access control lists (ACLs).
In this article:
- Configure Network Addressable Storage (NAS) Data Sources
• Create Backup Schedules
• Create Data Retention Policies - Configure Optional Features
Configure Network Addressable Storage (NAS) Data Sources
Use the following steps to identify the data shares on your server that are to be directly backed up:
- Log into Barracuda Backup, and select the Barracuda Backup Server in the left pane that is to back up the data shares.
- Go to the page, and click .BACKUP > Data Source Add Computer
- In the Add Computer page, enter a description of the data source in the Computer Description field.
- In the Computer Name field, enter the IP address or fully qualified domain name (FQDN) for the data source.
- From the Computer Type drop-down menu, select Microsoft Windows, and turn on Enable File Share Backups.
- Specify the file share credentials in the Microsoft Windows Computer Information section, and then click Test Credentials.
- Click Save at the top of the page; the Add Data Source page displays.
- In the Backup section, in the Data Description field, enter a label for the data source you are backing up.
-
From the Data Type drop-down menu, select File Share - CIFS.
-
In the File Share Information section, enter the exact name of the network share on the server, for example, c\$, needed to access the data source from devices on the local network, and then click Test Share to test Share connectivity.
-
If you wish to view all available network shares on the server, click Toggle All Shares, and then click Fetch Data Sources to automatically populate the list of data sources.
-
In the Folder Selection section, you can select all folders in the network share, or optionally select specific folders you wish to back up:
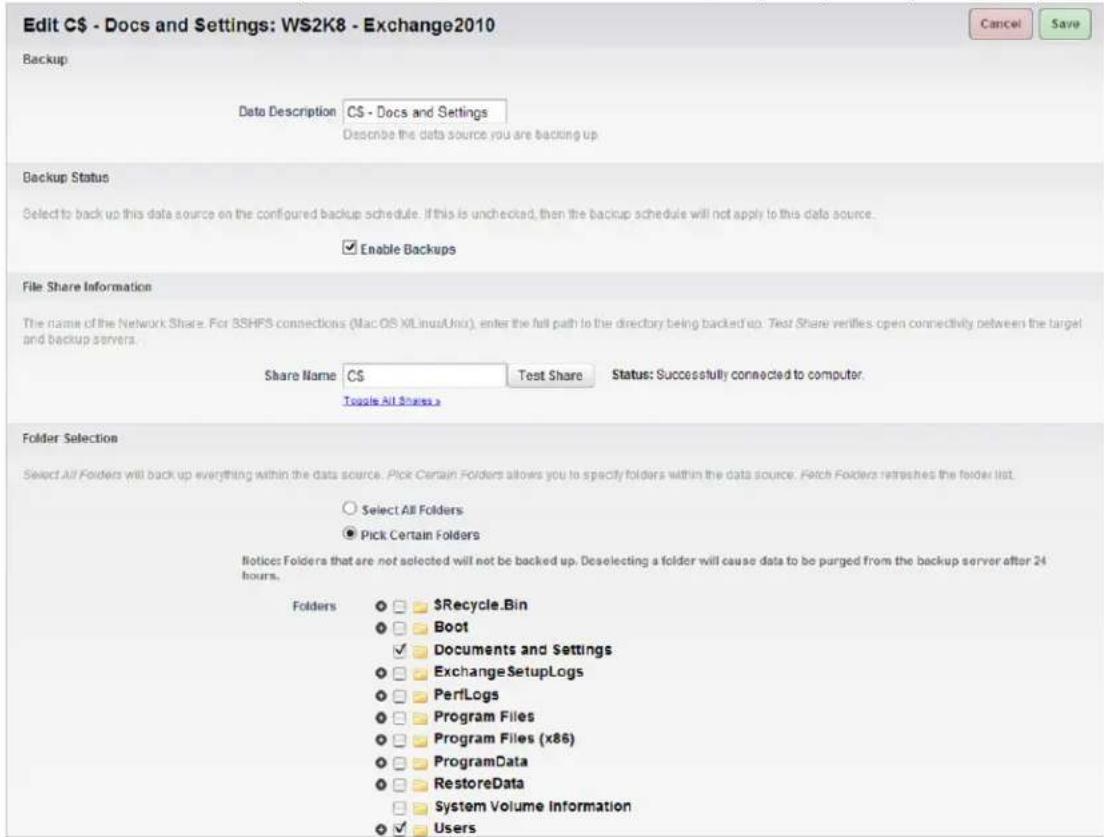
- To replicate to the cloud, turn on Replicate to Barracuda Cloud Storage; note that if you have globally selected to replicate to the cloud, you cannot change this setting.

Replication
If you wish to set up replication to another Barracuda Backup Server, turn on Replicate to Other Barracuda Backup Servers, and click Add a new Backup Server. For detailed steps, refer to Configuring a Replication Destination.
- Click at the top of the page.Save
Create Backup Schedules

A schedule is automatically created (with the default set to back up every day at 8:00PM) when a data source is created except if a schedule specifying all data sources already exists.
To create a backup schedule, go to the BACKUP > Schedules page of the Barracuda Backup web interface. Click Add a Schedule and fill in the information on the page. Add Backup Schedule
Create Data Retention Policies
To set retention policies,
- Go to the BACKUP > Retention Policies page, click Add a Retention Policy, and enter a name to identify the policy.
- In the Items to Retain section, select the NAS data source to which the retention policy applies; the Retention Timeline section displays. Select a timeline template on which to base your retention policy, or specify your own revision timeline.
- Select the desired Removed Files Rule setting, and click Save.
Configure Optional Features
You can optionally configure the following settings for the NAS data sources:
- Back Up Rate Limit - Rate limits control the data replication rate to Barracuda Cloud Storage or other offsite storage locations. You can limit Internet bandwidth consumption during peak usage times, and schedule backups for non-peak hours on the BACKUP > Rate Limit page.
- Exclude Files from Backup - You can create exclusion rules that use pattern matching to identify directory or file names that you do not wish to back up on the BACKUP > Exclusions page.
How to Back Up FirstClass Mail
This article refers to firmware version 5.3 and higher, and the FirstClass Mail client running on Windows ^® or Linux/Unix.
In this article:
• Install the Agent
- Replicate Data
- Add FirstClass Mail as a Data Source
Related Articles
- Creating Backup Schedules
- Setting Up Exclusion Rules
- Creating Retention Policies
Install the Agent
Use the following steps to install the Barracuda Backup Agent:
- Log in to the Barracuda Backup web interface, and selected the associated Barracuda Backup Server in the left pane.
- Go to the SYSTEM > Software Downloads page, and select the appropriate Agent for the environment in which you are running FirstClass Mail:
- If you are running FirstClass in Windows, download and install the Barracuda Backup Agent (Windows).
- If you are running FirstClass in a Linux/Unix environment, download and unzip the Barracuda Backup Agent
(Linux) on your local Linux system or server.
Replicate Data
If you are replicating data to another FirstClass Mail Server, you must disable mirroring when backups run.
You can run pre- and post commands to stop and start this process.

Permissions
To run these commands you must have permissions to the FCP utility fcputility.
To pause mirroring, use the command:
fcputil pause
To restart mirroring, use the command:
fcputil continue

If the installed Agent has access to fcputility, you can run these commands from the Agent. For more information, refer to How to Create a Pre- or Post-Agent Backup Command Batch File or Script.
Add FirstClass Mail as a Data Source
Use the following steps to add FirstClass Mail as a data source:
- Log in to the Barracuda Backup web interface, and selected the associated Barracuda Backup Server in the left pane.
- Go to the BACKUP > Sources page, and click Add Computer.
- Enter the FirstClass Network Store (FCNS) computer description, and enter the IP address or FQDN in the Computer Name field.
- From the Computer Type drop-down menu, select either Microsoft Windows or Linux / Unix, and click Save.
- In the Add Data Source page, select Barracuda Agent Software as the Data Type.
- Click Test Software Connectivity to verify Barracuda Backup can communicate with the Agent.
- In the Item Selection section, click Select All Items to back up the entire F CNS folder including desktop folders, calendar, contacts, etc., or click Select Specific Items to select individual items for backup.
- Click Save at the top of the page.
FirstClass Mail backups will run at the next scheduled time.
How to Back Up NFS Mounts with the Barracuda Backup Agent (Linux)
This article refers to Barracuda Backup firmware version 5.3 and higher, and the Barracuda Backup Agent (Linux).
Back up NFS mounts using the Barracuda Linux Backup Agent.
Configure the Agent
Use the following steps to configure the Barracuda Backup Agent (Linux):
- Log in to your Linux Server, and enter the following command to stop the Agent:
/etc/init.d/bbagent stop
- Navigate to the Barracuda Backup Agent installation directory. The default location is: /usr/local/barracuda/bbs/
- Open the config directory, and open the bbconfig.ini file in a text editor.
- Below the [configuration] section, enter:
IncludedMountpoints=/mount/mountpoint,/mount/mountpoint2
For example:
[root@barracuda-llc config]# cat bbconfig.ini

[installControl]
buildNumber=85117
installedVersion=5.3.00-rel

[configuration]
nodeGuid={00001001-4A639DB9-4A639DB9-4A639DBA}
IncludedMountpoints=/barracuda/RAID5,/barracuda/VMBackup,/barracuda/data,/barracuda/projects,/barracuda/tech
- Save and close the file.
- Enter the following command to restart the Agent:
# /etc/init.d/bbagent start
How to Back Up NSS Mounts with the Barracuda Backup Agent (Linux)
This article refers to Barracuda Backup firmware version 5.3 and higher, the Barracuda Backup Agent (Linux), and the Novell .Storage Services (NSS) file system
Back up NSS mounts using the Barracuda Backup Agent (Linux).
Configure the Agent
Use the following steps to configure the Barracuda Backup Agent (Linux):
- Log in to your Linux Server, and enter the following command to stop the Agent:
/etc/init.d/bbagent stop
- Navigate to the Barracuda Backup Agent installation directory. The default location is: /usr/local/barracuda/bbs/
- Open the directory, and open the file in a text editor.config bbconfig.ini
- Below the section, enter:[configuration] IncludedMountpoints=/ mount/mountpoint,/mount/mountpoint2 For example:
[root@barracuda-llc config]# cat bbconfig.ini

[installControl]
buildNumber=85117
installedVersion=5.3.00-rel

[configuration]
nodeGuid={00001001-4A639DB9-4A639DB9-4A639DBA}
IncludedMountpoints=/barracuda/RAID5,/barracuda/VMBackup,/barracuda/data,/barracuda/projects,/barracuda/tech
- Save and close the file.
- Enter the following command to restart the Agent:
# /etc/init.d/bbagent start
Replication Page
This article refers to Barracuda Backup firmware version 5.0 and higher.
Related Articles
- Configuring a Replication Destination
• Temporarily Disabling a Destination
• How to Manage the Data Queue
• Why Data is not Replicating to an Offsite Location
Barracuda Backup Servers that are used to back up data from one or more Barracuda Backup Servers are known as destinations. Data from one Barracuda Backup Server can be replicated to one or more destinations.
Backup Data Replication Configuration
Configure backup data replication to one or more other Barracuda Backup Servers. On the BACKUP > Replication page you can view:
• Target List - Displays where data from the selected Barracuda Backup Server is sent
- Source List - Displays a list of devices sending data to the selected Barracuda backup Server
A Barracuda Backup Server can act as a backup to one or more other Barracuda Backup Servers. Each Barracuda Backup Server can send data to one or more other Barracuda Backup Servers.

Important
- Only the Barracuda Backup Server 490 and higher can act as a backup to other Barracuda Backup Servers, although any Barracuda Backup Server can send data.
- Data can be backed up to both a second Barracuda Backup Server and to Barracuda Cloud Storage. Data that is backed up on a second Barracuda Backup Server cannot be backed up yet again onto another Barracuda Backup Server.
- For every Terabyte of data replicated, Barracuda Networks recommends a 1.5 Mbps or T1 connection.
- You must have the serial number and replication code of the destination. These can be found by selecting the destination Barracuda Backup Server and looking at its BACKUP > Replication page.
Before Getting Started
Before getting started, verify the following:
- Make sure that your retention policies are configured before configuring replication. Otherwise you may waste bandwidth copying data that does not need to be replicated.
- Verify Internet connectivity between the local and remote Barracuda Backup Server(s). Configuring a secure VPN connection between multiple Barracuda Backup Servers ensures the highest level of security possible.
- You must have the serial number and replication code of the destination Barracuda Backup Server. Go to the destination Barracuda Backup Server, and go to the BACKUP > Replication page. The serial number and replication code display at the top right of the page.
Dordlastenattn.
Configuring a Replication Destination
This article refers to Barracuda Backup firmware version 4.2 or higher.
In this article:
• Edit Replication Server Settings
- Remove a Barracuda Backup Server
- Send Data To/Receiving Data From
Related Articles
- Configuring Replication
• How to Restore from a Replication Destination
• How to Temporarily Disable a Destination
• Why Data is not Replicating to an Offsite Location
八

Important
- Only the Barracuda Backup Server 490 and higher can act as a backup to other Barracuda Backup Servers, although any Barracuda Backup Server can send data.
- Data can be backed up to both a second Barracuda Backup Server and to Barracuda Cloud Storage. Data that is backed up on a second Barracuda Backup Server cannot be backed up yet again onto another Barracuda Backup Server.
- For every Terabyte of data replicated, Barracuda Networks recommends a 1.5 Mbps or T1 connection.
- You must have the serial number and replication code of the destination. These can be found by selecting the destination Barracuda Backup Server and looking at its BACKUP > Replication page.
Barracuda Backup Servers that are used to back up the data from one or more Barracuda Backup Servers are known as destinations. Data from one Barracuda Backup Server can be replicated to one or more destinations.
To configure where data is replicated to from a Barracuda Backup Server,
- Select the Barracuda Backup Server in the list to which you wish to add a replication destination, and go to the BACKUP > Replication page.
- To add a replication destination, click .Add a Target
- In the page, select from one of the following options: Add Destination
- From the Backup Server list, select a Barracuda Backup Server from your account to automatically load the required destination details, or
- Enter the following details in the associated fields:
- Enter the destination hostname or IP address
- Enter the Serial Number from the Barracuda Backup Serverdestination
- Enter the Replication Code from the Barracuda Backup Serverdestination
4. Click .Save
Once a destination is added, it appears in the Sending Data To table. If the status displays as online (Online), the two systems are able to communicate with each other.
On the BACKUP > Replication page, there is a global flag to replicate all data to either Barracuda Cloud Storage or to Barracuda Backup Servers:

Send All Local Backups
If you wish to send data from diverse sources to both of these options, then do not set this flag on any items in the Target List. Instead, edit each data source on the BACKUP > Sources page, and specify where its data is to be replicated.
Edit Replication Server Settings
To edit the replication target settings, click Settings in the Target List. In the Replication Target Settings list, you can modify the destination IP address, disable data replication, and specify whether to send all data on the Barracuda Backup Server to this target.
Remove a Barracuda Backup Server
To permanently remove a replication destination, click Remove in the Target List.
Send Data To/Receiving Data From
Destination Barracuda Backup Servers display in the Sending Data To table. If a Barracuda Backup Server is acting as a destination for another Barracuda Backup Server, it displays in the Receiving Data From table.
Replication for Engineering - US
Serial Number: BAR-BS-
Replication Code: c
Sending Data To
| TARGET LIST | Status | Global Setting | Total Stored | Queue Age | Queue Size |
| Barracuda Cloud Storage | Online | Send All Local Backups | 0 bytes | 0 secs | 0 bytes |
| Engineering - Asia SettingsBarracuda Backup Server VM / 10Remove | Online | Send All Local Backups | 5.20 GB | 0 secs | 0 bytes |
● Data stored from other sources is not replicated from this Backup Server.
Add a Target
Receiving Data From
| SOURCE LIST | Status | Total Stored | Queue Age | Queue Size |
| Engineering - AsiaBarracuda Backup Server VM / 10. | Online | 1.98 GB | 0 secs | 0 bytes |
How to Temporarily Disable a Destination
You can temporarily disable the site-to-site replication feature for one or more destinations. If it is disabled, nothing is sent from the Barracuda Backup Server to the destination until the feature is enabled or until 24 hours have passed. This allows you to move the destination system to a remote location, say, without getting backup errors. If the 24 hours pass without a manual re-enabling of this feature, the Barracuda Backup Servers attempt to communicate with each other and, if successful, perform the backups.
To temporarily disable site-to-site replication, go to the BACKUP > Replication page. In the Sending Data To table, click on the Settings link beside the destination Barracuda Backup Server. On the Replication Target Settings page there is a setting to disable data replication for up to 24 hours.
How to Manage the Data Queue
If there is a loss of communication between the Barracuda Backup Server and its back up destination for any reason, the data to be backed up is queued and errors generated. Data is queued until the issue is resolved. The queue size in the table on the BACKUP > Replication page indicates how much data is waiting to be replicated.

Note that not all of this data is actually copied to the destination. Some of it is deduplicated as the replication proceeds. Only those parts that are not already stored in the remote location are sent over the Internet.
The following queue details display on the BACKUP > Replication page:
Sending Data To
| TARGET LIST | Status | Send All Local Backups | Total Stored | Queue Age | Queue Size | |
| [8974] | Barracuda Cloud Storage | Online | ON | 6.58 GB | 2 hrs, 27 mins, 59 secs | 2.61 GB |
- Status - Displays either the green indicator ( ) icon or the red indicator ( ) icon
• Total Stored - Total size of file parts transferred offsite from the Barracuda Backup Server - Queue Age - Amount of time that the queued data has been waiting to be transferred offsite from the Barracuda Backup Server
- Queue Size - Total size of the file parts yet to be transferred offsite from the Barracuda Backup Server


Schedules Page
This article refers to Barracuda Backup firmware version 5.0 and higher.
In this article:
- Data Backup
- Adding a Schedule
- Schedule Options
Once you configure computers and data sources, create backup schedules, either individually or for all sources.

If no schedule is created for a data source then it will not be backed up. Data sources that do not have a schedule applied display at the top of the page in a yellow note box.
Data Backup
Once your Barracuda Backup Server is installed and data sources are set up, data is collected from each data source for the first time during an initial backup period. Once the initial backup is complete, Barracuda Backup checks for changed and new data based on backup schedules you define on the BACKUP > Schedules page. Any data sources that do not have a schedule defined are, by default, backed up nightly at 8:00PM local time. When Barracuda Backup identifies new or changed information, each file is analyzed at the bit level, and only the new bit sequences in the files themselves are copied and transferred, saving both bandwidth and storage space.
Adding a Schedule
To create a backup schedule, go to the BACKUP > Schedules page of the Barracuda Backup web interface. Click Add a Schedule and fill in the information on the Add Backup Schedule page:
Add Backup Schedule
Cancel
Save
Schedule Name
Create a short description of for your backup schedule. Recommended: describe data being backed up.
Schedule Name
Items to Backup
Choose computers and data sources to backup. Uncheck Apply to All Computers and Data Sources to open item selection.

Apply to All Computers and Data Sources for this Barracuda Backup Server
Schedule Timeline
Check each day you want this backup schedule to run. Recommended: backup data every day it may change
Sunday
Monday
Tuesday
Wednesday
Thursday
Friday
Saturday
Daily Backup Timeline
When the backup runs begin. Select Repeat to schedule multiple backups in the same day.
Start Time

AM
Repeat
SQL/Exchange Backup
Full captures a complete database/information store each time. Log captures transaction log changes since the last backup. Smart automatically decides when full or log backups are appropriate. Recommended: Smart
Backup Type

Minimum Threshold

days
Maximum Threshold

days
After a full backup is performed, the backup server performs transaction log backups until the minimum threshold is met. After the minimum threshold, the backup server will perform a full backup unless more than 1 GB of data is in the Cloud Transfer Queue or until the maximum threshold is met.
Field Description
Schedule Name
Enter a label to identify the backup schedule.
| Items to Back Up Turn on Apply to All Computers and Data Sources for this | to apply this schedule to all contentBarTurn offApply to All Computers and Data Sources for thisand expand and select specificBarracitems to apply this schedule to a specific data source or group of data sources: |
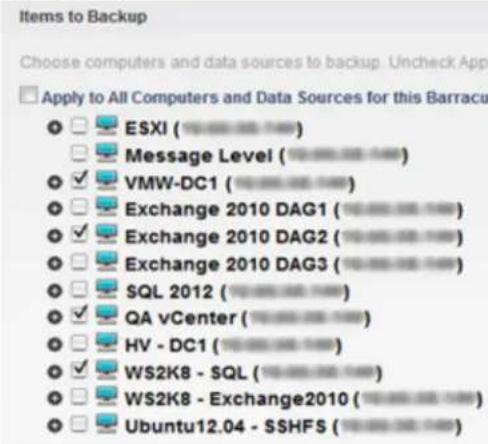 | |
| Schedule Timeline | Turn on the days on which to run the backup: |
| Schedule TimelineCheck each day you want this backup schedule to run. Recommended: SundayMondayTuesdayWednesdayThursdayFridaySaturday | |
| Daily Backup Timeline | Enter the start time; turn on Repeat if you wish to specify a time period and end date to repeat the backup:Daily Backup TimelineWhen the backup runs begin. Select Repeat to schedule multiple back   Multiple Daily BackupsIf you turn on , you can run multiple backups daily.RepeatFor example, in the following image, the back up start time is 10:00PM, and the backup schedule will repeat at 10:15PM, 10:30PM, 10:45PM, and so on until stopping at the time irUntil field:Daily Backup TimelineWhen the backup runs begin. Select Repeat to schedule multiStart Time 10Repeat √Every 15Until 11This schedule only applies to the current day, so you cannot start a backup at night and then repeat it until the next morning. Instead, create a separate schedule after midnight or start the original backup job in the morning and repeat it throughout the day. Multiple Daily BackupsIf you turn on , you can run multiple backups daily.RepeatFor example, in the following image, the back up start time is 10:00PM, and the backup schedule will repeat at 10:15PM, 10:30PM, 10:45PM, and so on until stopping at the time irUntil field:Daily Backup TimelineWhen the backup runs begin. Select Repeat to schedule multiStart Time 10Repeat √Every 15Until 11This schedule only applies to the current day, so you cannot start a backup at night and then repeat it until the next morning. Instead, create a separate schedule after midnight or start the original backup job in the morning and repeat it throughout the day. |
| SQL/Exchange Backup | If the backup schedule is for Microsoft®SQL Server ® or Microsoft Exchange Server, you must specify the type of backup to run:Smart- After a full backup is performed, the backup server performs transaction log backups until the minimum threshold s met. After the is met, the Barracudaminimum threshold Backup Server performs a full backup unless there is more than 1 GB of data in the Cloud Transfer Queue, or until the maximum is met.thresholdFull - A captures a complete database/informationFull Backup store each time.Log - A captures transaction log changes since theLog Backup last backup.SQL/Exchange BackupFull captures a complete database/information store each time. Log captures transaction log changes appropriate. Recommended. Smart Minimum Threshold 7 daysMaximum Threshold 14 daysAfter a full backup is performed, the backup server performs transaction log backups until the mixer full backup unless more than 1 GB of data is in the Cloud Transfer Queue or until the maximum the Minimum Threshold 7 daysMaximum Threshold 14 daysAfter a full backup is performed, the backup server performs transaction log backups until the mixer full backup unless more than 1 GB of data is in the Cloud Transfer Queue or until the maximum the |
Daily Backup Timeline
Multiple Daily Backups
Daily Backup Timeline
SQL/Exchange Backup
SQL/Exchange Backup
Once you are satisfied with your new schedule, click Save. The new schedule displays on the BACKUP > Schedules page:

Schedule Options
Once you create a backup schedule, you can edit, delete, or immediately run a backup:
- Edit Schedule (e) icon - Click to access the Edit Backup Schedule page. Make the desired modifications to the schedule, and then click at the top of the page.Save
- Remove Schedule (💡) icon - Click to delete the selected schedule, and click Remove Schedule in the dialog box to verify you wish to remove the selected schedule.
- Run Backup Now (Run Backup Now) icon - Click to run the scheduled backup process immediately, and click Run Backup Now in the dialog box that follows to verify your the selected action. Once the backup starts, allow a few minutes for the report to generate on the page.REPORTS > Backup
Rate Limit Page
This article applies to Barracuda Backup firmware version 5.0 and higher.
Rate limits control the data replication rate to Barracuda Cloud Storage or other offsite storage locations. You can limit Internet bandwidth consumption during peak usage times, and schedule backups for non-peak hours.
Your initial offsite backup may take on the order of days to complete but all of the data is backed up locally on the Barracuda Backup Server during this period. After the initial large transfer is complete, replicating your data offsite should complete with only a few hours of transfer each day. By default, Barracuda Backup is configured to run full speed data transfers at night so that bandwidth is not affected while most people are at work. An alternate rate limit allows you to adjust the limit speed and time interval.
The length of transfer time it will take to get your data offsite is impacted by the compression and deduplication rates on your data, the uplink speed of your Internet connection, the amount of data that changes every day, and any speed limits you apply to Barracuda Backup.
If you do not set a rate limit, the BACKUP > Rate Limit page displays the following message:
Rate Limit
This Backup Server currently has no rate limit. Create one to have more control over your bandwidth usage.
Click Create one to set up a rate limit.
Once you create a rate limit, the BACKUP > Rate Limit page displays the customized rate limit settings:
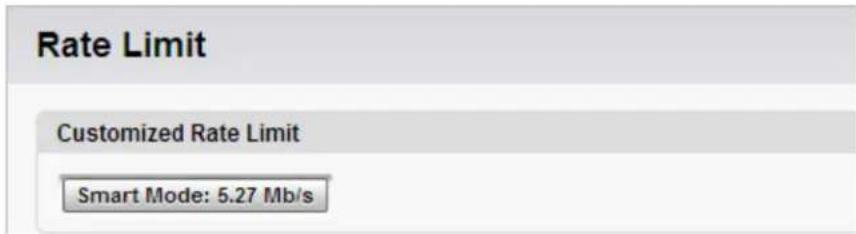
If you have created a rate limit, you can take the following actions on the BACKUP > Rate Limit page:
- Edit Rate Limit ( ) icon - Click to edit the rate limit. Select from the options listed in the following table:
| Option Settings Details | ||
| Default Rate Limit Full Speed - Uses 100% of available bandwidthSmart Mode - Drag the Percent of Bandwidth bar to specify the rate limit;click Test bandwidth to verify your setting- Kb/s or Mb/s Specify the rate limit in Kilobits or Megabits per second | Specify the default rate limit. | |
| Alternate Rate Limit Full Speed - Uses 100% of available bandwidthSmart Mode - Drag the Percent of bar to specify the rate limit;Bandwidth click to verify yourTest bandwidth settingKb/s or Mb/s - Specify the rate limit in Kilobits or Megabits per second | You can optionally create an alternate rate limit which is maintained only during the specified time periods:From/To - Specify the start and end timeOn - Select the days to which the alternate rate limit applies. |
- Reset to Default Rate Limit (5) icon - Click to rest the selected Barracuda Backup Server to the default rate limit; click Reset To in the dialog box that follows to complete your selection. Defaults
Exclusions Page
This article applies to Barracuda Backup firmware version 5.0 and higher.
You can create exclusion rules that use pattern matching to identify directory or file names that are not to be backed up. Files which are typically excluded from backups include temporary files, music, movies and other files which are not essential for business needs.
Use the following steps to create an exclusion rule:
- Log in to the Barracuda Backup web interface, and select the associated Barracuda Backup Server in the left pane.
- Go to the page, and click .BACKUP > Exclusions Add an Exclusion
-
Fill in the information on the page: Add an Exclusion
-
Exclusion Rule Name - Enter a descriptive label to identify the exclusion rule.
- Add Exclusions to Reports - Specify whether to include exclusions in reports.
- Apply Recursively to Sub Directories - Specify whether to apply the exclusion rule recursively to sub directories.
-
Where to Exclude - Specify whether to apply the exclusion rule to all computers and data sources for the selected Barracuda Backup Server.
-
In the What to Exclude section, specify the excluded file types:
-
From the Preset Expressions menu, select the content you want to exclude, for example, Audio files, then click Add.
- In the Expressions field, enter a search string to exclude, for example, *.mp3, then click Add.

Use Case
For example, a school organization does not want to back up music files located in user home directories. To exclude these music files, they create an exclusion rule, select the directory, select the preset expression Audio files, and enter the types of music files they want to exclude in the Expressions field.
- click Save at the top of the page to add the exclusion rule.
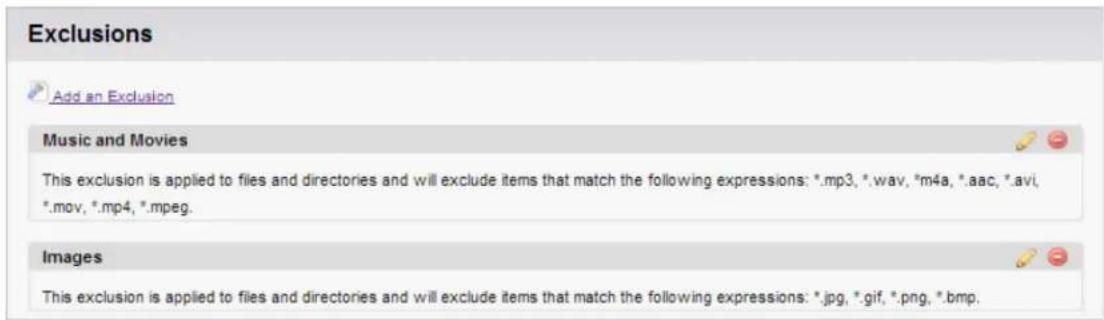
To edit an existing exclusion rule, go to the BACKUP > Exclusions page of the Barracuda Backup web interface, and click the Edit Exclusion (
) icon following the exclusion rule you want to edit. Make the desired changes, then click Save.
To delete an exclusion rule, go to the BACKUP > Exclusions page of the Barracuda Backup web interface, and click the Remove Exclusion (
) icon following the exclusion rule you want to remove. Click OK to confirm you want to remove the rule.
Retention Policies Page
Related Articles
• Understanding Retention Policies
• How to Create Retention Policies
• Understanding Barracuda Offsite Vaulting
- Creating Effective Retention Policies
• Retention Policy Example
Configure retention policies for data stored on a Barracuda Backup Server on the BACKUP > Retention Policies page. Be sure to configure retention policies for your data. Not doing so means that some unwanted data will be moved across the Internet and stored, causing unnecessary expense.
Data is retained based on a traditional grandfather-father-son (daily-weekly-monthly) rotation model. You can specify how long to keep daily, weekly, monthly, and yearly backups by creating data retention policies. Multiple retention policies can be created for files, data backed up by the Barracuda Backup Agent (Exchange, SQL, System State), and email messages.
There are some template policies provided to assist you in creating your own retention policies. You can create one policy for all data sources on a Barracuda Backup Server or multiple policies that each include some subset of the data.
When data is removed according to a retention policy, it is deleted from both the local Barracuda Backup Server and the offsite storage locations. Removed files that have been backed up using Network File Shares Protocol or SSHFS may be retained for a longer period of time, according to the configuration. Otherwise, once your data has been purged, it is gone forever. Purging applies to historic file revisions only; your current data is not impacted by a retention policy. If you wish to purge data immediately for a specific retention policy, go to the BACKUP > Retention Policies page, and click the Start Purge Process (Start Purge Process) icon, and click Start Purge Process in the dialog that follows to confirm your selection.

Purging applies to historic file revisions only; your current data is never impacted by a retention policy.
Understanding Retention Policies
Related Articles
• How to Create Retention Policies
- Creating Effective Retention Policies
• Retention Policy Example
- Offsite Vaulting (firmware version 5.4 and higher only)
Use retention policies to define the length of time you retain historic data based on daily, weekly, monthly, or yearly time intervals. Barracuda
Backup retention policies can be created for different sets of data including virtual machines, data backed up by the Barracuda Backup Agent (Exchange, SQL, Hyper-V, System State), and email messages. You can create one policy for all of the computers and data sources on Barracuda Backup or create multiple policies for each data source. Use the BACKUP > Retention Policy page to define content retention rules:
- Enter an identifying name for the policyPolicy Name
- Items to Retain - Displays all data sources on the selected Barracuda Backup Server. Select all of the items you want to include in the retention policy.

Items with no retention policy are retained forever on the local appliance.

- Define how historic data is retained. Retention Timeline

Data backed up using the Barracuda Backup Agent treats Sunday as the end of week in accordance with the ISO date standard. Data backed up using a NAS protocol considers weeks as seven day periods beginning each month.
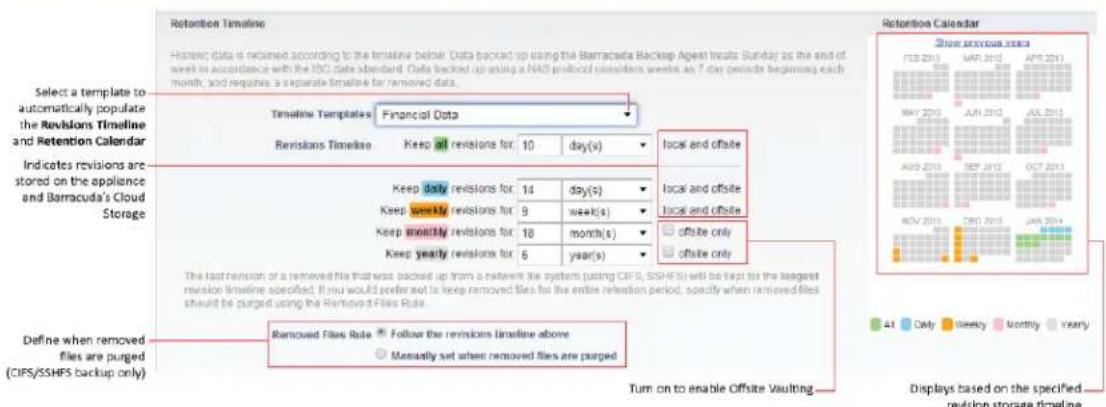
- Timeline Templates - Select from the pre-defined templates which you can modify, or create your own custom timeline. The Re and display the timeline based on the selected template.visions Timeline Retention Calendar
• Revisions Timeline - Define how long to keep daily, weekly, monthly, and yearly backups.

Local and Offsite Revision Storage
Local and offsite means that revisions are stored both on the physical Barracuda Backup appliance and in Barracuda's Cloud Storage or to another Barracuda Backup Server. Set this value based on your business requirements. Keeping revisions forever can affect your cloud storage requirements.
- Keep all revisions for - Specify the number of day(s) to keep all content revisions, or select never or forever.

This features allows you to keep revisions when you have multiple backups per day. For example, you back up your SQL Server hourly for 5 days giving you 120 revisions.
- Keep daily revisions for - Specify how long to keep daily revisions. Specify a number of day(s), never, or forever.
- Keep monthly revisions for - Specify how long to keep weekly revisions. Specify a number of week(s), never, or forever. Turn on offsite only to use Barracuda Offsite Vaulting.
- Keep yearly revisions for - Specify how long to keep yearly revisions. Specify a number of years(s), never, or forever. Turn on offsite only to use Barracuda Offsite Vaulting.

Offsite Vaulting
Offsite vaulting leverages Barracuda's replication technology to offload up to twelve monthly and seven yearly revisions to an offsite location, freeing up disk space on your local Barracuda Backup Server. This feature maintains your organization's compliance with long retention policies, allowing you to save more daily and weekly revisions. Note that offsite vaulting is available for both Barracuda Cloud and box-to-box replication. For more information, see Understanding Barracuda Offsite Vaulting.
- Retention Calendar - Display the timeline based on the values in the Revisions Timeline. Click Show previous years to view prior year retention timelines.
- Removed Files Rule (only applies to data backed up using file-based protocol (CIFS) or SSHFS) - The last revision of a removed file that was backed up from a network file system (using CIFS, SSHFS) is kept for the longest revision timeline specified. If you would prefer not to keep removed files for the entire retention period, specify when removed files should be purged using the Removed Files Rule:
- Follow the revisions timeline above - When selected, files are removed based on the Revisions Timeline.
- Manually set when removed files are purged - When selected, you can specify the Removed Files Timeline:
- Removed Files Timeline - Specify the number of day(s), week(s), month(s), years(s), never, or forever to keep removed files.
How to Create Retention Policies
This article refers to Barracuda Backup firmware version 4.3 and higher.
In this article:
• Create a Retention Policy
- Removed Files Rule
- Removed Email Timeline
Related Articles
• Understanding Retention Policies
- Creating Effective Retention Policies
• Retention Policy Example
- Offsite Vaulting (firmware version 5.4 and higher only)
Use retention policies to define the length of time you retain historic data based on daily, weekly, monthly, or annual time intervals. This allows you to manage data storage and growth.

Important
Purging applies to historic file revisions only; your current data is never impacted by a retention policy.
Create a Retention Policy
To set retention policies,
- Go to the BACKUP > Retention Policies page, click Add a Retention Policy, and enter a name to identify the policy.
- In the Items to Retain section, specify the data sources to which the retention policy applies; the Retention Timeline section displays. Select a timeline template on which to base your retention policy, or specify your own revision timeline.
- Select the desired Removed Files Rule setting, and click Save.
Removed Files Rule
If you do not want to keep removed files for the entire retention period, specify when removed files should be purged using the Removed Files Rule:
- Follow the revisions timeline above (default) - Directs Barracuda Backup to follow the rules set in the Revisions Timeline section
- Manually set when removed files are purged - When selected, you specify the additional amount of times to keep removed files. You can specify in days, weeks, months, or years, or you can select never or forever
Removed Email Timeline
Specify how long to retain removed email messages. After the specified period of time, removed messages are purged. You can specify in days, weeks, months, or years, or select never or forever.
Understanding Barracuda Offsite Vaulting
This article refers to Barracuda Backup firmware version 5.4 or higher.
Related Articles
• Understanding Retention Policies
• How to Create Retention Policies
- Creating Effective Retention Policies
Offsite vaulting leverages Barracuda's replication technology to offload up to twelve monthly and seven yearly revisions to an offsite location, freeing up disk space on your local Barracuda Backup Server. This feature maintains your organization's compliance with long retention policies, allowing you to save more daily and weekly revisions. Note that offsite vaulting is available for both Barracuda Cloud and box-to-box replication. Offsite vaulting can be used for 12 monthly and 7 yearly historical revisions; these revisions are retained at the end of each calendar month and year.

Warning
Once offsite vaulting is enabled not be undone.
To specify offsite vaulting,
- Log in to Barracuda Backup, and select the associated Barracuda Backup Server in the left pane.
-
Go to the page.BACKUP > Retention Policies
-
Click the Edit Retention Policy ( ) icon to the right of the retention policy you want to configure monthly and/or yearly offsite revisions.
-
Scroll down to the section.Retention Timeline
-
Select offsite only following weekly and/or monthly, and enter the associated time to keep the revisions:
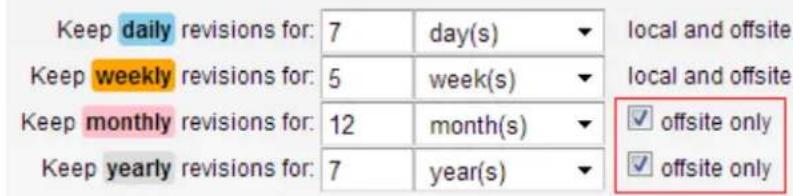

Offsite Only
Monthly and/or yearly revisions sent offsite only are purged from the local Barracuda Backup Server, and all revisions outside of this policy will be purged both locally and offsite.
- Click the to apply your changes.Save
Creating Effective Retention Policies
This article refers to Barracuda Backup firmware version 4.3 and higher.
In this article:
• How it Works
- Revision Timelines
- Removed Files Rule
- Removed Email Timeline
Related Articles
• Understanding Retention Policies
• How to Create Retention Policies
• Retention Policy Example
• Understanding Barracuda Offsite Vaulting (firmware version 5.4 and higher only)

Important
Before defining data retention policies, make sure you have a clear understanding of data and email message compliance rules as well as your organization's record retention policies.
Use retention policies to define the length of time you retain historic data based on daily, weekly, monthly, or annual time intervals. This allows you to manage data storage and growth.

Important
Purging applies to historic file revisions only; your current data is never impacted by a retention policy.
Use the Barracuda Backup web interface to verify retention policies are in place and enforced. You can create different retention policies for different sets of data including:
- Files
• Data backed up by the Barracuda Backup Agent (Exchange, SQL, system state) - Email messages
How it Works
Data is retained based on a traditional grandfather-father-son (daily-weekly-monthly) rotation model. You specify how long to keep daily, weekly, monthly, and yearly backups through data retention policies.
When you define a retention policy, begin by selecting either a preset template or a previously defined policy as a starting point. This helps you avoid creating multiple retention policies for the same sets of data. You can create one policy for all of the computers and data sources on a Barracuda Backup Server, or create different policies that include subsets of the data.
Revision Timelines
Historic data is retained based on your revision timeline settings.
Depending on how your data is backed up, revision timelines are treated in the following manner:
• Data backed up using the Barracuda Backup Agent treats Sunday as the end of week in accordance with the ISO date standard.
- Data backed up using a NAS protocol considers weeks as 7 day periods beginning each month, and requires a separate timeline for removed data.
Retention policies are based on retaining different types of data and different revisions for different periods of time. For example, in the General Documents Revision Template in the table below, all revisions are kept based on daily, weekly, and monthly revisions.
The predefined timeline templates use the revision timelines defined in the following table.
| Revision Template Keep All Revisions Keep Daily | Keep Weekly Revisions | Keep Monthly Revisions | Keep Yearly Revisions | |
| Revisions | ||||
| General Documents 5 days 1 week 1 month 1 year never | ||||
| Dump Files Never 1 week 1 month 3 months Never | ||||
| Financial Data 10 days 2 weeks 2 months 18 months 6 years | ||||
| Keep No Historic Data | Never Never Never Never Never | |||
| Exchange Data Never 2 weeks Never Never Never | ||||
| SQL Server Database | Never 1 month | Never Never Never |
Removed Files Rule
If you would prefer not to keep removed files for the entire retention period, you specify when removed files should be purged using the Removed Files Rule:
• Follow the revisions timeline above (default) - Directs Barracuda Backup to follow the rules set in the Revisions Timeline
- Manually set when removed files are purged - When selected, you specify the additional amount of times to keep removed files. You can specify in days, weeks, months, or years, or you can select or never forever
Removed Email Timeline
You can select how long to retain removed email messages. After the specified period of time, removed messages are purged. You can specify in days, weeks, months, or years, or select or .never forever
Retention Policy Example
Use retention policies to define the length of time you retain historic data based on daily, weekly, monthly, or yearly time intervals. Think of retention policies in terms of your ability to restore data backed up in the past. For example, you have a retention timeline that keeps daily backups for five days, weekly backups for two weeks, monthly backups for six months, and yearly backups for one year:
Retention Timeline
Keep All Revisions: 5 days Keep Daily Revisions: 5 days Keep Weekly Revisions: 2 weeks Keep Monthly Revisions: 6 months Keep Yearly Revisions: 1 year
A revision is created when the data being backed up is changed. For example, if you backup a file every day and no changes are made for a week, and then you make a change to that file the next week, there is only one revision for that file. The revision is kept through five more changes to the data, and when a sixth change is made, the oldest revision "graduates" to a weekly revision, and that new sixth change becomes a daily revision. This means there are five daily revisions and one weekly revision, or six total revisions. The seventh change to that file will then force the oldest revision to graduate and then there will be five daily and two weekly revisions. When the eighth revision is made, the oldest revision graduates to the monthly revision, so there are five daily, two weekly, and one monthly revision:
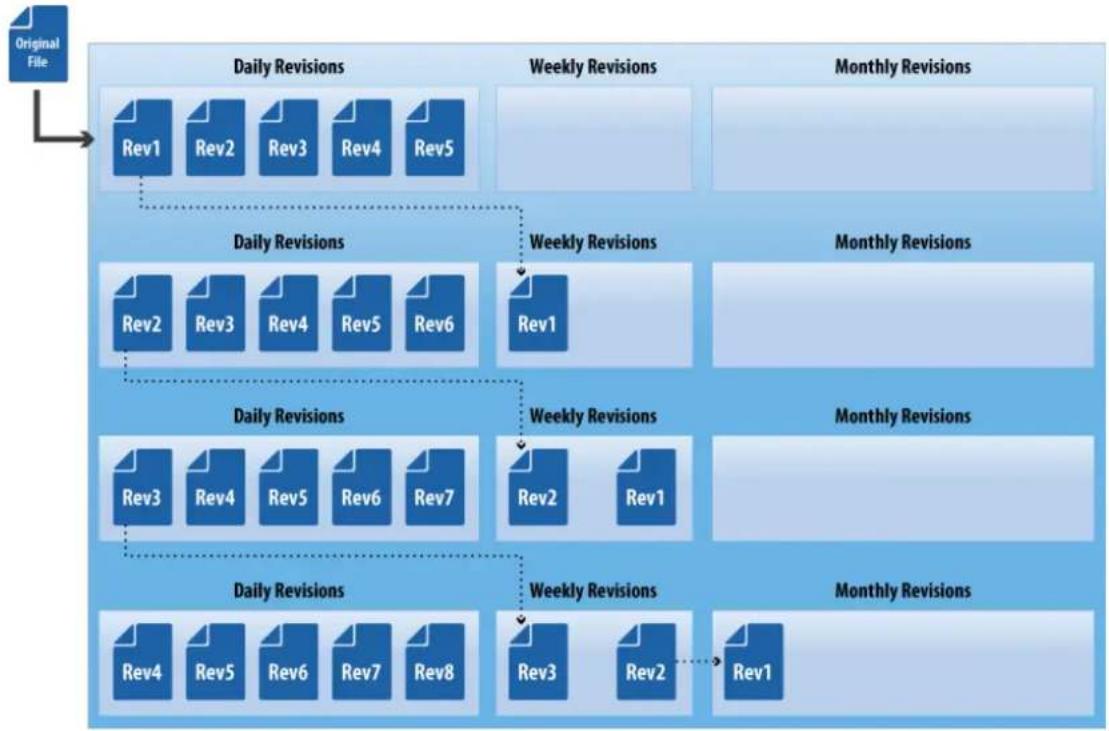
flowchart
graph TD
    A["Original File"] --> B["Daily Revisions"]
    B --> C["Rev1"]
    B --> D["Rev2"]
    B --> E["Rev3"]
    B --> F["Rev4"]
    B --> G["Rev5"]
    H["Weekly Revisions"] --> I["Monthly Revisions"]
    J["Daily Revisions"] --> K["Rev2"]
    J --> L["Rev3"]
    J --> M["Rev4"]
    J --> N["Rev5"]
    J --> O["Rev6"]
    P["Weekly Revisions"] --> Q["Monthly Revisions"]
    R["Daily Revisions"] --> S["Rev3"]
    R --> T["Rev4"]
    R --> U["Rev5"]
    R --> V["Rev6"]
    R --> W["Rev7"]
    X["Weekly Revisions"] --> Y["Monthly Revisions"]
    Z["Daily Revisions"] --> AA["Rev4"]
    Z --> AB["Rev5"]
    Z --> AC["Rev6"]
    Z --> AD["Rev7"]
    Z --> AE["Rev8"]
    AF["Monthly Revisions"] --> AG["Rev1"]
Changing Retention Policies
If you make changes to your retention policy, the updates take effect within 24 hours, at which time, any excess data based on your new policy settings is removed from your device. Note that the removal process can take some time depending on the amount of data. View progress in the page.STATUS
Watched Files Page
This article applies to Barracuda Backup firmware 5.1 and earlier .only
The seldomly used Watched Files feature has been deprecated in firmware versions 5.2, and will not be supported for new Barracuda Backup Servers. Note that existing Watched File Rules will continue to function as expected.
Use this page to add files to watch on a particular Barracuda Backup Server. File watch rules are used to monitor and send email alerts when specified files have not been changed often enough or appear smaller than expected. For example, an administrator could choose to receive an alert if third-party backup software fails to process dump files or if the dump files appear to be of insufficient size. Use the BACKUP > Watched Files page to add files to watch on a particular Barracuda Backup Server.
Click, and enter the details described in the following table: Add a File Watch
| Field Description | |
| Add File Watch Rule Name | Enter a short description for the file watch rule. |
| Modified Time Threshold | This section displays all data sources set up on the selected Barracuda Backup Server. Select the items to which the watch rule is to apply. |
| Modified Time Threshold Warning | Turn on Warn if file is not modified at least once in, and specify how frequently the file should change in hours, days, weeks, months, or years. |
| Size Threshold Warning | Turn on Warn if the size is not at least and enter the smallest acceptable size for the file in bytes, kilobytes, megabytes, gigabytes, or terabytes. |
Click Save to save the watch rule, or click Cancel to close the page without saving changes.

Note that you can add file watch rules on network file share data sources only; you cannot add a file watch rule on agent data sources.
The ADMIN > Email Notifications page allows you to specify the email addresses that are to receive an email notification when files matching the parameters in a file watch rule are detected. The emails are sent to those users who are configured to receive alerts.
RESTORE Page
From the RESTORE page you can restore data from the local Barracuda Backup Server, from a remote Barracuda Backup Server that has been used to replicate that system, or from the Barracuda Cloud Storage. Restores from the local Barracuda Backup Server offer the fastest restore times. Multiple methods are available to restore your backed up data. You can restore single files, individual email messages, and entire systems. In firmware version 5.2 and higher, use the LiveBoot Management page to manage active virtual machines LiveBooted to the cloud.
In this Section
• VMware Server Recovery and Restoration
• Microsoft Exchange Server Recovery and Restoration
• Microsoft SQL Server Database Recovery and Restoration
• Microsoft Hyper-V Recovery and Restoration
• Microsoft Windows Server Active Directory
• Barracuda LiveBoot in the Cloud
- Barracuda copy.com
- Restore Browser
• How to Restore from Local and Offsite Backups
• How to Recover Backed Up Data
• How to Restore from a Replication Destination
• How to Restore SharePoint Objects Using Kroll Ontrack
• How to Restore a Microsoft Windows Server 2003 Domain Controller
• How to Restore Windows System State
• How to Restore Exchange and GroupWise Messages
• How to Restore a Windows System to Bare Metal
• How to Restore a Linux Server Using Bare Metal Restore
• How to Restore Data with FTPES
• Legacy Firmware Recovery and Restoration Options

Legacy Firmware
The articles in the Legacy Firmware Recovery and Restoration section refer to firmware version 5.0 or earlier only.
Related Articles
• How to Back Up and Restore a Microsoft SharePoint SQL Database
• How to Restore a Microsoft SharePoint SQL Database Using STSADM
• VMware Data Recovery Backup and Restore Permissions
VMware Server Recovery and Restoration
In this Section
• How to Restore a Virtual Machine to its Original Location
• How to Restore a Virtual Machine to a Different Host Protected by Barracuda Backup
• How to Restore a Virtual Machine to an Alternate VMware Host not available through the Barracuda Backup Service
• VMware Data Recovery Licenses
• How to Restore VMware Guest Systems Using Barracuda LiveBoot
How to Restore a Virtual Machine to its Original Location
This article applies to the Barracuda Backup Server firmware version 4.2, and VMware ^® 4.0 and above, and the vSphere ^® Data Recovery API.
Related Articles
- Restore to a Different Host Protected by Barracuda Backup
- Restore to an Alternate VMware Host not available through Barracuda Backup
- Set Up a VMware Server and Guests
- Changed Block Tracking
Barracuda Backup utilizes the vSphere Data Recovery API to backup and restore the VMware Host configuration as well as VMware guests. VMware host backup provides a comprehensive disaster recovery option for virtual machines and provides the ability to recover virtual machines to any VMware host accessible by the Barracuda Backup Server.
Use the Barracuda Backup Server web interface to restore VMware hosts, host configuration, or virtual machine images.
Use the following steps to restore a VMware data source:
- Log into the Barracuda Backup web interface, and go to the page.RESTORE >Restore Browser
-
Expand the VMware data source on the left, and click on the virtual machine you want to restore; all available revisions display.
-
Click to the right of the revision to restore.Restore
-
In the dialog box, select the following options:Restore
-
Restore to - Select Original Location
• Overwrite - Turn On to overwrite existing data for this virtual machine at the source -
Click .Start Restoring
How to Restore a Virtual Machine to a Different Host Protected by Barracuda Backup
This article applies to the Barracuda Backup Server firmware version 4.2, and VMware® 4.0 and above, and the vSphere® Data Recovery API.
Related Articles
- Restore to Original Location
- Restore to an Alternate VMware Host not available through Barracuda Backup
- Set Up a VMware Server and Guests
- Changed Block Tracking
Barracuda Backup utilizes the vSphere Data Recovery API to protect the VMware guests at the host level. Barracuda Backup provides a comprehensive disaster recovery option for virtual machines and provides the ability to recover virtual machines to any VMware host accessible by the Barracuda Backup Server. Note that the VMware host being restored must have a VMware Disaster Recovery and Backup license available from VMware.
Use the following steps to restore a virtual machine to a new location:
- Log into the Barracuda Backup web interface, and go to the page.RESTORE >Restore Browser
- Expand the VMware data source on the left, and click on the virtual machine you wish to restore; all available revisions display.
- Click to the right of the revision you wish to restore.Restore
- In the Restore dialog box, in the Restore to section, select the second radio button, and select the host from the drop-down menu.
- If you are restoring to a vCenter, complete the following steps:
-
From the Datacenter drop-down menu, select the data center where you want to restore the virtual machine.
-
From the Host drop-down menu, select the desired restore host name.
• From the Datastore drop-down menu, select the desired restore datastore. -
To overwrite any existing data on the selected virtual machine at the source, turn on Overwrite.
-
Click .Start Restoring
How to Restore a Virtual Machine to an Alternate VMware Host not available through the Barracuda Backup Service
This article applies to the Barracuda Backup Server firmware version 4.2, and VMware ^® 4.0 and above, and the vSphere ^® Data Recovery API.
Related Articles
- Restore to Original Location
- Restore to a Different Host Protected by Barracuda Backup
- Set Up a VMware Server and Guests
- Changed Block Tracking
Barracuda Backup utilizes the vSphere Data Recovery API to backup and restore the VMware Host configuration as well as VMware guests. VMware host backup provides a comprehensive disaster recovery option for virtual machines and provides the ability to recover virtual machines to any VMware host accessible by the Barracuda Backup Server. Note that the VMware host being restored must have a VMware Disaster Recovery and Backup license available from VMware.
Use the following steps to restore a virtual machine to an alternate location:
- Log into the Barracuda Backup web interface, and go to the page.RESTORE >Restore Browser
- Expand the VMware data source on the left, and click on the virtual machine you want to restore; all available revisions display
- Click to the right of the revision you want to restore.Restore
- In the Restore dialog box, in the Restore to section, select the third radio button, and enter the fully qualified domain name (FQDN) or IP address of the VMware host where you want to restore the virtual machine.
- Enter the VMware host username and password in the Authentication fields, and click Load Datacenters to view a list of datacenters and datastores.
- If you are restoring to a vCenter, complete the following:
- From the Datacenter drop-down menu, select the data center where you want to restore the virtual machine.
• From the Host drop-down menu, select the desired restore host name. -
From the Datastore drop-down menu, select the desired restore datastore.
-
To overwrite any existing data on the selected virtual machine at the source, turn on Overwrite, and click Start Restoring.
VMware Data Recovery Licenses
This article refers to Barracuda Backup firmware version 4.2 and higher, and VMware® vSphere®.
Barracuda Backup requires access to the vStorage APIs for Data Protection in order to back up VMware virtual machines. You can access these APIs from the following vSphere Essentials and Acceleration Kits:
- Essentials Kit
- Essentials Plus Kit
• Standard Acceleration Kit - Enterprise Acceleration Kit
- Enterprise Plus Acceleration Kit
Related Articles
• VMware Data Recovery Backup and Restore Permissions
Additional Resource
• VMware vSphere with Operations Management
How to Restore VMware Guest Systems Using Barracuda LiveBoot
This article refers to firmware 5.0 and higher, and VMware ^® ESX/ESXi with the VMware license which includes access to vSphere ^® Data Recovery API.
In this article:
- Restore a Virtual Machine Using Barracuda LiveBoot
- Move the Virtual Machine to a Datastore
- Remove the Virtual Machine from vCenter
Related Articles
• Understanding Cloud LiveBoot
• How to Use Barracuda LiveBoot in the Cloud
- How to vMotion a LiveBooted Virtual Machine from the Barracuda Backup Server
- How to vMotion a LiveBooted Virtual Machine from the Barracuda Backup Server
In this article:
Use Barracuda LiveBoot to recover and traverse the file structure of VMware virtual guest system data, and to download files and directories within a VMware snapshot. In the event of a failure with your primary storage system, the Barracuda Backup Server can act as the datastore for your VMware ESX/ESXi server. You can recover any revision of a VMware virtual guest server within your retention policy, and serve up deduplicated content as needed by the virtual server.
Restore a Virtual Machine Using Barracuda LiveBoot
Use the following steps to recover VMware virtual guest system data using Barracuda LiveBoot:
- Log in to the Barracuda Backup web interface, and go to :RESTORE
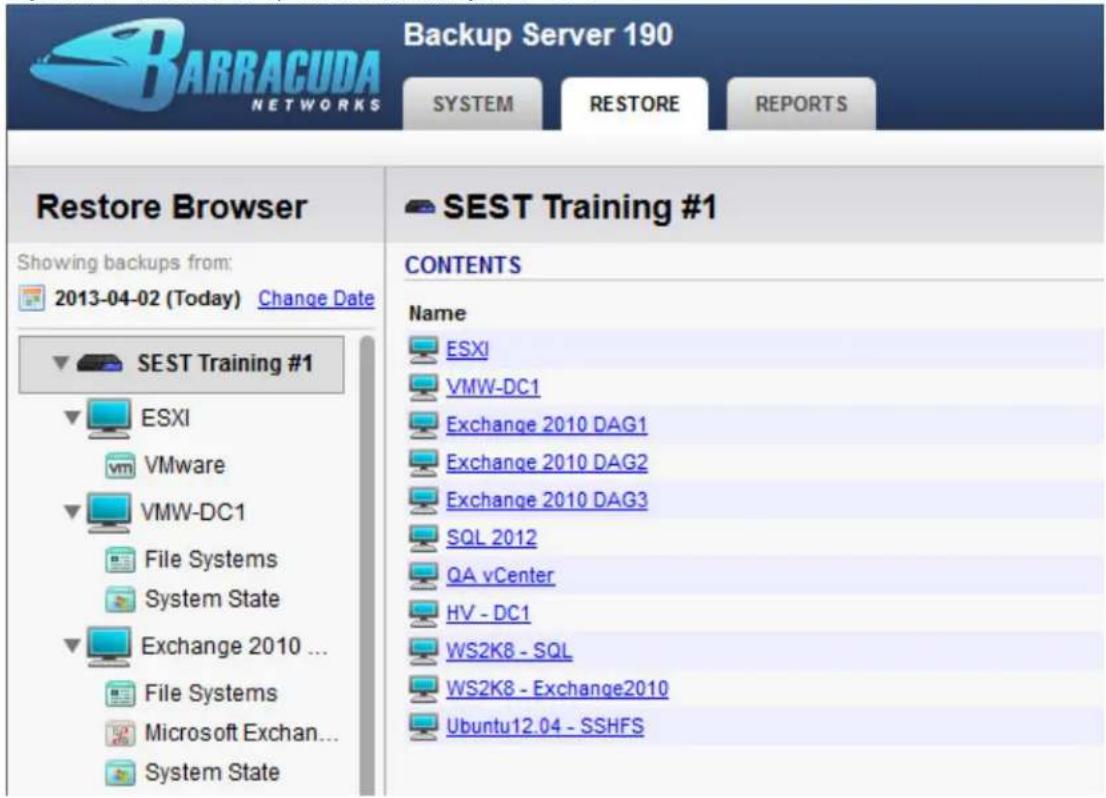
- Navigate to and expand the ESXi host, click on the guest system to restore, and drill down to the level you want to restore.
- Click the link next to the Virtual Machine to restore:LiveBoot
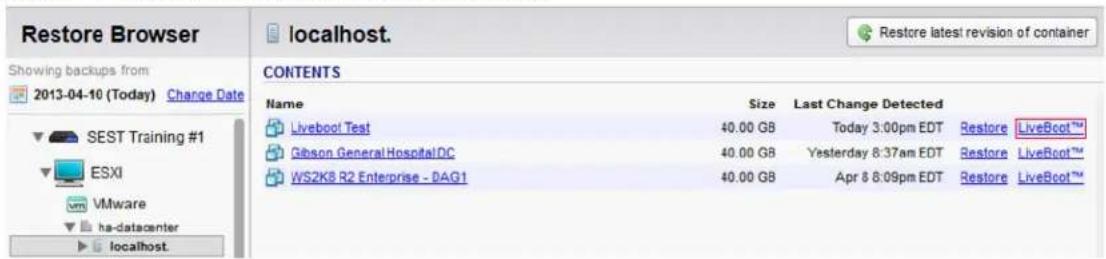
- The page displays: Run Instantly from Backup Server
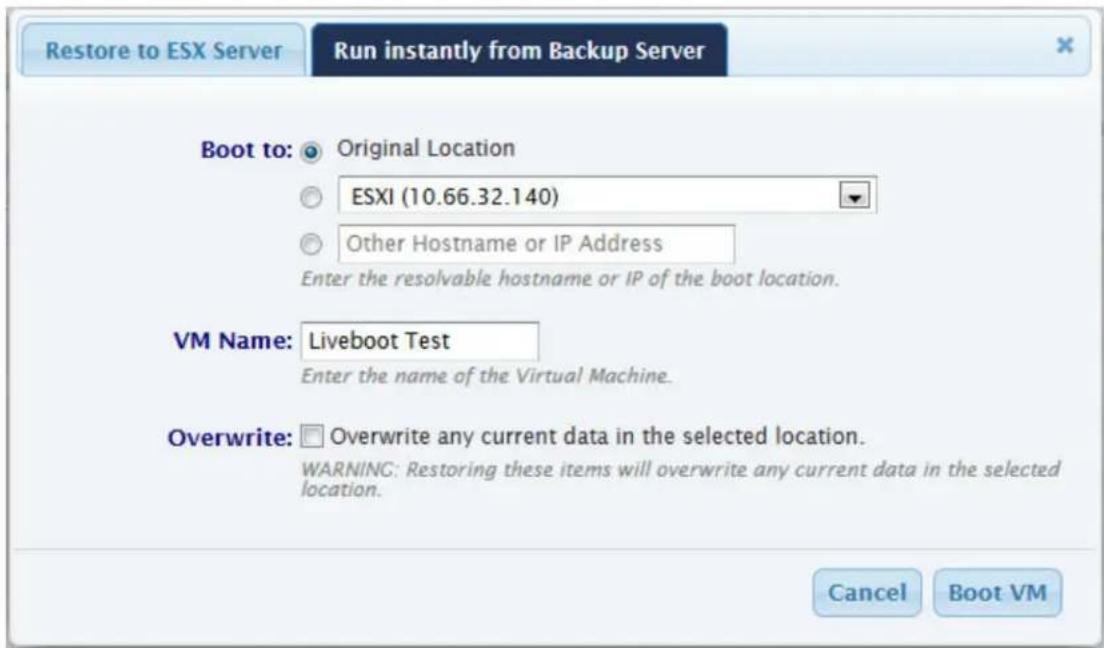
- In the Boot to section, select whether to boot the Virtual Machine to the Original Location or enter an alternate Hostname or IP address.
- Enter name of the Virtual Machine in the VM Name field, for example, LiveBootRestore, and click Boot VM.
- The progress dialog box displays. Once the process is complete, a green check mark displays next to Bootin :g Virtual Machine
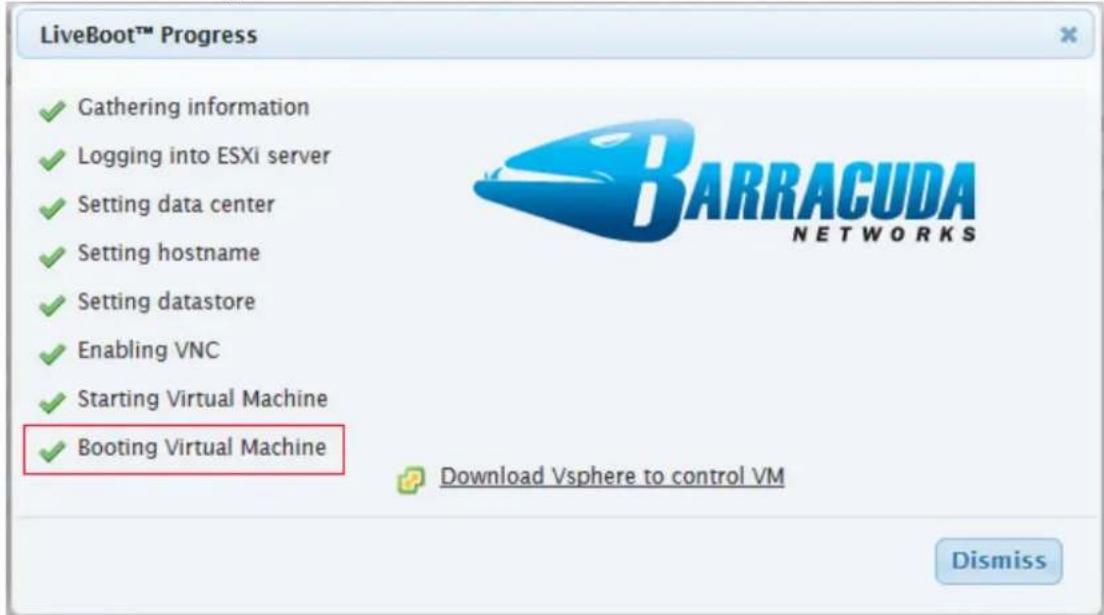
- Once the process is complete the server boots up.
- On your VMware Server, open VCenter vSphere Client and verify the Virtual Machine displays:
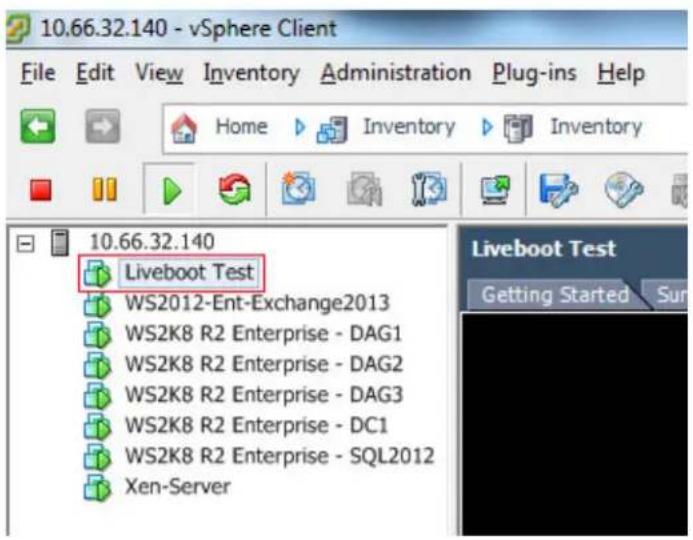
- In the Barracuda Backup web interface, click in the dialog box:Dismiss LiveBoot Progress
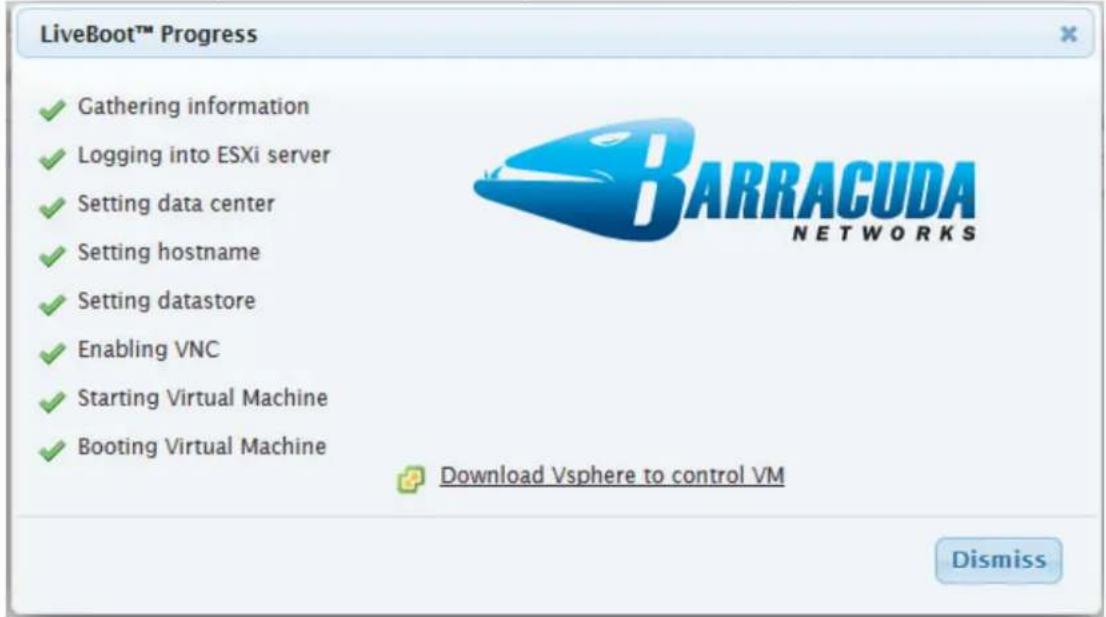
- Once the LiveBoot is complete, in the Barracuda Backup web interface click Destroy to terminate the process:
| Name | Size | Last Change Detected | ||
| Liveboot Test | 40.00 GB | Yesterday 3:00pm EDT | Restore | Destroy |
| Gibson General Hospital DC | 40.00 GB | Apr 9 8:37am EDT | Restore | LiveBoot™ |
Move the Virtual Machine to a Datastore
Use the following steps to move the "LiveBooted" Virtual Machine to your own datastore.
- On your VMware Server, open the VCenter VSphere Client.
- Right-click on the Virtual Machine and click Migrate. The Migrate Virtual Machine wizard displays.
- In the page, select :Select Migration type Change datastore
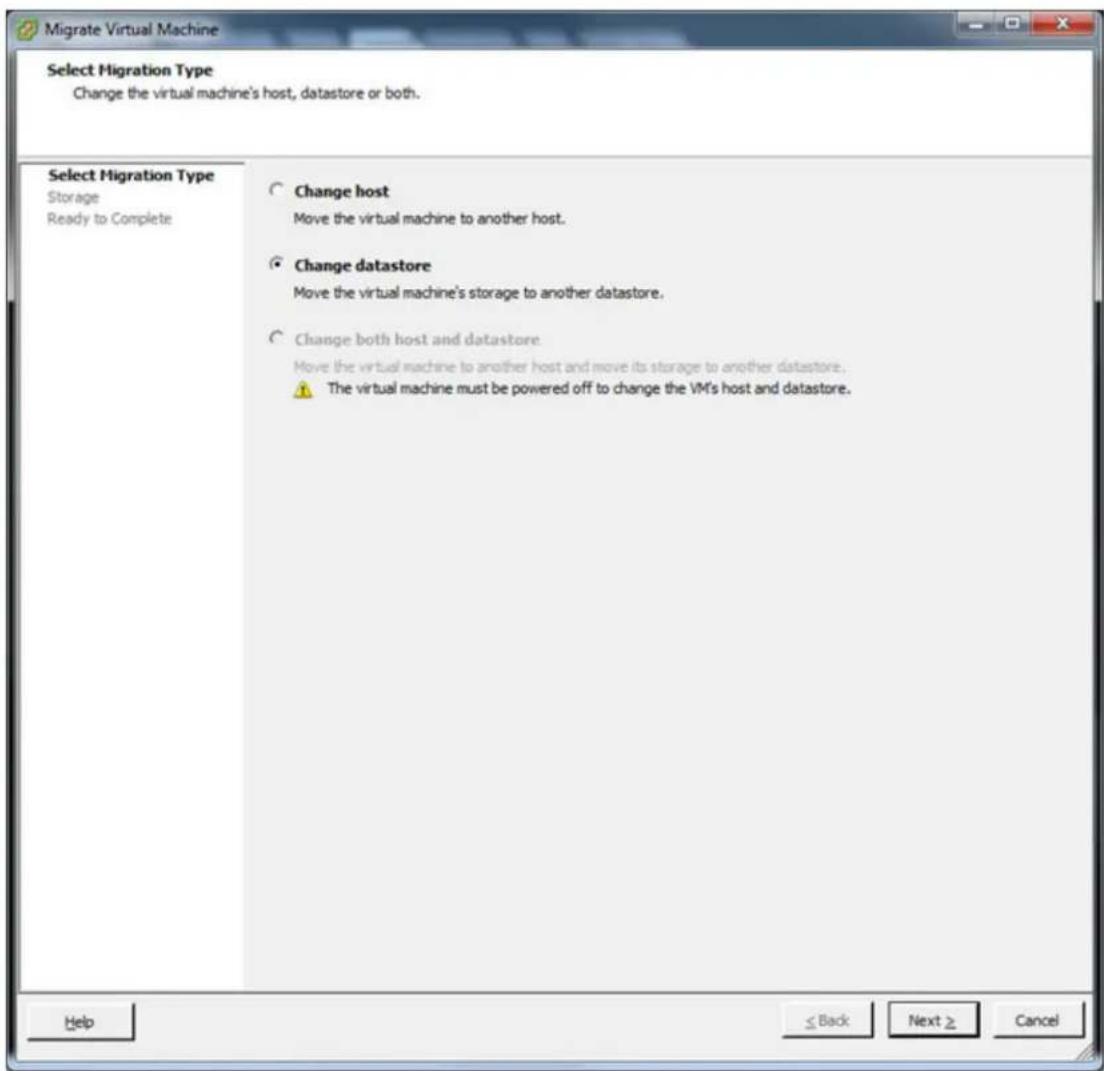
- Click . In the page, select the datastore to which to move the Virtual Machine:Next Storage
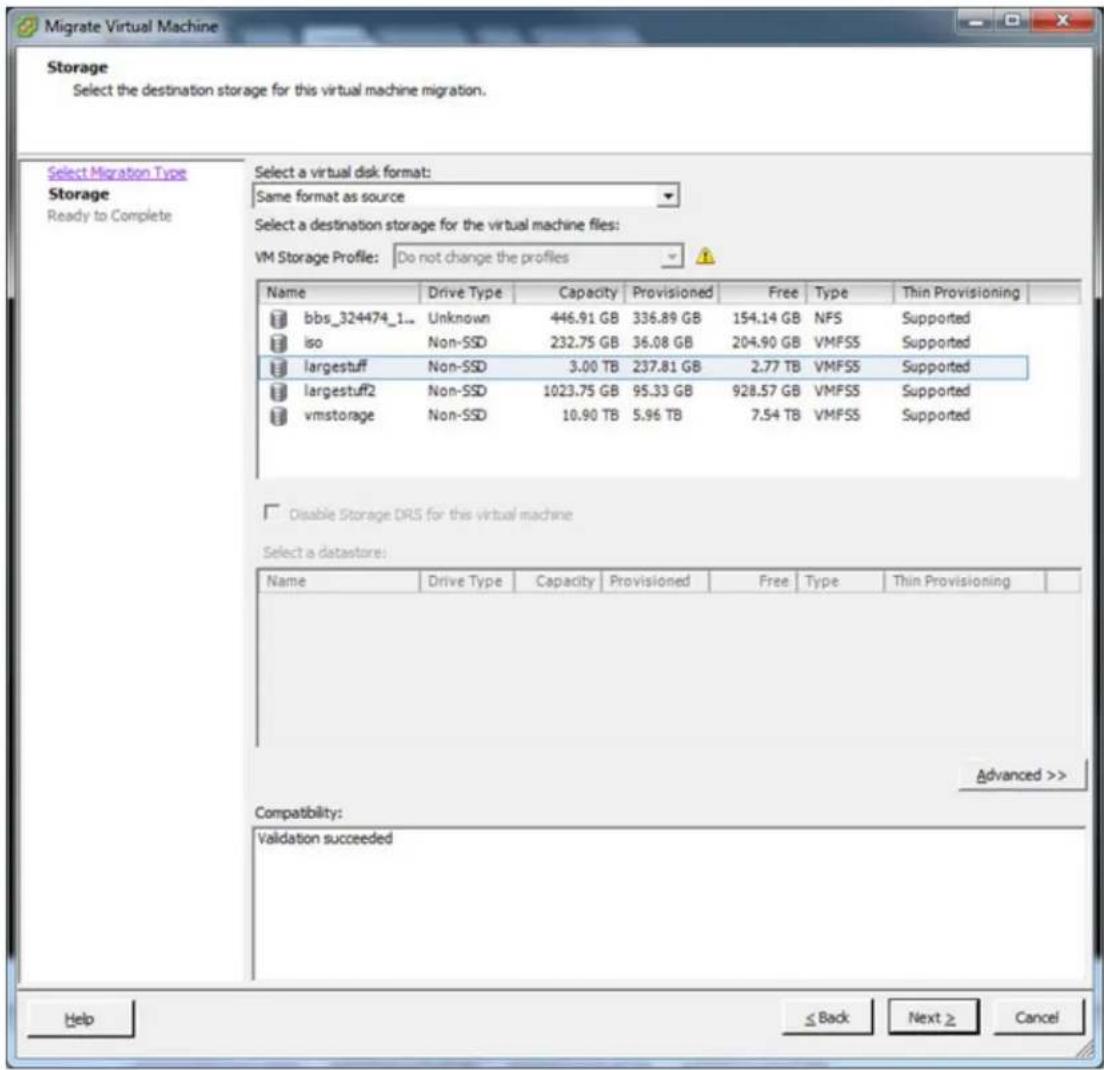
- Click Next. In the Ready to Complete page, click Finish to start the migration process using vMotion.
- You can check the progress of vMotion in the log:Recent Tasks
Recent Tasks
| Name | Target | Status | Details | Initiated by |
| Relocate virtual machine | LiveBoot TEST - SQL2008 | 98% | Migrating the active state of Virtual Machine | LARGESTUFF\Administrator |
| Power On virtual machine | LiveBoot TEST - SQL2008 | Completed | LARGESTUFF\Administrator | |
| Create virtual machine | Ann Arbor | Completed | LARGESTUFF\Administrator |
- Select the active environment to which to move the restored system, click Next, and then click Finish.
Remove the Virtual Machine from vCenter
Use the following steps to remove the "LiveBooted" Virtual Machine from vCenter:
- On your VMware Server, open the VCenter VSphere Client.
- Right-click on the LiveBooted Virtual Machine and click .Power off
- Right-click the Virtual Machine again and click .Delete from disk
- Click on the ESXi host where the Virtual Machine was running, and click the Configuration tab:
| Identification Status Device Drive Type Capacity Free Type Last Update | |||||||
| bbs_324474_18_2013-04-22.20:02:32:04 Normal 10.66.32.252:/mail/usb/fuse/restore_324474_18_2013... Unknown 446.91 GB 154.14 GB NFS 4/26/2013 3:55:12 PM | |||||||
| iso Normal Local ATA Disk(110.4TA_ST3258620NS) Non-SSD 232.75 GB 264.90 GB VMFSS 4/26/2013 3:55:12 PM | |||||||
| largestuff Normal MSFT iSCSI Disk(naa.60003ffe4f0c0404a5abb29fa977... Non-SSD 3.00 TB 2.77 TB VMFSS 4/26/2013 3:t58:13 PM | |||||||
| largestuff2 Normal MSFT iSCSI Disk(naa.60003ffe4f0c040496d140707SFO... Non-SSD 1,022.75 G 928.57 GB VMFSS 4/26/2013 3:t58:13 PM | |||||||
| vmstorage Normal Local LSI Disk(naa.600605b0015ab060187f30b629c8b... Non-SSD 10.90 TB 7.54 TB VMFSS 4/26/2013 3:t55:12 PM |
- Right-click on the LiveBooted Virtual Machine datastore, and click .Unmount
Microsoft Exchange Server Recovery and Restoration
In this Section
• How to Restore a Microsoft Exchange 2013 Server Database to a Recovery Storage Group
• How to Restore a Microsoft Exchange 2010 Server by Overwriting an Existing Database
• How to Restore a Microsoft Exchange 2010 Server to a Recovery Database
• How to Restore a Microsoft Exchange 2007 Database
• How to Restore a Microsoft Exchange 2003 Database by Overwriting Existing Database
• How to Restore a Microsoft Exchange 2003 Database using a Recovery Storage Group
How to Restore a Microsoft Exchange 2013 Server Database to a Recovery Storage Group
This article refers to Barracuda Backup version 5.3 or higher, and Microsoft® Exchange Server 2013. This article assumes the Microsoft Exchange Server is installed and configured.
Set up Barracuda Backup
- Log in to Barracuda Backup, and select the Barracuda Backup Server that contains the Microsoft Exchange 2013 Server backups that you wish to restore.
- Go to the RESTORE >Restore Browser page, select the Microsoft Exchange data source, and click Microsoft Exchange:
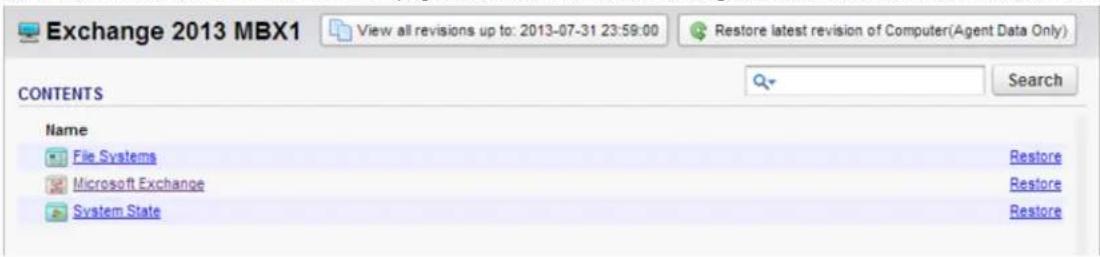
- To restore the latest backed up database, click :Restore

- The Restore window displays. In the Restore to section, select Restore to an Exchange Recovery Storage Group / Database:
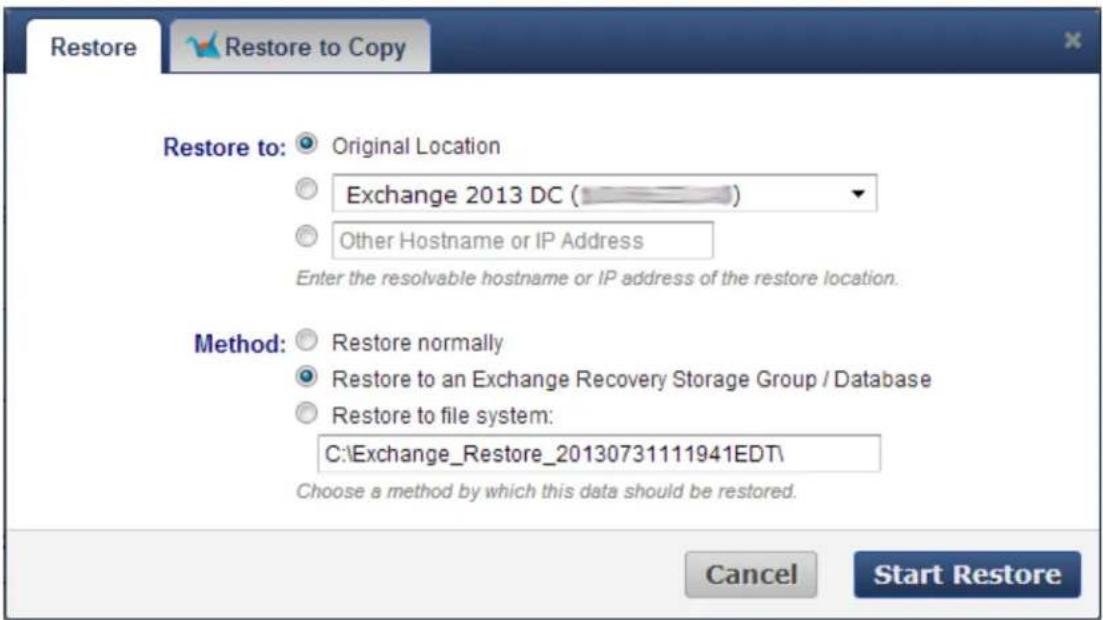
- Click Start Restore. Once the restore is complete, go to REPORTS >Restore to verify the restore completed successfully.
Recover a Mailbox from the Exchange 2013 Recovery Storage Group

When running the commands in this section, substitute DatabaseName with the name of your original database.
- Log in to the Exchange 2013 Mailbox Server, and open the Exchange Management Shell.
- To mount your recovery database, run the following command:
Mount-Database ' - Recovery'DatabaseName
![Machine: Titan.milky-way.local Get help for a cmdlet: Help or -? Show quick reference guide: QuickRef Exchange team blog: Get-ExBlog Show full output for a command: | Format-List Tip of the day #69: Exchange 2013 uses management role groups and management role assignment policies to manage permissions. Role groups enable you to grant permissions to groups of administrators and specialist end users. These are people who manage your organization or perform special tasks, like mailbox searches for compliance reasons. Role assignment policies enable you to grant permissions to your end users. These permissions include whether users can manage their own distribution groups, edit their own profile information, access voice nail, and none. UEREOSE: Connecting to Titan.milky-way.local. UEREOSE: Connected to Titan.milky-way.local. [PS] C:\Windows\system32 taxation Database 'Database1 - Recovery' [PS] C:\Windows\system32 taxation Database -Status 'Database1 - Recovery' | fl Mounted Mounted : True [PS] C:\Windows\system32>](/content/2026/06/1260286/images/92eb9b4e71504b836913cb705669032b826a6b6b7b913a00d3416c282feca813.jpg)
- To view the Mailboxes within the database, run the following command:
Get-MailboxStatistics -I
![[PS] C:\Windows\system32>Get-MailboxStatistics -Database 'Database1 - Recovery' DisplayName ItemCount StorageLimitStatus LastLogenTime Microsoft Exchange 2 SystemMailbox<9044acd7... 1 HealthMailbox2d23d16f5... 1680 8/1/2013 1:26:13 PM Personal Archive - Hea... 0 8/1/2013 10:44:34 AM Microsoft Exchange 9 HealthMailbox0eb5e718e... 1 8/1/2013 1:29:50 PM Personal Archive - Hea... 0 8/1/2013 12:52:23 PM Administrator 3 8/1/2013 3:56:04 PM HealthMailbox9044acd71... 2 8/1/2013 12:58:16 PM Personal Archive - Hea... 0 9/1/2013 12:52:05 PM Shaun Lubahn 11 7/31/2013 10:45:36 AM Paul Troy 8 8/2/2013 10:01:20 AM Matthew Haag 2 Paul McDonnell 9 8/2/2013 3:39:10 PM Shaun Lubahn 14 8/2/2013 10:50:08 AM Josh Kelka 3 [PS] C:\Windows\system32>](/content/2026/06/1260286/images/57e4274e80063cd14aa5b2ccb14b767803279b67be4db895cd2bef4dbc7b6b08.jpg)
- To view the globally unique identifier (GUID), run the following command:
Get-MailboxStatistics -Database ' - Recovery' | Format-ListDatabaseName DisplayName, MailboxGUID
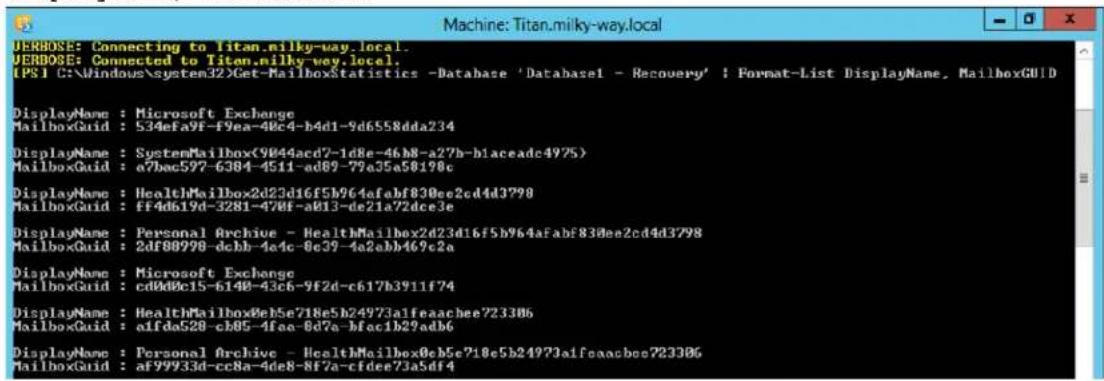
- To restore a mailbox using the GUID, run the following command:
New-MailboxRestoreRequest -SourceDatabase 'DatabaseName - Recovery' -SourceStoreMailbox -TargetMailbox -AllowLegacyDNMailboxGUID TargetMailboxAli
Mismatch
![[PS] C:\Windows\system32>New-MailboxRestoreRequest -SourceDatabase 'Database1 - Recovery' -SourceStoreMailbox 20b9a974-e28d-43d4-88de-ebbha583e02d -TargetMailbox pncdonnell -AllowLegacyBNMismatch Name TargetMailbox Status ---- milky-way.local/Users/Paul McDonnell Queued [MailboxRestore1] [PS] C:\Windows\system32>](/content/2026/06/1260286/images/c567701d51013435c5eb321e8da66f89e177b6906e5090613feaff048e93ffad.jpg)
- To check the status of your Mailbox restore, run the following command:
Get-MailboxRestoreRequestStatistics -Identity MailboxUser\RestoreRequestName
![[PS] C:\Windows\system32\Get-MailboxRestoreRequestStatistics -Identity pncdonnell\MailboxRestore1 Name StatusDetail TargetAlias PercentComplete MailboxRestore1 Completed pncdonnell 100 [P$] C:\Windows\system32>](/content/2026/06/1260286/images/1c899fa887a9cd38cfc884e0639b8d1744de3dd60c947054935d4df7d84d8a97.jpg)
How to Restore a Microsoft Exchange 2010 Server by Overwriting an Existing Database
This article refers to Barracuda Backup firmware 4.0 and higher, and Microsoft® Exchange 2010 Server. This article assumes the Microsoft Exchange Server is installed and configured. This article describes how to restore an Exchange 2010 Server by overwriting an existing database or to an original location. You can also restore to a Recovery Storage Group (RSG).
In this article:
- Step 1. Allow Database Restore
- Step 2. Specify Barracuda Backup Restore Settings
- Step 3. Mount the Database
Related Articles
- Restore to a Recovery Database
Additional Resource
- How do I set up my Barracuda Backup Service to restore Exchange 2010?

Warning
This option overwrites all existing data. If you do not want to overwrite the database, see Restore to a Recovery Storage Group.
Take caution when overwriting an existing database; Barracuda Networks highly recommends restoring to a separate recovery database except in cases of extreme data loss or when performing disaster recovery.
If you do not want to restore your Exchange Server by overwriting the existing database, you can select a different option:
- Restore Exchange 2010 to Recovery Database
- Restore Single Exchange 2010 Mailbox
- Restore All Exchange 2010 Mailboxes
See Restore to a Recovery Storage Group for more information on these options.
Step 1. Allow Database Restore
- Log in to your Exchange Server as the administrator, and open the Exchange Management Console (EMC) from Start > All Programs > .Microsoft Exchange Server > Exchange Management Console
- In the left pane, expand Microsoft Exchange > Microsoft Exchange On-Premises > Organization Configuration, and click Mailbox:
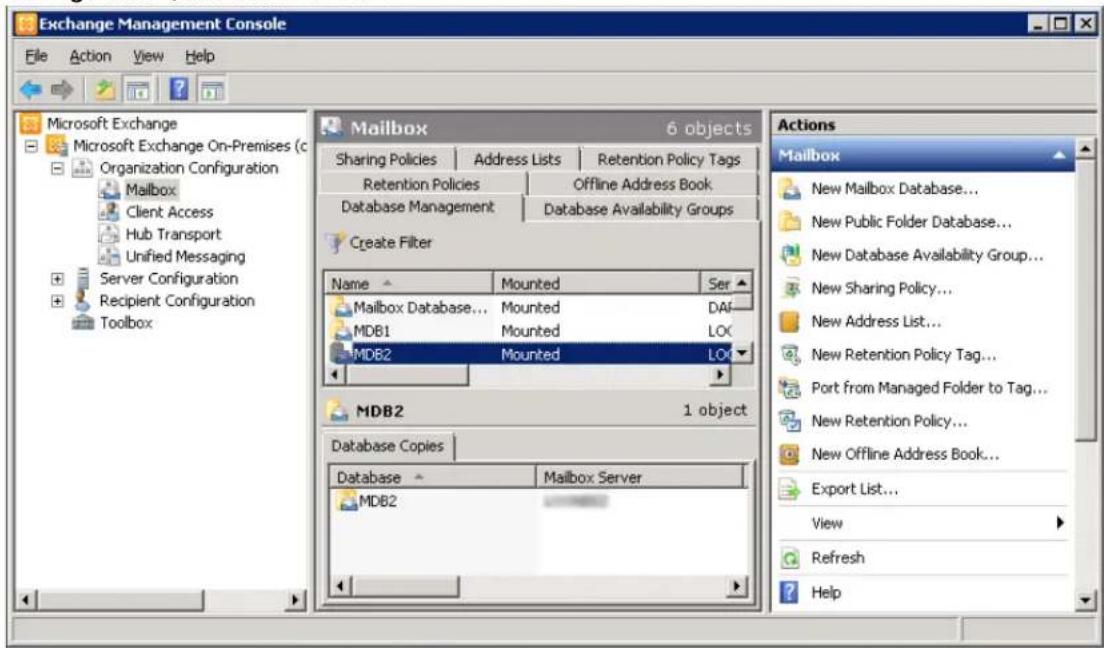
- In the center pane, right-click the mailbox database you want to overwrite with the restore, and click Properties.
- In the Mailbox Database dialog box, click the Maintenance tab, and select This database can be overwritten by a restore:
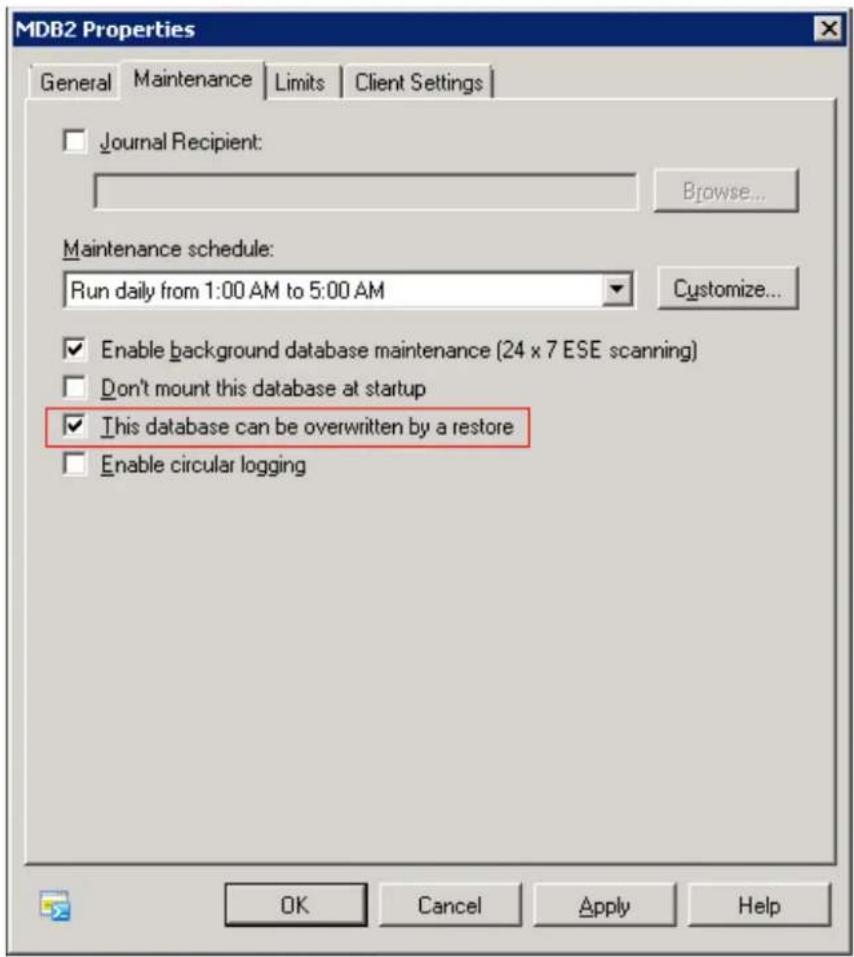
- Click Apply, and then click OK to close the dialog box.
- Right-click the database, and click Unmount.
Step 2. Specify Barracuda Backup Restore Settings
- Log in to Barracuda Backup web interface, and select the associated Barracuda Backup Server in the left pane.
- Go to RESTORE >Restore Browser. Locate the Exchange 2010 Server, and click Restore.
-
In the Restore dialog box, choose the Restore to location:
-
Original Location
- Select an IP Address from the available servers
-
Enter an IP Address or FDQDN
-
Choose the Restore method as Restore normally, and click Start Restore.
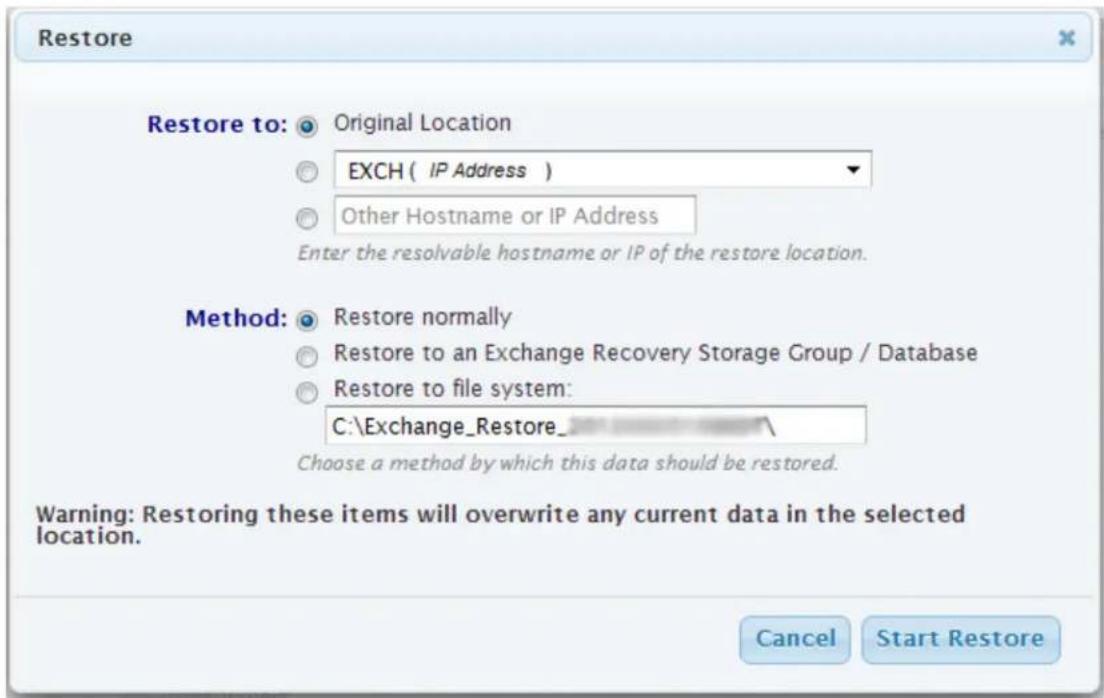
- Go to the REPORTS > Restore page to monitor the restore progress.
Step 3. Mount the Database
Once the restore is complete, use the following steps to mount the database.
- Log in to the target Exchange 2010 Server as the Administrator, and open the EMC.
- In the left pane, expand Microsoft Exchange > Microsoft Exchange On-Premises > Organization Configuration, and click Mailbox.
- In the center pane, click the Mailbox Database that was restored, and in the right pane, click Mount Database.
- The database should now be ready to use; ensure users can access their mailboxes.
How to Restore a Microsoft Exchange 2010 Server to a Recovery Database
This article refers to Barracuda Backup firmware 4.0 and higher, and Microsoft Exchange®2010 Server. This article assumes the Microsoft Exchange Server is installed and configured. This article describes how to restore a Microsoft Exchange 2010 Server to a Recovery Storage Group. You can also restore a Microsoft Exchange 2010 Server by overwriting an existing database or restoring .to an original location
In this article:
- Step 1. Barracuda Backup Setup
• Step 2. Microsoft Exchange 2010 Server
• Step 3. Restore Microsoft Exchange 2010 Mailboxes - Option 1. Restore a Single Exchange 2010 Mailbox
• Option 2. Restore All Exchange 2010 Mailboxes
Related Articles
| • | Restore by Ove |
Additional Resource
- How do I set up my Barracuda Backup Service to restore Exchange 2010?

Recovery Storage Group
If you do not create a recovery storage group, Barracuda Backup creates one and places it in the default Exchange install location. If you want to create a recovery storage database, use the following Exchange PowerShell command, replacing the bracketed variables with the actual database and server names:
New-MailboxDatabase -Recovery -Name "<atabasename - Recovery" -Server servername -EdbFilePath "R:\databasename - Recovery\databasename - Recovery.edb" -LogFolderPath "R:\databasename - Recovery"
Step 1. Barracuda Backup Setup
- Log in to Barracuda Backup, and select the Barracuda Backup Server that contains the Microsoft Exchange 2010 Server backups you want to restore.
- Go to the Restore >Restore Browser page, and s elect the Microsoft Exchange data source; the backed up Exchange 2010 databases display.
- To restore the latest backed up database, click Restore. The Restore window displays. In the Restore to section, select Original Location.

If restoring to a server with a different IP address, select the drop down menu, and select the associated Exchange Server from the list.
- Next to the Method section, select Restore to an Exchange Recovery Storage Group / Database:
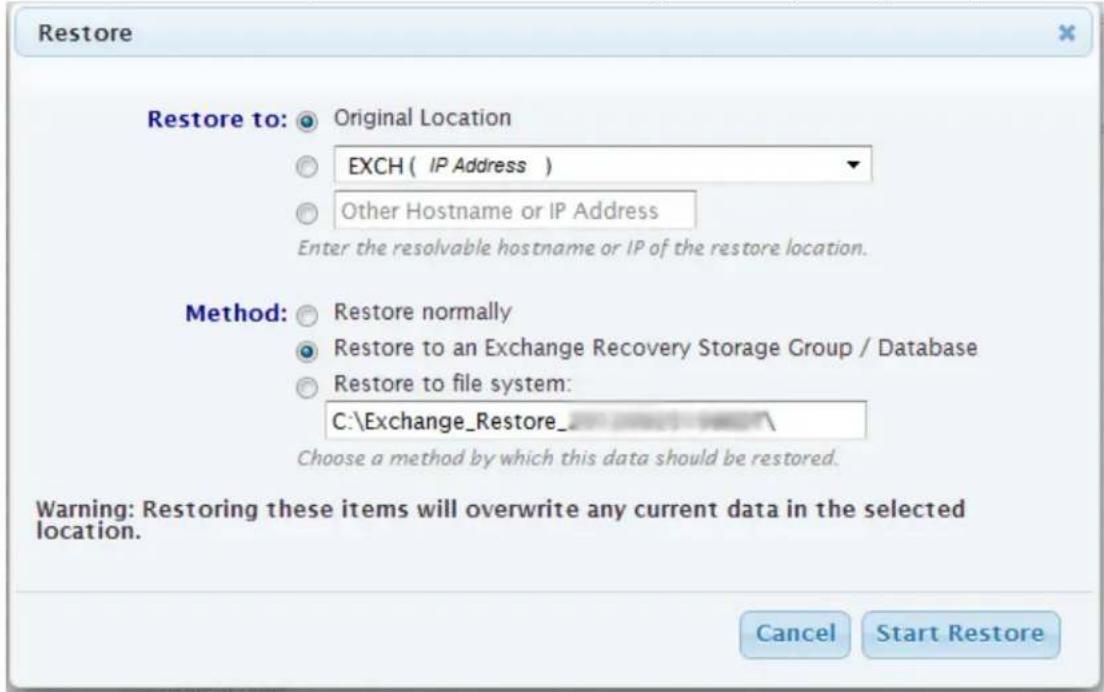
- Click Start Restore. Once the restore is complete, go to REPORTS >Restore to verify the restore completed successfully.

Each Exchange 2010 server can only have ONE recovery database. Restoring again to the same server will overwrite any existing recovery databases.
Step 2. Microsoft Exchange 2010 Server
- Log into the Exchange 2010 Server as the administrator, and open the Exchange Management Console (EMC) from Start > All Programs > Microsoft Exchange Server > Exchange Management Console.
- In the left pane, expand Microsoft Exchange > Microsoft Exchange On-Premises > Organization Configuration, and click Mailbox:
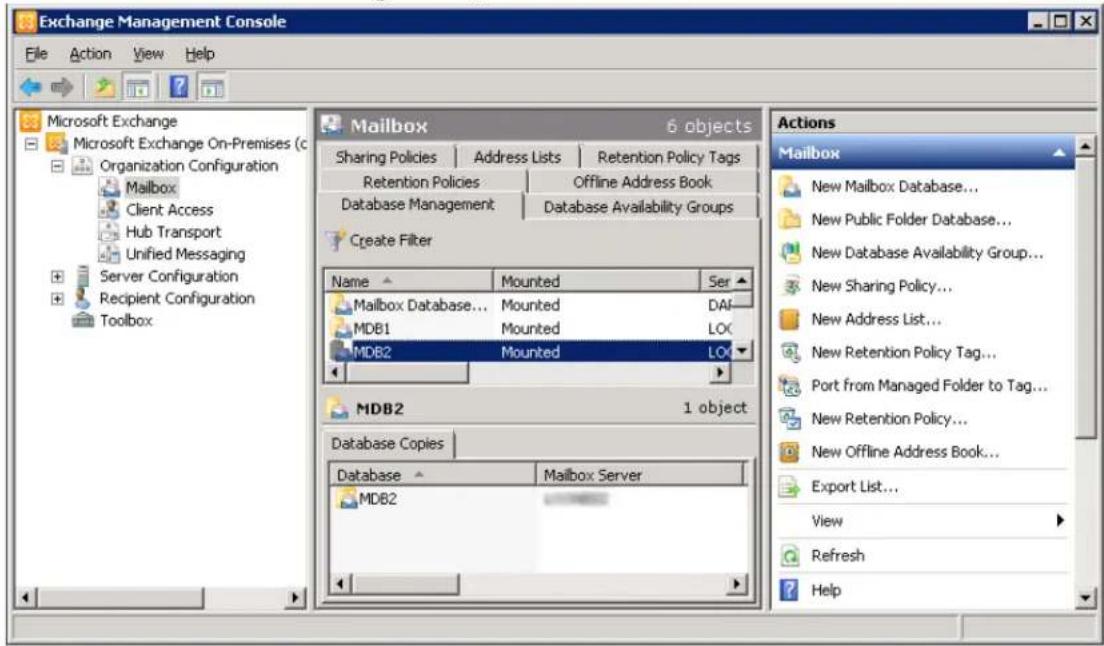
- In the center pane, click the restored recovery database, and in the right pane, click Mount Database. You can now restore individual mailboxes.
Step 3. Restore Microsoft Exchange 2010 Mailboxes
Once you mount the restored database, you can select to restore a single mailbox or all mailboxes.

Any email or appointments newer than the restored data are not affected by the mailbox restore.
Option 1. Restore a Single Exchange 2010 Mailbox
Use the steps in this option to restore all email to a single mailbox. Note that you must complete Step 1 and Step 2 above before you can restore a single Exchange mailbox.

You must have the name of the restored recovery database to complete these steps. The recovery database usually has the same name as the mailbox database appended with -Recovery.
- Log into the Exchange 2010 Server as the administrator, and select to run the Exchange Management Shell as the administrator; the console opens.
- At the prompt, type the following command, and then press :Enter
Restore-Mailbox -Identity -RecoveryDatabase user recoverydbname

Where user is the name of the user account you want to restore, and recoverydbname is the name of the recovery database created by the restore job; if the name includes spaces, enclose the name with double quotes ("").
- Type Y and press Enter to confirm the restore operation. Once the operation is complete, the Exchange Management Shell prompt displays.
- Ask the user to verify the mailbox has been restored; if confirmed, type exit in the shell, and then press Enter
- Once you are done restoring mailboxes, open the EMC, click the restored recovery database, and in the
Option 2. Restore All Exchange 2010 Mailboxes
Use the steps in this option to restore all email to all mailboxes that exist in the restored recovery database. Note that you must complete Step 1 and above before you can restore a single Exchange mailbox.Step 2

You must have the name of the restored recovery database to complete these steps. The recovery database usually has the same name as the mailbox database appended with -Recovery.
- Log into the Exchange 2010 Server as the administrator, and select to run the Exchange Management Shell as the administrator; the console opens.

Warning
This option restores email to all user accounts that exist in the recovery database.
- At the prompt, type the following command, and then press :Enter
Get-Mailbox -Database | Restore-Mailbox-RecoveryDatabase recoverydbnamedbname

Where dbname is the name of the mailbox database account to which to restore, and recoverydbname is the name of the recovery database created by the restore job; if the name includes spaces, enclose the name with double quotes ("").
- Type A and press Enter to confirm the restore operation for all users. Once the operation is complete, the Exchange Management Shell prompt displays.
- Ask users to verify the mailboxes have been restored; if confirmed, type exit in the shell, and then press Enter.
- Once the restore is complete, open the EMC, click the restored recovery database, and i n the right pane, click Dis mount Database.
How to Restore a Microsoft Exchange 2007 Database
This article refers to Barracuda Backup firmware 4.0 and higher, and Microsoft® Exchange Server 2007. This article assumes the Exchange Server is installed and set up.
You can select to restore an Exchange Server 2007 by overwriting an existing database or restoring to an original location, or restoring to a Recovery Storage Group (RSG).
In this article:
- Option 1. Overwrite an Existing Database or Restore to an Original Location
- Step 1. Allow Database Restore
- Step 2. Specify Barracuda Backup Restore Settings
- Step 3. Remount the First Storage Group
- Option 2. Restore to a Recovery Storage Group
• Step 1. Exchange Server 2007
- Step 2. Barracuda Backup
• Step 3. Exchange Server 2007
Option 1. Overwrite an Existing Database or Restore to an Original Location

Warning
This option overwrites all existing data. If you do not want to overwrite the database, see Restore to a Recovery Storage Group.
Use this option to restore by overwriting an existing database or restoring to an original location.
Click here to expand...
Step 1. Allow Database Restore
- Log in to your Exchange Server as the Administrator, and open the Exchange Management Console (EMC) (Start > All Programs > Microsoft Exchange Server > Exchange Management Console).
2. Expand Server Configuration, and click Mailbox:
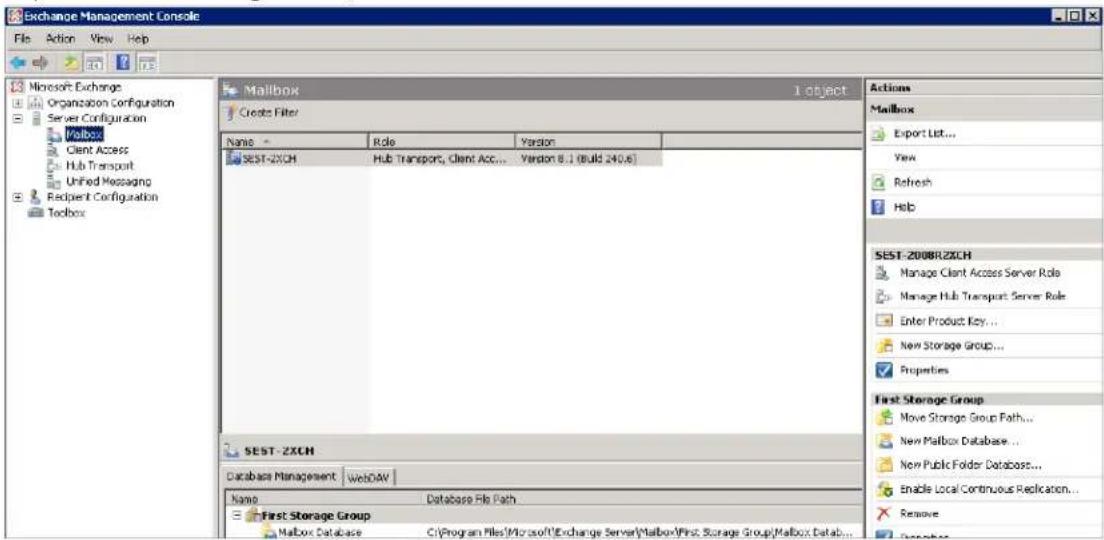
3. Right-click Mailbox Database, and click Properties. Select This database can be overwritten by a restore:
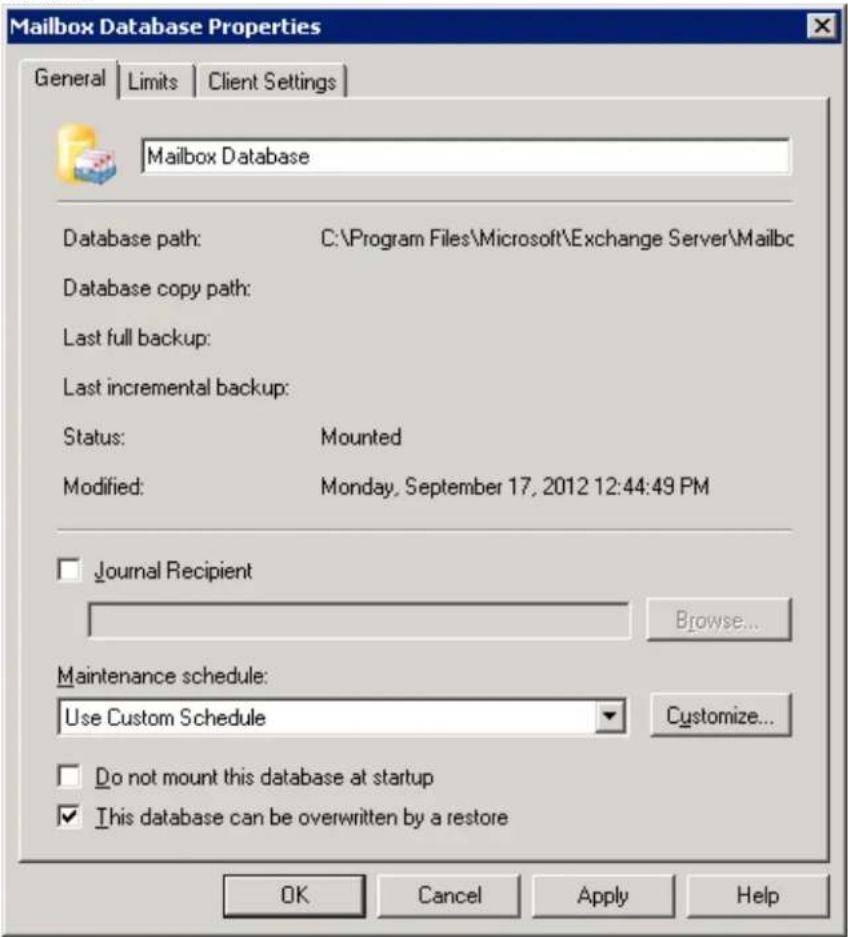
4. Click Apply, and OK to close the dialog box. Right-click the Mailbox Database, and click Dismount Database:
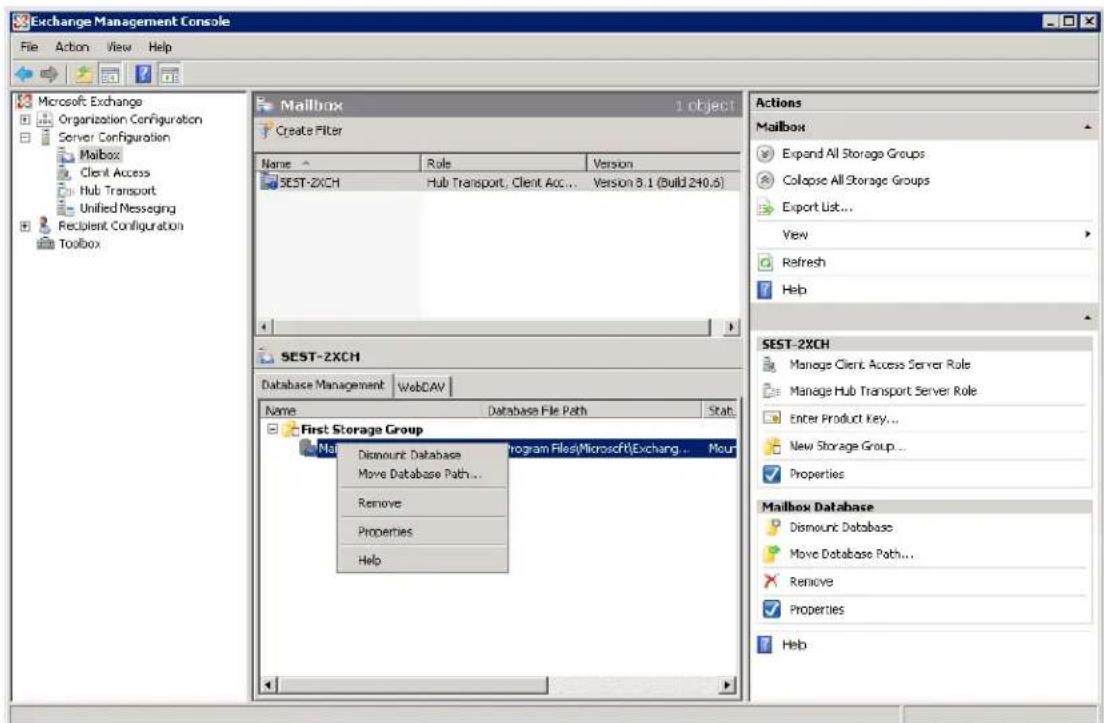
Step 2. Specify Barracuda Backup Restore Settings
- Log in to the Barracuda Backup Service as the administrator, and go to RESTORE >Restore Browser.
-
Locate the Exchange Server 2007, and navigate to the First Storage Group. Click Restore. In the Restore dialog box, choose the Restore to location:
-
Original Location
- Select an IP Address from available servers
- Enter an IP Address or FQDN
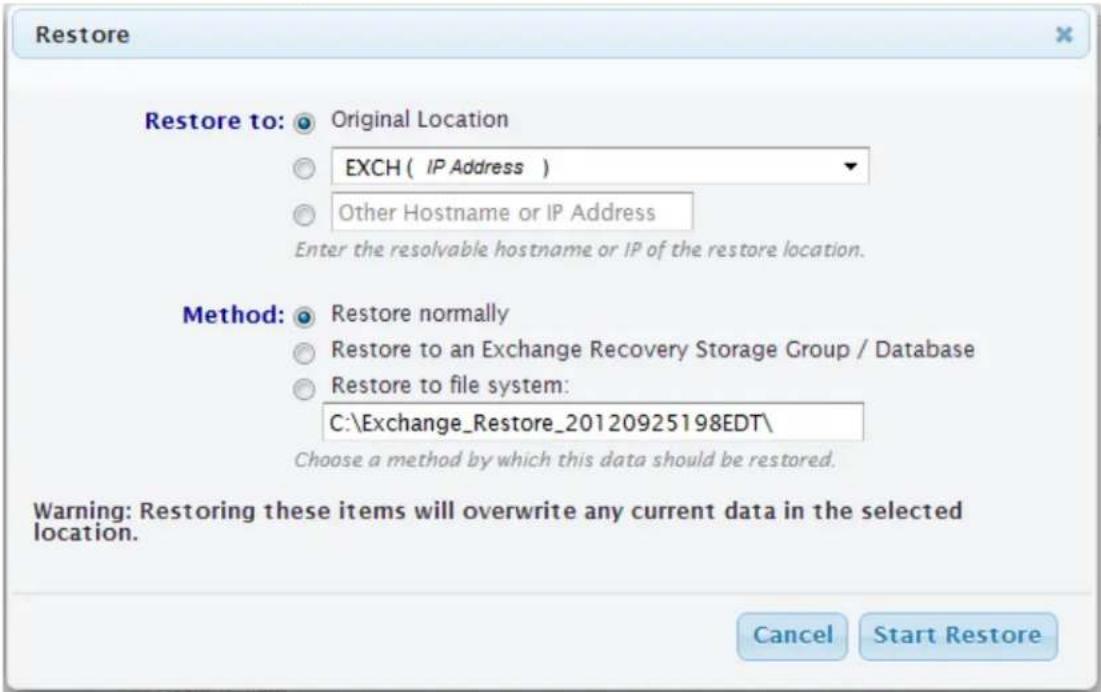
- Choose the Restore method as Restore normally, and click Start Restore.
Step 3. Remount the First Storage Group
Once the restore is complete, mount the database.
Option 2. Restore to a Recovery Storage Group
Use this option to restore to a recovery storage group (RSG).
Click here to expand...
Step 1. Exchange Server 2007
- In the EMC on the Exchange Server 2007, click :Toolbox
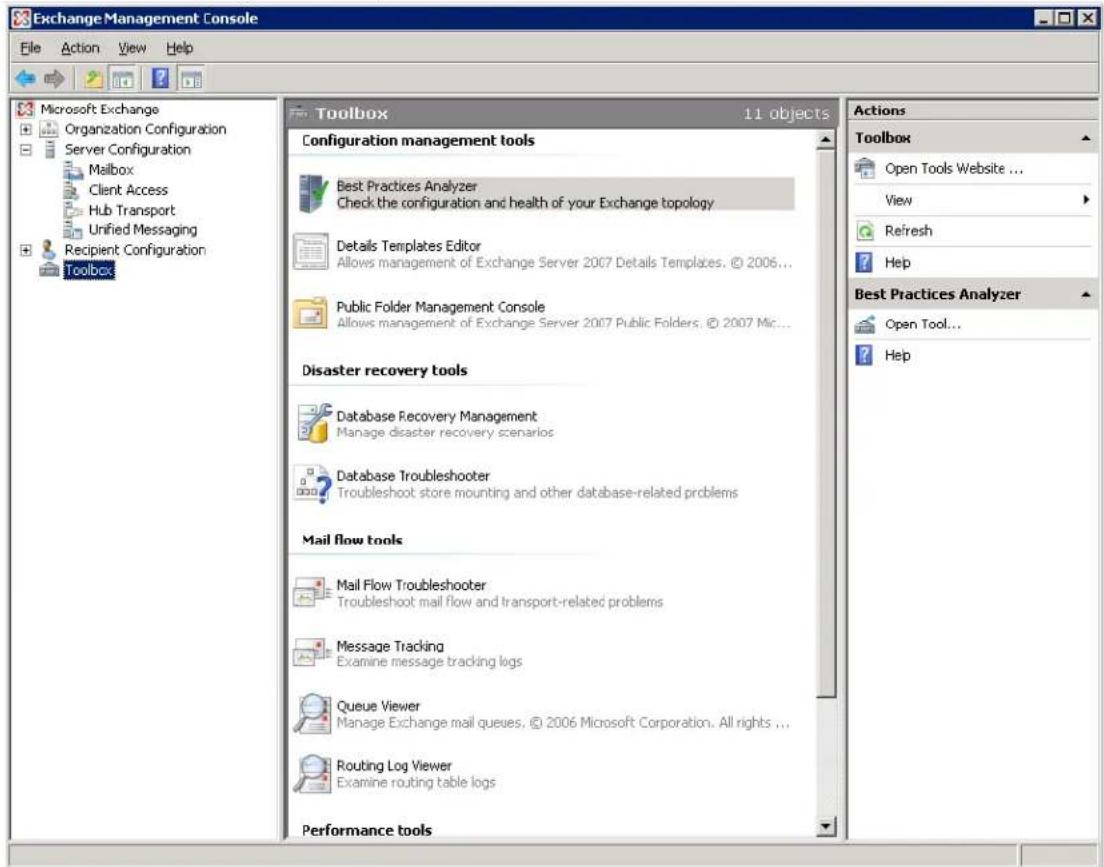
- In the center pane, double click Database Recovery Management:
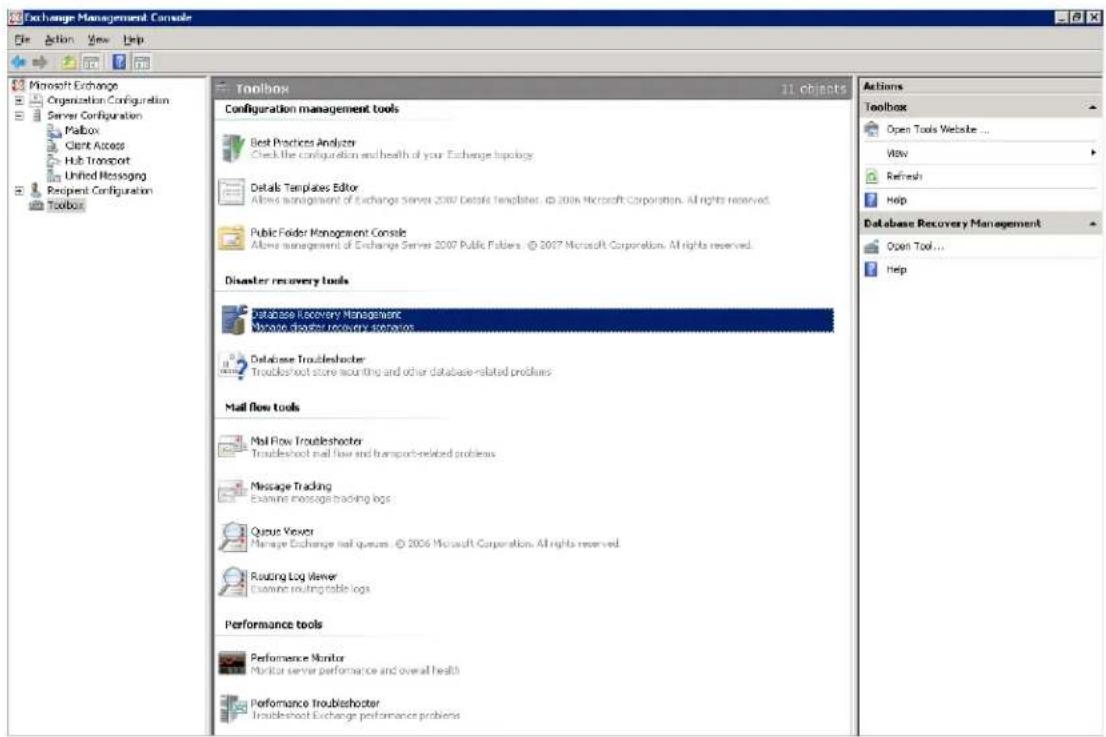
- In the Troubleshooting Assistant, enter an identifying label, the Exchange server name, the Domain controller name, and click Next:
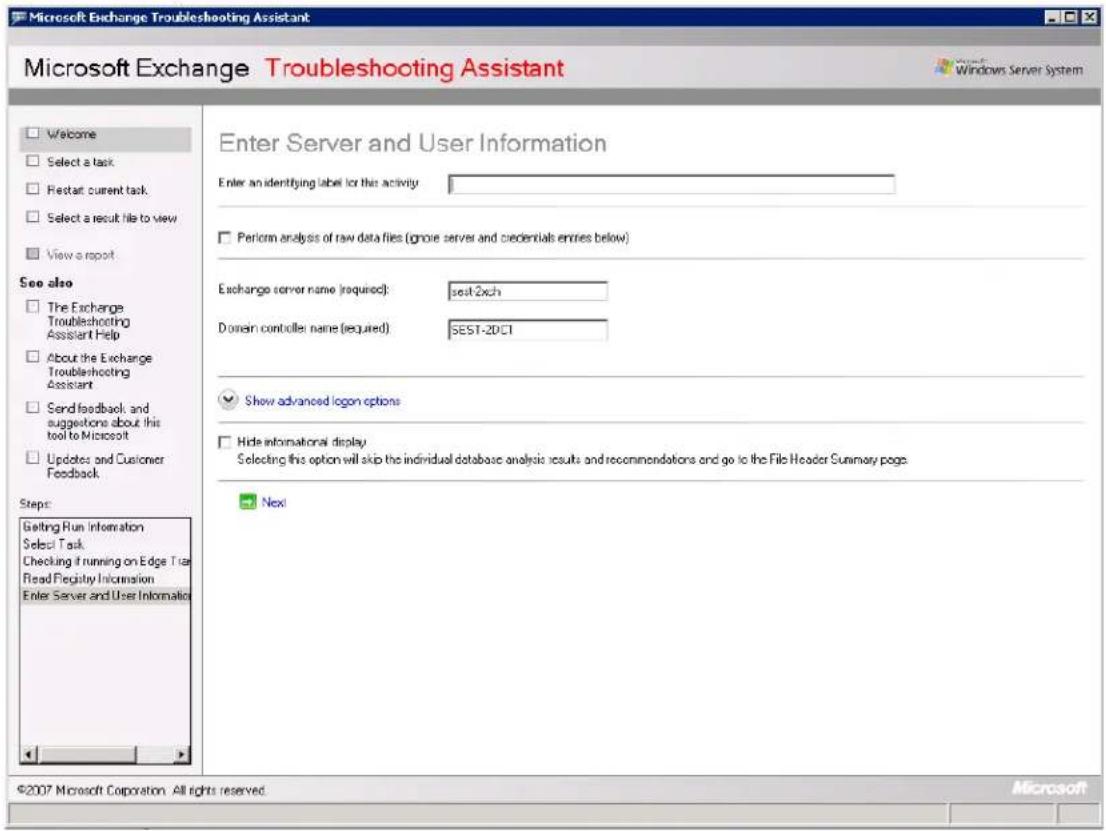
- In the next screen, click Create a recovery storage group, and leave the default values; Click Create Recovery Storage Group once again:
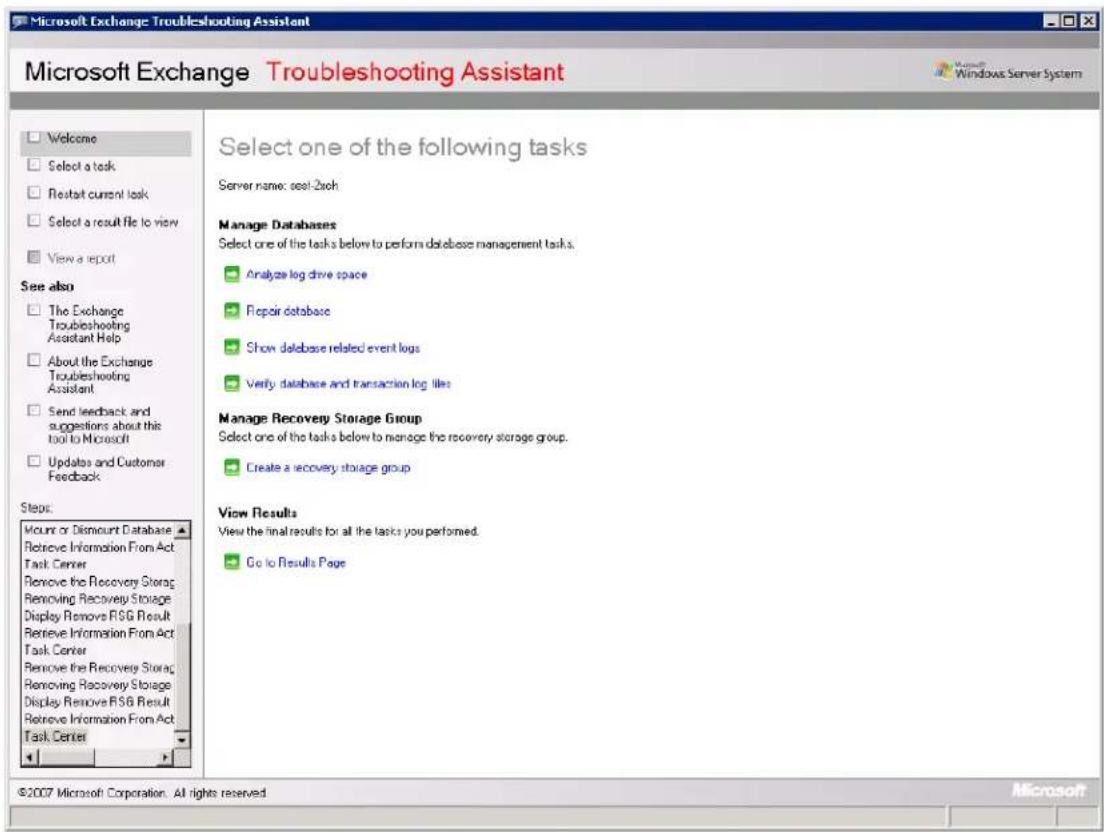
5. The Create the Recovery Storage Group Result screen displays:
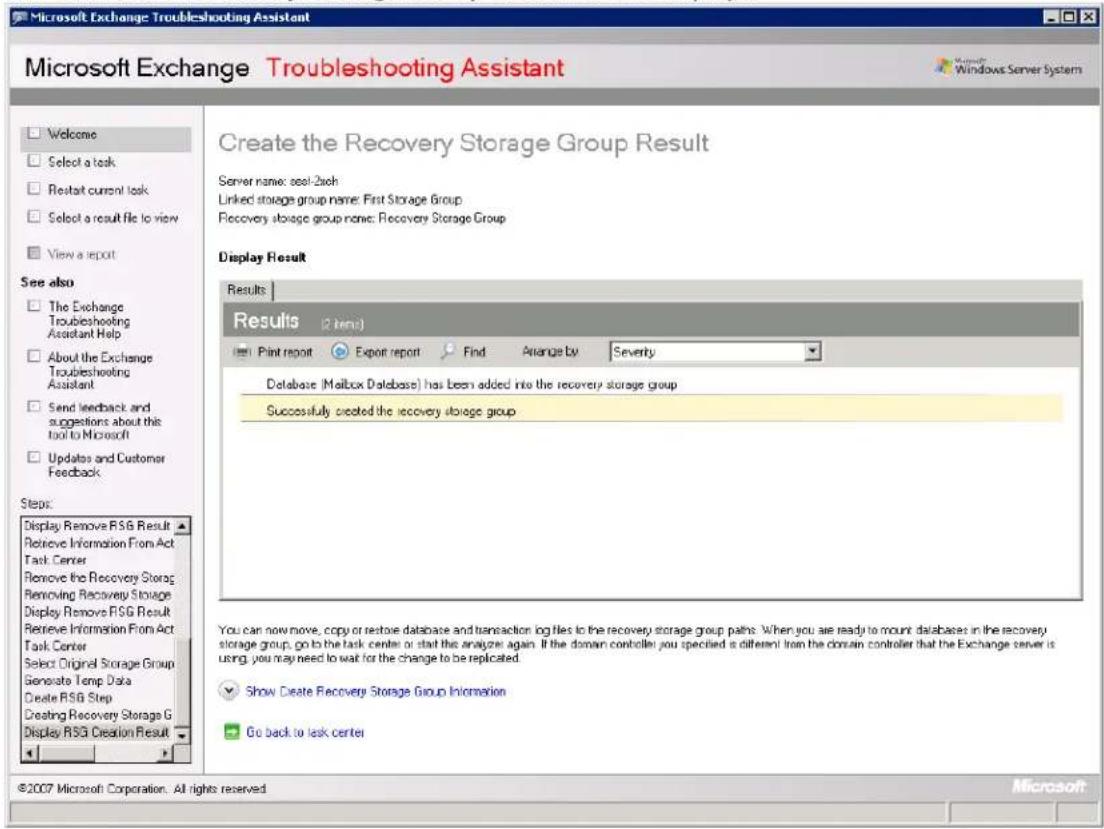
6. Click Go back to task center. In the Troubleshooting Assistant, click Set up 'Database can be
overwritten by restore' flag:
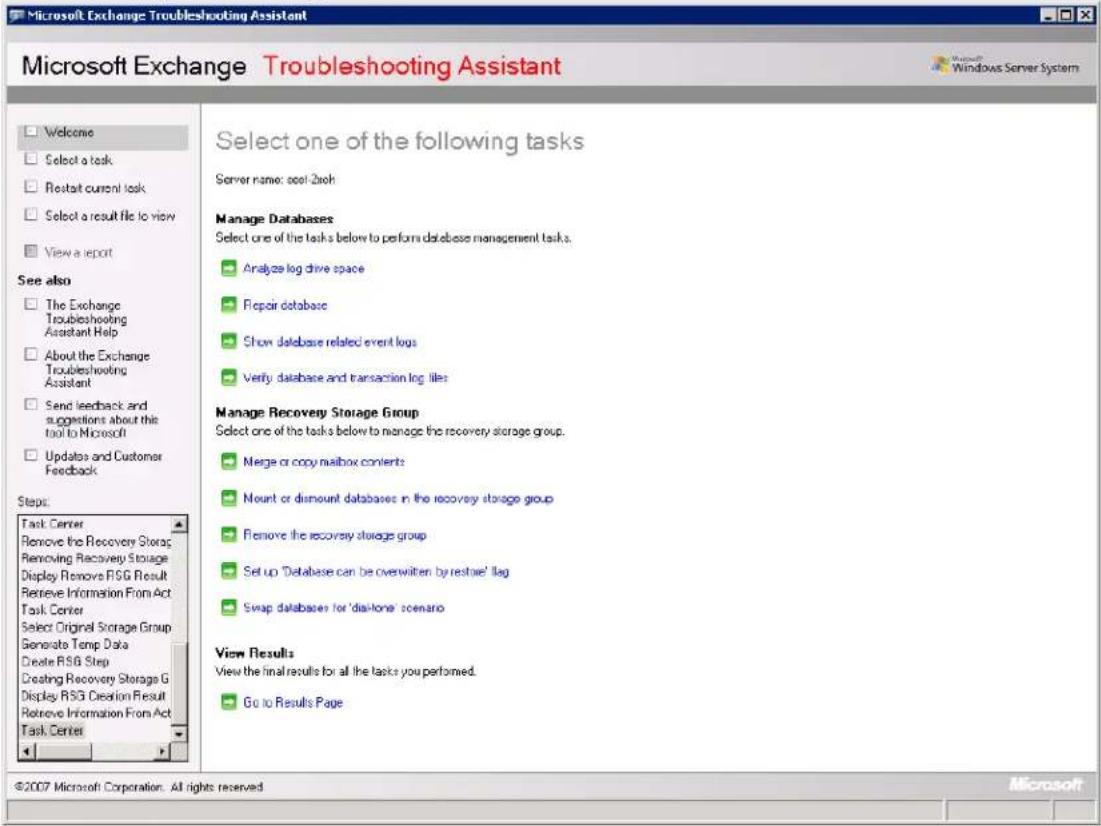
7. The Databases page displays. Verify the Mailbox Database displays, and click Previous:
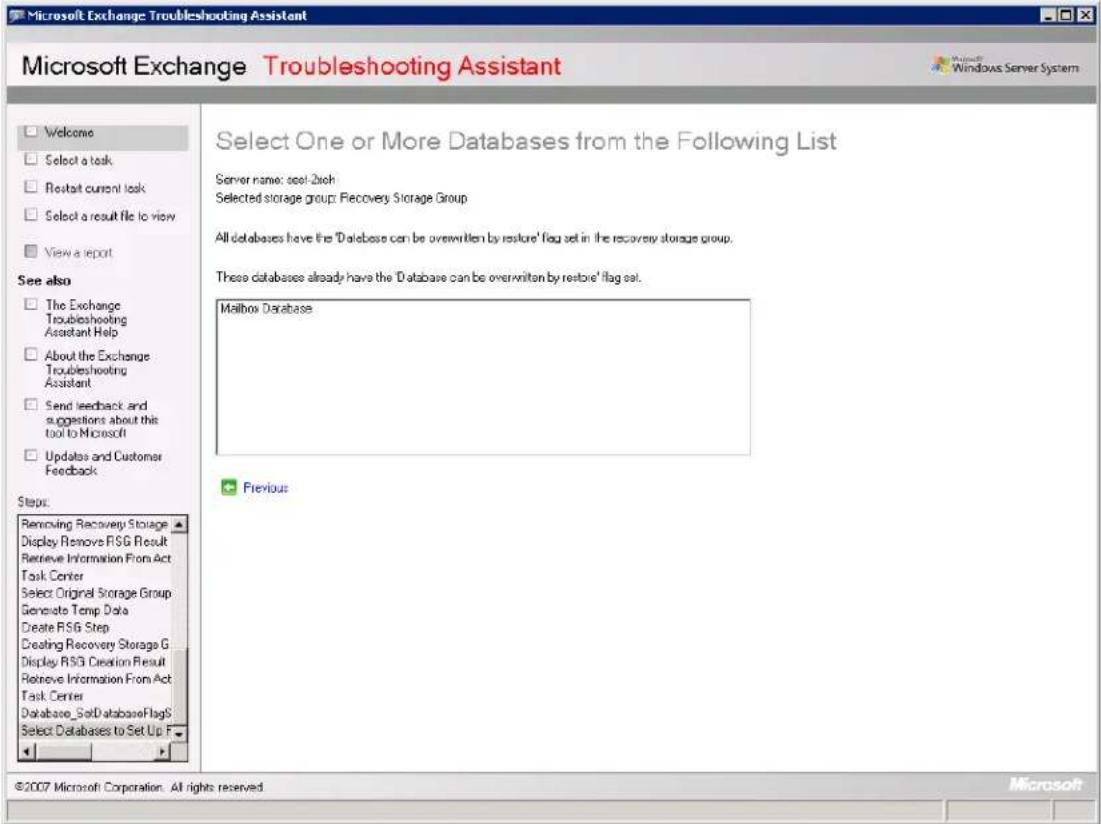
Step 2. Barracuda Backup
- In Barracuda Backup, go to RESTORE >Restore Browser. Locate the restored Exchange Server 2007, and navigate to the First Storage Group.
- Click Restore, select the Restore to location, and specify the Method as Restore to an Exchange Recovery Storage Group / Database:
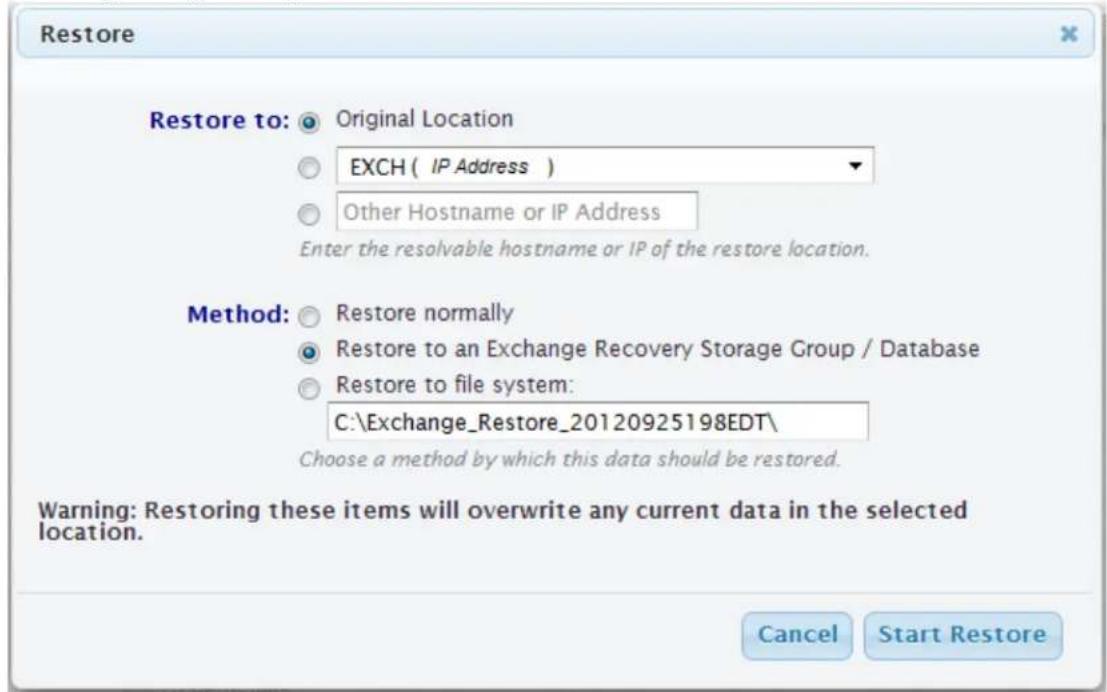
- Click Start Restore. Once the restore is complete, go to RESTORE >Restore Reports to verify the restore completed successfully:
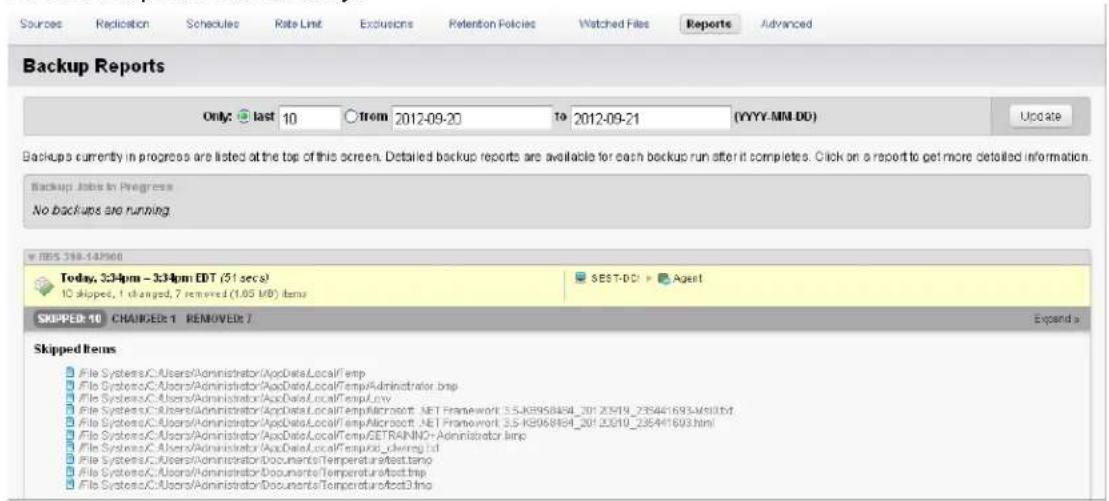
Step 3. Exchange Server 2007
- In the EMC on the Exchange Server 2007, in the Troubleshooting Assistant, click Mount or dismount databases in the recovery storage group
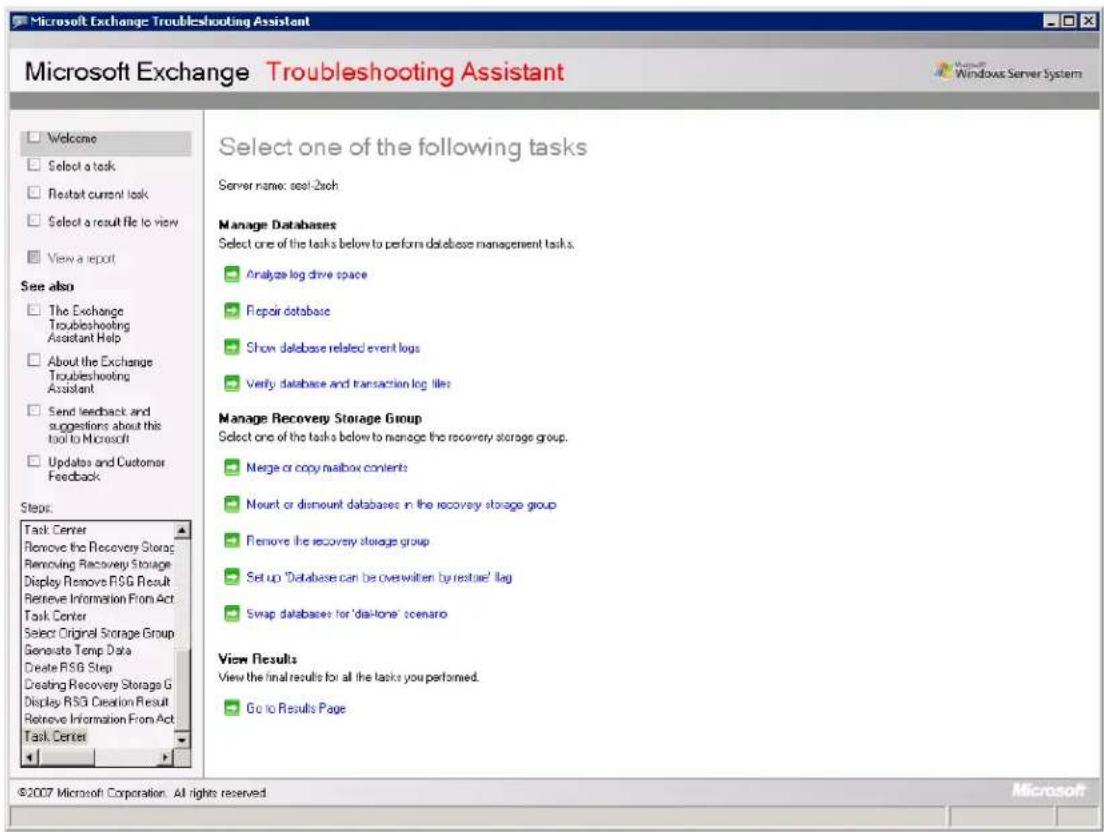
- Turn on Mailbox Database, and click Mount selected database:
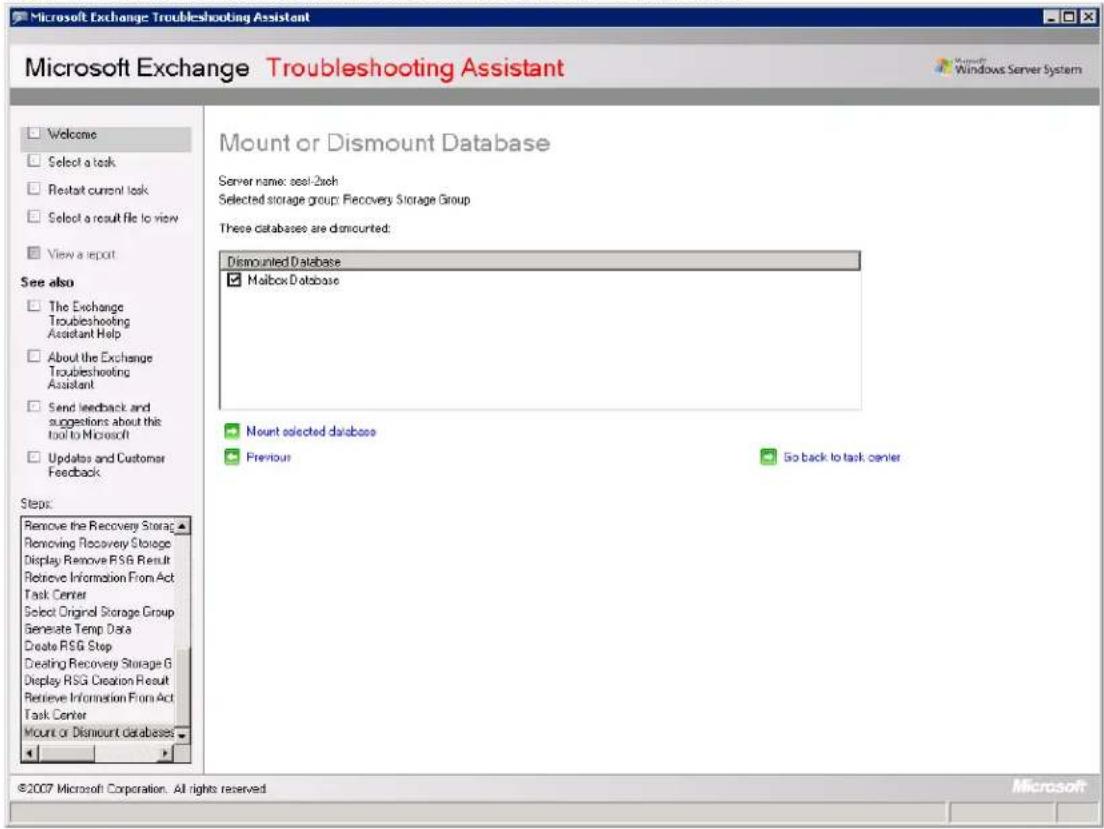
- The Mount or Dismount Databases Report displays:
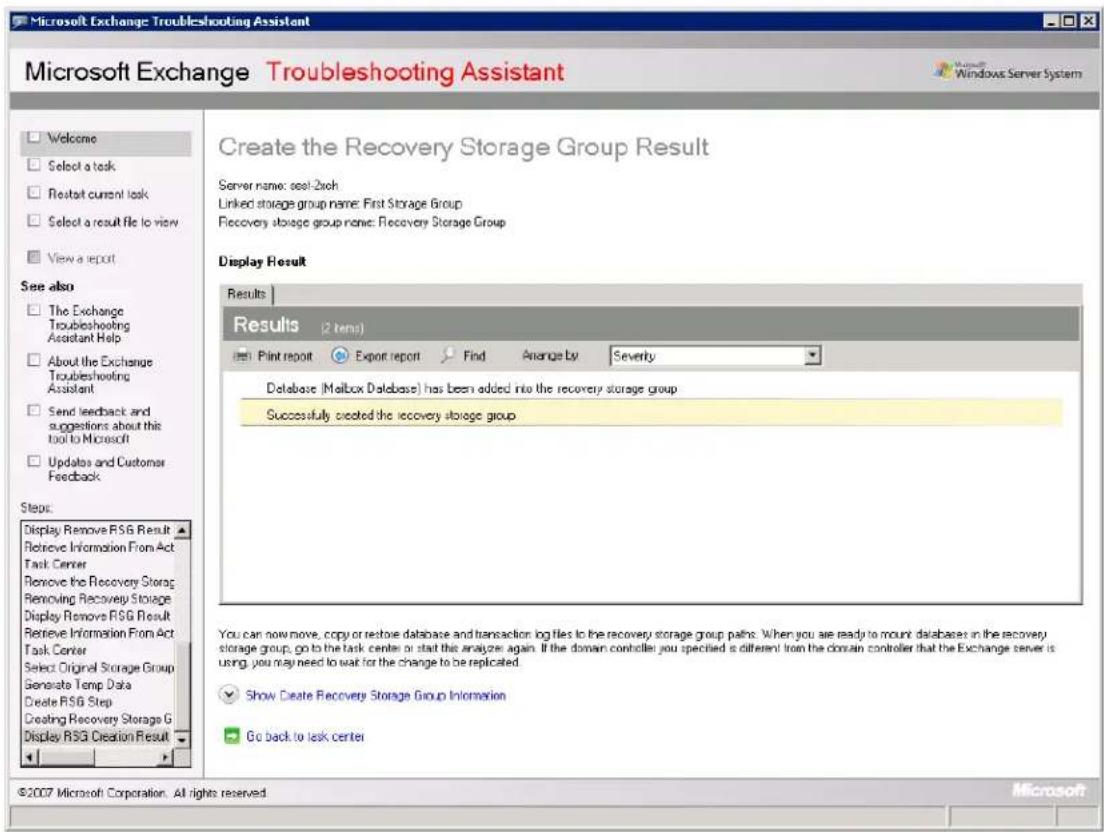
- Click Go back to task center. Click Merge or copy mailbox contents. Click Gather merge information
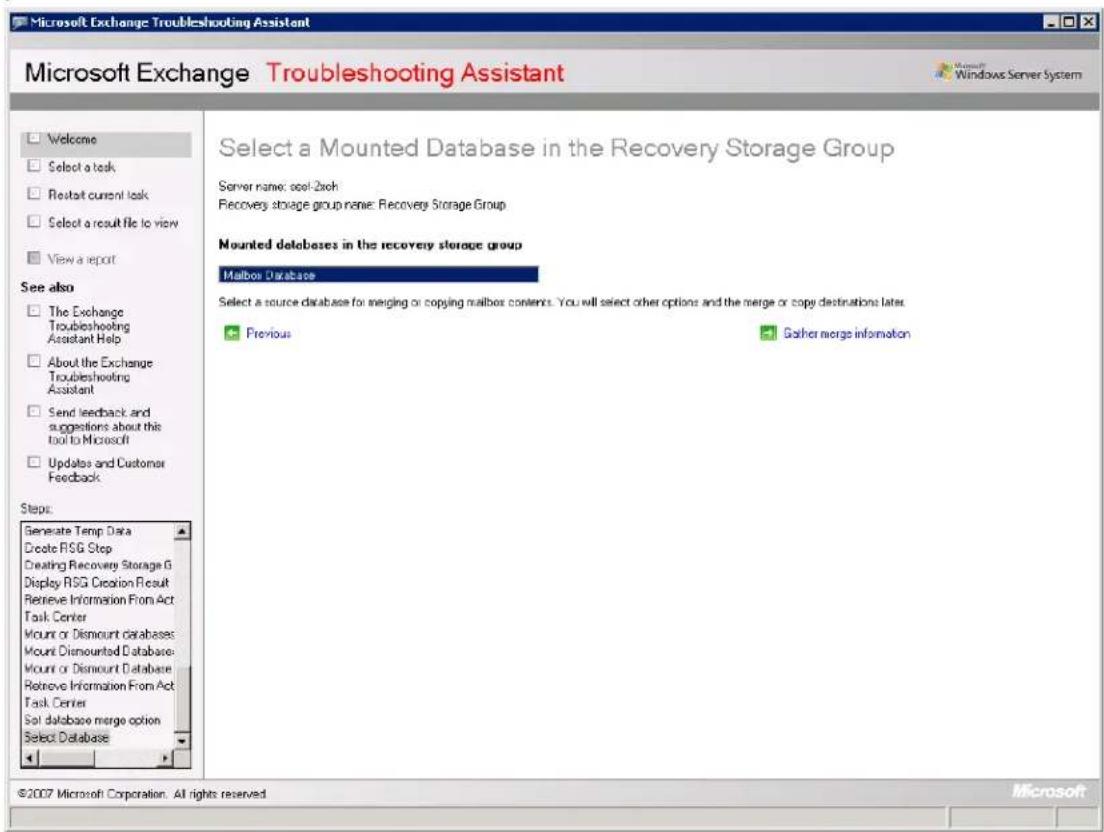
5. Click Perform pre-merge tasks:
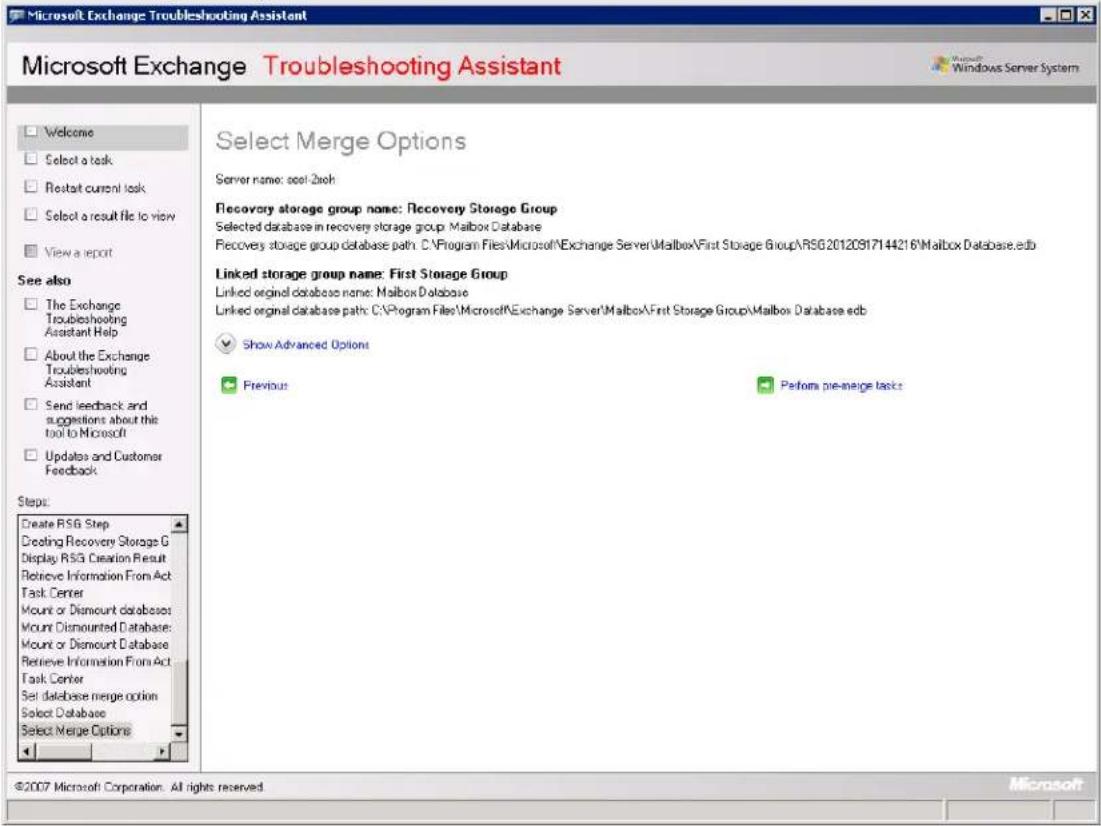
6. Turn on the mailboxes to restore, and click Perform merge actions; the Results page displays:
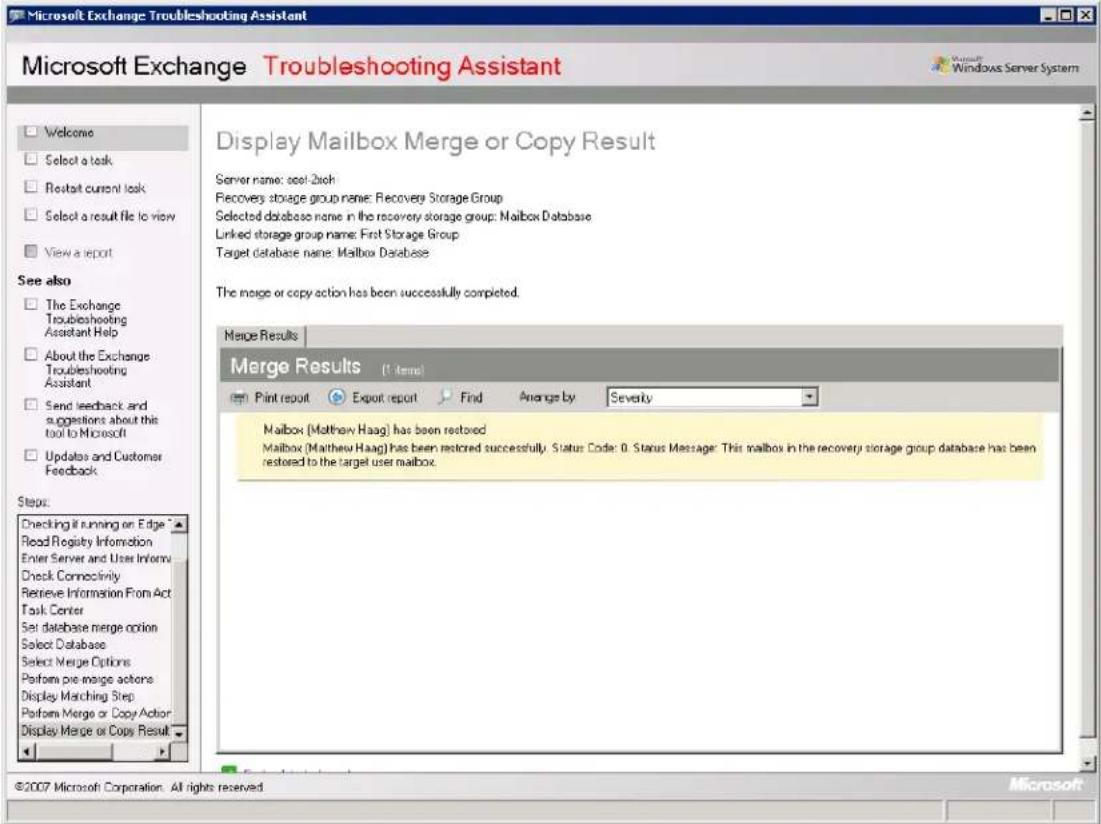
The restore is now complete.
How to Restore a Microsoft Exchange 2003 Database by Overwriting Existing Database
This article refers to all Barracuda Backup firmware versions. This article assumes you have Microsoft® Exchange 2003 installed and set up. This article describes how to restore Microsoft Exchange 2003 by either overwriting the existing database or restoring to the original location.
In this article:
• Prepare the Databases
• Dismount the Databases
- Restore the Database
- Remount the Databases
Related Articles
- Restore Using a Recovery Storage Group

Important
Take caution when overwriting the existing database or restoring to the original location as this procedure overwrites all existing data. If you do not want to overwrite the existing data, you can restore the database using a Recovery Storage Group.
Prepare the Databases
- Log into the Exchange Server as the administrator, and go to Start > Programs > Microsoft Exchange > System Manager:
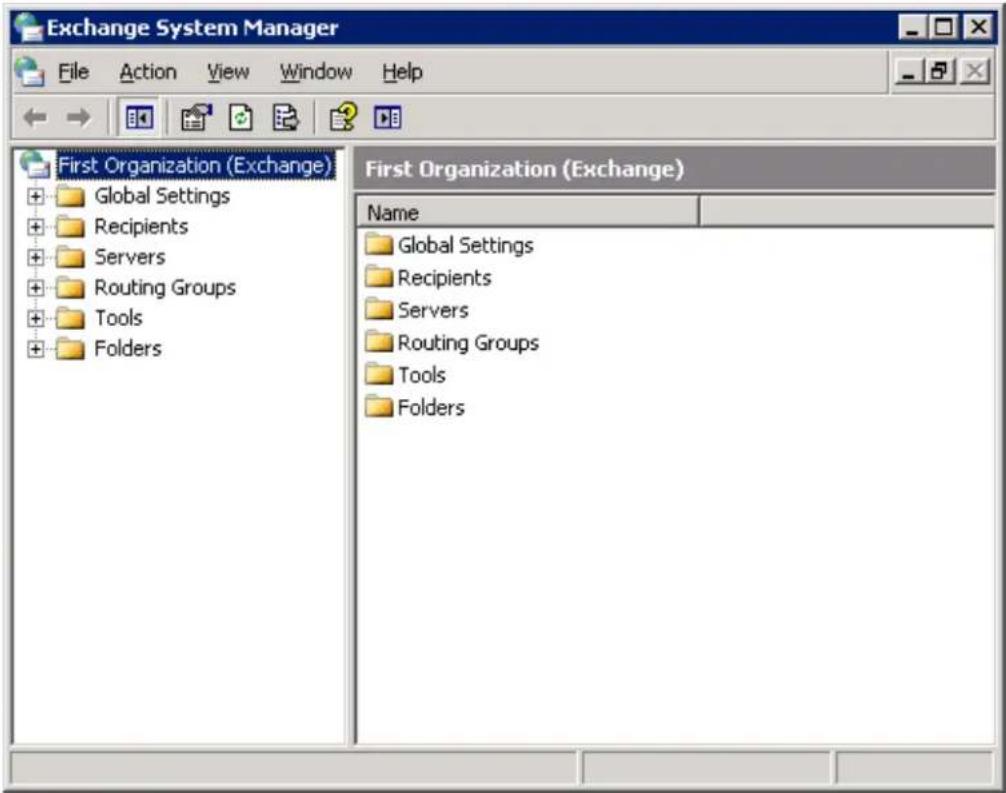
- Expand Administrative Groups > First Administrative Group > Servers > ServerName > First Storage Group.
- Right-click the, and click. Mailbox Store Properties
- Click the Database tab, and select This database can be overwritten by a restore:
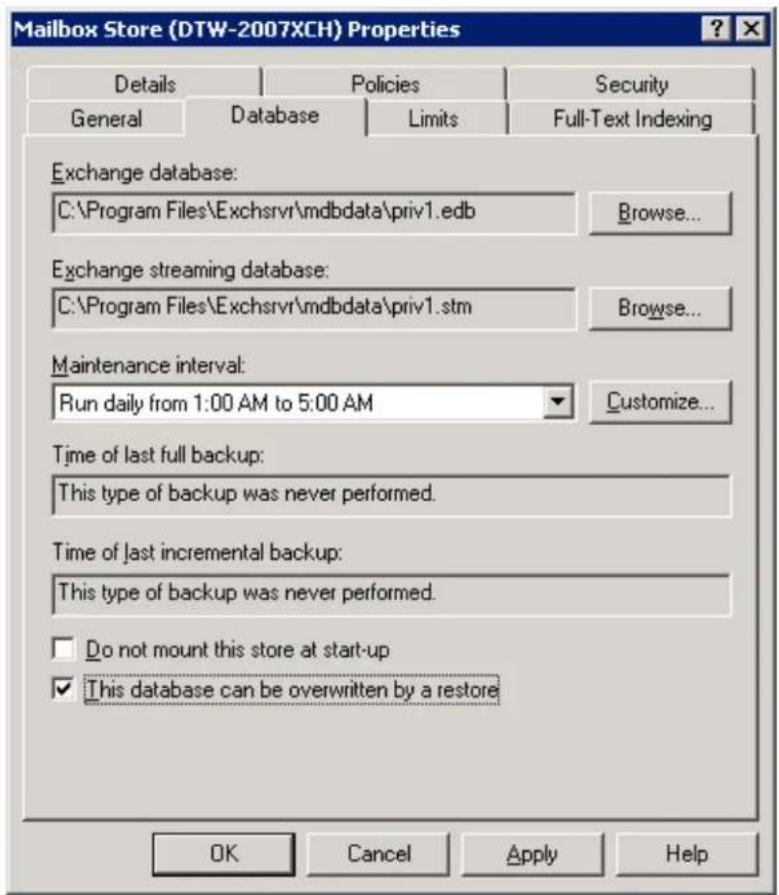
- Click, and then click .Apply OK
- In the System Manager, right-click Public Folder Store, and click Properties; in the dialog box click the Database tab, and turn on This .database can be overwritten by a restore
- Click Apply, and then click OK.
Dismount the Databases
- In the System Manager, right-click the Mailbox Store, and click Dismount Store:
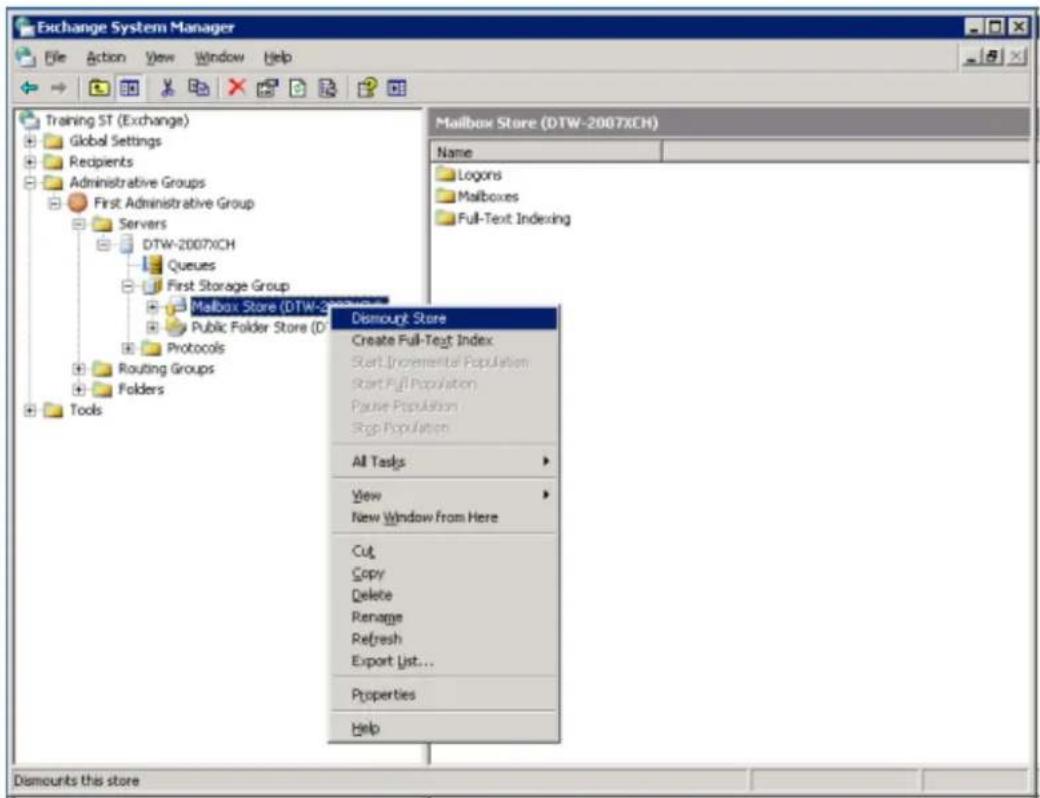
- Click in the Warning dialog box to dismount the .Yes Mailbox Store
- In the System Manager, right-click the Public Folder Store, and click Dismount Store; click Yes in the Warning dialog box to dismount the .Public Folder Store
- Log into the Barracuda Backup web interface, and go to the page.Restore >Restore Browser
- Expand the Microsoft Exchange 2003 Server down to the database instance to restore, and click Restore.
- In the Restore dialog box, select the Restore to location where you want to restore the data, or enter a resolvable hostname or IP address of a restore location.
- Select the Method as Restore normally, and click Start Restore:
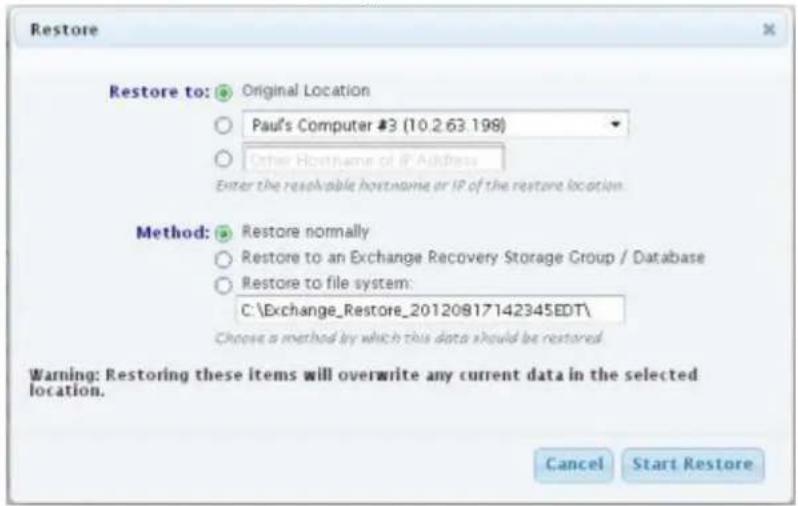

To view the restore status, go to the RESTORE >Restore Reports page, and click on a report to view individually restored items.
Remount the Databases
- On the Exchange 2003 Server, open the System Manager, right-click the Mailbox Store, and click Mount Store.
- Click in the Warning dialog box to remount the .Yes Mailbox Store
- In the , right-click the , and click .System Manager Public Folder Store Mount Store
- Click in the Warning dialog box to remount the .Yes Public Folder Store
How to Restore a Microsoft Exchange 2003 Database using a Recovery Storage Group
This article refers to Barracuda Backup firmware version 5.0 or greater and
Microsoft Exchange 2003. This article assumes the Microsoft Exchange Serv
Microsoft Exchange 2003 by restoring the database to a folder and using a recovery storage group to restore the database. If you do not want to use a recovery storage group, you can restore by overwriting the database.
In this article:
- Step 1. Restore Browser
- Step 2. System Manager
• Step 3. Recovery Store Group - Step 4. Mount the Restored Database
- Step 5. Microsoft Exchange Server Mailbox Merge Wizard (ExMerge)
- Step 5a. Extract Data from the Exchange Server Mailbox
- Step 5b. Import Data into the Exchange Server Mailbox
Related Articles
- Restore by Overwriting Existing Database
Additional Resource
- Barracuda Networks Knowledgebase solution #00 004643
• How to use Recovery Storage Groups in Exchange Server 2003
1a. Log in to the Barracuda Backup web interface, and go to the Restore >Restore Browser page.
1b. Expand the Microsoft Exchange 2003 Server down to the database instance you want to restore, and click Restore.
1c. In the Restore dialog box, select the Restore to location where you want to restore the data, or enter a resolvable hostname or IP address of a restore location.
1d. Select the Method as Restore to file system, and enter the location to which to restore, for example C:\Program Files\Exchsrvr\backup:
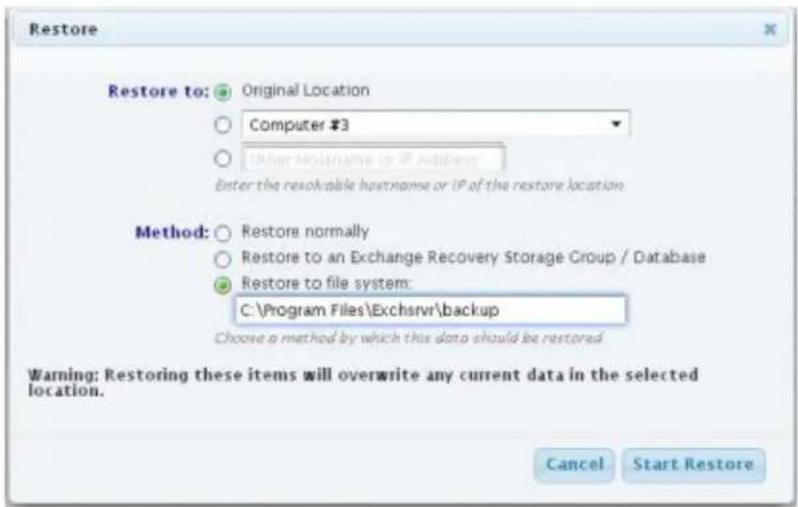
1e. Click .Start Restore
To view the restore status, go to the REPORTS > Restore page, and click on a report to view individually restored items.
Step 2. System Manager
2a. Log in to the Exchange Server as the administrator, and go to Start > Programs > Microsoft Exchange > System Manager:
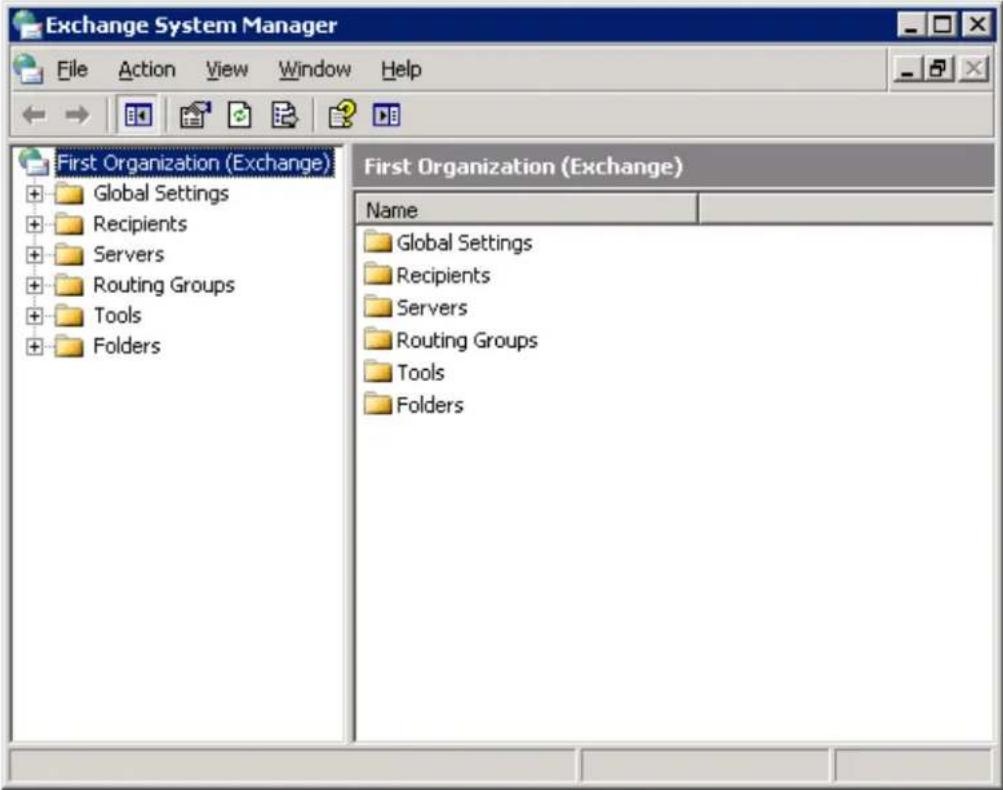
2b. Expand Administrative Groups > First Administrative Group > Servers, and click on your Server name. Right-click the Server name, point to New, and click Recovery storage Group:
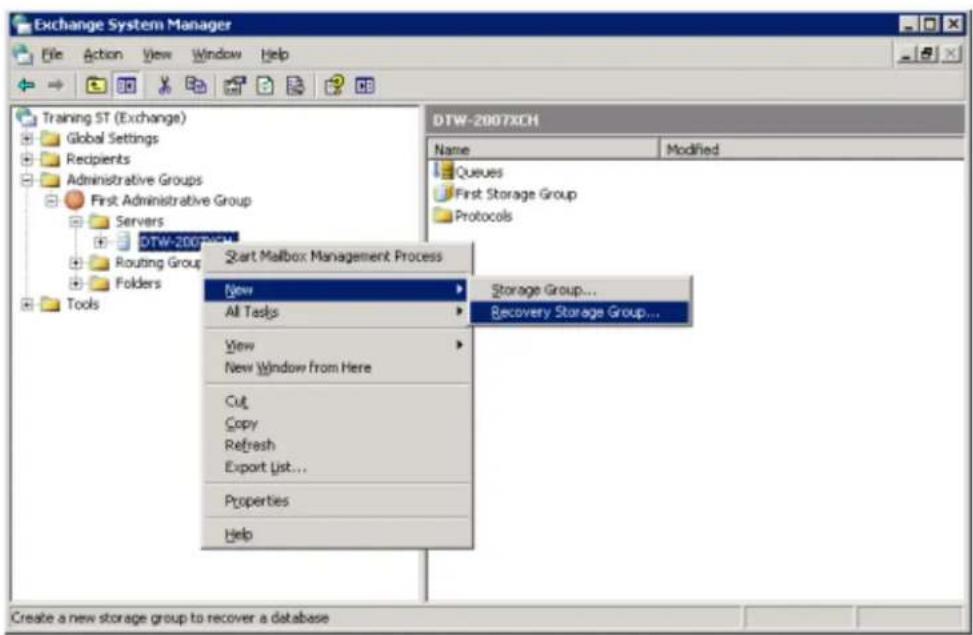
2c. The Recovery Storage Group displays in the System Manager; right-click the Recovery Storage Group, and then click Add Database to :Recover
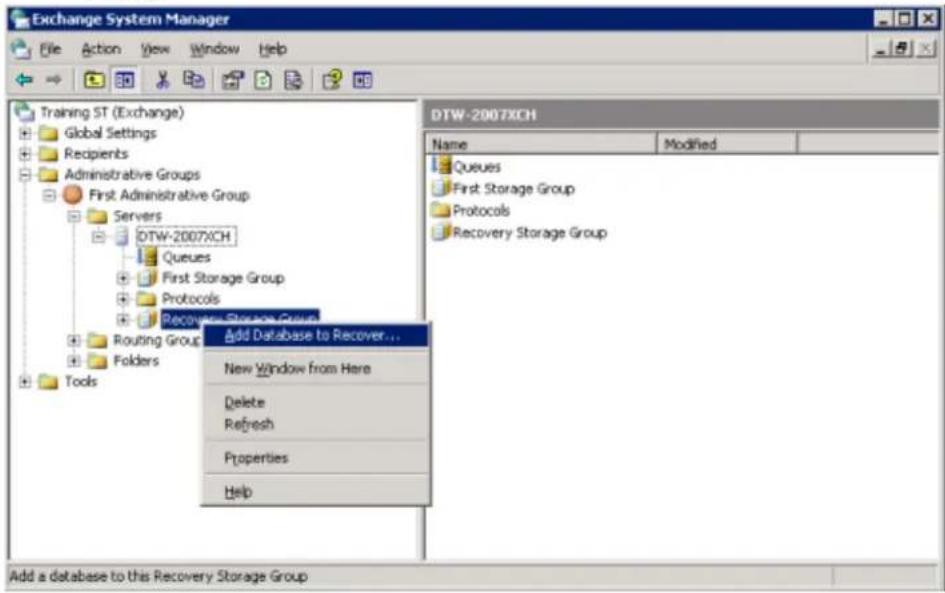
2d. In the Select database to recover dialog box, select the database restore location from Step 1d, completed on the RESTORE >Restore Browser page in the Barracuda Backup web interface, and click OK:
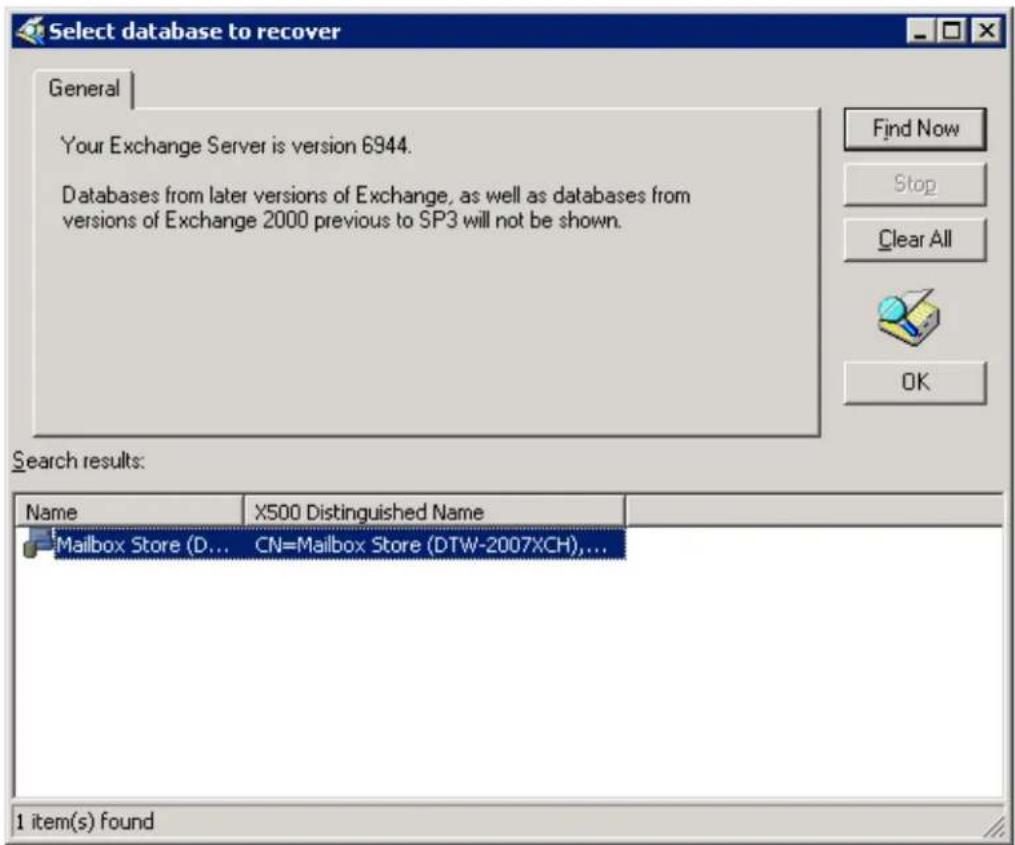
2e. In the Mailbox Store Properties dialog box, change the value in the Name field, for example, priv1, and click OK to save your changes:
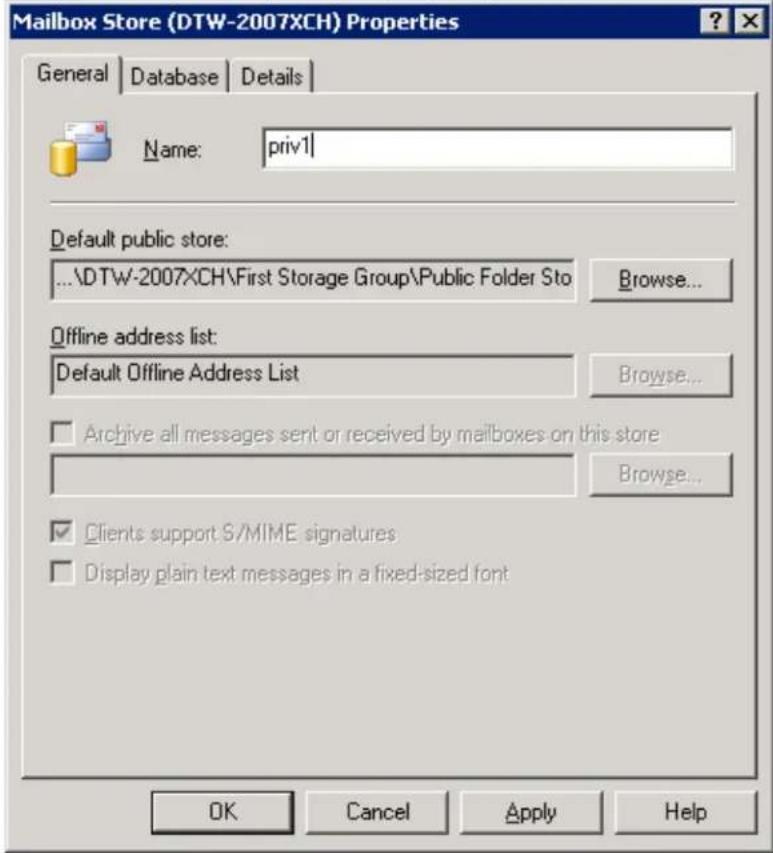
2f. In the System Manager, expand Recovery storage Group, right-click on the mailbox store priv1 from Step 2e, and click Mount Store:
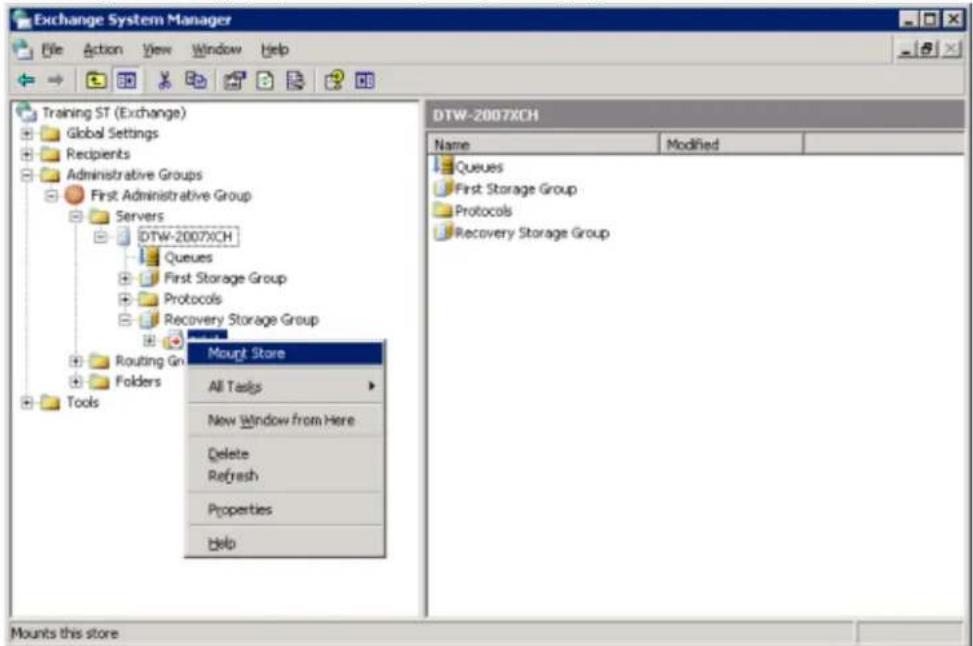
2g. Click Yes in the Warning dialog box. Right-click on the mailbox store priv1 once again, and click Dismount Store:
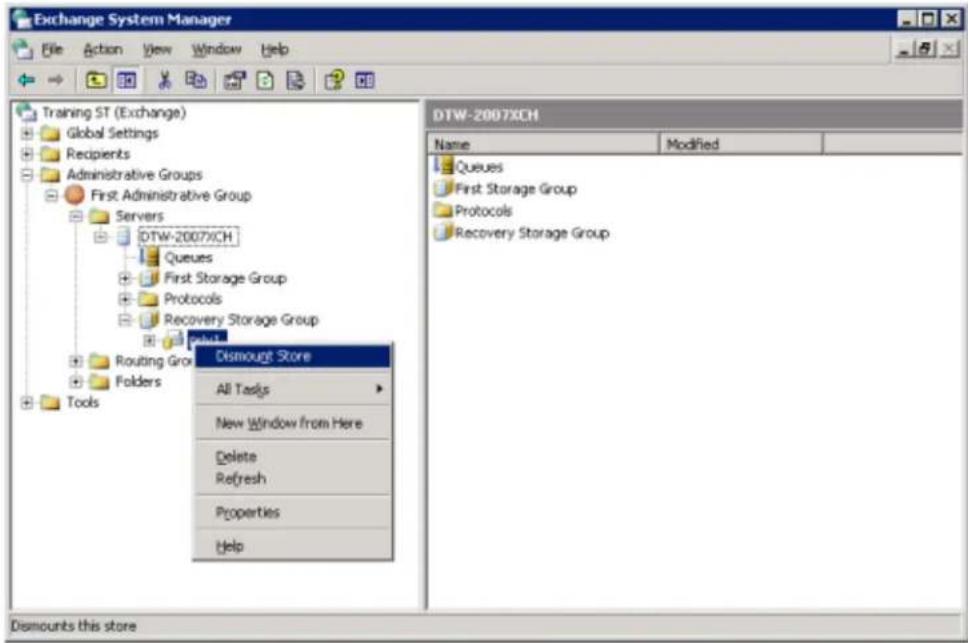
Step 3. Recovery Store Group
3a. On the Exchange Server in Explorer, navigate to C:\Program Files\Exchsrv\Recovery Storage Group, and delete the contents of this folder.
3b. Open another window in Explorer, and navigate to the original restore location, for example, C:\Program Files\Exchsrvr\backup
3c. Move the files priv1.edb and priv1.stm from the original restore location C:\Program Files\Exchsrvr\backup (Step 3b) to the Recovery Group Step8a).
3d. At a command prompt, enter the following command to change the directory to the original restore location:
cd C:\Program Files\Exchsrvr\bin
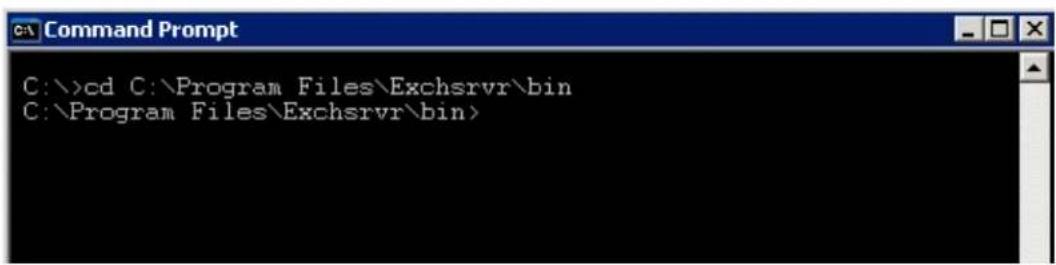
3e. At a command prompt, enter the following command to check the database state using the Exchange tool esutil: esutil /mh "C:\Program Files\Exchsrvr\Recovery Storage Group\privl.edb"

In this command, replace 'priv1' with the mailstore name you entered in .Step 2e
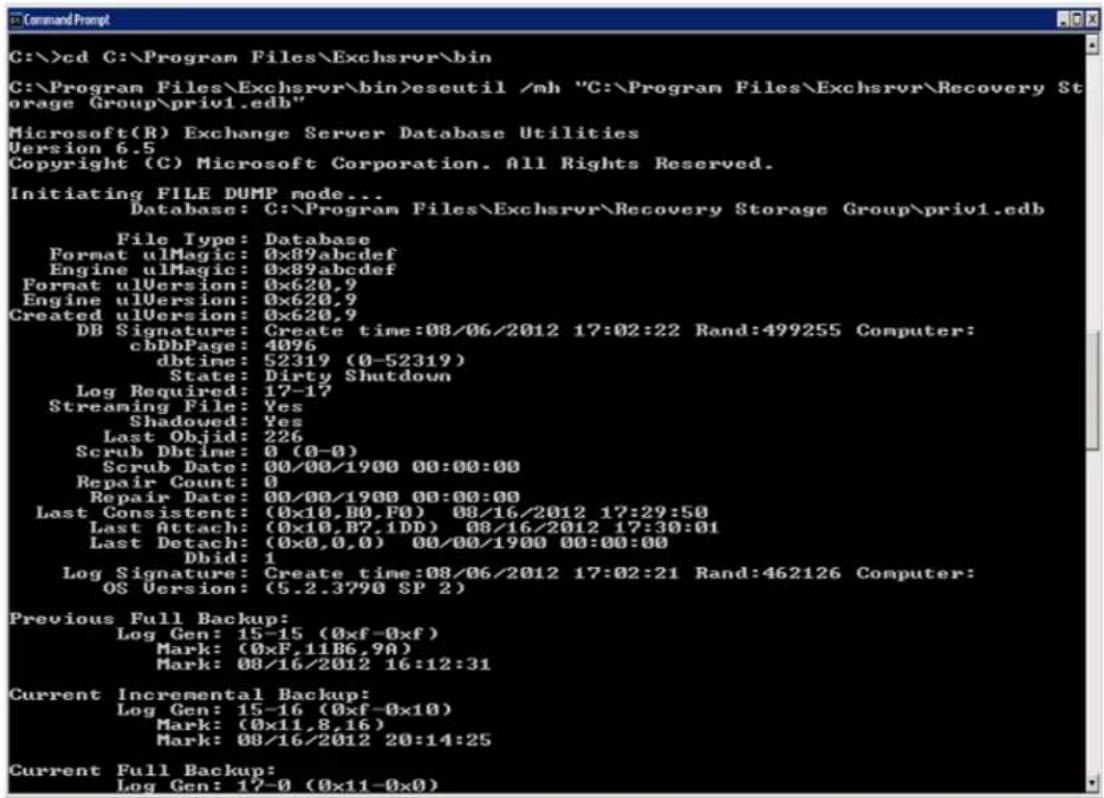
3f. If the database is in a 'Dirty Shutdown' state, at a command prompt, enter the following command: esutil /p "C:\Program Files\Exchsrvr\Recovery Storage Group\priv1.edb"

To further repair the Exchange database, from the command prompt, run the defragment command: esutil /d "C:\Program Files\Exchsrvr\Recovery Storage Group\privl.edb" /p
In this command, replace 'priv1' with the mailstore name you entered in Step 2e.
Step 4. Mount the Restored Database
4a. In the System Manager, right-click on the database priv1, and click Properties. Click the Database tab, and select This database can be :overwritten by a restore
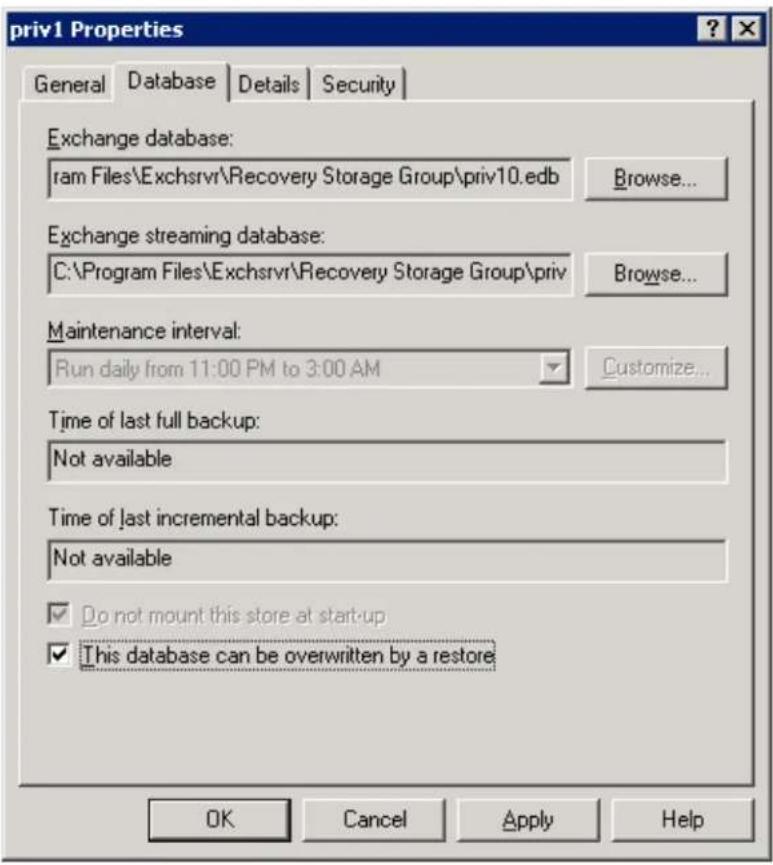
4b. Click, and then click .Apply OK
4c. Right-click on the database priv1, and click Mount Store; click Yes in the Warning dialog box.
Step 5. Microsoft Exchange Server Mailbox Merge Wizard (ExMerge)
Go to the Microsoft download page, and download ExMerge.exe to the C:\Program Files\Exchsrvr\bin directory on your Exchange 2003 Server. Once downloaded, double-click to start the Wizard.ExMerge.exe
Step 5a. Extract Data from the Exchange Server Mailbox
- Click Next on the Welcome page. On the Procedure Selection page, select Extract or Import (Two Step Procedure), and then click N ext:
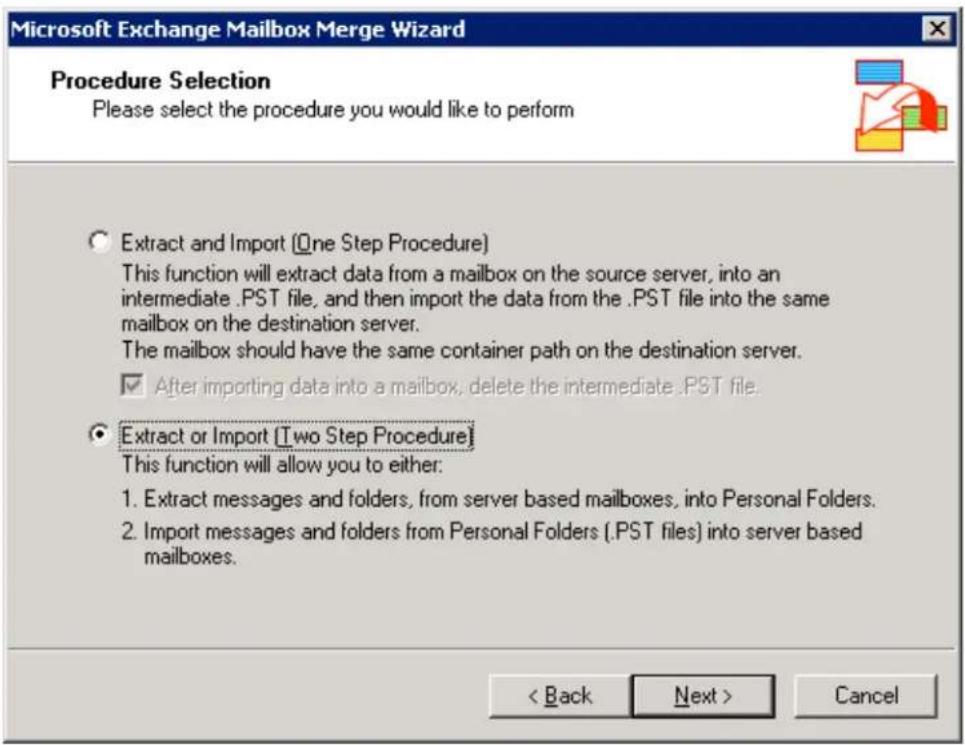
- On the Two Step Procedure page, select Step 1: Extract data from an Exchange Server Mailbox, and then click Next:
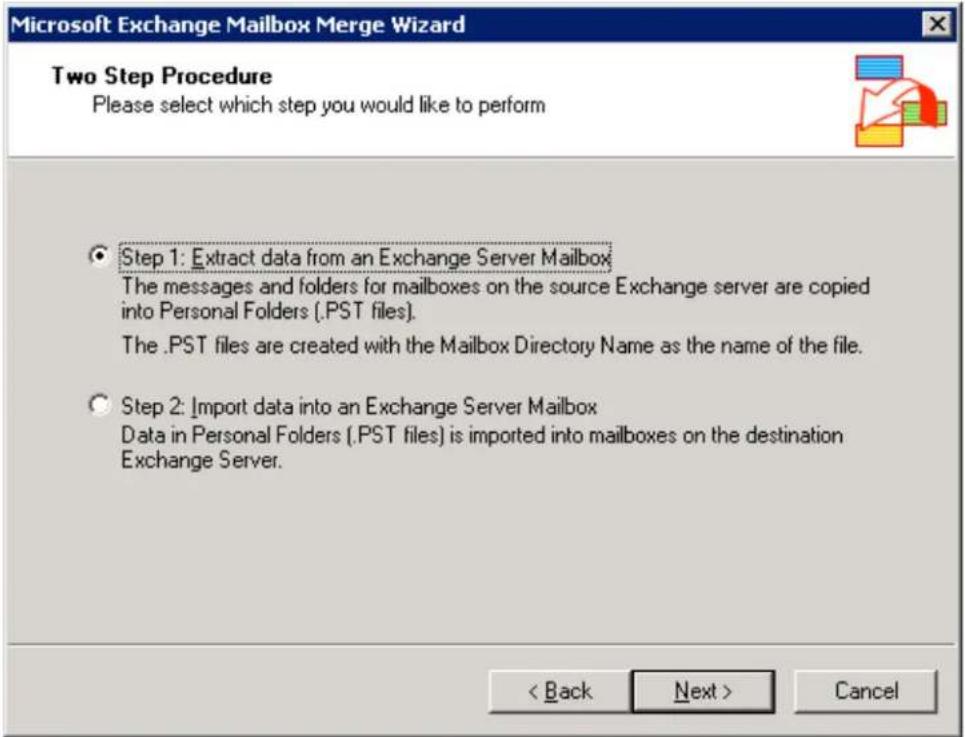
- On the Source Server page, enter the Exchange Server name, Domain Controller name, and port number in the corresponding fields, and click Next
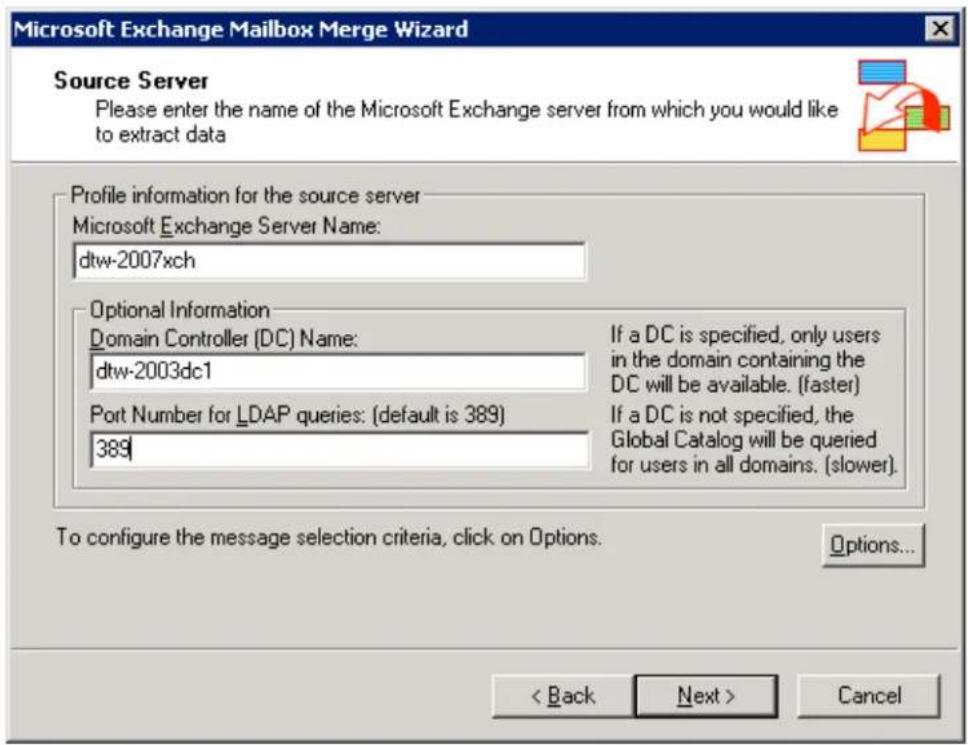
- On the Database Select page, select RECOVERY STORAGE GROUP/PRIV1 where PRIV1 represents the mailstore name you entered, and then click in Step 2e Next
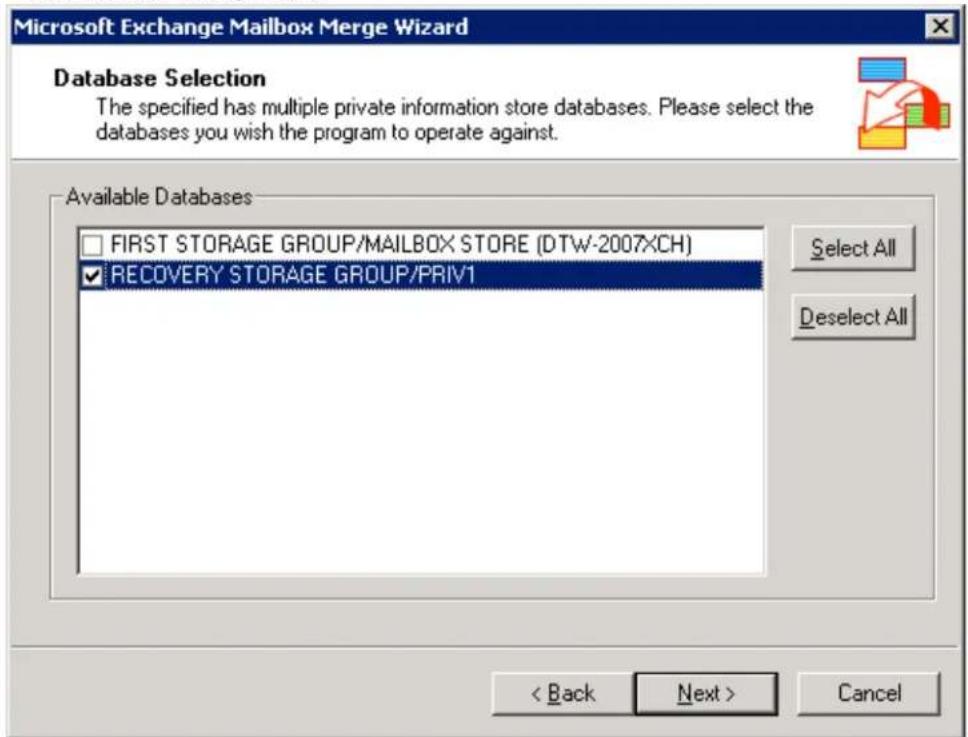
- On the Mailbox Selection page, select all of the mailboxes using Ctrl-click, and click Next:
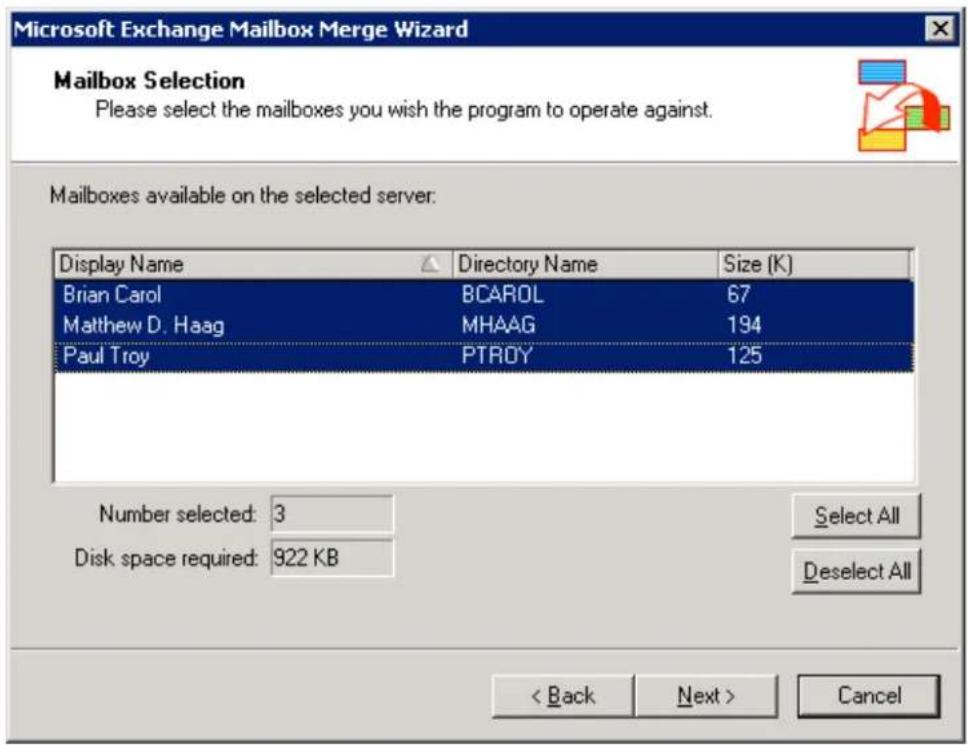
- On the page, select the , and then click .Locale Selection Default locale Next
- On the Target Directory page, click Change Folder and choose a target directory for the PST files from which to merge data into the Exchange Server, and then click :Next
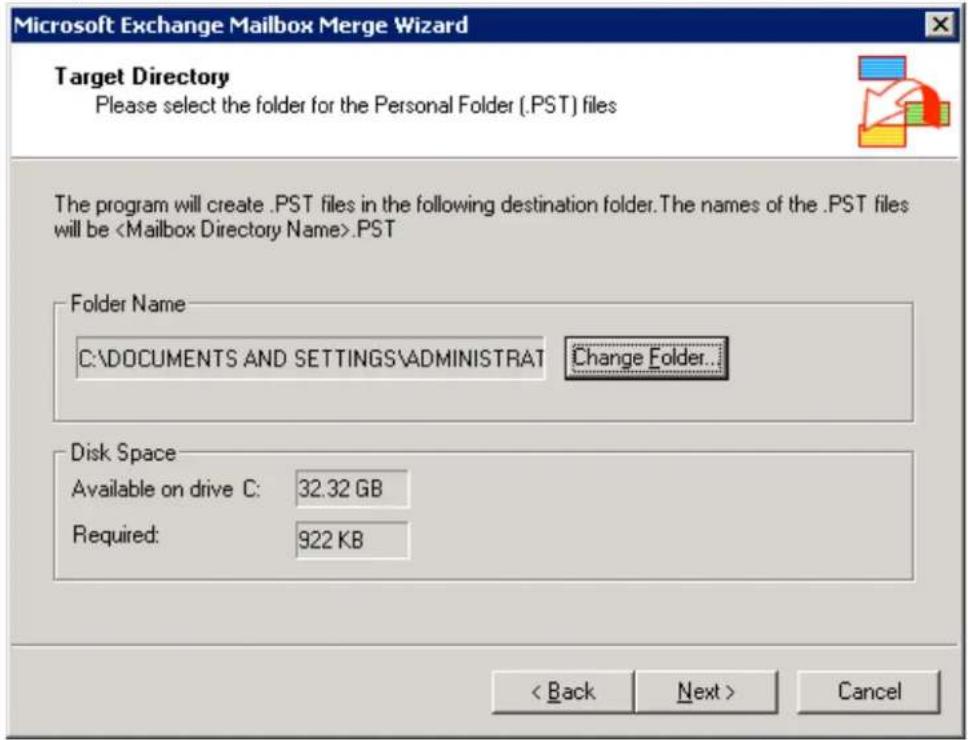
- On the Save Settings page, click Next, and on the Process Status page, click Finish:
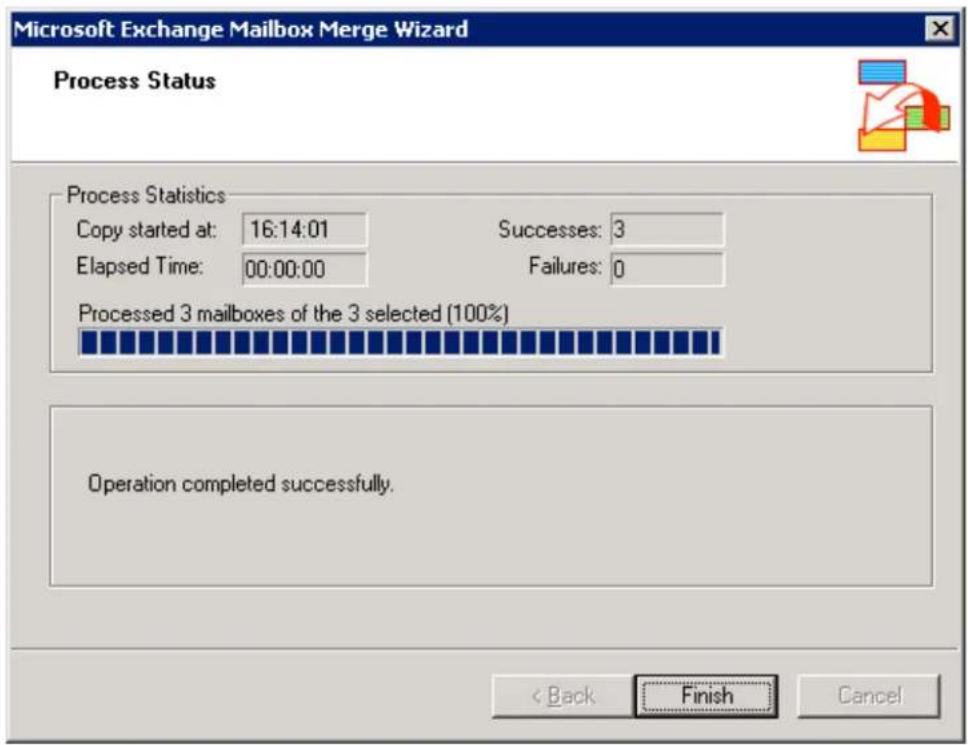
Step 5b. Import Data into the Exchange Server Mailbox
- Double-click to start the Wizard, and click on the page.ExMerge.exe Next Welcome
- On the Procedure Selection page, select Extract or Import (Two Step Procedure), and click Next.
- On the Two Step Procedure page, select Step 2: Import data into an Exchange Server Mailbox, and then click Next:
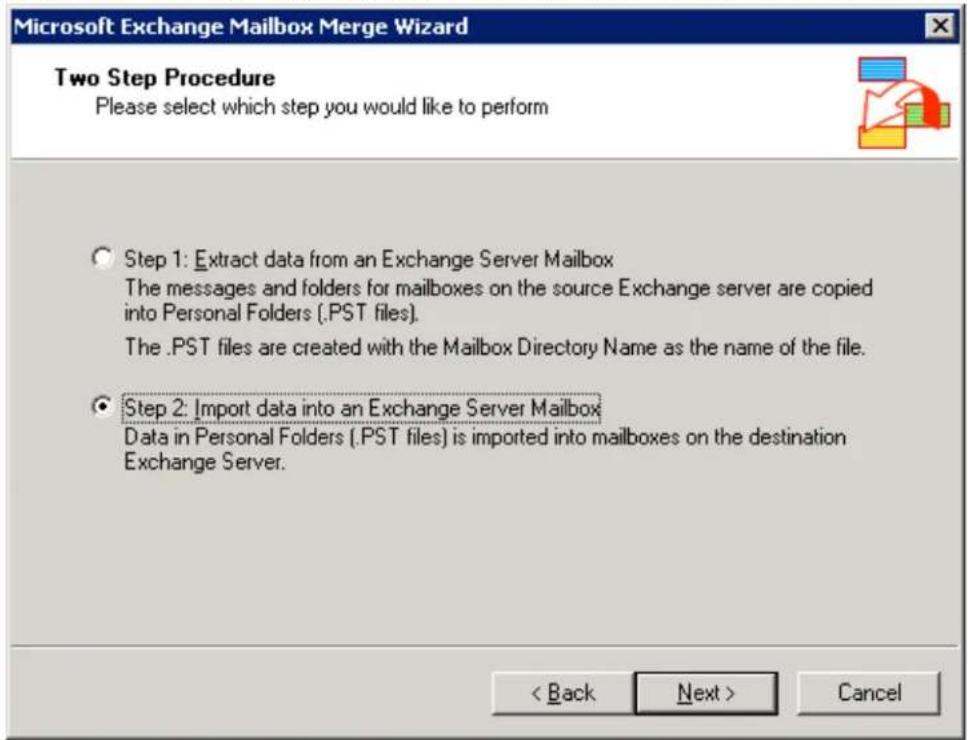
- On the Destination Server page, enter the server name, Domain Controller name, and port number in the corresponding fields, and dNext:
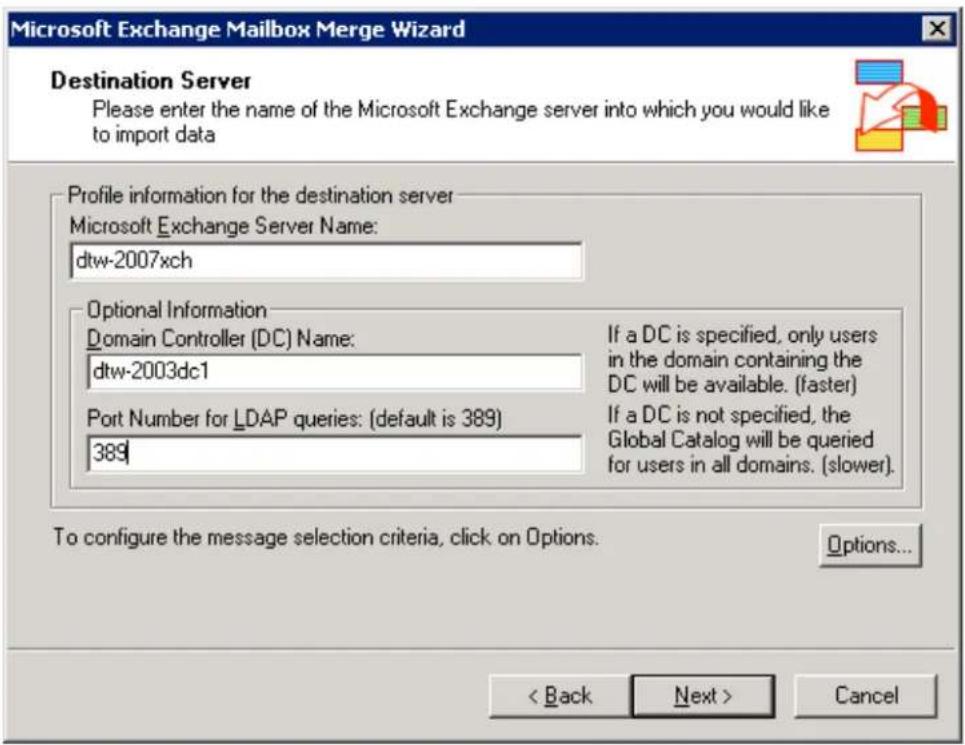
- On the Mailbox Selection page, select all of the mailboxes using Ctrl-click, and click Next:
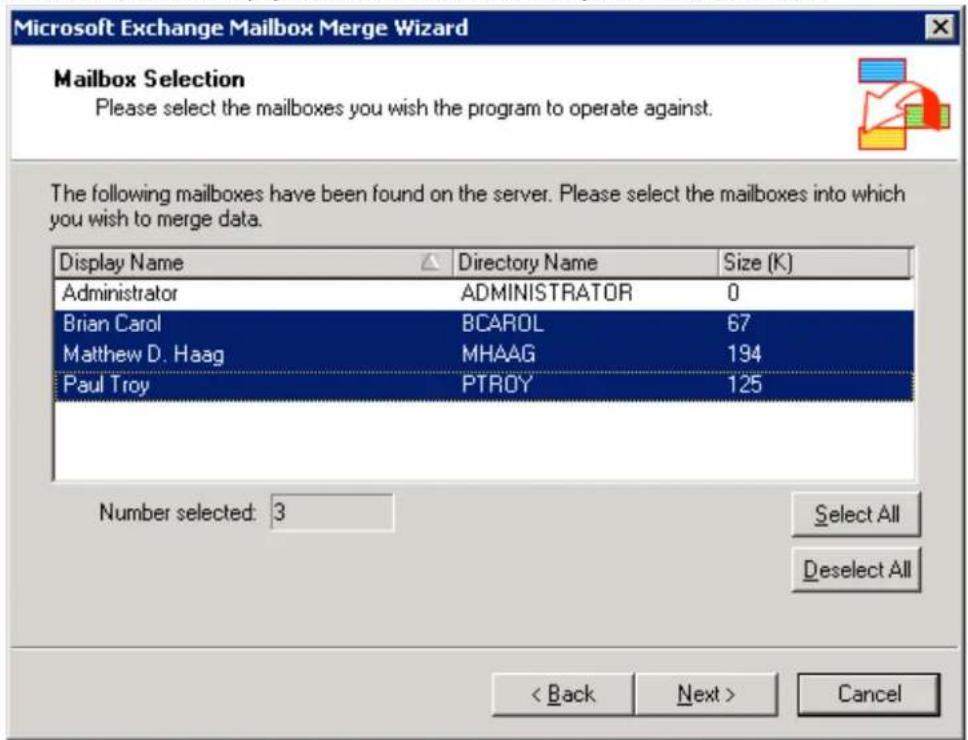
- On the Locale Selection page, select the desired locale, and click Next. On the Target Directory page, click Change Folder and select the target folder containing the PST files.
- On the Save Settings page, click Next, and on the Process Status page, click Finish.
Microsoft SQL Server Database Recovery and Restoration
In this Section
• How to Restore a Microsoft SQL Database
• How to Restore a SQL Server 2008 Master Database
• How to Restore a Microsoft SQL Database to a Point-in-Time
• How to Restore a Microsoft SQL Server Database to a Flat File
Related Articles
• How to Change the SQL Recovery Model
How to Restore a Microsoft SQL Database
This article refers to Barracuda Backup firmware version 5.0 or higher.
In this article:
- Restore a SQL User Database
- Restore a SQL Master Database
- Restore a SQL SharePoint Database
When you request the restore of a Microsoft SQL Server user database, Barracuda Backup performs all of the restores required to get to the desired date, as follows:
- Restore a full backup of the SQL Server database
- Restore the incremental backups in the order in which they were created
In other words, if you want to restore the database to a certain date, simply select the date and that database, and Barracuda Backup restores all intermediate required database revisions.
ToUse the following steps to restore a Microsoft SQL user database,
- On the RESTORE > Restore Browser page, select the day and time from which you want to restore.
- Select the data source from which you want to restore.
- Select the database(s) to restore, and click .Restore
If the master database becomes unusable, it must be restored from a previous SQL Dump or backup. All changes made to the master database after the last backup or dump are lost when the dump is reloaded, and therefore must be reapplied.

A damaged master database is evident by the failure of the SQL Server to start, by segmentation faults, or by input/output errors. The procedure used to recover a damaged master database is different from the procedure used to recover user databases. If the master database becomes unusable, it must be restored from a previous SQL Dump or back up. All changes made to the master database after the last backup or dump are lost when the dump is reloaded and therefore must be reapplied. It is strongly recommended that the master database be backed up each time it is changed.
Use the following steps to recover a damaged master database,
- Verify that the Barracuda Backup Agent is installed on the local machine.
- Stop the SQL Server Services using the SQL Server Enterprise Manager.
- Rebuild the master database; refer to Microsoft Developer Network (MSDN) for detailed procedures for your version of SQL.
- Initiate Single User Restore Mode on the SQL database by entering the following from a command prompt; leave the window open after executing the command:
CD \program files\microsoft sql server
$$ \text { sqlservr } - c - m \text {(SQL 7)} $$
sqlservr -c -m -s %
- After you complete the restore, remove the -m before you restart the server instance in the normal multi-user mode:
CD \program files\microsoft sql server\
sqlservr (SQL 7)
sqlservr -s %<Named Instance>% (SQL 8)
- If login IDs or devices have been added to or dropped from the master database since the last backup, those changes must be reapplied. Restart the server and reapply the changes manually or from saved batch files.
- If any databases have been created, expanded, or shrunk since the last dump of the master, those databases must be dropped and then restored. Refer to for detailed procedures for your version of SQL.http://msdn.microsoft.com
- Close the command prompt.
- Restart the SQL Service using SQL Enterprise Manager.
Restore a SQL SharePoint Database
Use the following steps to restore a SQL SharePoint database:
- Start the Windows SharePoint Services VSS Writer service.
- Start the Volume Shadow Copy service.
- Shut down any web applications whose content is being restored.
How to Restore a SQL Server 2008 Master Database
This article refers to all Barracuda Backup firmware versions, and Microsoft SQL Server 2005 and 2008.
In this article:
- Set Microsoft SQL Server to Single User Mode
- Stop Services
- Restore the Database
- Set Microsoft SQL Server to Multi-User Mode
Set Microsoft SQL Server to Single User Mode
- Log in to the SQL server as the administrator.
- Go to Administrative Tools > Services, right-click on the service SQL Server (MSSQLSERVER), and click Stop.
- Double-click to open the dialog box.SQL Server (MSSQLSERVER) Service Properties
- Click the General tab, and in the Start parameters field, type: -c -m
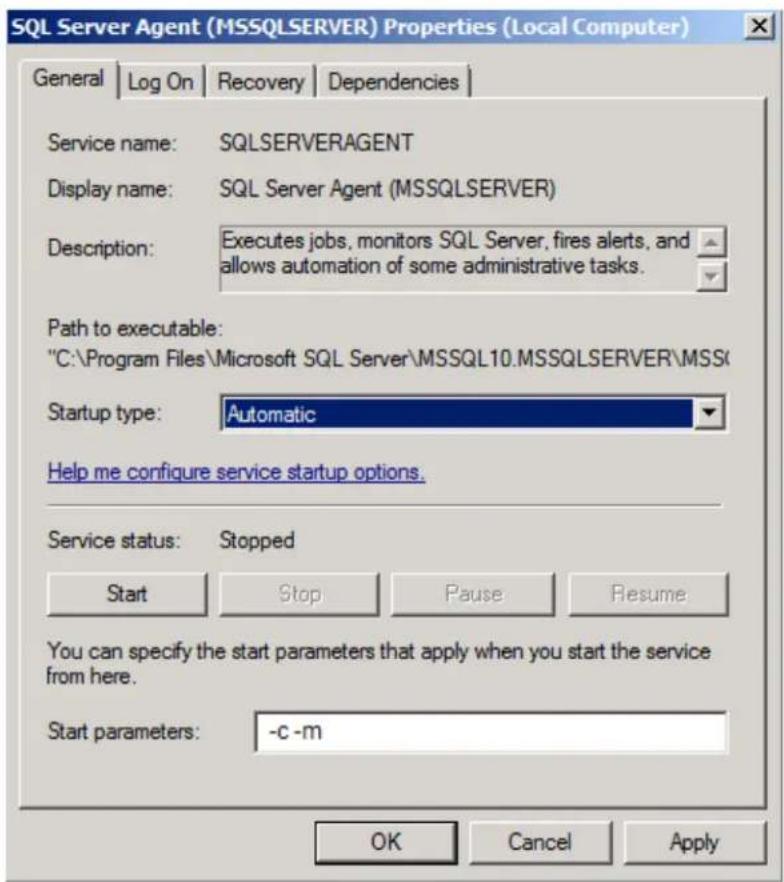
- Click Start in the General tab to place the server in single user mode, and then click OK to close the dialog box.
Stop Services
- In the Services window, right-click on the service SQL Server Agent (MSSQLSERVER), and click Stop.
- In the Services window, right-click on the service SQL Server Reporting (MSSQLSERVER) service, and click Stop:
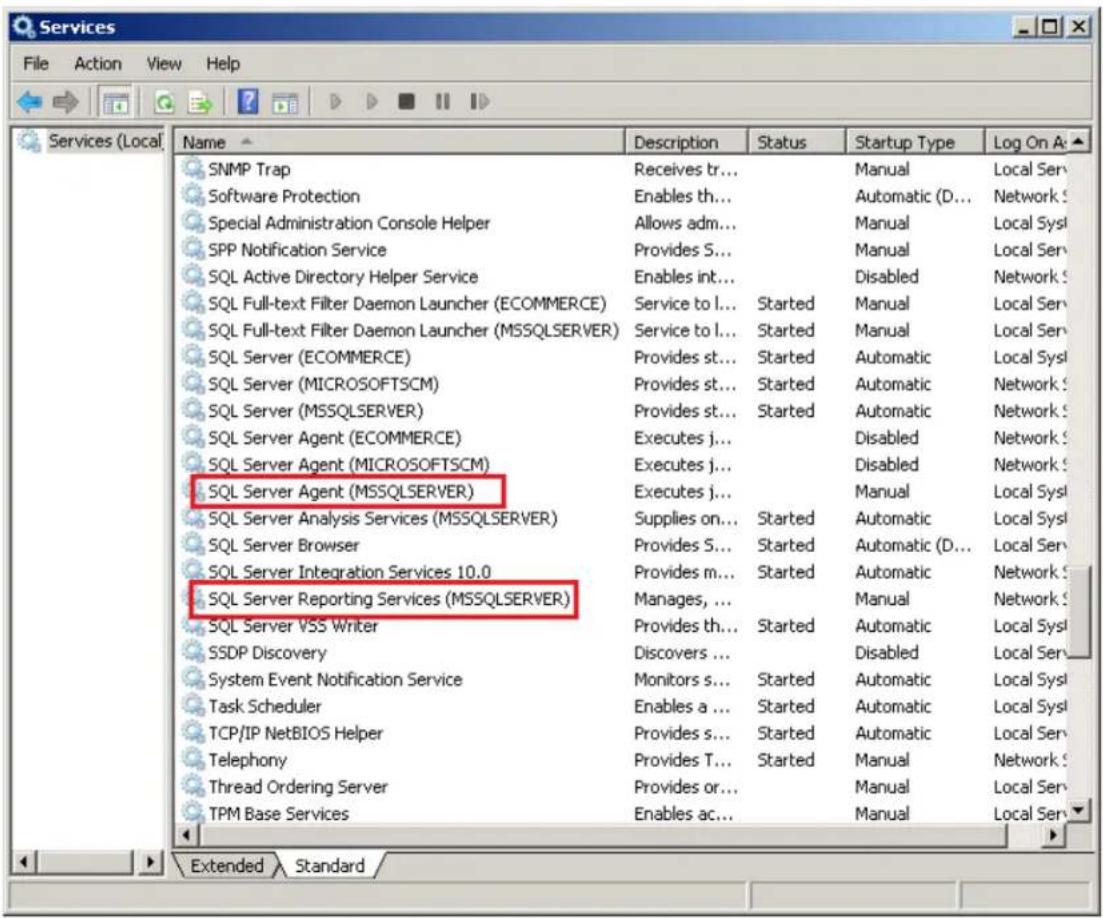
- Log in to Barracuda Backup, go to the Restore >Restore Browser page.
- Click next to the Microsoft SQL Server instance to restore.Restore
- In the Restore dialog box, select to restore to the original instance or a new instance, and click Start Restore.
Set Microsoft SQL Server to Multi-User Mode
- Log in to the SQL server as the administrator.
- Go to Administrative Tools > Services, right-click on the following services, and click Start:
• SQL Server (MSSQLSERVER)
• SQL Server Agent (MSSQLSERVER)
• SQL Server Reporting Services ( MSSQLSERVER)
How to Restore a Microsoft SQL Database to a Point-in-Time
This article refers to all Barracuda Backup firmware releases, and Microsoft SQL Server 2000, 2005, and 2008, using Microsoft SQL Server Management Studio.
In this article:
- Restoring the Database
• Restoring to a Point-in-Time
Related Articles
This article describes how to restore a SQL database to a point-in-time, and then restore the database to working condition using SQL Management Studio. Before completing this solution, you must first Restore the Microsoft Database to a Flat File.
Restoring the Database
Use the following steps to restore the database:
- Open Microsoft SQL Server Management Studio, and navigate to :Databases
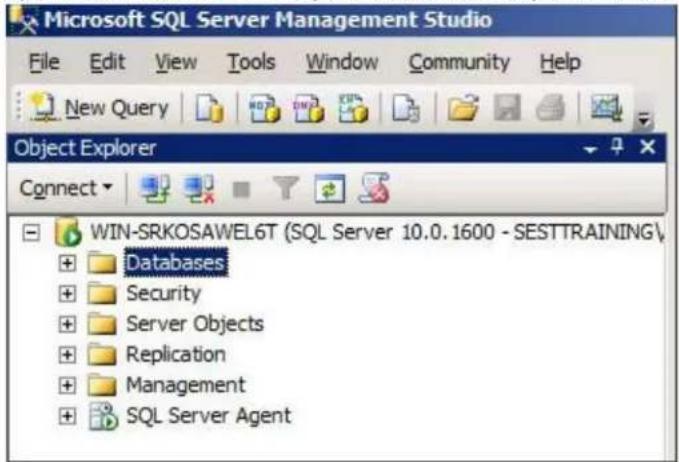
- Right-click Databases, and click Restore Database. In the Source for restore section, select From Device, and click the browse button:
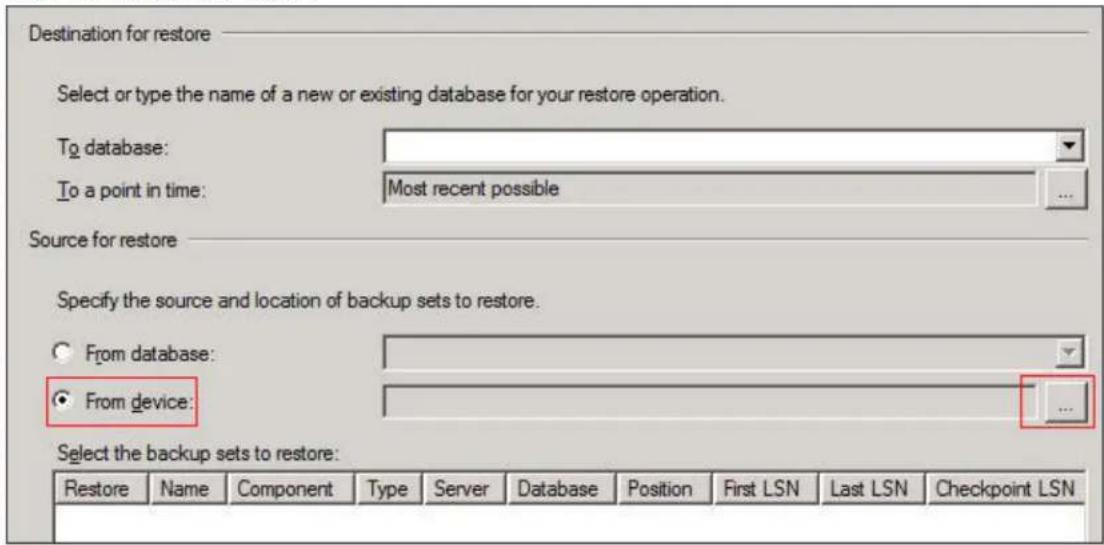
- Click Add in the Specify Backup window. Browse to the location of your recently restored flat files. Choose the Full backup file which should be the first backup file in the list:
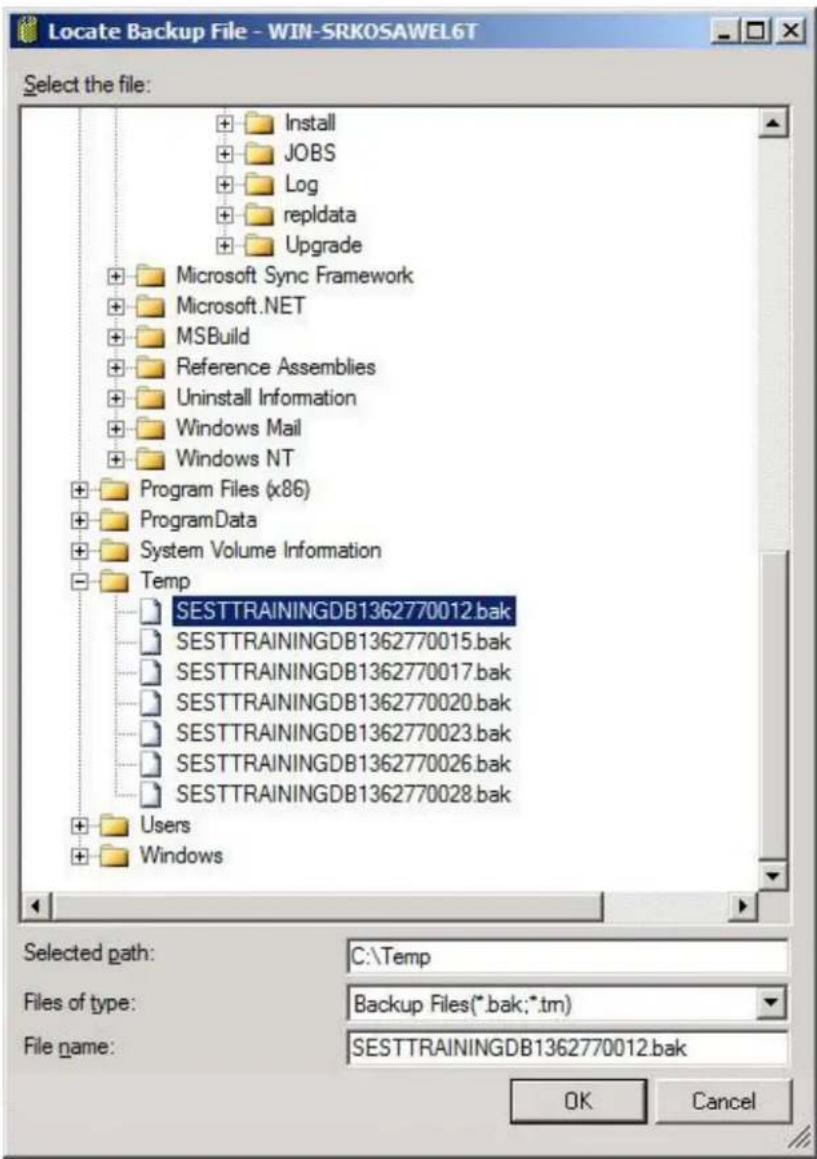
- Click OK; the Specify Backup window displays:
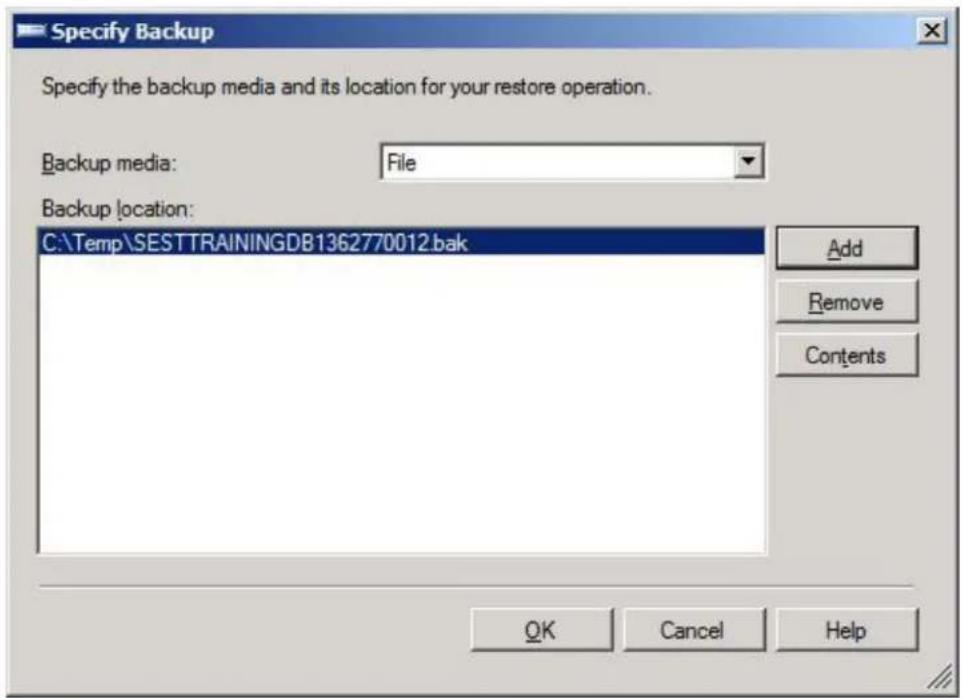
- Click OK. In the Destination for restore section, select the database to which you wish to restore, and in the Select the backup sets to restore section, select the backup file you selected above in step 3:
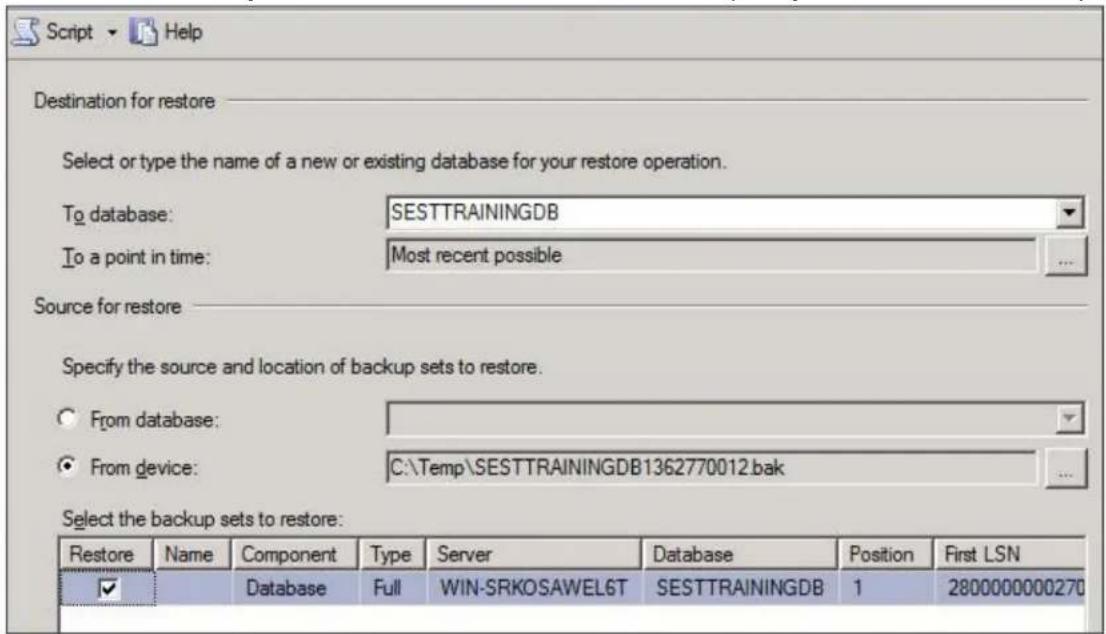
-
In the left pane, click, and select the following:Options
-
In the Restore options section, select Overwrite the existing database (WITH REPLACE), and leave the other options unselected.
- In the Recovery state section, select Leave the database non-operational, and do not roll back uncommitted transactions. Additional transaction logs can be restored. (RESTORE WITH NORECOVERY):
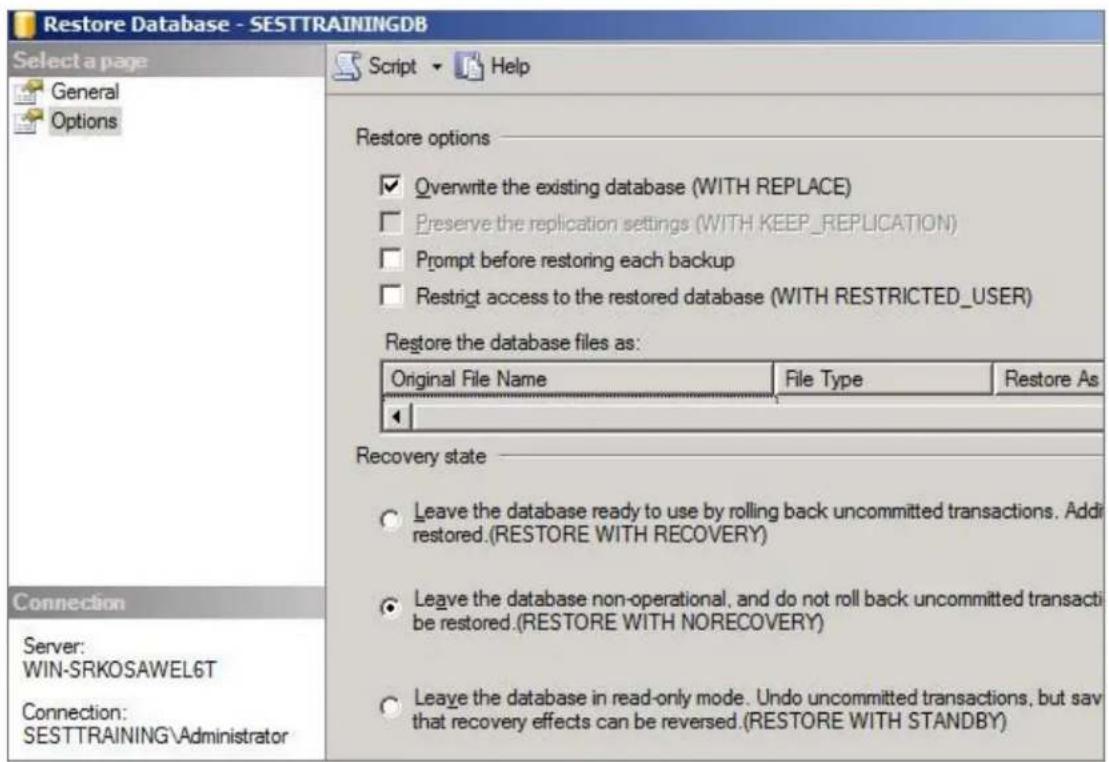
-
Click to perform the restore.OK
-
If the restore is successful, complete steps 1 through 7 for each incremental backup file, which includes the .tm file extension, until you reach the incremental file containing the point-in-time file to which you wish to restore.
Restoring to a Point-in-Time
Use the following steps to restore the last incremental file containing the point-in-time:
- In Microsoft SQL Server Management Studio, right-click Databases, and click Restore Database.
- In the Source for restore section, select From Device, and click the browse button.
- Click Add in the Specify Backup window. Browse to the location of your recently restored flat files, select the incremental backup file containing the point-in-time to restore to, and click OK.
- Click OK in the Specify Backup window. In the Select the backup sets to restore section, check the backup file you added in step 3.
- In the Destination for restore section, select the database to which to restore:
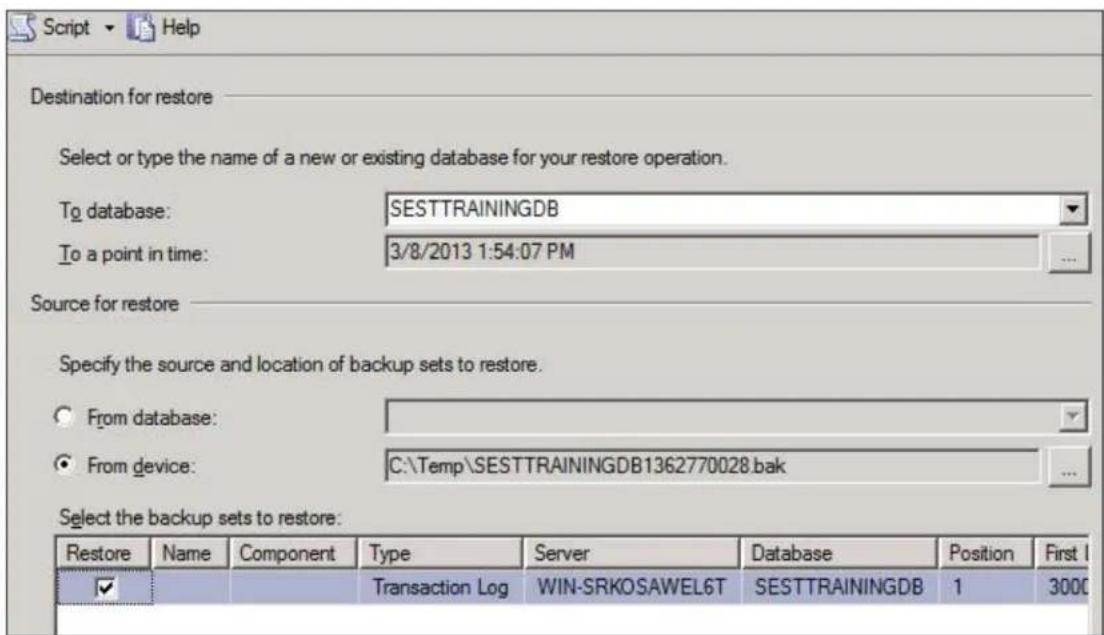
- In the Destination for restore section, click the browse button following To a point in time; the Point in time window displays.restore
- Select, and choose the date and time to which to restore: a specific date and time
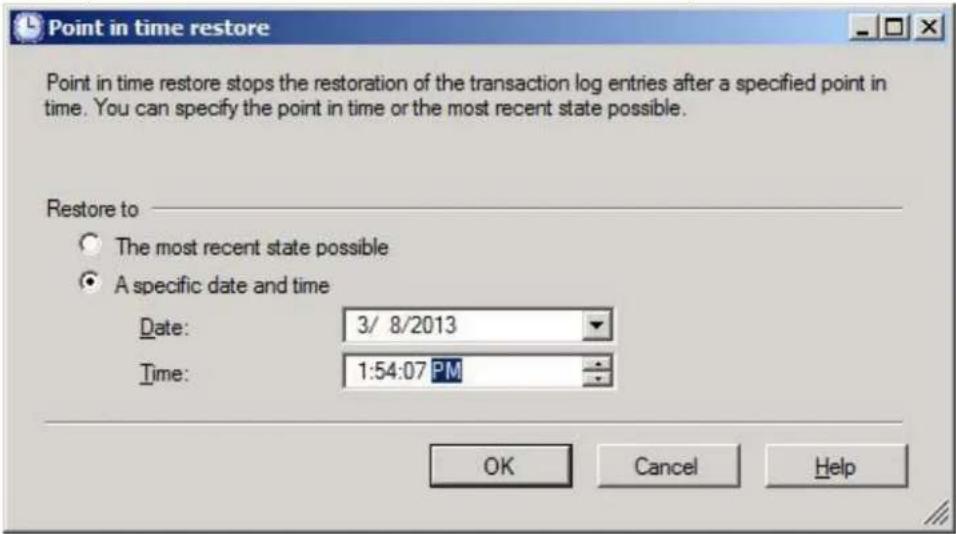
-
Click OK. In the left pane, click Options, and make the following selections:
-
In the Restore options section, select Overwrite the existing database, and leave the other options unselected.
- In the Recovery state section, select Leave the database ready to use by rolling back uncommitted transactions. Additional transaction logs can be restored. (RESTORE WITH RECOVERY):
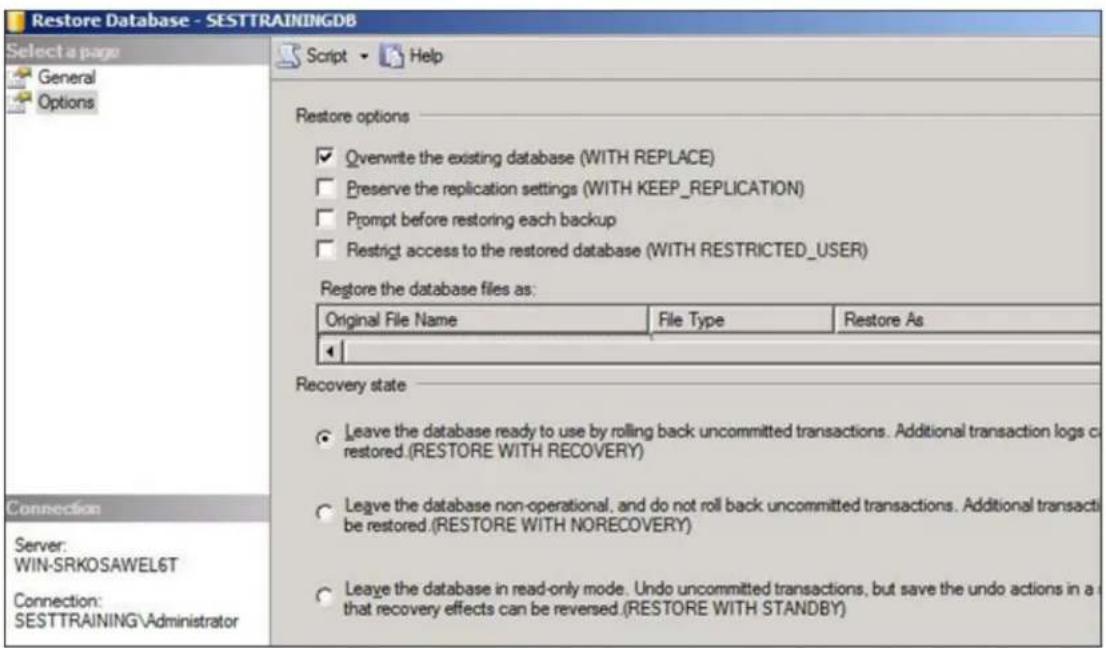
- Click OK to perform the restore. the restored database should display with only the changes up to the specified point-in-time.
How to Restore a Microsoft SQL Server Database to a Flat File
This article refers to Barracuda Backup firmware 5.1 and lower, and Microsoft SQL Server 2005 and 2008 Windows Agent.
In this article:
- Step 1. Modify the bbconfig.ini File
- Step 2. Restore the Database
- Step 3. Restoring a Flat File into SQL Management Studio
Related Articles
- Restore to a Point-in-Time
Step 1. Modify the bbconfig.ini File
- On the Microsoft SQL Server where you installed the Barracuda Backup Agent, open Services.
- Right-click on the Service Barracuda Backup Agent, and click Stop. The Service is now stopped.
- Open the file in Notepad; the file is located in the following directory:bbconfig.ini
- /Program Files/Barracuda/Barracuda Backup Agent/config/bbconfig.ini
- Add the following lines to the end of the file, where path to file represents the restore path:
restoreToFilePath= path to file For example:
![[installControl] buildNumber=84705 installedversion=5.3.00-rel [configuration] nodeGuid={00001001-E38CF7F1-E38CF7F1-E38CF7F2} [Microsoft SQL Server Agent] restoreToFilePath=C:\testing](/content/2026/06/1260286/images/2e3a7c825f433eacf47ebe09cbd6b64ceb5a4dd73e289aa149283e988f5ffa97.jpg)
- Save and close the file.
- Open Services once again.
- Right-click on the Service Barracuda Backup Agent, and click Start. The Status field should display as Started.
Step 2. Restore the Database
Use the following steps to restore the database normally through the Barracuda Restore Browser to the path specified in Step 1:
- Log in to Barracuda Backup, and go to RESTORE > Restore Browser.
- Drill down to and select the database revision to restore, and click .Restore
- In the Restore dialog, from the Restore to drop-down menu, select the appropriate server.
- In the Path section, select the second option, and enter the path specified in Step 1 in the bbconfig.ini file; click Start Restore.
- The database is restored to the server as a .bak file if this is a full restore, and to a .trn file if this is an incremental backup:

Step 3. Restoring a Flat File into SQL Management Studio

Restoring to a Point-in-Time
Once you create the flat file, you can select to restore the Microsoft SQL Database to a Point-in-Time.
Use the following steps to restore the flat file into SQL Management Studio:
- After connecting to the appropriate instance of the Microsoft SQL Server Database Engine, in Object Explorer, click the server name to expand the server tree.
- Expand Databases, and, depending on the database, either select a user database or expand System Databases and select a system database.
- Right-click the database, point to Tasks, and then click Restore.
- Click the type of restore operation you want (Database, Files and Filegroups, or Transaction Log). The corresponding restore dialog box opens.
- On the General page, in the Restore source section, click From device.
- Click the browse button for the From device text box; the Specify Backup dialog box displays.
- From the Backup media menu, select Backup Device, and click Add; the Select Backup Device dialog opens.
- In the Backup device menu, select the device you want to use for the restore operation.
Microsoft Hyper-V Recovery and Restoration
In this Section
• How to Restore a Microsoft Hyper-V 2012 to its Original Location
• How to Restore a Microsoft Hyper-V Virtual Machine
How to Restore a Microsoft Hyper-V 2012 to its Original Location
This article refers to Barracuda Backup Server firmware version 5.3 and higher, and Microsoft® Hyper-V 2012 and 2012 R2. This article assumes Hyper-V is installed and configured.
Use the following steps to restore a Hyper-V virtual machine (VM) back to its original location.
- Turn off or remove the original VM; the restore job will fail if the VM is running.
- Log in to the Barracuda Backup web interface, select the associated Barracuda Backup Server in the left pane, and go to the page.RESTORE >Restore Browser
- Select the Hyper-V source that contains the VM you want to restore.
- In the list, click to the right of the VM.Contents Restore
- In the dialog box, select, and then click :Restore Original Location Start Restore
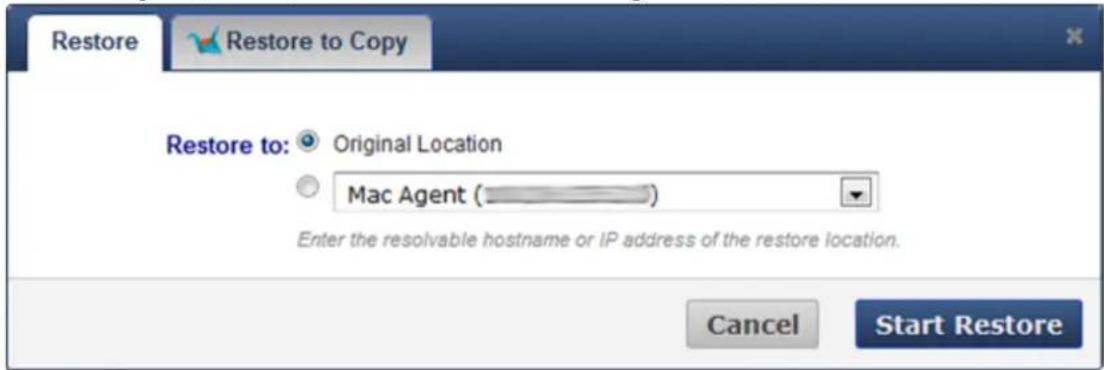
- Go to the page to monitor the backup progress: REPORTS > Restore

- Once the restore is complete, log in to Hyper-V, and then start the server:
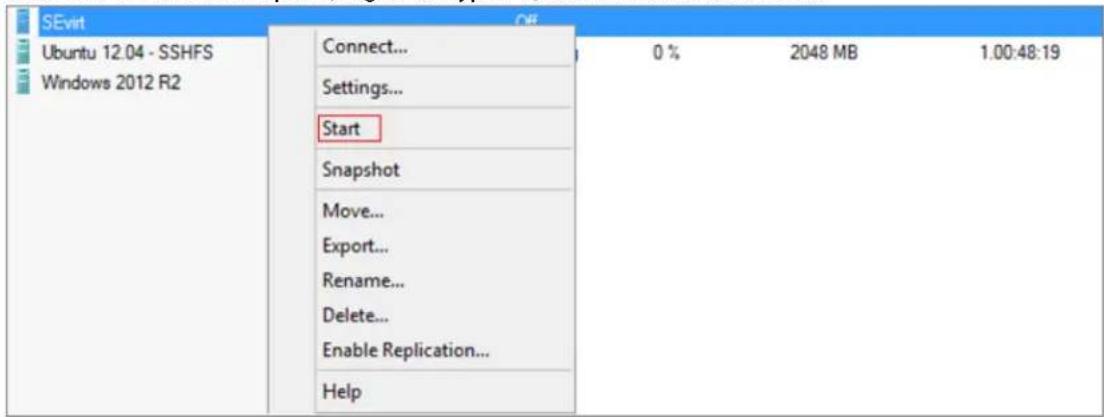
How to Restore a Microsoft Hyper-V Virtual Machine
This article refers to Barracuda Backup Server firmware version 5.2 and higher, and assumes that Microsoft® Hyper-V is installed and configured.
When restoring a Hyper-V virtual machine back to its original location,
keep the following in mind:
- Message-level data must be restored to the computer from which it originally came;
- File share data cannot be restored to its original location.
- Restore Data
- Import the Virtual Machine
Related Articles
• How to Set Up Microsoft Hyper-V Virtual Machine Backups
Additional Resources
- Barracuda Networks Knowledgebase Solution #00 005702

High Availability
When restoring a high availability (HA) Hyper-V virtual machine, if the virtual machine still exists anywhere in the cluster, to avoid restore errors, you must first complete one of the following options before restoring:
- Remove the virtual machine - First shut down and then delete the virtual machine; or
- Keep the original virtual machine - First clone the virtual machine to assign it a unique identifier (GUID), and then delete the original virtual machine.
virtua0machine is removed, you can proceed with restoration.
Restore Data
Use the following steps to restore a Hyper-V virtual machine using Barracuda Backup.
- Log into the Barracuda Backup web interface, and in the left pane, click on the Barracuda Backup Server from which to restore data.
-
Click RESTORE, and in the Restore Browser list, click on the Hyper-V source that contains the virtual machine to restore, and click Res to the right of the virtual machine.tore
-
In the dialog box, click :Restore Original Location
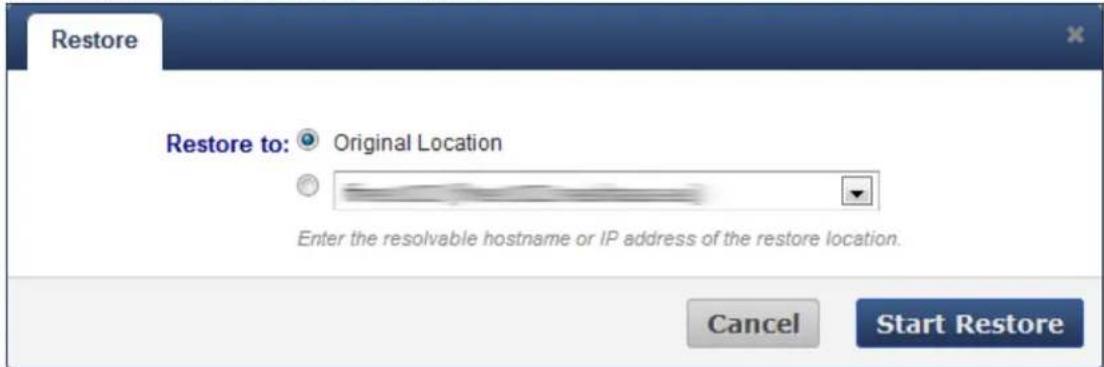
Go to the REPORTS > Restore page to view restore progress.
- Data is restored to the original location.
Import the Virtual Machine
Use the following steps to import the virtual machine.
- Open the Hyper-V Manager, and click in the pane:Import Virtual Machine Actions
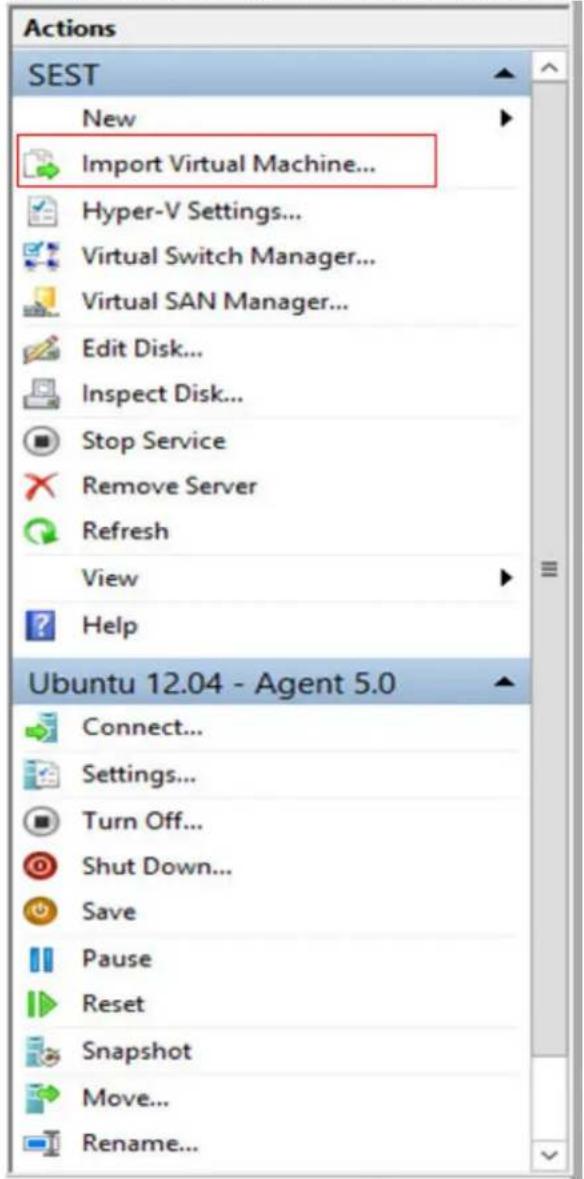
- In the dialog box, click :Import Virtual Machine Next
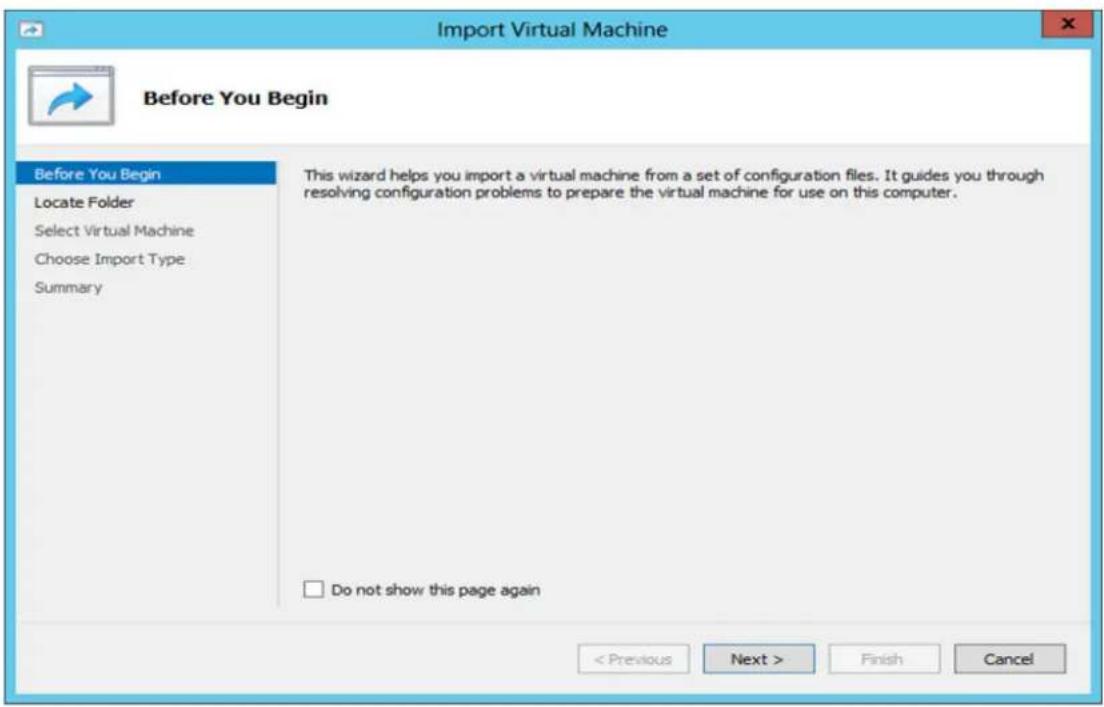
- Browse to the folder where the virtual machine was restored, and locate the file:.vhd
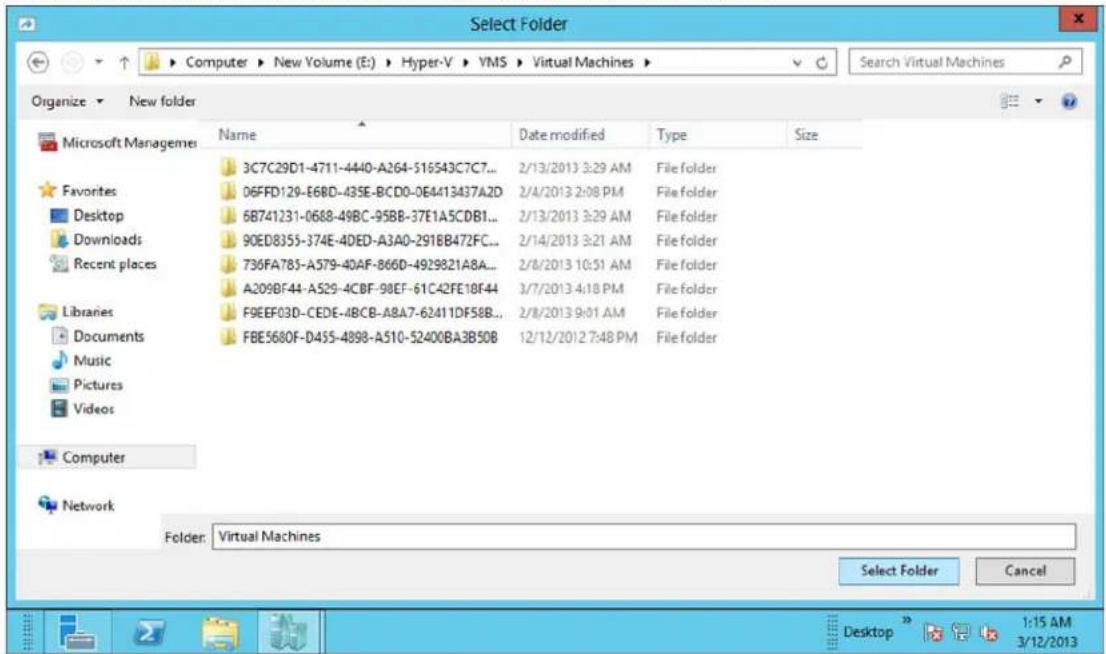
- Click . Select the virtual machine to import, and click .Select Folder Next
- Select the type of import to perform, and click .Next
- Browse to the location of the virtual disks:
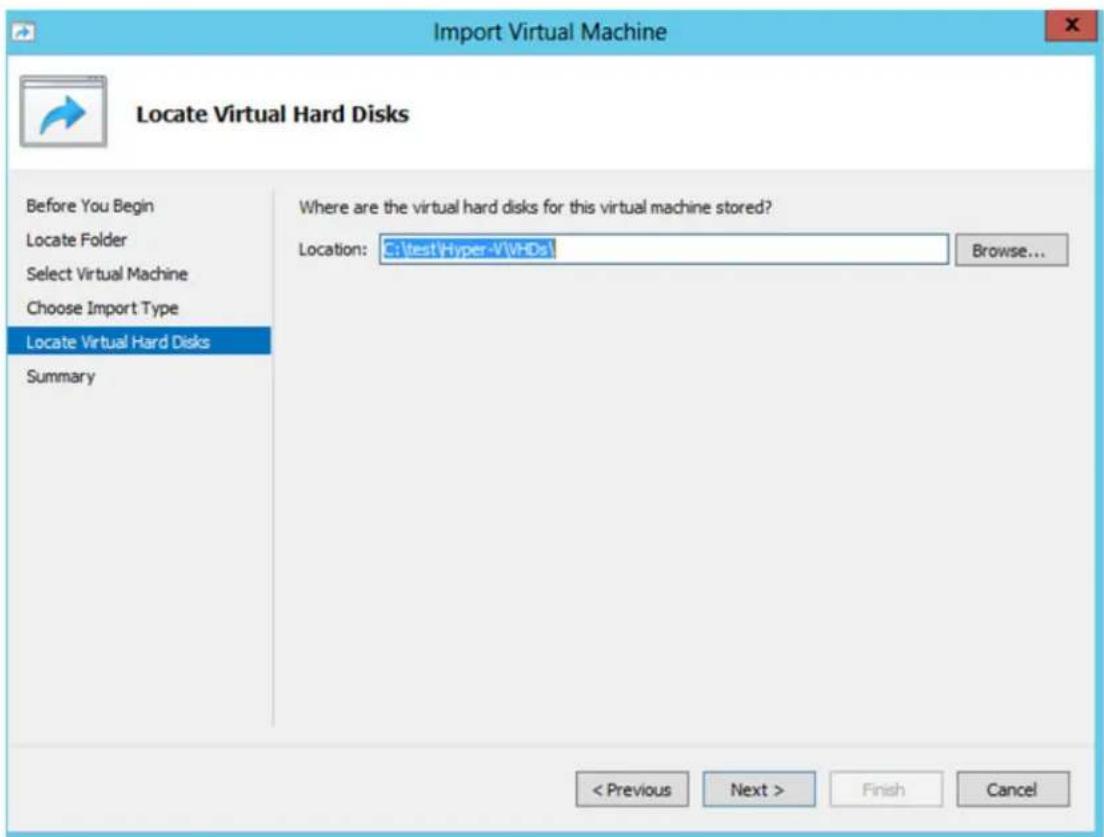
- Click . Click , and start your virtual machine.Next Finish
Microsoft Windows Server Active Directory
In this Section
• How to Restore a Microsoft Server 2012 Active Directory Object from the Active Directory Recycle Bin
• How to Enable Active Directory Recycle Bin on Windows Server 2012
• How to Restore a Microsoft Server 2008 R2 Active Directory Object from the Active Directory Recycle Bin
• How to Enable Active Directory Recycle Bin on Windows Server 2008 R2
How to Restore a Microsoft Server 2012 Active Directory Object from the Active Directory Recycle Bin
This article refers to Barracuda Backup firmware version 5.0 or higher, and Microsoft® Active Directory (AD) on Microsoft Windows Server® 2012.
Related Articles
- Enable AD Recycle Bin on Windows Server 2012
- Restore Microsoft Server 2008 R2 AD Object from AD Recycle Bin
• How to Back Up Microsoft Active Directory
Additional Resources
- Restore a Deleted Active Directory Object
Use the following steps to restore an AD Object from the AD Recycle Bin:
- Log in to the Windows Server 2012 as the administrator.
- Go to Start, and type dsac.exe to open the ADAC, or in Server Manager, click Tools, and then click Active Directory Administrative Center.
- In the left pane, click on the target Server name; a Deleted Objects container displays in the center pane:
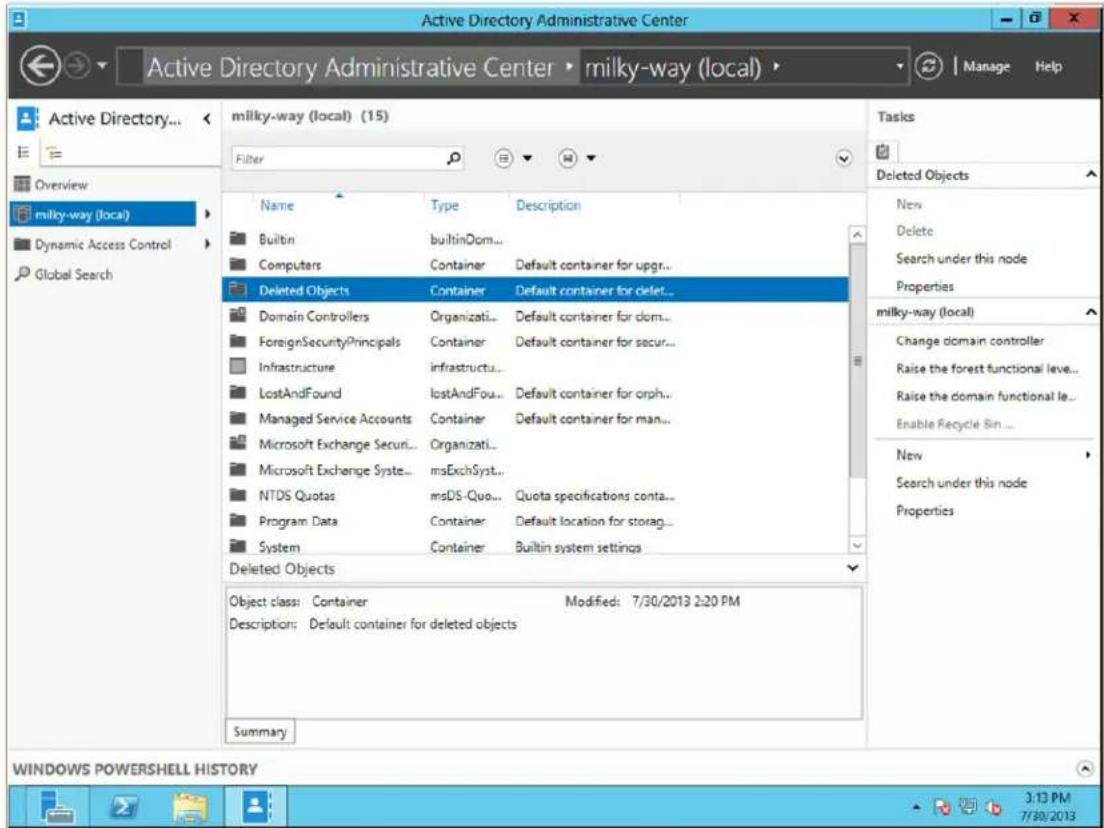

Deleted Objects Container
If the Deleted Objects container does not display, right-click on the Server name in the left pane to enable the container.
- Double-click the Deleted Objects container to view a list of deleted items which can be restored.
- Right-click on the user to restore, and click :Restore
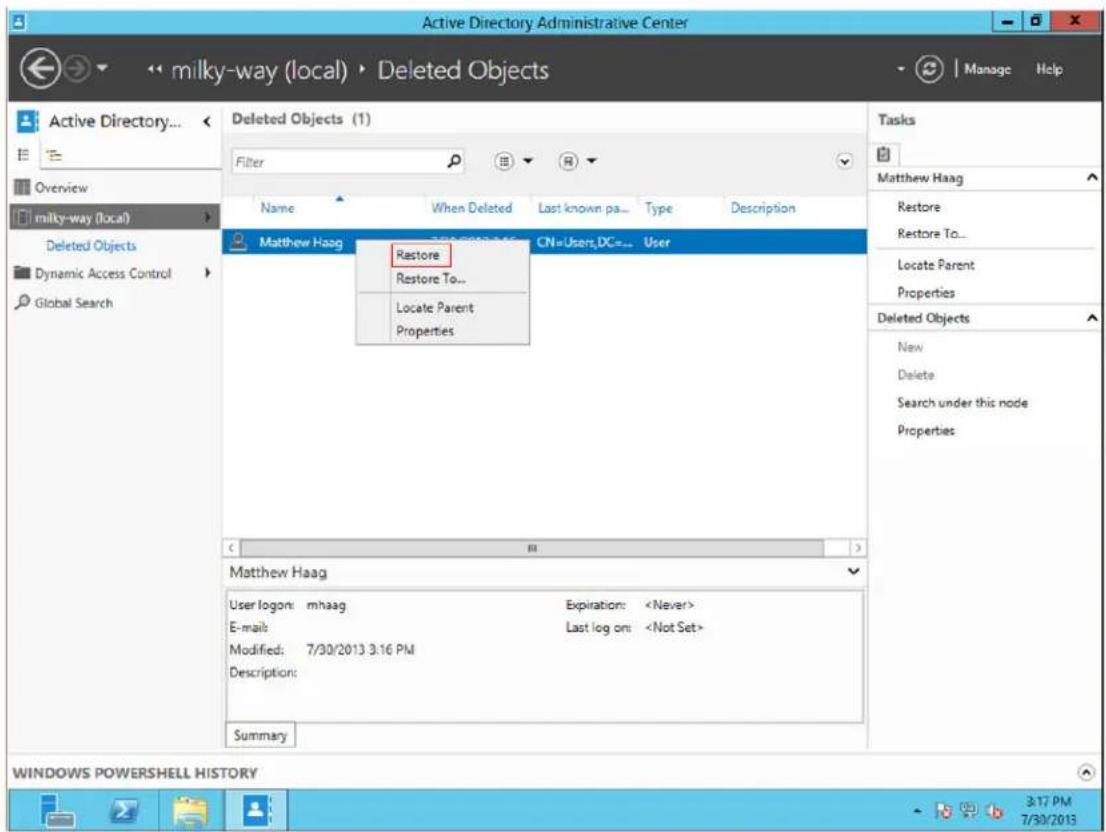
- Verify the user has been restored.
How to Enable Active Directory Recycle Bin on Windows Server 2012
This article refers to firmware version 5.0 and higher, and Microsoft ^® Windows Server ^® 2012
In this article:
- Requirements
- Step 1. Raise the Forest Functional Level
- Step 2. Enable Active Directory Recycle Bin
Related Articles
- Restore a Server 2012 Active Directory Object from the Active Directory Recycle Bin
• How to Back Up Microsoft Active Directory - Enable Active Directory Recycle Bin on Windows Server 2008 R2
Additional Resources
• Active Directory Recycle Bin

Warning
Once you enable Active Directory (AD) Recycle Bin in your environment, you disable it. cannot
Requirements
To manage the Recycle Bin feature through a user interface, you must install Active Directory Administrative Center in Windows Server 2012.
Step 1. Raise the Forest Functional Level
Before enabling AD Recycle Bin, you must first raise the forest functional level of your AD domain services (DS):
- Log in to the Windows Server, and open Windows PowerShell.
- At the PowerShell command prompt, enter the following cmdlet on a single line:
Set-ADForestMode -Identity contoso.com -ForestMode Windows2008R2Forest
-Confirm:\$false
Where represents the fully qualified DNS name:-Identity
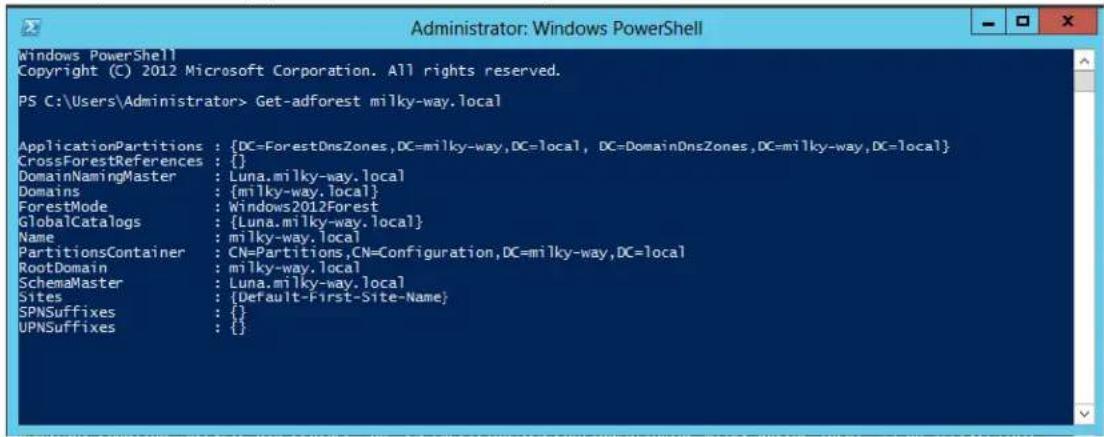
Step 2. Enable Acitve Directory Recycle Bin
Complete the following steps to enable AD Recycle Bin in Active Directory Administrative Center (ADAC) on the target domain:
- Log in to the Windows Server, and open Windows PowerShell.
- At the PowerShell command prompt, enter the following command; note that some wrapping may occur due to formatting constraints:
Enable-ADOptionalFeature -Identity 'CN=Recycle Bin Feature, CN=Optional
Features, CN=Directory Service, CN=Windows
NT, CN=Services, CN=Configuration, DC=contoso, DC=com' -Scope
ForestOrConfigurationSet -Target 'contoso.com
3. Press Enter:
![Administrator: Active Directory Module for Windows PowerShell PC C:\Users\Administrator> Enable=ADOptionalFeature -Identity 'CN=Recycle Bin Feature,CN=Optional Features,CN=Directory Service.CN=Windows NI.CN=Services.CN=Configuration.DC=sestvmw.DC=Local' -Scope ForestOrConfigurationSet -Target 'sestvmw .local' WARNING: Enabling 'Recycle Bin Feature' on 'CN=Partitions,CN=Configuration.DC=sestvmw.DC=local' is an irreversible action! You will not be able to disable 'Recycle Bin Feature' on 'CN=Partitions,CN=Configuration.DC=sestvmw.DC=local' if you proceed. Confirm Are you sure you want to perform this action? Performing operation "Enable" on Target "Recycle Bin Feature". [?] Yes [A] Yes to All [N] No [L] No to All [G] Suspend [?] Help (default is "V"): A PC C:\Users\Administrator>](/content/2026/06/1260286/images/b7f5a689fe5fa36859f029d226cb84cbfccc70a4c839e578e806bf81cdd0a746.jpg)
- AD Recycle Bin is now enabled.
How to Restore a Microsoft Server 2008 R2 Active Directory Object from the Active Directory Recycle Bin
This article refers to Barracuda Backup firmware version 5.0 or higher, and Microsoft® Active Directory (AD) on Microsoft Windows Server®2008 R2.
Related Articles
• How to Back Up Microsoft Active Directory
Additional Resources
- Restore a Deleted Active Directory Object
Use the following steps to restore an AD Object from the AD Recycle Bin:
- Log in to the Windows Server 2008 R2 as the administrator.
- Go to Start > Administrative Tools, right-click Active Directory Module for Windows PowerShell, and click Run as administrator.
- At the command prompt, enter the following command to verify that the object has been deleted:
Get-ADObject -Filter {displayName -eq "Shawn Lubahn"} -IncludeDeletedObjects
Where is the name of the deleted user object:displayName
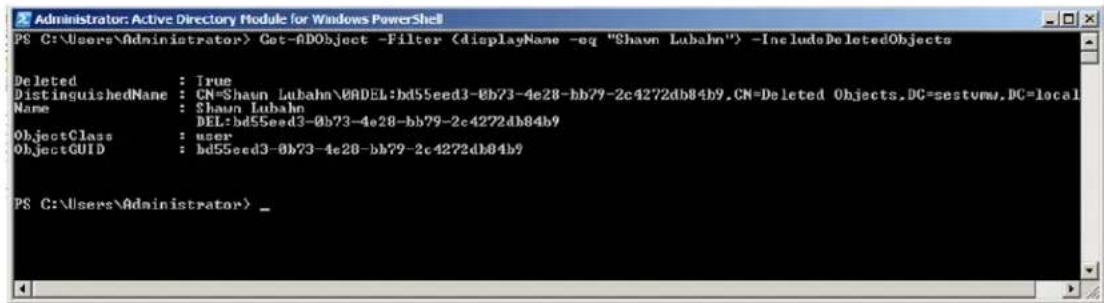
4. Press .Enter
- At the command prompt, enter the following command to restore the deleted object:
Get-ADObject -Filter {displayName -eq "Shawl Lubahn"} -IncludeDeletedObjects | Restore-ADObject
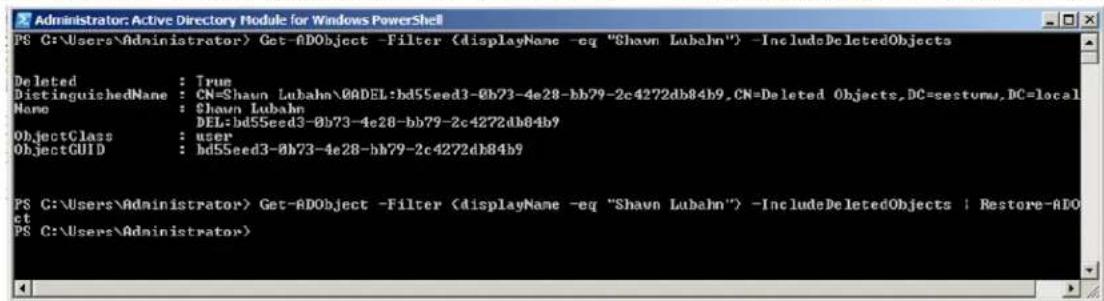
- Verify the user has been restored.
How to Enable Active Directory Recycle Bin on Windows Server 2008 R2
This article refers to firmware version 5.0 and higher, and Microsoft® Windows Server 2008 R2.
In this article:
- Requirements
- Enable Active Directory Recycle Bin
Related Articles
• How to Enable Active Directory Recycle bin on Windows Server 2012
Additional Resources
- Local and Domain Default Groups
- Enable Active Directory Recycle Bin

Warning
Once you enable Active Directory (AD) Recycle Bin in your environment, you disable it. cannot
At a minimum, you must have membership in Enterprise Admins, or equivalent access privileges. For additional information, refer to the Microsoft TechNet article .Local and Domain Default Groups
Enable Active Directory Recycle Bin

Important
You must use Active Directory Module for Windows PowerShell to run the commands described in this set of steps or an error will occur. To run these commands using Windows PowerShell directly, run the command import-module activatedirectory to import the Active Directory cmdlet.
Use the following steps to enable AD Recycle Bin using the : Enable-ADOptionalFeature cmdlet
- Log in to the Windows Server, and go to .Start > Administrative Tools
- Right-click Active Directory Module for Windows PowerShell, and click Run as administrator:
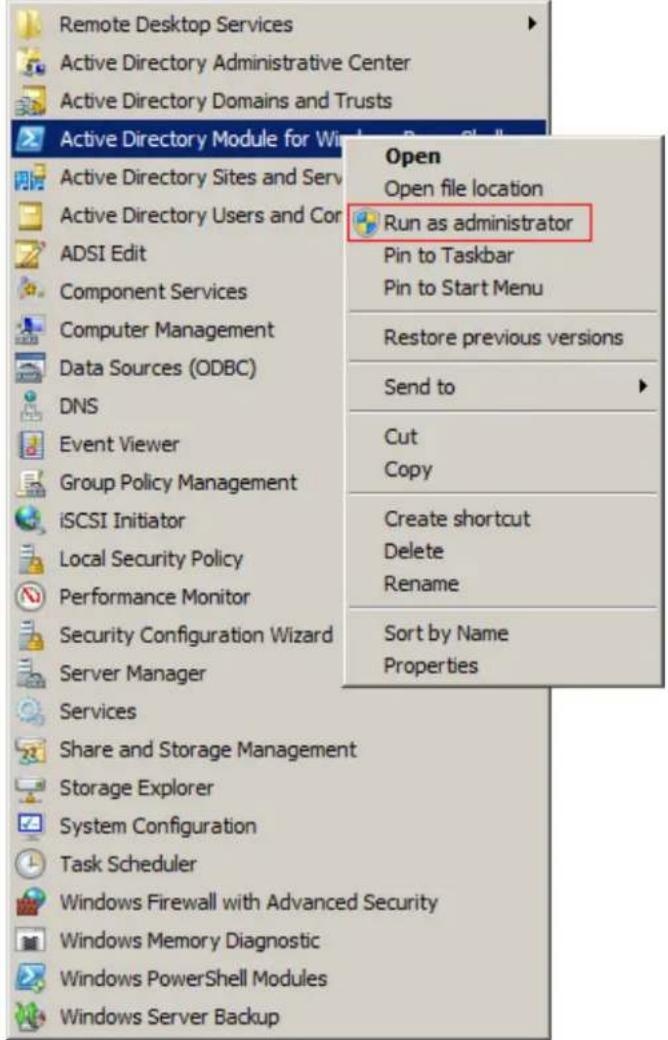
- At the PowerShell command prompt, enter the following command, replacing the bracketed variable as appropriate:
Enable-ADOptionalFeature -Identity <ADOptionalFeature> -Scope <ADOptionalFeatureScope> -Target <ADEntity>
- Press Enter:
![Administrator: Active Directory Module for Windows PowerShell P$ C:\Users\Administrator> Enable-ADOptionalFeature -Identity 'CN=Recycle Bin Feature, CN=Optional Features, CN=Directory Service, CN=Windows NT, CN=Services, CN=Configuration, DC=sestomw, DC=Local' -Scope ForestOrConfigurationSet -Target 'sestomw, local' WARNING: Enabling 'Recycle Bin Feature' on 'CN=Partitions, CN=Configuration, DC=sestomw, DC=local' is an irreversible action! You will not be able to disable 'Recycle Bin Feature' on 'CN-Partitions, CN-Configuration, DC-sestomw, DC-local' if you proceed. Confirm Are you sure you want to perform this action? Performing operation "Enable" on Target "Recycle Bin Feature". [Y] Yes [A] Yes to All [N] No [L] No to All [S] Suspend [?] Help (default is "Y"): A P$ C:\Users\Administrator>](/content/2026/06/1260286/images/d5927dec9545bc5f1c4e265ff1a522d0aaff04d33c230be7f2d19b0d32304154.jpg)
- AD Recycle Bin is now enabled.
Barracuda LiveBoot in the Cloud
Use Barracuda LiveBoot to boot VMware virtual guest systems in the Barracuda Cloud. LiveBoot in the cloud is useful as a sandbox for testing purposes.
In this Section
• Understanding Cloud LiveBoot
• How to Use Barracuda LiveBoot in the Cloud
• How to vMotion a LiveBooted Virtual Machine from the Barracuda Backup Server
Related Articles
How to Restore VMware Guest Systems Using Barracuda LiveBoot
Understanding Cloud LiveBoot
This article refers to firmware 5.0 and higher, and VMware ^® ESX/ESXi with the VMware license which includes access to vSphere ^® Data Recovery API.
Cloud LiveBoot™ is available to all Barracuda Backup customers with Instant Replacement and a Cloud storage subscription, and is available to all customers excluding those in Japan, Germany, and Austria.
In this article:
• Virtual Machine States
• Recover and Test Virtual Servers
Related Articles
• How to Use Barracuda LiveBoot in the Cloud
- How to vMotion a LiveBooted Virtual Machine from the Barracuda Backup Server
• How to Restore VMware Guest Systems Using Barracuda LiveBoot
Virtual Machine States
A virtual machine (VM) has three basic states: running, suspend/resume, and stopped. You suspend a VM to save its current state, and then when it is resumed, applications running before it was suspended resume in their running state, content is unchanged, and user session is active. When a VM is stopped, applications are stopped and user sessions are inactive.
Recover and Test Virtual Servers
Cloud LiveBoot allows you to boot VMware virtual guest systems in Barracuda's Cloud for recovery and testing, as described in Table 1.
Table 1. LiveBoot Recovery and Testing Features.
| Recovery | Recover any revision of a VMware virtual guest server within your retention policy.Boot virtual servers in the cloud to recover and traverse the file structure of VMware virtual guest system data.Retrieve an individual Active Directory (AD) object. i Exporting AD FilesFor details on exporting an AD object, refer to the Microsoft TechNet article Import or Export Directory .Objects Using LdifdeServe up deduplicated content as needed by the virtual server. |
| Testing | Once replicated to the cloud, boot the virtual guest system to verify data integrity.Use LiveBoot to set up a sandbox to test applications or changes to applications outside of your production environment. |
When you back up a VMware virtual guest server and replicate this data to Barracuda Cloud Storage, you can boot the server in Barracuda's Cloud directly from the Barracuda Backup web interface; no additional configuration is necessary. Go to RESTORE > Restore Browser, and click LiveBoot to the right of the guest server. Allow the operating system to complete the boot process; typically this process takes less than a minute. Once the system is available in the cloud, you are presented your login credentials so that you can use a Virtual Network Computing (VNC) client to connect securely to your guest machine. For direct access, you can connect remotely over a public IP address by modifying the Network Settings to External. Note that you must first shutdown the server to enable a public IP address. The public address is allocated by Barracuda.

When accessing a guest machine remotely, because it is assigned a public IP address, you are responsible for securing the virtual machine in the Cloud.
Once a virtual guest is running in the Cloud, it remains operational for seven days; if you require additional time, contact Barracuda Networks Technical Support. The number of virtual images you can run is based on your Barracuda Backup model, as shown in Table 2.
Table 2. VMware Virtual Images by Model.
| Model Available Virtual Images | |
| 190/390 1 | |
| 490/690 3 | |
| 890/891/892/990/991/1090/1091 5 |
How to Use Barracuda LiveBoot in the Cloud
This article refers to firmware 5.2 and higher, and . VMware® 4.0 and above
Use Barracuda LiveBoot to boot VMware virtual guest systems in the Barracuda Cloud. LiveBoot in the cloud is useful as a sandbox for testing purposes.
In this article:
• LiveBoot a VMware Virtual Machine from the Cloud
- Connect to your LiveBooted Virtual Machine
- Manage LiveBooted Virtual Machines
- Change the Virtual Machine IP Address
• Download the VMDK File
LiveBoot a VMware Virtual Machine from the Cloud
Use the following steps to LiveBoot a VMware virtual machine:
- Log in to the Barracuda Backup web interface, and go to the page.RESTORE
- Navigate to and expand the VMware Server, click on the guest system you wish to LiveBoot, and click on LiveBoot to the right of the system:
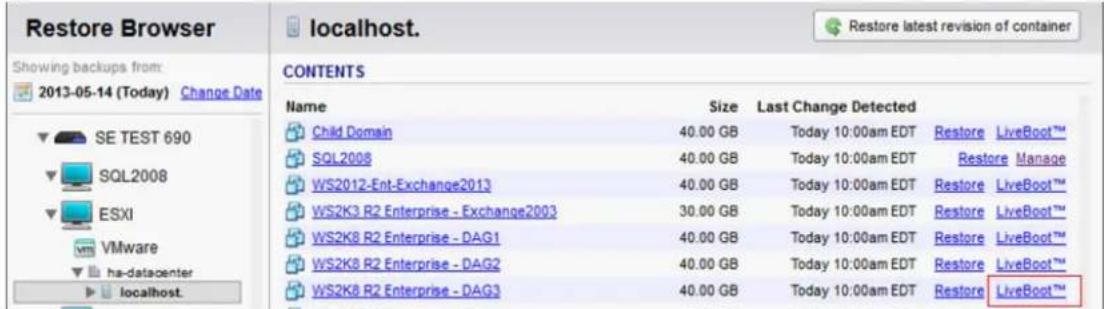
- The dialog box displays the Barracuda LiveBoot page; click the Cloud icon, and enter a name for the virtual machine in the VM Name field:
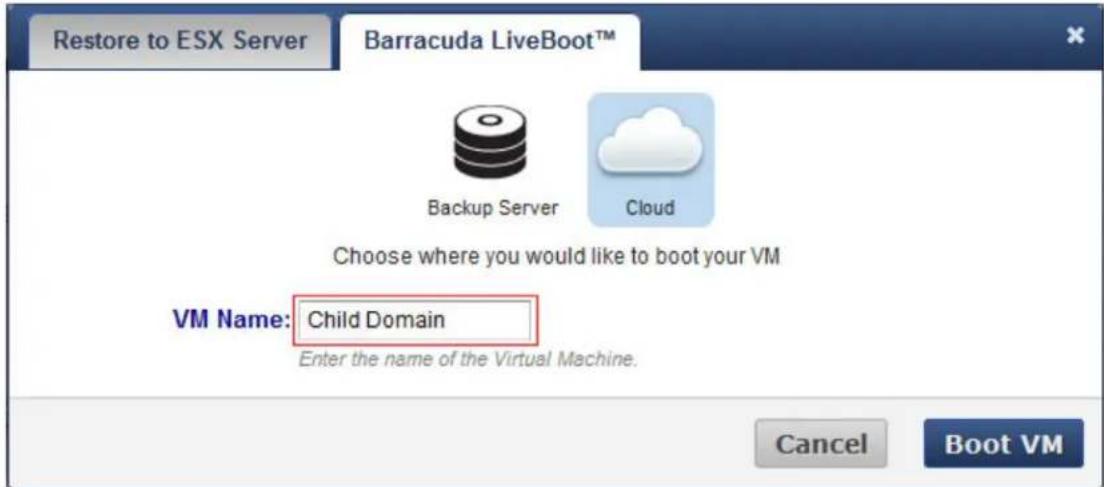
- Click .Boot VM
- The LiveBoot progress dialog box displays; click Dismiss to close the dialog; the LiveBoot process is complete:
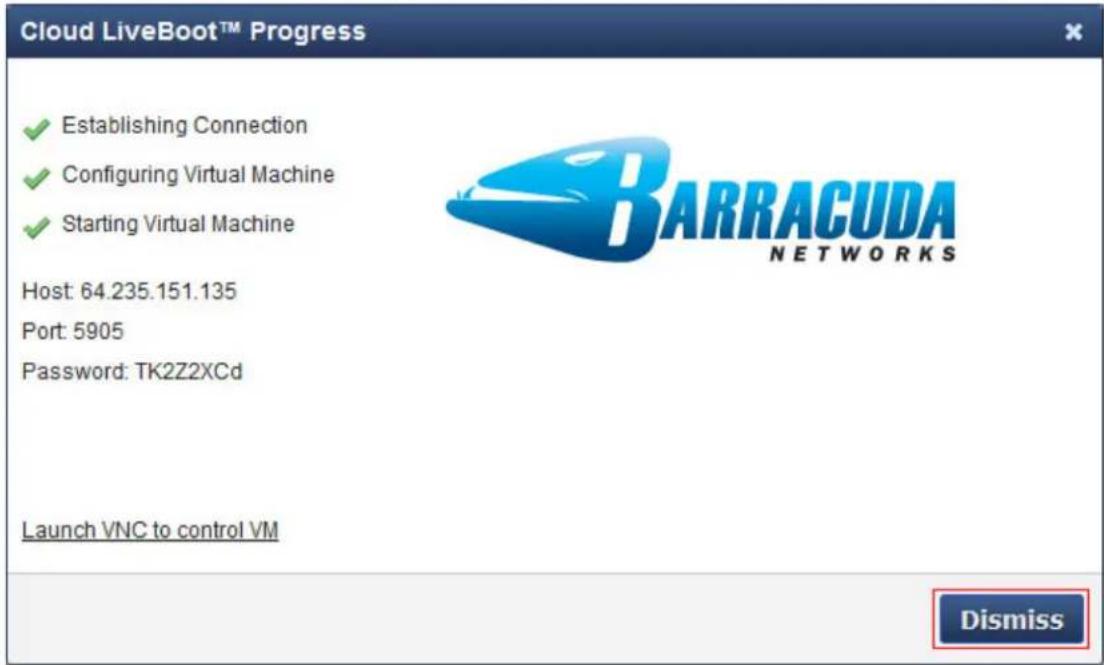
You can use a Virtual Network Computing (VNC) client to connect directly to a virtual machine LiveBooted to the cloud:
- To manage your LiveBooted virtual machine, in the RESTORE page, click LiveBoot Management:
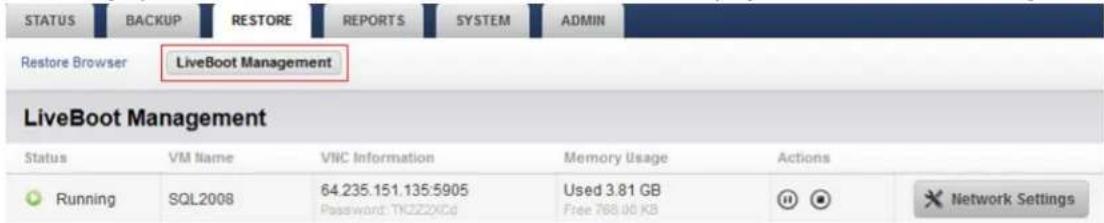
- The details display in the table: VNC Information
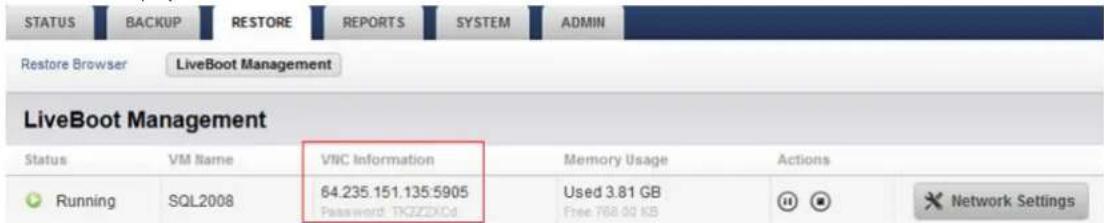
- Open a VNC client, for example, TightVNC, and enter the VNC Information from the RESTORE page in the Remote Host field:
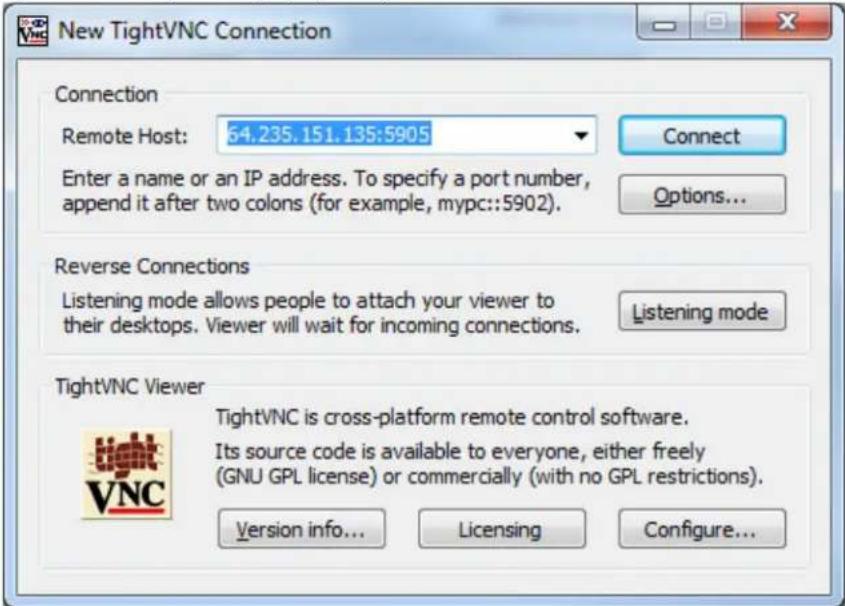
- Click . You should now be connected to your virtual machine LiveBooted from the cloud:Connect
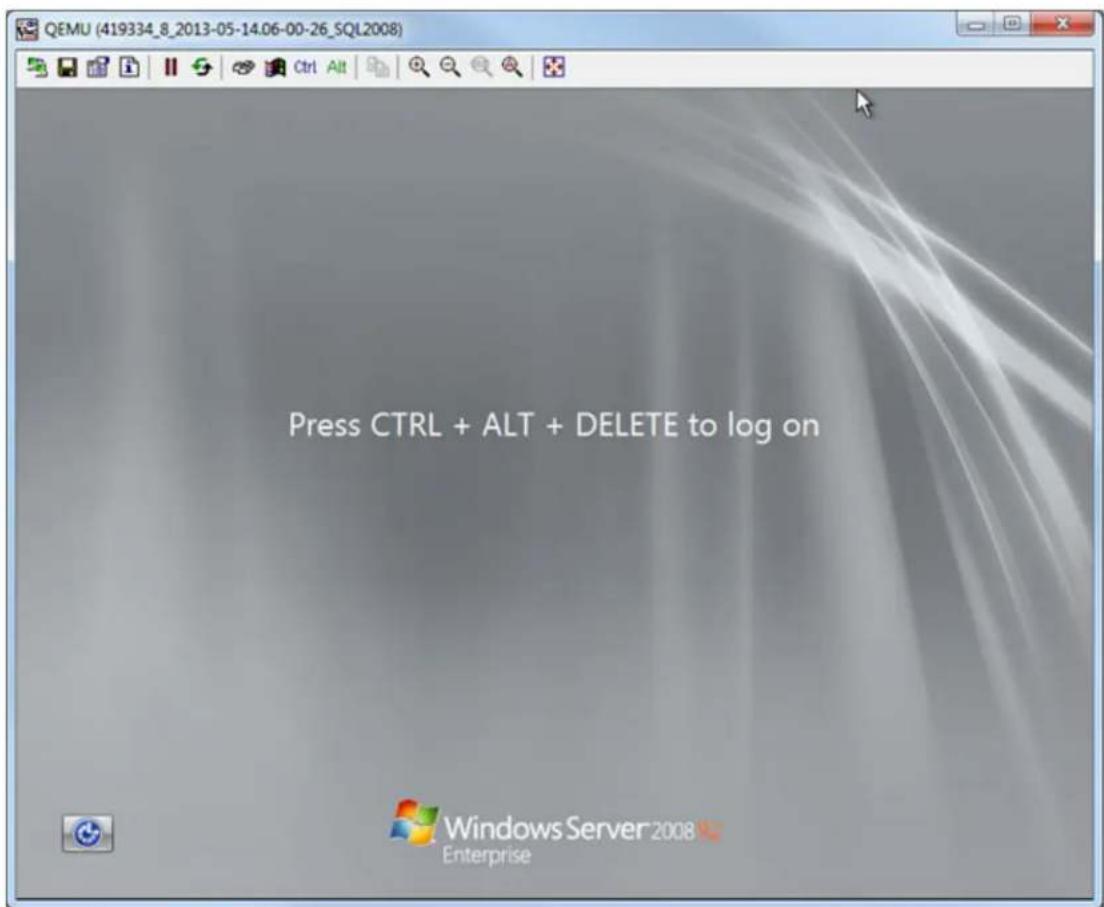
Manage LiveBooted Virtual Machines
Use the options in the Actions column of the LiveBoot Management table to manage your LiveBooted virtual machines:
- Pause ( ) icon - Click to pause the virtual machine
- Play ( ) icon - Click to restart the virtual machine
- Shutdown ( ) icon - Click to shut down the virtual machine
- Destroy (✗) icon - Once you shut down a virtual machine, click this icon to destroy the virtual machine
Change the Virtual Machine IP Address
By default the virtual machine uses a private IP address with no Internet access. If you wish to do so, you can change the address to a public IP address using the following steps:
- In the LiveBoot Management table, click the Shutdown (☐) icon in the Actions column; the icon changes to the Destroy (✗) icon.
- Click :Network Settings
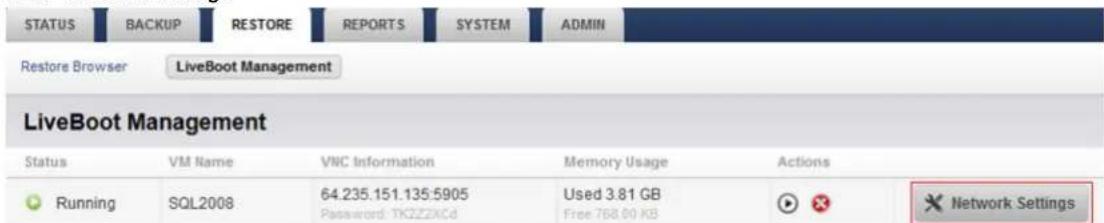
- In the Interface section, select External from the Interface Type drop-down menu, and make note of the Public IP Address and Default Gateway fields (you will need these values to complete Step 7):
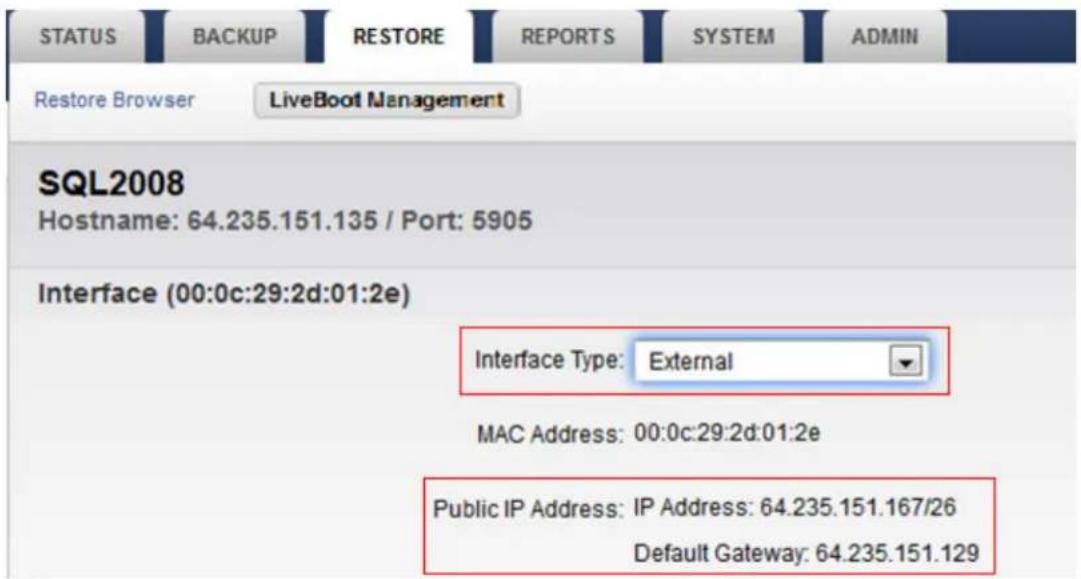
- Click LiveBoot Management at the top of the page, and then click the Play (播放) icon in the Actions table to start the virtual machine:
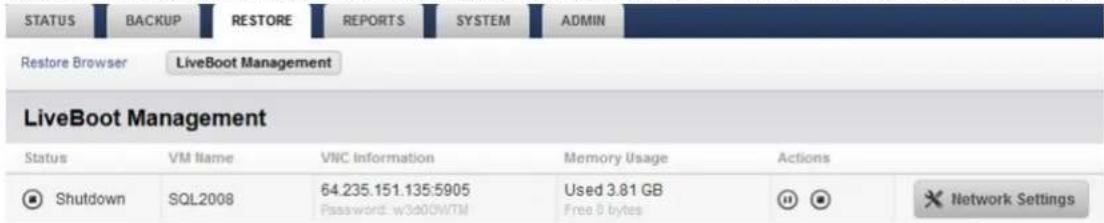
- Open the VNC client again, and connect to the virtual machine:
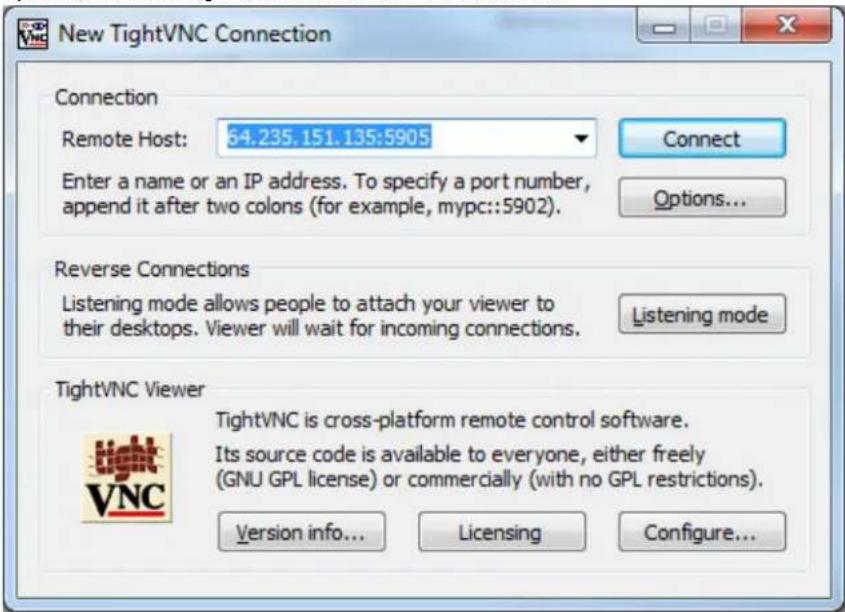
- Log in to the virtual machine, and open :TCP/IPv4 Properties
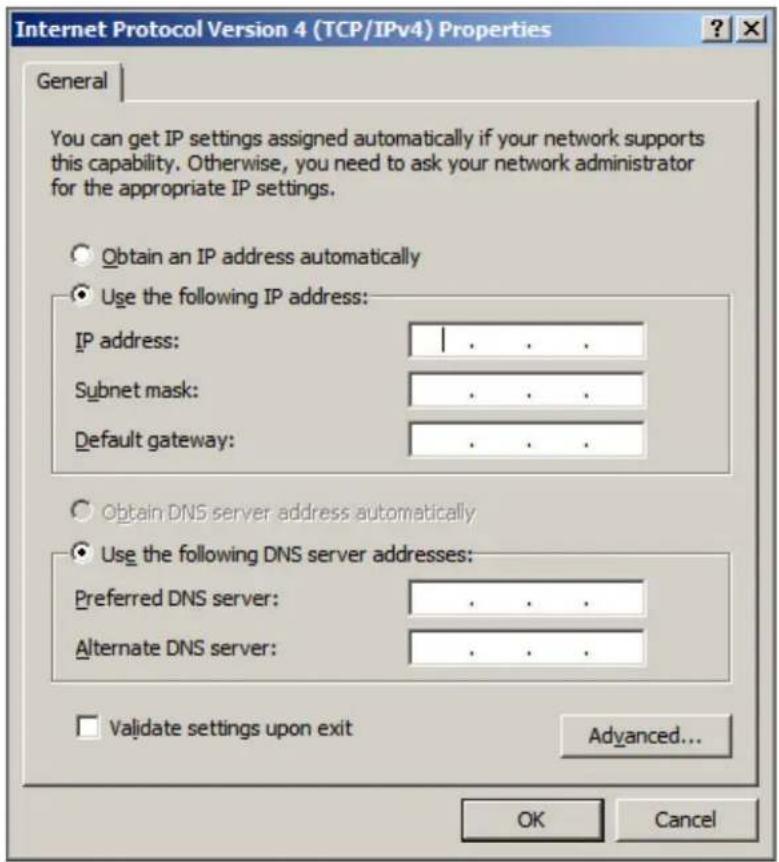
- Enter the Public IP address values from Step 3 in to the associated fields; You can use public DNS server values such as 8.8.8.8 and 4.4.4.2:

You may need a subnet calculator to calculate the subnet mask.
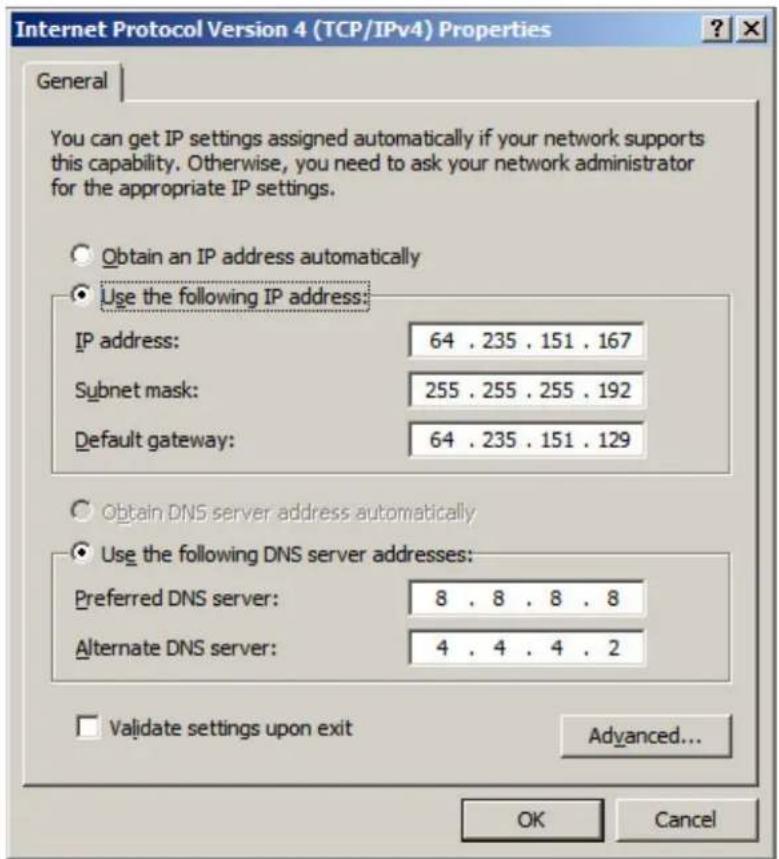
- Click OK to apply your settings. Open a web browser and confirm that you can connect to the Internet.

Two virtual machines LiveBooted in the cloud can communicate with each other provided they are both on the same account. Note that each account is assigned a VLAN. The same is true if the virtual machines have a public IP address.
Download the VMDK File
Use the following steps to download the VMDK file:
- Log in to VMware and stop the virtual guest machine.
- In the Barracuda Backup web interface, go to the tab.RESTORE > LiveBoot Management
- Verify the virtual guest machine displays as .Status Shutdown
- Click the link to download the VMDK file to your local system. Download
How to vMotion a LiveBooted Virtual Machine from the Barracuda Backup Server
This article applies to Barracuda Backup firmware version 5.2 and higher, and vmWare® vCenter vSphere vMotion.
Use the following steps to LiveBoot and vMotion a virtual machine from Barracuda Backup:
- Log in to Barracuda Backup web interface or the local UI.
- Go to the page, and select the vCenter or host in the left pane.RESTORE >Restore Browser
- Navigate to and select the virtual machine you want to LiveBoot:
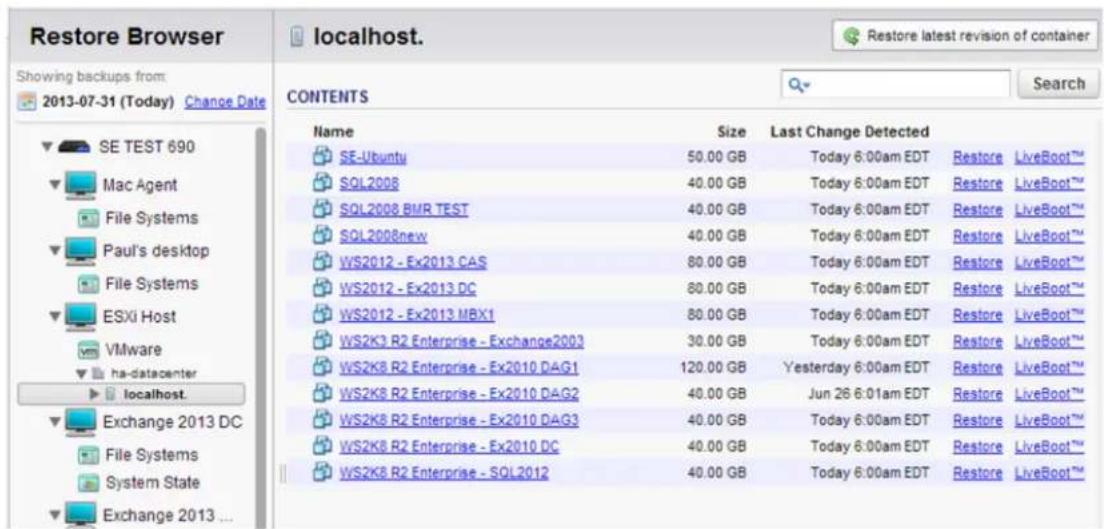
- Click to the right of the virtual machine.LiveBoot
- In the Barracuda LiveBoot dialog box, select either Original Location or an alternate location, and enter the virtual machine details:
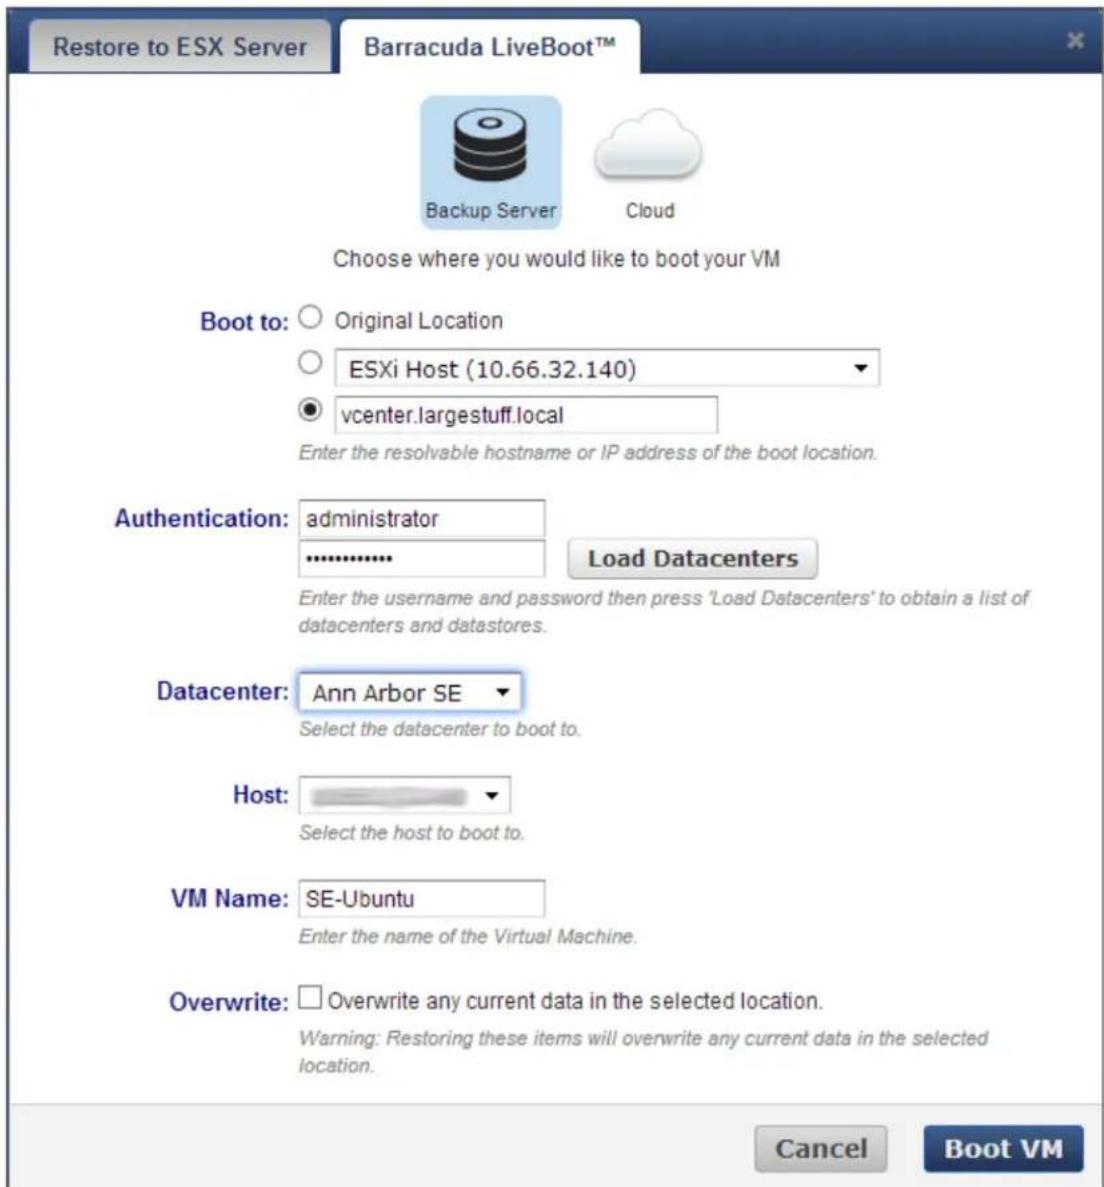
- Click :Boot VM
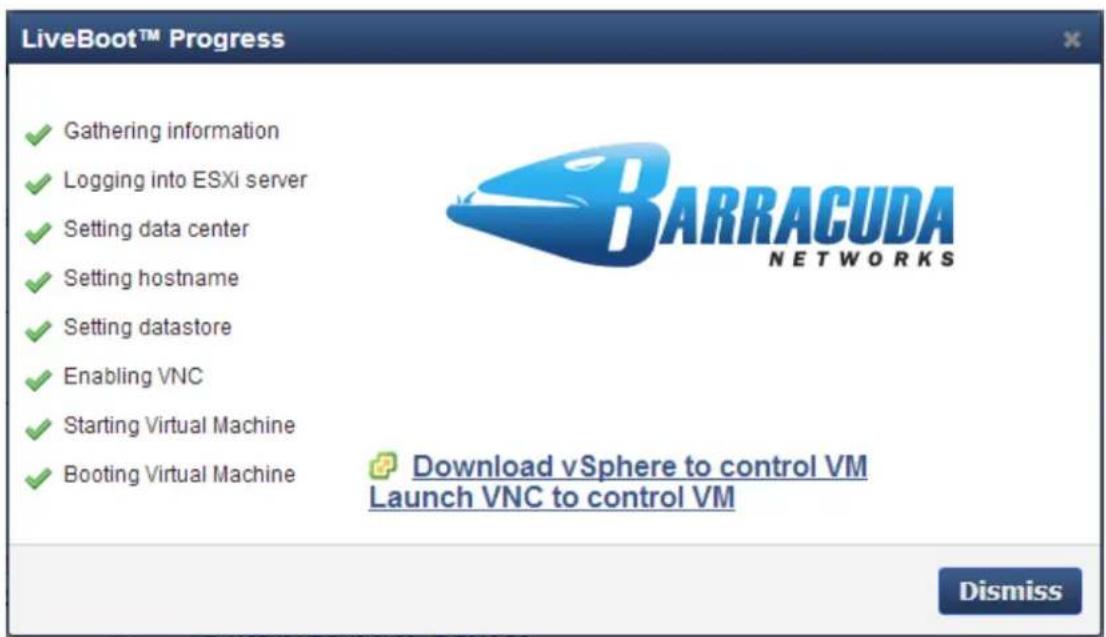
- Once the process is complete, log in to vCenter with your vSphere client.
- Right-click on the LiveBooted virtual machine, and click :Migrate
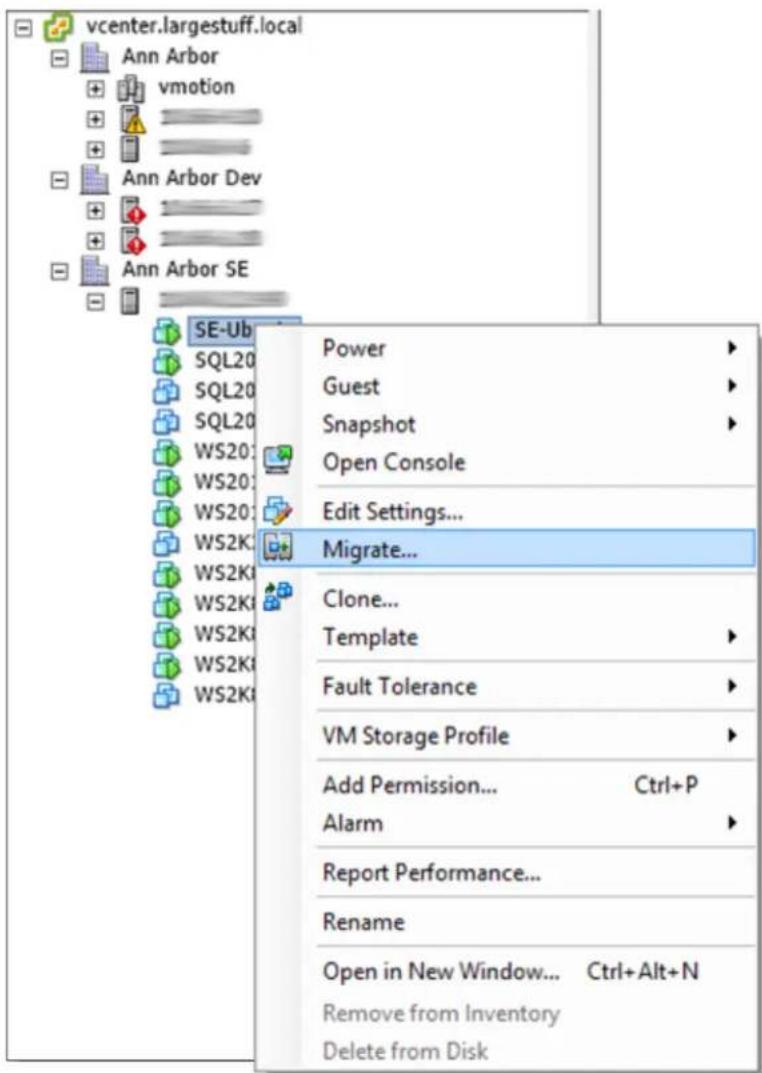
- In the page, select : Migrate Virtual Machine Change datastore
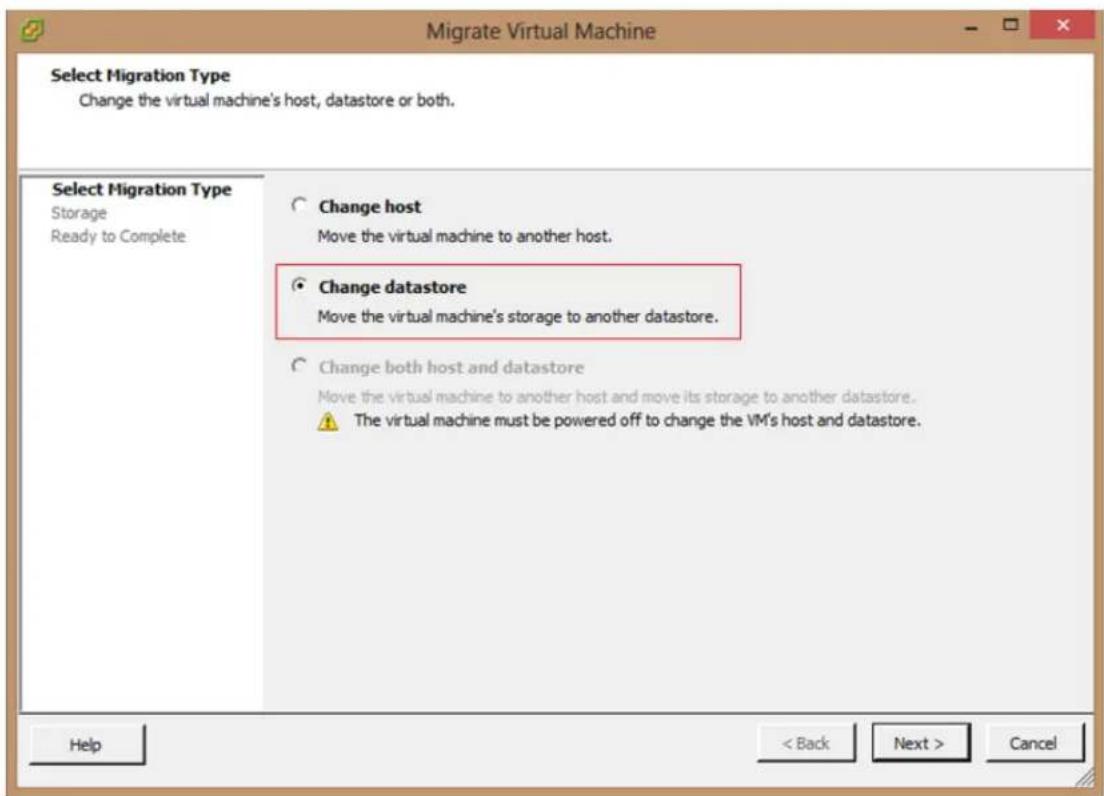
- Click . In the page, select the destination storage:Next Storage
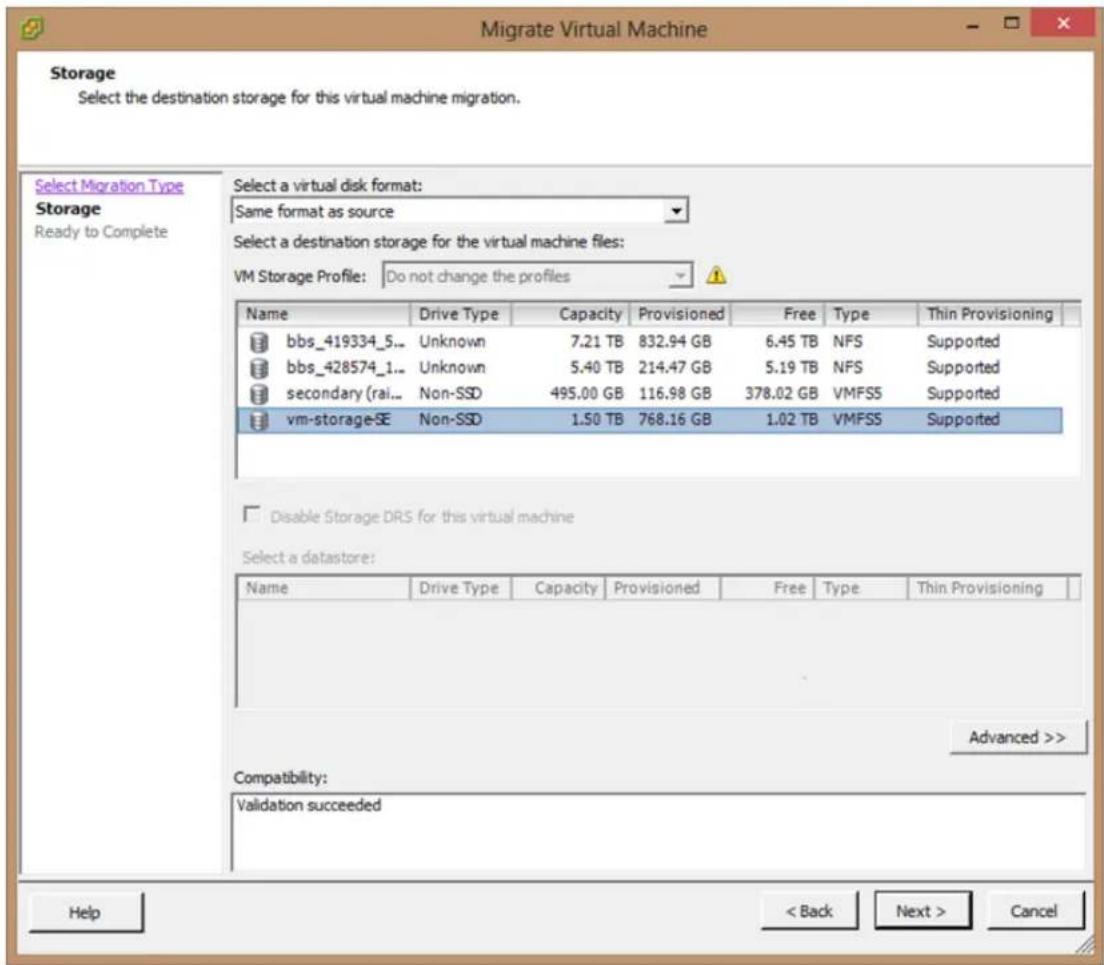
- Click, and then click in the page. Next Finish Ready to Complete
- In vCenter, the Relocate virtual machine task displays under Recent Tasks, and the status displays as Completed:
Recent Tasks

Barracuda copy.com
In this Section
• How to Restore to a copy.com Account
• How to Share and View Files Using copy.com
How to Restore to a copy.com Account
This article refers to Barracuda Backup firmware version 5.1 and higher, and both privately and publicly shared copy.com accounts. This feature is available only if your copy.com account has cloud subscriptions and data is replicated to the cloud.
Related Articles
• How to Share and View Files Using copy.com
Use the following steps to restore your copy.com account,
- Log in to the Barracuda Backup web interface, and click .RESTORE
- In the pane, navigate to and select the Copy content you want to restore.Restore Browser
- In the right pane, drill into the content and select the file or folder for restore, and click Restore.
- The dialog displays.Restore
- Click the Restore to Copy tab, and enter your username and password in the associated fields.
-
Click Test Credentials to verify your Copy credentials.
-
In the Restore Path field, enter the path within your Copy root share where you want to restore the files:
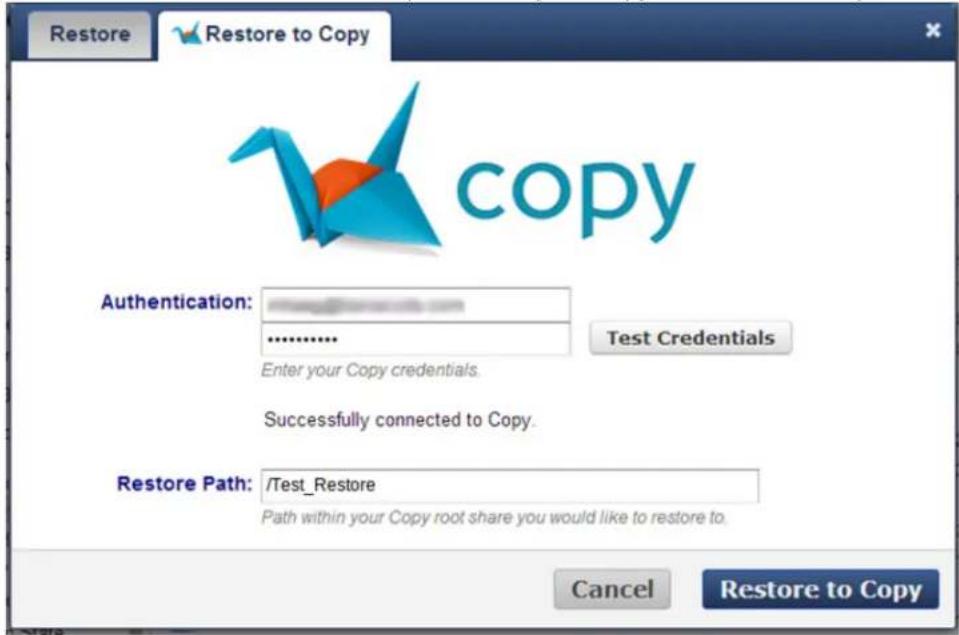
- Click .Restore to Copy
- The dialog displays: Copy Upload Progress
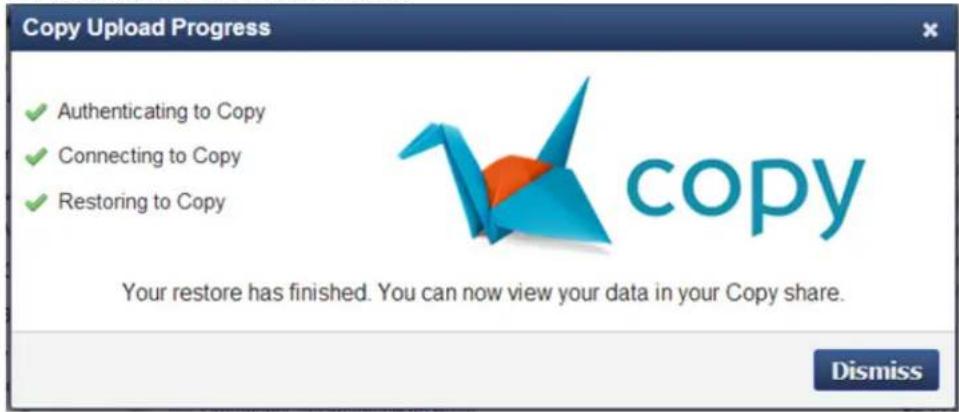
- The upload is complete once a check mark ( ) displays in front of each action.
- Click Dismiss to close the dialog. The restore is complete.
- Log into Copy to view the restored content:
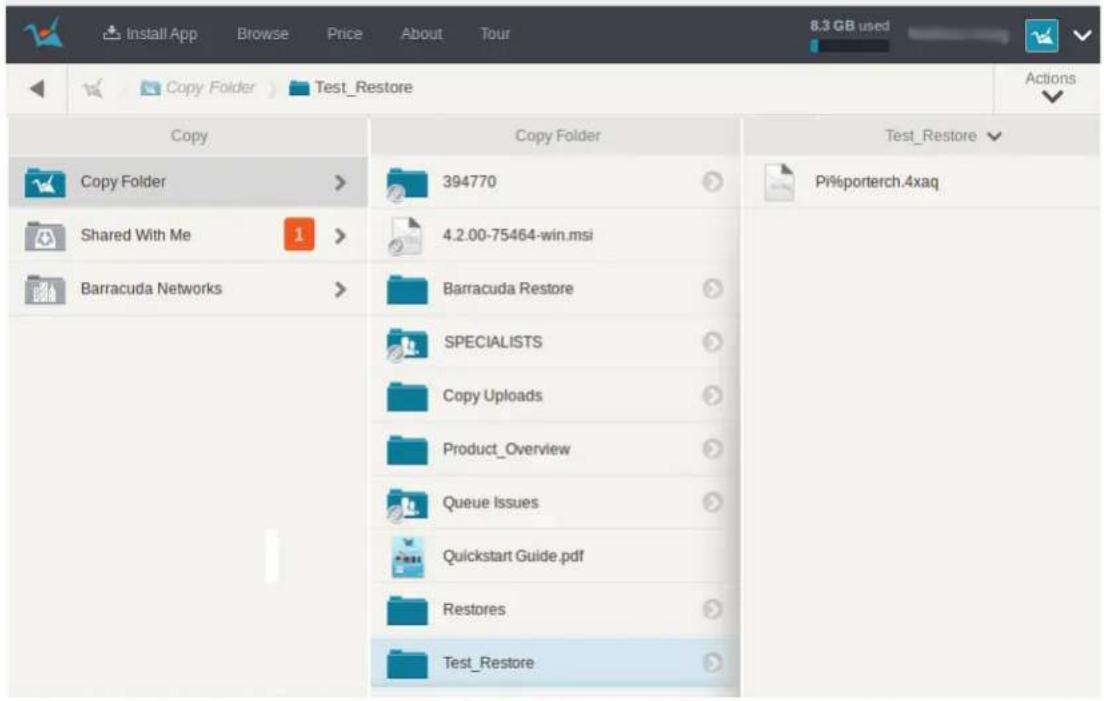
How to Share and View Files Using copy.com
This article refers to Barracuda Backup firmware version 5.1 and higher.
In this article:
- Share Files
• View Files
Related Articles
• How to Restore to a copy.com Account
Share Files
Use copy.com to easily share files and directories with remote or traveling employees. Use the following steps to share files using copy.com:
- Log in to login.barracuda.com, and select the associated Barracuda Backup Server in the left pane.
- Click, navigate to the file or directory you want to share, and click:Restore Share
| Documents and Settings | -- | Yesterday 12:00pm EDT | Restore | Share | Download |
| Marketing | -- | Yesterday 9:11am EDT | Restore | Share | Download |
| PerfLogs | -- | Yesterday 12:00pm EDT | Restore | Share | Download |
- The selected folder displays in the field.Allow access to
- Enter your copy.com credentials, and add the email address of the user(s) with whom to share the selected content:
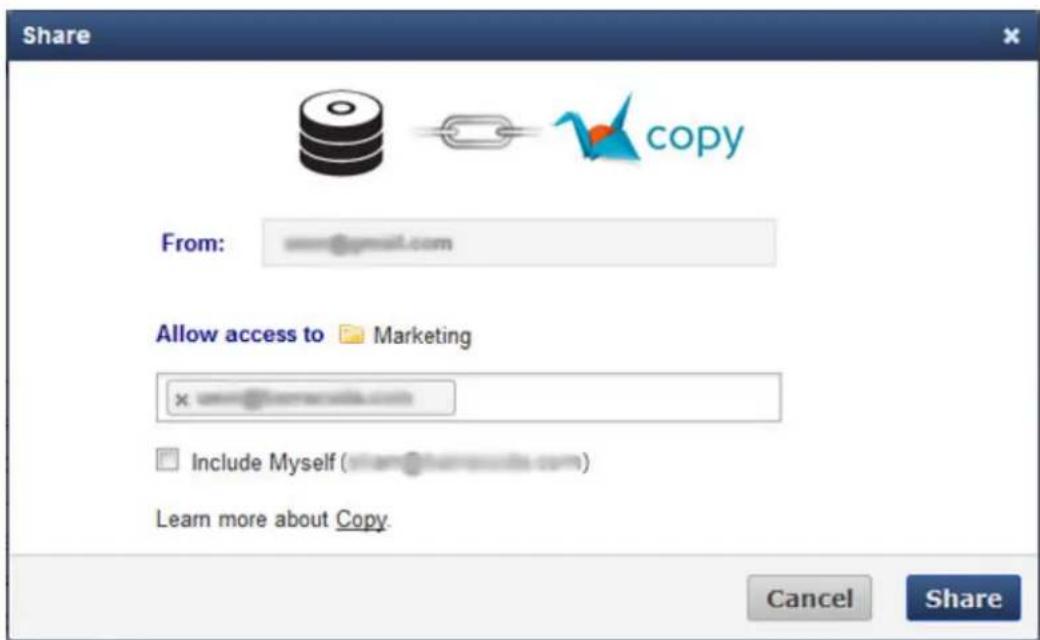
- Click, and then click .Share OK
- An email is sent to the specified user(s) with a link to the shared data on copy.com.
View Files
To view the shared file or directory:
- Log in to copy.com. A folder titled displays in your ._Devices Copy Folder
- Click through the folder path to view your shared file or directory.
Restore Browser
In this Section
• Understanding Restore Browser
• How to Search for Items Using the Restore Browser
• How to Restore Data Using the Restore Browser
Understanding Restore Browser
Use the Barracuda Backup web interface to restore data that was stored either using the Barracuda Backup Agent or file share data, or to download a file, a file system directory, an email mailbox, or mailbox folders.
This is the recommended way to restore data backed up by the Barracuda Backup Agent. You should know:
- Message-level data must be restored to the computer from which it originally came
- Data can be restored back to its original location or to another computer on your network. If restoring to another location, the Barracuda Backup Agent must be installed on that system
- A functioning Barracuda Backup Server must be in place in order to restore SQL Server and Microsoft®Exchange databases
File Share Data
When restoring file share data through the web interface, you can restore one file at a time, a single directory, or an entire share. This works well when you only need to restore a few documents. File share data can be restored to its original location through the web interface.
How to Search for Items Using the Restore Browser
This article applies to Barracuda Backup Server firmware version 5.3.00 and higher.
Use the following steps to search for items using the restore browser:
- Log in to the Barracuda Backup web interface using https://login.barracudanetworks.com/, and select the associated Barracuda Backup Server in the left pane.
- Go to the RESTORE > Restore Browser page, and select the target data source.
- Enter a word or phrase as the search string in the Search field, for example, enter the file extension .docx:
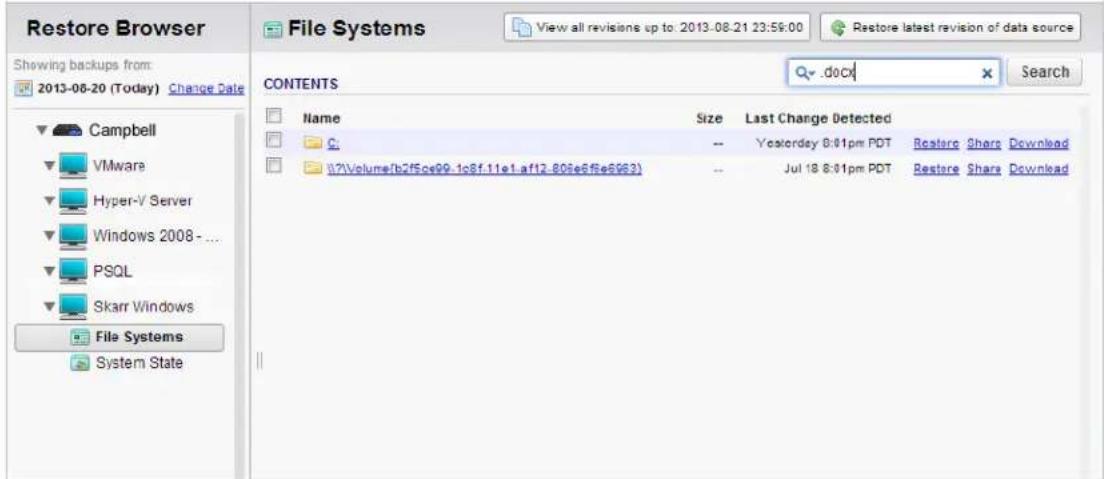
- Click ; the search results returns:Search
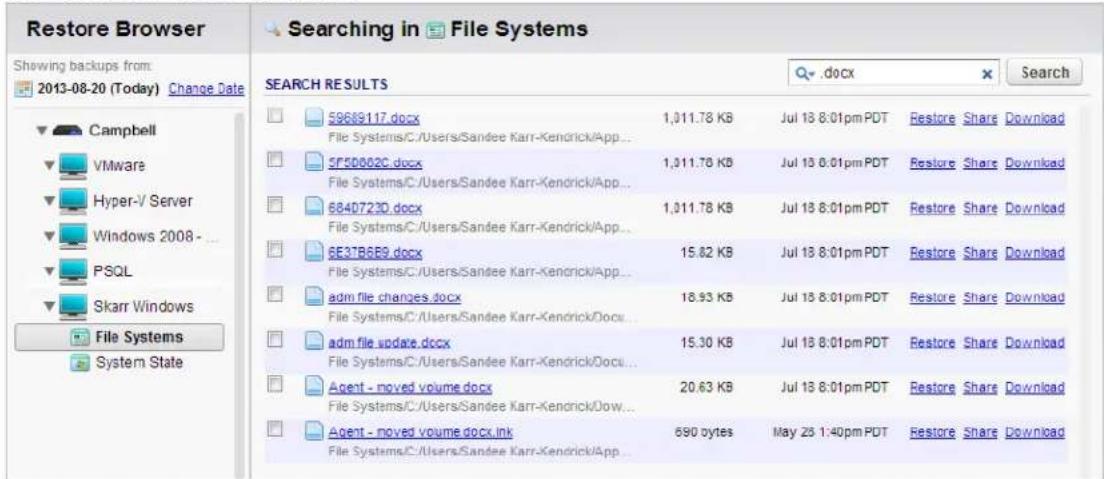
- Identify the item you wish to restore, and click; the dialog box displays:Restore Restore
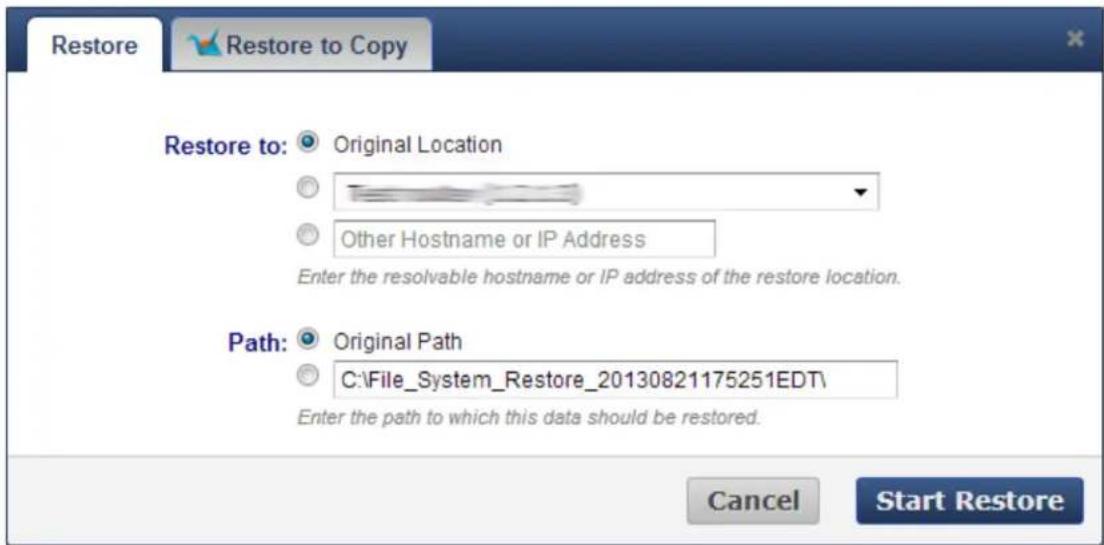
- In the Restore tab, select the Restore to location and Path, and then click Start Restore.
- Once the restore is complete, the dialog displays:Success
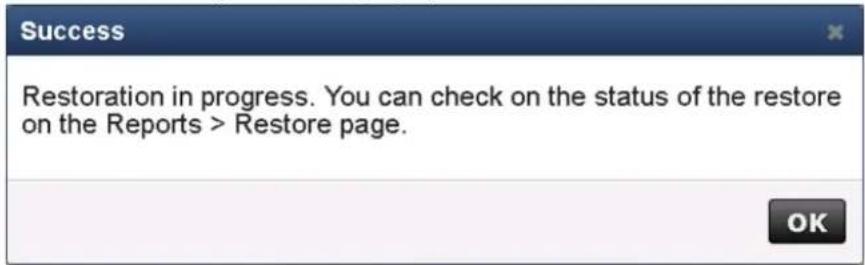
- Restore details are available on the REPORTS > Restore page.
Use the Barracuda Backup web interface to restore data that was stored either using the Barracuda Backup Agent or file share data, or to download a file, a file system directory, an email mailbox, or mailbox folders.
In this article:
- Requirements
- File Share Data
- Backup Data by Date
- Restore Data
- Restore a Revision
- Restore Latest Revision
• Download Files and Directories
This is the recommended way to restore data backed up by the Barracuda Backup Agent. You should know:
- Message-level data must be restored to the computer from which it originally came
- Data can be restored back to its original location or to another computer on your network. If restoring to another location, the Barracuda Backup Agent must be installed on that system
- A functioning Barracuda Backup Server must be in place in order to restore SQL Server and Microsoft®Exchange databases
Requirements
When restoring data backed up by the Barracuda Backup Agent:
- Message-level data must be restored to the computer from which it originally came.
- Data can be restored back to its original location, or to another computer on your network. If restoring to another location, the Barracuda Backup Agent must be installed on that system.
- A functioning Barracuda Backup Server must be in place in order to restore a SQL Server and Microsoft® Exchange databases.
File Share Data
When restoring file share data through the web interface, you can restore one file at a time, a single directory, or an entire share. This works well when you only need to restore a few documents. File share data can be restored to its original location through the web interface, or for Barracuda Backup firmware release 4.3 and earlier, you can use Barracuda Restore for Windows to restore file share data to its original location.
Backup Data by Date
By default, the Restore Browser page displays backups as of the current date. To select backups from an earlier date, click Change Date in the left pane, and select the desired date:
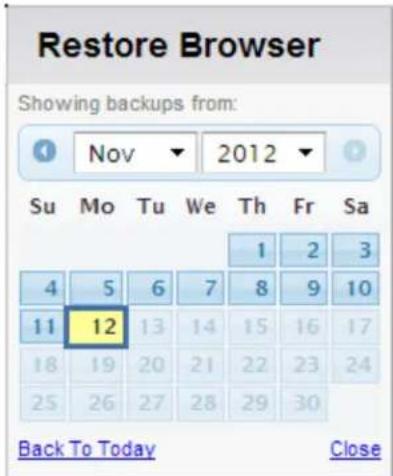
Click to hide the date selection view.Close
Restore Data
- Select the Barracuda Backup Server from which to restore data, and go to the RESTORE >Restore Browser page.
- In the left pane, select the computer and the associated data source that contains the files you want to restore.
- In the right pane, navigate to and click on the content you want to restore, and click Restore.
- In the Restore dialog, select a local location where you want to restore the data, or enter a resolvable hostname or IP address of a restore location.
- Select the Original Path, or enter a new path to which to restore the data, and click Start Restoring.
- Go to the REPORTS > Restore page to view the restore status; click on a report to view individually restored items.
- To stop the restoration process, go to the REPORTS > Restore page, and click Abort Restore.
Restore a Revision
For file systems and system state, you can select a revision to which to restore.
- Select the Barracuda Backup Server from which to restore data, and go to the RESTORE >Restore Browser page.
- In the left pane, select the computer and the associated data source that contains the files you want to restore.
- In the right pane, click View all revisions up to [date]; all available revisions display.
Restore following the revision you want to restore.
Restore Latest Revision
- Select the Barracuda Backup Server from which to restore data, and go to the RESTORE >Restore Browser page.
- In the left pane, select the computer and the associated data source that contains the files you want to restore.
- In the right pane, click Restore Latest Revision of Data Source. The Restore Latest Revision of Data Source dialog box displays.
- Select whether to restore to the original location, select an alternate location from the drop-down menu, or enter a resolvable hostname or IP address of the restore location.
- click Start Restore.
Download Files and Directories
You can select to download files and directories directly to your system. Click Download in the right pane to:
- Download a single file
- Download file system directories as ZIP files
- Download email mailboxes and folders as ZIP files
How to Restore from Local and Offsite Backups
Data can be restored from the local Barracuda Backup Server, from a remote Barracuda Backup Server that has been used to replicate that system, or from the Barracuda Cloud Storage. Restores from the local Barracuda Backup Server offer the fastest restore times.
In this article:
- Restore Methods
- Restore Data Backed Up by the Barracuda Backup Agent
- Restore File Share Data
Related Articles
- Restore by Overwriting Existing Database
- Restore Using a Recovery Storage Group
• VMware Server Recovery and Restoration - Restore Exchange and GroupWise Messages
Restore Methods
Multiple methods are available to restore your backed-up data including:
- Restore Browser in the Barracuda Backup web interface
- Barracuda Restore for Windows
- Restore from a Replication Destination
• How to Restore Data with FTPES
You can restore single files, individual email messages, and entire systems.
Restore Data Backed Up by the Barracuda Backup Agent
Data backed up by the Barracuda Backup Agent can be restored using the following methods:
- Restore Browser in the Barracuda Backup Server web interface (recommended)
- Barracuda Restore for Windows (firmware release 4.3 and earlier)
File share data can be restored using any of the following methods:
- Barracuda Restore for Windows (firmware release 4.3 and earlier)
- Restore Browser in the Barracuda Backup web interface
- FTP from Barracuda Backup Server
• How to Restore Data with FTPES
How to Recover Backed Up Data
This article refers to Barracuda Backup firmware version 5.0 or higher.
You can recover backed up content either from the local web interface or from the cloud.
- Local Device Web Interface - To download from the local device at LAN speeds, use the Download feature in the Barracuda Backup local web interface.
• Cloud Web Interface - To verify and download data from the cloud, use the hosted Barracuda Backup web interface login credentials.
Download Using the Local Device Web Interface
Use the Barracuda Backup Download feature through the local web interface to quickly download backed up data. The following steps describe how to use this feature:
- Open a web browser, enter the Barracuda Backup Server IP address, and log in to the Barracuda Backup web interface.
- The page displays; go to the page:System RESTORE >Restore Browser
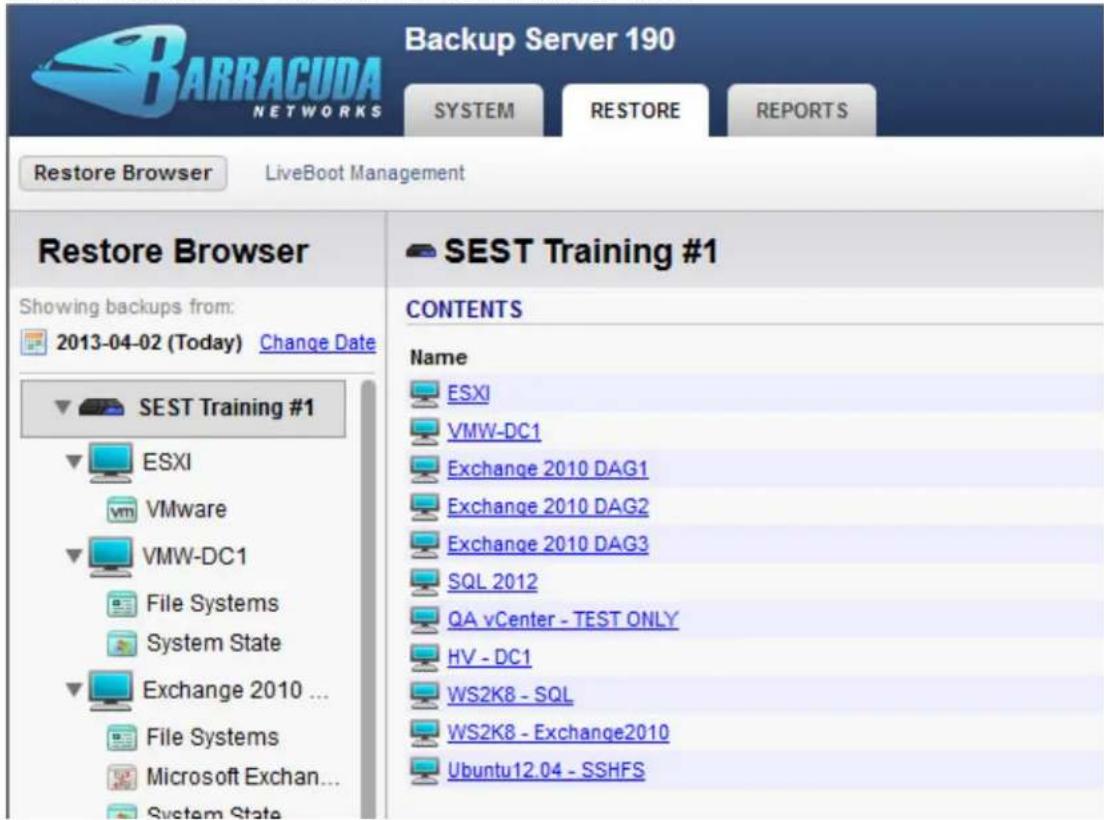
- Navigate to a directory or file for download:
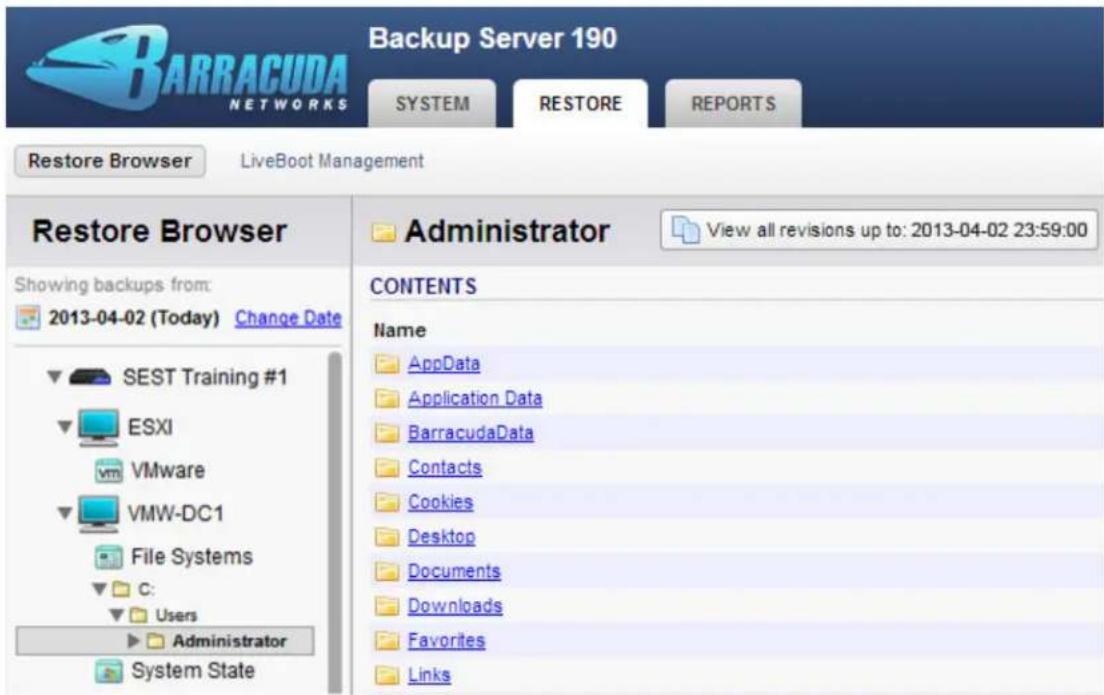
- The section displays the latest backup date.Restore Browser

Older Revision
To restore an older revision of the file or directory, click Change Date to display all available revisions:
- Click Download to the right of the file or folder you want to download:

- The selected file is downloaded to a zip file. Once downloaded, you can extract the downloaded content from the zip file:
| Copy-1.14.0329.exe | 11/12/2012 2:33 PM | Application | 27,462 KB |
| Copy-1.28.657.0.exe | 4/1/2013 4:02 PM | Application | 28,914 KB |
| Desktop.zip | 1/24/2013 4:10 PM | Compressed (zipped) Folder | 66,643 KB |
| dotnetfx35setup.exe | 2/19/2013 10:54 AM | Application | 2,891 KB |
Download Using the Cloud Web Interface
Use the following steps to download and verify backed up data from the cloud:
- Go to https://login.barracudanetworks.com/ and log in to the Barracuda Backup web interface.
- Go to the RESTORE > Restore Browser page.
- Navigate to a file or folder for download:
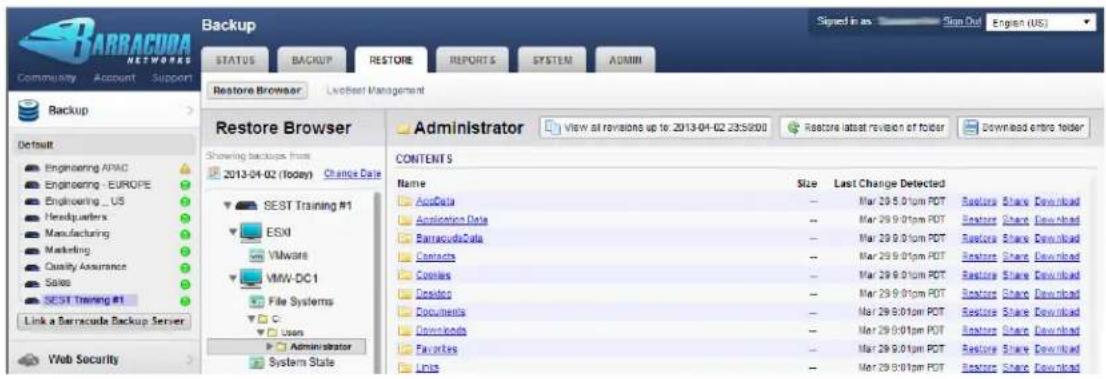
- The Restore Browser section displays the latest backup date.

Older Revision
To restore an older revision of the file or directory, click Change Date to display all available revisions:
- Click Download to the right of the file or folder you want to download, or click Download entire folder to download all content within the folder selected in the section:Restore Browser

Download entire folder
- The content is downloaded as a .zip file. Once downloaded, you can extract the downloaded content from the zip file:
| Copy-1.14.0329.exe | 11/12/2012 2:33 PM | Application | 27,462 KB |
| Copy-1.28.657.0.exe | 4/1/2013 4:02 PM | Application | 28,914 KB |
| Desktop.zip | 1/24/2013 4:10 PM | Compressed (zipped) Folder | 66,643 KB |
| dotnetfx35setup.exe | 2/19/2013 10:54 AM | Application | 2,891 KB |
Example - Restore Data Using the Local Web Interface
This article refers to Barracuda Backup firmware 5.1 and higher.
Use the following steps to restore data using the Barracuda Backup local web interface. Note that the local web interface does not require an Internet connection which may improve performance.
- Open a web browser, and enter the Barracuda Backup Server IP address.
- Log into the Barracuda Backup web interface; the page displays:System
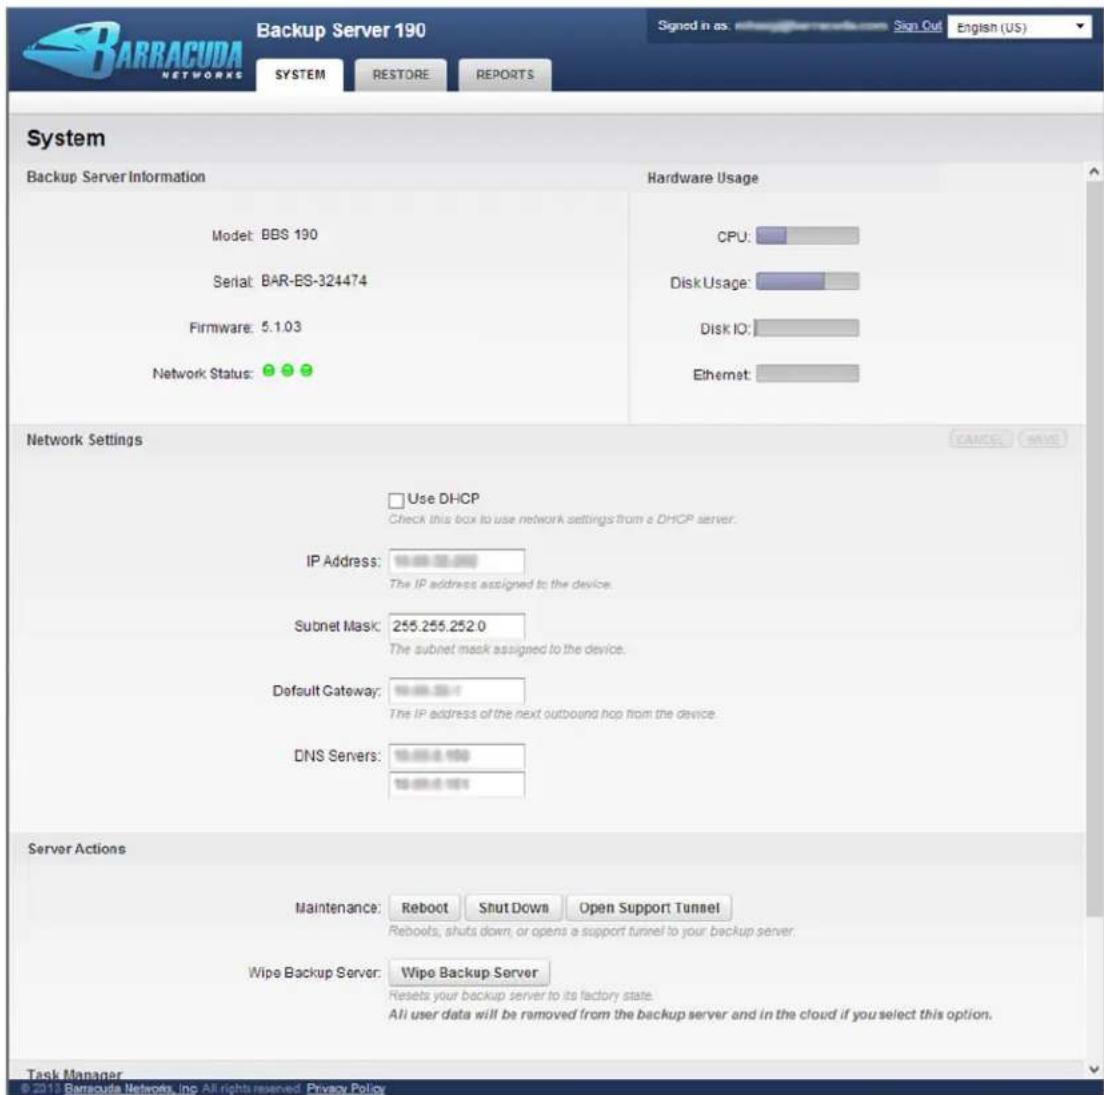
- Click the RESTORE tab, and select the server from which to restore data. In the following example, a Microsoft Exchange Database is
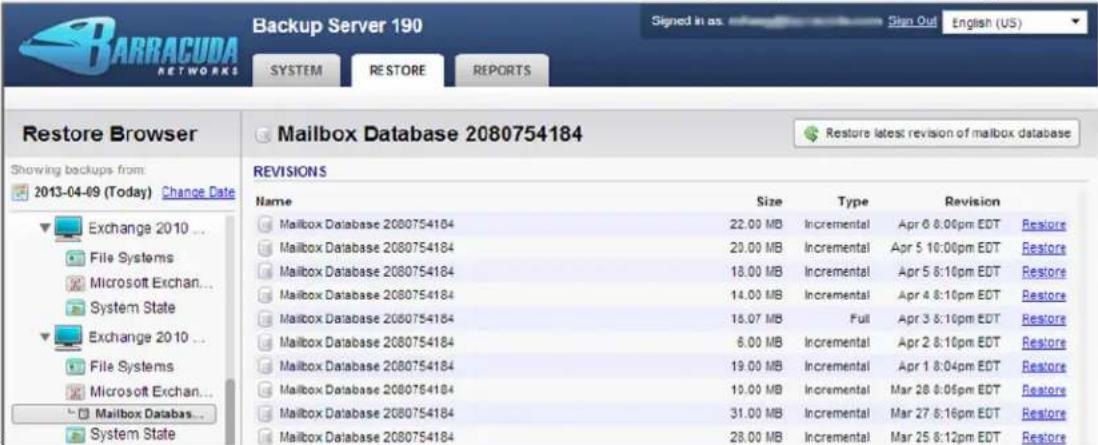
selected:
- Click the Restore link to the right of the data you wish to restore; the Restore window displays. Select the Restore to and Method for restoring the data, for example, select Original Location to select the original server, and select Restore to an Exchange Recovery to restore to a recovery database: Storage Group/Database
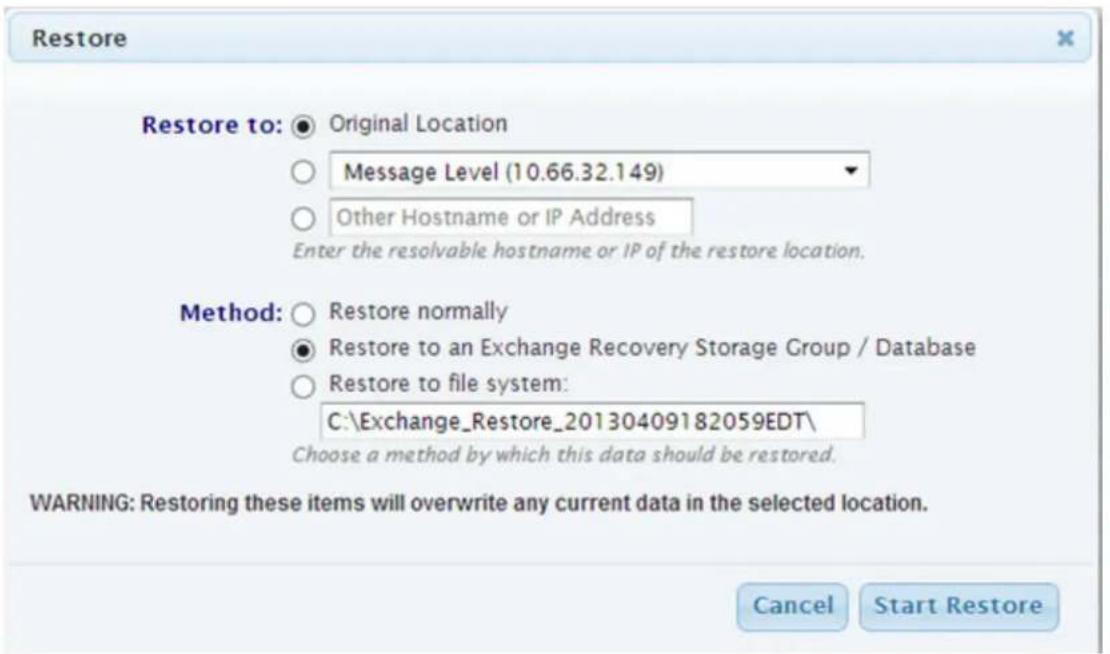
- Click ; the window displays: Start Restore Restoration in progress
- Click . In the web interface, go to to view the restoration status:OK REPORTS >Restore
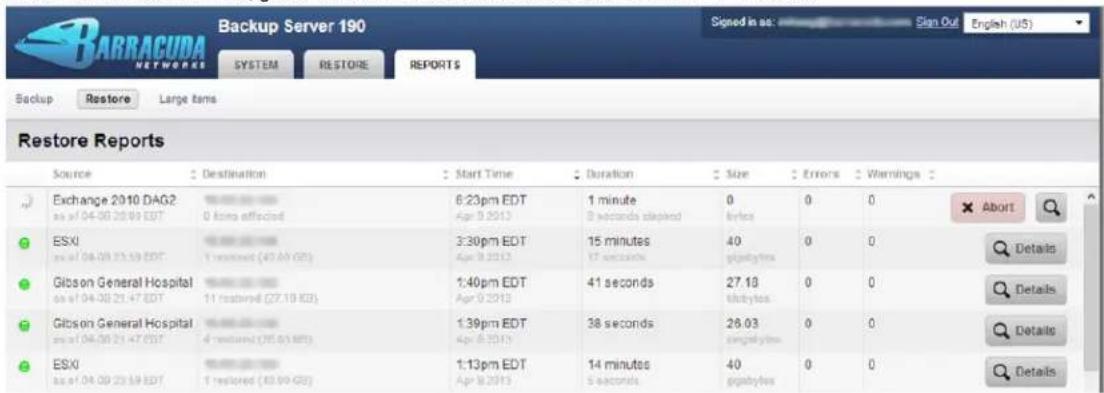
- Once the restore is complete, the left column displays a green indicator ( ) next to the restored data source.
How to Restore from a Replication Destination
This article refers to Barracuda Backup firmware 4.0 and higher, and assumes that replication has been successfully set up on both devices and that are running successfully backups.
Only the Barracuda Backup Server 490 and higher can act as a backup to other Barracuda Backup Servers, although any Barracuda Backup Server can data.send
Related Articles
• Getting Started with Replication
• How to Restore a Microsoft SQL Database
• Microsoft SQL Server Database Recovery and Restoration
• How to Restore a Microsoft Exchange 2007 Database
To restore from a replication destination,
- Log into the Barracuda Backup web interface, and select the receiving Barracuda Backup Server from which to restore.
- Go to the Restore>Restore Browser page, and in the left pane select the sending Barracuda Backup Server that you are receiving data from:
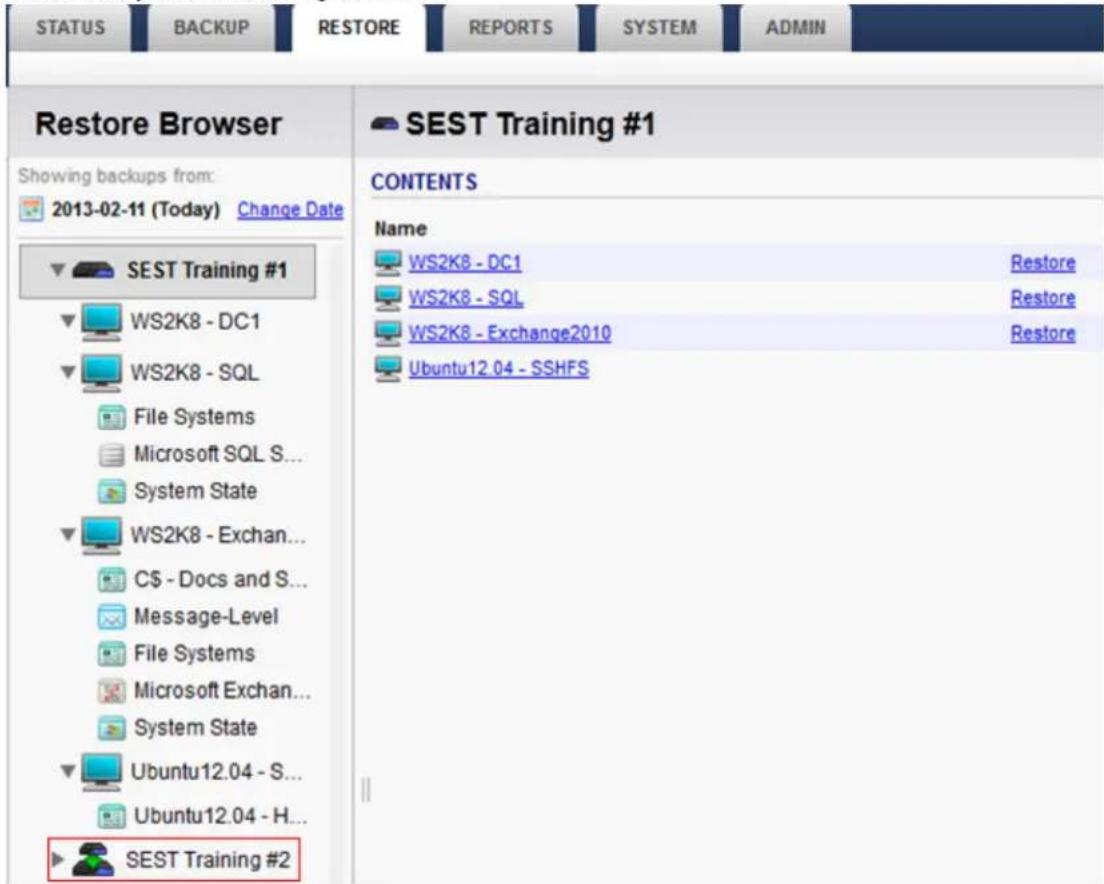
- Expand the sending Barracuda Backup Server to review its backup sources, and click on the server or computer from which to restore; the contents displays in the right pane:
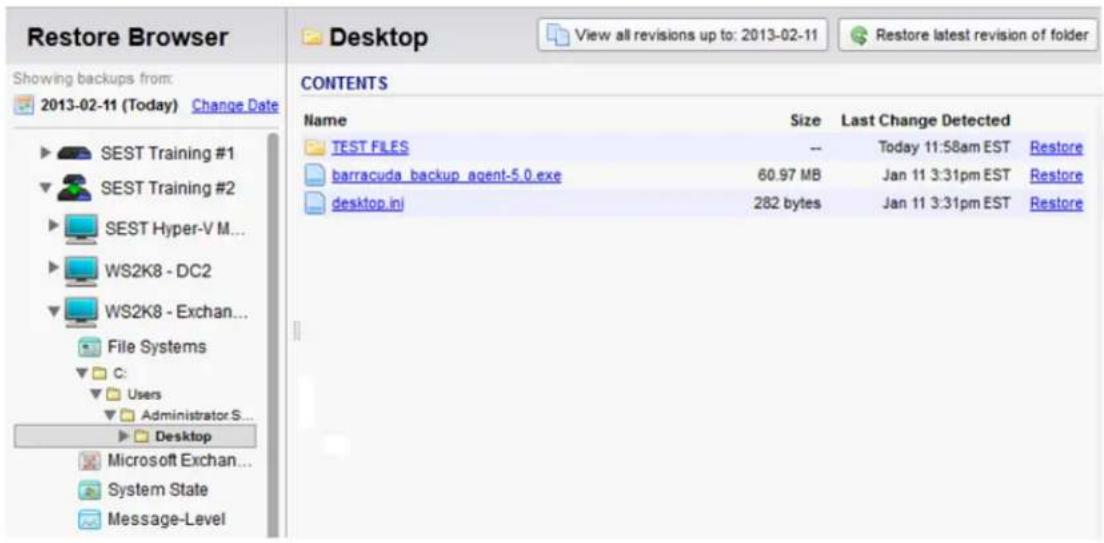
- In the Contents section, click Restore next to the file or directory for restore. The Restore window displays.
- In the Restore to field, enter the hostname or IP address of the restore to location. In the Path section, select the Original Path, or you can designate a new location:
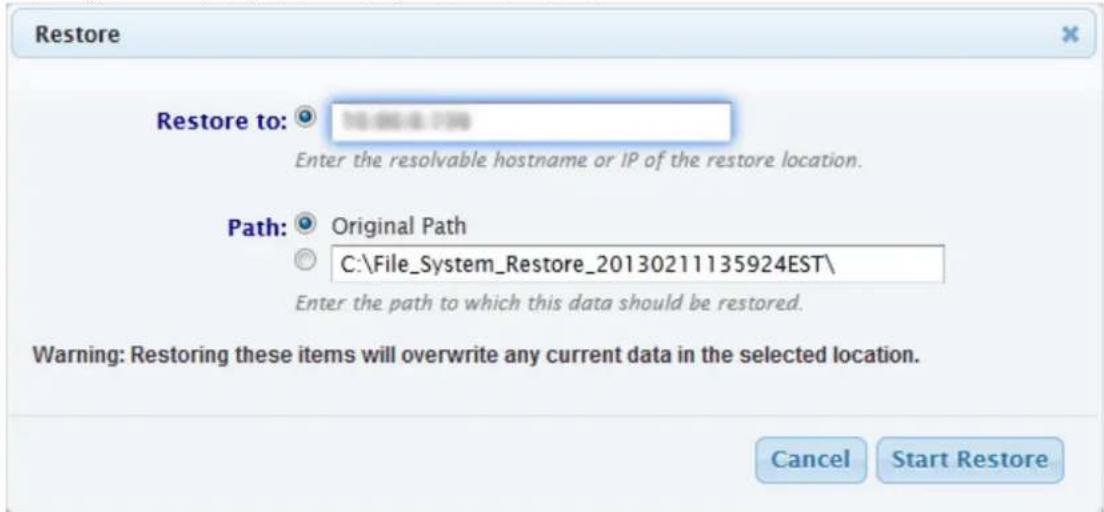
- Click Start Restore. Once the restore is complete, go to REPORTS >Restore to verify the restore completed successfully.
How to Restore SharePoint Objects Using Kroll Ontrack
This article refers to firmware version 5.4 and higher, Microsoft® SharePoint 2010 and 2013, and Kroll Ontrack PowerControls™ version 6.0 and later, and assumes you have an active Kroll Ontrack license.
You can use Kroll Ontrack to granularly restore SharePoint Objects.

To extract a SharePoint object from a restore, you must first restore the WSS_Content database to a flat file using the instructions in the article. How to Restore a Microsoft SQL Server Database to a Flat File
Extracting and Converting Files
Once you restore the content database using the instructions in the article How to Restore a Microsoft SQL Server Database to a Flat File, use the following steps to extract the .bak and .trn files, and then convert these files to .mdf and .ldf files.
- Go to Start > Programs > Kroll Ontrack > Ontrack PowerControls > PowerControls ExtractWizard. On the introduction page of Extr , click .actWizard Next
- In the Method of Extraction page, select Direct Method:
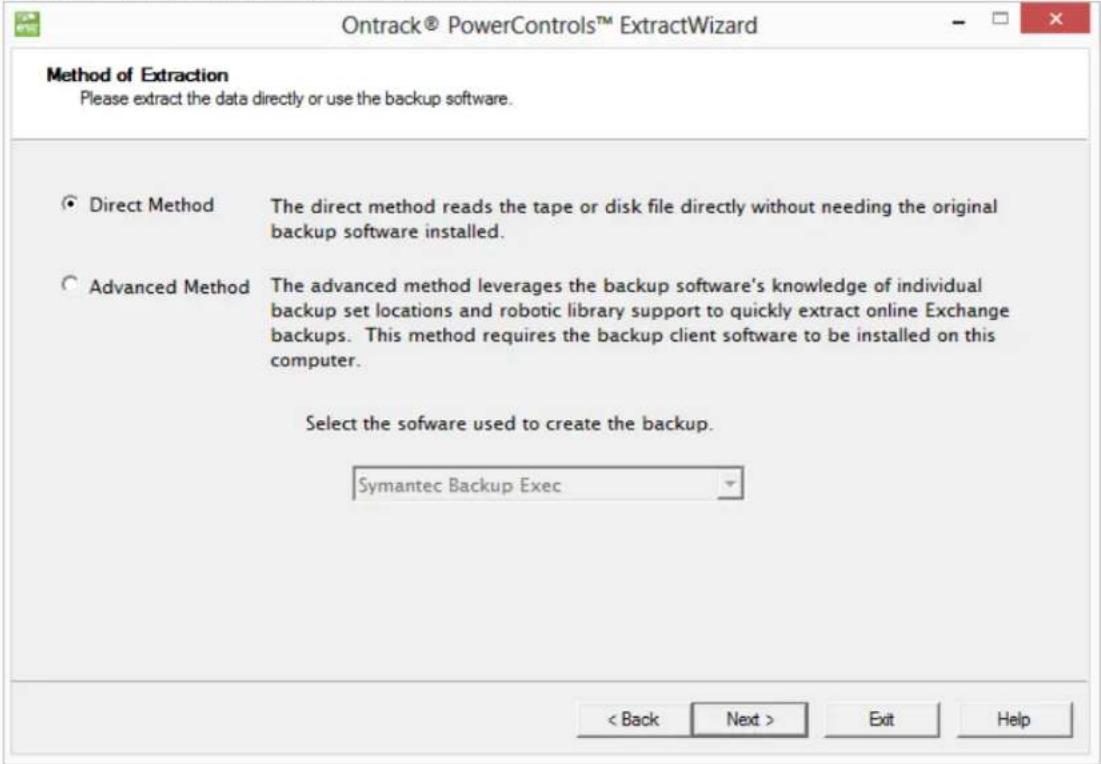
- Click Next. On the Extraction Source page, navigate to and select the .bak file corresponding to the database you want to access:
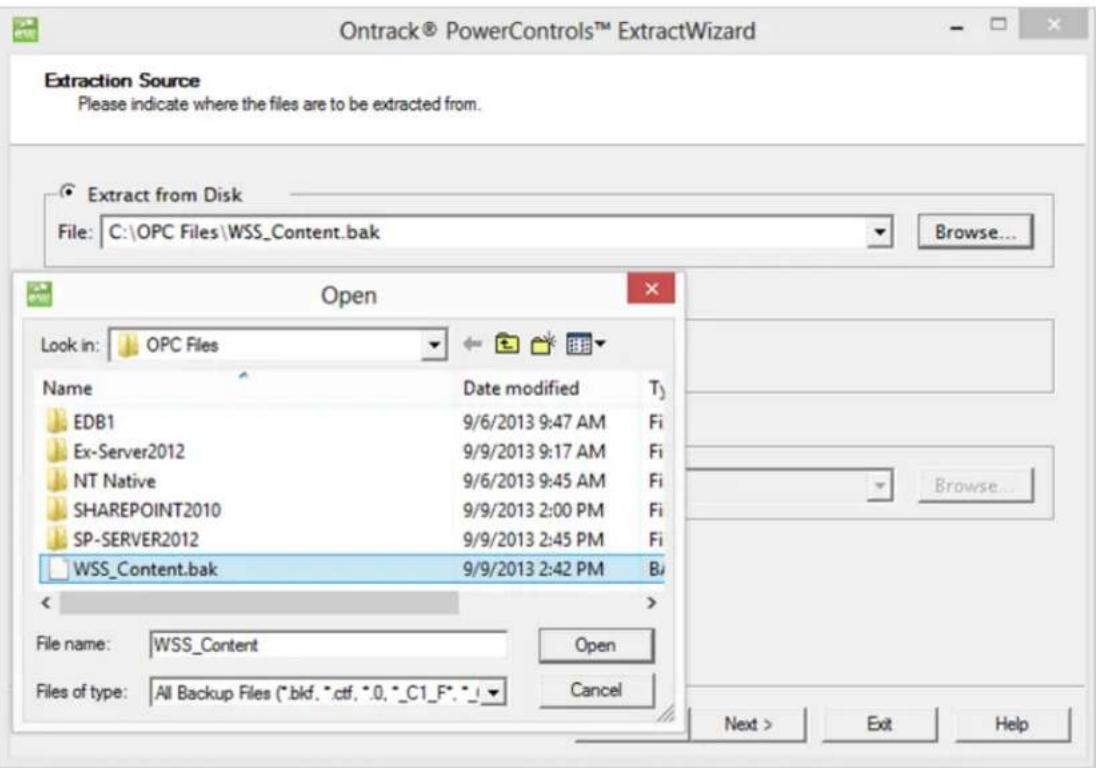
- Click Next. On the Catalog Performance Options page, select Catalog SharePoint backup datasets only:
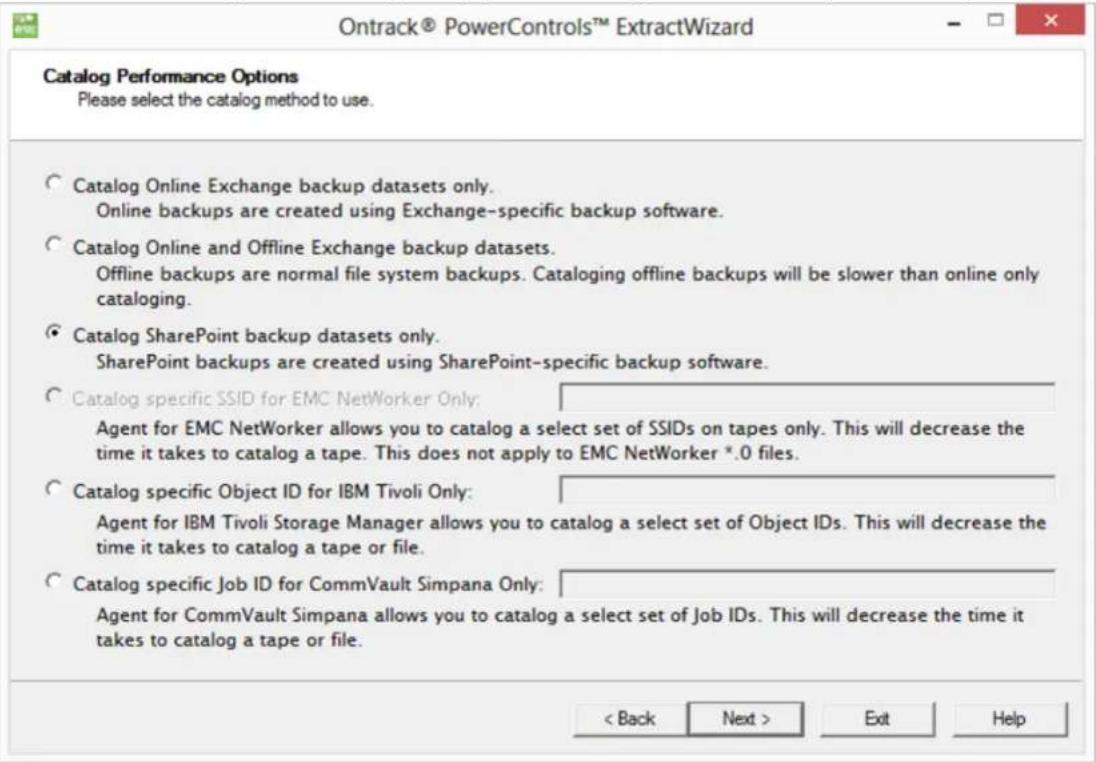
- Click Next. On the File Selection page, select Catalog, or browse to and select the database set you want to recover:
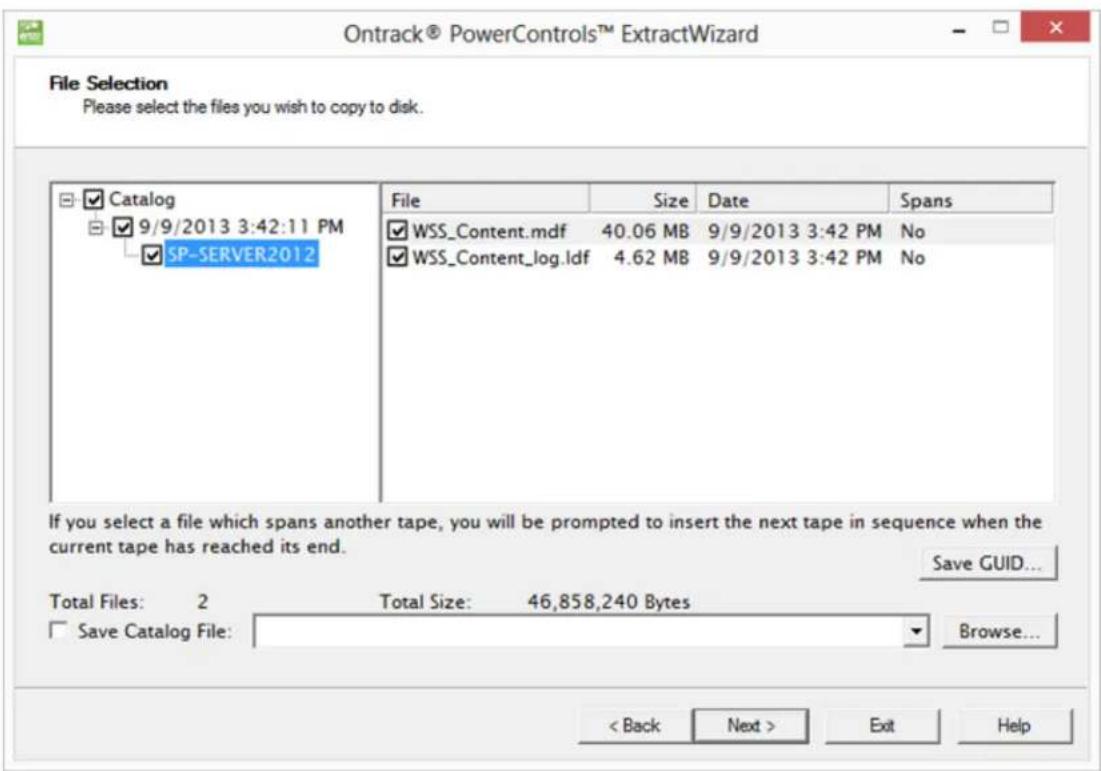
- Click Next. On the Destination Folder page, browse to and select the destination folder where you want to copy the .mdf and .ldf files:
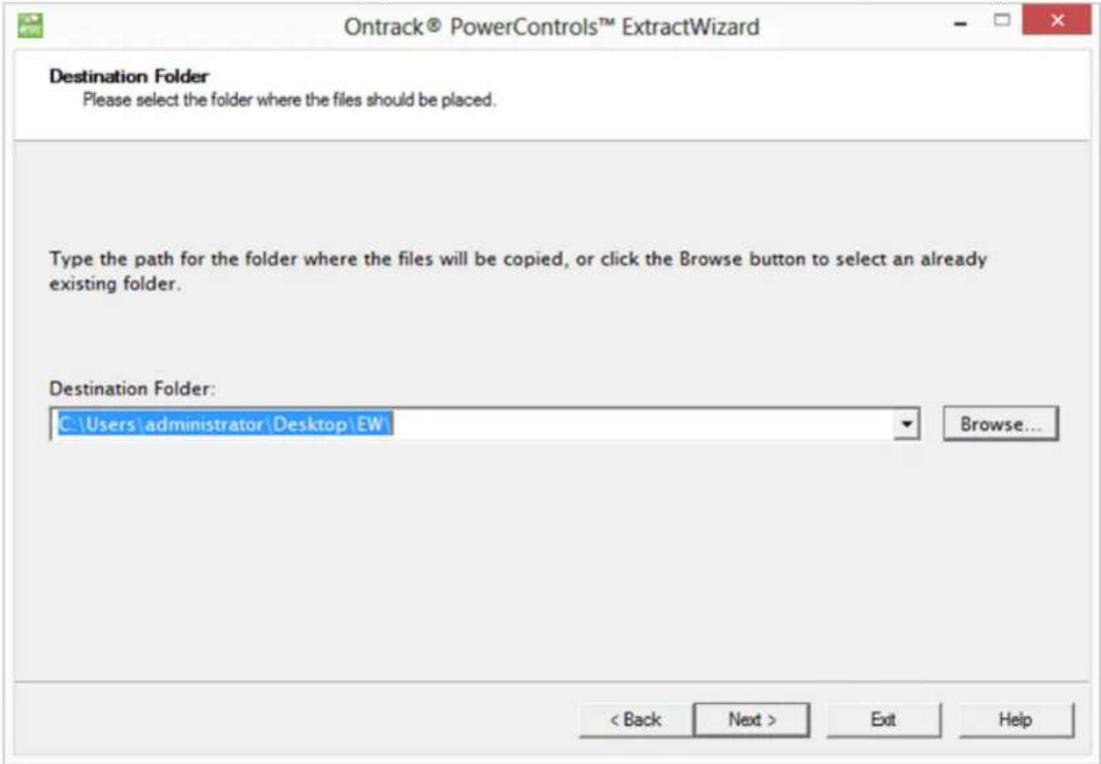
- Click . Once the extraction is complete, click to close .Next Finish ExtractWizard
Restore the SharePoint Objects
Once you extract the .mdf and .ldf files from the restore, use the following steps to browse to and restore the SharePoint objects.
- Go to Start > Programs > Kroll Ontrack > Ontrack PowerControls > PowerControls for SharePoint. The Data Wizard displays
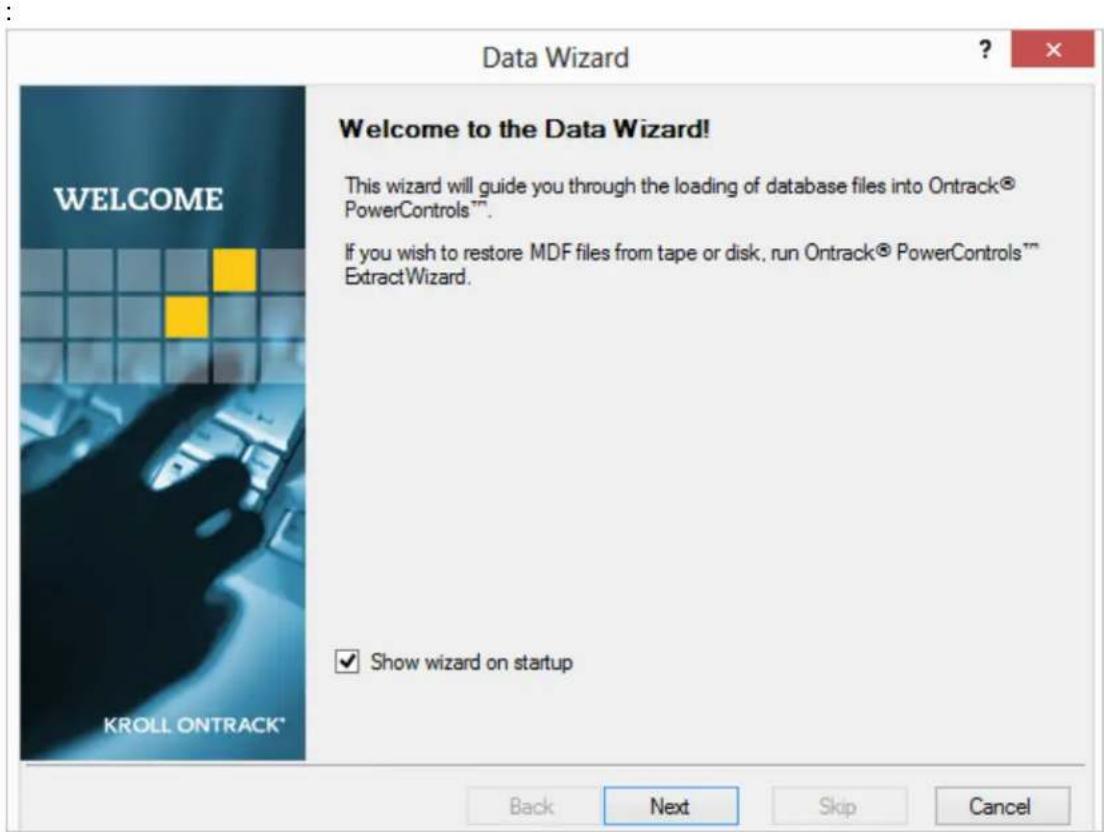
- Click Next. In the Source Path Selection page, click Add, and navigate to and select the files created using the in tExtractWizard he previous section:
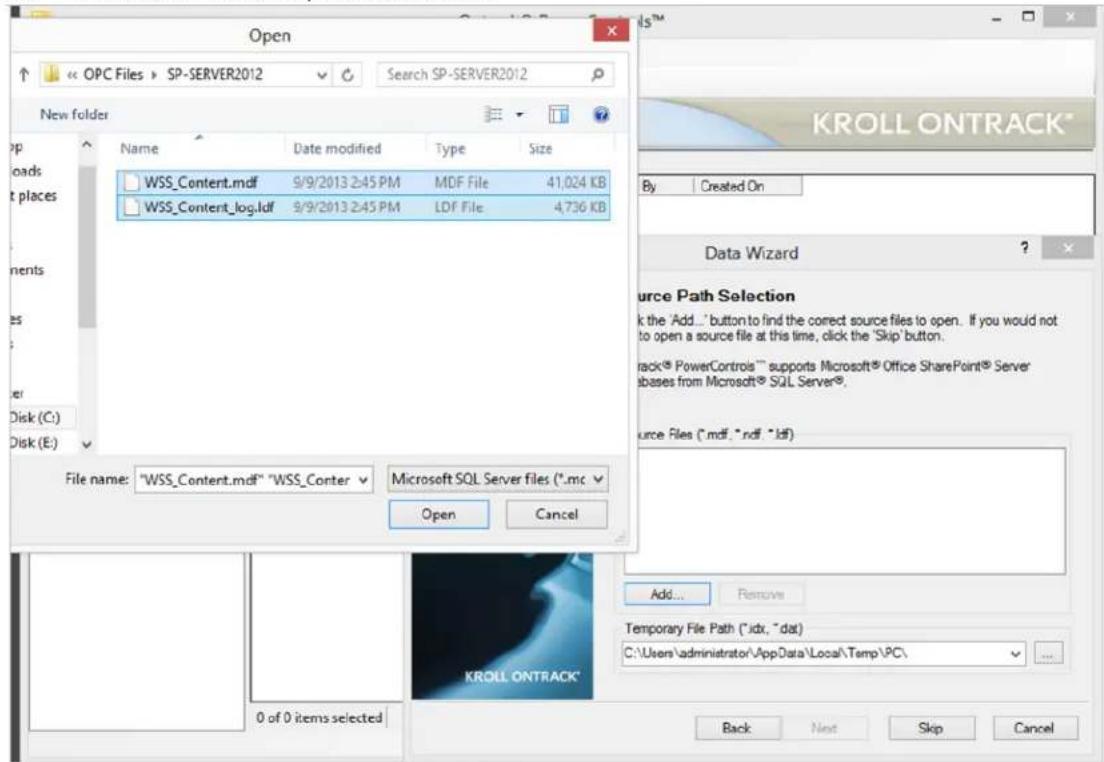
- Click to add the files. Verify the is valid, and then click .Open Temporary File Path Next
-
The database content displays in the list.Source
-
In the Target Server Selection page, from the SharePoint Server Site URL drop-down menu, select the target site URL:
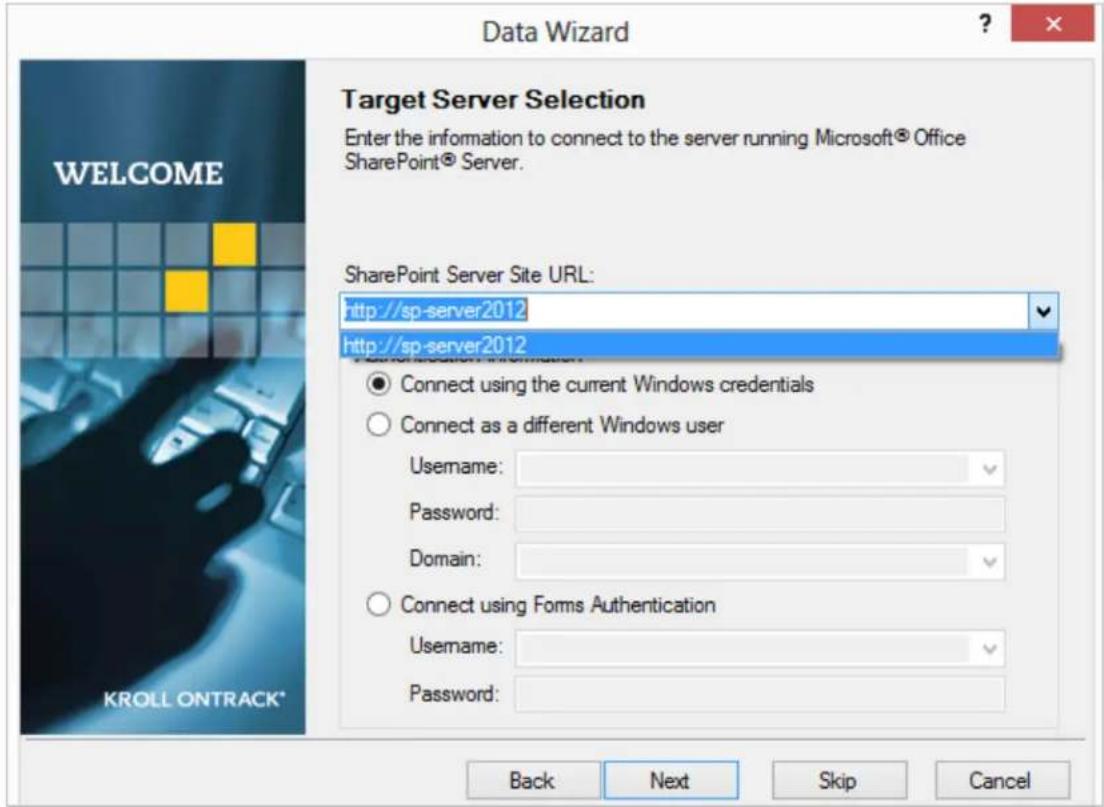
- Select an authentication option, and then click Next.
- The source and target selections display. Expand the Source list, right click the item to restore, and then click Copy:
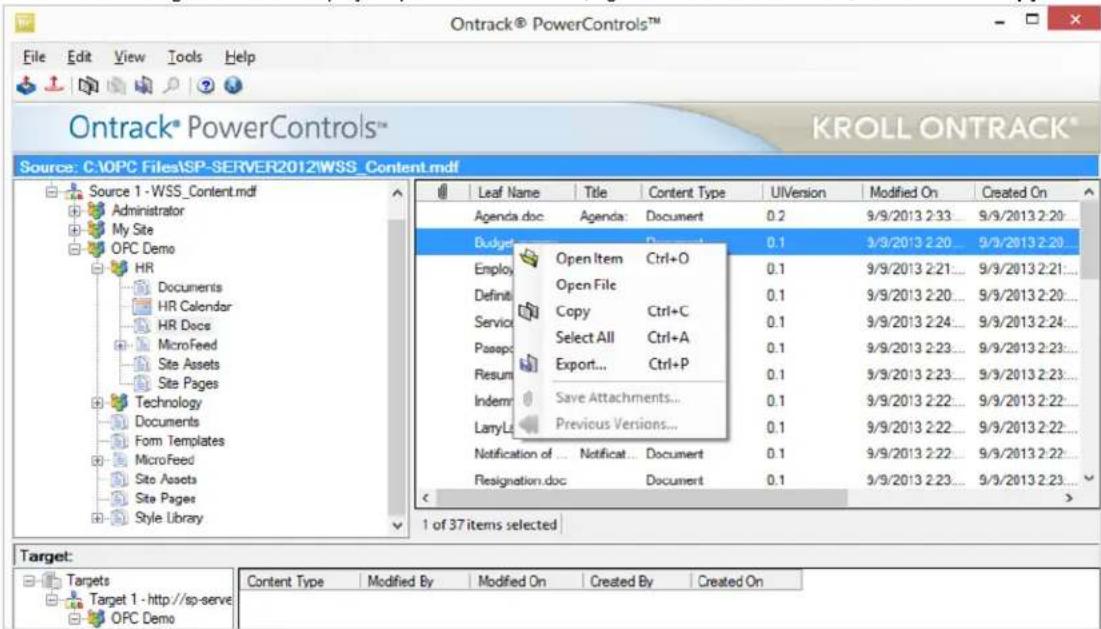
- Expand the Target list, right-click the site object location where you want to copy the source file, and click Paste:
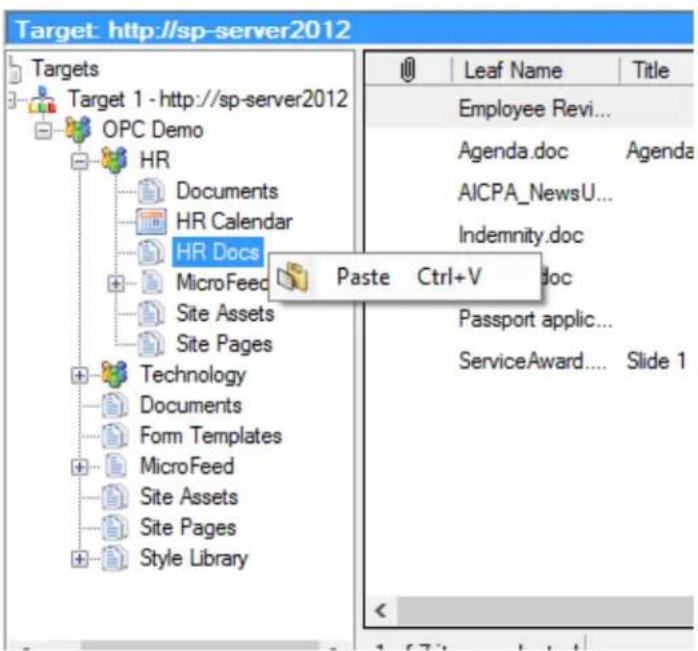
- Once the restore process is complete, the status log generates:Copy Progress
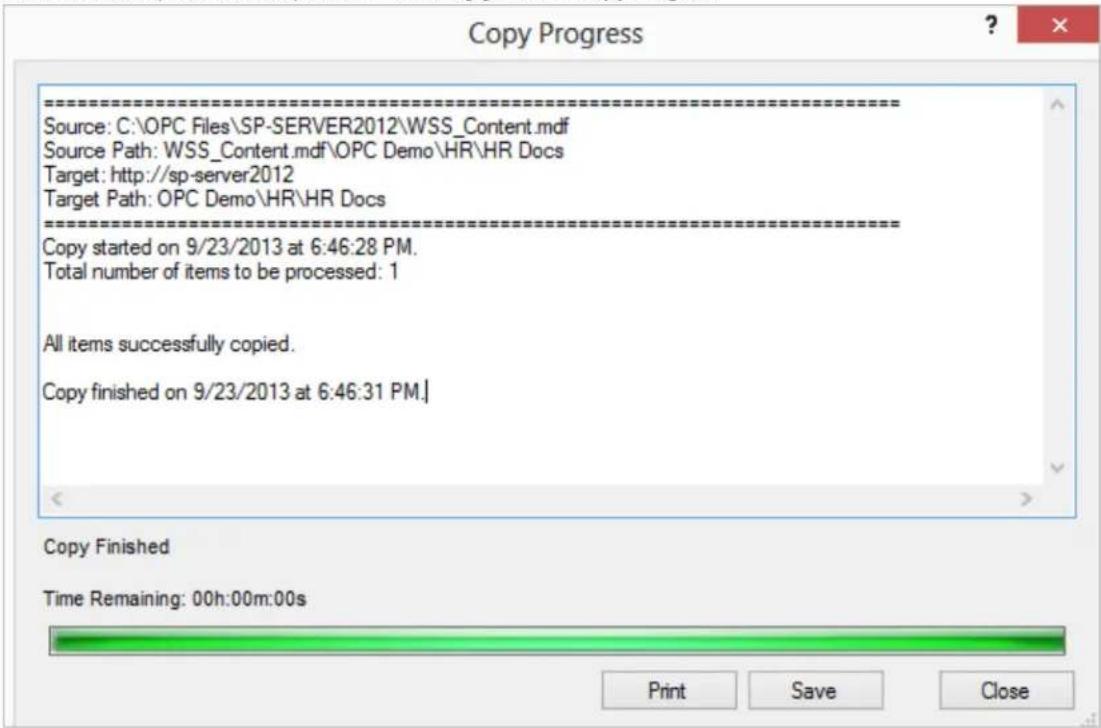
- Click Print to print a copy of the report, Save to save a copy to your local system, or click Close.
- Log in to SharePoint and verify the object has been restored to the desired location:
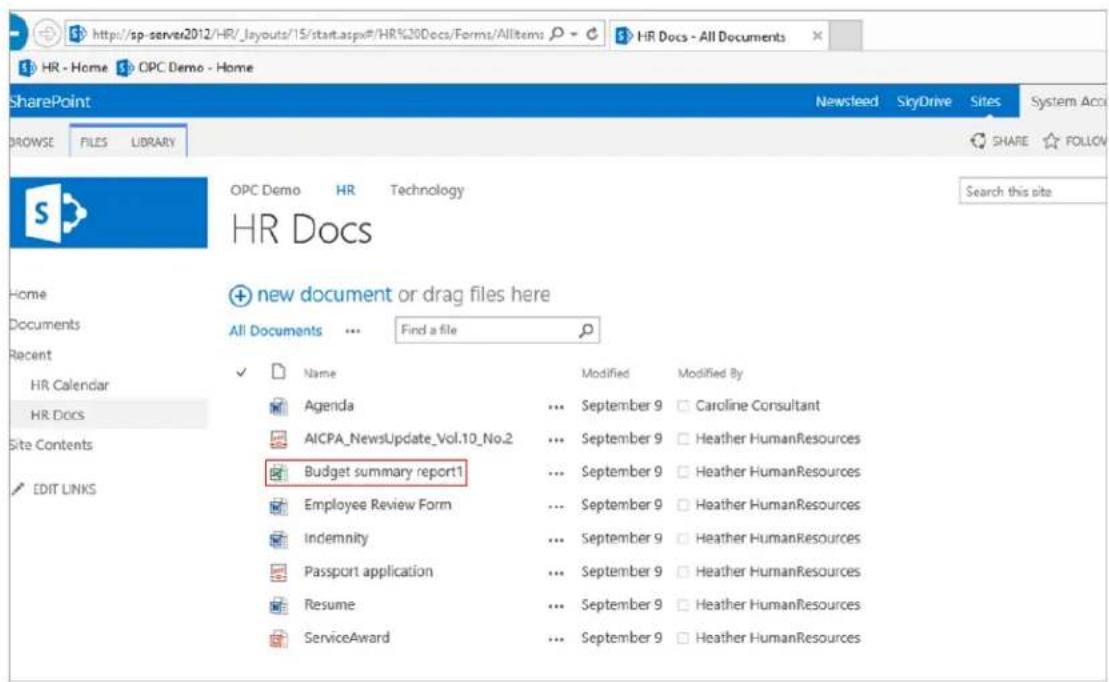
How to Restore a Microsoft Windows Server 2003 Domain Controller
Additional Resource
- Restart the domain controller in Directory Services Restore Mode Remotely
Use the following steps to restore a Windows Server:
- Log in to the Windows Server, and reboot the server into directory services restore mode.

Remotely Reboot
Note that you can reboot the server remotely; for more information, refer to the Microsoft TechNet article Restart the domain .controller in Directory Services Restore Mode Remotely
- Log in to the Barracuda Backup web interface, select the associated Barracuda Backup Server in the left pane, and go to the BACKUPS page.> Restore
- Under the domain controller on the left, click .System State
- Click next to the date from which to Restore restore.
- In the dialog box, select either the original location or an alternate location, and turn on Authoritative .Restore

You must turn on for your changes to be replicated. Authoritative Restore
- Click, and then click .Start Restore OK
- Go to the page to view restore progress.REPORTS > Restore
- Log back in to the Windows Server, and reboot the domain controller into normal mode.
- The restore is now complete.
How to Restore Windows System State
Restoring Windows System State should only be performed in a disaster recovery situation. Typically, this is if a server goes down and will not boot or if the configuration is severely corrupted.
In this Section
• How to Restore Windows Server 2003 Domain Controller System State
• How to Restore Windows Server 2008 Domain Controller System State
How to Restore Windows Server 2003 Domain Controller System State
This article refers to Barracuda Backup firmware version 3.1 and higher, and Windows® Server 2003 domain controller. This article assumes that a System State backup exists, and that the user restoring to System State has access to the Directory Services Restore Mode (DSRM) password. If you are restoring Windows Server 2008, refer to the article How to Restore Windows Server 2008 Domain Controller System State. You cannot perform a system state restore from the Cloud.
In this article:
- Requirements
• Active Directory Domain Controllers
• Prepare the Target - Restore File System and System State
- Restore System State
Related Articles
• Barracuda Backup Agent (Windows)
- Restore Windows Server 2008 Domain Controller System State
Additional Resources
• Active Directory Backup and Restore

Disaster Recovery
Restoring Windows System State should only be performed in a disaster recovery situation. Typically, this is if a server goes down and will not boot, or if the configuration is severely corrupted.
Requirements
Before proceeding, verify that all of the following are true:
• The is installed on the server; Barracuda Backup Agent target
- File System and System State from the server exist;source
- Both the target and source server hardware and operating systems are configured the same; and
- The target server is on the network and can communicate directly with the Barracuda Backup Server.
Active Directory Domain Controllers
For Active Directory (AD) domain controllers, you must have access to the DSRM password. Additionally, it is highly recommended that the IP address to which you are restoring is the same as the original server.
Prepare the Target
When setting up the target server, the configuration should be identical to that of the source server that you are restoring including:
- Version
- Edition
• 32- or 64-bit
For example, if the source server is 64-bit Windows 2003 R2, Enterprise Edition, the target server should also be 64-bit Windows 2003 R2, Enterprise Edition.
- Power on the server, or if it is already running, reboot the server.target target
- Once the target server boots up, hold down the F8 key until the Windows Advanced Options menu displays:
Windows Advanced Options Menu Please select an option:
- Use the keys on the keyboard to select the :Arrow Directory Services Restore Mode

- Press Enter. The Select Operating System to Boot menu displays; Select the appropriate operating system:

- Press Enter. Windows reboots in Directory Services Restore Mode; Safe Mode displays onscreen:
Safe Mode
- When the log in prompt appears, press Ctrl-Alt Delete and log in to Windows using the administrator account.
- The Safe Mode warning dialog displays:
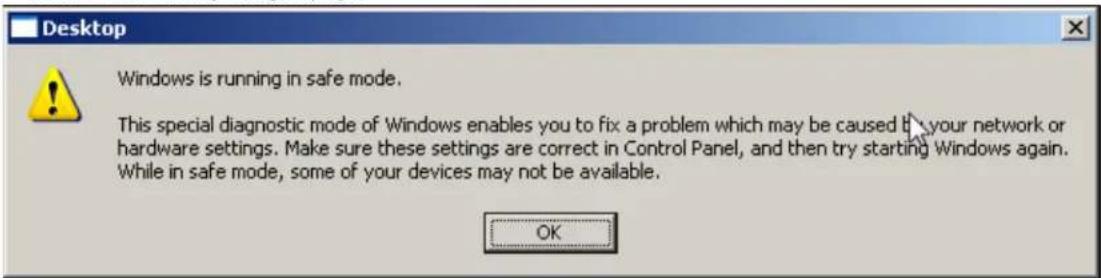
- Click OK to close the dialog and continue in Safe Mode.
- Click Start > Run, enter services.msc, and click OK to open Services.
- Navigate to Barracuda Backup Agent in the list of Services and verify the Status field displays as Started:


If the Barracuda Backup Agent Service is not listed in the Services window, you must first install the Agent before proceeding.
- If the Status field displays as Stopped, right click the Agent, and click Start.
Restore File System and System State
Use the following steps to restore an AD domain controller to the target server, or to restore a complete copy of the source server without AD.

This procedure restores the file system, overwriting existing files. Restoring System State from a source domain controller restores AD to its original state on that server; check with your system administrator before restoring a domain controller from an old revision backup.
- Log in to the Barracuda Backup web interface, and go to RESTORE >Restore Browser.
- Select the Windows Server that represents the source server you wish to restore:
- Click ; a list of revisions displays.View all revisions up to:
- Click next to the revision you wish to restore:Restore
- The window displays.Restore

Authoritative Restore
An authoritative restore returns the source server to the state it was in at the time of the backup, overwriting all changes made since that backup was performed. Changes made subsequent to that backup will be lost. For more information on authoritative restore, refer to the Microsoft TechNet article Active Directory Backup and Restore.
If the target server is set up with the same IP address as the source server you are restoring, select Original Location:
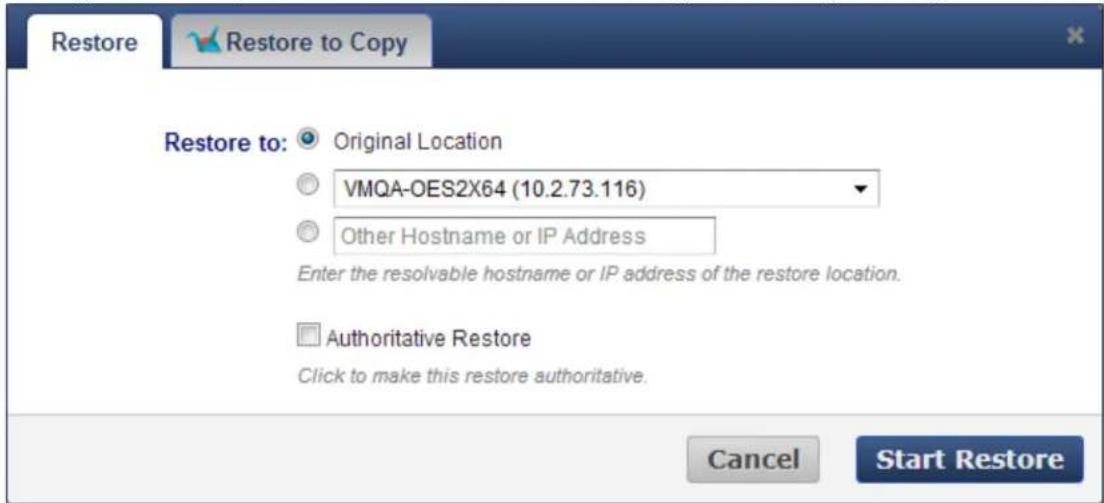
If the target server has a different IP address, select the third option and enter the IP address of the new location:
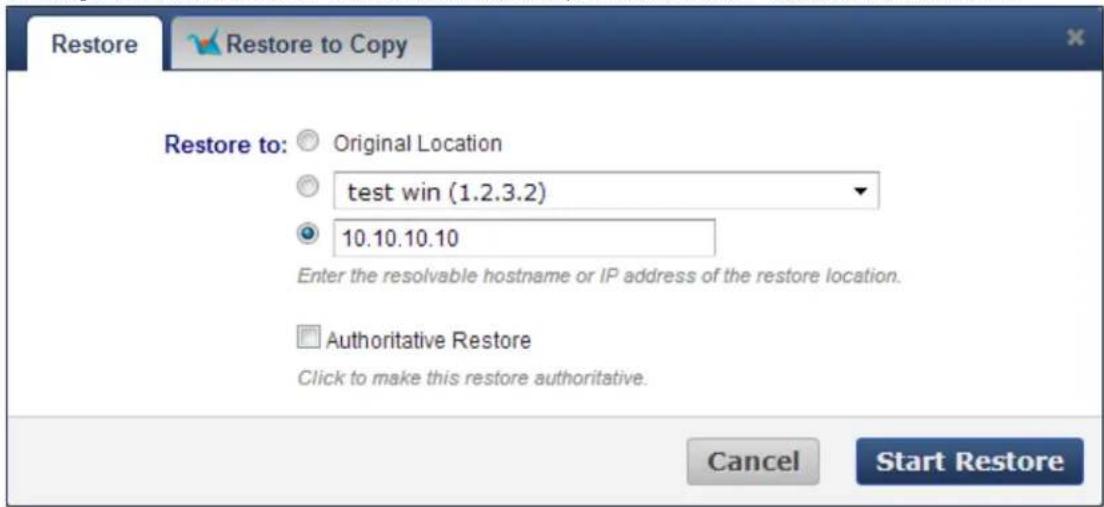
- Click .Start Restore
- Go to to view restore job details.REPORTS >Restore

Restore Job
The restore job completion is dependent upon the size of the original server.
- Once the restore is complete, a dialog displays. Click to close the dialog box.OK
- Once the restore job is complete, restart the server.
Restore System State
Use the procedure described in this section only if you wish to restore System State to the target server without restoring the rest of the file system as it was on the source server. This procedure restores System files including those in the C:\Windows folder. Perform the steps in this section if you are not performing full disaster recovery and wish to keep the target server's file system intact. Since this procedure does not restore file systems, following these steps will not restore replicated file systems or administration tools if the source server was a domain controller. This means group policy objects and log on scripts will not be available on the target server unless they are already on that server or on another server on the network. If you wish to restore file systems, use the steps described in the section Restoring File System and System State, or restore file systems manually from another server on the network.

Important
Restoring System State from a source domain controller restores AD to its original state on that server; check with your system administrator before restoring a domain controller from an old revision backup.
To restore System State only,
- Log in to the Barracuda Backup web interface, and go to RESTORE >Restore Browser.
- Expand the Windows Server that represents the source server, and select System State:

W2003R2X64

File System Replication

File Systems

System State
- Click View all revisions up to:
; a list of revisions displays. - Click Restore next to the revision you wish to restore:
Revision
Today 10:38am

- The Restore window displays.

Authoritative Restore
An authoritative restore returns the source server to the state it was in at the time of the backup, overwriting all changes made since that backup was performed. Changes made subsequent to that backup will be lost. For more information on authoritative restore, refer to the Microsoft TechNet article Active Directory Backup and Restore.
If the target server is set up with the same IP address as the source server you are restoring, select Original Location:
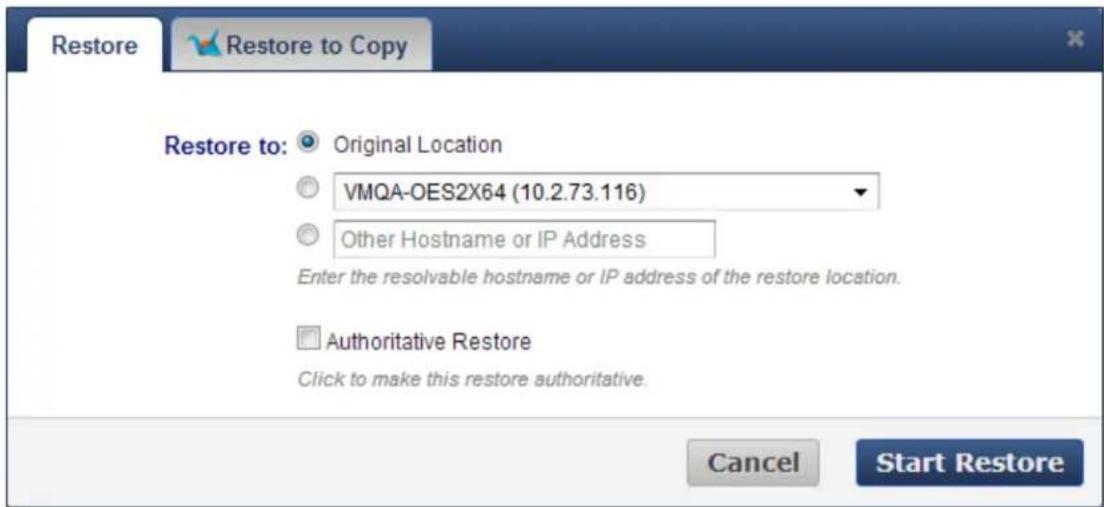
If the target server has a different IP address, select the third option and enter the IP address of the new location:
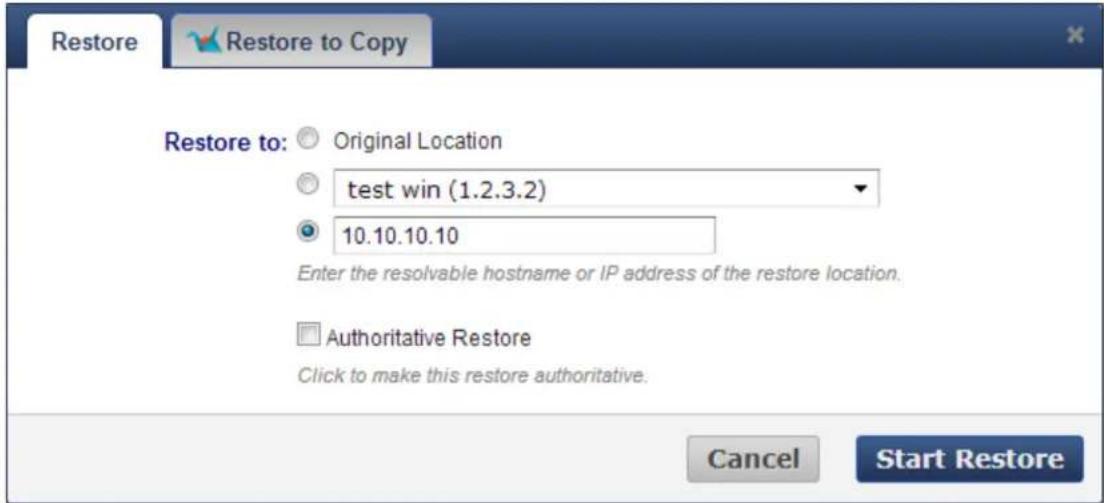
- Click .Start Restore
- Go to REPORTS > Restore to view restore job details.

Restore Job
The restore job completion is dependent upon the size of the original server.
- Once the restore is complete, a dialog displays. Click to close the dialog box.OK
- Once the restore job is complete, restart the server.
How to Restore Windows Server 2008 Domain Controller System State
This article refers to Barracuda Backup firmware version 3.1 and higher, and Windows ^® Server 2008 domain controller. This article assumes that a System State backup exists, and that the user restoring to System State has access to the Directory Services Restore Mode (DSRM) password. If you are restoring Windows Server 2003, refer to the article How to Restore Windows Server . You cannot perform a system state restore from the Cloud.2003 Domain Controller System Stat
In this article:
- Requirements
• Active Directory Domain Controllers
• Prepare the Target - Restore File System and System State
- Restore System State
- Restore Normal Boot Mode
Related Articles
• Barracuda Backup Agent
- Restore Windows Server 2003 Domain Controller System State
Additional Resources
• Active Directory Backup and Restore

Disaster Recovery
Restoring Windows System State should only be performed in a disaster recovery situation. Typically, this is if a server goes down and will not boot, or if the configuration is severely corrupted.
Requirements
Before proceeding, verify that all of the following are true:
• The is installed on the ;Barracuda Backup Agent target server
- File System and System State from the server exist;source
- Both the target and source server hardware and operating systems are configured the same; and
- The target server is on the network and can communicate directly with the Barracuda Backup Server.
Active Directory Domain Controllers
For Active Directory (AD) domain controllers, you must have access to the DSRM password. Additionally, it is highly recommended that the IP address to which you are restoring is the same as the original server.
Prepare the Target
When setting up the target server, the configuration should be identical to that of the source server that you are restoring including:
- Version
- Edition
• 32- or 64-bit
For example, if the source server is 32-bit Windows 2008, Enterprise Edition, the target server should also be 32-bit Windows 2008, Enterprise Edition.

Cancel Restore
If you decide you do not wish to restore the server, use the steps in the section Restoring Normal Boot Mode to return your server to the normal boot mode.
- Power on the target server, or if it is already running, reboot the target server.
- Log on using an administrator account; if the target server is a domain controller, log in using a domain account with administrative access to the server.
- At a command prompt, enter the following command:
bcdedit /set safeboot dsrepair - Press Enter, and then enter the following command to restart the server:
shutdown -r -t 1
Administrator: C:\Windows\system32\cmd.exe
C:\Users\Administrator>bcdedit /set safeboot dsrepair The operation completed successfully.
C:\Users\Administrator>shutdown -r -t 1
- Press Enter to restart the server. The server restarts, and Windows boots into Directory Services Repair Mode.
- Press Ctrl-Alt-Delete and log into the system using the same credentials you entered above in Step 2.
- Click Start > Run, enter services.msc, and click OK to open Services.
- Navigate to Barracuda Backup Agent in the list of Services, and verify the Status field displays as Started:

If the Barracuda Backup Agent Service is not listed in the Services window, you must first install the Agent before proceeding.
- If the Status field displays as Stopped, right click the Agent, and click Start.
Restore File System and System State
Use the following steps to restore an AD domain controller to the target server, or to restore a complete copy of the source server without AD.

This procedure restores the file system, overwriting existing files. Restoring System State from a source domain controller restores AD to its original state on that server; check with your system administrator before restoring a domain controller from an old revision backup.
- Log in to the Barracuda Backup web interface, and go to RESTORE >Restore Browser.
- Select the Windows Server that represents the source server you wish to restore:
- Click View all revisions up to:
; a list of revisions displays. - Click Restore next to the revision you wish to restore:
- The Restore window displays.

Authoritative Restore
An authoritative restore returns the source server to the state it was in at the time of the backup, overwriting all changes made since that backup was performed. Changes made subsequent to that backup will be lost. For more information on authoritative restore, refer to the Microsoft TechNet article Active Directory Backup and Restore.
If the target server is set up with the same IP address as the source server you are restoring, select Original Location:
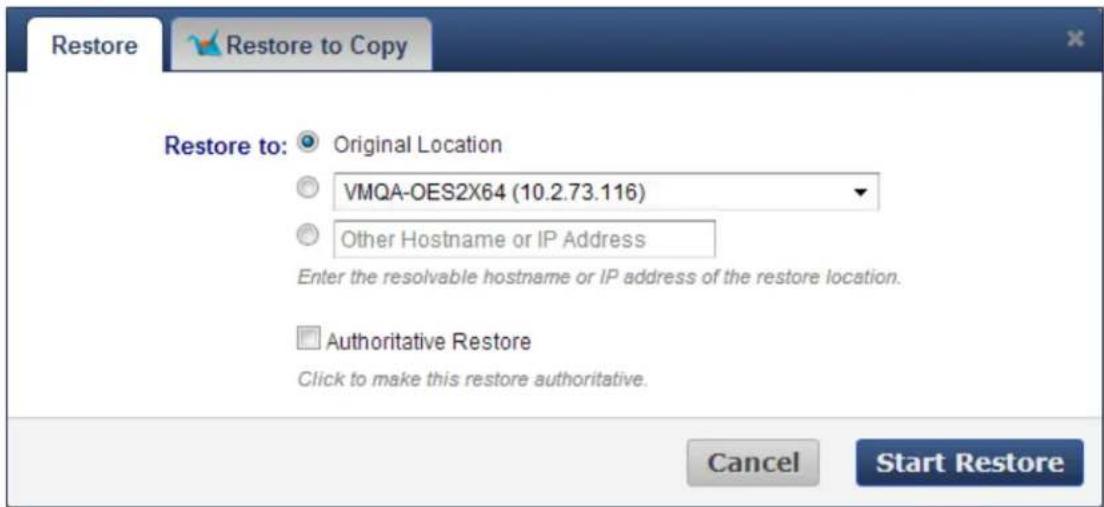
If the target server has a different IP address, select the third option and enter the IP address of the new location:
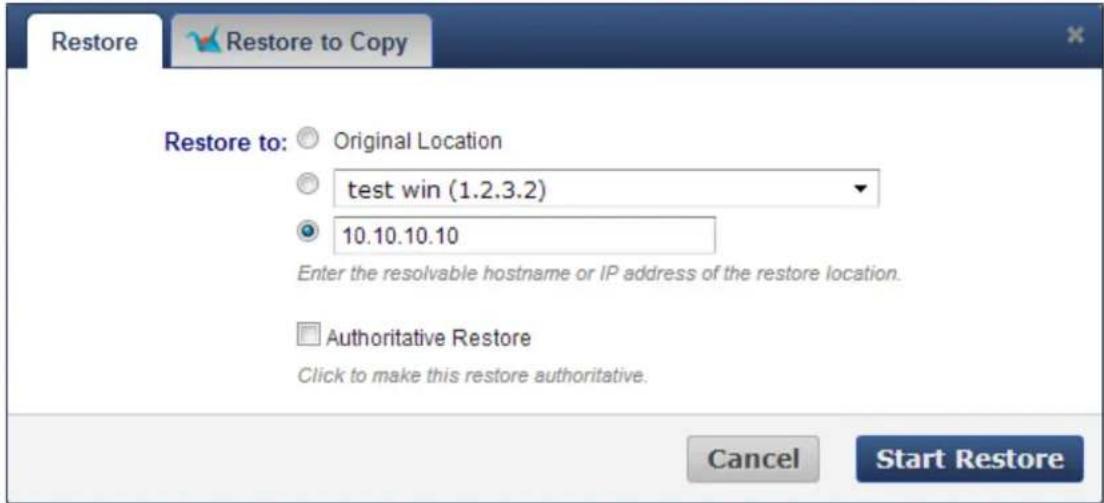
- Click .Start Restore
- Go to to view restore job details.REPORTS > Restore

Restore Job
The restore job completion time is dependent upon the size of the original server.
- Once the restore is complete, a dialog displays. Click to close the dialog box.OK
- Once the restore job is complete, use the steps in the section Restoring Normal Boot Mode to restore the server to normal mode.
Restore System State
Use the procedure described in this section only if you wish to restore System State to the target server without restoring the rest of the file system as it was on the source server. This procedure restores System files including those in the C:Windows folder. Perform the steps in this section if you are not performing full disaster recovery and wish to keep the target server's file system intact. Since this procedure does not restore file systems, following these steps will not restore replicated file systems or administration tools if the source server was a domain controller. This means group policy objects and log on scripts will not be available on the target server unless they are already on that server or on another server on the network. If you wish to restore file systems, use the steps described in the section Restoring File System and System State, or restore file systems manually from another server on the network.

Restoring System State from a source domain controller restores AD to its original state on that server; check with your system administrator before restoring a domain controller from an old revision backup.
To restore System State only,
- Log in to the Barracuda Backup web interface, and go to .RESTORE > Restore Browser
- Expand the Windows Server that represents the source server, and select System State:

W2003R2X64

File System Replication

File Systems

- Click ; a list of revisions displays.View all revisions up to:
- Click next to the revision you wish to restore:Restore
- The Restore window displays.

Authoritative Restore
An authoritative restore returns the source server to the state it was in at the time of the backup, overwriting all changes made since that backup was performed. Changes made subsequent to that backup will be lost. For more information on authoritative restore, refer to the Microsoft TechNet article Active Directory Backup and Restore.
If the target server is set up with the same IP address as the source server you are restoring, select Origin al Location :
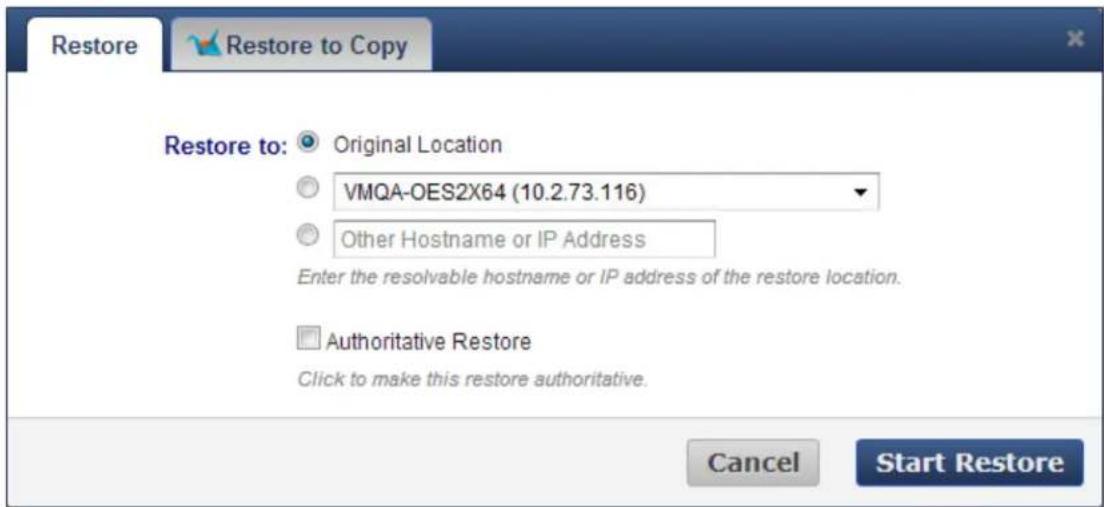
If the target server has a different IP address, select the third option and enter the IP address of the new location:
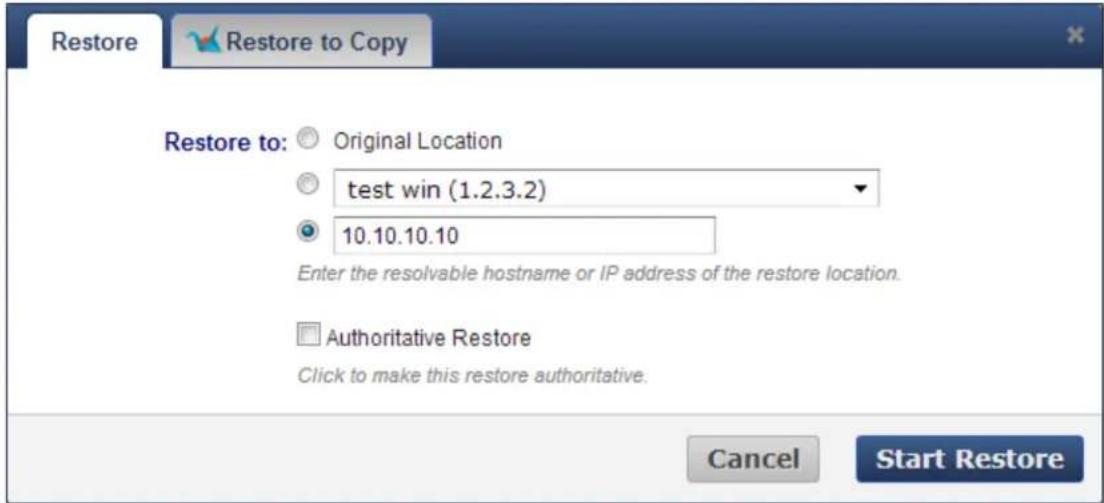
- Click Start Restore.
- Go to REPORTS > Restore to view restore job details.

Restore Job
The restore job completion is dependent upon the size of the original server.
- Once the restore is complete, a dialog displays. Click to close the dialog box.OK
- Once the restore job is complete, use the steps in the section Restoring Normal Boot Mode to restore the server to normal mode.
Once the restore is complete, use the following steps to restore the server to normal boot mode:
- Power on the server, or if it is already running, reboot the server.target target
- Log on using an administrator account; if the target server is a domain controller, log in using a domain account with administrative access to the server.
- At a command prompt, enter the following command:
bcdedit /deletevalue safeboot - Press, and then enter the following command to restore normal boot mode:Enter
shutdown -t 0 -r
Administrator: C:\Windows\system32\cmd.exe
C:\Users\Administrator>bcdedit /deletevalue safeboot The operation completed successfully.
C:\Users\Administrator>shutdown -t 0 -r
- Press to restart the server in normal boot mode.Enter
How to Restore Exchange and GroupWise Messages
Related Articles
- Set Up GroupWise Message-Level Backups
Use the Barracuda Backup web interface to view, search, and restore Microsoft® Exchange and Novell® GroupWise messages. You can view all of the messages within a single mailbox, or select multiple mailboxes in which to search for a text string.
Use the following steps to restore messages using the Restore Browser:
- Log in to the Barracuda Backup web interface, and in the left pane, click on the Barracuda Backup Server from which to restore data.
- Go to the RESTORE > Restore Browser page, select the computer and the associated data source that contains the messages that you want to restore, and follow the on-screen instructions.
How to Restore a Windows System to Bare Metal
This article applies to Barracuda Backup Server firmware version 5.3 and higher.
"Bare metal" recovery allows you to restore a complete Microsoft® Windows system, including data, settings, applications, and operating system, onto a new computer on which nothing is installed.

Caution
The bare metal recovery process overwrites all existing data on the system to which you are restoring the data; therefore, bare metal recovery is recommended only when no other recovery option is available. This process rebuilds the target computer or server to its original system set up.
A bare metal restore is intended to be used for restoring to similar hardware.
All system volumes and system state must be backed up in order for bare metal recovery to be possible.
Requirements
You must have an existing backup of a system that uses one of the following Microsoft operating systems:
• Microsoft Windows Server 2012
• Microsoft Windows Server 2008 R2
• Windows 2008 Server
• Windows Small Business Server (SBS) 2011
- Windows SBS 2008
- Windows Vista
- Windows 8
- Windows 7
Additionally, you must have all of the following:
- Barracuda Backup Server firmware version 5.3 or higher;
- Barracuda Backup Bare Metal Live CD 5.3 or higher (available from the SYSTEM > Software Downloads page); and
• Administrator rights to the Microsoft Exchange Server.
Bare Metal Live CD
Use the following steps to download the Bare Metal Live CD boot media; select the appropriate bit version for the OS you are planning to restore. For example, if you are restoring a 64-bit operating system, you must use the 64-bit version.
-
Log in to Barracuda Backup and go to SYSTEM > Software Downloads. Download the Bare Metal Live ISO file to your local system.
-
Burn the Bare Metal Live ISO file to a CD.
- Boot the system you want to restore using the Bare Metal Live CD you created in step 2.
- Read the onscreen warning:
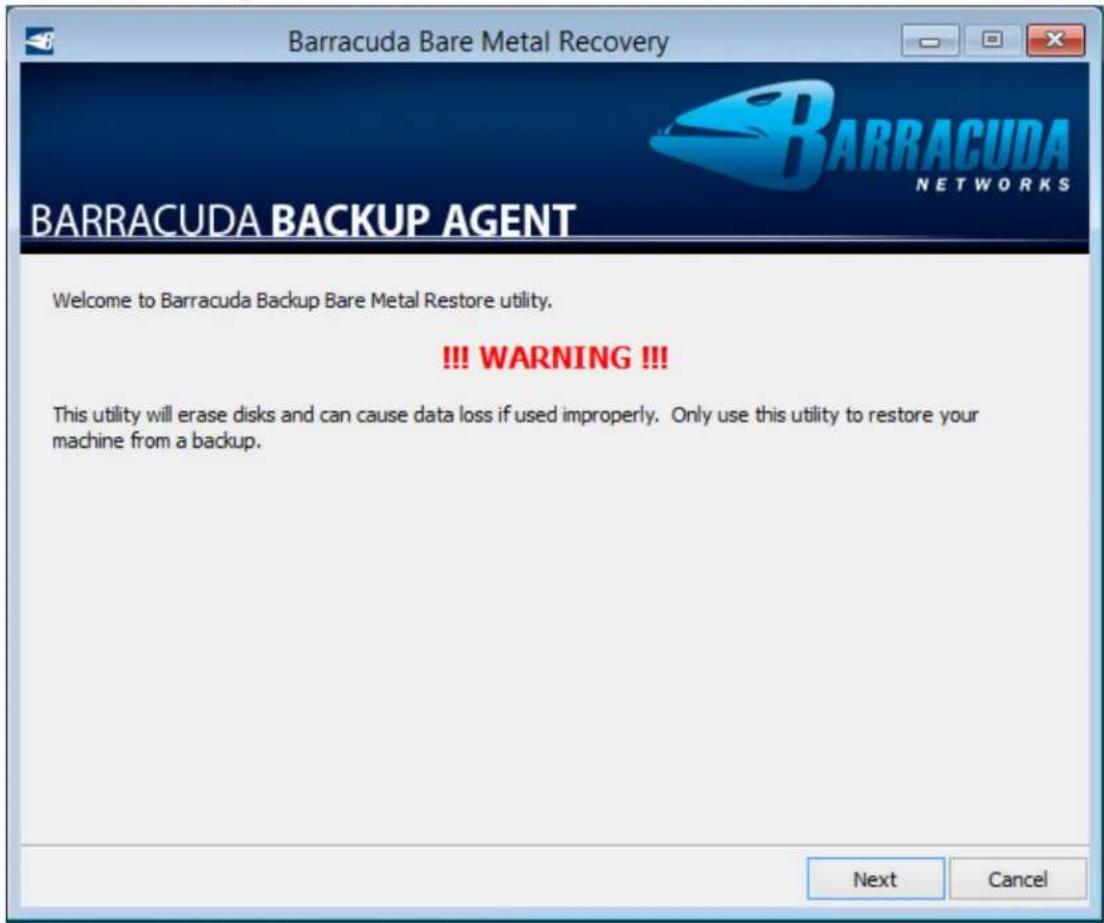
- continue with the Bare Metal restore, click To Next.
-
Set up the Network configuration:
-
If you have DHCP enabled on your network, an assigned IP address displays in the IP Address field.
- If DHCP is not enabled, uncheck DHCP, and enter the IP Address, Subnet Mask, and Default Gateway:
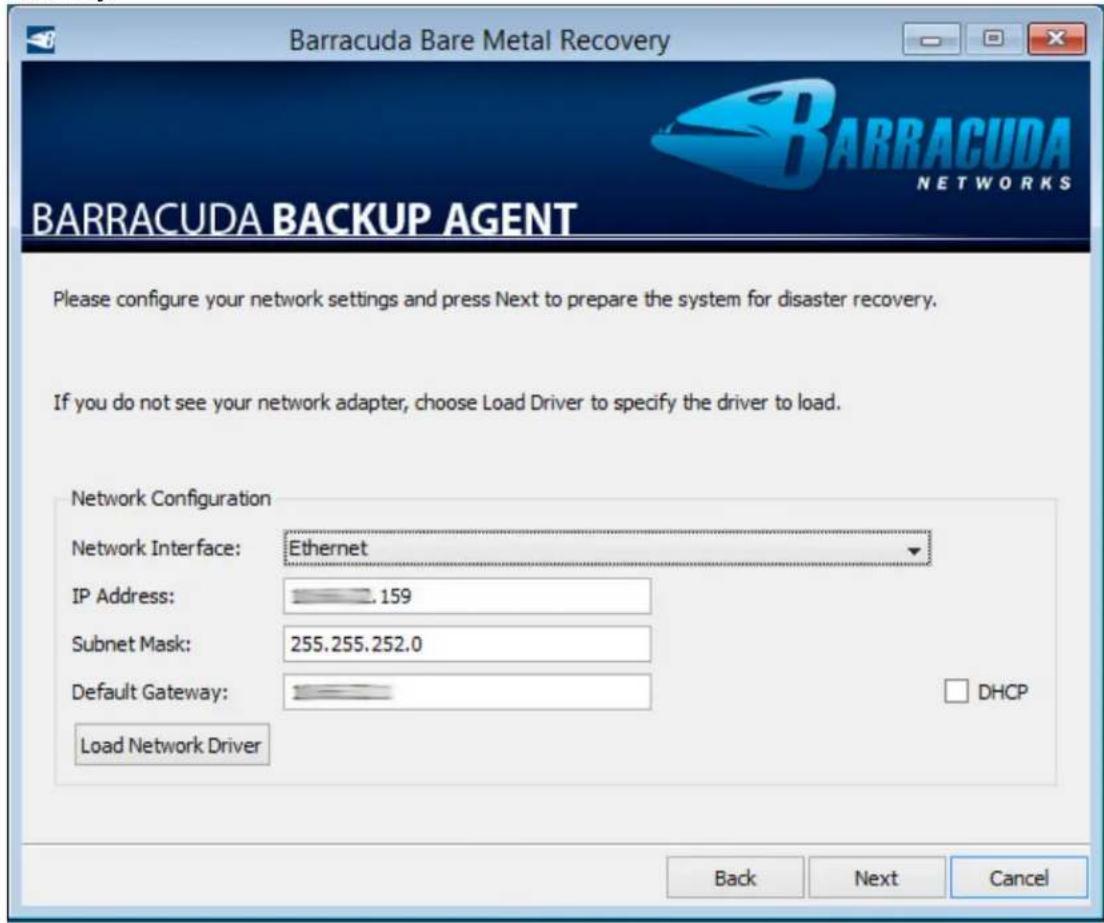
- Click . Next You are prompted to log in to Barracuda Backup:
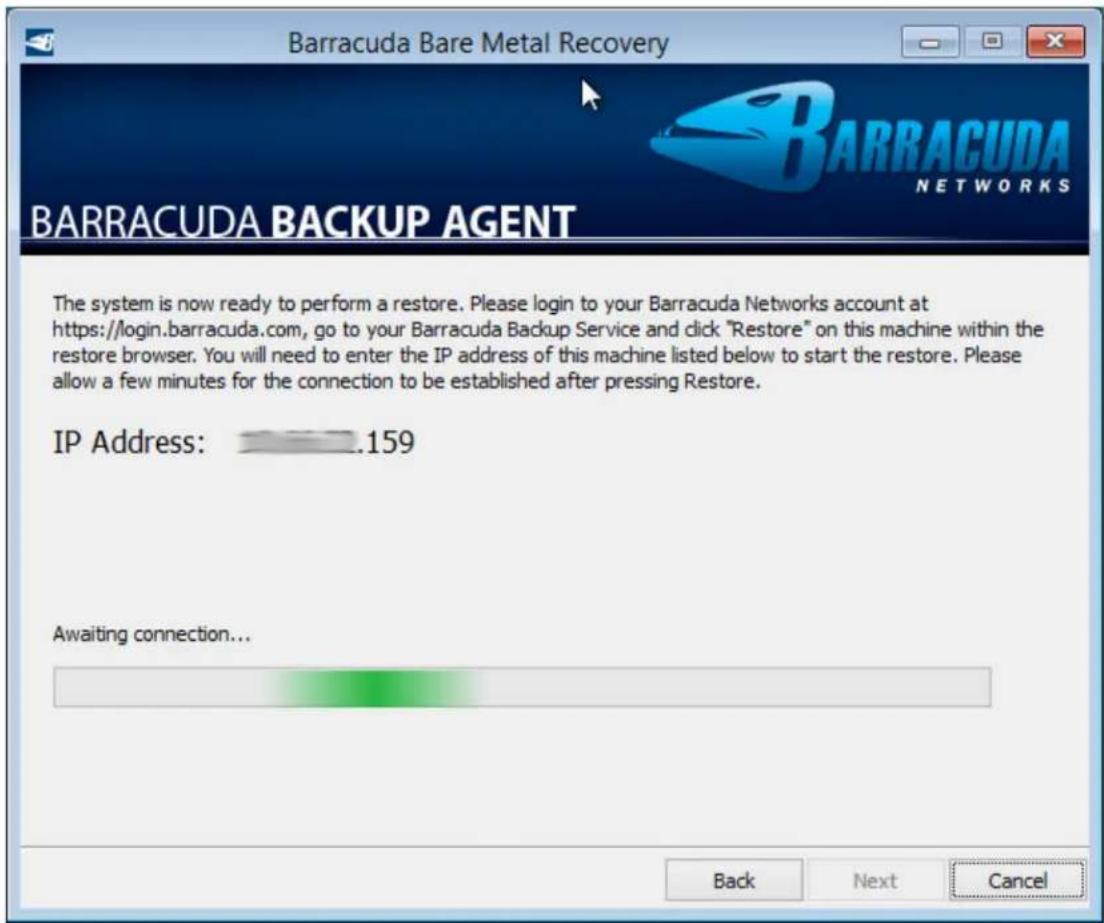
- In the Barracuda Backup web interface, go to the RESTORE >Restore Browser page and select the system you want to recover.
- Click View all revisions up to:
to view the selected system's revisions available for restore:
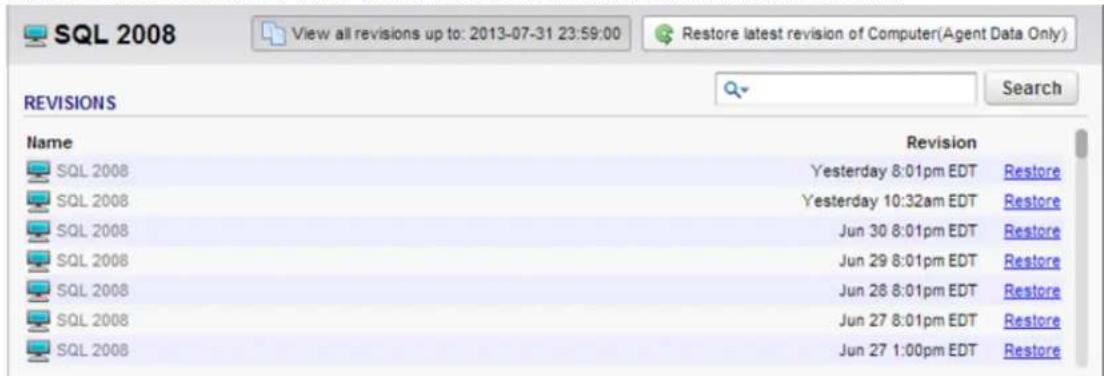
-
In the Revisions list, click Restore for the revision you want to recover.
-
In the Restore dialog box, click the Restore tab, and enter the IP address of the system you are recovering: in the Restore to section
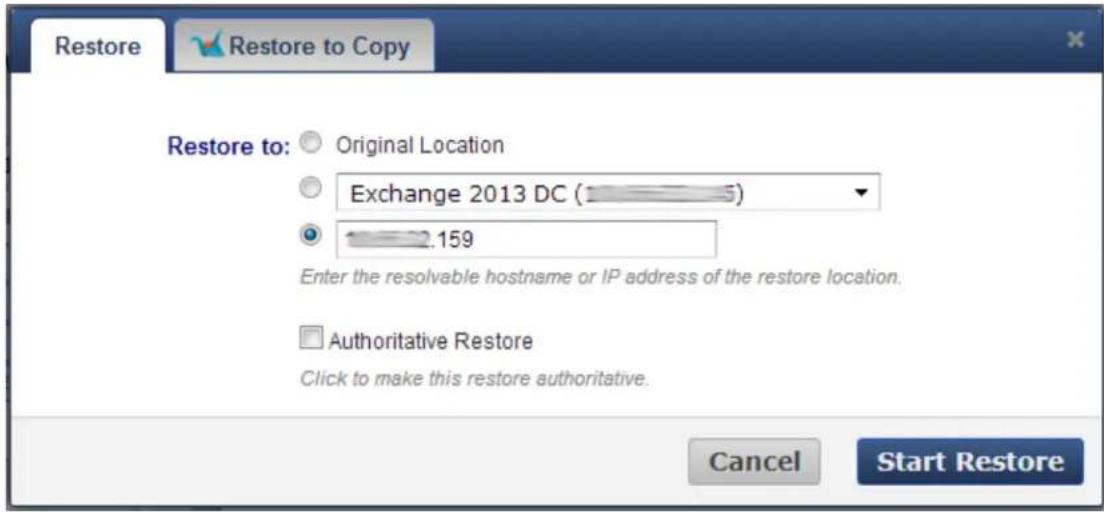
- Click .Start Restore
- For the system booted using the Bare Metal Live CD, a list of volumes that are recoverable displays:
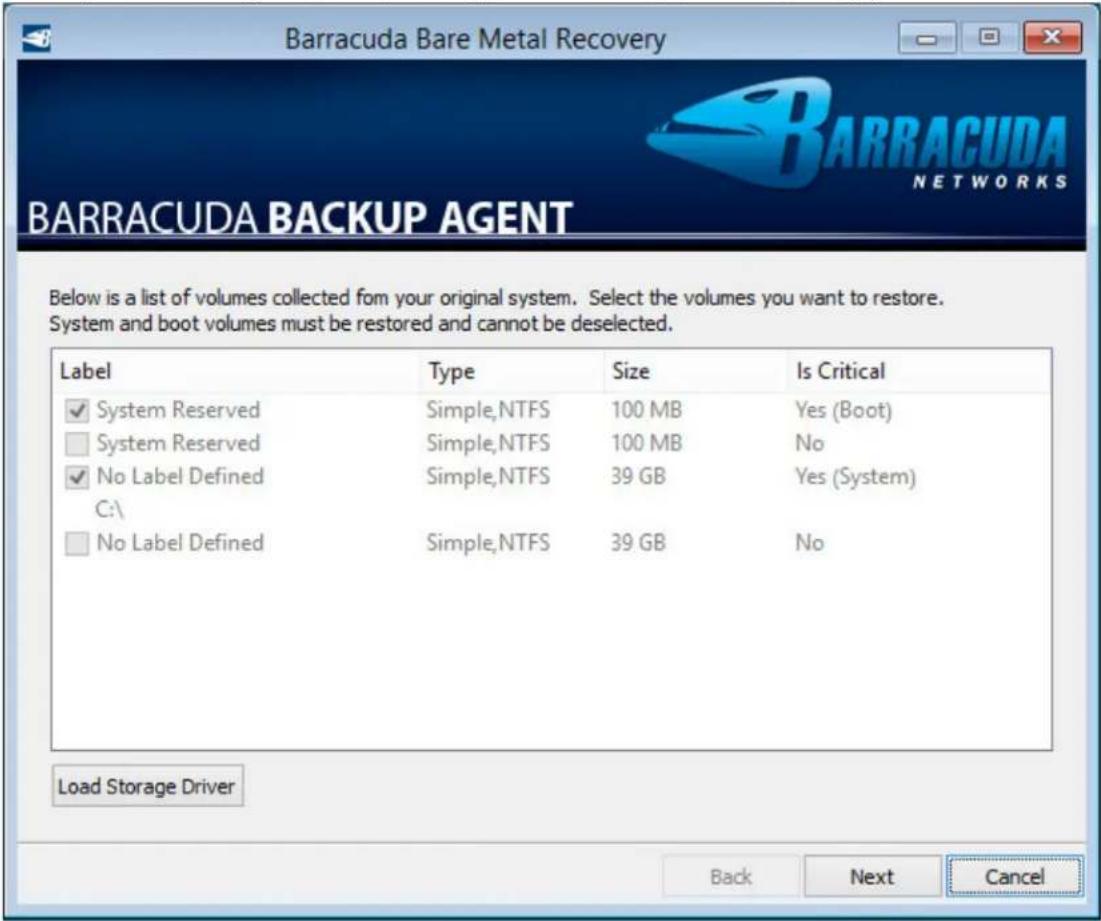
- Select the volumes you want to recover.

Boot and System Volumes
You cannot deselect boot and system volumes as these are required for the Bare Metal restore.
15. Click to begin the restore:Next
![Barracuda Bare Metal Recovery BARRACUDA NETWORKS BARRACUDA BACKUP AGENT Your system is now being restored. ✓ Restoring Volume Layout Info Restoring System File Systems C:\Users\Administrator.SESTVMW\...\Content.IE5\R276XBUM\main.min[1].js Finalizing Recovery Throughput: 15 files/sec (7.49 MB/sec) Total: 1,195 files (527 MB) Back Next Cancel](/content/2026/06/1260286/images/27a0cca6b8f57b44d24b6fdd1b3cb3bfad5b990ba52833d9cdf0e01e2d1abcf1.jpg)
- When the restore is complete, click OK in the Confirmation dialog box:
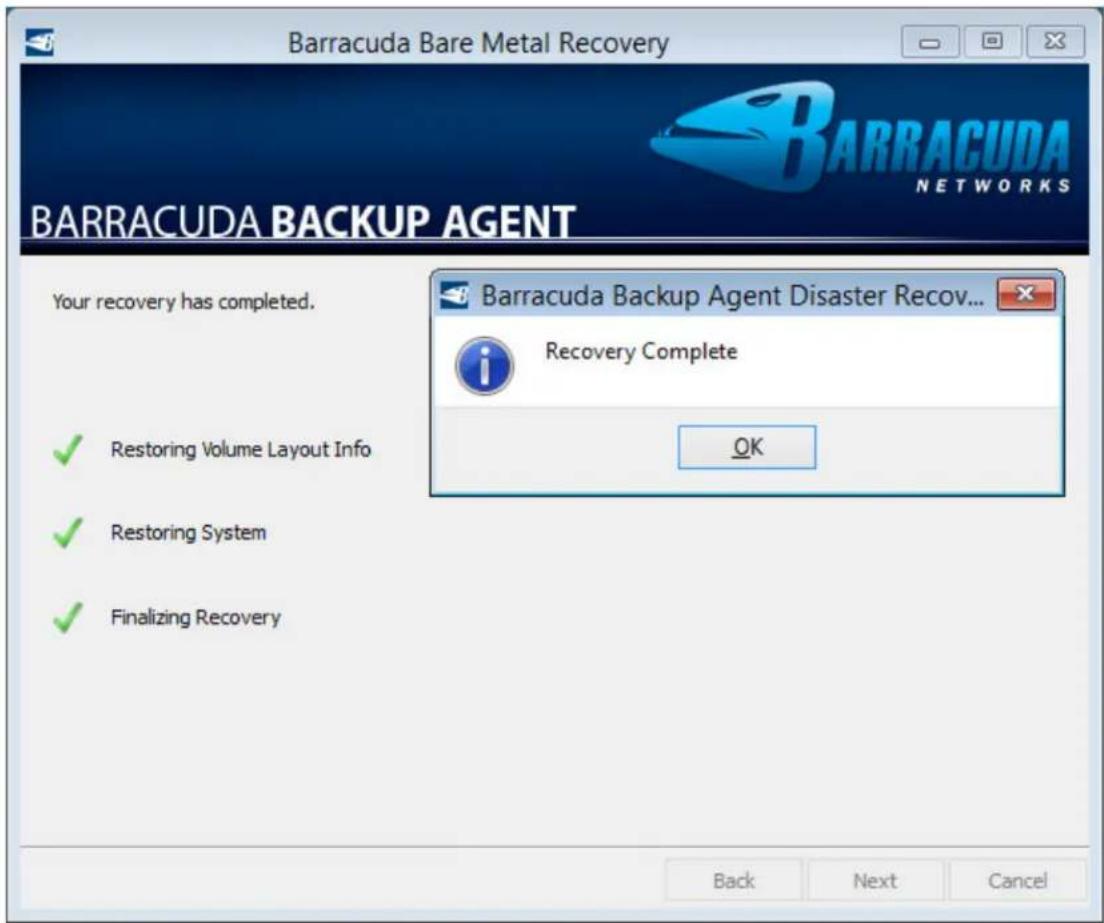
- Remove the bare Metal Live CD, and reboot the system.
SQL and Exchange Server
If SQL and/or Exchange are installed on the system, you are required to restore those items separately once the bare metal restore is complete.
How to Restore a Linux Server Using Bare Metal Restore
This article refers to firmware version 5.3 and higher, and the Barracuda Linux Backup Agent 5.3 and higher.
In this article:
- Step 1. Install the Barracuda Linux Backup Agent
- Step 2. Partition, Format, and Create the File System
- Step 3. Restore the File System Using the Barracuda Linux Backup Agent
- Step 4. Mount the Linux System Directories and Install a Bootloader
Linux distributions (distros) that support Live CDs can only be restored to bare metal; for example, Red Hat, Fedora, Ubuntu, Gentoo, and SUSE Linux.
Use the following steps to restore an entire file system backed up using the Barracuda Linux Backup Agent.

Example
The following steps are based on Ubuntu Desktop 12.04 x64.
Step 1. Install the Barracuda Linux Backup Agent
- Boot into a live CD environment that supports your hardware, for example, Ubuntu 12.04 x64.
- Configure an IP address, and verify network connectivity to the Barracuda Backup Server containing the data source files you want to restore.
- In the Barracuda Backup web interface, go to the page.SYSTEM > Software Downloads
-
Download and unzip the Barracuda Linux Backup Agent to your live booted environment.
-
Unpack the tar file:
tar -xvf barracuda_backup_agent-x.x.x.tgz
For example:
root@ubuntu:/home/ubuntu/Downloads# ls
barracuda_backup_agent-5.3.01.tgz
root@ubuntu:/home/ubuntu/Downloads# tar -xvf barracuda_backup_agent-5.3.01.tgz
config/bbfilter.ini
config/bbconfig.ini
config/bbdetect.ini
config/bbinstall.ini
resource/bbxxxvam.msg
resource/bbxxxins.msg
resource/bbxxxerr.msg
resource/bbxxxods.msg
resource/bbxxxsup.msg
resource/bbxxxdtb.msg
license_eng.htm
install
- On the live booted environment, and change the directory to the Barracuda Linux Backup Agent directory, for example:
/Desktop/agent-5.3-lin$
- Install the agent:
./install
For example:
root@ubuntu:/home/ubuntu/Downloads# ls
barracuda_backup_agent-5.3.01.tgz install lin
config license_eng.htm resource
root@ubuntu:/home/ubuntu/Downloads# ./install
Please choose an installation path, or press enter for default.
[/usr/local/barracuda/bbs]:
Installing to
Stopping process bblingin
Stopping process bblinagt
Removing service
Stopping process bblinsdr
Copying file /usr/local/barracuda/bbs/lin/x86_64/bblincin
Copying file bblincin
Step 2. Partition, Format, and Create the File System

The destination file system(s) must be empty. If you have multiple mount points, you must mount them such that the backup paths match during restore. For example, if you have a separate root and home partition, mount the root partition at /mnt/system and the home partition at /mnt/system/home. Configure the restore to target the path /mnt/system/.
- Open a terminal window, and enter the following command to create the partition:
- Press Return. Enter N to create a new partition, and press Return.
- Enter the primary partition, and press .P Return
- Enter the partition number, for example, enter 1 for partition 1. Press Return.
- Press Enter to select the default first sector, and then press Enter again to select teh default last sector.
- Enter, and press to write the changes:W Enter
fdisk /dev/sda
root@ubuntu:~# fdisk /dev/sda
Device contains neither a valid DOS partition table, nor Sun, SGI or OSF disklabel
Building a new DOS disklabel with disk identifier 0x19ccd49c.
Changes will remain in memory only, until you decide to write them.
After that, of course, the previous content won't be recoverable.

Warning: invalid flag 0x0000 of partition table 4 will be corrected by w(rite)

Command (m for help): n
Partition type:
    p primary (0 primary, 0 extended, 4 free)
    e extended

Select (default p): p
Partition number (1-4, default 1):
Using default value 1
First sector (2048-83886079, default 2048):
Using default value 2048
Last sector, +sectors or +size{K,M,G} (2048-83886079, default 83886079):
Using default value 83886079

Command (m for help): w
The partition table has been altered!

Calling ioctl() to re-read partition table.
Syncing disks.
root@ubuntu:~#
- Enter and press to view the partitions:fdisk -1 Return
root@ubuntu:~# fdisk -l
Disk /dev/sda: 42.9 GB, 42949672960 bytes
171 heads, 5 sectors/track, 98112 cylinders, total 83886080 sectors
Units = sectors of 1 * 512 = 512 bytes
Sector size (logical/physical): 512 bytes / 512 bytes
I/O size (minimum/optimal): 512 bytes / 512 bytes
Disk identifier: 0x19ccd49c
Device Boot Start End Blocks Id System
/dev/sda1 2048 83886079 41942016 83 Linux
- Enter mkfs.ext4 /dev/sda1 and press Return to create the file system:
root@ubuntu:~# mkfs.ext4 /dev/sda1
mke2fs 1.42 (29-Nov-2011)
Filesystem label=
OS type: Linux
Block size=4096 (log=2)
Fragment size=4096 (log=2)
Stride=0 blocks, Stripe width=0 blocks
2621440 inodes, 10485504 blocks
524275 blocks (5.00%) reserved for the super user
First data block=0
Maximum filesystem blocks=4294967296
320 block groups
32768 blocks per group, 32768 fragments per group
8192 inodes per group
Superblock backups stored on blocks:
    32768, 98304, 163840, 229376, 294912, 819200, 884736, 1605632, 2654208,
    4096000, 7962624

Allocating group tables: done
Writing inode tables: done
Creating journal (32768 blocks): done
Writing superblocks and filesystem accounting information: done

root@ubuntu:~#
- Enter the mount point, and press . For example:Return
root@ubuntu:~# mkdir /mnt/data
root@ubuntu:~# mount /dev/sda1 /mnt/data
root@ubuntu:~#
Step 3. Restore the File System Using the Barracuda Linux Backup Agent
- Log in to the Barracuda Backup Server, and go to page.RESTORE >Restore Browser
- Select and expand the Linux Server you wish to restore; select .File Systems
- In the right pane, click the top check box to select all contents:
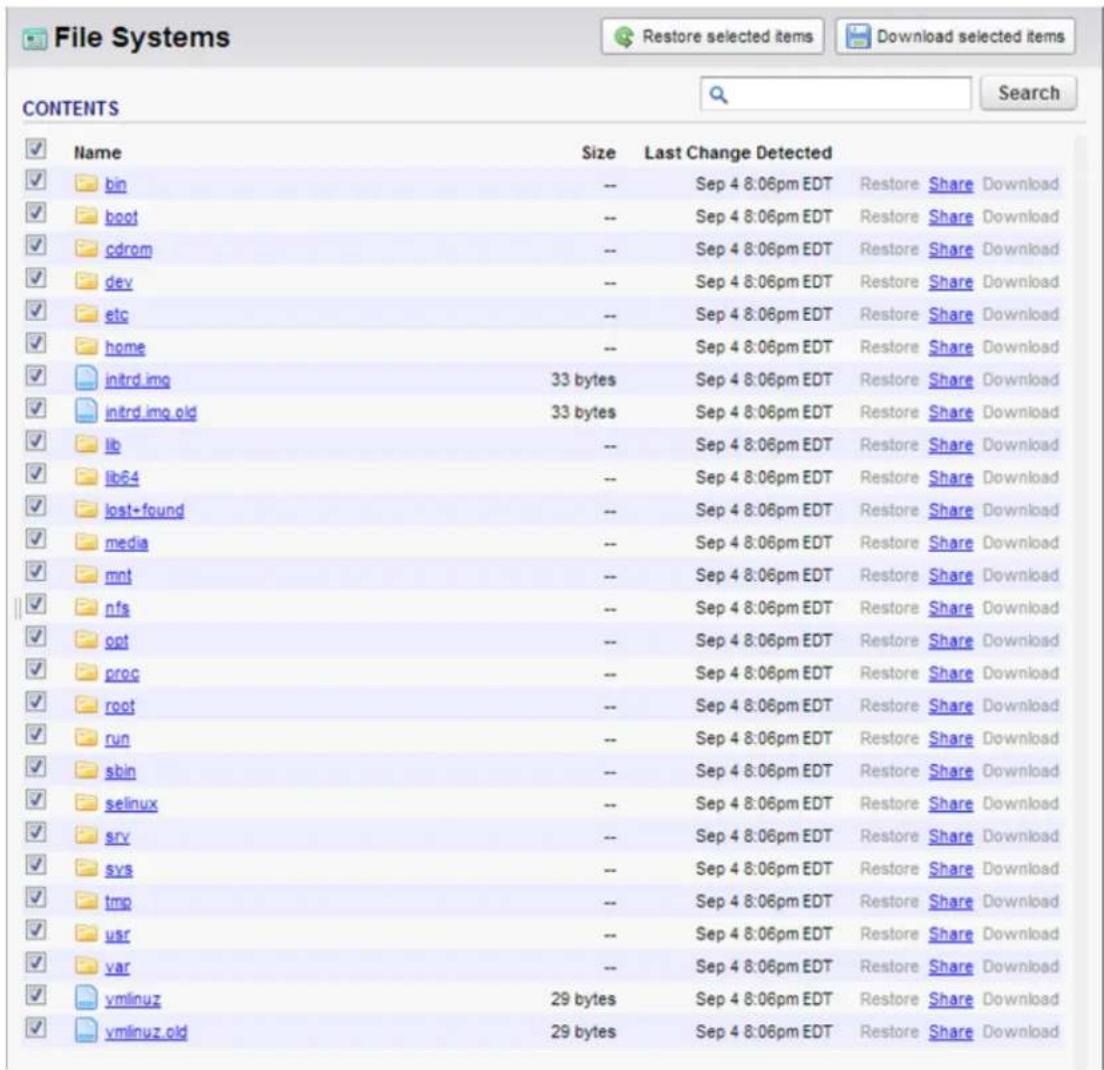
- Click at the top of the screen.Restore selected items
- In the Restore dialog, enter the target IP address of the live booted machine, and enter the mount point to which to restore, for example, :/mnt/data/
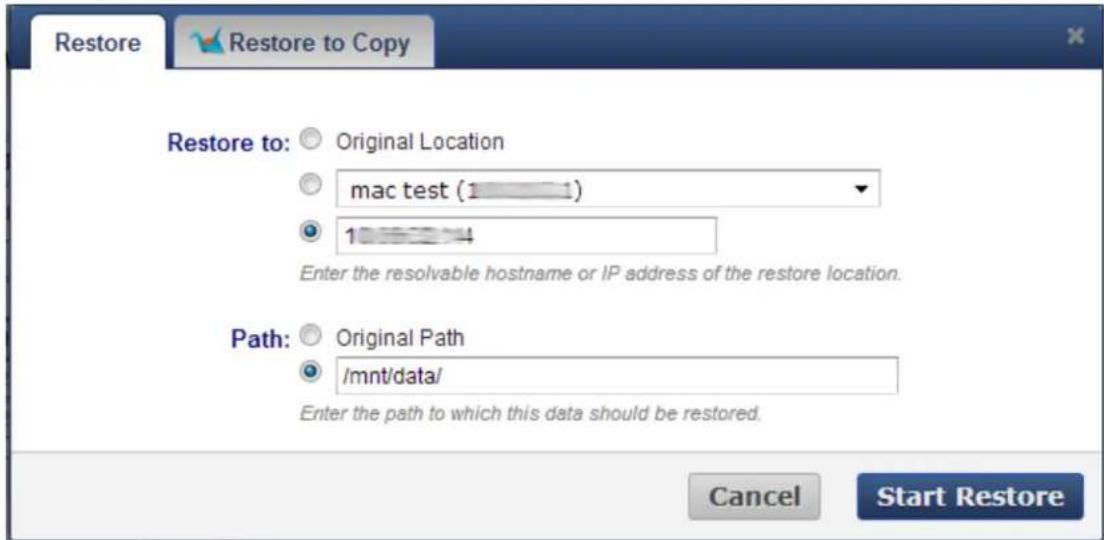
- Click . To view the restore progress, go to the page:Start Restore Reports >Restore

Step 4. Mount the Linux System Directories and Install a Bootloader
Complete the following steps when the restore is 100% complete and successful.
- Open a terminal window, and enter the following commands to mount the Linux system directories and install a bootloader using your mount points:
ubuntu@ubuntu:~$ sudo -i
root@ubuntu:~# mount -o bind /proc /mnt/data/proc/
root@ubuntu:~# mount -o bind /dev /mnt/data/dev/
root@ubuntu:~# mount -o bind /sys /mnt/data/sys/
root@ubuntu:~# chroot /mnt/data
root@ubuntu:/# grub-install /dev/sda
Installation finished. No error reported.
root@ubuntu:/#
- Enter and press to update the grub bootloader:update-grub2 Return
root@ubuntu:/# update-grub2
Generating grub.cfg ...
Found linux image: /boot/vmlinuz-3.2.0-48-generic
Found initrd image: /boot/initrd.img-3.2.0-48-generic
Found linux image: /boot/vmlinuz-3.2.0-38-generic
Found initrd image: /boot/initrd.img-3.2.0-38-generic
Found linux image: /boot/vmlinuz-3.2.0-36-generic
Found initrd image: /boot/initrd.img-3.2.0-36-generic
Found linux image: /boot/vmlinuz-3.2.0-35-generic
Found initrd image: /boot/initrd.img-3.2.0-35-generic
Found linux image: /boot/vmlinuz-3.2.0-23-generic
Found initrd image: /boot/initrd.img-3.2.0-23-generic
Found memtest86+ image: /boot/memtest86+.bin done
root@ubuntu:/#
- Reboot the system.
How to Restore Data with FTPES
This article refers to Barracuda Backup firmware 4.2 and earlier .only
You can use FTPES to restore data if your local Barracuda Backup Server is not currently accessible, or if you are not on the same network as your local Barracuda Backup Server. This is not for data stored by the Barracuda Backup Agent. This option is used:
• For file share data only
• To restore data directly from Barracuda Cloud Storage
Programs such as FileZilla for Windows and Linux, and Transmit for Mac OS X, work well.
To use FTPES to restore data,
- Download, install, and launch an FTPES client.
- Connect to the server/host .restore.barracuda.com
- Your account must have administrator rights to restore files. The username and password are the same as those used to access the Barracuda Backup web interface.
- Select the protocol and standard port .FTPES 21
- Upon connection, a listing of directories displays. Follow the directory structure to the date when you would like to restore your data. Past those directories, the backed up servers display. After servers, you are presented with each share that you backed up on that server. Locate the data you want to restore.
- Drag the data to restore from the connection to a location on your system. All of the data is retrieved from the Barracuda Cloud Storage.
Legacy Firmware Recovery and Restoration Options
In this Section
The following articles refer to recovery and restore options available on firmware version 4.3 or earlier only.
• How to Use Windows Explorer and WebDAV
• How to Restore Data with an FTP Client
- Barracuda Restore for Windows
How to Use Windows Explorer and WebDAV
This article refers to Barracuda Backup firmware 4.2 and earlier .only
The Barracuda Backup Server supports the web-based Distributed Authoring and Versioning (WebDAV) protocol, which defines how users can access and manage documents on a remote server. This option is used:
• For file share data only
- Only if you are on the same network as the local Barracuda Backup Server
Most Internet browsers have a WebDAV client. In the browser address bar, type http://Barracuda Backup Server IP Address:8080 to connect directly to the local Barracuda Backup Server.
Windows users can restore data from the local Barracuda Backup Server using the built-in Windows Explorer as follows:
- On a Windows system, go to .My Network Places
- AddeNetwork Place to start the wizard.
- Select Choose Another Network Location, and then click Next.
- Enter http://Barracuda Backup Server IP Address:8080 and then click Next.
- Your account must have administrator rights to restore files. The username and password are the same as those used to access the Barracuda Backup web interface.
- Follow the instructions to finish the connection.
- Once you are connected you are presented with a list of directories on the Barracuda Backup Server. The directories are labeled by year and include subdirectories for each month, and within each month there is a directory for each day. Each daily directory contains folders for the servers and directory shares that are deployed on the Barracuda Backup Server. The data files that can be restored are located within each server's directory share.
- You can select and restore files by right clicking on them, or you can drag and drop files from the Barracuda Backup Server to a directory on your network or local system.
How to Restore Data with an FTP Client
This article refers to Barracuda Backup firmware 4.2 and earlier .only
An FTP client can be used to restore data securely and quickly. This is not for data stored by the Barracuda Backup Agent.
Related Articles
• How to Restore Data with FTPES
An FTP client is used for the following:
- Local restores of file share data only
- Only if you are on the same network as the local Barracuda Backup Server
Programs such as FileZilla for Windows and Linux, and Transmit for Mac OS X, work well.
To use FTP to restore data,
- Download, install, and launch an FTP client.
- Your account must have administrator rights to restore files. The username and password are the same as those used to access the Barracuda Backup web interface.
- Enter the IP address of the local Barracuda Backup Server. Use FTP protocol, and standard port 21.
- Upon connection, a listing of directories displays. Past those directories, you are shown each server that is backed up by the Barracuda Backup Server. After servers, you are presented with each share that you backed up on that server. Now you can find the data you want to restore.
- Drag the data to restore from the Barracuda Backup Server connection to a location on your system. The Barracuda Backup Server first attempts to retrieve its data locally. If some of your data is no longer local, it automatically fetches it from an offsite storage location.
Barracuda Restore for Windows
In this Section

Use Barracuda Restore for Windows for Barracuda Backup firmware release 4.3 and earlier only.
• How to Set Up Barracuda Restore for Windows
• How to Customize Barracuda Restore for Windows
• How to Run Barracuda Restore for Windows
• How to Restore Data Using Barracuda Restore for Windows
How to Set Up Barracuda Restore for Windows
This article refers to Barracuda Backup firmware version 4.3 and earlier .only
In this article:
• Install Barracuda Restore for Windows
- Set Up Restore Connections
- Log In
• View New Features List
- Modify Backup Server Location
Install Barracuda Restore for Windows
To install Barracuda Restore for Windows, log into the Barracuda Backup web interface, go to SUPPORT > Software Downloads, and click the Download link for the Barracuda Restore Tool. Save and run the installer to add Barracuda Restore for Windows ^® to your local system; note that you must have administrator rights on the system on which you are installing Barracuda Restore for Windows.
Set Up Restore Connections
To set up the restore connection, from the Start menu on your local system, go to Barracuda > Barracuda Restore; the Login window displays:
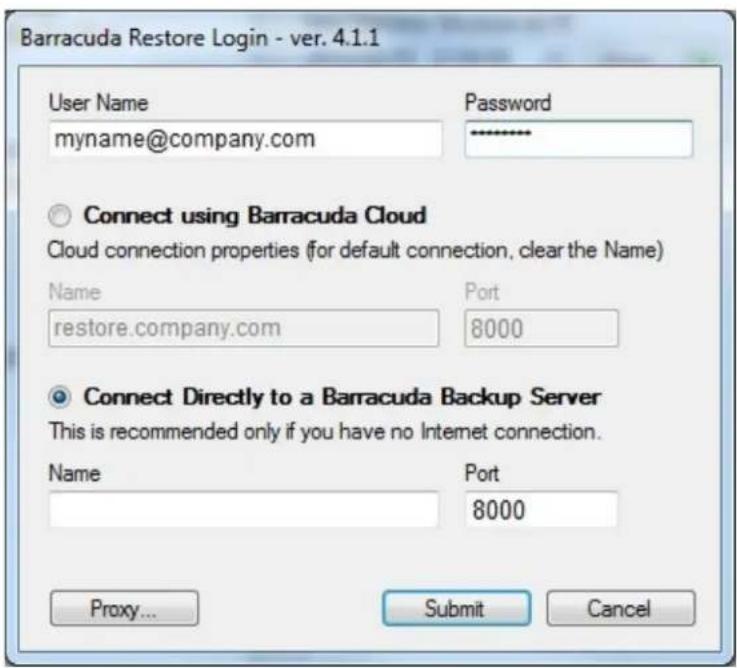
To set up the restore connection,
- In the User Name field, enter your Barracuda Backup user name, and enter the associated password in the Password field.
-
Select the manner in which to connect:
-
Connect using Barracuda Cloud-Connect to your backed up data stored on the Cloud
-
Connect Directly to a Barracuda Backup Server-Restore from a local or offsite Barracuda Backup Server; for improved restoration performance, it is recommended that you restore from a local Barracuda Backup Server.
-
Enter the hostname or IP address, and associated port number.
-
If you use a proxy to access the Internet, click Proxy to expand the proxy details section; if you are not using a proxy server, skip to Step .6
-
In the Proxy section, select from the following options:
-
Use Internet Explorer settings - Select to access the network address of your proxy server using the Explorer Proxy Settings.
-
Use custom settings- Select and enter the proxy server hostname or IP address, and associated port number.
-
Verify your settings, and click .Submit
- Barracuda Restore for Windows launches.
Log In
Each time you launch Barracuda Restore for Windows or perform an action that requires authentication, you are required to log into the tool. Once you are logged in, you may be required to log in again if you change your connection location.

Your user name and password should be the same for both the Barracuda Backup Server or Barracuda Cloud Control and the offsite location login; this login is identical to the one you use in the Barracuda web interface.
- Enter your username and password, and click .Submit
- Once you log into the tool, the associated data sources display:
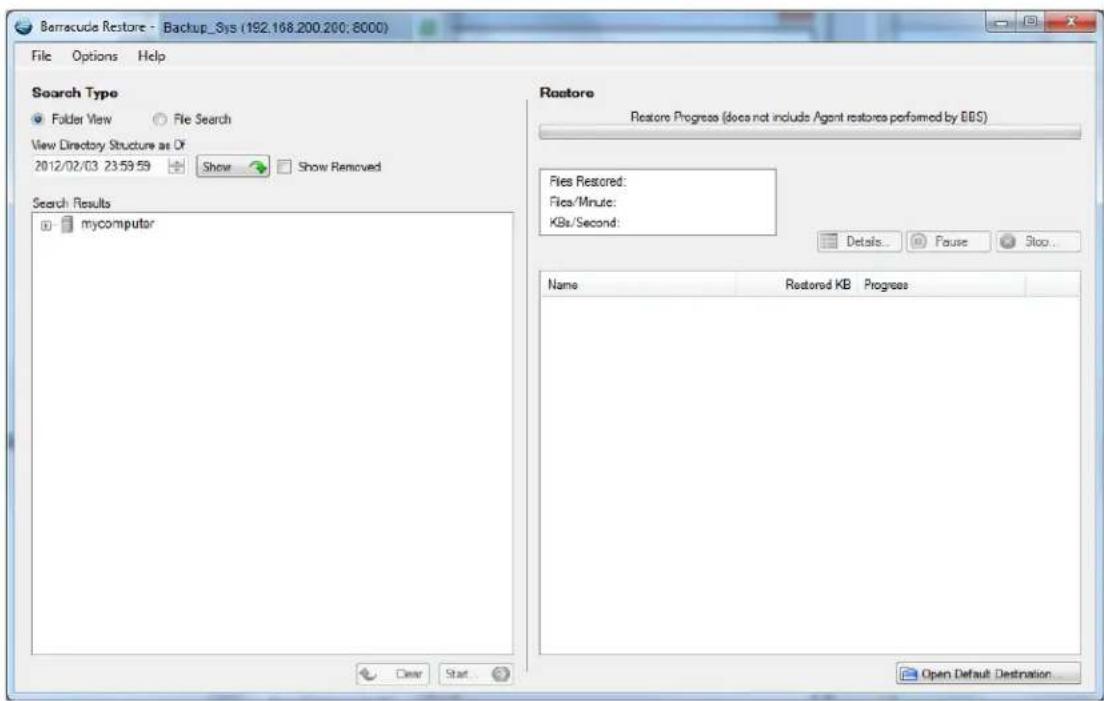
View New Features List
New features and changes in the application are listed by release in the "What's New" page available from Help > What's New:
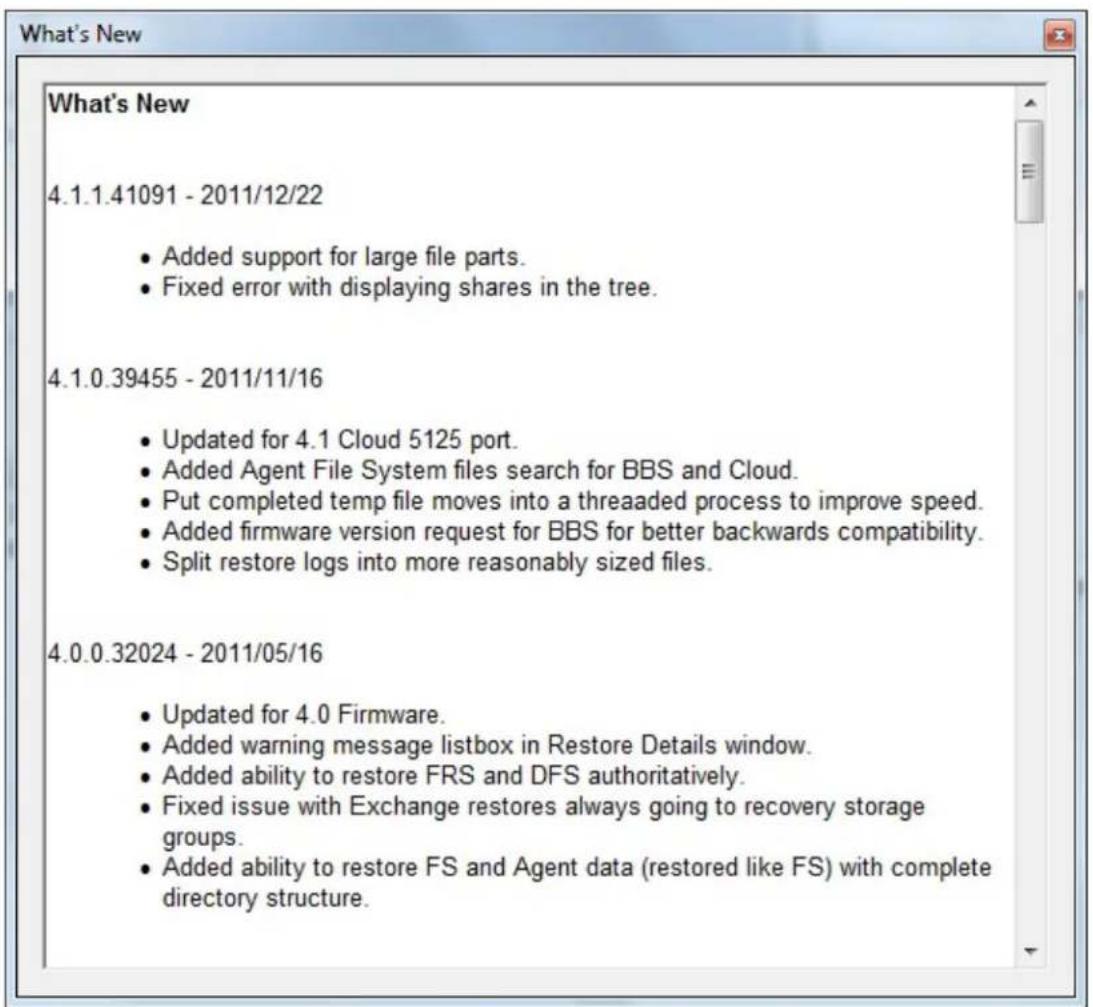
Modify Backup Server Location
In general, do not modify your backup server location unless directed to do so by Barracuda Networks Technical Support. If directed to do so, you can specify a different source location from which to restore data by going to Options > Backup Servers:
- Cloud - Click to replace the current hostname/IP address with a cloud connection name and associated port number.
- Local BBS - Click to select a Barracuda Backup Server, and automatically connect all of all associated local data sources.
- Manual - Click to replace the current hostname/IP address with a different connection name and associated port number; do not use this setting unless instructed to do so by Barracuda Networks Technical Support.
How to Customize Barracuda Restore for Windows
This article refers to Barracuda Backup firmware version 4.3 and earlier only.
Customize Your View
Use the Preferences menu to customize behavior and appearance of Barracuda Restore Tool for Windows. From the Options menu, click Preferences, and select the options you wish to customize. Once you change a setting, click Apply to apply your change and continue customizing the Barracuda Restore Tool for Windows, or click OK to apply your changes and close the dialog box. You can customize the following:
- Destination
- Data Transfer
- Colors
Destination
Use the Destination page to specify the default restore destination and to select restore options:
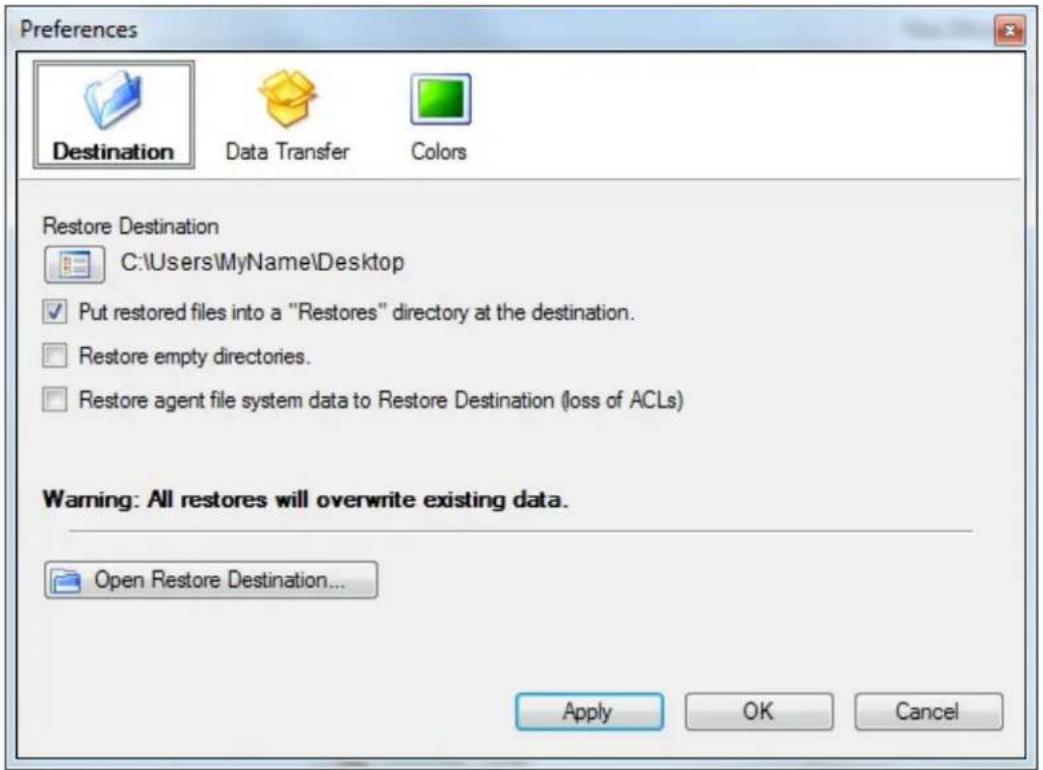
- Restore Destination - Click on the Restore Destination icon to navigate to and select (or create) the default restore location
- Put restored files into a "Restores" directory at the destination (turned on by default) - When turned on, restored files are automatically added to a folder int he default restore locationRestores
- Restore empty directories - Turn on to restore empty directories during file restoration
- Restore agent file system data to Restore Destinations (loss of ACLs)-Turn on to restore agent directories and files to the default restore location; note that the user permissions on the original folder system are not retained
- Open Restore Destination - Click to open the default restore folder on your local system
Data Transfer
Use the Data Transfer page to balance the workload during a restore between the restoration source location and your local system:
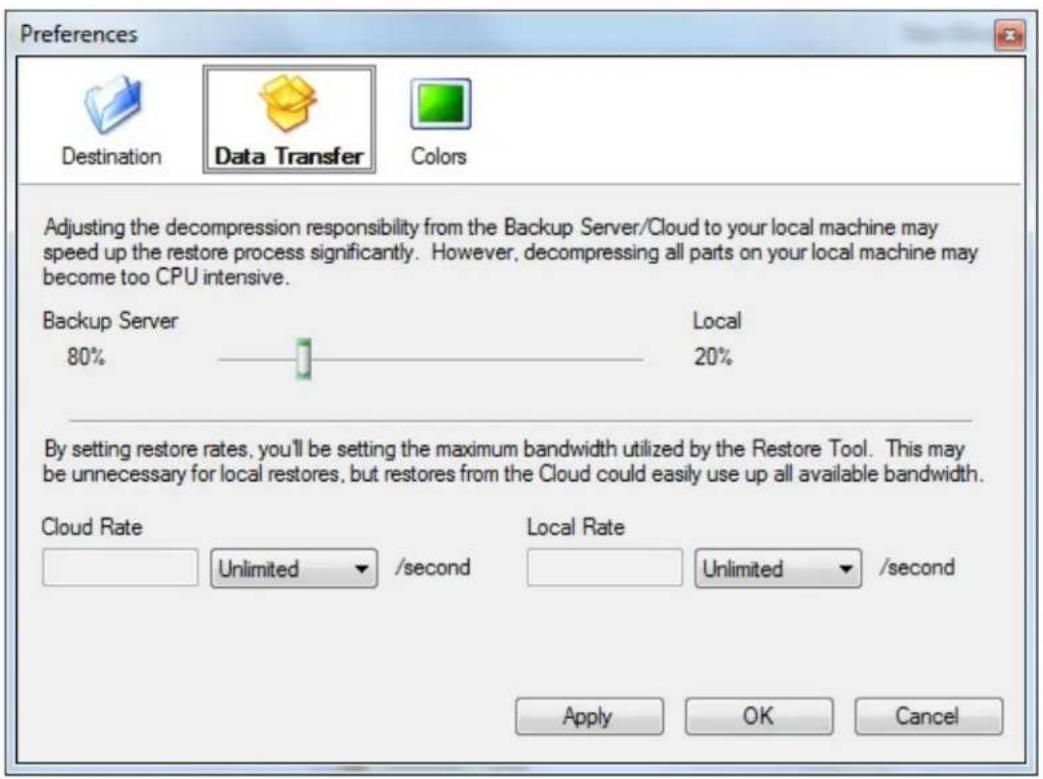
- Backup Server - Drag the slide bar to adjust the decompression load between the Barracuda Backup Server/Cloud to your local system

For improved restoration performance, you may wish to adjust the decompression from the Barracuda Backup Server/Cloud to your local system. This allows the parts being restored to come across compressed, and therefore, faster as the source does not have to perform decompression. The local system can then decompress the parts and assemble the files. However, decompressing all parts on your local machine is not recommended as this may become too CPUintensive.
- Cloud Rate - Specify the maximum bandwidth restore rate for the source; specify the rate per second as Unlimited, or in Kilobits, Kilobytes, Megabits, or Megabytes
- Local Rate - Specify the maximum bandwidth restore rate for the local system; specify the rate per second as Unlimited, or in Kilobits, Kilobytes, Megabits, or Megabytes
Colors
In the Colors page you specify whether to use gradient colors to personalize the application in place of the default Windows system colors; by default gradient color is turned off:
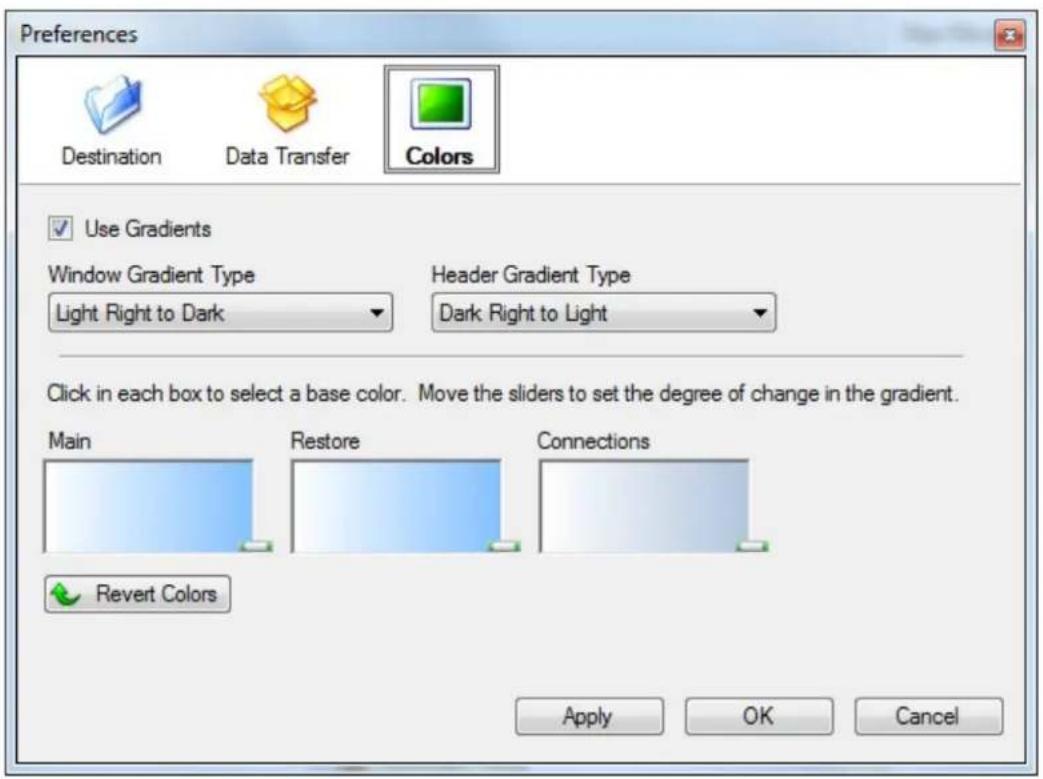
- Use Gradients - Turn on to customize gradient display settings; note that adding gradients to the application settings does not affect restoration speed.
- Type display-When Use Gradients is turned on, the application detects whether the selected luminosity works best with white or black text, and adjusts the label text color accordingly. If your color selection is "too middle of the road", the application adjusts to the closest acceptable luminosity. Depending on whether you have selected a light or dark color, the gradient fades from your selection to white or black respectively, preventing a gradient that interferes with label text.
■ Revert Colors - When Use Gradients is turned on, you can click in the Main, Restore, or Connections box to select a new base color; to restore the base color to the original value, click Revert Colors

If you customize and save your gradients, and then turn off gradients, your settings are not overwritten; however, if you click Revert Colors and then click Apply, your settings are lost.
How to Run Barracuda Restore for Windows
This article refers to Barracuda Backup firmware version 4.3 and earlier only.
The Barracuda Restore tool is a Windows-based client that allows you to restore data from your local Barracuda Backup Server, a remote Barracuda Backup Server, or from . Barracuda Restore for Windows:Barracuda Cloud Control
• Is recommended if the Internet connection is unavailable and you have to restore data from local Barracuda Backup Server
• Is the only method that can do offline restores
- Does not restore message-level emails
- Can restore data that was backed up by the Barracuda Backup Agent to an alternate location
- Provides option to include or exclude file attributes (metadata) permissions, creation time, etc.
To run Barracuda Restore for Windows:
- Download and install the Barracuda Restore Tool from the page.SUPPORT > Software Downloads
- Go to Start > All Programs > Barracuda > Barracuda Restore for Windows.
- You can choose to authenticate to a Barracuda Cloud Storage, or to a remote or local Barracuda Backup Server. Your account must have administrator rights to use the Barracuda Restore tool. The username and password are the same as those used to access the Barracuda Backup web interface.
- Follow the on-screen instructions to select a source for the data to be restored and restore your data. If you restore the data back to the
original location, file attributes are retained. If the data is restored to an alternate location, the file attributes are removed.
How to Restore Data Using Barracuda Restore for Windows
This article refers to Barracuda Backup firmware version 4.3 and earlier only.
In this article:
- Select Data for Restoration
- Restore Files
- Restore Logs
Select Data for Restoration
Use Barracuda Restore for Windows to restore data from your local Barracuda Backup Server, a remote Barracuda Backup Server, or from Barracuda Cloud Storage. To restore a directory, or multiple directories or files, from the same date and time, use the Folder View option. To search for a specific file or set of files for restoration, use the option.File Search
Turn on to search for a specific file or set of files you wish to restore: File Search Display Folders
This view displays the folder tree of your backed up data as it existed at a particular point in time:
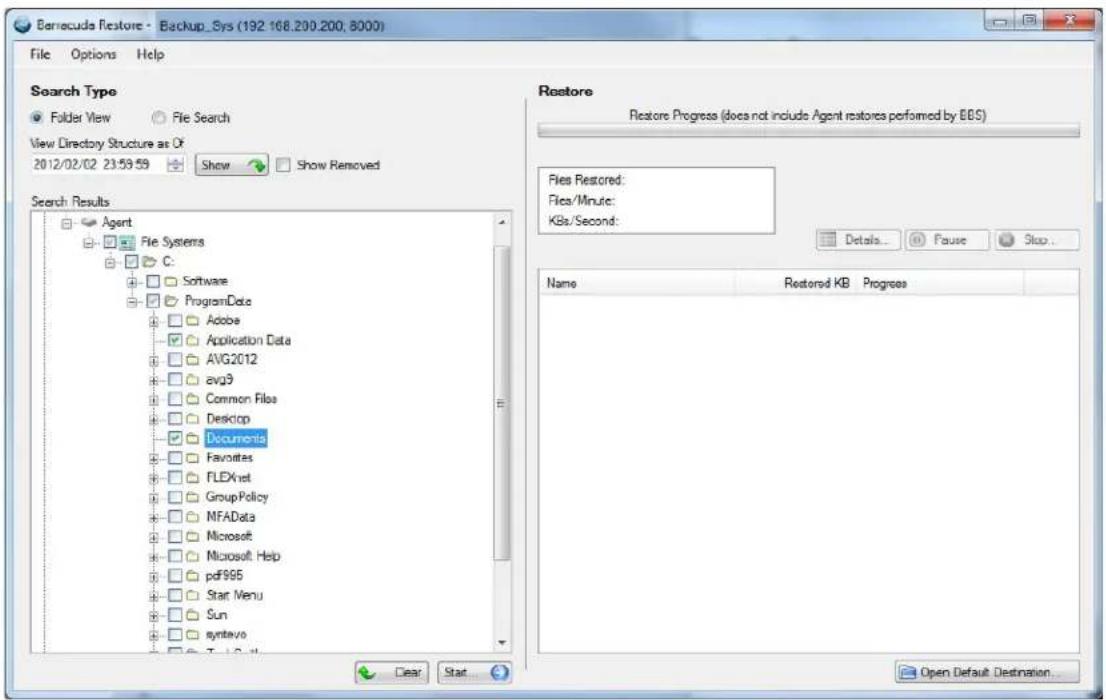
Use the following options in the :Folder View
• Show Removed - Turn on to select from previously deleted directories and files. When turned on, click Show to update the Search
Results pane with all files, including those that were previously removed, based on the specified date and time range
• View Directory Structure as Of - Select the date and time range, and click Show to update the Search Results pane based on your selections
- Clear - Click to deselect all files and folders in the Search Results pane
Select those files and folders you wish to restore; note that when you turn on a folder, all files and folders contained within that folder are selected, and when you turn off a folder, all files and folders within that folder are deselected. To clear all currently selected files and folders, click Clear. Revision Date
To view file revisions by date and time, select the date and time range in the View Directory Structure as Of filed, and click Show to update the Search Results pane:
View Directory Structure as Of
2012/01/22 23:59:58

Show

Show Removed
File Restore
You can restore a single file from the Folder View.
- Navigate to the file(s) you wish to view.
- To view revisions on a single file by date including file size, navigate to and doubleclick the desired file name to open the Revisions wind ow.
- In the Revisions window, select the desired revision, and click Restore to restore the selected file.
Note: When restoring multiple versions of a file, the entire directory structure is maintained, allowing multiple versions of the same file without overwriting each revision as long as data is not restored to its original location via the agent.
File Search
Turn on to search for a specific file or set of files you wish to restore: File Search
Search Type
Folder View
File Search
File Name (case sensitive)
RULON
Search
Advanced
Size


Date

Created
2012/02/03 09:38:12

2012/02/03 09:38:12

Search Results
Files: 2
| Name | Last Modified | Size |
| 10.2.73.234/Agent | ||
| File Systems/RULON.txt | 2012-01-31 17:00:09 | 1 KB |
| File Systems/RULON.txt | 2012-02-01 11:53:17 | 1 KB |
Note that search criteria is case sensitive.
To search for a backed up file you wish to restore, select from the following options:
- Basic Search - Enter all or a portion of the , and click File Name Search
-
Advanced Search - Enter all or a portion of the File Name, click Advanced, and then turn on the desired options before you click Search:
-
Size - Turn on to specify the file size range in Bytes, KB, MB, or GB
- Created, Last Modified, or Removed - Select the date range type, and then adjust the date range to match the selected criteria
Once the search is complete, a maximum of 500 records return; to limit the number of files returned, click Advanced and refine the size and/or date range, and then run the file search once again.
In the Search Result pane, you can view more information about a file:
- Click once on a file to view file size, number of revisions, and creation/modification date:
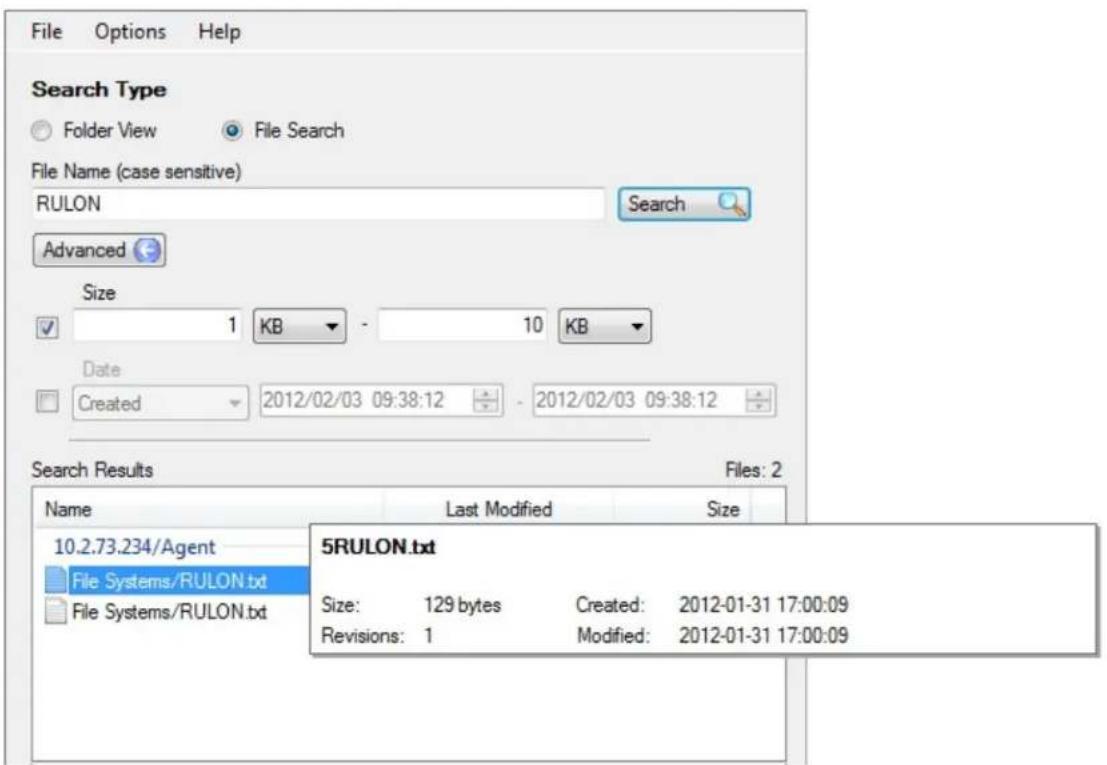
- Double-click on a file to view all revisions by date, and optionally select to restore a revision directly from the window. Restore Files
Once you select the desired files for restoration,
- Click Start to bring up the Restore Configuration dialog box where you specify Agent Directory and Agent Revision restore locations:
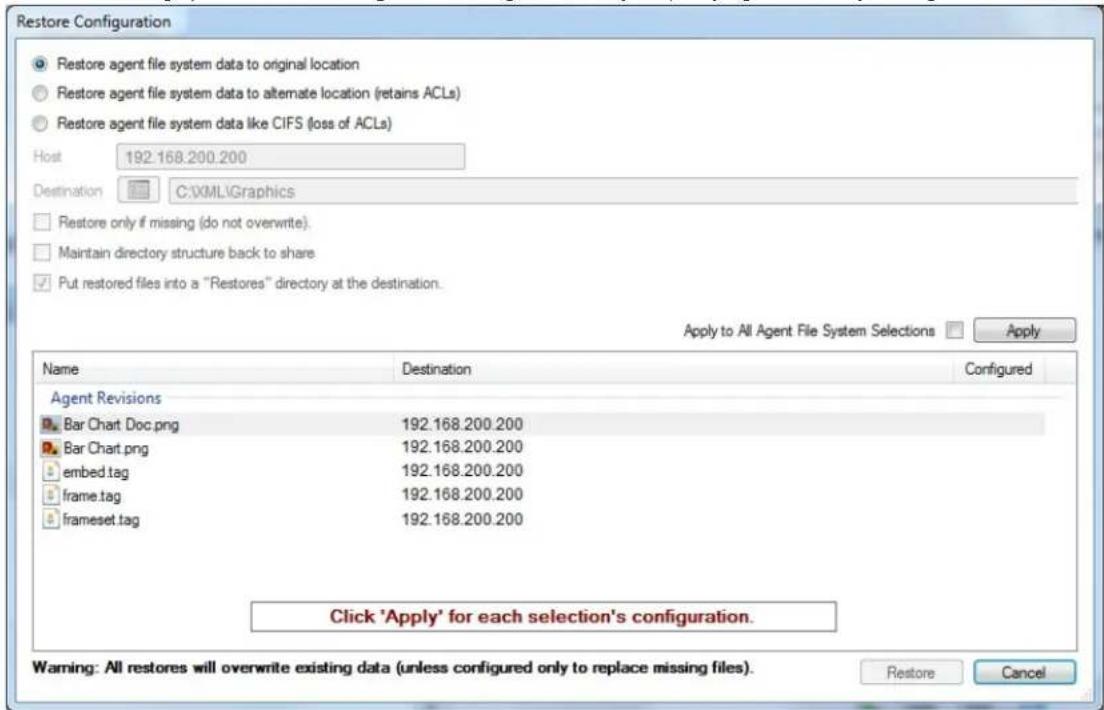
- Click on a file name, and select from the available configuration options:
- Restore agent file system data to original location - Select to restore the data to the original file system location. By default, files are restored to the Restores folder, for example, User Name > My Documents > Restores; to open the default restore
folder, in the main window, click .Barracuda Restore Open Default Destination
- Restore agent file system data to alternate location (retain ACLs) - Select to specify an alternate location to which to restore the data; note that the user permissions on files and folders are retained.
- Restore agent file system data like CIFS (loss of ACLs) - Select to restore the agent file system data, including windows file sharing-related data. You can identify an alternate location to which to restore the data, and then specify:
- Restore only if missing (do not overwrite)
- Maintain directory structure back to share
- Pub restored files into a "Restores" directory at the destination
- Apply to All Agent File System Selections - Turn on if the selected configuration options apply to all files
To specify the restore location,
- Select from the available restore locations and configuration options.
- In the list of items for restoration, select the item on which to set the configuration options, and click Apply.
- Once you apply the restore location to an item, verify a check mark displays to the right of the item.
- If the configuration options apply to all files, click Apply to All Agent File System Selections, and click Apply.
- Click . The window closes and the restoration begins.Restore
Note: You must specify the restore location for all items before you can complete the restore process.
Once the restoration begins, Restore Progress displays in the tool window. As the restore progresses, the overall restoration progress and individual file restoration progress displays as progress bars including an in-progress counter of total files restored, files per minute, and kilobytes per second. If errors are encountered during the restore process, click Restore Logs and open the latest restore log for more information. View, Pause, or Stop Restoration
While the restoration is in progress, click the Details icon to view realtime important restoration details about restoration progress such as path issues and restore failures. This allows you to determine if a restore needs to be canceled and redefined. Additionally, you can turn on the following options in the Details window:
- Rate Limit - Click to specify the restoration rate limit per second; specify as unlimited, or in kilobits, kilobytes, megabits, or megabytes
- Open this window at the start of each restore - Turn on to automatically launch the Details window each time you start a restore
While the restoration is in progress, you can also select:
- Pause/Play - Click to suspend/resume restoration
- Stop - Click to end the restoration process and remove partially restored files
Restore Logs
Once a restore is complete, paused, or stopped, the Restore Completed dialog box displays the restore statistics. From this view you can click R estore Logs to view restore details. A restore log is generated each time you perform a restore, and is named based on the restoration date and time. The log file is stored in a sub-folder of the Barracuda Restore for Windows folder. For example,
C://Program Data/Barracuda/Barracuda Restore for Windows/Restore Logs

Log files are always stored in this location regardless of the specified restore location.
You can also access the Restore Logs folder from the Help >Restore Logs folder.
View Error Logs
Error logs are generated only if an error is encountered during a file or folder search, or during restoration. File naming is based on the date and time of the error, and the error log file is stored in a sub-folder of the Barracuda Restore for Windows folder. For example,
C://Program Data/Barracuda/Barracuda Restore for Windows/Error Logs
REPORTS Page
This article refers to Barracuda Backup firmware release 5.0 and higher, except where noted.
In this article:
- Backup Reports
- Restore Report
• Large Items Report - Audit Log Report
- User Activity Reports
Backup Reports
Barracuda Backup provides a detailed report for each backup that is run. Backup reports can be accessed from the REPORTS > Backup page of the Barracuda Backup web interface. In addition, any back up process that is currently running is also displayed from this page. Backup reports include details about the backup such as when the backup started, duration, size, if there were any errors or warnings, and any new, changed, or removed items. Reports also include links to each backed up file to view or download the item from the report.
Click Details to view recent activity in chart form. You can also view a list of backed up files including the number of new, changed, and removed files, as well as a list of any errors encountered during backup.
If a backup is currently in progress, the REPORTS > Backup page displays this information and allows you to cancel the backup.
Click View Past Reports to access archived backup reports in the Backup (Archived) page. You can specify the number of reports you wish to display on the page, or enter a date range and click to display the archived reports.Update
Click on the report to view report details, and specify whether to show new, changed, or removed files. Additionally, you can click on a file name to restore the file through the page.RESTORE >Restore Browser
Restore Report
You can view restoration details in the REPORTS >Restore page. To specify how you wish to sort the table, click on a heading, and then click on the up/down arrows to the right of each heading to specify either an ascending or descending sort.
Click Details to view all details for the selected restoration including any encountered errors. Expand the detail tabs to view specific file errors and a list of restored content.
Large Items Report

Firmware version 5.1 and higher only
The Large Item Report is available only in Barracuda Backup firmware version 5.1 and higher.
The REPORTS > Large Items page displays a detailed list of large items including the data source and path, original file size, and deduplicated backup size. From the Sources drop-down menu, you can select to view large items by individual source, by Agent, or for all sources. To further refine the report, enter a string in the Filename contains field, and click Filter. The report displays only those items matching the Filename contains value for the selected source.
Audit Log Report
The REPORTS > Audit Log page displays a report of all activities on the Barracuda Backup web interface by time and date, by user, and by action. Logged activity includes log on authentication, firmware update, changes to settings, changes to account information, and more. Click the Details icon for additional information for a specific activity.
In the top pane, you can specify the following:
- Select a specific user or display logs for all users
- Specify whether to include log on authentication activities
• Date range of logs to display
User Activity Reports

Firmware version 5.0 and earlier only
The User Activity Report is available only with Barracuda Backup firmware version 5.0 and earlier.
The REPORTS > User Activity page displays activity logs of users accessing the Barracuda Backup web interface. Logged activity includes log on authentication, firmware update, changes to settings, changes to account information, and more. Mouse-over an entry for additional information.
In the top pane, you can specify the following:
• Number of logs to display
• Date range of logs to display
- Select a specific user or display logs for all users
- Specify whether to include log on authentication in the logs
Once you make changes, click to display user activity based on your new settings.Update
SYSTEM Page
This article refers to firmware version 5.0 and higher, except where noted.
Use the SYSTEM page to manage the Barracuda Backup firmware version and settings, and access software downloads.
| Location Description Related Articles | ||
| SYSTEM > Firmware | Displays the current version of the installed firmwareAllows you to set yourFirmwareand install a newUpgrade Policyfirmware release based on the selected policy:Legacy Release Access a-previously installed version of the firmware;do not select this optionunless directed to do so by Barracuda da Networks Technical SupportGeneral Release The latest-generally available version of the firmware available for use on Barracuda Backup.Early Release The newest-firmware versions available for early access to Barracuda Backup.To update the firmware, clickFirmware Available; if a newer version is available, you are prompted to download and apply the new firmware.View Barracuda Backup release notes including new features and resolved issues. | |
| > Barracuda Backup Server SYSTEM Settings | Specify the Barracuda Backup Settings including:- Enter a name to identification the Barracuda Backup Server in the web interface.From the drop-down menu, select the time zone where the Barracuda Backup Server is located.Barracuda Backup Server Location -Enter the phyBarracuda Backup Server sical location detailsIf you have created display groups, from the drop-down menu, select the group in which to display the Barracuda Backup Server. Click Manage your display to go to the groups ADMIN > Display page where you can create and groups manage display groups. | How to Configure Barracuda BackupDisplay Groups pageBackup Server NameBackup Server Time Zone -Backup Server Display Group - |
| > Software Downloads SYSTEM | Download tools for use with Barracuda Backup including the Barracuda Backup Agent. | Barracuda Backup AgentBarracuda Linux Backup AgentBare Metal RestoreHow to Configure Backups |
| SYSTEM > Advanced Graphs | In firmware version 5.3.00 and higher, in addition to the graphs provided on the STAT page, you can access detailed systemUS performance information on the Advanced page.Graphs |
Firmware Page
This article refers to Barracuda Backup version 4.2 or higher.
In this article:
- Firmware Update
- Firmware Notification
Related Articles
• System Management
Firmware Update
Use the page to select the firmware upgrade policy: SYSTEM > Firmware
- Current Installed Version - Displays the currently installed firmware version
-
Firmware Upgrade Policy - Select the release stage you want to update to the latest firmware:
-
Legacy Release - Access a previously installed version of the firmware; do not select this option unless directed to do so by Barr .acuda Networks Technical Support
- General Release - The latest generally available version of the firmware available for use on Barracuda Backup.
- Early Release - The newest firmware versions available for early access to Barracuda Backup.
- Firmware Available - Specifies the latest firmware version available based on the selected Upgrade Policy
- Upgrade Now - If a newer version of firmware is available, click Upgrade Now to upgrade the firmware
• View release notes - Click to view the Barracuda Backup release notes
Firmware Notification
If a newer version of firmware is available, once you log in to Barracuda Backup, the Status page displays a notification banner across the top of
the page. Click Upgrade Now to immediately begin the firmware upgrade, or click Dismiss to hide the banner until the next time you log in to the web interface.

If a backup job is running and you select to upgrade the firmware, the firmware upgrade is queued until the existing job is completed.
BBS Settings Page
This article refers to Barracuda Backup version 4.2 or higher.
Use the SYSTEM > BBS Settings page to view or modify the Barracuda Backup Server details including server name, time zone, physical location, and display group:
- Backup Server Name - Name used to identify the currently selected Barracuda Backup Server in the web interface
- Backup Server Time Zone - The time zone where the currently selected Barracuda Backup Server is located
- Backup Server Location - The physical location of the Barracuda Backup Server including city, state, and country
- Backup Server Display Group - The display group in which the Barracuda Backup Server resides
- Manage your display groups - Click to add or remove a display group in the ADMIN > Display Groups page
Software Downloads Page
This article refers to Barracuda Backup version 4.2 or higher.
Go to the SYSTEM > Software Downloads page to download tools for use with Barracuda Backup including:
• Barracuda Bare Metal Live CD
• Barracuda Backup Agent (Windows)
• Barracuda Backup Agent (Linux)
- Barracuda GroupWise Trusted Application Key Generator
Advanced Graphs Page
This article applies to Barracuda Backup version 5.3.00 or higher.
In this article:
• View Advanced Graphs
- Local Ethernet Traffic
• Barracuda Central Bandwidth
- Transfer Efficiency
- Node Latency
- Disk Space
- Queue Size
- Queue Count
- Processor Utilization
- Metadata Queue Length
View Advanced Graphs
To view Advanced Graphs, log in to the web interface, select the Barracuda Backup Server in the left pane, and go to the SYSTEM > Advanced Graphs tab:

Local Ethernet Traffic
The Local Ethernet Traffic graph presents inbound and outbound network traffic for the selected Barracuda Backup Server:
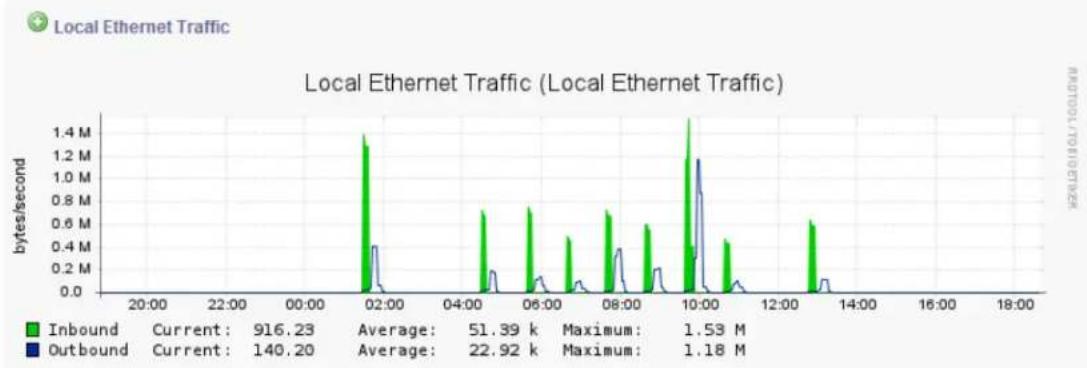
line
| Time | Inbound (bytes/second) | Outbound (bytes/second) | |--------|--------------------------|---------------------------| | 20:00 | 0.0 | 0.0 | | 22:00 | 0.0 | 0.0 | | 00:00 | 0.0 | 0.0 | | 02:00 | 1.4 M | 0.4 M | | 04:00 | 0.7 M | 0.2 M | | 06:00 | 0.7 M | 0.1 M | | 08:00 | 0.7 M | 0.3 M | | 10:00 | 1.5 M | 1.2 M | | 12:00 | 0.5 M | 0.1 M | | 14:00 | 0.6 M | 0.1 M | | 16:00 | 0.0 | 0.0 | | 18:00 | 0.0 | 0.0 |Barracuda Central Bandwidth
The Barracuda Central Bandwidth graph represents the bandwidth utilization from the Barracuda Backup Server to the Barracuda Networks Cloud Servers:
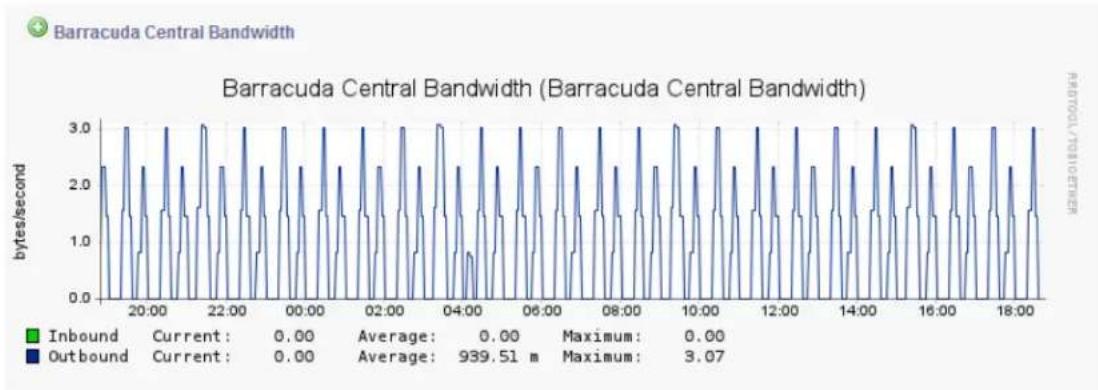
line
| Time | Inbound | Outbound | |--------|---------|----------| | 20:00 | 0.00 | 3.07 | | 22:00 | 0.00 | 3.07 | | 00:00 | 0.00 | 3.07 | | 02:00 | 0.00 | 3.07 | | 04:00 | 0.00 | 3.07 | | 06:00 | 0.00 | 3.07 | | 08:00 | 0.00 | 3.07 | | 10:00 | 0.00 | 3.07 | | 12:00 | 0.00 | 3.07 | | 14:00 | 0.00 | 3.07 | | 16:00 | 0.00 | 3.07 | | 18:00 | 0.00 | 3.07 |Transfer Efficiency
The Transfer Efficiency graph provides a detailed look at data replication from the Barracuda Backup Server to the replication target (Barracuda Cloud or another Barracuda Backup Server). In the graph below, the green shaded area represents the Skipped or deduplicated data. The blue, TX (Uncompressed), represents the actual data being transferred and the amount of bandwidth that would be used if compression was not
utilized. The orange, TX (Compressed), represents the actual bandwidth utilized, after compression, to send data offsite. The red Purged amount refers to data removed from the offsite transfer queue that has already been purged locally:
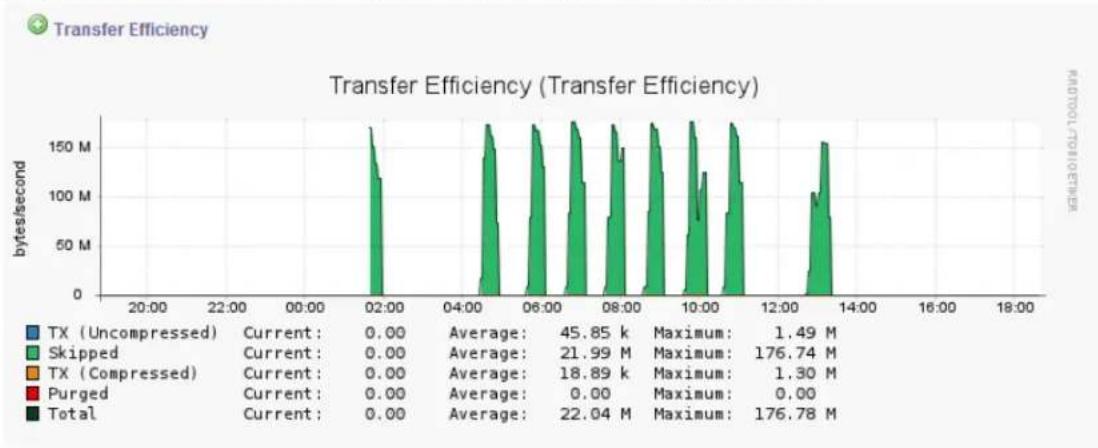
line
| Metric | Current | | ---------------- | ----------- | | TX (Uncompressed) | 0.00 | | TX (Compressed) | 0.00 | | Purged | 0.00 | | Total | 0.00 |Node Latency
The Node Latency graph represents the latency between the Barracuda Backup Server and the cloud node:
line
| Location | Current | Average | Maximum | | -------- | ------- | ------- | ------- | | Location 1 | 0.00 | 0.00 | 0.00 | | Location 2 | 0.00 | 0.00 | 0.00 |Disk Space
The Disk Space graph provides a detailed account of the amount of disk space that has been used on the Barracuda Backup Server, as well as the remaining available disk space:
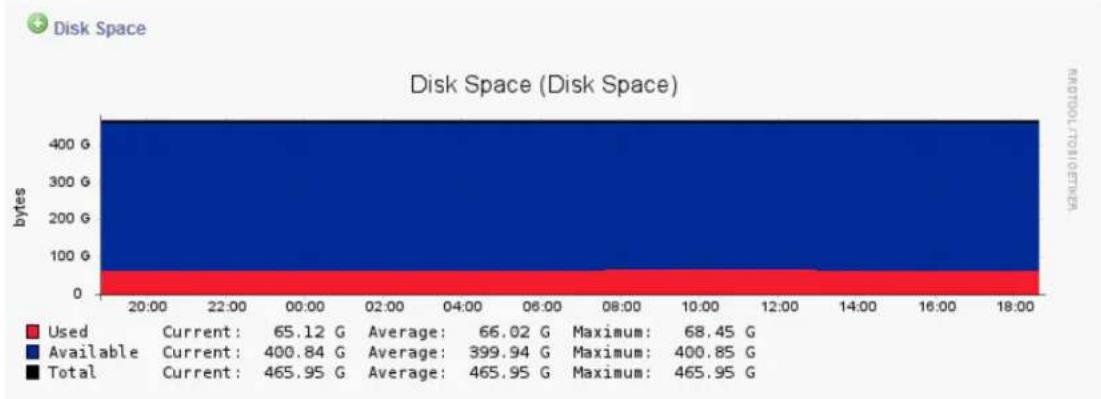
bar_stacked
Disk Space (Disk Space) | Time | Used (bytes) | Available (bytes) | Total (bytes) | | :--- | :--- | :--- | :--- | | 20:00 | 65.12 | 68.45 | 465.95 | | 22:00 | 400.84 | 399.94 | 465.95 | | 00:00 | 399.94 | 400.85 | 465.95 | | 02:00 | 399.94 | 400.85 | 465.95 | | 04:00 | 399.94 | 400.85 | 465.95 | | 06:00 | 399.94 | 400.85 | 465.95 | | 08:00 | 399.94 | 400.85 | 465.95 | | 10:00 | 399.94 | 400.85 | 465.95 | | 12:00 | 399.94 | 400.85 | 465.95 | | 14:00 | 399.94 | 400.85 | 465.95 | | 16:00 | 399.94 | 400.85 | 465.95 | | 18:00 | 399.94 | 400.85 | 465.95 |Queue Size
The Queue Size - Barracuda Cloud graph presents a graphical history of the amount of data replicated over time from the Barracuda Backup Server to the Barracuda Cloud:

Queue Size - Barracuda Cloud
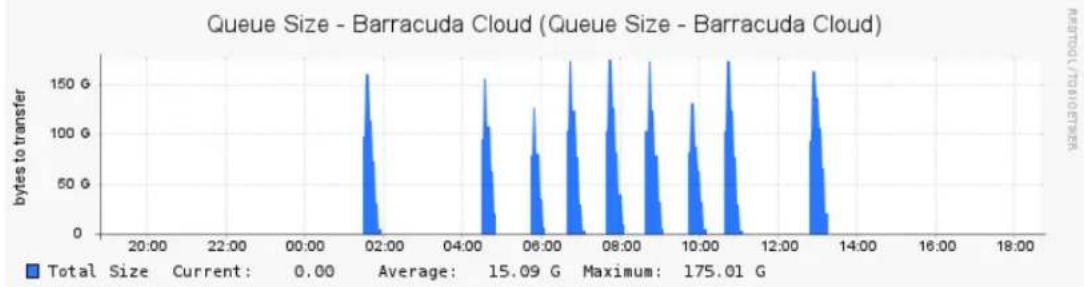
bar
| Time | Total Size (bytes to transfer) | | ------ | ------------------------------ | | 20:00 | 0.00 | | 22:00 | 0.00 | | 00:00 | 0.00 | | 02:00 | 150.00 | | 04:00 | 150.00 | | 06:00 | 125.00 | | 08:00 | 175.01 | | 10:00 | 125.01 | | 12:00 | 175.01 | | 14:00 | 150.00 | | 16:00 | 0.00 | | 18:00 | 0.00 |Queue Count
The Queue Count - Barracuda Cloud graph represents the number of parts replicated over time:

Queue Count - Barracuda Cloud
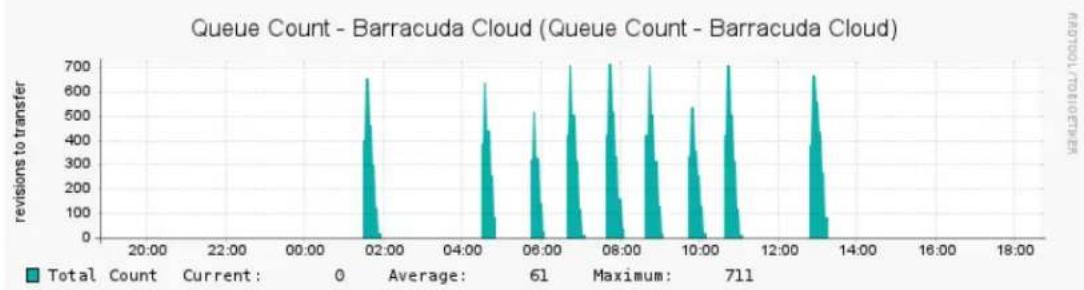
bar
| Time | Total Count | Current | |--------|-------------|---------| | 02:00 | 650 | 0 | | 04:00 | 620 | 61 | | 06:00 | 320 | | | 08:00 | 700 | | | 10:00 | 550 | | | 12:00 | 711 | |Processor Utilization
The processor utilization graph represents the following:
- System - Percentage of CPU utilization that occurred while executing at the system level (kernel).
- User - Percentage of CPU utilization that occurred while executing at the user level (application).
- Nice - Percentage of CPU utilization that occurred while executing at the user level with nice priority.
- IO Wait - Percentage of time that the CPU or CPUs were idle during which the system had an outstanding disk I/O request.
- Idle - Percentage of time that the CPU or CPUs were idle and the system did not have an outstanding disk I/O request.

Processor Utilization
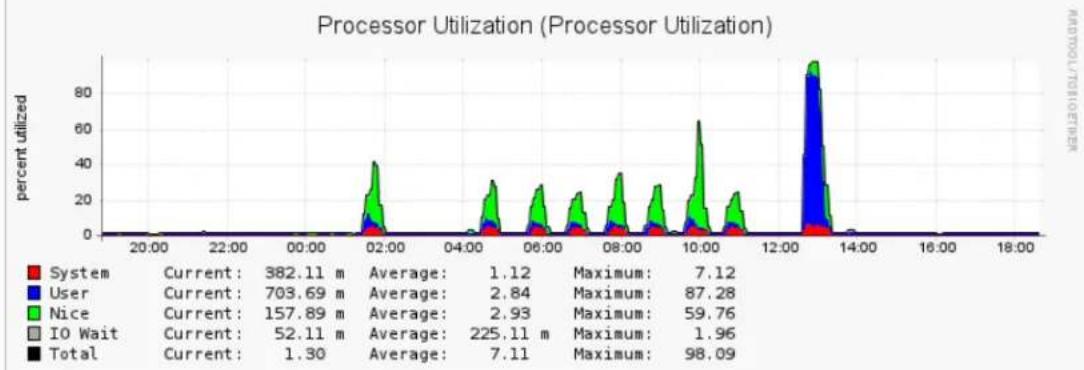
line
| System | Current | Average | Maximum | |--------|---------|---------|---------| | User | 382.11 m | 1.12 | 7.12 | | Nice | 703.69 m | 2.84 | 87.28 | | IO Wait | 157.89 m | 2.93 | 59.76 | | Total | 52.11 m | 225.11 m | 1.96 |Metadata Queue Length
The Metadata Queue Length graph provides a graphical representation of the reporting and statistics data transfer over time:

Metadata Queue Length
line
| Status | Current | Average | Maximum | | -------- | ------- | ------- | ------- | | Reporting | 2 | 27 | 3 | | Table | 2 | 19 | 2 | | Purge | 2 | 429 | 4 | | Other | 2 | 248 | 3 | | Total | 2 | 476 | 3 |REDTOOL/TO BIOETER
Load Average
The Load Average graph details the history of running processes over time:

Load Average
line
| Time | Current | Average | | ---------- | ----------- | ----------- | | 16:00 | 128.07 m | 76.99 m | | 18:00 | 67.80 m | 60.35 m | | 20:00 | 22.60 m | 38.72 m | | 22:00 | - | - | | 00:00 | - | - | | 02:00 | - | - | | 04:00 | - | - | | 06:00 | - | - | | 08:00 | - | - | | 10:00 | - | - | | 12:00 | - | - | | 14:00 | - | - |ADMIN Page
This article refers to firmware version 5.0 and higher.
Use the ADMIN page to configure users, set up email notifications, manage display groups, access documentation, and link a Barracuda Backup Server.
Location Description Related Articles
| ADMIN > Users | Use this page to administer users that have access to the Barracuda Backup Service web interface. Click the icon to modifyEdit email notifications, authentication, and permissions for the selected user, or click Add & Remove Users to add a new user, edit details for an existing user, or delete a user.If you are an administrator, you can modify your profile in the following manner:1. Go to , and click ADMIN > Users Add & .Remove Users2. Click the tab to changeMY PROFILE your password, change product notifications, and set the time zone for your user account.3. Click to apply your settings.Save | Managing UsersManaging Your Account |
| ADMIN > Email Notifications | Specify the type of email notification for each user:Reports - When selected, an email notification is sent for each backup job.Alerts - When selected, an email notification is sent if a backup job has errors or if your Barracuda Backup Server is offline.Notices - When selected, an email notification is sent when your Barracuda Backup Server software is updated. | Managing Email Notifications |
| ADMIN > Display Groups | Add and remove display groups to manage multiple Barracuda Backup Servers. | Display Groups |
| ADMIN > Documentation | Access Barracuda Knowledgebase and Barracuda TechLibrary articles. | |
| ADMIN > Link a Barracuda Backup Server | Link your Barracuda Backup Server to your B .arracuda Cloud Cont | Link a Barracuda Backup Server to an Ad AccountUnlink a Barracuda Backup Server |
Users Page
Use this page to administer users that have access to the Barracuda Backup Service web interface. Click the Edit icon to modify email notifications, authentication, and permissions for the selected user, or click Add & Remove Users to add a new user, edit details for an existing user, or delete a user.
If you are an administrator, you can modify your profile in the following manner:
-
Go to ADMIN > Users, and click Add & Remove Users. From this page you can complete the following actions:
-
Click Add User in the ADMIN tab to create a new user
-
Click on an existing user name to edit or remove the selected user
-
Click the MY PROFILE tab to change your password, change product notifications, and set the time zone for your user account.
-
Click to apply your settings.Save
From the Users page, you can:
- Manage Your Account
- Manage User Access
- Manage Product Entitlements
Managing Your Account
Your account with Barracuda Networks gives you access to Barracuda Backup, Barracuda Networks services to which you have a subscription, and any devices added through . As long as you are logged in as an administrator,Barracuda Appliance Control you can add users that can perform administrative tasks. Each user uses their own user name to log in.
In this article:
- Select Account Options
- Community
- Account
- Support
- Verify Service Plan Size
Related Articles
- Create a Barracuda Cloud Control Account
• Product Entitlements
Select Account Options
Go to to perform these account-related tasks: ADMIN > Users
- Add, edit and remove users, including setting their privileges and start page. When you add a user you can select the services that the user is able to access.
- Update contact and billing information for your Barracuda Cloud Control account.
• View invoices. - Manage services associated with your account.
Click on the Backup Service link on the top left hand side to go to the Barracuda Backup web interface.
Community
Click on Community at the top left hand side of the Barracuda Backup web interface to access product forums and add your own feedback. Use forums to discuss and view feature requests. For additional information, refer to Barracuda User Community.
Account
Click on Account on the top left hand side of the Barracuda Backup web interface to perform the following tasks:
- Manage user information and specify device access
• View user event log files - Change your password
• View status of your Barracuda Cloud Control Services
• View invoices - Specify forum and product notification settings
- Update contact and billing information for your Barracuda Cloud Control account
Support
Click on Support on the top left hand side of the Barracuda Backup web interface to perform the following tasks:
• Search Barracuda Networks Knowledgebase solutions
- Access the Barracuda Networks TechLibrary
- Contact Barracuda Networks Technical Support
- Access existing support cases, or open a new case
- Manage your Barracuda Backup Server serial numbers
Verify Service Plan Size
After you have successfully linked your Barracuda Backup Server, your Barracuda Cloud Storage service plan is activated. To ensure that you
have a sufficient amount of offsite storage space at Barracuda Networks, it is important for you to verify that the plan size is the one you selected. View your Cloud Storage service plan size on the STATUS tab of the Barracuda Backup web interface.
Managing User Access
Use the ADMIN > Users page to administer users that have access to the Barracuda Backup web interface. This page has a link that takes you to Account/Support to add or remove users.
Related Articles
• Managing Your Account
• Product Entitlements
Edit Users
Edit users from this page by selecting a user and clicking on the Edit ( ) icon. You can edit the following user options, all of which are specific to this service:
- Receive emails with backup reports, error condition alerts, or Barracuda Backup Server software update notices.
- Restrict access to the Barracuda Backup web interface to one or more IP addresses.
-
Designate the user as an , , or an . Account Administrator BBS Administrator Operator
-
An Account Administrator can create new users and manage billing information, and has full access to all of the Barracuda Backup Servers associated with the account.
- A Barracuda Backup Server Administrator has full access to specific Barracuda Backup Servers associated with the account including data restore. A Barracuda Backup Server Administrator cannot edit or view other user accounts.
- An Operator cannot restore data or edit user accounts; operators are limited to viewing statistics and modifying backup configuration for selected Barracuda Backup Servers.
Product Entitlements
Use the following steps to add Barracuda Backup entitlements when you add a user to your Barracuda Networks account:
- Log in to Barracuda Backup as the administrator, and go to the ADMIN > Users page.
- Click Add User; the new user options display.
- Enter the new username and email address; the user email address will be their username.
-
Select the Starting Page for this user upon log in from the following options:
-
Default
- Account
• Community/Forum -
Support
-
In the Privileges section, you can optionally give the user the following privileges:
-
User Management - When selected, the user can add, remove, and edit users
- Billing Administration - When selected, the user can view and update billing information for the account
• In the Product Entitlements list, turn on Backup:

For details on adding additional subscribed to Barracuda Networks products and services, refer to connecting Barracuda Networks Products to Barracuda Cloud Control.
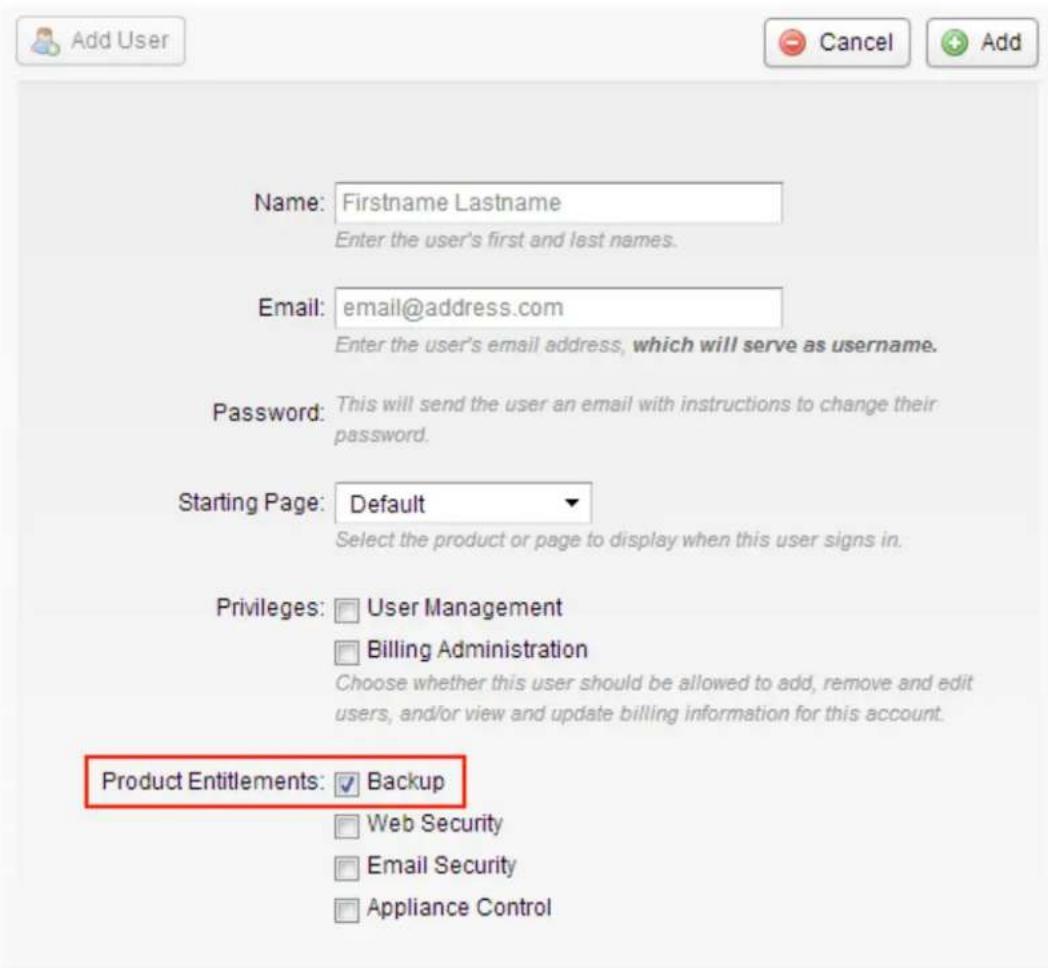
- Click Add at the top of the page to add the user to Barracuda Backup; an email is then sent to the user prompting them to set their password.
- Click on the username in the Users list; the user details display in the right pane. Under Product Entitlements, click Configure :Permissions
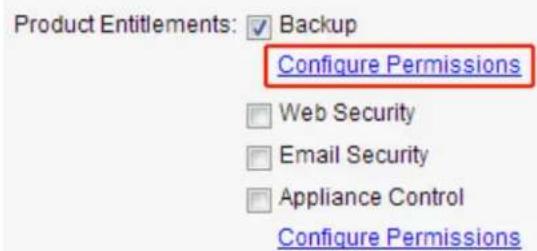
- In the configuration page, you can set the following options:
- Turn on the Barracuda Email Notifications for this user:
- Reports - When turned on, a report is sent to this user for each backup job.
- Alerts - When turned on, an alert is sent to this user if an error occurs during a backup job or if the Barracuda Backup Server goes offline.
- Notices - when turned on, a notice is sent to this user when the Barracuda Backup Server software is updated.
- Authentication - If you wish to restrict the IP address that this user is allowed to log in from, enter a value in the IP Login Restrictions field.
- Specify user Permissions:
• Account Administrator - User has full access to all Barracuda Backup Servers within the account. - Barracuda Backup Server Administrator - User has full access to all selected Barracuda Backup Servers; user does not have
edit or view user accounts access. When selected, the Backup Server Permissions section displays:
- Select All Backup Servers - When turned On, user has full access to all Barracuda Backup Servers within the account, when turned Off, a list of all connected devices display. Turn on the Barracuda Backup Servers to which this user is to have access.
- Operator - User access is limited to viewing statistics and modifying backup configuration for selected Barracuda Backup SErvers. Operators cannot restore data or edit user accounts.
- Select All Backup Servers - When turned On, user has Operator access privileges to all Barracuda Backup Servers within the account, when turned Off, a list of all connected devices displays. Turn on the Barracuda Backup Servers to which this user is to have access.Operator
- Click Save at the top of the page to save the Backup configuration settings for the selected user.
Email Notifications Page
Notification Types
Specify the type of email notification for each user:
- Reports - When selected, an email notification is sent for each backup job.
- Alerts - When selected, an email notification is sent if a backup job has errors or if your Barracuda Backup Server is offline.
- Notices - When selected, an email notification is sent when your Barracuda Backup Server software is updated.
Managing Email Notifications
Use the ADMIN > Users page to specify whether a user is to receive email notifications. Edit users from this page by selecting a user and clicking on the Edit graphic. You can specify whether a user is to receive one or more of the following types of emails:
• Backup reports saying that a scheduled back up was run
- Alerts for conditions such as:
• A Barracuda Backup Server is offline or has come online
• A Barracuda Backup Server has not been able to communicate with Barracuda Cloud Storage (check for Internet problems)
- A Barracuda Backup Server appliance, such as a RAID volume or HD hardware, fails
- A watched file rule condition has been met (firmware version 5.1 and earlier only)
- An error has occurred in a backup
- An error situation returned to normal and no (further) action is required
- You have reached the limit on your Barracuda Cloud Storage subscription plan size
- Notices of Barracuda Backup Server software updates
Use the ADMIN > Email Notifications page to specify email addresses of non-users that are to receive an email when a report, alert, or notice generates. This page allows you to specify any email address (in some cases, your reseller), not only the email address of a user associated with your account. You can also see the users that are receiving any type of email notification, and edit those users in a similar way to the ADMIN > Users page.
Display Groups Page
Display Groups
If you have multiple Barracuda Backup Servers, you can manage them through display groups:
- Log in to Barracuda Backup, and go to the ADMIN > Display Groups page.
- All display groups active on your account display in the Current Display Groups section.
-
To add a new display group, enter a name for the group of devices, and click Add. For example, if you want to group all Barracuda Backup by location, you might create groups by geographic location: Engineering - Asia, Engineering - US, Engineering - Europe.
-
The display group name appears in the Current Display Groups section.
-
To remove a display group, click Remove following the name of the group you want to remove; click OK to confirm you want to remove the group.

If you delete a display group that contains devices, those devices are moved to the default group.
Once you create display groups, you can add a Barracuda Backup Server to the group using the following steps:
- In the left pane, select the appropriate Barracuda Backup, and go to the SYSTEM > BBS Settings page.
- In the Backup Server Display Group section, choose from the Current Display Group drop-down list, select the display group name.
- To add or remove display groups, click Manage your display groups to go to the ADMIN > Display Groups page.
- Click .Save
Documentation Page
Access the and articles.Barracuda Networks Solutions Knowledgebase Barracuda TechLibrary
Link a Barracuda Backup Server Page
Use this page to set up your Barracuda Backup Server. The Barracuda Backup Server must be linked online before backups can be initiated. See the following articles for details on linking and unlinking a Barracuda Backup Server:
- Link a Barracuda Backup Server as a User or Reseller
- Unlink a Barracuda Backup Server
How to Link a Barracuda Backup Server as a User or Reseller
This article refers to Barracuda Backup firmware version 3.0 or higher.
In this article:
- Initial Set Up
- Link a Barracuda Backup Server to your Account
- Link a Barracuda Backup Server as a Reseller
Related Articles
- Unlink a Barracuda Backup Server
Initial Set Up
The Barracuda Backup Server must be linked online before backups can be initiated. You must have billing information (credit card recommended) to complete the linking process.
- Go to http://login.barracuda.com, and log in.
- Once logged in, click Backup Service in the left pane. If this is your first time linking a Barracuda Backup Server, click Start Backup Service Setup; otherwise, click Link a Barracuda Backup Server in the left pane.
- On the Validation page, enter the serial number and the linking code for the Barracuda Backup Server from the sticker included on the Barracuda Backup Server Quick Start Guide included with the appliance.
- In the Identity section, you are presented with two options. Your selection determines how the unit is linked to an account:
• This backup server is for me or my company
• I am a reseller and this backup server is for a client
Link a Barracuda Backup Server to your Account
Once you complete the steps in the Initial Set Up section, you can link the appliance for yourself or your company:
- In the Identity section, select This backup server is for me or my company:
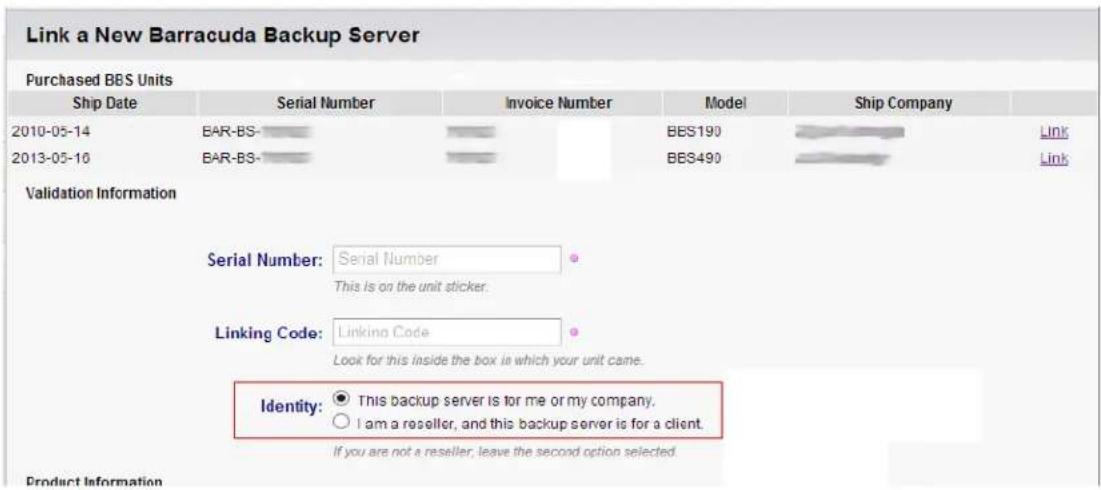
- Click Continue. In the next page, enter the physical location and time zone details, and choose a Cloud Storage subscription plan if you intend to replicate data to Barracuda Cloud Storage; no Cloud Storage subscription is required for site-to-site replication.
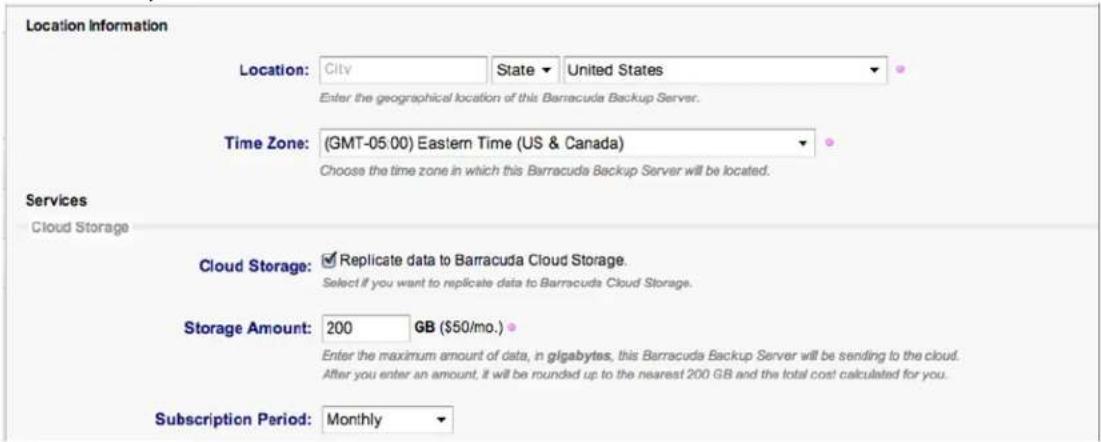
- Click . In the next page, enter the billing information:Continue
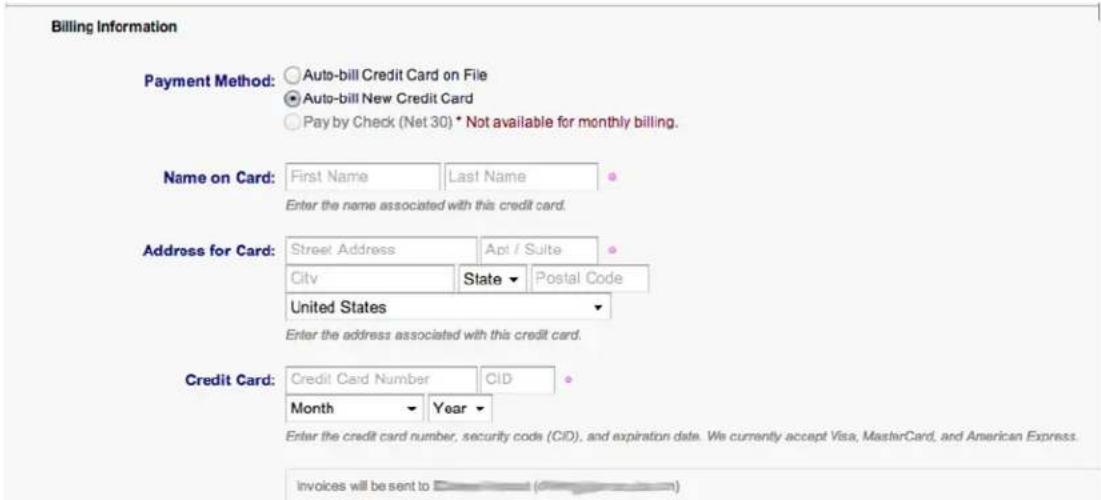
- Click Link Barracuda Backup Server to link the unit to the account you logged into in the Initial Set Up section:
Link a New Barracuda Backup Server
Success
The Barracuda Backup Server was successfully linked to this account.
- Once the unit is linked, the firmware is updated and the appliance reboots. When the unit comes back online you must log out and then log back in to the user interface to clear any cached pages.
- Data sources can now be set up on the Barracuda Backup Server.
Link a Barracuda Backup Server as a Reseller
Once you complete the steps in the Initial Set Up section, you can link the client appliance as a reseller:
- In the Identity section, select I am a reseller and this backup server is for a client:
Link a New Barracuda Backup Server
| Ship Date | Serial Number | Invoice Number | Model | Ship Company | |
| 2010-05-14 | BAR-BS- | BES190 | Link | ||
| 2013-05-16 | BAR-BS- | BES490 | Link | ||
| Validation Information | |||||
| Serial Number: Serial NumberThis is on the unit sticker. | |||||
| Linking Code: Linking CodeLook for this inside the box in which your unit came. | |||||
| Identity: This backup server is for me or my company.I am a reseller, and this backup server is for a client.If you are not a reseller, leave the second option selected. | |||||
- When selected, an additional set of dialog boxes display where you add the end-user information. Click Conti .nue

The details added in this set of dialog boxes are used to create an account to which the unit is linked, and to which the reseller is then granted access. This allows a reseller to manage multiple Barracuda Backup Servers from one central location in the UI, while giving the end-customer access to their individual appliances. Note that a reseller can determine whether to have access to the appliance once it is linked.
- In the next page, enter the physical location and time zone details, and choose a Cloud Storage subscription plan if your client intends to replicate data to Barracuda Cloud Storage; no Cloud Storage subscription is required for site-to-site replication:
Location Information
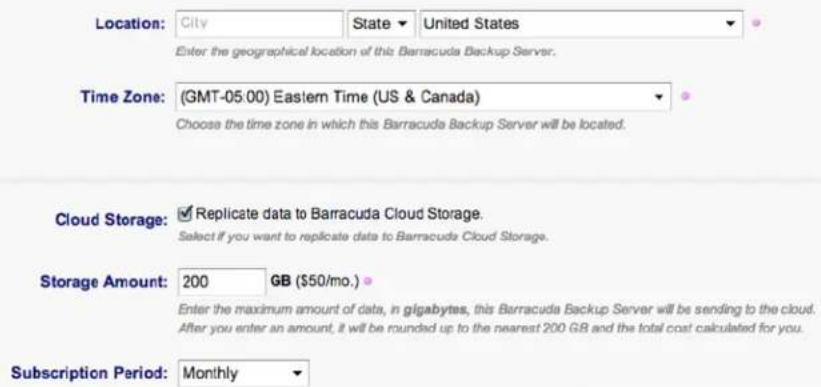
- Click . In the next page, enter the client's billing information: Continue
Billing Information
Payment Method: Auto-bill Credit Card on File Auto-bill New Credit Card Pay by Check (Net 30) * Not available for monthly billing.
Name on Card: First Name Last Name Enter the name associated with this credit card.
Address for Card: Street Address Api/Suite City State Postal Code United States Enter the address associated with this credit card.
Credit Card: Credit Card Number CID Month Year
invoices will be sent to ____ (____)
- Click Continue. In the Client Information page, specify whether you want to have access to the unit after it has been linked, and enter the name of the client organization:

If you turn Grant me (the reseller) administrative access to this Barracuda Backup Server off, the only way to manage the linked unit is through the end-user (client) credentials.
Client Information
√ Grant me (the reseller) administrative access to this Barracuda Backup Server.
Decide whether you would like to have administrative access to this backup server after it has been linked.
Company: Company
Enter the name of the client company or organization
- Enter the client contact details:
Name: First Name Last Name
Enter the client contact's first and last name.
Email: Email
Enter the client contact's email address, which will be used as their login name.
√ Client should receive email-based alerts.
Decide whether you want this client to receive automated email alerts for their Barracuda Backup Server by default. Barracuda Networks will send an email when the Barracuda Backup Server is offline, when there are errors after a backup, or when the amount of data backed up is over the service plan.
Phone: Phone
Address: Street Address Apt / Suite City State Postal Code United States
Enter the street address of the client company.
Link Barracuda Backup Server
- Click Link Barracuda Backup Server:
Link a New Barracuda Backup Server
Success
The Barracuda Backup Server was successfully linked to this account.
- Once the unit is linked, the firmware is updated and the appliance reboots. When the unit comes back online you must log out and then log back in to the user interface to clear any cached pages.
- Data sources can now be set up on the Barracuda Backup Server.
Security
In this Section
• Backup Security and Site-to-Site Replication
• Barracuda Cloud Storage Standards and Protection
• Policy-Based Security
• How to Secure Your Barracuda Backup Server
Backup Security and Site-to-Site Replication
When using a site-to-site deployment, you need to ensure the physical security of the remote Barracuda Backup Servers. Typically the Barracuda Backup Servers are kept behind corporate firewalls and communicate with each other using a VPN tunnel.
Barracuda Cloud Storage Standards and Protection
In this article:
- Facility Standards
- Storage
- Oversight
- Verify Service Plan Size
Related Articles
- Barracuda Cloud Control
Facility Standards
Barracuda Networks leases space in a number of Tier 3 and 4 facilities across the world. Each of these storage locations is equipped with:
- Controlled access systems requiring key-card authentication and physical check-in
• Video-monitored access points - Intrusion alarms
- Locking cabinets
• Climate control systems
• Waterless fire suppressant systems - Redundant power (generator backup, UPS, no single point of failure)
- Redundant Internet connectivity
The Barracuda Cloud Storage infrastructure boasts high-quality RAID hardware with hot-spare drives in every file server, and near instant data mirroring over high-speed fiber connections between the storage locations.
Storage
In the United States, data is transmitted from Barracuda Backup Servers to one data center, and then replicated to another. The process of replicating data begins immediately after it is copied from a Barracuda Backup Server, and runs continuously. Data in Barracuda Cloud Storage is stored in parts, and no single computer in the storage system has all the parts required to reconstruct data. Each of these computer systems communicates in unison to deliver restored data securely. This diverse storage system serves to further strengthen the physical security of your data.
With this architecture, Barracuda Networks equipment can maintain up to three distinct copies of your data which can be stored in three geographically separate locations.
Oversight
Access to Barracuda Backup Servers is limited to approved Barracuda Networks employees on an 'as needed' basis. Employee activity is logged, and all logs are archived to an independent storage device.
Verify Service Plan Size
After you have successfully linked your Barracuda Backup Server, your Barracuda Cloud Storage service plan is activated. To ensure that you have a sufficient amount of offsite storage space at Barracuda Networks, it is important for you to verify that the plan size is the one you selected. View your Barracuda Cloud Storage service plan size on the STATUS tab of the Barracuda Backup web interface.
Policy-Based Security
Data retention policies allow you to specify the retention of selected files or broader data based on daily, weekly, monthly or annual time intervals. You can create multiple retention policies for different types of data:
- Files
• Data backed up by the Barracuda Backup Agent (Exchange, SQL, system state) - Email messages
Retention policies are the only way to purge data; data cannot be deleted directly by a user.
How to Secure Your Barracuda Backup Server
The Barracuda Backup Server is deployed behind your corporate firewall, and is protected by the same security as your primary data sources.
In this article:
• Communication and Configuration
• Data Transmission and Storage
• Management Access
- Encryption
Related Articles
- Barracuda Cloud Storage Standards and Protection
Communication and Configuration
Administration and backup configuration that is set using the Barracuda Backup web interface is sent to the Barracuda Backup Server via a 256-bit encrypted VPN tunnel. The Barracuda Backup Server uses HTTPS port 1194 to send status updates to Barracuda Backup. Data transfers are initiated by the Barracuda Backup Server rather than by Barracuda Cloud Storage or a remote Barracuda Backup Server.
Data Transmission and Storage
Data transferred between your network and Barracuda Cloud Storage, or between your network and a remote Barracuda Backup Server, is always encrypted. File parts are AES 256-bit symmetrically encrypted before they are stored, and they remain encrypted until a restore is requested.
Management Access
- Monitor Activity - You can check the user activity page periodically for authentication attempts, changes to settings, and updates to account information. Go to the ADMIN > User Activity Reports page to see all activity for an account, including logins and when a user has enabled or disabled replication.
- Restrict Logins by IP Address - You can restrict access to Barracuda Backup to one or more IP addresses. On the ADMIN > Users page, click the graphic ( ) to edit a user account; enter an IP address or a range.Edit
- Secure Network Access - HTTPS is always used for secure web browser communication with Barracuda Backup.
Encryption
Data transfers from the local Barracuda Backup Server to a receiving Barracuda Backup Server are always encrypted. Data is stored compressed and encrypted at rest on the receiving Barracuda Backup Server; the local Barracuda Backup Server does not store in an encrypted or compressed state. The most aggressive combination of symmetrical and asymmetrical encryption in the industry keeps your data stored in a
format that nobody but you can access. The United States government recently approved 192-bit AES encryption as the preferred method for protecting top-secret information. The Barracuda Backup solution starts with even higher 256-bit AES encryption.
In addition, Barracuda Networks has developed a proprietary advanced digital cataloging system that breaks down your data into small pieces and tracks the changes of these parts over time, and strips the original meta identifiers from your files.
As data is transmitted to the remote Barracuda Backup Server, your symmetrically-encrypted data parts are compressed and sent over your Internet connection with an asymmetrically-encrypted key.
System Management
In this Section
• Barracuda Backup Replacement and Data Migration
• Replacing a Failed Barracuda Backup Server
• How to Shut Down a Barracuda Backup Server
• How to Wipe a Barracuda Backup Server
- Barracuda Backup Server Panel Indicators, Ports, and Connectors
• Barracuda Backup Server Hardware Specifications
• How to Physically Install the Barracuda Backup Server
Related Articles
• How to Link a Barracuda Backup Server
• How to Unlink a Barracuda Backup Server
- Firmware Page
- BBS Settings Page
- Software Downloads Page
Barracuda Backup Replacement and Data Migration
This article refers to all Barracuda Backup firmware versions.
If you have any questions or concerns regarding your Barracuda Backup Replacement, contact Barracuda Networks Technical .Support
In this article:
- Setting Up the New Barracuda Backup Server
• Data Migration Options - Option 1. Pull Data from the Cloud
- Option 2. Pull Data from an Existing Barracuda Backup Server
- Option 3. Use an Existing Barracuda Backup Server Configuration
- Option 4. Set Up a New Barracuda Backup Server from Scratch
Setting Up the New Barracuda Backup Server
Before you can replace a device and migrate the data, you must first install and configure the new Barracuda Backup Server. Use Step 1 and Step 2 in the Getting Started section of this library, or refer to the Barracuda Backup Quick Start Guide available for download on the Barracuda page.Backup Overview
Data Migration Options
Select the data migration option that best suits your deployment.
Option 1. Pull Data from the Cloud
If you elect to pull the data from the cloud, Barracuda Networks uses the following procedure to complete your request:
- Once the new unit is linked, Barracuda Networks connects to the new device and begins wiping the metadata in the database ensuring the unit is completely clean of any data.
- Barracuda Networks then pulls the metadata associated with all binary data (your backed-up data).

The metadata is a description of the data, whereas the binary data is comprised of your actual files.
- As the metadata is downloaded, it is inserted into the database tables on the new device. Depending on the amount of metadata to be pulled, this process may take 24 or more hours to complete.
- Once the metadata download is complete, backups are enabled on the new device, and the binary data is then pulled from the cloud. The process of pulling the binary data from the cloud can take 24 hours or more depending on the amount of data to be retrieved.
- You will receive a notification at the time of backups start and the binary data begins to be pulled.

At this point you can make any changes to the configuration via the web interface; the device is now at full capability.
- Once the initial binary data pull is complete, a final check is run with the cloud to ensure data integrity and to verify that all data is present and accounted for. Once verification is complete, the data migration as a whole is finished.
- You will receive a notification indicating the process is complete.
Option 2. Pull Data from an Existing Barracuda Backup Server
If you have elected to pull the data from your existing Barracuda Backup Server, confirm the following:
-
Both units are on the same LAN/subnet, and
• Both units are linked to a Barracuda Networks Account -
Once the new device has been linked to the existing Barracuda Backup Server, Barracuda Networks begins prepping the old device for the migration including:
-
Shutting down all dependent functions of the old device
-
Dumping the metadata tables from the databases on the old unit in order to pull them across and import them into the new device.
-
Once prepping is complete, Barracuda Networks begins the actual data migration by importing the metadata tables from the old device to the new unit.
- Once the import is complete, the binary data is synchronized across to the new unit. AT this point, backups are enabled on the new device and a backup is run on all data sources.

Running a backup on all data sources assists in populating the new device with the synchronized data. By backing up the data sources, those data parts that already exist are skipped over, thus reducing the time it takes to complete the process.
- You will receive a notification alerting you that the backup process has begun on the new device and that data is syncing.
- Once the initial binary data pull is complete, a final check is run with the cloud to ensure data integrity and to verify that all data is present and accounted for. Once verification is complete, the data migration as a whole is finished.
- You will receive a notification indicating the process is complete.
Option 3. Use an Existing Barracuda Backup Server Configuration
You can set up and configure a new Barracuda Backup Server with an existing configuration, data sources, retention policies, and all other aspects of backup.barracuda.com.
This is the fastest type of migration because you are not migrating large amounts of data.
- Once the new device is linked, Barracuda Networks pulls the configuration from the cloud.
- You will receive a notification indicating the process is complete.
Option 4. Set Up a New Barracuda Backup Server from Scratch
You can set up and configure a new Barracuda Backup Server without utilizing an existing configuration. With this option, you must configure the new device from scratch as it is treated as a brand new unit. For step-by-step instructions on setting up backups, refer to Data Backup Tasks in
Replacing a Failed Barracuda Backup Server
Related Articles
• How Barracuda Networks Manages Returned Device Drives

Barracuda Networks Technical Support
Before you replace your Barracuda Backup Server, contact Barracuda Networks Technical Support to try to resolve the problem.
Troubleshooting
Use the articles in the Troubleshooting and Error Messages section of this TechLibrary to help resolve issues encountered on your system.
Instant Replacement Service
In the event that a Barracuda Backup Server fails and you cannot resolve the issue, customers that have purchased the Instant Replacement service can contact Barracuda Networks Technical Support to arrange for a new unit to be shipped out within 24 hours.
After receiving the new system, ship the old Barracuda Backup Server back to Barracuda Networks at the address below with the Return Material Authorization (RMA) number clearly marked on the package; Barracuda Networks Technical Support can provide details on the best way to return the unit:
Barracuda Networks, Inc.
3175 S. Winchester Blvd
Campbell, CA 95008
attn: RMA #
How to Shut Down a Barracuda Backup Server
You can remotely reboot or shut down a Barracuda Backup Server by logging into its local web interface. Type the IP address of the Barracuda Backup Server in a web browser and log in using your Barracuda Networks account.
You can also perform a safe shutdown of a Barracuda Backup Server by pressing the POWER button on the front of the device. This issues a shutdown command to all system and service processes before the device powers down.

Caution
Do not push the POWER button for more than a couple of seconds. Holding it for five seconds or longer causes an immediate hard shutdown. This interrupts running processes and the Barracuda Backup Server powers off before unmounting the file system.
How to Wipe a Barracuda Backup Server
This article refers to Barracuda Backup firmware version 3.0 or higher.
Wiping a Barracuda Backup Server unlinks it from your account and puts all data and configuration information into a queue to be purged from Barracuda Cloud Storage. The wipe feature also deletes the contents of the local databases on the Barracuda Backup Server, moves the binary data on the Barracuda Backup Server into a temporary storage location on the system, and then shuts it down. The next time the Barracuda Backup Server is booted the binary data that has been moved is deleted.
Use the following steps to wipe a Barracuda Backup Server to unllink it from your account:
- Enter the Barracuda Backup Server IP address to log in to the local web interface.
- Go to the STATUS page, and in the Server Actions section, click Wipe Backup Server:
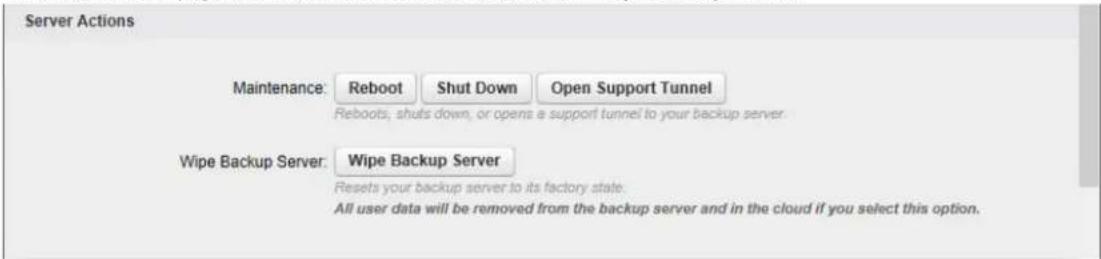
- The message Wipe Started Successfully displays in the web interface. Once the unlinking process is in progress, a warning message displays:
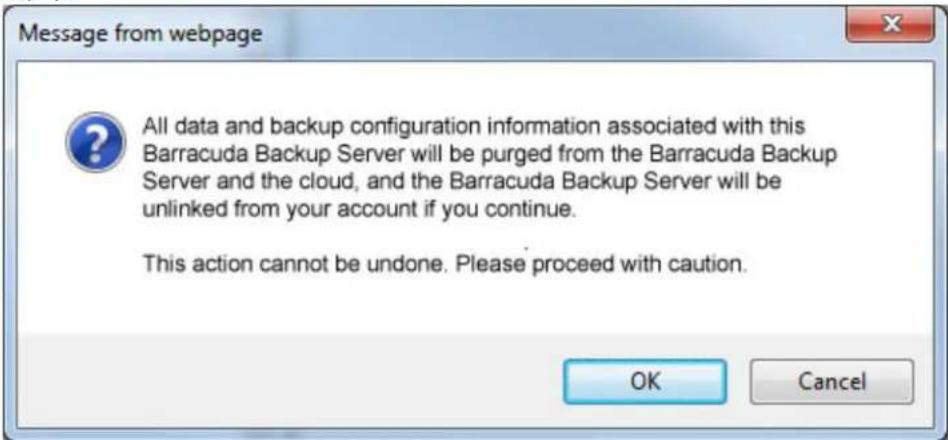
- Click OK to complete the unlinking process. Once the Barracuda Backup Server is unlinked from the account, the Backup Server Wipe page displays, including the Serial Number and Linking Code: Successful
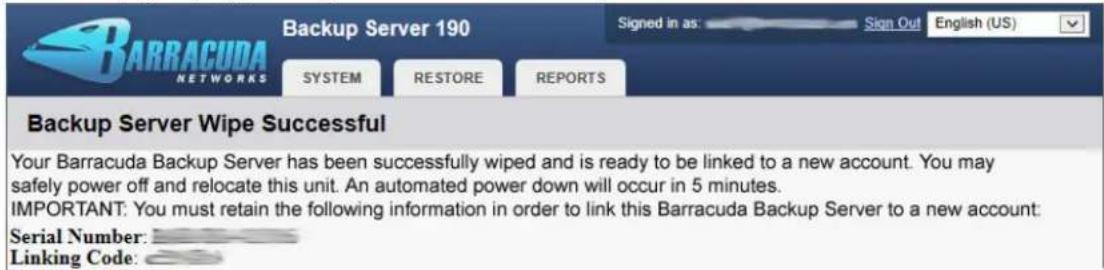
- Make note of the serial number and linking code. You can now link the Barracuda Backup Server to a new account. For details, see How to Link a Barracuda Backup Server as a User or Reseller
Barracuda Backup Server Panel Indicators, Ports, and Connectors
This article refers to Barracuda Backup firmware version 5.0 and higher.
In this article:
• Barracuda Backup Server Model 190 and 390
• Barracuda Backup Server Model 490 and 690
• Barracuda Backup Server 890, 891, 892, 990, and 991
• Barracuda Backup Server 1090 and 1091
Related Articles
- Barracuda Backup Server Hardware Specifications
• How to Physically Install the Barracuda Backup Server
Barracuda Backup Server Model 190 and 390
The following figure illustrates the Barracuda Backup power and disk activity indicator lights for models 190 and 390.
Model 190 and 390 Front Panel
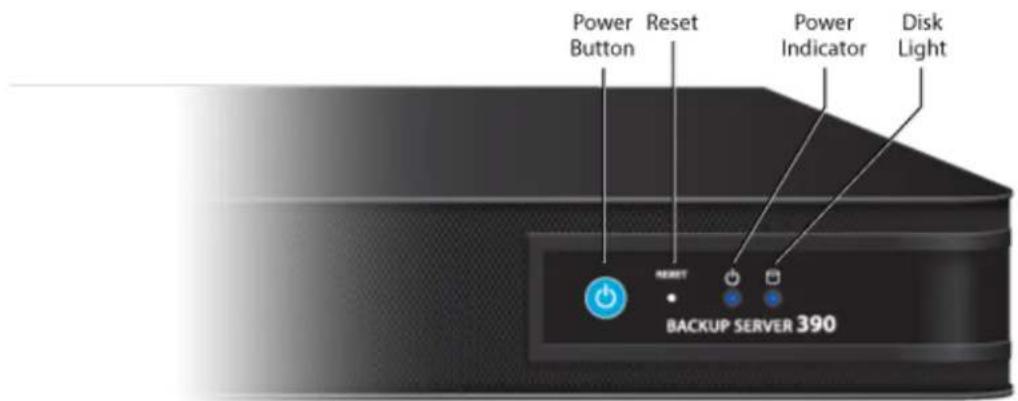
The following table describes the Barracuda Backup front panel power and disk activity indicator lights for models 190 and 390.
Model 190 and 390 Front Panel Component Description
| Component Name Description | |
| Power Button Push to power on the Barracuda Backup Server, tap to safely resetthe Barracuda Backup Server. | |
| Reset Button Push for 5 seconds to reset the Barracuda Backup Server. | |
| Power Light Displays a solid green light when the system is powered on. | |
| Disk Light Displays a solid green light and blinks during disk activity. | |
The following figure illustrates the Barracuda Backup rear panel ports and connectors for model 190.
Model 190 Rear Panel
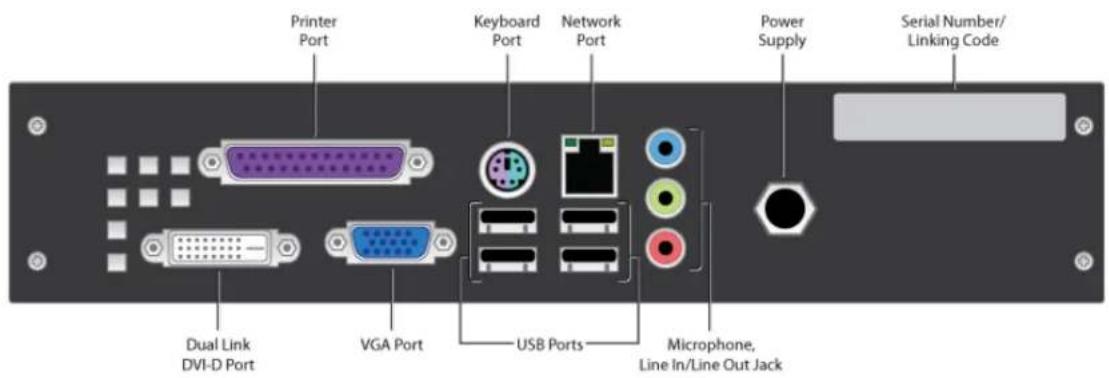
The following table describes the Barracuda Backup power and disk activity indicator lights for model 190.
Model 190 Rear Panel Port and Connector Description
| Port/Connector Name Details | |
| Dual Link DVI-D Port Optional. Digital monitor connection. | |
| Printer Port Optional. Printer connection. | |
| VGA Port Recommended. Video graphics array (VGA) monitor connection. | |
| Keyboard Port Optional. PS2 keyboard connection. | |
| Network Port Network port. | |
| USB Ports (4) Optional. USB device connection. | |
| Microphone Optional. Microphone line-in connection. | |
| Line In/Line Out Jack Optional. Audio input/output connections. | |
| Power Supply Power supply input. | |
| Serial Number/Linking Code Use the linking code to initiate backups.Barracuda Backup Server | |
The following figure illustrates the Barracuda Backup rear panel ports and connectors for model 390.
Model 390 Rear Panel

The following table describes the Barracuda Backup rear panel ports and connectors for model 390.
Model 390 Rear Panel Port and Connector Description
| Port/Connector Name Details | |
| Power Supply Power supply input. | |
| Mouse Port Optional. Mouse port. | |
| Keyboard Port Optional .. PS2 keyboard connection | |
| Dual Link DVI-D Port Optional. Digital monitor connection. | |
| VGA Port Recommended. Video graphics array (VGA) monitor connection. | |
| Network Port Network port. | |
| USB Ports (4) Optional. USB device connection. |
Barracuda Backup Server Model 490 and 690
The following table describes the front panel indicator lights for models 490 and 690.
Model 490 and 690 Front Panel Component Description
| Component Name Description | |
| Reserved | Reserved for future use. |
| Network Activity (2) Blinks green to indicate network activity. | |
| Disk Light Displays a solid green light and blinks during disk activity. | |
| Power Light Displays a solid green light when the system is powered on. | |
| Reset Button Push for 5 seconds to reset the Barracuda Backup Server. | |
| Power Button Push to power on the Barracuda Backup Server, tap to safely resetthe Barracuda Backup Server. |
The following figure illustrates the Barracuda Backup rear panel ports and connectors for model 490.
Model 490 Rear Panel

The following table describes the Barracuda Backup rear panel ports and connectors for model 490.
Model 490 Rear Panel Port and Connector Description
| Port/Connector Name Details | |
| Power Supply Power supply input. | |
| Mouse Port Optional. Mouse port. | |
| Keyboard Port Optional. PS2 keyboard connection. | |
| USB Ports (4) Optional. USB device connection. | |
| Dual Link DVI-D Port Optional. Digital monitor connection. | |
| VGA Port Recommended. Video graphics array (VGA) monitor connection. | |
| Network Port Network port. |
The following figure illustrates the Barracuda Backup rear panel ports and connectors for model 690.
Model 690 Rear Panel

The following table describes the Barracuda Backup rear panel ports and connectors for model 690.
Model 690 Rear Panel Port and Connector Description
| Port/Connector Name Details | |
| Power Supply Power supply input. | |
| Mouse Port Optional. Mouse port. | |
| Keyboard Port Optional. PS2 keyboard connection. | |
| USB Ports (2) Optional. USB device connection. | |
| Serial Port Optional. Serial device connection. | |
| VGA Port Recommended. Video graphics array (VGA) monitor connection. | |
| Network Ports (2) Network ports. |
Barracuda Backup Server 890, 891, 892, 990, and 991
The following figure illustrates the Barracuda Backup power and disk activity indicator lights for models 890 through 991.
Model890, 891, 892, 990, and 991 Front Panel
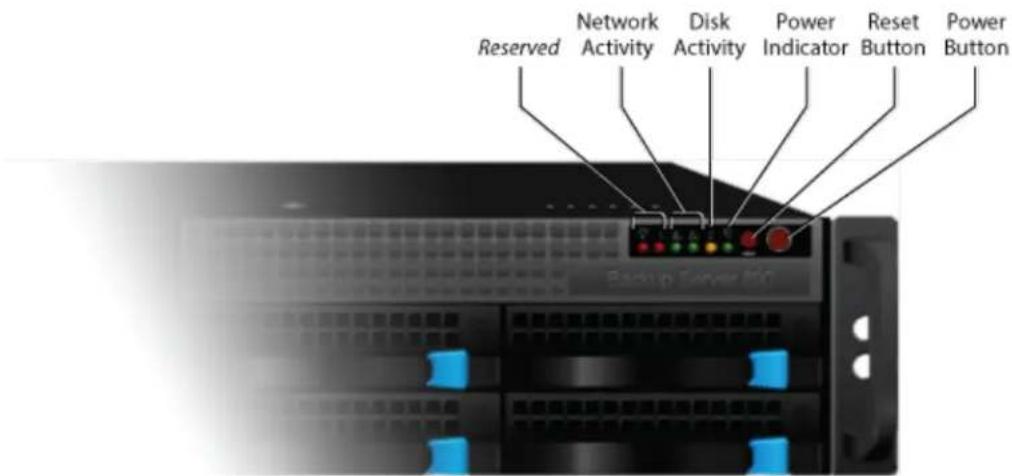
The following table describes the Barracuda Backup front panel indicator lights for models .890, 891, 892, 990, and 991
Model 890, 891, 892, 990, and 991 Front Panel Component Description
| Component Name Description | |
| Reserved (2) Reserved for future use. | |
| Network Activity (2) Blinks green to indicate network activity. | |
| Disk Light Displays a solid green light and blinks during disk activity. | |
| Power Light Displays a solid green light when the system is powered on. | |
| Reset Button Push for 5 seconds to reset the Barracuda Backup Server. | |
| Power Button Push to power on the Barracuda Backup Server, tap to safely reset the Barracuda Backup Server. |
The following figure illustrates the Barracuda Backup rear panel ports and connectors for models 890 and 891.
Model 890 and 891 Rear Panel
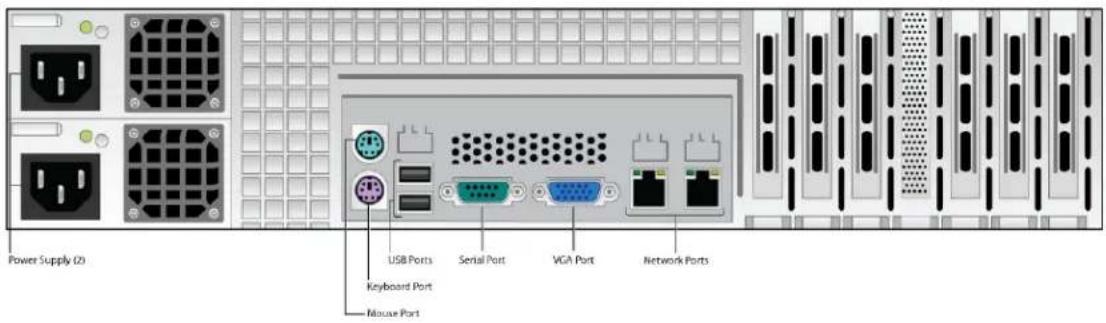
The following table describes the Barracuda Backup rear panel ports and connectors for models 890 and 891.
Model 890 and 891 Rear Panel Port and Connector Description
| Port/Connector Name Description | |
| Power Supply (2) Redundant power supply input. | |
| Mouse Port Optional. Mouse port. | |
| Keyboard Port Optional. PS2 keyboard connection. | |
| USB Ports (2) Optional. USB device connection. | |
| Serial Port Optional. Serial device connection. | |
| VGA Port Recommended. Video graphics array (VGA) monitor connection. | |
| Network Ports (2) Network ports. |
The following figure illustrates the Barracuda Backup rear panel ports and connectors for models 892, 990 and 991.
Model 892, 990, and 991 Rear Panel
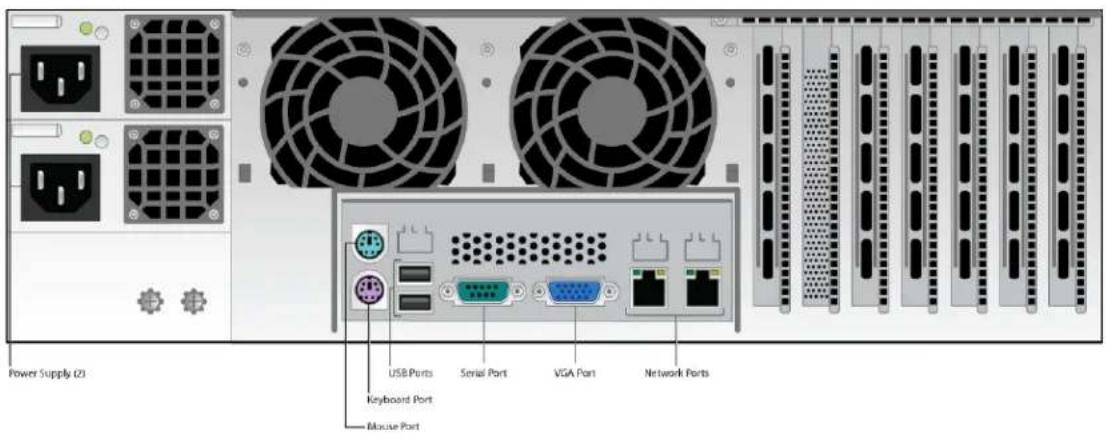
Model 892, 990, and 991 Rear Panel Port and Connector Description
| Port/Connector Name Description | |
| Power Supply (2) Redundant power supply input. | |
| Mouse Port Optional . Mouse port. | |
| Keyboard Port Optional . PS2 keyboard connection. | |
| USB Ports (2) Optional. USB device connection. | |
| Serial Port Optional. Serial device connection. | |
| VGA Port Recommended. Video graphics array (VGA) monitor connection. | |
| Network Ports (2) Network ports. |
Barracuda Backup Server 1090 and 1091
The following table describes the front panel indicator lights for models 1090 and 1091.
Model 1090 and 1091 Front Panel Component Description
| Component Name Description | |
| Reserved (2) Reserved for future use. | |
| Network Activity (2) Blinks green to indicate network activity. | |
| Disk Light Displays a solid green light and blinks during disk activity. | |
| Power Light Displays a solid green light when the system is powered on. | |
| Reset Button Push for 5 seconds to reset the Barracuda Backup Server. | |
| Power Button Push to power on the Barracuda Backup Server, tap to safely resetthe Barracuda Backup Server. |
The following figure illustrates the Barracuda Backup rear panel ports and connectors for models 1090 and 1091.
Model 1090 and 1091 Rear Panel
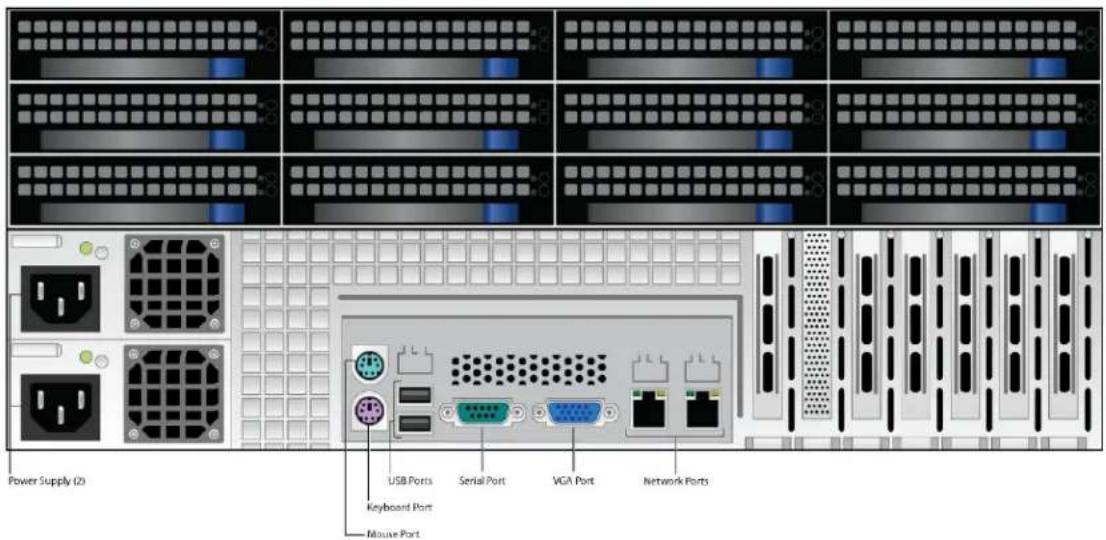
The following table describes the rear panel ports and connectors for models 1090 and 1091.
Model 1090 and 1091 Rear Panel Port and Connector Description
| Port/Connector Name Description | |
| Power Supply (2) Redundant power supply input. | |
| Mouse Port Optional. Mouse port. | |
| Keyboard Port Optional. PS2 keyboard connection. | |
| USB Ports (2) Optional. USB device connection. | |
| Serial Port Optional. Serial device connection. | |
| VGA Port Recommended. Video graphics array (VGA) monitor connection. | |
| Network Ports (2) Network ports. |
Barracuda Backup Server Hardware Specifications
This article refers to Barracuda Backup firmware version 5.0 and higher.
In this article:
• Barracuda Backup Form Factor
• Barracuda Backup Server Weight and Dimensions
• Barracuda Backup Server Network Interface Card
• 10 Gigabit Ethernet Card Option (Models 892, 990, and 1090 Only)
• 10 Gigabit Fiber Card Option (Models 891, 991, and 1091 Only)
- Barracuda Backup Server Model 890, 990, and 1090 Drive Layout
Related Articles
- Barracuda Backup Server Panel Indicators, Ports, and Connectors
• How to Physically Install the Barracuda Backup Server
Barracuda Backup Form Factor
| Model Form Factor | |
| 190 Rack mountable - 1U | |
| 390 Rack mountable - 1U | |
| 490 Rack mountable - 1U | |
| 690 Rack mountable - 1U | |
| 890/891 Rack mountable - 2U | |
| 892/990/991 Rack mountable - 3U | |
| 1090/1091 Rack mountable - 4U |
Barracuda Backup Server Weight and Dimensions
| Model Weight in Pounds Dimensions in Inches (W x D x H) | |
| 190 5.2 10 x 8.3 x 2 | |
| 390 12 16.8 x 14 x 1.7 | |
| 490 26 17.2 x 19.8 x 1.7 | |
| 690 26 17.2 x 19.8 x 1.7 | |
| 890/891/892 52 17.4 x 25.5 x 3.5 | |
| 990/991 76 17.2 x 25.5 x 5.2 | |
| 1090/1091 154 17.2 x 27.4 x 7 |
Barracuda Backup Server Network Interface Card
Use network interface card (NIC) bonding to increase available bandwidth:
| Model Throughput Number of Interfaces | |
| 190 1Gb 1 | |
| 390 1Gb 1 | |
| 490 1Gb 1 | |
| 690 1Gb 2 | |
| 890 1Gb 2 | |
| 891/892 10Gb 3 | |
| 990/991 10Gb 3 | |
| 1090/1091 10Gb 3 |
10 Gigabit Ethernet Card Option (Models 892, 990, and 1090 Only)
Models 892, 990, and 1090 include a 10 Gigabit Ethernet card. If your organization's environment does not support 10 Gigabit throughput, the card reduces its speed to 1 Gigabit:
• 1 Gigabit Connection - Plug in a CAT5e cable for 1 Gigabit throughput.
• 10 Gigabit Connection - Plug in a CAT6e cable and a 10 Gigabit switch for 10 Gigabit throughput.
10 Gigabit Fiber Card Option (Models 891, 991, and 1091 Only)
Use a small form-factor pluggable (SFP) transceiver module:
- SFP - Use SFP for 1/4 Gigabit/second throughput; you will need a multi-mode cable with LC connections or a direct attach cable.
- SFP+ - Use SFP+ for 10 gigabit/second throughput (included); you will need a multi-mode cable with LC connections or a direct attach cable.
- Vendor-Specific SFP - If you are using a vendor-specific module in your environment, simply remove the Barracuda provided SFP and replace with other vendor.
By default the top port is active. Contact Barracuda Networks Technical Support if you wish to bond the two ports for 20 Gigabit throughput with failover capabilities.
Barracuda Backup Server Model 890, 990, and 1090 Drive Layout
Model 890 Drive Layout
| Drive 0 | Drive 2 | Drive 4 | Drive 6 |
| Drive 1 | Drive 3 | Drive 5 | Drive 7 |
Model 990 Drive Layout
| Drive 0 | Drive 4 | Drive 8 | Drive 12 |
| Drive 1 | Drive 5 | Drive 9 | Drive 13 |
| Drive 2 | Drive 6 | Drive 10 | Drive 14 |
| Drive 3 | Drive 7 | Drive 11 | Drive 15 |
Model 1090 Drive Layout
Device Front - Connector 1
| Drive 05 | Drive 11 | Drive 17 | Drive 23 |
| Drive 04 | Drive 10 | Drive 16 | Drive 22 |
| Drive 03 | Drive 09 | Drive 15 | Drive 21 |
| Drive 02 | Drive 08 | Drive 14 | Drive 20 |
| Drive 01 | Drive 07 | Drive 13 | Drive 19 |
| Drive 00 | Drive 06 | Drive 12 | Drive 18 |
Device Back - Connector 0
| Drive 02 | Drive 05 | Drive 08 | Drive 11 |
| Drive 01 | Drive 04 | Drive 07 | Drive 10 |
| Drive 00 | Drive 03 | Drive 06 | Drive 09 |
AC Input Voltage Range
| Model Power AC Input Range BTU/hr | |||
| 190 Single 60W 12V 205 | |||
| 390 Single 220W 100V 751 | |||
| 490 Single 350W 100-240V 1194 | |||
| 690 Single 350W 100-240V 1194 | |||
| 890/891/892 720W Redundant Power 100-240V 2457 | |||
| 990/991 800W Redundant Power 100-240V 2730 | |||
| 1090/1091 1400W Redundant Power 100-140V | 180-240V120-230V | 4777 | |
How to Physically Install the Barracuda Backup Server
This article refers to Barracuda Backup firmware version 5.0 and higher.
In this article:
- Rack Mount Barracuda Backup Server Models 390 through 1091
- Set Up the Barracuda Backup Server
Related Articles
- Barracuda Backup Server Panel Indicators, Ports, and Connectors
- Barracuda Backup Server Hardware Specifications
Rack Mount Barracuda Backup Server Models 390 through 1091
For Barracuda Appliances 390 and above, these rack mounting Instructions provide information on installing the SC825 chassis into a rack unit with the rail kit provided. Refer to the installation instructions that comes with the rack unit for detailed instructions.

Model 190
The Model 190 is a desktop unit and does not require rack mounting.
Choose a Setup Location
- Allow enough clearance in front of the rack to allow the front door to open completely (\~25 inches).
- Leave approximately 30 inches of clearance in the back of the rack to allow for sufficient airrow and ease in servicing.
- This product is for installation only in a "Restricted Access Location" (dedicated equipment rooms, service closets and other secure, ventilated environments).
- You must have access to a grounded power outlet.

Rack Mounting Precautions
- Ensure the leveling jacks on the bottom of the rack are fully extended to the oor with the full weight of the rack resting on them.
- In a single rack installation, stabilizers should be attached to the rack.
• In multiple rack installations, the racks should be coupled together. - Verify the rack is stable before extending a component from the rack.
- Extend only one component at a time - extending two or more simultaneously may cause the rack to become unstable.

General Server Precautions
Review the electrical and general safety precautions that came with the components you are adding to the chassis. Determine the placement of each component in the rack before you install the rails. Install the heaviest server components on the bottom of the rack rst, and then work upwards.
Use a regulating uninterruptible power supply (UPS) to protect the server from power surges, voltage spikes, and to keep your system operating in case of a power failure. Allow the hot plug hard drives and power supply modules to cool before touching them. Always keep the rack's front door and all panels and components on the servers closed when not servicing to maintain proper cooling.
- Ambient Operating Temperature - If installed in a closed or multi-unit rack assembly, the ambient operating temperature of the rack environment may be greater than the ambient temperature of the room. Therefore, consideration should be given to installing the equipment in an environment compatible with the manufacturer's maximum rated ambient temperature (Tmra).
- Proper Airrow and Mechanical Loading - Mount equipment into a rack so that the amount of airrow required for safe operation is not compromised and to prevent any hazardous condition that can arise due to uneven mechanical loading.
- Circuit Overloading - Consideration should be given to the connection of the equipment to the power supply circuitry and the effect that any possible overloading of circuits might have on overcurrent protection and power supply wiring. Appropriate consideration of equipment nameplate ratings should be used when addressing these concerns.
- Reliable Ground - To ensure a reliable ground at all times, the rack itself should be grounded. Particular attention should be given to power supply connections other than the direct connections to the branch circuit (i.e. the use of power strips, etc.).
Install the Barracuda Backup Server into the Rack
This section provides information on installing the SC825 chassis into a rack unit with the provided rails. Refer to the installation instructions that came with the rack unit you are using for detailed instructions; these rails fit a rack between 26" and 33.5" deep.
- Identify the Rack Rail Sections - The chassis package includes two rack rail assemblies in the rack mounting kit. Each assembly consists of two sections: an inner fixed chassis rail that secures directly to the server chassis, and an outer xed rack rail that secures directly to the rack itself.
Rack Rail Sections
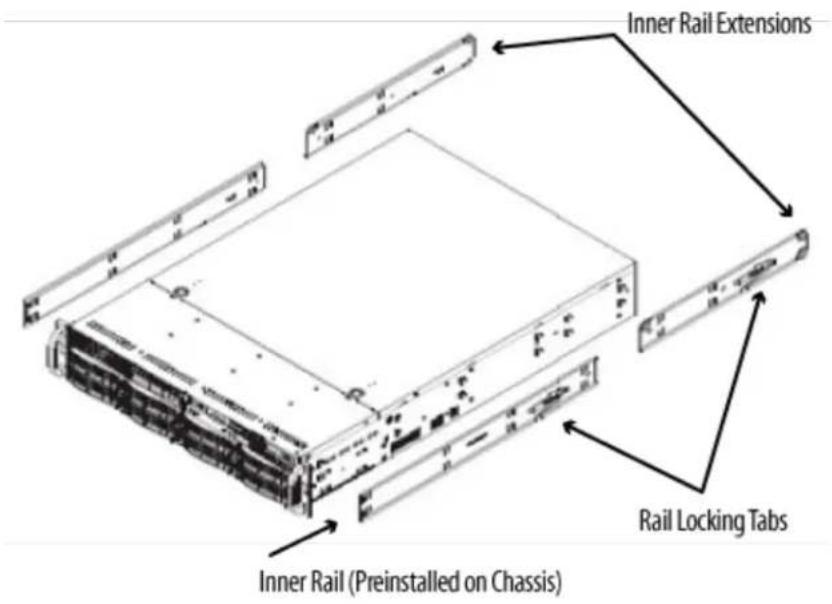
- Locking Tabs - Both chassis rails have a locking tab. The tabs lock the server into place when it is installed and pushed fully into the rack. These tabs also lock the server into place when fully extended from the rack so as to prevent the server from coming completely out of the rack when pulled out for servicing.
Identifying Rack Rail Sections (right side rail shown)
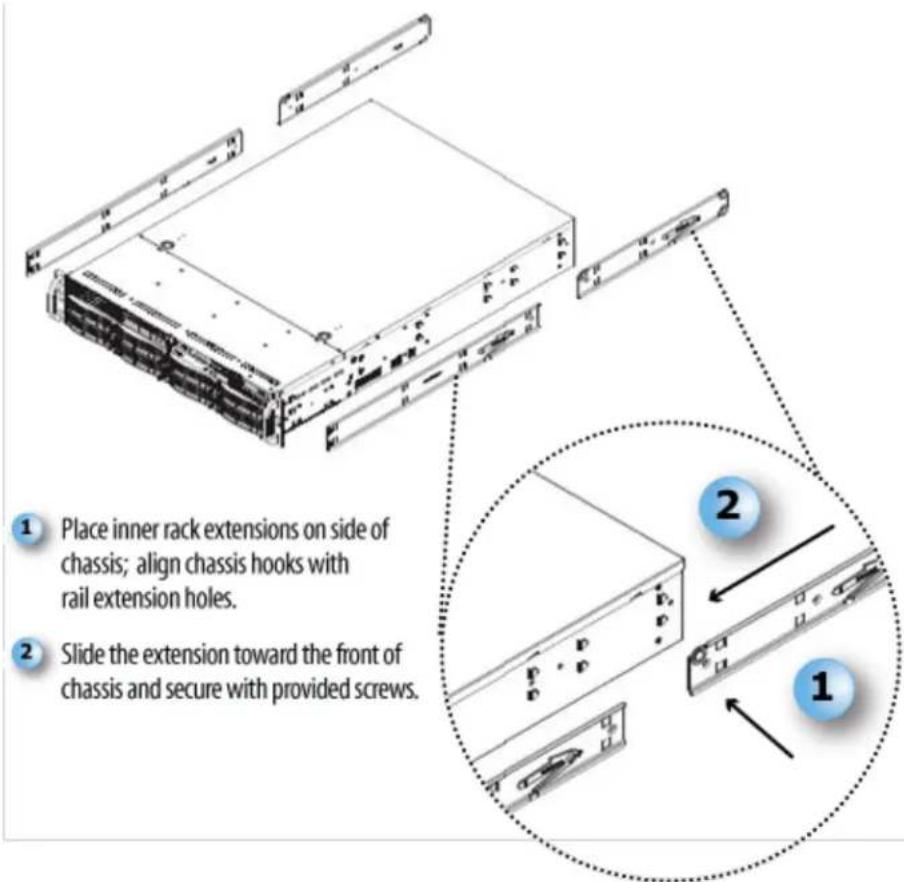
The SC825 chassis includes a set of inner rails in two sections: inner rails and inner rail extensions.
- Inner Rack Rails - The inner rails are pre-attached and do not interfere with normal use of the chassis if you decide not to use a server rack. Attach the inner rail extension to stabilize the chassis within the rack.
- Place the inner rack extensions on the side of the chassis, aligning the hooks of the chassis with the rail extension holes. Verify the extension faces "outward" like the pre-attached inner rail.
- Slide the extension toward the front of the chassis, and secure the chassis with 2 screws as shown below.
- Outer Rack Rails - Outer rails attach to the server rack and hold the server in place. The outer rails for the SC836 chassis extend between 30 inches and 33 inches.
- Assemble the outer rack rails using the diagram shown below:
Assemble Outer Rack Rails
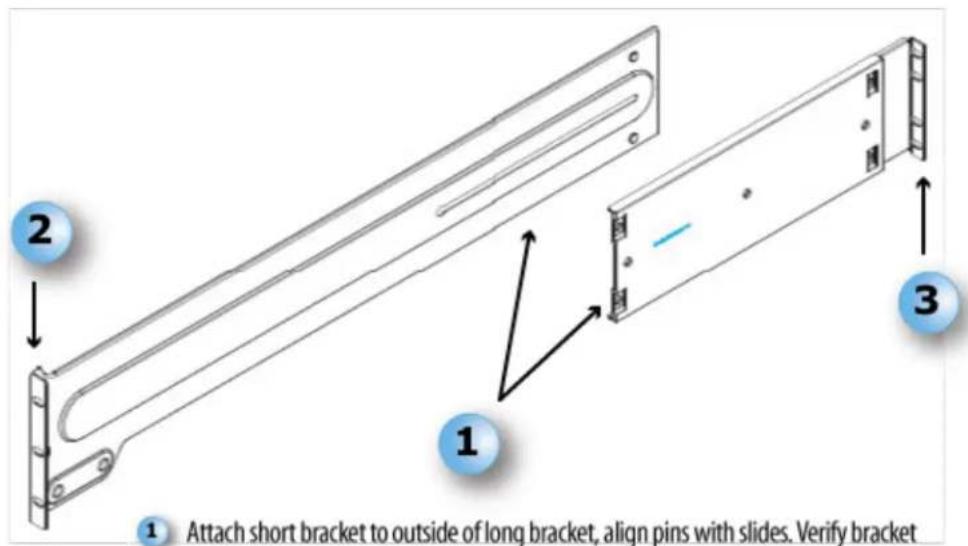
1 Attach short bracket to outside of long bracket, align pins with slides. Verify bracket ends face same direction.
2 Adjust short and long bracket to proper distance so rail fits snugly into rack, and secure long bracket to front side of outer rail with two M5 screws.
3 Attach short bracket to rear side of outer rail with three M5 screws.
- Attach the outer rack rails and install the chassis into the rack as illustrated in the following diagram:
Install Chassis into the Rack
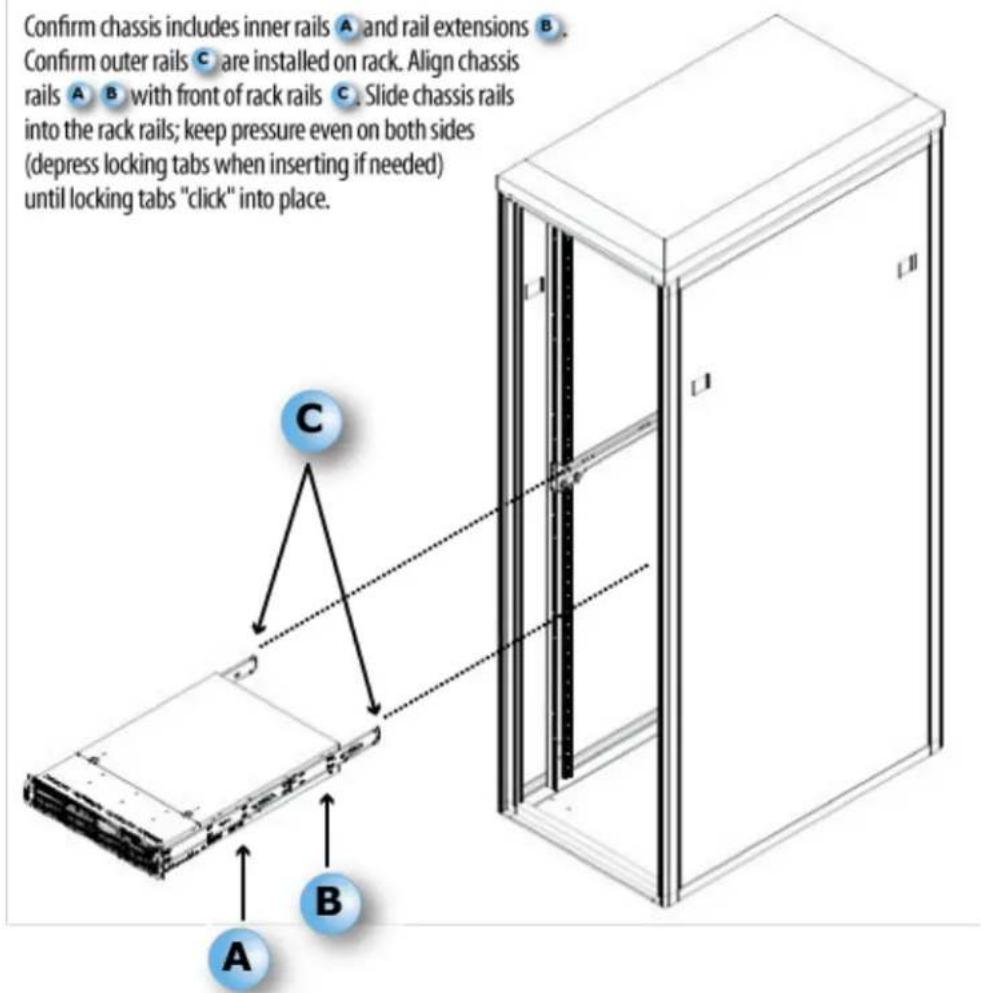
Set Up the Barracuda Backup Server
Physically install the Barracuda Backup Server using the following steps:
- For models 390-1091, fasten the Barracuda Backup Server to a 19-inch rack. For model 190, place it in a stable location.
- Connect an Ethernet cable from the network switch to the Ethernet port on the back of the Barracuda Backup Server.
- Connect a standard VGA monitor, PS2/USB keyboard, and an AC power cord to the Barracuda Backup Server.
- Press the button to turn the unit on.Power
For detailed configuration steps, refer to Step 2 in the Getting Started section of this TechLibrary, or the Barracuda Backup Deployment Template.
Troubleshooting and Error Messages
In this Section
• Understanding Why the Barracuda Backup Agent Moves to a New Volume
• Understanding Why Data is not Replicating to an Offsite Barracuda Backup Location
• How to Troubleshoot Using the Barracuda Backup Agent (Windows) Log File
• How to Resolve Low Disk Space
• How to Change the Barracuda Backup Agent Port Number
• How to Change the Barracuda Linux Backup Agent Port Number
• How to Change the SQL Recovery Model
• How to Resolve Microsoft Exchange 2010 Large Message Restore Errors
• How to Resolve Snapshot Backup Errors
- Resolving "Agent database moved to different location" Warning
- Resolving "Error Creating Snapshot" Error During ESX/ESXi Virtual Machine Backup
- Resolving "Error Reading Object" Error During ESX or ESXi Virtual Machine Backup
- Resolving "Error Removing Snapshot" Error During ESX/ESXi Virtual Machine Backup
- Resolving "Failed to connect to backup agent software" Error
- Resolving "File System Snapshot was Released" Error
- Resolving "Incremental backups cannot be performed while circular logging is enabled" Error
- Resolving "An error occurred during agent backup initialization" Error
- Resolving "Unable to back up virtual machines with independent disks" Error
- Resolving "VMDK is larger than the maximum size supported by datastore" Error
- Resolving "Error backing up selected object" Error
- Resolving "An unknown OS error occurred" Error
- Resolve the "Failure while using USN journal" Error
• Monitoring Windows System Performance During Backup
• How to Increase Backup Performance
Related Articles
• Replacing a Failed Barracuda Backup Server
• VMware Data Recovery Backup and Restore Permissions
Understanding Why the Barracuda Backup Agent Moves to a New Volume
The Barracuda Backup Agent requires at least 1GB of free disk space on a data source for its database. If less than the required amount of disk space is available, the Barracuda Agent database is automatically moved to another storage volume.
While backups will continue to run, a warning message displays in the Barracuda Backup web interface stating that the database has been moved:

To resolve this issue, install the Barracuda Backup Agent to an alternate storage volume with adequate free disk space.
Updating the Backup Agent Location
Use the following steps to move the Barracuda Backup Agent to an alternate storage volume and eliminate the warning message:
- Completely uninstall the Barracuda Backup Agent using the Add/Remove Programs or Programs and Features option on your system.
- Once the Agent is uninstalled, log in to the Barracuda Backup web interface, and go to the SUPPORT > Software Downloads page.
- Download and install the latest version of the Barracuda Backup Agent.
- During installation, select the installation path on a storage volume with at least 1GB of free disk space.
- Once the next successful backup occurs, the warning message no longer displays.
Understanding Why Data is not Replicating to an Offsite Barracuda Backup Location
This article refers to firmware version 5.0 and higher.
The Barracuda Backup default rate limit controls the rate of data replicated to offsite storage locations throughout the day; preserving Internet bandwidth during peak usage and optimizing offsite backup transfers during daily
non-peak hours. You can further refine the rate limit by enabling an alternate rate limit and specifying a specific time period to which it applies.
However, if a large backup is scheduled during the alternate rate limit time interval, replication to the offsite location may not complete within the specified time period. In this case, the yellow status indicator (△) icon displays on the STATUS page indicating there is a problem with the offsite syncing queue.
Resolving Data Replication Issue
To resolve this issue, you can:
- Increase Speed Limit
- Reduce Amount of Data for Replication
• Decrease Backup Schedule Frequency
Increase Speed Limit
Use the following steps to increase the speed limit to ensure data replication finishes within the specified timeframe:
- Log in to Barracuda Backup, and go to page.BACKUP > Rate Limit
- Turn on, and update the bandwidth based on the selected option: Alternate Rate Limit
• Full Speed - Uses 100% of available bandwidth
• Smart Mode - Increase the Percent of Bandwidth value -
Kb/s or Mb/s - Specify a higher value
-
Click Save at the top of the page to save your changes.
Reduce Amount of Data for Replication
Use the following steps to select less data for replication:
- Log in to Barracuda Backup, and go to BACKUP > Sources.
- On the Data Sources page, locate the data source on the system you wish to modify, and click Edit to the right of the data source.
- In the Edit page, in the Item Selection section, review the selected items. Determine if there are items that do not need backup, and deselect those items.
- Stave at the top of the page to save your changes.
Decrease Backup Schedule Frequency
- Log in to Barracuda Backup, and go to BACKUP > Schedule.
- Click the Edit ( ) icon to the right of the schedule associated with the backup.
- In the Edit Backup Schedule page, if Repeat is turned on in the Daily Backup Timeline section, reduce the minute or hour frequency.
- State at the top of the page to save your changes.
How to View Offsite Transfer Statistics
To view transfer statistics, log in to Barracuda Backup, and go to BACKUP > Replication. The following queue details display:
- Status - Displays either the green indicator (Online) icon or the red indicator (Offline) icon
• Total Stored - Total size of file parts transferred offsite from the Barracuda Backup Server - Queue Size - Total size of the file parts yet to be transferred offsite from the Barracuda Backup Server
- Queue Age - Amount of time that the queued data has been waiting to be transferred offsite from the Barracuda Backup Server
Sending Data To
| TARGET LIST | Status | Send All Local Backups | Total Stored | Queue Age | Queue Size |
| Barracuda Cloud Storage | Online | 6.58 GB | 2 hrs, 27 mins, 59 secs | 2.61 GB |
How to Troubleshoot Using the Barracuda Backup Agent (Windows) Log File
This article refers to Barracuda Backup firmware version 5.2 and higher, and the Barracuda Backup Agent (Windows) version 5.2 and higher.
Use the Backup Agent bbtrace.txt log files to understand and resolve any errors that may occur with the Backup Agent such as an Agent backup initialization error. Each time the Backup Agent Service is restarted, a number is appended to the current bbtrace.txt file, and a new file is generated.
To review the log file:
- Log in to the data source that is failing to back up data, and go to the Backup Agent log files. By default, the log files are located in:
C:\Program Files\Barracuda\Barracuda Backup Agent\log
- Locate the file ; this is the most recent log file.bbtrace.txt

If the server was rebooted, or the agent was restarted, you may need to review older bbtrace.txt files to find the time listed in pbet details page in the previous step.
- Open bbtrace.txt in Notepad. This file contains data that is helpful in determining the specific error. Each log entry is time stamped, so you will first want to identify when the failed backup occurred based on the Report details page; note that there may be multiple days of log details so it is recommended that you use the search function to find the error.
- Search the log file for terms such as Failed or Critical. Once you locate the term, review the associated content to determine the specific error message:
05/22/13 02:09:55 CRITICAL Failed to send class begin message id: 0600000b class id: 00000716
(Error 5093: Snapshot provider service detected an error preventing the snapshot operation)
05/22/13 02:09:55 CRITICAL Exception - Original: 2147754753 - 0x80042301 Mapped:5090
Location:YVssManager :l:BackupComplete:c:\jenkins\workspace\bbagent_win\source\ods+\server\vam\vss
\YvssManager.cpp:1959 Description: 'Unexpected operating system error
In this example, a VSS snapshot failed due to an unexpected operating system error on the targeted server.

Note that an Agent error message is typically followed by associated CRITICAL Sup: Resource not put details which is not needed for troubleshooting.
How to Resolve Low Disk Space
This article applies to all firmware versions, except where noted.
If the Barracuda Backup Server drives run out of space, backups cannot complete and will fail. A low disk space notification is sent when the Barracuda Backup server reaches 80% capacity and above. Following are several options to combat this issue:
- Verify a retention policy is applied to all data sources. If a source does not have a retention policy applied to it, all data from that source is retained forever.
- For example, if you initially back up 100GB of data and 5GB of changed data daily, after 30 days with no retention policy you will have a total of 250GB for the source.
- Go to the BACKUP > Retention Policies page in the web interface and verify that each source has a retention policy applied to it.
- Additionally, you can contact Barracuda Networks Technical Support and request verification that each data source on the Barracuda Backup Server has a policy applied.
- Determine which data sources are backing up the largest files.
- In firmware version 5.1 and higher, go to REPORTS > Large Items to review which sources are backing up the largest files. You can then determine if these files need to be backed up and exclude them, or lower the retention policy applied to the source.
- For firmware version 5.0 and lower, contact Barracuda Networks Technical Support and request to have a report of large items generated.
• Determine which Servers are using the most space.
- Contact Barracuda Networks Technical Support and request to have a usage report generated for your Barracuda Backup Server. This report displays the amount of space used by each backup data source. Additionally, this report shows which Server is retaining the most historic data kept per the retention policy.
- Modify your retention policies by source basis to manage disk usage.
If you determine that all of the above suggestions are in place and all settings are correct, and you are continuing to run low on space, it may be time to look at upgrading to the next model with increased disk capacity.

If you are unable to determine what is causing your server to run low on space, contact Barracuda Networks Technical Support and a technician can assist with troubleshooting.
How to Change the Barracuda Backup Agent Port Number
This article refers to Barracuda Backup firmware version 5.0 and higher. This article describes how to resolve the service start error 112.
Issue
You encounter the following error when installing the Barracuda Backup Agent on a server or workstation in your environment:
Barracuda Backup Agent setup received error "112 Service Error" while attempting to start service.
Cause
You may be running software that uses port 5120 on the selected system which is causing a conflict and generating the error.
Solution
If port 5120 is in use by another piece of software on your data source, Barracuda Networks recommends configuring the Barracuda Backup Agent to use port 5121.
Step 1. Determine the Ports Used by the System
Use the following steps to configure the port:
- Log in to the system where you received the error, and launch a web browser.
- Go to the downloads page on the Microsoft TechNet site, and download and install .TCPView
- Launch TCPView; the ports that the system is currently using display in the web interface.
- Review the list. If you see that port 5120 is in use, change the port number in the bbconfig.ini file as described in step 2.
Step 2. Add the Alternate Port Number bbconfig.ini
Use the following steps to change the port number through the file:bbconfig.ini
- On the system where you received the error, locate the bbconfig.ini file, usually found in the C:\Program Files\Barracuda\Barracuda folder.Backup Agent\config
- Open bbconfig.ini in Notepad, and add the line port='port number' beneath the [configuration] options. For example:
- Save and close the file.
[configuration]
nodeGuide={XXXXXXXX-XXXXXXXX-XXXXXXXX-XXXXXXXX}
port=5121
Step 3. Restart Services
- Log in to the system again.
- Restart the Barracuda Backup Agent service.
Step 4. Update Data source
- Log in to Barracuda Backup, select the associated Barracuda Backup Server in the left pane, and go to the BACKUP > Sources page.
- In the right pane, click Edit to the right of the system where the error occurred.
- In the Computer Name field, append the IP address with the port number added in Step 2 above.
For example, if your IP address is '192.168.0.1', and you added the line 'port=5121' to the bbconfig.ini file, update the Computer Name field as follows:
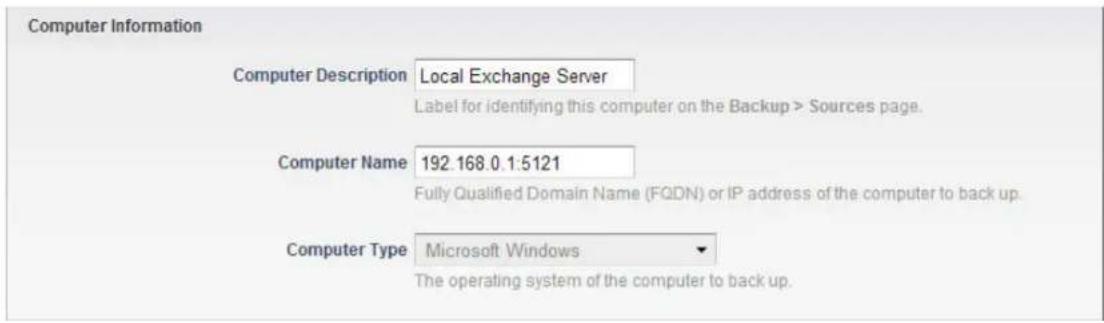
How to Change the Barracuda Linux Backup Agent Port Number
This article refers to Barracuda Backup firmware version 5.3 and higher, and the Barracuda Backup Agent (Linux).
By default the Barracuda Backup Agent (Linux) utilizes port 5120 to communicate with the Barracuda Backup Server. If there is a port conflict with another service, assign the Linux Agent a different port.
Assign a New Port
- Locate the bbconfig.ini file in the default file location: /usr/local/barracuda/bbs/config/bbconfig.ini
- To view the file, type the following command: cat /usr/local/barracuda/bbs/config/bbconfig.ini
- The file content displays: [installControl] buildNumber=85471 installedVersion=5.3.01-rel [configuration] nodeGuid={00001001-5476F68E}
- Open the file with a text editor such as vi or vim, for example: vim /usr/local/barracuda/bbs/config/bbconfig.ini
- Add the following line to the end of the bbconfig.ini file: Port=5555 Where represents the port number you wish to assign the Agent. 5555
- View the file, it should look similar to: [installControl] buildNumber=85471 installedVersion=5.3.01-rel [configuration] Port=5555
- Save and close the file.
Restart the Agent
Enter the following command to restart the Linux Agent:
/etc/init.d/bbagent start
Edit the Data Source
- Log in to the Barracuda Backup web interface, and go to the page.BACKUP > Sources
- Click Edit next to the data source, and configure the new port that the Linux Agent is to use, for example:
Computer Information
Computer Description
Linux Server
Label for identifying this computer on the Backup >Sources page
Computer Name
10.26.135.249 5555
Fully Qualified Domain Name (FGDN) or IP address of the computer to back up.
Computer Type
Linux / Linux

The operating system of the computer to backup
How to Change the SQL Recovery Model
This article refers to all Barracuda Backup firmware, and Microsoft®SQL Server 2005, 2008, 2008 R2, or 2012.
In this article:
- Warning Message
- Set the SQL Recovery Model
Additional Resource
- SQL Server 2012
- SQL Server 2008 R2
- SQL Server 2008
- SQL Server 2005
The Barracuda Backup Server is designed to initially complete a full backup of the SQL Server database(s). Once the initial full backup is complete, the Barracuda Backup Server can attempt to complete an incremental backup of the SQL Server database. In order for the Barracuda Backup Server to successfully complete an incremental backup, the SQL Server database(s) must be set to Full Recovery Model. Typically, SQL Server databases are set to Simple Recovery Model by default.
Warning Message
If an incremental backup cannot be completed, the Barracuda Backup Server reverts to a full backup and a warning message displays:
Agent Software
Download a copy of the Barracuda Backup Agent from the software page
Test Software Connectivity to verify the Backup Server can communicate with the Barracuda Backup Agent.
Test Software Connectivity Status: Note: One or more user databases are not using the full recovery model. If any user
databases are not configured to use the full recovery model, all SQL backups will be full, rather than incremental.

Simple Recovery Model
If you wish to leave the SQL Recovery Model set to Simple Recovery Model, log into the Barracuda Backup web interface, and go to the BACKUP > Schedules page. On the Schedules page, Click the Edit icon for the associated backup schedule. On the Edit page, in the SQL/Exchange Backup section, select Full from the Backup type drop-down menu. Click Save at the top of the page to save your changes.
The recovery model controls how transaction logs are managed. Before changing the Recovery Model, consult your database administrator to determine the setting that is appropriate for your environment.
Set the SQL Recovery Model
All SQL databases need to be set to Full Recovery Model in order to produce Incremental backups. Otherwise, Full backups are performed on every run.
Use the following steps to set the Recovery Model on your SQL databases to Full:
- Connect to the appropriate instance of the Microsoft SQL Server Database Engine.
- In Object Explorer, click the server name to expand the server tree.
- Expand Databases, and, depending on the database, either select a user database or expand System Databases and select a system database.
- Right-click the database, and then click Properties; the Database Properties dialog box displays.
- In the pane, click .Select a Page Options
- The current recovery model displays in the Recovery Model list. Select Full from the list, and click OK to save your changes.
How to Resolve Microsoft Exchange 2010 Large Message Restore Errors
This article refers to firmware 5.0 and higher, and Microsoft® Exchange Server 2010 successfully running message-level backups.
In this article:
- Error Message
- Modify web.config
- Run appcmd
- Barracuda Backup Restore
- Configuration Settings
- Verify Exchange Management Console Settings
• Exchange Management Shell
Error Message
If you attempt to restore large messages from Microsoft Exchange 2010, you may encounter a Max EWS Request error:
Restore Destination:
Restore Failed
Duration January 3 2013 11:31am-11:32am EST (52 seconds)
Size 85.71 KB
Errors 11 Errors
▼ Message-Level - January 3 2013 11:32am EST
▼ original mailbox
| Error | original mailbox × Inbox/[BLANK SUBJECT] (subahn@sestraining.locab)Max EWS request length exceeded or insufficient storage | 15.47 MB | January 3 2013 11:31am EST |
| Error | original mailbox × Inbox/[BLANK SUBJECT] (subahn@sestraining.locab)Max EWS request length exceeded or insufficient storage | 25.52 MB | January 3 2013 11:31am EST |
| Error | original mailbox × Inbox/[BLANK SUBJECT] (subahn@sestraining.locab)Max EWS request length exceeded or insufficient storage | 18.76 MB | January 3 2013 11:31am EST |
| Error | original mailbox × Inbox/[BLANK SUBJECT] (subahn@sestraining.locab)Max EWS request length exceeded or insufficient storage | 17.92 MB | January 3 2013 11:31am EST |
| Error | original mailbox × Inbox/[BLANK SUBJECT] (subahn@sestraining.locab)Max EWS request length exceeded or insufficient storage | 17.15 MB | January 3 2013 11:31am EST |
| Error | original mailbox × Inbox/Q-2& (subahn@sestraining.locab)Max EWS request length exceeded or insufficient storage | 24.98 MB | January 3 2013 11:31am EST |
| Error | original mailbox × Inbox/EHI probable #E#W (subahn@sestraining.locab)Max EWS request length exceeded or insufficient storage | 21.92 MB | January 3 2013 11:31am EST |
| Error | original mailbox × Inbox/Plough value system enough (subahn@sestraining.locab)Max EWS request length exceeded or insufficient storage | 22.50 MB | January 3 2013 11:31am EST |
| Error | original mailbox × Inbox/RE: TEST w Attachment - 10MB (Shawn Lubahnsubahn@sestraining.locab)Max EWS request length exceeded or insufficient storage | 21.74 MB | January 3 2013 11:31am EST |
| Error | original mailbox × Inbox/Reaction (subahn@sestraining.locab)Max EWS request length exceeded or insufficient storage | 25.60 MB | January 3 2013 11:31am EST |
| Error | original mailbox × Inbox/Voice (subahn@sestraining.locab)Max EWS request length exceeded or insufficient storage | 16.32 MB | January 3 2013 11:31am EST |
Messages 11 Restored Duration 11:31am-11:31am EST (00:00:44) Restore Size 85.71 KB at 1.9 KB/s Restore Rate 22 items at < 1 item/sec
| Restored | original mailbox × Inbox/[BLANK SUBJECT] (----) | 5.03 KB | January 3 2013 11:31am EST |
| Restored | original mailbox × Inbox/[BLANK SUBJECT] (----) | 14.68 KB | January 3 2013 11:31am EST |
| Restored | original mailbox × Inbox/[BLANK SUBJECT] (----) | 8.01 KB | January 3 2013 11:31am EST |
| Restored | original mailbox × Inbox/[BLANK SUBJECT] (----) | 3.91 KB | January 3 2013 11:31am EST |
| Restored | original mailbox × Inbox/fg yesterday (----) | 10.66 KB | January 3 2013 11:31am EST |
| Restored | original mailbox × Inbox/172 'JE 9P' (----) | 7.82 KB | January 3 2013 11:31am EST |
Modify web.config
Use the following steps to resolve a failed restore:
- Log into your Microsoft Exchange 2010 Server as the administrator, and navigate to the Program Files > Microsoft > Exchange Server > V14 > Client Access > exchweb > ews folder, and create a copy of the file web.config:
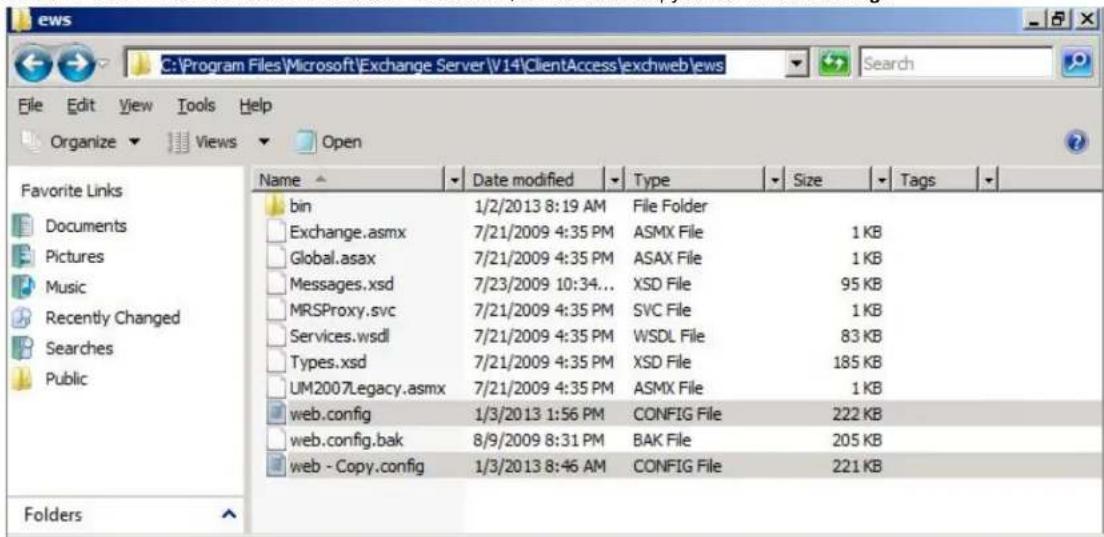

Creating a copy of the web.config file allows you to revert to your original settings in case you encounter issues during resolution of the restore error.
- Open the original file using running as the administrator.web.config Notepad
- In Notepad, go to Edit > Find, and enter max in the find what field:
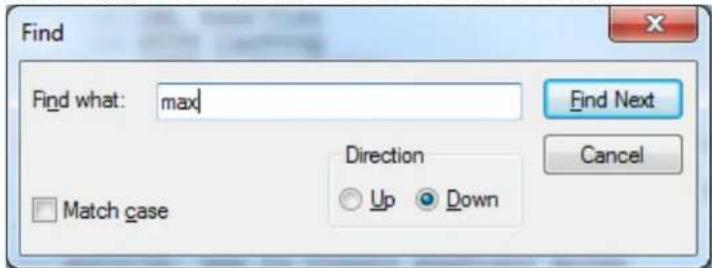
FindNext until you locate the following line of code:
- The value maxReceivedMessageSize="13600000" represents a maximum attachment size of 13MB. Therefore, any attachments over 13MB cannot be restored. Change this value to a larger value to handle the largest attachment failing to restore, for example, replace 13600000 with 53600000 which allows for attachments just over 50MB:
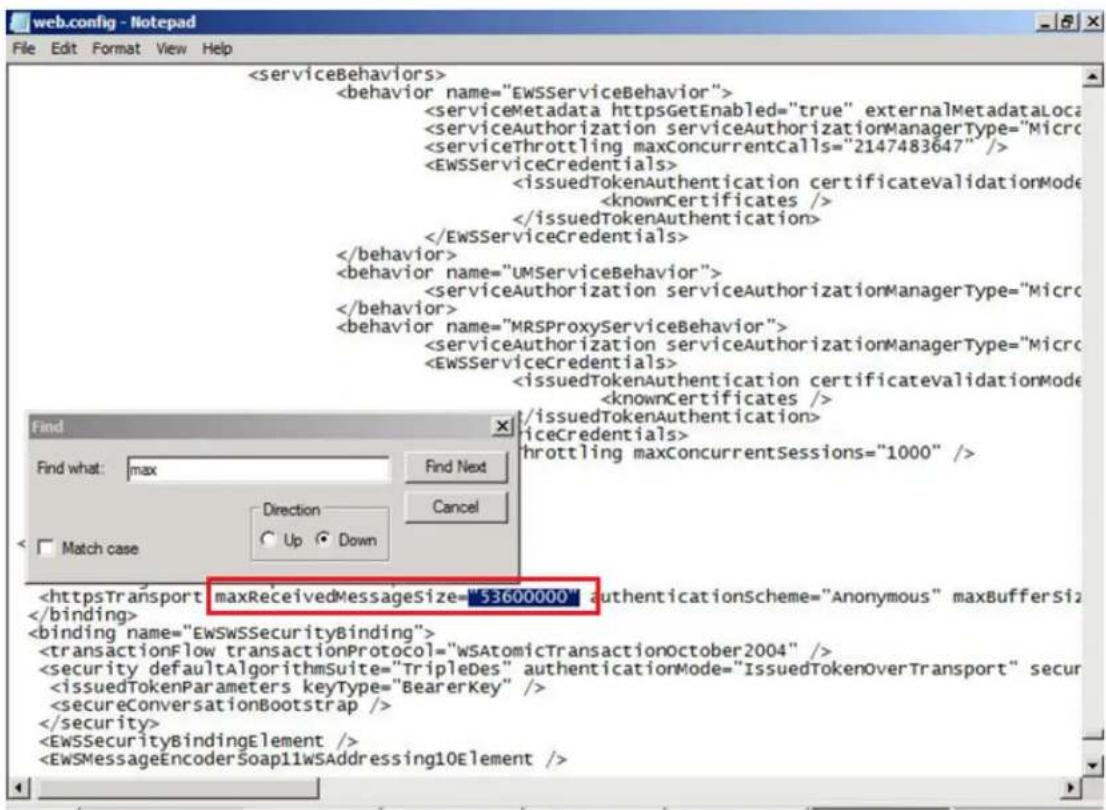
- Click until you locate the following line of code: Find Next
maxBufferSize="81920" transferMode="Streamed" /> - Replace with the same value you entered in step 5 above, for example, .13600000 53600000
- Click once again until you locate the following line of code: Find Next
- Replace 13600000 with the same value you entered in step 5 above, for example \$3600000.
Click, and close Notepad.File > Save
Run appcmd
-
Log into your Microsoft Exchange 2010 Server, and at a command prompt, change the directory to the inetsrv folder: cd c:\windows\system32\inetsrv
-
At a command prompt, run the appcmd command using the new size limit value you entered in the previous section: appcmd set config "Default Web Site/ews" -section::requestFiltering -requestLimits.maxAllowedContentLength:53600000
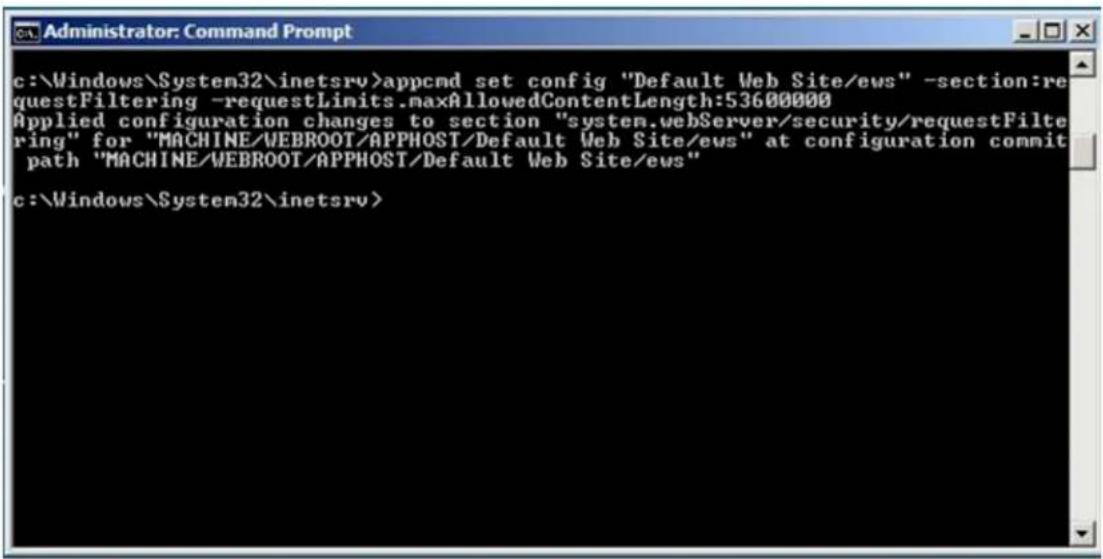
- Close the command prompt.
- Open and restart the following services: Services
- Restart :IIS Admin Service
- Restart : Microsoft Exchange Transport
Barracuda Backup Restore
- Log in to your Barracuda Backup web interface, and restore the messages that originally failed.
- Messages should now restore without any errors. However, if you continue to encounter errors when restoring large messages, continue to the next section, .Configuration Settings
Configuration Settings

Microsoft Exchange 2010 Configuration Settings
Use the steps in the following sections only if you continue to encounter errors when restoring large messages.
Verify Exchange Management Console Settings
- Log in to your Microsoft Exchange 2010 Server, and open the .Exchange Management Console (EMC)
- Expand, click, and click the tab:Organization Configuration Hub Transport Global Settings
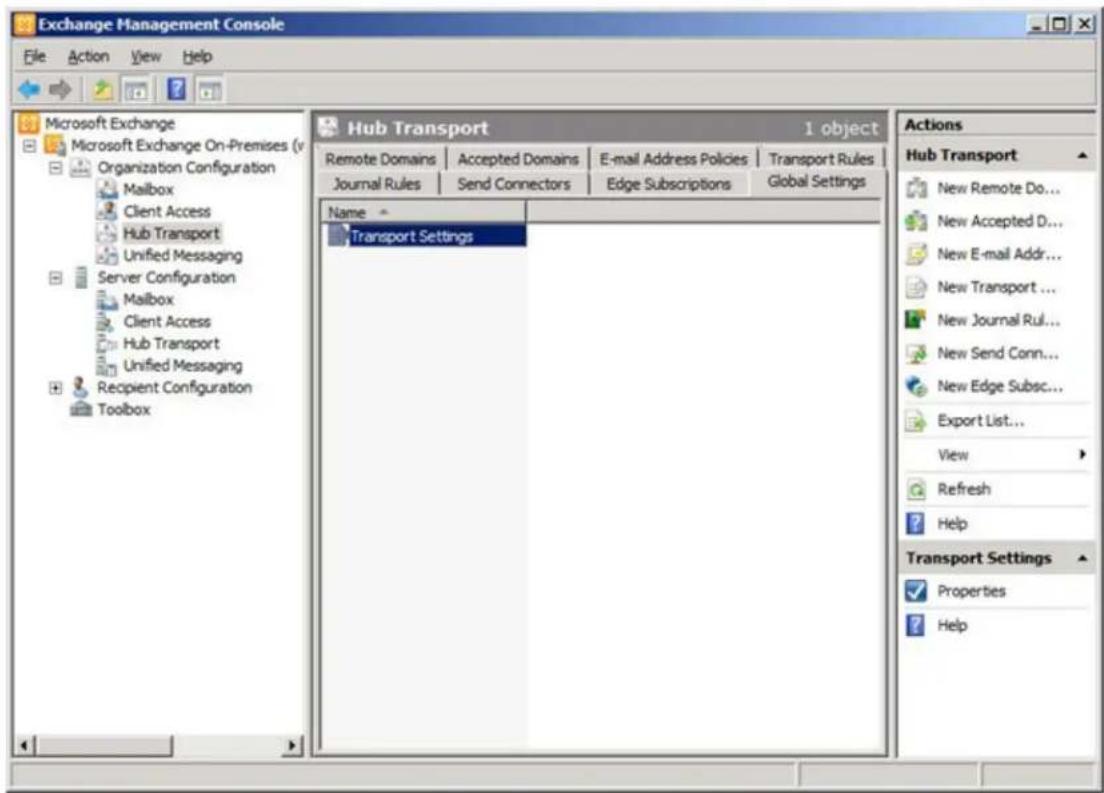
- Right-click, and click :Transport Settings Properties
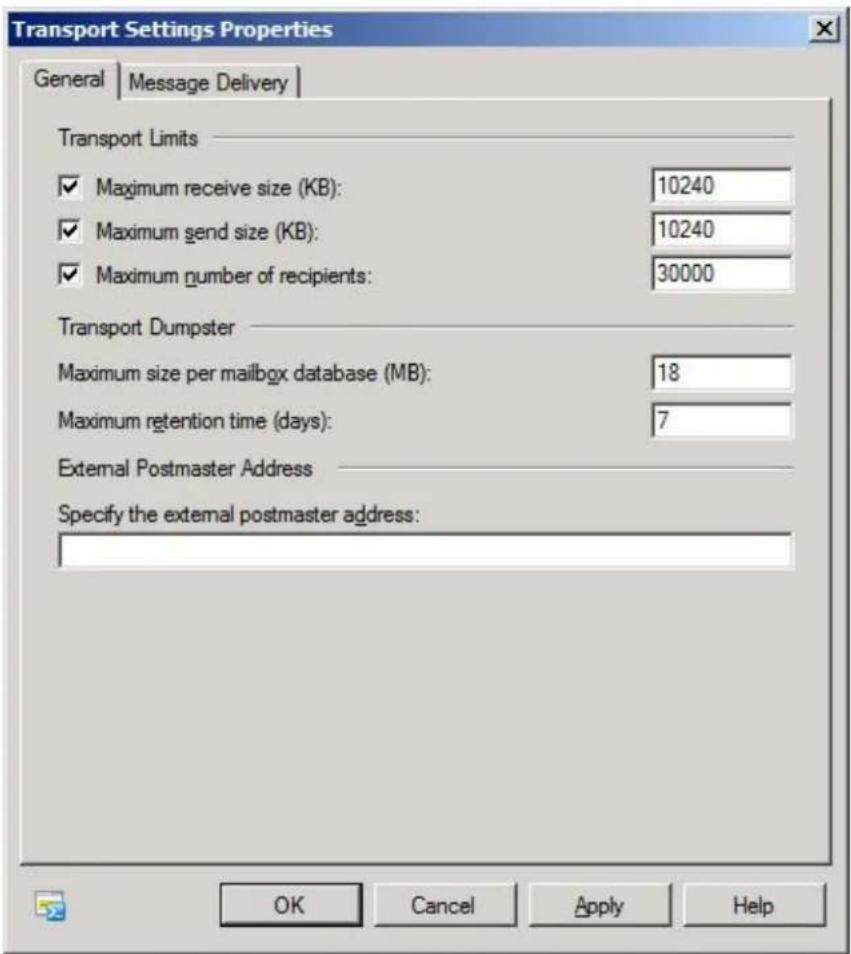
- Verify the settings are large enough and listed correctly, then click .Transport Limits OK
- In the , expand , click :EMC Server Configuration Hub Transport
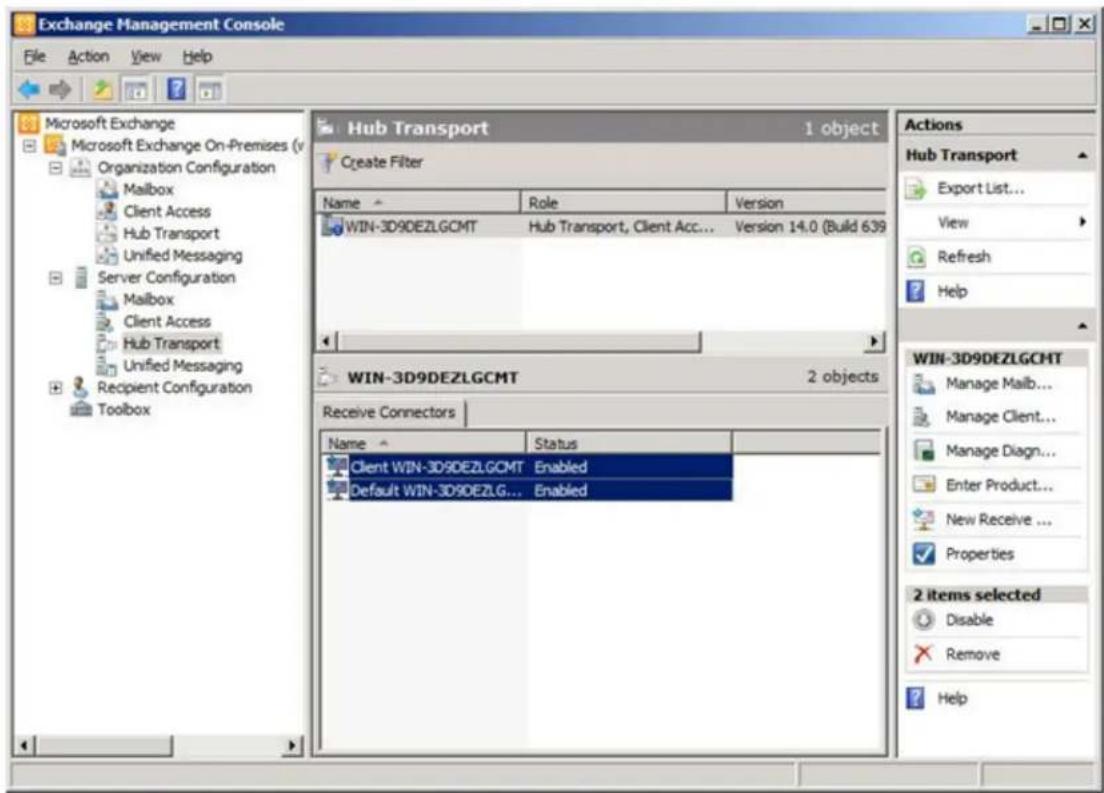
- Right-click on the Receive Connector, and click :Client Properties
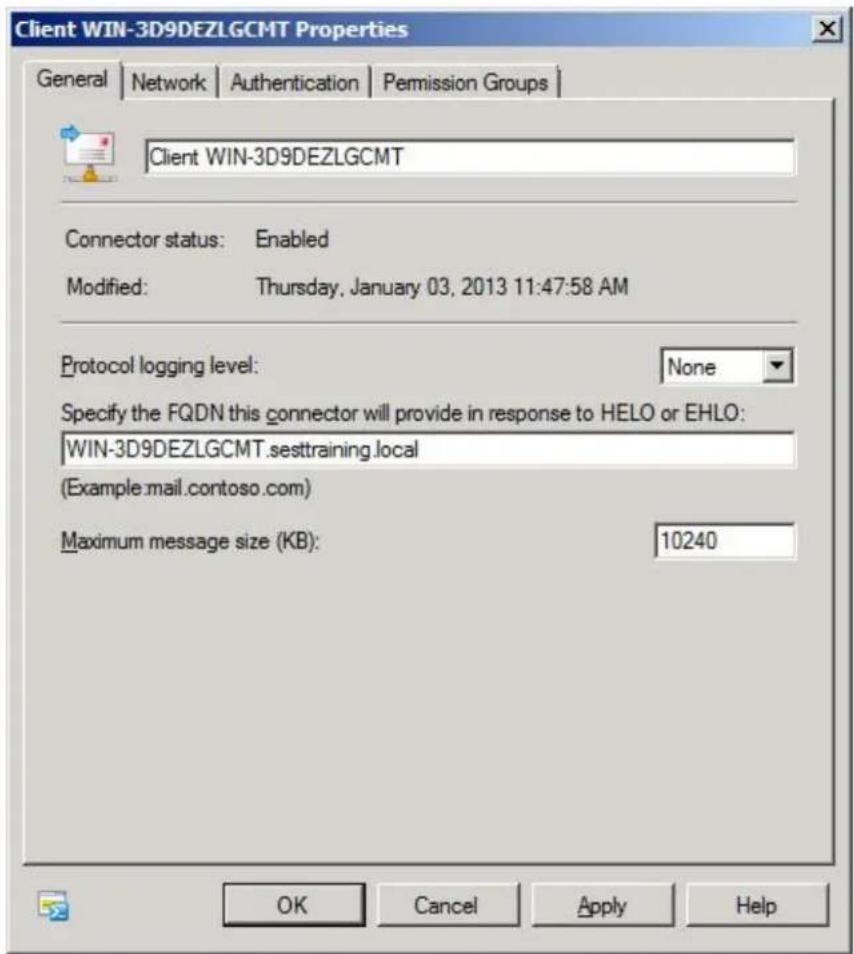
- Verify the value in the Maximum message size (KB) is large enough to accommodate message restore.
- Right-click the Default Receive Connector, click Properties, and verify the Maximum message size (KB) is large enough to accommodate message restore.
- If you modified any settings in the preceding steps, go to Services and restart both IIS Admin Service and Microsoft Exchange services. Transport
Exchange Management Shell
- Open the Exchange Management Shell, and enter the following command: :get-tranportconfig
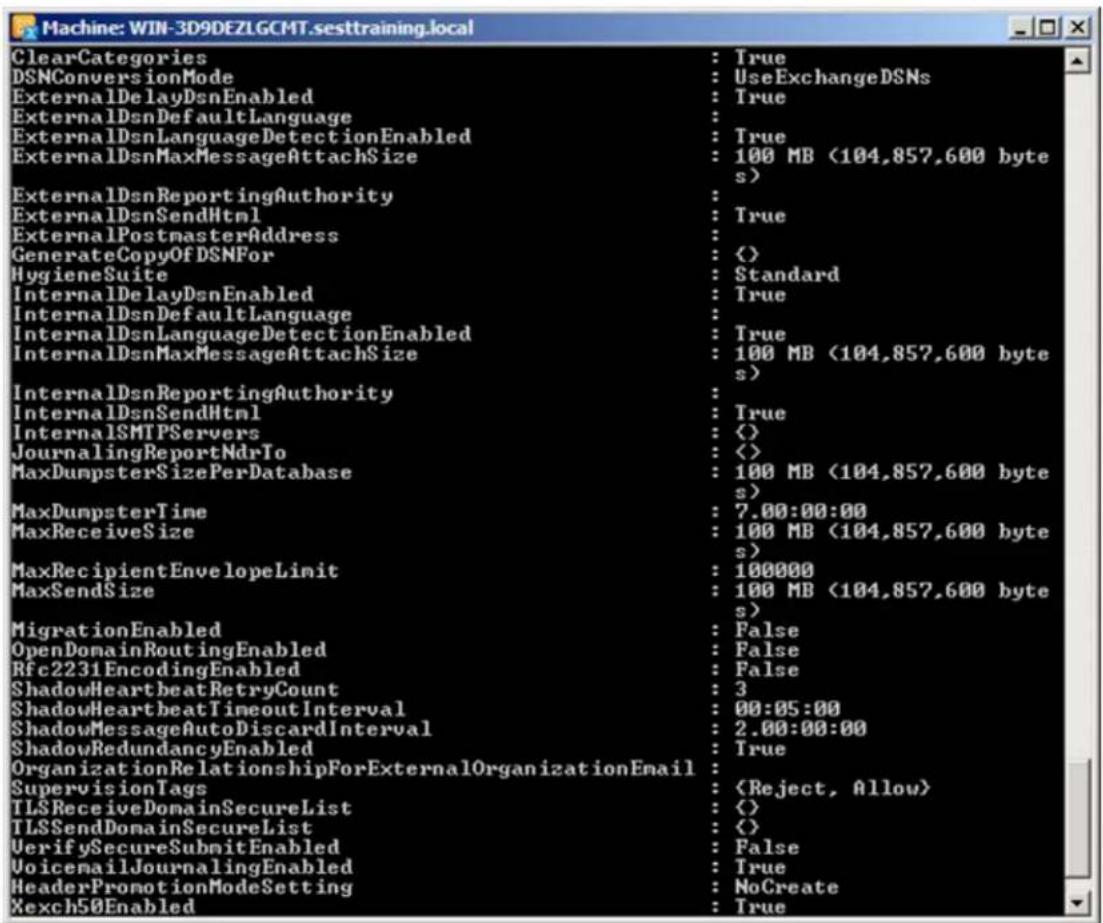
-
Verify that the following settings are large enough and listed correctly:
-
ExternalDsnMaxMessageAttachSize
- InternalDsnMaxMessageAttachSize
- MaxReceiveSize
• MaxRecipientEnvelopeLimit (shown in KB) -
MaxSendSize
-
If any of the values need modification, run the following command:
Set-transportconfig -
For example:
set-transportconfig -MaxSendSize 50MB
- If you modified any values through the Exchange Management Shell, go to Services and restart both IIS Admin Service and Microsoft services.Exchange Transport
How to Resolve Snapshot Backup Errors
This article refers to Barracuda Backup firmware version 5.0 or higher, and Microsoft® Windows Server 2003, Windows Vista, Windows 7, and Windows 2008, except where noted.
If you receive a File System Snapshot was Released reporting error, a partition may be heavily used or fragmented. Use the steps in this article to determine the issue and to resolve the error on the Windows 2003 Server.
In this article:
• Determine the Source of the Issue
- Move the Snapshot Location
- Defragmentation
- Verify Service Packs and Patches are Installed
Determine the Source of the Issue

Windows Server 2003
This step applies to Windows Server 2003 only.
Determine the source of the issue is to identify the partition causing the problem. To do so, complete the following steps:
- Go to the system even log on the server in question.
- Look for an event with the source volsnap and an id of 25/35 containing the following message:
The shadow copies of volumvolumename were aborted because the diff area file could not grow in time. Consider reducing the IO load on this system to avoid this problem in the future.
Move the Snapshot Location

This step applies to Windows 2003, Windows Vista, Windows 7, and Windows 2008.
First determine if the server has multiple partitions with available disk space, and then move the snapshot location to a less used disk using the following steps:
- On a Microsoft 2003 Server, log into the server as the administrator, go to My Computer, and right-click on the troubled partition.
- Select, and click the tab:Properties Shadow Copies
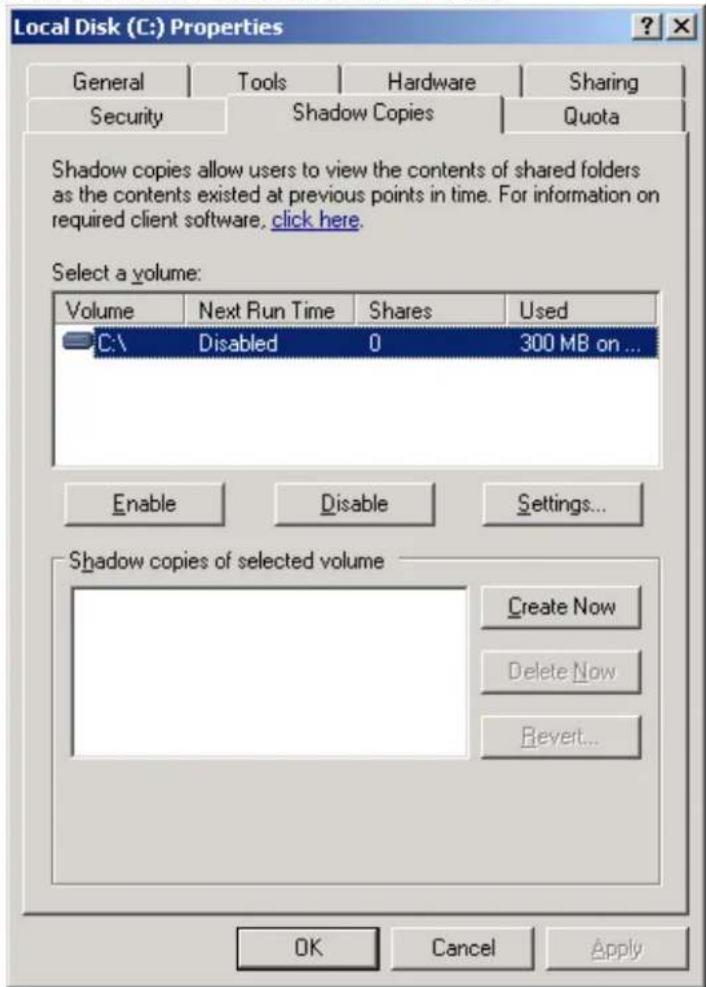
- In the Select a volume list, click on the troubled partition, and click Settings:
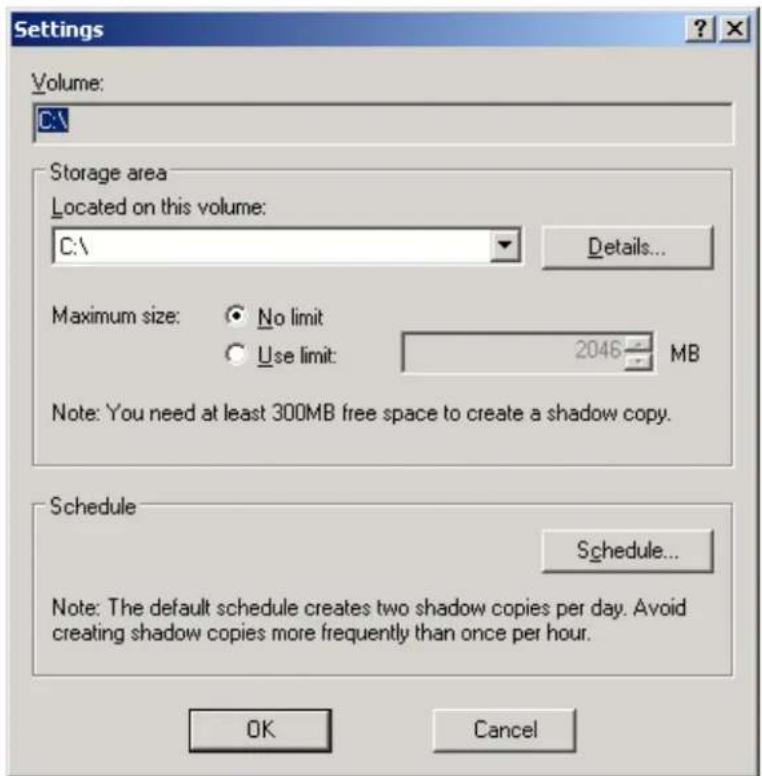
- In the Settings dialog box, from the Located on this volume drop-down menu select a partition with available space, and then click OK.

Verify the maximum size is adequate to back up the partition.
Defragmentation

This step applies to Windows 2003, Windows Vista, Windows 7, and Windows 2008.
Analyze the partition in question for a Defrag. The disk will show up heavily fragmented:
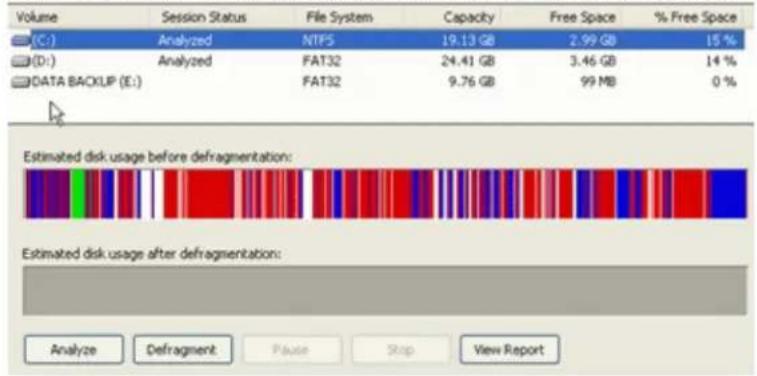

It is recommended that you defragment the hard drive during off hours in order to reduce server load during normal business hours.
Verify Service Packs and Patches are Installed

Windows Server 2003
This step applies to Windows 2003 only.
Verify that both the server and snapshot instance have all service packs and patches installed, and then use the following steps to adjust the page file to 1.5 of the amount of RAM:
- Log into the server as the administrator, and open in the .System Control Panel
- On the tab, in the section, click .Advanced Performance Settings
- In the section, click .Virtual Memory Change
- Under, click the drive containing the paging file you want to change. Drive [Volume Label]
- In the Paging file size for selected drive section, click Custom size, and type a new paging file size in megabytes in the Initial size (MB) or Maximum size (MB) field; click Set.

If you decrease the size of either the initial or maximum page file settings, you must restart your computer to see the effects of those changes. Increases typically do not require a system restart. For additional information, refer to the Microsoft solution
For Windows Server 2003, you can apply these roll-ups supplied by Microsoft to solve this problem; note that you must restart after applying a roll-up. Each patch should be applied individually and a backup run after the patch is applied to see if this resolves the issue:
- http://support.microsoft.com/kb/940349
- http://support.microsoft.com/kb/979457
• http://support.microsoft.com/kb/943669
• http://support.microsoft.com/kb/981166
Resolving "Agent database moved to different location" Warning
The Barracuda Backup Agent requires at least 1GB of free disk space on a data source for its database. If less than the required amount of disk space is available, the Barracuda Agent database is automatically moved to another storage volume.
While backups will continue to run, a warning message displays in the Barracuda Backup web interface stating that the database has been moved:

To resolve this issue, install the Barracuda Backup Agent to an alternate storage volume with adequate free disk space.
Updating the Backup Agent Location
Use the following steps to move the Barracuda Backup Agent to an alternate storage volume and eliminate the warning message:
- Completely uninstall the Barracuda Backup Agent using the Add/Remove Programs or Programs and Features option on your system.
- Once the Agent is uninstalled, log in to the Barracuda Backup web interface, and go to the SUPPORT > Software Downloads page.
- Download and install the latest version of the Barracuda Backup Agent.
- During installation, select the installation path on a storage volume with at least 1GB of free disk space.
- Once the next successful backup occurs, the warning message no longer displays.
Resolving "Error Creating Snapshot" Error During ESX/ESXi Virtual Machine Backup
This article refers to all Barracuda Backup firmware 5.0 and higher, and VMware ^® 4.0 and above with the VMware license which includes access to vSphere ^® Data Recovery API.
This article describes how to resolve the error "Error creating snapshot" encountered while backing up an ESX/ESXi virtual machine, as shown in the following image:

The most common causes for this error are the size of the snapshot being created is larger than the available free space on the datastore, or a
vss writer error.

Additional Information
For more information, refer to the following VMware knowledgebase articles:
(1028924)VMware Data Recovery back
- Cannot create a quiesced snapshot because the snapshot operation exceeded the time limit for holding off I/O in the frozen virtual machine (1018194)
Resolving "Error Reading Object" Error During ESX or ESXi Virtual Machine Backup
This article refers to all Barracuda Backup firmware 5.0 and higher, and VMware®4.0 and above with the VMware license which
® Data Recovery API includes access to vSphere
Additional Resource
VMware knowledgebase: QueryChangedDiskAreas API
call returns a FileFault error (203)
This article describes how to resolve the error "Error reading object" encountered while backing up an ESX/ESXi virtual machine. The most common causes for this error are a crashed virtual machine or missing blocks on the virtual machine. When an error is encountered when backup up the disk, the following displays in the vSphere logs:
Error QueryChangedDiskAreas

Contact Barracuda Networks Technical Support for information on enabling CBT from the VMware API.
If you receive this error:

Use the following steps to resolve this error:
- Remove all virtual machine snapshots.
- Disable .changed block tracking
- Enable changed block tracking.
Resolving "Error Removing Snapshot" Error During ESX/ESXi Virtual Machine Backup
This article refers to Barracuda Backup firmware version 3.0 and higher, VMware ^® 4.0 and above, VMware vCenter, vSphere ^® , and ESX, and Agent for VMware Virtual Infrastructure (AVVI).
When AVVI is enabled, you cannot manually delete a vCenter snapshot because when a snapshot is removed from a virtual machine, ESX automatically creates a Consolidated Helper-0 snapshot which holds the snapshot data until the actual snapshot is deleted. Once the process is complete, the Consolidated Helper-0 is rolled into the resulting .vmdk file only when the following conditions are met:
- Consolidated Helper-0 snapshot file size must meet the minimal snapshot size in VMware which is less than 16MB
• None or minimal I/O write on the virtual machine
To automatically delete a vCenter snapshots, log into the Barracuda Backup web interface, and go to the BACKUP > Schedules page.
If you attempt to manually delete a vCenter snapshot from Barracuda Backup before the Consolidated Helper-0 snapshot is rolled into the VMDK, an error displays in the REPORTS > Backup report page in the Barracuda Backup web interface, as shown in the following image:

Verifying VMware Disk I/O Issues
If you continue to encounter an error, you may wish to confirm whether there are I/O issues on the virtual machine causing high CPU usage.
- Log into and restart the virtual machine to commit the Consolidated Helper-0 snapshot.
- Log into the vCenter/vSphere Snapshot Manager and create a snapshot file.quiesce
- Once the quiesce snapshot is created, click on the quiesce snapshot file name, and click Delete.
- When you delete the snapshot, if a Consolidate Helper-0 snapshot continues to display, and the Status field displays an error message similar to the following:
Status

Unable to access file
You may need to adjust your virtual environment to resolve the high CPU usage.
How to Unlock the quiesce Snapshot
Use the following steps to unlock the Consolidated Helper-0 file:
- Log into and restart the virtual machine.
- Allow the quiesce snapshot to commit the snapshot; the Consolidated Helper-0 file should be automatically removed once this process is complete.
Resolving "Failed to connect to backup agent software" Error
This article refers to all Barracuda Backup firmware 5.0 and higher, and the Barracuda Backup Agent.
The Barracuda Agent is a light weight agent that performs source side-based deduplication, and securely transfers changes over port 5120. Use the following steps to resolve the "Failed to connect to backup agent software" error:
CRITICAL ERRORS
- Failed to connect to backup agent software.
1 Error
Step 1. Verify Barracuda Backup Agent is Started
- Log in to the Barracuda Backup web interface, and go to the page.BACKUP > Data Sources
- Determine which Server is unable to connect to the Backup Agent.
- Log in to that Server, open Services, and verify that the Barracuda Backup Agent Service is started.
- If the Service is not started, restart it.
If you are still unable to connect to the Agent, move on to the next step.
Step 2. Verify Windows Firewall Rules
If you are running Windows Firewall, make sure that you have both an inbound and an outbound rule created and enabled for Barracuda Backup.
- Log in to Windows Firewall, and click in the left pane.Inbound Rules
- If a rule for Barracuda Backup is listed in the center pane, right-click the rule and verify it is enabled.
- If there is not a rule, create and enable a rule for Barracuda Backup.
- In the left pane, click Outbound Rules; complete steps 2 and 3 for the outbound rule.
Step 3. Ping Barracuda Backup from the Server
You can use the ping command to check whether the Barracuda Backup IP address is accessible from the Server.
-
Log in to the Server that is unable to connect to the Backup Agent.
-
Ping the IP address of the Barracuda Backup Server.
For additional information and ping command options, refer to the Microsoft TechNet article Using the ping command.
Step 4. Test and Reinstall Barracuda Backup Agent
- Log in to Barracuda Backup and download and install the latest Barracuda Agent from the SYSTEM > Software Downloads page.
- Once the Agent is installed, go to the BACKUP > Data Sources page.
- To the right of the Server unable to connect, click Verify connectivity with the Barracuda Backup Agent software.
- In the page, click .Edit Server Test Software Connectivity
If you are still unable to connect to the Agent, move on to the next step.
Resolving "File System Snapshot was Released" Error
This article refers to all Barracuda Backup firmware versions, and Microsoft® Windows® 2003 Server.
If you receive a File System Snapshot was Released reporting error, a partition may be heavily used or fragmented. Take the following steps to determine the issue and to resolve the error on the Windows 2003 Server.
Step 1. Determine the Source of the Issue
The first step in determining the source of the issue is to identify the partition causing the problem. To do so, complete the following steps:
- Go to the system even log on the server in question.
- Look for an event with the source volsnap and an id of 25/35 containing the following message:
The shadow copies of volume/volume name> were aborted because the diff area file could not grow in time. Consider reducing the IO load on this system to avoid this problem in the future.
Step 2. Move the Snapshot Location
First determine if the server has multiple partitions with available disk space, and then move the snapshot location to a less used disk using the following steps:
- On a Microsoft 2003 Server, log into the server as the administrator, go to My Computer, and right-click on the troubled partition.
- Select Properties, and click the Shadow Copies tab:
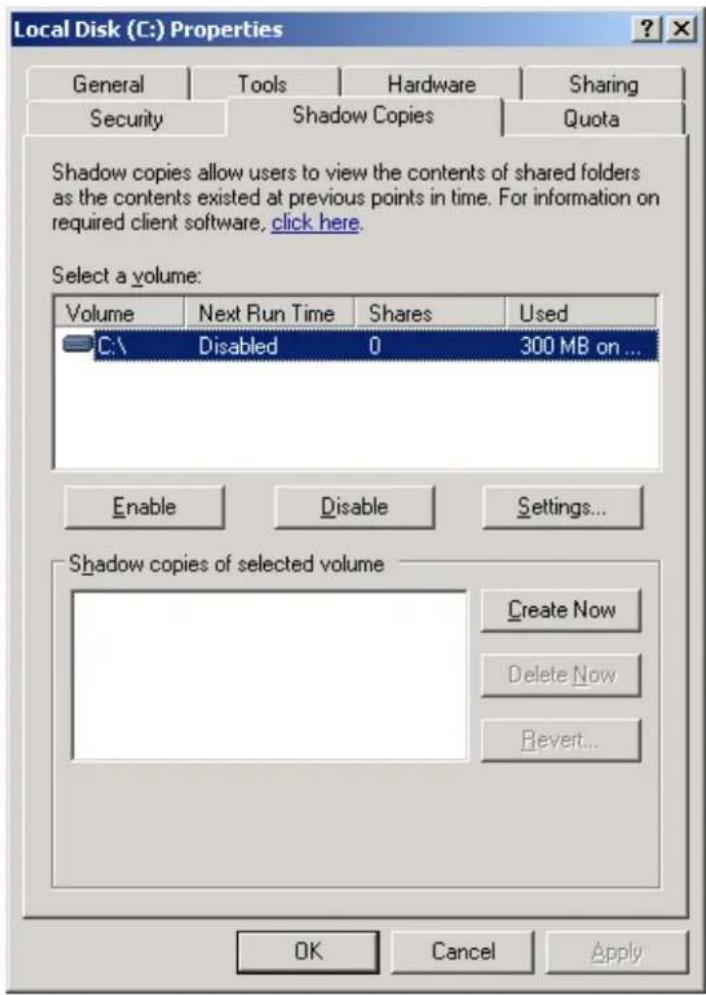
- In the Select a volume list, click on the troubled partition, and click Settings:
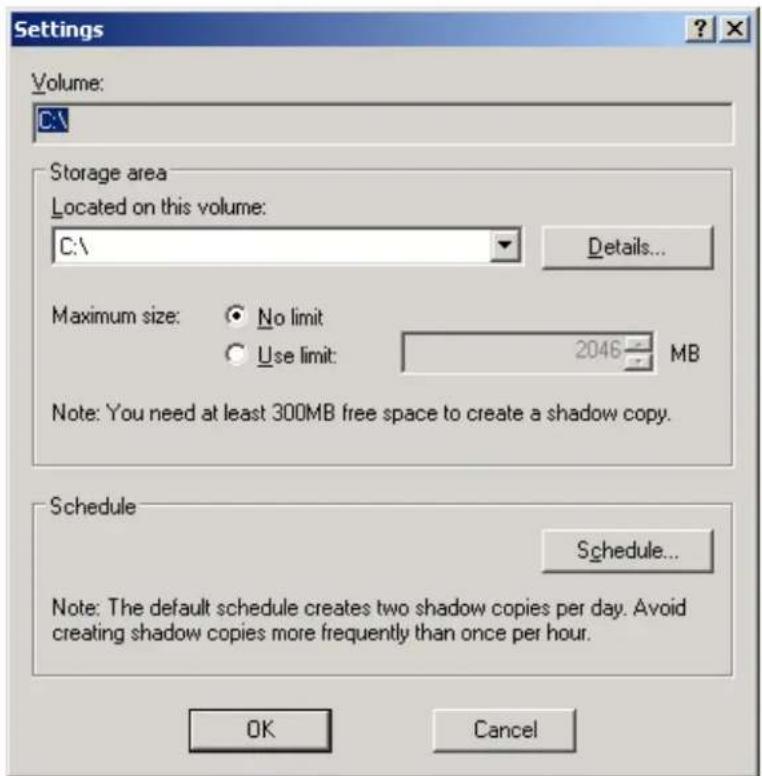
- In the Settings dialog box, from the Located on this volume drop-down menu select a partition with available space, and then click OK.

Verify the maximum size is adequate to back up the partition.
Second, analyze the partition in question for a Defrag. The disk will show up heavily fragmented:
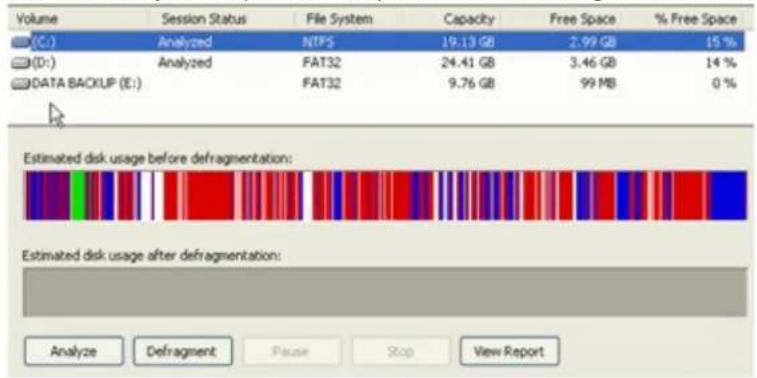

It is recommended that you defragment the hard drive during off hours in order to reduce server load during normal business hours
Additional Information
If these solutions do not work make sure the customer is updated to the latest service pack.
For Windows 2003 Servers, you can apply these roll-ups supplied by Microsoft to solve this problem; note that you must restart after applying a roll-up. Each patch should be applied individually and a backup run after the patch is applied to see if this resolves the issue:
- http://support.microsoft.com/kb/940349
- http://support.microsoft.com/kb/979457
- http://support.microsoft.com/kb/943669
- http://support.microsoft.com/kb/981166
Resolving "Incremental backups cannot be performed while circular logging is enabled" Error
This article refers to all Barracuda Backup firmware, and Microsoft® Exchange Server 2003, 2007, 2010, or 2013; note that circular logging is disabled by default in Microsoft Exchange 2010 and 2013.
In this article:
- Logging Cycle
- Disable Circular Logging in Exchange 2003
• Disable Circular Logging in Exchange 2007
• Disable Circular Logging in Exchange 2010 - Disable Circular Logging in Exchange 2013
Logging Cycle
Circular Logging is designed to save storage on your Microsoft Exchange Server by preventing transaction logs from building up on the Server. This is achieved by creating and writing to a total of four transaction log files. Once the fourth log is full, it cycles back to the first log and overwrites it, creating a logging cycle referred to as "Circular Logging." Once the first log is full, it then moves on to overwrite the second, third, and fourth, and then cycles back to the first log. The assumption is that by the time the fourth log is filled, the first log is committed.
These transaction logs are saved for use when restoring data. If Circular Logging is enabled, this is not possible as you are able to restore only to the last full backup as the transaction log sequence is not consistent making it unreliable.
If you are unable to complete a Smart Backup or Log Backup of your Microsoft Exchange Server, Circular Logging may be enabled. In this case, an error similar to the following displays either in the Barracuda Backup web interface or in a Barracuda Backup report:
Incremental backups cannot be performed while circular logging is enabled for
. Disable circular logging to perform incremental backups.
Disable Circular Logging in Exchange 2003
Use the following steps to disable circular logging for the Exchange Storage Groups on the Exchange Server 2003:
- Log into the Exchange Server as the administrator, and go to Start > Programs > Microsoft Exchange > System Manager.
- In the console tree, expand, right-click the storage group, and click .Server Properties
- In the Properties dialog box, turn Off Enable circular logging, and click OK.
- Click Yes to confirm you want to continue and close the Properties dialog box.
- Go to Start > Programs > Administrative Tools > Services.
- In the right pane, click Microsoft Exchange Information Store, and click Restart in the Action menu.
- CYes to restart the service.
Disable Circular Logging in Exchange 2007
Use the following steps to disable circular logging for the Exchange Storage Groups on the Exchange Server 2007:
- Log into the Exchange Server as the administrator, and open the Exchange Management Console (EMC).
- In the console tree, expand Server Configuration, and click Mailbox.
- In the center pane, right-click the storage group for which you want to disable Circular Logging, and click Properties.
- The Storage Group Properties dialog box displays. Turn Off Enable circular logging, and click OK to close the Properties dialog box.
- Restart the Microsoft Exchange Information Store service or dismount and then mount all of the databases in the storage group.
Disable Circular Logging in Exchange 2010

Circular logging is disabled by default in Microsoft Exchange 2010.
Use the following steps to disable circular logging for the Exchange Storage Groups on the Exchange Server 2010:
- Log into the Exchange Server as the administrator, and open the Exchange Management Console (EMC).
- In the console tree, expand, and click .Organization Configuration Mailbox
- In the result pane, click the Database Management tab and click Properties below the storage group database.
- Click the Maintenance tab, and turn Off Enable circular logging. Click OK to close the Properties dialog box.
- Restart the Microsoft Exchange Information Store service or dismount and then mount all of the databases in the storage group.
Disable Circular Logging in Exchange 2013

Circular logging is disabled by default in Microsoft Exchange 2013.
Use the following steps to disable circular logging for the Exchange Storage Groups on the Exchange Server 2013:
- Log into the Exchange Server as the administrator.
- In the left pane, click servers, and then click databases at the top of the page.
- Click on the Mailbox Database, and click the edit ( ) icon.
- In the Properties window, click maintenance, and turn Off Enable circular logging.
- Click save to close the Properties window.
- Click on the Mailbox Database once again, and click the more (…) icon.
- Click Dismount database. Once the view refreshes, click the more ( *** ) icon once again, and click Mount database.

Before you can complete an Exchange Server Smart Backup or Log Backup, you must first perform a full backup to ensure that transaction logs are reset.
Resolving "An error occurred during agent backup initialization" Error
This article refers to Barracuda Backup firmware version 5.0 or higher.
In this article:
• View Data Source Errors
- Review Reports
• Review Backup Agent Log Files
• Review Source Logs
If a backup fails, and the error "An error occurred during backup initialization" displays, there can be a number of causes. Use the information in this article to resolve this error.

You may need the Barracuda Backup Agent log files and Server Application and System log files to assist in troubleshooting this error.
Use the following troubleshooting options to resolve this error:
- Review error message details on the data source
• Review the Barracuda Backup Reports
• Review the Backup Agent bbtrace.txt log file
• Review the Server Application and System event logs
• Additional resources

If you receive an email report stating that a source has failed to back up data, or if you notice a red status indicator in the STATUS page, use these steps to determine the cause of the error.
-
Log in to Barracuda Backup, and go to the page.BACKUP > Sources
-
To the right of the source, a red status indicator (■) displays if an error is generated during backup. Mouse-over the status indicator to view a pop-up message describing the cause of the error:
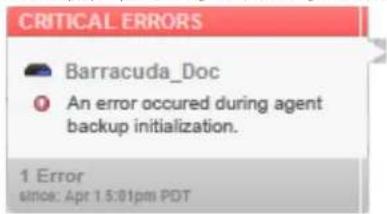
- If the error "An error occurred during agent backup initialization" displays, then something during the beginning of the Agent backup failed.
Review Reports
Use the following steps to review the Barracuda Backup Agent log file and determine if something failed to initialize.
- Go to the REPORTS > Backup page, and select the following options in the filter section above the table:
a. Schedules - Select All
b. Sources - Select directly below the Source in questionAgent
c. From - Specify a date
-
View the list of reports. A red status indicator displays to the left of a failed backup. Click Details to the right of the most recent backup report.
-
At the bottom of the Report details page, a list of errors display. Determine the date and time the error occurred:

Review Backup Agent Log Files
Use these steps to review the Backup Agent log files for the specific error reported by the Backup Agent.
- Log in to the data source that is failing to back up data, and go to the Backup Agent log files. By default, the log files are located in:
C:\Program Files\Barracuda\Barracuda Back
- Localettracéilxt; this is the most recent log file.
If the server was rebooted, or the agent was restarted, you may need to review older bbtrace.txt files to find the time listed in Repbet details page in the previous step.
-
Open bbtrace.txt in Notepad. This file contains data that is helpful in determining the specific error. Each log entry is time stamped, so you will first want to identify when the failed backup occurred based on the Report details page; note that there may be multiple days of log details so it is recommended that you use the search function to find the error.
-
Search the log file for terms such as Failed or Critical. Once you locate the term, review the associated content to determine the specific error message:
05/22/13 02:09:55 CRITICAL Failed to send class begin message id: 0600000b class id: 00000716 (Error 5093: Snapshot provider service detected an error preventing the snapshot operation) 05/22/13 02:09:55 CRITICAL Exception - Original: 2147754753 - 0x80042301 Mapped:5090 Location:YVssManager::BackupComplete:c:\jenkins\workspace\bbagent_win\source\ods+\server\vam\vss\YVssManager.cpp:1959 Description: 'Unexpected operating system error'
In this example, a VSS snapshot failed due to an unexpected operating system error on the targeted server.
Note that an Agent error message is typically followed by associated CRITICAL Sup: Resource not put details which is not needed for troubleshooting.
Review Source Logs
If the Backup Agent log files indicate an error on the source, use the following steps to review the Application and System log files:
- Log in to the source server, and locate the Application and System log files for further troubleshooting.
- In the Application and System log files, locate the time the errors occurred on the Backup Agent based on the Report details page.
- Critical errors should display for the time in the log files.
- Review the error messages and determine if additional troubleshooting is needed on the source.

Review the error messages and determine if additional troubleshooting is needed on the source. Use the event ID found in the Application and System event log files, and use an Internet search engine for troubleshooting.
Resolving "Unable to back up virtual machines with independent disks" Error
This article refers to Barracuda Backup firmware version 5.0 and higher, and VMware®4.0 and above with the VMware license which includes access to vSphere® Data Recovery API.
Related Articles
- Resolving "Error Creating snapshot"- ESX/ESXi VM Backup
Additional Resource
• Understanding virtual machine snapshots in VMware ESX
- Creating a virtual machine snapshot fails with the error: The attempted operation cannot be performed in the current state (Powered Off)
- Taking a snapshot with virtual machine memory stuns the virtual machine while the memory is written to disk
Use the steps in this article to resolve the "Unable to back up virtual machines with independent disks" error while backing up an ESX/ESXi virtual machine.
If you encounter the following error while backing up an ESX/ESXi virtual machine:

When you revert a virtual machine snapshot, it returns to the state the system was in when the snapshot was taken by reloading the memory and eliminating the matching disk snapshot. However, VMware does not support snapshots of independent disks, and such virtual machines must be powered off before you take a snapshot. Snapshots of powered-on or suspended virtual machines with independent disks are not supported.
If you have Independent turned on in your virtual machines, the persistent attribute of the independent disk prevents a snapshot from being taken. To resolve this, power off the virtual machine, and disable the following options:
- Go to, and click the tab.Inventory > Virtual Machine > Edit Settings Hardware
- Under, deselect. Mode Independent
Resolving "VMDK is larger than the maximum size supported by datastore" Error
This article refers to Barracuda Backup firmware version 5.0 or higher, and VMware ESX/ESXi 4.0 and higher with the VMware license which includes access to vSphere ^® Data Recovery API.
Use the steps in this article to resolve the error "VMDK is larger than the maximum size supported by datastore" encountered when creating an ESX/ESXi virtual machine snapshot.
In this article:
- Step 1. Determine Maximum File Size
• ESXi 5.0 and 5.1 with VMFS5
• ESX/ESXi 4.1 and ESXi 5.1 with VMFS3
• ESX/ESXi 4.0 with VMFS3
- Step 2. Move Files to Accommodate Space Requirements
- Step 3. Calculate Required Overhead
Barracuda Networks Technical Support
- VMware KB Solution: Creating a snapshot for a virtual machine fails with the error: File is larger than maximum file size supported (1012384)
In the vSphere Client, you may see the error:
File is larger than the maximum size supported by datastore.
In the hostd log file, you may see the error:
Snapshot guest failed: The file is too big for the filesystem.
In the vmware.log file of the virtual machine, you may see an error similar to:
vmx| FILE: File_VMFSSupportsFileSize: Requested file size ( ) larger than maximum554051831808
supported filesystem file size (274877906944)
vmx| Dis}
vmx| DISKLIB-LIB : Failed to create link: The destination file system does not support large files (12)
vmx| SNAPSHOT: BranchDisk: Failed to create child disk '/vmfs/volumes/uuid/vmname/vmname-000001.vmdk': The destination file system does not support large files (5).
vmx| SNAPSHOT: SnapshotBranch failed: The destination file system does not support large files (5).
vmx| [msg.checkpoint.save]
vmx| The destination file system does not support large files.
These errors occur when the snapshot file has exceeded the maximum size to fit in a datastore. Beginning with version 4.0, ESX/ESXi compares the maximum size of a snapshot redolog file to the maximum size of files on the datastore. The redolog file may not work correctly once it reaches the maximum size of the datastore. If the file can grow beyond the maximum size, ESX cancels the Create Snapshot operation and displays the File is larger than the error message.maximum size supported by datastore

ESX/ESXi 3.5 and Earlier
This does not apply to ESX/ESXi versions prior to 4.0; in prior versions, a snapshot is created even if there is insufficient space to store the full size redolog.
Use the following steps to resolve this error:
Step 1. Determine Maximum File Size
- Compare the base disk size of the virtual machine against the block size of the datastore which contains the working directory of the virtual machine. By default, the working directory contains the virtual machine's .vmx configuration file. Note that the maximum file size differs among versions of ESX/ESXi and among versions of VMFS.
- If you experience this error even after confirming that the snapshot files can fit on the datastore, proceed to Step 3.


A virtual machine on NFS or VMFS has a maximum virtual disk size of 2TB - 512Bytes, the same as the maximum in each of these tables.
ESXi 5.0 and 5.1 with VMFS5
On ESXi 5.0 and 5.1 and newly formatted VMFS5, a standard 1MB block size is available. The maximum file size is 2TB - 512Bytes.
• Block Size / Maximum File Size 1MB 2TB - 512 Bytes

On ESXi 5 hosts using VMFS5 upgraded from VMFS3, upgraded volumes inherit the VMFS3 block size. The default block size for new volumes is 1MB. The maximum file size, regardless of block size, is 2TB - 512Bytes. For more information, see the Storage Maximums table in Configuration Maximums for VMware vSphere 5.0.
ESX/ESXi 4.1 and ESXi 5.1 with VMFS3
On ESX/ESXi 4.1 and ESXi 5.1 using a VMFS3 datastore, the maximum file size corresponds to the block size of the VMFS datastore:
• Block Size / Maximum File Size 1MB 256GB
• Block Size / Maximum File Size 2MB 512GB
• Block Size / Maximum File Size 4MB 1TB
• Block Size / Maximum File Size 8MB 2TB - 512 Bytes
ESX/ESXi 4.0 with VMFS3
On ESX/ESXi 4.0, the maximum file size corresponds to the block size of the VMFS3 datastore:
• Block Size / Maximum File Size 1MB 256GB - 512Bytes
• Block Size / Maximum File Size 2MB 512GB - 512Bytes
• Block Size / Maximum File Size 4MB 1TB - 512Bytes
• Block Size / Maximum File Size 8MB 2TB - 512 Bytes
Step 2. Move Files to Accommodate Space Requirements
This step describes how to resolve this error by changing either the location of the virtual machine configuration files or the workingDir to a datastore with enough block size.
The workingDir is the location where the snapshots are created, By default, the workingDir contains the virtual machine's .vmx configuration file. To change the workingDir directory to a datastore with enough block size, see the VMware solution Creating snapshots in a different location than .default virtual machine directory (1002929)
To move the virtual machine's disks and/or configuration files, use Storage vMotion or cold migration with relocation of files. For more information, see the following VMware documentation:
• vSphere 5: Migrating Virtual Machines section of the vCenter Server and Host Management Guide.
- vSphere 4.1: Migrating Virtual Machines section of the vSphere Datacenter Administration Guide.
- vSphere 4.0: Migrating Virtual Machines section of the vSphere Basic System Administration Guide.
If the virtual machine already has snapshots, some procedures may not work, or they may attempt to create a snapshot. This table lists the requirements for the various procedures:
| Procedure | Requirements |
| Storage vMotion | The virtual machine must not have snapshots on ESX/ESXi 4.1 hosts or earlier. It may have snapshots on ESXi 5.0 or later. |
| Cold migration with file relocation | The virtual machine may have snapshots. The source and destination hosts must be running ESX/ESXi 3.5 or later. |
| Change workingDir | The virtual machine may have snapshots. When new snapshots are created, new redologs are placed in the workingDir directory. |
| Hot clone The virtual machine may have snapshots, but the snapshot hierarchy must be less than 31 snapshots deep. Hot cloning a virtual machine creates a snapshot on the source at the beginning of the process, and then deletes the snapshot at the end of the process. |
| Cold clone The virtual machine may have snapshots. Cloning the virtual machine creates a new virtual machine with the same content as the original virtual machine, but without snapshots. |
| vMotion to ESX/ESXi 3.5 The virtual machine may have snapshots. The virtual machine must use hardware version 4. ESX/ESXi 3.5 does not perform the check described here and allows snapshots to be created. |
Step 3. Calculate Required Overhead
The failure depends on the size of the virtual disk. All virtual machines that have disks greater than the maximum supported size by VMFS may experience this error. Overhead for the snapshot is approximately 2GB for a disk size of 256GB. If snapshots are to be used, consider the overhead while deciding the size of the disks:
| Maximum VMDK Size Maximum Overhead Maximum Size Less Overhead | |
| 256GB - 512B ~ 2GB 254GB | |
| 512GB - 512B ~ 4GB 508GB | |
| 1TB - 512B ~ 8GB 1TB | |
| 2TB - 512B ~ 16GB 2TB |
VMware recommends that you create virtual disks that are smaller than the maximum size minus the overhead to enable the use of features such as snapshotting, cloning, and independent non-persistent disks.
Resolving "Error backing up selected object" Error
This article refers to Barracuda Backup firmware version 5.0 or higher.
Through the Barracuda Backup web interface you can select specific folders for back up within a parent directory. However, if a folder that has been selected for backup is moved or removed from the parent directory, the Barracuda Backup Server generates an error because the item selected for back up is no longer present:

To resolve this error, log in to the web interface and deselect the folder which has been removed from the directory for the source. To do so,
- Log in to Barracuda Backup, and go to the page.BACKUP > Sources
- Click to the right of the source to edit share settings.Edit
- Expand the item selection. The folder displays with a warning triangle:
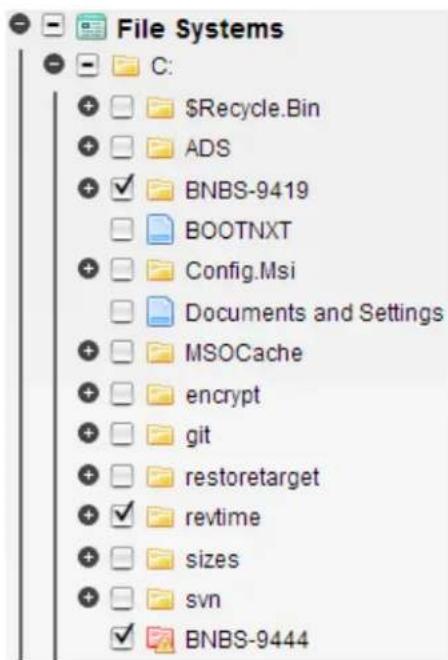
- Uncheck the removed folder, and click to save your settings.Save

Important
Deselecting folders and/or files purges the associated data from the Barracuda Backup Server.
Resolving "An unknown OS error occurred" Error
This article refers to Barracuda Backup firmware version 4.0 or higher.
This article describes how to resolve the error "Error occurred during backup initialization". If you encounter this error in the Backup Report on the Barracuda Backup Server, it may be caused by misconfigured or disabled Volume Shadow Copy Services (VSS) drivers. Microsoft provides a command-line tool to verify the state of the VSS writers. To utilize this tool, open a command prompt on the Windows Server, and enter: vssadm in list writers
Following is an example using this tool to check driver status:
C:>vssadmin list writers
vssadmin 1.1 - Volume Shadow Copy Service administrative command-line tool (C) Copyright 2001 Microsoft Corp.
Writer name: 'System Writer'
Writer Id: {e8132975-6f93-4464-a53e-1050253ae220}
Writer Instance Id: (449e12cf-6b8f-4d75-a821-bc869d6612c4)
State: [1] Failed
Last error: No error
Writer name: 'SqlServerWriter'
Writer Id: {a65faa63-5ea8-4ebc-9dbd-a0c4db26912a}
Writer Instance Id: (de3b2861-77f6-43f8-8619-64dc9ea2fbcf)
State: [1] Stable
Last error: No error
Writer name: 'MSDEWriter'
Writer Id: {f8544ac1-0611-4fa5-b04b-f7ee00b03277}
Writer Instance Id: {9036fdfa-05ef-4f7d-9c2f-84fa2f06560a}
State: [1] Stable
Last error: No error
Writer name: 'WMI Writer'
Writer Id: {a6ad56c2-b509-4e6c-bb19-49d8f43532f0}
Writer Instance Id: (f9f92826-a3d4-486c-ade3-a4201deb8ad2)
State: [7] Failed
Last error: No error
If the output of this command contains writers with a state that is not 'Stable', you must restart the VSS service Volume Shadow Copy Services. If you continue to see this error in reports and agent logs even after restarting the services, register your VSS drivers use the following instructions:
- Windows Server 2003 and Windows Server 2003 R2 - Refer to the Microsoft Knowledgebase solution Error message when you run the "vssadmin list writers" command on a Windows Server 2003-based computer: "Error: 0x8000FFFF" for details.
- Windows Server 2008 and Windows Server 2008 R2 - VSS drivers on Windows Server 2008 and 2008 R2 can normally be reset by restarting the Services from the Management Console based on the Microsoft Knowledgebase solution. No VSS writers are listed when you run vssadmin list writers on Windows Server 2008.

Important
Restarting VSS on Windows 2008 can cause unexpected behavior. Verify that all necessary writers (e.g., Hyper-V or Exchange) have restarted or data objects may not be detected or backed up. It is recommended that you reboot the Server in lieu of restarting the VSS writer components listed below, and verify that all appropriate Microsoft updates are installed.
If you determine that restarting Services is appropriate for your environment, complete the following steps:
- Log in to the system, and click .Start
- Enter in the Start Search box, and press .services.msc Enter
- In the Services window, right-click each of the following services individually, and then click Restart :
a. COM+ Event System
b. Volume Shadow Copy - Close the Services window.
- Open an elevated command prompt, enter vssadmin list writers, and then click Enter.
- Verify that the VSS writers are listed.

Barracuda Networks Technical Support
If you continue to experience problems with your VSS drivers in relation to your Barracuda Backup Server, contact Barracuda Networks Technical Support.
Error occurred during backup initialization
Resolve the "Failure while using USN journal" Error
This article refers to Barracuda Backup firmware version 5.0 and higher, the Barracuda Backup Agent (Windows), and Microsoft Windows Server 2003 and higher.
In this article:
• Deleting an Active USN Change Journal
- Adding a USN Change Journal
Related Articles
• Barracuda Backup Agent (Windows)
Additional Resources
• Change Journal Operations
- Fsutil usn
An Update Sequence Number (USN) Journal is a change journal of file and directory changes on the NTFS volume including a description of the change, and the name of the file or directory. Each log file is incremented for each entry in the journal. Log files are stored until they are deleted or storage runs out. If storage is exhausted, older log files are deleted and cannot be restored.
If too many file or directory changes are encountered on your Windows Server, you may encounter a max journal wrapping error causing slower Barracuda Backup Agent backups. While full backups should not be affected, you may encounter differential and incremental backup failure:
08/13/13 18:32:55 0x0001208 YUsnJournalManager: Info: USN journal backups have been disabled for volume:
C:\
08/13/13 18:43:09 0x0001208 YUsnJournalManager: Exception occurred while backing up volume changes:
Exception - Original: 12011 - 0x00002eeb Mapped:12011
Location:YUsnJournalManager::BackupVolumeChanges:D:\compile\source\ods++\server\vam\core\win\YUsnJournalManager.cpp:214 Description:'Failure while using USN journal'
This article describes how to expand the maximum Update Sequence Number (USN) Journal size in Windows.

The following instructions apply only if the USN change Journal is available and readable.
Deleting an Active USN Change Journal
Use the following steps to remove the active USN change Journal using fsutil usn deletejournal.

fsutil usn Parameters
- deletejournal - Deletes the active USN change journal. Deleting the change journal impacts the File Replication Service (FRS) and the Indexing Service. Additionally, this negatively impacts FRS SYSVOL replication and replication between DFS link alternates during rescanning of the volume.
-
/D - Disables the active USN change journal and returns I/O control while the change journal is being disabled.
-
Log in to your Windows Server, launch cmd, and run as admin.
- Enter the following command:
fsutil usn queryjournal C:
Where "C" represents the backup or partition drive.
- The USN change Journal settings display including its size in hex bytes. If the value is approximately 30MB, the backup can fail due to snapshot creation failure from lack of space.
- Run the following command:
fsutil usn deletejournal /D C:
- The USN Journal is deleted and the size reset.
- You can proceed with your backup.
Adding a USN Change Journal
Use the following steps to add a USN change Journal using .fsutil usn createjournal
- Log in to your Windows Server, launch cmd, and run as admin.
- Run the following command:
- fsutil usn createjournal C:m=2147483648 a=1 Where "C" represents the backup or partition drive.
- The USN Journal is added.

Once the USN change Journal is recreated, Barracuda Backup goes through the entire file system which may result in a longer backup.
Slow Agent Backups
Monitoring Windows System Performance During Backup
This article refers to Barracuda Backup firmware version 5.0 and higher, and Microsoft Windows 7, Windows 8, Windows Server 2003, Windows Server 2003 R2, Windows Server 2008, Windows Server 2008 R2, Windows Server 2012, Windows Vista, and Windows XP, except where noted.
During backup, your organization may encounter performance or resource contention. To reduce this possibility, first evaluate the systems in your environment for hardware-specific performance limitations. Once this is determined, configure data sources for backup, and then monitor system performance using a system performance monitoring tool.
Monitor Windows System Components

This utility is available for Windows 7, Windows Server 2008 R2, Windows Server 2012, and Windows Vista.
Evaluate Windows system components using a tool such as Windows Performance Monitor to evaluate performance in real time during backup or by reviewing historical data. You can view the results in graph, histogram, or report form. This utility organizes the results by object, counter, and instance which you can customize as data collector sets:
• Performance counters
- Event trace data
• System configuration information (registry key values)
An object is a system resource category, and counters are the properties of that object. For example, % Processor Time and Interrupts/sec are counters for the object. Processor
For additional information, refer to the following Microsoft TechNet articles:
• Windows Performance Monitor
• Using Performance Monitor
- Creating Data Collector Sets
CPU Usage
If backups consume too much CPU processing, system performance is affected. To determine whether a system is consuming too much CPU processing during backup, monitor the % Processor Time counter for the Processor object. This counter measures the time the processor spends working on productive threads against time spent servicing requests. The normal range for the counter is 0-80%, with occasional spikes up to 100%. Consistent values over 80% indicate a potential performance hit on the CPU load.
To determine the number of processes waiting, monitor the Process Queue Length for the System object. A continuous value of two or more indicates too many threads are queued up for processing. If you encounter a sustained value of 0, verify that a non-zero value can display.
Determine the default scale for the Process Queue Length counter to determine the actual value. For example, if the scale is 10x, then a reading of 20 indicates 2 waiting processes.
Memory Usage
If memory usage is too high, backup operations are negatively affected. To determine the amount of committed virtual memory in bytes, use the C omitted Bytes counter for the Memory object. Verify that the Committed Bytes value is not approaching the amount of physical memory. Additionally, determine hard page faults on the system. Hard page faults occur when requested information is not where the application expects it to be, and must be must be retrieved either from another location or from the page file. Review for both a sustained value, which may indicate memory usage is too high, as well as the number of hard page faults that represent the actual read/write requests. A high Page Fault/sec rate may negatively affect performance and indicate insufficient memory. To resolve hard page faults, use the Page Faults/sec counter on the Memory object.
Disk Load
Use the disk performance counters to evaluate disk subsystem performance including disk controller card, High disk load during backup negatively affects performance. I/O bus, and the disk. Use the %Disk Time counter on the PhysicalDisk object to determine the elapsed time that the disk processes read/write requests. Additionally, use the Avg. Disk Queue Length counter on the PhysicalDisk object to determine the number of processes waiting for the hard disk. A value greater than one that lasts for more than one second indicate multiple processes are waiting and indicate heavy disk load.
i Enable Disk Performance Counters
If the disk performance counters are disabled, use the following steps to enable all disk performance counters:
- At a command prompt, enter the following command:
diskperf -y - Restart the Windows system. Once the system restarts, all disk performance counters are enabled.
For additional information on using Diskperf, refer to the Microsoft TechNet article Diskperf.
How to Increase Backup Performance
This article refers to Barracuda Backup firmware version 5.0 or higher.
It can take longer to back up multiple small files in comparison to one large file. To improve performance during backup, complete the following:
- Turn off virus scanning on Windows systems, this can double performance
- Upgrade network interface card (NIC) drivers to the latest release
:

Barracuda has encountered issues with several server network cards which were resolved by upgrading the network driver.
- Increase system background performance over foreground performance
- Uninstall unused/unnecessary programs
- Remove unnecessary files using a program such as Disk Cleanup to remove temporary files, empty the Recycle Bin, and to remove other unnecessary items
-
Run fewer programs when the Backup is scheduled to run
-
Apply the latest service packs and system patches
- Review data fragmentation levels; you can set Disk Defragmenter to run on a schedule or run it manually
- If appropriate, add secondary physical disks to the system to increase performance
- Add additional memory to the system
• Use RAID devices for greater throughput
• Review the system controller
• Install the on a less used partition rather than a heavily used partition Barracuda Agent

For details on moving the Barracuda Backup Agent database to an alternate location, refer to the following articles:
• How to Manually Move the Barracuda Backup Agent (Windows) Database to an Alternate Location
• How to Manually Move the Barracuda Backup Agent (Linux) Database to an Alternate Location
Agents and Tools
Go to the SYSTEM > Software Downloads page in Barracuda Backup to download Tools and Backup Agents.
In this Section
Barracuda Backup Agent (Windows)
• How to Install and Use the Barracuda Backup Agent (Windows)
• How to Silently Install the Barracuda Backup Agent (Windows)
• Understanding the Barracuda Backup Agent (Windows) File Structure
• How to Manually Move the Barracuda Backup Agent (Windows) Database to an Alternate Location
Barracuda Backup Agent (Linux)
• How to Install and Use the Barracuda Backup Agent (Linux)
• How to Manually Move the Barracuda Backup Agent (Linux) Database to an Alternate Location
Related Troubleshooting and Error Message Articles
• How to Troubleshoot Using the Barracuda Backup Agent (Windows) Log File
• Understanding Why the Barracuda Backup Agent Moves to a New Volume
• How to Change the Barracuda Backup Agent Port Number
• How to Change the Barracuda Linux Backup Agent Port Number
• How to Create a Pre- or Post-Agent Backup Command Batch File or Script
- Resolving "Agent database moved to different location" Warning
Tools
• How to Edit Network Settings through the Barracuda Console
- Bare Metal Restore
• GroupWise Trusted Key Generation
Barracuda Backup Agent (Windows)
In this Section
• How to Install and Use the Barracuda Backup Agent (Windows)
• How to Silently Install the Barracuda Backup Agent (Windows)
• Understanding the Barracuda Backup Agent (Windows) File Structure
• How to Manually Move the Barracuda Backup Agent (Windows) Database to an Alternate Location
How to Install and Use the Barracuda Backup Agent (Windows)
This article refers to Barracuda Backup firmware version 5.2 and higher and Barracuda Backup Agent (Windows) 5.2 or higher.
In this article:
• Install Barracuda Backup Agent
- Add Data Sources
- Set Up Backup Schedules and Retention
Related Articles
- Barracuda Backup Agent File Structure
• Change Barracuda Backup Agent Port Number
• Command Prompt Install

Agent Software Requirements
Use the Barracuda Backup Agent (Windows) to back up your Microsoft ^® File System, Microsoft Exchange ^® Server, Microsoft SQL Server ^® , and system state.
Barracuda Backup Agent (Windows) 5.2 or higher supports the following Microsoft Windows systems:
- Windows Server 2012
- Windows Server 2008
• Windows Server 2003 SP2 or higher - Windows 7
• Windows Vista SP1 or higher - Windows 8
• Windows XP SP3 or higher (excluding System State)
The Barracuda Agent is enabled by default for Windows Servers.
Install Barracuda Backup Agent
Use the following steps to install the Barracuda Backup Agent:
- Log in to Barracuda Backup, and go to the page.SYSTEM > Software Downloads
- Download the Barracuda Backup Agent 5.2 (Windows) to your local system or server.
- Navigate to the download location, and run the executable; the installer self-extracts:
- Follow the instructions in the wizard to complete the installation.
Add Data Sources
Use the following steps to add the Data Source to Barracuda Backup:
- Log in to Barracuda Backup, and go to the page. BACKUP > Sources
- Click Add Computer. Enter a computer description and enter the IP address or fully qualified domain name in the Computer Name field.
- From the operating system drop-down menu, select Microsoft Windows:
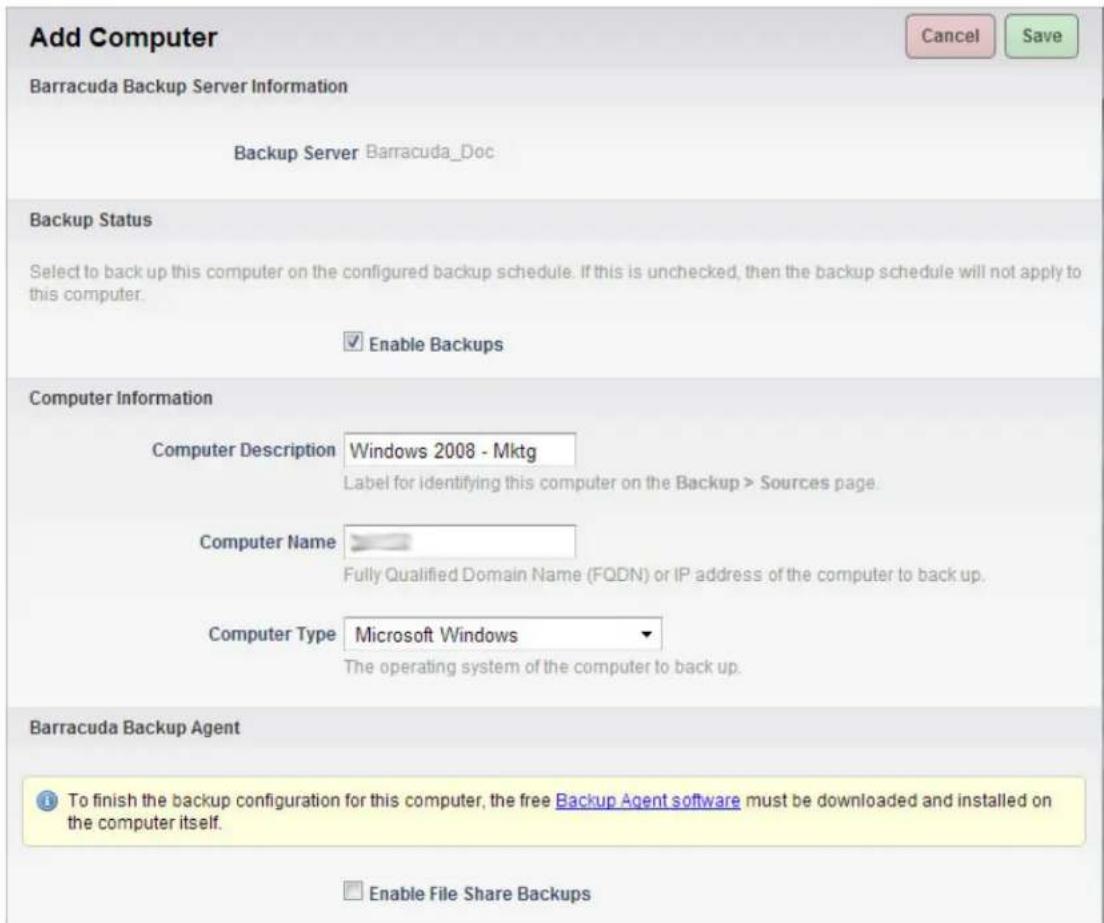
- Select whether to .Enable File Share Backups
- Click Save at the top of the page. In the Add Data Source page, verify the Data Type displays as Barracuda Agent Software.
- Click Test Software Connectivity: if the connection is successful, continue to the next step; however, if the connection is not successful, return to the Add Computer page and verify the IP address is correct before continuing. Click Save to return to the Add Data Source page.
- If this is a SQL Server, complete the Microsoft SQL Server Authentication section.
- In the Item Selection section, select the items you wish to back up.
- Specify whether you wish to back up to cloud storage or replicate to another Barracuda Backup Server.
- State at the top of the page.
Set Up Backup Schedules and Retention
Once you have your data source items set up for backup, you can set up schedules and retention policies.
How to Silently Install the Barracuda Backup Agent (Windows)
This article refers to firmware version 5.2 and higher, and the Barracuda Backup Agent 5.0 and higher, and the Barracuda Backup Agent (Windows) 5.2 and higher.
Use the steps in this article to "silently" install the Barracuda Backup Agent on the server you wish to back up from a command prompt. These steps apply to either a new installation or an upgrade to a previously installed version of the Agent.
- Log into the Barracuda Backup web interface, and go to the SYSTEM > Software Downloads page.
- Under Barracuda Backup Agent, click Download the latest version, and download the .exe installer file to the system you intend to back up.
- At a command prompt, change the directory to the location where you saved the Agent .exe installer file, and
enter the following command:
-win.exe -sp"-silent=Yes -up
Where version number represents the name of the downloaded .exe installer file. For example:
5.2.00-80572-win.exe -sp"-silent=Yes -upgrade=Yes"
Understanding the Barracuda Backup Agent (Windows) File Structure
This article refers to Barracuda Backup firmware version 5.0 and higher, and the Barracuda Backup Agent (Windows) version 5.0 and higher.
This article describes the overall file structure of the Barracuda Backup Agent (Windows) installation.

Important
If the volume on which the Backup Agent is installed has less than 2GB available free space, the Backup Agent attempts to move its database to another volume. For details and resolution, see Understanding Why the Barracuda Backup Agent Moves to a New Volume.
The Barracuda Backup Agent default installation directory is: C:\Program Files\Barracuda\Barracuda Backup Agent
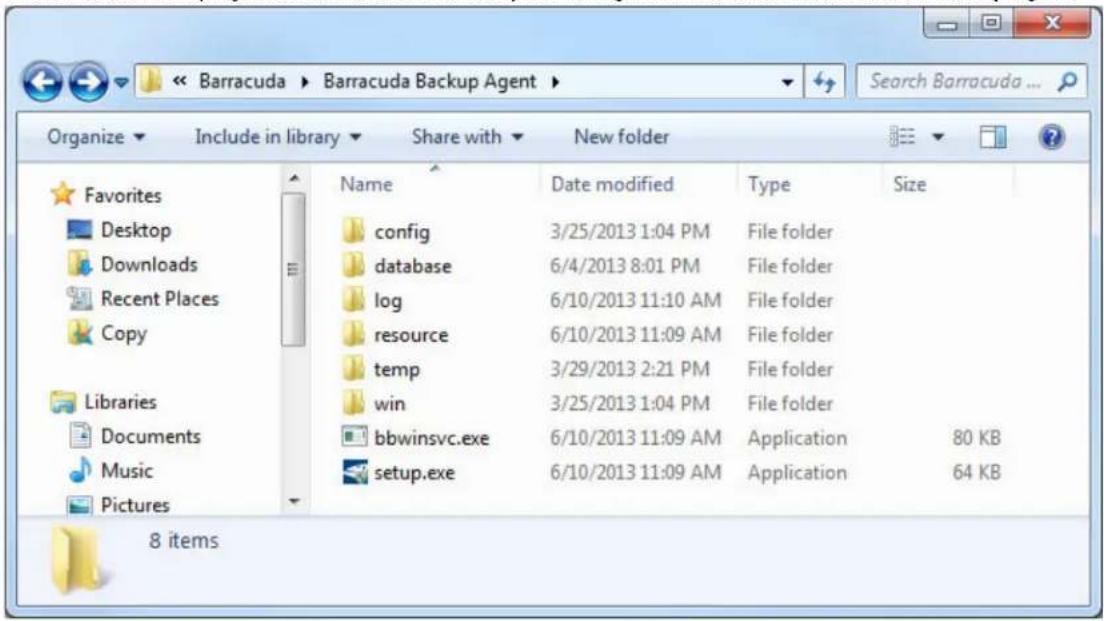
The following applications are contained in this directory:
| File Details | |
| bbwinsvc.exe | Parent application that directs the appropriate .exe file located in the folder.win |
| setup.exe | Setup installation file. |
The following folders are contained within this directory:
Folder Details
| config | This folder contains the Barracuda Backup Agent configuration files including: bbconfig.ini - Contains the Barracuda Backup Agent build number and installation version. Additionally, you can modify the file to take advantage of additional features, for example, change the Backup Agent port number, or leverage the Microsoft Volume Shadow Copy Service (VSS) to implement a full and differential SQL database backup operation. bbdetect.ini - Initializes various Backup Agent features. If you do not want a feature to load, add a semicolon at the beginning of the line to comment it out. For example, you may want to comment out the SQL details. bbfilter.ini - Initializes Backup Agent filters. bbinstall.ini - Contains installation configuration settings. |
| database | Contains the local database used for source-based deduplication, and maintains the organization of the managed files for backup. This folder contains multiple files..dat |
| log | Contains the Backup Agent log files; bbtrtace.txt is always the most recent log file. Each time the Backup Agent Service is restarted, a number is appended to the current file, and a new file isbbtrace.txt generated. Use these files to understand and resolve any errors that may occur with the Backup Agent such as an Agent backup .initialization error |
| resource | Contains the Backup Agent resource files. |
| temp | Remains empty unless an update is downloaded, at which time the update installer is temporarily added to this folder during installation. |
| win Contains the files and applications used by the Backup Agent.dll | Service. |

Barracuda Backup Agent Service
The Backup Agent runs as a Service called Barracuda Backup Agent:
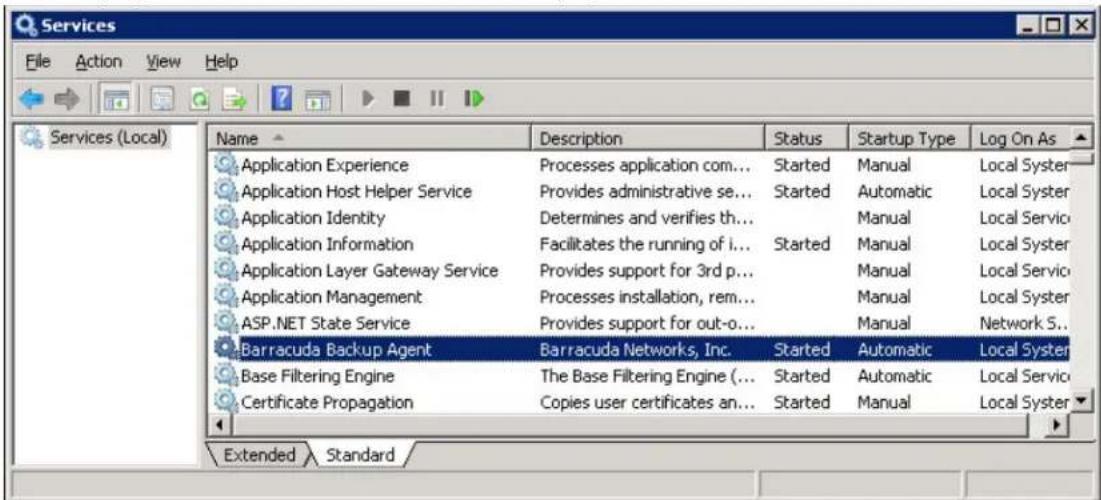

Process Name
In the Task Manager, the process displays as .bbwinsdr
How to Manually Move the Barracuda Backup Agent (Windows) Database to an Alternate
Location
This article refers to firmware version 5.4 and higher, and the Barracuda Backup Agent (Windows).
In cases where the partition has limited space, use the following steps to move the Windows Backup Agent database.
- Log in to the system where the Agent is installed.
- Open the Agent database folder:
C:\Program Files\Barracuda\Barracuda Backup Agent\database\
- Copy the database named and paste it into an alternate location. bbs400000 - File Systems.db
- Locate the Windows Agent configuration file in the default file location:bbconfig.ini
5.
C:\Program Files\Barracuda\
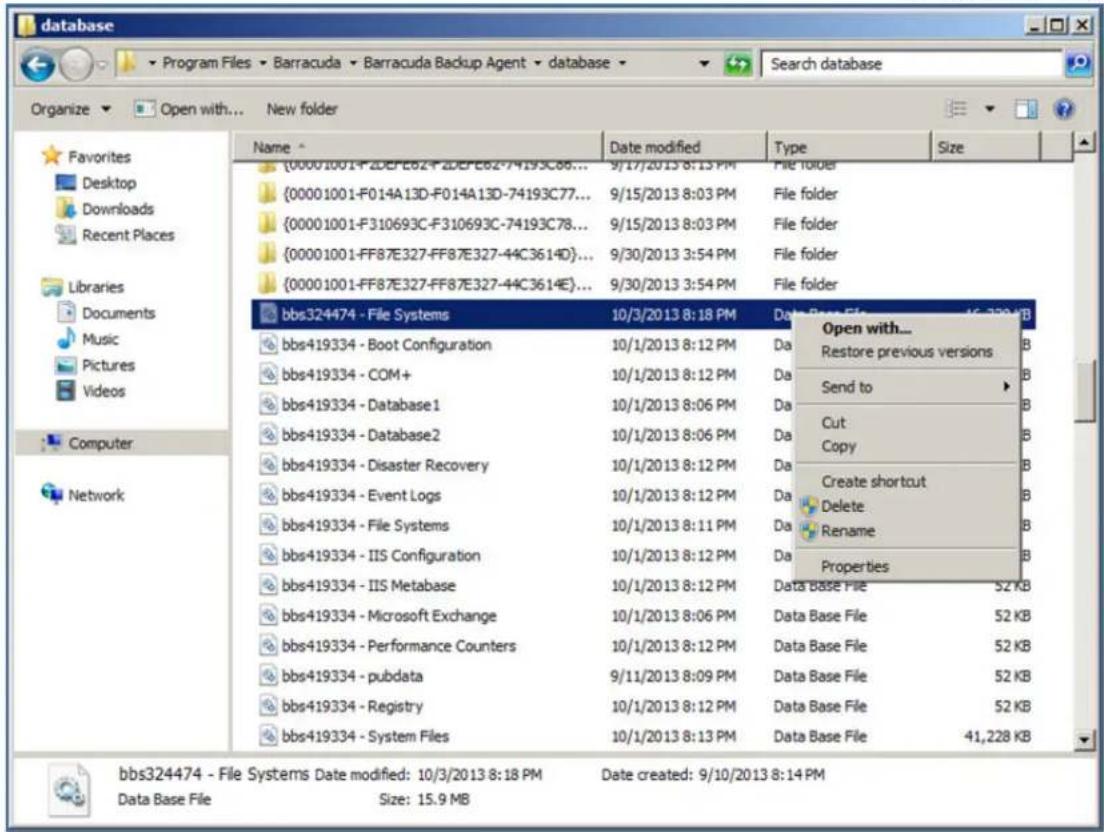
- Open using a text editor, and add the following lines to the end of the file:bbconfig.ini
[fileStores]
bbs - File Systems=C:\Program Files\Barracuda\Barracuda Backup Agent\400000
database\bbs400000 - File Systems.db
Where 400000 represents the serial number of your Barracuda Backup Server.
For example:
[installControl]
buildNumber=84642
installedVersion=5.3.00-rel
[configuration]
nodeGuid={00001001-AC5CBCB7-AC4CBCB6-AC5CDCB8}
[fileStores]
bbs400000 - File Systems=C:\Program Files\Barracuda\Barracuda Backup
Agent\database\bbs400000 - File Syst
-
Save and close the file.
-
Type in the box, and press .services.msc Start Search Enter
- In the window, right-click, and click :Services Barracuda Backup Agent Restart
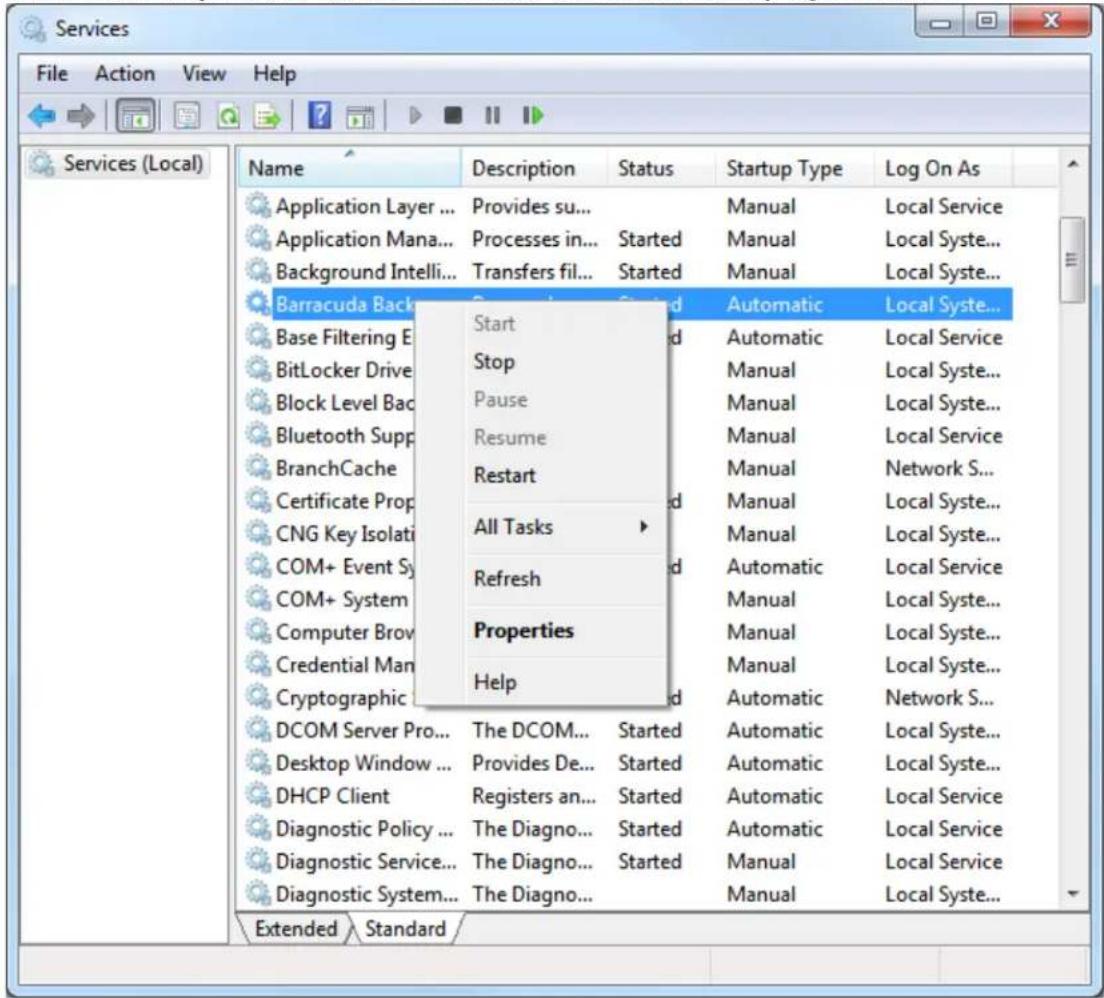
Barracuda Backup Agent (Linux)
In this Section
• How to Install and Use the Barracuda Backup Agent (Linux)
• How to Manually Move the Barracuda Backup Agent (Linux) Database to an Alternate Location
How to Install and Use the Barracuda Backup Agent (Linux)
This article refers to Barracuda Backup firmware version 5.3 and higher, and the Barracuda Backup Agent (Linux).
In this article:
• Installing the Barracuda Backup Agent (Linux)
- Adding the Linux Data Source
• Backup Schedules and Retention

Agent Software Requirements
Barracuda Linux Backup Agent supports:
- Kernel 2.6.16 and higher
• glibc version 2.2.5 for 32-bit binary
• glibc version 2.3.4 for 64-bit binary

Backed Up Content
Use the Barracuda Backup Agent (Linux) to back up Linux file systems such as Red Hat, Ubuntu, or SUSE. The Linux Agent can back up open files, permissions, soft and hard links, and supports multiple data streams.
Installing the Barracuda Backup Agent (Linux)
Use the following steps to install the Backup Agent:
- Log in to Barracuda Backup, and go to the page.SYSTEM > Software Downloads
-
Download and unzip the on your local Linux system or server. Barracuda Backup Agent (Linux)
-
Unpack the tar file:
tar -zxvf barracuda_backup_agent-x.x.x.tgz
-
On your Linux system, open a terminal window, and change the directory to the Barracuda Linux Backup Agent directory, for example: /Desktop/agent-5.3-lin\$
-
In the terminal window, run the command :sudo ./install Press to install the Backup Agent in the default location:Enter [usr/local/barracuda/bbs]
-
Once the Barracuda Linux Backup Agent installs, the Service automatically starts.
-
In the terminal window, run the command ps-A1 to view the Barracuda Linux Backup Agent Service:
| 0 S | 0 2113 | 1 0 80 | 0 - 6196 wait ? | 00:00:00 bblinsdr |
| 1 S | 0 2114 2113 | 1 80 | 0 - 140753 hrtime ? | 00:00:04 bblinsdr |
- The Linux Backup Agent is now installed; close the terminal window.
Adding the Linux Data Source
Use the following steps to add the Linux Data Source to Barracuda Backup:
- Log into Barracuda Backup, and go to the page.BACKUP > Sources
- Click Add Computer. Enter a computer description and enter the IP address or fully qualified domain name in the Computer Name field.
- From the operating system drop-down menu, select Linux/Unix:
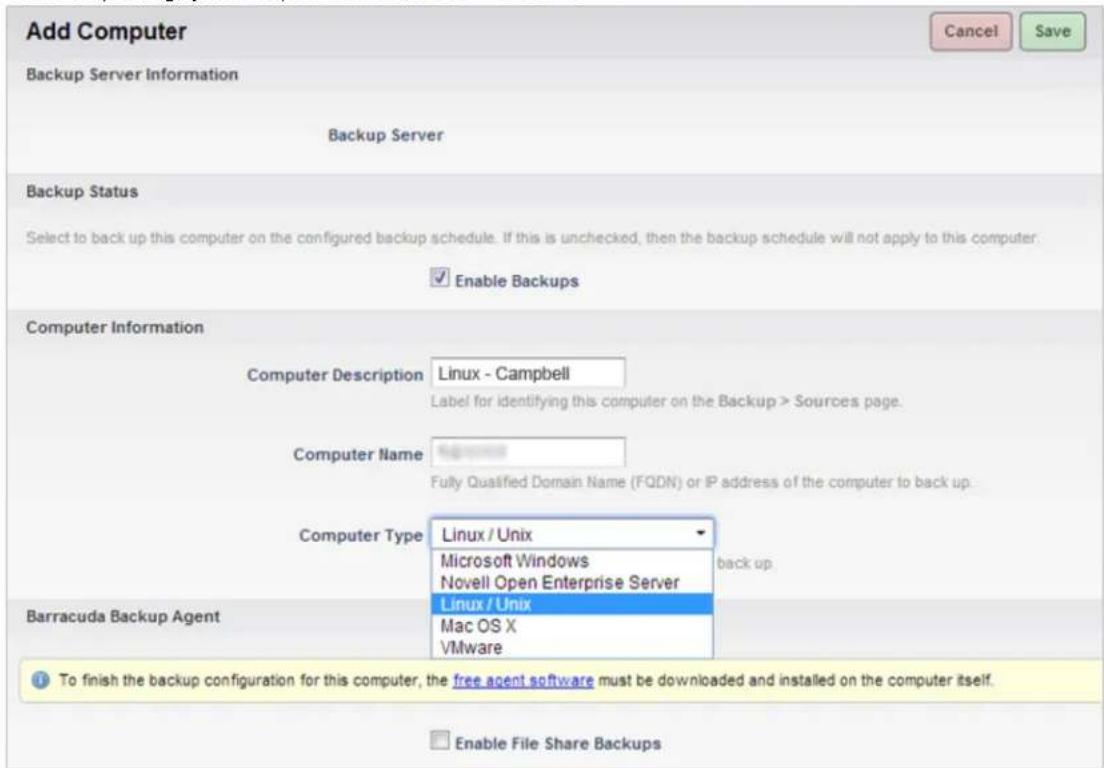
- Click Save at the top of the page. In the Edit page, verify the Data Type displays as Agent Software.
- Click Test Software Connectivity; if the connection is successful, continue to the next step; however, if the connection is not successful,
return to the Add Computer page and verify the IP address is correct before continuing. Click Save to return to the Edit page.
- In the section, select the items you wish to back up: Item Selection
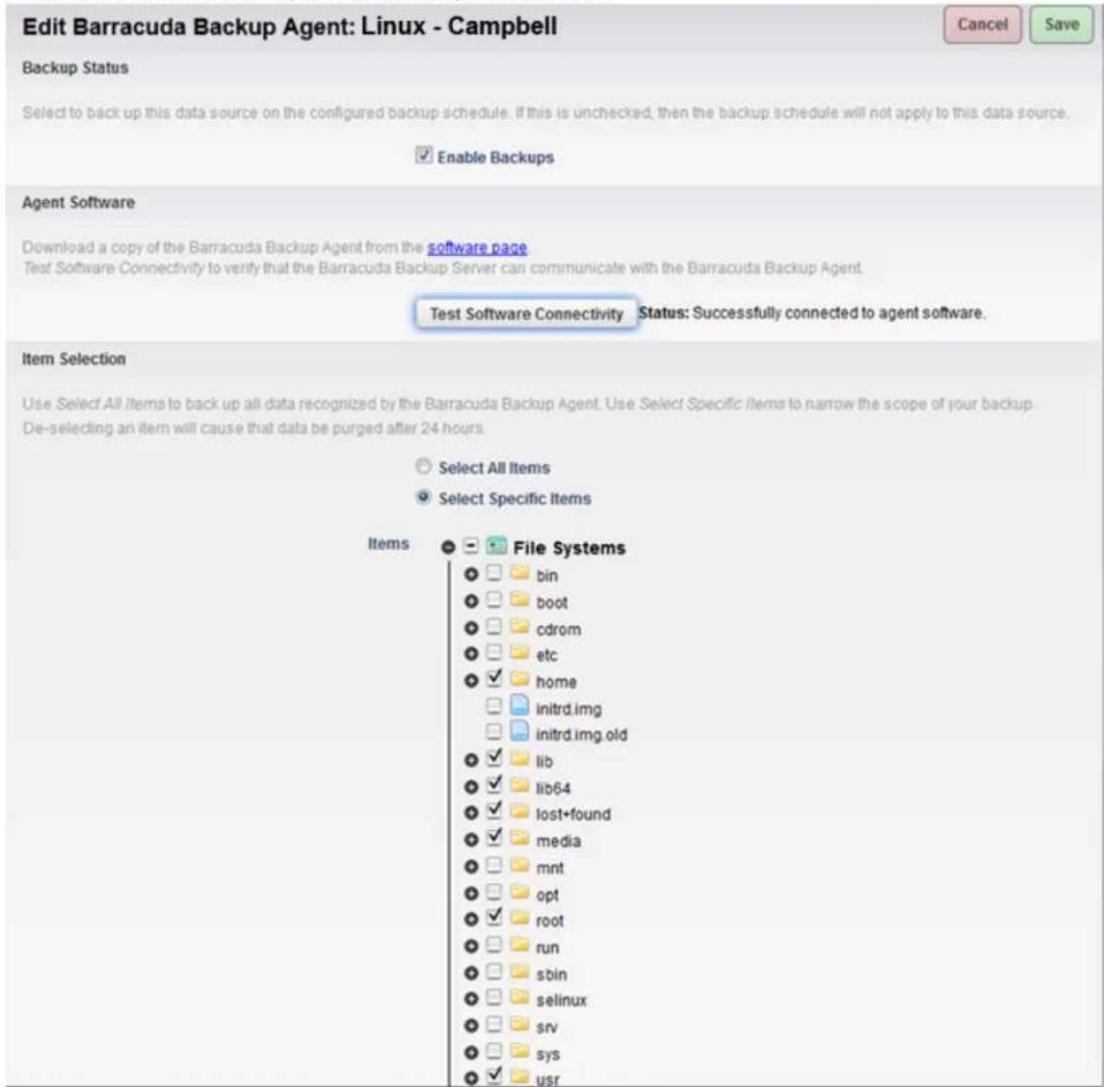
- Click at the top of the page. Save
Backup Schedules and Retention
Once you have your Linux data source items set up for backup, you can set up schedules and retention policies.
How to Manually Move the Barracuda Backup Agent (Linux) Database to an Alternate Location
This article refers to firmware version 5.3 and higher, and the Barracuda Backup Agent (Linux).
In cases where the partition has limited space, use the following steps to move the Backup Agent database.
- At a command prompt, issue the following command where 40000 represents the serial number of your Barracuda Backup Server: Mv /var/lib/bbs/database/bbs400000 - File Systems.db /opt/database/bbs400000 - File Systems.db
- Locate the Linux Agent configuration file bbconfig.ini in the default file location: /usr/local/barracuda/bbs/config/
- Open bbconfig.ini using a text editor, and add the following lines to the end of the file:
[fileStores]
bbs400000 - File Systems=/mnt/harddrive2/Barracuda Backup Agent Database/bbs400000 - File Systems.db
Where 400000 represents the serial number of your Barracuda Backup Server.
- Save the file.
- Enter the following command to restart the Backup Agent:
/etc/init.d/bbagent restart
6.
View the file; it should look similar to:bbconfig.ini
[installControl]
buildNumber=84642
installedVersion=5.3.00-rel
[configuration]
nodeGuid={00001001-AC5CBCB7-AC4CBCB6-AC5CDCB8}
[fileStores]
bbs438251 - File Systems=/opt/database/bbs400000 - File Systems.db
- Close the file.bbconfig.ini
How to Edit Network Settings through the Barracuda Console
In this article:
- Console
- Interface
- Out-of-the-Box
Related Articles
- Barracuda Backup Server Hardware Specifications
- Barracuda Backup Server Panel Indicators, Ports, and Connectors
Console
The Barracuda Console allows you to change the network settings on a Barracuda Backup Server directly. To access and interact with the Console screen, you must plug a keyboard and monitor into your Barracuda Backup Server.
Interface
The Console interface is a curses application that Barracuda Backup Servers boot into when started. Use the interface to change network settings through direct physical access to the unit:
![Barracuda Console - Serial 0000 - Firmware Version 4.2.02.43161 DHCP/Static [ ] DHCP [X] Static Commit Changes OK LAN IP 10.2.75.65 Netmask 255.055.055.9 Internet Gateway 10.0.75.1 Primary DNS 10.0.75.288 Secondary DNS 10.2.75.5 Barracuda Activity Log - 2012-02-23 15:11:40 2012-02-23 14:57:55 Connection to Barracuda is still healthy 2012-02-23 15:02:55 Polling Barracuda connection 2012-02-23 15:02:57 Connection to Barracuda is still healthy 2012-02-23 15:07:57 Polling Barracuda connection 2012-02-23 15:07:58 Connection to Barracuda is still healthy](/content/2026/06/1260286/images/3be492cc377d53234e75c16ce27daeef316ebe06bbb78258efa7df37be7be532.jpg)
Out-of-the-Box
Making network setting changes using the Barracuda Console is easy. A Barracuda Backup Server is considered fully online when all three boxes, LAN, Internet, and Barracuda, are green. It is possible to have connectivity to the LAN and Internet but not to Barracuda Networks. This can occur if the system is not linked or if a LAN firewall is blocking the necessary outbound port 1194. Encrypted traffic is sent out across port 1194 to the Barracuda Networks management network.
If you wish to restrict the outbound network traffic on port 1194 to the Barracuda Networks specific IP range, please contact Barracuda Networks Technical Support for a listing of required IP addresses to allow. If a firewall is blocking outbound traffic on this port, the Barracuda Backup Server's Smartmode will be unable to bring the unit online.
If a DHCP server is running on the network, it is an easy way to bring the Barracuda Backup Server online. The Barracuda Backup Server requests network IP information from the DHCP server when it boots, or after it loses network connectivity for any reason. Static IP information can be specified on the Barracuda Backup Server as well.
Use the following keyboard commands to navigate and make changes in the Barracuda Console. The activity log shows you what the Barracuda Backup Server is doing during the process. Changes do not take effect until the Commit Changes button is highlighted and you press Enter on the keyboard:
- Arrow keys change field highlighting
• Spacebar selects DHCP or Static address
• Red headings are disabled fields due to the current mode - Press on when finished Enter Commit Changes
• After changes are committed, the Barracuda Backup Server attempts to connect to Barracuda Networks
If you have questions about Barracuda Console, or need assistance getting your Barracuda Backup Server online, please contact Barracuda
.Networks Technical Support
Hardware Compliance
This article contains appliance compliance information.

Notice for the USA
Compliance Information Statement (Declaration of Conformity Procedure) DoC FCC Part 15: This device complies with part 15 of the FCC Rules. Operation is subject to the following conditions:
This device may not cause harmful interference, and
This device must accept any interference received including interference that may cause undesired operation. If this equipment does cause harmful interference to radio or television reception, which can be determined by turning the equipment off and on, the user in encouraged to try one or more of the following measures:
- Reorient or relocate the receiving antenna.
- Increase the separation between the equipment and the receiver.
- Plug the equipment into an outlet on a circuit different from that of the receiver.
- Consult the dealer or an experienced radio/television technician for help.
Notice for Canada
This apparatus complies with the Class B limits for radio interference as specified in the Canadian Department of Communication Radio Interference Regulations.

Notice for Europe (CE Mark)
This product is in conformity with the Council Directive 89/336/EEC, 92/31/EEC (EMC).
Power Requirements
AC input voltage 100-240 volts; frequency 50/60 Hz.
Limited Warranty and License
Barracuda Networks Limited Hardware Warranty (v 2.1)
Barracuda Networks, Inc., or the Barracuda Networks, Inc. subsidiary or authorized Distributor selling the Barracuda Networks product, if sale is not directly by Barracuda Networks, Inc., ("Barracuda Networks") warrants that commencing from the date of delivery to Customer (but in case of resale by a Barracuda Networks reseller, commencing not more than sixty (60) days after original shipment by Barracuda Networks, Inc.), and continuing for a period of one (1) year: (a) its products (excluding any software) will be free from material defects in materials and workmanship under normal use; and (b) the software provided in connection with its products, including any software contained or embedded in such products will substantially conform to Barracuda Networks published specifications in effect as of the date of manufacture. Except for the foregoing, the software is provided as is. In no event does Barracuda Networks warrant that the software is error free or that Customer will be able to operate the software without problems or interruptions. In addition, due to the continual development of new techniques for intruding upon and attacking networks, Barracuda Networks does not warrant that the software or any equipment, system or network on which the software is used will be free of vulnerability to intrusion or attack. The limited warranty extends only to you the original buyer of the Barracuda Networks product and is non-transferable.
Exclusive Remedy
Your sole and exclusive remedy and the entire liability of Barracuda Networks under this limited warranty shall be, at Barracuda Networks or its service centers option and expense, the repair, replacement or refund of the purchase price of any products sold which do not comply with this warranty. Hardware replaced under the terms of this limited warranty may be refurbished or new equipment substituted at Barracuda Networks' option. Barracuda Networks obligations hereunder are conditioned upon the return of affected articles in accordance with Barracuda Networks then-current Return Material Authorization ("RMA") procedures. All parts will be new or refurbished, at Barracuda Networks' discretion, and shall be furnished on an exchange basis. All parts removed for replacement will become the property of Barracuda Networks. In connection with warranty services hereunder, Barracuda Networks may at its discretion modify the hardware of the product at no cost to you to improve its reliability or performance. The warranty period is not extended if Barracuda Networks repairs or replaces a warranted product or any parts. Barracuda Networks may change the availability of limited warranties, at its discretion, but any changes will not be retroactive. IN NO EVENT
SHALL BARRACUDA NETWORKS LIABILITY EXCEED THE PRICE PAID FOR THE PRODUCT FROM DIRECT, INDIRECT, SPECIAL, INCIDENTAL, OR CONSEQUENTIAL DAMAGES RESULTING FROM THE USE OF THE PRODUCT, ITS ACCOMPANYING SOFTWARE, OR ITS DOCUMENTATION.
Exclusions and Restrictions
This limited warranty does not apply to Barracuda Networks products that are or have been (a) marked or identified as "sample" or "beta," (b) loaned or provided to you at no cost, (c) sold "as is," (d) repaired, altered or modified except by Barracuda Networks, (e) not installed, operated or maintained in accordance with instructions supplied by Barracuda Networks, or (f) subjected to abnormal physical or electrical stress, misuse, negligence or to an accident.
EXCEPT FOR THE ABOVE WARRANTY, BARRACUDA NETWORKS MAKES NO OTHER WARRANTY, EXPRESS, IMPLIED OR STATUTORY, WITH RESPECT TO BARRACUDA NETWORKS PRODUCTS, INCLUDING WITHOUT LIMITATION ANY IMPLIED WARRANTY OF TITLE, AVAILABILITY, RELIABILITY, USEFULNESS, MERCHANTABILITY, FITNESS FOR A PARTICULAR PURPOSE, NONINFRINGEMENT, OR ARISING FROM COURSE OF PERFORMANCE, DEALING, USAGE OR TRADE. EXCEPT FOR THE ABOVE WARRANTY, BARRACUDA NETWORKS' PRODUCTS AND THE SOFTWARE ARE PROVIDED "AS-IS" AND BARRACUDA NETWORKS DOES NOT WARRANT THAT ITS PRODUCTS WILL MEET YOUR REQUIREMENTS OR BE UNINTERRUPTED, TIMELY, AVAILABLE, SECURE OR ERROR FREE, OR THAT ANY ERRORS IN ITS PRODUCTS OR THE SOFTWARE WILL BE CORRECTED. FURTHERMORE, BARRACUDA NETWORKS DOES NOT WARRANT THAT BARRACUDA NETWORKS PRODUCTS, THE SOFTWARE OR ANY EQUIPMENT, SYSTEM OR NETWORK ON WHICH BARRACUDA NETWORKS PRODUCTS WILL BE USED WILL BE FREE OF VULNERABILITY TO INTRUSION OR ATTACK.
Barracuda Networks Software License Agreement (v 2.1)
PLEASE READ THIS SOFTWARE LICENSE AGREEMENT ("AGREEMENT") CAREFULLY BEFORE USING THE BARRACUDA NETWORKS SOFTWARE. BY USING THE BARRACUDA SOFTWARE YOU ARE AGREEING TO BE BOUND BY THE TERMS OF THIS LICENSE. IF YOU ARE A CORPORATION, PARTNERSHIP OR SIMILAR ENTITY, THEN THE SOFTWARE LICENSE GRANTED UNDER THIS AGREEMENT IS EXPRESSLY CONDITIONED UPON ACCEPTANCE BY A PERSON WHO IS AUTHORIZED TO SIGN FOR AND BIND THE ENTITY. IF YOU ARE NOT AUTHORIZED TO SIGN FOR AND BIND THE ENTITY OR DO NOT AGREE WITH ALL THE TERMS OF THIS AGREEMENT, DO NOT USE THE SOFTWARE. IF YOU DO NOT AGREE TO THE TERMS OF THIS LICENSE YOU MAY RETURN THE SOFTWARE OR HARDWARE CONTAINING THE SOFTWARE FOR A FULL REFUND TO YOUR PLACE OF PURCHASE.
- The software and documentation, whether on disk, in flash memory, in read only memory, or on any other media or in any other form (collectively "Barracuda Software") is licensed, not sold, to you by Barracuda Networks, Inc. ("Barracuda") for use only under the terms of this Agreement, and Barracuda reserves all rights not expressly granted to you. The rights granted are limited to Barracuda's intellectual property rights in the Barracuda Software and do not include any other patent or intellectual property rights. You own the media on which the Software is recorded but Barracuda retains ownership of the Software itself. If you have not completed a purchase of the Software and made payment for the purchase, the Software may only be used for evaluation purposes and may not be used in any production capacity. Furthermore the Software, when used for evaluation, may not be secure and may use publicly available passwords.
- Permitted License Uses and Restrictions. If you have purchased a Barracuda Networks hardware product, this Agreement allows you to use the Software only on the single Barracuda labeled hardware device on which the software was delivered. You may not make copies of the Software. You may not make a backup copy of the Software. If you have purchased a Barracuda Networks Virtual Machine you may use the software only in the licensed number of instances of the licensed sizes and you may not exceed the licensed capacities. You may make a reasonable number of backup copies of the Software. If you have purchased client software you may install the software only on the number of licensed clients. You may make a reasonable number of backup copies of the Software. For all purchases you may not modify or create derivative works of the Software except as provided by the Open Source Licenses included below. You may not make the Software available over a network where it could be utilized by multiple devices or copied. Unless otherwise expressly provided in the documentation, your use of the Software shall be limited to use on a single hardware chassis, on a single central processing unit, as applicable, or use on such greater number of chassis or central processing units as you may have paid Barracuda Networks the required license fee; and your use of the Software shall also be limited, as applicable and set forth in your purchase order or in Barracuda Networks' product catalog, user documentation, or web site, to a maximum number of (a) seats (i.e. users with access to install Software), (b) concurrent users, sessions, ports, and/or issued and outstanding IP addresses, and/or (c) central processing unit cycles or instructions per second. Your use of the Software shall also be limited by any other restrictions set forth in your purchase order or in Barracuda Networks' product catalog, user documentation or web site for the Software. The BARRACUDA SOFTWARE IS NOT INTENDED FOR USE IN THE OPERATION OF NUCLEAR FACILITIES, AIRCRAFT NAVIGATION OR COMMUNICATION SYSTEMS, LIFE SUPPORT MACHINES, OR OTHER EQUIPMENT IN WHICH FAILURE COULD LEAD TO DEATH, PERSONAL INJURY, OR ENVIRONMENTAL DAMAGE. YOU EXPRESSLY AGREE NOT TO USE IT IN ANY OF THESE OPERATIONS.
- You may not transfer, rent, lease, lend, or sublicense the Software or allow a third party to do so. YOU MAY NOT OTHERWISE TRANSFER THE SOFTWARE OR ANY OF YOUR RIGHTS AND OBLIGATIONS UNDER THIS AGREEMENT. You agree that you will have no right and will not, nor will it assist others to: (i) make unauthorized copies of all or any portion of the Software; (ii) sell, sublicense, distribute, rent or lease the Software; (iii) use the Software on a service bureau, time sharing basis or other remote access system whereby third parties other than you can use or benefit from the use of the Software; (iv) disassemble, reverse engineer, modify, translate, alter, decompile or otherwise attempt to discern
the source code of all or any portion of the Software; (v) utilize or run the Software on more computers than you have purchased license to; (vi) operate the Software in a fashion that exceeds the capacity or capabilities that were purchased by you.
- THIS AGREEMENT SHALL BE EFFECTIVE UPON INSTALLATION OF THE SOFTWARE OR PRODUCT AND SHALL TERMINATE UPON THE EARLIER OF: (A) YOUR FAILURE TO COMPLY WITH ANY TERM OF THIS AGREEMENT OR (B) RETURN, DESTRUCTION OR DELETION OF ALL COPIES OF THE SOFTWARE IN YOUR POSSESSION. Rights of Barracuda Networks and your obligations shall survive any termination of this Agreement. Upon termination of this Agreement by Barracuda Networks, You shall certify in writing to Barracuda Networks that all copies of the Software have been destroyed or deleted from any of your computer libraries, storage devices, or any other location.
- YOU EXPRESSLY ACKNOWLEDGE AND AGREE THAT THE USE OF THE BARRACUDA SOFTWARE IS AT YOUR OWN RISK AND THAT THE ENTIRE RISK AS TO SATISFACTION, QUALITY, PERFORMANCE, AND ACCURACY IS WITH YOU. THE BARRACUDA SOFTWARE IS PROVIDED "AS IS" WITH ALL FAULTS AND WITHOUT WARRANTY OF ANY KIND, AND BARRACUDA HEREBY DISCLAIMS ALL WARRANTIES AND CONDITIONS WITH RESPECT TO THE BARRACUDA SOFTWARE, EITHER EXPRESSED OR IMPLIED OR STATUTORY, INCLUDING, BUT NOT LIMITED TO, THE IMPLIED WARRANTIES AND/OR CONDITIONS OF MERCHANTABILITY, OF SATISFACTORY QUALITY, OF FITNESS FOR ANY APPLICATION, OF ACCURACY, AND OF NON-INFRINGEMENT OF THIRD PARTY RIGHTS. BARRACUDA DOES NOT WARRANT THE CONTINUED OPERATION OF THE SOFTWARE, THAT THE PERFORMANCE WILL MEET YOUR EXPECTATIONS, THAT THE FUNCTIONS WILL MEET YOUR REQUIREMENTS, THAT THE OPERATION WILL BE ERROR FREE OR CONTINUOUS, THAT CURRENT OR FUTURE VERSIONS OF ANY OPERATING SYSTEM WILL BE SUPPORTED, OR THAT DEFECTS WILL BE CORRECTED. NO ORAL OR WRITTEN INFORMATION GIVEN BY BARRACUDA OR AUTHORIZED BARRACUDA REPRESENTATIVE SHALL CREATE A WARRANTY. SHOULD THE BARRACUDA SOFTWARE PROVE DEFECTIVE, YOU ASSUME THE ENTIRE COST OF ALL NECESSARY SERVICING, REPAIR, OR CORRECTION. FURTHERMORE BARRACUDA NETWORKS SHALL ASSUME NO WARRANTY FOR ERRORS/BUGS, FAILURES OR DAMAGE WHICH WERE CAUSED BY IMPROPER OPERATION, USE OF UNSUITABLE RESOURCES, ABNORMAL OPERATING CONDITIONS (IN PARTICULAR DEVIATIONS FROM THE INSTALLATION CONDITIONS) AS WELL AS BY TRANSPORTATION DAMAGE. IN ADDITION, DUE TO THE CONTINUAL DEVELOPMENT OF NEW TECHNIQUES FOR INTRUDING UPON AND ATTACKING NETWORKS, BARRACUDA NETWORKS DOES NOT WARRANT THAT THE SOFTWARE OR ANY EQUIPMENT, SYSTEM OR NETWORK ON WHICH THE SOFTWARE IS USED WILL BE FREE OF VULNERABILITY TO INTRUSION OR ATTACK. YOU EXPRESSLY ACKNOWLEDGE AND AGREE THAT YOU WILL PROVIDE AN UNLIMITED PERPETUAL ZERO COST LICENSE TO BARRACUDA FOR ANY PATENTS OR OTHER INTELLECTUAL PROPERTY RIGHTS WHICH YOU EITHER OWN OR CONTROL THAT ARE UTILIZED IN ANY BARRACUDA PRODUCT.
- Termination and Fair Use Policy. BARRACUDA SHALL HAVE THE ABSOLUTE AND UNILATERAL RIGHT AT ITS SOLE DISCRETION TO DENY USE OF, OR ACCESS TO BARRACUDA SOFTWARE, IF YOU ARE DEEMED BY BARRACUDA TO BE USING THE SOFTWARE IN A MANNER NOT REASONABLY INTENDED BY BARRACUDA OR IN VIOLATION OF ANY LAW.
- Limitation of Liability. TO THE EXTENT NOT PROHIBITED BY LAW, IN NO EVENT SHALL BARRACUDA BE LIABLE FOR PERSONAL INJURY OR ANY INCIDENTAL SPECIAL, INDIRECT, OR CONSEQUENTIAL DAMAGES WHATSOEVER, INCLUDING, WITHOUT LIMITATION, DAMAGES FOR LOSS OF PROFITS, LOSS OF DATA, BUSINESS INTERRUPTION, OR ANY OTHER COMMERCIAL DAMAGES OR LOSSES, ARISING OUT OF OR RELATED TO YOUR ABILITY TO USE OR INABILITY TO USE THE BARRACUDA SOFTWARE HOWEVER CAUSED, REGARDLESS OF THE THEORY OF LIABILITY AND EVEN IF BARRACUDA HAS BEEN ADVISED OF THE POSSIBILITY OF DAMAGES. In no event shall Barracuda's total liability to you for all damages exceed the amount of one hundred dollars. The following terms govern your use of the Energize Update Software except to the extent a particular program (a) is the subject of a separate written agreement with Barracuda Networks or (b) includes a separate "click-on" license agreement as part of the installation and/or download process. To the extent of a conflict between the provisions of the foregoing documents, the order of precedence shall be (1) the written agreement, (2) the click-on agreement, and (3) this Energize Update Software License.
- Content Restrictions. YOU MAY NOT (AND MAY NOT ALLOW A THIRD PARTY TO) COPY, REPRODUCE, CAPTURE, STORE, RETRANSMIT, DISTRIBUTE, OR BURN TO CD (OR ANY OTHER MEDIUM) ANY COPYRIGHTED CONTENT THAT YOU ACCESS OR RECEIVE THROUGH USE OF THE PRODUCT CONTAINING THE SOFTWARE. YOU ASSUME ALL RISK AND LIABILITY FOR ANY SUCH PROHIBITED USE OF COPYRIGHTED CONTENT. You agree not to publish any benchmarks, measurements, or reports on the product without Barracuda Networks' written express approval.
- Third Party Software. Some Software which supports Bare Metal Disaster Recovery of Microsoft Windows Vista and Microsoft Windows 2008 Operating Systems (DR6) contains and uses components of the Microsoft Windows Pre-Installation Environment (WINPE) with the following restrictions: (i) the WINPE components in the DR6 product are licensed and not sold and may only be used with the DR6 product; (ii) DR6 is provided "as is"; (iii) Barracuda and its suppliers reserve all rights not expressly granted; (iv) license to use DR6 and the WINPE components is limited to use of the product as a recovery utility program only and not for use as a general purpose operating system; (v) Reverse engineering, decompiling or disassembly of the WINPE components, except to the extent expressly permitted by applicable law, is prohibited; (vi) DR6 contains a security feature from Microsoft that will automatically reboot the system without warning after 24 hours of continuous use; (vii) Barracuda alone will provide support for customer issues with DR6 and Microsoft and its Affiliates are released of all liability related to its use and operation; and, (viii) DR6 is subject to U.S. export jurisdiction.
-
Trademarks. Certain portions of the product and names used in this Agreement, the Software and the documentation may constitute trademarks of Barracuda Networks. You are not authorized to use any such trademarks for any purpose.
-
Export Restrictions. You may not export or re-export the Software without: (a) the prior written consent of Barracuda Networks, (b) complying with applicable export control laws, including, but not limited to, restrictions and regulations of the Department of Commerce or other United States agency or authority and the applicable EU directives, and (c) obtaining any necessary permits and licenses. In any event, you may not transfer or authorize the transfer of the Software to a prohibited territory or country or otherwise in violation of any applicable restrictions or regulations. If you are a United States Government agency the Software and documentation qualify as "commercial items", as that term is defined at Federal Acquisition Regulation ("FAR") (48 C.F.R.) 2.101, consisting of "commercial computer software" and "commercial computer software documentation" as such terms are used in FAR 12.212. Consistent with FAR 12.212 and DoD FAR Supp. 227.7202-1 through 227.7202-4, and notwithstanding any other FAR or other contractual clause to the contrary in any agreement into which this Agreement may be incorporated, Government end user will acquire the Software and documentation with only those rights set forth in this Agreement. Use of either the Software or documentation or both constitutes agreement by the Government that the Software and documentation are "commercial computer software" and "commercial computer software documentation", and constitutes acceptance of the rights and restrictions herein.
- General. THIS AGREEMENT IS GOVERNED BY THE LAWS OF THE STATE OF CALIFORNIA, USA WITH JURISDICTION OF SANTA CLARA COUNTY, CALIFORNIA, UNLESS YOUR HEADQUARTERS IS LOCATED IN SWITZERLAND, THE EU, OR JAPAN. IF YOUR HEADQUARTERS IS LOCATED IN SWITZERLAND THE SWISS MATERIAL LAW SHALL BE USED AND THE JURISDICTION SHALL BE ZURICH. IF YOUR HEADQUARTERS IS LOCATED IN THE EU, AUSTRIAN LAW SHALL BE USED AND JURISDICTION SHALL BE INNSBRUCK. IF YOUR HEADQUARTERS IS LOCATED IN JAPAN, JAPANESE LAW SHALL BE USED AND JURISDICTION SHALL BE TOKYO. THIS AGREEMENT WILL NOT BE SUBJECT TO ANY CONFLICT-OF-LAWS PRINCIPLES IN ANY JURISDICTION. THIS AGREEMENT WILL NOT BE GOVERNED BY THE U.N. CONVENTION ON CONTRACTS FOR THE INTERNATIONAL SALES OF GOODS. This Agreement is the entire agreement between You and Barracuda Networks regarding the subject matter herein and supersedes any other communications with respect to the Software. If any provision of this Agreement is held invalid or unenforceable, the remainder of this Agreement will continue in full force and effect. Failure to prosecute a party's rights with respect to a default hereunder will not constitute a waiver of the right to enforce rights with respect to the same or any other breach.
- Assignability. You may not assign any rights or obligations hereunder without prior written consent from Barracuda Networks.
- Billing Issues. You must notify Barracuda of any billing problems or discrepancies within sixty (60) days after they first appear on the statement you receive from your bank, Credit Card Company, other billing company or Barracuda Networks. If you do not bring such problems or discrepancies to Barracuda Networks attention within the sixty (60) day period, you agree that you waive the right to dispute such problems or discrepancies.
- Collection of Data. You agree to allow Barracuda Networks to collect information ("Statistics") from the Software in order to fight spam, virus, and other threats as well as optimize and monitor the Software. Information will be collected electronically and automatically. Statistics include, but are not limited to, the number of messages processed, the number of messages that are categorized as spam, the number of virus and types, IP addresses of the largest spam senders, the number of emails classified for Bayesian analysis, capacity and usage, and other statistics. Your data will be kept private and will only be reported in aggregate by Barracuda Networks.
- Subscriptions. Software updates and subscription information provided by Barracuda Energize Updates or other services may be necessary for the continued operation of the Software. You acknowledge that such a subscription may be necessary. Furthermore some functionality may only be available with additional subscription purchases. Obtaining Software updates on systems where no valid subscription has been purchased or obtaining functionality where subscription has not been purchased is strictly forbidden and in violation of this Agreement. All initial subscriptions commence at the time of activation and all renewals commence at the expiration of the previous valid subscription. Unless otherwise expressly provided in the documentation, you shall use the Energize Updates Service and other subscriptions solely as embedded in, for execution on, or (where the applicable documentation permits installation on non-Barracuda Networks equipment) for communication with Barracuda Networks equipment owned or leased by you. All subscriptions are non-transferrable. Barracuda Networks makes no warranty that subscriptions will continue un-interrupted. Subscription may be terminated without notice by Barracuda Networks for lack of full payment.
- Auto Renewals. If your Software purchase is a time based license, includes software maintenance, or includes a subscription, you hereby agree to automatically renew this purchase when it expires unless you notify Barracuda 15 days before the renewal date. Barracuda Networks will automatically bill you or charge you unless notified 15 days before the renewal date.
- Time Base License. If your Software purchase is a time based license you expressly acknowledge that the Software will stop functioning at the time the license expires. You expressly indemnify and hold harmless Barracuda Networks for any and all damages that may occur because of this.
- Support. Telephone, email and other forms of support will be provided to you if you have purchased a product that includes support. The hours of support vary based on country and the type of support purchased. Barracuda Networks Energize Updates typically include Basic support.
- Changes. Barracuda Networks reserves the right at any time not to release or to discontinue release of any Software or Subscription and to alter prices, features, specifications, capabilities, functions, licensing terms, release dates, general availability or other characteristics of any future releases of the Software or Subscriptions.
- Open Source Licensing. Barracuda Networks products may include programs that are covered by the GNU General Public License (GPL) or other Open Source license agreements, in particular the Linux operating system. It is expressly put on record that the Software does not
constitute an edited version or further development of the operating system. These programs are copyrighted by their authors or other parties, and the authors and copyright holders disclaim any warranty for such programs. Other programs are copyright by Barracuda Networks. Further details may be provided in an appendix to this agreement where the licenses are re-printed. Barracuda Networks makes available the source code used to build Barracuda products available at source.barracuda.com. This directory includes all the programs that are distributed on the Barracuda products. Obviously not all of these programs are utilized, but since they are distributed on the Barracuda product we are required to make the source code available.
Barracuda Networks Energize Updates and Other Subscription Terms
Barracuda Networks Software License Agreement Appendix
The GNU General Public License (GPL) Version 2, June 1991 Copyright © 1989, 1991 Free Software Foundation, Inc. 59 Temple Place, Suite 330, Boston, MA 02111-1307 USA
Everyone is permitted to copy and distribute verbatim copies of this license document, but changing it is not allowed.
Preamble
The licenses for most software are designed to take away your freedom to share and change it. By contrast, the GNU General Public License is intended to guarantee your freedom to share and change free software--to make sure the software is free for all its users. This General Public License applies to most of the Free Software Foundation's software and to any other program whose authors commit to using it. (Some other Free Software Foundation software is covered by the GNU Library General Public License instead.) You can apply it to your programs, too.
When we speak of free software, we are referring to freedom, not price. Our General Public Licenses are designed to make sure that you have the freedom to distribute copies of free software (and charge for this service if you wish), that you receive source code or can get it if you want it, that you can change the software or use pieces of it in new free programs; and that you know you can do these things.
To protect your rights, we need to make restrictions that forbid anyone to deny you these rights or to ask you to surrender the rights. These restrictions translate to certain responsibilities for you if you distribute copies of the software, or if you modify it.
For example, if you distribute copies of such a program, whether gratis or for a fee, you must give the recipients all the rights that you have. You must make sure that they, too, receive or can get the source code. And you must show them these terms so they know their rights.
We protect your rights with two steps: (1) copyright the software, and (2) offer you this license which gives you legal permission to copy, distribute and/or modify the software.
Also, for each author's protection and ours, we want to make certain that everyone understands that there is no warranty for this free software. If the software is modified by someone else and passed on, we want its recipients to know that what they have is not the original, so that any problems introduced by others will not reflect on the original authors' reputations.
Finally, any free program is threatened constantly by software patents. We wish to avoid the danger that redistributors of a free program will individually obtain patent licenses, in effect making the program proprietary. To prevent this, we have made it clear that any patent must be licensed for everyone's free use or not licensed at all.
The precise terms and conditions for copying, distribution and modification follow.
TERMS AND CONDITIONS FOR COPYING, DISTRIBUTION AND MODIFICATION
- This License applies to any program or other work which contains a notice placed by the copyright holder saying it may be distributed under the terms of this General Public License. The "Program", below, refers to any such program or work, and a "work based on the Program" means either the Program or any derivative work under copyright law: that is to say, a work containing the Program or a portion of it, either verbatim or with modifications and/or translated into another language. (Hereinafter, translation is included without limitation in the term "modification".) Each licensee is addressed as "you".
Activities other than copying, distribution and modification are not covered by this License; they are outside its scope. The act of running the Program is not restricted, and the output from the Program is covered only if its contents constitute a work based on the Program (independent of having been made by running the Program). Whether that is true depends on what the Program does.
-
You may copy and distribute verbatim copies of the Program's source code as you receive it, in any medium, provided that you conspicuously and appropriately publish on each copy an appropriate copyright notice and disclaimer of warranty; keep intact all the notices that refer to this License and to the absence of any warranty; and give any other recipients of the Program a copy of this License along with the Program. You may charge a fee for the physical act of transferring a copy, and you may at your option offer warranty protection in exchange for a fee.
-
You may modify your copy or copies of the Program or any portion of it, thus forming a work based on the Program, and copy and distribute such modifications or work under the terms of Section 1 above, provided that you also meet all of these conditions:
a) You must cause the modified files to carry prominent notices stating that you changed the files and the date of any change.
b) You must cause any work that you distribute or publish, that in whole or in part contains or is derived from the Program or any part thereof, to be licensed as a whole at no charge to all third parties under the terms of this License.
c) If the modified program normally reads commands interactively when run, you must cause it, when started running for such interactive use in the most ordinary way, to print or display an announcement including an appropriate copyright notice and a notice that there is no warranty (or else, saying that you provide a warranty) and that users may redistribute the program under these conditions, and telling the user how to view a copy of this License. (Exception: if the Program itself is interactive but does not normally print such an announcement, your work based on the Program is not required to print an announcement).
These requirements apply to the modified work as a whole. If identifiable sections of that work are not derived from the Program, and can be reasonably considered independent and separate works in themselves, then this License, and its terms, do not apply to those sections when you distribute them as separate works. But when you distribute the same sections as part of a whole which is a work based on the Program, the distribution of the whole must be on the terms of this License, whose permissions for other licensees extend to the entire whole, and thus to each and every part regardless of who wrote it.
Thus, it is not the intent of this section to claim rights or contest your rights to work written entirely by you; rather, the intent is to exercise the right to control the distribution of derivative or collective works based on the Program.
In addition, mere aggregation of another work not based on the Program with the Program (or with a work based on the Program) on a volume of a storage or distribution medium does not bring the other work under the scope of this License.
- You may copy and distribute the Program (or a work based on it, under Section 2) in object code or executable form under the terms of Sections 1 and 2 above provided that you also do one of the following:
a) Accompany it with the complete corresponding machine-readable source code, which must be distributed under the terms of Sections 1 and 2 above on a medium customarily used for software interchange; or,
b) Accompany it with a written offer, valid for at least three years, to give any third party, for a charge no more than your cost of physically performing source distribution, a complete machine-readable copy of the corresponding source code, to be distributed under the terms of Sections 1 and 2 above on a medium customarily used for software interchange; or,
c) Accompany it with the information you received as to the offer to distribute corresponding source code. (This alternative is allowed only for noncommercial distribution and only if you received the program in object code or executable form with such an offer, in accord with Subsection b above.)
The source code for a work means the preferred form of the work for making modifications to it. For an executable work, complete source code means all the source code for all modules it contains, plus any associated interface definition files, plus the scripts used to control compilation and installation of the executable. However, as a special exception, the source code distributed need not include anything that is normally distributed (in either source or binary form) with the major components (compiler, kernel, and so on) of the operating system on which the executable runs, unless that component itself accompanies the executable.
If distribution of executable or object code is made by offering access to copy from a designated place, then offering equivalent access to copy the source code from the same place counts as distribution of the source code, even though third parties are not compelled to copy the source along with the object code.
- You may not copy, modify, sublicense, or distribute the Program except as expressly provided under this License. Any attempt otherwise to copy, modify, sublicense or distribute the Program is void, and will automatically terminate your rights under this License. However, parties who have received copies, or rights, from you under this License will not have their licenses terminated so long as such parties remain in full compliance.
- You are not required to accept this License, since you have not signed it. However, nothing else grants you permission to modify or distribute the Program or its derivative works. These actions are prohibited by law if you do not accept this License. Therefore, by modifying or distributing the Program (or any work based on the Program), you indicate your acceptance of this License to do so, and all its terms and conditions for copying, distributing or modifying the Program or works based on it.
- Each time you redistribute the Program (or any work based on the Program), the recipient automatically receives a license from the original licensor to copy, distribute or modify the Program subject to these terms and conditions. You may not impose any further restrictions on the recipients' exercise of the rights granted herein. You are not responsible for enforcing compliance by third parties to this License.
- If, as a consequence of a court judgment or allegation of patent infringement or for any other reason (not limited to patent issues), conditions are imposed on you (whether by court order, agreement or otherwise) that contradict the conditions of this License, they do not excuse you from the conditions of this License. If you cannot distribute so as to satisfy simultaneously your obligations under this License and any other pertinent
obligations, then as a consequence you may not distribute the Program at all. For example, if a patent license would not permit royalty-free redistribution of the Program by all those who receive copies directly or indirectly through you, then the only way you could satisfy both it and this License would be to refrain entirely from distribution of the Program.
If any portion of this section is held invalid or unenforceable under any particular circumstance, the balance of the section is intended to apply and the section as a whole is intended to apply in other circumstances.
It is not the purpose of this section to induce you to infringe any patents or other property right claims or to contest validity of any such claims; this section has the sole purpose of protecting the integrity of the free software distribution system, which is implemented by public license practices. Many people have made generous contributions to the wide range of software distributed through that system in reliance on consistent application of that system; it is up to the author/donor to decide if he or she is willing to distribute software through any other system and a licensee cannot impose that choice.
This section is intended to make thoroughly clear what is believed to be a consequence of the rest of this License.
- If the distribution and/or use of the Program is restricted in certain countries either by patents or by copyrighted interfaces, the original copyright holder who places the Program under this License may add an explicit geographical distribution limitation excluding those countries, so that distribution is permitted only in or among countries not thus excluded. In such case, this License incorporates the limitation as if written in the body of this License.
- The Free Software Foundation may publish revised and/or new versions of the General Public License from time to time. Such new versions will be similar in spirit to the present version, but may differ in detail to address new problems or concerns.
Each version is given a distinguishing version number. If the Program specifies a version number of this License which applies to it and "any later version", you have the option of following the terms and conditions either of that version or of any later version published by the Free Software Foundation. If the Program does not specify a version number of this License, you may choose any version ever published by the Free Software Foundation.
- If you wish to incorporate parts of the Program into other free programs whose distribution conditions are different, write to the author to ask for permission. For software which is copyrighted by the Free Software Foundation, write to the Free Software Foundation; we sometimes make exceptions for this. Our decision will be guided by the two goals of preserving the free status of all derivatives of our free software and of promoting the sharing and reuse of software generally.
NO WARRANTY
- BECAUSE THE PROGRAM IS LICENSED FREE OF CHARGE, THERE IS NO WARRANTY FOR THE PROGRAM, TO THE EXTENT PERMITTED BY APPLICABLE LAW. EXCEPT WHEN OTHERWISE STATED IN WRITING THE COPYRIGHT HOLDERS AND/OR OTHER PARTIES PROVIDE THE PROGRAM "AS IS" WITHOUT WARRANTY OF ANY KIND, EITHER EXPRESSED OR IMPLIED, INCLUDING, BUT NOT LIMITED TO, THE IMPLIED WARRANTIES OF MERCHANTABILITY AND FITNESS FOR A PARTICULAR PURPOSE. THE ENTIRE RISK AS TO THE QUALITY AND PERFORMANCE OF THE PROGRAM IS WITH YOU. SHOULD THE PROGRAM PROVE DEFECTIVE, YOU ASSUME THE COST OF ALL NECESSARY SERVICING, REPAIR OR CORRECTION.
- IN NO EVENT UNLESS REQUIRED BY APPLICABLE LAW OR AGREED TO IN WRITING WILL ANY COPYRIGHT HOLDER, OR ANY OTHER PARTY WHO MAY MODIFY AND/OR REDISTRIBUTE THE PROGRAM AS PERMITTED ABOVE, BE LIABLE TO YOU FOR DAMAGES, INCLUDING ANY GENERAL, SPECIAL, INCIDENTAL OR CONSEQUENTIAL DAMAGES ARISING OUT OF THE USE OR INABILITY TO USE THE PROGRAM (INCLUDING BUT NOT LIMITED TO LOSS OF DATA OR DATA BEING RENDERED INACCURATE OR LOSSES SUSTAINED BY YOU OR THIRD PARTIES OR A FAILURE OF THE PROGRAM TO OPERATE WITH ANY OTHER PROGRAMS), EVEN IF SUCH HOLDER OR OTHER PARTY HAS BEEN ADVISED OF THE POSSIBILITY OF SUCH DAMAGES.
END OF GNU TERMS AND CONDITIONS
Barracuda Networks Products may contain programs that are copyright (c)1995-2005 International Business Machines Corporation and others. All rights reserved. These programs are covered by the following License: "Permission is hereby granted, free of charge, to any person obtaining a copy of this software and associated documentation files (the "Software"), to deal in the Software without restriction, including without limitation the rights to use, copy, modify, merge, publish, distribute, and/or sell copies of the Software, and to permit persons to whom the Software is furnished to do so, provided that the above copyright notice(s) and this permission notice appear in all copies of the Software and that both the above copyright notice(s) and this permission notice appear in supporting documentation."
Barracuda Networks Products may include programs that are covered by the BSD License: "Redistribution and use in source and binary forms, with or without modification, are permitted provided that the following conditions are met:
Redistributions of source code must retain the above copyright notice, this list of conditions and the following disclaimer.
Redistributions in binary form must reproduce the above copyright notice, this list of conditions and the following disclaimer in the documentation and/or other materials provided with the distribution.
The names of the authors may not be used to endorse or promote products derived from this software without specific prior written permission.
THIS SOFTWARE IS PROVIDED "AS IS" AND WITHOUT ANY EXPRESS OR IMPLIED WARRANTIES, INCLUDING, WITHOUT LIMITATION, THE IMPLIED WARRANTIES OF MERCHANTABILITY AND FITNESS FOR A PARTICULAR PURPOSE."
Barracuda Networks Products may include the libspf library which is Copyright (c) 2004 James Couzens & Sean Comeau. All rights reserved. It is covered by the following agreement: Redistribution and use in source and binary forms, with or without modification, are permitted provided that the following conditions are met: 1. Redistributions of source code must retain the above copyright notice, this list of conditions and the following disclaimer. 2. Redistributions in binary form must reproduce the above copyright notice, this list of conditions and the following disclaimer in the documentation and/or other materials provided with the distribution. THIS SOFTWARE IS PROVIDED "AS IS" AND ANY EXPRESSED OR IMPLIED WARRANTIES, INCLUDING, BUT NOT LIMITED TO, THE IMPLIED WARRANTIES OF MERCHANTABILITY AND FITNESS FOR A PARTICULAR PURPOSE ARE DISCLAIMED. IN NO EVENT SHALL THE AUTHORS MAKING USE OF THIS LICENSE OR ITS CONTRIBUTORS BE LIABLE FOR ANY DIRECT, INDIRECT, INCIDENTAL, SPECIAL, EXEMPLARY, OR CONSEQUENTIAL DAMAGES (INCLUDING, BUT NOT LIMITED TO, PROCUREMENT OF SUBSTITUTE GOODS OR SERVICES; LOSS OF USE, DATA, OR PROFITS; OR BUSINESS INTERRUPTION) HOWEVER CAUSED AND ON ANY THEORY OF LIABILITY, WHETHER IN CONTRACT, STRICT LIABILITY, OR TORT (INCLUDING NEGLIGENCE OR OTHERWISE) ARISING IN ANY WAY OUT OF THE USE OF THIS SOFTWARE, EVEN IF ADVISED OF THE POSSIBILITY OF SUCH DAMAGE.
Barracuda Networks Products may contain programs that are Copyright (c) 1998-2003 Carnegie Mellon University. All rights reserved. Redistribution and use in source and binary forms, with or without modification, are permitted provided that the following conditions are met: 1. Redistributions of source code must retain the above copyright notice, this list of conditions and the following disclaimer. 2. Redistributions in binary form must reproduce the above copyright notice, this list of conditions and the following disclaimer in the documentation and/or other materials provided with the distribution. The name "Carnegie Mellon University" must not be used to endorse or promote products derived from this software without prior written permission. For permission or any other legal details, please contact Office of Technology Transfer, Carnegie Mellon University, 5000 Forbes Avenue, Pittsburgh, PA 15213-3890 (412) 268-4387, fax: (412) 268-7395, tech-transfer@andrew.cmu.edu. Redistributions of any form whatsoever must retain the following acknowledgment: "This product includes software developed by Computing Services at Carnegie Mellon University (http://www.cmu.edu/computing/)." CARNEGIE MELLON UNIVERSITY DISCLAIMS ALL WARRANTIES WITH REGARD TO THIS SOFTWARE, INCLUDING ALL IMPLIED WARRANTIES OF MERCHANTABILITY AND FITNESS, AND IN NO EVENT SHALL CARNEGIE MELLON UNIVERSITY BE LIABLE FOR ANY SPECIAL, INDIRECT OR CONSEQUENTIAL DAMAGES OR ANY DAMAGES WHATSOEVER RESULTING FROM LOSS OF USE, DATA OR PROFITS, WHETHER IN AN ACTION OF CONTRACT, NEGLIGENCE OR OTHER TORTIOUS ACTION, ARISING OUT OF OR IN CONNECTION WITH THE USE OR PERFORMANCE OF THIS SOFTWARE.
Barracuda Networks Software may include programs that are covered by the Apache License or other Open Source license agreements. The Apache license is re-printed below for you reference. These programs are copyrighted by their authors or other parties, and the authors and copyright holders disclaim any warranty for such programs. Other programs are copyright by Barracuda Networks.
Apache License
Version 2.0, January 2004
http://www.apache.org/licenses/
TERMS AND CONDITIONS FOR USE, REPRODUCTION, AND DISTRIBUTION
1. Definitions.
"License" shall mean the terms and conditions for use, reproduction, and distribution as defined by Sections 1 through 9 of this document.
"Licensor" shall mean the copyright owner or entity authorized by the copyright owner that is granting the License.
"Legal Entity" shall mean the union of the acting entity and all other entities that control, are controlled by, or are under common control with that entity. For the purposes of this definition, "control" means (i) the power, direct or indirect, to cause the direction or management of such entity, whether by contract or otherwise, or (ii) ownership of fifty percent (50%) or more of the outstanding shares, or (iii) beneficial ownership of such entity.
"You" (or "Your") shall mean an individual or Legal Entity exercising permissions granted by this License.
"Source" form shall mean the preferred form for making modifications, including but not limited to software source code, documentation source, and configuration files.
"Object" form shall mean any form resulting from mechanical transformation or translation of a Source form, including but not limited to compiled object code, generated documentation, and conversions to other media types.
"Work" shall mean the work of authorship, whether in Source or Object form, made available under the License, as indicated by a copyright notice that is included in or attached to the work (an example is provided in the Appendix below).
"Derivative Works" shall mean any work, whether in Source or Object form, that is based on (or derived from) the Work and for which the editorial
revisions, annotations, elaborations, or other modifications represent, as a whole, an original work of authorship. For the purposes of this License, Derivative Works shall not include works that remain separable from, or merely link (or bind by name) to the interfaces of, the Work and Derivative Works thereof.
"Contribution" shall mean any work of authorship, including the original version of the Work and any modifications or additions to that Work or Derivative Works thereof, that is intentionally submitted to Licensor for inclusion in the Work by the copyright owner or by an individual or Legal Entity authorized to submit on behalf of the copyright owner. For the purposes of this definition, "submitted" means any form of electronic, verbal, or written communication sent to the Licensor or its representatives, including but not limited to communication on electronic mailing lists, source code control systems, and issue tracking systems that are managed by, or on behalf of, the Licensor for the purpose of discussing and improving the Work, but excluding communication that is conspicuously marked or otherwise designated in writing by the copyright owner as "Not a Contribution."
"Contributor" shall mean Licensor and any individual or Legal Entity on behalf of whom a Contribution has been received by Licensor and subsequently incorporated within the Work.
- Grant of Copyright License. Subject to the terms and conditions of this License, each Contributor hereby grants to You a perpetual, worldwide, non-exclusive, no-charge, royalty-free, irrevocable copyright license to reproduce, prepare Derivative Works of, publicly display, publicly perform, sublicense, and distribute the Work and such Derivative Works in Source or Object form.
- Grant of Patent License. Subject to the terms and conditions of this License, each Contributor hereby grants to You a perpetual, worldwide, non-exclusive, no-charge, royalty-free, irrevocable (except as stated in this section) patent license to make, have made, use, offer to sell, sell, import, and otherwise transfer the Work, where such license applies only to those patent claims licensable by such Contributor that are necessarily infringed by their Contribution(s) alone or by combination of their Contribution(s) with the Work to which such Contribution(s) was submitted. If You institute patent litigation against any entity (including a cross-claim or counterclaim in a lawsuit) alleging that the Work or a Contribution incorporated within the Work constitutes direct or contributory patent infringement, then any patent licenses granted to You under this License for that Work shall terminate as of the date such litigation is filed.
- Redistribution. You may reproduce and distribute copies of the Work or Derivative Works thereof in any medium, with or without modifications, and in Source or Object form, provided that You meet the following conditions:
(a) You must give any other recipients of the Work or Derivative Works a copy of this License; and
(b) You must cause any modified files to carry prominent notices stating that You changed the files; and
(c) You must retain, in the Source form of any Derivative Works that You distribute, all copyright, patent, trademark, and attribution notices from the Source form of the Work, excluding those notices that do not pertain to any part of the Derivative Works; and
(d) If the Work includes a "NOTICE" text file as part of its distribution, then any Derivative Works that You distribute must include a readable copy of the attribution notices contained within such NOTICE file, excluding those notices that do not pertain to any part of the Derivative Works, in at least one of the following places: within a NOTICE text file distributed as part of the Derivative Works; within the Source form or documentation, if provided along with the Derivative Works; or, within a display generated by the Derivative Works, if and wherever such third-party notices normally appear. The contents of the NOTICE file are for informational purposes only and do not modify the License. You may add Your own attribution notices within Derivative Works that You distribute, alongside or as an addendum to the NOTICE text from the Work, provided that such additional attribution notices cannot be construed as modifying the License.
You may add Your own copyright statement to Your modifications and may provide additional or different license terms and conditions for use, reproduction, or distribution of Your modifications, or for any such Derivative Works as a whole, provided Your use, reproduction, and distribution of the Work otherwise complies with the conditions stated in this License.
- Submission of Contributions. Unless You explicitly state otherwise, any Contribution intentionally submitted for inclusion in the Work by You to the Licensor shall be under the terms and conditions of this License, without any additional terms or conditions. Notwithstanding the above, nothing herein shall supersede or modify the terms of any separate license agreement you may have executed with Licensor regarding such Contributions.
- Trademarks. This License does not grant permission to use the trade names, trademarks, service marks, or product names of the Licensor, except as required for reasonable and customary use in describing the origin of the Work and reproducing the content of the NOTICE file.
- Disclaimer of Warranty. Unless required by applicable law or agreed to in writing, Licensor provides the Work (and each Contributor provides its Contributions) on an "AS IS" BASIS, WITHOUT WARRANTIES OR CONDITIONS OF ANY KIND, either express or implied, including, without limitation, any warranties or conditions of TITLE, NON-INFRINGEMENT, MERCHANTABILITY, or FITNESS FOR A PARTICULAR PURPOSE. You are solely responsible for determining the appropriateness of using or redistributing the Work and assume any risks associated with Your exercise of permissions under this License.
- Limitation of Liability. In no event and under no legal theory, whether in tort (including negligence), contract, or otherwise, unless required by applicable law (such as deliberate and grossly negligent acts) or agreed to in writing, shall any Contributor be liable to You for damages, including
any direct, indirect, special, incidental, or consequential damages of any character arising as a result of this License or out of the use or inability to use the Work (including but not limited to damages for loss of goodwill, work stoppage, computer failure or malfunction, or any and all other commercial damages or losses), even if such Contributor has been advised of the possibility of such damages.
- Accepting Warranty or Additional Liability. While redistributing the Work or Derivative Works thereof, You may choose to offer, and charge a fee for, acceptance of support, warranty, indemnity, or other liability obligations and/or rights consistent with this License. However, in accepting such obligations, You may act only on Your own behalf and on Your sole responsibility, not on behalf of any other Contributor, and only if You agree to indemnify, defend, and hold each Contributor harmless for any liability incurred by, or claims asserted against, such Contributor by reason of your accepting any such warranty or additional liability.
END OF TERMS AND CONDITIONS
Barracuda Networks makes available the source code used to build Barracuda products available at source.barracuda.com. This directory includes all the programs that are distributed on the Barracuda products. Obviously not all of these programs are utilized, but since they are distributed on the Barracuda product we are required to make the source code available.
- Barracuda Backup - Overview 4
- Getting Started 27
- Web Interface 36
- BACKUP Page 43
- Replication Page 101
- Microsoft Exchange Server Recovery and Restoration 126
- How to Link a Barracuda Backup Server as a User or Reseller 264
- Security 268
- System Management 270
- Troubleshooting and Error Messages 286
- Agents and Tools 323
- Hardware Compliance 333
- Limited Warranty and License 334
- Barracuda Backup - Overview
- Where to Start
- Key Features
- Web Interface
- Mobile Access
- What's New in Barracuda Backup
- The following new major features have been added to Barracuda Backup version 5.4
- The following new major features have been added to Barracuda Backup version 5.2
- The following feature has been deprecated in version 5.2:
- The following new major features have been added to Barracuda Backup version 5.1
- The following new major features have been added to Barracuda Backup version 5.0
- Deployment Options
- In this Section
- Related Articles
- Barracuda Backup Deployment Template
- In this article:
- Configuration Guidelines
- Before Getting Started
- Physically Install and Configure the Barracuda Backup Server
- Firewall Ports
- Create a Barracuda Cloud Control Account
- Standard Activation
- Use the following steps to link your Barracuda Backup Server:
- Reseller (MSP) Activation
- Use the following steps to link customer Barracuda Backup Servers:
- Update Server Settings and Firmware
- From the SYSTEM > BBS Settings page, you can add and update Barracuda Backup Server settings including:
- From the SYSTEM > Firmware page, you can select the firmware upgrade policy:
- Additional Information
- Configure Backup Source Devices
- Connection Information
- Authentication and System Configuration Notes
- Create Backup Schedules
- To create a backup schedule:
- Modify Your Backup Rate Limit
- To adjust the backup rate limit:
- Exclude Files from a Backup
- Use the following steps to create an exclusion rule:
- Create Data Retention Policies
- To set retention policies:
- Replicate Data to another Barracuda Backup
- Important
- Click .Save
- √ Send All Local Backups
- Edit Replication Server Settings
- Remove a Barracuda Backup Server
- Send Data To/Receiving Data From
- View Reports
- Barracuda Backup provides detailed reports including:
- Create Display Groups
- Site-to-Site Deployment
- Configure the IP Address and Network Settings
- To configure the Barracuda Backup Server to use a static IP address:
- Configure Your Corporate Firewall
- Cloud Replication
- Link Your Barracuda Backup Server to an Account
- Add the Server Name and Location
- Add Systems and Select Data Sources
- Modify Your Back Up Rate Limit
- Check Backup Reports
- Communication and Configuration
- Data Transmission and Storage
- Management Access
- Encryption
- Send All Local Backups
- Restore Data from Replication Destinations
- Configuring Replication
- Before Starting Replication
- Verify Retention Policies
- Configure Destinations
- Specify Data Replication Destination
- Temporarily Disable a Destination
- Remove a Destination
- Loss of Communication
- Site-to-Cloud Deployment
- Define Display Groups
- Configure Data Sources
- Globally Replicate Data
- Selectively Replicate Data
- Data Sources
- Barracuda Cloud Storage Deployment Overview
- Storage Plans
- Getting Started
- Recommended Steps
- Step 1: How to Install the Barracuda Backup Server
- Verify the Equipment
- Connect to Network
- Caution
- Step 2: How to Configure Barracuda Backup
- Enter Server Name and Location
- Add a Barracuda Backup Server to a Group
- Step 3: How to Configure Backups
- Where Data is Backed Up
- Supported Data Types
- Configuration Details
- Microsoft Server Applications
- Microsoft Exchange Storage Group Backup
- Microsoft Exchange Server Message-Level Backups
- Novell GroupWise Message-Level Backup
- Microsoft SQL Server Backup
- Microsoft Hyper-V Virtual Machines
- Windows System State Backup
- VMware Host Storage
- Linux File Systems using the Barracuda Backup Agent (Linux)
- Macintosh OS X, Linux/Unix, and Novelle NetWare
- Network Addressable Storage
- Step 4: Data Backup Tasks
- Perform these tasks to configure your data for backup:
- Identify Systems to be Backed Up
- Select Type of Data to be Backed Up
- STATUS Page
- Backup Activity Section
- Storage Efficiency Statistics
- Local Storage
- Transfer History
- Status Indicators
- How to Monitor Backup Status
- How to Unlink a Barracuda Backup Server
- Task Messages
- Click to toggle additional information on or off.Details
- Processes and Services
- BACKUP Page
- Understanding Source-Based Deduplication
- Backing Up Data Sources
- Microsoft Exchange Server and Exchange Server DAG
- Additional Resource
- Message-Level Backup
- Service Type Account
- Base DN Field
- Halted
- Operation 4. Log Files are Truncated
- database:
- Click Save. The Exchange Server passive database is added as a data source. The Sources page now displays the Microsoft item as a data source to be backed up:Exchange Replication
- Microsoft Hyper-V
- Hyper-V 2012 Management Console
- CSV Utilization
- Add Data Source
- Select the desired setting, and click .Removed Files Rule Save
- How to Enable VSS Backups for Microsoft SQL Server
- Edit the Barracuda Backup Agent
- SQL Server Version
- VMware
- Best Practices
- Parallel VMware Backup
- How to Back Up Microsoft Active Directory
- Tombstone Lifetime
- How to Back Up and Restore a Microsoft SharePoint SQL Database
- SharePoint 2003/WSS 2.0
- Install the Barracuda Backup Agent
- Add SharePoint as a Data Source
- Backup Schedules
- Click .Save
- Backup Tasks
- SharePoint Backup Considerations
- Site Recycle Bin
- SharePoint Backup Best Practices
- Backing Up SharePoint using STSADM
- Restore SharePoint using STSADM
- PowerShell and STSADM Backup Commands
- Site Lock
- IBM Domino Server Databases
- IBM Domino Server Backup
- Windows Volume Shadow Copy Service
- the batch file to stop the process
- Requirements
- Configure the GroupWise Server
- Generate a GroupWise Trusted Key
- Add the GroupWise Server as a Data Source
- Retain Emails
- Create a Root Account
- Log in as the Root User
- Set up SSH Key for Mac
- How to Back Up Linux/UNIX Data Using SSHFS
- Backed Up Content
- Add the Linux Server
- Enable File Share Backups
- Linux/Unix (SSHFS) Information
- Username
- To backup data on Linux or Unix based servers:
- [root@localhost mhaag]# vi /etc/ssh/sshd\_config
- For this to work you will also need host keys in /etc/ssh/ssh_known_hosts
- similar for protocol version 2
- Change to yes if you don't trust ~/.ssh/known_hosts for
- RhostsRSAAuthentication and HostbasedAuthentication
- Don't read the user's ~/.rhosts and ~/.shosts files
- To disable tunneled clear text passwords, change to no here!
- Change to no to disable s/key passwords
- Add Linux Server Data Sources
- Set Up Backup Schedules and Retention Policies
- Setting Up Changed Block Tracking
- How to Enable Changed Block Tracking through the Barracuda Backup Web Interface
- Enable Changed Block Tracking
- Set Up Changed Block Tracking
- How to Back Up Network Addressable Storage - NAS
- Configure Network Addressable Storage (NAS) Data Sources
- Replication
- Configure Optional Features
- Install the Agent
- Replicate Data
- Permissions
- Add FirstClass Mail as a Data Source
- How to Back Up NFS Mounts with the Barracuda Backup Agent (Linux)
- Configure the Agent
- /etc/init.d/bbagent stop
- How to Back Up NSS Mounts with the Barracuda Backup Agent (Linux)
- Replication Page
- Backup Data Replication Configuration
- Configuring a Replication Destination
- Replication for Engineering - US
- Sending Data To
- Receiving Data From
- How to Temporarily Disable a Destination
- How to Manage the Data Queue
- Schedules Page
- Data Backup
- Adding a Schedule
- Add Backup Schedule
- Schedule Name
- Items to Backup
- Schedule Timeline
- Daily Backup Timeline
- SQL/Exchange Backup
- Field Description
- Multiple Daily Backups
- Schedule Options
- Rate Limit Page
- Rate Limit
- Exclusions Page
- Use Case
- Retention Policies Page
- Understanding Retention Policies
- Local and Offsite Revision Storage
- Offsite Vaulting
- How to Create Retention Policies
- Create a Retention Policy
- Removed Files Rule
- Removed Email Timeline
- Understanding Barracuda Offsite Vaulting
- Warning
- Offsite Only
- Creating Effective Retention Policies
- How it Works
- Revision Timelines
- Retention Policy Example
- Retention Timeline
- Watched Files Page
- RESTORE Page
- Legacy Firmware
- VMware Server Recovery and Restoration
- How to Restore a Virtual Machine to its Original Location
- VMware Data Recovery Licenses
- How to Restore VMware Guest Systems Using Barracuda LiveBoot
- Restore a Virtual Machine Using Barracuda LiveBoot
- Remove the Virtual Machine from vCenter
- Microsoft Exchange Server Recovery and Restoration
- How to Restore a Microsoft Exchange 2013 Server Database to a Recovery Storage Group
- Set up Barracuda Backup
- How to Restore a Microsoft Exchange 2010 Server by Overwriting an Existing Database
- Step 1. Allow Database Restore
- Step 2. Specify Barracuda Backup Restore Settings
- Step 3. Mount the Database
- How to Restore a Microsoft Exchange 2010 Server to a Recovery Database
- Recovery Storage Group
- Step 1. Barracuda Backup Setup
- Step 2. Microsoft Exchange 2010 Server
- Step 3. Restore Microsoft Exchange 2010 Mailboxes
- How to Restore a Microsoft Exchange 2007 Database
- Option 1. Overwrite an Existing Database or Restore to an Original Location
- Expand Server Configuration, and click Mailbox:
- Right-click Mailbox Database, and click Properties. Select This database can be overwritten by a restore:
- Click Apply, and OK to close the dialog box. Right-click the Mailbox Database, and click Dismount Database:
- Option 2. Restore to a Recovery Storage Group
- The Create the Recovery Storage Group Result screen displays:
- Click Go back to task center. In the Troubleshooting Assistant, click Set up 'Database can be
- overwritten by restore' flag:
- The Databases page displays. Verify the Mailbox Database displays, and click Previous:
- Click Perform pre-merge tasks:
- Turn on the mailboxes to restore, and click Perform merge actions; the Results page displays:
- How to Restore a Microsoft Exchange 2003 Database by Overwriting Existing Database
- Prepare the Databases
- Dismount the Databases
- Remount the Databases
- Step 2. System Manager
- Step 3. Recovery Store Group
- Step 4. Mount the Restored Database
- Step 5. Microsoft Exchange Server Mailbox Merge Wizard (ExMerge)
- Microsoft SQL Server Database Recovery and Restoration
- How to Restore a Microsoft SQL Database
- Restore a SQL SharePoint Database
- How to Restore a SQL Server 2008 Master Database
- Set Microsoft SQL Server to Single User Mode
- Stop Services
- Set Microsoft SQL Server to Multi-User Mode
- How to Restore a Microsoft SQL Database to a Point-in-Time
- Restoring the Database
- Restoring to a Point-in-Time
- How to Restore a Microsoft SQL Server Database to a Flat File
- Step 1. Modify the bbconfig.ini File
- Step 2. Restore the Database
- Step 3. Restoring a Flat File into SQL Management Studio
- Microsoft Hyper-V Recovery and Restoration
- How to Restore a Microsoft Hyper-V Virtual Machine
- Additional Resources
- High Availability
- Restore Data
- Import the Virtual Machine
- Microsoft Windows Server Active Directory
- Deleted Objects Container
- Step 1. Raise the Forest Functional Level
- Step 2. Enable Acitve Directory Recycle Bin
- Press Enter:
- Press .Enter
- Barracuda LiveBoot in the Cloud
- Virtual Machine States
- Recover and Test Virtual Servers
- How to Use Barracuda LiveBoot in the Cloud
- Manage LiveBooted Virtual Machines
- Change the Virtual Machine IP Address
- Download the VMDK File
- Recent Tasks
- Barracuda copy.com
- How to Share and View Files Using copy.com
- Share Files
- View Files
- Restore Browser
- Understanding Restore Browser
- File Share Data
- How to Search for Items Using the Restore Browser
- Backup Data by Date
- Restore a Revision
- Restore Latest Revision
- Download Files and Directories
- How to Restore from Local and Offsite Backups
- Restore Methods
- Restore Data Backed Up by the Barracuda Backup Agent
- How to Recover Backed Up Data
- Download Using the Local Device Web Interface
- Older Revision
- Download entire folder
- Example - Restore Data Using the Local Web Interface
- How to Restore from a Replication Destination
- How to Restore SharePoint Objects Using Kroll Ontrack
- Restore the SharePoint Objects
- How to Restore a Microsoft Windows Server 2003 Domain Controller
- Remotely Reboot
- How to Restore Windows System State
- How to Restore Windows Server 2003 Domain Controller System State
- Disaster Recovery
- Active Directory Domain Controllers
- Prepare the Target
- Safe Mode
- Authoritative Restore
- Restore System State
- Restore Job
- How to Restore Windows Server 2008 Domain Controller System State
- Cancel Restore
- Administrator: C:\Windows\system32\cmd.exe
- Restore File System and System State
- How to Restore Exchange and GroupWise Messages
- How to Restore a Windows System to Bare Metal
- Bare Metal Live CD
- Click to begin the restore:Next
- SQL and Exchange Server
- How to Restore a Linux Server Using Bare Metal Restore
- Example
- How to Restore Data with FTPES
- Legacy Firmware Recovery and Restoration Options
- How to Use Windows Explorer and WebDAV
- How to Restore Data with an FTP Client
- Barracuda Restore for Windows
- How to Run Barracuda Restore for Windows
- REPORTS Page
- Backup Reports
- Restore Report
- Large Items Report
- Firmware version 5.1 and higher only
- Audit Log Report
- User Activity Reports
- Firmware version 5.0 and earlier only
- SYSTEM Page
- Firmware Page
- Firmware Update
- Firmware Notification
- BBS Settings Page
- Software Downloads Page
- Advanced Graphs Page
- View Advanced Graphs
- Local Ethernet Traffic
- Barracuda Central Bandwidth
- Transfer Efficiency
- Node Latency
- Disk Space
- Queue Size
- Queue Count
- Processor Utilization
- Metadata Queue Length
- Load Average
- ADMIN Page
- Users Page
- Managing Your Account
- Select Account Options
- Community
- Account
- Support
- Verify Service Plan Size
- Managing User Access
- Edit Users
- Product Entitlements
- Email Notifications Page
- Notification Types
- Managing Email Notifications
- Display Groups Page
- Display Groups
- Documentation Page
- Link a Barracuda Backup Server Page
- Initial Set Up
- Link a Barracuda Backup Server to your Account
- Link a New Barracuda Backup Server
- Success
- Location Information
- Security
- Backup Security and Site-to-Site Replication
- Barracuda Cloud Storage Standards and Protection
- Facility Standards
- Storage
- Oversight
- Policy-Based Security
- How to Secure Your Barracuda Backup Server
- System Management
- Barracuda Backup Replacement and Data Migration
- Setting Up the New Barracuda Backup Server
- Data Migration Options
- Option 1. Pull Data from the Cloud
- Option 2. Pull Data from an Existing Barracuda Backup Server
- Option 3. Use an Existing Barracuda Backup Server Configuration
- Option 4. Set Up a New Barracuda Backup Server from Scratch
- Replacing a Failed Barracuda Backup Server
- Barracuda Networks Technical Support
- Troubleshooting
- Instant Replacement Service
- How to Shut Down a Barracuda Backup Server
- How to Wipe a Barracuda Backup Server
- Barracuda Backup Server Panel Indicators, Ports, and Connectors
- Barracuda Backup Server Model 190 and 390
- Barracuda Backup Server Model 490 and 690
- Barracuda Backup Server 1090 and 1091
- Barracuda Backup Server Hardware Specifications
- Barracuda Backup Server Network Interface Card
- Gigabit Ethernet Card Option (Models 892, 990, and 1090 Only)
- Gigabit Fiber Card Option (Models 891, 991, and 1091 Only)
- Barracuda Backup Server Model 890, 990, and 1090 Drive Layout
- How to Physically Install the Barracuda Backup Server
- Rack Mount Barracuda Backup Server Models 390 through 1091
- Model 190
- Choose a Setup Location
- Rack Mounting Precautions
- General Server Precautions
- Install the Barracuda Backup Server into the Rack
- Set Up the Barracuda Backup Server
- Troubleshooting and Error Messages
- Understanding Why the Barracuda Backup Agent Moves to a New Volume
- Updating the Backup Agent Location
- Understanding Why Data is not Replicating to an Offsite Barracuda Backup Location
- Resolving Data Replication Issue
- Increase Speed Limit
- Reduce Amount of Data for Replication
- Decrease Backup Schedule Frequency
- How to View Offsite Transfer Statistics
- How to Troubleshoot Using the Barracuda Backup Agent (Windows) Log File
- To review the log file:
- C:\Program Files\Barracuda\Barracuda Backup Agent\log
- How to Resolve Low Disk Space
- How to Change the Barracuda Backup Agent Port Number
- Issue
- Cause
- Solution
- Step 1. Determine the Ports Used by the System
- Step 2. Add the Alternate Port Number bbconfig.ini
- Step 3. Restart Services
- Step 4. Update Data source
- How to Change the Barracuda Linux Backup Agent Port Number
- Assign a New Port
- Restart the Agent
- Edit the Data Source
- How to Change the SQL Recovery Model
- Warning Message
- Simple Recovery Model
- How to Resolve Microsoft Exchange 2010 Large Message Restore Errors
- Error Message
- Restore Destination:
- Errors 11 Errors
- Messages 11 Restored Duration 11:31am-11:31am EST (00:00:44) Restore Size 85.71 KB at 1.9 KB/s Restore Rate 22 items at < 1 item/sec
- Modify web.config
- Run appcmd
- Barracuda Backup Restore
- Configuration Settings
- Microsoft Exchange 2010 Configuration Settings
- Verify Exchange Management Console Settings
- Exchange Management Shell
- How to Resolve Snapshot Backup Errors
- Windows Server 2003
- Move the Snapshot Location
- Defragmentation
- Resolving "Agent database moved to different location" Warning
- Resolving "Error Creating Snapshot" Error During ESX/ESXi Virtual Machine Backup
- Resolving "Error Reading Object" Error During ESX or ESXi Virtual Machine Backup
- Resolving "Error Removing Snapshot" Error During ESX/ESXi Virtual Machine Backup
- Verifying VMware Disk I/O Issues
- How to Unlock the quiesce Snapshot
- Resolving "Failed to connect to backup agent software" Error
- CRITICAL ERRORS
- Step 1. Verify Barracuda Backup Agent is Started
- Step 2. Verify Windows Firewall Rules
- Step 3. Ping Barracuda Backup from the Server
- Step 4. Test and Reinstall Barracuda Backup Agent
- Resolving "File System Snapshot was Released" Error
- Step 1. Determine the Source of the Issue
- Step 2. Move the Snapshot Location
- Resolving "Incremental backups cannot be performed while circular logging is enabled" Error
- Logging Cycle
- Disable Circular Logging in Exchange 2003
- Disable Circular Logging in Exchange 2007
- Disable Circular Logging in Exchange 2010
- Disable Circular Logging in Exchange 2013
- Resolving "An error occurred during agent backup initialization" Error
- Review Reports
- Review Backup Agent Log Files
- Review Source Logs
- Resolving "Unable to back up virtual machines with independent disks" Error
- Resolving "VMDK is larger than the maximum size supported by datastore" Error
- ESX/ESXi 3.5 and Earlier
- Step 1. Determine Maximum File Size
- ESXi 5.0 and 5.1 with VMFS5
- ESX/ESXi 4.1 and ESXi 5.1 with VMFS3
- ESX/ESXi 4.0 with VMFS3
- Step 2. Move Files to Accommodate Space Requirements
- Step 3. Calculate Required Overhead
- Resolving "Error backing up selected object" Error
- Resolving "An unknown OS error occurred" Error
- Error occurred during backup initialization
- Resolve the "Failure while using USN journal" Error
- Deleting an Active USN Change Journal
- fsutil usn Parameters
- Adding a USN Change Journal
- Slow Agent Backups
- Monitoring Windows System Performance During Backup
- Monitor Windows System Components
- CPU Usage
- Memory Usage
- Disk Load
- i Enable Disk Performance Counters
- How to Increase Backup Performance
- Agents and Tools
- Barracuda Backup Agent (Windows)
- Barracuda Backup Agent (Linux)
- How to Install and Use the Barracuda Backup Agent (Windows)
- Agent Software Requirements
- Install Barracuda Backup Agent
- Add Data Sources
- How to Silently Install the Barracuda Backup Agent (Windows)
- Understanding the Barracuda Backup Agent (Windows) File Structure
- Barracuda Backup Agent Service
- Process Name
- Location
- How to Install and Use the Barracuda Backup Agent (Linux)
- Installing the Barracuda Backup Agent (Linux)
- Adding the Linux Data Source
- Backup Schedules and Retention
- How to Manually Move the Barracuda Backup Agent (Linux) Database to an Alternate Location
- How to Edit Network Settings through the Barracuda Console
- Console
- Interface
- Out-of-the-Box
- Hardware Compliance
- Notice for the USA
- Notice for Canada
- Power Requirements
- Limited Warranty and License
- Exclusive Remedy
- Exclusions and Restrictions
- Barracuda Networks Software License Agreement (v 2.1)
- Barracuda Networks Software License Agreement Appendix
- Preamble
- TERMS AND CONDITIONS FOR COPYING, DISTRIBUTION AND MODIFICATION
- NO WARRANTY
- END OF GNU TERMS AND CONDITIONS
- TERMS AND CONDITIONS FOR USE, REPRODUCTION, AND DISTRIBUTION
- Definitions.
- END OF TERMS AND CONDITIONS
Brand : Barracuda Networks
Model : Backup Server 390
Category : Server