KC60WW - Cooker KELVINATOR - Free user manual and instructions
Find the device manual for free KC60WW KELVINATOR in PDF.


| Product Type | Freestanding Cooker |
| Brand | Kelvinator |
| Model | KC60WW |
| Energy Type | Electric |
| Number of Ovens | 1 |
| Oven Capacity | 65 liters |
| Number of Hobs | 4 |
| Hob Type | Ceramic |
| Dimensions (H x W x D) | 85 x 60 x 60 cm |
| Weight | 45 kg |
| Power Supply | 230 V ~ 50 Hz |
| Total Power | 8.5 kW |
| Oven Functions | Convection, Grill, Bake |
| Cleaning Type | Manual |
| Safety Features | Child lock, Automatic shut-off |
| Spare Parts Availability | Yes |
| Repair Index | 7.5/10 |
| Color | White |
| Display | Digital |
Frequently Asked Questions - KC60WW KELVINATOR
User questions about KC60WW KELVINATOR
0 question about this device. Answer the ones you know or ask your own.
Ask a new question about this device
Download the instructions for your Cooker in PDF format for free! Find your manual KC60WW - KELVINATOR and take your electronic device back in hand. On this page are published all the documents necessary for the use of your device. KC60WW by KELVINATOR.
USER MANUAL KC60WW KELVINATOR
Electrolux Home Products
OWNER S MANUAL
ELECTRIC STOVE
- READ these instructions carefully before installing and operating the oven. Keep them for further reference.
- Record in the space below the MODEL NO. and the SERIAL NO. found on the nameplate on your oven and retain this information for future reference.
MODEL NO. SERIAL NO.
INTRODUCTION
Dear Customer;
Thank you for buying a Kelvinator Electric Stove, specially designed to give many years of safe, convenient, clean, economical and trouble-free cooking. To ensure that you get the best performance from your superb Kelvinator Stove, please read this Instruction Manual carefully. Familiarise yourself with the information it contains about the use and care of your stove, together with other useful hints.
ALL SPECIFICATIONS ARE SUBJECT TO CHANGE WITHOUT PRIOR NOTICE
Kelvinator
CONTENTS

A - SAFETY INSTRUCTION - PLUGS
(ONLY FOR PLUG IN STOVES)
● CAUTION! IF THE SUPPLY CORD IS DAMAGED IT MUST BE REPLACED BY THE MANUFACTURER OR IT'S SERVICE AGENT OR A SIMILARLY QUALIFIED PERSON IN ORDER TO AVOID A HAZARD.

natural_image
Simple line drawing of a plug with a fuse and explosion sparks (no text or symbols)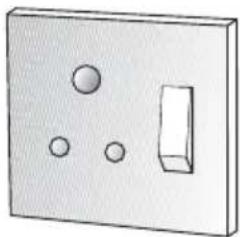
natural_image
Simple 3D diagram of a rectangular electrical outlet with three circular holes and a rectangular switch (no text or symbols)
B - SAFETY INSTRUCTION / HEATED ELEMENTS
DURING USE THE APPLIANCE BECOMES HOT, CARE SHOULD BE TAKEN TO AVOID TOUCHING HEATING ELEMENTS INSIDE THE OVEN.
SAFETY NOTE
C - INSTALLATION
Plug-In appliances may be self connected, but cable stoves must be connected to electrical supply points only by LICENSED ELECTRICIANS who should ensure proper earthing and correct matching between operating and supply voltages, phases and currents in accordance with the information stamped on the "Manufacturers Label" affixed to every appliance. Free-standing stoves must be positioned firm and leave at least 25 mm from the wall. When installing built-in ovens please make sure that it is properly vented.
D - OPERATING INSTRUCTIONS
1) Identify the control switch for a particular plate by looking at the easy-to-understand indicator on the control panel.
2) Start by setting the control switch to 6 and reduce when the contents boils. Reduce to ±3.
3) Experience will soon dictate the setting between 1-6, for the cooking purpose required.
4) The following symbols are indicated on your oven, depending on your model.

Oven Light - stays on when oven is in use.
Grill - Thermostatically controlled grilling.
Preheat - Reduces oven heat-up time - Remember to select bake when selected temperature has been reached.

Bake - Top & bottom bake elements work for conventional baking.
Bottom Bake - only bottom element works for moderate baking, e.g. pastries.
Thermostat - All functions of the oven are thermostatically controlled.
Plates - Temperature is selected by rotating the switch in an anti clockwise direction.
Warmer Drawer - (where fitted)
For Plug-in Stoves
For 500mm wide Cookware
1) Remember to turn the control panel switches to '0' position when plates are not in use.
2) To operate the oven turn the temperature control knob to the desired setting. When the pilot light goes out the oven has reached temperature. The pilot light will continue to go on and off during the period of use in a set range.
3) To grill turn the temperature control knob until it reaches "Grill".
NOTE - The grill is not thermostatically controlled.
For Model KC 64 WW/WB
1) Turn the temperature control knob to the required setting when using your oven for baking or grilling. Remember to select which elements you want to use on the selector switch, otherwise the oven will not work. Both pilot lights will go out when the oven has reached temperature and will continue to go "ON" & "OFF" as the thermostat cycles.
2) Warmer drawer (if fitted) has an element fitted with a symbol on the selector switch. If no symbol is on the selector switch then your model only has a storage drawer.
3) Set all switches to '0' position when not in use.
4) Controls and glass panels should be easy to clean with a damp cloth.
5) Plates may be wiped with a thin layer of cooking oil after use to prevent rusting.
6) Ensure that sufficient ventilation is provided for both oven and hob. (Only for undercounter ovens). Kindly contact your nearest dealer for further information.
E - STORAGE DRAWER (WHERE FITTED)
Do not store combustible materials in your storage drawer, or warmer drawer (if fitted) as these could ignite. The oven can be used to heat up plates or keep food warm.
F - SPLASHBACK MOUNTING
SPLASHBACK MOUNTING PROCEDURE
1) Position holes in splashback over captive nuts in top plate
2) Screw threaded rod into captive nut.
3) Tighten splashback down with knurled nut assy until firm.

G - GENERAL HINTS & CLEANING NOTES
- Before cleaning or repairing your stove, remember to isolate the electric appliance at the mains switch.
- Set oven Rotary Selector switch and all heating plate switches to "0" position when stove is not in use.
- OVEN AND ENAMEL SURFACES
Do not use any abrasives, steel wool, etc., to clean the above mentioned surfaces.
Simply wipe with a damp cloth while the surfaces are still warm or use one of the leading brands of oven-enamel cleaners on the market.
DO NOT USE ALUMINIUM FOIL ON THE BOTTOM OF THE OVEN AS YOU WILL DAMAGE THE ENAMEL
- KNOBS AND CONTROL PANELS
As these are specially designed to be easy to clean, a wipe with a damp cloth with or without cleaner will generally suffice.
- STORAGE DRAWER
Do not use the warmer drawer for storing paper or wood, as you might forget that you put them there and they could catch alight.
- SOLID HEATING PLATES
In order to protect your plates and ensure the best service especially in coastal towns, or wet climates, do the following:
Switch the new plate on to the lowest heat position. Let it burn for a period of half and hour. Switch it off and rub its surface with a small quantity of clean cooking oil. Do not use fats or oils that have been used for cooking or any other purpose. Repeat this rubbing regularly during the first three or four weeks of service immediately after each plate has been used. It is most important that this should be done while the plate is still warm so that the oil can soak into the minute pores of the metal. When the plate is next switched on, the heat carbonises the oil and if this is repeated a sufficient number of times for each cooking plate, the pores of the metal become filled by carbonised oil, thus sealing the surface of the plate against the ingress of moisture or any corrosives such as salt and acid solutions. Once a hard black layer has been formed by treating the plate as recommended above, the plate needs very little attention other than being kept clean and dry. If any liquid is dropped on the plate while in use, wipe it off as soon as possible. Never scrub the plate with harsh scouring powders, detergents or agents, never use steel wool on the plate. Do not let moisture lie on a cold plate, wipe it off and switch the plate on for a few minutes so that it can dry thoroughly.
Try to use all plates regularly as an infrequently used plate tends to corrode.
If these precautions are taken, no undue rusting of the stove should be experienced, even under coastal conditions.
- Ensure that sufficient ventilation is provided for oven and hob.
H - DIMENSIONS & INSTALLATION HOB, OVEN & COOKER HOOD
BUILT - IN OVEN

HOB FOR BUILT - IN OVEN


OVEN CUT OUT
DIMENSIONS :
HEIGHT 600mm
WIDTH 568mm
DEPTH 590mm
HOB CUT OUT
DIMENSIONS:
WIDTH 525mm
DEPTH 445mm

I - USEFUL HINTS

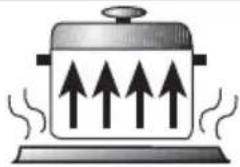
Pan too small - electricity loss of up to 50%. Constant spillage means continuous corrosion danger.
natural_image
Illustration of a cooking pot with three upward arrows inside, emitting steam (no text or symbols)Pan with uneven bottom. Electricity loss of up to 50%

natural_image
Illustration of a cooking pot with downward arrows indicating pressure or flow (no text or symbols)Pan bottom has to be clean and dry. Moisture causes corrosion danger.

natural_image
Illustration of a cooking pot with steam rising from a tray (no text or symbols)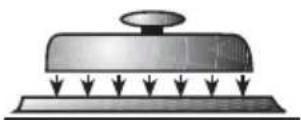
Do not place steamed pan lids on the hotplates. Do not use heat diffusers. The accumulation of heat can cause damage to the hotplates.
Correct size utensils ensures complete heat utilization. Spillage on the hob is easily cleaned during cooking.

natural_image
Simple line drawing of a cooking pot with four upward arrows inside, no text or symbols present.Flat bottomed good quality pan. Equal heat distribution: large surface heat transmission.

natural_image
Illustration of a cooking pot with four downward arrows indicating pressure or flow (no text or symbols)After use, clean the hotplate. Make sure pans are not wet underneath when placing them on the hotplate.
natural_image
Illustration of a hand holding a small object above a tray (no text or symbols)
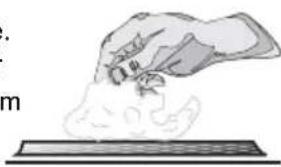
After cleaning, switch on the hotplate to dry off any dampness
J - CONVERSION TABLES
TEMPERATURE
| 250iF | 120iC |
| 300iF | 150iC |
| 325iF | 165iC |
| 350iF | 175iC |
| 400iF | 205iC |
| 425iF | 220iC |
| 450iF | 230iC |
| 475iF | 245iC |
| 500iF | 260iC |
OVEN TEMPERATURES
| Cool under 120iC (250iF) |
| Slow 120-175iC (250-350iF) |
| Moderate 175-190iC (250-350iF) |
| Moderate Warm 190-205iC (375-400iF) |
| Warm 205-230iC (400-450iF) |
| Very Warm 230-260iC (450-500iF) |
PINTS TO LITRES
| 1/4 PINT | 142 ml |
| 1/2 PINT | 284 ml |
| 1 PINT | 568 ml |
| 1.75 PINT | 1 Litre |
| 1 Quart | 1.14 Litre |
| 1 Gall. | 4.5 Litre |
FLUID OUNCES TO MIILITRES
| 1 fl.oz | 28 ml |
| 2 fl.oz | 57 ml 1/4 cup |
| 3 fl.oz | 85 ml |
| 4 fl.oz | 115 ml 1/2 cup |
| 5 fl.oz | 142 ml |
| 6 fl.oz | 170 ml 3/4 cup |
| 7 fl.oz | 200 ml |
| 8 fl.oz | 225 ml 1 cup |
OUNCES TO GRAMS
| 1 oz | 28 g |
| 2 oz | 55 g |
| 3 oz | 85 g |
| 4 oz | 110 g |
| 5 oz | 140 g |
| 6 oz | 170 g |
| 7 oz | 195 g |
| 8 oz | 225 g |
| 9 oz | 255 g |
| 10 oz | 280 g |
| 11 oz | 315 g |
| 12 oz | 340 g |
| 13 oz | 370 g |
| 14 oz | 395 g |
| 15 oz | 425 g |
| 16 oz | 450 g |
| 2.2 lb | 1000 g |
K - WARRANTY
This warranty is issued by Electrolux Home Products in respect of all products manufactured and sold by Electrolux. The liability to Electrolux is limited to the following conditions:
- This warranty operates in favour of the original purchaser of new appliances only and cannot be ceded, assigned or transferred. Electrolux shall have no liability in respect of second hand goods or to second or subsequent purchasers of any appliances.
- This warranty shall operate for a period of one year from the date of original purchase of the appliance which date shall be proved to the reasonable satisfaction of a Electrolux authorised service dealer.
- The liability of Electrolux shall be limited to the repair or replacement by a Electrolux authorised service dealer in its sole discretion of the defective parts of the appliance at its sole cost. Electrolux shall not be liable for any loss or damage suffered by the customer or any other party or caused to the appliance arising from any cause whatsoever.
- Should the defective appliance be situated further than 50km from the nearest Electrolux service centre or authorised service dealer, Electrolux shall be entitled to charge its customer a travelling charge at its usual travelling chargeout rate for such distance in excess of 50km.
- The liability of Electrolux shall be limited in respect of defective parts or material or in respect of defective workmanship only. Electrolux authorised service dealer shall have no liability if in its opinion the defect or fault was caused through faulty installation, accidental damage, incorrect usage, misuse or abuse or failure to follow the operating instructions and any acts of God, or force majeure. Electrolux shall not be obliged to replace light bulbs, fuses, vitreous enamelware, burners, burner parts, rings and any other items which Electrolux in its sole discretion determines that the life of such item depends on the amount of use and care taken in respect of such item.
- The warranty shall become void and cease to operate if the appliance is dismantled by or any repairs to the appliance are affected by any persons not duly authorised by Electrolux, or if any non-genuine Electrolux parts are used in the appliance, or if the serial number of the appliance is removed.
- The product has been designed and manufactured for normal domestic use and the warranty will accordingly become void and cease to operate if the product is not used for domestic purposes.
- If the customer is unable to prove the date of purchase of the appliance to the reasonable satisfaction of the representative of a Electrolux authorised service dealer or if no fault or defects are found in the appliance, a Electrolux authorised service dealer shall be entitled to charge for the work done and travelling expenses incurred.
- All parts replaced shall become the property of Electrolux.
- This warranty shall only operate within the territorial area of the Republic of South Africa as constituted on the 31st May 1961.
- INTRODUCTION
- Dear Customer;
- C - INSTALLATION
- D - OPERATING INSTRUCTIONS
- For 500mm wide Cookware
- For Model KC 64 WW/WB
- E - STORAGE DRAWER (WHERE FITTED)
- F - SPLASHBACK MOUNTING
- SPLASHBACK MOUNTING PROCEDURE
- G - GENERAL HINTS & CLEANING NOTES
- DO NOT USE ALUMINIUM FOIL ON THE BOTTOM OF THE OVEN AS YOU WILL DAMAGE THE ENAMEL
- H - DIMENSIONS & INSTALLATION HOB, OVEN & COOKER HOOD
- OVEN CUT OUT
- DIMENSIONS :
- HOB CUT OUT
- DIMENSIONS:
- I - USEFUL HINTS
- J - CONVERSION TABLES
- K - WARRANTY
- This warranty is issued by Electrolux Home Products in respect of all products manufactured and sold by Electrolux. The liability to Electrolux is limited to the following conditions:
Brand : KELVINATOR
Model : KC60WW
Category : Cooker