
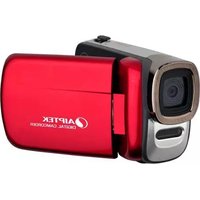
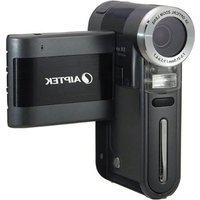
Pocket DV AHD C 100 - Camcorder AIPTEK - Free user manual and instructions
Find the device manual for free Pocket DV AHD C 100 AIPTEK in PDF.


| Product Type | Camcorder |
| Brand | Aiptek |
| Model | Pocket DV AHD C 100 |
| Video Resolution | 720p HD (1280 x 720 pixels) |
| Still Photo Resolution | 5 MP (interpolated) |
| Storage Media | SD/SDHC card (up to 32 GB) |
| Display | 2.0 inch TFT LCD |
| Lens | Fixed focus, f/3.0 |
| Zoom | 4x digital zoom |
| Battery | Rechargeable Li-ion 3.7V, 700 mAh |
| Charging | Via USB port |
| Connectivity | USB 2.0, AV out |
| Dimensions | 115 x 55 x 20 mm (4.5 x 2.2 x 0.8 in) |
| Weight | Approx. 100 g (3.5 oz) with battery |
| Power Supply | Built-in rechargeable battery, USB charging |
| Video Format | AVI (MJPEG) |
| Photo Format | JPEG |
| Microphone | Built-in |
| Speaker | Built-in |
| Tripod Mount | Yes (1/4 inch) |
| Languages | English, French, German, Spanish, etc. |
| Maintenance and Cleaning | Wipe exterior with dry cloth; clean lens with lens tissue; avoid moisture and direct sunlight. |
| Safety Precautions | Do not expose to water or extreme temperatures; keep away from magnets; use only approved charger. |
| Spare Parts and Repairability | Battery and charger available from Aiptek; device not user-serviceable; contact support for repairs. |
Frequently Asked Questions - Pocket DV AHD C 100 AIPTEK
User questions about Pocket DV AHD C 100 AIPTEK
0 question about this device. Answer the ones you know or ask your own.
Ask a new question about this device
Download the instructions for your Camcorder in PDF format for free! Find your manual Pocket DV AHD C 100 - AIPTEK and take your electronic device back in hand. On this page are published all the documents necessary for the use of your device. Pocket DV AHD C 100 by AIPTEK.
USER MANUAL Pocket DV AHD C 100 AIPTEK
Digital Camcorder
User's Manual
Welcome:
Dear user, thanks for purchasing this product.
Much investment in time and effort has gone into its development, and it is our hope that it will give you many years of trouble-free service.
Safety Notice:
- Do not drop, puncture or disassemble the camcorder; otherwise the warranty will be voided.
- Avoid all contact with water, and dry hands before using.
- Do not expose the camcorder to high temperature or leave it in direct sunlight. Doing so may damage the camcorder.
- Use the camcorder with care. Avoid pressing hard on the camcorder body.
- For your own safety, avoid using the camcorder when there is a storm or lightning.
- Do not use batteries of different specifications. Doing so may lead to the potential for serious damage.
- Remove the battery during long periods between usage, as a deteriorated battery may affect the functionality of the camcorder.
- Remove the battery if it shows signs of leaking or distortion.
- Use only the accessories supplied by the manufacturer.
- Keep the camcorder out of the reach of infants.
- Risk of explosion if battery is replaced by an incorrect type.
- Dispose of used batteries according to the instructions.
FCC Compliance Statement:
This device complies with Part 15 of the FCC Rules. Operation is subject to the following two conditions: (1) this device may not cause harmful interference, and (2) this device must accept any interference received, including interference that may cause undesired operation.

This equipment has been tested and found to comply with the limits for a Class B digital device, pursuant to Part 15 of the FCC rules. These limits
are designed to provide reasonable protection against harmful interference in residential installations. This equipment generates, uses, and can radiate radio frequency energy, and if not installed and used in accordance with the instructions, may cause harmful interference to radio communications.
However, there is no guarantee that interference will not occur in a particular installation. If this equipment does cause interference to radio or television equipment reception, which can be determined by turning the equipment off and on, the user is encouraged to try to correct the interference by one or more of the following measures:
- Reorient or relocate the receiving antenna. - Move the equipment away from the receiver. - Plug the equipment into an outlet on a circuit different from that to which the receiver is connected. - Consult the dealer or an experienced radio/television technician for additional suggestions.
Changes or modifications not expressly approved by the party responsible for compliance could void the user's authority to operate the equipment.


If the time arises to throw away your product, please recycle all the components possible. Batteries and rechargeable batteries are not to be disposed of in your domestic waste! Please recycle them at your local recycling point.
Together we can help to protect the environment.
Parts of the camcorder
1 Microphone 2 Record button (💡) 3 Up & Down / Zoom buttons ( 1/w ) 4 Menu/OK button 5 Mode/Return button 6 HDMI port 7 USB port 8 TV-out connector 9 Power button (under LCD panel) 10 LCD panel 11 Focus switch 12 Shutter button (φ) 13 Lens 14 Flash strobe 15 Tripod socket 16 Battery compartment / SD/MMC card slot 17 Speaker 18 LED indicator


- Loading the battery
Note: Upon using the battery for the first time, you are recommended to fully discharge and then charge the battery for 8 hours to ensure its lifecycle.
- Slide open the battery compartment cover as indicated.
- Place the accessory Li-ion battery into the compartment. Note that the metallic contacts must be aligned with the contacts in the compartment.
- Replace the cover.


Charging battery
- Connect one end of the cable to the USB port of the camcorder.
- Plug the AC adapter to a wall outlet, or connect the other end of the USB cable to the PC that has been powered on.
- The charge starts. The LED indicates red light during charging. When the battery is fully charged, the LED light will go out.
Note: When using a PC to charge the battery, do not power on the camcorder or the charge will stop.


- Inserting the SD/SDHC/MMC card (optional)
- Slide open the battery compartment cover.
- Insert the card in the direction of indication until it reaches the end of the slot.
- When using a SD card, the built-in memory will become inaccessible.
- To remove the SD card, gently push the card until it pops up.


- Turning on/off the camcorder
Open/Close the LCD panel to turn on/off; or press and hold down the Power button for 3 seconds.

Mode selection
- Turn on the camcorder.
- Press the Mode button.
- Use the Zoom buttons to select the desired item.
- Press the Menu/OK button to confirm.
- By pressing the Mode button you can switch mode:
Setting ( ) ; Camera ( ) ; My Works ( ) ; Voice Recorder ( ) ; Music Player ( ).

★ For select model only. Please refer to the package printing for detailed specification.
Setting language
Power-on → Press the Mode button → Enter the Setting mode → Use the Zoom buttons to select the Language item → Use the Zoom buttons to select a suitable language and press the Menu/OK button to confirm.
Battery life indicator
| Icon Description | |
 | Full battery life |
 | Moderate battery life |
 | Low battery life |
 | Empty battery life |
 | Charging battery |
Note: To avoid sudden outage of power supply, you are recommended to replace the battery when the icon indicates low battery life.
- Reading LCD indicators
Camera mode:
My Works mode:

Voice Recorder mode:

Recording a video clip
- Set the focus to an appropriate setting. Normally, you may set the focus to (🔊) for most filming conditions. Select (🔒) only for close-ups.
- Press the Record button to start recording.
- Use the Zoom buttons to zoom in or zoom out the screen.
- Press the Record button again to stop recording.

Taking a still picture
- Set the focus to an appropriate setting. Normally, you may set the focus to ( ) for most filming conditions. Select ( ) only for close-ups.
- Use the Zoom buttons to zoom in or zoom out the screen.
- Press the Shutter button to take a still picture.
| 50cm ~∞ | |
| 30cm ~ 50cm |

Recording a voice clip
- Press the Modton.
- Use the Zoom buttons to select Voice Recorder mode.
- Press the Menu/OK button to confirm.
- Press the Record button to start recording.
- When you are done, press the Record button again to stop recording.

Playing back your recordings
- Press the Modton.
- Use the Zoom buttons to select My Works mode. Select the type of file you want to view in the sub items.
- Press the Menu/OK button to enter.
- Use the Zoom buttons to shift between files.
- Press the Menu/OK button to review/play the file.

Press the Shutter button to delete files.
- Playing back your recordings on PC
Please notice that the video clips are recorded in MP4 format. To view these videos on your PC, you may need to install some special programs. For first time use, please install the software on the bundled CD.
Connecting the camcorder to HDTV
Connect your camcorder and TV via the accessory AV cable for real-time display. You can display your video clips, still pictures, and audio recordings directly on your TV, sharing them with your friends and family.
TV: HDTV with HDMI input port

- Turn on your HDTV.
- Connect the HDMI-in connector (the larger end) of the HDMI cable to the HDTV.
- Turn on the camcorder.
- Connect the other end of the HDMI cable to your camcorder.
- Switch the HDTV to the "HDMI input" mode.

Connecting the camcorder to a standard TV
TV: Traditional CRT TV
The TV system varies by region. If you need to adjust the TV-out setting, refer to the "Advanced Operations" section for more information. (Taiwan: NTSC; America: NTSC; Europe: PAL; China: PAL)

- Turn on your TV and switch it to AV mode.
- Connect the audio and video ends of the AV cable to the TV.
- Turn on the camcorder.
- Connect the other end of the AV cable to your camcorder.

Connecting the camcorder to your PC
- Turn on the camcorder.
- Connect the camcorder to your computer by the USB cable.
The default is set to "Disk" mode. When connected to a PC, the camcorder will automatically enter Disk (Removable disk) mode. If you set the USB Mode to "Menu" mode, the following items will appear.

Please select the desired connection mode.
If you would like to change the setting, please refer to the "Advanced Operations" section for more information.
Playing MP3 music
For select model only. Please refer to the package printing for detailed specification.
Copy MP3 files to the camcorder
Note: Before you can play MP3 music, you need to copy MP3 files to the camcorder first.
- Turn on the camcorder, and connect the camcorder to a PC using the USB cable.
- After the camcorder is connected to the PC, double-click on My Computer and you will find a removable disk. Create a "MUSIC" folder in the disk and then copy MP3 files into the "MUSIC" folder for playing.
Playing music in Music Player mode
- Press the button.
- Use the Zoom buttons to select Music Player mode.
- Press the button to confirm.
Operations in Music Player mode:
How to... Action
Shift between tracks: Use the Zoom buttons to move up or down.
Start playing
Press the
button.
Pause/Resume playing
During playing/While paused, press the
button.
Adjust sound volume: Use the Zoom buttons to move up or down while playing.
Stop playing
During playing, press the Mode / button.
Delete files: Press the Shutter button.
Displaying lyrics
You can play MP3 songs with lyrics displayed. To enable the function, you need to copy LRC format files into the "MUSIC" folder, and name the LRC files after their matched songs. For example, if a song is named A.MP3, then the LRC file should be named A.LRC. You can search the Internet for your desired lyrics files. The LRC file contains both lyrics as text and time tags, so that the music and lyrics can be synchronized. This camcorder supports LRC files with "line time tags".
Note: The format of time tag denotes [minutes]:[seconds]:[milliseconds].

Using menu
The menu items provide several options for you to fine-tune your camcorder functions. The following table gives details on menu operations:
| How to... Action | |
| Bring up the menu in each mode | Press theMenu/OKbutton. Note that this step is not necessary in theSettingmode. |
| Move the highlight bar Use theZoombuttons to move up or down. | |
| Confirm an item | Press theMenu/OKbutton. |
| Exit menu/Go back to upper menu | Press theMode / button (when in sub-menu). |

Menu items in Camcorder mode (1)
Power-on → Press the Menu button.
| Item Option Description | ||
| * Video Resolution | Please refer to the package printing for resolution specification. | |
| * Picture Resolution | Please refer to the package printing for resolution specification. | |
| Flash Strobe | Auto The flash automatically fires when the lighting is insufficient. | |
| On The flash is forced to fire in every shot. | ||
| Off The flash is disabled. | ||
| NightShot On/Off | This setting allows you to take a photograph with a dark background. Since the shutter speed will slow down when taking photographs at a dark place, we recommend using a tripod to eliminate blurring from hand shake. | |
| Stabilizer On/Off Minimize blur caused by hand shake. | ||
| EV -2~+2 | Manually adjust the exposure to gain better effect when the preview image appears too bright or too dark. A positive value indicates the image will be brighter than usual; while a negative value makes the image dimmer. | |
| Selftimer | On/Off | Enable the selftimer. After the selftimer is turned on, the camcorder will have ten seconds delay before recording when the Shutter button is pressed. |
Menu items in Camcorder mode (2)
| Item Option Description | ||
| White Balance | Auto The camcorder automatically adjusts white balance. | |
| Sunny This setting is suitable for outdoor recording in sunny weather. | ||
| Cloudy | This setting is suitable for recording in cloudy weather or shady environments. | |
| Fluorescent | This setting is suitable for indoor recording with fluorescent lamp lighting, or environments with high color temperature. | |
| Tungsten | This setting is suitable for indoor recording with incandescent lamp lighting, or environments with low color temperature. | |
| Effect | Normal Make recordings in natural color. | |
| Black&White Make recordings in black and white. | ||
| Classic Make recordings in sepia-toned color. | ||
| Photo Frame 0 - 10 | This setting allows you to add customized frames to photos. 10 background frames (1-10) are available on the LCD monitor. Set 0 to disable this function. | |
The "Photo Frame" option and zoom function will be disabled when the picture resolution is set to 12M. The "Video resolution" and "Picture resolution" menu items are model-dependent. Please refer to the package printing for detailed specifications.

Menu items in My Works mode
Power-on → Press the Mode button → Enter My Works mode → Press the Shutter button.
| Item Option | Description | |
| Delete One Yes/No Delete current file. | ||
| Delete All Yes/No Delete all files of the same type stored in the memory. | ||
| Lock On/Off Enable/Disable protection of the selected file. | ||
| * Repeat all - Start picture slideshow. / Repeat playing all video clips. | ||
| ** Background Music | On/Off Enable/Disable playing MP3 music while viewing pictures. | |
| ** Set Start-up Picture | - | Use the selected picture as the start-up screen (when the camcorder is powered on). |
| *** Repeat Off/Single/All Enable/Disable repeat play of current file/all files. | ||
* For videos and pictures. ** For pictures only. *** For voice files only.

Menu items in Setting mode (1)
Power-on → Press the Mode button → Enter Setting mode.
| Item | Option | Description |
| Clock | - | Set date and time. |
| Date Stamp | On/Off | Enable this feature to print a date mark on each picture. |
| Language - | Lets you select the language used for OSD. | |
| Beep | On/Off | Enable beep sound on/off. |
| Start Movie | Off | Toggle start screen off. |
| On | Use the default start screen. | |
| * Custom | Use a custom picture as the start screen. This item does not show up until you have set up the start-up picture. | |
| Icon | On/Off | Enable/disable OSD icons to display on the screen. |
| LCD Brightness | 0 ~ 4 | Set LCD brightness. A greater value makes the LCD brighter; while a smaller value makes the LCD dimmer. |
Menu items in Setting mode (2)
| Item Option Description | ||
| TV System | NTSC | Set TV system compatibility to NTSC. This option is suitable for America, Taiwan, Japan, and Korea areas. |
| PAL | Set TV system compatibility to PAL. This option is suitable for Germany, England, Italy, Netherlands, China, Japan, and Hong Kong. | |
| Flicker 50Hz/60Hz | Set flicker frequency to 50Hz or 60Hz. For more information, please refer to the “Flicker Settings” table. | |
| Auto Off | Off1min/3min/5min | Set how long the camcorder will automatically shut down when staying inactive. Setting to [Off] will make the camcorder stay powered on until it runs out of power. |
| USB Mode | Menu | When connected to a PC, the camcorder displays a menu for you to choose a desired connection mode. |
| PC Cam | When connected to a PC, the camcorder automatically enters Camera (PC camera) mode. | |
| Disk | When connected to a PC, the camcorder automatically enters Disk (removable disk) mode. | |
| Printer | When connected to a PC, the camcorder automatically enters printer connection mode. | |
| Format Yes/No | Format the storage medium. Note that all files stored in the medium will be gone. | |
| Reset Default Yes/No | Restore factory defaults. Note that your current settings will be overridden. | |
! Flicker Settings
| Area England | Germany | France Italy | Spain Russia | |||
| Setting | 50Hz | 50Hz | 50Hz | 50Hz | 50Hz | 50Hz |
| Area | Portugal | America | Taiwan | China | Japan | Korea |
| Setting | 50Hz | 60Hz | 60Hz | 50Hz | 50/60Hz | 60Hz |
Note: The flicker setting is based on the frequency standard of your local power supply.
Advanced Instructions

Digital Camcorder
English
Connecting to PC
Connecting the camcorder to your PC
- Turn on the camcorder.
- Connect the USB cable to your computer.
Turn on your computer, and then connect the accessory USB cable to the USB port of your computer. Make sure the cable and the port are correctly aligned.
- Connect the USB cable to your camcorder.
Connect the other end of the USB cable to your camcorder.
The default is set to "Disk" mode. If you would like to set other modes as default, please refer to the "USB Mode" section for more information.


! USB mode:
Power-on → Press the Mode button → Enter Setting mode.
| USB Mode | Menu | The camcorder displays a menu. |
| PC Cam | The camcorder automatically enters PC camera mode. | |
| Disk | The camcorder automatically enters Disk (removable disk) mode. | |
| Printer The | The camcorder automatically enters printer connection mode. |
Notice for Windows XP/Vista users:
If you want to disconnect the camcorder from your computer, please follow these steps:
- Double-click the USB connection icon in the system tray.
- Click on the USB Disk item, and then click Stop.
- Select the camcorder when the confirmation screen appears and click OK.
- Follow the on-screen instructions to safely disconnect the camcorder from your computer.

File location
After connecting the camcorder to your computer, a removable disk will appear in your computer. The removable disk actually represents the storage medium of your camcorder. In the disk you can find all of your recordings. Refer to the figure below to see where the files are stored.

Using PC Camera
Installing the software
The PC camera driver is included in the accessory CD, and therefore you should install the driver before using the PC camera function.

Starting the application
1. Connect the camcorder to your computer.
Turn on your computer, and then connect the accessory USB cable to the USB port of your computer. Make sure the connector and the port are correctly aligned.
2. Switch to the Camera mode.
Connect the other end of the USB cable to your camcorder. Power on the camcorder, and the following items will appear on the screen:
Select [PC Cam] and press the OK button to confirm.
3. Launch PC camera program.
After the camcorder is correctly connected to and detected by your PC, you are ready to launch your own favorite software (e.g., MSN Messenger, Yahoo Messenger, etc.) to use the PC camera function.
Appendix

Troubleshooting
| When using the camcorder: | ||
| Problem Cause Solution | ||
| The camcorder can not be powered on normally. | The battery is out of power. Replace the battery. | |
| The battery is incorrectly installed. | Re-install the battery. | |
| Can not take pictures or video clips when pressing the Shutter or Record button. | Out of memory. | Free some space from the SD/MMC card or the internal memory. |
| The camcorder is recharging the flash strobe. | Wait until the flash strobe is fully charged. | |
| Using a “protected” SD card. | Set the SD card to be writable. | |
| The LCD screen displays “MEMORY ERROR” or “CARD ERROR” message. Or the camcorder cannot read the memory card. | The format of the memory card is not compatible with the camcorder. | Use the camcorder “Format” function to format the card. |
| The memory card is corrupted. | Replace the memory card with a new one. | |
| I did not delete the pictures and video clips, but can not find them in the memory card. | The lost recordings are saved in the internal memory. | It happens when you insert a memory card after taking a few pictures or video clips. You can access those files after removing the memory card. |
Appendix
| When using the camcorder: | ||
| Problem Cause Solution | ||
| Cannot use the flash strobe. | If the battery icon indicates low battery, the flash strobe may be disabled due to insufficient voltage. | Replace the battery. |
| The camcorder does not respond to any action during operation. | The camcorder encounters software failure. | Remove the battery pack and replace it into the compartment. Then power on the camcorder. |
| The recorded pictures appear too blurred. | The focus is not correctly set. | Adjust the focus to an appropriate position. |
| The recorded pictures or video clips appear too dark. | The environment of shooting or recording does not have adequate light. | Use flash strobe when taking pictures. Add extra light sources when recording video clips. |
| Noises occur when viewing images on the LCD screen or on the computer. | The flicker setting does not match the standard of the country you are staying. | Adjust the flicker setting. For more information, please refer to the “Flicker Settings” table. |
| I want to restart the serial number of the file name (PICTxxxx). | The counting of the serial number is handled by the camcorder firmware. | Use the camcorder “Format” function to format the card. |
| I convert a media file and name it as PICTxxxx.* (xxxx indicates number). Then I copy the file to the camcorder but cannot find it on the camcorder. | There is another file with duplicate serial number (e.g. PICT0001.MP4 and PICT0001.JPG), or the file type is not supported. | Give the file a distinctive serial number and make sure the file type is supported by the camcorder. |
Appendix
| When connecting the camcorder to the computer or TV: | ||
| Problem Cause Solution | ||
| I cannot view the video clips on my computer. | Driver or software is not installed on the computer. | Install Direct X 9.0c or above and Windows Media 9.0 Codecs to solve this problem. Install the software and driver in the bundled CD, or go to http://www.microsoft.com to download the required files. |
| Driver installation failed. | The installation is terminated abnormally. | Remove the driver and other related programs. Follow the installation steps in the manual to re-install the driver. |
| The camcorder has been connected to the PC via the USB cable before installing the driver. | Install the driver before plugging in the USB cable. | |
| The TV screen does not display after connecting the camcorder to the TV. | The camcorder is not correctly connected to the TV. | Reconnect the camcorder to TV correctly. |
| A conflict with other installed camcorder or capture device occurred. | The device is not compatible with the camcorder. | If you have any other camcorder or capture device installed in your computer, please completely remove the camcorder and its driver from the computer to avoid the conflict. |
| Noises occur on my computer screen when using Video Conferencing. | The flicker setting does not match the standard of the country you are staying. | Adjust the flicker setting. For more information, please refer to the “Flicker Settings” table. |
Appendix

Battery Life
| Still picture Video clip | |
| Number of shots Recording time (minute) | |
| 240 100 | |
| * shoot every 30 seconds** flash is on*** resolution is set to 5M | * resolution is set to VGA (640x480 pixels) |
Note: This table is for your reference only. The actual battery life depends on your battery type and recharge level.

Storage Capacity
* Please refer to the package printing for the specification of your model.
| Memory | Video (min.) Audio (min.) | ||||
| HD DVD VGA QV | GA Maximum | ||||
| SD/MMC card (512MB) 9 12 28 102 | 340 | ||||
| SD/MMC card (1GB) 18 25 55 200 | 666 | ||||
| SD/MMC card (2GB) 36 50 110 | 400 | 1332 | |||
| Memory | Still picture | ||
| 3M | 5M 12M | ||
| SD/MMC card (512MB) | 640 426 | 176 | |
| SD/MMC card (1GB) | 1250 | 833 344 | |
| SD/MMC card (2GB) | 2500 | 1666 | 688 |
Note: The actual value of capacity may vary (up to ±30%) depending on the color saturation and complexity of your subject and surroundings.
The contents in this manual are subject to change without prior notification.
Appendix

System Requirements
Windows XP Service Pack 2 or Vista
512MB of system memory, 1GB is recommended
Nvidia GeForce 7600 / ATI X1600 or above with 256MB of RAM
2.8 GHz Pentium 4 or faster processor
HDCP compliant display devices
CD-ROM SPEED: 4X or above
Other: USB connector

- DIGITAL CAMCORDER
- WELCOME
- SAFETY NOTICE
- FCC COMPLIANCE STATEMENT
- PARTS OF THE CAMCORDER
- LOADING THE BATTERY
- CHARGING BATTERY
- INSERTING THE SD/SDHC/MMC CARD (OPTIONAL)
- TURNING ON/OFF THE CAMCORDER
- MODE SELECTION
- SETTING LANGUAGE
- BATTERY LIFE INDICATOR
- READING LCD INDICATORS
- RECORDING A VIDEO CLIP
- TAKING A STILL PICTURE
- RECORDING A VOICE CLIP
- PLAYING BACK YOUR RECORDINGS
- PLAYING BACK YOUR RECORDINGS ON PC
- CONNECTING THE CAMCORDER TO HDTV
- CONNECTING THE CAMCORDER TO A STANDARD TV
- CONNECTING THE CAMCORDER TO YOUR PC
- PLAYING MP3 MUSIC
- COPY MP3 FILES TO THE CAMCORDER
- PLAYING MUSIC IN MUSIC PLAYER MODE
- DISPLAYING LYRICS
- USING MENU
- MENU ITEMS IN CAMCORDER MODE (1)
- MENU ITEMS IN CAMCORDER MODE (2)
- MENU ITEMS IN MY WORKS MODE
- MENU ITEMS IN SETTING MODE (1)
- MENU ITEMS IN SETTING MODE (2)
- ADVANCED INSTRUCTIONS
- CONNECTING TO PC
- USB MODE
- NOTICE FOR WINDOWS XP/VISTA USERS
- FILE LOCATION
- USING PC CAMERA
- INSTALLING THE SOFTWARE
- STARTING THE APPLICATION
- CONNECT THE CAMCORDER TO YOUR COMPUTER
- SWITCH TO THE CAMERA MODE
- LAUNCH PC CAMERA PROGRAM
- APPENDIX
- TROUBLESHOOTING
- BATTERY LIFE
- STORAGE CAPACITY
- SYSTEM REQUIREMENTS
Brand : AIPTEK
Model : Pocket DV AHD C 100
Category : Camcorder