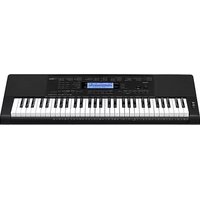
CTK-5200 - Keyboard CASIO - Free user manual and instructions
Find the device manual for free CTK-5200 CASIO in PDF.


| Product Type | Portable Keyboard |
| Brand | Casio |
| Model | CTK-5200 |
| Number of Keys | 61 standard-size keys |
| Touch Response | Yes, with 2 sensitivity levels (Off, Light, Normal, Heavy) |
| Maximum Polyphony | 32 notes |
| Built-in Tones | 400 tones |
| Built-in Rhythms | 150 rhythms |
| Built-in Songs | 110 songs for practice |
| Lesson Function | 3-step lesson system with left/right hand practice |
| Display | LCD with note and chord names |
| Power Supply | 6 AA batteries or optional AC adapter (AD-E95100L) |
| Battery Life | Approximately 3 hours with alkaline batteries |
| Dimensions (W x D x H) | 946 x 307 x 92 mm (37.2 x 12.1 x 3.6 inches) |
| Weight | About 3.3 kg (7.3 lb) without batteries |
| Connectors | PHONES/OUTPUT jack (stereo mini), SUSTAIN jack (standard) |
| Speakers | Two 8 cm x 6 cm oval speakers, 2.5W + 2.5W |
| Auto Power Off | After approx. 6 minutes of inactivity |
| Included Accessories | Music stand, song book, and AC adapter (varies by region) |
| Cleaning | Wipe with a soft dry cloth; do not use solvents |
| Safety Precautions | Avoid moisture, extreme temperatures, and physical shock. Do not open. |
| Reparability | Contact authorized Casio service centers for repairs |
Frequently Asked Questions - CTK-5200 CASIO
User questions about CTK-5200 CASIO
0 question about this device. Answer the ones you know or ask your own.
Ask a new question about this device
Download the instructions for your Keyboard in PDF format for free! Find your manual CTK-5200 - CASIO and take your electronic device back in hand. On this page are published all the documents necessary for the use of your device. CTK-5200 by CASIO.
USER MANUAL CTK-5200 CASIO
Please keep all information for future reference.
Safety Precautions
Before trying to use the Digital Keyboard, be sure to read the separate "Safety Precautions".
GUÍA DEL USUARIO
This equipment has been tested and found to comply with the limits for a Class B digital device, pursuant to Part 15 of the FCC Rules. These limits are designed to provide reasonable protection against harmful interference in a residential installation. This equipment generates, uses and can radiate radio frequency energy and, if not installed and used in accordance with the instructions, may cause harmful interference to radio communications. However, there is no guarantee that interference will not occur in a particular installation. If this equipment does cause harmful interference to radio or television reception, which can be determined by turning the equipment off and on, the user is encouraged to try to correct the interference by one or more of the following measures:
- Reorient or relocate the receiving antenna.
- Increase the separation between the equipment and receiver.
- Connect the equipment into an outlet on a circuit different from that to which the receiver is connected.
- Consult the dealer or an experienced radio/TV technician for help.
FCC WARNING
Changes or modifications not expressly approved by the party responsible for compliance could void the user's authority to operate the equipment.
Declaration of Conformity
Model Number: CTK-5200
Trade Name: CASIO COMPUTER CO., LTD.
Responsible party: CASIO AMERICA, INC.
Address: 570 MT. PLEASANT AVENUE, DOVER, NEW JERSEY 07801
Telephone number: 973-361-5400
This device complies with Part 15 of the FCC Rules, Operation is subject to the following two conditions:
(1) This device may not cause harmful interference, and (2) this device must accept any interference received, including interference that may cause undesired operation.
Important!
Please note the following important information before using this product.
- Before using the optional AC Adaptor to power the unit, be sure to check the AC Adaptor for any damage first. Carefully check the power cord for breakage, cuts, exposed wire and other serious damage. Never let children use an AC adaptor that is seriously damaged.
- Never attempt to recharge batteries.
- Do not use rechargeable batteries.
- Never mix old batteries with new ones.
- Use recommended batteries or equivalent types.
- Always make sure that positive (+) and negative (−) poles are facing correctly as indicated near the battery compartment.
- Replace batteries as soon as possible after any sign they are getting weak.
- Do not short-circuit the battery terminals.
- The product is not intended for children under 3 years.
- Use only a CASIO AD-E95100L adaptor.
• The AC adaptor is not a toy. - Be sure to disconnect the AC adaptor before cleaning the product.
This mark applies in EU countries only.
Declaration of Conformity According to EU Directive

Manufacturer:
CASIO COMPUTER CO., LTD.
6-2, Hon-machi 1-chome, Shibuya-ku, Tokyo 151-8543, Japan
Responsible within the European Union:
CASIO EUROPE GmbH
- Any reproduction of the contents of this manual, either in part or its entirety, is prohibited. Except for your own, personal use, any other use of the contents of this manual without the consent of CASIO is prohibited under copyright laws.
● IN NO EVENT SHALL CASIO BE LIABLE FOR ANY DAMAGES WHATSOEVER (INCLUDING, WITHOUT LIMITATION, DAMAGES FOR LOSS OF PROFITS, BUSINESS INTERRUPTION, LOSS OF INFORMATION) ARISING OUT OF THE USE OF OR INABILITY TO USE THIS MANUAL OR PRODUCT, EVEN IF CASIO HAS BEEN ADVISED OF THE POSSIBILITY OF SUCH DAMAGES.
●The contents of this manual are subject to change without notice. - The actual appearance of the product may be different from that shown in the illustrations in this User's Guide.
●Company and product names used in this manual may be registered trademarks of others.
General Guide ......E-4
Using the 10-key Pad (17)....E-7
FUNCTION Button (29) Functions ......E-7
Returning the Digital Keyboard to Its Factory Default Settings ....E-8
Getting Ready to Play......E-9
Preparing the Music Stand ....E-9
Power Supply ......E-9
Playing the Digital Keyboard .....E-10
Turning on Power and Playing ....E-10
Using Headphones.....E-11
Changing Keyboard Response to Touch Pressure (Touch Response)....E-11
Adjusting Display Contrast ....E-12
Using the Metronome ....E-12
Controlling the
Keyboard Sounds ......E-14
Select from a variety of musical instrument sounds....E-14
Layering Two Tones....E-15
Splitting the Keyboard between Two Different Tones ....E-15
Using Reverb.....E-16
Using Chorus.....E-16
Using a Pedal....E-17
Changing the Pitch (Transpose, Tuning, Octave Shift)......E-17
Using the Pitch Bend Wheel to Shift the Pitch of Notes.....E-18
Sampling Sounds and Playing
Them on the Digital Keyboard .....E-19
Connection and Preparation.....E-19
Sampling and Playing a Melody Sound (Melody Sampling)....E-19
Incorporating a Sampled Sound into a Drum Set (Drum Sampling) ......E-22
Other Sampling Functions....E-24
Playing Built-in Songs.....E-27
Playing the Demo Songs....E-27
Playing Back a Particular Song ....E-28
Increasing the Selection of Songs.....E-30
Using Built-in Songs to Master
Keyboard Play...... E-31
Phrases.... E-31
Step Up Lesson Flow.... E-31
Selecting the Song, Phrase, and Part You Want to Practice.... E-32
Lessons 1, 2, and 3..... E-33
Lesson Settings E-34
Using Auto Step Up Lesson.... E-36
Music Challenge
Keyboard Game E-37
Using Auto Accompaniment...... E-38
Playing the Rhythm Part Only..... E-38
Playing All Parts.... E-39
Using Auto Accompaniment Effectively ...... E-41
Using One-Touch Preset E-42
Using Auto Harmonize E-43
Looking Up the Notes of Chords (Chord Book)...... E-44
Editing Auto Accompaniment
Patterns E-45
Saving Keyboard Setups to
Registration Memory...... E-48
To save a setup to registration memory...... E-49
To recall a setup from registration memory ..... E-49
Recording Your Keyboard Play.... E-50
Recording and Playing Back Keyboard Play..... E-50
Using Tracks to Record and Mix Parts ...... E-51
Recording Two or More Songs, and Selecting One for Playback.... E-53
Recording while Playing Along with a Built-in Song.... E-53
Saving Recorded Data on an External Device.... E-54
Other Useful Digital Keyboard
Functions.....E-55
Changing the Scale of the Keyboard.....E-55
Using Music Preset E-56
Using the Arpeggiator....E-57
Deleting User Song Data.....E-58
Deleting All Data in Digital Keyboard
Memory E-58
Using a Memory Card ....E-59
Memory Card and Card Slot Precautions.....E-59
Inserting and Removing a Memory Card.....E-60
Formatting a Memory Card.....E-60
Saving Digital Keyboard Data to
a Memory Card.....E-61
Loading Data from a Memory Card into
Digital Keyboard Memory ......E-62
Deleting Data from a Memory Card.....E-63
Playing Back Data from a Memory Card ......E-64
Memory Card Error Messages ......E-64
Connecting External Devices .....E-65
Connecting a Computer ....E-65
MIDI Settings.....E-66
Storing and Loading Digital Keyboard
Memory Data.....E-68
Connecting to Audio Equipment.....E-69
Reference.....E-70
Troubleshooting.....E-70
Specifications ......E-72
Operating Precautions....E-73
Error Messages ......E-74
Song List E-75
Fingering Guide.....E-76
Button Number Reference
MIDI Implementation Chart
Included Accessories
●Music Stand
●Song Book
●Leaflets
- Safety Precautions
- Appendix
- Other (Warranty, etc.)
Items included as accessories are subject to change without notice.
Separately Available Accessories
- You can get information about accessories that are separately for this product from the CASIO catalog available from your retailer, and from the CASIO website at the following URL.
http://world.casio.com/
- In this manual, the term "Digital Keyboard" refers to the CTK-5200.
- In this manual, buttons and other controllers are identified using the numbers shown below.
- There is the "Button Number Reference" at the back of this manual. You can tear it out and refer to the button numbers as required.

- The following explains the meaning of the symbol that appears on the product console and with the key names below. : Indicates a function that is enabled by holding down the button for some time.
① ⏻ (POWER) button 📄E-10
② VOLUME knob E-10
4 RHYTHM EDITOR button 📞E-45
⑤ METRONOME, ↓ BEAT button 📞 E-12
6 INTRO, REPEAT button E-29, 41
7 NORMAL/FILL-IN, REW button E-28, 41
⑧ VAR./FILL-IN, FF button E-28, 41
⑨ SYNCHRO/ENDING, PAUSE button E-28, 41
10 START/STOP, PLAY/STOP button E-27, 38
11 ↓ CHORDS, ACCOMP, PART SELECT button E-30, 39
12 TEMPO buttons E-13
13 TONE, ↓ MUSIC PRESET button 📋 E-14, 56
14 RHYTHM, ↓ ONE TOUCH PRESET button E-38, 42
15 SONG BANK button E-28
16 CARD, ↓ LOAD/SAVE button E-59
17 Number buttons, [-]/[+] keys E-7
18 BANK, LISTEN button E-33, 48
19 Area1, WATCH button E-33, 48
20 Area2, REMEMBER button E-34, 48
21 Area3, NEXT button 📋E-32, 48
22 Area4, AUTO button E-36, 48
23 STORE, MUSIC CHALLENGE button E-37, 49
24 SPLIT button E-15
25 LAYER button E-15
26 AUTO HARMONIZE/ARPEGGIATOR, ↓ TYPE button E-43, 57
27 PIANO/ORGAN button E-14
28 CHORD BOOK button E-44
29 FUNCTION button E-7
30 Speakers
31 Song Bank list
32 Display
33 Music Preset list
34 Rhythm list
35 Tone list
36 PITCH BEND wheel E-18
37 CHORD root names E-39
38 Percussion instrument list E-14
■Back


39 SD CARD SLOT E-59
40 USB port E-65
41 SUSTAIN/ASSIGNABLE JACK E-17
42 AUDIO IN jack E-19
43 DC 9.5V terminal E-9
44 PHONES/OUTPUT jack E-11, 69
Using the 10-key Pad (17)
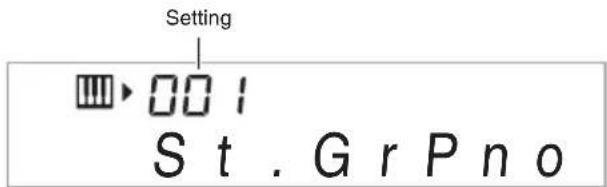
Use the number buttons and the [-] and [+] keys to change the settings of the parameters that appear in the upper left area of the display.

Number Buttons
Use the number buttons to enter numbers and values.
- Enter the same number of digits as the currently displayed value.
Example: To enter tone number 001, input 0 → 0 → 1.
NOTE
- Negative values cannot be input using the number buttons. Use [-] (decrease) and [+] (increase) instead.
[-] and [+] Keys
You can use the [-] (decrease) and [+] (increase) keys to change the displayed number or value.
- Holding down either key scrolls the displayed setting.
- Pressing both keys at the same time will revert to the initial default setting or the recommended setting.
FUNCTION Button (29) Functions
You can use the FUNCTION button (29) to adjust the reverb effect, to delete data, and to perform a wide range of other Digital Keyboard operations.
To select a function
-
Press 29 (FUNCTION) to display the function menu.
-
Use the 17 (10-key) [4] (←) and [6] (→) keys to display the function you want.
-
You can exit the function menu by pressing 29 (FUNCTION).
-
After selecting functions 8 through 13, press the 17 (10-key) [9] (ENTER) key to display the menu item's submenu. Then use [4] (←) and [6] (→) to select an item. You can exit a submenu by pressing the 17 (10-key) [7] (EXIT) key.
-
Refer to the indicated pages for details about each function.
| Function Display | See Page | ||
| 1 | Transpose Trans. E-17 | ||
| 2 | Accompaniment Volume Acomp | Vol E-42 | |
| 3 | Song Volume Song Vol E-30 | ||
| 4 | Touch Response Touch E-11 | ||
| 5 | Tuning Tune E-17 | ||
| 6 | Reverb Reverb E-16 | ||
| 7 | Chorus Chorus E-16 | ||
| 8 | Sampling SAMPLING | ||
| Automatic Sampling Start | AutoStrt | E-24 | |
| Automatic Sampling Stop | AutoStop | E-25 | |
| Sampled Tone Protect | (Protect) | E-26 | |
| 9 | Step Up Lesson LESSON | ||
| Voice Fingering Guide | Speak E-34 | ||
| Note Guide | NoteGuid | E-35 | |
| Performance Evaluation | Scoring | E-35 | |
| Phrase Length | PhraseLn | E-35 | |
| 10 | Preset Scales | SCALE | E-55 |
| 11 | Other Settings | OTHER | |
| Arpeggiator Hold | ArpegHld | E-57 | |
| Pedal Effect | Jack | E-17 | |
| Pitch Bend Range | Bend Rng E-18 | ||
| Accompaniment Scale | AcompScl | E-56 | |
| LCD Contrast | Contrast | E-12 | |
| 12 | MIDI Settings MIDI | ||
| Keyboard Channel | Keybd Ch | E-66 | |
| Navigate Channels | Navi. Ch | E-66 | |
| Local Control | Local | E-67 | |
| Accomp Out | AcompOut | E-67 | |
| 13 | Delete | DELETE | |
| Sampled Sound Delete | (tone name) | E-25 | |
| User Rhythm Delete | (rhythm name) | E-47 | |
| User Song Delete | (song name) | E-58 | |
| All Data Delete | All Data | E-58 | |

IMPORTANT!
- The tone and other parameters revert to their initial defaults whenever you turn on power (page E-10).
Returning the Digital Keyboard to Its Factory Default Settings
Perform the following procedure when you want to return the Digital Keyboard's stored data and settings to their initial factory defaults.
- Turn off the Digital Keyboard.
- While holding down 15 (SONG BANK) and the [1] 10-key (17) key at the same time, press 1.
- Keep ⑮ (SONG BANK) and the [1] 10-key (⑰) key depressed until the next step is complete.
- When the message "PIs wait" appears on the screen, release 15 (SONG BANK) and the [1] 10-key (17) key.
- You will be able to use the Digital Keyboard in a short while after its system is initialized.

NOTE
- See "Turning on Power and Playing" (page E-10) for information about turning digital power on and off.
Preparing the Music Stand

Power Supply
Either an AC adaptor or batteries can be used to power this Digital Keyboard. Normally, use of AC adaptor power is recommended.
Using the AC Adaptor
Make sure that you use only the AC adaptor specified for this Digital Keyboard. Use of a different type of AC adaptor can cause malfunction.
Specified AC Adaptor: AD-E95100L
Household power outlet
DC 9.5V

AC adaptor
- Configuration and type depend on your geographic location.

IMPORTANT!
- Be sure to turn off Digital Keyboard power before connecting or disconnecting the AC adaptor.
- The AC adaptor will become warm to the touch after very long use. This is normal and does not indicate malfunction.
- To prevent breaking of the wire, take care to avoid putting any type of load on the power cord.
No bending! No winding!


- Never insert metal, pencils, or any other objects into the product's 9.5V DC terminal. Doing so creates the risk of accident.
Using Batteries

IMPORTANT!
- Be sure to turn off power before loading batteries.
-
It is up to you to prepare six commercially available batteries. Do not use oxyride batteries or any other nickel based batteries.
-
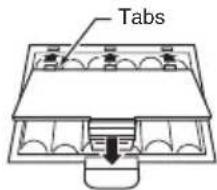
Open the battery cover on the bottom of the Digital Keyboard.

- Load six AA-size batteries into the battery compartment.
Make sure the positive ⊕ and negative ⊖ ends of the batteries are facing as shown in the illustration.

- Insert the tabs of the battery cover into the holes on the side of the battery compartment, and close the cover.
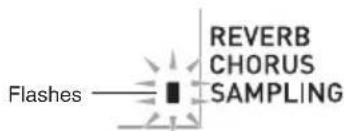
■Low Battery Indication
The indicator shown below starts to flash to let you know when battery power is low. Replace the batteries with new ones.

Playing the Digital Keyboard
natural_image
Illustration of three people playing a piano together (no text or symbols)
Turning on Power and Playing
- Press ① to turn on Digital Keyboard power.

- Try playing something on the keyboard. Use ② to adjust volume.

natural_image
Illustration of a hand touching a piano keyboard (no text or symbols)- To turn off the Digital Keyboard, press 1 again.

IMPORTANT!
- If you press ① only lightly, the display will light up momentarily but power will not turn on. This does not indicate malfunction. Press ① firmly and completely to turn on power.
- Turning off the Digital Keyboard causes most current settings to be cleared. The Digital Keyboard will revert to initial settings the next time you turn it on. This is true for all settings except for sample sound protection. Once you turn it on it remains on until you turn it off again.
- The message "PIs wait" will remain on the display while a data save operation is in progress. Do not perform any other operation while it is displayed. Turning off the Digital Keyboard or removing the memory card can cause Digital Keyboard data to be deleted or become corrupted.
- Pressing ① to turn off power actually puts the Digital Keyboard into a standby state. Minute amounts of current continue to flow within the Digital Keyboard in the standby state. If you do not plan to use the Digital Keyboard for a long time or if there is a lightning storm in your area, be sure to unplug the AC adaptor from the power outlet.
Auto Power Off
If you do not perform any operation on the Digital Keyboard for one of the trigger times noted below, Auto Power Off will turn off power.
During battery operation : 6 minutes
During AC adaptor operation: 30 minutes
■Disabling Auto Power Off
You can disable Auto Power Off to ensure that power is not turned off automatically during a concert, etc.
1. While holding down ⑬ (TONE), turn on power.
Auto Power Off will be disabled.
Using Headphones
Using headphones cuts off output from the built-in speakers, which means you can practice playing even late at night without disturbing others.
- Be sure to turn down the volume level before connecting headphones.

NOTE
• Headphones do not come with the Digital Keyboard.
- Use commercially available headphones. See page E-3 for information about options.

IMPORTANT!
- Do not listen to very high volume output over headphones for long period. Doing so creates the risk of hearing damage.
- If you are using headphones that require an adaptor plug, make sure you do not leave the adaptor plugged in when removing the headphones.
Changing Keyboard Response to Touch Pressure (Touch Response)
Touch Response alters tone volume in accordance with keyboard pressure (speed). This provides you some of the same expressivity you get on an acoustic piano.

natural_image
Illustration of a hand playing piano keys with musical notes and motion lines (no text or symbols)Pressing fast produces louder notes.

natural_image
Illustration of a hand pressing down on a piano keyboard (no text or symbols)Pressing slowly produces softer notes.

natural_image
Illustration of a hand pressing down on piano keys with stars and a cross symbol (no text or labels)Do not try to use too much pressure.
Changing Touch Response Sensitivity
Use the procedure below to control how much the volume of played notes change in accordance with playing speed. Select the setting that best matches your playing style.
- Press 29 (FUNCTION) and then use the 17 (10-key) [4] (←) and [6] (→) keys to display "Touch" (page E-7).
Touch
- Use 17 (10-key) [-] and [+] keys to select one of the three Touch Response sensitivity settings.
| Off (oFF) Touch Response is turned off. Sound volume is fixed, regardless of key press speed. |
| Type 1 (1) Normal Touch Response |
| Type 2 (2) More sensitive Touch Response than Type 1 |
Adjusting Display Contrast
- Press 29 (FUNCTION) and then use the 17 (10-key) [4] (←) and [6] (→) keys to display "OTHER" (page E-7).

- Press 17 (10-key) [9] (ENTER) key.
- Use the ⑰ (10-key) [4] (←) and [6] (→) keys to display "Contrast".
Contrast
- Use the ⑰ (10-key) [−] and [+] keys to adjust the contrast.
• The contrast setting range is 01 to 17.
Using the Metronome
The metronome lets you play and practice along with a steady beat to help keep you on tempo.
Start/Stop
- Press ⑤.
This starts the metronome.
This pattern changes with each beat.

TEMPO MEASURE
- Press ⑤ again to stop the metronome.
Changing the Beats Per Measure
You can configure the metronome to use a bell sound for the first beat of each measure of the song you are playing.
- You can specify 0, or a value from 2 to 6 as the number of beat per measure.
-
When playing a built-in song, the beats per measure setting (which determines when the bell sounds) is configured automatically for the currently selected song.
-
Hold down ⑤ until the beats per measure setting screen appears on the display.
B e a t
- If you do not perform any operation for a few seconds after the beats per measure setting screen appears, the display will return to the screen displayed before you pressed ⑤.
- Use 17 (10-key) to enter the number of beats per measure.
- The bell will not sound if you specify 0 for this setting. In this case, all beats are indicated by a click sound. This setting lets you practice with a steady beat, without worrying how many beats there are in each measure.
Changing the Metronome Tempo
Use the following procedure to change the tempo of the metronome.
1. Press 12.
Use √ (slower) and ∧ (faster) to change the tempo setting. Holding down either button changes the setting at high speed.
- Pressing and at the same time will initialize the tempo setting in accordance with the currently selected song or rhythm.
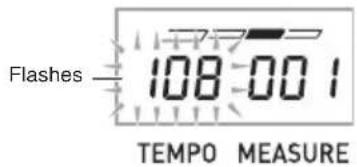
- Pressing 12 causes the tempo value to flash on the display. While the tempo value is flashing, you can use 17 (10-key) to change it.
Note that you must input leading zeros, so 89 is input as 089. - The tempo value will stop flashing if you do not perform any operation for a short while.
Tempo value (flashes)

TEMPO MEASURE
Changing the Metronome Sound Volume
The metronome volume setting is changed automatically with the volume level of the currently selected Auto Accompaniment or song. The metronome volume cannot be adjusted independently.
- For information about changing the Auto Accompaniment volume, see page E-42.
- For information about changing the song volume, see page E-30.
NOTE
- You cannot adjust the balance between the metronome and note volume during Auto Accompaniment and built-in tune play.

Controlling the Keyboard Sounds
natural_image
Illustration of a bandaged band with musical notes and two people playing, no text or symbols present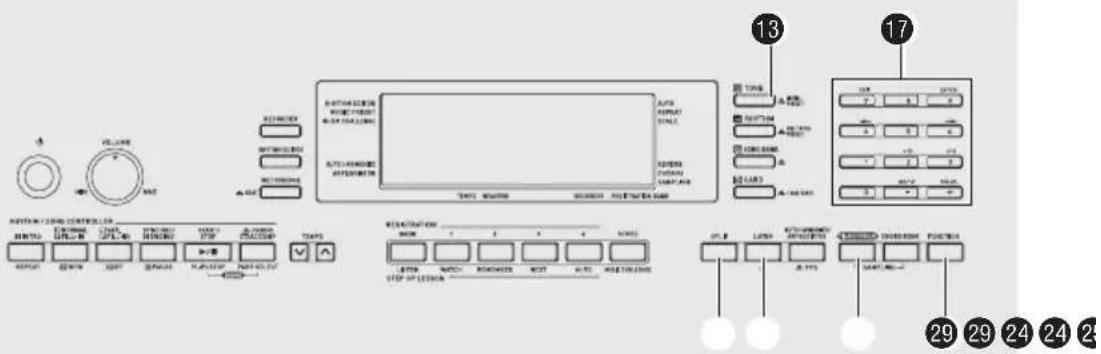
Select from a variety of musical instrument sounds
Your Digital Keyboard lets you select tones for a wide variety of musical instrument sounds, including violin, flute, orchestra, and more. Even the same song sound takes on a different feel by changing the instrument type.
To select an instrument for playing
1. Press ⑬ (TONE).

2. Use 17 (10-key) to select the tone number you want.
The corresponding tone number and tone name will appear on the screen.
- Use the number buttons to enter the tone number. Specify three digits for the tone number.
Example: To select 001, enter 0 → 0 → 1.
NOTE
- See the separate "Appendix" for a complete list of available tones.
- When one of the drum sets is selected, each keyboard key is assigned a different percussion sound.
3. Try playing something on the keyboard.
The tone of the instrument you selected will sound.
natural_image
Illustration of a smiling child playing piano with musical notes around (no text or symbols)Playing with a Piano or Organ Tone
Pressing ^27 toggles between the piano and organ modes. Each press of ^27 toggles the tone setting between a piano tone (Tone Number 001) and an organ tone (Tone Number 079).
In addition to the tone number, you also can configure the settings listed below.
Reverb : "06"
Transpose: "00"
Touch Response : Off:Returns to initial default On: No change
Pedal Effect : SUS
Rhythm Number : "161" (When a piano tone is selected) "094" (When an organ tone is selected)
Accompaniment : Rhythm part only
Local Control : On
Drum Assign : Off
Split : Off
Layer : Off
Chorus : Off
Octave Shift (Upper): "0"
Auto Harmonize : Off
Arppegiator : Off
Scale : Equal
Layering Two Tones
You can use the following procedure to layer two different tones (such as piano and strings) so they sound simultaneously when you press a keyboard key.
1. Select the first tone you want to use.
Press 13 (TONE) and then use 17 (10-key) to select the tone you want. Example:032 ELEC.PIANO 1
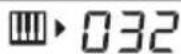
E. Piano 1
2. Press 25.
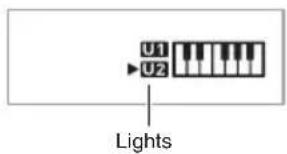
3. Use 17 (10-key) to select the second tone you want.
Example:205 STRINGS

S t r i n g s
4. Play something on the keyboard.
Both tones sound at the same time.
5. Pressing 25 again to unlayer the keyboard (so it plays only the tone you selected in step 1).
• Each press of 25 toggles between layered (two tones) and unlayered (one tone).
Splitting the Keyboard between Two Different Tones
You can use the procedure below to assign different tones to the right range and left range of the keyboard, so it sounds like you are playing an ensemble between two instruments.
To select the two tones for a split keyboard
1. Select the tone for the right side range (page E-14).
Press 13 (TONE) and then use 17 (10-key) to select the tone you want. Example:303 FLUTE 1

Flute 1
2. Press 24.
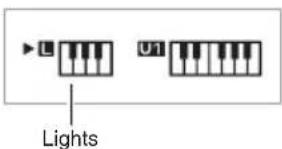
3. Use 17 (10-key) to select the left side range tone you want.
Example:064 VIBRAPHONE 1

Vibes 1
4. Play something on the keyboard.
This will sound the tones assigned to the left and right side ranges of the keyboard.


Controlling the Keyboard Sounds
5. Pressing 24 again to unsplit the keyboard (so it plays only the tone you selected in step 1).
• Each press of 24 toggles between split (two tones) and unsplit (one tone).

NOTE
- If you turn on both layer and split, layering will be applied to the right side range of the keyboard only.
To change the split point
1. While holding down 24, press the keyboard key where you want the split point to be.
The key you press will become the lowest note of the right side range of the split keyboard.
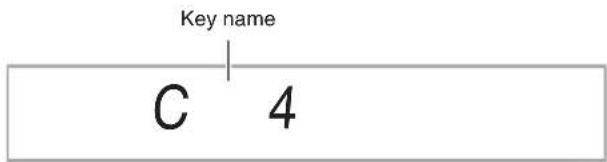
Example: Setting middle C (C4) as the split point.
Using Reverb
Reverb adds reverberation to notes. You can change the duration of the reverb.
1. Press 29 (FUNCTION) and then use the 17 (10-key) [4] (←) and [6] (→) keys to display "Reverb" (page E-7).
Reverb
2. Use the 17 (10-key) [-] and [+] keys to select the reverb setting you want.
| Off (oFF) Tums off reverb. | |
| 1 to 10 The larger the number selected, the longer the reverb duration. |
![CASIO CTK-5200 - Use the 17 (10-key) [-] and [+] keys to select the reverb setting you want. - 1](/content/2026/06/1254294/images/55f6c86be5a703732a710160914c05c9f841595b6eed48be944a6b0940ce66b8.jpg)
Indicator disappears when reverb is turned off.
Using Chorus
Chorus is a function that adds depth and breadth to notes. It makes you sound as if you are playing multiple instruments.
- Press 29 (FUNCTION) and then use the 17 (10-key) [4] (←) and [6] (→) keys to display "Chorus" (page E-7).
Chorus
2. Use the ⑰ (10-key) [−] and [+] keys to select the chorus type you want.
There are five chorus types, plus an off setting.
![CASIO CTK-5200 - Use the ⑰ (10-key) [−] and [+] keys to select the chorus type you want. - 1](/content/2026/06/1254294/images/1f42bb748ef85221d35e6396a2eba9430128e05dd351090c87b45355d2a20ab9.jpg)
Indicator disappears when chorus is turned off.
• The actual effect produced by chorus depends on the tone you are using.
Using a Pedal
A pedal can be used to change notes in various ways while playing.
- A pedal unit does not come with the Digital Keyboard. Purchase one separately from your retailer. See page E-3 for information about options.
Connecting a Pedal Unit
Connect an optional pedal unit.

Selecting the Pedal Effect
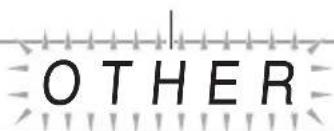
- Press 29 (FUNCTION) and then use the 17 (10-key) [4] (←) and [6] (→) keys to display "OTHER" (page E-7).
Flashes
-
Press ⑰ (10-key) [9] (ENTER) key.
-
Use the ⑰ (10-key) [4] (←) and [6] (→) keys to display "Jack".
Jack
- Use the 17 (10-key) [-] and [+] keys to select the pedal effect you want.
• The following shows the available pedal effects.
| Sustain (SUS) | Sustains notes played while the pedal is depressed. Organ and other similar tone notes are sustained even if the pedal is not pressed. |
| Sostenuto (SoS) | Sustains notes that are playing when the pedal is depressed before the keyboard keys are released. |
| Soft (SFt) | Slightly softens notes played while the pedal is depressed. |
| Rhythm (rHy) | Pressing the pedal starts and stops Auto Accompaniment or song playback. |
Changing the Pitch (Transpose, Tuning, Octave Shift)
Changing the Pitch in Semitone Steps (Transpose)
The transpose feature lets you change the pitch, in semitone steps. A simple operation lets you instantly change the pitch to match that of a singer.
- The transpose setting range is -12 to +12 semitones.
- Press 29 (FUNCTION).
Trans.
- Use the 17 (10-key) [-] and [+] keys to select the transpose setting you want.
Fine Tuning (Tuning)
Use the tuning feature when you need to adjust the pitch slightly to play along with another musical instrument. Also, some artists perform their music with slightly altered tuning. You can use the tuning feature to adjust tuning so it exactly matches a performance on a CD.
- The tuning feature specifies the frequency of the A4 note. You can set a frequency within the range of 415.5 to 465.9 Hz. The initial default setting is 440.0 Hz.
- Press 29 (FUNCTION) and then use the 17 (10-key) [4] (←) and [6] (→) keys to display "Tune".
Tune
- Use the ⑰ (10-key) [−] and [+] keys to adjust the tuning.
- Performing this step causes the display to change from "Tune" to a value that indicates the current frequency setting as shown below. You can change the frequency in 0.1 Hz steps.
4 4 0 . 0 Hz
- Even if you do not perform a 17 (10-key) operation to adjust the tuning, the current frequency setting will appear automatically after a few seconds.
Octave Shift
Octave Shift lets you raise or lower the pitch of the keyboard notes in octave units.
- The octave shift setting range is -2 to +2 octaves.
-
When using Split (page E-15), you can individually set the left and right keyboard ranges to the pitches you want.
-
Keep pressing 25 until the screen shown below appears on the display.
If you want to use Split, turn on Split before pressing 25.
- If you do not perform any operation for a few seconds after this screen appears, the display will return to the previous screen automatically.
Oct Upper
-
Use the 17 (10-key) [-] and [+] keys to shift the octave.
-
Split On: This step affects the right side keyboard range only.
-
Split Off: This step affects the entire keyboard range.
-
Press 25.
-
Split On: The screen shown below will appear. Use the 17 (10-key) [-] and [+] keys to shift the octave for the left side keyboard range.
- Split Off: The screen shown below will appear. Advance to step 4.
Oct Lower
- Press 25 again.
Using the Pitch Bend Wheel to Shift the Pitch of Notes
You can use the pitch bend wheel to slide the pitch of notes smoothly upwards and downwards. This technique makes it possible to produce effects that are similar to sounds produced when bending notes on a saxophone or electric guitar.
To play with the pitch bend wheel
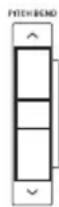
- While playing a note on the keyboard, rotate the pitch bend wheel on the left of the keyboard upwards or downwards.
The amount the note bends depends on how much you rotate the pitch bend wheel.
- Do not have the pitch bend wheel rotated as you turn on the Digital Keyboard.
Specifying the Pitch Bend Range
Use the following procedure to specify how much the pitch of the note changes whenever the pitch bend wheel is rotated upwards or downwards. You can specify a range from 0 to 12 semitones (one octave).
- Press 29 (FUNCTION) and then use the 17 (10-key) [4] (←) and [6] (→) keys to display "OTHER" (page E-7).
Flashes
OTHER
- Press 17 (10-key) [9] (ENTER) key.
- Use the 17 (10-key) [4] (←) and [6] (→) keys to display "Bend Rng".
B e n d R n g
- Use the 17 (10-key) [-] and [+] keys to change the range.
You can sample a sound from a portable audio player or other device, and then play the sound on the keyboard. You can sample and use passages from a CD. The sampling feature is a great way to create new sounds that are highly creative.
Connection and Preparation

IMPORTANT!
- Before connecting, make sure that this Digital Keyboard, as well as the external device being connected, are all turned off.
- Connect an external device to the Digital Keyboard.

Digital Keyboard AUDIO IN jack

- Connection of an external device requires commercially available connecting cords, supplied by you. Connecting cords should have a stereo mini plug on one end and a plug that matches the configuration of the external device on the other end.
- Turn down the volume levels of the external device and the Digital Keyboard.
- Turn on the external device, and then turn on the Digital Keyboard.
NOTE
- Sampled sounds are recorded in monaural.
Sampling and Playing a Melody Sound (Melody Sampling)
Use the procedures in this section to sample a sound and play it as the melody part on the Digital Keyboard.
- Up to five sampled sounds can be stored in Digital Keyboard memory as tone numbers 601 through 605. Simply select the tone number where the sound you want is located to assign the sound to the keyboard.
To sample a sound
- Press ⑬ (TONE) and then use ⑰ (10-key) to enter the tone number (601 to 605) where you want to store the sampled sound.

- Press 27 and 28 at the same time.
This enters sampling standby. The allowable sampling time (in seconds) will appear on the display momentarily and then the display will change to the following.
Waiting

3. Output sound from the external device.
Sampling will start automatically.
- Sampling will not start if the volume of the sound is too low.
Sampling
4. After the sound you want to sample is finished, press 27 and 28 at the same time.
Sampling will stop.
- Even if you do not press 27 and 28, sampling will stop automatically whenever there is no more sound being input from the external device. Sampling also will stop automatically 10 seconds after it is started.
601
S 1 : O r g n l
Sampled sound 1
Used memory (Unit: Kbytes) 150 170 Remaining memory capacity
5. Play something on the Digital Keyboard.
NOTE
- You may not be able to get 10 seconds of sampling if Digital Keyboard memory is low due to storage of other data. If this happens, deleting other memory data you no longer need will free up memory space and you should be able to sample for 10 seconds. See “Deleting a Sampled Sound” on page E-25 for more information.

IMPORTANT!
- Sampling sound and storing it will delete any sound data currently stored under the same tone number. To help ensure that you do not accidentally delete important data, be sure to read "Protecting Against Accidental Deletion of Sampled Sounds" on page E-26.
■How sampled sounds are played
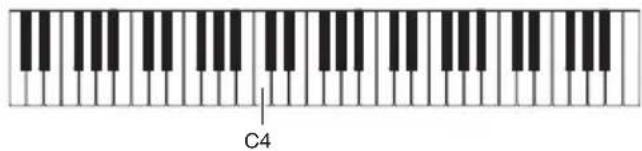
Pressing Middle C (C4) will play back the original sound. The keys to the left and right of C4 play the sound at different pitches.
Looping a Sampled Sound
You can use the following procedure to loop a sampled sound so it continues to repeat, as you play on the Digital Keyboard.
-
Press 14 (RHYTHM).
-
Press 27 and 29 at the same time.
This enters repeat standby.
- Press the button (19 to 23) that corresponds to the melody sampling tone number you want to select.
This will start looped playback of the selected sound.
| To select this tone number: Press this button: | |
| 601 | 19 |
| 602 | 20 |
| 603 | 21 |
| 604 | 22 |
| 605 | 23 |
-
Press the same button again to stop playback.
-
Press 18 to return to the screen that was displayed before step 2 of this procedure.
Changing the Volume of Sampled Sound Looped Playback
You can use the following procedure to change the volume level of the looped playback of each sampled sound, if you want.
- Press the button of the sampled sound whose volume you want to change (19 to 23).
- This will cause the sounds loop to sound.
- While the loop is sounding, hold down the same sampled sound button (19 to 23) as you press any keyboard key.
- Pressing the keyboard key quickly will increase sample sound volume, while pressing slowly will decrease volume.
- After the sampled sound is at the volume level you want, release its button (19 to 23).
Applying Effects to a Sampled Sound
You can apply various effects to sampled sounds.
-
Press ⑬ (TONE) and then use ⑰ (10-key) to enter the tone number (601 to 605) to which you want to apply effects.
-
Press 13 (TONE) to cycle through the available effects, described below.
| Effect Type(Display) | Description |
| Original (Orgnl) | Normal sampled tone (no looping, no effect). |
| Loop 1 (Loop1) | Loops the sampled sound. |
| Loop 2 (Loop2) | Loops the sample sound and raises the pitch of the resonating sound when the keyboard key is released. |
| Loop 3 (Loop3) | Loops the sample sound and lowers the pitch of the resonating sound when the keyboard key is released. |
| Pitch 1 (Ptch1) | Changes the pitch from low to high, at an increasing rate. |
| Pitch 2 (Ptch2) | Changes the pitch from high to low, at a decreasing rate. |
| Pitch 3 (Ptch3) | Changes the pitch from high to low, at a decreasing rate, and then raises the pitch when the key is released. |
| Tremolo (Treml) | Alternates volume between high and low. |
| Funny 1 (Funy1) | Adds vibrato and changes the pitch by a gradually increasing amount. |
| Funny 2 (Funy2) | Alternates between high pitch and low pitch. |
| Funny 3 (Funy3) | Adds vibrato and changes the pitch from low to high. |
- Avoid assigning the same sampled sound to the keyboard for play along and for looped play. Doing so will cause, the Loop 1 effect to be applied to the keyboard tone while looped play of the sampled sound is being performed.
Incorporating a Sampled Sound into a Drum Set (Drum Sampling)
You can use the procedure to change the drum sounds that are assigned to each keyboard key.
- You can store up to three drum sets and store them as tone numbers 606, 607, and 608. Simply select the tone number where the drum set you want is located to assign the drum set sounds to the keyboard.
- Press ⑭ (RHYTHM).
- Press ⑬ (TONE) and then use ⑰ (10-key) to enter the tone number (606, 607, or 608) for the drum set whose sounds you want to change.
606
No Data
- Press 27 and 28 at the same time.
606
No Data
- Press the keyboard key to which you want to assign the drum sound you are about to sample.
This enters sampling standby.
The allowable sampling time (in seconds) will appear on the display momentarily and then the display will change to the following.
Waiting
- Output sound from the external device.
Sampling will start automatically.
- Sampling will not start if the volume of the sound is too low.
Sampling

- After the sound you want to sample is finished, press 27 and 28 at the same time.
606
SmpIDrm1
Used memory
(Unit: Kbytes)
150 170
Remaining
memory capacity
Sampling will stop.
- Even if you do not press 27 and 28, sampling will stop automatically whenever there is no more sound being input from the external device. Sampling also will stop automatically 10 seconds after it is started.
7. Press the keyboard key.
NOTE
- You can repeat steps 3 through 6 to change other sounds that make up the currently selected drum set. There are eight sounds per drum set.
- You may not be able to get 10 seconds of sampling if Digital Keyboard memory is low due to storage of other data. If this happens, deleting other memory data you no longer need will free up memory space and you should be able to sample for 10 seconds. See “Deleting a Sampled Sound” on page E-25 for more information.

IMPORTANT!
- Sampling a sound will delete any sound data currently assigned to the same keyboard key. To help ensure that you do not accidentally delete important data, be sure to read “Protecting Against Accidental Deletion of Sampled Sounds” on page E-26.
Editing Sampled Drum Set Sounds
You can use the procedures in this section to copy the drum sound assigned to one keyboard key to another key, to change the pitch of a sound, and to delete a sampled sound.
- Press ⑬ (TONE) and then use ⑰ (10-key) to enter the tone number (606, 607, or 608) for the drum set you want.
- Press 27 and 28 at the same time.
- Press 29 (FUNCTION).
606
Smp1Drm1
This is the editing mode.
- While in the editing mode, you can copy a sound, change the pitch of a sound, or delete a sound (each of which is described below). Pressing 29 (FUNCTION) again exits the editing mode and returns to step 2 of this procedure.

natural_image
Pure horizontal bar with black and white musical notes, no text or symbols presentIndicates keyboard keys that have sounds assigned.
■To copy a sampled sound from one key to another
While holding down the keyboard key to which the sampled sound you want to copy is assigned, press the keyboard key to which you want to copy it.
Example: To copy sampled sound of key C4 to key D4

natural_image
Pure electrical circuit lines without any symbolsIndicates the keyboard key whose sound was copied.
- A keyboard key that already has a sampled sound assigned cannot be selected as a copy destination.
■To change the pitch of a sampled sound
While holding down the keyboard key of the sampled sound whose pitch you want to change, use the 17 (10-key) [-] and [+] keys to change the pitch.
- You can change the pitch within a range of -64 to 63 semitones.
■To delete a keyboard key's sampled sound
While holding down the keyboard key whose sound you want to delete, press 14 (RHYTHM). In response to the "DelSure?" message that appears, press the 17 (10-key) [+] (YES) key to delete, or [-] (NO) to cancel the delete operation.
- Deleting a sampled sound will return the key to its initial default built-in sound. Example: To delete the sound assigned to key D4

Using a Drum Sampling Tone in Auto Accompaniment (Drum Assign)
Use the following procedure to change the rhythm part of an Auto Accompaniment pattern to a drum set sound that you sampled.
- Press ⑭ (RHYTHM) and then use ⑰ (10-key) to enter the rhythm number of the Auto Accompaniment pattern you want.
You cannot use a Drum Sampling Tone in a user rhythm, so do not select a user rhythm in the above step. - Press 13 (TONE) and then use 17 (10-key) to enter the tone number of the sampling drum set that contains the sound you want to use.
- Press 13 (TONE).
This changes the rhythm part of the Auto Accompaniment pattern you selected in step 1 to the sampled sound you selected in step 2.
- To change the Auto Accompaniment rhythm part back to its original sound, press 13 (TONE) again.
NOTE
- Some rhythm part drum sounds cannot be replaced by sampled sounds.
Other Sampling Functions
Changing to a Manual Sampling Start
Normally when the Digital Keyboard is in sampling standby, it will start sampling automatically whenever it detects sound input. You can use the following procedure to enable manual sampling start, which will cause sampling to wait until you press a button to start it. You can use this to insert silence before the sampled sound.
- Press 29 (FUNCTION) and then use the 17 (10-key) [4] (←) and [6] (→) keys to display "SAMPLING" (page E-7).
Flashes
SAMPLING
- Press the 17 (10-key) [9] (ENTER) key.
on
A u t o S t r t
- Press the ⑰ (10-key) [–] key to turn off automatic sampling start.
This enables manual sampling start, which operates as described below.
- Melody sampling (page E-19): Sampling starts when you press 27 and 28 at the same time, which you press in step 2 of the sampling procedure.
- Drum sampling (page E-22): Sampling starts when you release the Digital Keyboard key you press in step 4 of the sampling procedure.
Changing to Manual Sampling Stop
Normally the Digital Keyboard will stop sampling automatically whenever it detects there is no sound input. You can use the following procedure to enable manual sampling stop, which will cause sampling to continue until you press a button to stop it. You can use this to insert silence after the sampled sound.
- Press 29 (FUNCTION) and then use the 17 (10-key) [4] (←) and [6] (→) keys to display "SAMPLING" (page E-7).
- Press the ⑰ (10-key) [9] (ENTER) key.
- Press the 17 (10-key) [6] (→) key.
on A u t o S t o p
- Press the ⑰ (10-key) [−] key to turn off automatic sampling stop.
Sampling continues until you perform one of the operations below, even if nothing is being input from an external device.
- Melody sampling (page E-19) Press 27 and 28 at the same time.
- Drum sampling (page E-22) Press 27 and 28 at the same time, or press any keyboard key.
Deleting a Sampled Sound
You can use the following procedure to specify a sampled tone number and delete its data.
- Press 29 (FUNCTION) and then use the 17 (10-key) [4] (←) and [6] (→) keys to display "DELETE" (page E-7).
Flashes
DELETE
- Press the 17 (10-key) [9] (ENTER) key.
601
S 1 : O r g n l
Used memory — 150 170 — Remaining memory capacity (Unit: Kbytes)
-
Use the ⑰ (10-key) [−] and [+] keys to select the tone number of the data you want to delete.
-
Press the 17 (10-key) [9] (ENTER) key. This displays a delete confirmation message.
Sure?
- Press the ⑰ (10-key) [+] (YES) key to delete the data, or [-] (NO) or [7] (EXIT) to cancel the delete operation.
- After the delete procedure is complete, "Complete" will appear on the display followed by the screen in step 1 of the above procedure.
IMPORTANT!
- For information about deleting individual drum sounds in a drum sampling set, see "Editing Sampled Drum Set Sounds" on page E-23.
Protecting Against Accidental Deletion of Sampled Sounds
You can use the following procedure to protect each sampled sound against accidental deletion.
- Press ⑬ (TONE) and then use ⑰ (10-key) to enter the tone number of the sampled tone you want to protect.
- Press 29 (FUNCTION) and then use the 17 (10-key) [4] (←) and [6] (→) keys to display "SAMPLING" (page E-7).
- Press the ⑰ (10-key) [9] (ENTER) key.
- Use the ⑰ (10-key) [4] (◀) and [6] (▶) keys to display "Protect".
Protect
- Press the ⑰ (10-key) [+] key to turn on protection.
Once protected a tone cannot be deleted. A protected tone is indicated as shown below.

■Saving Sample Data on an External Device
• Memory card (page E-59)
- Computer (page E-68)
Playing Built-in Songs
With this Digital Keyboard, built-in tune data is referred to as "songs". You can listen to the built-in songs for your own enjoyment, or you can play along with them for practice.
NOTE
- In addition to simple listening enjoyment, the built-in songs can be used with the lesson system (page E-31) for practice.
- You can increase the number of tunes using your memory cards (page E-59) or computer (page E-65).
Playing the Demo Songs
Use the following procedure to play back built-in songs.
1. Press ⑩ and ⑪ at the same time.
This will start playback of the demo songs.
• See page E-75 for information about song numbers and the song sequence.
• Demo playback always starts from song number 151.

2. To change to another song while demo playback is in progress, use 17 (10-key) [-] and [+] keys to enter the song number you want (page E-7).
This will cause demo playback to jump to the song whose number you entered.
- You cannot use 17 (10-key) number buttons to select a song.
3. To stop demo playback, press 10.
Demo playback continues until you stop it by pressing 10.
Playing Back a Particular Song
Use the procedure below to play back one of the built-in songs. You can play along on the keyboard with song playback.
Start/Stop
1. Press 15 (SONG BANK).
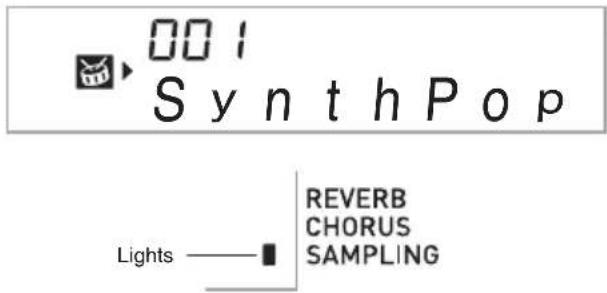
Tune nameSong numberLights

2. Use 17 (10-key) to enter the number of the song you want.
• See page E-75 for a complete list of available songs.
- Use the number buttons to enter the song number. Specify three digits for the song number.
Example: To select 001, enter 0 → 0 → 1.
3. Press 10.
This starts playback of the song.

4. Press 10 again to stop playback.
Song playback will continue (repeat) until you press 10 to stop it. You can cancel song repeat by pressing 6.

Pause, Skip Forward, Skip Back
Use the operations in this section to perform pause, skip forward, and skip back operations.
Pause
1. Press ⑨.
This pauses song playback.
2. Press ⑨ again to resume playback from the point where you paused it.
Skip Forward
1. Press ⑧.
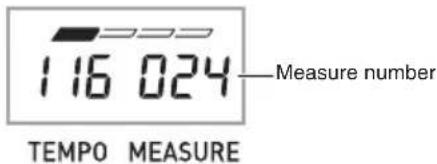
This skips song playback forward to the next measure. Each press of ⑧ skips ahead one measure. Holding down ⑧ skips forward at high speed until you release it. - Pressing ⑧ while song playback is stopped performs lesson function phrase skip forward (page E-32).
Skip Back
1. Press ⑦.
This skips song playback back to the previous measure. Each press of ⑦ skips back one measure. Holding down ⑦ skips back at high speed until you release it. - Pressing ⑦ while song playback is stopped performs lesson function phrase skip back (page E-32).
Repeating Playback of Specific Measures
You can use the procedure in this section to repeat particular measures for practice playing along until you master it. You can specify the start measure and the end measure of the section you want to play and practice.

1. Press ⑥ to temporarily turn off song repeat.

2. When song playback reaches the measure you want to specify as the start measure, press ⑥.
This specifies the measure as the start measure.

3. When playback reaches the measure you want to select as the end measure, press ⑥ again.
This specifies the measure as the end measure and starts repeat playback of the measures in the specified range.
- During repeat play you can use ⑨ to pause playback, ⑧ to skip forward, or ⑦ to skip back.

4. Pressing ⑥ again returns to normal playback.
Changing the song number clears the start measure and end measure of the repeat operation.
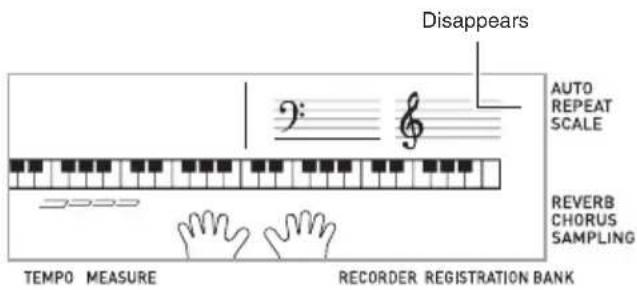
Changing Playback Speed (Tempo)
You can use the following procedure to change the speed (tempo) in order to slow down playback to practice difficult passages, etc.
1. Press 12.
Use V (slower) and A (faster) to change the tempo setting. Holding down either button changes the setting at high speed.
- Pressing and at the same time will return the current song to its original default tempo.
- Pressing 12 causes the tempo value to flash on the display. While the tempo value is flashing, you can use 17 (10-key) to change it. The tempo value will stop flashing if you do not perform any operation for a short while.
- Changing the song number will return the song to its original default tempo.
Adjusting the Song Volume
Use the following procedure to adjust the balance between the volume of what you play on the keyboard and song playback volume.
- Press 29 (FUNCTION) and then use the 17 (10-key) [4] (←) and [6] (→) keys to display "Song Vol" (page E-7).
Song Vol
- Use the ⑰ (10-key) [-] and [+] keys to adjust the song volume.
Playing with the Tone as Song Playback
The procedure below lets you select the same keyboard tone as the one being used in the song and play along with your favorite tunes.
- After selecting a song, hold down 15 (SONG BANK) for about two seconds until the displayed tone name changes to the tone name of the song.
- If your currently selected tone is the same as the song tone, the display contents will not change.
- Play along with song playback.
NOTE
- If you select a song that uses different tones for left and right hand play, the right hand part tone is assigned to the keyboard.
Turning Off the Part of One Hand for Practice (Part Select)
You can turn off the right hand part or the left hand part of a song during playback and practice playing along with the remaining part.
- Press ⑪ to select the part you want to turn off.
Each press of ⑪ cycles through the settings shown below.

flowchart
graph TD
    A["Right hand part off"] --> B["Left hand part off"]
    B --> C["Both hand parts off"]
    C --> D["Both hand parts on"]
- Press ⑪.
This starts playback in accordance with the setting you selected in step 1.
NOTE
- During playback with one part turned off, only the notes of the part that is turned off are shown on the display.
Increasing the Selection of Songs
You can load song data from an external device and increase the selection of songs available on the keyboard. See the following pages for more information.
• Memory card (page E-59)
• Computer (page E-68)
NOTE
- For information about how to delete song data loaded from an external device, see page E-58.

Using Built-in Songs to Master Keyboard Play

To master a song, it is best to break it up into shorter parts (phrases), master the phrases, and then put everything together. Your Digital Keyboard comes with a Step Up Lesson feature that helps you to do just that.
Phrases
The built-in songs are pre-divided into phrases to help you master keyboard play.

Step Up Lesson Flow
Step Up Lesson takes you through practice of the right hand part, left hand part, and both hand parts for each phrase of a song. Master all of the phrases and you master the song.
Phrase 1
• Right Hand Lesson 1, 2, 3
• Left Hand Lesson 1, 2, 3
- Both Hand Lesson 1, 2, 3

Repeat the above to practice phrase 2, 3, 4, and so on, until you reach the final phrase of the song.

After mastering all of the phrases, practice the entire song.

Now you have mastered the entire song!


natural_image
Illustration of a smiling girl playing piano with musical notes (no text or symbols)Messages that Appear during Lessons
The following are the messages that appear on the display during Step Lessons.
| Message Description | |
| Appears when you select a phrase, when a lesson starts, etc.Note that certain phrases will cause “” to appear instead of “”. | |
| Appears when the lesson starts with an intro or fill-in phrase that is not included in the phrases to be practiced. Play toll advance automatically to the next phrase after the un-included phrase plays, so wait until then to start playing on the keyboard. | |
| NextPhrs | Appears when advancing automatically to the next phrase. This message appears following a phrase for which “” (see above) is displayed, and during an Auto Step Up Lesson (page E-36). |
| Listen Watch Remember | Appears at the start of Auto Step Up lesson 1, 2, or 3 (page E-36). |
| From top This | Message appears during Auto Step Up Lesson (page E-36) immediately before practice from Phrase 1 up until the phrase currently being practiced. |
| Complete | Appears at the end of Auto Step Up Lesson (page E-36). |
Selecting the Song, Phrase, and Part You Want to Practice
First, select the song, phrase, and part you want to practice.
1. Select the song you want to practice (page E-28).
This will select the first phrase of the song.
2. Press 21 (or 8) to move forward one phrase, or 7 to move back one phrase.
- Holding down ⑧ or ⑦ scrolls through phrases at high speed.
- The Digital Keyboard remembers the last phrase you practiced for up to 20 songs. To recall the last practice phrase for the current song (if it is available), hold down 21.

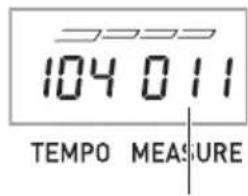
First measure of the selected phrase
3. Press ⑪ to select the part you want to practice.
Each press of 11 cycles through the settings shown below.
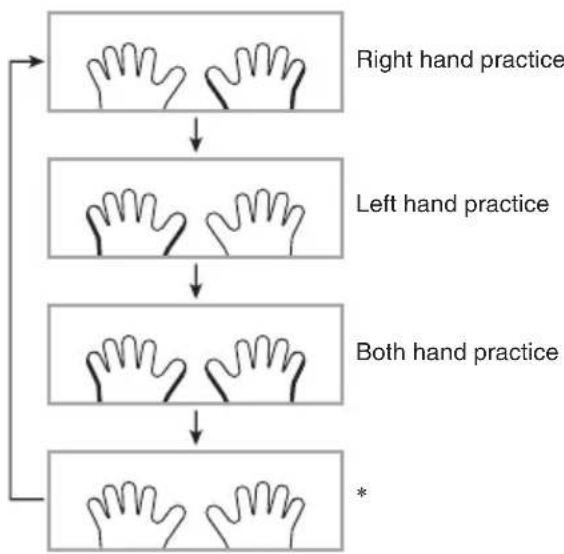
flowchart
graph TD
    A["Right hand practice"] --> B["Left hand practice"]
    B --> C["Both hand practice"]
    C --> D["*"]
* This indicator (setting) is skipped if you press⑪ while a lesson is in progress.
4. Hold down 15 (SONG BANK) for about two seconds.
The same tone used for song playback will be assigned to the keyboard (page E-30).
Lessons 1, 2, and 3
Now it is time to start the lessons. First, select the song and part you want to practice.
Lesson 1: Listen to the song.
First, listen to the example a few times to familiarize yourself with what it sounds like.
1. Press 18.
This starts example play.
2. To stop Lesson 1, press ⑱ or ⑩.
Lesson 2: Watch how the song is played.
Play the song on the keyboard. During this lesson, the display shows the key you need to press next. Voice fingering guide also uses a simulate voice to announce which finger you should use. Follow the instructions to press the correct keyboard keys and play the notes. Don't worry if you play the wrong note. Song playback will wait until you play the correct note. Take your time and play at your own pace.
1. Press 19.
This starts Lesson 2.
2. Play notes on the keyboard in accordance with the instructions provided on the display and by voice fingering guide.
During this lesson, the display shows the key you need to press next. Voice fingering guide uses a simulate voice to announce which finger you should use.
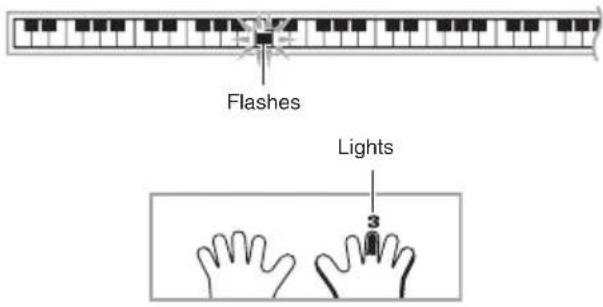
Master playing the correct note with the correct finger as instructed by the guidance. Practice playing with the correct timing.

Song playback will wait for you to play the correct note.
- Keyboard key goes from flashing to lit.
- Note guide sounds the correct note to be played.
• Voice Fingering Guide tells you what finger to use.

Pressing the correct keyboard key causes song playback to resume and the key for the next note flashes.
3. To stop Lesson 2, press 19 or 10.
- If you complete Lesson 2 play to the end, a score that rates your play appears on the screen.
Bravo! You pass! Advance to the next lesson.
Again! Go back and try again.
Lesson 3: Remember what you learned as you play.
Though song playback stands by waiting for you to press the correct keys as in Lesson 2, the Digital Keyboard does not provide any guidance about what note you need to play next. Remember everything you have learned up to Lesson 2 as you play.
1. Press 20.
This starts Lesson 3.
2. Play the song along with the song playback.
Press the keyboard keys you learned in Lesson 2.

Song playback will wait for you to play the correct note.
- Note guide sounds the correct note to be played.

If you are still unable to press the correct keyboard key, the Digital Keyboard will display keyboard guidance and voice fingering guide will tell you what finger to use, just as in Lesson 2.

Pressing the correct key will cause song playback to resume.
3. To stop Lesson 3, press 20 or 10.
- If you complete Lesson 3 play to the end, a score that rates your play appears on the screen the same as with Lesson 2.
Playing a Particular Song All the Way Through
After you successfully complete all of the phrases in Lessons 1, 2, and 3, it is time to try playing the entire song from beginning to end.
1. Use 11 to turn off both hand parts and then press 10.
Try playing with both hands and find out how the Digital Keyboard evaluates your effort.
Lesson Settings
Playing without Phrase Repeat
You can turn off phrase repeat for Lessons 1, 2, and 3.
1. Press 6.
This disables phrase repeat play.

Turning Off Voice Fingering Guide
Use the following procedure to turn off voice fingering guide, which tells you which finger to use to play each note in Lesson 2 and Lesson 3.
1. Press 29 (FUNCTION) and then use the 17 (10-key) [4] (←) and [6] (→) keys to display "LESSON" (page E-7).
Flashes
LESSON
2. Press 17 (10-key) [9] (ENTER) key.
Speak
3. Press the 17 (10-key) [–] key to select the OFF setting.
Turning Off Note Guide
Use the following procedure to turn off note guide, which sounds the note to be played next in Lesson 2 and Lesson 3.
- Press 29 (FUNCTION) and then use the 17 (10-key) [4] (←) and [6] (→) keys to display "LESSON" (page E-7).
- Press ⑰ (10-key) [9] (ENTER) key.
- Use the ⑰ (10-key) [4] (←) and [6] (→) keys to display "NoteGuid".
NoteGuid
- Press the 17 (10-key) [–] key to select the OFF setting.
Turning Off Performance Evaluation
Use the following procedure to turn off performance evaluation, which evaluates your performance and displays a score in Lesson 2 and Lesson 3.
- Press 29 (FUNCTION) and then use the 17 (10-key) [4] (←) and [6] (→) keys to display "LESSON" (page E-7).
- Press ⑰ (10-key) [9] (ENTER) key.
- Use the ⑰ (10-key) [4] (←) and [6] (→) keys to display "Scoring".
Scoring
- Press the 17 (10-key) [-] key to select the OFF setting.
Changing the Phrase Length
You can use the following procedure to change the length of lesson phrases, or to configure the lesson feature so the song is played all the way through, without being divided into phrases.
- Press 29 (FUNCTION) and then use the 17 (10-key) [4] (←) and [6] (→) keys to display "LESSON" (page E-7).
- Press 17 (10-key) [9] (ENTER) key.
- Use the 17 (10-key) [4] (←) and [6] (→) keys to display "PhraseLn".
PhraseLn
- Use the ⑰ (10-key) [−] and [+] keys to select the phrase length you want.
| Off (oFF) The phrase length is from the beginning to the end of the song. |
| Preset (PrE) Phrase lengths are as specified in the song. |
The following options are available for songs loaded from external sources only.
| Short (Ln1) Length of one phrase is one measure. |
| Middle (Ln2) Length of one phrase is two measures. |
| Long (Ln3) Length of one phrase is four measures. |
Using Auto Step Up Lesson
With Auto Step Up Lesson, the Digital Keyboard advances through each lesson automatically.
- Select the song and part you want to practice (page E-28).
- Press 22.
Listen to the first phrase in Lesson 1.
- In Lesson 1, the sample phrase is played only once before advancing to Lesson 2.
-
Auto Step Up Lesson stops automatically after you are able to get through all of the lessons successfully.
-
In Lesson 2 and Lesson 3, the Digital Keyboard advances to the next lesson if you are able to achieve the "Bravo!" evaluation result.
• To cancel a lesson, press 22 or 10.
NOTE
- You can change the step and phrase during Auto Step Up Lesson using 7, 8, and 18 to 21.
- Starting Auto Step Up Lesson automatically turns on phrase repeat (page E-34) and play evaluation (page E-35). These features cannot be turned off during lessons.
■Auto Step Up Lesson Procedure

flowchart
graph TD
    A["Phrase 1\nLesson 1\n↓\nLesson 2\n↓\nLesson 3"] --> B["Phrase 2\nLesson 1\n↓\nLesson 2\n↓\nLesson 3\n↓\nPhrase 1, 2\n• Lesson 3*"]
    B --> C["Phrase 3\nLesson 1\n↓\nLesson 2\n↓\nLesson 3\n↓\nPhrase 1, 2, 3\n• Lesson 3*"]
    C --> D["Next phrase practice using the same procedure"]
    D --> E["Final phrase\nLesson 1\n↓\nLesson 2\n↓\nLesson 3\n↓\nFrom Phrase 1 to the final phrase\n• Lesson 3*"]
    E --> F["Lesson complete"]
* Auto Step Up Lesson advances to the next phrase, regardless of whether the "Bravo!" result is attained.

Music Challenge is a game that measures your reaction speed as you press keys in response to on-screen keyboard indicators and fingering guide indications.
- Press 15 (SONG BANK).
- Press 23.
This causes a key on the on-screen keyboard to start to flash, and starts the Music Challenge song.

- After the on-screen keyboard indicator changes from flashing to lit, press the indicated key with the indicated finger as quickly as possible.
This causes the on-screen keyboard key to go out to let you know that you cleared the first note. The next on-screen keyboard key starts to flash, so get ready to press the next key.
- The time it takes you to press the keyboard key after the on-screen key lights appears on the display (Unit: 0.1 sec). The shorter the time, the higher your score.
- Pressing a keyboard key before the on-screen key goes from flashing to lit, will not advance to the next note.

-
The game ends when you advance successfully through 20 notes.
-
Your playing time appears on the display. After a short while, the playing time display changes to a score. To clear the score from the display, press 13 (TONE), 14 (RHYTHM), or 15 (SONG BANK).
- You can cancel a game at any time by pressing 23 or 10.

flowchart
graph TD
    A["Time 19.2"] --> B["Score 80"]
    C["Playing time"] --> A
    D["Score"] --> B
NOTE
- Notes and fingering guide fingers are indicated randomly.
• The tempo of the game songs cannot be changed. - All buttons except 1, 10, and 23 are disabled while a game is in progress.

natural_image
Illustration of a family playing piano with musical notes (no text or symbols)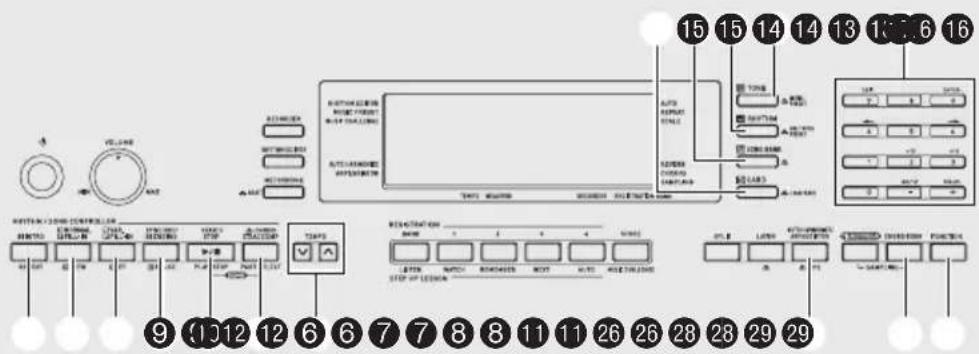
With Auto Accompaniment, simply select an accompaniment pattern. Each time you play a chord with your left hand the appropriate accompaniment will play automatically. It's like having a personal backup group along with you wherever you go.
NOTE
• Auto Accompaniments are made up of the following three parts.
(1) Rhythm
(2) Bass
(3) Harmony
You can have only the rhythm part play, or you can have all three parts play at the same time.
Playing the Rhythm Part Only
The rhythm part is the foundation each Auto Accompaniment. Your Digital Keyboard comes with a variety of built-in rhythms, including 8-beat and waltz. Use the following procedure to play the basic rhythm part.
Starting and Stopping the Rhythm Part Only
1. Press 14 (RHYTHM).
Rhythm number Rhythm pattern name

2. Use 17 (10-key) to select the rhythm number you want.
- See the separate "Appendix" for information about individual rhythms.
- Use the number buttons to enter the rhythm number. Specify three digits for the rhythm number. Example: To select 001, enter 0 0 1 .
3. Press ⑩ or ⑦.
This starts the rhythm.
This pattern changes with each beat.

TEMPO MEASURE
- Play along with the rhythm.
- To stop the rhythm, press 10 again.
Playing All Parts
Auto Accompaniment with Chords
Playing a chord with your left hand automatically adds bass and harmony accompaniment parts to the currently selected rhythm. It is just like having your own personal back up group on call.
- Start play of the Auto Accompaniment rhythm part.
- Press ⑪.
This enables chord input on the accompaniment keyboard.
Accompaniment keyboard

- Use the accompaniment keyboard to play chords.
This will cause bass and harmony Auto Accompaniment parts to be added to the rhythm part.

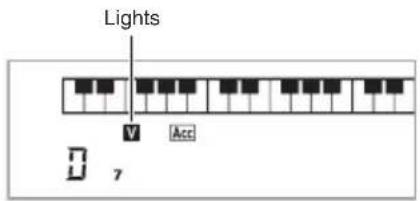
Example: Pressing D-F ^# -A-C on the accompaniment keyboard ↓ Accompaniment for the D-F ^# -A-C chord (D7) sounds.

-
Play other chords with left hand as you play the melody with your right hand.
-
Pressing 11 again returns to rhythm only accompaniment.
NOTE
- For information about starting Auto Accompaniment as soon as a chord is played, see "Using Synchro Start" on page E-42.
- You can use the split point to change the size of the accompaniment keyboard range (page E-16).
Selecting a Chord Input Mode
You can select from among the following five chord input modes.
-
FINGERED 1
• FINGERED 2
• FINGERED 3
• CASIO CHORD
• FULL RANGE CHORD -
Hold down ⑪ until the chord input mode selection screen appears on the display.
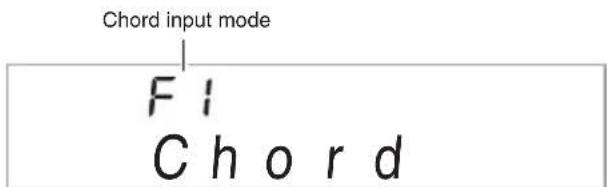
- Use the ⑰ (10-key) [−] and [+] keys to select the chord input mode you want.
- If you do not perform any operation after the chord input mode selection screen appears, the display will return automatically to the screen that was displayed before you held down 11.
■FINGERED 1, 2, and 3
With these three input modes, you play chords on the accompaniment keyboard using their normal chord fingerings. Some chord forms are abbreviated, and can be fingered with one or two keys.
See page E-76 for information about chords that are supported and how they are fingered on the keyboard.
Accompaniment keyboard

natural_image
Pure diagram of a piano keyboard without any text, numbers, or symbols●FINGERED 1
Play the component notes of the chord on the keyboard.
●FINGERED 2
Unlike FINGERED 1, 6th input is not possible. m7 or m7 ^5 is input.

●FINGERED 3
Unlike FINGERED 1, allows input of fraction chords with the lowest keyboard note as the bass note.
■CASIO CHORD
With CASIO CHORD, you can use simplified fingerings to play the four types of chords described below.
Accompaniment keyboard

natural_image
Pure diagram of piano keys without any text, numbers, or symbolsCASIO CHORD Fingering
| Chord Type Example | |
| Major ChordsLetters above the accompaniment keyboard indicate the chord assigned to each key. Pressing a single accompaniment area key in the CASIO CHORD mode will play the major chord whose name is marked above the key. All of the accompaniment area keys that are marked with the same chord name play exactly the same chord. | C (C Major)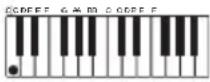 |
| Minor ChordsTo play a minor chord, press the accompaniment area key that corresponds to the major chord, while also pressing one other accompaniment area key to the right. | Cm (C Minor) |
| Seventh ChordsTo play a seventh chord, press the accompaniment area key that corresponds to the major chord, while also pressing two other accompaniment area keys to the right. | C7 (C Seventh) |
| Minor Seventh ChordsTo play a minor seventh chord, press the accompaniment area key that corresponds to the major chord, while also pressing three other accompaniment area keys to the right. | Cm7(C Minor Seventh) |

NOTE
- When playing a minor, seventh, or minor seventh chord, it makes no different whether the additional keys you press are black or white.
FULL RANGE CHORD
With this mode, you can use the full range of the keyboard to play chords and the melody.
See page E-76 for information about chords that are supported.

Accompaniment keyboard / Melody keyboard

natural_image
Pure horizontal bar with black and white piano keys, no text or symbols presentUsing Auto Accompaniment Effectively
Auto Accompaniment Pattern Variations
Use the following procedures to play intro and ending patterns, to play fill-in patterns, and to play variations of basic Auto Accompaniment patterns.
■Auto Accompaniment Variation
Each Auto Accompaniment pattern has a basic "normal pattern" as well as a "variation pattern".
1. Press ⑧.
This starts the variation pattern.
2. Pressing ⑦ returns to normal pattern.

■Auto Accompaniment Intro
Use the following procedure to play an intro of a few measures.
1. Press 6.
This starts the intro pattern. Normal pattern play will start when the intro pattern is finished.
- If you press ⑧ while an intro pattern is being played, the variation pattern will start when the intro pattern is finished.

■Auto Accompaniment Fill-in
Use the procedure below to play a fill-in pattern during a performance.
- A "fill-in" is a short phrase played where you want to change the mood of a piece. A fill-in pattern can be used to create a link between two melodies or an accent.
- Normal and variation patterns have their own unique fill-in patterns.
●Normal Pattern Fill-in
1. While a normal pattern is playing, press ⑦.
This plays the fill-in for the normal pattern.
- Normal pattern play will resume after the fill in pattern is complete.

●Variation Pattern Fill-in
1. While a variation pattern is playing, press 8.
This plays the fill-in for the variation pattern.
- Variation pattern play will resume after the fill in pattern is complete.

■Auto Accompaniment Ending
Use the following procedure to play an ending of a few measures.
1. While an Auto Accompaniment is playing, press ⑨.
This will play the ending pattern and then stop Auto Accompaniment play automatically.

■Using Synchro Start
Use the following procedure to configure the Digital Keyboard to start Auto Accompaniment play as soon as you press a keyboard key.
1. Press ⑨.
This enters accompaniment start standby.

TEMPO MEASURE
2. Play a chord on the keyboard.
This will start full part accompaniment (normal).
Any of the following operations can be performed while in synchro standby to start a non-normal pattern.
• To start with intro pattern, press 6.
• To start with variation pattern play, press 8.
Changing Auto Accompaniment Speed (Tempo)
Use the following procedure to change Auto Accompaniment speed to a level that suits you.
1. Press 12.
Use V (slower) and A (faster) to change the tempo setting. Holding down either button changes the setting at high speed.
- Pressing V and at the same time will initialize the tempo setting in accordance with the currently selected rhythm.
- While the tempo value is flashing, you also can use (10-key) to change it.
- If you do not perform any operation for a few seconds after the tempo setting screen appears, the display will return to the screen displayed before you pressed 12.
Adjusting the Accompaniment Volume
Use the following procedure to adjust the balance between what you are playing on the keyboard and the volume of the Auto Accompaniment.
- Press 29 (FUNCTION) and then use the 17 (10-key) [4] (←) and [6] (→) keys to display "AcompVol" (page E-7).
A c o m p V o l
- Use the ⑰ (10-key) [−] and [+] keys to adjust the accompaniment volume.
Using One-Touch Preset
With One-Touch Preset, the Digital Keyboard automatically configures optimal tone, tempo, and other settings in accordance with the rhythm pattern you select.
- Hold down ① (RHYTHM) until the current tone screen appears on the display.
This will automatically apply the One-Touch Preset settings in accordance with the rhythm pattern that is currently selected.
- Play a chord on the keyboard.
This will start accompaniment automatically.
Using Auto Harmonize
Auto Harmonize automatically adds harmony to notes you play with your right hand, which adds rich depth to the melody of your performances. You can select from among 12 types of Auto Harmonize to suit the type of music you are playing.

NOTE
- Auto Harmonize is controlled using the same button 26 as the Arpeggiator (page E-57). Because of this, these two functions cannot be used at the same time.
1. Press ⑪ to enable Auto Accompaniment with chords (ACCOMP indicator lit) (page E-39).
- Auto Harmonize cannot be used while FULL RANGE CHORD is selected as the chord input mode. Select another mode if you want to use Auto Harmonize.
2. Hold down 26 until the Auto Harmonize or Arpeggiator type number and type name appear on the display.
- If you do not perform any operation for a few seconds, the display will return to previous screen automatically.
Type number Type name
001
D u e t 1
3. Use the ⑰ (10-key) [-] and [+] keys to select the Auto Harmonize type you want.
- 013 through 102 are Arpeggiator types (page E-57). Do not select them when using the Auto Harmonize.
002
D u e t 2
| Type number | Type Name Description |
| 001 Duet 1 Adds close | (separated by 2 to 4 degrees) 1-note harmony below the melody note. |
| 002 Duet 2 Adds open | (separated by more than 4 to 6 degrees) 1-note harmony below the melody note. |
| 003 Country Adds country style harmony. | |
| 004 Octave Adds the note from the next lower octave. | |
| 005 5th Adds the fifth degree note. | |
| 006 3-Way Open Adds | 2-note open harmony, for a total of three notes. |
| 007 3-Way Close Adds | 2-note close harmony, for a total of three notes. |
| 008 Strings Adds harmony that is optimal for strings. | |
| 009 4-Way Open Adds | 3-note open harmony, for a total of four notes. |
| 010 4-Way Close Adds | 3-note close harmony, for a total of four notes. |
| 011 Block Adds block chord notes. | |
| 012 Big Band Adds big | band style harmony. |
4. Press 26 to turn on Auto Harmonize.
If you play chords with your left hand and the melody with your right hand, harmony notes will be added to the melody.
- Press 26 again to turn off Auto Harmonize.
001
St. Gr P no
AUTO HARMONIZE ARPEGGIATOR

Lit when on
Looking Up the Notes of Chords (Chord Book)
You can use the Chord Book to look up chords that you do not know how to play.
1. Press 28.
C h o r d B k
2. On the chord keyboard, press the keyboard key that corresponds to the root note of the chord you want to look up.
Chord keyboard

Example: To look up C

3. Use the 17 (10-key) [-] and [+] keys to select the type of chord you want.
Selecting a chord type causes the chord to sound, and shows the chord name and its notes on the display.
Example: Selecting M (Major)

Chord type Chord notes
- You can select any one of the following chord types.
M(Major), m(minor), dim, aug, sus4, sus2, 7th, m7, M7, m7 ^b5 , 7 ^b , 7sus4, add9, madd9, mM7, dim7, 69, 6th, m6
• To display inverted forms of the chord, use 17 (10-key) keys [0] through [4] as shown below.
| To display this inverted form: Press this key: | |
| Normal form 0 | |
| First inversion 1 | |
| Second inversion 2 | |
| Third inversion 3 | |
| Fourth inversion 4 | |
4. After you are finished looking up what you want, press 28 to exit the Chord Book.
- You can also exit the chord book by pressing 13 (TONE), 14 (RHYTHM), 15 (SONG BANK), or 16.

You can use the procedure in this section to edit the Digital Keyboard's built-in Auto Accompaniment rhythm patterns and create your own "user rhythms".
- You can store up to 10 user rhythms in Digital Keyboard memory, using rhythm numbers 181 through 190.
■ Editable Accompaniment Patterns and Instrument Parts
Any of the following parts that make up each rhythm that is assigned a rhythm number can be edited.
Accompaniment patterns (intro, fill-in, etc.): 6 types Instrument parts (drum, bass, etc.): 8 types
| Instrument Parts | Accompaniment Pattern | ||||||
| INTRO | NORMAL | NORMALFILL-IN | VARIATION | VARIATIONFILL-IN | ENDING | ||
| IN | NF V | VE | |||||
| 1 | Drum | I-1 | N-1 | NF-1 | V-1 | VF-1 | E-1 |
| 2 | Percussion | I-2 | N-2 | NF-2 | V-2 | VF-2 | E-2 |
| 3 | Bass | I-3 | N-3 | NF-3 | V-3 | VF-3 | E-3 |
| 4 | Chord 1 | I-4 | N-4 | NF-4 | V-4 | VF-4 | E-4 |
| 5 | Chord 2 | I-5 | N-5 | NF-5 | V-5 | VF-5 | E-5 |
| 6 | Chord 3 | I-6 | N-6 | NF-6 | V-6 | VF-6 | E-6 |
| 7 | Chord 4 | I-7 | N-7 | NF-7 | V-7 | VF-7 | E-7 |
| 8 | Chord 5 | I-8 | N-8 | NF-8 | V-8 | VF-8 | E-8 |
■ Editable Contents
- Rhythm number
- Part on/off
- Tone number
• Volume level
• Left-right speaker balance (panning) - Reverb depth (reverb send)
• Chorus depth (chorus send)
To edit and save an Auto Accompaniment
- Select the number of the rhythm you want to edit.
- Press ④.

If the "Err Mem Full" message appears on the display, see page E-74 for information about what you should do.

Editing Auto Accompaniment Patterns
3. Press a button from ⑥ to ⑨ to select the Accompaniment Pattern you want to edit.
The name of the pattern will appear on the display.

8 Variation selected
Pattern selected by each button
6:Intro
⑦ : Normal, Normal Fill-in
(Each press toggles the selection.)
8: Variation, Variation Fill-in (Each press toggles the selection.)
⑨ : Ending
4. Press ⑪ to select the instrument part you want to edit.
The part number of the part you select will flash on the display.

5. Press 14 (RHYTHM).
This will display the rhythm name.
6. Use the ⑰ (10-key) [-] and [+] keys to select the rhythm number you want to assign to the instrument part you are editing.
A different rhythm number is assigned for each instrument part.
- You can play the data of the currently selected rhythm number by pressing 10.
- All of the eight instrument parts of an intro (I-1 to 8) must have the same rhythm number. If you assign rhythm 003 to I-1, for example, 003 also will be assigned automatically to parts I-2 through I-8. If you then assign rhythm 004 to part I-2, for example, I-1 and all of the other parts also will change to 004. All of the eight parts of an ending (E-1 to E-8) also must have the same rhythm number.
7. To edit the other contents, press 29 (FUNCTION) to display the screen for the setting you want.
• Each press of 29 (FUNCTION) will cycle through the settings shown below, from 1 through 6.
- Use the 17 (10-key) [-] and [+] keys to change the currently selected setting.
- You can play the current settings of the editable part by pressing 10.
| Setting Type Display Settings | ||
| 1 | Part on/off Part On/Off | |
| 2 | Tone number* Tone 001 - 583 | |
| 3 | Volume level Vol. 000 - 127 | |
| 4 | Left-right speaker balance (panning) | Pan -64 - 0 - +63 |
| 5 | Reverb depth (reverb send) | Rvb 000 - 127 |
| 6 | Chorus depth (chorus send) | Cho. 000 - 127 |
* Instrument parts 1 and 2 can be assigned drum set tones only.
8. Repeat steps 4 through 7 as many times as necessary to edit the parts you want for the pattern you selected in step 3.
- If you change the rhythm number in step 6, the editable contents (1 through 6 in the above table) you last configured in step 7 of this procedure will be overwritten with the settings of the newly selected rhythm.
9. Repeat steps 3 through 8 as many times as necessary to edit the accompaniment patterns you want (intro through ending).
10. Press 4.
This will display a message asking if you want to save the user rhythm.
11-1. Press the ⑰ (10-key) [–] key to exit without saving.
This displays the delete confirmation message. Press the 17 (10-key) [+] key to exit the editing procedure.
11-2. Press the ⑰ (10-key) [+] key to save the data.
181 Synth Pop
- Use 17 (10-key) [-] and [+] keys to select the rhythm number you want to save.
- You can edit the user rhythm name. Use the 17 (10-key) [4] (◀) and [6] (▶) keys to move the cursor to the character you want to change, and then use [+] and [−] to change the character.
| ! | " | # | $ | % | & | ' | ( | ) | |
| * | + | , | - | . | / | 0 | 1 | 2 | 3 |
| 4 | 5 | 6 | 7 | 8 | 9 | : | ; | < | = |
| > | ? | @ | A | B | C | D | E | F | G |
| H | I | J | K | L | M | N | O | P | Q |
| R | S | T | U | V | W | X | Y | Z | [ |
| ¥ | ] | ^ | _ | ` | a | b | c | d | e |
| f | g | h | i | j | k | l | m | n | o |
| p | q | r | s | t | u | v | w | x | y |
| z | { | | | } | ||||||
12. Press ⑰ (10-key) [9] (ENTER) key.
This will display a message asking if you want to save the user rhythm.
- Press the 17 (10-key) [+] key to save the data.
- Press the 17 (10-key) [-] key to return to the screen that was displayed before you pressed [9] (ENTER) key.
![CASIO CTK-5200 - Press ⑰ (10-key) [9] (ENTER) key. - 1](/content/2026/06/1254294/images/cea1e0654d1990978df7675977bcab96c95b8ff68e25778e509eb4b5689981d2.jpg)
IMPORTANT!
- If you select a user rhythm number that already contains data, the existing data will be replaced by the new data.
NOTE
- You cannot change the tone assigned to the keyboard while an Auto Accompaniment editing (rhythm edit) operation is in progress.
■Saving User Rhythm Data on an External Device
• Memory card (page E-59)
• Computer (page E-68)
To delete saved data
The following procedure cannot be performed while an Auto Accompaniment editing (rhythm edit) operation is in progress.
- Press 29 (FUNCTION) and then use the 17 (10-key) [4] (←) and [6] (→) keys to display "DELETE" (page E-7).

Used memory (Unit: Kbytes)

- Press the 17 (10-key) [9] (ENTER) key.
- Press the 17 (10-key) [6] (→) key.

- Use the ⑰ (10-key) [−] and [+] keys to select the user rhythm you want to delete.
- Press the 17 (10-key) [9] (ENTER) key.
This displays a delete confirmation message.
Sure?
- Press the 17 (10-key) [+] (YES) key.
After the delete procedure is complete, "Complete" will appear followed by the screen in step 2 of the above procedure.
- To cancel the delete operation, press [-] (NO) or [7] (EXIT) in place of [+] (YES).
natural_image
Illustration of a family playing piano together (no text or symbols)
Registration memory lets you store Digital Keyboard setups (tone, rhythm, etc.) for instant recall whenever you need them. Registration memory simplifies performance of complex pieces that require successive tone and rhythm changes.
You can have up to 32 setups in Registration memory at one time. 18 and 19 to 22 are used for recording.

flowchart
graph TD
    A["REGISTRATION BANK"] --> B["18 19 20 21 22"]
    B --> C["Area 1 Area 2 Area 3 Area 4"]
    C --> D["Bank 1 Setup 1-1 Setup 1-2 Setup 1-3 Setup 1-4"]
    C --> E["Bank 2 Setup 2-1 Setup 2-2 Setup 2-3 Setup 2-4"]
    E --> F["..."]
    E --> G["..."]
    E --> H["..."]
    E --> I["..."]
    E --> J["..."]
    E --> K["..."]
    E --> L["..."]
    E --> M["..."]
    E --> N["..."]
    E --> O["..."]
    E --> P["..."]
    E --> Q["..."]
    E --> R["..."]
    E --> S["..."]
    E --> T["..."]
    E --> U["..."]
    E --> V["..."]
    E --> W["..."]
    E --> X["..."]
    E --> Y["..."]
    E --> Z["..."]
• Each press of bank select button 18 cycles through the bank numbers, from 1 to 8.
- Pressing a button from 19 to 22 selects the corresponding area in the currently selected bank.
■Registration Save Example
This example saves the data shown in the table below to the following setups in Bank 1.
- Initial melody setup saved to Setup 1-1.
• Second melody setup saved to Setup 1-2.
• Third melody setup saved to Setup 1-3.
| Setup 1-1 | Setup 1-2 | Setup 1-3 | |
| Tone Number 001 062 001 | |||
| Rhythm Number 118 005 089 | |||
| Tempo 080 140 089 |
■Registration Memory Data
The following is the complete list of data that is saved to a registration memory setup.
- Tone numbers (main, layer, split)
- Rhythm number
- Tempo
- Auto Harmonize
- Transpose
- Split point
- Touch Response
- Octave shift
- Chord fingerings
• Accompaniment volume
• Arpeggiator setting (on, off, type) - Synchro start
- Reverb (on, off, type)
- Chorus (on, off, type)
- Bend Range
- Accomp (on, off)
• Arpeggiator hold (on, off) - Layer (on, off)
- Split (on, off)
- Pedal effect
To save a setup to registration memory
1. Press 14 (RHYTHM).

flowchart
graph TD
    A["Bank number"] --> B["Step 1"]
    B --> C["End"]
- Configure the tone, rhythm, and other settings you can to include in the setup.
- Press 18 to select the bank you want.
Each press of 18 cycles through the bank numbers.
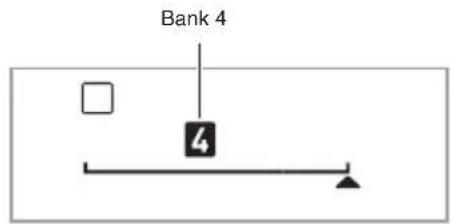
- You also can select a bank by holding down 18 as you use the 17 (10-key) number buttons to enter a bank number.
- While holding down 23, press a button from 19 to 22 to select an area.
This will save the settings you configured in step 2 into the applicable setup.
- If there is anything already stored in the setup, it will be replaced (deleted) by the new setup.
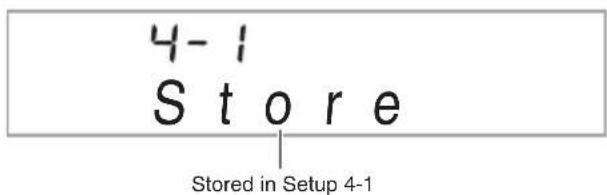
To recall a setup from registration memory
- Press 18 to select the bank that contains the setup you want to recall.

- Use buttons 19 to 22 to select the area whose setup you want to recall.
This will recall the registration memory setup and automatically configure the Digital Keyboard settings accordingly.

NOTE
- Notes currently being sounded by the keyboard may stop if you recall a setup that causes a change in octave shift (page E-18). To keep this from happening, either select a setup that does not cause a change in the octave shift setting, or hold down the pedal (which will cause notes currently being played to be sustained).
■Saving registration Data on an External Device
• Memory card (page E-59)
• Computer (page E-68)
Recording Your Keyboard Play
natural_image
Illustration of a bandaged musical instrument with musicians performing, no text or symbols present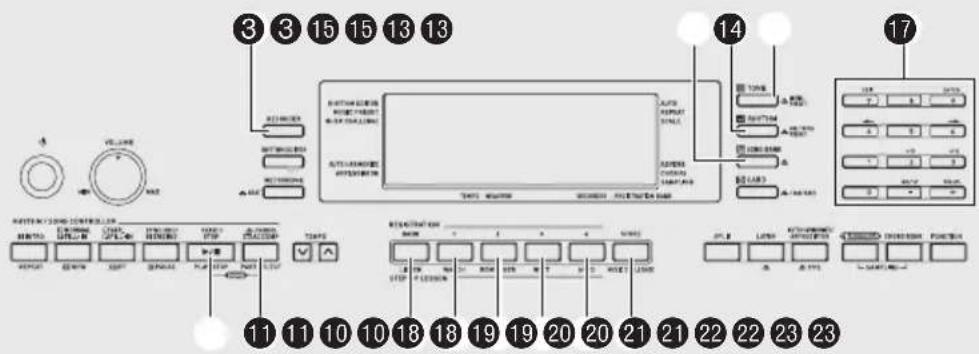
The recorder feature lets you record your keyboard play.
Recording and Playing Back Keyboard Play
Use the following procedure to record everything you play on the keyboard.
- Press 14 (RHYTHM).
- Press ③.
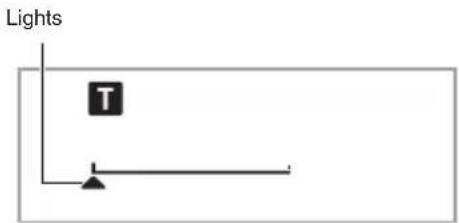
This will enter record standby.
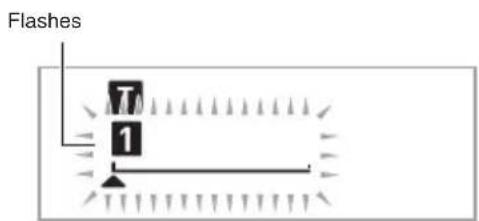
- Configure the tone, rhythm, and other settings you want to use.
- Start playing.
Recording starts as soon as you play something on the keyboard.

- You can use Auto Accompaniment while playing. If you do, Auto Accompaniment also will be recorded.
- To stop recording, press 10.

- To play back what you have recorded, press 10 again.
Each press of 10 starts and stops playback.
8. Press ③ twice to exit the recorder mode.
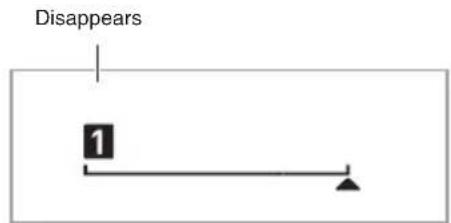
- The flashing on the screen shown in step 3 becomes faster when remaining recorder memory capacity becomes less than 100 notes.
- Total recorder memory capacity is approximately 12,000 notes. Recording will stop automatically when there is no more unused recorder memory remaining.
• Each press of ③ cycles through the settings shown below. You can listen to the recorded data as many times as you like by pressing ⑩ while in playback standby.
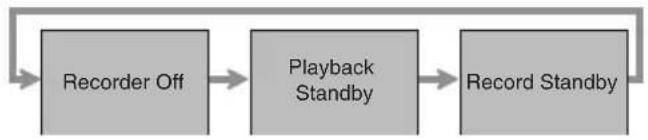
flowchart
graph LR
    A["Recorder Off"] --> B["Playback Standby"]
    B --> C["Record Standby"]
■To delete recorded data
After step 3 of the above procedure, do hold down ③ (without pressing any keyboard key) until the message "Tr.Del?" appears on the display. Press [+] (YES) to delete the data, or [-] (NO) to cancel the delete operation.

IMPORTANT!
- Turning off the Digital Keyboard while recording is in progress will cause any data in recorder memory to be deleted.
- A new recording replaces (deletes) previously recorded contents.
Using Tracks to Record and Mix Parts
You can divide a song according to various types of parts (instrument, left and right hand, etc.), and record each part to a specific track. You can mix up to six tracks (the original track plus five additional tracks) into a final song.
■About tracks
Tracks are numbered from 1 to 6.
- If you do not specify a track number when recording, recording is performed to Track 1 automatically.
In addition to what you play on the keyboard, the following information also is recorded.
- Track 1
Settings:
Tone number, rhythm number, tempo, reverb, chorus, chords, layer/split settings, Auto Harmonize/Arpeggiator setting
Operations:
Pedal, pitch bend wheel, INTRO button, SYNCHRO/ENDING button, NORMAL/FILL-IN button, VARIATION/FILL-IN button
- Tracks 2 through 6
Tone number, pedal operation, pitch bend wheel operation
To record to Tracks 1 through 6
1. Record the first part to Track 1.
To record to Track 1, perform steps 1 through 4 under "Recording and Playing Back Keyboard Play" (page E-50).

This will enter record standby.

3. Press a button from 19 to 23 to select the track number of the next track to which you want to record.
This will enter record standby for the track you selected. Example:Track 2
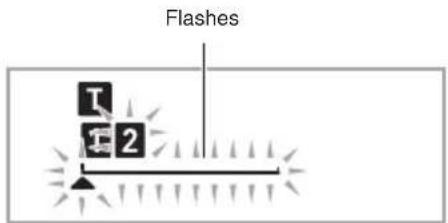
- If you want to use a different tone than the one you used in Track 1, press 13 (TONE) and then use 17 (10-key) to input the tone number.
4. Press 10.
This will start playback of what you recorded up to this point in other tracks and record what you play on the keyboard to the currently selected track. Play the notes you want on the keyboard.
5. To stop recording, press 10.
• To play back what you have recorded, press 10 again. Each press of 10 starts and stops playback.
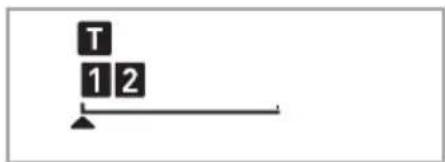
6. Repeat steps 2 through 5 to record the other tracks.
7. After you finish recording all of the tracks, press 10.
- This will start playback of the recorded tracks. Press 10 to stop or restart playback.
- At this time you can turn off playback of specific tracks using buttons 18 to 23. Pressing a key toggles playback of each track on (track number displayed) or off (track number not displayed).
- If you want to re-record a track, press ③. This will return to step 2 of the above procedure. Only the tracks that are turned on (displayed) above will play as you re-record.
Example: Tracks 2 and 3 selected
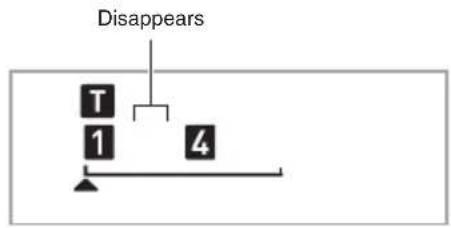
8. Press ③ twice to exit the recorder mode.

■To delete a recorded track
After step 3 of the above procedure, do hold down ③ (without pressing any keyboard key) until the message "Tr.Del?" appears on the display. Press [+] (YES) to delete the track, or [-] (NO) to cancel the delete operation.
Recording Two or More Songs, and Selecting One for Playback
You can record up to five songs (numbered 1 through 5) in memory. After that, you can select a specific song for playback.
-
Press ⑭ (RHYTHM).
-
Press ③.
A song number will appear in the upper left corner of the display for a few seconds. While it is, use 17 (10-key) to specify the number of the song you want to record or play back. The song number will disappear if you do not perform any operation.
Example:Song 2
562
P I ay N o .
- Press ③ to record, or ⑩ to play back.
To stop recording or playback, press 10.
- Press ③ twice to exit the recorder mode.
■To delete recorded data
After step 2 of the above procedure, do hold down ③ (without pressing any keyboard key) until the message "Song Del?" appears on the display. Press [+] (YES) to delete the song, or [-] (NO) to cancel the delete operation.
Recording while Playing Along with a Built-in Song
This section explains how to play along and record along with one of the Digital Keyboard's built-in songs.
●The following operations and settings also are recorded along with your keyboard play.
Tone number, song number, pedal operation, tempo, reverb, chorus, layer/split settings, pitch bend wheel operation
NOTE
- There can be only one recording of keyboard play with a built-in song in recorder memory. Making a new recording replaces (deletes) previously recorded data.
-
Press 15 (SONG BANK).
-
Press ③.
This will enter playback standby.

This will enter record standby.
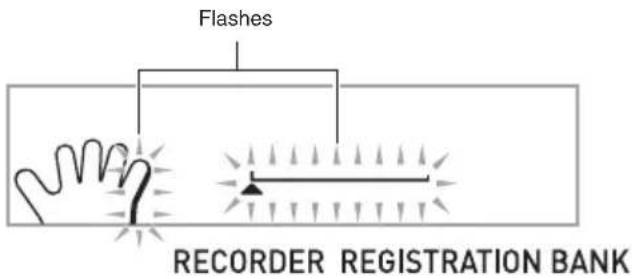
- Use 17 (10-key) to enter the song number you want to assign to the recording.

Recording Your Keyboard Play
5. Press ⑪ to cycle through the parts in the sequence shown below.

flowchart
graph TD
    A["Right-hand Recording"] --> B["Left-hand Recording"]
    B --> C["Both-hand Recording"]
Example: Left-hand part recording

- Configure tone and tempo settings at this time as well.
6. Press 10 to start built-in song playback and recorder recording.
Play along with the playback.
• To stop recording part way through, press 10.
7. Recording will stop automatically when the end of the built-in song is reached.
This will enter playback standby.

This will start playback of what you recorded.
• Each press of 10 starts and stops playback.
9. Press ③ twice to exit the recorder mode.
■To delete recorded data
After step 2 of the above procedure, do hold down ③ until the message "Song Del?" appears on the display. Press [+] (YES) to delete the song.
Saving Recorded Data on an External Device
You can save data you record with the Digital Keyboard onto a memory card or on your computer's hard disk. In the case of a memory card, you can save recorded song data as a standard MIDI file (SMF 0 format).
■To save data to a memory card
See page E-59.
■To save data on your computer's hard disk
See page E-68.
natural_image
Illustration of a family playing piano with musical notes (no text or symbols)


flowchart
graph TD
    A["开始"] --> B{是否需要审批}
    B -->|是| C["提交审批"]
    B -->|否| D["退回修改"]
    C --> E["审批通过"]
    E --> F{审批通过?}
    F -->|是| G["归档"]
    F -->|否| H["退回修改"]
    G --> I["结束"]
    H --> C


Changing the Scale of the Keyboard
You can use the following procedure to select from among 17 preset scales, including the standard Equal Temperament.
| No. | Scale name Display | |
| 00 | Equal Temperament Equal | |
| 01 | Pure Major PureMajr | |
| 02 | Pure Minor PureMinr | |
| 03 | Pythagorean Pythagor | |
| 04 | Kirnberger 3 Kirnbrg3 | |
| 05 | Werckmeister Wercmeis | |
| 06 | Mean-Tone MeanTone | |
| 07 | Rast Rast | |
| 08 | Bayati Bayati | |
| 09 | Hijaz Hijaz | |
| 10 | Saba | Saba |
| 11 | Dashti | Dashti |
| 12 | Chahargah | Chaharga |
| 13 | Segah | Segah |
| 14 | Gurjari Todi | GujrTodi |
| 15 | Chandrakauns | Cndrkuns |
| 16 | Charukeshi | Carukesi |
- Press ⑭ (RHYTHM).
- Press ⑲ (FUNCTION) and then use the ⑰ (10-key) [4] (←) and [6] (→) keys to display "SCALE" (page E-7).
Flashes
SCALE
- Press 17 (10-key) [9] (ENTER) key.
00 E q u a l
Scale Name
- Use the ⑰ (10-key) [−] and [+] keys to select the preset scale you want. After selecting a scale, press the key on the keyboard that you want to use as the root key (C to B).
- After you are finished, press 29 (FUNCTION) to assign the scale to the keyboard.
Using the Current Scale Notes for Auto Accompaniments
You can use the following procedure to reflect the preset scale you selected in Auto Accompaniments.
- Press 29 (FUNCTION) and then use the 17 (10-key) [4] (←) and [6] (→) keys to display "OTHER" (page E-7).

- Press 17 (10-key) [9] (ENTER) key.
- Use the ⑰ (10-key) [4] (←) and [6] (→) keys to display "AcompScl".
A c o m p S c l
- Use the ⑰ (10-key) [+] key to select on.
Using Music Preset
Selecting a Music Preset instantly changes the Digital Keyboard to a preset setup (tone, rhythm, tempo, etc.) for play of songs of various genres/categories. The press of a button sets up the Digital Keyboard so those songs sound exactly the way you thought they should.
- See the separate "Appendix" for a complete list of the 305 Music Presets that are available.
- Hold down ⑬ (TONE) until the indicator shown below appears on the display.

- Use 17 (10-key) to select the preset number you want.
This will change the setup (tone, rhythm, etc.) of the Digital Keyboard.
- At this time the Digital Keyboard will go into Auto Accompaniment synchro start standby (page E-42).
-
Pressing 13 (TONE), 14 (RHYTHM), or 15 (SONG BANK) will return to the screen that was displayed before you held down in step 1, above.
-
Play along on the keyboard with the accompaniment.
Using the Arpeggiator
The Arpeggiator makes it possible to play an arpeggio pattern automatically. There are 90 different arpeggio patterns from which to choose in order to match the music you are playing.
NOTE
- The Arpeggiator is controlled using the same button 26 as Auto Harmonize (page E-43). Because of this, these two functions cannot be used at the same time.
1. Hold down 26 until the Auto Harmonize or Arpeggiator type number and type name appear on the display.
- If you do not perform any operation for a few seconds, the display will return to the previous screen automatically.

2. Use the ⑰ (10-key) [−] and [+] keys to select the Arpeggiator type you want.
- 001 through 012 are Auto Harmonize types (page E-43). Do not select them when using the Arpeggiator.
Octave
1... Uses the actual notes played.
2... Uses the actual notes played plus the same notes one octave.
4... Uses the actual notes played plus the same notes three octaves.

| Type number | Type Name Description |
| 013-030 Up Rising | |
| 031-048 Down Falling | |
| 049-066 U/D A | Repeat pattern alternating between rising and falling (Type A) |
| 067-084 U/D B | Repeat pattern alternating between rising and falling (Type B) |
| 085-102 Random | Random arrangement of notes of the pressed keys |
3. Press 26 to turn on Arpeggiator.
Playing a chord on the keyboard will start arpeggio play.
- Press 26 again to turn off Arpeggiator.
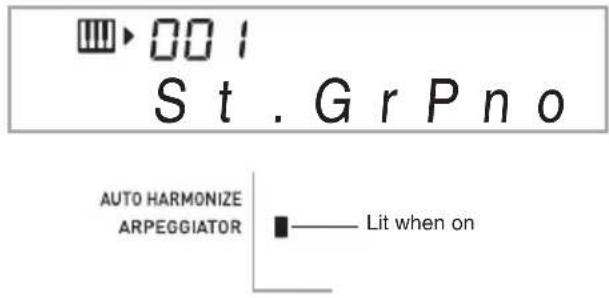
NOTE
- The tempo setting of the Arpeggiator is the same as that set for the metronome (page E-12).
Sustaining an Arpeggio (Arpeggiator Hold)
Use the following procedure when you want an arpeggio pattern to keep playing after you release the keyboard keys.
- Press 29 (FUNCTION) and then use the 17 (10-key) [4] (←) and [6] (→) keys to display "OTHER" (page E-7).
- Press 17 (10-key) [9] (ENTER) key.

- Press the 17 (10-key) [+] key to select the ON setting.
Deleting User Song Data
You can use the following procedure to delete user song data stored as song numbers 153 through 162.
- Press 29 (FUNCTION) and then use the 17 (10-key) [4] (←) and [6] (→) keys to display "DELETE" (page E-7).

- Press the ⑰ (10-key) [9] (ENTER) key.
- Press the ⑰ (10-key) [6] (→) key twice.

- Use the 17 (10-key) [-] and [+] keys to select the user song you want to delete.
- Press the ⑰ (10-key) [9] (ENTER) key. This displays a delete confirmation message.
Sure?
- Press the 17 (10-key) [+] (YES) key.
After the delete procedure is complete, "Complete" will appear followed by the screen in step 2 of the above procedure.
- To cancel the delete operation, press [-] (NO) or [7] (EXIT) in place of [+] (YES).
Deleting All Data in Digital Keyboard Memory
Use the following procedure when you want to delete sampled sounds, user songs and all other data, except for recorded songs, currently in Digital Keyboard memory.

IMPORTANT!
- Performing this procedure also will delete protected sampled sound data (page E-26). It is recommended that you save important data to a memory card (page E-59) or your computer's hard disk (page E-65).
-
This operation does not delete recorded song data.
-
Press 29 (FUNCTION) and then use the 17 (10-key) [4] (←) and [6] (→) keys to display "DELETE" (page E-7).
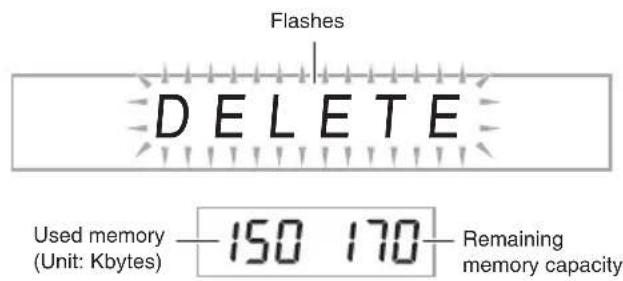
- Press the 17 (10-key) [9] (ENTER) key.
- Use the 17 (10-key) [4] (←) and [6] (→) keys to display "All Data".

- Press the 17 (10-key) [9] (ENTER) key. This displays a delete confirmation message.
Sure?
- Press the 17 (10-key) [+] (YES) key.
After the delete procedure is complete, "Complete" will appear followed by the screen in step 2 of the above procedure.
- To cancel the delete operation, press [-] (NO) or [7] (EXIT) in place of [+] (YES).

natural_image
Illustration of a family playing piano with musical notes (no text or symbols)
You can save Digital Keyboard user area data to a memory card and load data from a memory card to Digital Keyboard memory. You also can play music files (MIDI files) stored on a memory card on the Digital Keyboard.

IMPORTANT!
- Use a memory card that satisfies the conditions below.
Format: SDHC or SD
Capacity: 2GB to 32GB
Use of any memory cards other than those defined above is not supported.
• SDHC Logo is a trademark of SD-3C, LLC.

Supported Data Types
■Data that can be saved to and exported from a memory card
| Data Type Description | File Name Extension | |
| Sampled sound (page E-19) | Sampled sound data | TW7 DW7^*1 |
| User rhythms (page E-45) | Edited Auto Accompaniment data | AC7 |
| User songs (page E-30) | Song data imported from an external device (cannot be saved to a memory card). | CM2 MID^*2 |
| Recorded songs (page E-50) | Recorded song data | SP7 SL7^*3 |
| Registration setups (page E-48) | Tone and rhythm setup settings | RM7 |
| All data Above data | AL7 | |
*1: Sampled drum set sounds
*2: Standard MIDI file (format 0, 1)
*3: Data recorded playing along with built-in song

IMPORTANT!
- Use only memory cards. Operation is not guaranteed when any other type of memory card is used.
Memory Card and Card Slot Precautions

IMPORTANT!
- When using a memory card, make sure you observe all of the precautions in the instructions that come with it.
• Memory cards have a write-protect switch that you can use to protect against accidental deletion of data. -
Avoid using a memory card under the following conditions. Such conditions can corrupt data stored on the memory card.
-
Areas subjected to high temperature, high humidity, and corrosive gas
-
Areas subjected to strong electrostatic charge and digital noise
-
Never touch the contacts of a memory card when loading it or removing it from the Digital Keyboard.
- While data is being stored to or recalled from a memory card, never perform any other Digital Keyboard operation or remove the memory card. Doing so can corrupt the data on the card and damage the card slot.
- Never insert anything besides a memory card into the card slot. Doing so creates the risk of malfunction.
- Electrostatic charge discharging from your fingers or the memory card to the card slot can cause malfunction of the Digital Keyboard. If this happens, turn the Digital Keyboard off and then back on again.
- A memory card can become quite warm after very long use in the memory card slot. This is normal and does not indicate malfunction.
Inserting and Removing a Memory Card
IMPORTANT!
- Note that the memory card must be oriented correctly when you insert it into the memory card slot. Trying to force the memory card into the slot can damage the card and the slot.
- With the top of the memory card facing upwards (so you can see it), carefully insert the card into the memory card slot (39) until stops with a click.

- Press the memory card into the card slot and then release it.
This will cause the card to disengage and eject partially. Pull the card out of the slot.
Formatting a Memory Card
IMPORTANT!
- Before using a memory card, first be sure to format it on the Digital Keyboard.
- Before performing the procedure below, check to make sure that the memory card does not contain any data you might need.
-
The memory card format performed by the Digital Keyboard is a “quick format”. If you want to completely delete all of the data on the card, format it on your computer or using some other device.
-
Insert the memory card you want to format into the memory card slot.
- Make sure that the write-protect switch of the memory card is not in the write-protect position.
- Press 16 and 29 (FUNCTION) at the same time.
Crd Format
- Press the ⑰ (10-key) [9] (ENTER) key.
This will display the format confirmation screen.
Crd Sure?
- Press the ⑰ (10-key) [+] (YES) key.
The message "PIs wait" will appear on the display. Do not perform any operation while this message is displayed. "Complete" appears on the display after formatting is complete.
- To cancel the format operation, press [-] (NO) or [7] (EXIT) in place of [+] (YES).
P l s w a i t ↓
Complete
Saving Digital Keyboard Data to a Memory Card
Use the following procedure to save Digital Keyboard data to a memory card.
1. On the Digital Keyboard, select the data you want to save as described below.
| To save this type of data | Do this |
| Sampled sound Select | ect the tone number of the sampled sound you want to save. |
| User rhythm Select | the rhythm number of the user rhythm you want to save. |
| Recorded song Select | ect the song you want to save and put the Digital Keyboard in playback standby. |
| Registration data | Select one of the Digital Keyboard's default built in tones or rhythms. |
| All data |
-
You cannot save a user song (song data loaded from an external device) to a memory card.
• See page E-59 for information about data types. -
Insert a memory card into the memory card slot.
-
Hold down 16 until the screen shown below appears on the display.
• To cancel data save, press 16 again.
Lod
- Use the 17 (10-key) [4] (←) and [6] (→) keys to display one of the settings shown below.
- You also could use [-] and [+] .
| To save this data Display this screen | |
| Sampled sound “SAv” “SmplTone” | |
| User rhythm “SAv” “UserRhy.” | |
| Recorded song “SAv” “Rec.Song” | |
| Recorded song(SMF 0 format) | “SAv” “SMF 0” |
| Registration data “SAv” “Regist.” | |
| All data “SAv” “All Data” | |
Saving a recording made while playing along with a built-in song in SMF 0 format will save only what was played on the keyboard.
- Press the 17 (10-key) [9] (ENTER) key.
601 USERNAME
Flashes
- Enter the file name of the data you are saving. Use the 17 (10-key) [4] (◀) and [6] (▶) keys to move the cursor to the character you want to change, and then use [+] and [-] to change the character.
-
Pressing [7] (EXIT) will return to the screen that was displayed before you pressed [9] (ENTER).
-
Press the ⑰ (10-key) [9] (ENTER) key.
This will save the data to the memory card.
601 Complete
- If there is a file with the same name already on the memory card, a message will appear asking if you want to overwrite it. Press the 17 (10-key) [+] (YES) key to overwrite, or [-] (NO) or [7] (EXIT) to cancel.
601 Replace?
NOTE
- You can input the following characters in a file name.
| 0 | 1 | 2 | 3 | 4 | 5 | 6 | 7 | 8 | 9 |
| A | B | C | D | E | F | G | H | I | J |
| K | L | M | N | O | P | Q | R | S | T |
| U | V | W | X | Y | Z | $ | & | _ | ' |
| ( ) | - | ^ | { } | @ | ~ | ` | |||
- The Digital Keyboard displays the “\~” character as “→”.
■Memory Card Data (File) Storage Locations
The above procedure stores Digital Keyboard data in a folder named "MUSICDAT" on the memory card.
- The "MUSICDAT" folder is created automatically when you format the memory card on the Digital Keyboard (page E-60).
- If you store a file in any location other than inside the "MUSICDAT" folder, you will not be able to recall, delete, or play the file on the Digital Keyboard. You also will not be able to recall, delete, or play any file you store inside of a subfolder you create inside the "MUSICDAT" folder.
- The message "No File" will appear on the display if you try to perform a recall, delete, or play operation while there is no file inside the "MUSICDAT" folder.
Loading Data from a Memory Card into Digital Keyboard Memory
Use the following procedure to load data from a memory card into Digital Keyboard memory.
IMPORTANT!
- Whenever you copy a file to the memory card that you plan to recall on the Digital Keyboard, be sure to store the file in the memory card's "MUSICDAT" folder.
- On the Digital Keyboard, select the data you want to load as described below.
| To load this type of data | Do this |
| Sampled sound Select the tone number of the sampled sound you want to load. | |
| User rhythm Select the rhythm number of the user rhythm you want to load. | |
| User song Select the song number of the song you want to load. | |
| Recorded song Select the song you want to load and put the Digital Keyboard in playback standby. | |
| Registration data Select one of the Digital Keyboard's default built in tones, songs, rhythms, etc. | |
| All data | |
- Insert the memory card that contains the data into the memory card slot.
- Hold down 16 until the screen shown below appears on the display.
• To cancel data load, press 16 again.

- Use the 17 (10-key) [4] (←) and [6] (→) keys to display one of the settings shown below.
- You also could use [-] and [+] .
| To load this data Display this screen | |
| Sampled sound “Lod” “SmplTone” | |
| User rhythm “Lod” “UserRhy.” | |
| User song “Lod” “User$ong” | |
| Recorded song “Lod” “Rec.Song” | |
| Registration data “Lod” “Regist.” | |
| All data “Lod” “All Data” |
5. Press the 17 (10-key) [9] (ENTER) key.
601
* * * * * * * *
Flashes
- Pressing [7] (EXIT) will return to the screen that was displayed before you pressed [9] (ENTER).
6. Use the 17 (10-key) [-] and [+] keys to select the data (file) you want to load.
7. Press the 17 (10-key) [9] (ENTER) key.
This will load the data into Digital Keyboard memory.
601
Complete
- If there is already data stored in the user area where you are trying to load data, an overwrite confirmation message will appear. Press the 17 (10-key) [+] (YES) key to overwrite, or [-] (NO) or [7] (EXIT) key to cancel.
601
Replace?
Deleting Data from a Memory Card
Use the following procedure to delete data saved on a memory card.
1. On the Digital Keyboard, select the data you want to delete as described below.
| To delete this type of data | Do this |
| Sampled sound Select the tone number of the sampled sound. | |
| User rhythm Select the rhythm number of the user rhythm. | |
| User song Select the song number of the user song. | |
| Recorded song Select the song and put the Digital Keyboard in playback standby. | |
| Registration data | Select one of the Digital Keyboard's default built in tones, songs. |
| All data | |
2. Insert a memory card into the memory card slot.
3. Hold down 16 until the screen shown below appears on the display.
• To cancel data delete, press 16 again.
Lod
4. Use the 17 (10-key) [4] (←) and [6] (→) keys to display one of the settings shown below.
- You also could use [-] and [+] .
| To delete this type of data | Display this screen |
| Sampled sound “dEL” “SmplTone” | |
| User rhythm “dEL” “UserRhy.” | |
| User song “dEL” “UserSong” | |
| Recorded song “dEL” “Rec.Song” | |
| Registration data “dEL” “Regist.” | |
| All data “dEL” “All Data” | |
- Press the 17 (10-key) [9] (ENTER) key.

- Pressing [7] (EXIT) will return to the screen that was displayed before you pressed [9] (ENTER).
-
Use the ⑰ (10-key) [−] and [+] keys to select the number of the data (file) you want to delete.
-
Press the 17 (10-key) [9] (ENTER) key. This will display the delete confirmation screen.
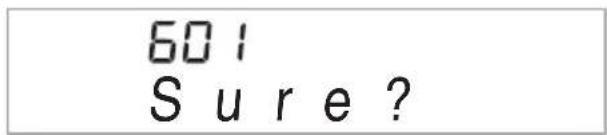
- Press the 17 (10-key) [+] (YES) key.
- To cancel the delete operation, press [-] (NO) or [7] (EXIT) in place of [+] (YES).

Playing Back Data from a Memory Card
You can use the following procedure to play back user song data (page E-59) directly from a memory card.
IMPORTANT!
- Whenever you copy a file to the memory card that you plan to play on the Digital Keyboard, be sure to store the file in the memory card's "MUSICDAT" folder (page E-62).
-
Insert the memory card that contains the data into the memory card slot.
-
Press 16.
This will display the file numbers and song names for the data stored on the display.
-
Use 17 (10-key) to select the song you want to play.
-
Press 10.
This will start playback.
• Each press of 10 starts and stops playback.
Memory Card Error Messages
For information about memory card error messages, see page E-74.
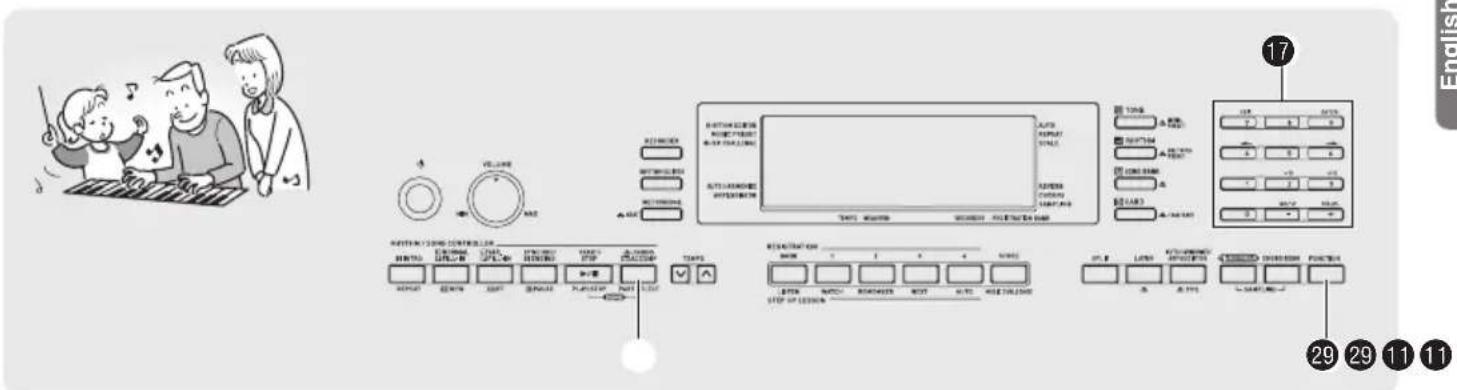
Connecting a Computer
You can connect the Digital Keyboard to a computer and exchange MIDI data between them. You can send play data from the Digital Keyboard to commercially available music software running on your computer, or you can send MIDI data from your computer to the Digital Keyboard for playback.
Minimum Computer System Requirements
The following shows the minimum computer system requirements for sending and receiving MIDI data. Check to make sure that your computer complies with these requirements before connecting the Digital Keyboard to it.
- Operating System
Windows ^® XP (SP2 or later) ^*1
Windows Vista® *2
Windows® 7 *3
Windows® 8 *4
Mac OS ^® X (10.3.9, 10.4.11, 10.5.X, 10.6.X, 10.7.X, 10.8.X)
*1: Windows XP Home Edition
Windows XP Professional (32-bit)
*2: Windows Vista (32-bit)
*3: Windows 7 (32-bit, 64-bit)
*4: Windows 8 (32-bit, 64-bit)
- USB port

IMPORTANT!
- Never connect to a computer that does not conform to the above requirements. Doing so can cause problems with your computer.
Connecting the Digital Keyboard to Your Computer

IMPORTANT!
- Make sure you follow the steps of the procedure below exactly. Connecting incorrectly can make data send and receive impossible.
- Turn off the Digital Keyboard and then start up your computer.
- Do not start up the music software on your computer yet!
- After starting up your computer, use a commercially available USB cable to connect it to the Digital Keyboard.
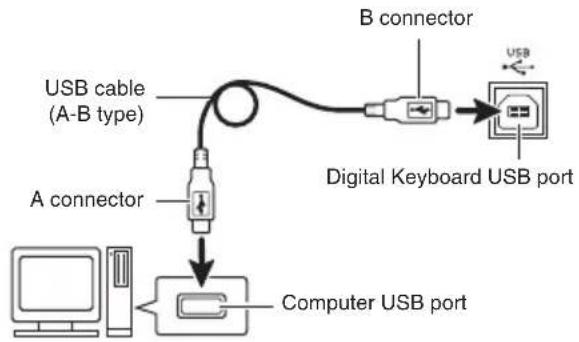
flowchart
graph TD
    A["USB cable (A-B type)"] --> B["A connector"]
    B --> C["Computer USB port"]
    D["B connector"] --> E["Digital Keyboard USB port"]
- Turn on the Digital Keyboard.
- If this is the first time you are connecting the Digital Keyboard to your computer, the driver software required to send and receive data will be installed on your computer automatically.
- Start up commercially available music software on your computer.
5. Configure the music software settings to select one of the following as the MIDI device.
CASIO USB-MIDI : For Windows Vista, Windows 7, Windows 8, Mac OS X
USB Audio Device : For Windows XP
- For information about how to select the MIDI device, see the user documentation that comes with the music software you are using.

IMPORTANT!
- Be sure to turn on the Digital Keyboard first before starting up your computer's music software.

NOTE
- Once you are able to connect successfully, there is no problem with leaving the USB cable connected when you turn off your computer and/or Digital Keyboard.
- This Digital Keyboard conforms to General MIDI Level 1 (GM).
- For detailed specifications and connections that apply to MIDI data send and receive by this Digital Keyboard, see the latest support information provided by the website at the following URL.
http://world.casio.com/
MIDI Settings
Keyboard Channel
A keyboard channel is the channel used for sending Digital Keyboard data to a computer. You can select the channel you want for sending Digital Keyboard data to a computer.
- The keyboard channel setting range is 01 to 16.
- Press 29 (FUNCTION) and then use the 17 (10-key) [4] (←) and [6] (→) keys to display "MIDI" (page E-7).

- Press 17 (10-key) [9] (ENTER) key.
- Use the 17 (10-key) [-] and [+] keys to change the keyboard channel.
Navigate Channels
The navigate channels can be used to display only the notes of a particular channel (part) as on-screen guide information from among the note information of a tune sent from the computer.
■Specifying the Navigate Channels
From among the 16 available channels (numbered 01 to 16), you can specify any two neighboring channels (such as 05 and 06) as navigate channels. The smaller numbered channel is the navigate (L) channel, while the larger numbered channel is the navigate (R) channel. Specifying the navigate (R) channel will automatically configure the navigate (L) channel as well.
- Press 29 (FUNCTION) and then use the 17 (10-key) [4] (←) and [6] (→) keys to display "MIDI" (page E-7).
- Press 17 (10-key) [9] (ENTER) key.
- Use the ⑰ (10-key) [4] (←) and [6] (→) keys to display "Navi. Ch".
$$ \begin{array}{c} \text {04} \ \text {N a v i . C h} \end{array} $$
- Use the ⑰ (10-key) to specify the navigate (R) channel.
This also will automatically configure the next lower channel number as the navigate (L) channel.
■Turning Off the Navigate Channel Sound and Playing the Part on the Keyboard
You can turn off the sound on one or both of the navigate channels and play the cancelled part on the keyboard yourself.
1. Press ⑪ to select the channel setting you want to turn off.
Each press of 11 cycles through settings (1) through (4) described below.
- If you turn off one channel, you can play the cancelled part on the keyboard using the same tone as the channel you turned off. If you turn off both channels (option (3)), what you play on the keyboard sounds using the tone of the navigate (R) channel.
Selected channel indicator appears.
natural_image
Simple line drawing of two hands holding a container with a top handle (no text or symbols)| Navigate (L) Channel | Navigate (R) Channel | |||
| Sound | On-screen Guide | Sound | On-screen Guide | |
| (1) R only displayed | ○ × | × | ○ | |
| (2) L only displayed | × ○ | ○ | × | |
| (3) LR displayed | × ○ | × ○ | ||
| (4) LR nor displayed | ○ | ○ | ○ | ○ |
Local Control
There are times when exchanging data with a computer when you may not want the Digital Keyboard to sound notes you play on its keyboard. The local control setting lets you do just that.
- Press 29 (FUNCTION) and then use the 17 (10-key) [4] (←) and [6] (→) keys to display "MIDI" (page E-7).
- Press 17 (10-key) [9] (ENTER) key.
- Use the 17 (10-key) [4] (←) and [6] (→) keys to display "Local".

- Use the 17 (10-key) [-] and [+] keys to specify the local control setting.
Accomp Out
Enabling the Accomp Out setting causes Auto Accompaniment data to be sent to the computer.
- Press 29 (FUNCTION) and then use the 17 (10-key) [4] (←) and [6] (→) keys to display "MIDI" (page E-7).
- Press 17 (10-key) [9] (ENTER) key.
- Use the 17 (10-key) [4] (←) and [6] (→) keys to display "AcompOut".


- Use the ⑰ (10-key) [-] and [+] keys to turn Accomp Out on or off.
Storing and Loading Digital Keyboard Memory Data
You can transfer sampled sounds, recorded songs, and other data in Digital Keyboard memory to a computer for storage. You also can load standard MIDI file (SMF) data, and Auto Accompaniment data you download from the CASIO website to the Digital Keyboard, which greatly expands the Song Bank songs and Auto Accompaniment patterns available to you. A special Data Manager application is required in order to transfer data to and from the Digital Keyboard.
Data Types Supported for Data Transfer
The same types of data that you can store to or recall from a memory card (page E-59) can be transferred to and from the Digital Keyboard. Note, that recorded song data can be transferred to a computer in the Digital Keyboard's native format only. You cannot save recorded song data to a computer as a standard MIDI file (SMF format).
Downloading Data Manager
- Go to the CASIO WORLDWIDE site at the following URL. http://world.casio.com/
- At the site, select a geographic area or country.
- After accessing the area site, navigate to the minimum computer system requirements for Data Manager for this product.
- You should be able to find a link to Data Manager information on the product introduction page of this product. If you cannot find such a link, use the search form of the area site where you are located to enter the model name of this product and search for it.
- Note that site contents are subject to change without notice.
- Check if your computer system complies with the minimum requirements for Data Manager.
- Download Data Manager and its user's guide to your computer.
- Follow the procedure in the user's guide that you downloaded in step 5 to install and use Data Manager.
- You can download accompaniment data from the Internet Data Expansion system of the CASIO MUSIC SITE (http://music.casio.com/) and load it into the memory of this Digital Keyboard. Note that there is not any accompaniment data intended specifically for this model, so you should use data for other models.
NOTE
- Since the accompaniment data is for other models, you may experience some abnormalities when playing it on this model.
- For information about accompaniment data compatibility between models, see the Data Manager user's guide you download in step 5 of the above procedure.
Connecting to Audio Equipment
This Digital Keyboard can be connected to commercially available stereo, amplifier, or recording equipment, to a portable audio player or other equipment.
Outputting Keyboard Notes to Audio Equipment
Connection requires commercially available connecting cords, supplied by you. The connecting cords should have a stereo standard plug on one end and a plug that matches the configuration of the external device on the other end.

IMPORTANT!
- Turn off the external device when making connections. After connecting, turn down the Digital Keyboard and external device volume levels whenever turning power on or off.
• After connecting, turn on the Digital Keyboard and then the external device. - If keyboard notes sound distorted when they are sounded from external audio equipment, lower the Digital Keyboard's volume setting.
Stereo standard plug
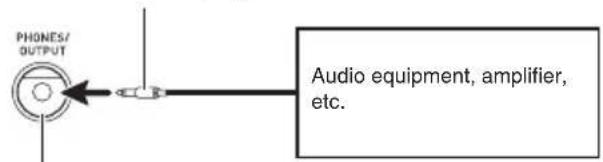
Digital Keyboard PHONES/OUTPUT jack
Playing an External Device from the Digital Keyboard
Connection requires commercially available connecting cords, supplied by you. The connecting cords should have a stereo mini plug on one end and a plug that matches the configuration of the external device on the other end.

IMPORTANT!
- Turn off the Digital Keyboard when making connections. After connecting, turn down the Digital Keyboard and external device volume levels whenever turning power on or off.
• After connecting, turn on the external device and then the Digital Keyboard. - If notes are distorted when they are sounded on the external device, lower the volume setting of the external device.

Digital Keyboard AUDIO IN jack
Troubleshooting
| Symptom Action | |
| Included Accessories | |
| I can't find something that should be here. Carefully c | check inside all of the packing materials. |
| Power Requirements | |
| Power will not turned on. • Check the AC adaptor or m | make sure that the batteries are facing correctly (page E-9).• Replace the batteries with new ones or switch over to AC adaptor power (page E-9). |
| The display lights up momentarily but power does not turn on when I press the power button (1). | Press 1 firmly and completely to turn on power. |
| The Digital Keyboard outputs a loud sound and then suddenly powers down. | Replace the batteries with new ones or switch over to AC adaptor power (page E-9). |
| The Digital Keyboard suddenly powers down after a few minutes. | This happens when Auto Power Off (page E-10) is triggered. |
| Display | |
| The display keeps going out or are flashing. Replace | the batteries with new ones or switch over to AC adaptor power (page E-9). |
| On-screen keyboard keys or notes remain on the display. | A Step Up Lesson is in progress and the Digital Keyboard is waiting for you to play the next note in the song. To stop this from happening, cancel the lesson (page E-33). |
| Screen contents are visible only from straight ahead. | This is dues to production limitations. It does not indicate malfunction. |
| Sound | |
| Nothing happens when I press any keyboard key. • Adjust the volume setting (page E-10).• Check if something is plugged into 44 on the back of the Digital Keyboard.• If there is no sampled sound in memory, nothing will play if you press a keyboard key while a tone in the range of 601 to 608 is selected (page E-19).• Turn power off and then back on to initialize all keyboard settings (page E-10). | |
| Nothing happens or notes do not play normally when I play notes on the left side of the keyboard. | Press 11 to disable chord input in the accompaniment keyboard area (page E-39). |
| Nothing happens when I start an Auto Accompaniment. | • With rhythms 171 to 180, nothing will sound until you play a chord on the keyboard. Try playing a chord (page E-39).• Check and adjust the accompaniment volume setting (page E-42).• If there is no user rhythm stored in memory, Auto Accompaniment will not start when you press 10 while a rhythm in the range of 181 to 190 is selected (page E-45).• Turn power off and then back on to initialize all Digital Keyboard settings (page E-10). |
| Nothing happens when I start playback of a built-in song. | • It takes a little time after you press the button until the song starts to play. Wait for a moment for the song to start.• Check and adjust the song volume (page E-30).• If there is no user song stored in memory, song playback will not start when you press 10 while a song in the range of 153 to 162 is selected (page E-30).• Turn power off and then back on to initialize all Digital Keyboard settings (page E-10). |
| The metronome does not sound. • Check and adjust the accompaniment volume setting (page E-42).• Check and adjust the song volume (page E-30).• Turn power off and then back on to initialize all Digital Keyboard settings (page E-10). | |
| Notes keep sounding, without stopping. • Turn power off and then back on to initialize all Digital Keyboard settings (page E-10).• Replace the batteries with new ones or switch over to AC adaptor power (page E-9). | |
| Some notes are cut off while they are playing. Notes are cut off whenever the number of notes being sounded exceeds the maximum polyphony value of 48 (24 for some tones). This does not indicate malfunction. | |
| The volume or tone setting I made has changed. • Adjust the volume setting (page E-10).• Turn power off and then back on to initialize all Digital Keyboard settings (page E-10).• Replace the batteries with new ones or switch over to AC adaptor power (page E-9). | |
| Output volume does not change even though is change my keyboard touch. | • Change the Touch Response setting (page E-11).• Turn power off and then back on to initialize all Digital Keyboard settings (page E-10). |
| In certain keyboard ranges, the volume and tone quality sound are slightly different from those in other keyboard ranges. | This is due to system limitations. It does not indicate malfunction. |
| With some tones, octaves do not change at the far ends of the keyboard. | This is due to system limitations. It does not indicate malfunction. |
| The pitch of the notes does not match other accompanying instruments or sounds strange when played long with other instruments. | • Check and adjust the transpose (page E-17) and tuning settings (page E-17).• Turn power off and then back on to initialize all Digital Keyboard settings (page E-10). |
| The reverb of notes seems to change suddenly. • Check and adjust the reverb setting (page E-16).• Turn power off and then back on to initialize all Digital Keyboard settings (page E-10). | |
| Operation | |
| When I perform a skip forward or skip back operation, the skip operation moves multiple song measures instead of only a single measure. | While song playback is stopped or a Step Up Lesson is in progress, skip forward and skip back operations are performed in phrase units (page E-28). |
| Tone, rhythm, and other settings revert to their initial defaults whenever you turn on the Digital Keyboard. | Though Digital Keyboard settings reset when you turn off the Digital Keyboard, you can save setups to registration memory for instant recall whenever you need them (page E-48). |
| Computer Connection | |
| I can't exchange data between the Digital Keyboard and a computer. | • Check to make sure that the USB cable is connected to the Digital Keyboard and computer, and that the device is selected correctly with your computer's music software settings (page E-65).• Turn off the Digital Keyboard and then exit the music software on your computer. Next, turn the Digital Keyboard back on and then restart the music software on your computer. |
Specifications
| Model CTK-5200 | |
| Keyboard 61 standard size keys Touch Response 2 types, Off | |
| Maximum Polyphony 48 notes (24 for certain tones) | |
| TonesBuilt-in Tones 600Sampling Tones Up to 8 (Melody Up to 10 secondsFunctions Layer, Split, Piano/Organ button | Sampling: 5, Drum Sampling: 3)*Up to 10 seconds |
| Reverb 1 to 10, Off | |
| Chorus 1 to 5, Off | |
| MetronomeBeats per Measure 0, 2 to 6Tempo Range 30 to 255 | |
| Song BankBuilt-in Songs 152User Songs Up to 10* | |
| Step Up LessonLessons 4 (Listen, Watch, Remember, Auto)Lesson Part L, R, LRFunctions Repeat, Voice Fingering Guide, Note Guide, Performance Evaluation | |
| Music Challenge | 20 notes |
| Auto AccompanimentBuilt-in RhythmsUser Rhythms Up to 10 (Accompaniment Edit)* | 180 |
| Chord Book Function | Chord guide |
| Registration | 32 (4 setups × 8 banks) |
| RecorderKeyboard PlayPlaying Along with aBuilt-in Songs 1 song (L, R, LR)Memory Capacity | Real-time recording, playback5 songs, 6 tracksApproximately 12,000 notes (total for 6 songs) |
| Other FunctionsTransposeOctave ShiftTuningPreset Scales 17Music PresetOne Touch PresetAuto HarmonizeArpeggiator | ±1 octaves (-12 to +12 semitones)Upper/Lower ±2 octavesA4 = 415.5 to 465.9 Hz (Initial Default: 440.0 Hz)30518012 types90 types |
| MIDI | 16 multi-timbre received, GM Level 1 standard |
| Musical Information Function | Tone, Rhythm, Song Bank numbers and names, staff notation, fingering, pedal operation, tempo, measure and beat number, chord name, etc. |
| Pitch Bend WheelPitch Bend Range | 0 to 12 semitones |
| Memory CardsSupported Memory CardsFunctions SMF playback, file storage, file recall, file delete, card format | SD or SDHC memory cards, 32GB or less |
| Inputs/OutputsUSB port TYPE BSustain/Assignable jack Standard jack (sustain, sostenuto, soft, rhythm)Phones/Output jackStereo standard jackOutput Impedance: 140Ω, Output Voltage: 4.5V (RMS) MAXAudio In jack Stereo mini jackInput Impedance: 9kΩ, Input Sensitivity: 200mV | |
| Power Jack DC9.5V | |
| Power Supply 2-wayBatteries 6 AA-size zinc-carbon batteries or alkaline batteriesBattery Life Approximately 3 hours continuous operation on alkaline batteriesAC Adaptor AD-E95100L• The AC adaptor can be used safely in areas up to 4,000 meters above sea level.Auto Power Off Approximately 6 minutes (during battery operation) or 30 minutes (during AC adaptor operation) without any operation, Auto Power Off can be disabled. | |
| Speakers 12cm × 2 (Output: 2.5W + 2.5W) | |
| Power Consumption | 9.5V --- 7.7W |
| Dimensions 94.8 × 35.0 × 10.3 cm (37 5/16 × 13 3/4 × 4 1/16 inch) | |
| Weight | Approximately 4.4kg (9.7 lbs) (without batteries) |
- Design and specifications are subject to change without notice.
* This data is stored in a shared memory area with a total capacity of approximately 320Kbytes (1Kbyte = 1,024bytes).
Operating Precautions
Be sure to read and observe the following operating precautions.
■Location
Avoid the following locations for this product.
- Areas exposed to direct sunlight and high humidity
- Areas subjected to temperature extremes
- Near a radio, TV, video deck, or tuner
The above devices will not cause malfunction of the product, but interference from the product can cause audio or video interference of a nearby device.
■User Maintenance
- Never use benzine, alcohol, thinner, or other chemical agents to clean the product.
• To clean the product or its keyboard, wipe with a soft cloth moistened in a weak solution of water and a mild neutral detergent.
Wring all excess moisture from the cloth before wiping.
■Included and Optional Accessories
Use only accessories that are specified for use with this product. Use of unauthorized accessories creates the risk of fire, electric shock, and personal injury.
■Weld Lines
Lines may be visible on the exterior of the product. These are "weld lines" that result from the plastic molding process. They are not cracks or scratches.
■Musical Instrument Etiquette
Always be aware of others around you whenever using this product. Be especially careful when playing late at night to keep the volume at levels that do not disturb others. Other steps you can take when playing late at night are closing the window and using headphones.
Error Messages
| Display Message | Cause Action | |
| Err CardFull There is not enough room available on the memory card. | Delete some of the files on the memory card to make room for new data (page E-63).Use a different memory card. | |
| Err Card R/W The memory card is damaged. Use a different memory card. | ||
| Err Convert There is not enough unused memory available to save recorded song data to a memory card as an SMF 0 format file. | Delete some or all of the following user data from memory to make room for new data.Sampled sounds (page E-19), user rhythms (page E-45),user songs (page E-30) | |
| Err Exist A sampled drum set sound cannot be copied (page E-23) to a keyboard key because the key already has a sampled sound assigned to it. | Delete the sampled sound that is currently assigned to the key you are copying to (page E-24).Copy the sampled sound to another key that does not yet have a sampled sound assigned to it. | |
| Err Format 1. The format of the memory card is not compatible with this Digital Keyboard.2. The memory card is damaged. 2. Use a different memory card.3. You are trying to use an SDXC card. 3. SDXC cards are not supported. Use an SD or SDHC memory card. | 1. Format the memory card (page E-60). | |
| Err Limit The tone number you selected before starting sampling already has the allowable maximum of eight sampled sounds assigned to it. | Delete the one or more of the sampled sounds currently assigned to the tone number (page E-24).Select another tone number that has less than eight sampled sounds currently assigned to it (page E-21). | |
| Err Mem Full 1. There is not enough memory available to play back song data from a memory card.2. There is not enough memory available for sampling or Auto Accompaniment editing. | Delete some or all of the following user data from memory to make room for new data.Sampled sounds (page E-19), user rhythms (page E-45),user songs (page E-30) | |
| Err No Card | 1. The memory card is not set correctly in the card slot.2. The memory card was removed part way through a card access operation. | 1. Remove the memory card and reinsert it correctly (page E-60).2. Never remove a memory card from the card slot while a card access operation is in progress. |
| Err No Data There is no data in the selected user area (tone, rhythm, song number, etc.) | Select a Digital Keyboard user area that contains data. | |
| Err No File | There is no folder named “MUSICDAT” on the memory card. | Use a computer to create a folder named “MUSICDAT” on the memory card (page E-62).Format the memory card on the Digital Keyboard (page E-60). |
| Err NotSMF01 | You are attempting to play back SMF Format 2 song data. | Playback of SMF Format 0 or 1 only is supported. |
| Err Protect | 1. The memory card is write protected.2. Sampled sounds (Tone Numbers 601 to 608) are protected. | Adjust the memory card's write protect switch to enable data storage.Unprotect one or more of the sampled sounds, which will allow it to be overwritten or deleted. |
| Err ReadOnly | You are attempting to save a file using the same name as an existing read-only file. | Save the new file to a different card or use another name.Remove the read-only attribute of the exiting file on the memory card and try again.Use a different memory card. |
| Err SizeOver | 1. The song data on the memory it too big to play back.2. Auto Accompaniment editing cannot be performed because the accompaniment pattern or instrument part data is too large. | This Digital Keyboard can play back song data files with a maximum size of about 320Kbytes.Select a different accompaniment pattern or instrument parts. |
| Err WrongDat | 1. The data on the memory card is corrupted.2. The data on the memory card is a type that is not supported by this Digital Keyboard. | — |
Song List
SONG BANK
WORLD
| 001 TWINKLE TWINKLE LITTLE STAR |
| 002 LIGHTLY ROW |
| 003 LONG LONG AGO |
| 004 ON TOP OF OLD SMOKEY |
| 005 SAKURA SAKURA |
| 006 WHEN THE SAINTS GO MARCHING IN |
| 007 AMAZING GRACE |
| 008 AULD LANG SYNE |
| 009 COME BIRDS |
| 010 DID YOU EVER SEE A LASSIE? |
| 011 MICHAEL ROW THE BOAT ASHORE |
| 012 DANNY BOY |
| 013 MY BONNIE |
| 014 HOME SWEET HOME |
| 015 AURA LEE |
| 016 HOME ON THE RANGE |
| 017 ALOHA OE |
| 018 SANTA LUCIA |
| 019 FURUSATO |
| 020 GREENSLEEVES |
| 021 JOSHUA FOUGHT THE BATTLE OF JERICHO |
| 022 THE MUFFIN MAN |
| 023 LONDON BRIDGE |
| 024 UNDER THE SPREADING CHESTNUT TREE |
| 025 SIPPIN' CIDER THROUGH A STRAW |
| 026 GRANDFATHER'S CLOCK |
| 027 ANNIE LAURIE |
| 028 BEAUTIFUL DREAMER |
| 029 IF YOU'RE HAPPY AND YOU KNOW IT, CLAP YOUR HANDS |
| 030 MY DARLING CLEMENTINE |
| 031 LITTLE BROWN JUG |
| 032 HOUSE OF THE RISING SUN |
| 033 SHE WORE A YELLOW RIBBON |
| 034 YANKEE DOODLE |
| 035 MY OLD KENTUCKY HOME |
| 036 SZLA DZIEWECZKA |
| 037 TROIKA |
| 038 WALTZING MATILDA |
| 039 ON THE BRIDGE OF AVIGNON |
| 040 I'VE BEEN WORKING ON THE RAILROAD |
| 041 OH! SUSANNA |
| 042 CAMPTOWN RACES |
| 043 JEANNIE WITH THE LIGHT BROWN HAIR |
| 044 TURKEY IN THE STRAW |
| 045 JAMAICA FAREWELL |
EVENT
| 046 SILENT NIGHT |
| 047 WE WISH YOU A MERRY CHRISTMAS |
| 048 JINGLE BELLS |
| 049 JOY TO THE WORLD |
| 050 O CHRISTMAS TREE |
PIANO/CLASSICS
| 051 MARY HAD A LITTLE LAMB |
| 052 LE CYGNE FROM "LE CARNAVAL DES ANIMAUX" |
| 053 JE TE VEUX |
| 054 SONATA op.13 "PATHÉTIQUE" 2nd Mov. |
055 HEIDENRÖSLEIN
056 AIR FROM "SUITE no.3"
057 SPRING FROM "THE FOUR SEASONS"
058 HABANERA FROM "CARMEN"
059 BRINDISI FROM "LA TRAVIATA"
060 HUNGARIAN DANCES no.5
061 MINUET IN G MAJOR
062 MUSETTE IN D MAJOR
063 GAVOTTE (GOSSEC)
064 ARABESQUE (BURGMÜLLER)
065 CHOPSTICKS
066 DECK THE HALL
067 ODE TO JOY
068 AVE MARIA (GOUNOD)
069 SONATINA op.36 no.1 1st Mov.
070 PRELUDE op.28 no.7 (CHOPIN)
071 RÊVERIE
072 GYMNOPÉDIES no.1
073 GOING HOME FROM "FROM THE NEW WORLD"
074 FÜR ELISE
075 TURKISH MARCH (MOZART)
076 SONATA op.27 no.2 "MOONLIGHT" 1st Mov.
077 ETUDE op.10 no.3 "CHANSON DE L'ADIEU"
078 THE ENTERTAINER
090 MARCH FROM "THE NUTCRACKER"
091 INVENTIONEN no.1
092 PRAELUDIUM no.1 (J.S.BACH)
093 SONATINE op.20 no.1 1st Mov.
094 HUMORESKE (DVO AK)
095 DOLLY'S DREAMING AND AWAKENING
096 LA FILLE AUX CHEVEUX DE LIN
097 ARABESQUE no.1 (DEBUSSY)
098 TRÄUMEREI
099 MAPLE LEAF RAG
100 NOCTURNE op.9 no.2 (CHOPIN)
EXERCISE
101 - 150 EXERCISE I / II / III
DEMO TUNES
151 - 152 DEMO TUNES
USER SONGS
153 - 162 USER SONGS
Fingering Guide
Fingered 1, Fingered 2 Chords
| C |  |
| Cm | 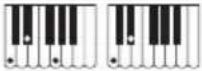 |
| Cdim |  |
| Caug *3 |  |
| Csus4 *3 |  |
| Csus2 *3 |  |
| C7 |  |
| Cm7 *3 |  |
| CM7 |  |
| Cm7b5 *3 |  |
| C7b5 *3 |  |
| C7sus4 |  |
| Cadd9 |  |
| Cmadd9 |  |
| CmM7 | 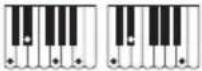 |
| Cdim7 *3 |  |
| C69 *3 |  |
| C6 *1 *3 |  |
| Cm6 *2 *3 |  |
*1 With Fingered 2, interpreted as Am7.
*2 With Fingered 2, interpreted as Am7 ^15 .
*3 Inverted form not supported in some cases.
Fingered 3, Full Range Chords
In addition to the chords that can be fingered with Fingered 1 and Fingered 2, the following chords also are recognized.

NOTE
- With Fingered 3, the lowest note fingered is interpreted as the base note. Inverted forms are not supported.
- With Full Range Chord, when the lowest note fingered is a certain distance from the neighboring note, the chord is interpreted as a fraction chord.
- Unlike Fingered 1, 2, and 3, Full Range Chord requires pressing of at least three keys to form a chord.
flowchart
graph TD
    A["Volume"] --> B["RECORDER"]
    B --> C["RHYTHM EDITOR"]
    C --> D["METRONOME"]
    D --> E["BEAT"]
    E --> F["RHYTHM / SONG CONTROLLER"]
    F --> G["INTRO"]
    F --> H["REPEAT"]
    F --> I["FF"]
    F --> J["PLAY/STOP"]
    F --> K["PART SELECT"]
    F --> L["TEMPO"]
    L --> M["REGISTRATION BANK"]
    M --> N["LISTEN STEP UP LESSON"]
    M --> O["REMEMBER"]
    M --> P["NEXT"]
    M --> Q["AUTO"]
    M --> R["USC CHALLENGE"]
    M --> S["SPLIT"]
    M --> T["TYPE"]
    M --> U["AUTO HARMONE/ARPEGGIATOR"]
    M --> V["CHORD BOOK"]
    M --> W["FUNCTION"]
    M --> X["PRESS AND HOLD"]

    subgraph Signal Details
        direction TB
        4 --> 16
        14 --> 13
        17 --> 13
        13 --> 16
        16 --> 14
        14 --> 13
        13 --> 17
    end

    %% Note: The chart includes labels for the components of the instrument and controls. Numbers inside the instrument are shown on the left side.
Model: CTK-5200 Version : 1.0
MIDI Implementation Chart
| Function Transmitted | Recognized Remarks | |||
| Basic Channel | Default Changed | 1 1 - 16 | 1 - 16 1 - 16 | |
| Mode | Default Messages Altered | Mode 3 X * * * * * * * | Mode 3 X * * * * * * * | |
| Note Number | True voice | 12 - 120 * * * * * * * | 0 - 127 0 - 127 *1 | |
| Velocity | Note ON Note OFF | O 9nH v = 1 - 127 X 9nH v = 0 | O 9nH v = 1 - 127 X 9nH v = 0, 8nH v =** | **:no relation**:sin relación |
| After Touch | Key's Ch's | X X | X O | |
| Pitch Bender | O | O | ||
| Control Change | 0, 32 1 6, 38 7 10 11 64 | O X O *2 O O X O *3 | O (MSB only) O O *2 O O O O | Bank select Modulation Data entry Volume Pan Expression Hold 1 |
| 66679193100, 101 | O *3O *3XOO *2 | OOOO *2 | SostenutoSoft pedalReverb sendChorus sendRPN LSB, MSB | |
| ProgramChange :True # | O 0 - 127***** | O 0 - 127 | ||
| System Exclusive | O *2 | O *2 | ||
| SystemCommon : Song Pos : Song Sel : Tune | XXXX | XXX | ||
| SystemReal Time : Clock : Commands | OO | XX | ||
| AuxMessages : All sound off : Reset all controller : Local ON/OFF : All notes OFF : Active Sense : Reset | XXOXXX | OOXX | ||
| Remarks | *1: Depends on tone.*2: For details about NRPN, RPN, and system exclusive messages, see MIDI Implementation at http://world.casio.com/.*3: In accordance with pedal effect setting. | *1: Depende del tono.*2: Para obtener información acerca de NRPN, RPN y los mensajes exclusivos del sistema, consulte Implementación MIDI en http://world.casio.com/.*3: De acuerdo con el ajuste de efecto de pedal. | ||
Mode 1 : OMNI ON, POLY Mode 2 : OMNI ON, MONO O : Yes Mode 3 : OMNI OFF, POLY Mode 4 : OMNI OFF, MONO X : No
CASIO®

- GUÍA DEL USUARIO
- FCC WARNING
- Declaration of Conformity
- Important!
- General Guide ......E-4
- Getting Ready to Play......E-9
- Playing the Digital Keyboard .....E-10
- Controlling the
- Keyboard Sounds ......E-14
- Sampling Sounds and Playing
- Them on the Digital Keyboard .....E-19
- Playing Built-in Songs.....E-27
- Using Built-in Songs to Master
- Keyboard Play...... E-31
- Music Challenge
- Keyboard Game E-37
- Using Auto Accompaniment...... E-38
- Editing Auto Accompaniment
- Patterns E-45
- Saving Keyboard Setups to
- Registration Memory...... E-48
- Recording Your Keyboard Play.... E-50
- Other Useful Digital Keyboard
- Functions.....E-55
- Using a Memory Card ....E-59
- Connecting External Devices .....E-65
- Reference.....E-70
- MIDI Implementation Chart
- Included Accessories
- Separately Available Accessories
- Using the 10-key Pad (17)
- Number Buttons
- NOTE
- [-] and [+] Keys
- FUNCTION Button (29) Functions
- To select a function
- Returning the Digital Keyboard to Its Factory Default Settings
- Preparing the Music Stand
- Power Supply
- Using the AC Adaptor
- Using Batteries
- ■Low Battery Indication
- Playing the Digital Keyboard
- Turning on Power and Playing
- Auto Power Off
- ■Disabling Auto Power Off
- While holding down ⑬ (TONE), turn on power.
- Using Headphones
- Changing Keyboard Response to Touch Pressure (Touch Response)
- Changing Touch Response Sensitivity
- Adjusting Display Contrast
- Using the Metronome
- Start/Stop
- Changing the Beats Per Measure
- Changing the Metronome Tempo
- Press 12.
- Changing the Metronome Sound Volume
- Controlling the Keyboard Sounds
- Select from a variety of musical instrument sounds
- To select an instrument for playing
- Press ⑬ (TONE).
- Use 17 (10-key) to select the tone number you want.
- Try playing something on the keyboard.
- Playing with a Piano or Organ Tone
- Layering Two Tones
- Select the first tone you want to use.
- Press 25.
- Use 17 (10-key) to select the second tone you want.
- Play something on the keyboard.
- Pressing 25 again to unlayer the keyboard (so it plays only the tone you selected in step 1).
- Splitting the Keyboard between Two Different Tones
- To select the two tones for a split keyboard
- Select the tone for the right side range (page E-14).
- Press 24.
- Use 17 (10-key) to select the left side range tone you want.
- Pressing 24 again to unsplit the keyboard (so it plays only the tone you selected in step 1).
- To change the split point
- While holding down 24, press the keyboard key where you want the split point to be.
- Using Reverb
- Press 29 (FUNCTION) and then use the 17 (10-key) [4] (←) and [6] (→) keys to display "Reverb" (page E-7).
- Use the 17 (10-key) [-] and [+] keys to select the reverb setting you want.
- Using Chorus
- Use the ⑰ (10-key) [−] and [+] keys to select the chorus type you want.
- Using a Pedal
- Connecting a Pedal Unit
- Selecting the Pedal Effect
- Changing the Pitch (Transpose, Tuning, Octave Shift)
- Changing the Pitch in Semitone Steps (Transpose)
- Fine Tuning (Tuning)
- Octave Shift
- Using the Pitch Bend Wheel to Shift the Pitch of Notes
- To play with the pitch bend wheel
- Specifying the Pitch Bend Range
- Connection and Preparation
- Sampling and Playing a Melody Sound (Melody Sampling)
- To sample a sound
- Output sound from the external device.
- After the sound you want to sample is finished, press 27 and 28 at the same time.
- Play something on the Digital Keyboard.
- ■How sampled sounds are played
- Looping a Sampled Sound
- Changing the Volume of Sampled Sound Looped Playback
- Applying Effects to a Sampled Sound
- Incorporating a Sampled Sound into a Drum Set (Drum Sampling)
- Press the keyboard key.
- Editing Sampled Drum Set Sounds
- ■To copy a sampled sound from one key to another
- ■To change the pitch of a sampled sound
- ■To delete a keyboard key's sampled sound
- Using a Drum Sampling Tone in Auto Accompaniment (Drum Assign)
- Other Sampling Functions
- Changing to a Manual Sampling Start
- Changing to Manual Sampling Stop
- Deleting a Sampled Sound
- Protecting Against Accidental Deletion of Sampled Sounds
- Playing Built-in Songs
- Playing the Demo Songs
- Press ⑩ and ⑪ at the same time.
- To change to another song while demo playback is in progress, use 17 (10-key) [-] and [+] keys to enter the song number you want (page E-7).
- To stop demo playback, press 10.
- Playing Back a Particular Song
- Press 15 (SONG BANK).
- Use 17 (10-key) to enter the number of the song you want.
- Press 10.
- Press 10 again to stop playback.
- Pause, Skip Forward, Skip Back
- Pause
- Press ⑨.
- Press ⑨ again to resume playback from the point where you paused it.
- Skip Forward
- Press ⑧.
- Skip Back
- Press ⑦.
- Repeating Playback of Specific Measures
- Press ⑥ to temporarily turn off song repeat.
- When song playback reaches the measure you want to specify as the start measure, press ⑥.
- When playback reaches the measure you want to select as the end measure, press ⑥ again.
- Pressing ⑥ again returns to normal playback.
- Changing Playback Speed (Tempo)
- Adjusting the Song Volume
- Playing with the Tone as Song Playback
- Turning Off the Part of One Hand for Practice (Part Select)
- Increasing the Selection of Songs
- Using Built-in Songs to Master Keyboard Play
- Phrases
- Step Up Lesson Flow
- Phrase 1
- Messages that Appear during Lessons
- Selecting the Song, Phrase, and Part You Want to Practice
- Select the song you want to practice (page E-28).
- Press 21 (or 8) to move forward one phrase, or 7 to move back one phrase.
- Press ⑪ to select the part you want to practice.
- Hold down 15 (SONG BANK) for about two seconds.
- Lessons 1, 2, and 3
- Lesson 1: Listen to the song.
- Press 18.
- To stop Lesson 1, press ⑱ or ⑩.
- Lesson 2: Watch how the song is played.
- Press 19.
- Play notes on the keyboard in accordance with the instructions provided on the display and by voice fingering guide.
- To stop Lesson 2, press 19 or 10.
- Lesson 3: Remember what you learned as you play.
- Press 20.
- Play the song along with the song playback.
- To stop Lesson 3, press 20 or 10.
- Playing a Particular Song All the Way Through
- Use 11 to turn off both hand parts and then press 10.
- Lesson Settings
- Playing without Phrase Repeat
- Press 6.
- Turning Off Voice Fingering Guide
- Press 29 (FUNCTION) and then use the 17 (10-key) [4] (←) and [6] (→) keys to display "LESSON" (page E-7).
- Press 17 (10-key) [9] (ENTER) key.
- Press the 17 (10-key) [–] key to select the OFF setting.
- Turning Off Note Guide
- Turning Off Performance Evaluation
- Changing the Phrase Length
- Using Auto Step Up Lesson
- Playing the Rhythm Part Only
- Starting and Stopping the Rhythm Part Only
- Press 14 (RHYTHM).
- Use 17 (10-key) to select the rhythm number you want.
- Press ⑩ or ⑦.
- Playing All Parts
- Auto Accompaniment with Chords
- Selecting a Chord Input Mode
- ■FINGERED 1, 2, and 3
- ●FINGERED 1
- ●FINGERED 2
- ●FINGERED 3
- ■CASIO CHORD
- FULL RANGE CHORD
- Using Auto Accompaniment Effectively
- Auto Accompaniment Pattern Variations
- ■Auto Accompaniment Variation
- Pressing ⑦ returns to normal pattern.
- ■Auto Accompaniment Intro
- ■Auto Accompaniment Fill-in
- ●Normal Pattern Fill-in
- While a normal pattern is playing, press ⑦.
- ●Variation Pattern Fill-in
- While a variation pattern is playing, press 8.
- ■Auto Accompaniment Ending
- While an Auto Accompaniment is playing, press ⑨.
- ■Using Synchro Start
- Play a chord on the keyboard.
- Changing Auto Accompaniment Speed (Tempo)
- Adjusting the Accompaniment Volume
- Using One-Touch Preset
- Using Auto Harmonize
- Press ⑪ to enable Auto Accompaniment with chords (ACCOMP indicator lit) (page E-39).
- Hold down 26 until the Auto Harmonize or Arpeggiator type number and type name appear on the display.
- Use the ⑰ (10-key) [-] and [+] keys to select the Auto Harmonize type you want.
- Press 26 to turn on Auto Harmonize.
- Looking Up the Notes of Chords (Chord Book)
- Press 28.
- On the chord keyboard, press the keyboard key that corresponds to the root note of the chord you want to look up.
- Use the 17 (10-key) [-] and [+] keys to select the type of chord you want.
- After you are finished looking up what you want, press 28 to exit the Chord Book.
- ■ Editable Accompaniment Patterns and Instrument Parts
- ■ Editable Contents
- To edit and save an Auto Accompaniment
- Editing Auto Accompaniment Patterns
- Press a button from ⑥ to ⑨ to select the Accompaniment Pattern you want to edit.
- Press ⑪ to select the instrument part you want to edit.
- Press 14 (RHYTHM).
- Use the ⑰ (10-key) [-] and [+] keys to select the rhythm number you want to assign to the instrument part you are editing.
- To edit the other contents, press 29 (FUNCTION) to display the screen for the setting you want.
- Repeat steps 4 through 7 as many times as necessary to edit the parts you want for the pattern you selected in step 3.
- Repeat steps 3 through 8 as many times as necessary to edit the accompaniment patterns you want (intro through ending).
- Press 4.
- 11-1. Press the ⑰ (10-key) [–] key to exit without saving.
- 11-2. Press the ⑰ (10-key) [+] key to save the data.
- Press ⑰ (10-key) [9] (ENTER) key.
- ■Saving User Rhythm Data on an External Device
- To delete saved data
- ■Registration Save Example
- ■Registration Memory Data
- To save a setup to registration memory
- To recall a setup from registration memory
- Recording Your Keyboard Play
- Recording and Playing Back Keyboard Play
- Press ③ twice to exit the recorder mode.
- ■To delete recorded data
- Using Tracks to Record and Mix Parts
- ■About tracks
- - Track 1
- - Tracks 2 through 6
- To record to Tracks 1 through 6
- Record the first part to Track 1.
- Press a button from 19 to 23 to select the track number of the next track to which you want to record.
- Press 10.
- To stop recording, press 10.
- Repeat steps 2 through 5 to record the other tracks.
- After you finish recording all of the tracks, press 10.
- ■To delete a recorded track
- Recording Two or More Songs, and Selecting One for Playback
- Recording while Playing Along with a Built-in Song
- Press ⑪ to cycle through the parts in the sequence shown below.
- Press 10 to start built-in song playback and recorder recording.
- Recording will stop automatically when the end of the built-in song is reached.
- Press ③ twice to exit the recorder mode.
- Saving Recorded Data on an External Device
- ■To save data to a memory card
- ■To save data on your computer's hard disk
- Changing the Scale of the Keyboard
- Using the Current Scale Notes for Auto Accompaniments
- Using Music Preset
- Using the Arpeggiator
- Hold down 26 until the Auto Harmonize or Arpeggiator type number and type name appear on the display.
- Use the ⑰ (10-key) [−] and [+] keys to select the Arpeggiator type you want.
- Octave
- Press 26 to turn on Arpeggiator.
- Sustaining an Arpeggio (Arpeggiator Hold)
- Deleting User Song Data
- Deleting All Data in Digital Keyboard Memory
- Supported Data Types
- Memory Card and Card Slot Precautions
- Inserting and Removing a Memory Card
- Formatting a Memory Card
- Saving Digital Keyboard Data to a Memory Card
- On the Digital Keyboard, select the data you want to save as described below.
- ■Memory Card Data (File) Storage Locations
- Loading Data from a Memory Card into Digital Keyboard Memory
- Press the 17 (10-key) [9] (ENTER) key.
- Use the 17 (10-key) [-] and [+] keys to select the data (file) you want to load.
- Press the 17 (10-key) [9] (ENTER) key.
- Deleting Data from a Memory Card
- On the Digital Keyboard, select the data you want to delete as described below.
- Insert a memory card into the memory card slot.
- Hold down 16 until the screen shown below appears on the display.
- Use the 17 (10-key) [4] (←) and [6] (→) keys to display one of the settings shown below.
- Playing Back Data from a Memory Card
- Memory Card Error Messages
- Connecting a Computer
- Minimum Computer System Requirements
- - Operating System
- - USB port
- Connecting the Digital Keyboard to Your Computer
- Configure the music software settings to select one of the following as the MIDI device.
- MIDI Settings
- Keyboard Channel
- Navigate Channels
- ■Specifying the Navigate Channels
- ■Turning Off the Navigate Channel Sound and Playing the Part on the Keyboard
- Press ⑪ to select the channel setting you want to turn off.
- Local Control
- Accomp Out
- Storing and Loading Digital Keyboard Memory Data
- Data Types Supported for Data Transfer
- Downloading Data Manager
- Connecting to Audio Equipment
- Outputting Keyboard Notes to Audio Equipment
- Playing an External Device from the Digital Keyboard
- Operating Precautions
- ■Location
- ■User Maintenance
- ■Included and Optional Accessories
- ■Weld Lines
- ■Musical Instrument Etiquette
- Song List
- SONG BANK
- Fingering Guide
- Fingered 3, Full Range Chords
- CASIO®
Brand : CASIO
Model : CTK-5200
Category : Keyboard