
XJ6 (1997) - Car JAGUAR - Free user manual and instructions
Find the device manual for free XJ6 (1997) JAGUAR in PDF.


| Product Type | Luxury Sedan |
| Brand | Jaguar |
| Model | XJ6 (1997) |
| Engine Type | 4.0L Inline-6 Cylinder |
| Horsepower | 245 hp @ 4800 rpm |
| Torque | 290 lb-ft @ 4000 rpm |
| Transmission | 4-Speed Automatic or 5-Speed Manual |
| Drivetrain | Rear-Wheel Drive |
| Dimensions (L x W x H) | 5024 mm x 1798 mm x 1435 mm |
| Wheelbase | 2870 mm |
| Curb Weight | 1760 kg |
| Fuel Tank Capacity | 81 liters |
| Fuel Type | Premium Unleaded Petrol (95 octane minimum) |
| Fuel Consumption (Combined) | 12.4 L/100 km |
| Brakes | Disc brakes all around with ABS |
| Tire Size (Front/Rear) | 225/60ZR16 |
| Steering | Power-assisted rack and pinion |
| Maintenance Intervals | Oil change every 7500 km, major service at 48000 km |
| Battery | 12V, 70 Ah capacity |
| Air Conditioning | Automatic climate control |
| Security Features | Immobilizer, remote central locking, alarm system |
| Spare Parts Availability | Widely available through Jaguar dealers and specialist suppliers |
| Repairability | Common issues include electrical problems and cooling system leaks; DIY friendly with moderate skills |
Frequently Asked Questions - XJ6 (1997) JAGUAR
User questions about XJ6 (1997) JAGUAR
0 question about this device. Answer the ones you know or ask your own.
Ask a new question about this device
Download the instructions for your Car in PDF format for free! Find your manual XJ6 (1997) - JAGUAR and take your electronic device back in hand. On this page are published all the documents necessary for the use of your device. XJ6 (1997) by JAGUAR.
USER MANUAL XJ6 (1997) JAGUAR
Jaguar XJ6 Service and Repair Manual
Mike Stubblefield
Models covered
(3261-248-11AA1)
Jaguar XJ6 models with 3.2 litre (3239 cc), 3.6 litre (3590 cc) & 4.0 litre (3980 cc) six-cylinder in-line dohc petrol engines and automatic transmission
Covers most features of Daimler 3.6 and 4.0 litre models
Does not cover 2.9 litre (2919 cc) sohc engine or manual transmission
Does not cover XJR models or revised Jaguar/Daimler model ranges introduced September 1994
© Haynes Publishing 1997
ABCDE EGHLI
KLMNO
PQRST
123
A book in the Haynes Service and Repair Manual Series
All rights reserved. No part of this book may be reproduced or transmitted in any form or by any means, electronic or mechanical, including photocopying, recording or by any information storage or retrieval system, without permission in writing from the copyright holder.
ISBN 1 85960 261 4
British Library Cataloguing in Publication Data
A catalogue record for this book is available from the British Library.
Printed by J H Haynes & Co. Ltd, Sparkford, Nr Yeovil, Somerset BA22 7JJ
Haynes Publishing
Sparkford, Nr Yeovil, Somerset BA22 7JJ, England
Haynes North America, Inc
861 Lawrence Drive, Newbury Park, California 91320, USA
Editions Haynes S.A.
147/149, rue Saint Honoré, 75001 PARIS, France
Haynes Publishing Nordiska AB
LIVING WITH YOUR JAGUAR XJ6
Introduction Page 0·4
Notes for UK readers Page 0·4
Safety first! Page 0·5
Roadside repairs
Introduction Page 0·6
If your car won't start Page 0·6
Jump starting Page 0·7
Wheel changing Page 0·8
Identifying leaks Page 0·9
Towing Page 0·9
Weekly checks
Introduction Page 0·10
Underbonnet check points Page 0·10
Engine oil level Page 0·11
Coolant level Page 0·11
Brake fluid level Page 0·12
Screen washer fluid level Page 0·12
Power steering fluid level Page 0·13
Wiper blades Page 0·13
Tyre condition and pressure Page 0·14
Battery Page 0·15
Bulbs and fuses Page 0·15
Lubricants, fluids and tyre pressures Page 0·16
MAINTENANCE
Routine maintenance and servicing Page 1·1
Servicing specifications Page 1·2
Maintenance schedule Page 1·3
Maintenance procedures Page 1·6
REPAIRS & OVERHAUL
Engine and associated systems
Engine in-car repair procedures Page 2A·1
Engine removal and overhaul procedures Page 2B·1
Cooling, heating and air conditioning systems Page 3·1
Fuel and exhaust systems Page 4·1
Engine electrical systems Page 5·1
Emissions and engine cone control systems Page 6·1
Transmission
Automatic transmission Page 7·1
Drivetrain Page 8·1
Brakes and suspension
Braking system Page 9·1
Suspension and steering systems Page 10·1
Body equipment
Bodywork and fittings Page 11·1
Body electrical systems Page 12·1
Wiring diagrams Page 12·16
REFERENCE
Dimensions and weights Page REF·1
Jacking and vehicle support Page REF·1
Radio/cassette unit anti-theft system - precaution Page REF·1
Conversion factors Page REF·2
Use of English Page REF·3
Buying spare parts and vehicle identification Page REF·4
General repair procedures Page REF-5
Tools and working facilities Page REF·6
MOT test checks Page REF·8
Fault finding Page REF·12
Glossary of technical terms Page REF·18
Index
Page REF·22
0·4 Introduction
These models are equipped with dual overhead cam in-line six-cylinder engines. The engines feature a computer-controlled ignition system and electronic fuel injection. Transmissions are a four-speed automatic equipped with a lock-up torque converter. The transmission is mounted to the back of the engine, and power is transmitted to the fully independent rear axle through a two-piece propshaft. The differential is bolted solidly to a frame crossmember and drives the wheels through driveshafts equipped with inner and outer U-joints.
The front suspension is fitted with upper and lower control arms, coil springs and shock absorbers. The rear suspension is an independent type suspension which also have coil spring/shock absorber assemblies and a lower control arm. The rear driveshaft acts as the upper control arm.
Power-assisted Anti-lock Brake Systems (ABS) with four-wheel disc brakes are standard equipment on all Jaguar XJ6 models covered in this manual. Power rack-and-pinion steering is also standard equipment.
Your Jaguar manual
The aim of this manual is to help you get the best value from your vehicle. It can do so in several ways. It can help you decide what work must be done (even should you choose to get it done by a garage). It will also provide information on routine maintenance and servicing, and give a logical course of action and diagnosis when random faults occur. However, it is hoped that you will use the manual by tackling the work yourself. On simpler jobs it may even be quicker than booking the car into a garage and going there twice, to leave and collect it. Perhaps most important, a lot of money can be saved by avoiding the costs a garage must charge to cover its labour and overheads.
The manual has drawings and descriptions to show the function of the various components so that their layout can be understood. Tasks are described and photographed in a clear step-by-step sequence.
Notes for UK readers
Because this manual was originally written in the US, its layout differs from our UK-originated manuals. The preliminary and reference sections have been re-written specifically for the UK market, and the maintenance schedule has been amended to suit UK vehicles. However, it will be noticed that some references to components remain in the US style; the UK equivalent of US components and various other US words is given in the Section headed "Use of English". It should be remembered that the project vehicle used in the main Chapters of this manual was a left-hand drive US model; therefore, the position of the steering wheel, steering column and pedals, etc. will be on the opposite side of the vehicle on UK models. References to "right" and "left" will need to be considered carefully to decide which applies to UK models (eg the headlight dipped beams should be adjusted to dip to the left of the headlight vertical line described in Chapter 12, instead of to the right on US models). In other instances, no reference is made to the location of a particular item, but that item may be located on the opposite side of the vehicle on UK models. Reference to the underbonnet photos at the start of Chapter 1 will give the reader the location of the engine compartment components on UK models.
All specifications in the main Chapters of the manual appear in Imperial form; the equivalent metric values can be calculated using the "Conversion factors" page.
The only other major difference between UK and US models is in the level of emission control equipment fitted to the vehicle. To meet the strict emission standards present in the US, all vehicles for that market are fitted with various emission control systems (see Chapter 6), most of which are not fitted to the corresponding UK model, especially so on early models. Therefore, a lot of the information contained in Chapter 6 is not applicable to UK models.
Acknowledgements
Thanks are due to Jean Preis, Rich Wilson and Ray Marcuse of Silver Star Jaguar (Thousand Oaks, CA), Rick Calaci of Conejo Imports (Newbury Park, CA) and Jim Strohmeier and Jonathan Lund of British Motor Cars (Thousand Oaks, CA), for providing valuable technical information. Technical writers who contributed to this project include Jeff Kibler, Robert Maddox and Jay Storer.
We take great pride in the accuracy of information given in this manual, but vehicle manufacturers make alterations and design changes during the production run of a particular vehicle of which they do not inform us. No liability can be accepted by the authors or publishers for loss, damage or injury caused by any errors in, or omissions from, the information given.
natural_image
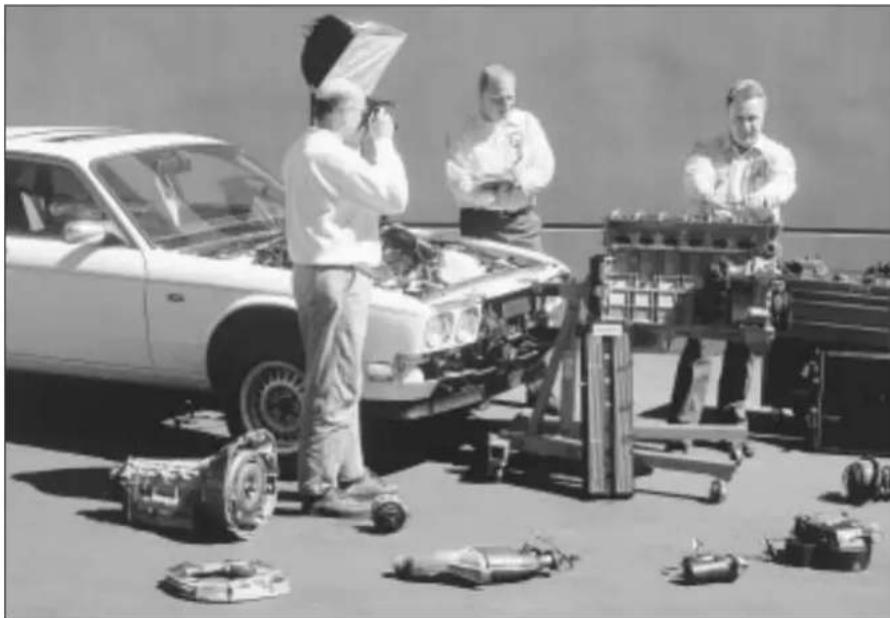
Black-and-white photo of three technicians working with a car and mechanical components, no visible text or symbolsHaynes mechanic, author and photographer with 1989 Jaguar XJ6
Working on your car can be dangerous. This page shows just some of the potential risks and hazards, with the aim of creating a safety-conscious attitude.
General hazards
Scalding
- Don't remove the radiator or expansion tank cap while the engine is hot.
- Engine oil, automatic transmission fluid or power steering fluid may also be dangerously hot if the engine has recently been running.
Burning
- Beware of burns from the exhaust system and from any part of the engine. Brake discs and drums can also be extremely hot immediately after use.
Crushing
- When working under or near a raised vehicle,
always supplement the jack with axle stands, or use drive-on ramps.
Never
venture
under a car which
is only supported by a jack.
• Take care if loosening or tightening high-torque nuts when the vehicle is on stands. Initial loosening and final tightening should be done with the wheels on the ground.

Fire
- Fuel is highly flammable; fuel vapour is explosive.
- Don't let fuel spill onto a hot engine.
- Do not smoke or allow naked lights (including pilot lights) anywhere near a vehicle being worked on. Also beware of creating sparks (electrically or by use of tools).
- Fuel vapour is heavier than air, so don't work on the fuel system with the vehicle over an inspection pit.
- Another cause of fire is an electrical overload or short-circuit. Take care when repairing or modifying the vehicle wiring.
- Keep a fire extinguisher handy, of a type suitable for use on fuel and electrical fires.
Electric shock
- Ignition HT voltage can be dangerous,
especially to people with heart problems or a pacemaker. Don't work on or near the ignition system with the engine running the ignition switch

- Mains voltage is also dangerous. Make sure that any mains-operated equipment is correctly earthed. Mains power points should be protected by a residual current device (RCD) circuit breaker.
Fume or gas intoxication
- Exhaust fumes are poisonous; they often contain carbon monoxide, which is rapidly fatal if inhaled.
Never run the engine in a confined space such as a garage with the doors shut.
- Fuel vapour is also poisonous, as are the vapours from some cleaning solvents and paint thinners.
Poisonous or irritant substances
- Avoid skin contact with battery acid and with any fuel, fluid or lubricant, especially antifreeze, brake hydraulic fluid and Diesel fuel. Don't syphon them by mouth. If such a substance is swallowed or gets into the eyes, seek medical advice.
- Prolonged contact with used engine oil can cause skin cancer. Wear gloves or use a barrier cream if necessary. Change out of oil-soaked clothes and do not keep oily rags in your pocket.
• Air conditioning refrigerant forms a poisonous gas if exposed to a naked flame (including a cigarette). It can also cause skin burns on contact.
Asbestos
- Asbestos dust can cause cancer if inhaled or swallowed. Asbestos may be found in gaskets and in brake and clutch linings. When dealing with such components it is safest to assume that they contain asbestos.

Special hazards
Hydrofluoric acid
- This extremely corrosive acid is formed when certain types of synthetic rubber, found in some O-rings, oil seals, fuel hoses etc, are exposed to temperatures above 400^ . The rubber changes into a charred or sticky substance containing the acid. Once formed, the acid remains dangerous for years. If it gets onto the skin, it may be necessary to amputate the limb concerned.
- When dealing with a vehicle which has suffered a fire, or with components salvaged from such a vehicle, wear protective gloves and discard them after use.
The battery
- Batteries contain sulphuric acid, which attacks clothing, eyes and skin. Take care when topping-up or carrying the battery.
• The hydrogen gas given off by the battery is highly explosive. Never cause a spark or allow a naked light nearby. Be careful when connecting and disconnecting battery chargers or jump leads.
Air bags
• Air bags can cause injury if they go off accidentally. Take care when removing the steering wheel and/or facia. Special storage instructions may apply.
Diesel injection equipment
• Diesel injection pumps supply fuel at very high pressure. Take care when working on the fuel injectors and fuel pipes.

Warning: Never expose the hands, face or any other part of the body to injector spray; the fuel can
penetrate the skin with potentially fatal results.
Remember...
DO
- Do use eye protection when using power tools, and when working under the vehicle.
- Do wear gloves or use barrier cream to protect your hands when necessary.
- Do get someone to check periodically that all is well when working alone on the vehicle.
- Do keep loose clothing and long hair well out of the way of moving mechanical parts.
- Do remove rings, wristwatch etc, before working on the vehicle – especially the electrical system.
- Do ensure that any lifting or jacking equipment has a safe working load rating adequate for the job.
DON'T
- Don't attempt to lift a heavy component which may be beyond your capability – get assistance.
- Don't rush to finish a job, or take unverified short cuts.
- Don't use ill-fitting tools which may slip and cause injury.
- Don't leave tools or parts lying around where someone can trip over them. Mop up oil and fuel spills at once.
- Don't allow children or pets to play in or near a vehicle being worked on.
0·6 Roadside repairs
The following pages are intended to help in dealing with common roadside emergencies and breakdowns. You will find more detailed fault finding information at the back of the manual, and repair information in the main chapters.
If your car won't start and the starter motor doesn't turn
□ If it's a model with automatic transmission, make sure the selector is in 'P' or 'N'.
□ Open the bonnet and make sure that the battery terminals are clean and tight.
□ Switch on the headlights and try to start the engine. If the headlights go very dim when you're trying to start, the battery is probably flat. Get out of trouble by jump starting (see next page) using a friend's car.
If your car won't start even though the starter motor turns as normal
□ Is there fuel in the tank?
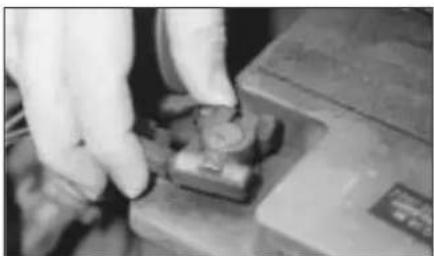
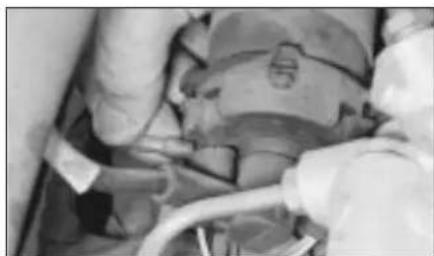
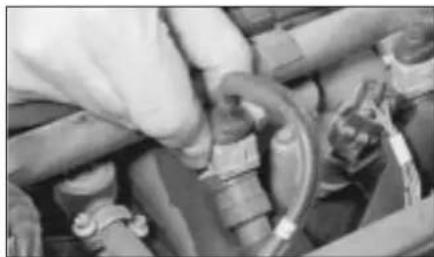
□ Is there moisture on electrical components under the bonnet? Switch off the ignition, then wipe off any obvious dampness with a dry cloth. Spray a water-repellent aerosol product (WD-40 or equivalent) on ignition and fuel system electrical connectors like those shown in the photos. Pay special attention to the ignition coil wiring connector and HT leads.
natural_image
Close-up of a hand using a tool to adjust or install a component on a battery (no visible text or symbols)A Check the condition and security of the battery connections.

natural_image
Close-up of a mechanical component with curved and flanged surfaces (no visible text or symbols)B Check that the spark plug HT leads are securely connected by pushing them onto the plugs and distributorery connections.
natural_image
Close-up of hands operating a mechanical device with a tool (no visible text or symbols)C Check that the HT leads and wiring connectors are securely connected to the ignition coil.

Check that electrical connections are secure (with the ignition switched off) and spray them with a water dispersant spray like WD40 if you suspect a problem due to damp
natural_image
Close-up of hands adjusting a mechanical component with pipes and valves (no visible text or symbols)D Check that the wiring connectors are securely connected to the injectors and various fuel system sensors and switches.

Jump starting will get you out of trouble, but you must correct whatever made the battery go flat in the first place. There are three possibilities:
1) The battery has been drained by repeated attempts to start, or by leaving the lights on.
2) The charging system is not working properly (alternator drivebelt slack or broken, alternator wiring fault or alternator itself faulty).
3) The battery itself is at fault (electrolyte low, or battery worn out).
When jump-starting a car using a booster battery, observe the following precautions:
√ Before connecting the booster battery, make sure that the ignition is switched off.
√ Ensure that all electrical equipment (lights, heater, wipers, etc) is switched off.
√ Take note of any special precautions printed on the battery case.
Jump starting
√ Make sure that the booster battery is the same voltage as the discharged one in the vehicle.
√ If the battery is being jump-started from the battery in another vehicle, the two vehicles MUST NOT TOUCH each other.
√ Make sure that the transmission is in neutral (or PARK, in the case of automatic transmission).

natural_image
Close-up of hands connecting wires to a mechanical component (no visible text or symbols)1 Connect one end of the red jump lead to the positive (+) terminal of the flat battery

natural_image
Close-up of a person's foot pressing down on a mechanical component (no visible text or symbols)Connect the other end of the red lead to the positive (+) terminal of the booster battery
natural_image
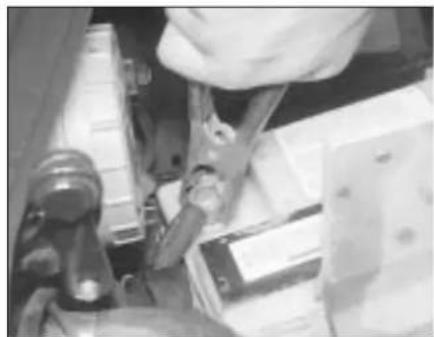
Close-up of a mechanical assembly with gears and components (no visible text or symbols)Connect one end of the black jump lead to the negative (-) terminal of the booster battery

flowchart
graph TD
    A["Panel 1"] --> B["Switch with +/- polarity"]
    C["Panel 2"] --> D["Switch with +/- polarity"]
    B --> E["Ground Symbol"]
    D --> F["Ground Symbol"]
    style A fill:#f9f,stroke:#333
    style C fill:#f9f,stroke:#333
    style B fill:#ccf,stroke:#333
    style D fill:#ccf,stroke:#333
    style E fill:#dfd,stroke:#333
    style F fill:#dfd,stroke:#333
natural_image
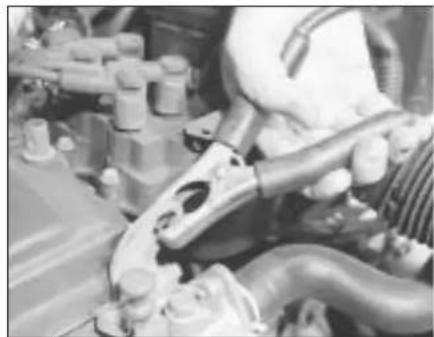
Close-up of mechanical components and hoses in a vehicle (no visible text or symbols)4 Connect the other end of the black jump lead to a bolt or bracket on the engine block, well away from the battery, on the vehicle to be started
5 Make sure that the jump leads will not come into contact with the fan, drivebelts or other moving parts of the engine
6 Start the engine using the booster battery, then with the engine running at idle speed, disconnect the jump leads in the reverse order of connection
Wheel changing
Some of the details shown here will vary according to model. For instance, the location of the spare wheel and jack is not the same on all cars. However, the basic principles apply to all vehicles.

Warning: Do not change a wheel in a situation where you risk being hit by other traffic. On busy roads, try to stop in a lay-by or a gateway. Be wary of passing traffic while changing the wheel – it is easy to become distracted by the job in hand.
Preparation
□ When a puncture occurs, stop as soon as it is safe to do so.
□ Park on firm level ground, if possible, and well out of the way of other traffic.
□ Use hazard warning lights if necessary.
□ If you have one, use a warning triangle to alert other drivers of your presence.
□ Apply the handbrake and engage first or reverse gear (or Park on models with automatic transmission.
□ Chock the wheel diagonally opposite the one being removed – a couple of large stones will do for this.
☐ If the ground is soft, use a flat piece of wood to spread the load under the jack.
Changing the wheel

natural_image
Close-up of a hand adjusting a mechanical component with circular holes and a ring (no visible text or symbols)1 The spare wheel and tools are stored in the boot. Remove the carpet cover then unscrew the retainer and lift out the spare wheel from the boot.

natural_image
Black-and-white photo of a person inside a door, holding a tool and a small object (no visible text or symbols)2 Remove the jack and wheelbrace its holder which is located behind the spare wheel.

natural_image
Close-up of a car wheel rim with a metal rod inserted, showing bolt holes and concentric rings (no text or symbols visible)3 With the vehicle on the ground, remove the trim cap (where fitted) and slacken each wheel nut by half a turn.
natural_image
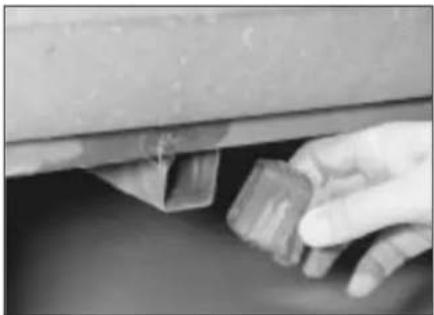
Close-up of a hand pressing down on a car wheel component (no visible text or symbols)4 Remove the plastic cover from the end of the vehicle jack lifting point tube, nearest to the wheel that is being changed.

natural_image
Close-up of a hand using a mechanical clamp or tool on a workbench (no visible text or symbols)5 Slide the lifting bracket of the jack fully into the lifting point tube. Make sure the jack is located on firm ground.
natural_image
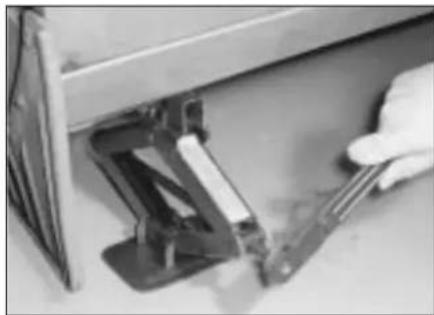
Close-up of a hand using a tool to adjust or install a mechanical component (no visible text or symbols)6 Raise the jack until the wheel is raised clear of the ground. Unscrew the wheel nuts and remove the wheel. Fit the spare wheel and screw on the nuts. Lightly tighten the nuts then lower the vehicle to the ground.
natural_image
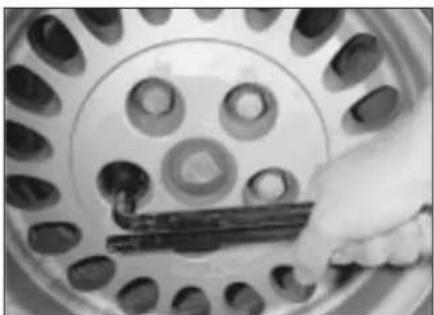
Close-up of a hand holding a tool next to a circular mechanical component (no visible text or symbols)7 Securely tighten the wheel nuts in a diagonal sequence then (where necessary) refit the wheel trim cap. Stow the tolls and punctured wheel and back in the luggage compartment and secure them in position. Note that the wheel nuts should be slackened and retightened to the specified torque at the earliest possible opportunity.
Finally...
□ Remove the wheel chocks.
☐ Check the tyre pressure on the wheel just fitted. If it is low, or if you don't have a pressure gauge with you, drive slowly to the nearest garage and inflate the tyre to the right pressure.
□ Have the damaged tyre or wheel repaired as soon as possible.
Puddles on the garage floor or drive, or obvious wetness under the bonnet or underneath the car, suggest a leak that needs investigating. It can sometimes be difficult to decide where the leak is coming from, especially if the engine bay is very dirty already. Leaking oil or fluid can also be blown rearwards by the passage of air under the car, giving a false impression of where the problem lies.

Warning: Most automotive oils and fluids are poisonous. Wash them off skin, and change out of contaminated clothing, without delay.

The smell of a fluid leaking from the car may provide a clue to what's leaking. Some fluids are distinctively
coloured. It may help to clean the car and to park it over some clean paper as an aid to locating the source of the leak. Remember that some leaks may only occur while the engine is running.
Sump oil Gearbox oil

natural_image
Close-up of a metallic bolt head with a hexagonal nut, resting on a textured surface (no text or symbols visible)Engine oil may leak from the drain plug... ...or from the base of the oil filter.
Oil from filter

natural_image
Close-up of mechanical components with bolts and a central square component (no visible text or symbols)Antifreeze

natural_image
Close-up of a mechanical pipe assembly with visible fittings and joints (no text or symbols)Leaking antifreeze often leaves a crystalline deposit like this.
Brake fluid

natural_image
Close-up of a car suspension system with visible springs and suspension components (no text or symbols)A leak occurring at a wheel is almost certainly brake fluid.
natural_image
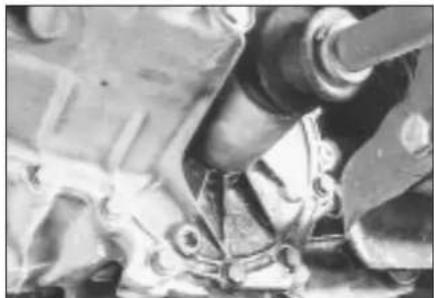
Close-up of mechanical components including a cylindrical shaft and mechanical parts (no visible text or symbols)Gearbox oil can leak from the seals at the inboard ends of the driveshafts.
Power steering fluid
natural_image
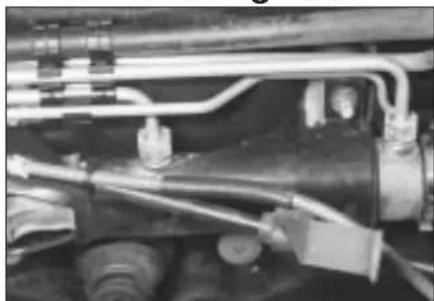
Close-up of industrial piping and valves in a vehicle (no visible text or symbols)Power steering fluid may leak from the pipe connectors on the steering rack.
When all else fails, you may find yourself having to get a tow home – or of course you may be helping somebody else. Long-distance recovery should only be done by a garage or breakdown service. For shorter distances, DIY towing using another car is easy enough, but observe the following points:
□ Use a proper tow-rope – they are not expensive. The vehicle being towed must display an 'ON TOW' sign in its rear window.
□ Always turn the ignition key to the 'on' position when the vehicle is being towed, so that the steering lock is released, and that the direction indicator and brake lights will work.
□ Only attach the tow-rope to the towing eyes provided. On some models with energy-absorbing bumpers there are no front towing eyes; on these vehicles the tow-rope should
be attached around the rear arm of the lower control arm so that the rope passes on the inside of the coil spring.
□ Before being towed, release the handbrake and select neutral on the transmission.
☐ Note that greater-than-usual pedal pressure will be required to operate the brakes, since the vacuum servo unit is only operational with the engine running.
☐ On models with power steering, greater-than-usual steering effort will also be required.
☐ The driver of the car being towed must keep the tow-rope taut at all times to avoid snatching.
□ Make sure that both drivers know the route before setting off.
□ Only drive at moderate speeds and keep the distance towed to a minimum. Drive
Towing
smoothly and allow plenty of time for slowing down at junctions.
☐ On models with automatic transmission, special precautions apply. If in doubt, do not tow, or transmission damage may result.
Caution: On models with automatic transmission, if the vehicle is to be towed with its rear wheels on the ground, and extra 1.7 litres of fluid should be added to the transmission, prior to towing (this extra fluid must be drained before driving the vehicle). Even with the extra fluid added to the transmission, do not tow the vehicle at speeds in excess of 30 mph (50 kmh) or for a distance of greater than 15 miles (25 km). If towing speed/distance are to exceed these limits, then the vehicle must be towed with its rear wheels off the ground.
Introduction
There are some very simple checks which need only take a few minutes to carry out, but which could save you a lot of inconvenience and expense.
These "Weekly checks" require no great skill or special tools, and the small amount of time they take to perform could prove to be very well spent, for example;
□ Keeping an eye on tyre condition and pressures, will not only help to stop them wearing out prematurely, but could also save your life.
□ Many breakdowns are caused by electrical problems. Battery-related faults are particularly common, and a quick check on a regular basis will often prevent the majority of these.
□ If your car develops a brake fluid leak, the first time you might know about it is when your brakes don't work properly. Checking the level regularly will give advance warning of this kind of problem.
☐ If the oil or coolant levels run low, the cost of repairing any engine damage will be far greater than fixing the leak, for example.
Underbonnet check points
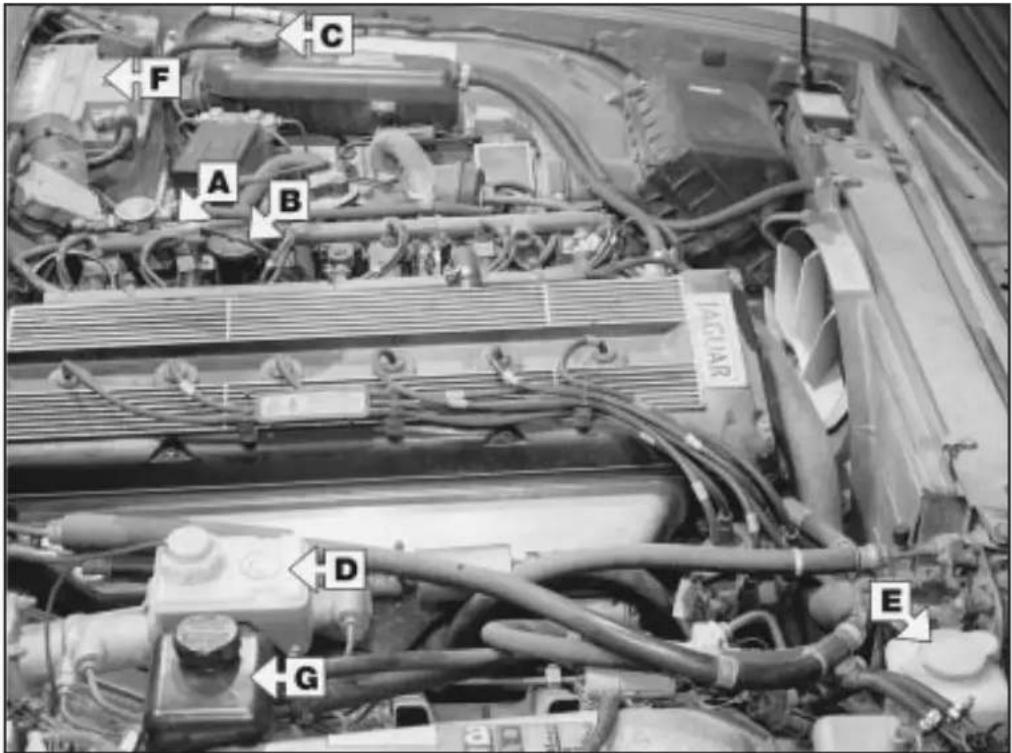
◀3.6 litre engine (others similar)
Viewed from right-hand side
A Engine oil level dipstick
B Engine oil filler cap
C Coolant expansion tank
D Brake fluid reservoir
E Screen washer fluid reservoir
F Battery
G Power steering fluid reservoir
Engine oil level
Before you start
√ Make sure that your car is on level ground. √ Check the oil level before the car is driven, or at least 5 minutes after the engine has been switched off.

If the oil level is checked immediately after driving the vehicle, some of the oil will remain in the upper engine units, resulting in an inaccurate on the dipstick!
The correct oil
Modern engines place great demands on their oil. It is very important that the correct oil for your car is used (See "Lubricants, fluids and tyre pressures").
Car care
- If you have to add oil frequently, you should check whether you have any oil leaks. Place some clean paper under the car overnight, and check for stains in the morning. If there are no leaks, the engine may be burning oil (see "Fault finding").
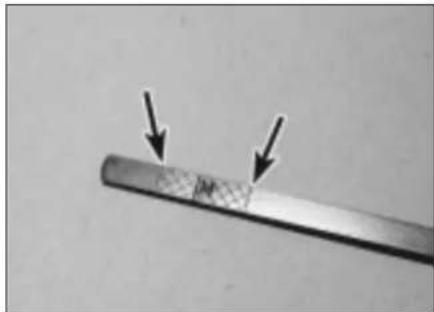
● Always maintain the level between the upper and lower dipstick marks (see photo 3). If the level is too low severe engine damage may occur. Oil seal failure may result if the engine is overfilled by adding too much oil.
natural_image
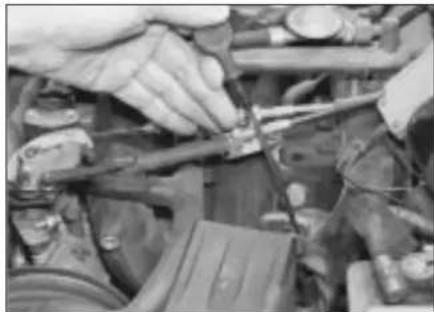
Close-up of hands using pliers to adjust engine components (no visible text or symbols)1 The dipstick is located at the rear of the engine on the left-hand side (see "Underbonnet check points" on page 0·10 for exact location). Withdraw the dipstick.

natural_image
Close-up of hands cleaning a white cloth or fabric (no visible text or symbols)2 Using a clean rag or paper towel remove all oil from the dipstick. Insert the clean dipstick into the tube as far as it will go, then withdraw it again.
natural_image
Close-up of a fiber with two arrows pointing to its surface (no text or symbols visible)3 Note the oil level on the end of the dipstick which should be between the upper and lower marks. The "M" mark is for use when checking the oil level after the vehicle has been standing overnight; in this case the oil level should be between the "M" and upper level markings.

natural_image
Close-up of a hand holding an EXR-branded container with visible internal components (no readable text or symbols)4 Oil is added through the filler cap. Unscrew the cap and top-up the level; a funnel may help to reduce spillage. Add the oil slowly, checking the level on the dipstick often. Don't overfill (see "Car care" left).
Coolant level

Warning: DO NOT attempt to remove the expansion tank pressure cap when the engine is hot, as there is a very great risk of scalding. Do not leave open containers of coolant about, as it is poisonous.
Car care
- Adding coolant should not be necessary on a regular basis. If frequent topping-up is required, it is likely there is a leak. Check the radiator, all hoses and joint faces for signs of staining or wetness, and rectify as necessary. - It is important that antifreeze is used in the cooling system all year round, not just during the winter months. Don't top-up with water alone, as the antifreeze will become too diluted.
natural_image
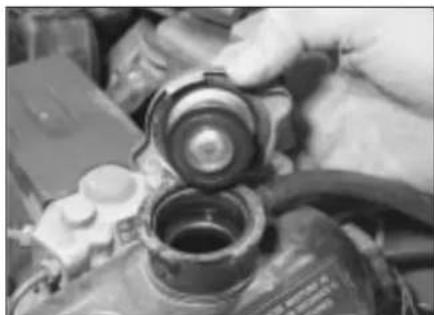
Close-up of hands adjusting a mechanical component with a cylindrical housing and hoses (no visible text or symbols)1 The coolant level should be checked only with the engine cold. The level is checked in the expansion tank on the left-hand side of the engine compartment. Remove the expansion tank pressure cap and check that the coolant level is upto the base of filler neck.
natural_image
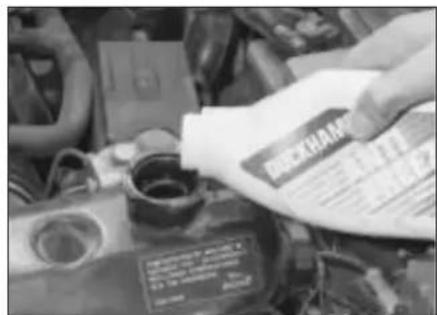
Close-up of a hand pouring liquid into a car engine, no visible text or symbols on the object itself.2 If topping up is necessary, add a mixture of water and antifreeze to the expansion tank until the coolant level is upto the base of the filler neck. Once the level is correct, securely refit the pressure cap.
Brake fluid level

Warning:
● Brake fluid can harm your eyes and will damage painted surfaces, so use extreme caution when handling and pouring it.
- Do not use fluid that has been standing open for some time, as it absorbs moisture from the air, which can cause a dangerous loss of braking effectiveness.
HAYNES
HINT
• Make sure that your car is on level ground.
• The fluid level in the reservoir will drop slightly as
the brake pads wear down, but the fluid level must never be allowed to drop below the "MIN" mark.
Safety first!
- If the reservoir requires repeated topping-up this is an indication of a fluid leak somewhere in the system, which should be investigated immediately.
- If a leak is suspected, the car should not be driven until the braking system has been checked. Never take any risks where brakes are concerned.
natural_image
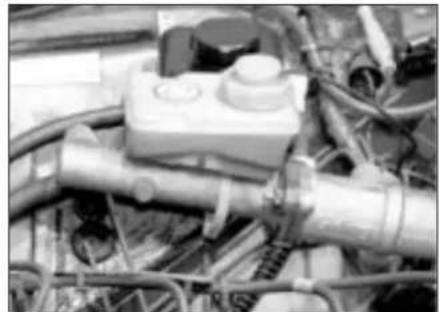
Close-up of industrial piping and machinery components (no visible text or symbols)1 The brake fluid reservoir is located on the right-hand rear corner of the engine compartment, on top of the master cylinder.
natural_image
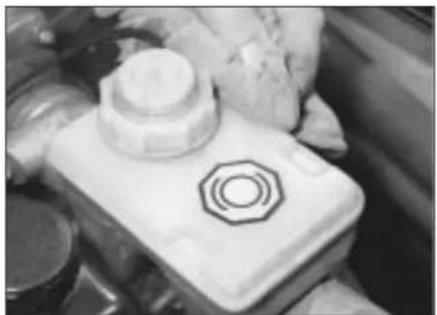
Close-up of a white mechanical component with a hexagonal bolt symbol, partially covered by a hand holding it (no visible text or symbols)3 If topping up is necessary, first wipe clean the area around the filler cap with a clean cloth then unscrew the cap and position it clear of the reservoir.

natural_image
Close-up of a mechanical component with two bolts and a hexagonal nut, showing directional arrows (no readable text or symbols)2 The upper (MAX) and lower (MIN) fluid level markings are on the side of the brake fluid reservoir. The fluid level must always be kept between these two marks.
natural_image
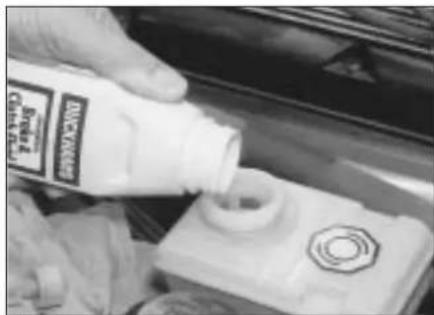
Close-up of a hand pouring liquid into a car engine component (no visible text or symbols)4 Carefully add fluid, avoiding spilling it on the surrounding paintwork. Use only the specified hydraulic fluid. After filling the correct level, refit the cap and tighten it securely. Wipe off any spilt fluid.
Screen washer fluid level
Screenwash additives not only keep the winscreen clean during foul weather, they also prevent the washer system freezing in cold weather - which is when you are likely to need it most. Don't top up using plain water as the screenwash will become too diluted, and will freeze during cold weather. On no account use coolant antifreeze in the washer system - this could discolour or damage paintwork.

natural_image
Close-up of a car engine bay with hoses and a valve, no visible text or symbols1 The screen washer fluid reservoir is located in the front, right-hand corner of the engine compartment. The level is visible through the reservoir body.
natural_image
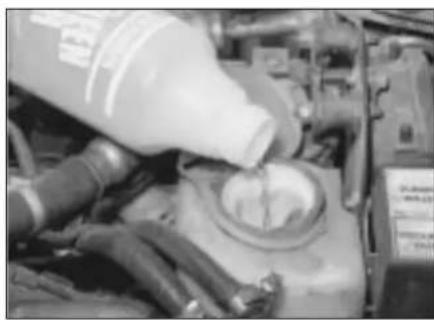
Close-up of a car engine bay with a bottle pouring liquid into the engine (no visible text or symbols)2 If topping up is necessary, add water and a screenwash additive in the quantities recommended on the bottle.
Power steering fluid level
Before you start:
√ Park the vehicle on level ground.
√ Set the steering wheel straight-ahead.
√ The engine should be turned off.

For the check to be accurate, the steering must not be turned once the engine has been stopped.

natural_image
Close-up of hands cleaning a black ink bottle with a white plastic container (no visible text or symbols)1 Wipe clean the area around the reservoir cap then remove the cap noting that it unscrews in a clockwise direction (see arrow on cap).

natural_image
Close-up of a hand adjusting a mechanical component with a metallic lever (no visible text or symbols)2 Wipe clean the cap dipstick then insert it fully into the reservoir and withdraw it.
Safety first!
● The need for frequent topping-up indicates a leak, which should be investigated immediately.

Warning:
● This check applies only to vehicles fitted with a separate power steering system. For vehicles fitted with power steering where the fluid
reservoir is part of the power hydraulic system, this weekly check is not applicable.
- It is essential to use the correct power steering fluid, this being dependent on the year of manufacture and type of system fitted. A label attached to the fluid reservoir will indicate the specification of fluid. However, if necessary refer to the driver's handbook supplied with the vehicle or to your local Jaguar dealer.
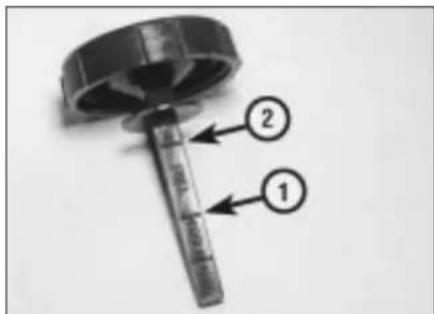
3 Note the fluid level on the end of the dipstick. If the fluid is cold (vehicle not having been used) the fluid level should be upto the COLD level marking (1). If the vehicle has been driven and the fluid is hot then the fluid level should be upto the upper (HOT) level marking (2).

natural_image
Close-up of a mechanical component with wires and a bottle, no visible text or symbols4 If necessary, top-up the reservoir with the specified type of fluid (note that the type of fluid differs according to model - see
"Lubricants, fluids and tyre pressures" on page 0·16). Once the level is correct, securely refit the reservoir cap. Do not overfill the reservoir.
Wiper blades
natural_image
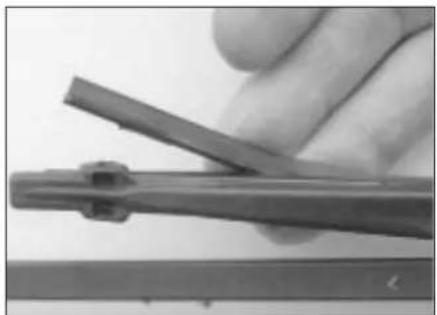
Close-up of a hand using a tool to cut a metal strip (no text or symbols visible)1 Check the condition of the wiper blades: if they are cracked or show signs of deterioration, or if the glass swept area is smeared, renew them. For maximum clarity of vision, wiper blades should be renewed annually.

natural_image
Close-up of hands holding a metal tool, no visible text or symbols2 To remove a wiper blade, pull the arm fully away from the screen until it locks. Swivel the blade then depress the locking clip at the base of the mounting block and slide the blade off the arm.
Tyre condition and pressure
It is very important that tyres are in good condition, and at the correct pressure - having a tyre failure at any speed is highly dangerous. Tyre wear is influenced by driving style - harsh braking and acceleration, or fast cornering, will all produce more rapid tyre wear. As a general rule, the front tyres wear out faster than the rears. Interchanging the tyres from front to rear ("rotating" the tyres) may result in more even wear. However, if this is completely effective, you may have the expense of replacing all four tyres at once! Remove any nails or stones embedded in the tread before they penetrate the tyre to cause deflation. If removal of a nail does reveal that the tyre has been punctured, refit the nail so that its point of penetration is marked. Then immediately change the wheel, and have the tyre repaired by a tyre dealer.
Regularly check the tyres for damage in the form of cuts or bulges, especially in the sidewalls. Periodically remove the wheels, and clean any dirt or mud from the inside and outside surfaces. Examine the wheel rims for signs of rusting, corrosion or other damage. Light alloy wheels are easily damaged by "kerbing" whilst parking; steel wheels may also become dented or buckled. A new wheel is very often the only way to overcome severe damage.
New tyres should be balanced when they are fitted, but it may become necessary to rebalance them as they wear, or if the balance weights fitted to the wheel rim should fall off. Unbalanced tyres will wear more quickly, as will the steering and suspension components. Wheel imbalance is normally signified by vibration, particularly at a certain speed (typically around 50 mph). If this vibration is felt only through the steering, then it is likely that just the front wheels need balancing. If, however, the vibration is felt through the whole car, the rear wheels could be out of balance. Wheel balancing should be carried out by a tyre dealer or garage.
natural_image
Close-up of a car tire with two labeled points A and B, showing tread pattern and tire surface (no text or symbols beyond labels)1 Tread Depth - visual check
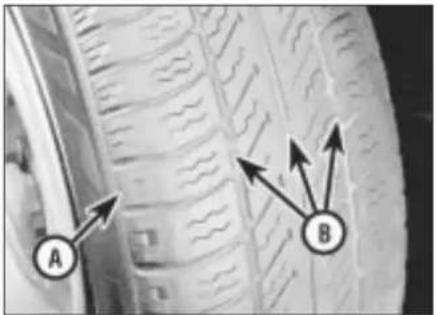
The original tyres have tread wear safety bands (B), which will appear when the tread depth reaches approximately 1.6 mm. The band positions are indicated by a triangular mark on the tyre sidewall (A).

natural_image
Close-up of a gloved hand holding a pen, writing on a textured surface (no visible text or symbols)2 Tread Depth - manual check
Alternatively, tread wear can be monitored with a simple, inexpensive device known as a tread depth indicator gauge.

natural_image
Close-up of a hand using a tool to mark the tire surface (no visible text or symbols)3 Tyre Pressure Check
Check the tyre pressures regularly with the tyres cold. Do not adjust the tyre pressures immediately after the vehicle has been used, or an inaccurate setting will result.
Tyre tread wear patterns

natural_image
Close-up of a car tire tread pattern (no text or symbols visible)Shoulder Wear
Underinflation (wear on both sides)
Under-inflation will cause overheating of the tyre, because the tyre will flex too much, and the tread will not sit correctly on the road surface. This will cause a loss of grip and excessive wear, not to mention the danger of sudden tyre failure due to heat build-up.
Check and adjust pressures
Incorrect wheel camber (wear on one side) Repair or renew suspension parts
Hard cornering
Reduce speed!

natural_image
Close-up of a car tire with visible tread pattern (no text or symbols)Centre Wear
Overinflation
Over-inflation will cause rapid wear of the centre part of the tyre tread, coupled with reduced grip, harsher ride, and the danger of shock damage occurring in the tyre casing. Check and adjust pressures
If you sometimes have to inflate your car's tyres to the higher pressures specified for maximum load or sustained high speed, don't forget to reduce the pressures to normal afterwards.

natural_image
Close-up of a car tire tread pattern (no text or symbols visible)Uneven Wear
Front tyres may wear unevenly as a result of wheel misalignment. Most tyre dealers and garages can check and adjust the wheel alignment (or "tracking") for a modest charge.
Incorrect camber or castor
Repair or renew suspension parts
Malfunctioning suspension
Repair or renew suspension parts
Unbalanced wheel
Balance tyres
Incorrect toe setting
Adjust front wheel alignment
Note: The feathered edge of the tread which typifies toe wear is best checked by feel.
Battery
Caution: Before carrying out any work on the vehicle battery, read the precautions given in "Safety first" at the start of this manual.
√ Make sure that the battery tray is in good condition, and that the clamp is tight. Corrosion on the tray, retaining clamp and the battery itself can be removed with a solution of water and baking soda. Thoroughly rinse all cleaned areas with water. Any metal parts damaged by corrosion should be covered with a zinc-based primer, then painted.
√ Periodically (approximately every three months), check the charge condition of the battery as described in Chapter 5.
√ If the battery is flat, and you need to jump start your vehicle, see Roadside Repairs.
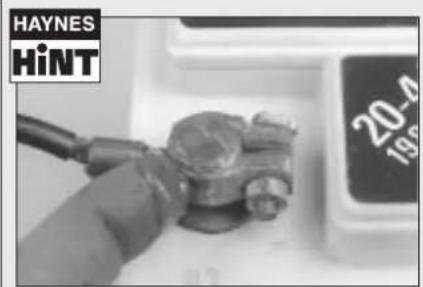
Battery corrosion can be kept to a minimum by applying a layer of petroleum jelly to the clamps and terminals after they are reconnected.

natural_image
Close-up of a car's internal battery pack and fuel tank (no visible text or symbols)1 The battery is located in the left-hand, rear corner of the engine compartment. Check the battery terminals for signs of corrosion and examine the battery leads closely for signs of damage.
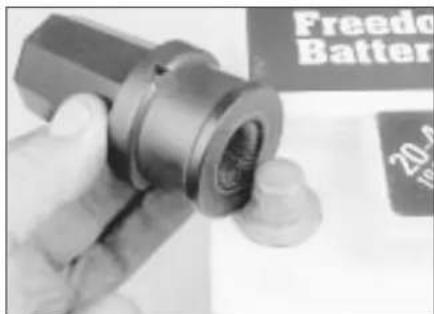
3 If corrosion (white, fluffy deposits) is evident, remove the cables from the battery terminals, clean them with a small wire brush, then refit them. Automotive stores sell a tool for cleaning the battery post ...

natural_image
Close-up of hands using a tool to adjust or install a mechanical component (no visible text or symbols)2 Check the battery lead clamps for tightness to ensure good electrical connections.

natural_image
Close-up of hands holding a mechanical component with visible internal structure (no text or symbols)4 ... as well as the battery cable clamps
Bulbs and fuses
√ Check all external lights and the horn. Refer to the appropriate Sections of Chapter 12 for details if any of the circuits are found to be inoperative.

natural_image
Close-up of hands assembling electronic components on a circuit board (no visible text or symbols)1 If a single indicator light, stop light or headlight has failed, it is likely that a bulb has blown and will need to be replaced. Refer to Chapter 12 for details. If both stop lights have failed, it is possible that the switch has failed (see Chapter 9).
√ Visually check all accessible wiring connectors, harnesses and retaining clips for security, and for signs of chafing or damage.
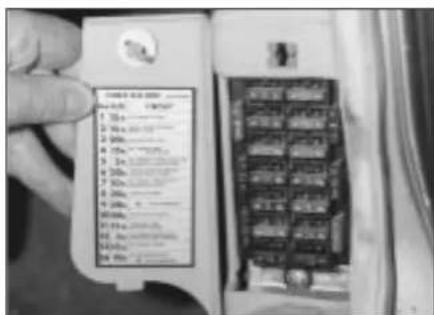
2 If more than one indicator light or tail light has failed it is likely that either a fuse has blown or that there is a fault in the circuit. The fuseboxes are located behind the left and right side kick panels and in the centre console glove box (see Chapter 12).

If you need to check your brake lights and indicators unaided, back up to a wall or garage door and operate the reflected light should show if working properly.
natural_image
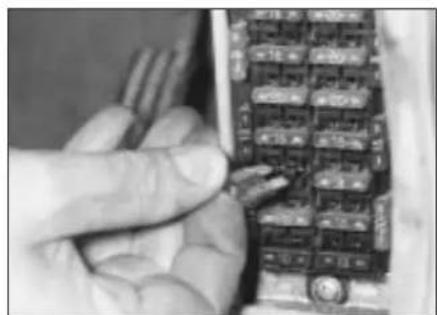
Close-up of a hand inserting a small electronic component into a device (no visible text or symbols)3 To replace a blown fuse, simply pull it out and fit a new fuse of the correct rating (see Chapter 12). If the fuse blows again, it is important that you find out why - a complete checking procedure is given in Chapter 12.
Lubricants and fluids
| Engine | Multigrade engine oil to API SG or higher (Duckhams QS, QXR, Hypergrade Plus, Hypergrade, or 10W-40 Motor Oil) |
| Cooling system | Ethylene glycol based (phosphate free) antifreeze(Duckhams Antifreeze and Summer Coolant) |
| Automatic transmission | Dexron type II automatic transmission fluid (ATF) (Duckhams Uni-Matic) |
| Differential: | |
| Standard differential | SAE EP90 to API GL5 (Duckhams 80W-90S Gear Oil) |
| Powr-lok differential | SAE 90 to API GL5 (Duckhams Hypoid 90 DL) |
| Braking system | Hydraulic fluid to DOT 4 (Duckhams Universal Brake and Clutch Fluid) |
| Power steering (with separate reservoir) | dependent on year of manufacture and system fitted - refer to your Jaguar dealer |
| Power hydraulic system | Castrol or Jaguar hydraulic system mineral oil (HSMO) Refer to your Jaguar dealer |
Choosing your engine oil
Oils perform vital tasks in all engines. The higher the engine's performance, the greater the demand on lubricants to minimise wear as well as optimise power and economy. Duckhams tailors lubricants to the highest technical standards, meeting and exceeding the demands of all modern engines.
HOW ENGINE OIL WORKS
- Beating friction
Without oil, the surfaces inside your engine which rub together will heat, fuse and quickly cause engine seizure. Oil, and its special additives, forms a molecular barrier between moving parts, to stop wear and minimise heat build-up.
- Cooling hot spots
Oil cools parts that the engine's water-based coolant cannot reach, bathing the combustion chamber and pistons, where temperatures may exceed 1000°C. The oil assists in transferring the heat to the engine cooling system. Heat in the oil is also lost by air flow over the sump, and via any auxiliary oil cooler.
- Cleaning the inner engine
Oil washes away combustion by-products (mainly carbon) on pistons and cylinders, transporting them to the oil filter, and holding the smallest particles in suspension until they are flushed out by an oil change. Duckhams oils undergo extensive tests in the laboratory, and on the road.

Note: It is antisocial and illegal to dump oil down the drain. To find the location of your local oil recycling bank, call this number free.
Engine oil types
Mineral oils are the "traditional" oils, generally suited to older engines and cars not used in harsh conditions. Duckhams Hypergrade Plus and Hypergrade are well suited for use in most popular family cars.
Diesel oils such as Duckhams Diesel are specially formulated for Diesel engines, including turbocharged models and 4x4s.
Synthetic oils are the state-of-the-art in lubricants, offering ultimate protection, but at a fairly high price. One such is Duckhams QS, for use in ultra-high performance engines.
Semi-synthetic oils offer high performance engine protection, but at less cost than full synthetic oils. Duckhams QXR is an ideal choice for hot hatches and hard-driven cars.
For help with technical queries on lubricants, call Duckhams Oils on 0181 290 8207

Tyre pressures
Note: Tyre pressures must always be checked with the tyres cold to ensure accuracy.
| Front | 34 psi (2.3 bar) |
| Rear | 34 psi (2.3 bar) |
Note: Jaguar state that the tyre pressures may be reduced by up to 8 psi (0.6 bar) on the front tyres and 6 psi (0.4 bar) on the rear tyres to increase the ride comfort. This is only allowable if the vehicle is not to be driven at speeds in excess of 100 mph (160 kmh); if speeds are to exceed this, the tyres must be run at the specified pressures.




- Jaguar XJ6 Service and Repair Manual
- Models covered
- LIVING WITH YOUR JAGUAR XJ6
- Roadside repairs
- Weekly checks
- MAINTENANCE
- REPAIRS & OVERHAUL
- Engine and associated systems
- Transmission
- Brakes and suspension
- Body equipment
- REFERENCE
- 0·4 Introduction
- Your Jaguar manual
- Notes for UK readers
- Acknowledgements
- General hazards
- Scalding
- Burning
- Crushing
- Fire
- Electric shock
- Fume or gas intoxication
- Poisonous or irritant substances
- Asbestos
- Special hazards
- Hydrofluoric acid
- The battery
- Air bags
- Diesel injection equipment
- Remember...
- DO
- DON'T
- 0·6 Roadside repairs
- If your car won't start and the starter motor doesn't turn
- If your car won't start even though the starter motor turns as normal
- Jump starting
- Wheel changing
- Preparation
- Changing the wheel
- Finally...
- Towing
- Introduction
- Underbonnet check points
- ◀3.6 litre engine (others similar)
- Engine oil level
- Before you start
- The correct oil
- Car care
- Coolant level
- Brake fluid level
- Warning:
- HAYNES
- HINT
- Safety first!
- Screen washer fluid level
- Power steering fluid level
- Before you start:
- Wiper blades
- Tyre condition and pressure
- Tread Depth - visual check
- Tread Depth - manual check
- Tyre Pressure Check
- Tyre tread wear patterns
- Shoulder Wear
- Underinflation (wear on both sides)
- Hard cornering
- Centre Wear
- Overinflation
- Uneven Wear
- Incorrect camber or castor
- Malfunctioning suspension
- Unbalanced wheel
- Incorrect toe setting
- Battery
- Bulbs and fuses
- Lubricants and fluids
- Choosing your engine oil
- HOW ENGINE OIL WORKS
- - Beating friction
- - Cooling hot spots
- - Cleaning the inner engine
- Engine oil types
- Tyre pressures
Brand : JAGUAR
Model : XJ6 (1997)
Category : Car