
SSD7749M2 - SSD Highpoint - Free user manual and instructions
Find the device manual for free SSD7749M2 Highpoint in PDF.


| Product Type | SSD (Solid State Drive) |
| Brand | Highpoint |
| Model | SSD7749M2 |
| Form Factor | M.2 2280 |
| Interface | PCIe 4.0 x4 / NVMe 1.4 |
| Capacity | 1 TB |
| NAND Flash Type | 3D TLC NAND |
| Sequential Read Speed | Up to 7,000 MB/s |
| Sequential Write Speed | Up to 5,000 MB/s |
| Random Read IOPS (4K) | Up to 1,000,000 IOPS |
| Random Write IOPS (4K) | Up to 800,000 IOPS |
| Power Consumption (Active) | 6 W typical |
| Power Consumption (Idle) | 50 mW typical |
| Operating Temperature | 0°C to 70°C |
| Dimensions (L x W x H) | 80 mm x 22 mm x 2.4 mm |
| Weight | 8 g |
| Warranty | 5 years limited warranty |
| Supported Features | TRIM, S.M.A.R.T., NCQ, Garbage Collection |
| Compatibility | Desktops and laptops with M.2 NVMe slot (PCIe 4.0 or 3.0) |
Frequently Asked Questions - SSD7749M2 Highpoint
User questions about SSD7749M2 Highpoint
0 question about this device. Answer the ones you know or ask your own.
Ask a new question about this device
Download the instructions for your SSD in PDF format for free! Find your manual SSD7749M2 - Highpoint and take your electronic device back in hand. On this page are published all the documents necessary for the use of your device. SSD7749M2 by Highpoint.
USER MANUAL SSD7749M2 Highpoint
natural_image
Front view of a high-precision PCI front-end card with a central fan and heatsink (no visible text or symbols)Quick Installation Guide
V1.00
System Requirements
PC Requirements
• PC platform with a free physical PCIe 4.0 (3.0 or 5.0) x16
- Form factor: Full-Height, Full-Length, Dual-Width
Operating System
- Windows 11, 10 / Server 2022, 2019, 2016 / Microsoft Hyper
- RHEL/ Debian/ Ubuntu/ Fedora/ Proxmox/ Rocky Linux (Linux kernel 3.10 and later)
Kit Content
- 1x SSD7749M2
• 1x Quick Installation Guide
• 16x M.2 rubbers
SSD7749M2 Hardware
Front View
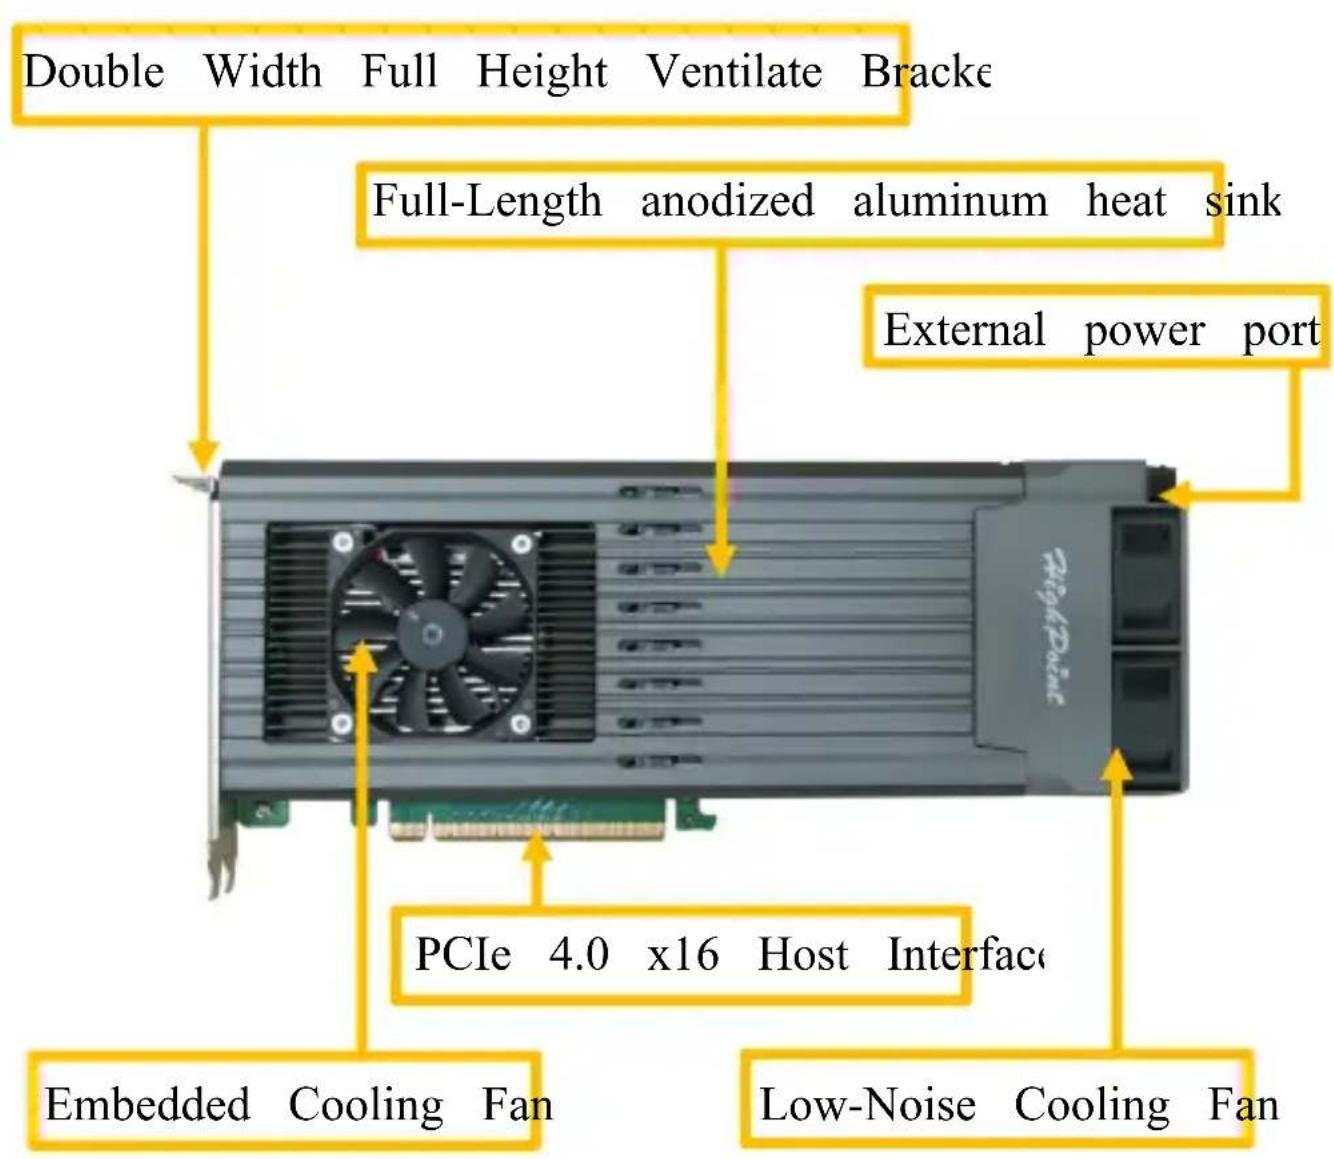
NVMe SSD Tray - Front View

NVMe SSD Tray - Rear View

Hardware Installation
Step 1. Use a wired ESD wrist strap that is properly grounded Step 2. Unpack and remove the SSD7749M2 and check it for If it appears damaged, please get in touch with HighPoint Technical Support.
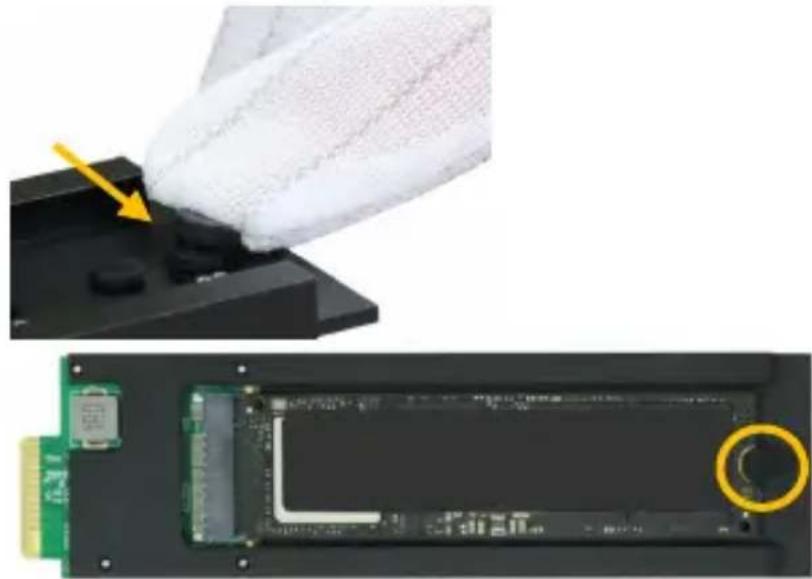
Step 3. Apply pressure at the mark to release the lock, and tu counterclockwise.

natural_image
Two views of a device chassis showing internal components and a yellow circular component with an arrow indicating rotation (no text or symbols present)Step 4. Gently remove the NVMe SSD Tray from the SSD7749

natural_image
Exterior view of a computing hardware unit with cooling fan and heatsink (no visible text or symbols)Step 5. Confirm the direction of the rubber (pointing to the rig

Step 6. Gently insert the NVMe SSD into the M.2 port of the SSD Tray.

natural_image
Close-up of a green electronic device with a yellow arrow pointing to a rectangular component (no visible text or symbols)Notes:
Ensure the NVMe SSD contacts (“golden fingers”) are clear before installation.
The SSD can be installed in front or rear of each NVMe
Step 7. Press the right side of the rubber to align it and insert retention hole on the end of the NVMe SSD.
natural_image
Close-up of a computer RAM module with a highlighted slot and a yellow arrow pointing to a component (no text or symbols visible)Step 8. Rotate the direction of the rubber so that it points to secure the NVMe SSD better.

natural_image
Electronic device module with green circuit board and yellow connector, showing close-up of internal components (no text or symbols visible)Step 9. After installing all NVMe SSDs, carefully insert the NV SSD Trays into the slots.

Note: Ensure the NVMe SSD Tray is carefully but securely mounted to each port. Loose connections can cause various stability and performance issues and may ultimately result in loss.
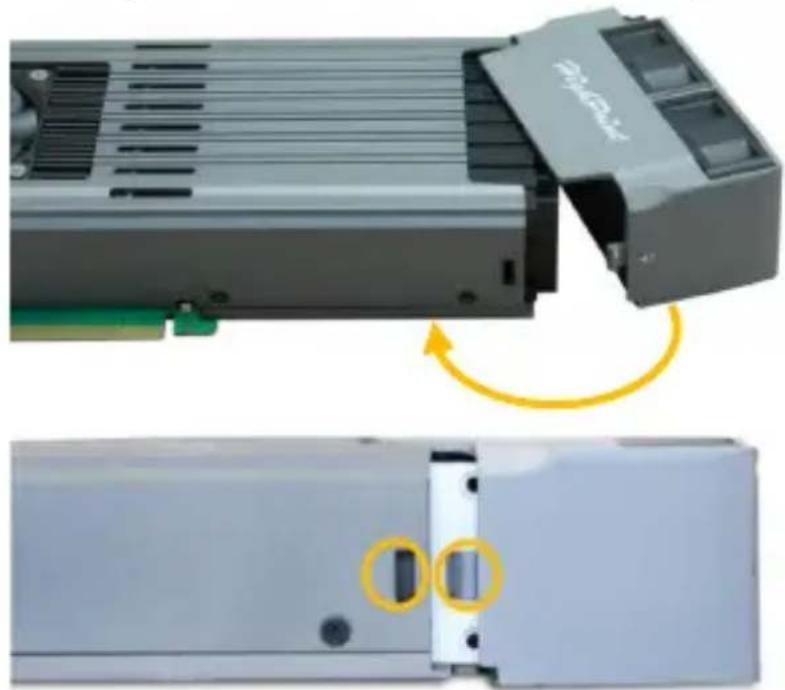
Step 10. Align the fan module and press down to secure.
natural_image
Two views of a device showing internal components and a highlighted section (no text or symbols visible)Note: Ensure the fan module is aligned correctly with the board (PCB). If the fan module is improperly installed, the not sufficiently cool the NVMe SSDs and AIC componentry, may damage the NVMe SSDs or AIC hardware, performance unstable I/O, and data loss.
Step 11. Shut down the system and disconnect the AC power
Step 12. Connect the SSD external power supply.

Connect 6 pin PCIe power cable
Note: If the external power supply is not powered on, the SSDs may drop offline or remain undetected, which could find data loss.
SSD7749M2 relies on two power sources to support sixteen NVMe SSDs: power supplied through the PCIe bus and po from the system's PSU via an external 6-pin PCIe power the external cable is not connected, there will be insufficient power to support all sixteen NVMe SSDs; this may cause NVMe SSDs to drop offline.
Step 13. Insert the SSD7749M2 into the system's open PCIe 3.15.0 x16 slot.

natural_image
Close-up of a power supply unit with cooling fan and circuit board (no visible text or symbols)Step 14. When finished, turn on the power to the system.
Resources
Various manuals, guides, and FAQs are available for the SSD77-NVMe RAID AIC.
In addition, we recommend visiting the Software Downloads web for the latest drivers and RAID Management software.
For Software Downloads, Documentation, and more information at this product, please visit the following website:
https://www.highpoint-tech.com/nvme-individual/ssd7749m2
FAQ & Troubleshooting:
FAQ - HighPoint Technologies, Inc. (helpjuice.com)
Customer Support
If you encounter any problems while utilizing the SSD7749M2 of any questions about this or any other HighPoint Technologies, In product, feel free to contact our Customer Support Department.
Web Support:
https://www.highpoint-tech.com/support-and-services
HighPoint Technologies, Inc. websites:
https://www.highpoint-tech.com
Brand : Highpoint
Model : SSD7749M2
Category : SSD