
P-BKST-02 - Floor Support Proaim - Free user manual and instructions
Find the device manual for free P-BKST-02 Proaim in PDF.


| Product Type | Universal Backseat Monitor Control System |
| Brand | Proaim |
| Model | P-BKST-02 |
| Primary Application | Mounting monitors and control devices in vehicle backseat |
| Material | Black anodized aluminum speed rail, aluminum rigging rods, steel clamps, plastic cheese plate |
| Main Speed Rail Length | 3 ft (approx. 91 cm), diameter 16 mm |
| Rigging Rods | 2 pcs of 250 mm length and 2 pcs of 180 mm length, diameter 16 mm |
| Clamp Type | Houdini speed rail rod clamp (360° rotation) |
| Mounting Points | Universal headrest mount (2 pcs) and round cheese plate with multiple threads and holes |
| Fasteners Included | Standoff pins (4 pcs), Allen bolts, Allen keys (5/16, 7/32, 3/16, 5 mm) |
| Accessories Included | 4 O-rings (8x14x3 mm), baby pin for monitor mounting |
| Adjustability | Fully modular and adjustable; enables positioning of monitors, LCDs, wheels, joysticks in desired location |
| Installation Method | Attaches to vehicle backseat using headrest mount; no permanent modification required |
| Weight Capacity | Not specified; designed for standard monitor and control equipment (estimated up to 5 kg) |
| Weight (System) | Estimated 2-3 kg depending on configuration |
| Warranty | 1 year from date of purchase; covers labor and parts, not transportation or misuse |
| Maintenance | Wipe clean with dry cloth; check bolt tightness periodically |
| Safety Notes | Ensure all bolts are securely tightened; do not exceed weight limit; avoid sharp objects near components |
| Compatibility | Universal headrest mount fits most vehicles with adjustable headrests |
| Contents | 1 speed rail 3ft, 2 rigging rods 250mm, 2 rigging rods 180mm, 2 headrest mounts, 2 cheese plates, 2 Houdini clamps, 2 rod clamps, 4 standoff pins, 4 Allen keys, 4 O-rings, hardware |
Frequently Asked Questions - P-BKST-02 Proaim
User questions about P-BKST-02 Proaim
0 question about this device. Answer the ones you know or ask your own.
Ask a new question about this device
Download the instructions for your Floor Support in PDF format for free! Find your manual P-BKST-02 - Proaim and take your electronic device back in hand. On this page are published all the documents necessary for the use of your device. P-BKST-02 by Proaim.
USER MANUAL P-BKST-02 Proaim
natural_image
Mechanical assembly with two circular components mounted on a rail, shown in black and white (no text or symbols visible)
What's In The Box
Please inspect the contents of your shipped package to ensure you have received everything that is listed below.

1 x Black Anodized Speed Rail (3ft Length) (Dia) 16mm

1 x 360° Houdini
Speed Rail Rod Clamp

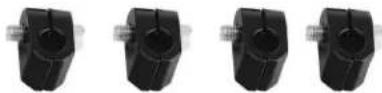
4 x Standoff pins

2 x Rigging Rod 250mm (Length) (Dia) 16mm
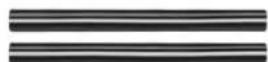
2 x Rigging Rod 180mm (Length)
(Dia) 16mm
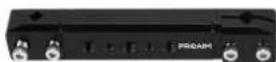

2 x Universal Headrest Mount
natural_image
Circular black mechanical component with perforated base and mounting holes (no visible text or symbols)
natural_image
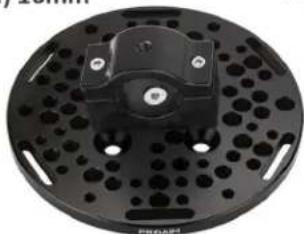
Circular black plastic device with perforated base and central mounting bracket (no visible text or symbols)2 x Round Cheese Plate with 2 x Houdini Speed Rail Clamp

2 x 360° Houdini
Rod Clamps
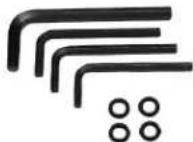
4 x Allen Keys 5/16mm,
7/32mm, 3/16mm, 5mm
& 4 x O Rings Black
(8x14x3)
All rights reserved.
No part of this document may be reproduced, stored in a retrieval system, or transmitted by any form or by any means, electronic, mechanical, photo-copying, recording, or otherwise, except as may be expressly permitted by the applicable copyright statutes or in writing by the Publisher.
Universal Backseat Setup
- Attach the Universal headrest mount on the back seat of the vehicle, as shown in the image.

natural_image
Close-up of a hand adjusting a car seatbelt component in a car (no visible text or symbols)
natural_image
Interior view of a car showing a hand adjusting a seatbelt device on the backrest (no visible text or symbols)• After attaching the headrest, insert a bolt to secure it properly.

natural_image
Close-up of hands installing or adjusting a small electronic component on a car interior (no visible text or symbols)
natural_image
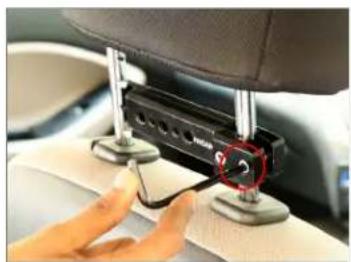
Close-up of hands using a sewing machine to adjust a small mechanical component (no visible text or symbols)- After inserting the bolt, properly secure the headrest on the backseat with the help of the Allen key, and same step is to be followed on the other side as well, as shown in the image.
natural_image
Close-up of a hand inserting a black device into a car seat, no visible text or symbols
natural_image
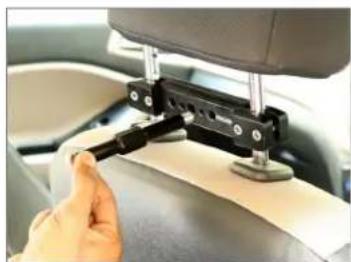
Interior view of a car headrest with a black tab device mounted on a chair, no visible text or symbols- Insert two Standoff pins into the Universal headrest mount by matching them with the threads of the Universal headrest, as shown in the image.
natural_image
Close-up of a hand adjusting a mechanical clamp or bracket on a vehicle's back panel (no visible text or symbols)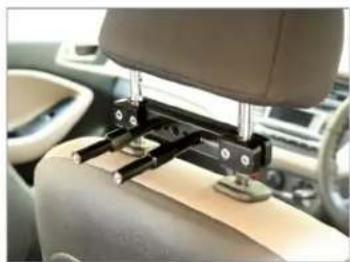
natural_image
Interior view of a car showing a mounted vehicle head assembly with a beige panel and black brackets (no visible text or symbols)- Attach the round cheese plate properly by matching it with the threads of two standoff pins, and then insert the Allen bolt.

natural_image
Close-up of a hand holding a circular black object with perforated texture, next to a mechanical assembly (no visible text or symbols)
natural_image
Hand holding a circular mechanical component with holes, next to a mounted device (no visible text or symbols)- Tighten the Allen Bolt with help of the Allen key.
Note: Easily connect the headrest mount with cheese plate which has multiple threads & holes for quick & easy mounting.

natural_image
Close-up of a hand using a tool to adjust a circular mechanical component, no visible text or symbols- Attach the Houdini speed rail clamp on the round cheese plate and insert the bolt into it.
- After inserting the bolt, secure it properly with the help of the Allen key and then insert the rigging rod (4ft Length) into it.
- Insert the Rigging rod (4ft Length) in both the Houdini speed rail clamps and secure it by properly tightening the bolt, as shown in the image.
- After inserting the rod, tighten the bolt with the help of the Allen key. Then attach the 360° Houdini speed rail rod clamp at the center of the 4ft length rod.
- Then secure the bolt properly with the help of the Allen Key and then insert the baby pin to mount the monitor.
- After inserting the baby pin, secure it properly with the help of the Allen key, as shown in the image.

natural_image
Hand holding a black plastic fan component, no visible text or symbols
natural_image
Close-up of a hand adjusting a car brake disc component (no visible text or symbols)
natural_image
Close-up of a hand using a tool to adjust a car wheel component (no visible text or symbols)
natural_image
Close-up of a car dashboard with a circular mechanical component and mounting holes (no visible text or symbols)
natural_image
Close-up of a person adjusting a car trunk-mounted device (no visible text or symbols)
natural_image
Interior view of a car showing rear seats, steering wheel, and dashboard (no visible text or symbols)
natural_image
Close-up of a hand adjusting a black mechanical component on a car wheel (no visible text or symbols)
natural_image
Interior view of a car showing a hand holding a camera on the steering wheel, with dashboard and steering wheel visible (no text or symbols)
natural_image
Close-up of a car interior showing a hand adjusting a mechanical lever (no visible text or symbols)
natural_image
Close-up of a hand using a tool to adjust or install a mechanical component (no visible text or symbols)
natural_image
Close-up of a hand using a mechanical tool to adjust a black cylindrical component (no visible text or symbols)- Mount the monitor on the baby pin and secure it properly by tightening it with the help of the knob.
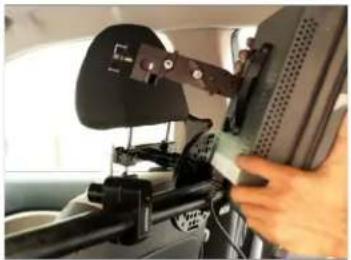
natural_image
Close-up of a hand adjusting a mechanical device mounted on a vehicle (no visible text or symbols)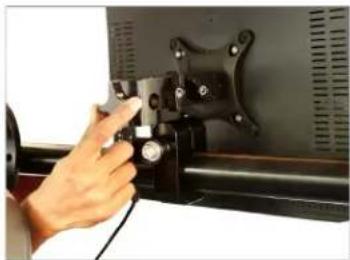
natural_image
Close-up of a hand using a tool to adjust or install a mechanical component (no visible text or symbols)- Attach the rigging road clamp to the round cheese plate by matching it with the threads, then secure it properly with the help of Allen Key.

natural_image
Close-up of a hand adjusting a mechanical component with a knob (no visible text or symbols)
natural_image
Close-up of a hand adjusting a mechanical component with a black lever (no visible text or symbols)- To secure the rigging road clamp, insert the rigging road 180mm in it and secure it with the help of Allen key.

natural_image
Close-up of a hand using a tool to adjust or install a mechanical component (no visible text or symbols)
natural_image
Close-up of a hand adjusting a car interior component with a screwdriver (no visible text or symbols)- Then insert 360° Houdini Rod Clamp into the Rigging Rod (180mm) and secure it properly with the help of the Allen key, and then insert rigging rod (250mm) into it.

natural_image
Close-up of hands installing a small mechanical component on the back panel of a car (no visible text or symbols)
natural_image
Close-up of hands installing or adjusting a black mechanical component on a car interior (no visible text or symbols)- After inserting the rigging rod (250mm), tighten it with the help of Allen Key. Then insert the 360° Houdini rod clamp into it, as shown in the image.
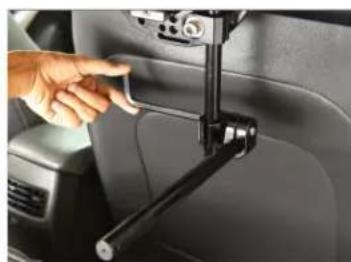
natural_image
Close-up of a hand adjusting a black mechanical lever inside a car (no visible text or symbols)
natural_image
Close-up of hands installing a mechanical component on a car (no visible text or symbols)- After inserting the 360° Houdini Rod Clamp, insert black anodized speed rail (3ft length) and secure it properly with the help of the Allen key.

natural_image
Close-up of a hand adjusting a mechanical lever inside a car's seat (no visible text or symbols)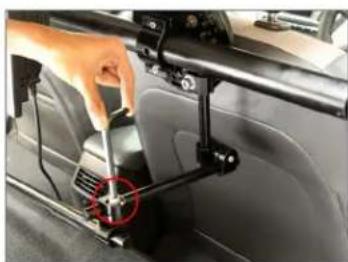
natural_image
Close-up of a hand operating a car interior with a red circular marker highlighting a key component (no visible text or symbols)- Black anodized speed rail (3ft length) with 360^ houdini rod clamp are properly secured, as shown in the image.

natural_image
Interior view of a vehicle showing a mounted computer monitor and control panel (no visible text or symbols)Note: It is entirely modular & adjustable. You just need to set your control device, monitor, LCD, wheels, and joysticks behind the front seat in any desired position and focus only on your creative cinematic shots.

natural_image
Close-up of hands holding a tablet device in a car, with a red circular mark highlighting the screen (no visible text or symbols)
natural_image
Interior view of a military vehicle with mounted optical equipment and two monitors (no visible text or symbols)YOUR PROAIM UNIVERSAL BACKSEAT MONITOR CONTROL SYSTEM ALL DRESSED UP AND READY TO GO!
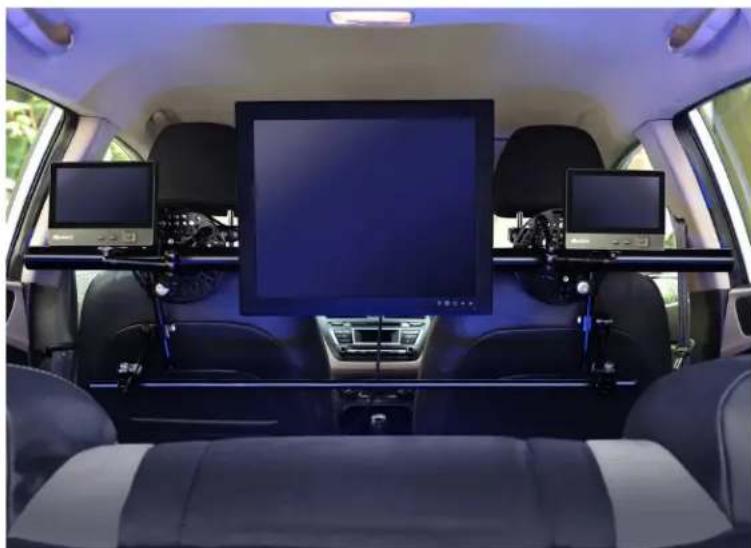
natural_image
Interior view of a car with three monitors and backrests, no visible text or symbols(SHOWN WITH OPTIONAL ACCESSORIES)
Warranty: We offer one year warranty for our products from date of purchase. Within this period of time, we will repair it without charge for labor or parts. Warranty doesn't cover transportation costs nor does it cover a product subjected to misuse or accidental damage. Warranty repairs are subjected to inspection and evaluation by us.
Liability: We are not liable for damage caused by products that we do not supply or from mishandling in transit, accident, misuse, neglect, lack of care of the product, or service by anyone other than our company.
Contact Us: In case of any kind of dissatisfaction, please Contact us immediately and we promise our utmost support and care until you use our product.
Brand : Proaim
Model : P-BKST-02
Category : Floor Support