P-MLAK-01 - Tripod Proaim - Free user manual and instructions
Find the device manual for free P-MLAK-01 Proaim in PDF.

User questions about P-MLAK-01 Proaim
0 question about this device. Answer the ones you know or ask your own.
Ask a new question about this device
Download the instructions for your Tripod in PDF format for free! Find your manual P-MLAK-01 - Proaim and take your electronic device back in hand. On this page are published all the documents necessary for the use of your device. P-MLAK-01 by Proaim.
USER MANUAL P-MLAK-01 Proaim
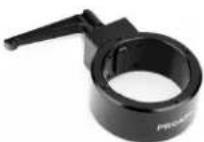
Multi Adapter Kit (Mitchell-Euro/Elemac-Bowl) (P-MLAK-01)
Assembly Manual
natural_image
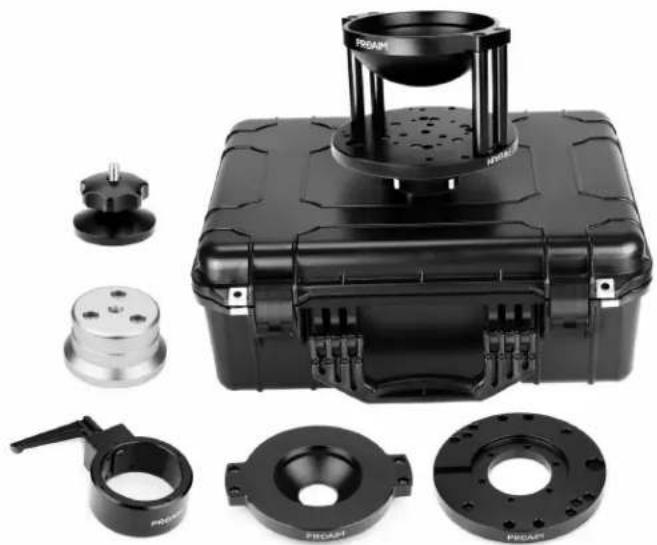
Black plastic and metal mechanical device with multiple circular components and a central cylindrical component (no visible text or symbols)What's In The Box
Please inspect the contents of your shipped package to ensure you have received everything that is listed below.

natural_image
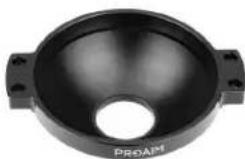
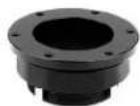
Close-up of a black plastic mechanical component with two side tabs and a central hole (no text or symbols visible)1 x Bowl adapter Size: 100 mm
natural_image
Black circular mechanical component with a central hole and side flanges (no visible text or symbols)1 x Bowl adapter Size: 150 mm
1 x Mitchell plate
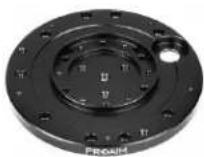
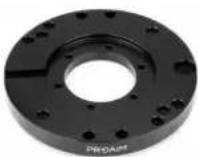
1 x Adapter Plate
1 x Euro Flange
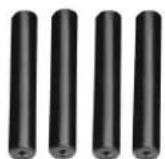
4 x Distance Rods

1x Euro Adapter
1 x Mitchell
Lock

Clamping knob
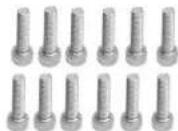
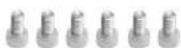
(6 x 25mm=12pc) Allen Bolts (6 x 12mm=6pc) Allen Bolts
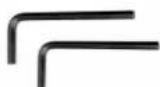
2 x L-Type Allen Key (Size:5mm & 6mm)

Allen Bolts (8 x 50mm=3pc)
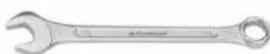
1 x Spanner (Size:13)
All rights reserved.
No part of this document may be reproduced, stored in a retrieval system, or transmitted by any form or by any means, electronic, mechanical, photo-copying, recording, or otherwise, except as may be expressly permitted by the applicable copyright statutes or in writing by the Publisher.

natural_image
Black hard-shell mechanical case with a handle and visible internal components (no text or symbols)Hard Case
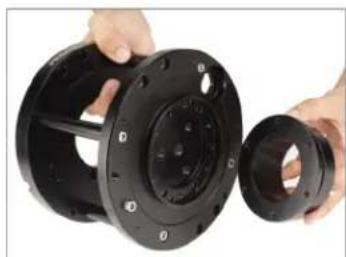
Multi Adapter Kit Setup
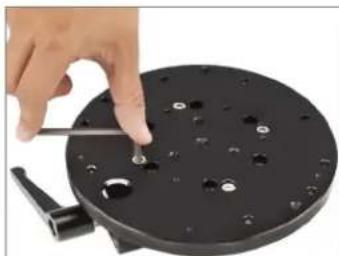
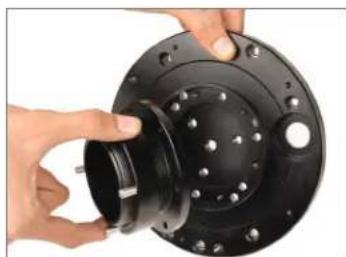
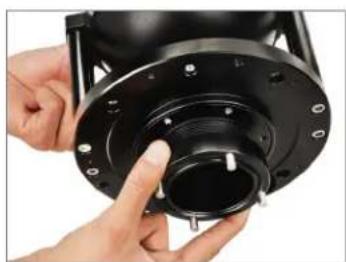
- Attach the Euro Flange by matching it with the thread of the Adapter Plate and then insert the bolt.
natural_image
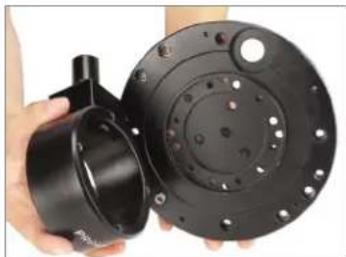
Close-up of a hand holding a black mechanical component with multiple holes and a central hub (no visible text or symbols)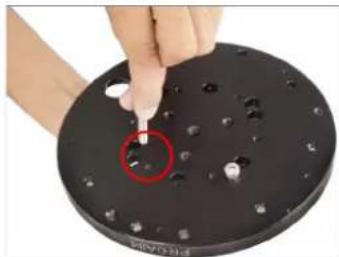
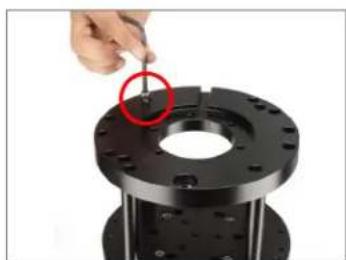
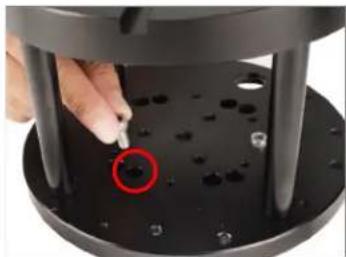
natural_image
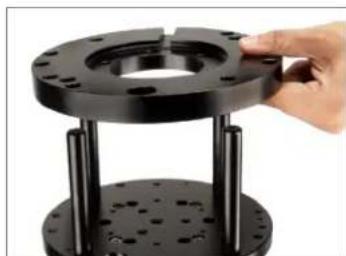
Close-up of a hand using a tool to apply small holes on a black circular base (no text or symbols visible)- Secure all the bolts by tightening them using the Allen Key.
natural_image
Close-up of a hand using a tool to adjust or install a circular mechanical component with holes (no visible text or symbols)Bowl-Euro
- Attach the Distance Rods by matching them with the side thread on the Adapter Plate and then secure them using the Allen Key.

natural_image
Close-up of hands holding a black circular mechanical component with a handle and mounting holes (no text or symbols visible)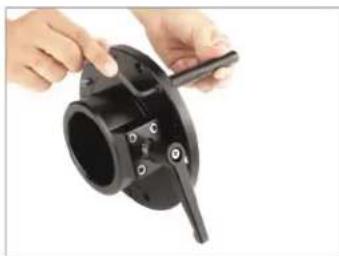
natural_image
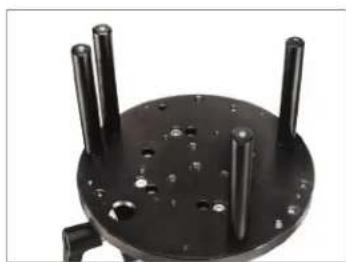
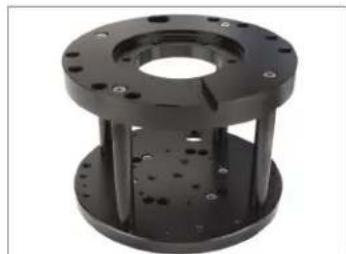
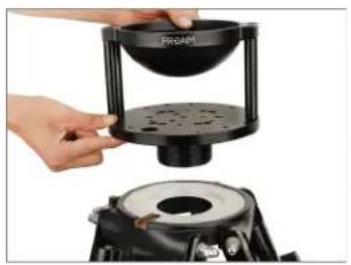
Close-up of hands holding a black mechanical component with a handle and mounting holes (no text or symbols visible)- Attach all the Distance Rods on the Adapter Plate, as shown in the image. Place the 100mm bowl adapter by matching it with the threads of the Rods.

natural_image
Mechanical component with three vertical rods and a central circular base (no text or symbols visible)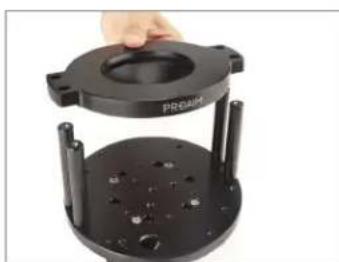
natural_image
Close-up of a black industrial device with a circular base and three protruding components, no visible text or symbols.- After placing the 100mm bowl adapter on the rods, then match the thread and insert the bolts.

natural_image
Close-up of a black mechanical component with circular top and side mounting (no visible text or symbols)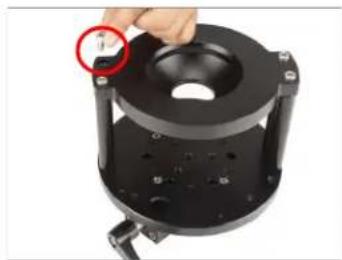
natural_image
Close-up of a black mechanical component with a red circle highlighting a small feature, no visible text or symbols.- Tighten the bolt using the Allen Key, so that bowl euro can be attached properly.

natural_image
Close-up of a black mechanical component with a hand adjusting its top edge (no visible text or symbols)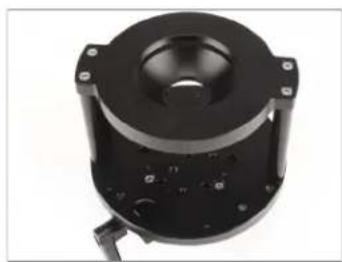
natural_image
Close-up of a black mechanical component with circular top and mounting base (no visible text or symbols)Mitchell-Euro
- Attach the Distance Rods on the Adapter Plate at equal distance from each other according to your requirement and then secure them with the help of the bolt.

natural_image
Close-up of a black electronic device with two U-shaped connectors and a central perforated base, being handled by a hand (no visible text or symbols)
natural_image
Close-up of a hand using a tool to press a black circular component with three protrusions (no text or symbols visible)- Attach the distance rods at equal distance from each other, as shown in the image.
NOTE: You can attach rods on the multiple threads of the Adapter Plate according to your setup requirement.
natural_image
Close-up of a black mechanical component with three vertical rods and mounting holes (no text or symbols visible)
natural_image
Close-up of a black circular mechanical component with three metallic pins and mounting holes (no text or symbols visible)- Place the Mitchell Plate by matching it with the thread of the Distance Rods and then insert the bolt by matching it with the thread hole.
natural_image
Close-up of a black mechanical flange with bolt holes and a hand adjusting its top surface (no text or symbols visible)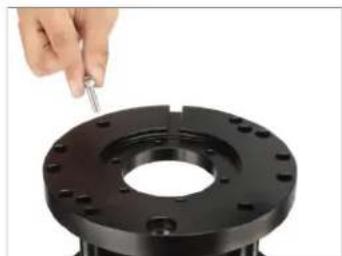
natural_image
Close-up of a hand using a tool to adjust a black mechanical flange (no text or symbols visible)- Properly tighten the bolt of the Mitchell Plate using the Allen Key.
natural_image
Close-up of a hand adjusting a black mechanical flange with a red circle highlighting a feature (no text or symbols visible)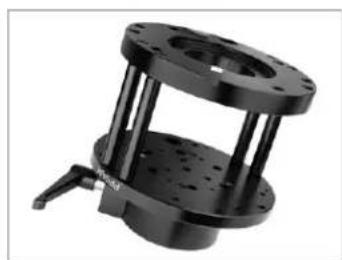
natural_image
Mechanical component with flanged cylindrical and rectangular parts, no visible text or symbolsEuro Flange Detach
- Loosen the bolts to remove the Euro Flange from the Adapter Plate and then remove them using the Allen Key, as shown in the image.

natural_image
Close-up of a hand operating a black cylindrical mechanical device with a base plate and mounting holes (no visible text or symbols)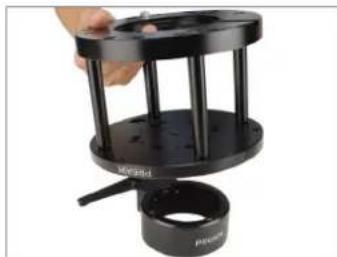
natural_image
Hand holding a black cylindrical device with a base, featuring a perforated top and a circular base (no visible text or symbols)Mitchell-Bowl
- Attach the Mitchell Lock by matching it with the threads from the bottom part of the Adapter Plate.
natural_image
Close-up of hands assembling a black plastic flange component (no text or symbols visible)
natural_image
Close-up of hands assembling a black mechanical flange component (no text or symbols visible)- Insert the bolt after matching the Mitchell Lock with the threads of the Adapter Plate and then properly tighten it with the Allen Key.
natural_image
Close-up of a hand using a tool to apply black holes on a circular metal base (no text or symbols visible)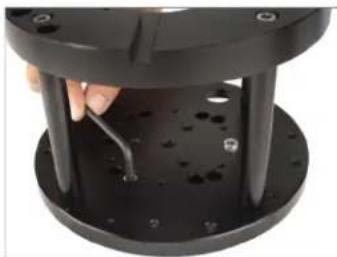
natural_image
Close-up of a black cylindrical mechanical component with a hand adjusting a small tool, showing internal holes and mounting holes (no text or symbols visible)- Then Mitchell-Mitchell plate is ready to use.
natural_image
Black mechanical flange component with bolt holes and mounting holes (no text or symbols visible)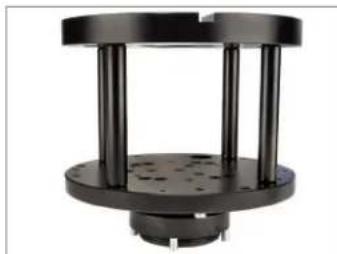
natural_image
Black cylindrical mechanical component with three vertical rods and a central base (no text or symbols visible)Mitchell-Euro Adapter
- Attach the Mitchell Lock by matching it with the bolt thread of the Adapter Plate.
natural_image
Close-up of hands adjusting a black mechanical component with bolt holes (no visible text or symbols)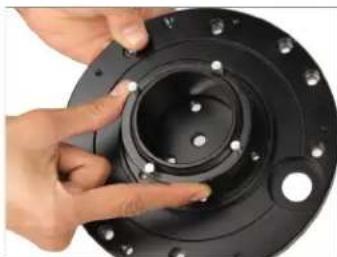
natural_image
Close-up of hands adjusting a black mechanical component with bolt holes (no visible text or symbols)- Insert the bolts from the back side of the Adapter Plate, and then properly tighten them using the Allen Key.
natural_image
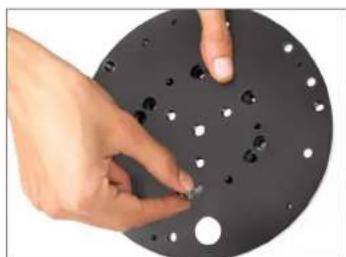
Close-up of hands holding a small object on a circular metal plate with holes (no text or symbols visible)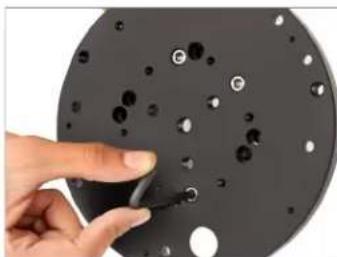
natural_image
Hand pointing at a circular black plate with multiple holes and a small object inserted (no text or symbols visible)- Place the Euro Adapter on the Adapter Plate by matching it with the thread of the Plate and then insert the bolts.

natural_image
Hand holding a metallic cylindrical object over a black circular base (no text or symbols visible)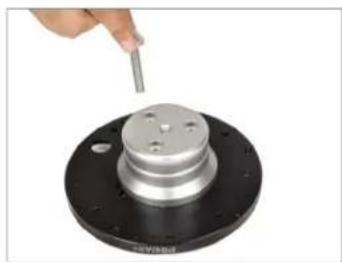
natural_image
Close-up of a hand using a tool to press or install a metallic mechanical component (no visible text or symbols)• After inserting the bolts, tighten them properly using the Allen Key.

natural_image
Close-up of a hand using a tool to adjust a metallic mechanical component with a red circle highlighting the pivot point (no text or symbols visible)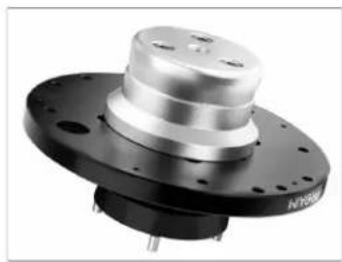
natural_image
Close-up of a metallic mechanical component with flange and bolt holes (no visible text or symbols)Mitchell-Bowl Adapter
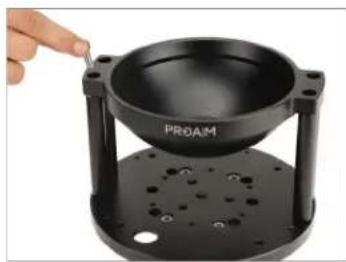
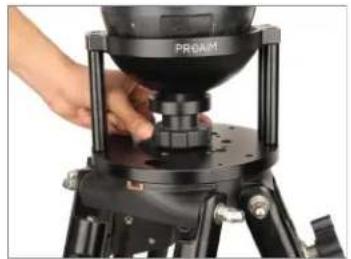
- Place the bowl adapter (150mm) plate on the rods.
natural_image
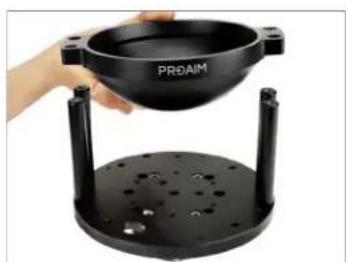
Hand holding a black PROAIM-branded bowl with support legs, placed on a circular base (no text or symbols visible)
natural_image
Hand holding a black PROAIM camera lens component (no text or symbols visible on the device itself)- After placing the Bowl Adapter on the Rods, insert the bolt by matching it with the Rod thread.
natural_image
Close-up of a black industrial mixing bowl with a hand pointing to it, mounted on a black base (no visible text or symbols)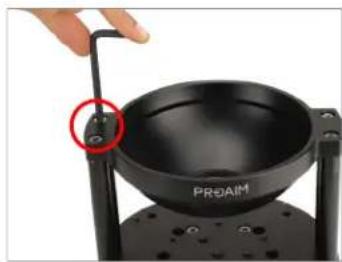
natural_image
Close-up of a hand using a tool to press down a black bowl labeled 'PROAIM', with no visible text or symbols on the bowl itself.- Properly tighten the all bolts using the Allen Key. then Michell-bowl adapter is ready to use.

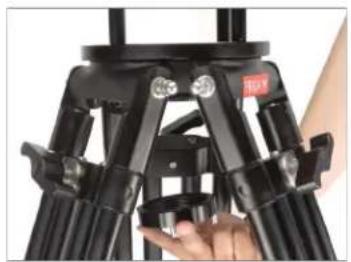
natural_image
Black industrial mechanical component with circular base and central hub (no visible text or symbols)- Remove the castle nut from the Mitchell Lock, as shown in the image.
natural_image
Close-up of hands installing or adjusting a black mechanical component with mounting holes (no visible text or symbols)
natural_image
Close-up of hands holding a black mechanical component with flange and base (no visible text or symbols)- Mount the Bowl-Mitchell on the tripod stand. (Not Included).
natural_image
Close-up of a hand holding a black RPSAM device over a mechanical press or engine component (no visible text or symbols)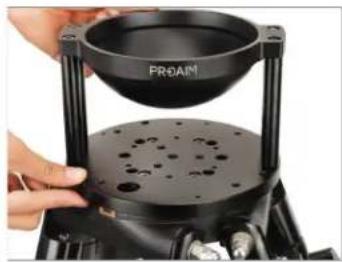
natural_image
Close-up of a hand holding a black industrial lamp with 'PROAIM' label, no visible text or symbols on the lamp itself.- Secure the Bowl-Mitchell using the castle nut from the bottom of the Tripod Stand (Not Included).
natural_image
Close-up of a black tripod frame with a hand adjusting its base (no visible text or symbols)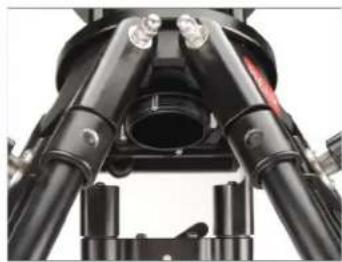
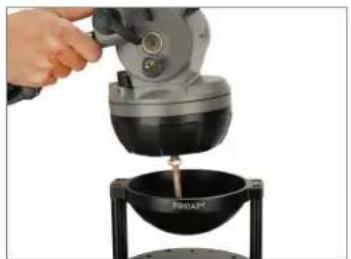
natural_image
Close-up of a black mechanical tripod with multiple metal rods and a central circular opening (no visible text or symbols)- Mount 150mm fluid head (Not Included) & insert it into the bowl through the screw.
natural_image
Hand pouring liquid into a black bowl labeled 'PHOAP' (no text or symbols on the object itself)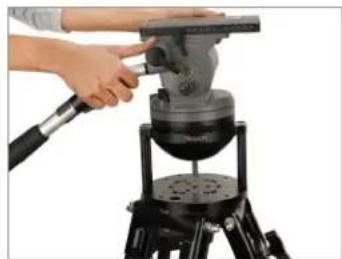
natural_image
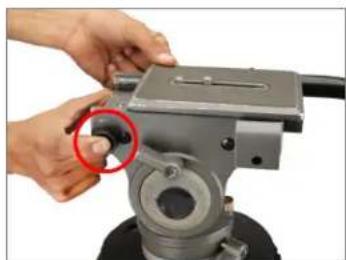
Person operating a mechanical device mounted on a tripod, no visible text or symbols- Properly secure the Fluid Head (150mm bowl) (Not Included) using the Fluid Head knob.
natural_image
Close-up of a hand operating a camera setup on a tripod, no visible text or symbols
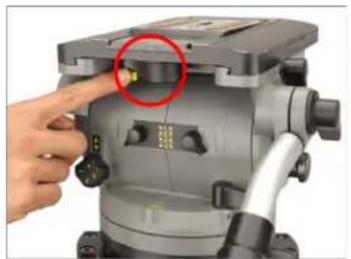
natural_image
Black-and-white photo of a tripod-mounted camera with a mounted sensor and base mount (no visible text or symbols)- After properly mounting the Fluid Head (150mm bowl) (Not Included), remove the Plate by pulling the provided knob.
natural_image
Close-up of a mechanical device with a hand adjusting its top component, highlighted by a red circle (no visible text or symbols)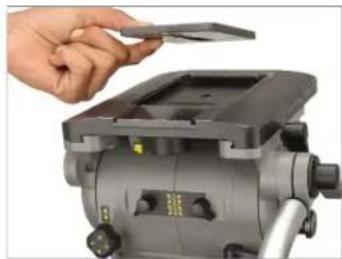
natural_image
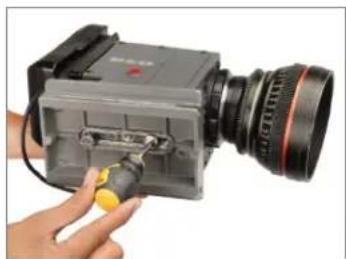
Close-up of a hand using a handheld device to adjust or install a mechanical component (no visible text or symbols)- Attach the Plate to the bottom part of the Camera (Not Included) and then mount the Camera (Not Included) by pulling the knob of the Fluid Head.

natural_image
Close-up of a black digital camera with a red-lit lens, held by a hand (no visible text or symbols)
natural_image
Close-up of a hand inserting a small yellow component into a mechanical device (no visible text or symbols)- The Camera (Not Included) has been properly attached to the Fluid head.
natural_image
Photograph of a precision optical instrument mounted on a tripod, no visible text or symbols
natural_image
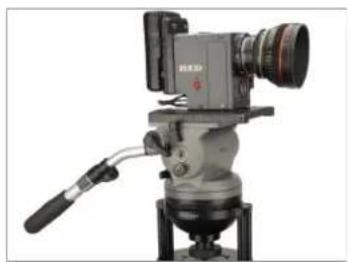
Black-and-white photo of a professional video camera on a tripod, no visible text or symbolsEuro-Mitchell Setup
- Mount the Euro Mitchell on the Bazooka (Not Included).

natural_image
Mechanical component with flanged circular housing and cylindrical shaft (no visible text or symbols)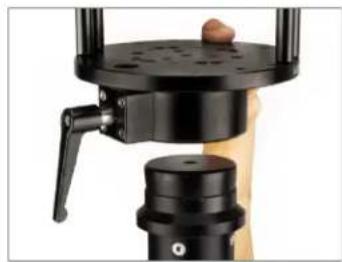
natural_image
Close-up of a black mechanical presser with a wooden handle and cylindrical base (no visible text or symbols)- Then properly secure the Euro Mitchell with the help of the provided ratchet knob.

natural_image
Close-up of a black industrial lamp with a hand adjusting its handle (no visible text or symbols)- Mount the Fluid Head (Not Included) onto the Euro Mitchell.

natural_image
Close-up of a mechanical assembly with flanged components and a threaded component (no visible text or symbols)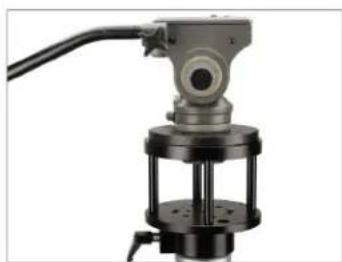
natural_image
Mechanical device with cylindrical components and a connecting rod (no visible text or symbols)- Properly secure the Fluid Head (Not Included) using the castle ring.

natural_image
Close-up of a hand operating a black mechanical press or press device with no visible text or symbols
natural_image
Close-up of a mechanical component with cylindrical and rectangular features (no visible text or symbols)NOTE: It with Camera, Dolly, Bazooka, Tripod, Slider, Jib & more, as it is compatible with almost every operation.
natural_image
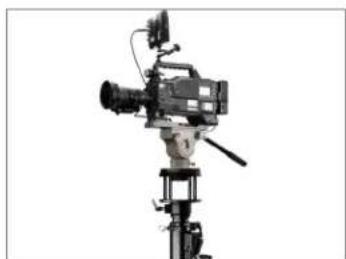
Black-and-white photo of a professional video camera mounted on a tripod stand (no visible text or symbols)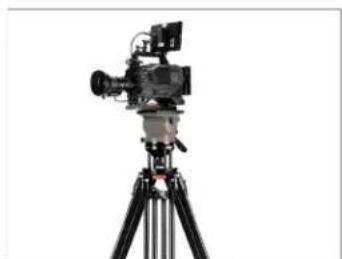
natural_image
Black-and-white photo of a professional video camera on a tripod (no visible text or symbols)- Remove the Plate by pushing the knob of the Fluid Head (Not Included).
natural_image
Close-up of hands operating a mechanical device with a red circle highlighting a button (no visible text or symbols)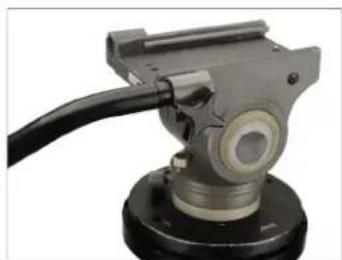
natural_image
Close-up of a mechanical component with a black cable and metallic housing (no visible text or symbols)- Attach the plate of the Fluid Head (Not Included) to the bottom of the Camera (Not Included) and then properly tighten it using the screw driver.
natural_image
Hand holding a camera module with a lens and yellow grip, no visible text or symbols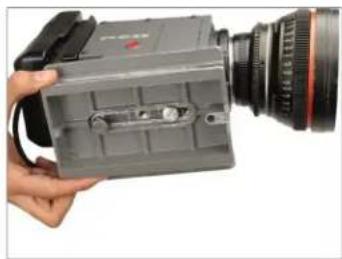
natural_image
Hand holding a gray compact electronic device with a black lens, against a plain white background (no text or symbols visible)- Mount the Camera (Not Included) by sliding it onto the Fluid Head, as shown in the image.

natural_image
Close-up of a camera module with lens and control panel, no visible text or symbols
natural_image
Exterior view of a precision camera mounted on a tripod stand (no visible text or symbols)- Tighten the knob of the Fluid Head by pulling it to secure the Camera (Not Included).

natural_image
Close-up of a hand adjusting a camera module with a red circle highlighting the button (no visible text or symbols)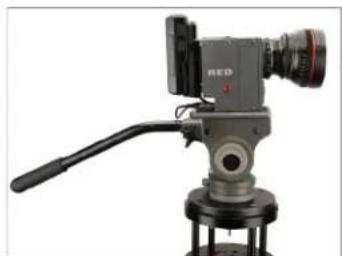
natural_image
Exterior view of a mechanical device with camera and tripod base (no visible text or symbols)NOTE: It is a full-fledged kit that includes all necessary adapters and tools, created with a goal to be adaptable with every mount and with as few items as possible. Quickly adapt from Bowl to Euro, Bowl to Mitchell, Euro to Bowl, Euro to Mitchell, Mitchell to Bowl, Mitchell to Euro, truly one solution for every situation.
natural_image
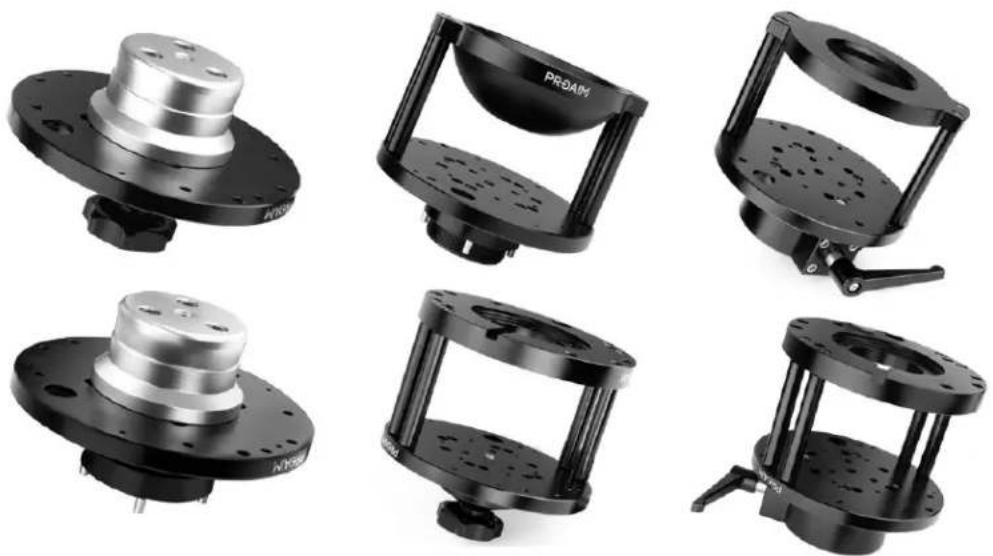
Six black industrial mechanical components with flanged bases, displayed against a white background (no text or symbols visible)YOUR PROAIM MULTI ADAPTER KIT (MITCHELL-EURO/ELEMAC-BOWL) ALL DRESSED UP AND READY TO GO!

natural_image
Professional video camera on a wheeled cart with orange frame structure (no visible text or symbols)(SHOWN WITH OPTIONAL ACCESSORIES)
Warranty: We offer one year warranty for our products from date of purchase. Within this period of time, we will repair it without charge for labor or parts. Warranty doesn't cover transportation costs nor does it cover a product subjected to misuse or accidental damage. Warranty repairs are subjected to inspection and evaluation by us.
Liability: We are not liable for damage caused by products that we do not supply or from mishandling in transit, accident, misuse, neglect, lack of care of the product, or service by anyone other than our company.
Contact Us: In case of any kind of dissatisfaction, please Contact us immediately and we promise our utmost support and care until you use our product.