OSL-600 - Unspecified Taiji - Free user manual and instructions
Find the device manual for free OSL-600 Taiji in PDF.

User questions about OSL-600 Taiji
0 question about this device. Answer the ones you know or ask your own.
Ask a new question about this device
Download the instructions for your Unspecified in PDF format for free! Find your manual OSL-600 - Taiji and take your electronic device back in hand. On this page are published all the documents necessary for the use of your device. OSL-600 by Taiji.
USER MANUAL OSL-600 Taiji
Thank you for purchasing this product. For the safe and proper use of this product, be sure to carefully read and fully understand this instruction manual before use.
Failure to observe the precautions described in this manual may result in an accident causing injury or death. Be very careful not to use this product in any manner other than as indicated in this manual.
After reading this manual, keep it in a handy place for future reference.
Safety Precautions .....2
Applications ....5
How It Works ....5
Checking and Preparation before Use.5
Part Names and Handling .....6
Operation 8
Maintenance 9
Troubleshooting .....10
Specifications .....10
Circuit Diagram 11
Warranty and After-sales Service ... 11
Safety Precautions
- Read this "Safety Precautions" section to ensure proper product use.
■ The precaution items listed in this manual are intended to ensure safe and proper product use, as well as for preventing damage or injury to the user or others. The precaution items are classified into "WARNING" and "CAUTION" so as to clarify the degree of possible damage or injury in the case when the product is used improperly without following the relevant precaution item. Both precautions are important for safety, thus be sure to observe them.
■ After reading this manual, always keep it in a handy place when using the product.
■ Example of symbols 1 · Precaution items are classified and indicated via the following symbols.
 WARNING WARNING | This symbol indicates the possibility of serious injury or even death. |
 CAUTION CAUTION | This symbol indicates the possibility of physical injury or property damage only. |
■ Example of symbols 2 · Precaution items are classified and indicated via the following symbols.
 | A triangle (△) indicates an alert or necessary caution.(The figure at left indicates a caution regarding high temperature.) |
 | A circle with a diagonal line through it (⊗) indicates an act that is prohibited.(The figure at left indicates that disassembly is prohibited.) |
 | A black circle (●) indicates a necessary directive that the user must follow. |
 | WARNING | If the product is used improperly without following the instructions below, serious injury or even death can occur. |
 | Prohibited: Disassembly | Persons other than service engineers must not disassemble, attempt to repair, or modify the product.Otherwise, fire, electric shock, or accidents involving falls can occur. If the connection is incomplete, an electric shock or fire can occur. |
 | Prohibited | Do not allow the product to be used by children.Keep children away from the product.Otherwise, burns, electric shock, or injury can occur. |
 | Do not allow the product to come in contact with water. | Do not allow the product to come in contact with water.Allowing the product to come in contact with water can cause short-circuiting or electric shock. |
 | Prohibited: Excessive humidity | Do not install the product in humid areas or in locations where the product could come in contact with water.Otherwise, an insulation failure may result, and electrical leakage or electric shock can occur. |
 | Prohibited | Avoid damaging the power cord.Do not place any object on the cord. Do not pull, bundle, pinch, or tamper with the cord.Do not allow the cord to come close to an area of high temperature. Doing so can damage the power cord, causing electric shock or fire. |
 | Prohibited:Handling with wet hands | Do not touch or operate the power plug, power switch, or other electrical parts with wet hands.Doing so can cause electric shock. |
 | Installation on a horizontal/stable surface | Be sure to install the product on a horizontal and stable surface.Otherwise, the product may fall and sustain impact. |
 | Prohibited | Do not set anything on top of the product or allow the product to sustain large impact.Otherwise, the door may come off or the product may fall, causing injury or failure. |
 | Prohibited:Outdoor use | Do not use the product outdoors.If the product is exposed to rain, electrical leakage or electric shock can occur. |
 | Do not connect the product through power bars, etc. | Never use power bars, multiple electrical adapters, etc.Otherwise, fire can occur. |
 | Prohibited | Do not bend the power plug blade intentionally to prevent the blade from coming off.Doing so can cause a loose connection, resulting in fire. |
 | Prohibited | If the power cord or plug is damaged, or if the plug cannot be firmly inserted into the outlet, do not use the product.Using the product under such a condition can cause electric shock, short-circuiting, or ignition. |
 | Prohibited:Improper product disposal | Contact a disposal service provider, public agency, or your dealer for the proper disposal of the product (fees may apply).If a third party modifies the product, or if the product is used for any purpose other than for use as a food display warmer, an unexpected accident might occur. |
 | Prohibited | Do not move the main unit when the unit is in use.Doing so can cause a failure or accident. |
 | Direction | Insert the power plug deeply and firmly.Otherwise, short-circuiting, electric shock, or fire can occur. |
 | Caution regarding installation | Be sure to use a 220-240VAC, 10A+ power supply.Use of a power supply other than this can cause abnormal heating or fire. |
 | Plug removal | If any unusual smell, noise, or smoke appears, immediately turn the power OFF and remove the power plug from the outlet.Otherwise, fire or electric shock can occur. |
 | Checking and cleaning | Periodically, check that the power plug blade or the blade-mounted surface does not exhibit any adherence of dust.Fully insert the blade into the outlet, and ensure that it is not loose. If dust is adhered or if the connection is not secure, electric shock or fire can occur. |
 | Connecting the ground | Perform grounding work without fail.- If the outlet is not equipped with a ground terminal, have it installed by your dealer or an electronics store. If grounding is not secure, electric shock can occur.- Do not connect the ground line to a gas pipe, telephone line, lightning rod, or water pipe. |
 | CAUTION | If the product is used improperly without following the instructions below, physical injury to the user or damage to property can occur. |
 | Holding the plug during plug removal | When removing the power plug, always hold the plug itself-do not pull on the cord. Pulling by the cord can cause electric shock or short-circuiting, resulting in ignition. |
 | Caution | Be careful not to allow the product to drop or sustain impact. Doing so can cause a failure or fire. |
 | Caution | Discard plastic packaging articles or cushioning included in the package immediately after unpacking. If a child tampers with plastic packaging articles, an accident involving suffocation might occur. |
 | Prohibited | Do not put heavy items or items containing water on the product. Doing so can cause damage to the product, or can cause injury, short-circuiting, electric shock, rust, or failure. |
 | Caution | For plastic food containers, use one with heat resistance of 120°C or more. However, note that if a plastic food container is placed on the lower heat cover, it may be deformed or melted. |
 | Caution | Do not place a food container on the heater cover. If you do so, heat from the heater can be trapped inside, resulting in trouble regarding temperature control. |
 | Caution | Do not turn OFF the power switch while warming food. Otherwise, the inside temperature can become lowered and food can perish. |
 | Holding the plug during plug removal | When not in use, remove food and wipe off any moisture from inside the warmer. Otherwise, unusual odors may occur. Also, for safety, turn OFF the power switch and remove the power plug from the outlet. |
 | Removal of moisture | |
 | Caution | Do not leave food in the warmer for one day or longer. Food that is warmed for long periods of time will lose taste and flavor. |
 | Caution regarding high temperatures | Perform maintenance only after confirming that the warmer has been cooled completely. Otherwise, contact with high-temperature areas may occur, and burns may result. |
 | Caution regarding high temperatures | Do not touch heater parts and other high-temperature areas during use and for a while after use. Otherwise, burns may occur. |
 | Caution regarding high temperatures | Do not touch the shelf net, heater cover, or inside the warmer after usage for keeping items warm. Otherwise, burns may occur. |
 | When not in use | When not in use, switch the power OFF and remove the power plug from the outlet. Otherwise, electric shock or fire due to electrical leakage may occur. |
 | Plug removal | If thunder begins to sound, remove the power plug from the outlet. In case of a lightning strike occurrence, the product may be damaged due to the invasion of abnormal current and voltage generated by direct or indirect lightning surge via power wires, etc. |
Applications
This food display warmer is for indoor use only and is designed to be used for keeping prepared food warm. Do not use it for any other purpose.
How It Works
This product is equipped with a heater to keep prepared food warm, and the temperature inside the warmer is controlled by the temperature controller.
Checking and Preparation before Use
- Take the product out of the box, remove any plastic, and install all parts.
-
The box contains the "main unit," "accessories" (see page 6 for details), and the "Instruction Manual" (this document). Check that all of these are present.
-
Install the product under the following conditions.
• Install the product on a horizontal and stable surface.
- Install the product in a location not affected by heat, direct sunlight, gas cookers, cooking ranges, and other heat sources (at least 50 cm away from any heat source).
- Do not install the product in a location with high humidity or near water. Be sure to maintain clearance around the main unit for secure ventilation.
 WARNING WARNING |  Caution regarding installation Caution regarding installation | Be sure to use a 220-230VAC, 10A+ power supply.Use of a power supply other than this can cause abnormal heating or fire. |
 CAUTION CAUTION |  Caution Caution | Discard plastic packaging articles or cushioning included in the package immediately after unpacking.If a child tampers with plastic packaging articles, an accident involving suffocation might occur. |
Part Names and Handling
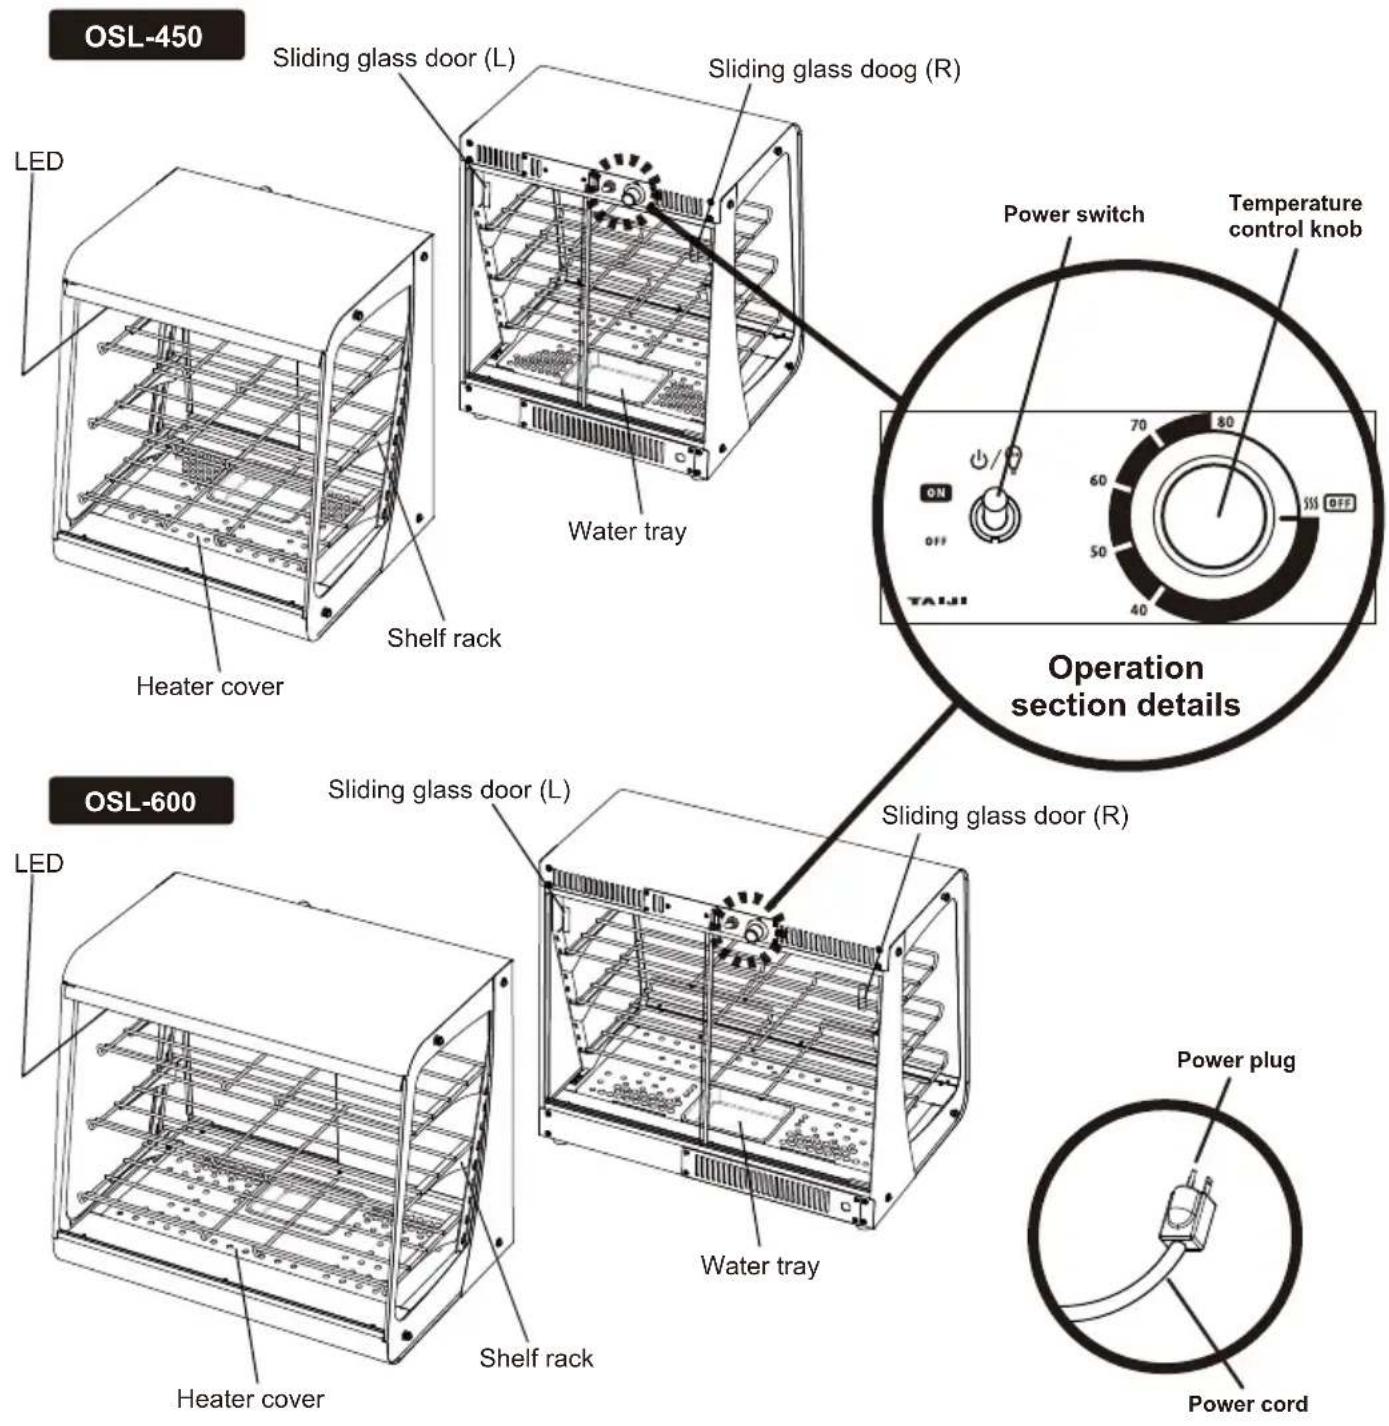
text_image
OSL-450 LED Sliding glass door (L) Sliding glass doog (R) Power switch Temperature control knob Water tray Shelf rack Heater cover Operation section details 70 80 60 50 40 ON OFF TALI OSL-600 LED Sliding glass door (L) Sliding glass door (R) Shelf rack Water tray Power plug Power cord Heater cover| Included accessories | |
Shelf rack x 3 | Sliding glass door (pair)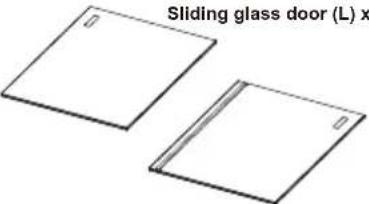 Sliding glass door (R) x 1 Sliding glass door (R) x 1 |
About the heater
A heater is situated under the heat cover. When in use, do not touch the heater cover, the heater itself, and the Water tray.

CAUTION

Caution regarding high temperatures
Do not touch heater parts and other high-temperature areas during use and for a while after use. Otherwise, burns may occur.

text_image
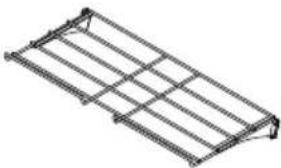
Heater Heater coverSetting the shelf rack and adjusting its height
You can adjust the height of the shelf rack by hooking the "stop" of the rack into the rectangular holes in the desired position. When removing the rack, reverse the procedure.
When the shelf rack is securely fixed via the rectangular holes, there will be approximately a 4 mm clearance between the upper side of the rectangle holes and the rack.

text_image
in adjust the height shelf rack by hooking "Stop" of the rack into tangular holes in sired position. removing the rack, e the procedure. "Stop" a 4 mm of Rectangle holes
text_image
Approximately 4 mm* The load capacity of the shelf rack is 5 kg per shelf on an equal-static-load basis.
Shelf rack angle adjustment
You can adjust the shelf rack angle according to two stages by adjusting the position of the "stop" of the rack.
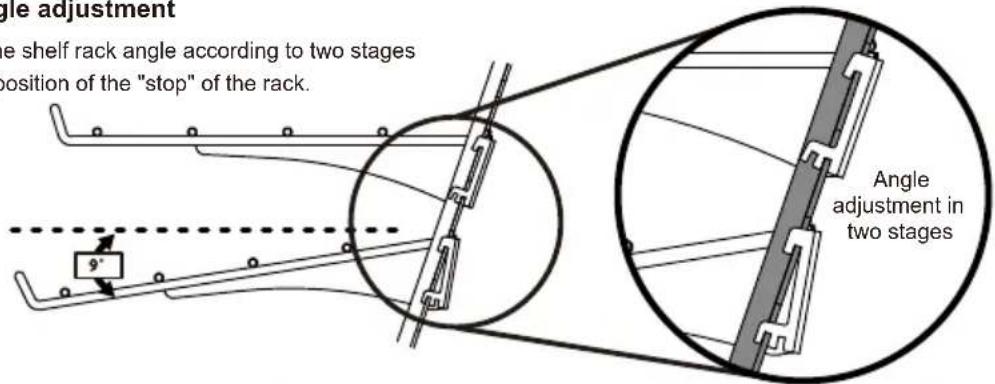
text_image
Angle adjustment the shelf rack angle according to two stages position of the "stop" of the rack. 9° Angle adjustment in two stagesSetting the sliding glasses door
There is sliding glass door on the back of the product, and it can be removed.
* The two pieces of sliding glass door (one for the right and one for the left) are not the same in design. Set them so that the handle (concave part) of the sliding glass door comes to the upper side.

text_image
Inner side Sliding glass door (L) Outer sideOuter side Sliding glass door (R) (mohair seal attached)
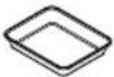
Regarding the Water tray (humidity control)
You can humidify the inside of the warmer by putting water in the tray.
* Note that if the insides of the warmer are excessively humidified, condensation may occur.
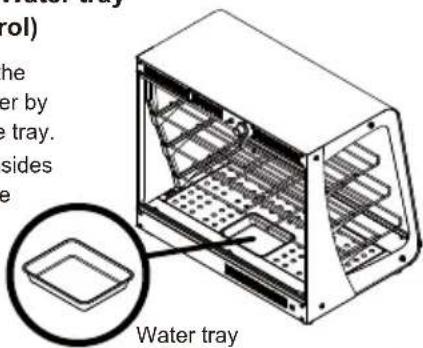
text_image
Control) the er by e tray. sides e Water tray
CAUTION

Caution
Do not apply excessive force to the shelf rack.
Doing so can cause damage, such as bending or folding.
(The load capacity of the shelf rack is 5 kg per shelf on an equal-static-load basis.)
Operation
For usual operation
- Insert the power plug into the outlet.
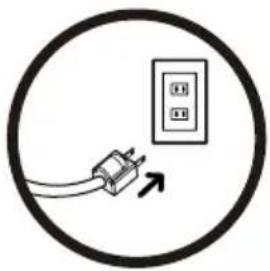
natural_image
Simple line drawing of a plug inserted into an electrical outlet, enclosed in a circle (no text or symbols)- Check that the temperature control knob is set to the OFF position, and then turn the power switch to ON (LED lights).
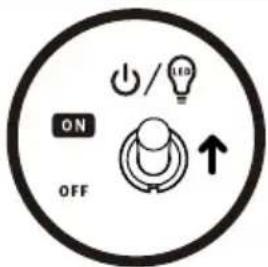
text_image
ON OFFPower switch
- Set the desired temperature range by using the temperature control knob.
The indicated temperature is only a guide.
The LED lights up even when the temperature control knob is set to the OFF position.
Temperature control knob
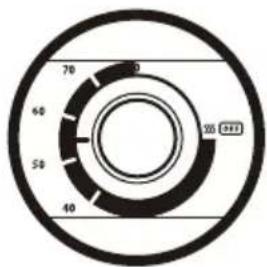
When stopping the operation
- Set the temperature control knob to OFF, and then turn the power switch to OFF.
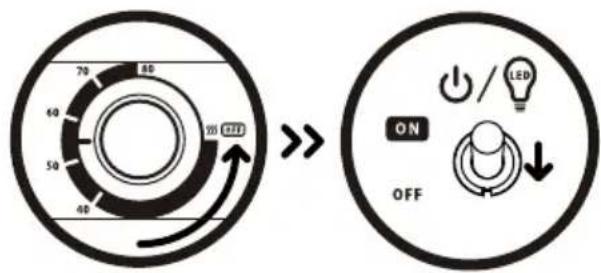
text_image
70 80 60 50 40 100 OFF ON OFF- Remove the power plug from the outlet.

natural_image
Simple line drawing of a plug inserted into an electrical outlet, enclosed in a circle (no text or symbols)Check the following before maintenance.
 WARNING WARNING |  Holding the plug during plug removal Holding the plug during plug removal | Remove the power plug from the outlet before starting maintenance operation.Otherwise, electric shock can occur. |
 CAUTION CAUTION |  Caution regarding high temperatures Caution regarding high temperatures | Perform maintenance only after confirming that the warmer has been cooled completely.Otherwise, contact with high-temperature areas may occur, and burns may result. |
| Wiping the product with a soft, tightly wrung clothEvery day | Washing with a dishwashing neutral detergentEvery day | ||
 |  |  |  |
| Shelf rack | Heater cover | ||
 |  | ||
| Water tray | Sliding glass door | ||
 | - Scrubbing brush- Wire wool- Sponge |  | - Scrubbing brush- Wire wool |
| Do not use! | Do not use! | ||
Do not use the following for maintenance.

Do not use!
- Alkaline synthetic detergents
- Cleansers
- Thinners
- Benzine
- Household synthetic detergents
Troubleshooting
| (1) The temperature does not increase even after turning the power ON. | |
| Is the power plug (or conversion plug)loosely inserted into the outlet? | Insert the power plug (or conversion plug) securelyand firmly until it can't be inserted any further. |
| Is the power supply circuit breaker tripped? | Remove the power plug (or conversion plug) and checkthe power supply circuit breaker used for the room. |
| Is the temperature control knob set to OFF? | Check the temperature control knob position andadjust it to the desired temperature range. |
| (2) The LED does not light up even after turning the power ON. | |
| Is the power plug (or conversion plug)loosely inserted into the outlet? | Insert the power plug (or conversion plug) securelyand firmly until it can't be inserted any further. |
| Is the power supply circuit breaker tripped? | Remove the power plug (or conversion plug) and checkthe power supply circuit breaker used for the room. |
If a normal condition could not be restored even after the countermeasures above are executed, contact your dealer, your nearest distributor, or Taiji & Co., Ltd. For details, please see "Warranty and After-sales Service" (page 11).
Specifications
| Model | OSL-450 OSL-600 | |
| Rated voltage | Single-phase 220-240V, 50/60 Hz | |
| Power consumption | 420-500W 425-505W | |
| Temperature control | Adjustable thermostat | |
| Temperature inside the warmer | Standard temperature: 40 to 80°C | |
| Safety device | Excessive temperature rise-prevention device: 135°C | |
| Lighting specification | LED 24V 8.4W LED 24V 12W | |
| Heater specification | 450W (230V) | |
| External dimensions | W453×D400×H535 W603×D400×H535 | |
| Internal dimensions | W440×D(360/266)×H413 W590×D(360/266)×H413 | |
| Weight | 22kg 25kg | |
| Included accessories | Sliding glass door (pair), shelf rack × 3 | |
* The specifications and external appearance are subject to change without prior notice, for improvement.
Circuit Diagram
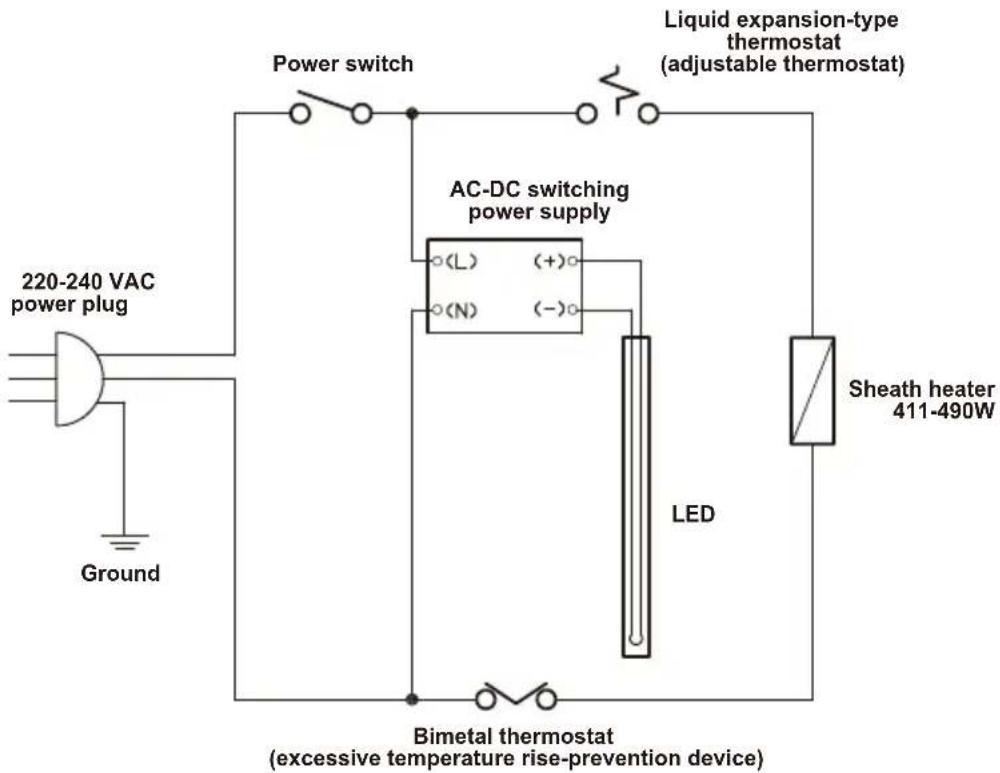
text_image
220-240 VAC power plug Ground Power switch Liquid expansion-type thermostat (adjustable thermostat) AC-DC switching power supply (L) (+) (N) (-) LED Sheath heater 411-490W Bimetal thermostat (excessive temperature rise-prevention device)Warranty and After-sales Service
- For after-sales service, contact your dealer, your nearest our distributor, or Taiji & Co., Ltd.
- The warranty period is one year from the date of shipment from TAIJI. This is effective between TAIJI Japan as a manufacture/exporter and importers/distributors in each countries. However, for a failure due to unintended use other than described in the "Applications" section, repair costs will apply within even the warranty period.
- Service parts are kept in inventory for five years after production is discontinued.
* "Service parts" refers to the parts necessary to maintain product functions.
To contact us via the internet, access the following URL.
http://www.taiji.co.jp/e/contact/contact.php
To contact us directly, contact the following address or phone number.
Taiji & Co., Ltd.
International Sales Department
8-2 Okawa-cho, Kawasaki-ku, Kawasaki City,
Kanagawa Prefecture, Japan 210-0858
TEL: +81-44-329-6338 Skype Call ID: taijijp
E-mail overseas@taiji.co.jp