
FSMNMFPDBKA - Bike Trainer Fortis - Free user manual and instructions
Find the device manual for free FSMNMFPDBKA Fortis in PDF.

| Product Type | Magnetic Mini Under Desk Pedal Bike Exerciser |
| Brand | Fortis |
| Model | FSMNMFPDBKA |
| Maximum User Weight | 100 kg (220 lbs) |
| Resistance Levels | 8 magnetic tension settings |
| Display Functions | Speed, Time, Calories, Distance, Scan (auto-cycle every 6 seconds) |
| Power Source | 1x AA battery (not included) |
| Operating Temperature | 0°C to 40°C |
| Storage Temperature | -10°C to 60°C |
| Assembly Required | Yes |
| Safety Features | Consult physician before use; stop if pain, dizziness, or irregular heartbeat; indoor use only; wear sports shoes; avoid loose clothing |
| Maintenance | Dry after each use; clean with mild, non-abrasive cleaner; lubricate moving parts monthly |
| Recommended Warm-Up | Minimum 12 minutes of stretching exercises as described in the manual |
| Monitor Sleep Mode | Auto sleep after 4 minutes of inactivity; wakes on key press or sensor signal |
| Parts Included | Main frame, front/rear support tubes, pedals, cranks, monitor, tension control, hardware kit (52 parts total) |
| Repairability | Spare parts list available in the manual; contact help.kogan.com for support |
Frequently Asked Questions - FSMNMFPDBKA Fortis
User questions about FSMNMFPDBKA Fortis
0 question about this device. Answer the ones you know or ask your own.
Ask a new question about this device
Download the instructions for your Bike Trainer in PDF format for free! Find your manual FSMNMFPDBKA - Fortis and take your electronic device back in hand. On this page are published all the documents necessary for the use of your device. FSMNMFPDBKA by Fortis.
USER MANUAL FSMNMFPDBKA Fortis
natural_image
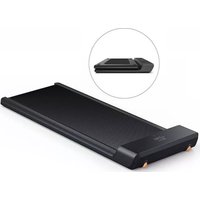
Technical line drawing of a mechanical device with no visible text or symbolsMAGNETIC FLYWHEEL MINI UNDER DESK PEDAL BIKE EXERCISER
FSMNMFPDBKA
SAFETY & WARNINGS
Read all the instructions in this guide before assembling or using this product. Do not skip, substitute, or modify any steps or procedures in this guide, as doing so could result in personal injury or product damage. Retain this guide for future reference.
- Before starting any exercise program, you should consult your physician to determine if you have any medical or physical conditions that could put your health and safety at risk or prevent you from using the equipment properly. Your physician's advice is essential if you are taking any medication that may affect your heart rate, blood pressure or cholesterol level.
- Incorrect or excessive exercise can damage your health. Stop exercising if you experience any of the following symptoms: pain, tightness in your chest, irregular heartbeat, shortness of breath, light headedness, dizziness, or feelings of nausea. If you experience any of these conditions, you should consult your physician before continuing with your exercise program.
- This equipment can be used by children and persons with reduced physical, sensory or mental capabilities or lack of experience and knowledge, under the supervision or instruction concerning use of the equipment in a safe way by the person responsible for their safety, and understand the hazards involved.
- This equipment is designed for consumer use. Follow directions and use only as described.
- Do not exceed the maximum user weight of 100kgs.
- Prior to assembly, ensure you have all the components and tools listed. Some components are pre-assembled to help with the assembly process.
- Use the equipment on a solid, flat level surface with a protective cover for your floor or carpet.
- Once fully assembled, inspect to ensure all hardware parts such as bolts, nuts and washers are positioned correctly and tightly secured. It is recommended to lubricate all moving parts monthly.
- Dry after each use to remove moisture. Wipe regularly with a mild, non-abrasive cleaner and water solution. To avoid damaging the finish, never use a petroleum-based solvent.
- Use the equipment on a solid, flat level surface with a protective cover for your floor or carpet. To ensure safety, the equipment should have at least 2 feet (approximately 60 cm) of free space on each side.
- Always use the equipment as intended. If you find any defective components while assembling or checking the equipment, or if you hear any unusual noises coming from the equipment during exercise, cease use immediately and contact help.kogan.com for assistance. Do not use until resolved.
- This equipment is designed and intended for indoor use only, not for commercial use. This equipment can be used by only one person at a time.
- Do not wear loose clothing while using this bike. Ensure to wear sports shoe.
- If at any time during exercise you feel faint, dizzy or experience pain. Stop immediately and consult your physician.
OVERVIEW

| Part | Description | Qty. | Part | Description | Qty. |
| 1 | Main frame | x1 | 2/ | Axis block D10 | x1 |
| 2 | Front support tube | x1 | 28 | Washer D10 | x1 |
| 3 | Front bottom tube | x1 | 29 | U metal blade | x2 |
| 4 | Rear bottom tube | x1 | 30 | Nylon nut M6 | x2 |
| 5 | Q feet cap | x4 | 31 | Idler belt | x1 |
| 6 | Bolt M8×50 | x4 | 32 | Idler axis | x1 |
| 7 | Washer D8 | x4 | 33 | Magnetic | x4 |
| 8 | Nut M8 | x4 | 34 | Magnetic board | x1 |
| 9 | Screw M8×15 | x3 | 35 | Washer D8 | x1 |
| 10L/R | L&R Pedals | x2 | 36 | Screw M6×12 | x1 |
| 11 | Crank cap | x2 | 37 | Tube cap | x1 |
| 12L/R | L&R nut | x2 | 38 | Compress spring | x1 |
| 13L/R | L&R crank | x2 | 39 | Washer D10 | x1 |
| 14 | Washer φ18xφ5x1.5 | x1 | 40 | Idler axis | x1 |
| 15 | Belt | x1 | 41 | Axis 620'2 | x1 |
| 16 | Belt | x1 | 42 | Axis block D15 | x1 |
| 17 | Screw M6×10 | x7 | 43 | Monitor | x1 |
| 18 | Axis block D17 | x6 | 44 | Tension control | x1 |
| 19 | Axis seat | x2 | 45L/R | L&R chain cover | x2 |
| 20 | Axis 600'3 | x4 | 46 | Bolt S I 4.2×16 | x4 |
| 21 | Curved washer D17 | x1 | 47 | Bolt ST4.2×18 | x8 |
| 22 | Flywheel | x1 | 48 | Spring washer D8 | x3 |
| 23 | Belt disk | x1 | 49 | Sensor | x1 |
| 24 | Nut M10×1.0 | x3 | 50 | Screw M4×10 | x1 |
| 25 | Bolt | x2 | 51 | Sensor | x1 |
| 26 | Nut M10×1.0 | x1 | 52 | Screw M5x20 | x1 |
ASSEMBLY
Step 1:
Secure Front Bottom Tube (3) to Main Frame (1) with Rear Bottom Tube (4) with Bolt (6) Curved Washer (7) Nut (8).

Step 2:
Secure L&R Pedals (10L) (10R) to L&R Crank (13L) (13R). Lock Pedal (10R) clockwise and lock Pedal (10L) anti-clock. Ensure the pedals are locked when you are exercising.

OPERATION
Adjusting Tension Controller

-
There are 8 tension settings. The higher the number, the higher the pedal resistance.
-
The Tension Indicator arrow points to the current tension setting.
Exercise Monitor
This allows you to select and lock on to a particular function you want.

Functions
| SPEED | The current speed setting is shown when the equipment is turned on. | Range: 0~99.99KM (MILE/H) |
| SCAN | The display automatically changes every 6 seconds.SCAN→TIME→CALORIES(CAL)→DIST | 6 seconds |
| TIME | The total workout time will be shown when the equipment is turned on. | 0:00-99:59 (M :S) |
| CALORIE | The target calorie count will be shown when the equipment is turned on. | 0~999.9Kcal |
| DISTANCE | The distance of each workout will be shown when the equipment is turned on. | 0~999.9KM (MILE) |
Sleep Mode
- When the sensor has no signal input or no keys are pressed for approximately 4 minutes, the system enters sleep mode automatically.
- The system turns on when the MODE key is depressed or a signal input from the sensor is received.
Tip
- Adjusting the tension control can change the resistance of the equipment, higher the resistance, harder to step. You can adjust it to your suitable speed.
- When you are doing elliptical fitness exercises, do not increase training intensity arbitrarily. It may make your leg muscles sprain, which means you cannot continue exercising for a long time.
WARM-UP EXERCISE
Before you start your workout routine, it is essential to do warm up exercises. This will increase blood flow and muscle flexibility. It will also reduce the risk of cramp and muscle injury.
The warm-up should last for a minimum of 12 minutes. However, you can take up to 15\~20 minutes in the beginning. After exercising for a period, your heartbeat will be close to the target zone as shown in the image below.

line
| Age | Heart Rate | | --- | --- | | 20 | 200 | | 40 | 160 | | 75 | 150 |It is recommended to do a few stretching exercises as shown in the image. Hold each stretch for approximately 30 seconds. Do not force or jerk your muscles into a stretch. If it hurts, stop immediately.

Down Stretch
Bend your knees slightly and body slowly. Relax your back and shoulders and try to touch your toes. Hold the stretch for 10 \~15 seconds, repeat 3 times.
Hamstring Stretch
Sit on a flat surface, keep your legs straight. Take your left foot and place it against the inner thigh of your right foot. Try to touch your toes. Hold the stretch for 10 \~15 seconds, repeat each foot 3 times.
Calf and Foot Stretching
Stand and place both hands on a wall or a tree. Place your right foot behind your left. Gently bend your left leg forward. Keep the right knee straight and heel on the ground. Hold the stretch for 10 \~15 seconds, repeat each foot 3 times.
Quadriceps Stretch
Place your left hands against a wall or a desk to aid your balance. Then grasp your left ankle with your left hand and pull your foot toward your buttocks. Hold the stretch for 10 -15 seconds, repeat each foot 3 times.
Groin Stretch
Sit with your knees flexed and soles of feet together as shown in the image (5). Hold your ankles and bend at your hips. Hold the stretch for 10 \~15 seconds, repeat 3 times.
COOL DOWN
This stage is to let your cardio-vascular system and muscles wind down. This is a repeat of the warm-up exercise. In this stage you will reduce your tempo and continue to exercise for approximately 5 minutes. Be careful not to force or jerk your muscles.
SPECIFICATIONS
Battery AA
Operating Temperature 0\~40°C
Storage Temperature -10\~60°C
Need more information?
We hope that this user guide has given you
the assistance needed for a simple set-up.
For the most up-to-date guide for your product, as well as any additional assistance you may require,
head online to help.kogan.com
kogan.com
- MAGNETIC FLYWHEEL MINI UNDER DESK PEDAL BIKE EXERCISER
- SAFETY & WARNINGS
- OVERVIEW
- ASSEMBLY
- Step 1:
- Step 2:
- OPERATION
- Adjusting Tension Controller
- Exercise Monitor
- Sleep Mode
- Tip
- WARM-UP EXERCISE
- Down Stretch
- Hamstring Stretch
- Calf and Foot Stretching
- Quadriceps Stretch
- Groin Stretch
- COOL DOWN
- SPECIFICATIONS
- Need more information?
Brand : Fortis
Model : FSMNMFPDBKA
Category : Bike Trainer