CT-HMMT-01 - Monitor stand Proaim - Free user manual and instructions
Find the device manual for free CT-HMMT-01 Proaim in PDF.

User questions about CT-HMMT-01 Proaim
0 question about this device. Answer the ones you know or ask your own.
Ask a new question about this device
Download the instructions for your Monitor stand in PDF format for free! Find your manual CT-HMMT-01 - Proaim and take your electronic device back in hand. On this page are published all the documents necessary for the use of your device. CT-HMMT-01 by Proaim.
USER MANUAL CT-HMMT-01 Proaim
Hybrid 75mm/100mm VESA Monitor Mount (CT-HMMT-01)
Assembly Manual

natural_image
Mechanical arm assembly with three cylindrical components and mounting brackets (no text or symbols visible)What's In The Box
Please inspect the contents of your shipped package to ensure you have received everything that is listed below.

All rights reserved.
No part of this document may be reproduced, stored in a retrieval system, or transmitted by any form or by any means, electronic, mechanical, photo-copying, recording, or otherwise, except as may be expressly permitted by the applicable copyright statutes or in writing by the Publisher.

Monitor Mount Setup
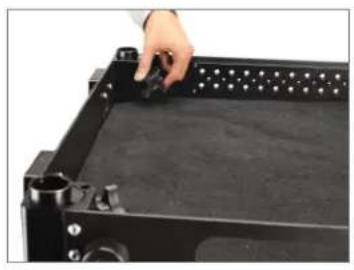
- Loosen both the (top & bottom) knobs on the production camera cart (Not Included).
- Then, raise the pole of the camera cart (Not Included), as shown in the image.
- Loosen the knob of the rod mounting clamp and insert it into the rod of the cart.
NOTE: The monitor mount rod can be fixed parallelly to the mast of any compatible cart via the clamping bracket with a clamping range of 38mm.
- After inserting the rod mounting clamp into the rod of the cart (Not Included), re-tighten the knob to secure it. Follow the same process to insert another Rod Mounting Clamp into the main rod of the cart.
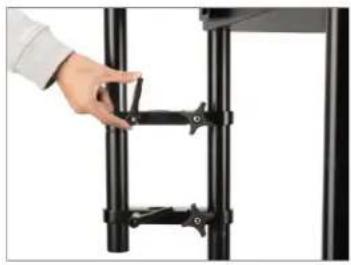
- Loosen the ratchet knob of the rod mounting clamp. Follow the same process to loosen the other rod mounting clamp.
- Now, insert the rod post into the hole of the rod mounting clamp, as shown in the images.
natural_image
Close-up of a hand adjusting a black rectangular electronic device with a grid of pins (no visible text or symbols)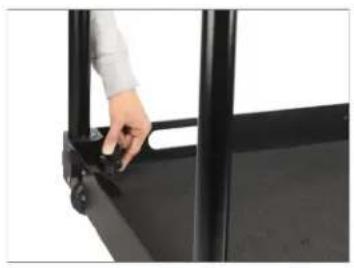
natural_image
Close-up of a hand adjusting a black metal frame with a handle (no text or symbols visible)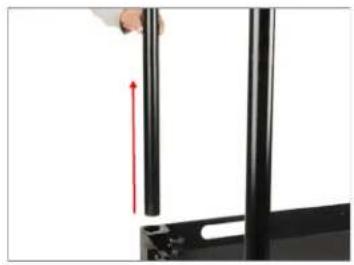
natural_image
Close-up of a hand holding a black cylindrical object with a red upward arrow, next to a black folder (no text or symbols visible)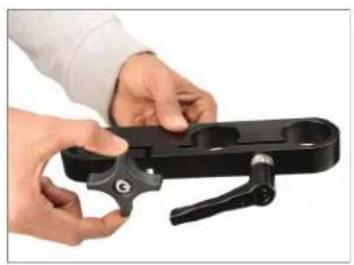
natural_image
Close-up of hands holding a black mechanical clamp or bracket (no text or symbols visible)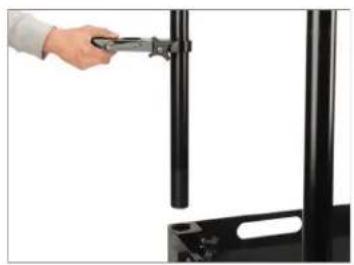
natural_image
Hand holding a tool interacting with a black vertical panel or rack (no visible text or symbols)
natural_image
Close-up of hands using a tool to adjust or install a black metal bracket (no text or symbols visible)
natural_image
Close-up of a black metal vertical pole with two adjustable clips (no text or symbols visible)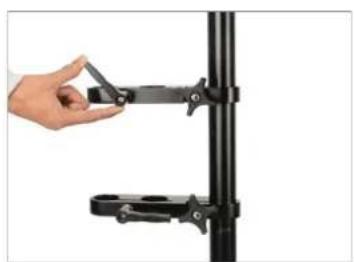
natural_image
Hand holding a black mechanical clamp attached to a vertical pole (no text or symbols visible)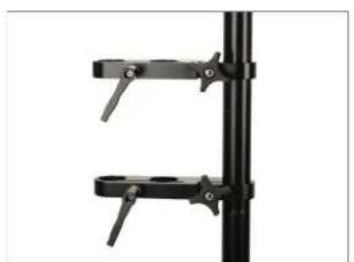
natural_image
Close-up of two black metal clamps mounted on a vertical pole (no text or symbols visible)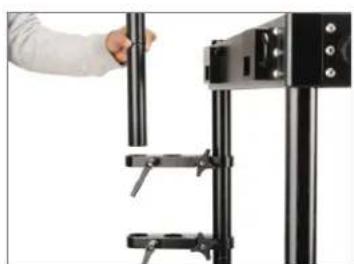
natural_image
Close-up of a hand adjusting a black cylindrical object with attached clamps (no visible text or symbols)
natural_image
Close-up of a hand installing or adjusting a black mechanical component (no visible text or symbols)- Then secure the rod post with the rod mounting clamp using the ratchet knob.
- After securing the rod post with the rod mounting clamp, mount the second rod post by screwing it into the provided thread right above the first rod post.
- Mount the arm mount adapter on the rod post by screwing it into the provided thread.
- Then mount the Hybrid Cylindrical Arm with Vesa Mount on top of the Arm Mount Adapter, and secure the arm mount adapter's knob by re-tightening it.
- Then mount the Hybrid Cylindrical Arm with Vesa Mount on top of the Arm Mount Adapter, and secure the arm mount adapter's knob by re-tightening it.
NOTE: A 5/8" Baby Pin receiver at the base of the arm mount adapter gives you the autonomy to rig the arm on C-Stands, and Light Stands.
- To detach the Vesa Mount from the Hybrid Cylindrical Arm, loosen the bolt, as shown in the image.
natural_image
Hand placing a black L-shaped bracket on a vertical metal frame (no text or symbols visible)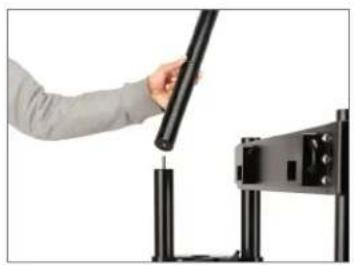
natural_image
Person using a handheld device to press or install a black mechanical component (no visible text or symbols)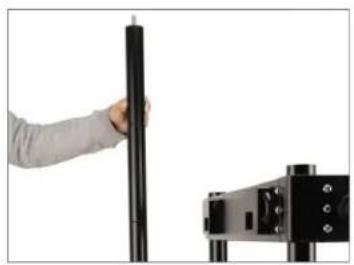
natural_image
Person holding a black cylindrical object next to a black mechanical device (no visible text or symbols)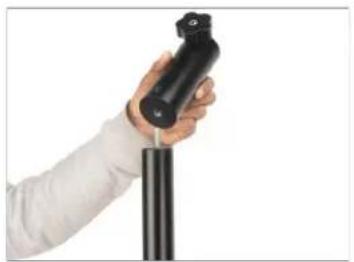
natural_image
Hand holding a black cylindrical device against a white background (no text or symbols visible)
natural_image
Hand holding a black cylindrical object against a white background (no text or symbols visible)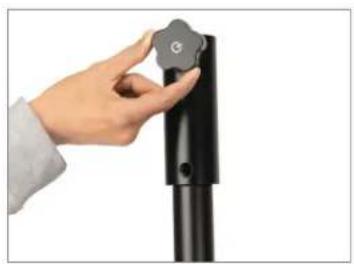
natural_image
Hand holding a black cylindrical object with a circular button labeled 'G' (no text or symbols on the object itself)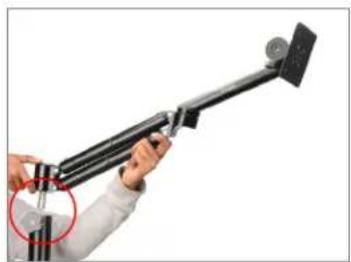
natural_image
Person holding a black tripod-mounted device with a red circle highlighting the handle (no text or symbols visible)
natural_image
Hand placing a small object onto a black metal bracket (no text or symbols visible)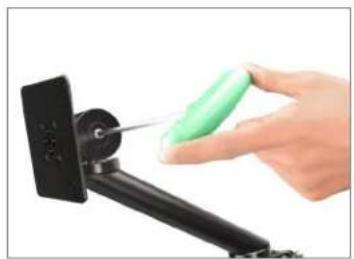
natural_image
Hand using a green screwdriver to apply a black mechanical component (no text or symbols visible)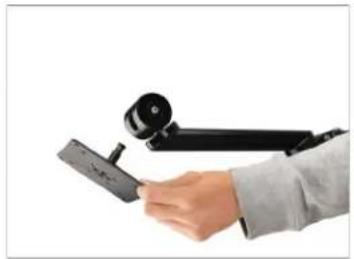
natural_image
Hand holding a black mechanical device with a camera module (no text or symbols visible)- Attach the Vesa Mount at the back of the LCD Monitor (Not Included) by aligning the threads, as shown in the image.
- To secure the assembly, insert the bolts and secure them using the Allen key.
- Secure all the bolts by tightening them.
- Align and match the thread holes of LCD monitor (Not Included) with the Hybrid Cylindrical Arm and then insert and tighten the bolts using the Allen key to secure the assembly.
- In order to enable the panning movement of the LCD Monitor (Not Included), loosen the bolt of the Hybrid Cylindrical Arm.

natural_image
Close-up of a hand pressing a small cylindrical component on a dark surface, with no visible text or symbols.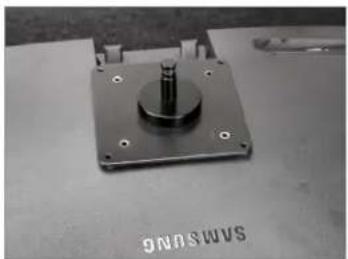
natural_image
Close-up of a metallic mechanical component with a central cylindrical shaft and mounting holes (no visible text or symbols)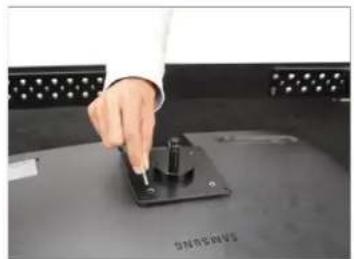
natural_image
Hand pressing a button on a black electronic device (no visible text or symbols)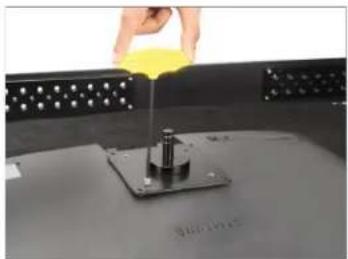
natural_image
Close-up of a hand pouring yellow liquid into a small metallic component on a dark surface (no text or symbols visible)
natural_image
Hand holding a yellow object above a metal base with a rod, against a perforated background (no text or symbols visible)
natural_image
Person using a studio lamp to adjust a flat-screen object, with an inset close-up of the lens (no text or symbols visible)
natural_image
Person using a green tool to clean or adjust a computer monitor (no visible text or symbols)
natural_image
Person using a green tool to adjust or install a black mechanical device mounted on a stand (no visible text or symbols)
natural_image
Close-up of a black satellite dish mounted on a pole against a white background (no text or symbols visible)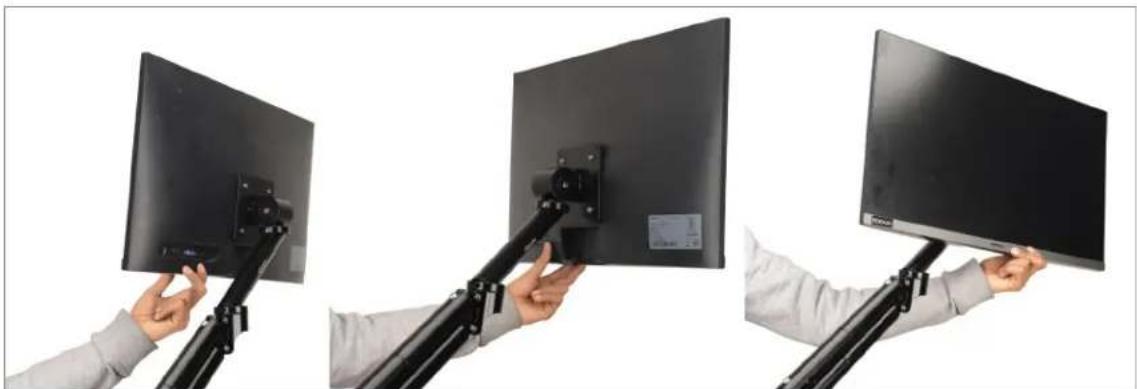
natural_image
Three-panel photo showing hands holding a black monitor mounted on a tripod stand, no visible text or symbols- The LCD monitor (Not Included) can be subjected to tilting (75°) by loosening the bolt at the top of the Hybrid Cylindrical Arm with the Allen key.

natural_image
Hand inserting a green screwdriver into a computer monitor (no text or symbols visible)
natural_image
Three-panel diagram showing a person using a laptop stand to lift a screen, with red arrows indicating motion (no text or symbols)- Tighten the fitted bolt in the Hybrid Cylindrical arm with VESA mount using the Allen key to lock the arm at the required position.
NOTE: Arm will stay positioned at the exact angle you leave it. To make your monitor more agile & flexible, the arm offers panning & tilting movements so that you can position your monitor at your convenience

natural_image
Two-panel image showing a hand holding a green clip next to a black mechanical arm, and a separate view of a computer monitor mounted on a stand (no text or symbols visible)YOUR PROAIM HYBRID 75MM/100MM VESA MONITOR MOUNT ALL DRESSED UP AND READY TO GO!

natural_image
Black wheeled cart with a monitor on top, mounted on a vertical support frame (no text or symbols visible)(SHOWN WITH OPTIONAL ACCESSORIES)
Warranty: We offer one year warranty for our products from date of purchase. Within this period of time, we will repair it without charge for labor or parts. Warranty doesn't cover transportation costs nor does it cover a product subjected to misuse or accidental damage. Warranty repairs are subjected to inspection and evaluation by us.
Liability: We are not liable for damage caused by products that we do not supply or from mishandling in transit, accident, misuse, neglect, lack of care of the product, or service by anyone other than our company.
Contact Us: In case of any kind of dissatisfaction, please Contact us immediately and we promise our utmost support and care until you use our product.