
KASLSTMTSTA - Monitor stand Kogan - Free user manual and instructions
Find the device manual for free KASLSTMTSTA Kogan in PDF.

| Product Type | Monitor Stand (Premium Racing Simulator Cockpit) |
| Brand | Kogan |
| Model | KASLSTMTSTA |
| Compatible VESA Patterns | 100x100, 200x100, 200x200, 300x200, 300x300, 400x200, 400x300, 400x400 mm |
| Materials | Steel (assumed) |
| Color | Black (typical) |
| Mounting Type | Table clamp or bolt-through (to simulator cockpit) |
| Height Adjustment | Yes, multiple holes for different mounting heights |
| Tilt Adjustment | Not specified, likely fixed |
| Swivel Adjustment | Not specified |
| Weight Capacity | Not specified, but warning against exceeding max rated weights |
| Included Hardware | Mounting screws and Allen key |
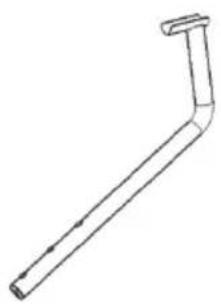
| Number of Arms | 2 (arms A) |
| Assembly Required | Yes, with included instructions |
| Recommended Number of Installers | 2 people |
| Indoor Use Only | Yes |
| Maintenance Interval | Every 3 months |
| Safety Warning | Exceeding max weight may cause instability, injury or death |
| Parts Availability | Contact help.Kogan.com for missing or faulty parts |
| Manual Language | English (available for translation) |
Frequently Asked Questions - KASLSTMTSTA Kogan
User questions about KASLSTMTSTA Kogan
0 question about this device. Answer the ones you know or ask your own.
Ask a new question about this device
Download the instructions for your Monitor stand in PDF format for free! Find your manual KASLSTMTSTA - Kogan and take your electronic device back in hand. On this page are published all the documents necessary for the use of your device. KASLSTMTSTA by Kogan.
USER MANUAL KASLSTMTSTA Kogan
natural_image
Technical line drawing of a mechanical support structure with two vertical supports and a horizontal plate (no text or symbols)
100×100/200×100
200×200/300×200
300×300/400×200
400x300/400x400


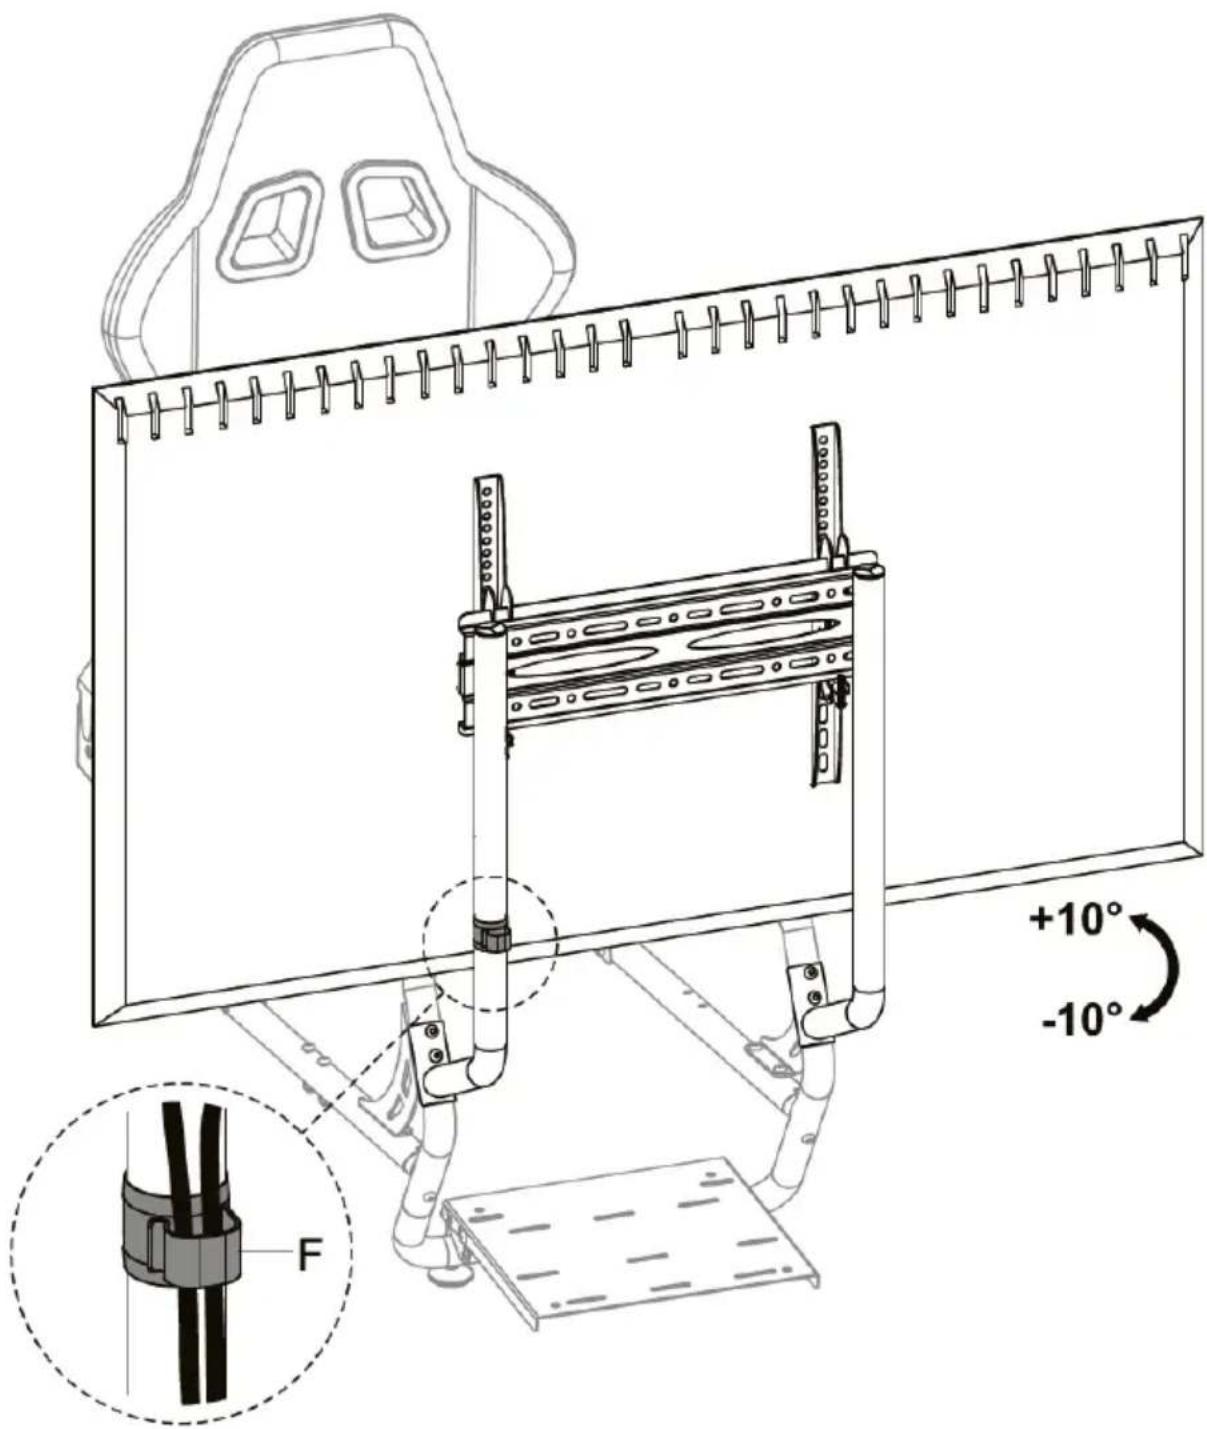
PREMIUM RACING SIMULATOR COCKPIT
MONITOR STAND
KASLSTMTSTA
SAFETY & WARNINGS
WARNING: Exceeding the maximum rated weights indicated may result in instability causing possible property damage, serious injury or death.
- Closely follow the assembly instructions. Improper installation may result in property damage or serious personal injury.
- A minimum of two people is recommended for this installation. Failure to use safety gear and safe working methods may result in property damage, serious injury or death.
- Be careful of sharp objects during assembly.
- Ensure that the supporting surface will safely support the combined weight of the equipment and all attached hardware and components.
• Use the mounting screws provided and do not over tighten them. - This product contains small items that could be a choking hazard if swallowed. Keep small items away from children.
• Do not allow children to play near this stand. - This product is intended for indoor use only. Using this product outdoors could lead to product failure and personal injury.
IMPORTANT: Ensure that you have received all parts according to the component checklist prior to installation. If any parts are missing or faulty, contact help.Kogan.com for support.
MAINTENANCE: Check that the product is secure and safe to use at regular intervals (at least every three months).
COMPONENTS
Lay all components out on a clean floor and ensure all parts are included. If any pieces are missing, check all packaging thoroughly, then contact help.Kogan.com for assistance.
Parts:
natural_image
Simple line drawing of a bent pipe or support structure (no text or symbols)A (x2)

E (x4)

B

F (x2)

C

G (x4)

D

H Allen key
Mounting hardware:

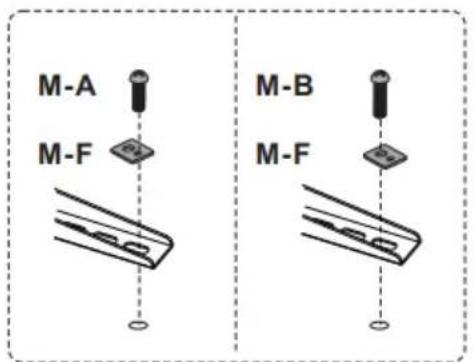
M-A M5x14 (x4)
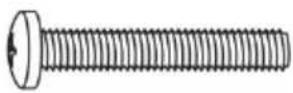
M-E M8x50 (x4)

M-B M6x14 (x4)
M-F (x4)

M-C M6x30 (x4)
M-G (x8)

M-D M8x30 (x4)
M-H (x8)
ASSEMBLY
Step 1:
- Remove the existing fasteners and attach the arms (A) to the simulator cockpit.
- Secure the arms (A) in place using the previously removed fasteners.
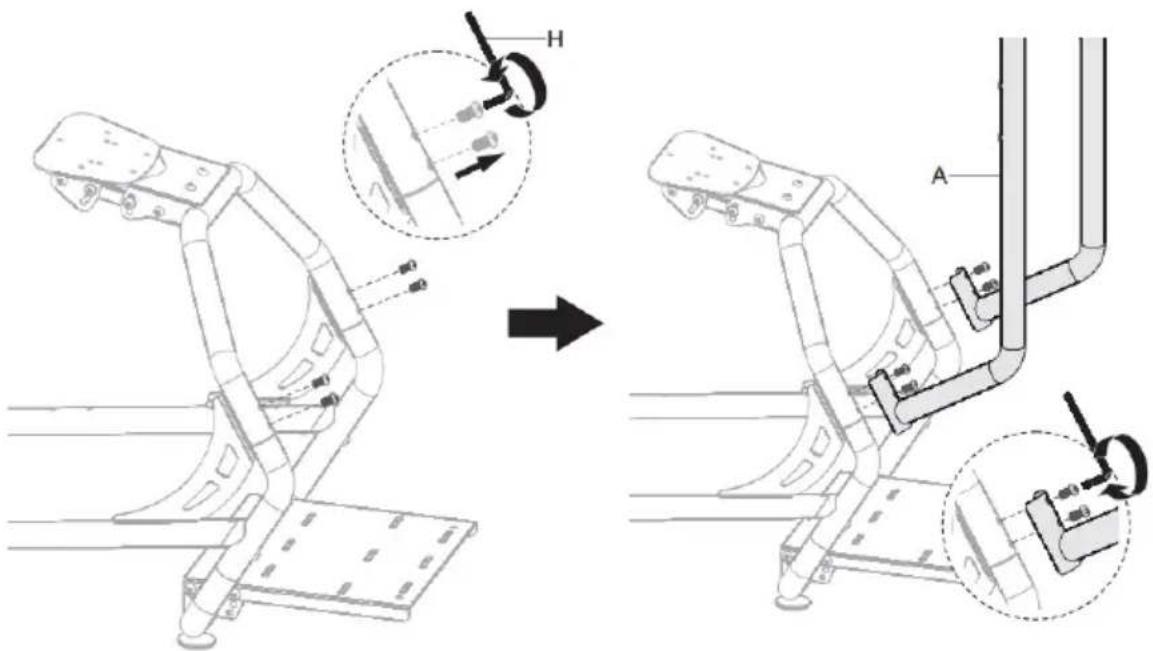
Step 2: Optional holes are provided for different mounting heights.
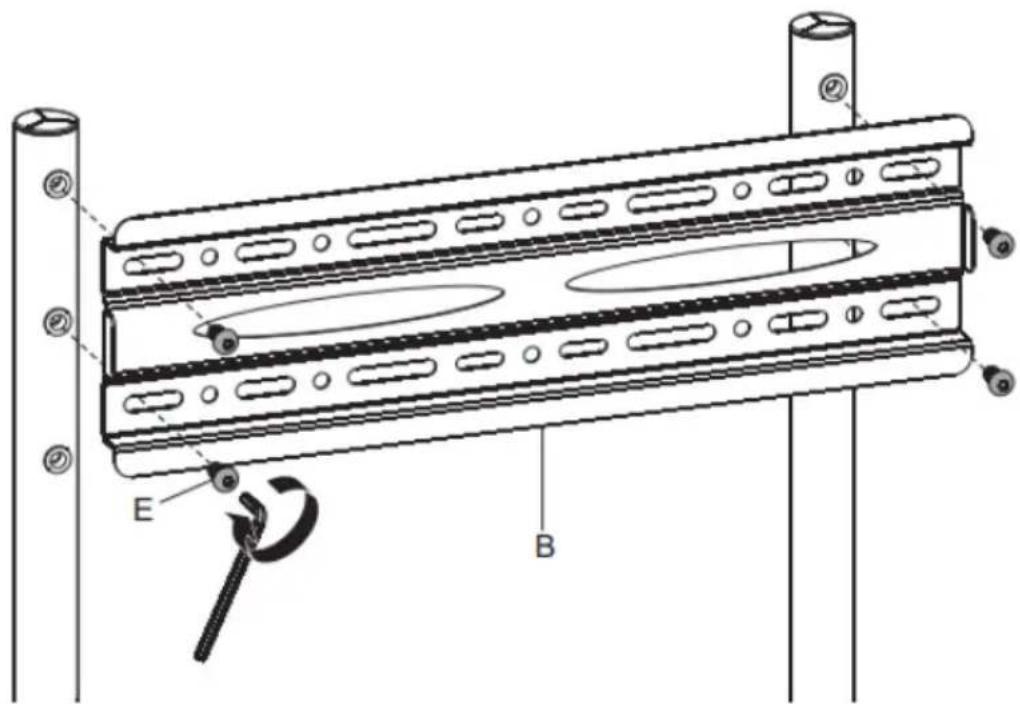
Step 3:
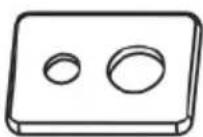
Using a combination of the supplied mounting hardware, securely attach the 2 mounting brackets (C)(D) to the rear of your display.
Note: If you are unsure as to which hardware to use to safely mount your display, please seek the advice of a professional tradesmen.


Step 4:
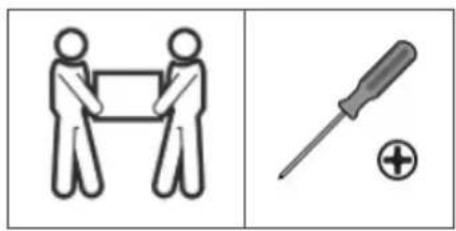
natural_image
Two symbolic illustrations: one showing two figures holding a rectangular object, the other showing a screwdriver with a plus sign (no text or symbols)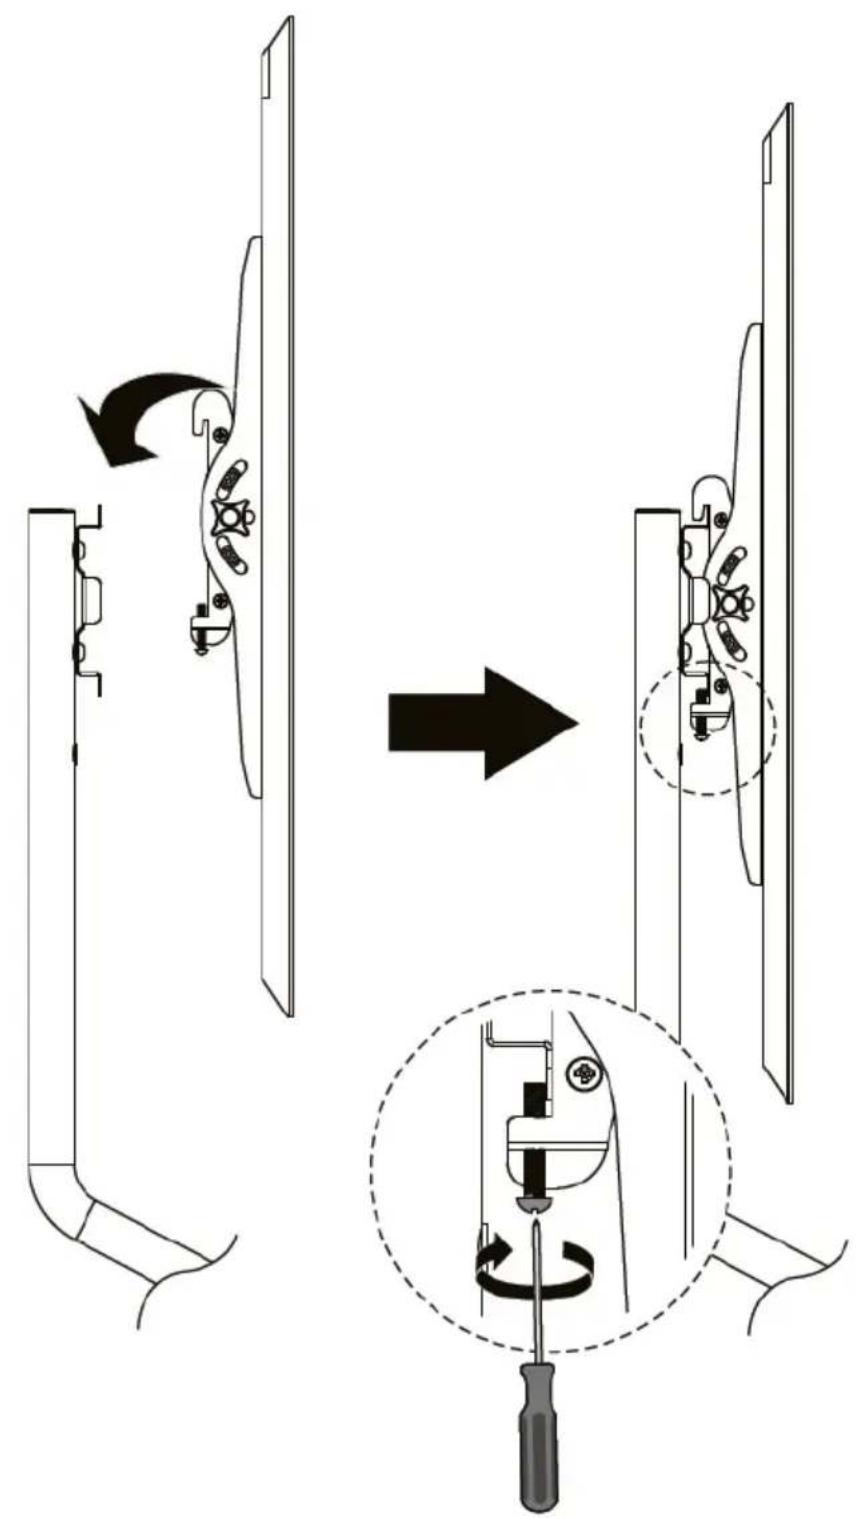
Step 5:
NOTES
Need more information?
We hope that this user guide has given you the assistance needed for a simple set-up.
For the most up-to-date guide for your product, as well as any additional assistance you may require, head online to help.kogan.com
kogan.com
Brand : Kogan
Model : KASLSTMTSTA
Category : Monitor stand