
P-HDRP-01 - Tripod Proaim - Free user manual and instructions
Find the device manual for free P-HDRP-01 Proaim in PDF.

| Product Type | Car Seat Headrest Mount Bracket |
| Brand | Proaim |
| Model | P-HDRP-01 |
| Material | Aluminum alloy and steel |
| Mounting Type | Clamp onto car headrest rods |
| Compatibility | Vehicles with removable headrests (standard rods) |
| Adjustable Joints | 2 highly flexible joints with tilting adjustments |
| Tilting Mechanism | Yes, for optimal viewing angle |
| Attachment Screw | 1/4"-20 screw for LCD monitor/tablet |
| Included Accessories | 1 x L-Type Allen Key (5mm) |
| Additional Components | Headrest Plus Bracket, ratchet knob for positioning |
| Installation | Loosen bolts, insert headrest rod, re-tighten |
| Warranty | 1 year from date of purchase (labor and parts) |
| Cleaning Instructions | Wipe with dry cloth; avoid harsh chemicals |
| Safety Note | Ensure all bolts are securely tightened before use |
| Repairability | Contact Proaim for warranty service; do not disassemble |
Frequently Asked Questions - P-HDRP-01 Proaim
User questions about P-HDRP-01 Proaim
0 question about this device. Answer the ones you know or ask your own.
Ask a new question about this device
Download the instructions for your Tripod in PDF format for free! Find your manual P-HDRP-01 - Proaim and take your electronic device back in hand. On this page are published all the documents necessary for the use of your device. P-HDRP-01 by Proaim.
USER MANUAL P-HDRP-01 Proaim
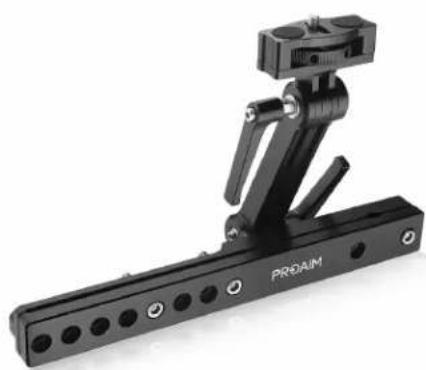
natural_image
Black industrial robotic arm with mounting bracket and labeled 'PRAIM' on a metal base (no other text or symbols visible)
What's In The Box
Please inspect the contents of your shipped package to ensure you have received everything that is listed below.
natural_image
Black PROAIM robotic arm with articulated joints and mounting holes (no text or symbols visible)Proaim Headrest Plus Bracket
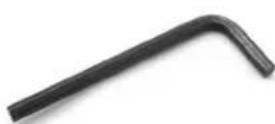
1 x L-Type Allen Key (Size: 5mm)
Feature Of Car Seat Headrest Plus Bracket


Car Seat Headrest Bracket Setup
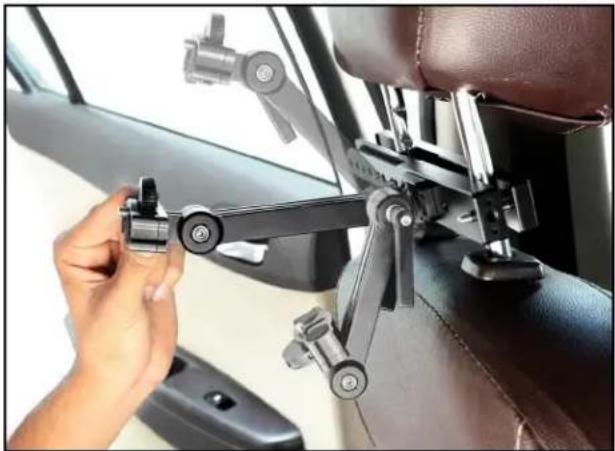
- Loosen the bolts of the headrest car mount using the 5mm Allen key. Now, loosen the clamp attached at the bottom of the Headrest Car Mount.
- To remove the Headrest, push the seat's button as shown in the image.

natural_image
Close-up of a hand holding a black PROAM device with multiple ports and a small sensor attached (no visible text or symbols)
natural_image
Close-up of hands holding a black mechanical device with a lever mechanism (no visible text or symbols)
natural_image
Close-up of hands adjusting a brown car headrest in a car (no visible text or symbols)
natural_image
Interior view of a car showing a hand adjusting a tool on the steering wheel (no visible text or symbols)- Insert the Headrest Rod in the Headrest Plus Bracket, as shown in the image.
- Then, re-insert the assembly headrest in the vehicle's seat.
- After properly inserting the assembly headrest into the vehicle's seat, secure all the bolts of the Headrest Plus Bracket by re-tightening them, as shown in the image.
- Now, loosen the rachet knob and set the position of the Bracket, per your requirement.
- Mount the desired accessory in the Bracket and position it per your requirement.
NOTE: The arm has two highly flexible joints with tilting adjustments for your monitor or accessory at the perfect angle for optimal viewing comfort.

natural_image
Close-up of hands holding a black PREAM camera mount with metal rods (no visible text or symbols)
natural_image
Person assembling a mechanical component on a car interior (no visible text or symbols)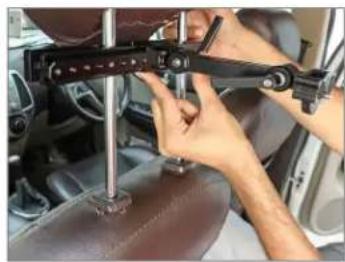
natural_image
Close-up of hands operating a mechanical device on a car wheel (no visible text or symbols)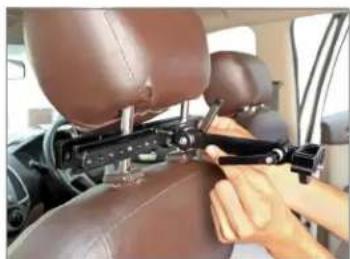
natural_image
Person adjusting a mechanical device on a car seat (no visible text or symbols)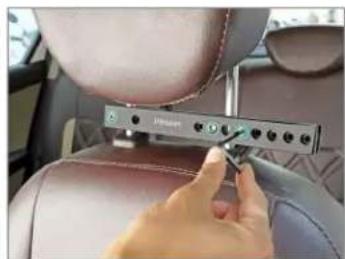
natural_image
Close-up of a hand adjusting a Jinkan car seatbelt with control buttons (no visible text or symbols)
natural_image
Close-up of a person adjusting a mechanical device on a leather surface (no visible text or symbols)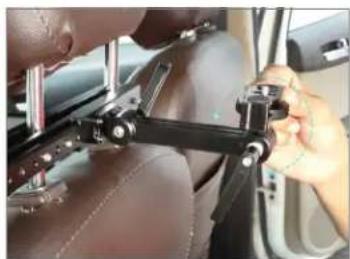
natural_image
Close-up of a person adjusting a mechanical bracket on a car interior (no visible text or symbols)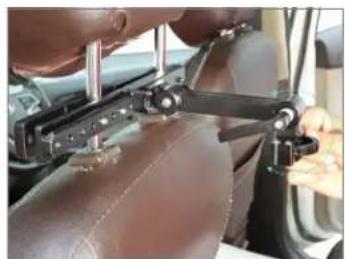
natural_image
Close-up of hands operating a mechanical device on a leather surface inside a vehicle (no visible text or symbols)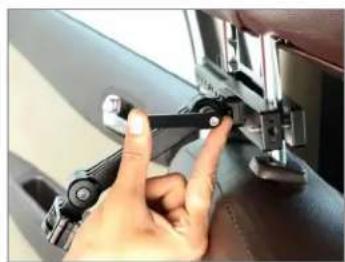
natural_image
Close-up of a hand adjusting a mechanical component with a tool (no visible text or symbols)Tilting Mechanism Feature
natural_image
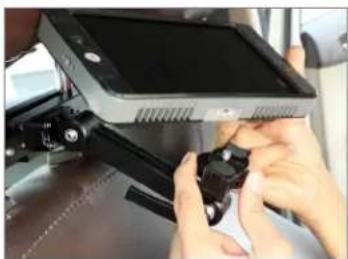
Close-up of a car interior showing a hand adjusting a mounted mechanical component (no visible text or symbols)- Place the LCD monitor (Not Included) directly on the Headrest Plus Bracket and secure it by twisting the 1/4"-20 screw.
- The LCD monitor is properly attached with Headrest Plus Bracket.
natural_image
Close-up of hands installing a small electronic device on a vehicle (no visible text or symbols)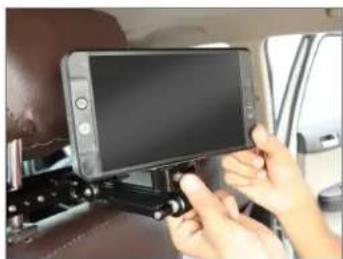
natural_image
Close-up of hands holding a smartphone mounted on a bracket, showing the front wheel and dashboard (no visible text or symbols)
natural_image
Interior view of a car showing a mounted electronic device on the backrest, with no visible text or symbols.YOUR PROAIM CAR SEAT HEADREST PLUS BRACKET ALL DRESSED UP AND READY TO GO!

natural_image
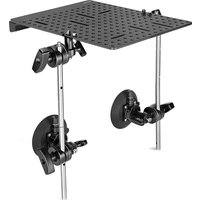
Interior view of a car showing a mounted tablet device on a black tripod-mounted platform, with leather seat and dashboard visible (no text or symbols)(SHOWN WITH OPTIONAL ACCESSORIES)
Warranty: We offer one year warranty for our products from date of purchase. Within this period of time, we will repair it without charge for labor or parts. Warranty doesn't cover transportation costs nor does it cover a product subjected to misuse or accidental damage. Warranty repairs are subjected to inspection and evaluation by us.
Liability: We are not liable for damage caused by products that we do not supply or from mishandling in transit, accident, misuse, neglect, lack of care of the product, or service by anyone other than our company.
Contact Us: In case of any kind of dissatisfaction, please Contact us immediately and we promise our utmost support and care until you use our product.
Brand : Proaim
Model : P-HDRP-01
Category : Tripod