
KASMSWTH3GA 2PACK - Smart Home Kogan - Free user manual and instructions
Find the device manual for free KASMSWTH3GA 2PACK Kogan in PDF.

| Product Type | Smart Touch Light Switch (1, 2, or 3 Gang) |
| Model | KASMSWTH3GA 2PACK (Pack of 2) |
| Brand | Kogan |
| Dimensions | 116 x 70 x 35 mm (overall); 71 x 45 x 26 mm (in-wall) |
| Input | AC 100-240V, 50/60Hz |
| Output | Incandescent: 300W per gang max; Fluorescent: 150W per gang max |
| Wireless Protocol | Wi-Fi (2.4 GHz) & Bluetooth |
| Transmit Power | 19 dBm |
| Receiving Sensitivity | -100 dBm |
| Communication Distance | >300 m (open area) |
| Control Methods | Manual (touch button), App (Kogan SmarterHome) |
| Installation Requirements | Requires neutral wire; must be installed by licensed electrician; protected by 10A circuit breaker |
| Safety | Turn off power before installation; do not expose to water; do not disassemble |
| Cleaning | Use a soft, dry cloth; avoid abrasive or corrosive agents |
| Spare Parts & Repairability | No user-serviceable parts; contact help.kogan.com for support |
| Operating Environment | Avoid extreme temperatures, high humidity, excessive dust, direct sunlight |
| Network Compatibility | 2.4 GHz Wi-Fi only; Bluetooth for initial pairing |
| Indicator | Button indicator shows load status; flashes quickly in pairing mode |
| Warranty | Refer to Kogan warranty policy |
Frequently Asked Questions - KASMSWTH3GA 2PACK Kogan
User questions about KASMSWTH3GA 2PACK Kogan
0 question about this device. Answer the ones you know or ask your own.
Ask a new question about this device
Download the instructions for your Smart Home in PDF format for free! Find your manual KASMSWTH3GA 2PACK - Kogan and take your electronic device back in hand. On this page are published all the documents necessary for the use of your device. KASMSWTH3GA 2PACK by Kogan.
USER MANUAL KASMSWTH3GA 2PACK Kogan
KOGAN SMARTERHOME™ SMART TOUCH LIGHT SWITCH
(1, 2 & 3 GANG)
Read and follow the installation instructions provided in the user guide before installation and operation. Retain this user guide for future reference.
Electrical Safety:
- This product must be installed by a licensed electrician or qualified trade professional.
- Before installing or handling the smart light switch, ensure that the power supply to the switch is turned off.
- Do not touch the electrical terminals of the switch with bare hands or conductive objects.
- Ensure that the electrical wiring is properly grounded and meets local electrical codes and regulations.
- Avoid exposing the smart light switch to water or other liquids to prevent electrical shock or damage.
Installation and Use:
- Ensure that the smart light switch is securely mounted to the wall or junction box to prevent it from falling or becoming loose.
- Avoid using the smart light switch in environments with extreme temperatures, high humidity, or excessive dust.
- Keep the smart light switch away from direct sunlight or heat sources that may damage the device.
- Use a soft, dry cloth to clean the surface of the smart light switch. Avoid using abrasive or corrosive cleaning agents that may damage the device.
- Do not disassemble the smart light switch or attempt to repair it yourself. Contact help.Kogan.com for support.
OVERVIEW
1 gang light switch
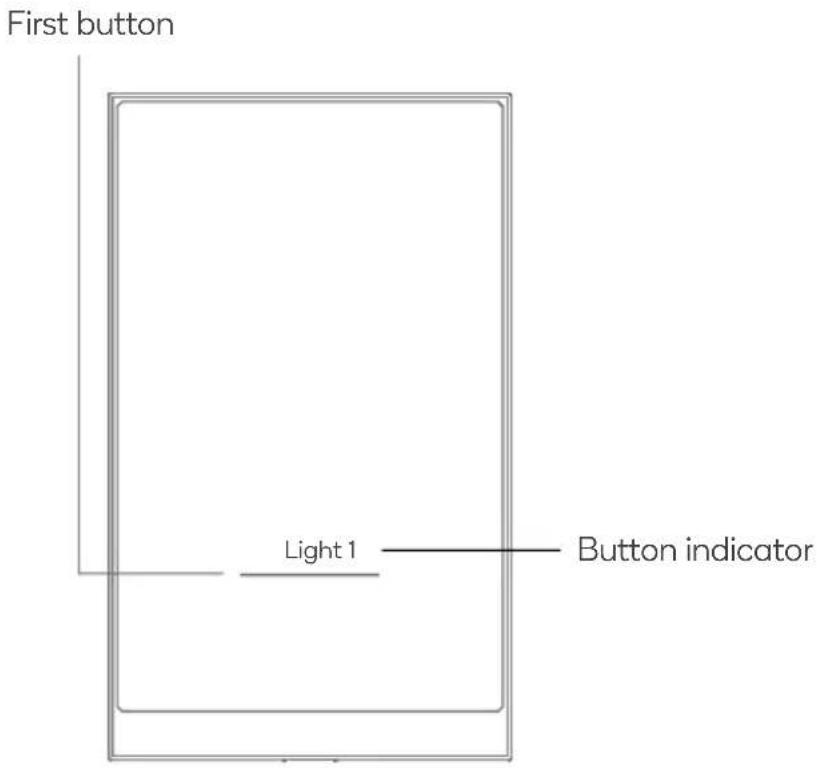
| Light switch | Operation | Methods | Indicator status |
| ON/OFF | Short press any button | The indicator light turns on and off according to the load status. | |
| Network pairing mode | Long press (5 sec.) the first button | The first button indicator will flash quickly.The indicator will turn off to indicate successfully connected to network. |
2 gang light switch

3 gang light switch

INSTALLATION
• This product must be installed by a licensed electrician or qualified trade professional.
- Before installation, ensure that the power supply to the switch is turned off.
- The installation location of the light switch must have a neutral wire. Where multiple neutral wires are present, ensure that it is the same neutral wire as the light intended to be controlled.
- When installing, the junction box should not be greater than: 71x45x26mm.
- Confirm all the wiring is correct before turning on the main power to avoid hazards.
Wiring Diagram
Follow the wiring diagram below to connect the wiring to the light switch. Note: The diagram is for a 3 gang switch, 1 & 2 gang models will have the respective number of lights to wire.
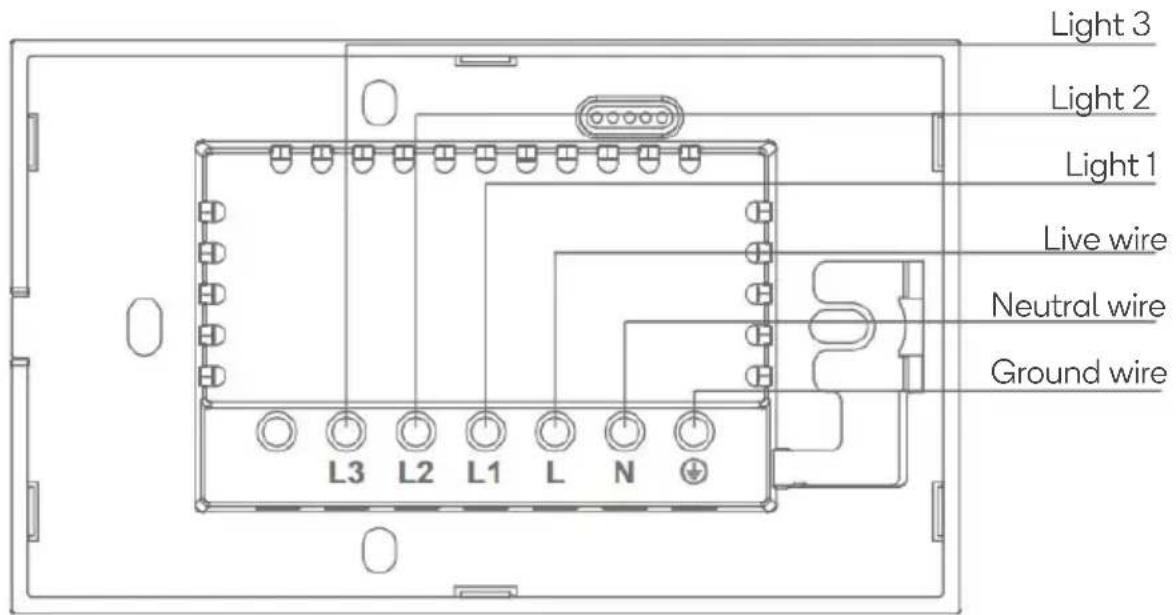
Notes:
• This product must be protected by a 10A circuit breaker.
• The switched circuits cannot be used in SELV/PELV circuits.
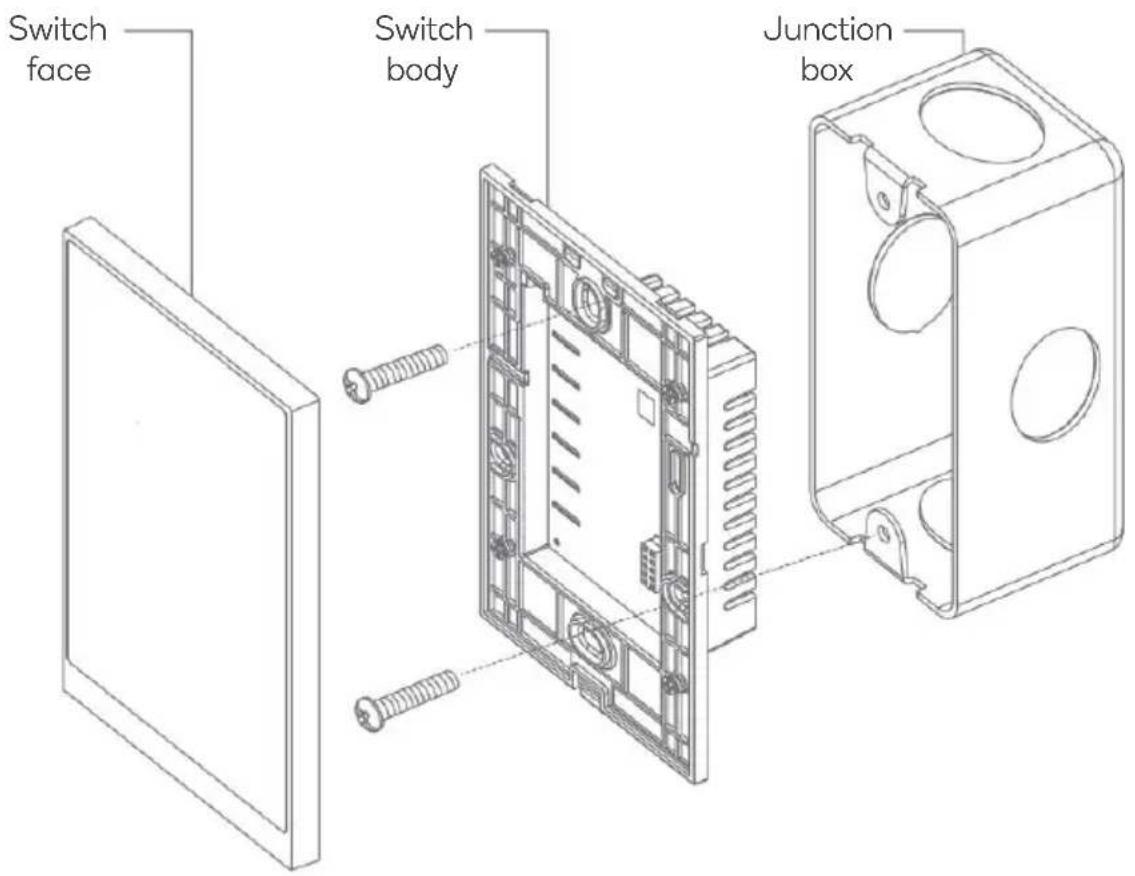
Installing the Switch
- Separate the switch face from the switch body using a flat screwdriver.
- Attach the switch body to the wall junction box using the supplied screws.
- Attach the wall switch face to the switch body.
- Ensure the wiring has been connected correctly before turning the power back on.
CONNECT TO SMARTERHOME™ APP
Install App
Download the "Kogan SmarterHome" app from the Play Store (Android) or App Store (iOS).


App Store (iOS)
To register:
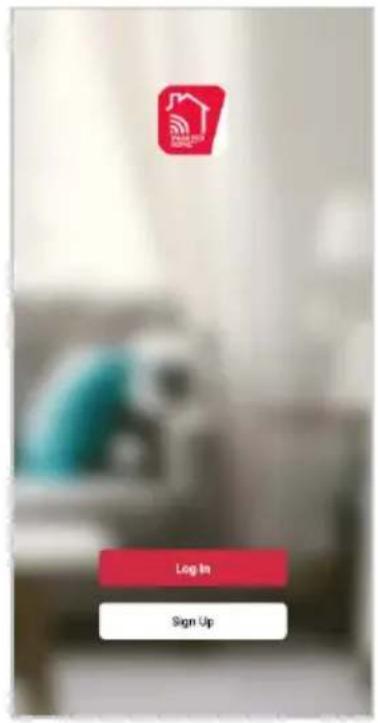
- If you already have a SmarterHome account, select 'Log In'. To register a new account, select 'Sign Up'.
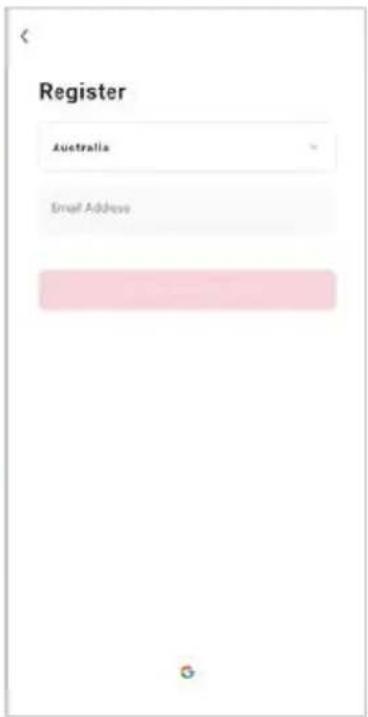
- The system will automatically recognise your country. If needed, you can manually select your country from the drop-down box. Enter your email address and tap 'Get Verification Code' to continue.
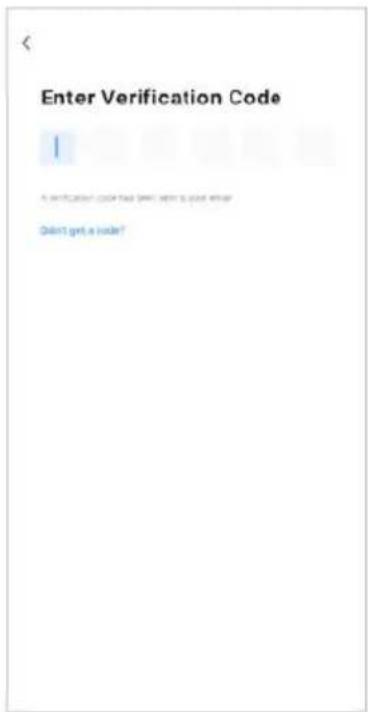
- A 6-digit code will be sent to the submitted email address. Enter this code before the one-minute timer expires.
- Continue to the next page and complete your SmarterHome profile.
Set device in pairing mode
When the device is first turned on, it may automatically enter pairing mode (the indicator on the first button is flashing rapidly).
If not automatically in pairing mode when powered on, you can manually set the device in pairing mode by pressing and holding the first button for 5 seconds until the button indicator begins flashing rapidly.
Add device through network
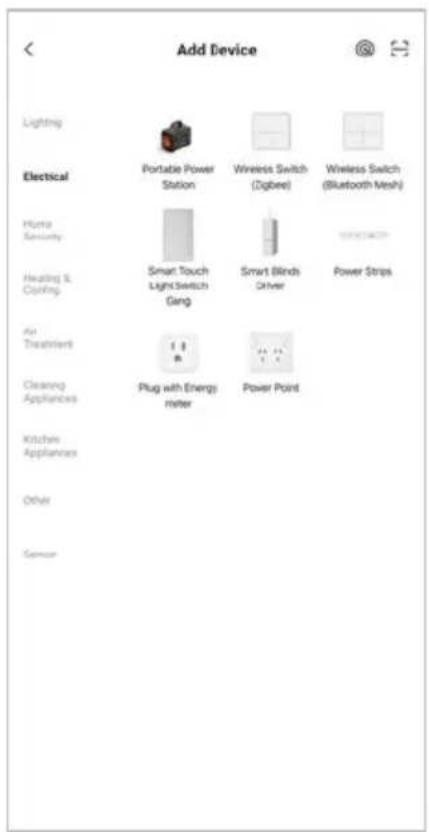
- Once registered, tap "Add Device" on the app's home page, or the "+" in the upper right corner, to add a new device through the network.
- Select the product type from the list of options in the app (Electrical > Smart Touch Light Switch Gang).
- Enter your Wi-Fi details. It is important that your SmarterHome™ device and the app are connected to the same Wi-Fi network during setup.


Notes:
• The device and the app have to use the same Wi-Fi network.
• The device is only compatible with 2.4Ghz networks.
- Depending on the product, Steps 3 and 4 may be in opposite order.
-
Ensure that the device is in pairing mode, with the indicator on the first button flashing rapidly, select "Confirm indicator rapidly blink" and tap "Next".
-
The device will commence the pairing process and connect to the app. Ensure your Wi-Fi router, mobile phone, and the SmarterHome™ device are kept close until connection is complete.
-
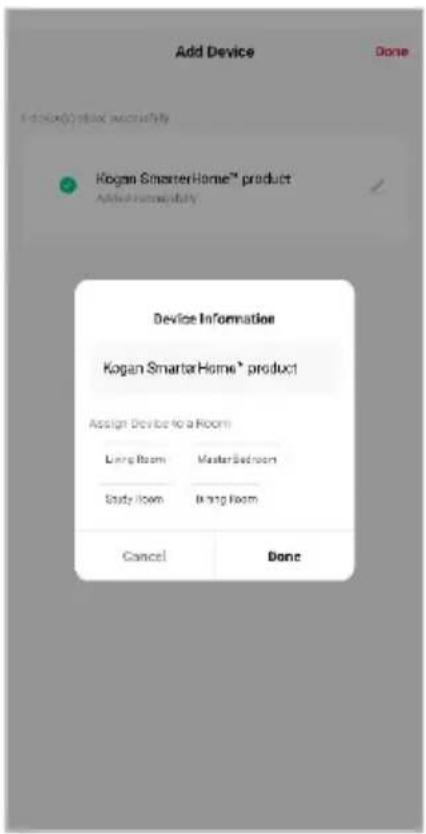
After successfully being added, you will have the option to rename the device and assign it to a location. It will now be listed on the app's home page. Tap the device listing to enter its control page.


Note:
Once connected, you can select Create Scene from the "+" in the upper right corner (or from the Scene tab) to group connected SmarterHome™ products and automate their functions.
SPECIFICATIONS
| Dimension | 116 x 70 x 35mm |
| In-wall Size | 71x45x26mm (LxWxH) |
| Output | Incandescent lamp 300W/gang.maxFluorescent lamp 150W/gang.max |
| Input | AC 100V-240V 50/60Hz |
| Wireless Protocol | Wi-Fi & Bluetooth |
| Transmit Power | 19dBm |
| Receiving Sensitivity | -100dBm |
| Communication Distance | >300m (Open area) |
| Control Method | Manual control, App control |
Need more information?
We hope that this user guide has given you the assistance needed for a simple set-up.
For the most up-to-date guide for your product, as well as any additional assistance you may require, head online to help.kogan.com
kogan.com
- KOGAN SMARTERHOME™ SMART TOUCH LIGHT SWITCH
- Electrical Safety:
- Installation and Use:
- OVERVIEW
- gang light switch
- gang light switch
- gang light switch
- INSTALLATION
- Wiring Diagram
- Notes:
- Installing the Switch
- CONNECT TO SMARTERHOME™ APP
- Install App
- To register:
- Set device in pairing mode
- Add device through network
- Note:
- SPECIFICATIONS
- Need more information?
Brand : Kogan
Model : KASMSWTH3GA 2PACK
Category : Smart Home