
KASMDBLATBA - Door chime Kogan - Free user manual and instructions
Find the device manual for free KASMDBLATBA Kogan in PDF.


| Product Type | Wireless Doorbell with Chime |
| Brand | Kogan |
| Model | KASMDBLATBA |
| Power Supply (Doorbell) | DC 5V/1A charging or 4800mAh battery |
| Power Supply (Chime) | DC 5V ±10% via USB |
| Wi-Fi Compatibility | 2.4GHz only (not 5GHz) |
| App Compatibility | Kogan SmarterHome™, Google Home, Amazon Alexa |
| Camera | Built-in, with night vision |
| Field of View | Not specified |
| Video Resolution | Not specified |
| Audio | Two-way audio with microphone and speaker |
| Motion Detection | Yes, with alerts |
| Storage | MicroSD card up to 128GB (FAT32) |
| Night Vision | Yes, infrared for complete darkness |
| Pairing Method | QR mode or AP mode via app |
| Chime Ringtone | Selectable via app |
| Chime Volume | Adjustable via app |
| Number of Supported Users | Up to 6 simultaneous online previews |
| Reset (Doorbell) | Press and hold reset button for 5 seconds |
| Reset (Chime) | Press reset button for 5 seconds to factory reset |
| Included Accessories | Power adapter, USB cable, screws (x3), wall anchors (x3), user guide |
| Mounting | Wall mount with screws and anchors |
Frequently Asked Questions - KASMDBLATBA Kogan
User questions about KASMDBLATBA Kogan
0 question about this device. Answer the ones you know or ask your own.
Ask a new question about this device
Download the instructions for your Door chime in PDF format for free! Find your manual KASMDBLATBA - Kogan and take your electronic device back in hand. On this page are published all the documents necessary for the use of your device. KASMDBLATBA by Kogan.
USER MANUAL KASMDBLATBA Kogan
natural_image
Line drawing of a mobile phone door with buttons and a circular dial (no text or symbols)Doorbell

natural_image
Diagram of concentric circular patterns with dot patterns and a central icon, no text or symbols presentChime

natural_image
Simple line drawing of a bent pipe or support structure (no text or symbols)Screwdriver

natural_image
Simple line drawing of a rectangular sheet or document (no text or symbols)User guide

Power adapter
natural_image
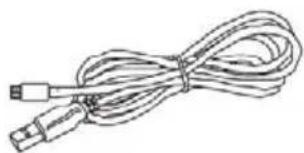
Line drawing of a cable with two connectors (no text or symbols)USB cable

Screw (x3)

Wall anchor (x3)
OVERVIEW
Doorbell

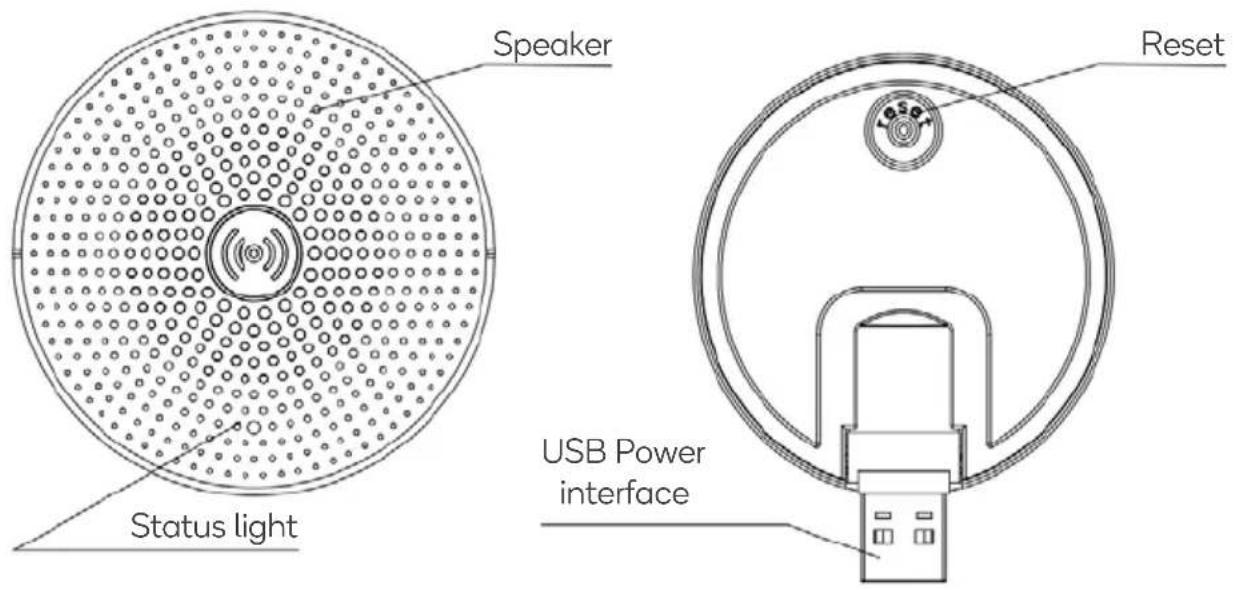
Chime
INSTALLATION
Mounting the Doorbell
- Remove the mounting screw from the bottom of the doorbell with the screwdriver.
- Separate the doorbell from the mounting bracket.
- Attach the bracket to the wall using the supplied screws.
- Replace the doorbell back onto the bracket and secure it with the previously removed mounting screw.
Note: Depending on the type of wall you are securing to, you may need to use the included wall anchors as well. If you're unsure as to what hardware suits your requirements, please seek advice from a qualified trade professional.

natural_image
Line drawing of a handheld device with a red circular button and a black outline, no text or symbols present.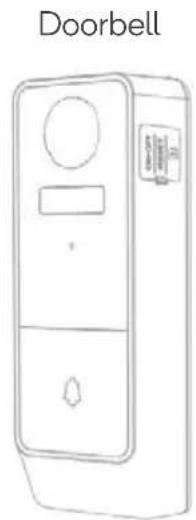
natural_image
Line drawing of a doorbell device with control panel and display (no text or symbols)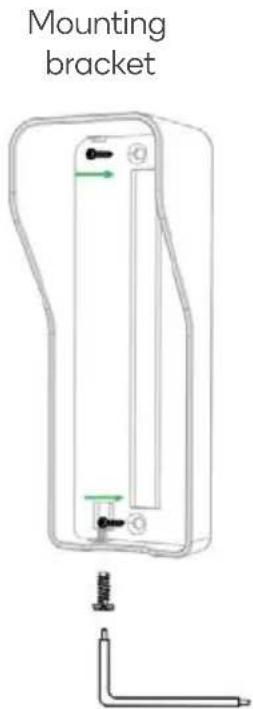
CONNECT TO SMARTERHOME™ APP
Install App
Download the "Kogan SmarterHome" app from the Play Store (Android) or App Store (iOS).


App Store (iOS)

To register:
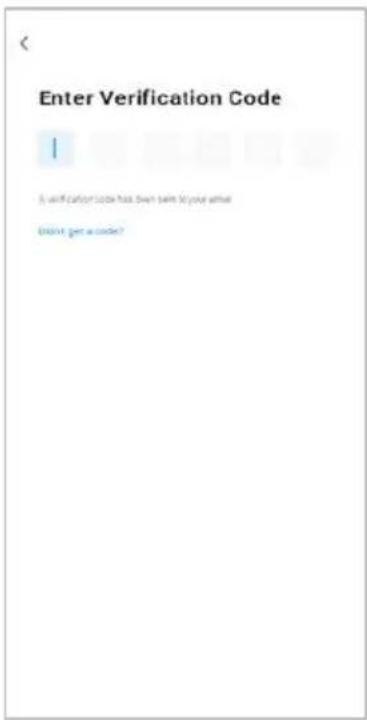
- If you already have a SmarterHome account, select 'Log In'. To register a new account, select 'Sign Up'.
- The system will automatically recognise your country. If needed, you can manually select your country from the drop-down box. Enter your email address and tap 'Get Verification Code' to continue.
- A 6-digit code will be sent to the submitted email address. Enter this code before the one-minute timer expires.
- Continue to the next page and complete your SmarterHome profile.


Set device in pairing mode
When the device is first turned on, it may automatically enter pairing mode (indicator is rapidly flashing BLUE).
If not automatically in pairing mode when powered on, you can manually set the device in pairing mode by pressing and hold the reset button for 5 seconds until the indicator is rapidly flashing BLUE.
Add device through network
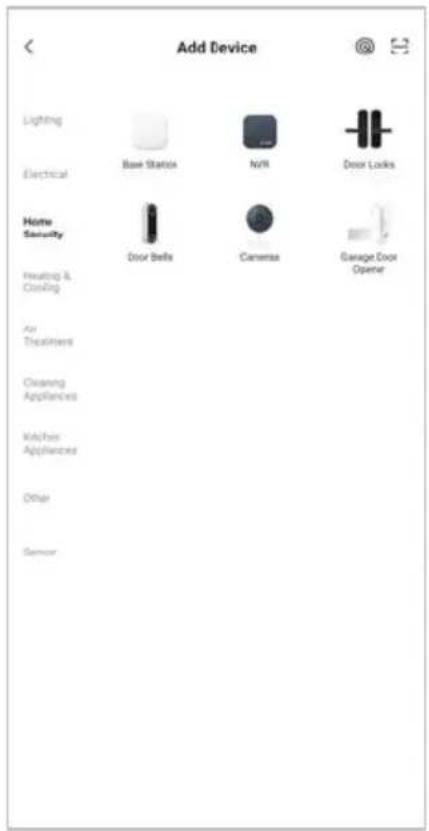
- Once registered, tap "Add Device" on the app's home page, or the "+" in the upper right corner, to add a new device through the network.
- Select the product type from the list of options in the app (Home Security > Door Bells).
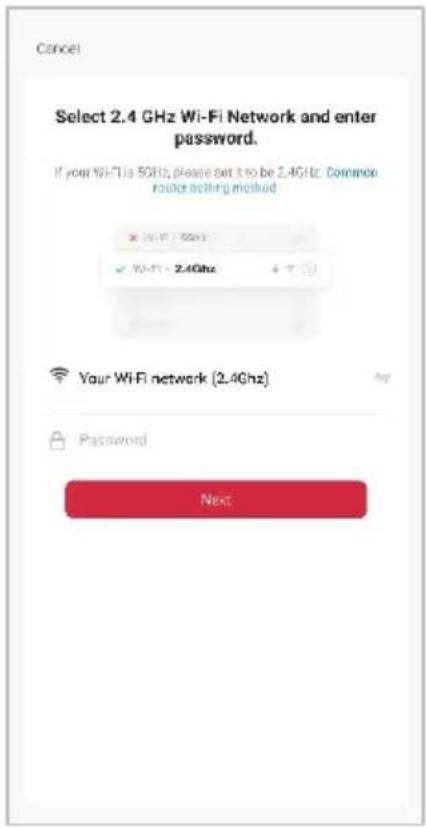
- Enter your Wi-Fi details. It is important that your SmarterHome™ device and the app are connected to the same Wi-Fi network during setup.

Notes:
• The device and the app have to use the same Wi-Fi network.
• The device is only compatible with 2.4Ghz networks.
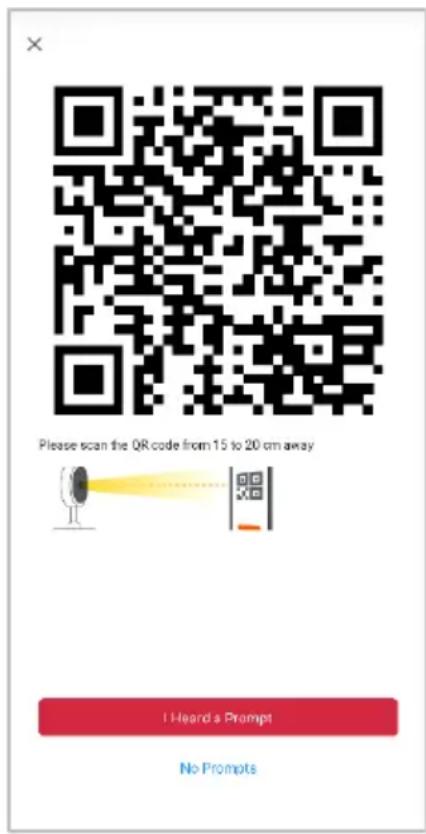
- Calibrate the smart camera by holding your smartphone 15-20cm away from the camera lens until it successfully scans the QR code shown on the following screen of the setup. The device will make a prompt sound to confirm, click “I heard a prompt” to proceed to the next screen.
- The device will commence the pairing process and connect to the app. Ensure your Wi-Fi router, mobile phone, and the SmarterHome™ device are kept close until connection is complete.
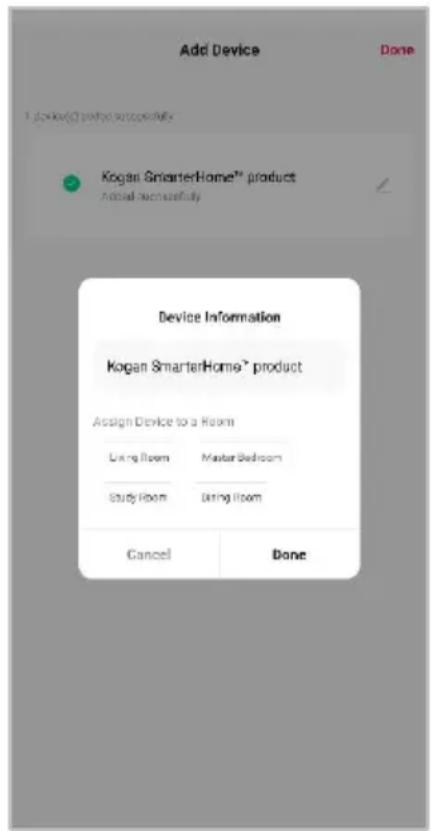
- After successfully being added, you will have the option to rename the device and assign it to a location. It will now be listed on the app's home page. Tap the device listing to enter its control page.


Note:
Once connected, you can select Create Scene from the “+” in the upper right corner (or from the Scene tab) to group connected SmarterHome™ products and automate their functions.
Having trouble connecting?
The prior steps detail the process for “QR Mode” connection. If that does not work for your connection, we suggest trying it again, and if still no success, attempting the following method for AP Mode connection.
Set device in AP pairing mode
Set the device in pairing mode by holding the reset button for 5 seconds until the indicator is rapidly flashing BLUE.
Using AP Mode to add device
- Follow the previous steps to select your product type (Home Security > Door Bells).
- Adjust your connection method by tapping on the mode type in the top-right corner of the screen. Select "AP Mode" for the set-up type.
- Ensure that the device is in pairing mode, with the indicator is rapidly flashing BLUE, and tap "Next".
- Enter your Wi-Fi details. It is important that your SmarterHome™ device and the app are connected to the same Wi-Fi network during setup.


Notes:
- The device and the app have to use the same Wi-Fi network.
-
The device is only compatible with 2.4Ghz networks.
-
Follow the in-app prompts to continue AP Mode connection, which will pair your mobile phone to the device's Wi-Fi hotspot to ensure a connection. This may be named "SL-KoganSmart", "SmartLife-XXXX", or another similar name.
Note:
If the Wi-Fi hotspot does not appear on your phone in the list of available networks, your device may not be set in AP Pairing Mode correctly. Try repeating the steps outlined above to ensure your device is ready for
- The device will commence the pairing process and connect to the app. Ensure your Wi-Fi router, mobile phone, and the SmarterHome™ device are kept close until connection is complete.
- After successfully being added, you will have the option to rename the device and assign it to a location. It will now be listed on the app's home page. Tap the device listing to enter its control page.


Note:
Once connected, you can select Create Scene from the “+” in the upper right corner (or from the Scene tab) to group connected SmarterHome™ products and automate their functions.
GOOGLE HOME CONTROL
Note:
You will need to have set up a Google Home account prior to linking your Kogan SmarterHome™ device.
Adding "SmarterHome" to the Google Home app
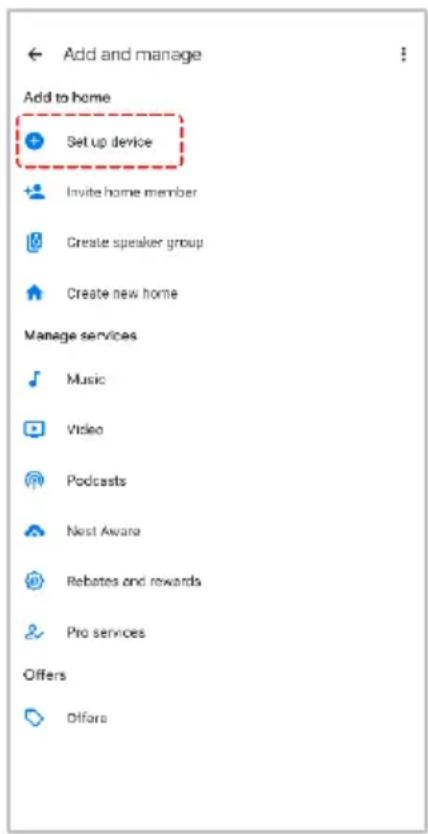
- From the home page of the Google Home app, select the “+” icon (top left corner, see arrow in the below screenshot) to access the ‘Add and manage’ page.
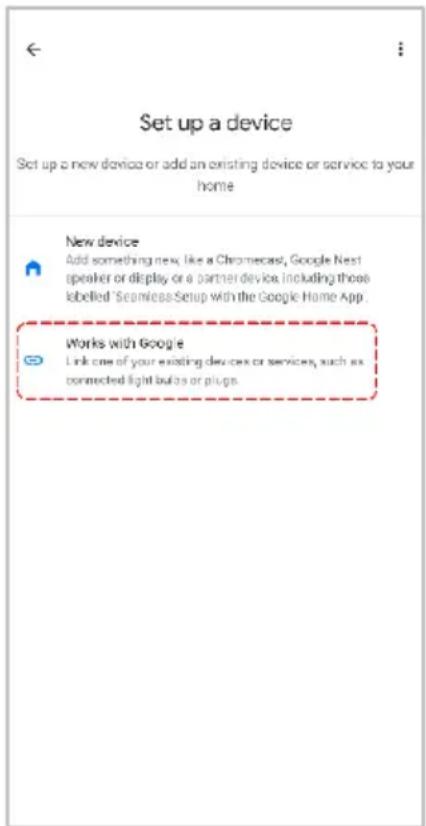
- Select 'Set up device', then select the 'Works with Google' option.

- Select the search bar and type 'Smarter Home' to locate the Kogan SmarterHome™ service.
- From here, you will be prompted to sign into your SmarterHome™ account using either your email or mobile phone number, depending on which method you used to register your account.
- Select "Kogan SmarterHome™" from the app options.


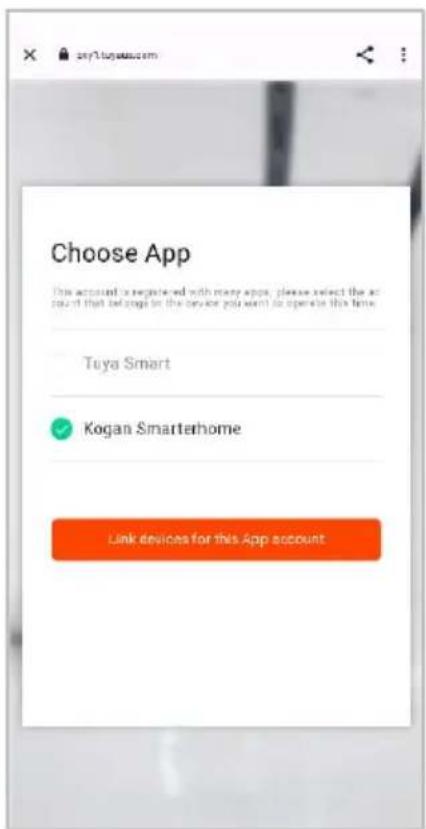
- Tap 'Authorise' to grant Google permission to access the SmarterHome™ app and your devices.
- Once connected, the app will display any compatible devices linked to your SmarterHome™ account. From here you can assign them to rooms and set up any routines. Tap on any of the devices to view a list of available commands.


Note:
Please note that Google Home can only control the base/core functions of any compatible SmarterHome™ devices. To make full use of this product's smart functionality, please use the Kogan SmarterHome™ app.
AMAZON ALEXA CONTROL
Note:
You will need to have set up an Alexa account prior to linking your Kogan SmarterHome™ device.
Adding "SmarterHome" to the Alexa app
- From the home page of the Alexa app, select the “≡” icon in the bottom-right and select “Skills & Games” from the sidebar.
- Select the search bar and type 'Smarter Home' to locate the Kogan SmarterHome™ skill.


- Tap 'Enable to Use' to add the Kogan SmarterHome™ skill to Alexa.
- From here, you will be prompted to sign into your SmarterHome™ account using either your email or mobile phone number, depending on which method you used to register your account.
- Select "Kogan SmarterHome™" from the app options.


- Tap 'Authorise' to grant Alexa permission to access the SmarterHome™ app and your devices.
- Once connected, the app will perform a search and display the devices linked to your SmarterHome™ account. When your devices have successfully connected to the Alexa app, you will be able to control your Kogan SmarterHome™ devices via Alexa's voice commands.


Note:
Please note that Alexa can only control the base/core functions of any compatible SmarterHome™ devices. To make full use of this product's smart functionality, please use the Kogan SmarterHome™ app.
PAIRING CHIME WITH DOORBELL
Note:
The Doorbell and Chime have been paired together from the factory. If they are not paired, the following steps will help you pair them.
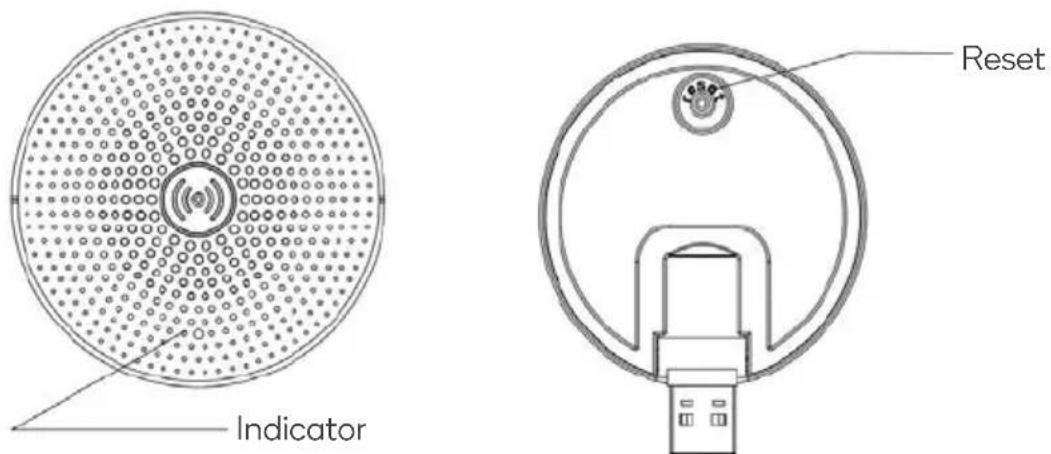
- Attach the Chime to the power adapter.

- Press the Reset button on the Chime, the indicator will begin flashing BLUE. The Chime is now pairing mode (searching for connection).
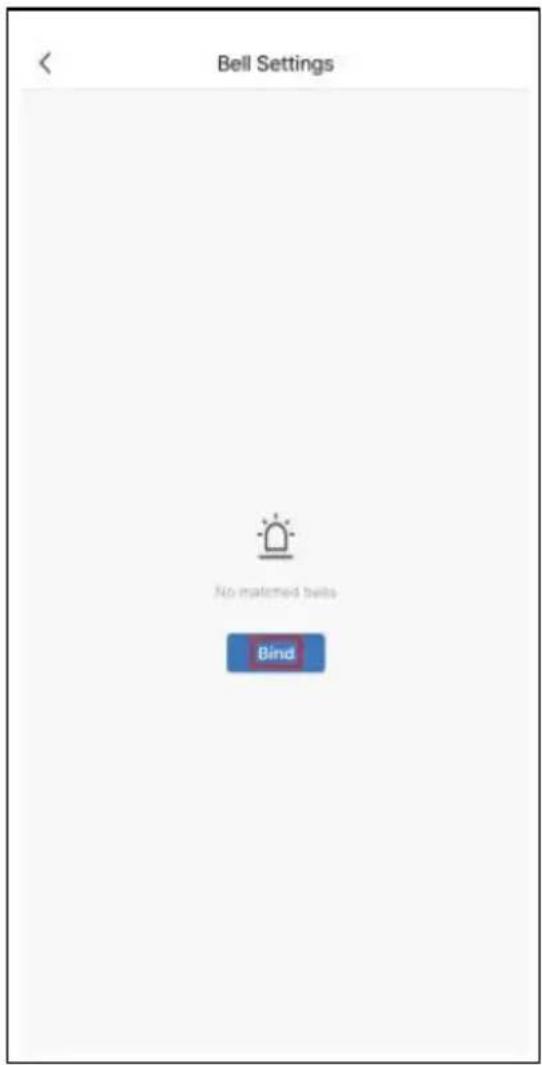
- In the SmarterHome app open the doorbell settings by tapping the “...” button in the upper right corner.
- Tap "Bell Settings".


- Tap the "Bind" button, the chime will connect to the doorbell. The indicator light on the chime will turn solid BLUE if successfully paired.
- Select the ringtone and volume settings, exit back to the Preview screen to complete the process.

Notes:
If the configuration fails, please press the "RESET" button for 5 seconds to reset your chime and click the "RESET" button, then add it again.
OPERATION
Two-way audio
When the visitor pushes the doorbell button, you will get a call. You can see and hear the visitor in your App from the doorbell if you answer.
Motion detection
Motion sensors will notify you when movement is detected.
Shared device
The doorbell can be shared with friends and friends so they can access the camera's feed. There is no limit to the number of sharing devices, but only 6 accounts are supported for online preview at the same time.
Record
Record every moment by using high-capacity SD card storage.
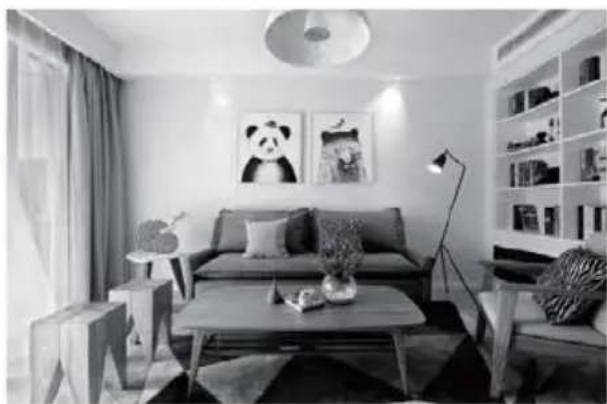
Day & Night
Powerful night vision means no interruptions, even in complete darkness.

natural_image
Modern living room interior with sofa, coffee table, lamp, and panda wall art (no visible text or symbols)Daytime
natural_image
Interior view of a modern living room with sofa, coffee table, lamp, and framed panda artwork on the wall (no visible text or symbols)Night
SPECIFICATIONS
| Doorbell | |
| Power Port | DC 5V/1A of charging; battery (4800mAh) |
| Doorbell button | Press the button to activate the doorbell |
| Status light | Solid RED: Network is disabled |
| Rapidly flashing RED: Wait for network connection | |
| Slowly flashing RED: Connecting the network | |
| Solid BLUE: Camera is working correctly | |
| Microphone | Capture sound for your video |
| SD card slot | Support local SD Card storage (Max.128G) |
| Reset | Press and hold on for 5 seconds to reset |
| Chime | |
| Mini USB | DC5V±10%, USB power supply |
| Reset | Press the RESET for 5s to restore Factory Settings.Click the RESET button to pair the doorbell |
| Status light | Flashing BLUE: Waiting for configuration. |
| Solid BLUE: Configuration completed | |
TROUBLESHOOTING
| Problem | Solution |
| While connecting to the Kogan SmarterHomeTM app, it never successfully reaches 100% and connects. | This doorbell only supports 2.4GHz Wi-Fi router, ensure you are using a 2.4GHz Wi-Fi router and confirm the Wi-Fi password again. 5.0GHz connections will not connect. |
| Multiple repeated attempts to connect. | After a failed attempt to connect, you may need to restart the device or power off and then try to add again. |
| After connecting, the device does not appear online, or cannot be accessed in the app. | Check whether the network is normal, you can place the camera close to the router and if not, it is recommended to reset the device and add it again. |
| Unable to reconnect with a new router. | First remove and reset the device on the SmarterHomeTM app and then configure the device again within the app. |
| Device still in the list of devices after resetting? | The reset device only resets the network configuration of the camera, but cannot change the configuration on the app. Deleted the doorbell the app. |
| App not displaying smart phone notifications. | Ensure that app is running in the background and that notifications have been activated. |
| Doorbell not recognising the SD card. | It is recommended to remove and re-insert an SD card after a power cut. Confirm whether the SD card is normally available (try reading it on another device) and that the format is FAT32. |
NOTES
Need more information?
We hope that this user guide has given you the assistance needed for a simple set-up.
For the most up-to-date guide for your product, as well as any additional assistance you may require, head online to help.kogan.com
kogan.com
- OVERVIEW
- INSTALLATION
- Mounting the Doorbell
- CONNECT TO SMARTERHOME™ APP
- Install App
- To register:
- Set device in pairing mode
- Add device through network
- Notes:
- Note:
- Having trouble connecting?
- Set device in AP pairing mode
- Using AP Mode to add device
- GOOGLE HOME CONTROL
- Adding "SmarterHome" to the Google Home app
- AMAZON ALEXA CONTROL
- Adding "SmarterHome" to the Alexa app
- PAIRING CHIME WITH DOORBELL
- OPERATION
- Two-way audio
- Motion detection
- Shared device
- Record
- Day & Night
- SPECIFICATIONS
- TROUBLESHOOTING
- NOTES
- Need more information?
Brand : Kogan
Model : KASMDBLATBA
Category : Door chime