
KADSAFSA9LA - Alarm Kogan - Free user manual and instructions
Find the device manual for free KADSAFSA9LA Kogan in PDF.

| Product Type | Digital Security Safe Lock Box |
| Model | KADSAFSA9LA (also KADSAFL27LA & KADSAFM16LA) |
| Power Supply | 4 x AA alkaline batteries |
| Default Passcode | 159 |
| Passcode Length | 3-8 digits |
| Emergency Override | Emergency key (2 keys included) |
| Locking Mechanism | Motorized bolts with manual knob |
| Indicators | Red (low battery), Yellow (code input), Green (unlocked) |
| Mounting | Floor or wall mounting via expansion anchors and bolts (included) |
| Reset Function | Internal reset button to restore factory passcode |
| Battery Replacement | When red indicator lights during operation |
| Cleaning | Wipe with a damp cloth; do not use liquids or sprays |
| Safety Warning | Do not store emergency keys inside the safe; install on a stable surface |
| Repair | No user-serviceable parts; contact help.Kogan.com for support |
| User Manual | 8 pages, PDF available |
Frequently Asked Questions - KADSAFSA9LA Kogan
User questions about KADSAFSA9LA Kogan
0 question about this device. Answer the ones you know or ask your own.
Ask a new question about this device
Download the instructions for your Alarm in PDF format for free! Find your manual KADSAFSA9LA - Kogan and take your electronic device back in hand. On this page are published all the documents necessary for the use of your device. KADSAFSA9LA by Kogan.
USER MANUAL KADSAFSA9LA Kogan
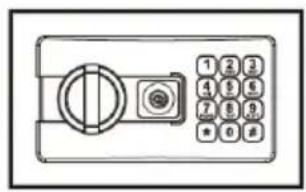
natural_image
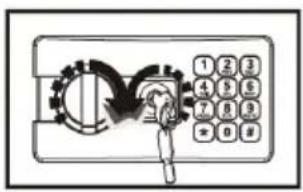
Line drawing of a simple safe with a door and keypad (no text or symbols)DIGITAL SECURITY SAFE LOCK BOX
KADSAFSA9LA, KADSAFL27LA & KADSAFM16LA
SAFETY & WARNINGS
- Do not install the safe in an elevated, insecure location. A falling safe can cause serious personal injury and damage to the product.
- Do not use any liquids or a spray cleaner to clean the safe. Wipe with a damp cloth instead.
- Do not expose the control panel to water or any other liquids as this may cause electric shock and damage the internal components.
- This product does not contain any user serviceable parts. Do not dismantle or modify the product in any way. Unguided dismantling and incorrect reassembly may damage the electrical components. If repairs are required, please contact help.Kogan.com for support.
• Never store the emergency keys inside the safe.
OVERVIEW
Safe

Control panel
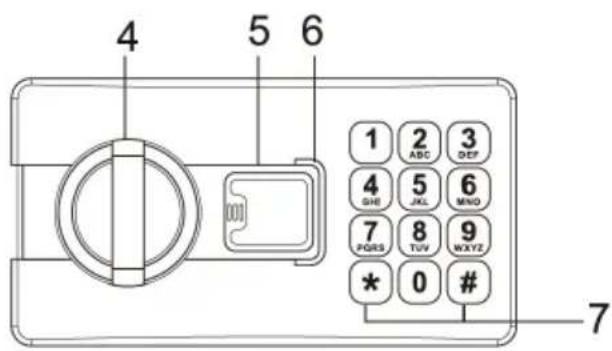
1 Bolts
2 Reset Button
3 Battery Compartment
4 Knob
5 Emergency Lock Cover
6 Indicator
7 Confirm Button (#)
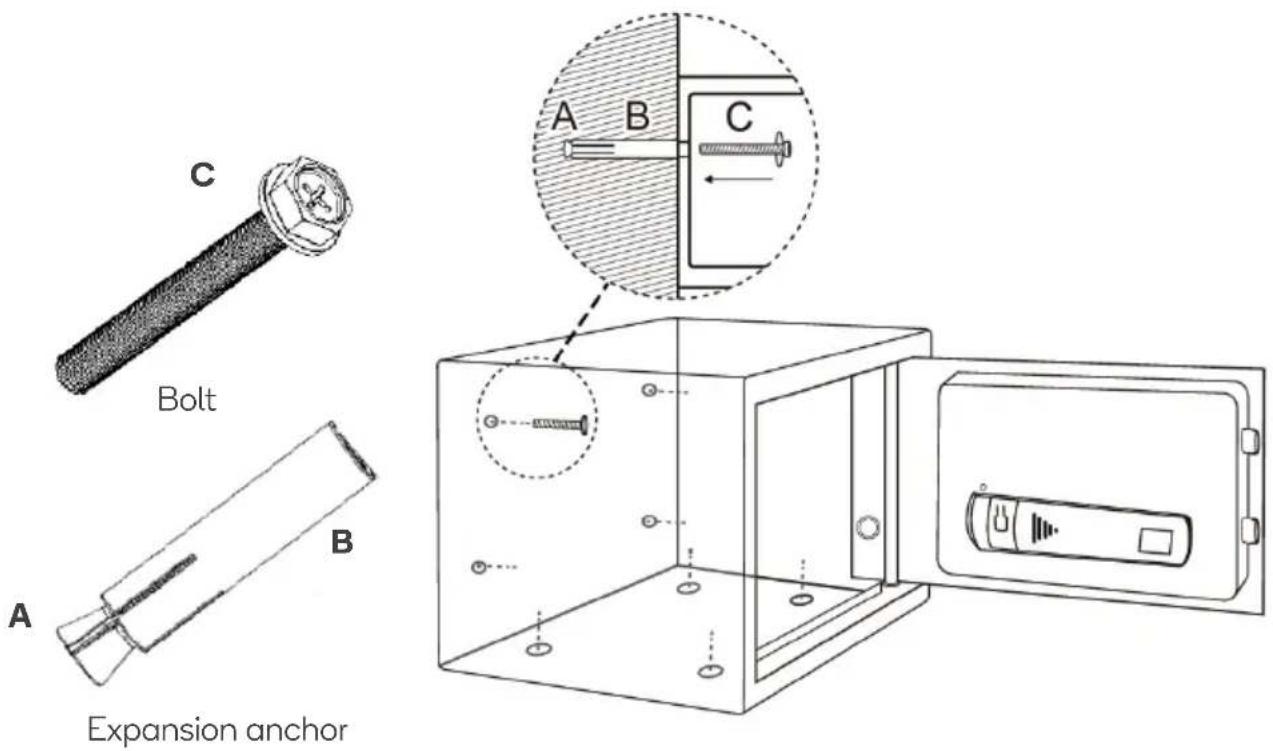
INSTALLATION
- Select a stable, dry and secure location for the safe.
- If bolting to a wall, ensure that your safe is resting on a well-supported surface (such as the floor or a shelf). Do not bolt your safe to both the floor and wall.
- Place the safe in the selected location. Use a pencil to mark the mounting holes on the floor or wall.
- Move the safe and drill the holes 50mm deep using the appropriately sized drill bit.
Note: If you have any doubt regarding the installation or appropriate hardware for your application, contact a qualified trades person for advice before drilling.
- Move the safe back into position and align the mounting holes to the openings in the safe.
- If you are mounting into concrete, insert the included expansion anchors into the holes before securing the safe in place using the suppled bolts.
• Tighten the bolts securely.
WARNING: Always use the expansion anchor when mounting to a concrete surface.
OPERATION
Installing the Batteries
- Remove the emergency lock cover and unlock the safe using the emergency key.
- Pull the door open.
- Remove the battery compartment cover.
- Insert x4 AA batteries into the battery compartment. Pay close attention to the orientation of the polarity symbols (+ and -).
Note:
If the red indicator turns on during operation, the batteries are low and will need to be replaced. It is highly recommended to use a high-powered alkaline battery.
Setting the Passcode
By default the factory passcode is "159". It is highly recommended to change the passcode to something more secure.
- Open the door and press the reset button, the yellow indicator will flash and the safe will beep.
- Input a new code (between 3-8 digits) and press “#” to confirm. If the code change has been successful, the yellow indicator will flash twice and the safe will emit 2 beeps.
- If the yellow light flashes 3 times with 3 beeps, the code change has failed and the process will need to be repeated.
Unlocking the Safe
Passcode:
- Input the passcode and press the “#” button to confirm.
- The yellow indicator will flash twice, the safe will emit 2 beeps and the green indicator will turn on.
- The safe has been successfully unlocked. Turn the knob clockwise to open the safe.
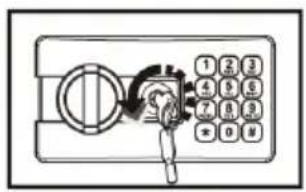
Emergency key:
In the event the passcode cannot be used, you can use the emergency key to unlock and open the safe.
- Remove the emergency lock cover.
- Insert the emergency key and turn counter-clockwise.
- Turn the knob clockwise and open the door.
WARNING: Ensure the emergency keys are kept in a safe place. Never store them in safe.

Resetting the Safe
To return the safe back to factory settings, open the safe then press and hold the reset button until the yellow indicator flashes twice and the safe emits 2 beeps. The passcode will return to the default code "159".
Need more information?
We hope that this user guide has given you
the assistance needed for a simple set-up.
For the most up-to-date guide for your product,
as well as any additional assistance you may require,
head online to help.kogan.com.
kogan.com
Brand : Kogan
Model : KADSAFSA9LA
Category : Alarm