
ULE-702-HDR - Surveillance Ikegami - Free user manual and instructions
Find the device manual for free ULE-702-HDR Ikegami in PDF.


| Product Type | Surveillance Monitor (Dual 7-inch LCD) |
| Brand | Ikegami |
| Model | ULE-702-HDR |
| Physical Resolution | 1920 x 1200 |
| Brightness | 400 cd/m² |
| Contrast Ratio | 2000:1 |
| Viewing Angle | 160° / 160° (H/V) |
| Input Voltage | DC 12V |
| Power Consumption | ≤ 18W |
| Operating Temperature | -20°C to 60°C |
| Storage Temperature | -30°C to 70°C |
| Dimensions (L x W x D) | 480 x 131.6 x 29.3 mm |
| Weight | 2.2 kg |
| Input Signals | HDMI, SDI, LAN, TALLY, USB |
| Key Features | 160° viewing angles, high resolution, high brightness, fast response, TALLY interface, 3D LUT support, remote control via LAN |
| Cleaning Instructions | Wipe with a clean soft cloth; do not use chemical solutions |
| Safety Precautions | Do not place screen downward, avoid heavy impact, unplug during thunderstorms or long-term non-use |
| Accessories Included | DC 12V power adapter, TALLY connector, user manual card |
Frequently Asked Questions - ULE-702-HDR Ikegami
User questions about ULE-702-HDR Ikegami
0 question about this device. Answer the ones you know or ask your own.
Ask a new question about this device
Download the instructions for your Surveillance in PDF format for free! Find your manual ULE-702-HDR - Ikegami and take your electronic device back in hand. On this page are published all the documents necessary for the use of your device. ULE-702-HDR by Ikegami.
USER MANUAL ULE-702-HDR Ikegami
with Full HD Resolution, 3RU rack mount design.
User Manual
ULE-702-HDR
Ikegami
IMPORTANT SAFETY INSTRUCTIONS:
- Please read User Guide before using this product.
- Please keep User Guide for future reference.
FEATURES:
160° Wide viewing angles;
High resoluon: 1920×1200;
High brightness: 400cd/m²;
High contrast: 2000:1;
▶ Faster response me;
▶ TALLY interface with indicang light;
Firm & thin design.
CAUTIONS:
- Please do not place the display screen towards the ground.
- Please avoid heavy impact or drop onto the ground.
- Please do NOT use chemical soluons to clean this product. Please wipe with a clean so cloth to maintain the brightness of the surface.
- Please do not block any vent hole.
- Please follow the instrucons and trouble-shoongs to adjust the product. Other improper adjustment may result in damage. Any further adjustment must be performed or conducted by a qualified technician.
- Please unplug the power if long-term no-use, or thunder weather.
7. TROUBLE SHOOTING
- Only black-and-white display:
Check whether the color saturaon is properly set up or not.
- Power on but no pictures:
Check whether the cables of HDMI, SDI are correctly connected or not. Please use the standard power adapter equipped with the product package. Improper power input may cause damage.
- Wrong or abnormal colors:
Check whether the cables are correctly and ghtly connected or not. Broken or loose pins of the cables may cause a bad conncon.
- When power on, the picture shows size error:
Press "MENU → DISPLAY → Overscan" to zoom in/out pictures automatically when receiving HDMI signals
- Other problems:
Please press "MENU" button and choose "SYSTEM→ Manufacturer Default →ON", then press "ENTER" buon to conrm it.
Note: due to constant eort to improve products and product features, specicaons may change without prior noce.
Contents
- PRODUCT DESCRIPTION ....4
- MENU SETTING ....5
- PARAMETERS....15
- ACCESSORIES....16
5.3D LUT Loading Demo 17 - Remote Terminal Instrucons .....20
- TROUBLE SHOOTING 22
1. PRODUCT DESCRIPTION
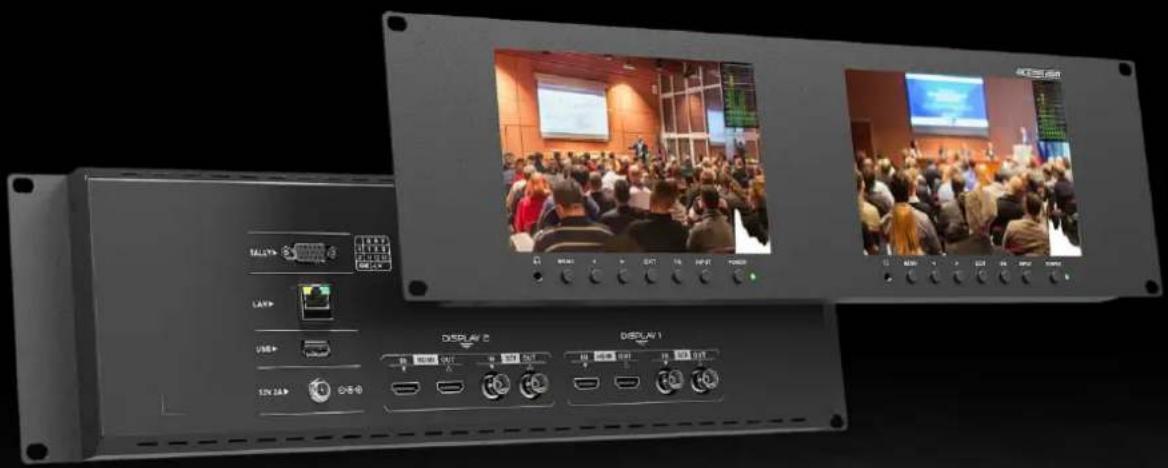
- Front Housing

- Earphone
- MENU: To acvate OSD (on-screen display) menu. Press “◀ / ▶” buon to switch among the picture, marker, funcon, waveform, audio, system.
- ◀ Le selecon buon: to select item on OSD menu and adjust its value; Press to decrease the value of brightness, sharpness, contrast, saturaon and Tint.
- ▶ Right selecon buon: to select item on OSD menu, adjust its value and confirm it; Press to increase the value of brightness, sharpness, contrast, saturaon and Tint.
Note: When press ◀ or ▶” buon, then press MENU buon, it will acvate user-denable menu OSD(Brightness, Contrast, Saturaon, Sharpness, Volume, Back light, Peaking Level). User can select the shortcut item based on dierent demand. Volume is default.
- EXIT
- FN: Customized Funcon buon; to launch funcon menu quickly. Peaking as default.
- INPUT: circularly switch among of HDMI, SDI.
- POWER on/o buon
- Power indicator light
- Back Housing
- Funcon
- Port Selecon: Select the specific conncon port according to the device interface and click "LAN" to switch.
● Device Search: Click "Refresh" button to search devices aer conguring the port. There are all of the found devices in the device list aer a successful search.
- Screen Choice: The "Screen" shows the number of the screens for the current device. For the device with mulple screens, use le mouse buon to click the screen icon to select the corresponding screen for operaon; use right mouse buon to click the screen icon to copy the screen.
● Device Control: Click the icons of [Picture], [Marker], [Funcon], [Source], [Audio] and [UMD] to switch the control page of the corresponding funcon.
- Acvate "All": Simultaneously control all of the devices in the device list if there is two or more devices with the same model aer acvang "All".
● Device Copy Funcon: If there are two or more devices with the same model in the device list, click one of them and click "Copy" buon to copy the source device, and then click the target device and click "Paste" buon to copy the conguraon of the source device to the target one.
6.Remote Terminal Instrucons
Remotely control the device by Remote Terminal applicaon.
- Home Screen
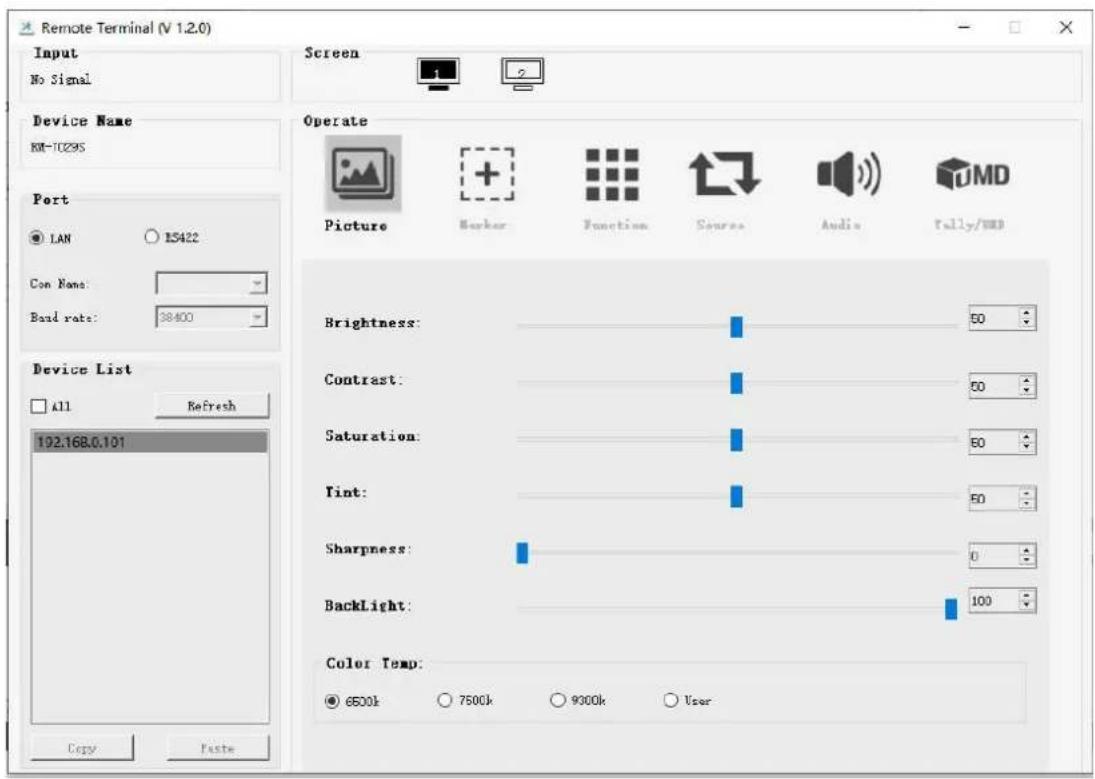
Picture: The home screen of the applicaon
- Input: Display the signal format of the connected device. For example, there is "No Signal" when no device is connected or no signal is input.
● Device Name: Display the Model No. of the connected device. - Port: Select the conneccon way of the port when connecng a device, and support LAN communicaon protocol.
● Device List: Display all of the found peripheral device. - Screen: Display the number of screens for the selected device and the current screen index.
● Operate: Operate the items for the device.
● Control Screen: The control rules for the device.
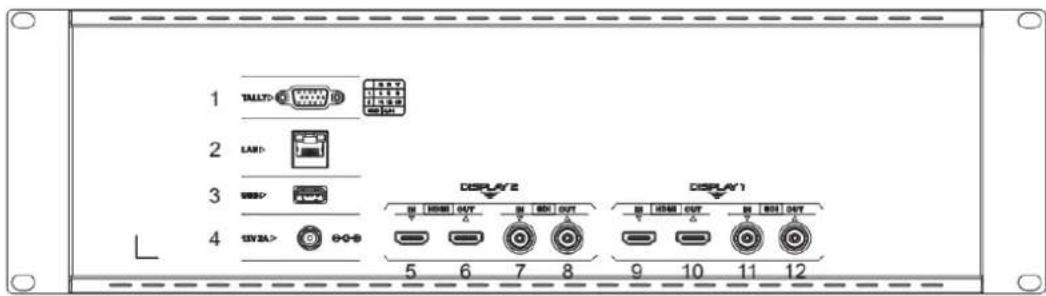
Note: The interfaces within DISPLAY 1 provide signal source for le monitor. The interfaces within DISPLAY 2 provide signal source for right monitor.
1.
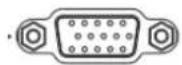
TALLY interface and interface definition.

2.
LAN port. (Connected to PC network interface for funcon adjustment.)
- USB input (Only used for program upgrades and LUT load, do NOT use if non-professionals).

4.


- & 9. HDMI input. 6. & 10. HDMI output.

- & 11.
SDI input
OUT
- & 12.

OUT
SDI output.
2. MENU SETTING
Before seng the funcons, please make sure the device is connected correctly.
2.1 FN user-denable funcon buon:
Press FN buon to pop up the default opons, Use “◀ / ▶” buons to adjust the value of selected item.
Long press FN buon for 3-5 seconds to pop up shortcut menu directly. As
Center Marker
Aspect Marker
Safety Marker
Overscan
Scan
Aspect
Camera Log
Check Field
HV Delay
Freeze
Color Bar
Peaking
False Color
Exposure
Histogram
TimeCode
shown in right Figure (default menu is displayed in white font).
Use "◀ / ▶" buons to select the desired item.
Funcons of FN buon can be customized: Center Marker, Aspect Marker, Safety Marker, Overscan, scan, Aspect, Camera Log, Check eld, H/V delay, Freeze, Color Bar, Peaking, False color, Exposure, Histogram, TimeCode, Mute, Level Meter.
2.2 MENU Operaon
Press "MENU" buon on the device aer power on. The menu used for seng funcon will display on the screen.
Press ◀/▶ buons to select the sub-menu; then press MENU buon to confirm it; aer that, press EXIT buon to return to main menu.
2.2.1 PICTURE
SDI Mode HDMI Mode
| PICTURE | |
| Brightness 50 | |
| Contrast 50 | |
| Saturation 50 | |
| Tint 50 | |
| Sharpness 0 | |
| Camera Log Off | |
| Def. Log SLog3ToL0-709 | |
| User Log User1 | |
| SDI | |
| PICTURE | |
| Brightness 50 | |
| Contrast 50 | |
| Saturation 50 | |
| Tint 50 | |
| Sharpness 0 | |
| HDMI EDID 4K | |
| Camera Log Off | |
| HDMI | |
- Brightness
Control the degree of brightness between 0-100.
- Contrast
Control contrast rao between 0-100.
- Saturaon
Adjust the color intensity between 0-100.
Tint
Adjust nt between 0-100.
- Sharpness
Control sharpness of the image between 0-100.
RGB Range
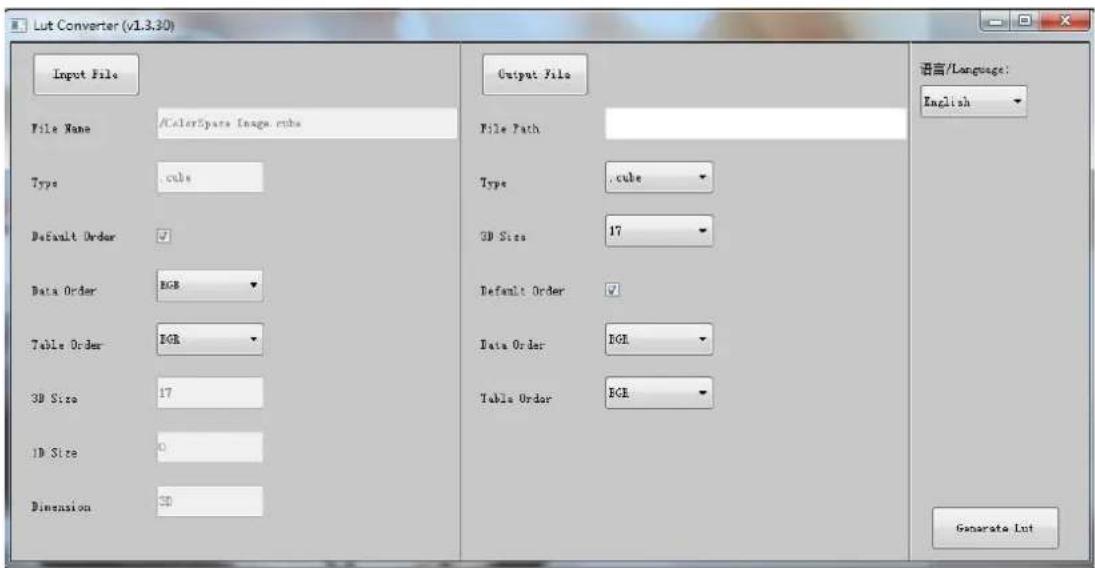
5.3.5. Click Generate Lut buon to nish.
5.4. USB Loading
Copy the needed les to the root directory of the USB ash disk.
Note! LUT files aer conversion must be named "User1", "User2", "User3", "User4", "User5" or "User6".
Plug the USB ash disk into USB port of the device aer power on. Click "Yes" on the pop-up prompt window (If the device doesn't pop-up the prompt window, please check if the LUT document name or the USB ash disk version meets monitor's requirement.), then press Menu buon to update automacally. It will pop-up a prompt message if the update completed.
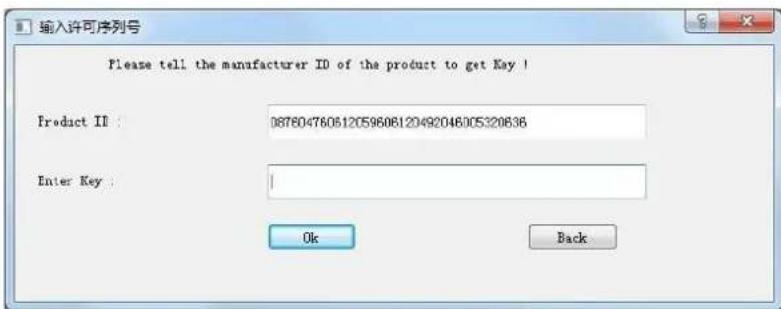
One individual Product ID for one computer. Please send the ID number to Sales to get an Enter Key. Then the computer gets the permission of the Lut Tool aer input the Enter Key.
5.3.2. Enter the LUT Converter interface aer input the Enter Key.

5.3.3. Click Input File, then select *LUT.

5.3.4. Click Output File, choose the le name.
Use this item to choose the RGB range of the HDMI input: [Full], [Limited].
- HDMI EDID
Select the HDMI EDID from between [4K] and [2K]. This item enables PC or other devices to recognize the property of this monitor and makes the images look excellent on the screen.
- Camera Log
Use this item to choose one of the camera Log modes:
- [O]: Turn o Camera Log.
- [Def. Log]: Use this item to choose one of the Camera Log modes as the following sequence: [SLog2ToLC-709], [SLog2ToLC-709TA], [SLog2ToSLog2-709], [SLog2ToCine+709], [SLog3ToLC-709], [SLog3ToLC-709TA], [SLog3ToSLog2-709], [SLog3ToCine+709], [ArriLogCTo709], [ArriLogCToP3DCI], [CLogToV709], [VLogToV709], [JLog To709], [JLogTo709HLG], [JLogTo709PQ], [Z7 NLogTo709], [D780 NLog To709].
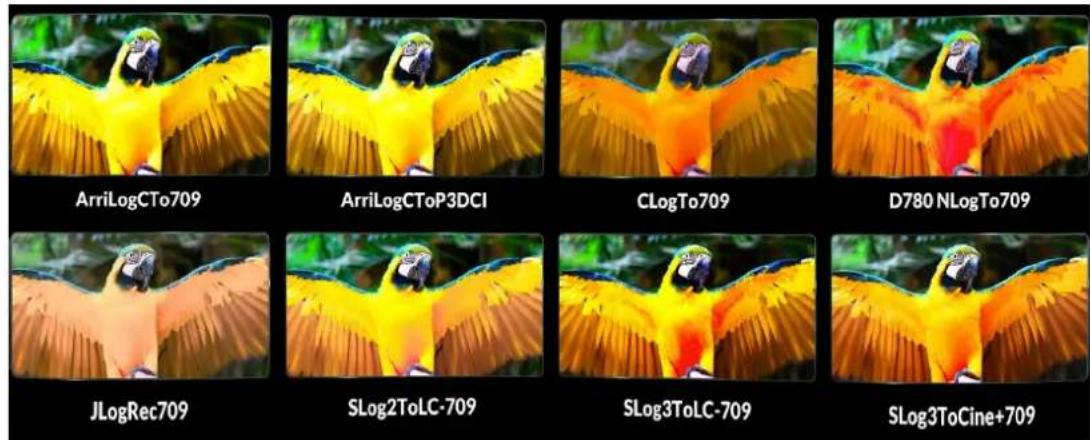
- [User Log]: Use this item to choose one of the User Log modes (1-6). Please install the User Log as following steps:
The User Log must be named with. cube in the sux. Please note: the device only supports the format of User Log: 17x17x17 / 33x33x33; Data order is BGR; Table order is BGR. If the format does not meet the requirement, please use tool "Lut Tool.exe" to transform it. Naming the User Log as User1-User6.cube, then copy the user Log into USB ash disk. Insert the USB ash disk to the device, the User Log is saved to the device automatically at the rst me.
- Back Light
Adjust the level of the back light from 0 to 100.
- Color Temp.
Use this item to choose one of the color temperature presets: [6500K], [7500K], [9300K], [User].
Note: Only available under [User] mode to adjust R/G/B Gain and Oset.
- R/G/B Gain
Adjust the R/G/B Gain of the current Color Temperature from 0 to 255. Default value: 128.
- R/G/B Oset
Adjust the R/G/B Oset of the current Color Temperature from 0 to 511. Default value: 256.
2.2.2 MARKER
MARKER
 | Center Marker | off |
 | Aspect Marker | off |
 | Safety Marker | off |
 | Marker Color | Red |
 | Aspect Mat. | off |
 | Thickness | 2 |
| SDI | ||
- Center Marker
Select [On] to display the center marker "+" and [O] not to display it.
- Aspect Marker
Select the aspect rao of the marker: [O], [16:9], [1.85:1], [2.35:1], [4:3], [3:2], [1.3X], [1.5X], [2.0X], [2.0X MAG].

2.35:1

1.85:1

4:3

3:2
- Safety Marker
- Select the size of the safety markers: [95%], [93%], [90%], [88%], [85%], [80%].
Note: When this item is used with the aspect marker, it is only in aspect marker.
- Marker Color
Select the color of marker displayed on the screen: [Red], [Green], [Blue], [White], [Black].
- Aspect Mat.
When acvated, it can be selected from 1-7 (Step value is 1).
5. 3D LUT Loading Demo
5.1. Format Requirement
- LUT format
Type: .cube
3D Size: 17x17x17
Data Order: BGR
Table Order: BGR
- USB ash disk version
USB: 2.0
System: FAT32
Size: <16G
● Color calibraon document: lcd.cube
- User Log: User1.cube \~User6.cube
5.2. LUT Format conversion
The format of LUT should be transformed if it doesn't meet monitor's requirement. It can be transformed by using Lut Converter (V1.3.30).
5.3. Soware user demo
5.3.1. Acvate Lut converter
4. ACCESSORIES

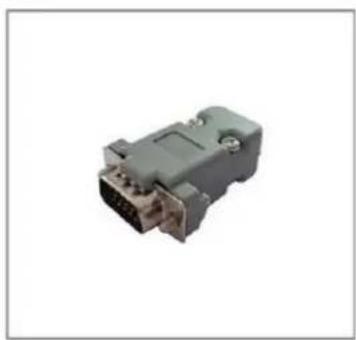
- DC 12V Power Adapter 1 piece
- TALLY Connector 1 piece
- User Manual Card 1 piece

aspect mat 7

aspect mat 6

aspect mat 4

aspect mat 2
- Thickness
Adjust the thickness of all the marker lines from 1-7 (Step value is 1).
2.2.3 FUNCTION
| FUNCTION | ||
 | Scan | Aspect |
| Aspect | Full | |
 | Overscan | Off |
 | H/V Delay | Off |
| Check Field | Off | |
 | Zoom | Offs |
| Freeze | Off | |
 | ||
 | HDMI | |
- Scan
Adjust the scan mode among [Aspect], [Pixel To Pixel], [Zoom].
Note: Aspect and Overscan funcons only can be adjusted under [Aspect] mode. Both of them cannot be adjusted in [Zoom] and [Pixel To Pixel] modes.
- Aspect
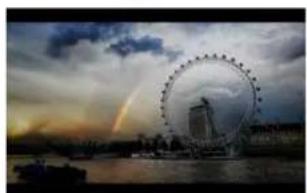
Select the aspect of the image among [Full], [16:9], [1.85:1], [2.35:1], [4:3], [3:2], [1.3X], [1.5X], [2.0X], [2.0X MAG].

2.0X
2.0X MAG
2.35:1
1.85:1

3:2

4:3
- Overscan
Use this item to acvate or deacvate overscan.
H/V Delay
Select one of the H/V modes: [OFF], [H], [V], [H/V]. When H/V Delay on, the blanking porons of the input signal will be displayed horizontally and vertically.
- Check Field
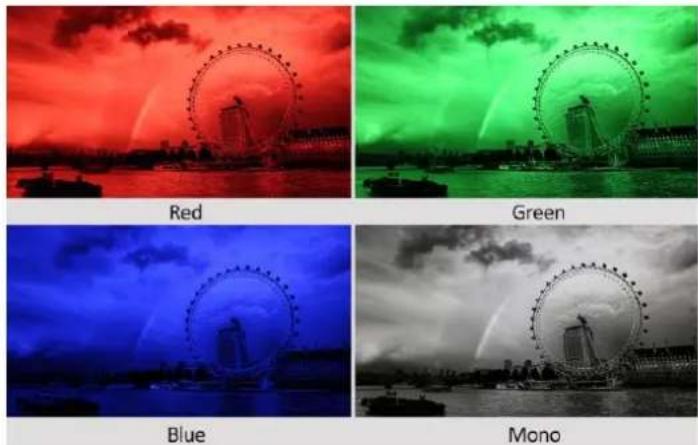
Select one of check eld modes: [O], [Red], [Green], [Blue], [Mono].
- Zoom
Select zoom scale from 10% to 90% (Step value is 10%).
- Freeze
Choose [On] to capture one frame of current image on the screen, and choose [O] to close freeze funcon.
2.2.4 WAVEFORM
- Transparency
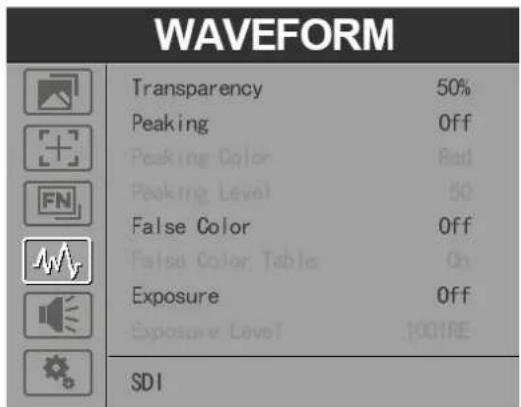
Adjustment of transparency can support histogram, audio vector, level meter. Transparency can be selected from among [O], [25%], and [50%].
3. PARAMETERS
| Panel | 2×7" |
| Physical Resoluon | 1920×1200 |
| Brightness | 400 cd/m2 |
| Contrast | 2000: 1 |
| Viewing Angle | 160° / 160° (H/V) |
| Input Voltage | DC 12V |
| Input Signal | HDMI, SDI, LAN, TALLY, USB |
| Power Consumpon | ≤18W |
| Operang Temperature | -20°C ~ 60°C |
| Storage Temperature | -30°C ~ 70°C |
| Dimension (LWD) | 480×131.6×29.3mm |
| Weight | 2.2KG |
Opon: 0-100. Default: 50.
- OSD V Posion
Opon: 0-100. Default: 50.
DHCP
- [On]: The monitor will automatically get an IP address from network for remote control via various programs.
- [O]: Manually congregate IP address.
IP Address
Manually congure IP address: 0.0.0.0
Note: When [DHCP] on, IP address cannot be manually set.
- Sub Mask
Manually congregate Sub net Mask: 0.0.0.0
Note: When [DHCP] on, Sub net Mask cannot be manually set.
- Gateway
Manually congure Gateway: 0.0.0.0
Note: When [DHCP] on, Gateway cannot be manually set.
- Reset Opon: [O], [On]
- [O] : The background of waveform is shown at black.
- [25%]: The background of waveform is shown at 25% intensity.
- [50%]: The background of waveform is shown at 50% intensity.
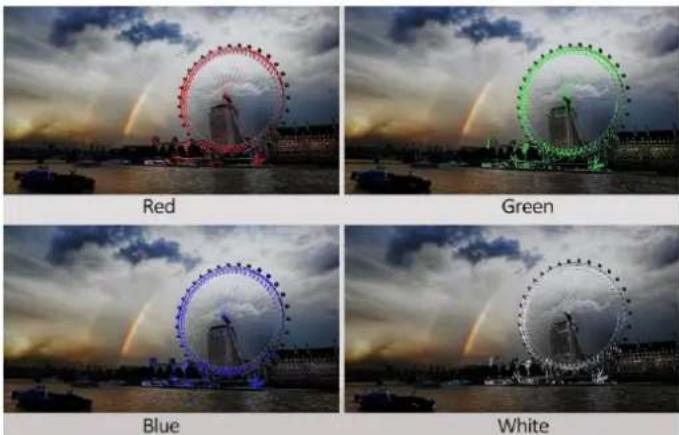
- Peaking
Use this item to acvate or deacvate the peaking funcon.
- Peaking Color
Select one of the peaking colors: [Red], [Green], [Blue], [White], [Black].
- Peaking Level
Use this item to adjust the level of peaking from 1-100. The higher peaking level is, the more obvious peaking effect is.
- False Color
Use this item to acvate or deacvate the false color funcon.
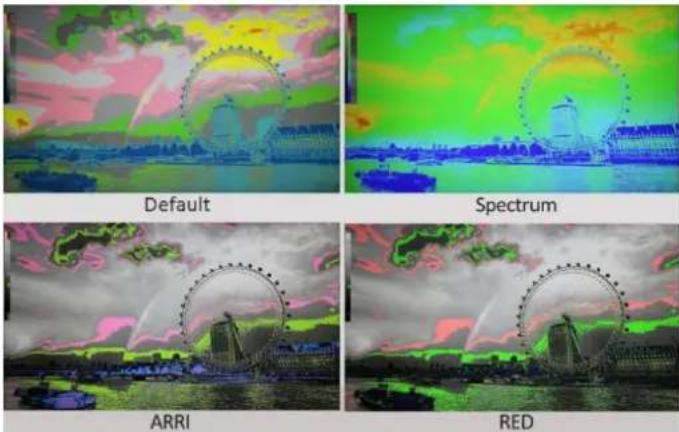
When acvated, [Default], [Spectrum], [ARRI], [RED] are for oponal.
- False Color Table
Use this item to acvate or deacvate the false color table.
- Exposure
Use this item to acvate or deacvate the exposure funcon.
When acvated, exposure works if the input signal exceeds the designated exposure level.
- Exposure Level
Use this item to adjust the level of exposure between 50-100 IRE.

- Histogram
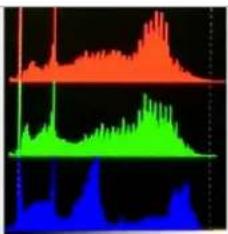
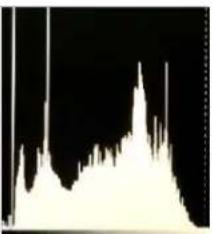
Use this item to acvate or deacvate histogram. When acvated, [Y], [RGB], [Color] are for oponal.
- [Y]: Display Y histogram.
- [RGB]: Display RGB mixed histogram.
- [Color], Display RGB separated histogram.

RGB
Color
Y
- Time Code
Use this item to acvate or deacvate the Time Code. When acvated, [LTC], [VITC] are for oponal.
Note: Time code is only available under SDI mode.
2.2.5 AUDIO

Volume
Adjust the volume among 0-100.
- Level Meter
Select whether to acvate or deacvate level meter.
- Audio Ch
In HDMI mode, select one of the audio channel from among 1-8.
2.2.6. SYSTEM
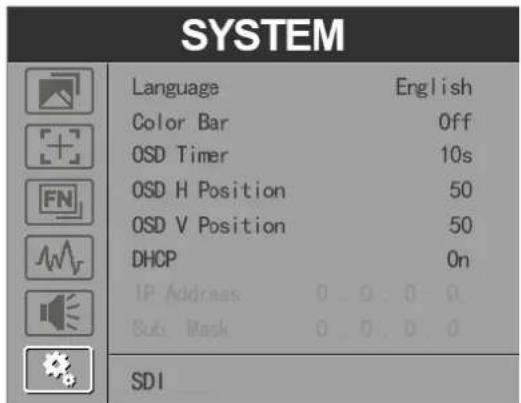
- Language
Opon: [English], [Chinese].
- Color Bar
Turn on/o color bar. When the color bar on, it can be selected: [100%], [75%].
- OSD Timer
Opon: [10s], [20s], [30s].
- OSD H Posion
- USER MANUAL
- ULE-702-HDR
- IMPORTANT SAFETY INSTRUCTIONS
- FEATURES
- CAUTIONS
- TROUBLE SHOOTING
- CONTENTS
- PRODUCT DESCRIPTION
- FRONT HOUSING
- BACK HOUSING
- FUNCON
- 6.REMOTE TERMINAL INSTRUCONS
- HOME SCREEN
- MENU SETTING
- 2.1 FN USER-DENABLE FUNCON BUON
- CENTER MARKER
- 2.2 MENU OPERAON
- 2.2.1 PICTURE
- CLICK GENERATE LUT BUON TO NISH
- USB LOADING
- ENTER THE LUT CONVERTER INTERFACE AER INPUT THE ENTER KEY
- CLICK INPUT FILE, THEN SELECT *LUT
- CLICK OUTPUT FILE, CHOOSE THE LE NAME
- HDMI EDID
- CAMERA LOG
- BACK LIGHT
- COLOR TEMP
- 2.2.2 MARKER
- 3D LUT LOADING DEMO
- FORMAT REQUIREMENT
- LUT FORMAT CONVERSION
- SOWARE USER DEMO
- ACVATE LUT CONVERTER
- ACCESSORIES
- THICKNESS
- 2.2.3 FUNCTION
- SCAN
- ASPECT
- 2.2.4 WAVEFORM
- PARAMETERS
- EXPOSURE
- EXPOSURE LEVEL
- HISTOGRAM
- TIME CODE
- 2.2.5 AUDIO
- SYSTEM
Brand : Ikegami
Model : ULE-702-HDR
Category : Surveillance