
H17UFW - Freezer HONEYWELL - Free user manual and instructions
Find the device manual for free H17UFW HONEYWELL in PDF.


| Product Type | Freezer (convertible to refrigerator) |
| Brand | Honeywell (licensed) |
| Model | H17UFW |
| Power Supply | 115V~60Hz, 10A |
| Plug Type | 3-prong grounded |
| Control Type | Electronic touch panel with LED display |
| Temperature Settings | 4 levels (1-4) |
| Convertible Mode | Freezer or Refrigerator (switchable via 3-second press) |
| Defrost Type | Automatic (manual option available) |
| Interior Light | Yes (replaceable by specialist) |
| Control Panel Lock | Auto-lock after 15 seconds; unlock by holding button for 3 seconds |
| Leveling Feet | Yes, adjustable (clockwise raise, counterclockwise lower) |
| Door Seal | Magnetic gasket, cleanable |
| Shelves | Glass shelves (removable) |
| Drawers | Freezer drawers (secure when moving) |
| Vegetable Crisper | Yes (included) |
| Door Tray | Removable for cleaning (squeeze inward and lift) |
| Bottle Rack | Yes (bottle frame) |
| Installation Type | Freestanding |
| Clearance Required | 30 cm above, 10 cm sides and back |
| Refrigerant | Flammable (R600a is typical) |
| Safety Features | Child lock (control panel), grounding required, flammable material warnings |
| Error Indicators | LED codes for sensor failures (freezer, refrigerator, ambient) |
| Customer Service | 1-800-604-0295, support@honeywellcoolingappliances.com |
Frequently Asked Questions - H17UFW HONEYWELL
User questions about H17UFW HONEYWELL
0 question about this device. Answer the ones you know or ask your own.
Ask a new question about this device
Download the instructions for your Freezer in PDF format for free! Find your manual H17UFW - HONEYWELL and take your electronic device back in hand. On this page are published all the documents necessary for the use of your device. H17UFW by HONEYWELL.
USER MANUAL H17UFW HONEYWELL
Read and save these instructions before use
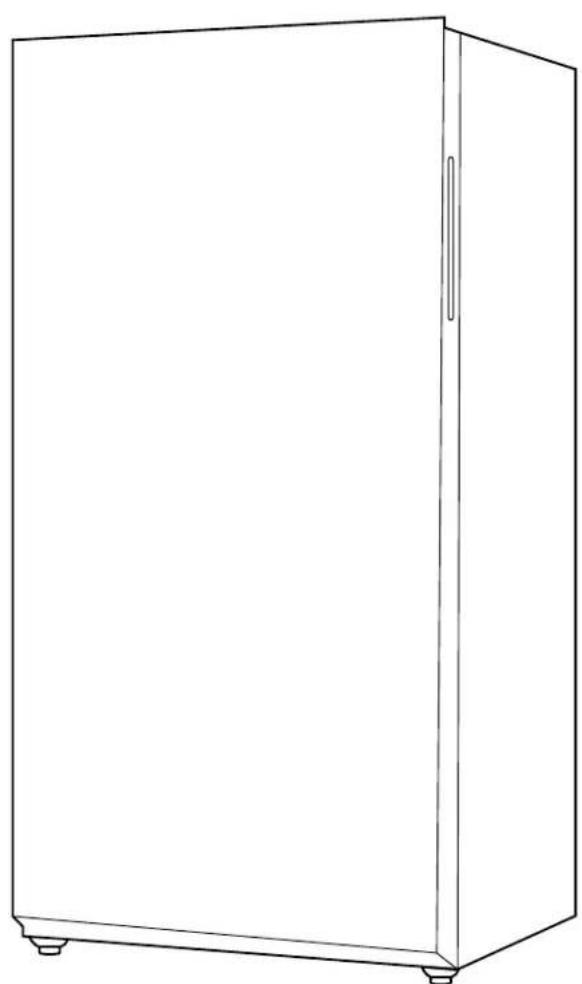
H17UFS H17UFW
CONTENTS
1 Safety Warnings
1.1 Warning 1-2
1.2 Related warnings for use .... 3
1.3 Electricity related warnings 4
1.4 Warnings related to placing items 4
1.5 Warnings for energy....5
1.6 Warnings related to disposal....5
2 Proper Use of Freezer
2.1 Placement....6
2.2 Leveling feet....6
2.3 Moving the appliance 6
2.4 Start to use 7
2.5 Energy saving tips .... 7
3 Structure and Functions
3.1 Key components 8
3.2 Functions....9
4 Maintenance of Freezer
4.1 Cleaning....10
4.2 Cleaning the door tray....10
4.3 Defrost 10
4.4 Power Interruptions 10
5 Troubleshooting....11
DEAR CUSTOMER:
Thank you for buying this freezer. To ensure that you get the best results from your new freezer, please take time to read through the simple instructions in this booklet. Please ensure that the packing material is disposed of in accordance with the current environmental requirements. When disposing of any freezer equipment please contact your local waste disposal department for advice on safe disposal. This appliance must be only used for its intended purpose.
1 SAFETY WARNINGS
1.1 Warning

WARNING: risk of fire / flammable materials
This appliance is intended to be used in household, non-retail applications.
This appliance is not intended for use by persons (including children) with reduced physical, sensory or mental capabilities unless they have been given supervision or instruction concerning use of the appliance by a person responsible for their safety. Children should be supervised to ensure that they do not play with the appliance.
If the supply cord is damaged, it must be replaced by the manufacturer, its service agent or similarly qualified persons in order to avoid a hazard.
The appliance has to be unplugged after use and before carrying out user maintenance.
DO NOT store explosive substances such as aerosol cans in this appliance.
DO NOT use extension cords or ungrounded (two prong) adapters.
WARNING: Keep ventilation openings, in the appliance enclosure or in the built-in structure, clear of obstruction.
WARNING: Do not use mechanical devices or other means to accelerate the defrosting process, other than those recommended by the manufacturer.
WARNING: Do not damage the refrigerant circuit.
WARNING: Do not use electrical appliances inside the food storage compartments of the appliance, unless they are the type recommended by the manufacturer.
WARNING: This freezer uses flammable blowing gas and refrigerant. Please dispose of according to local regulators.
WARNING: When positioning the appliance, ensure the supply cord is not trapped or damaged.
WARNING: Do not locate multiple portable socket-outlets or portable power supplies at the rear of the appliance.
DANGER: Risk of child entrapment. Before disposing your old freezer or freezer:
• Take off the doors.
- Leave the shelves in place so that children may not easily climb inside.
The freezer must be disconnected from the source of electrical supply before attempting the installation of accessory.
Refrigerant and cyclopentane foaming material used for the appliance are flammable. To prevent damage to the environment or any other harm, when the appliance is scrapped, it shall be kept away from any fire source and be recovered by a recovering company with corresponding qualification.
To avoid contamination of food, please read the following:
- Opening the door for long periods can cause a significant increase of the temperature in the compartments of the appliance.
- Regularly clean surfaces that can come in contact with food and accessible drainage systems.
- Clean water tanks if they have not been used for 48 h; flush the water system connected to a water supply if water has not been drawn for 5 days. (see note)
- Store raw meat and fish in suitable containers in the freezer to prevent it from contacting or dripping onto other food.
- Two-star frozen food compartments are suitable for storing pre-frozen food, storing ice cream and making ice cubes. (see note)
- One, two, three-star and four-star compartments are not suitable for the freezing of fresh food. (see note)
- If the freezer is left empty for long periods, switch off, defrost, clean, dry, and leave the door open to prevent mold from developing within the appliance.
Note: Please confirm whether it is applicable according to your product compartment type.
WARNING: To avoid a hazard due to instability of the appliance, it must be fixed in accordance with the instructions.
WARNING: Connect to potable water supply only. (Suitable for ice making machine)
To prevent a child from being entrapped, keep out of reach of children. (Suitable for products with locks)
1.2 Related Warnings for Use
- To prevent injury, do not to put your hand between the freezer doors and body. Please be gentle when opening the door to avoid falling items.
- To avoid frostbite, do not handle food or containers, especially metal, with wet hands in the freezer when it is running.
- Do not allow children to enter or climb the freezer to prevent entrapment or injury.
- Do not spray or wash the freezer; do not put the freezer in moist places or places where it can be easily splashed with water to protect the electrical insulation properties.
- Do not place heavy objects on the top of the appliance. Objects may fall when opening the door, and may cause accidental injury.
- Please pull out the plug in case of power failure or cleaning. Do not connect the freezer to power supply within five minutes to prevent damages to the compressor due to successive starts.
1.3 Electricity Related Warnings
- Do not pull the power cord when unplugging the freezer. Please firmly grasp the plug and pull out it from the socket directly.
- Do not damage the power cord under any condition, do not use when the power cord is damaged or the plug is worn.
- To prevent a fire or shock, the power plug should be firmly contacted with the socket. Please ensure that the grounding electrode of the power socket is equipped with a reliable grounding line.
- Do not under any circumstances cut or remove the ground prong from the power cord supplied. This appliance must be properly grounded.
- This appliance requires a standard 115/120 Volt AC \~60Hz three-prong grounded electrical outlet.
- To prevent accidental injury, the cord should be secured behind the appliance and not left exposed or dangling.
- The appliance should always be plugged into its own individual electrical outlet that has a voltage rating that matches the rating label on the appliance.
- It is recommended that you do not use an extension cord with this appliance. However, if you must use an extension cord, it is necessary that it be a UL/CUL-Listed, 3-wire grounding type appliance extension cord having a grounding type plug and outlet and that the electrical rating of the cord be 115 volts and at least 10 amperes.
1.4 Warnings Related to Placing Items
- Do not put flammable, explosive, volatile and highly corrosive items in the freezer to prevent damages to the product or fires.
- Do not place flammable items near the freezer to avoid fires.
- This product is household freezer and is suitable for the storage of foods. According to national standards, household freezers shall not be used for other purposes, such as storage of blood, drugs or biological products.
- Do not place items such as bottled or sealed containers of fluid such as bottled beers and beverages in the freezer.
1.5 Warnings for Energy
- Freezer might not operate consistently when sited for an extended period of time below the range of temperatures that it is designed to withstand.
- Do not exceed the storage time recommended by the food manufacturers for any kind of food and commercially quick-frozen food in freezer.
- A rise in temperature of the frozen food during maintenance or cleaning could shorten the storage life.
1.6 Warnings Related to Disposal
The freezer's refrigerant and cyclopentane foam materials are combustible materials. Discarded freezers should be isolated from fire sources and can not be burned. Please transfer the freezer to qualified professional recycling companies for processing to avoid damages to the environment or other hazards.
Please remove the door of the freezer and shelves to prevent children from entering and playing in the freezer.
Correct Disposal of this product:

This marking indicates that this product should not be disposed with other household wastes. To prevent possible harm to the environment or human health from uncontrolled waste disposal, recycle it responsibly to promote the sustainable reuse of material resources. To return your used device, please use the return and collection systems or contact the retailer where the product was purchased. Contact the retailer as many will take them back for recycling.
2 PROPER USE OF FREEZER
2.1 Placement
- Before using the freezer, remove all packaging materials including bottom cushions, foam pads and tape inside, tear off the protective film on the door and the freezer body.
- The freezer should be placed in a well-ventilated indoor place on ground that is flat and sturdy.
- Keep away from heat and avoid direct sunlight. Do not place the freezer in moist or watery places to prevent rust or reduction of insulation.
- Please leave at least 30 cm of space above the freezer, and 10 cm from both sides and backside to facilitate heat dissipation.
2.2 Leveling Feet
Schematic diagram of the leveling feet

Adjusting procedures:
a. Turn the feet clockwise to raise the freezer
b. Turn the feet counterclockwise to lower the freezer
c. Adjust the right and left feet based on the procedures above to a horizontal level
2.3 Moving the Appliance
- Remove all objects from the appliance before moving. Secure the glass shelves, vegetable crisper, and freezer drawers with tape.
- Tighten the leveling feet, close the doors, and secure them with tape. Keep the appliance inclined by more than 45°.
- Do not lay the appliance on its side or upside down.
2.4 Start to Use
- The freezer must stand upright for half an hour before connecting power when it is first started.
- Run the freezer for 2 to 3 hours, or 4+ hours in the summer, before loading fresh or frozen food.
2.5 Energy Saving Tips
- The appliance should be located in the coolest area of the room, away from heat producing appliances or heating ducts, and out of the direct sunlight.
- Let hot foods cool to room temperature before placing in the appliance. Overloading the appliance forces the compressor to run longer. Foods that freeze too slowly may lose quality, or spoil.
- Be sure to wrap foods properly, and wipe containers dry before placing them in the appliance. This cuts down on frost build-up inside the appliance.
- Do not line storage bin with aluminum foil, wax paper, or paper towels. Liners interfere with cold air circulation, making the appliance less efficient.
3 STRUCTURE AND FUNCTIONS
3.1 Key Components
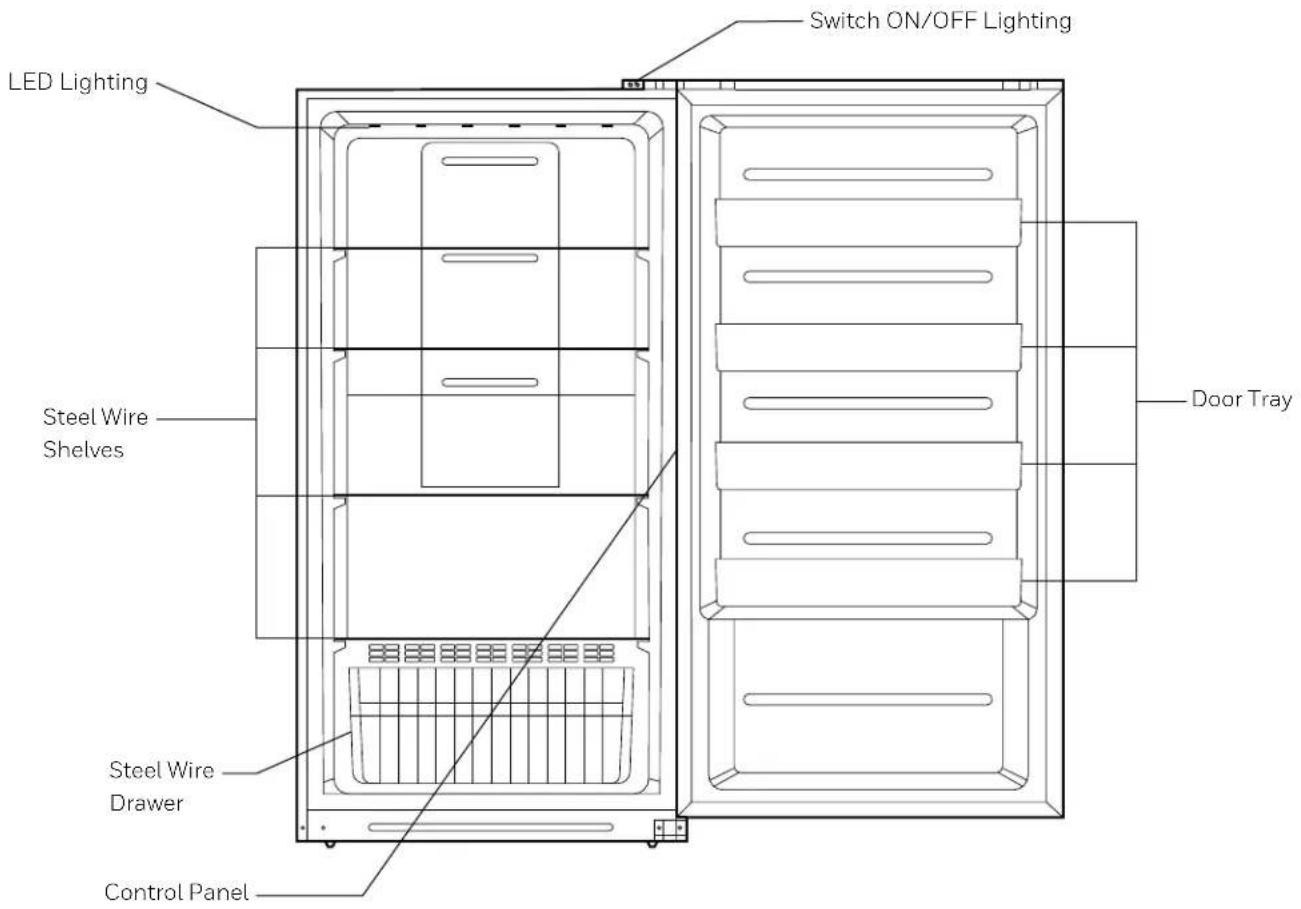
3.2 Functions

01 Control Panel
- Once powered on, the display screen will fully display for three seconds, and then normal operation functions will display.
02 Lock/Unlock
- When the temperature control panel is unused for 15 seconds, the panel will automatically lock.
- Press the Temperature Setting key (A) for three seconds to unlock the temperature control panel if locked. All of the LED lights will blink for two seconds when the panel is unlocked.
03 Temperature Setting
- Press the Temperature Setting key (A) each time to change the temperature setting.
- The settings will cycle 1 through 4, in order.
• After 15 seconds, the temperature will change to the appropriate setting. - Press the Temperature Setting key (A) for three seconds, the Freezer/Refrigerator (4) light will illuminate, and the appliance will run as a freezer.
- Press the Temperature Setting key (A) for another three seconds, the Freezer/Refrigerator (4) light will turn off, and the appliance will run as a refrigerator.
04 Indicator Lights
In case of a program failure, the following LED indicator lights will blink:
| Error code Error description | |
| LED 3, 4 flashing | Refrigerator sensor circuit failure |
| LED 2, 4 flashing | Freezer defrost sensor |
| LED 1, 4 flashing | Ambient temperature sensor failure |
- Check the door gasket regularly to make sure there is no debris. Clean the door gasket with a soft cloth dampened with soapy water or diluted detergent.
- Clean the interior of the freezer regularly to avoid odor.
- Use a soft cloth or sponge to clean the inside of the freezer, with two tablespoons of baking soda and a quart of warm water. Then rinse with water and wipe clean. After cleaning, open the door and let it dry naturally before turning on the power.
- For areas that are difficult to clean (such as narrow gaps or corners), it is recommended to wipe them regularly with a soft rag, soft brush, etc. to ensure no contaminants or bacteria accumulate in these areas.
- Do not use soap, detergent, scrub powder, spray cleaner, etc., as these may cause odors in the interior of the freezer or contaminate food.
- Clean the bottle frame, shelves and drawers with a soft cloth dampened with soapy water or diluted detergent. Dry with a soft cloth or dry naturally.
- Wipe the outer surface of the freezer with a soft cloth dampened with soapy water, detergent, etc., and then wipe dry.
- Do not use hard brushes, clean steel balls, wire brushes, abrasives (such as toothpastes), organic solvents (such as alcohol, acetone, banana oil, etc.), boiling water, acid or alkaline items, which may damage the cooler surface and interior. Boiling water and organic solvents such as benzene may deform or damage plastic parts.
- Do not rinse directly with water or other liquids during cleaning to avoid short circuits or affect electrical insulation.

Please unplug the freezer for defrost and cleaning.
4.2 Cleaning the Door Tray
- Remove the door tray before cleaning by squeezing the tray inward, then pushing the tray upward to remove. Wash the tray, then replace the tray into the door.

4.3 Defrost
- This appliance uses an automatic defroster. Frost formed due to warmer weather or a higher ambient temperature may be removed by first disconnecting the appliance to let defrost automatically, or may be removed manually with a dry towel.
4.4 Power Interruptions
- In the event of an interruption of power, food inside the appliance can be kept for several hours if the door remains closed. Do not add any more food to the refrigerator during this time.
- In the event of long-term power interruptions, unplug and clean the appliance, then leave the doors open to prevent odor build-up.
5 TROUBLESHOOTING
| Inoperation | Ensure the freezer is plugged in and connected to powerCheck that the voltage is not lowCheck for power failure or if circuits were tripped |
| Odor | Thoroughly clean the interior of the freezer. |
| Long-term operation of compressor | Do not overload the freezerDo not put hot contents in the freezerNote that it is normal that the freezer operates for a longer time in summer when the ambient temperature is higher |
| Light is out | Check if the freezer is still connected to power supply or if the light is damagedHave light replaced by specialist |
| The freezer door can not be properly closed | Check for any items blocking the freezer door or unbalanced placement of itemsCheck if freezer is tilted |
| Loud noises | Ensure that the freezer is sitting on a flat and stable surfaceEnsure that the freezer accessories are properly placed |
| Door seal is not tight | Remove anything that may be on the door sealUse a hair dryer or hot towel to heat the door seal and then allow it to cool |
| Water pan overflowing | Make sure there isn't too much food in the freezer and that the food does not contain too much waterIf the doors aren't properly closed, air entering through may result in increased water due to defrosting |
| Hot housing | When housing becomes hot due to high ambient temperature or too much food being stored, provide ventilation to promote heat dissipation |
| Surface condensation | Condensation on the exterior of the door seals is normal when ambient humidity is too highWipe the condensation with a clean towel |
| Airflow sound Buzz Clatter | The compressor may cause a buzzing sound when starting up or shutting down.The solenoid valve or electric switch valve may create a clattering sound which is normal and does not affect the operation. |
If you want to return or replace the product, please contact the store where it was purchased (remember to bring the purchase invoice). If your product needs repair, please contact us via email or phone.
BHRS Group, LLC
585 Prospect St.
Lakewood, NJ 08701
Customer Service Tel: 1-800-604-0295
Customer Service Email: support@honeywellcoolingappliances.com
Website: honeywellcoolingappliances.com
©2021 BHRS Group, LLC. All Rights Reserved.
The Honeywell Trademark is used under license from Honeywell International Inc. Honeywell International Inc. makes no representations or warranties with respect to this product. This product is manufactured by BI IRS Group, LLC.
MADE IN CHINA
Honeywell

- CONTENTS
- 1 SAFETY WARNINGS
- 1.3 ELECTRICITY RELATED WARNINGS 4
- 2 PROPER USE OF FREEZER
- 3 STRUCTURE AND FUNCTIONS
- 4 MAINTENANCE OF FREEZER
- DEAR CUSTOMER
- 1.1 WARNING
- 1.2 RELATED WARNINGS FOR USE
- 1.3 ELECTRICITY RELATED WARNINGS
- 1.4 WARNINGS RELATED TO PLACING ITEMS
- 1.5 WARNINGS FOR ENERGY
- 1.6 WARNINGS RELATED TO DISPOSAL
- 2.1 PLACEMENT
- 2.2 LEVELING FEET
- 2.3 MOVING THE APPLIANCE
- 2.4 START TO USE
- 2.5 ENERGY SAVING TIPS
- 3.1 KEY COMPONENTS
- 3.2 FUNCTIONS
- 01 CONTROL PANEL
- 02 LOCK/UNLOCK
- 03 TEMPERATURE SETTING
- 04 INDICATOR LIGHTS
- 4.2 CLEANING THE DOOR TRAY
- 4.3 DEFROST
- 4.4 POWER INTERRUPTIONS
Brand : HONEYWELL
Model : H17UFW
Category : Freezer