
725FK1 - Washing machine Sani-Lav - Free user manual and instructions
Find the device manual for free 725FK1 Sani-Lav in PDF.


| Product Type | Hands-Free Floor Mount Stainless Steel Sink |
| Brand | Sani-Lav (Columbia Products) |
| Model | 725FK1 |
| Material | Stainless Steel |
| Mounting Type | Floor Mount |
| Operation | Hands-free knee pedal valve |
| Spout Type | Swivel gooseneck spout with aerator |
| Valve Type | Single knee pedal valve, mixing check valve |
| Compliance | NSF/ANSI 2 Food Equipment, NSF/ANSI 372 Low-Lead |
| Recommended Cleaner | Abrasive cleaner like Bon-Ami or Zud, or baking soda |
| Maintenance Tips | Rinse with hot water after use; dry regularly to prevent water spots; scrub in direction of grain |
| Tools Required for Installation | Tape measure, adjustable wrench, drill motor, pipe wrench, level, safety glasses, screwdrivers, pencil, socket wrench |
| Replacement Parts Available | Valve repair kit (Low-Lead or Stainless), plunger assembly, spring, threaded insert, etc. |
| California Proposition 65 Warning | Contains chemicals known to cause cancer and reproductive harm (chromium, lead, phthalates) |
| Repair Kit | Model 1061L (Low-Lead) or 1061S (Stainless) |
| Warranty / Support | Contact Columbia Products: 800.626.2117, columbiasinks.com |
Frequently Asked Questions - 725FK1 Sani-Lav
User questions about 725FK1 Sani-Lav
0 question about this device. Answer the ones you know or ask your own.
Ask a new question about this device
Download the instructions for your Washing machine in PDF format for free! Find your manual 725FK1 - Sani-Lav and take your electronic device back in hand. On this page are published all the documents necessary for the use of your device. 725FK1 by Sani-Lav.
USER MANUAL 725FK1 Sani-Lav
SANI-LAV® COLUMBIA PRODUCTS
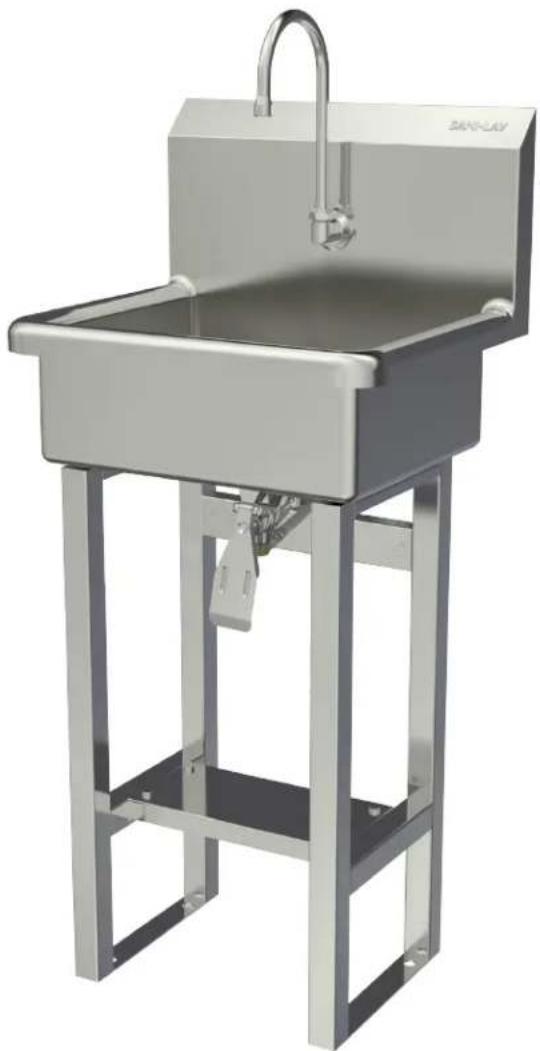
Operating Manual for Hands-Free Floor Mount Stainless Steel Sink
Models 725FK1 and 725FK1.5

Columbia does not recommend use with harsh chemicals.
Product Compliance
NSF/ANSI 2 Food Equipment, NSF/ANSI 372 Low-Lead

COLUMBIA SPECIFICATIONS
HANDS-FREE FLOOR MOUNT SINK
Parts List
□(1) Floor mount sink
□(1) Leg assembly set
☐ (6) Nuts, bolts and washers for leg assembly
☐ (4) Nuts and washers for connecting sink to leg assembly
☐ (1) Single knee pedal valve
☐ (2) Valve mounting nuts
☐ (1) Swivel gooseneck spout with aerator
☐ (1) Connecting tube for valve to spout connection
☐ (2) Fittings, brass, 0.375" male compression and 0.375" male NPT
□ (1) Mixing check valve
□(1) Strainer assembly with basket
Tools Required
□ Tape measure
□ Adjustable wrench
□ Drill motor and drill bits
□ Pipe wrench
□ Level
□ Safety glasses
□ Screw drivers: phillips and standard
□ Pencil
□ Socket wrench
Installation Instructions
Step 1
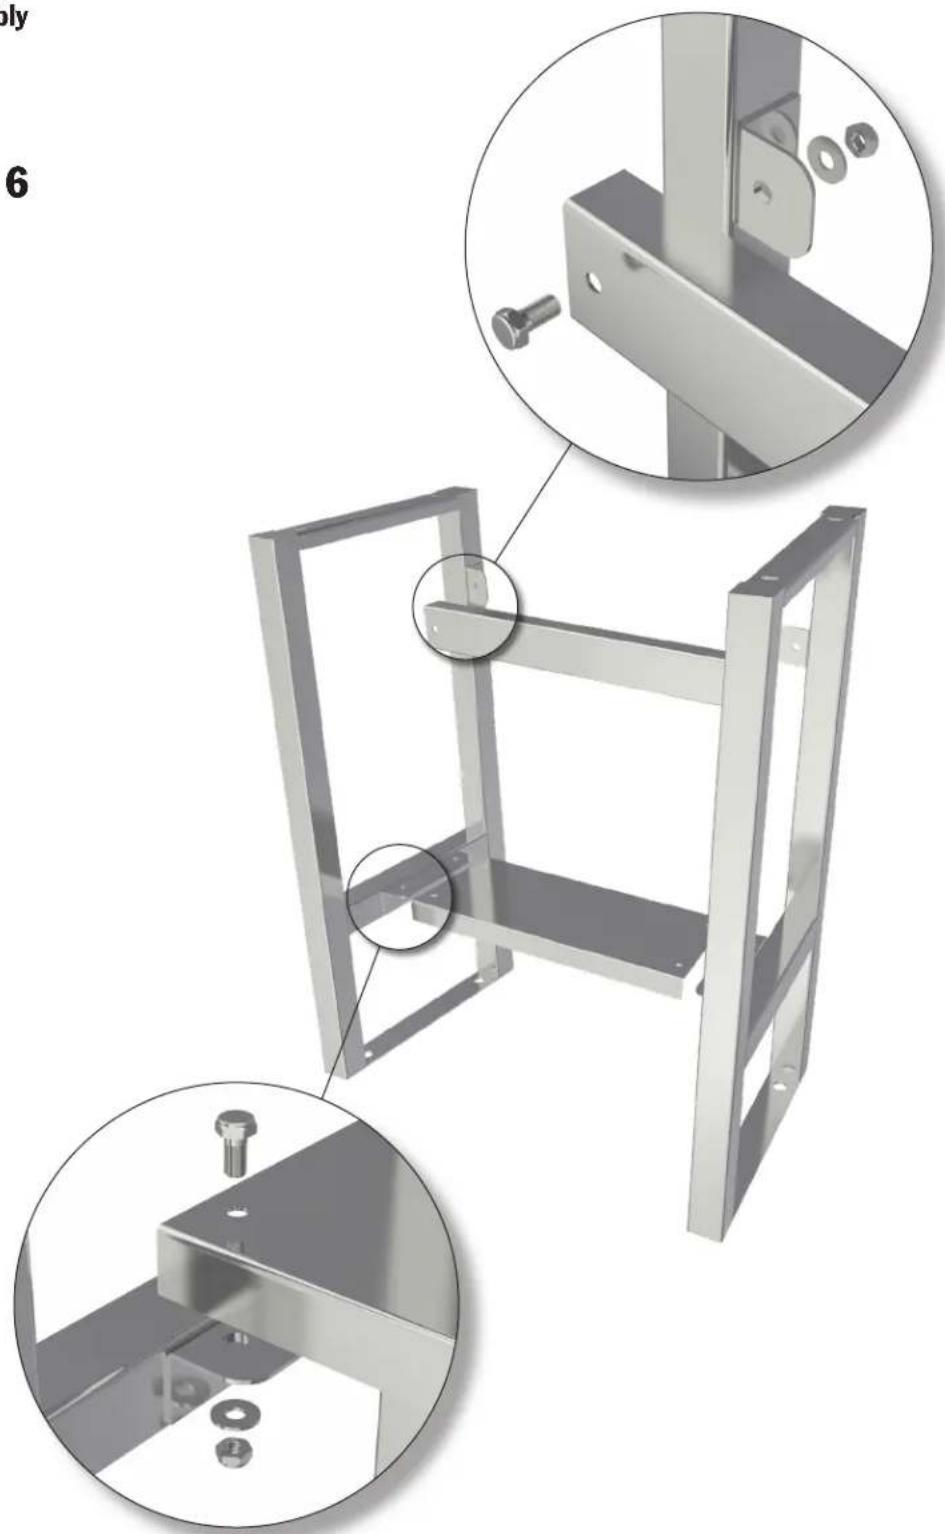
- Attach upper and lower leg support brackets to legs with hardware (provided).
- Place wash station sink on leg assembly and secure with hardware (provided).
- Establish sink location.
- Mark the floor where the four holes are at the base as shown in illustration A.
- Drill holes as required for mounting hardware. (Hardware not included).
Step 2
- Install spout assembly to the sink.
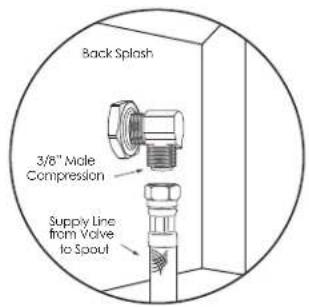
- Install elbow fitting (provided) to the spout assembly.
- Connect one side of the supply line (provided) to the spout assembly.
- Install strainer assembly.
Step 3
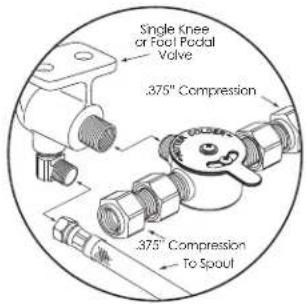
- Install mixing check valve and elbow fitting to valve.
- Install knee pedal valve under bowl if not mounted already.
- Attach connecting tube from the spout to the valve.
Step 4
- Secure wash station to floor.
- Connect waste line to strainer assembly.
- Connect water supplies (hot and cold) to the mixing check valve.
Step 5
- Remove aerator from the spout assembly and flush water line by pressing pedal for 30 seconds.
- Check connections for leaks. Replace aerator onto the spout assembly.
- Seal gap between bowl and leg assembly as shown in illustration B.
- When mounting against wall, we recommend sealing top of backsplash to wall as shown in illustration C.
Go to columbiasinks.com for more information on replacement parts and installation videos.
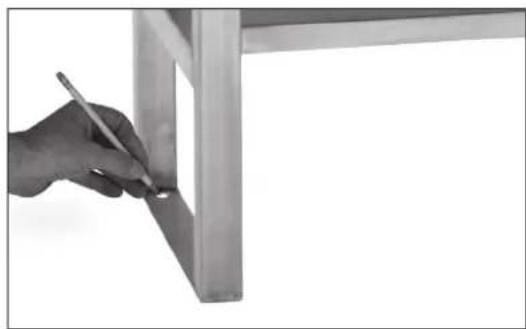
Illustration A
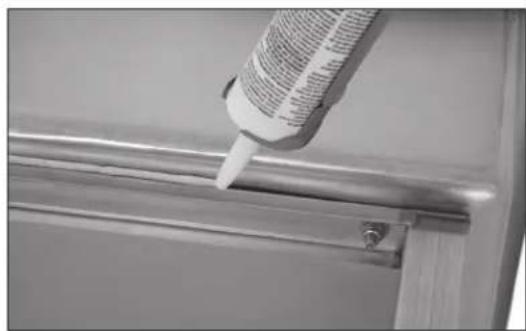
Illustration B

Illustration C
Notice for California Consumers

WARNING: This product can expose you to chemicals including Chromium (hexavalent compounds), Lead, and Phthalates (DEHP) which are known to the State of California to cause cancer and birth defects or other reproductive harm. For more information go to www.P65Warnings.ca.gov.
NOTE: Lead content originates from Brass components in valves and faucets and is certified under NSF/ANSI 372 as containing less than 0.25% lead in wetted surfaces.
COLUMBIA PRODUCTS
800.626.2117 • columbiasinks.com • info@columbiasinks.com
Trouble Shooting Guide
| Problem Possible Cause | To Diagnose Remedy | ||
| Water drips from spout or valve stem assembly. | Flat washer on the stem/plunger is worn. | To determine if the leak source is from the hot or cold side shut cold water source off. See if water still leaks from the spout. If leak continues then repair hot side if not repair cold side. | We recommend installing valve repair kit. |
| Water leaks from the front of the valve. | O-Rings on the plunger are worn out. | Visually determine whether the cold or hot side is leaking. We recommend replacing threaded insert, plunger assembly & spring. See illustrations below. | |
Valve Repair Instructions
Note: Valves are designed to be repaired without having to be disconnected from mount or plumbing.
- Tum off water source. Do not remove valve from sink.
- Remove pedal assembly using a 15/16" open end wrench or socket wrench. As shown in illustration A.
- Using a 1" deep socket wrench remove insert assembly parts as show in illustration B.
- Replace with new repair kit as shown on illustration C.
- Reinstall pedal assembly and turn water source on.
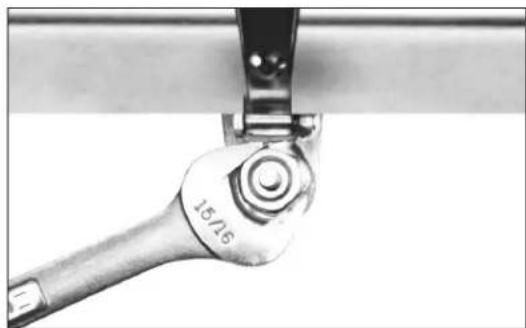
Illustration A

Illustration B

Illustration C
COLUMBIA SPECIFICATIONS
HANDS-FREE FLOOR MOUNT SINK
![Top 20in [50.8mm] 3,937in [100mm] 17.5in [444.5mm] 2in [50.8mm] R.5in [12.7mm] 14in [355.6mm] 1.5in [38.1mm] 17in [431.8mm] 1.5in [38.1mm]](/content/2026/06/1221104/images/9014e0ea9a23120cc53e8aa275fece615a253e99b48bdd80c346ed3719a324d3.jpg)
![■ Front 10in [254mm] 10in [234mm] 9.5in [241.3mm] 7in [178.9mm] 27in [685.8mm] 15.25in [387.4mm] 6.25in [158.8mm]](/content/2026/06/1221104/images/ae3ca62363d57c75217b20ed6552c07f7f9eec588d83093cf20e4075cce6ab51.jpg)
![Side 8.75in [19.1mm] .75in [19.1mm] 45deg 3in [76.2mm] Supply Line to Spout 7.5in [190.5mm] 2.25in [57.2mm] 12in [304.8mm]](/content/2026/06/1221104/images/dc6451e9b13b20f0add0f2a62a2473987367966b7afc14c2be391306115debdf.jpg)
■ Hole Configuration
![10in [254mm] 13in [254mm] .875" [22mm] dcl.hole 6.25in [159.8mm]](/content/2026/06/1221104/images/eabacfde2f205b03b78294375a774716c91ceae4d0edffcdf134e9d07d17a618.jpg)
■ Floor Mounting Detail

■ Supply Line Detail
Leg Assembly

x 6
Replacement Parts
Part No. Description Application
| A | 1041 Operated, Long Foot 103/104/105/106 (S) (L) | |
| B | 1042 Operated, Short Foot 101/102 (S) (L) | |
| C | 1043 Operated, Knee 109/110/111/112 (S) (L) | |
| D | 1049 Bolt & Nut Set (Stainless) All Single Valves | |
| E | 1050 Jam Nut (Stainless) All Valves | |
| F | 1051 Bolt & Nut Set (Stainless) All Double Valves | |
| G | 1052 Bracket All Double Valves | |
| H | 1053 Threaded Insert (Low Lead) All Valves | |
| I | 1053S Threaded Insert (Stainless) All Valves | |
| J | 1054 Bracket All Single Valves | |
| K | 1055 Plunger Assembly (Low Lead) All Valves | |
| L | 1055S Plunger Assembly (Stainless) All Valves | |
| M | 1056 Spring (Stainless) All Valves | |
| N | 1057 Body only, Double Valve (Low Lead) All Double Valves | |
| O | 1058 Body only, Single Valve All Single Valves | |
| P | 1061L Replacement Kit (Low Lead) All Valves | |
| Q | 1061S Replacement Kit (Stainless) All Valves | |
Double Knee or Foot Pedal

COLUMBIA PRODUCTS
800.626.2117 • columbiasinks.com • info@columbiasinks.com
Care and Maintenance
Regular cleaning will preserve the appearance and integrity of the surface. Stainless steel can easily be cleaned and kept stain-free using various methods.
Recommendations:
- Clean with an abrasive cleaner like, Bon-Ami or Zud weekly or bi-weekly. Always scrub in the direction of the grain or polish lines. Another option is to use Baking soda. Make sure to rinse well and dry. Illustration A
- Most soaps and detergents contain chlorides, we recommend rinsing the stainless-steel sink with hot water after use, to prevent corrosion. Illustration B
• Regularly dry your sink to prevent water and surface rust marks. Illustration C - Do not leave salt in the sink or near a saltwater environment.
- Use a quality stainless steel cleaner and follow cleaner instructions. Wipe along the grain (NOT against). Illustration D
Things to Avoid:
- Avoid harsh abrasive cleaners and corrosive chemicals.
- Avoid abrasive scouring pads, carbon steel brushes and steel wool for cleaning as iron particles left behind can lead to rust.
- Avoid the use of oily rags or greasy cloths when wiping the surface. To avoid water spots, wipe dry after use.
Additional Tips:
• Regularly drying your sink works wonders to prevent water and surface rust marks.
- Wear rubber gloves when working with cleaners to protect your hands.
- Never mix cleaners. Some products react to create dangerous gases.
- There are thousands of blended or compound cleaners on the market. Users are advised to contact suppliers of solvents for information on their applications on stainless steel.
• DO NOT USE SOLVENTS in closed spaces or while smoking.
• Note: Columbia does not recommend use with harsh chemicals.
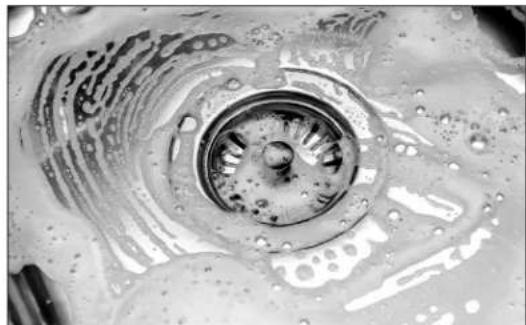
Illustration A
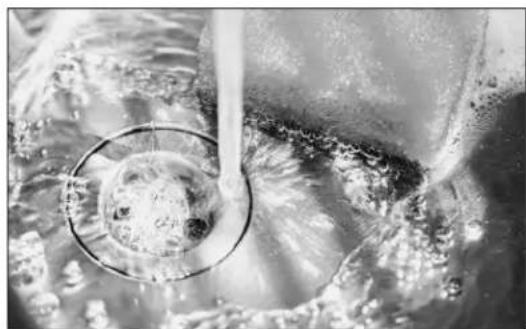
Illustration B

Illustration C
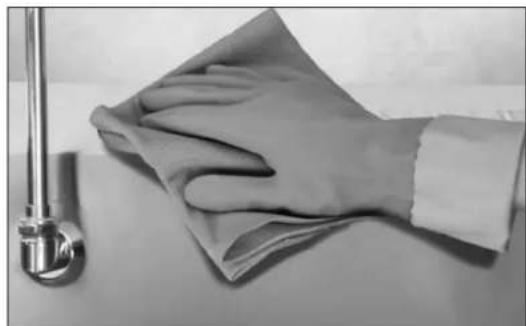
Illustration D
COLUMBIA PRODUCTS
800.626.2117 • columbiasinks.com • info@columbiasinks.com


Brand : Sani-Lav
Model : 725FK1
Category : Washing machine