Air Hog 7303LX-230 - Steam cleaner Mytee - Free user manual and instructions
Find the device manual for free Air Hog 7303LX-230 Mytee in PDF.

User questions about Air Hog 7303LX-230 Mytee
0 question about this device. Answer the ones you know or ask your own.
Ask a new question about this device
Download the instructions for your Steam cleaner in PDF format for free! Find your manual Air Hog 7303LX-230 - Mytee and take your electronic device back in hand. On this page are published all the documents necessary for the use of your device. Air Hog 7303LX-230 by Mytee.
USER MANUAL Air Hog 7303LX-230 Mytee
natural_image
Line drawing of a mechanical cleaning or inspection device with wheels and control panel (no text or symbols)Dear Customer:
Congratulations on the purchase of your new Air Hog™ Vacuum Booster. As technology continues to develop you can work confidently knowing that both Mytee Products and its employees are equally dedicated to developing with the industry and its advances.
Like any other piece of machinery or technology, the 7303LX also requires proper maintenance and care to keep the product working over extended use. Neglecting your machine, abusing it or not operating it properly can void its warranty and prevent the machine from performing to the quality and standard you'd expect out of the Mytee Products line.
If you have any warranty concerns or questions, please review this manual thoroughly or do not hesitate to contact your distributor. If there are questions regarding maintenance, replacement, or ordering parts please contact an authorized Mytee Products Service Center. To see an updated list please visit our website at http://www.mytee.com/support/service-centers.
Before using your Mytee product, please read this manual thoroughly.
Sincerely,
Mytee Customer Care Dept.
IMPORTANT SAFETY INFORMATION....4
1 AT A GLANCE 6....
1.1 - Technical Specifications 6....
1.2 - Included with the Air Hog ^TM 6....
1.3 - Air Hog™ Front View.7....
1.4 - Air Hog™ Rear View 8....
1.5 - Switch Plate 9....
2.1 - Powering the Air Hog™.10....
2.2 - Connecting Hoses 10....
2.3 - Air Hog™ Booster Configurations 10....
2.4 - Using the Air Hog™ as a Stand-Alone Extractor 10....
2.5 - Emptying the Recovery Tank 10....
2.6 - Setting Up the Air Hog™ as a Booster 11
2.7 - Setting Up the Air Hog™ as a Stand-Alone Extractor ..... 12
3 MACHINE MAINTENANCE ....13
3.1 - Filter Maintenance 13
3.2 - Ball Float Maintenance 13
4 ACCESSORIES FOR YOUR AIR HOG™ 14
5 TROUBLESHOOTING....15
IMPORTANT SAFETY INFORMATION
Grounding Instructions
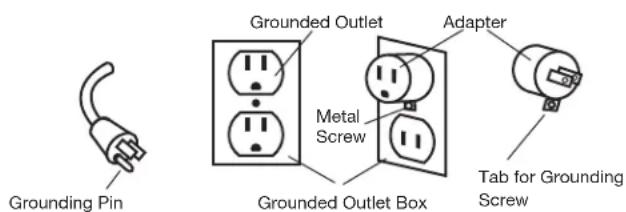
This machine must be grounded. If it should malfunction or break down, grounding provides a path of least resistance for electrical shock. This machine is equipped with a cord having an equipment-grounding conductor and grounding plug. The plug must be plugged into an appropriate outlet that is properly installed in accordance with all local code and ordinances. Do not remove ground pin; if missing, replace plug before use.

DANGER
Improper installation of the equipment-grounding conductor can result in a risk of electric shock. Be sure to check with a qualified electrician or service person if you are in doubt as to whether the outlet is properly grounded. If the plug will not fit in the outlet do not modify the plug on the machine's cord, instead have a proper outlet installed by a qualified technician.
This machine is for use on a nominal 120-volt circuit and with a grounding plug similar to the one in Figure 1 below. If a proper outlet is not available, follow the illustrations of Figure 2 & 3 to install a temporary-grounding plug. This temporary work-around should be used only until a proper outlet (Figure 1) can be installed by a qualified electrician. When and if this type of adapter is employed, screw the adapter's extended tab into place with a metal screw. However, grounding adapters are not approved for use in Canada.
Again, be sure to check the grounding pin for damages and replace if necessary.
The Green, or Green-Yellow, wire in the cord is the grounding wire. When replacing a plug, this wire must be attached to only the grounding pin.
DO NOT use extension cords.
Please Note for America use only.
text_image
Grounding Pin Grounded Outlet Metal Screw Adapter Tab for Grounding ScrewFigure 1
Figure 2 Figure 3
Parts and Service
Please contact Mytee service personnel or a Mytee authorized Service Center using Mytee original replacement parts and accessories if repairs need to be performed. When and if calling Mytee for support, please have your Model and Serial Number available for faster assistance.
Name Plate
The Model and Serial Number are located on the lower half of the back of the machine near the power plug and will be required for ordering replacement parts. You can use the space provided in this manual to note down both for future referencing.
Unpacking the Machine
When your new machine is delivered, please carefully inspect both the shipping carton and the machine for damages. If damage is evident, save both the shipping carton and machine so that the delivering carrier can inspect it. Contact the carrier immediately to file a freight claim if there has been any damage.
Caution and Warnings
Symbols
Mytee uses the symbols below to signal potentially dangerous conditions. Always read this information carefully and take the necessary steps to protect personnel and property.

DANGER
Is used to warn of immediate hazards that will cause severe personal injury or death.

WARNING
Is used to call attention to a situation that could cause severe personal injury.

Is used to call attention to a situation that could cause minor personal injury or damage to the machine or other property. When using an electrical appliance, basic precautions should always be followed, including the following: Read all instructions before using this machine. This product is intended for commercial use only.
To reduce the risk of fire, electrical shock, or injury:
-
Read all instructions before using equipment.
-
Use only as described in this manual. Use only manufacturer's recommended attachments.
IMPORTANT SAFETY INFORMATION
- Always unplug power cord from electrical outlet before attempting any adjustments or repairs.
- Do not unplug by pulling on cord. To unplug, grasp the plug, not the cord.
- Do not pull or carry by cord. Do not close a door on cord or pull cord around sharp edges or corners.
- Do not run appliance over cord. Keep cord away from heated surfaces.
- Do not use with damaged cord or plug. If cord is damaged, repair immediately.
- Do not use outdoors or on wet surfaces and/or standing water.
- Always unplug or disconnect the appliance from power supply when not in use.
- Do not allow to be used as a toy. Close attention is necessary when used by or near children.
- Do not use in areas where flammable or combustible material may be present.
- Do not leave the unit exposed to harsh weather elements. Temperatures below freezing may damage components and void warranty.
- Use only the appropriate handles to move and lift unit. Do not use any other parts of this machine for this purpose.
- Keep hair, loose clothing, fingers, and all parts of the body away from all openings and moving parts.
- Use extra care when using on stairs.
- To reduce the risk of fire or electric shock, do not use this machine with a solid-state speed control device.
- The voltage and frequency indicated on the name plate must correspond to the wall receptacle supply voltage.
- When cleaning and servicing the machine, local or national regulations may apply to the safe disposal of liquids which may contain: chemicals, grease, oil, acid, alkalines, or other dangerous liquids.
- Do not leave operating unattended.
1 - AT A GLANCE
1.1 - Technical Specifications
| Recovery Tank | 7 Gallons |
| Vacuum | Dual Mytee® Hybrid Ametek vacuum motors |
| CFM | 225-250 |
| Water Lift | 182" |
| Pump-Out GPM | 3.3 |
| Power Consumption | Cord 1: 15 amps @ 115V 60HzCord 2: 15 amps @ 115V 60Hz |
| Machine Weight | 40 lbs. |
| Machine Dimensions | 23" x 12" x 26.5" |
| Power Cord | Dual 25' 12/3 |
1.2 - Included with the Air Hog™
natural_image
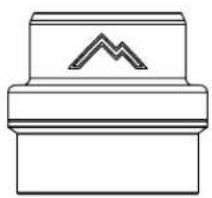
Simple line drawing of a mechanical component with a mountain symbol on top (no text or labels)H141V Cuff-Lynx™ (2" Female Cuff-Lynx™ x 1.5" Female Hose)

natural_image
Simple line drawing of a bottle with a cap and side tabs (no text or symbols)H110V Cuff-Lynx™ (2" Female Cuff-Lynx™ x 2" Female Hose)
natural_image
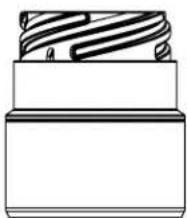
Cross-sectional diagram of a mechanical component with helical grooves (no text or symbols)H136V Cuff-Lynx™ (2" Male Cuff-Lynx™ x 2" Female Hose)
natural_image
Technical line drawing of a mechanical component with helical grooves (no text or symbols)
natural_image
Abstract geometric pattern with a grid and an oval shape at the bottom (no text or symbols)
text_image
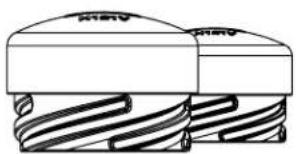
PIGLET® FILTERS2x H121V Cuff-Lynx™ Plugs G076 Mesh Filter Bag G008 Pack of 25 Piglet™ Filters
1.3 - Air Hog™ Front View
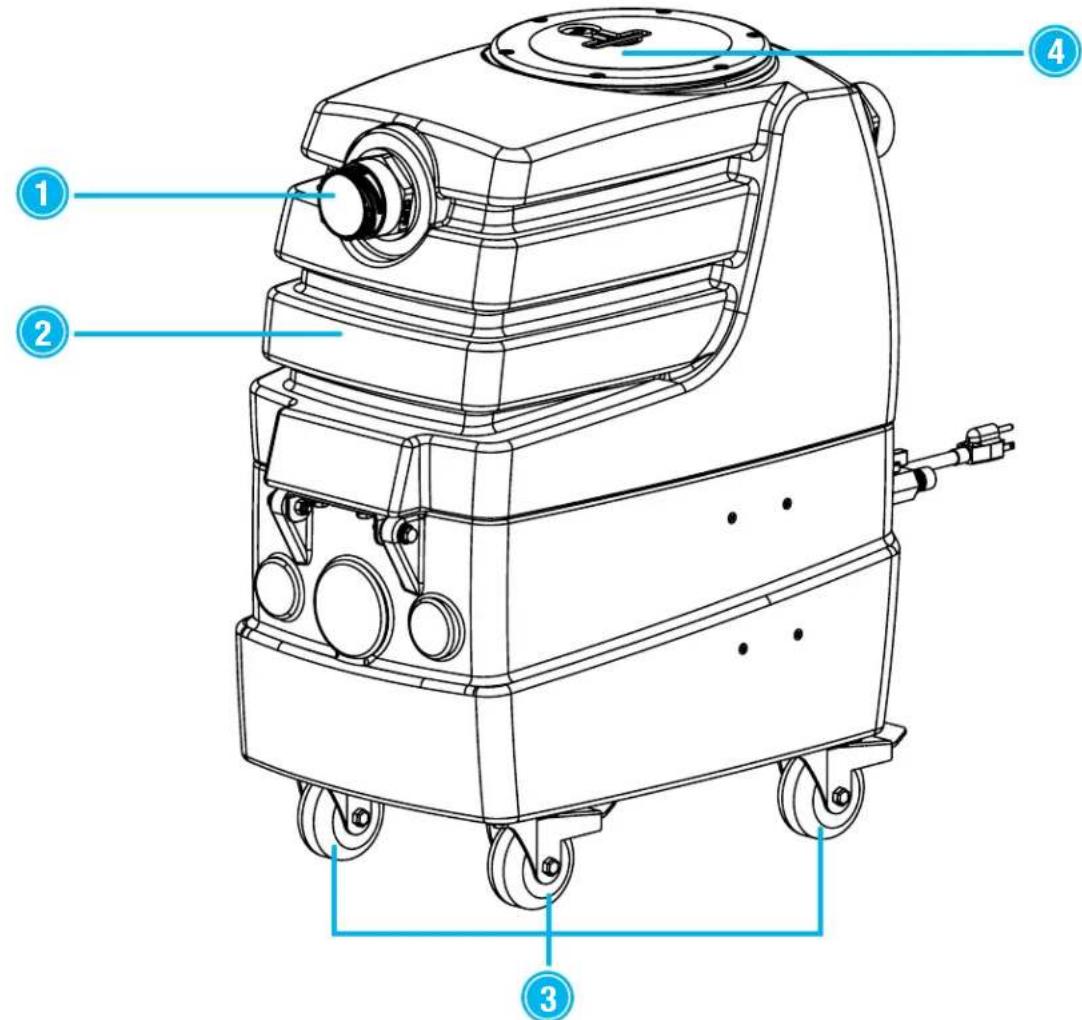
text_image
Technical diagram of a cleaning or inspection device with numbered parts labeled 1 to 4- 2" Male Cuff-Lynx™ Starter
2.7 Gallon Recovery Tank
-
3" Locking Casters
-
See-Thru Recovery Tank Lid
1 - AT A GLANCE
1.4 - Air Hog™ Rear View

text_image
Technical diagram of a mechanical device with numbered parts labeled 1 to 5- Rear Booster Ports with Cuff-Lynx™ Plugs
-
Pump-Out Valve & Garden Hose Quick Connection
-
Power Cord Pigtails
- Switch Plate
- Rear Latch For Opening Machine
1.5 - Switch Plate
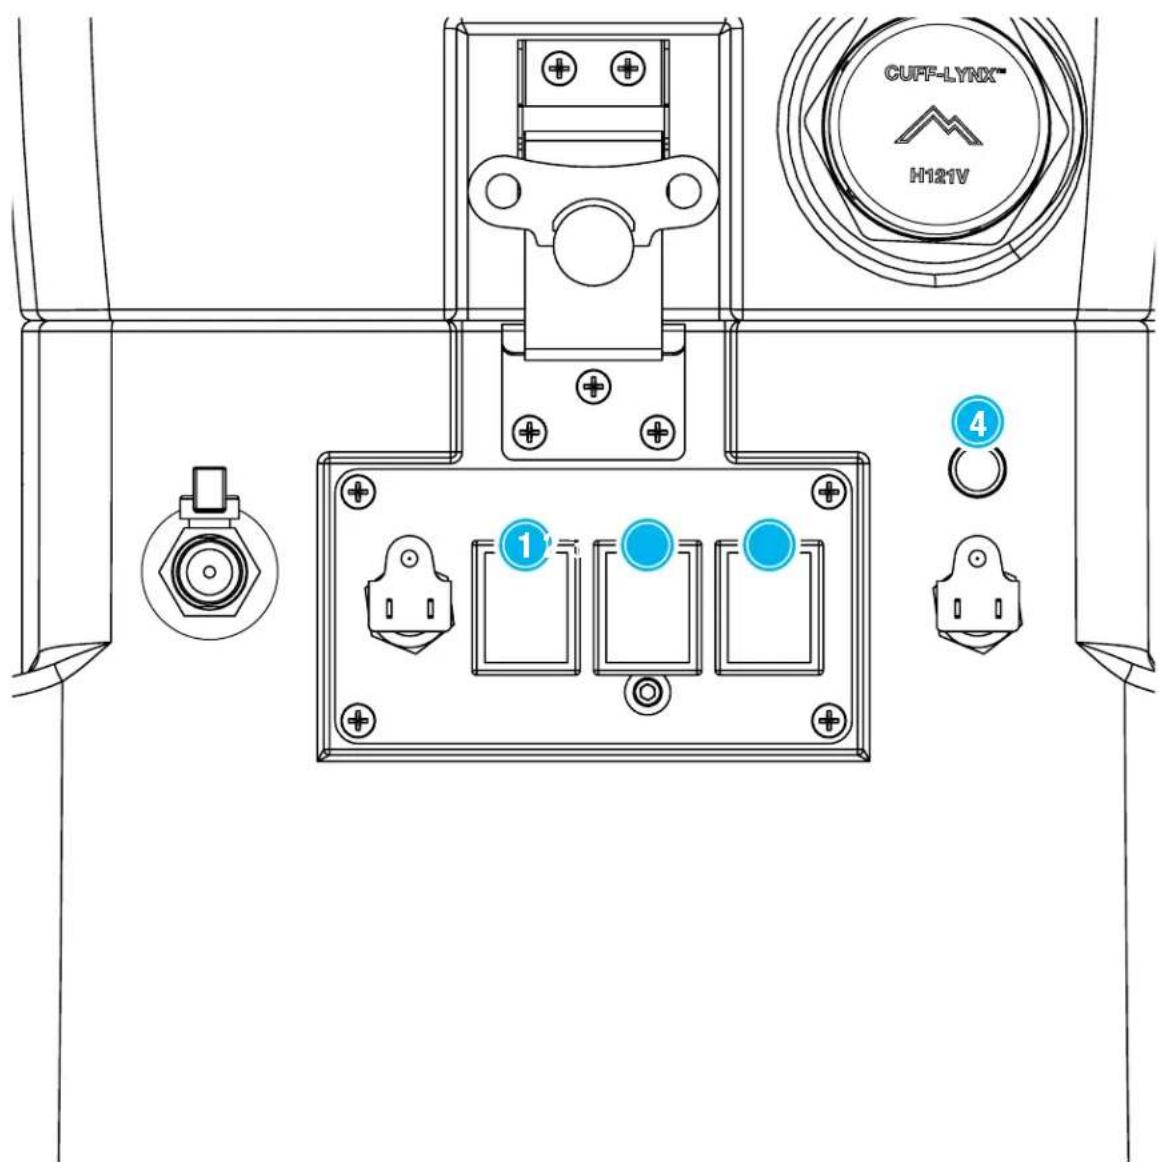
text_image
CUFF-LYNX™ H121V ① ④-
Vacuum Switch 1
-
Pump-Out Switch
-
Vacuum Switch 2
-
Dual Circuit Indicator Light
Take the included mesh filter bag and place it over the pump-out filter inside the recovery tank. This filter helps prevent any solid debris from damaging the pump-out.
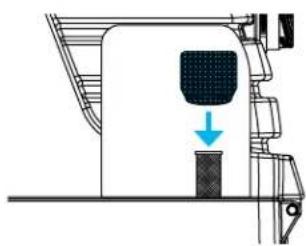
natural_image
Technical line drawing of a sewing machine component with a downward arrow indicating compression or adjustment (no text or symbols)2.1 - Powering the Air Hog™

natural_image
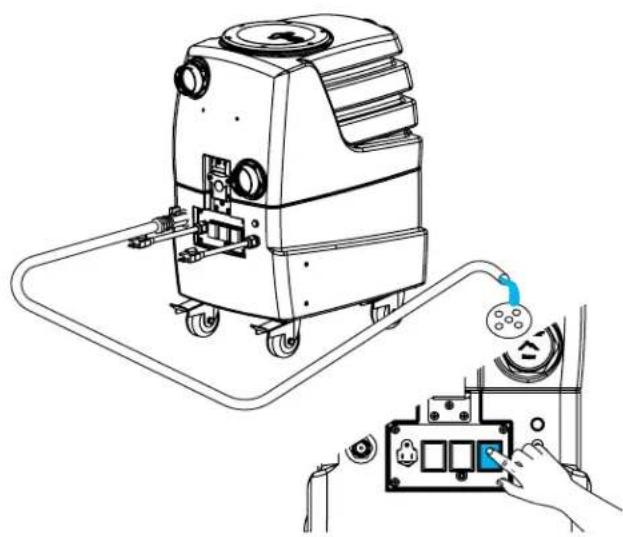
Diagram of a device rear panel with connected ports and a speaker, no text or symbols presentEach power cord on the Air Hog™ requires a grounded 15 amp outlet. The dual circuit indicator light and tone will activate when this is achieved.
2.2 - Connecting Hoses
text_image
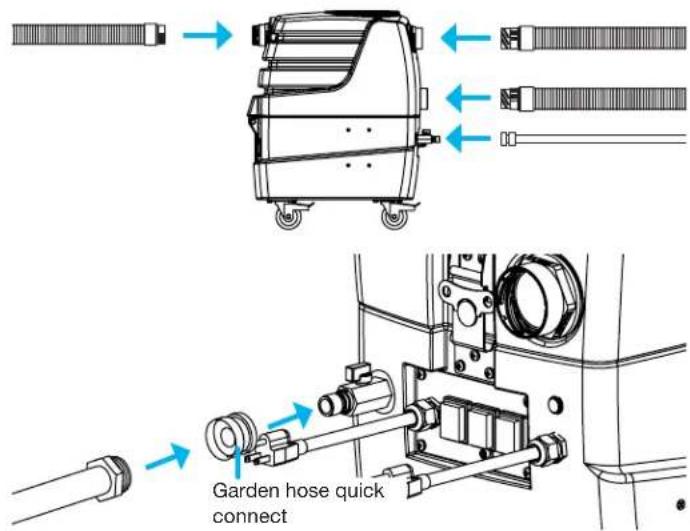
Garden hose quick connectUse the included H141V or H110V female Cuff-Lynx™ Hose Connectors to connect 1.5" or 2" vacuum hose to the Cuff-Lynx™ starter on the front of the Air Hog™. The included H136V male Cuff-Lynx™ Connector can be used to connect 2" vacuum hose to either rear booster port. To attach a garden hose for use with the pump-out, thread the included garden hose quick connect onto the garden hose. The hose can then easily snap onto the Air Hog's™ pump-out fitting.
2.3 - Air Hog™ Booster Configurations
The Air Hog™ can be set up as a booster in multiple configurations on its own or daisy-chained with other Air Hogs™. See page 11 for more details.
2.4 - Using the Air Hog™ as a Stand-Alone Extractor
The Air Hog™ can also be set up as a stand-alone extractor. See page 12 for more details.
2.5 - Emptying the Recovery Tank
natural_image
Line drawing of a cleaning or cleaning machine with attached electrical panel and control panel (no text or symbols)The recovery tank can be emptied using the pump-out feature. Attach a garden hose to the pump-out fitting, place the other end of the hose in a drain or receptacle, and press the PUMP-OUT switch on the switchplate.
2.6 - Setting Up the Air Hog™ as a Booster
text_image
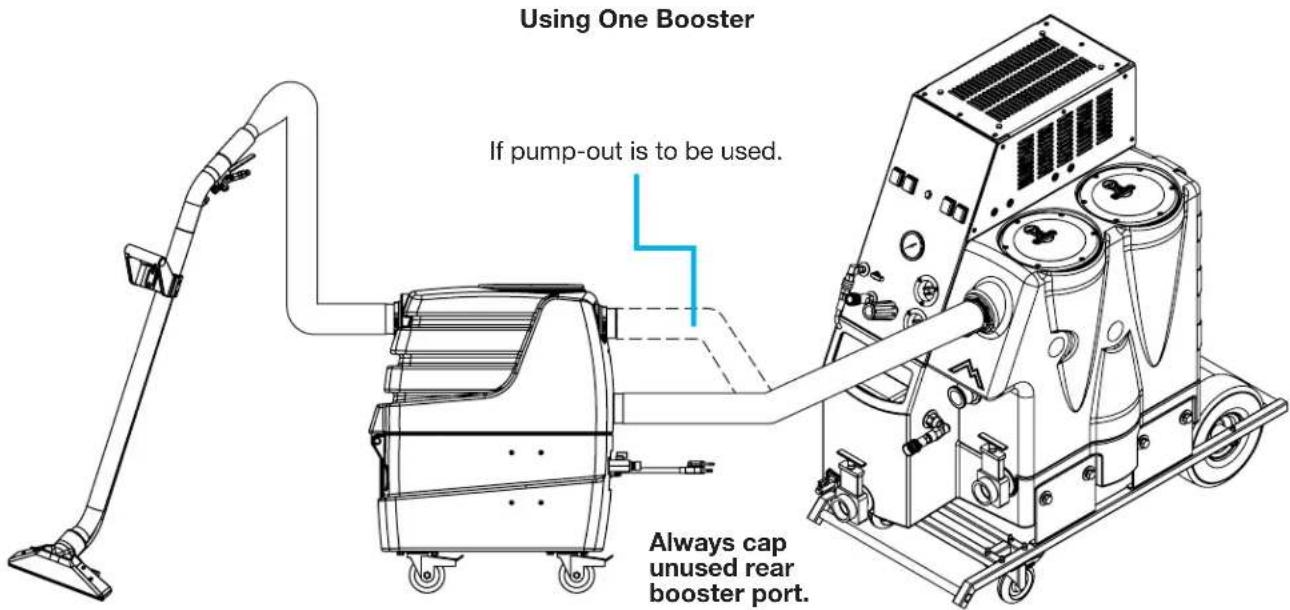
Using One Booster If pump-out is to be used. Always cap unused rear booster port.If the pump-out will be used, connect vacuum hose from extractor to top rear booster port and cap the bottom one. If not, connect hose to the bottom rear booster port and cap the top one. Recovered water will flow through the Air Hog™ to the extractor.
IMPORTANT: If the base extractor is not powerful enough to overcome the Air Hog's™ suction, use just one of the Air Hog's™ vacuums.
text_image
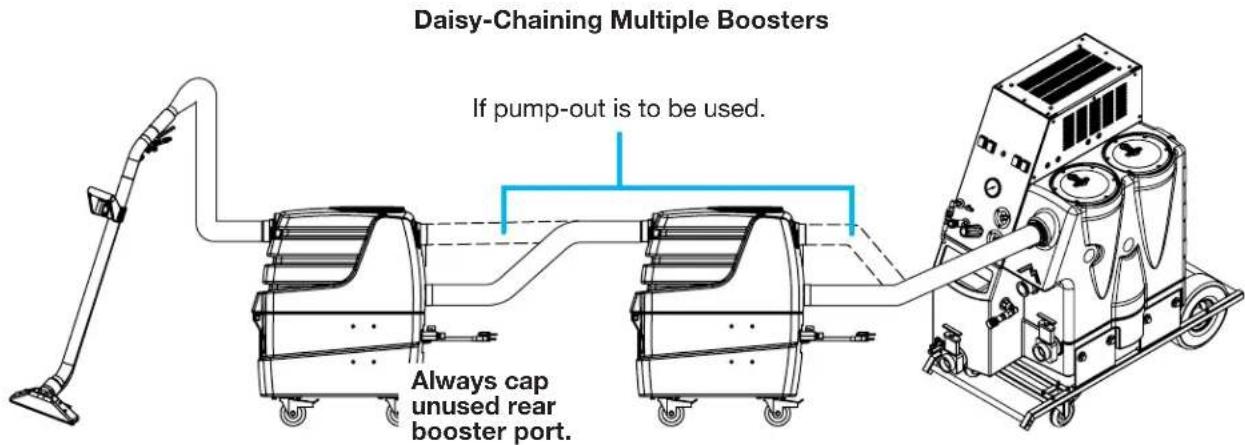
Daisy-Chaining Multiple Boosters If pump-out is to be used. Always cap unused rear booster port.If the pump-out will be used, connect vacuum hose from extractor to top rear booster port and cap the bottom one. If not, connect hose to the bottom rear booster port and cap the top one. Recovered water will flow through the Air Hog™ to the extractor.
Place each Air Hog™ after at least 50 feet of hose in order to maintain suction on very long hose runs.
IMPORTANT: If the base extractor is not powerful enough to overcome the Air Hog's™ suction, use just one of the Air Hog's™ vacuums.
2.7 - Setting Up the Air Hog™ as a Stand-Alone Extractor

text_image
Both booster ports plugged.The Air Hog ^™ does not have a solution tank or solution pump. However, it can be used to extract pre-sprayed solution from carpet.
With both booster ports plugged, attach a carpet wand via vacuum hose and attach a garden hose to the pump-out fitting (if pump-out is to be used). Switch on the vacuum (and pump-out, if desired) and begin extraction.
In order to keep the Air Hog ^™ running smoothly and reduce the risk of damage to the machine and subsequent downtime, Mytee recommends following the maintenance schedule below:
3.2 - Ball Float Maintenance
The ball float prevents recovered dirty water from rising too high and damaging the vacuum motors. Check regularly to make sure the mesh screen is free of debris.
| Maintenance Item Daily Weekly | ||
| Clean and inspect tanks. | X | |
| Clean and inspect hoses. | X | |
| Check and clean internal filters. | X | |
| Check power cable. | X | |
| Clean machine with all-purpose cleaner and cloth. | X | |
| Remove mesh filter bag from recovery tank and clean. | X | |
| Inspect vacuum hoses for holes and loose cuffs. | X | |
| Lubricate wheels with water resistant oil. | X | |
| Inspect machine for water leaks and loose hardware. | X |
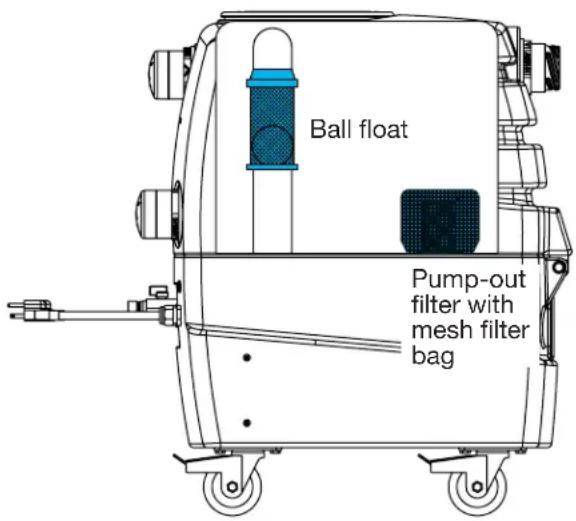
text_image
Ball float Pump-out filter with mesh filter bag3.1 - Filter Maintenance
The Air Hog ^™ has a mesh screen filter on the end of the intake for the pump-out in the recovery tank. This filter, along with the G079 mesh filter bag, should be checked and cleaned after each use.
4 - AVAILABLE ACCESSORIES

natural_image
Line drawing of a handheld device with lever and handle (no text or symbols)
natural_image
Line drawing of a vertical metal stand with attached bracket and handle (no text or symbols)8300-EZ - 12" Dual Jet Wand 8390-EZ - 10" Single Jet Wand
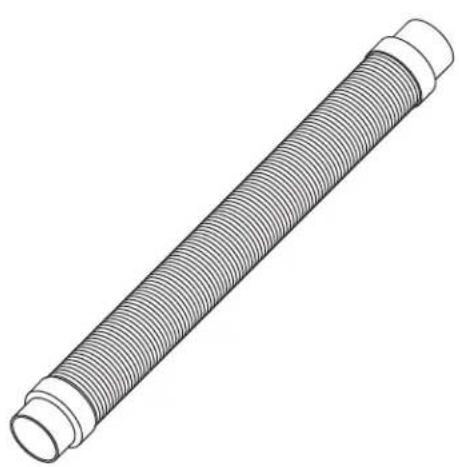
natural_image
Isometric line drawing of a threaded pipe with flanged ends (no text or symbols)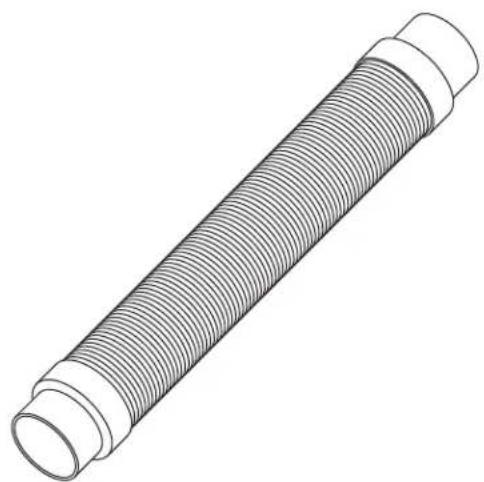
natural_image
Isometric line drawing of a threaded pipe fitting (no text or symbols)H294 - 1.5" x 25' Vacuum Hose H184 - 2" x 25' Vacuum Hose
5.1 - Vacuum Troubleshooting
| Vacuum is not turning on. | |
| Possible Cause Solution | |
| Vacuum may not be getting power. | Check the electrical connections and the switch.Look for loose or damaged wires.To check the switch:Unbolt the switch plate.Take a picture of the layout of the wires or tag the wires for future reference. Switch the wires from the vacuum switch with the wires from the pump-out switch. Turn on the pump-out switch.If the vacuum turns on,then you know the vacuum switch is bad. |
| Vacuum is not producing suction. | |
| Possible Causes Solutions | the recovery tank. |
| Recovery tank is full. Empty | Open the machine and find the hose running from the recovery tank to the vacuum motor. Check if it is disconnected. If so, reconnect it. If it has a leak, replace the hose (Part # PH627 if 1.5", PH628 if 2"). |
| If the vacuum exhausts but there is no suction, then the hose from the recovery tank to the vacuum motor is disconnected. | |
| Vacuum hose blockage (if there is no suction or exhaust). | Check for blockage in the hose, starting from the cleaning tool to the machine. |
| Clogged filter in vacuum tank. | Clean out filter regularly. |
| Hose cuffs are loose and causing air leakage. | Tighten all hose cuffs regularly as may loosen over time. Use a glue to prevet cuffs from coming loose (optional). |
| Lid on tank is loose and is causing air leakage. | Make sure the lid is tight. |
| Vacuum blows water out the exhaust. | |
| Possible Causes Solutions | |
| Foam building up in the recovery tank. | Use Mytee’s Auto Defoamer Kit (Part # A688). |
| Boot behind vacuum port is turned the wrong way. | Make sure this plastic boot is turned toward the right wall of the machine and not toward the ball float. |
| There is a loud grinding noise coming from the vacuum. | |
| Possible Cause Solution | |
| Debris has been sucked into the vacuum motor chamber. Usually results from dry vacuuming. | Replace the vacuum motor. To avoid repeat problem, DO NOT dry vacuum with your extractor. |
5.2 - Pump-Out Troubleshooting
| No water flow from pump-out. | |
| Possible Causes Solutions | |
| Filter is clogged. Clean the filter. | |
| Kinked hose inside the machine. | Open the machine and check hoses. If any hoses are kinked, undo the kink. |
NOTES

Mytee Products, Inc.
13655 Stowe Dr.
Poway, CA 92064
www.mytee.com
© 2018 Mytee Products, Inc.
Printed in the USA