
TripMaker RVND - Gps Rand McNally - Free user manual and instructions
Find the device manual for free TripMaker RVND Rand McNally in PDF.


| Product Type | GPS Navigation Device with RV-specific features |
| Models | TripMaker RVND 5510 and 7710 |
| Power Source | 12V vehicle charger, 100/240V wall charger, built-in rechargeable battery |
| Battery Charging | First use: charge for 2 hours; charging indicator: green (full), red (charging) |
| Display | Touch screen with adjustable brightness and day/night color modes |
| GPS Reception | Requires clear line of sight to sky; optional external GPS antenna for metalized windshields |
| Navigation Features | Turn-by-turn directions, 2D/3D maps, route options (fastest/shortest), multi-stop routes, detours, predictive traffic (select units) |
| RV-Specific Functions | RV mode with vehicle dimensions/weight, RV point of interest search, camp grounds, travel centers, warnings for low bridges, sharp curves, etc. |
| Points of Interest (POI) | Consumer POIs, RV-related POIs, Rand McNally Editor's Picks, custom POI import via Dock |
| Pre-loaded Trips | Best of the Road, Weekend Getaways, Scenic Tours, Regional Road Trips |
| Additional Tools | Virtual dashboard, trip computer, unit converter, calculator, checklists, maintenance notes, trails |
| Real-Time Traffic | Optional service (requires accessory); displays flow and incidents |
| Software Updates | Via Rand McNally Dock application on PC/Mac |
| Connectivity | Mini-USB port (charging and data), audio output socket, external GPS port, Micro SD card slot (future use) |
| Cleaning | Use only a moist cloth; do not use sharp objects on screen; device not waterproof |
| Safety | Do not mount in airbag deployment zone; follow traffic laws; do not open casing; do not attempt battery replacement |
| Customer Support | Toll-free: 800-333-0136, Mon-Fri 7am-6pm CST, Email: RVNDSupport@randmcnally.com |
| Operating Temperature | 32°F to 120°F (0°C to 49°C) |
| Language Support | Multiple languages (selectable in settings) |
Frequently Asked Questions - TripMaker RVND Rand McNally
User questions about TripMaker RVND Rand McNally
0 question about this device. Answer the ones you know or ask your own.
Ask a new question about this device
Download the instructions for your Gps in PDF format for free! Find your manual TripMaker RVND - Rand McNally and take your electronic device back in hand. On this page are published all the documents necessary for the use of your device. TripMaker RVND by Rand McNally.
USER MANUAL TripMaker RVND Rand McNally
Rand McNally, Best of the Road and TripMaker are registered trademarks and RVND is a trademark of RM Acquisition, LLC d/b/a Rand McNally.
NAVTEQ ON BOARD is a trademark of NAVTEQ.
InfoGation is a registered trademark of InfoGation Corporation.
Other products and companies mentioned herein may be trademarks of their respective owners.
© 2011 Rand McNally. All rights reserved.
Portions © 2011 NAVTEQ. All rights reserved. This data includes information taken with permission from Canadian authorities, including © Her Majesty the Queen in right of Canada, ©Queen's Printer for Ontario.
Portions ©2011, Infogation. All rights reserved.
Portions Zenrin Exit Authority© 2011 ZENRIN USA, Inc. All rights reserved.
Portions The RVer's Friend ©2011 TR Information Publishers. All rights reserved.
Portions © 2010 Allstays, LLC. All rights reserved.
Portions ©2010 BringFido.com. All rights reserved.
Portions ©2011 Fishidy, LLC. All rights reserved.
Patent No. 7,580,791
Rand McNally follows a continuous improvement process and reserves the right to provide enhancements that may not be reflected in the pictures and specifications in this manual.
The information contained herein may be changed at any time without prior notification. Neither this manual nor any parts thereof may be reproduced for any purpose whatsoever without the express written consent of RM Acquisition, LLC. d/b/a Rand McNally, Inc, nor may it be transmitted in any form either electronically or mechanically, including photocopying and recording. All technical specifications, drawings, etc. are subject to copyright law.
FCC Notice
This device complies with part 15 of the FCC rules. Operation is subject to the following two conditions: (1) this device may not cause harmful interference, and (2) this device must accept any interference received, including interference that may cause undesired operation.
This equipment has been tested and found to comply with the limits for a Class B digital device, pursuant to part 15 of the FCC rules. These limits are designed to provide reasonable protection against harmful interference in a residential installation. This equipment generates, uses, and can radiate radio frequency energy and may cause harmful interference to radio communications if not installed and used in accordance with the instructions. However, there is no guarantee that interference will not occur in a particular installation. If this equipment does cause harmful interference to radio or television reception, which can be determined by turning the equipment off and on, the user is encouraged to try to correct the interference by one of the following measures:
• Reorient or relocate the receiving antenna.
- Increase the separation between the equipment and the receiver.
- Connect the equipment into an outlet that is on a different circuit from the GPS unit.
- Consult the dealer or an experienced radio/TV technician for help.
Contents
Trademarks ......ii
FCC Notice ....iii
Welcome
Your TripMaker RVND 7710 ....1
Your TripMaker RVND 5510 2
About GPS 3
Customer Support 4
Getting Started
What's Included 5
Important Safety Information 6
Navigation Safety 6
Installation Safety 7
Device Safety 8
Battery Power Light 9
Charge the Battery 10
Charge with the Wall Charger 10
Charge with the Vehicle Charger ....10
Install the Cradle and Mount 11
Power the Device 12
Turn the Device On 12
Basic Operation
Start the TripMaker RVND....13
The Main Menu 14
Tapping the Screen 15
Using Keyboards 16
Special Keys....16
Routing Messages ....17
Basic Settings 18
Select a Language 18
Select a Keyboard Type 18
Volume Settings 19
Set RV Information 20
Set ETA Adjustment 20
Select RV or Car Mode 21
Set to Calculate Shortest Route or Fastest Route 21
Select a Voice for Spoken Instructions .....22
Select a Vehicle Icon and Color 23
Set Warnings 24
Maps
Route Map Window 25
Select a Display Time Option ......27
Exit POIs Slide Out List....28
Detail View 31
Highway View 32
Route Summary 33
Summary Map View 34
Current Location Information 35
View Current Location Information ....35
Junction View 36
Virtual Dashboard 37
Show/Hide the Virtual Dashboard ....38
Gather Trip Information 38
Automatically Reset Trip Information ....39
Detours 40
Detour Around Part of the Route 40
Detour Around a Specific Roadway ....41
Detour Using the Detail View Route Display Option 42
Detour Using the Highway View Route Display Option 42
Tap on the Map and Detour Around a Route Segment 43
Cancel a Route 44
Using Predictive Traffic (select Units) ....45
Destinations
Destination Search Auto-Complete Feature ....48
About City Street Names 49
Expand Search for Street Names ....49
Select a City 50
Find Addresses 51
Location Selection Window 51
Search for an Address 52
Search For a City Center 53
Search For an Intersection 54
Search by ZIP Code for an Address 55
Search by ZIP Code for an Intersection .....56
Search by Latitude/Longitude .....57
Point of Interest Windows 58
Points of Interest Selection Window 58
Points of Interest (POI) Category Window .....59
Points of Interest (POIs) Searches 60
Select a Quick Stop POI 61
Select an RV Point of Interest 62
Select and Filter Travel Center Amenities .....64
Select a Rand McNally Editor's Pick 65
Select a Consumer Point of Interest By Category ...67
Select a Consumer Point of Interest by Name .....68
Search for Nearby Points of Interest (POIs) ......69
Custom POI Imports....73
Changing the Custom POI Display or Warning Settings....75
Rand McNally Trips....76
Rand McNally Trips Window 76
Select a Rand McNally Best of the Road® Route ..77
Select a Rand McNally Weekend Getaway......78
Select a Rand McNally Scenic Tour....79
Select a Rand McNally Regional Road Trip......80
Tap on the Map 81
Tap on the Map and Avoid the Location .....81
Tap on the Map and Route to the Location .....82
Rate a RV-Related Point of Interest 83
Address Book 84
Save a Location in the Address Book 84
Sort Address Book Entries by Name, Distance or Date....85
Select a Location from the Address Book .....86
Create an Address Book Group ....87
Add an Address to a Group 88
Remove an Address From a Group 89
Select a Location From a Group 90
History List 91
Select a Location from the History List 91
Multi-Stop Routes
Create a Multi-Stop Route 92
Add Locations to a Multi-Stop Route .....93
Remove a Stop from a Multi-Stop Route .....94
Select and Run a Saved Route 95
Delete a Multi-Stop Route 96
Optimize Routes 97
Optimize a Route Manually .....97
Optimize a Route Automatically 98
Destination Confirmation Windows
Address Confirmation Window 99
Consumer Point of Interest Confirmation Window 100
RV-Related Point of Interest Confirmation Window ...101
Rand McNally Editor's Picks Confirmation Window 102
Address Book Confirmation Window 103
Real-Time Traffic (Optional Service)
Real-Time Traffic Window 104
Access the Real-Time Traffic Window....104
View Real-Time Traffic 105
RV Tools
Add Tasks to a Checklist ....109
Remove Tasks From a Checklist....110
Delete a Checklist ....111
RV Maintenance Notes 112
View Maintenance Note Information ....112
Add a Maintenance Note....113
Update an Existing Maintenance Note ....114
Delete a Maintenance Note....115
Trails....116
Create a New Trail 116
Rename an Existing Trail 117
Delete a Trail....118
Display a Trail....119
Set Warnings 120
Calculate a Mileage and Driving Time ....121
View Atlas Information 122
Send a Message to Rand McNally 123
Send a Message About Your Current Location 123
To Send a Message About Speed Limit Difference
While in Navigation Mode:....124
Send a Message About a Different Location ...125
Send a Message About a Location on the Map 126
Use the Unit Converter 127
Use the Calculator 128
Customize
RV Information 129
General Preferences (RV or Car) 130
Route Preferences 132
Map Preferences 134
Warning Options 136
Rand McNally Dock
Download and Install....137
Rand McNally Dock Main Window 138
Go to Rand McNally Website....139
Updates....140
View RVND Version Information ....141
View Manual 142
Tell Rand McNally....143
Go to RVND Support Website....144
Index
Welcome

natural_image
Illustration of a tablet device with a blank screen and a location pin (no text or symbols on the device itself)


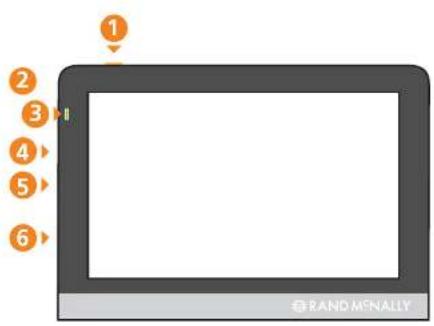
Your TripMaker RVND 7710
1 Power Key
Turns the device Off or On.
2 Stylus (in cradle)
Use the stylus for extended reach when tapping the screen.
3 Micro SD Card Slot
For future use.
4 Mini-USB Port
Connects to a power source (computer, vehicle charger, or wall charger). Also used with the Rand McNally Dock application.
5 Audio Output Socket
Connect to a powered external speaker. (Not provided).
6 Reset Button
Resets and restarts the device.
7 Battery Power Indicator
Shows charging status.
8 External GPS Port
Used with an optional GPS antenna in cases where clear view of the sky is blocked by metal objects or metalized windshields. (Antenna not provided.)
9 Speaker
Issues spoken road instructions and maneuvers.
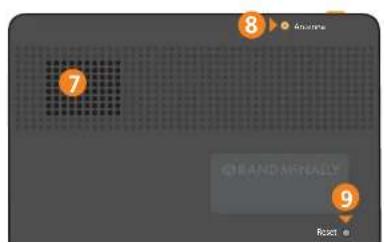
Your TripMaker RVND 5510
1 Power Key
Turns the device Off or On.
2 Stylus (in cradle)
Use the stylus for extended reach when tapping the screen.
3 Battery Power Indicator Shows charging status.
4 Audio Output Socket
Connect to a powered external speaker. (Not provided).
5 Micro SD Card Slot For future use.
6 Mini-USB Port Connects to a power source (computer, vehicle charger, or wall charger). Also used with the Rand McNally Dock application.
7 Speaker Issues spoken road instructions and maneuvers.
8 External GPS Port Used with an optional GPS antenna in cases where clear view of the sky is blocked by metal objects or metalized windshields. (Antenna not provided.)
9 Reset Button Resets and restarts the device.
About GPS
The Global Positioning System (GPS) is a constellation of satellites that a GPS receiver uses to calculate geographical positions. To determine a position, data from at least three satellites is required. To determine altitude, the data from four or more satellites is required. Accuracy of the positioning varies from 10 feet to several hundred feet, depending on vehicle placement and the surrounding environment.
Geographical terrain (such as mountains), man-made structures (such as highway overpasses, bridges, and tall buildings), as well as weather can interfere with the GPS signal. For best GPS reception, position the TripMaker RVND and mount with a clear line of sight to the sky.
Some vehicles may have a limited view of the sky due to metal sun shields or a metallized windshield coating. If your unit does not appear to receive signals well inside your vehicle but works well outside, contact Rand McNally for an available external antennae.
Map data used by the TripMaker RVND includes the geographical coordinates for address locations and points of interest (POIs). With GPS reception, your device calculates a route to your selected location.
Customer Support
Call toll-free:
800-333-0136
Service hours:
Monday through Friday, 7 a.m. to 6 p.m. CST
(except official holidays)
E-mail:
RVNDSupport@randmcnally.com
Web:
www.randmcnally.com/rvgps
Mailing Address:
Rand McNally
9855 Woods Drive
Skokie, IL 60077
Getting Started
What's Included
Your TripMaker RVND includes:
- TripMaker RVND navigation device
- Mount and cradle
• 12V vehicle charger
• Home charger (100/240V)
USB cable - Extra fuse
- Quick Start Guide
Important Safety Information

Navigation Safety
Caution: Use this navigation device at your own risk.
Caution: Use this navigation device only when it is safe to do so.
Caution: Look at the display only when it is safe to do so.
Caution: Traffic regulations always have priority over any instructions from the navigation system.
Caution: Follow navigation system instructions only when local regulations and road traffic allow you do so.
Caution: Make sure that the mount is securely mounted and properly adjusted before each trip.

Note: If you do not understand the spoken instructions, or are unsure of what to do next, refer to the navigation map on your navigation device.

Installation Safety
Caution: Make sure that the mount does not impair the driver's visibility.
Caution: Do not attach the mount within the airbag deployment zone.
Caution: When installing the mount, make sure that it does not pose a risk in the event of an accident.
Caution: Do not run cables directly next to safety-relevant devices and power supplies.
Caution: After installation, check all safety-relevant equipment in the vehicle.
Caution: Connect the wall charger to a 120V or 240V outlet only.
Caution: Connect the vehicle charger to a 12V outlet only.


Device Safety
Caution: Do not use sharp-edged objects on the device touch screen.
Caution: The device is not waterproof and is not protected against water damage.
Caution: Protect the device from extreme temperatures. Operating temperature for the device is between 32 degrees F and 120 degrees F.
Caution: When parking the vehicle for an extended time, to avoid battery drain, hold down the power button for 10 seconds to power off the device.
Caution: Do not open the navigation device casing.
Caution: Do not attempt to replace the battery. For problems with the battery, contact Rand McNally Customer Support.
Caution: Always follow local regulations when disposing of this device.
Note: Make sure that there are no kinks in the cable and that it will not be damaged by any sharp objects.
Note: Use only a moist cloth to clean the navigation device.
Note: Do not pull the cable to unplug the unit.
RVND 5510

Battery Power Light
When the device is charging, the power light on the front of the device displays the status of the built-in battery:
Green Device is plugged in and the battery is fully charged.
Red Device is plugged in and the battery is charging.
RVND 7710

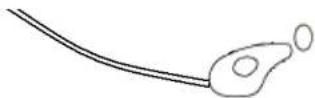
Charge with the Wall Charger

natural_image
Line drawing of a plug connected to a cable and a separate electrical outlet (no text or symbols)Charge with the Vehicle Charger
Charge the Battery
First Time Use
To maximize battery life, plug in the TripMaker RVND for the first two (2) hours of use.
Use the:
• Home charger to power the device from a wall outlet, or
• Vehicle charger to power the device from the battery.
Charge with the Wall Charger
- Plug the mini-USB socket into the port on the side of the device.
- Plug the wall charger into a wall socket.
Charge with the Vehicle Charger
- Plug the mini-USB socket into the port on the side of the device
- Plug the vehicle charger into the vehicle power outlet or cigarette lighter.
- The vehicle may need to be on for the device to charge.

natural_image
Front view of a black rectangular device mounted on a wall-mounted cable, showing its front screen and rear-mounted cable (no visible text or symbols)Install the Cradle and Mount
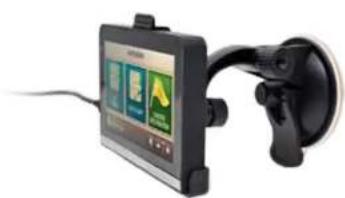
Select an area with a line of sight to the sky and GPS satellites to ensure reliable GPS information.
Note: Obey all local regulations governing the placement of the mount.
Note: Do not place the mount in an airbag deployment area.
- Clean and dry the mounting area.
- Remove the suction cup protective film.
- Adjust the angle of the mount using the thumbscrew and slide the mount onto the cradle.
- Pull the suction cup lever up to release suction.
- Place and hold the mount suction cup against the mounting surface.
- Press the suction cup lever down until it snaps into place.
- Angle the bottom of the device into the cradle and align the two slots on the bottom of the device into the two projections on the cradle.
- Press the top of the device towards the cradle until you hear the upper clip latch into place.
- Plug the power cord into the device and the vehicle's 12 volt power source.
- Adjust the navigation device so that it can be easily seen and does not block the driver's line of sight.

natural_image
Front view of a rectangular electronic device with a blank screen and a gray base labeled 'RAND MENALLY' (no other text or symbols visible)Power the Device
Note: To maximize battery life, plug in the TripMaker RVND for the first two (2) hours of use. See "First Time Use" on page 10.
Turn the Device On
- Press and hold the Power Key for several seconds, then release. (After 5-10 seconds, the RAND McNALLY SPLASH WINDOW displays as the device powers on.)
Turn the Device Off
- Press and hold the Power Key for five (5) seconds, then release. A message displays indicating that the device is powering off.
Reset the Device
When you reset the device, your current route information is lost. Address Book entries, trips, settings, ratings, and messages to Rand McNally are not affected.
Basic Operation
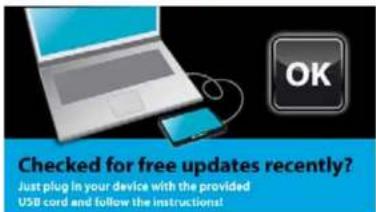
Check for Free Updates Window
Warning and Legal Consent Window
WARNING AND LEGAL CONSENT
You assume full risk and responsibility for using this product. Traffic and safety laws, road conditions, and street signs always take priority over instructions from the navigation system. Use this product only where it is safe and legal to do so. You must read the warnings and disclaimers included in the product materials before using this product.
Press ACCEPT to indicate you have read and accept the
ACCEPT
TUTORIAL & TIPS
Warning and Legal Consent Window (Mid Route)
WARNING AND LEGAL CONSENT
You assume full risk and responsibility for using this product. Traffic and safety laws, road conditions, and street signs always take priority over instructions from the navigation system. Use this product only where it is safe and legal to do so. You must read the warnings and disclaimers included in the product materials.
Start the TripMaker RVND
- Press and hold the device Power Key for several seconds. (Device powers on in 5 seconds.)
- Occasionally during start up, reminder windows such as CHECK FOR FREE UPDATES, DOCK UPDATE REMINDER, or TIPS will display.
- Tap OK.
The WARNING AND LEGAL CONSENT WINDOW displays.
- To view Frequently Asked Questions (FAQs), tips, or a short tutorial on device use, tap Tutorial & Tips.
- Tap Accept or if you turned the device off while on a route, tap Accept and Continue Previous Route.
The MAIN MENU displays.
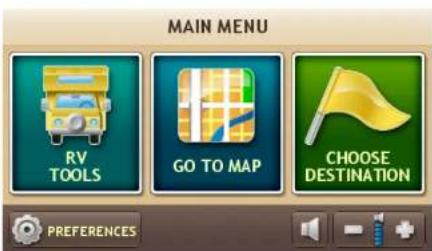

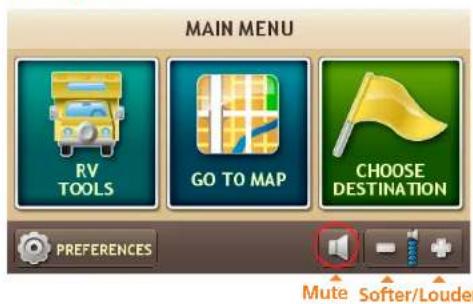
The Main Menu
1 RV Tools
Select to enter RV information, access other tools (such as the Unit Converter, Calculator), or to set warnings.
2 Go To Map
Tap to view the map.
3 Choose Destination
Tap to select an address, point of interest (POI), to create a multi-stop trip, or access Rand McNally exclusive pre-planned trips. Also used to select an Address Book entry or a previously selected POI from the History List
4 Preferences
Tap to set general, route, or map preferences.
5 Mute/Unmute the Speaker
Tap to mute or unmute spoken instructions.
6 Set Volume Louder or Softer
Tap to increase or decrease spoken instructions volume.


Tapping the Screen
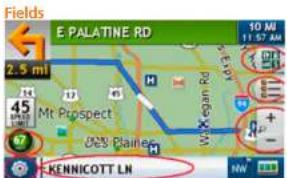
You can tap many areas on the TripMaker RVND screen to select options or view more information.
These include:
Buttons On many windows tapping a button selects an option or goes to another page. An example would be the current speed button. Tap this button to display the Virtual Dashboard.
Words and Icons On some windows, words and icons can be tapped to view more information. An example would be the words Kennicott Ln in the upper left hand picture. Continue tapping to view nearest cross street, and current city and county.
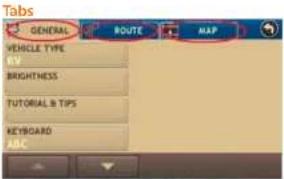
Tabs Some windows have tabs across the top of the window indicating specific categories. For example, Preferences has three tabs, General, Route, and Map. Tap the Route tab to display or change route settings.
Page Up/Page Down Some tabs have more than one page of options. On these windows, use Page Up (▶) and Page Down (▼) buttons to move between pages.
Increase/Decrease Some options can be set to specific values. On these windows, tap on increase and decrease buttons to change settings.
ABC Keyboard

QWERTY Keyboard

Using Keyboards
Software keyboards are used when entering text. See "Select a Keyboard Type" on page 18.
Special Keys

Tap to search for a location by ZIP code.

To save changes and return to previous window.

Tap to view a list of names matching the typed characters.

Tap to view a list of previously selected locations.

Add a space.

Display the Symbol keyboard and type a symbol.

Delete last character and move back one space.
Routing Message Example
WARNING
This route includes states or provinces where your total combined vehicle length exceeds the limit. Check in RV Tools, Road Atlas Info for specific RV length restrictions.
CLOSE
Routing Messages
After selecting a route and tapping Begin New Route, one of the following warning messages may display.
Types of warning messages include:
Via State Violation Your trip takes you thru a state that is in violation.
Intrastate Violation Your trip starts and stops in the same state and the vehicle is in violation.
Interstate Violation If your trip starts and/or stops in two different states and the vehicle is in violation of one of these states.
Language Setting

Basic Settings
Select a Language
From the MAIN MENU:
- Tap Preferences.
- Tap on the Language option.
- Tap and to view the options.
-
Tap on the Language option and select a language.
-
Tap to save changes.
Keyboard Setting

Select a Keyboard Type
For more information, see "Using Keyboards" on page 16.
From the MAIN MENU:
- Tap Preference.
- Tap on the Keyboard option
- Tap and to view the options.
-
Tap on the Keyboard option and select the keyboard type.
-
Tap to save changes.
Volume Controls

Volume Settings
Set the volume for spoken navigation instructions.
Increase Volume

Decrease Volume

Mute Spoken Instructions
- Tap - Button changes to

UnMute Spoken Instructions
- Tap Button changes to

You may also tap on 📋 while in driving mode to immediately mute the Volume.
Volume Controls
RV Info Window
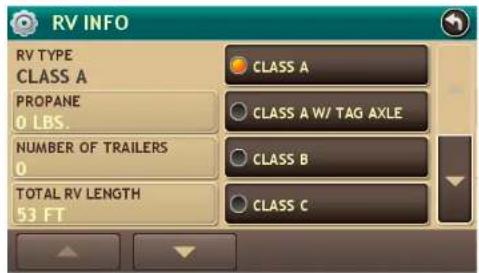
Set RV Information
Note: Only available when in RV mode.
The TripMaker RVND uses RV information to calculate a route for your specific type of vehicle. For more, see "RV Information" on page 129.
From the MAIN MENU:
- Tap RV Tools > RV Info.
- Tap and to view the options.
- Tap the option to be set.
- Enter the new information.
- Tap ↩ to save changes.
RV Info Window

Set ETA Adjustment
Set adjustments to your ETA based on your preferred driving style, or taking potential weather or traffic into account.
Note: Only available when in RV mode. See "RV Information" on page 129.
From the MAIN MENU:
- TapRV Tools > RV Info.
- Tap and to view the options.
- Tap on the ETA Adjustment option and select the type of adjustment to be performed.
- Tap to save changes.
Vehicle Mode Setting

Select RV or Car Mode
Select the type of vehicle. The TripMaker RVND calculates routes based on this type of vehicle. When Car is selected, some RV-related features are not available. When set to RV, routing is calculated for the specified vehicle (see "Set RV Information" on page 20).
From the MAIN MENU:
- TapPreferences.
- Tap on the Vehicle Type option.
- Tap and to view the options.
- Tap on the Vehicle Type option and select RV or Car.
- Tap to save changes.
Set Route Type Option

Set to Calculate Shortest Route or Fastest Route
Set the TripMaker RVND to calculate the fastest route to a location.
Note: You can further tune your route by combining this setting with other route preferences such as Tollways, Freeways, etc.
For more routing options, see "Route Preferences" on page 132.
From the MAIN MENU:
- TapPreferences.
- Tap on the Route tab.
- Tap and to view the options.
- Tap on the Route option and select the route type.
- Tap to save changes.
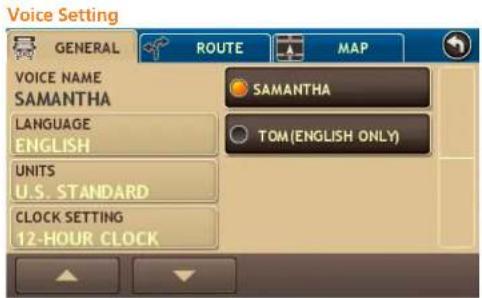
Select a Voice for Spoken Instructions
Note: Male voice (Tom) is only available in English.
From the MAIN MENU:
- TapPreferences.
- Tap on the Voice Name option.
- Tap and to view the options.
- Tap on the Voice Name option and select a voice.
- Tap to save changes.
Vehicle Icon and Color - RV

Vehicle Icon and Color - Car

Select a Vehicle Icon and Color
From the MAIN MENU:
- Tap Preferences.
- Tap on the Map tab.
- Tap and to view the options.
- Tapon:
• RV Icon to set the RV icon and color.
• Car Icon to set the car icon and color.
- Tap 7 and 12 to view all vehicle icon options.
With the selected vehicle icon displayed:
- Tap and drag the color bar to select a color.
The selected icon and color display above the color bar.
- Tap to save changes.

Set Warnings
For more on warning options, see "Warning Options" on page 136.
From the MAIN MENU:
- TapRV Tools >Warnings.
- Tap and to view the options.
- Tap the warning to be set.
- Note: Tap (decrease) and (increase) to specify the number of miles or hours.
- Tap to save changes.
Note: To turn specific warnings off completely, tap the button until "Off" displays.
To turn off all warnings, select "None" under Warning/Alert Prompts as is shown in the image on the left.
Maps
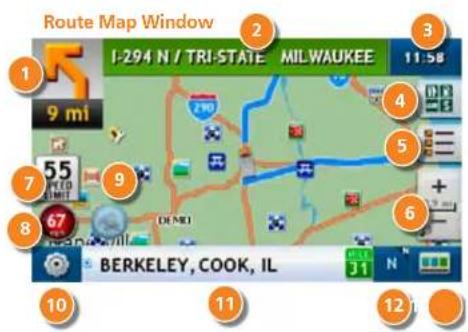
Route Map Window
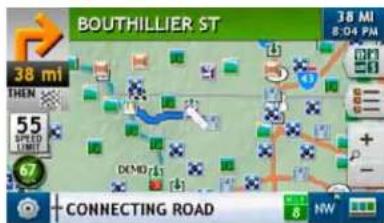
1 Next Maneuver Tap to repeat spoken next maneuver instructions
2 Road Name The name of street you will turn onto next.
3 Miles/Time Tap to select a time option. For more information see "Select a Display Time Option" on page 27
4 Upcoming Exits Slide Out List
View a list of amenities at upcoming exits.
Directions Slide Out List
Tap to select a route display option. Options include Detail view (turn-by-turn instructions), Highway View (highways list), Trip Summary (route legs), or Summary Map View (complete route map).
6 Zoom In/Zoom Out
Tap to zoom in and show greater detail on a smaller map or tap — to zoom out to show less detail on a larger map.
7 Posted Speed
Displays the posted speed limit.
8 Current Speed/Virtual Dashboard
Displays the current speed. Tap on the current speed to display the Virtual Dashboard. Icon turns red when vehicle speed is over the posted limit. To set a speed alert, see "Set Warnings" on page 120.

9 Real Time Traffic (Optional Service) and Predictive Traffic (not available on all models)
Displays real time traffic information. If a delay is expected, the number of minutes displays above. Tap this button to view the TRAFFIC WINDOW.
10 Options
Tap to see current location information, change route settings, or detour.
11 Location Information
Tap to view the current location information. See "View Current Location Information" on page 35.
12 Map Display
Tap to change the map display. An icon in the upper right button corner displays the selected option: Heading Up (arrow), North Up (N), 3D View (3).
13 Main Menu
Tap to return to MAIN MENU.
Route Map Window - Time Field

Route Map Window - Time Field
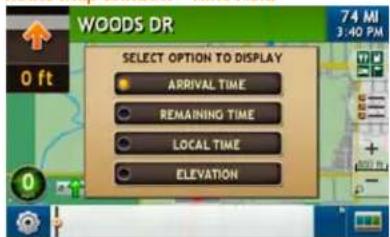
Select a Display Time Option
On the ROUTE MAP WINDOW:
- Tap on the Time field.
The SELECT OPTION TO DISPLAY WINDOW displays.
- Tap on a display option:
• Arrival Time - Arrival time and miles to destination.
• Remaining Time - Remaining time and miles to destination.
- Local Time - Current vehicle location time.
• Elevation - Presents the current elevation.
The ROUTE MAP WINDOW redisplays.
Exit POI Slide Out - Closed

Exit Slide Out List

Exit POIs Slide Out List
Note: Only available on interstate roads.
While navigating a route:
- Tap to display the exit POIs slide out.
To hide the slide out list, tap
1 Exit Information
Displays the distance to the exit, the street name, and number and type of amenities available.
2 Show Amenities Button
Tap on an exit to display this button. Tap on this button to view a list of amenities available at the selected exit.
3 Up/Down
Tap to scroll up and down to view the list of exits. Tap on any item in the list to view it on the map.
Exit POIs Slide Out
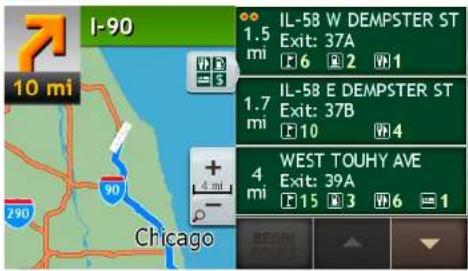
Exit POIs Slide Out - List Button

Detail Provided When List Button is Tapped

View POIs at a Selected Exit
On the ROUTE MAP WINDOW:
- Tap on the button.
The Exit POIs Slide out displays.
- Tap on an exit to display the List button (☐).
- Tap the List button ( ) to view the Exit POI TABS WINDOW.
- Select a tab and view available POIs. Additional RV services are also shown.
- Tap on an POI to select it. The confirmation window displays.

- On the confirmation window:
• Tap Begin New Route to route to the POI.
- Tap to return to the EXIT POI TABS WINDOW.
Route Option - Detail View

Route Display Mode Window

Route Option - Highway View

Directions Slide-Out List
Select a Route Display Option
When first opened, the slide-out list displays in Detail View.
While navigating a route:
- Tap to display slide out list.
The SLIDE OUT LIST displays Detail View.
- To change the route option, tap Route Display Options.
- On the Route Display Mode, tap on a view.
- The map displays the selected view.
- Use and to view the instructions.
- To hide the slide out list, tap
Route Option Display- Detail View

Detail View
1 Rise/Set
Displays the times of sunrise and sunset for your current location.
2 MPH
Displays the current vehicle speed, in miles per hour..
3 Trip Information
Displays trip distance and time of arrival.
4 Distance
Displays the distance to the next maneuver and the type maneuver performed.
5 Street/Road Name
Displays the street name you will be on after performing the next maneuver.
6 Zoom In/Zoom Out
Tap to zoom in and show greater detail on a smaller map or tap – to zoom out to show less detail on a larger map.
7 Route Options
Tap to select another route display option.
8 Up/Down
Tap to scroll up and down to view the list of maneuvers. Tap on any item in the list to view it on the map.
Route Option Display- Highway View)

Highway View
1 Rise/Set
Displays the times of sunrise and sunset for your current location
2 MPH
Displays the current vehicle speed, in miles per hour.
3 Trip Information
Displays trip distance and time of arrival.
4 Distance
Displays distance to next road.
5 Street/Road Name
Displays the name of the next road.
6 Zoom In/Zoom Out
Tap to zoom in and show greater detail on a smaller map or tap — to zoom out to show less detail on a larger map.
7 Route Display Options
Tap to select another route display option.
8 Up/Down
Tap to scroll up and down to view the list of maneuvers. Tap on any item in the list to view it on the map.
Route Option Display- Route Summary

Route Summary
1 Total Distance
Total distance for the entire trip.
2 Total Time
Total time to complete the entire trip.
3 Leg
Number of the leg and distance.
4 Leg Destination
Leg destination.
5 Zoom In/Zoom Out
Tap on :
6 Route Display Options
Tap to select another route display option.
7 Up/Down
Tap to scroll up and down to view the list of maneuvers. Tap on any item in the list to view it on the map.
Route Option Display- Summary Map View

Summary Map View
1 Back Tap to return to the Route Map Window.
2 Total Dist
Total distance for the entire trip.
3 TotalTime
Total time to complete the entire trip.
4 Vehicle Location
Current vehicle location on the route.
Road Info Field

Current Location Information
On the ROUTE MAP WINDOW, the Location Information field lets you view information on the road you are currently on. Tap on the button repeatedly to cycle through the information.
Informationincludes:
• City, county, and state
• Current road name
• Next intersecting street name
View Current Location Information
- Create a route or load a trip.
On the ROUTE MAP WINDOW:
The city, county and state display in the Location Information field.

- Tap on the Location Information field.
Current road information displays.

- Tap on the Location Information field again.
Next intersecting street name displays.

- Tap the Location Information field again to redisplay the city, county, and state information.

Junction View
When on a route, Junction View displays when you have an upcoming maneuver. Once past the maneuver, Junction View closes and the previous window displays.
Once you've driven past the junction, the previous window redisplays.
1 Next Highway
Highway you will turn on to.
2 Sign Text
Sign text to follow to get onto the correct highway.
3 Lanes
Number and direction of lanes for the next maneuver. Orange lanes are the ones you should be in.
4 Distance
Distance to the upcoming maneuver. Distance decreases as you approach the ramp.
5 Back
Tap to return to the ROUTE MAP WINDOW.

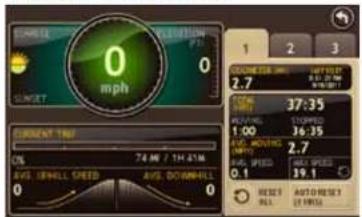
Virtual Dashboard
When using the virtual dashboard on a route, the virtual dashboard closes and the Junction View displays an upcoming maneuver. Once past the maneuver, the virtual dashboard redisplays.
1 Back
Return to the ROUTE MAP WINDOW.
2 Sunrise/Sunset
Sunrise/Sunset time based on vehicle location (latitude/longitude) and day.
3 Elevation
Current location elevation.
4 Tab 1, Tab 2, Tab 3
Gather trip information for up to three trips. Includes odometer settings, hours, and speeds.
5 Current Trip
Percentage of current trip completed, distance to next maneuver, and the number of miles and time spent on the trip to this point.
6 Average Speeds
Average uphill and downhill speeds.
7 Reset All
Reset trip information for the selected trip (Tab 1, Tab 2 or Tab 3).
8 Auto Reset
Select to define how much time should elapse before an auto reset of a particular tab occurs. See page 39 for a detailed description.
Virtual Dashboard - Show/Hide
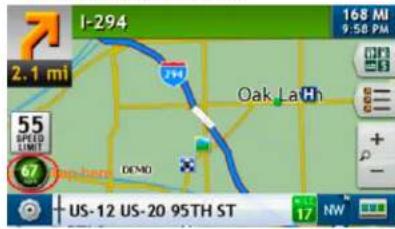
Show/Hide the Virtual Dashboard
On the ROUTE MAP WINDOW:
-
To show, tap the Current Speed field. The VIRTUAL DASHBOARD displays.
-
To hide, tap the button to return to the ROUTE MAP WINDOW.
Virtual Dashboard - Trip information

Gather Trip Information
On the ROUTE MAP WINDOW:
- Tap the Current Speed field.
The VIRTUAL DASHBOARD displays.
-
Tap on a tab (Tab 1, Tab 2, or Tab 3).
-
If necessary, tap Reset All to set the odometer for the selected tab back to zero.
Note: Last reset details the time the open tab was last reset.
Virtual Dashboard - Show/Hide

Virtual Dashboard - Auto Reset Off
Virtual Dashboard - Auto Reset Window

Virtual Dashboard - Auto Reset On

Automatically Reset Trip Information
On the ROUTE MAP WINDOW:
- Tap the Current Speed field. The VIRTUAL DASHBOARD displays.
- Tap on the tab you want to reset automatically.
- Tap Auto Reset. The AUTO RESET WINDOW displays.
-
To reset trip information after the vehicle has remained stationary after a specific number of hours:
-
Tap to increase the number of hours.
-
Tap to decrease the number of hours.
-
To save changes, tap Change
The Virtual Dashboard redisplays. The Tab displays the auto reset number of hours.
Route Map Window

Location Route Options Window

Detour Window
Detours
Detour Around Part of the Route
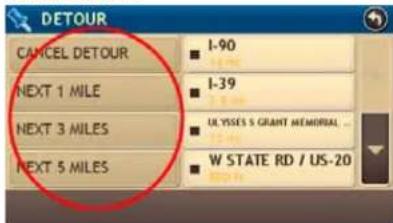
Use this procedure to recalculate a route to avoid the next several miles on the route.
Note: To detour around a specific roadway, see "Detour Around a Specific Roadway" on page 41.
While navigating a route:
- Tap

The LOCATION ROUTE OPTIONS WINDOW displays.
- TapDetour.
The DETOUR WINDOW displays.
- On the left side of the window, tap the number of miles on the route to be avoided.
A new route is calculated and the ROUTE MAP WINDOW redisplays.
Route Map Window

Location Route Options Window

Detour Window

Detour Around a Specific Roadway
Use this procedure to recalculate a route to avoid, if possible, a specific roadway.
While navigating a route:
- Tap
The LOCATION ROUTE OPTIONS WINDOW displays.

- TapDetour.
The DETOUR WINDOW displays.
-
On the right side of the window, tap and to view a list of roads in the current route.
-
Tap on one or more roadways to be avoided.
A yellow checkmark √ appears in front of each selected road.
- Tap Detour to recalculate the route.
A new route is calculated and the ROUTE MAP WINDOW redisplays.
Detail View Detour Options

Detour Using the Detail View Route Display Option
While navigation a route:
- Tap to display slide out list.
- Tap on the maneuver you want to avoid.
- Tap Detour.
A new route is calculated avoiding (if possible) the selected maneuver.
The Detail View redisplays, showing the new route.
Highway View Detour Options

Detour Using the Highway View Route Display Option
While navigation a route:
- Tap to display slide out list.
- Tap on the highway you want to avoid.
- Tap Detour.
- On the Detour popup window, tap on the length of highway you want to avoid.
- Tap Back.
A new route is calculated avoiding (if possible) the selected length of highway.
The slide out list redisplays, showing the new route.
Route Map Window (with Displayed Route)

Route Map Window (Route Segment to Avoid)

Route Map Window (Detour Around Segment)

Tap on the Map and Detour Around a Route Segment
Use this procedure to detour around a road segment on your route. Display a Route.
- Start your route.
On the ROUTE MAP WINDOW: - Tap on the route segment you want to detour around. The crosshairs display on the segment.
- Tap Detour.
The ROUTE MAP WINDOW displays the detour around the selected segment.
Route Map Window
Cancel a Route
While navigating a route:
- Tap
The LOCATION ROUTE OPTIONS WINDOW displays.
- TapCancel Route.
The route is cancelled and the ROUTE MAP WINDOW displays your current location.
Location Route Options Window

Predictive Traffic Icon

Choose Anticipated Day and Time of Travel, Select Options or View Details
List of Anticipated Traffic Along Route based on Historical Traffic Patterns
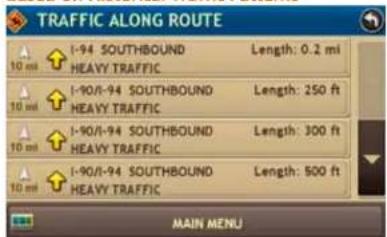
Using Predictive Traffic (not available on all units)
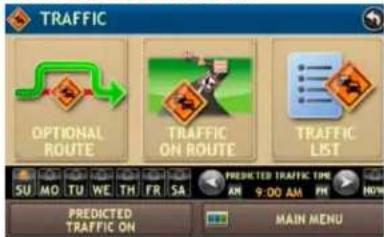
Traffic delays based on time of day traveling can be added to a route. These delays are based on expected, historical traffic patterns along the route. To utilize real time traffic, see page 104.
- Once a route has been calculated, Tap the 📋 on the navigation screen to access Predictive Traffic.
- Tap Traffic Off.
- Customize the route for time of day travel will take place, or Tap "Now". The estimated time of arrival will now change every 15 minutes as the route is driven to incorporate expected traffic.
- Choose Optional Route, Traffic on Route, or Traffic List to view options and details.
Ways to Search for Locations
Find Addresses
To find an address, you can:
• "Search for an Address" on page 52.
• "Search For a City Center" on page 53.
- "Search For an Intersection" on page 54.
- "Search by ZIP Code for an Address" on page 55.
- "Search by ZIP Code for an Intersection" on page 56.
• "Search by Latitude/Longitude" on page 57.
Find Nearby Points of Interest (POIs)
You can find points of interest (POIs) by:
• "Select a Quick Stop POI" on page 61.
- "Near the Current Vehicle Location" on page 69.
• "In a City" on page 70.
• "Along Your Route" on page 71.
• "Near Your Destination" on page 72
Find A Rand McNally POI
- "Select a Rand McNally Editor's Pick" on page 65.
Find a Rand McNally Trip:
You can also find a Rand McNally trip by:
- "Select a Rand McNally Best of the Road© Route" on page 77.
- "Select a Rand McNally Weekend Getaway" on page 78.
- "Select a Rand McNally Scenic Tour" on page 79.
- "Select a Rand McNally Regional Road Trip" on page 80
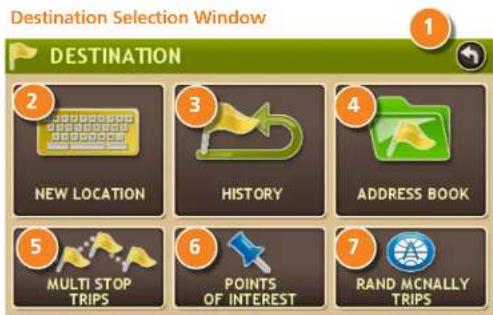
Location Searches
Destination Selection Window
To access this window from the MAIN MENU, tap Choose Destination.
1 Back
Tap to return to the MAIN MENU.
2 New Location
Tap to find an address, city center, or intersection.
3 History
Tap to view a list of previous locations.
4 Address Book
Tap to view a list of saved locations.
5 Multi-Stop Trips
Tap to view a list of saved multi-stop routes or to create a new one.
6 Points of Interest/ POI
Tap to search for a point of interest (POI) such as a gas station, restaurant, etc.
7 Rand McNally Trips
Tap to select a Rand McNally Best of the Road ^© , Weekend Getaways, Scenic Tour or Regional Trip.


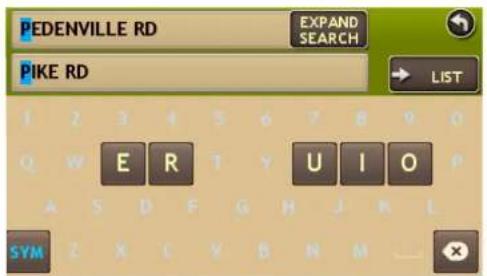
Destination Search Auto-Complete Feature
Enter the first few characters in a name and a short list displays a couple of names that start with the typed characters.
On the keyboard, the only keys available are for the next valid characters in a search name. If the letters you need do not appear, see "Expand Search for Street Names" on page 49.
Continue entering characters until the searched for name displays in the list. Tap on the name to select it.
Other buttons on this window include:

Tap to search for a location by ZIP code.

Tap to return to the previous window.

Tap to view a list of names matching the typed characters.

Tap to view a list of previously selected locations.

Tap to enter a space.

Tap to view the Symbols keyboard and select a symbol.

Tap to delete the last character and move the cursor back one space.


About City Street Names
Some cities with common names such as "Concord" have several types of names associated with a city.
If a name does not display, continue typing characters until the name you are looking for displays in the list.
Expand Search for Street Names
The Expand Search button on the street name selection window can help locate addresses that may actually be in a different town, spelled slightly differently, or in a neighboring town.
If the next letter in the street name can not be selected on the keyboard, tap Expand Search to search a greater area.
First Use
Short City List

Long City List

City/State List
Select a City
First Use
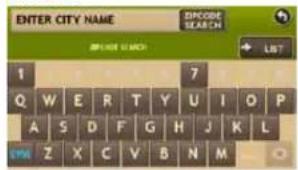
On first use, the SELECT CITY NAME WINDOW displays. On the keyboard, type the first few characters in the city name.
On the next use, the city name selected in the previous search displays. Tap on the city name to search for a location in the city. To find locations in a different city, type the first few characters in the new city name.
Short City List
As you type the characters in the city name, a short list of matching city names displays. Tap on a city to select it.
Long City List
If the city is not displayed on the short name list, continue typing characters in the city name or tap ENTER to display a long list of city names. Use the up and down arrows to view all cities/states. Tap on a city to select it.
City/State List
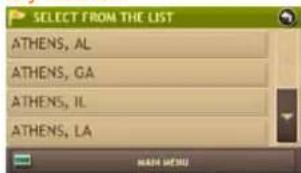
The CITY/STATE LIST displays cities of the selected name in different states. Use the up and down arrows to find the correct city/state. Tap on the city/state name to select it.
Special note: If a city name appears twice within a state, you may need to check both for your specific address.
Find Addresses
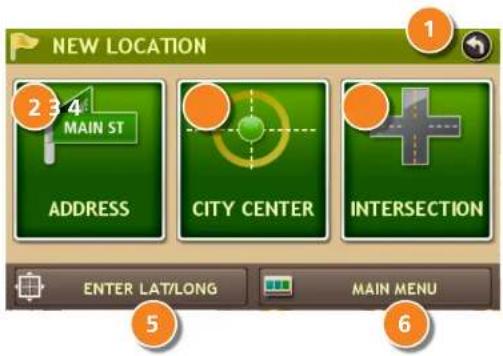
Location Selection Window
1 Back
Tap to return to the DESTINATION SELECTION WINDOW.
2 Address
Tap to search for an address by entering the city, street, and number.
3 City Center
Tap to search for a city center.
4 Intersection
Tap to search for an address by entering the city and two intersecting roads.
5 Enter Lat/Long
Tap to search for a location by latitude and longitude.
6MainMenu
Tap to return to the MAIN MENU.
Select City List

Select Street List

Enter House Number

Search for an Address
From the MAIN MENU:
- TapChoose Destination > New Location > Address.
- Type the first few characters in the city name. The SELECT FROM CITY LIST displays.
- Tap on the city/state from the displayed list.
- Type the first few characters in the street name, or if the next characters of the street name can not be selected on the keyboard, tap Expand Search and search a wider area. The SELECT STREET LIST displays.
- Tap on the street name from the displayed list.
- Tap the street number or tap List to show a list of street numbers. The SELECT FROM THE LIST displays valid address ranges.
- Tap on the street number range from the list. The CONFIRMATION WINDOW displays.

- Tap Begin New Route to navigate to the location. See "Address Confirmation Window" on page 99 for more options.
- If a warning message displays, select the appropriate response.
Select From the List

Search For a City Center
From the MAIN MENU:
- TapChoose Destination > New Location > City Center.
- Type the first few characters in the city name. The SELECT FROM THE LIST WINDOW displays.
- Tap on the city/state name. The confirmation window displays.

- Tap Begin New Route to navigate to the location. See "Address Confirmation Window" on page 99 for more options.
- If a warning message displays, select the appropriate response.
Select From The List Window

Enter Primary Street Window

Select Intersecting Street List
Search For an Intersection
From the MAIN MENU:
- Tap Choose Destination > New Location > Intersection.
- Type the first few characters in the city name. The SELECT FROM THE LIST WINDOW displays.
- Tap on the city name. The ENTER PRIMARY STREET WINDOW displays.
- Type the first few characters in the primary street name, or if the next characters of the street name can not be selected on the keyboard, tap Expand Search and search a wider area.
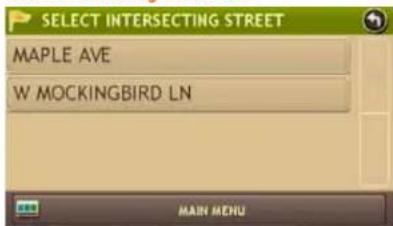
- Tap on the street name in the list. The SELECT INTERSECTING STREET LIST shows streets that intersect with the primary street.
- Type the first few characters in the street name The SELECT INTERSECTING STREET List displays.
- Tap on the intersecting street name. The CONFIRMATION WINDOW displays.

- Tap Begin New Route to navigate to the location. See "Address Confirmation Window" on page 99 for more options.
- If a warning message displays, select the appropriate response.

Search by ZIP Code for an Address
From the MAIN MENU:
- Tap Choose Destination > New Location > Address.
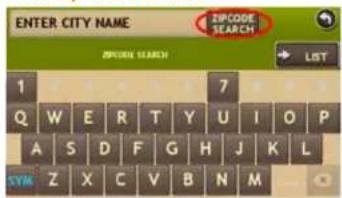
- Tap ZIPCode Search.
- The ENTER ZIP CODE WINDOW displays.
- Type the ZIP code. The ENTER STREET NAME WINDOW displays.
- Type the first few characters in the street name or if the next characters of the street name can not be selected on the keyboard, tap Expand Search and search a wider area. The SELECT STREET LIST displays.
- Tap on the street name from the displayed list.
- Tap the street number or tap List to show a list of street numbers. The SELECT FROM THE LIST displays valid address ranges.
- Tap on the street number range from the list. The confirmation window displays.

- Tap Begin New Route to navigate to the location.
- If a warning message displays, select the appropriate response.
Enter Zip Code Window
Enter Primary Street Name Window

Select Intersecting Street Window
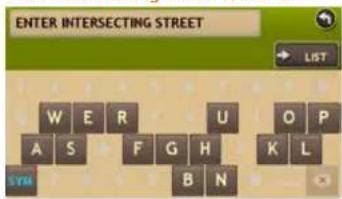
Search by ZIP Code for an Intersection
From the MAIN MENU:
- Tap Choose Destination > New Location > Address.
- Tap ZipCode Search. The ENTER ZIP CODE WINDOW displays.
- Type the ZIP code. The ENTER PRIMARY STREET NAME WINDOW displays.
- Type the first few characters in the street name or if the next characters of the street name can not be selected on the keyboard, tap Expand Search and search a wider area. The SELECT PRIMARY STREET LIST displays.
- Tap on the street name from the displayed list. The SELECT INTERSECTING STREET WINDOW displays.
- Type the first few characters in the street name. The SELECT INTERSECTING STREET LIST displays.
- Tap on the intersecting street name from the list. The confirmation window displays.

-
Tap Begin New Route to navigate to the location. See "Address Confirmation Window" on page 99 for more options.
-
If a warning message displays, select the appropriate response.
Enter Geographic Coordinate Window
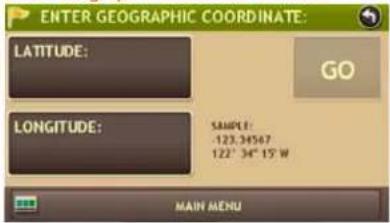
Enter Latitude Window

Enter Longitude Window

Search by Latitude/Longitude
From the MAIN MENU:
- Tap Choose Destination > New Location > Enter Lat/Long. The ENTER GEOGRAPHIC COORDINATE WINDOW displays.
- Tap in the Latitude field. The ENTER LATITUDE WINDOW displays.
- Enter the latitude of the location and tap Enter. The ENTER GEOGRAPHIC COORDINATE WINDOW redisplays.
- Tap in the Longitude field. The ENTER LONGITUDE WINDOW displays.
- Enter the longitude of the location and tap Enter. The ENTER GEOGRAPHIC COORDINATE WINDOW redisplays.
- Tap Go. The confirmation window displays.
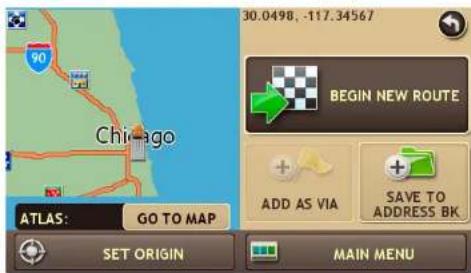
- Tap Begin New Route to navigate to the location. See "Address Confirmation Window" on page 99 for more options.
- If a warning message displays, select the appropriate response.

Point of Interest Windows
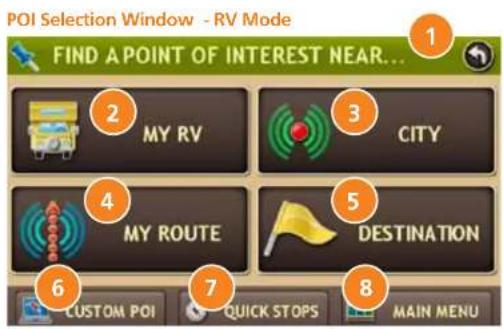
Points of Interest Selection Window
Different buttons display on the POI SELECTION WINDOW, depending on whether the device is set to RV or Car mode.
See "Select RV or Car Mode" on page 21 for more information.
1 Back
Tap to return to the DESTINATION SELECTION WINDOW.
2 My RV/Near Car
Tap to search for a point of interest near the current vehicle location.
3 City
Tap to search for a point of interest in a city.
4 My Route
Tap to search for a point of interest along the vehicle route.
5 Destination
Tap to find a point of interest near the route destination.
6 Custom POI
Tap to access Custom POIs. See page 51 for more detail.
7 Quick Stops
Tap to find a RV-friendly POI near the current vehicle location. See "Select a Quick Stop POI" on page 61.
8 Main Menu
Tap to return to the MAIN MENU.

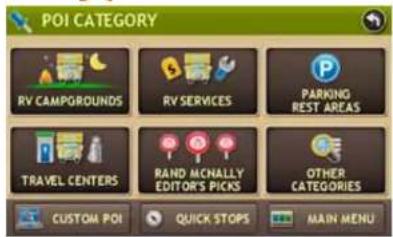
Points of Interest (POI) Category Window
1 Back
Return to previous window.
2 RV Campgrounds
Tap to search for an RV campground or motor park.
3 RV Services
Find an RV dealer/service or an RV dump.
4 ParkingRestAreas
Tap to search for RV parking or a rest stop.
5 Travel Centers
Tap to select a travel center POI.
6 Rand McNally Editor's Picks
Tap to select a Rand McNally Editor's choice POI.
7 More
Tap to select a consumer (non-RV) related point of interest.
8 Custom POIs
Tap to find third party POIs loaded via the Dock. See page 51.
9 Quick Stops
Tap to find a RV-friendly POI near the current vehicle location. See "Select a Quick Stop POI" on page 61.
10 Main Menu
Tap to return to the MAIN MENU.
-RV-Related POIs




-Rand McNally POIs
-Consumer-Related POIs

Points of Interest (POIs) Searches
The TripMaker RVND offers thousands of Points of Interest and RV-related POIs.
RV-Related POIs
See "Select an RV Point of Interest" on page 62.
- RV Campgrounds
RV Services - Parking Rest Areas
- Travel Centers
Amenities include: Fueling stations, Food stores, Restaurants, Showers, etc. See "Select and Filter Travel Center Amenities" on page 64.
Rand McNally Editor's Pick
You can select an Editor's Pick POI (see page 65).
• Rand McNally Editor's Picks
Consumer POIs
You can select a POI by category (see page 67) or by name (see page 68).
• Other Categories
Note: Whenever there is a mileage displayed in a point of interest list, the mileage is estimated by way of a straight line (as the crow flies). Once you select and route to the point of interest, the actual mileage from the current location to the point of interest will be displayed.
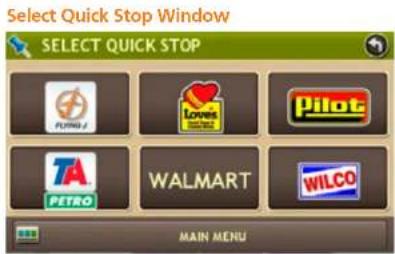
Select a Quick Stop POI
From the MAIN MENU:
- Tap Choose Destination > Points of Interest.
- Tap Quick Stops.
The SELECT QUICK STOP WINDOW displays.
- Tap on a POI type.
The Quick Stop List displays.

- Tap on a location from the list.
Note: Walmart Button provides searchable amenities for parking, pharmacy and open 24 hours.
POI Category Window

Select Subcategory Window

Select an RV Point of Interest
- Tap Choose Destination > Points of Interest.
- Select a search type (My RV/Near Car, City, My Route or Destination).
On the POI CATEGORY WINDOW:
- Tap:
RV Campgrounds
• RV Services, or
- Parking Rest Areas, or
• Travel Centers (See page 64), or
- If necessary, tap on a subcategory type. (For example, tap State Park.) The SELECT POINT OF INTEREST WINDOW displays POI locations.
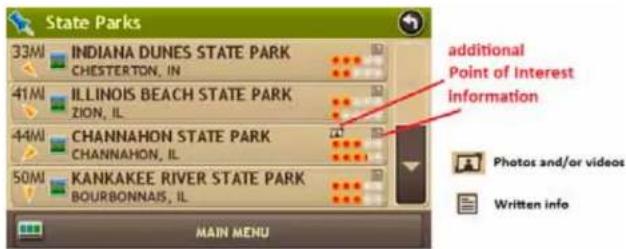
- Icons to the right of a POI indicate whether additional information on the POI is available:
Ratings for the location also display to the right of the POI.

The top row indicates community ratings. The second row indicates your personal ratings of the POI.
Note: For more information see "Rate a RV-Related Point of Interest" on page 83.
- Tap on location from the list.
The Map Confirmation window displays.

- To view photos and videos (if available), click on Location Info & Media.
The Location Information Window displays.

-
Click on:
-
Tap and to read more about the location.
- Begin Route to calculate and start a route.
• View Pictures to view photos of the location (if available).
• New Videos to watch videos of the location (if available).
• Main Menu to return to the Main Menu.
POI Category Window

Select Travel Center Window - Not Filtered
Filter Services Window
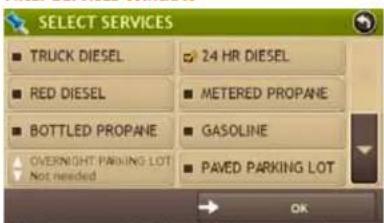
Select Travel Center Window - Filtered

Select and Filter Travel Center Amenities
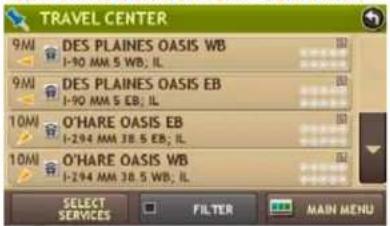
RV-related Travel Center points of interest can include over 70 different types of amenities. To select only amenities that you are interested in, filter your search results.
- Tap Choose Destination > Points of Interest.
- Select a search type (My RV/Near Car, City, My Route or Destination).
On the POI CATEGORY WINDOW:
- TapTravel Center.
The TRAVEL CENTER WINDOW displays all travel centers in your area. - TapSelect Services
The SELECT SERVICES WINDOW displays. - Click on the checkbox of each amenity to be included in the search.
- TapOK.
A checkmark displays in the Filter button.
The TRAVEL CENTER WINDOW displays POI locations with your selected amenities.

- Tap on a location from the list.
POI Category Window

Select Category Window

Select Subcategory Window

Select a Rand McNally Editor's Pick
- Tap Choose Destination > Points of Interest.
- Select a search type (My RV/Near Car, City, My Route or Destination).
On the POI CATEGORY WINDOW:
-
TapRand McNally Editor's Pick.
The SELECT CATEGORY WINDOW displays. -
Tap on a category. (For example, tap Interesting Places to Visit.)
-
If necessary, tap on a subcategory type. (For example, tap Interesting Cities and Towns.)
The SELECT POINT OF INTEREST WINDOW displays POI locations.
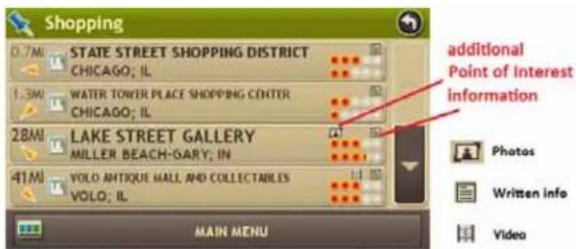
- Icons to the right of a POI indicate whether additional information on the POI is available:
Ratings for the location also display to the right of the POI. The top row indicates community ratings. The second row indicates your personal ratings of the POI.
Note: For more information see "Rate a RV-Related Point of Interest" on page 83.
- Tap on location from the list.
The Map Confirmation window displays.

- To view photos and videos (if available), click on Location Info & Media.
The Location Information Window displays.
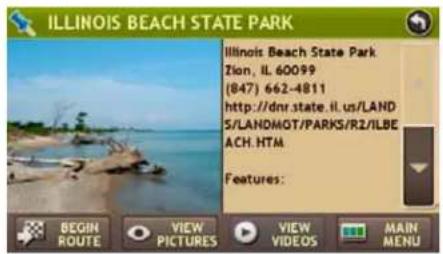
-
Click on:
-
Tap and to read more about the location.
- Begin Route to calculate and start a route.
• View Pictures to view photos of the location (if available). - New Videos to watch videos of the location (if available).
• Main Menu to return to the Main Menu.
POI Category Window
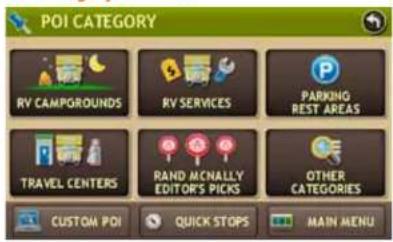
Select Category Window
Select Subcategory Window

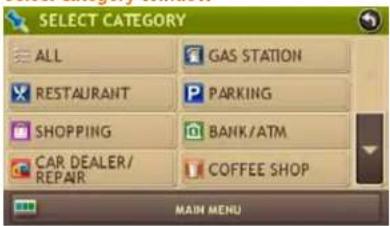
Select a Consumer Point of Interest By Category
- Tap Choose Destination > Points of Interest.
- Select a search type (My RV/Near Car, City, My Route or Destination).
On the POI CATEGORY WINDOW:
- TapOther Categories.
The SELECT CATEGORY WINDOW displays.
- Tap on a category. (For example, tap Parking.)
- If necessary, tap on a subcategory type. (For example, tap Park and Ride.) The SELECT POINT OF INTEREST WINDOW displays POI locations.

- Tap on a location from the list.
POI Category Window

Select Category Window
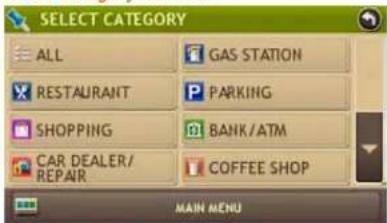
Select Point of Interest Window

Enter POI Name Window
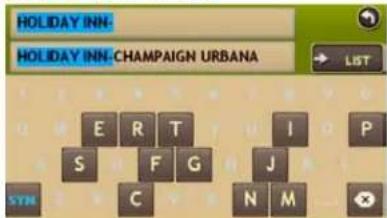
Select a Consumer Point of Interest by Name
Note: The spell function is only available for searches near My RV/Near Car or City. Search POI by name is not available for "Along Your Route" option.
- Tap Choose Destination > Points of Interest.
- Select a search type (My RV/Near Car or City).
On the POI CATEGORY WINDOW: - TapOther Categories.
The SELECT CATEGORY WINDOW displays.
- Tap All.
The SELECT POINT OF INTEREST WINDOW displays. - Tap on the Spell button to display the keyboard.
- Type the first characters in the POI name.
The SELECT FROM THE LIST displays.
- Tap on the POI name in the displayed list.
- The SELECT POINT OF INTEREST WINDOW displays POI locations.
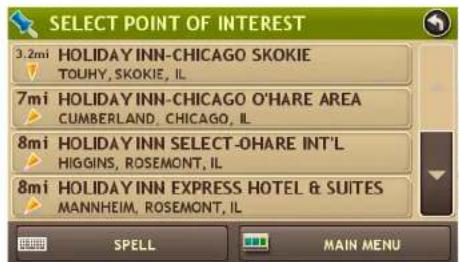
- Tap on a location from the list.
POI Category Window

Select

Select

Search for Nearby Points of Interest (POIs)
Near the Current Vehicle Location
From the MAIN MENU:
- Tap Choose Destination > Points of Interest > My RV/Near Car.
The POI CATEGORY WINDOW displays.
- Tap:
• RV Campgrounds, RV Services, Parking Rest Areas, or
• Travel Centers and filter for amenities. (See page 64.), or
• Rand McNally Editor's Picks (see page 65), or
- Other Categories and select a Consumer POI. See page 67 and page 68.
Note: If no locations are found, a message displays.
- Tap on a location on the list.
The confirmation window displays:

- Tap Begin New Route to navigate to the location.
See "RV-Related Point of Interest (POI) Confirmation Window" on page 101 for more options. - If a warning message displays, select the appropriate response.
Select Address List
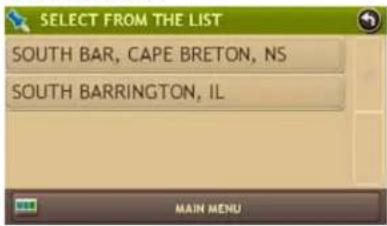
POI Category Window

Select

In a City
From the MAIN MENU:
- TapChoose Destination > Points of Interest > City.
- Type the first few characters in the city name. The SELECT ADDRESS LIST displays.
- Tap on the city/state from the displayed list. The POI CATEGORY WINDOW displays.
- Tap:
• RV Campgrounds, RV Services, Parking Rest Areas or
• Travel Centers and filter for amenities. (See page 64.)
• Rand McNally Editor's Pick (see page 65),
• Other Categories and select a Consumer POI. See page 67 and page 68.
The SELECT
Note: If no locations are found, a message displays.
- Tap on a location on the list.
The confirmation window displays:
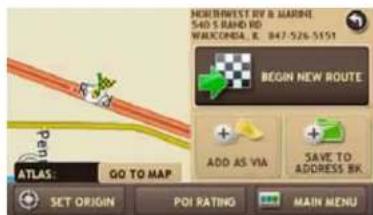
- Tap Begin New Route to navigate to the location.
See "RV-Related Point of Interest (POI) Confirmation Window" on page 101 for more options. - If a warning message displays, select the appropriate response.
Select

Select

Select a POI Window
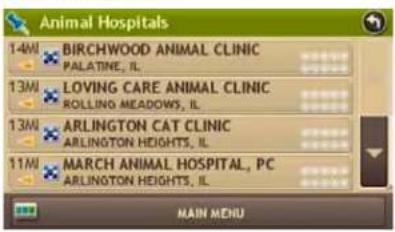
Along Your Route
From the MAIN MENU:
-
TapChoose Destination > Points of Interest > My Route. The POI CATEGORY WINDOW displays.
-
Tap:
• RV Campgrounds, RV Services, Parking Rest Areas or
• Travel Centers and filter for amenities. (See page 64.)
- Rand McNally Editor's Picks (see page 65), or
- Other Categories and select a Consumer POI. See page 67 and page 68.
The SELECT
Note: If no locations are found, a message displays.
- Tap on a location on the list. The confirmation window displays.

-
Tap Begin New Route to navigate to the location. See "RV-Related Point of Interest (POI) Confirmation Window" on page 101 for more options
-
If a warning message displays, select the appropriate response.
POI Category Window
Select

Select

Near Your Destination
- Create a route
From the MAIN MENU:
-
Tap Choose Destination > Points of Interest > Destination. The POI CATEGORY WINDOW displays.
-
Tap:
• RV Campgrounds, RV Services, Parking Rest Areas or
• Travel Centers and filter for amenities. (See page 64.)
• Rand McNally Editor's Picks (see page 65), or
- Other Categories and select a Consumer POI. See page 67 and page 68..
The SELECT
Note: If no locations are found, a message displays.
-
If necessary, select a subcategory.
-
Tap on a location on the list. The confirmation window displays:

-
Tap Begin New Route to navigate to the location. See "Address Confirmation Window" on page 99 for more options.
-
If a warning message displays, select the appropriate response.
Rand McNally Dock Home Page

Custom POI Imports
TripMaker allows for importing of a list of locations that are of interest. Custom points of interest can be downloaded to a file on a personal computer, and transported into the TripMaker device via the Dock.
- Install the most recent Rand McNally software for the Dock and for your unit.
Note: Specific icons and colors may vary depending on your unit.
-
Use the Rand McNally Dock to transfer the point of interest file to your device. Plug your device into your computer via USB and wait for the Rand McNally Dock to start.
-
Select the Custom POI button.
-
From the Dock, select the file you wish to transfer, select whether it is an "Alert" or "Interesting Location" POI, and then choose the Transfer button.
Note: "Alert" POIs are things like Red Light Cameras, which you would only like to be told about if they are on your route or on the road ahead. "Interesting Locations" are those things you would like a proximity alert about that could be anywhere around you.
- Step 5 – Load the custom POI's into your device.
• Unplug your device from your computer
- Plug it into power using the 12 or 120V power adapter.
- Turn the unit on. Note that depending on the size, this 1-time load could take more than ten minutes. The maximum number that should be loaded at any one time for best performance should be less than 25,000. When transferring an update of a current list, for instance Red Light Cameras, the new file will completely replace the file that is currently on the device.
- While transfer is in progress, you will see the LOADING CUSTOM POI window.
Loading Custom POI Screen

Load Complete Screen

Note: "Failed records" are those for which some information was dropped from the record, or the locations were invalid.
When transfer is complete, the Load Complete: CUSTOM POI DATABASE window will display.
My Custom POI Settings

Example of Imported Custom POI Lists

Change Settings for Custom POI Category

Custom POI Screen Access

Changing the Custom POI Display or Warning Settings
- Choose Preferences > General > My Custom POIs.
- Select the category that is to be customized.
- Select image, warning distance, type, map display and icon to change.
To Search for Custom POIs nearby:
- Select the Custom POI Button – Manage POIs
- Select from the list available.

Rand McNally Trips
Rand McNally Trips Window
1 Back
Return to previous window.
2 Best of the Road©
Tap to select from among pre-planned routes designed by Rand McNally's editors, and nominated as the "Best of the Road". Stop at interesting and enjoyable places. May include video and photo content.
3 Weekend Getaway
Tap to select a two or three day getaway.
4 Scenic Tours
Tap to select the most scenic trips in North America.
5 Regional Trips
Tap to select a regional route.
6 Main Menu
Tap to return to the MAIN MENU.
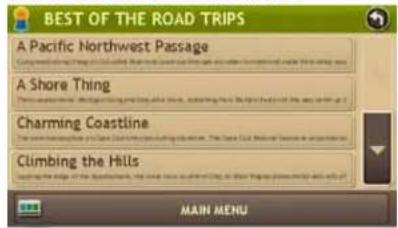
Best of the Road Selection Window
Selected Trip Info Window

Trip Stops List
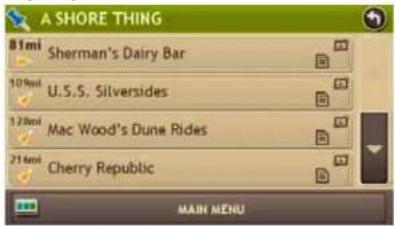
Select a Rand McNally Best of the Road® Route
From the MAIN MENU:
-
TapChoose Destination > Rand McNally Trips. The DESTINATION SELECTION WINDOW displays.
-
Tap Best of the Road. The BEST OF THE ROAD SELECTION WINDOW displays.
-
Tap and to view all available trips.
-
Tap on the trip you want to take. The SELECTED TRIP INFO WINDOW displays.
-
Tap View Stops to view more information about the trip The TRIP STOPS LIST displays.
-
Tap:
- Tap and to read more about the location.
• View Pictures to view pictures and videos on the selected stop. (Note: This button is disabled if no pictures or videos are available.)
• Prev Stop to view information on the previous stop.
• Next Stop to view information on the next stop.
- Begin Route to calculate the route and start the trip.
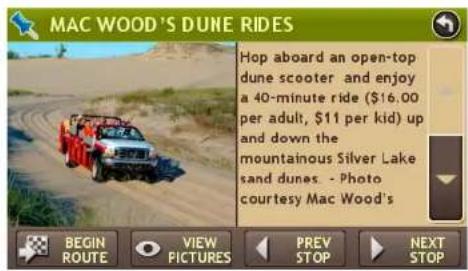
Weekend Getaways Selection Window
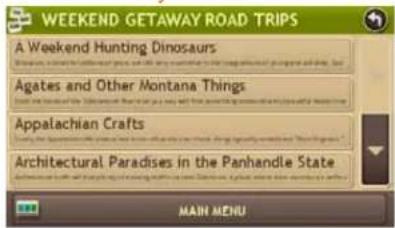
Selected Trip Info Window

Trip Stops List

Select a Rand McNally Weekend Getaway
From the MAIN MENU:
- TapChoose Destination > Rand McNally Trips. The DESTINATION SELECTION WINDOW displays.
- Tap WeekEnd Getaways. TheWeekEND GETAWAYS SELECTION WINDOW displays.
- Tap and to view all available trips.
- Tap on the trip you want to take. The Trip Information Window displays.
- Tap View Stops to view more information about the trip The TRIP STOPS LIST displays.
-
Tap:
-
Tap and to read more about the location.
• View Pictures to view pictures and videos on the selected stop. (Note: This button is disabled if no pictures or videos are available.)
• Prev Stop to view information on the previous stop.
• Next Stop to view information on the next stop. -
Begin Route to calculate the route and start the trip.

Scenic Tours Selection Window
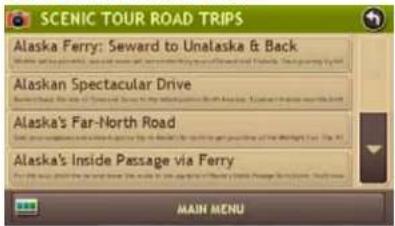
Selected Trip Info Window

Trip Stops ListtTrip Stops List

Select a Rand McNally Scenic Tour
From the MAIN MENU:
- TapChoose Destination > Rand McNally Trips . The DESTINATION SELECTION WINDOW displays.
- Tap Scenic Tours. The Scenic TOURS SELECTION WINDOW displays.
- Tap and to view all available trips.
- Tap on the trip you want to take. The TRIP INFORMATION WINDOW displays.
- Tap View Stops to view more information about the trip The TRIP STOPS LIST displays.
-
Tap:
-
Tap and to read more about the location.
• View Pictures to view pictures and videos on the selected stop. (Note: This button is disabled if no pictures or videos are available.)
• Prev Stop to view information on the previous stop.
• Next Stop to view information on the next stop. -
Begin Route to calculate the route and start the trip.
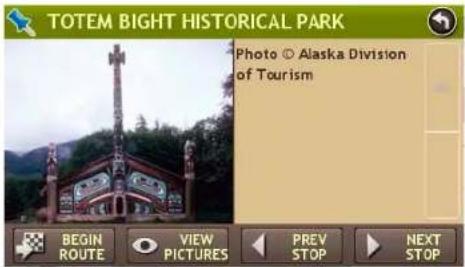
Regional Road Trips Selection Window

Selected Trip Info Window Window

Trip Stops ListtTrip Stops List

Select a Rand McNally Regional Road Trip
From the MAIN MENU:
-
TapChoose Destination > Rand McNally Trips . The DESTINATION SELECTION WINDOW displays.
-
Tap Regional Road Trips. The REGIONAL ROAD TRIPS SELECTION WINDOW displays.
-
Tap and to view all available trips.
-
Tap on the trip you want to take. The TRIP INFORMATION WINDOW displays.
-
Tap View Stops to view more information about the trip The TRIP STOPS LIST displays.
-
Tap:
-
Tap and to read more about the location.
• View Pictures to view pictures and videos on the selected stop. (Note: This button is disabled if no pictures or videos are available.)
• Prev Stop to view information on the previous stop.
• Next Stop to view information on the next stop. -
Begin Route to calculate the route and start the trip.
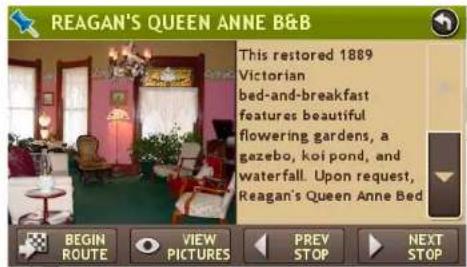
Map Window: Avoiding Road Segment when Route Not Active

Map Window: Avoiding Segment While On Route.
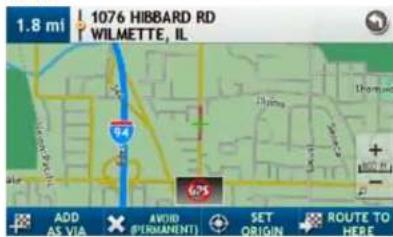
Tap on the Map
Tap on the Map and Avoid the Location
From the MAIN MENU:
- Tap on Go to Map to display the map.
- Use the + (zoom in) and (zoom out) buttons to display the road segment on the map
- Tap on the road segment you want to avoid.
The crosshairs + display at the tapped location.
- Tap Avoid
The button label changes to Remove Avoid.
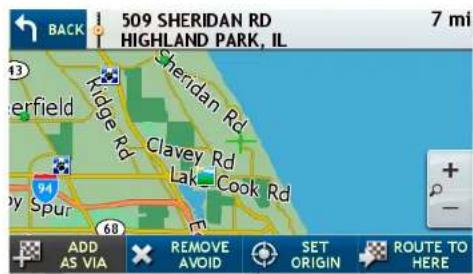
Note: When Avoid is selected, the location is permanently blocked. Tap the location and choose Remove Avoid to remove the block and include the location in routes. If you are currently operating a route, when you tap Avoid, it will avoid for the currently route only, i.e. not permanently. You can also manage your Avoid List in the preferences menu. Choose Preferences> Avoid List.
- Tap

to return to the map.
See "Route Map Window" on page 116 for more options.
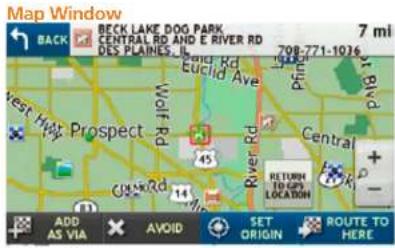
Tap on the Map and Route to the Location
- Tap on Go to Map to display the map.
- Use the + (zoom in) and (zoom out) buttons to display the location on the map
- Tap on the location you want to route to.
The crosshairs + display at the tapped location.
- TapRoute to Here.
- TapBack to save changes. The confirmation window displays.
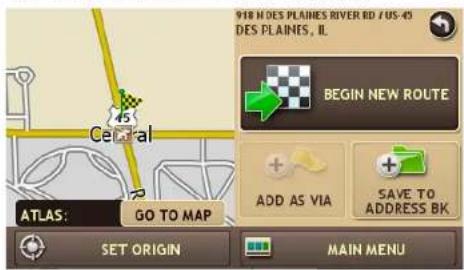
- Tap Begin New Route to navigate to the location. See "Address Confirmation Window" on page 99 for more options.
- If a warning message displays, select the appropriate response.
Confirmation Window

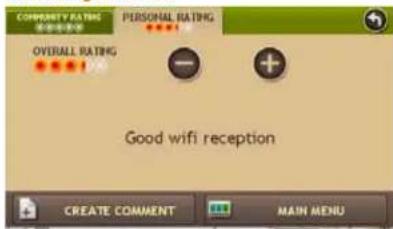
POI Ratings Window
Create Comment Window

Rate a RV-Related Point of Interest
For more on viewing POI ratings, see "Select an RV Point of Interest" on page 62 and "Select a Rand McNally Editor's Pick" on page 65.
- Search for and select an RV-related point of interest. (See page 62) The confirmation window displays.
On the POI RATING WINDOW, the Community Rating tab indicates the ratings from fellow drivers for the point of interest. The Personal Rating tab indicates your individual rating.
- Tap on the POI Ratings button.
The POI RATINGS WINDOW displays the Personal Rating tab.
-
Use - and + to rate the facility.
-
Tap Create Comment and type a personal comment on the facility.
-
Tap Enter to save the comment. The POI RATINGS WINDOW redisplays.
-
Tap to save changes. The confirmation window displays. Your rating displays on the button.

Note: To share ratings with fellow drivers, you must install the Rand McNally Dock software.
Confirmation Window

Enter Name Window

Enter Name Window

Address Book
Save a Location in the Address Book
- Search for a Destination.
On the confirmation window:
- TapSave to Address Book.
The DEFAULT NAME CONFIRMATION WINDOW displays.
-
Tap Yes to accept the default name or tap No to display a keyboard.
-
Type a the name of the location and tap Enter to save the location in the Address Book.
The confirmation window redisplays
- Tap Close to redisplay the confirmation window.

-
Tap Begin New Route to navigate to the location.
-
If a warning message displays, select the appropriate response.
Address Book Window - Sorted by Name

Sort By Window
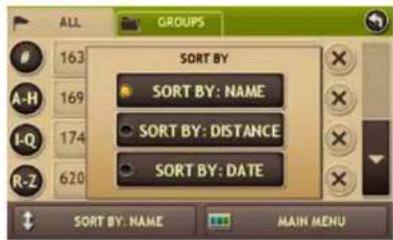
Address Book Window - Sorted by Distance

Sort Address Book Entries by Name, Distance or Date
From the MAIN MENU:
- TapChoose Destination > Address Book. The ADDRESS BOOK WINDOW displays.
The All Addresses tab is shown. Entries are alphabetically sorted by name.
-
To sort by distance, tap the Sort by Name button. The Sort By Window displays.
-
Tap Sort by Distance. Addresses are sorted by distance. The button is labeled Sort by Distance.
-
To sort by date entered, Tap Sort by Date Entered.
-
When finished:
• Tap to return to the DESTINATION SELECTION WINDOW.
- Tap to return to the MAIN MENU.
Address List
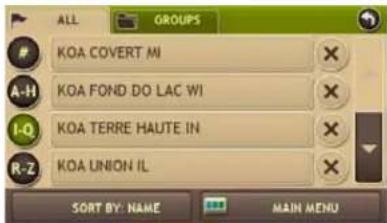
Select a Location from the Address Book
From the MAIN MENU:
- TapChoose Destination > Address Book.
- Tap on the All Addresses tab. The ADDRESS LIST displays.
- Tap on an address to select it. The confirmation window displays.

- Tap Begin New Route to navigate to the location. See "Address Confirmation Window" on page 99 for more options.
- If a warning message displays, select the appropriate response.
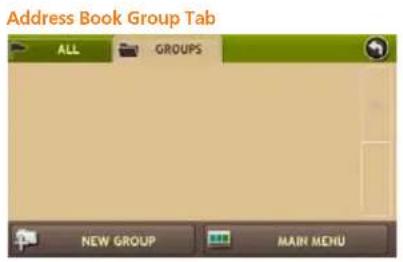


Create an Address Book Group
You must create the group before you can add addresses to it.
From the MAIN MENU:
- TapChoose Destination > Address Book. The ADDRESS BOOK WINDOW displays.
- Tap on the Groups tab.
- Tap New Group. The Enter Name Window displays.
- Type the group name.
- To select a different color folder, tap The CHOOSE FOLDER COLOR WINDOW displays.
- Tap on a color, then tap Close.
- When finished, tap Enter. The Groups tab redisplays. The new group name is shown.

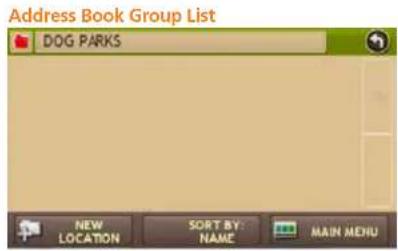
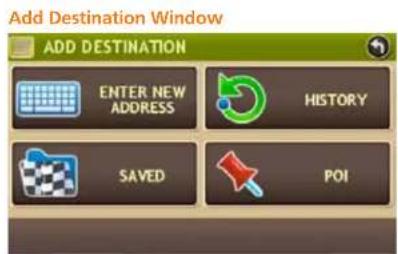

Add an Address to a Group
From the MAIN MENU:
- Tap Choose Destination > Address Book:
- Tap the Groups tab.
- Tap on the Group you want to add an address to.
- Tap New Location.
The ADD DESTINATION WINDOW displays.
-
Tap:
-
Enter New Address and search for an address. (See page 52.)
• History and select a History List location. (See page 91.)
• Saved and select an Address Book location. (See page 86.)
• POI and select a point of interest. (See page 60.) -
If you selected:
• History, Saved, or POI, the selected location is added to the group.
- Enter a New Address, theDEFAULT NAME CONFIRMATION Window displays. Tap Yes to accept the default name or tap No to display a keyboard.
Group Address List
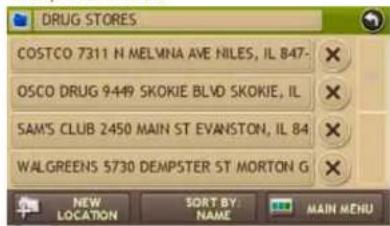
Confirmation Window

Remove an Address From a Group
From the MAIN MENU:
- TapChoose Destination > Address Book.
- Tap on the Group tab.
- Tap on the Group you want to remove the address from.
- Tap on the ✗ next to the address to be removed. A confirmation window displays.
- TapYes.
The Address Book Group redisplays with the address removed.
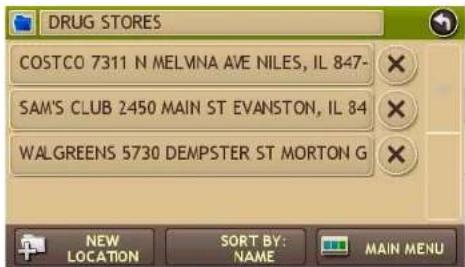

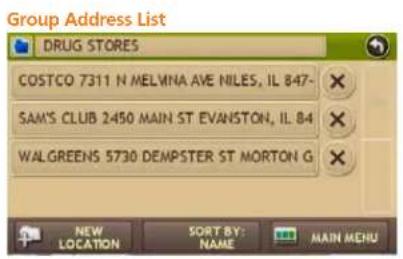
Select a Location From a Group
From the MAIN MENU:
- TapChoose Destination > Address Book.
- Tap on the Groups tab. The GROUPS LIST displays.
- Tap on the Group that contains the location. The GROUP ADDRESS LIST displays.
- Tap on the location. The confirmation window displays.
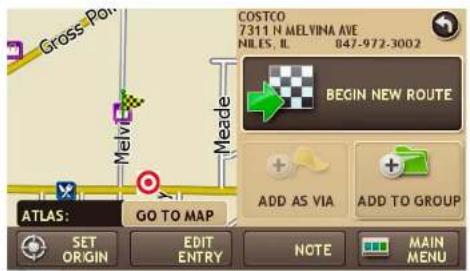
- Tap Begin New Route to navigate to the location. See "Address Confirmation Window" on page 99 for more options.
- If a warning message displays, select the appropriate response.
Destination History List
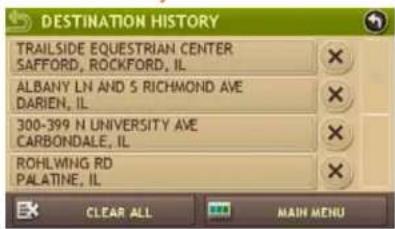
History List
Select a Location from the History List
From the MAIN MENU:
- Tap Choose Destination > History. The DESTINATION HISTORY LIST displays.
- Tap on the destination to select it. The confirmation window displays.
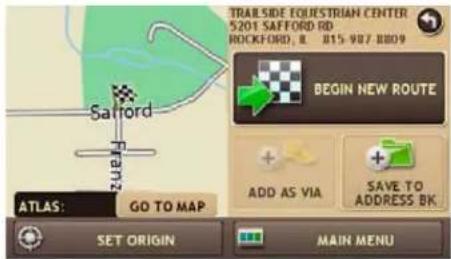
- Tap Begin New Route to navigate to the location. See "Address Confirmation Window" on page 99 for more options.
- If a warning message displays, select the appropriate response.
Multi-Stop Routes
Multi-Stop Trips Window

Enter Name Window
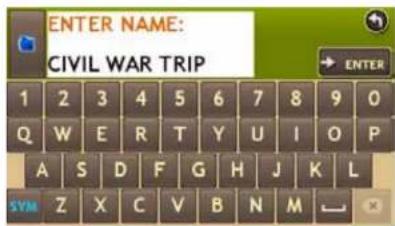
Choose Folder Color Window

Create a Multi-Stop Route
From the MAIN MENU:
- TapChoose Destination > Multi-Stop Trips. The MULTI-STOP TRIPS WINDOW displays.
- TapNew Trip. The ENTER NAME WINDOW displays.
- Type the trip name.
- To select a different color folder, tap The Choose Folder Color Window displays.
- Tap on a color, then tap Close.
- When finished, tap Enter. The MULTI-STOP TRIPS WINDOW redisplays. The new trip name is shown.


Add Locations to a Multi-Stop Route
Note: Add locations in the order you want to route to them.
From the MAIN MENU:
- TapChoose Destination > Multi-Stop Trips.
The MULTI-STOP TRIPS WINDOW displays.
- Tap on the route.
The ROUTE STOP WINDOW displays.
- TapAdd Address.
The ADD DESTINATION WINDOW displays.
-
To add an address, tap:
-
Enter New Address and search for an address. (See page 52.)
• History and select a History List location. (See page 91.)
• Saved and select an Address Book location. (See page 86.)
• POI and select a point of interest. (See page 60.)
A CONFIRMATION WINDOW asks if you want to add another stop.
- Tap:
• Yes to add another stop
• No if the route is complete.
- Tap

The ROUTE STOP WINDOW redisplays. The location has been added to the end of the route.
-
To change the order of the stops, see:
-
"Optimize a Route Manually" on page 97.
- "Optimize a Route Automatically" on page 98.
Route Stop List

Confirmation Window

Remove a Stop from a Multi-Stop Route
From the MAIN MENU:
- TapChoose Destination > Multi-Stop Trips. The MULTI-STOP TRIPS WINDOW displays.
- Tap on the route. The ROUTE STOP LIST displays.
- Tap on the ✗ next to the stop to be removed. A confirmation window displays.
- TapYes. The ROUTE STOP LIST redisplays with the stop removed.

Multi-Stop Route List

Multi-Stop Route List

Select and Run a Saved Route
From the MAIN MENU:
- TapChoose Destination > Multi-Stop Trips.
The MULTI-STOP ROUTE LIST displays.
- Tap on the route to select it.
The ROUTE STOP WINDOW displays.
- TapStart Trip.
The confirmation window displays.
- Tap Begin New Route to navigate to the location.
See "Address Confirmation Window" on page 99 for more options.
If the calculated route takes you through a state where your trailer length exceeds the legal limit, a Warning message displays.
- Tap Yes to calculate a route around the state or No accept the current route.
The TripMaker RVND calculates the route to your first stop. When you have reached the stop, a message displays.
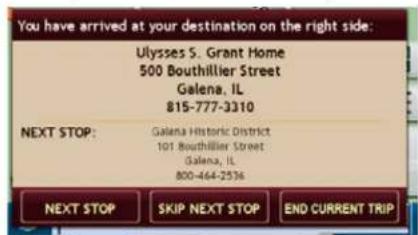
-
Tap:
-
Next Stop - To calculate a route to the next stop in the route
- Skip Next Stop - To skip the next stop and calculate a route to the stop after the next one.
• End Current Trip - To end the route at the current stop.

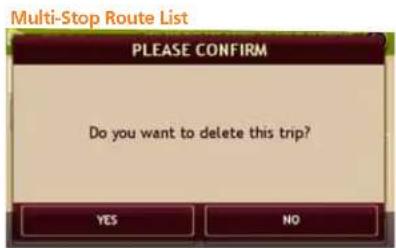
Delete a Multi-Stop Route
From the MAIN MENU:
-
TapChoose Destination > Multi-Stop Trips. The MULTI-STOP TRIPS WINDOW displays.
-
Tap on the ✗ next to the route to be deleted.
A confirmation message displays.
- Tap:
• Yes to delete the route.
- No to keep the route.
- The MULTI-STOP TRIPS WINDOW redisplays.
If you tapped Yes, the selected route has been removed.

Select Reorder Option Window
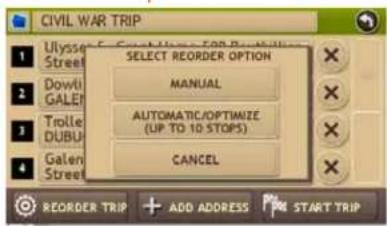
Reordering

Reordering

Optimize Routes
Optimize a Route Manually
- Tap Choose Destination > Multi-Stop Trips. The MULTI-STOP TRIPS WINDOW displays.
- Tap on the route you want to optimize. The ROUTE STOP WINDOW displays.
- Tap Reorder Trip. The SELECT REORDER OPTION WINDOW displays.
- Tap Manual.
The REORDERING
WINDOW displays. - Tap on the stop to be moved and tap:

To move the stop up in the route.

To move the stop down in the route.
- When finished, tap OK.
The ROUTE STOP WINDOW redisplays.
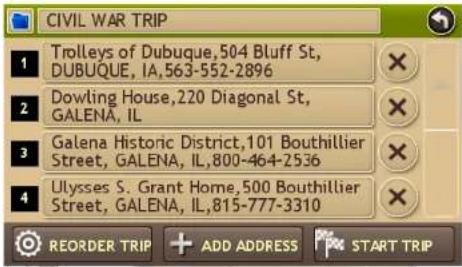
Select Reorder Option Window
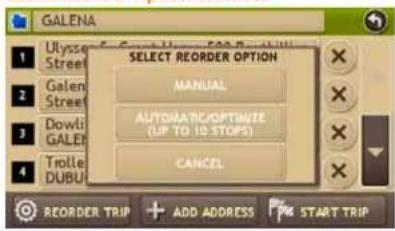
Auto Reorder First Stop Window
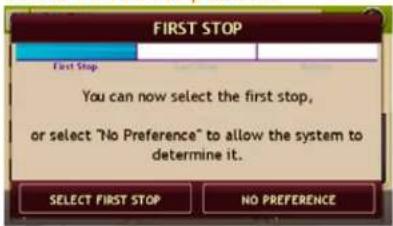
Auto Reorder Last Stop Window
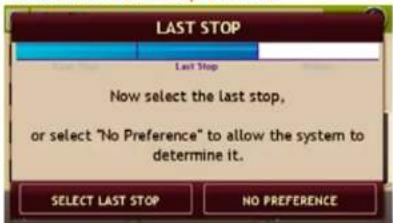
Reordered Route Stop Window

Optimize a Route Automatically
Note: There is a limit of ten stops that can be optimized.
From the MAIN MENU:
- TapChoose Destination > Multi-Stop Trips. The MULTI-STOP TRIPS WINDOW displays.
- Tap on the route you want to optimize. The ROUTE STOP WINDOW displays.
- Tap Reorder Trip. The SELECT REORDER OPTION WINDOW displays.
- Tap Automatic/Optimize. The FIRST STOP WINDOW displays.
-
Tap:
-
Select First Stop and select the first stop, or
- No Preference.
The LAST STOP WINDOW displays.
-
Tap:
-
Select Last Stop and select the last stop, or
- No Preference.
The RETURN TO CURRENT LOCATION WINDOW displays
- Tap:
• Yes to return to your current location to complete the route.
• No to complete the route at the last stop.
The ROUTE STOP WINDOW redisplays.
- Tap Start Trip to begin the route.
Destination Confirmation Windows

Address Confirmation Window
1 Destination Address
The selected location address.
2 Back Tap to return to previous window.
3 Begin New Route Tap to begin routing to destination.
4 Add as Via
Add this location as an interim stop between the origin and destination.
5 Save to Address Book
Add the location to the Address Book.
6 Atlas
View Rand McNally Road Atlas. "P" refers to the Road Atlas page number. The letter-number combination refers to the grid location.
7 Go to Map Tap to view this location on a map.
8 Set Origin Tap to set the location as the start of a route.
9 Main Menu Tap to return to the MAIN MENU.
Consumer Point of Interest Confirmation Window

Consumer Point of Interest Confirmation Window
1 Destination Address
The selected location address.
2 Back
Tap to return to previous window.
3 Begin New Route
Tap to begin routing to destination.
4 Add as Via
Add this location as an interim stop between the origin and destination.
5 Save to Address Book
Add the location to the Address Book. See "Address Book" on page 84.
6 Atlas
Cross-reference to printed Rand McNally Road Atlas. "P" refers to the Road Atlas page number. The letter-number combination after that refers to the grid location
7 Go to Map
Tap to view this location on a map.
8 Set Origin
Tap to set the location as the origin in a route.
9 Main Menu
Tap to return to the MAIN MENU.
RV-Related Point of Interest (POI) Confirmation Window
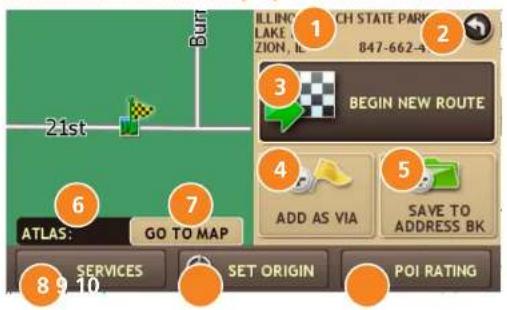
RV-Related Point of Interest Confirmation Window
1 Destination Address
The selected location address.
2 Back
Tap to return to previous window.
3 Begin New Route
Tap to begin routing to destination.
4 Add as Via
Add this location as an interim stop between the origin and destination.
5 Save to Address Book
Add the location to the Address Book. See "Address Book" on page 84.
6 Atlas
Cross-reference to printed Rand McNally Road Atlas.
7 Go to Map
Tap to view this location on a map.
8 Services
Tap to view RV amenities at this location.
9 Set Origin
Tap to set the location as the origin in a route.
10 POI Rating
Tap to rate amenities at this location.
Rand McNally Editor's Picks Confirmation Window

Rand McNally Editor's Picks Confirmation Window
1 Destination Address
The selected location address.
2 Back
Tap to return to previous window.
3 Begin New Route
Tap to begin routing to destination.
4 Location Info & Media
Tap to view pictures and videos about the POI.
5 Add as Via
Add this location as an interim stop between the origin and destination.
6 Save to Address Bk
Add the location to the Address Book. See "Address Book" on page 84.
7 Atlas
Cross-reference to printed Rand McNally Road Atlas.
8 Go to Map
Tap to view this location on a map.
9 Set Origin
Tap to set the location as the origin in a route.
10 POI Rating
Tap to rate amenities at this location.
11 Main Menu
Tap to return to the MAIN MENU.
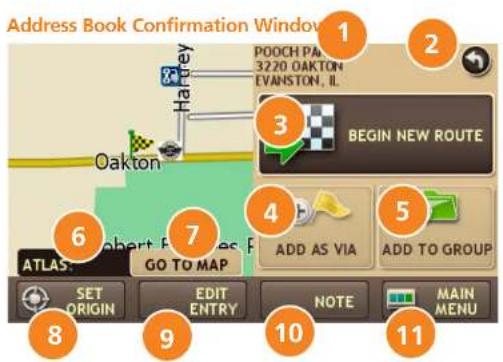
Address Book Confirmation Window
1 Destination Address
The selected location address.
2 Back
Tap to return to previous window.
3 Begin New Route
Tap to begin routing to destination.
4 Add as Via
Add this location as an interim stop between the origin and destination.
5 Add to Group
Tap to add the location to an Address Book group.
6 Atlas
Cross-reference to printed Rand McNally Road Atlas.
7 Go to Map
Tap to view this location on a map.
8 Set Origin
Tap to set the location as the origin in a route. This can be used for routes that start from somewhere other than the last known location.
9 Edit Entry
Tap to edit the location address book entry.
10 Note
Tap to create a note about the location.
11 Main Menu
Tap to return to the MAIN MENU.
Real-Time Traffic (Optional Service)

Route Map Window - Traffic Icon
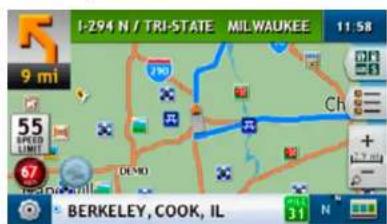
Real-Time Traffic Window
1 Avoid Traffic
Tap to select either a recalculated route based on traffic events or to stay on the current route.
2 Traffic on Route
Tap to view traffic events along your route.
3 Traffic List
Tap to view a list of traffic events within receiver range.
4 Back
Tap to return to the ROUTE MAP WINDOW.
5 Off/Real-Time Traffic
Tap to select Real-Time Traffic or to turn traffic reporting off. In some units, this also accesses Predictive Traffic.
Note: Real-Time traffic is an optional service.
6 Menu
Tap to return to the MAIN MENU.
Access the Real-Time Traffic Window
On the ROUTE MAP WINDOW:

The TRAFFIC WINDOW displays.
Sample Real-Time Traffic Window
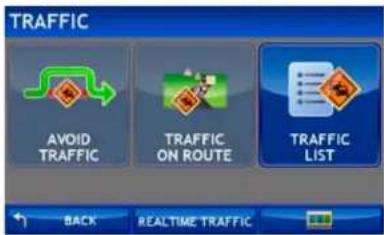
View Real-Time Traffic
Note: Real-time traffic is available as an optional service.
With the Real-Time Traffic service you'll receive notification of traffic conditions and events. You can choose to ignore the warning or to recalculate a route avoiding the problem.
To use this feature, you must purchase a Rand McNally Real-Time Traffic Receiver. The receiver also comes with a lifetime traffic subscription.
For more information, see www.randmcnally.com/rvgps.
RV Tools
RV Tools Window - RV Mode

RV Tools Window - Car Mode

RV Tools Window
1 Back
Return to the MAIN MENU.
2 RV Info
Enter RV information (weight, length, etc.).
Note: Not available in Car mode.
3 RV Logs Checklists Trails
View campground set up and take down checklists, maintenance logs, and breadcrumb trails feature.
4 Warnings
Set warning distances for speed reductions, toll booths, construction and hills & sharp curves.
5 Quick Planner
Calculate distance, driving time, and cost between two major cities quickly without having to calculate a route.
6 Road Atlas
View Rand McNally Emergency contact information, and fun facts about each state, Canadian province, or country of Mexico.
7 Tell Rand
Compose a message that will be sent to Rand McNally next time you connect to Rand McNally Dock.
8 Converter
Quickly convert distance, weight, and temperatures.
9 Calculator
Use a large key calculator.
Checklists Window
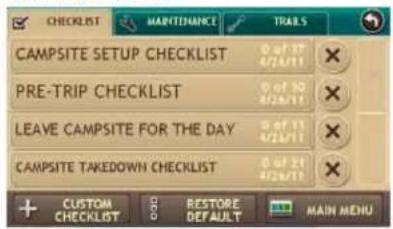
Selected Checklist Tasks List

Checklists Tasks List

RV Checklists
Select and Complete a Checklist
From the MAIN MENU
- Tap RV Tools > RV Logs Checklists Trails.
- Tap the Checklists tab.
The Checklists Window displays.
- Tap and to view all available checklists.
- Tap on a check list to select it.
The CHECKLIST TASKS LIST displays.
- After completing a task, tap on the task's checkbox.
A check mark ( √ ) displays indicating the task has been completed. - Continue completing tasks.
- To save changes, tap
A confirmation message displays.
-
Tap:
-
Cancel to continue completing tasks.
• Uncheck All to clear all checklist tasks. - OK to save changes.
The CHECKLIST TASKS LIST redisplays.
The number of completed tasks displays on the right (for example, 2 or 29).
Note: If you accidentally delete a default checklist, tap Restore Default. (This may take a minute or two.)
Checklists Window
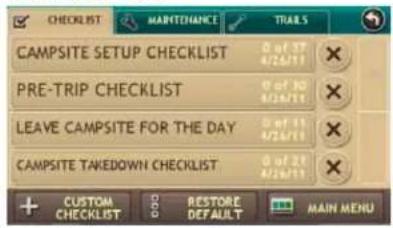
Enter Checklist Name Window

Checklists Tasks List

Create a Custom Checklist
From the MAIN MENU
- Tap RV Tools > RV Logs Checklists Trails.
- Tap the Checklists tab. The Checklists Window displays.
- Tap Custom Checklist. The ENTER CHECKLIST NAME WINDOW displays.
- Type the checklist name and tap Enter. The CHECKLISTS WINDOW redisplays.
- Tap to scroll to the end of the list.
The new checklist is added to the end of the listing. On the right, the numbers (0 of 0) indicate that no tasks have been added to checklist.
Checklists Window
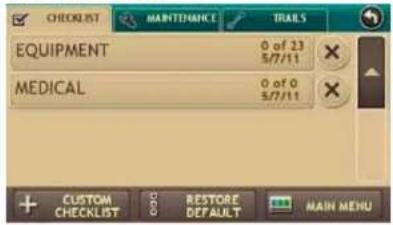
Selected Checklist Tasks List - Before
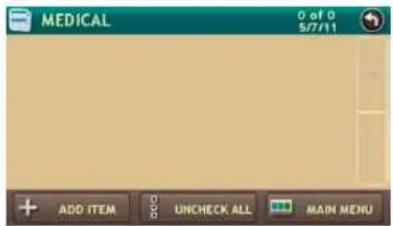
Enter Item Name Window
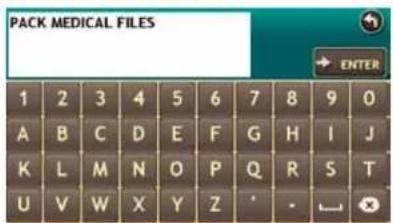
Selected Checklist Tasks List - After
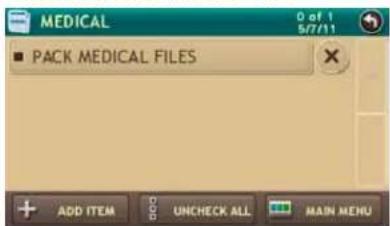
Add Tasks to a Checklist
From the MAIN MENU
- Tap RV Tools > RV Logs Checklists Trails.
- Tap the Checklists tab. The CHECKLISTS WINDOW displays.
- Tap on the checklist you want to add tasks to. The CHECKLIST TASKS LIST displays.
- Tap Add Item. The ENTER ITEM NAME WINDOW displays.
- Type the task name and tap Enter. The new task has been added to the checklist.
The new checklist is added to the end of the listing. On the right, the numbers (0 of 0) indicate that no tasks have been added to checklist.
Checklists Window
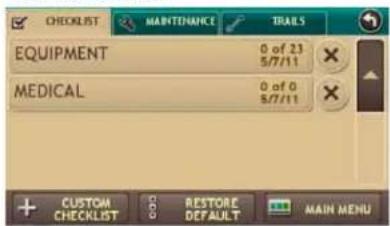
Selected Checklist Tasks List - Before
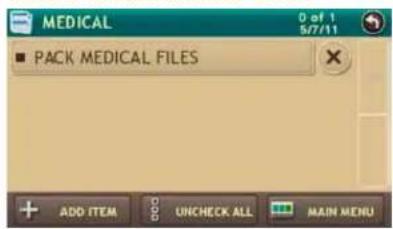
Selected Checklist Tasks List - After

Remove Tasks From a Checklist
From the MAIN MENU
-
Tap RV Tools > RV Logs Checklists Trails.
-
Tap the Checklists tab. The CHECKLISTS WINDOW displays.
-
Tap on the checklist containing the task you want to remove. The CHECKLIST TASKS LIST displays.
-
Tap on the ✗ next to the task you want to remove. A confirmation message displays.
-
Tap:
• Yes to delete the task.
• No to keep the task.
The CHECKLIST TASKS LIST redisplays. The task has been removed from the checklist.
Checklists Window

Selected Checklist Tasks List - Before

Delete a Checklist
From the MAIN MENU
- Tap RV Tools > RV Logs Checklists Trails.
- Tap the Checklists tab. The CHECKLISTS WINDOW displays.
- Tap on the ✗ next to the checklist you want to delete.
A confirmation message displays.
- Tap:
• Yes to delete the task.
• No to keep the task.
The CHECKLIST TASKS LIST redisplays. The checklist has been deleted.
Note: If you accidentally delete a default checklist, tap Restore Default to recover it. This may take a minute or two.
Maintenance Notes Window
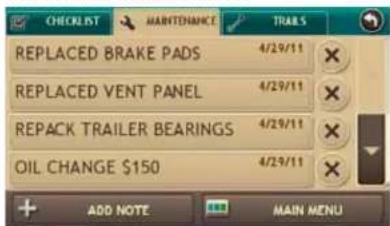
RV Maintenance Notes
View Maintenance Note Information
From the MAIN MENU:
- Tap RV Tools > RV Logs Checklists Trails.
- Tap the Maintenance tab. The MAINTENANCE NOTES WINDOW displays. Notes are shown by date, the most recent first.
- Tap and to scroll through the list.
- Tap on the Note you want to view. The NOTE DETAIL WINDOW displays.
- When finished, tap
Note Detail Window

Maintenance Notes Window

Enter Note Window

Enter Date Window

Add a Maintenance Note
From the MAIN MENU:
- Tap RV Tools > RV Logs Checklists Trails.
- Tap the Maintenance tab. The MAINTENANCE NOTES WINDOW displays. Notes are shown by date, the most recent first.
- Tap Add Note. The ENTER NOTE WINDOW displays.
- Type the note and tap Enter. The note displays in the NOTE DETAIL WINDOW.
- To change the date, tap Edit Date. The SET DATE WINDOW displays.
- Tap and to select the date.
- When finished, tap OK. The new date displays on the NOTE DETAIL WINDOW.

- Tap

The MAINTENANCE NOTES WINDOW redisplays.
Maintenance Notes Window

Note Detail Window
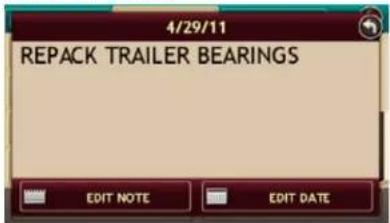
Update an Existing Maintenance Note
From the MAIN MENU:
- Tap RV Tools > RV Logs Checklists Trails.
- Tap the Maintenance tab. The MAINTENANCE NOTES WINDOW displays. Notes are shown by date, the most recent first.
- Tap and to scroll through the list.
- Tap on the Note you want to change. The NOTE DETAIL WINDOW displays.
- To change the note text, tap Edit Note. The ENTER NOTE TEXT window displays.
- Type the new text and tap Enter.
- To change the note date, tap Edit Date. The ENTER DATE WINDOW displays.
- Use and to select the date and tap OK. The NOTE DETAIL WINDOW displays the new text.

- When finished, tap

The MAINTENANCE NOTES WINDOW redisplays.
Maintenance Notes Window - Before
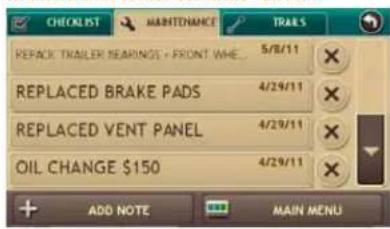
Maintenance Notes Window - After

Delete a Maintenance Note
From the MAIN MENU:
- Tap RV Tools > RV Logs Checklists Trails.
- Tap the Maintenance tab. The MAINTENANCE NOTES WINDOW displays. Notes are shown by date, the most recent first.
- Tap and to scroll through the list.
- Tap on the ✗ next to the note you want to delete. A confirmation message displays
- Tap:
• Yes to delete the note.
- No to keep the note.
The MAINTENANCE NOTES WINDOW redisplays.
The note has been deleted.
Trails Window

Route Map Window

Trails Window

Trails
Create a New Trail
From the MAIN MENU:
- Tap RV Tools > RV Logs Checklists Trails.
- Tap the Trails tab. The TRAILS WINDOW displays.
- Tap New Trail. The RECORD NEW TRAIL WINDOW displays.
- Tap OK. The ROUTE MAP WINDOW displays.
The Trail icon () displays.
- When you wish to stop recording, tap on the Trail icon. The STOP RECORDING TRAIL WINDOW displays.
- Tap OK. The trail is saved.
Trails Window

Trail Route Window

Rename an Existing Trail
From the MAIN MENU: 1. Tap RV Tools > RV Logs Checklists Trails. 2. Tap the Trails tab. The Trails Window displays. 3. Tap on the trail you want to update. The TRAIL ROUTE WINDOW displays. 4. Tap Edit Name. The ENTER TRAIL NAME WINDOW displays. 5. Type the new text and tap Enter. The ROUTE MAP WINDOW redisplays. Trail information is updated. Trails Window - Before  Trails Window - After Delete a Trail
From the MAIN MENU: 1. Tap RV Tools > RV Logs Checklists Trails. 2. Tap the Trails tab. The TRAILS WINDOW displays. 3. Tap on the ✗ next to the trail you want to delete. A confirmation message displays 4. Tap: • Yes to delete the note. \- No to keep the note. The Trail Window redisplays. The trail has been deleted. Trails Window  Trail Route Window Display a Trail
From the MAIN MENU: 1. Tap RV Tools > RV Logs Checklists Trails. 2. Tap the Trails tab. The TRAILS WINDOW displays. 3. Tap on the trail you want to run. The TRAIL ROUTE WINDOW displays the trail. 4. Tap on Show on Map. The ROUTE MAP WINDOW displays. 5. Tap on the Trails Icon ( ). 6. Tap: • Trail only to show only the trail. - Trail and Vehicle to show the trail and your current location. - Hide Trail to not display the trail 7. Visually follow the trail. Note: Because this mode may not contain roads, no voice direction is available. Warnings Window Set Warnings
From the MAIN MENU: 1. TapRV Tools >Warnings. The WARNINGS WINDOW displays 2. Tap and to view the options. 3. Tap the warning to be set. 4. Tap and to specify the number of miles or hours. 5. Tap to save changes. Quick Planner Window  Enter Amount Window  Enter Amount Window Calculate a Mileage and Driving Time
Note: This tool is not available for all locations. Use this tool to quickly estimate the mileage and time between one major city to another major city in North America. From the MAIN MENU: 1. TapRV Tools > QuickPlanner. The QUICK PLANNER WINDOW displays. The cost per mile used in the last computation displays. 2. Tap From City 1 and select the city. 3. Tap To City 2 and select the city. 4. Tap Cost per Mile and enter the per mile rate. The ENTER AMOUNT WINDOW displays. 5. Tap the new dollar amount and tap Enter. 6. Tap Average Speed (MPH) enter a speed:    7. The QUICK PLANNER WINDOW redisplays and shows the updated costs and driving time.  Rand McNally Road Atlas Window  Atlas Information Window View Atlas Information
From the MAIN MENU: 1. Tap RV Tools > Road Atlas Information. The RAND McNALLY ROAD ATLAS WINDOW displays. 2. Select the appropriate country tab. The State List (USA.), Province List (Canada) or Mexico displays. 3. Tap on the appropriate U.S. state or Canadian province. Tap Mexico to see information in Mexico. The ATLAS INFORMATION WINDOW for the selected location displays. 4. Use   oll to view specific RV information for that state. Tell Rand McNally About Window  Enter Message Window Send a Message to Rand McNally
You can send a message to Rand McNally about updates such as road construction, updates to RV road information, etc. To use this feature, you must install the Rand McNally Dock application on your computer. See "Rand McNally Dock" on page 137.Send a Message About Your Current Location
From the MAIN MENU: 1. TapRV Tools > Tell Rand. The TELL RAND McNALLY ABOUT WINDOW displays. 2. On the left side of the window, tap Current Location. Your current location appears below the buttons. 3. On the right side of the window, tap the type of message you want to send. The ENTER MESSAGE WINDOW displays. 4. Type your message. 5. Tap Enter to save the message. 6. To discard the message and return to the previous window, tap The TELL RAND McNALLY ABOUT WINDOW redisplays.   Enter Message Window To Send a Message About Speed Limit Difference While in Navigation Mode:
1. Tap on the Speed Limit Icon  2. A pop up screen will allow you to notify Rand McNally of a change in speed limit. 3. Make any changes. If the speed limit you are currently traveling is accurate, send to Tell Rand. 4. Tap Enter to save the message. 5. To discard the message and return to the previous window, tap 📋. The TELL RAND McNALLY ABOUT window redisplays. Note: You only need to enter a few brief words. You will be able to modify the message later in Rand McNally Dock using your computer keyboard, before it is sent to Rand McNally. Your message can be sent to Rand McNally the next time you connect your TripMaker RVND to your computer and use Rand McNally Dock. Tell Rand McNally About Window  Select Address Window  Enter Message Window Send a Message About a Different Location
From the MAIN MENU: 1. TapRV Tools > Tell Rand. The TELL RAND McNALLY ABOUT WINDOW displays. 2. On the left side of the window, tap Enter Different Location. The SELECT ADDRESS WINDOW displays. 3. Search for and select the location. The selected location appears below the buttons on the TELL RAND McNALLY ABOUT WINDOW. 4. On the right side of the window, tap the type of message you want to send. The ENTER MESSAGE WINDOW displays. 5. Type your message. 6. TapEnter to save the message. To discard the message and return to the previous window, tap The TELL RAND McNALLY ABOUT WINDOW redisplays.  Note: You only need to enter a few brief words here, since you will be able to modify the message later in Rand McNally Dock, using your computer keyboard, before it is sent to Rand McNally. Your message can be sent to Rand McNally the next time you connect your TripMaker RVND to your computer and use Rand McNally Dock. Tell Rand McNally About Window  Map Window  Enter Message Window Send a Message About a Location on the Map
From the MAIN MENU: 1. TapRV Tools > Tell Rand The TELL RAND McNALLY ABOUT WINDOW displays. 2. On the left side of the window, tap Find Location on Map. The MAP WINDOW displays. 3. Touch the map and drag the crosshairs over the location. 4. Tap Back. The selected address location appears below the buttons on the TELL RAND McNALLY ABOUT WINDOW. 5. On the right side of the window, tap the type of message you want to send. The ENTER MESSAGE WINDOW displays. 6. Type your message. 7. When finished, tap Enter to save the message. To discard the message and return to the previous window, tap The TELL RAND McNALLY ABOUT WINDOW redisplays.  Your message can be sent to Rand McNally the next time you connect your TripMaker RVND to your computer and use Rand McNally Dock. Converter Window  Conversion Types Window Use the Unit Converter
From the MAIN MENU: 1. TapRV Tools > Converter. The CONVERTER WINDOW displays 2. Tap on the first field and select the type of conversion to perform. The CONVERTER WINDOW redisplays. 3. Tap on the second field and enter the value to be converted. 4. TapEnter. The CONVERTER WINDOW redisplays and displays the converted value.  Calculator Use the Calculator
From the MAIN MENU: 1. Tap RV Tools > Calculator. 2. Tap keyboard as you would on any other calculator. 3. When finished, tap to return to the RV Tools Window.Customize
RV Info Window RV Information
Note: Only available in RV mode. See "Select RV or Car Mode" on page 21. To ensure the most accurate routing for your size vehicle, enter RV Type as well as the total RV length, width, height and propane onboard. To change these settings, from the MAIN MENU: \- Tap RV Tools RV Info. RV Type Specify the type of RV. Options are: Class A, Class A w/Tag Axle, Class B, Class C, Class C (Super), Fifth Wheel, Hybrid Trailer, Popup Trailer, Toy Hauler, Travel Trailer, and Truck Camper. Propane Use      size of bottles of propane. Number of Trailers Specify the type of trailer. Options are: 0, 1, and 2. Total RV Length Use      the RV. Important Note: Total RV Length should include your vehicle plus trailer(s) and/or toad. WeightUse      \-      ETA Adjustment Specify how arrival time should be estimated. Options are: ETA OK (no adjustment), Increase ETA Some, Increase ETA More, Decrease Some Time, and Decrease More Time. General Preferences Window General Preferences (RV or Car)
To change these settings, from the MAIN MENU: \- Tap Preferences > General tab. Vehicle Type Select the vehicle mode. Options are: RV or Car. This option controls how routes are calculated. When the Car mode is selected, some RV-related features are not available. See "Select RV or Car Mode" on page 21.Day and Night Map Color
Allows you to automatically or immediately change to day or night coloration for easier route viewing. Brightness Set the brightness level for screen display.My Custom POI Setting
This allows you to set warning distance and type, icon image, and display zoom level for any custom locations that you have imported (see page 73 for further information on Custom POI). Screen Click This allows you to turn off or on the click heard when you tap a button. Tutorial & Tips View a brief tutorial on how to use the RVND as well as new features, Frequently Asked Questions (FAQs), and Tips to successfully use your device. Keyboard Select the type of keyboard to be used. Options are: ABC or Computer (QWERTY). Voice Name Select the voice to be used to issue spoken instructions. Language Select the language to be used to display on the device and issue spoken instructions. Units Select how vehicle weight is displayed. Options are U.S. Standard or Metric. Clock Setting Select whether a 12 hour clock (with am and pm) or a 24 hour clock is set on the device. Align Screen Calibrate the touch screen. Note: Select this option if your RVND seems to have buttons that are hard to tap. You may need to realign the screen after a software update using Rand McNally Dock. GPS Data View information on the current GPS fix. About View device information.Traffic Receive Status
Note: Real-Time traffic requires the purchase of an additional accessory. View information related to the real-time traffic receiver.Real Time Traffic Settings
Note: Real-Time traffic requires the purchase of an additional accessory. Set to show real time traffic events related to flow only, incidents only, or both flow and incidents. Real time traffic can also be turned off. Route Preferences Window  Route Preferences Window (page 2) Route Preferences
Note: When a roadway (tollways, ferries, or freeways) or maneuver type (U-turns) is set to Avoid, a returned route may still include them. They're included if the only legal route found contains these types of roads or the route is over several hundred miles. To change these settings, from the MAIN MENU: \- Tap Preferences >Route tab. Recalculation Select whether reroute calculations will be performed manually or automatically. Route Select the type of route. Options are: Fastest Route (shortest travel time) or Shortest Route (shortest travel distance). Tollways Select whether highways are considered in a calculated route. Options are: Allow Tollways or Avoid Tollways. See note above. Freeways Select which types of roads are considered in a calculated route. Options are Allow All, Allow Freeways, Avoid Freeways, and Avoid Small Roads. U Turns Select whether u-turns are considered in a calculated route. Options are: Allow U-Turns or Avoid U-Turns. See note above. Ferries Select whether ferries are considered in a calculated route. Options are: Allow Ferries or Avoid Ferries. See note above. Route Preferences Window (page 2)  Route Preferences Window (page 3) Cross Country Borders
Select whether roads crossing a country border are considered in a calculated route. Options are: Allow Crossing Country Borders or Avoid Crossing Country Borders. When set to Avoid, a route may still cross country borders if the only legal route contains roads that cross borders or if the route origin and destination are in different countries. Dirt Roads Select whether dirt roads are considered in a calculated route. Options are: Allow Dirt Roads or Avoid Dirt Roads. See note above. Tunnels Select whether tunnels are considered in a calculated route. Options are: Allow Tunnels or Avoid Tunnels. See note above. Avoid List This allows you to view and/or re-open road segments which you have "permanently" avoided. Map Preferences Window Map Preferences
To change these settings, from the MAIN MENU: \- Tap Preferences >Map tab. Map Auto Zoom Select how zoom out displays on the map. Options are: Off (no zoom), On, Auto Scale (always zoom to keep the current vehicle position and the next turn in the map view), On, Street Scale (maximum zoom out to the local street level between turns), On, City Scale (maximum zoom out to the city level between turns, or On, County Scale (maximum zoom out to the county level between turns). Note: Map redraw speed is impacted by autozoom choice, especially when combined with 3D map display option. POI Icons Specify whether consumer point of interest icons display on the map. Options are: POI Icons On or POI Icons Off. These are general interest POIs that display when the POI category More is selected and when you are zoomed in close enough to see them. Note: Depending on the map display choice and zoom level, this can impact performance. In 3D display, POI display results in the slowest map redraw performance. Note: City names can appear on the map when zoomed out by turning on POI Icons. RV POI Icons Specify whether RV-related point of interest icons display on the map. Options are: POI Icons On or POI Icons Off. As these POIs may be farther apart, they display when zoomed farther out. Map Preferences Window  Car Icon When vehicle mode is set to Car, select the type of car icon and color to be used on the device. With some icons, you can select from an infinite range of colors. RV Icon When vehicle mode is set to RV, select the type of RV icon and color to be used on the device. With some icons, you can select from an infinite range of colors. Route Color Allows you to select the color of the route line. Auto Dismiss Warnings Window Warning Options
To change these settings, from the MAIN MENU: \- Tap RV Tools Warnings. Note: Only available in RV mode. See "Select RV or Car Mode" on page 21.Warning/Alert Prompts
Specify how warnings and alerts will prompt you. Options are None (no prompt), Audio & Visual, Visual, or Audio.Auto Dismiss Warnings
Specify when a warning or alert will automatically be dismissed. Options are: Never, After 10 seconds or After 30 seconds.Hills & Sharp Curves
Specify when (in miles or kilometers) to issue a warning before reaching a hill or sharp curve. Speed Limit Alert Specify when (in MPH) to issue a warning when exceeding the speed limit. State Border Alert Specify when (in miles or kilometers) to issue a warning about an upcoming state border.Crossing State Border/Time Zone Change Warning
Specify whether a warning is issued when crossing a state border to changing time zones. Toll Booth Alert Specify when (in miles or kilometers) to issue a warning about an upcoming tollbooth. Construction Area Specify when (in miles or kilometers) to issue a warning about upcoming road construction.Speed Limit Change
Specify when (in miles or kilometers) to issue a warning about a speed limit decrease.Rand McNally Dock
 Download and Install
Note: An internet connection is required for this feature.. 1. Go to http://www.randmcnally.com/dock/ and download Rand McNally Dock. 2. Turn on you TripMaker and connect the RVND to your computer using the USB cable. On the computer: 3. Click Install Rand McNally Dock The Welcome to Rand McNally Setup Wizard displays. 4. ClickNext. The LICENSE AGREEMENT WINDOW displays. 5. Clickon: I Agree button and tap Next to continue installation. I Do Not Agree and tap Next to end the installation. 6. Follow onscreen instructions to complete the installation. When finished, the INSTALLATION COMPLETE WINDOW displays. The Rand McNally Dock icon displays in the system tray in the lower right corner of your screen.  Rand McNally Dock Main Window
1 Update
Click to update your TripMaker RVND software.2 Custom POI
Import custom destinations or points of interest from a third party provider.3 Tell Rand McNally
Click to send a message to Rand McNally. An exclamation mark 🤒 indicates messages are ready to be sent. You can click this button to review and edit messages to Rand McNally.4 Tools
Update Dock preferences, such as language.5 TripMaker RVND Manual
Click to view the TripMaker RVND User's Guide.6 RVND Support Website
Click to view the RVND support website.7 Go to Rand McNally Website
Click to view the Consumer website.8 Announcements
Find out what is new from Rand McNally, retrieve important support notices Go to Rand McNally Website
Note: Connection to the internet is required to access the website. On the RAND McNALLY DOCK MAIN WINDOW: \- Click on the Go to the Rand McNally Website link. The Rand McNally Consumer Home Page displays.  Updates
Note: An internet connection is required for this feature. An exclamation mark next to the Update TripMaker RVND button indicates that updates for RVND software are available. There will also be periodic updates to Rand McNally Dock. You can retrieve software updates without being connected to the RVND. After retrieving updates, you can later load them onto the RVND without needing to re-connect to the internet. On the RAND McNALLY DOCK MAIN WINDOW: 1. Roll your mouse pointer over the Update button and click Get Updates. The UPDATING RVND WINDOW displays and RVND Dock checks for software updates. 2. If RVND software updates are found, click OK. The RVND Updates Progress Bar displays as the updates are transferred to your device. If Rand McNally Dock updates are found, a message displays. 3. Click Yes to update the software. 4. Follow on-screen instructions to complete the upgrade. 5. When finished, click Close The RAND McNALLY DOCK MAIN WINDOW redisplays. View RVND Version Information
These logs are part of Rand McNally's continuous improvement program and only contain information that can be used to diagnose software problems during device operation. No location, tracking or personal information is included. The information about your specific device is shown here. This information will be necessary when contacting customer support. View Manual
Note: Adobe Acrobat Reader is required to view the TripMaker RVND User's Guide. Note: You must be connected to the internet for the first use only. After that, you can view the manual at anytime without an internet connection. Note: Some Rand McNally Dock features require an internet connection. On the Rand McNally Dock Main Window: \- Click on the Read TripMaker RVND Manual button. The User's Guide displays in an Adobe Acrobat Reader Window. Tell Rand McNally
On the RAND McNALLY DOCK MAIN WINDOW: 1. Click on the Tell Rand McNally button. The TELL RAND WINDOW displays. Comments you have previously entered on your RVND are listed. 2. To add a comment, click Add Comment and enter information in the provided fields. 3. To delete a comment, click on the comment and click Delete Comment. Note: To receive a personal response from Rand McNally, include your e-mail address somewhere in the message text. 4. When finished, click Done. The SEND COMMENTS WINDOW displays. 5. Click: • Yes to send comments now. • No to send comments later. Go to RVND Support Website
On the RAND McNALLY DOCK MAIN WINDOW: \- Click on the RVND Support Website button. The RVND Support Website displays.Index
A
address book 84 add an address to a group 88 create a group 87 remove an address from a group 89 save a location.... 84 save a location to 84 select a location from a group 90 select a location from the 86 sort entries by name or distance 85 addresses find 46..51 Location Selection Window 51 search by city/state/street 52 search for a city center 53 search for an intersection 54 auto-complete, searches 48 auto-complete search names 48B
basic operation 13 basic settings 18 set RV or car mode 21 battery power light 9C
calculator, use a 128 charge the battery 10 first time use 10 with the vehicle charger 10 with the wall charger.... 10 Rand McNally TripMaker® RVND™ User's Guide Version 1 145 city and street names about 49 searches 49 confirmation windows Address 99 Address Book 103 Consumer Point of Interest 100 Rand McNally Editor's Picks 102 RV-Related Point of Interest 101 consumer POI select a.... 65..68 copyrights.... ii cradle and mount installation.... 11 current road information.... 35 city, county and state 35 next intersecting street name 35 road name.... 35 view 35 custom points of interest (POI)....73 customer support e-mail 4 service hours 4 toll-free 4 web.... 4 customize 129 general preferences 130 map preferences.... 134 route preferences 132 RV information 129 warning options 136D
destinations 46 about city and street names.... 49 Destination Selection Window 47 find addresses 46 find Points of Interest (POIs).... 60 ways to search for 46 detours 40 around a specific roadway 41 around part of the route.... 40 tap on a route segment 43 using detail view map display option 42 using highway view map display option...... 42E
ETA adjustment, set 20 exit POIs slide-out list 28 display POIs at an exit 29F
FCC Notice .... iiiG
general options.... 130 GPS, about 3H
history list 91 select a location from 91|
install cradle and mount.... 11J
junction view 36K
keyboards select a type 18 special keys 16 using.... 16L
language, select a 18 latitude/longitude search for a location 57 locations auto-complete.... 48 find addresses 46 find nearby Points of Interest (POIs) 69 way to search for.... 46 location searches 47M
main menu 14 manage destinations save location in the Address Book.... 84 maps 25 multi-stop routes 92 add locations to a 93 create a 92 delete a.... 96 remove a stop from a 94 select and run a saved 95 mute volume 19N
nearby POIs 69 along the route 71 in a city 70 near current vehicle location 69 near your destination.... 720
optimize routes.... 97 automatically 98 manually 97P
points of interest (POIs) 58 consumer 67 POI Category Window 59 Rand McNally Editor's Picks 65 RV-related 62 types of 60 power 12 turn the device off.... 12 turn the device on 12 power light 9 predictive traffic....45Q
quick route calculate a.... 121 quick stop POI select a.... 61R
Rand McNally Road Atlas view information 122 Rand McNally trips.... 76 select a Best of the Road 77 select a regional road trip 80 select a scenic tour 79 select a weekend getaway.... 78 real-time traffic (optional service) 104 access the window 104 view traffic events 105 reset the device.... 12 route between two major cities, calculate 121 route map window 25 route options slide out list 30 detail view.... 31 highway view 32 route summary 33 select a route display option 30 summary map view 34 routes cancel...... 44..45 route type, select 21 routing messages.... 17 RV information, set RV information.... 20 RVND Dock 137 go to support website 144 main window 138 tell Rand McNally.... 143 updates.... 140 view User's Guide 142 view version information 141 website 139 RVND Dock main window.... 138 RV or car mode select.... 21 RV-related POI rate a 83 RV tools 106 calculator 128 checklists.... 107 add tasks to a 109 create a custom 108 delete a 111 remove tasks from a 110 select and complete a.... 107 maintenance notes 112 add a.... 113 delete a 115 update an existing 114 view note information 112 Rand McNally Road Atlas view atlas information 122 trails.... 116 create a new.... 116 delete a 118 display a 119 rename an existing 117S
safety information driver safety.... 8 installation safety.... 7 navigation safety 6 searches about city and street names.... 49 city and street names.... 50 expanded street name 49 select a city city/state list 50 first use 50 long city list 50 short city list 50 select a language 18 select a POI consumer by category 67 consumer by name 68 quick stop 61 Rand McNally Editor's Pick 65 RV-related 62 travel center 64 send a message to Rand McNally about a different location 125 about your current location 123 start the TripMaker RVND 13T
tap on map and find a location 81 avoid location.... 81 route to location.... 82 tapping on the screen 15 tell Rand send a message 123 about a different location 125 about current location 123 select a location by tapping map 126 time option, set a.... 27 trademarks ii traffic real-time (optional service).... 104 TripMaker RVND main menu.... 14 parts of 1..2 turn off the device 12 turn on the device 12 type of route select fastest or shortest 21U
unit converter, use a 127 unmute volume 19 user's guide view 142v
vehicle icon, select 23 vehicle mode, set 21 virtual dashboard 37 automatically reset trip info 39 gather trip information 38 show/hide 38 voice, select a 22 volume, decrease 19 volume, increase 19 volume, mute 19 volume settings.... 19 volume, unmute 19W
warnings, set 24, 120 what's included 5 windows location selection.... 51 point of interest category window.... 59 point of interest selection.... 58 point of interest selection window.... 58 Rand McNally trips window 76 real-time traffic.... 104 route map 25 RVND Dock main.... 138 RV tools.... 106Z
ZIP codes search for an address.... 55 search for an intersection.... 56- FCC Notice
- Contents
- Welcome
- Getting Started
- Basic Operation
- Maps
- Destinations
- Multi-Stop Routes
- Destination Confirmation Windows
- Real-Time Traffic (Optional Service)
- RV Tools
- Customize
- Rand McNally Dock
- Index
- Your TripMaker RVND 7710
- Your TripMaker RVND 5510
- About GPS
- Customer Support
- What's Included
- Important Safety Information
- Navigation Safety
- Installation Safety
- Device Safety
- Battery Power Light
- Charge the Battery
- First Time Use
- Charge with the Wall Charger
- Charge with the Vehicle Charger
- Install the Cradle and Mount
- Power the Device
- Turn the Device On
- Turn the Device Off
- Reset the Device
- WARNING AND LEGAL CONSENT
- Start the TripMaker RVND
- The Main Menu
- RV Tools
- Go To Map
- Choose Destination
- Preferences
- Mute/Unmute the Speaker
- Set Volume Louder or Softer
- Tapping the Screen
- Using Keyboards
- Special Keys
- WARNING
- CLOSE
- Routing Messages
- Basic Settings
- Select a Language
- Select a Keyboard Type
- Volume Settings
- Increase Volume
- Decrease Volume
- Mute Spoken Instructions
- UnMute Spoken Instructions
- Set RV Information
- Set ETA Adjustment
- Select RV or Car Mode
- Set to Calculate Shortest Route or Fastest Route
- Select a Voice for Spoken Instructions
- Select a Vehicle Icon and Color
- Set Warnings
- Route Map Window
- Select a Display Time Option
- Exit POIs Slide Out List
- Exit Information
- Show Amenities Button
- Up/Down
- View POIs at a Selected Exit
- Directions Slide-Out List
- Select a Route Display Option
- Detail View
- Rise/Set
- MPH
- Trip Information
- Distance
- Street/Road Name
- Zoom In/Zoom Out
- Route Options
- Up/Down
- Highway View
- Route Display Options
- Route Summary
- Total Distance
- Total Time
- Leg
- Leg Destination
- Zoom In/Zoom Out
- Route Display Options
- Up/Down
- Summary Map View
- Current Location Information
- View Current Location Information
- Junction View
- Next Highway
- Sign Text
- Lanes
- Back
- Virtual Dashboard
- Back
- Sunrise/Sunset
- Elevation
- Tab 1, Tab 2, Tab 3
- Current Trip
- Average Speeds
- Reset All
- Auto Reset
- Show/Hide the Virtual Dashboard
- Gather Trip Information
- Automatically Reset Trip Information
- Detours
- Detour Around Part of the Route
- Detour Around a Specific Roadway
- Detour Using the Detail View Route Display Option
- Detour Using the Highway View Route Display Option
- Tap on the Map and Detour Around a Route Segment
- Cancel a Route
- Using Predictive Traffic (not available on all units)
- Ways to Search for Locations
- Find Addresses
- Find A Rand McNally POI
- Find a Rand McNally Trip:
- Location Searches
- Destination Selection Window
- Destination Search Auto-Complete Feature
- About City Street Names
- Expand Search for Street Names
- Select a City
- First Use
- Short City List
- Long City List
- City/State List
- Location Selection Window
- Address
- City Center
- Intersection
- Enter Lat/Long
- 6MainMenu
- Search for an Address
- Search For a City Center
- Search For an Intersection
- Search by ZIP Code for an Address
- Search by ZIP Code for an Intersection
- Search by Latitude/Longitude
- Point of Interest Windows
- Points of Interest Selection Window
- Points of Interest (POI) Category Window
- Points of Interest (POIs) Searches
- RV-Related POIs
- Rand McNally Editor's Pick
- Consumer POIs
- Select a Quick Stop POI
- From the MAIN MENU:
- Select an RV Point of Interest
- Select and Filter Travel Center Amenities
- Select a Rand McNally Editor's Pick
- Select a Consumer Point of Interest By Category
- Select a Consumer Point of Interest by Name
- Search for Nearby Points of Interest (POIs)
- Near the Current Vehicle Location
- In a City
- Along Your Route
- Near Your Destination
- Custom POI Imports
- Changing the Custom POI Display or Warning Settings
- Rand McNally Trips
- Rand McNally Trips Window
- Select a Rand McNally Best of the Road® Route
- Select a Rand McNally Weekend Getaway
- Select a Rand McNally Scenic Tour
- Select a Rand McNally Regional Road Trip
- Tap on the Map
- Tap on the Map and Avoid the Location
- Tap on the Map and Route to the Location
- Rate a RV-Related Point of Interest
- Address Book
- Save a Location in the Address Book
- Sort Address Book Entries by Name, Distance or Date
- Select a Location from the Address Book
- Create an Address Book Group
- Add an Address to a Group
- Remove an Address From a Group
- Select a Location From a Group
- History List
- Select a Location from the History List
- Create a Multi-Stop Route
- Add Locations to a Multi-Stop Route
- Route Stop List
- Confirmation Window
- Remove a Stop from a Multi-Stop Route
- Select and Run a Saved Route
- Delete a Multi-Stop Route
- Optimize Routes
- Optimize a Route Manually
- Optimize a Route Automatically
- Address Confirmation Window
- Consumer Point of Interest Confirmation Window
- RV-Related Point of Interest Confirmation Window
- Rand McNally Editor's Picks Confirmation Window
- Address Book Confirmation Window
- Destination Address
- Back
- Begin New Route
- Add as Via
- Add to Group
- Atlas
- Go to Map
- Set Origin
- Edit Entry
- Note
- Main Menu
- Real-Time Traffic Window
- Access the Real-Time Traffic Window
- View Real-Time Traffic
- RV Tools Window
- RV Checklists
- Select and Complete a Checklist
- Create a Custom Checklist
- Add Tasks to a Checklist
- Remove Tasks From a Checklist
- Delete a Checklist
- RV Maintenance Notes
- View Maintenance Note Information
- Add a Maintenance Note
- Update an Existing Maintenance Note
- Delete a Maintenance Note
- Trails
- Create a New Trail
- Rename an Existing Trail
- Delete a Trail
- Display a Trail
- Calculate a Mileage and Driving Time
- View Atlas Information
- Send a Message to Rand McNally
- Send a Message About Your Current Location
- To Send a Message About Speed Limit Difference While in Navigation Mode:
- Send a Message About a Different Location
- Send a Message About a Location on the Map
- Use the Unit Converter
- Use the Calculator
- RV Information
- General Preferences (RV or Car)
- Day and Night Map Color
- My Custom POI Setting
- Traffic Receive Status
- Real Time Traffic Settings
- Route Preferences
- Cross Country Borders
- Map Preferences
- Warning Options
- Warning/Alert Prompts
- Auto Dismiss Warnings
- Hills & Sharp Curves
- Crossing State Border/Time Zone Change Warning
- Speed Limit Change
- Download and Install
- Rand McNally Dock Main Window
- Update
- Custom POI
- Tell Rand McNally
- Tools
- TripMaker RVND Manual
- RVND Support Website
- Go to Rand McNally Website
- Announcements
- Go to Rand McNally Website
- Updates
- View RVND Version Information
- View Manual
- Tell Rand McNally
- Go to RVND Support Website
- A
- B
- C
- D
- E
- F
- G
- H
- |
- J
- K
- L
- M
- N
- 0
- P
- Q
- R
- S
- T
- U
- v
- W
- Z
Brand : Rand McNally
Model : TripMaker RVND
Category : Gps