V7011 - Kitchen scale Envizen Digital - Free user manual and instructions
Find the device manual for free V7011 Envizen Digital in PDF.

| Product Type | Tablet PC |
| Model | V7011 |
| Brand | Envizen Digital |
| Dimensions (H x W x D) | 0.47 x 4.6 x 1.72 inches |
| Weight | 0.7 lbs (317 g) |
| Display | 7.0 inch capacitive touch screen, 900 x 489 pixels |
| Operating System | Android 4.1 |
| Processor | 1.0 GHz (estimated) |
| System Memory (RAM) | 812 MB |
| Internal Storage | 4 GB |
| Expandable Storage | Micro SD (T-Flash) up to 32 GB |
| Wi-Fi | 802.11 b/g/n, 2.4 GHz |
| Camera | Front 0.3 MP |
| Audio | 3.5 mm headphone jack, built-in microphone |
| Ports | Micro USB (OTG), DC 5V power, Micro SD slot |
| Battery | Rechargeable lithium-ion, capacity not specified |
| Charging | Via included adapter (5V); first charge 8-12 hours |
| Supported Languages | English, French, German, Spanish, Chinese, and more |
| Included Accessories | Micro USB cable, AC adapter, user manual |
| Warranty | 1 year parts, 90 days labor |
Frequently Asked Questions - V7011 Envizen Digital
User questions about V7011 Envizen Digital
0 question about this device. Answer the ones you know or ask your own.
Ask a new question about this device
Download the instructions for your Kitchen scale in PDF format for free! Find your manual V7011 - Envizen Digital and take your electronic device back in hand. On this page are published all the documents necessary for the use of your device. V7011 by Envizen Digital.
USER MANUAL V7011 Envizen Digital
Tablet PC Model: V7011
Diamondking Inc. 3913 schaefer Ave. Chino, CA91710 Toll free: (866) 709 1999
Contents
1 Overview 1
1.1 Appearance and Keys 1
1.2 Basic Operation
1.2.1 Switch ON
1.2.2 Unlock the Screen
1.2.3 Lock the screen
1.24 Switch OFF 2
1.2.5 Battery charging
1.2.6 Switch input methods 3
1.2.7 Use T-Flash card
1.2.8 Connected to the computer
1.2.9 Browse the file in the device 4
1.2.10 Startup programs 5
1.2.11 Close programs 5
1.2.12 Screen operation 5
1.2.13 Home screen
1.2.14 Screen gestures 6
1.2.15 Security setting
1.2.16 Display setting
1.2.17 Wireless And Network Settings
1.3 Technical specifications
Warranty 11
Disclaimer
1 Thanks very much for purchasing our MID product! Before using this
product, please read the manual carefully.
We will consider that you have read this manual when you use this
product.
2. The functions information of this manual is subject to the product
Itself, We will keep developing flex functions. The information in this manual is subject to change without any prior notice.
3. The Company will not be responsible for any loss of personal data and
damage caused by incorrect operation of software/hardware, artificial damages, replacement of batteries or any other accident. To avoid loss
of your data, please backup your data to your computer at any time.
4. We can not control any dispute from users misunderstanding o
In effect, operation against the financial, the company will not take any relevant responsibility for any accidental loss potentially occurring in
the process of using this manual.
5. Please do not repair it by yourself, other wise, we will not provide you with offered service.
6. One company has
other relevant information
Preface
Dear Customers,
Thanks very much for purchasing our product! This device is built-in
High performance will receive mobile, supporting external 5G US DC/61.5 wireless network card, turning on the overhead wireless
BOPPOLE wireless network cable, toning of fire crowds/bars wireless networks, breaking through the restraint of network cable; it will bring
you into the portable media player world and fulfill your entertainment
Heeds. It also support picture browsing, L-Book Reader, game chat and other functions. Various settings will fully show you
individuality
Safety notices
This manual contains important information, in order to avoid accidents, places and this may always be found on the product.
Please read this manual carefully before you use this product.
- Please do not let the player fall or rub or compact with hard objects during using, or it may cause surface scratch of the player battery loose
data lose or damages of other hardware
- Never let this product expose to the humid environment or rain as
the water leaked in may disable it to the extent beyond maintenance. - You are recommended not to use the headset with large volume continuously. Please adjust the volume to the size of appropriate
security and control the using time to avoid the damage to your hearing,
as excessive volume will cause permanent hearing damage. - Please do not cut off the power abruptly during software update and
download, or it may cause data loss and system error. - Please be for turn by the device where the manufacturer equipment is forbidden or warn the usage of the device will cause interference and
planner. Please observe any relevant restrictions. - Please use original accessories and batteries, do not use
incompatible products. - Please do not use the device at gas station or nearby the fuel and chemicals.
- Please do not use this product when you are driving or walking in the
street, or it may cause an accident. - Please do not scrape the screen, it may be damaged and can not display a question.
display anything. - Never clean the device with any chemicals and detergent, or it will damage the product surface and corrode the spray pair.
Packing list
Welcome to purchase this product, when you open the package, acceptance of the following:
| Item | Components | Quantity |
| 1 | MID Device | 1 |
| 2 | Micro USB Cable | 1 |
| 3 | User Manual | 1 |
| 4 | Adapter | 1 |
Attention: Accessories are subject to the real products and change without notice.
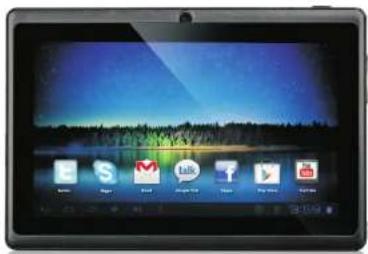
1. Overview
1.1 Appearance and Keys

| Symbol | Name Description | |
| 1 | Power | Press shortly to enter sleeping/wwaking up mode, press long to switch ON/OFF |
| 2 | DC-5V | for the power socket charging |
| 3 | Micro USB port | Connect with PC and ORG function |
| 4 | MIC | Microphone |
| 5 | Larphone jack Stereo earphone jack | |
| 6 | VOL/VOL+ | VOL/VOL+ |
| 7 | TF Card | Micro SD Card Slot |
device
1.2 Basic Operation
1.2.1 Switch ON
When the device is in the OFF mode, press and hold POWER key, then you can enter the system desktop.
1.2.2 Unlock the screen
Please press and drag the
unlocked automatically.
on to the
When the LCD will

1.2.3 Lock the screen
When the device is in the ON mode, press the POWER key shortly, the system will lock the screen and enter the save power mode. Then the screen is OFF but the system will still run.
1.2.4 Switch OFF
When the device is in the ON mode, press and hold the POWER key for 3 seconds, the screen will display the power off interface, choose the power off item to confirm, the system will shut automatically.
1.2.5 Battery charging
Insert the micro port of the battery adaptor into 220V AC slot on the device, and connect the other side with the power socket. Then, you can charge the device. [Note] This device is not recommended to use USB interface to charge, please use the special power adapter for charging. You should charge the battery for at least 8-12 hours
to make sure the battery is fully charged at the first time. On charging the Power indicating lamp of the device is in high light blue color, the desktop icon of the battery ■ keep rolling which shows it is connected to the device.
1.2.6 Switch input methods
The device support handwriting, number, letter, pinyin etc. switching as follows:
Click any text input area of the working program interface, it will pop input keyboard interface, as shown below:
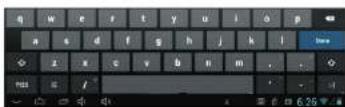
Press ☐, then it will pop Input Method switch interface. Select the input method you want here.
[Noted] After newly install input method, you should choose Settings>Language & input>Keyboard & Input methods then you can use.
1.2.7 Use T-Flash card
Insert the T-Flash card into the slot in direction of the devices bottom shell until you hear a sound of click.
- Browse files in the memory card
In this MID device, you can view and use the needed files in catalogue of Menu>File manager> SD Card.
- Remove T-Flash card
Close all open files from the T-Flash, then enter MENU> Settings > TF card and & device storage, click Unmount SD card, System will prompt that TF card was removed safely. Tap with your fingertips to the pop-up T-Flash Card [Note]
- Do not insert the TF card by force, this card can only be
applied in one direction.
-
Do not remove the TF card before Uninstalling it, or the card may be damaged.
-
If the memory card is write-protected, data will not be formatted and written, please remove the write protection before such operations.
-
Major brands memory card is recommended to avoid the card is not compatible to this device.
-
please well note that the APK (such as application software and games) is default installed to the device. (not the memory card)
1.2.8 Connected to the computer
One end of the USB line connect to the computer, the other end connect the MID device, select Settings>Developer options>USB debugging, the device will connect with computer, and you can copy files to the device.

1.2.9 Browse the file in the device


1.2.10 Startup programs
Click all the application icon you want to start and it can switch on.
1.2.11 Close programs
Press the icon continuously or the ESC key, the device will close the active program. You can also use the corresponding function in the management currently running applications to close the program.
1.2.12 Screen operation
- Zoom in and zoom out: In applications which support zoom gestures, such as photo, IE browser, mail and map etc. you can zoom in or out the screen contents by opening or closing your two fingers.
- Rolling: In applications which support rolling gestures, such as photo, IE browser, mail and map etc. you can scroll the screen contents by sliding your fingers on the screen. If you want to stop the rolling screen, you just need to touch it.
1.2.13 Home screen
- Switch home screen In the home state, you can change the home interface by
sliding your fingers on the screen quickly.
- Custom Home Screen
Press the blank area on the home screen interface for a few seconds, it will appear Choose wallpaper from menu, then you can set the home screen.
- Move application icons on screen
Press the icons of applications you need to move for several seconds, it will enter the moving model (the icon of application will be turn big), then drag the icon to expected position directly.
- Move application icons screen to screen
Press the icons of applications you need to move for several seconds, and you can drag the icon to the left side or right side.
- Delete applications
Press the icon of application you need to remove for several seconds, drag the icon to × (when the icon turns big, the bottom of screen will appear ×, then you can delete the application.
1.2.14 Screen gestures
- Click
When you need to input by the on-screen keyboard, you just need to select applications or press the button on the screen, then click the items.
- Press
When you want to start the available options of a project(such as web page link), you only need to press the project.
- Slide
Slicing on the interface with your fingers to make vertical or horizontal dragging action.
- Drag
Before you start dragging, you must press the items with your fingers, and can not let fingers leave the screen before dragging to the expected position.
- Rotation
Changing the screen orientation by rotating the device
laterally.
1.2.15 Security Setting
You can set the unlock pattern, each time you open or wake your MID device, you must draw pattern to unlock the screen. In Settings>Security>Screenlock, it support many unlock ways.

If use the pattern, as below
- You must ensure the four-point connection when you draw the unlock pattern.

flowchart
graph TD
    A["1"] --> B["2"]
    B --> C["3"]
    C --> D["4"]
    D --> E["5"]
    E --> F["6"]
    style A fill:#fff,stroke:#000
    style B fill:#fff,stroke:#000
    style C fill:#fff,stroke:#000
    style D fill:#fff,stroke:#000
    style E fill:#fff,stroke:#000
    style F fill:#fff,stroke:#000
- Click Continue and draw again to confirm it

flowchart
graph TD
    A["1"] --> B["2"]
    B --> C["3"]
    C --> D["4"]
    D --> E["5"]
    style A fill:#fff,stroke:#000
    style B fill:#fff,stroke:#000
    style C fill:#fff,stroke:#000
    style D fill:#fff,stroke:#000
    style E fill:#fff,stroke:#000
-
Cilck confirm to complete unlock pattern designing.
-
Each time you open or waking your MID device, you must draw pattern to unlock the screen.
1.2.16 Display setting
Click Settings>Display, you can set the brightness/wallpaper/Auto rotate screen/sleep/font size of the screen.
1.2.17 Wireless And Network Settings
a) WIFI Click Settings > Wi-Fi, turn on the wifi, the device will find available wireless network in the right interface.
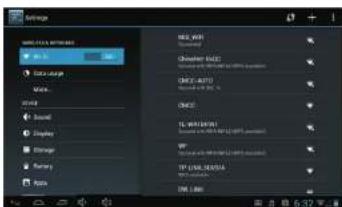
Select the expected wireless network, the system will directly connect the network or popup the password input window according to network access security settings. Please consult your wireless network administrator for the password.

1.3 Technical specifications
| Size | 1.72 x W/4.6 x H/0.47 inches | |
| Weight | 0.7 lbs | |
| LCD Display | 7.0 inch 900*489 Multi point capacitive touch screen | |
| PC Interface | High speed Micro USB | |
| OS | Android 4.1 | |
| Hard Drive Capacity | 4GB | |
| System Memory | 812 MB | |
| Capacity Expansion Support T-Flash card 32GB(max) | ||
| Music Function | Format | Mpa, WMA, OSG, AAC, 3GP, WAV etc. |
| Max. Resolutions | 20HZ 20HZ | |
| Video Function | Format | Mpa, MRV, WMA, 10MB, AVI etc. |
| Max. Resolutions | 1920*1000 | |
| Screen Ratio | 16:5 | |
| Photo browse | JFG, BW/V JFGG, GFP | |
| WIFI | Support | 802.116V/gh |
| Transmission rate | Max 54Mbps | |
| Work frequency | 2.4GHz | |
| Camera function | Front 0.3 megapetal camera | |
| Recording Function Support | Support | |
| Working temperature | 20 - 80°C | |
| Languages | Blimpified Chinese Traditional Chinese English French German Spainhs. | |
Warranty
Warranty Terms and Conditions
Envizen Digital("Envizen") warrants your Envizen products against defects in material and workman ship during the warranty period from the original date of purchase, subject to the following terms and conditions. If a product proves to be defective in material of workmanship during the warranty period, Envizen will, at its discretion, repair or replace the product with the same model provided the purchaser adheres to certain return authorization procedures and guidelines.
Warranty Period
All Enviizen televisions/media players/DVD players/speaker systems/digital photo frames/2.4G wireless devices/Tablet PC are warranted for one (1) year for parts and ninety(90)days for labor starting from the original date of purchase/invoice. After warranty period, the customer is responsible for parts and labor charges. Rechargeable batteries are warranted for ninety (90) days for parts and labor. Non-rechargeable batteries are not covered by warranty. A new warranty does not start with the replacement of a new product.
This Warranty Does Not Apply to:
- Any product, on which the serial number has been defaced, modified or
removed. 2. Damage, deterioration or malfunction resulting from:
a) Accident, misuse, neglect, fire, water, lightning, or other acts of nature, unauthorized product modification, or failure to follow instructions supplied with the product.
b) Repair or attempted repair by anyone not authorized by Envizen.
c) Any damage of the product due to shipment d) Removed from or installation in the product
a) Removal from or installation to the product. b) Causes external to the product, such as electric power fluctuations or
- Based on the results, such as the model's analysis of failure.
f) Use of supplies or parts not meeting Envizen's specifications.
g) Normal wear and tear
h) Any other cause which does not relate to product defect.
- Cosmetic damage by purchaser, such as marking, discoloration, scratches,
dents, gouges or any other defacement.
-
Physically damaged products by purchaser, such as broken PCB, Housing, damaged LCD Module
-
No Defect Found (product salt
-
No School Ponda (product returned to Enizen's defective but failure is not duplicated by Envizen's test method).
-
Product without proof of purchase. (The proof of purchase should be one of
the following documentations: purchase receipt, gift receipt, sales invoice.
and packing list that contains the product model number, price, vendor, and
purchase date.
Any damage caused by battery leakage.
This warranty does not apply to customers outside the Continental US states.
How to Get Warranty Service
- To obtain the warranty service, you will be required to reach Envizen's
Customer Service by phone at 1-866-709-1999 or by email at
service@envizendigital.com for assistance.
a) Customer information (name, day-time phone number, e-mail address
and/or residential address)
b) Proof of purchase (purchase receipt, gift receipt, sales invoice, order
No#. And/or packing list)
c) Product model number
d) Product serial number
e) A description of the problem f) Payment information (If any payment is required, you will be asked to
1) Payment information (if any payment is required, you will be asked to provide this information beforehand. At this moment, we only accept personal
check money order, credit card or cashier's check. Sorry for the
inconvenience
- We will issue you an RMA number for your returned item. Please take or ship product with the RMA number to Envizen service center. All products should be returned in secured packaging, preferably in the original package.
should be retained in observed packaging, preferably in the original package, with the complete set of accessories.
-
Upon receiving the product, defer
-
Open receiving the product, depending on the condition of the products, Envizen will repair or replace product, and ship it back to the customer within
2-4 weeks
- For additional information, please contact Envizen Customer Service
Out of Warranty Repair
For additional information on obtaining an extended warranty service, contact
Envizen Customer Service Department by e-mailing
service@envizendigital.com or call 1-866-709-1999
Products out of warranty requiring replacement will be reviewed individually.
but all will require the shipping and handling fee.
During the period of product warranty. We will answer your basic
configuration, setup and troubleshooting questions; and when necessary, we
will provide you with all the instructions on how to return your product for
repair. For more customer service and support inquiries, please call 1-866-
709-1999 or e-mail us at service@envizendigital.com.
FCC STATEMENT
- This device complies with Part 15 of the FCC Rules. Operation is subject to the following two conditions:
(1) This device may not cause harmful interference.
(2) This device must accept any interference received, including interference that may cause undesired operation.
- Changes or modifications not expressly approved by the party responsible for compliance could void the user's authority to operate the equipment.
NOTE:
This equipment has been tested and found to comply with the limits for a Class B digital device, pursuant to Part 15 of the FCC Rules. These limits are designed to provide reasonable protection against harmful interference in a residential installation.
This equipment generates uses and can radiate radio frequency energy and, if not installed and used in accordance with the instructions, may cause harmful interference to radio communications.
However, there is no guarantee that interference will not occur in a particular installation. If this equipment dose cause harmful interference to radio or television reception, which can be determined by turning the equipment off and on, the user is encouraged to try to correct the interference by one or more of the following measures:
Reorient or relocate the receiving antenna. Increase the separation between the equipment and receiver. Connect the equipment into an outlet on a circuit different from that to which the receiver is connected. Consult the dealer or an experienced radio/TV technician for help.

Brand : Envizen Digital
Model : V7011
Category : Kitchen scale