
RM3G-2 - Loudspeaker Osprey - Free user manual and instructions
Find the device manual for free RM3G-2 Osprey in PDF.

| Product Type | 3RU Rack Mount Monitor with Dual 7" Displays |
| Model | RM3G-2 |
| Display Panel | 7" LED IPS |
| Physical Resolution | 1280 x 800 |
| Brightness | 400 cd/m² |
| Contrast Ratio | 800:1 |
| Viewing Angle | 178° / 178° (H/V) |
| Input Signals | HDMI, YPbPr (Component), SDI, Composite Video |
| Input Connectors | HDMI, BNC (SDI, Component, Composite), LAN (Future Use) |
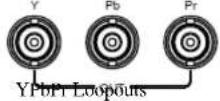
| Loopouts | SDI, Component, Composite |
| Tally Indicator | Yes |
| Loss of Signal Detection | Yes |
| Input Voltage | DC 7-24V |
| Power Consumption | ≤18W |
| Operating Temperature | -20°C to 60°C |
| Storage Temperature | -30°C to 70°C |
| Dimensions (L x W x D) | 482.5 x 133.5 x 25.3 mm |
| Weight | 2885 g |
| Warranty | 2 years |
| Included Accessories | 12V DC Power Supply, TALLY Connector, Power Cable Line Clip |
| On-Screen Display (OSD) Menu | Picture, Marker, Display, System adjustments |
| FN User-Definable Button | Quick access to Center Marker, Safety Marker, Check Field, Color Bar, Aspect Ratio, Camera, PIP, Image Flip, Zoom, Pixel-to-Pixel, Freeze, Underscan, H/V Delay |
| Cleaning | Wipe with a soft, dry cloth. Do not use harsh chemicals. |
Frequently Asked Questions - RM3G-2 Osprey
User questions about RM3G-2 Osprey
0 question about this device. Answer the ones you know or ask your own.
Ask a new question about this device
Download the instructions for your Loudspeaker in PDF format for free! Find your manual RM3G-2 - Osprey and take your electronic device back in hand. On this page are published all the documents necessary for the use of your device. RM3G-2 by Osprey.
USER MANUAL RM3G-2 Osprey
natural_image
Front panel with two rectangular panels, each with a vertical line of control buttons on the side (no text or symbols visible)FEATURES:
- 3RU rack mount monitor with two 7" displays
• 3G-SDI, HDMI, Component, Composite inputs with Loopouts - Tally
- Loss of Signal
- 2yr Warranty.
Content
- PRODUCT DESCRIPTION ......2
1. PRODUCT DESCRIPTION
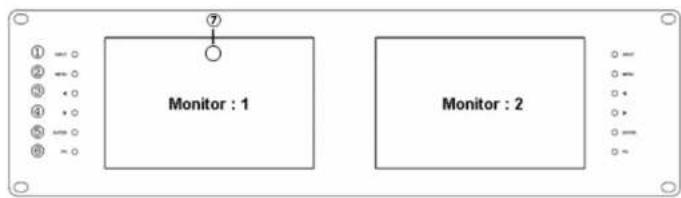
flowchart
graph TD
    A["Monitor : 1"] --> B["⑦"]
    C["Monitor : 2"] --> D["⑦"]
    style A fill:#f9f,stroke:#333
    style C fill:#f9f,stroke:#333
- INPUT: Toggle between HDMI, Component, Composite and SDI.
- MENU: To activate OSD (on-screen display) menu. Press to switch among the brightness, sharpness, contrast, saturation, Tint, MENU and Exit.
- Left selection button: to select item on OSD menu and adjust its value; Press to decrease the value of brightness, sharpness, contrast, saturation and Tint.
- ▶ Right selection button: to select item on OSD menu, adjust its value and confirm it; Press to increase the value of brightness, sharpness, contrast, saturation and Tint.
- ENTER.
- FN: Function button; to quick launch function menu
- TALLY indicator light.

- Mounting Hole for power cable clip for strain relief (to prevent unintended unplugging of Power Barrel Connector


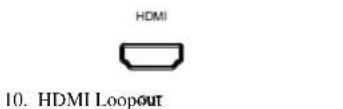
- HDMI input


- LAN port. (Future Use)
2-1-2. FN user-definable function button
Press FN button to pop up the default options, Use “◀ / ▶” buttons to adjust the value of selected item.
Long press FN button for 3-5 seconds to pop up shortcut menu directly. As shown in right Figure (default menu is displayed in white font).
Use "◀ / ▶" buttons to select the desired item.
Finally, use the "ENTER" button to confirm the selected item as default.
Functions of FN button can be customized: Center Marker, Safety Marker, Check Field, Color Bar, Aspect Ratio, Camera, PIP, Image Flip, Zoom, Pixel-to-Pixel, Freeze Input, Underscan, H/V delay.

2-2. MENU Operation
Press "MENU" button on the device after power on. The menu used for setting function will display on the screen.
Press ◀/▶ buttons to select the sub-menu; then press ENTER to confirm it; after that, press MENU to return to main menu.
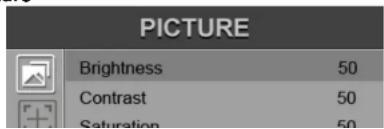
2-2-1. Picture
2-2-2. Marker

| ITEMS | OPTIONS |
| Center Marker | ON, OFF |
| Safety Marker | OFF, 95%, 93%, 90%, 88%, 85%, 80% |
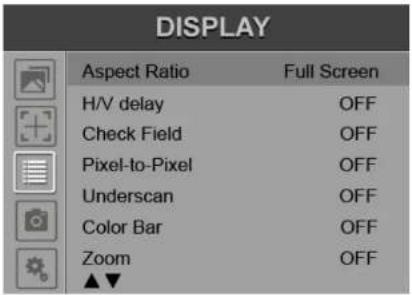
2-2-3. Display
| ITEMS | OPTIONS |
| Camera | 480P (5D-II Mode), 1080I (5D-III Mode) |
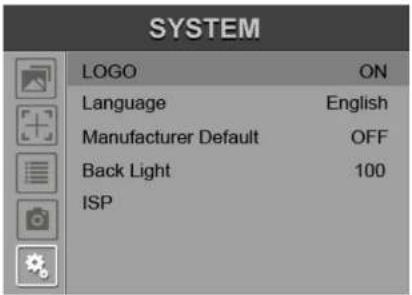
2-2-5. System
4. Included ACCESSORIES
- 12V DC Power Supply 1 piece
- TALLY connector 1 piece
-
Power Cable Line Clip 1 piece
-
Specifications
| Panel | 7" LED IPS |
| Physical Resolution | 1280×800 |
| Brightness | 400 cd/m2 |
| Contrast | 800: 1 |
| Viewing Angle | 178°/ 178°(H/V) |
| Input Voltage | DC 7-24V |
| Input Signal | HDMI, YPbPr, SDI, Video |
| Power Consumption | ≤18W |
| Operating Temperature | -20°C~60°C |
| Storage Temperature | -30°C~70°C |
| Dimension (LWD) | 482.5×133.5×25.3mm |
| Weight | 2885g |
Note: Due to constant efforts of product improvements, specifications may change without notice.


Brand : Osprey
Model : RM3G-2
Category : Loudspeaker