TX-PF50S20 - Projection screen Elite Screens - Free user manual and instructions
Find the device manual for free TX-PF50S20 Elite Screens in PDF.

User questions about TX-PF50S20 Elite Screens
0 question about this device. Answer the ones you know or ask your own.
Ask a new question about this device
Download the instructions for your Projection screen in PDF format for free! Find your manual TX-PF50S20 - Elite Screens and take your electronic device back in hand. On this page are published all the documents necessary for the use of your device. TX-PF50S20 by Elite Screens.
USER MANUAL TX-PF50S20 Elite Screens
natural_image
Abstract black logo design resembling stylized 'S' or chevron (no text or symbols)ELITE SCREENS
Yard Master 2 Dual Series
Indoor/Outdoor Portable Projection Screen User's Guide
Thank you for choosing the Yard Master 2 Dual portable projection screen! Please read through this user guide before utilizing the screen. Correct usage and maintenance will ensure a long product life.
Care & Use Instructions
◆ The WraithVeil Dual is a 2-directional flexible vinyl projection screen material. It is designed to accommodate either front or rear projection.
◆ Be sure to use the screen only during a light breeze; it is not meant to withstand heavy winds. *Elite Screens is not responsible for damages due to negligence resulting from misuse under weather conditions and will void your warranty.
◆Dust, dirt and scratches on the projection surface will affect the picture quality, please take note of the points below to prevent that from occurring:
- Do not touch the projection surface with your hands
- Do not write or draw on the projection surface
- Do not use fingers or sharp objects to point on the projection surface; this will damage the screen material.
- Use a soft-damp cloth to clean the projection surface; do not use chemical cleaning agents or alcohol.
- Use clean water when dampening the cleaning cloth and do not rub against the material to clean it.
◆ After using the screen, disassemble it and store it in the carrying bag provided.
◆To avoid damage and injury, the screen should only be operated by adults.
Product Description
Design: The aluminum frame is designed to be light weight and easily operated making it easy to carry, assemble and disassemble.
Screen Fabric: The screen fabric is attached to the rectangular frame and held in place by several press studs, which ensure an evenly stretched and flat surface. The WraithVeil Dual screen material is durable and can be folded many times without causing damage or distortion to the surface.
Parts Diagram
A. Folding frame x1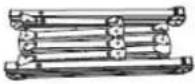 | B. Left and right folding legs x2 | C. Screen material bag x1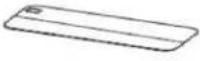 |
D. Projection screen material x1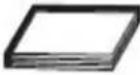 | E. Knob screw x2 | F. Eyebolt x2[2WA2] |
G. Rope x2 | H. Carrying Bag x1 | I. Stake x4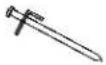 |
Note: The parts list above is subject to change without notice.
Correct usage of the projection screen will ensure better viewing results.
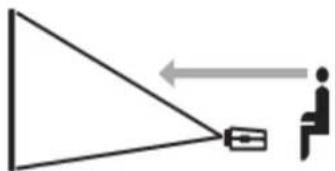
For front projection, assemble and view the screen as indicated in Fig.1.
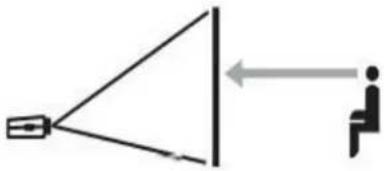
For rear projection, assemble and view the screen as indicated in Fig.2.
natural_image
Simple line drawing of a person sitting at a desk facing a camera, with an arrow indicating direction (no text or symbols)(Fig. 1)
natural_image
Simple line drawing of a projector and a person sitting on a chair, with no text or symbols present.(Fig. 2)
Frame Assembly and Screen Material Attachment
For a full video tutorial on assembling your Yard Master 2, please visit
www.elitescreens.com/ym2_assembly
OR scan the QR code provided.

text_image
QR code image containing encoded data, no visible human-readable text- Take the folding frame (A) out of the carrying bag (H) and place it on a flat surface. Unfold the longer sections first as shown in Fig.3-4

natural_image
Illustration of a person using a bench presser to lift a table (no text or symbols visible)
natural_image
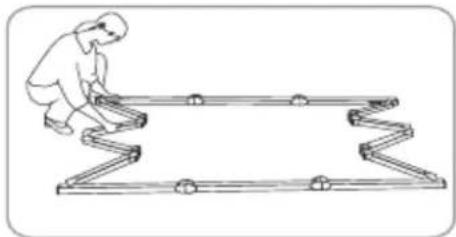
Illustration of a person using a treadmill with an arrow indicating motion (no text or symbols)- Unfold the frame until the latch on the hinge "clicks" into place. Repeat the procedure for the shorter sections. (Fig. 5-6)

natural_image
Technical illustration showing two mechanical joint configurations with arrows indicating motion (no text or symbols)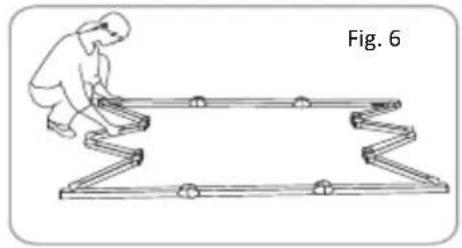
natural_image
Illustration of a person climbing a zigzag structure (no text or symbols)- Make sure all 4 corners of the frame are at a 90^ angle and the hinged support bar is straight and not bending. (Fig. 7-9)

text_image
Fig.7 Fig.8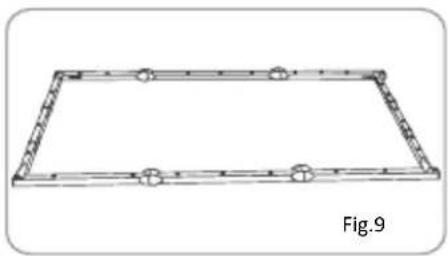
natural_image
Pure structural frame diagram with no text, numbers, or symbols- Insert the frame legs (B) into the openings located at the left and right bottom sides of the folding frame (A). Secure them by fastening the knob screw (E) into the adjacent hole. Next, screw the eyebolts (F) into the openings located at the top of the frame (Fig.10).
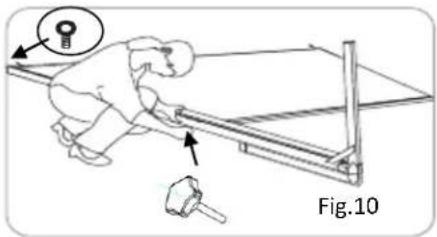
text_image
Fig.10- Take the screen material (D) out of the screen material bag (C) and align the corners of the screen material with the inside corners of the frame. Unfold as shown in the diagram (Fig.11-12).
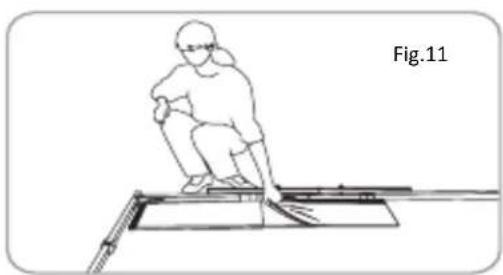
natural_image
Line drawing of a person sitting on a platform with a tool, labeled Fig.11 (no text or symbols on the diagram itself)
natural_image
Simple line drawing of a folded paper or sheet with a wavy edge, labeled 'Fig. 12' (no text or symbols on the diagram itself)- Once the screen material (D) is fully extended, secure the material by snapping the buttons onto the frame studs as shown in Fig. 13-15. Fasten the buttons in the following order AB→CD→EF→GH.
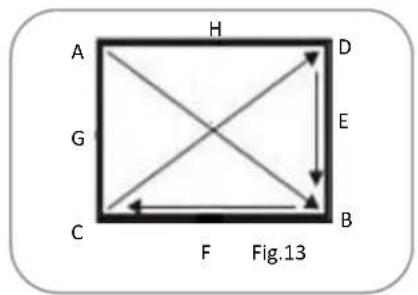
flowchart
graph TD
    A["A"] --> H["H"]
    G["G"] --> H["H"]
    C["C"] --> F["F"]
    B["B"] --> F["F"]
    D["D"] --> E["E"]
    F["F"] --> E["E"]
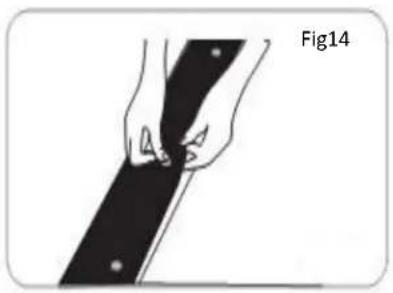
natural_image
Illustration of a hand holding a black object with dots, labeled Fig14 (no text or symbols on the object itself)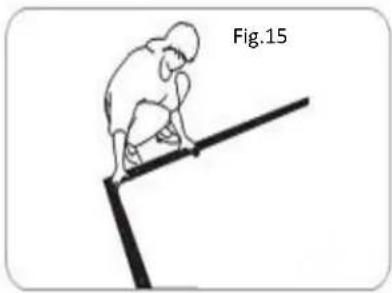
natural_image
Simple line drawing of a person climbing a slope, labeled Fig.15 (no text or symbols on the diagram itself)- Tie 4 pieces of rope (2 on the left and 2 on the right) to the eyebolts (F) that are located at the top of the frame. Next, lift the screen up while simultaneously opening the frame legs. Two people are needed for this step. Fig.16-17.

natural_image
Illustration of two workers installing a large rectangular frame with ropes, labeled Fig.16 (no text or symbols on the diagram itself)
natural_image
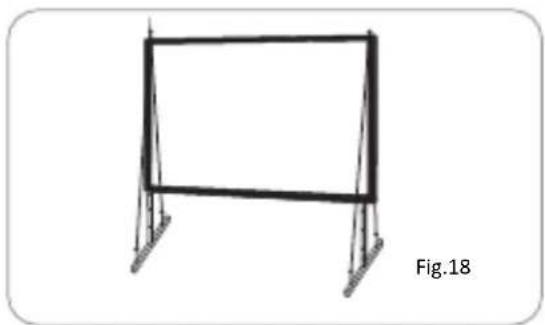
Pure technical line drawing of a mechanical joint or bracket without any text, numbers, or symbols- To secure the frame, place a stake (I) into each hole located on the frame footing, and hammer it into the ground. Finally, tie the 4 ropes (G) to the stakes to prevent the screen from tilting or falling over. As shown in fig.18.
natural_image
Simple line drawing of a rectangular frame with supports, labeled Fig.18 (no text or symbols on the frame itself)Screen Disassembly
For a full video tutorial on disassembling your Yard Master 2, please visit
www.elitescreens.com/ym2_disassembly
OR scan the QR code provided.

text_image
QR code image containing encoded data, no visible human-readable text- Remove ropes (G) and stakes (I) from the ground.
- Unlatch the hinged support bars on front side of each leg so that it is bent and fold that half of the legs up for the next step.
- Slowly lower the screen to the ground (towards the closed legs). Two people are needed for this step.

natural_image
Two stick figures pulling a blank board with arrows indicating motion (no text or symbols)- Unlatch the hinged support bars and fold down other half of legs.
- Loosen and remove the ropes, knob screws (E) and eyebolts (F) from each leg.

text_image
Diagram showing mechanical assembly with labeled parts and directional arrow indicating motion- Remove the frame legs (B) from the folding frame (A).
- Detach the screen material (D) from the folding frame (A) by carefully unsnapping each button as shown.

natural_image
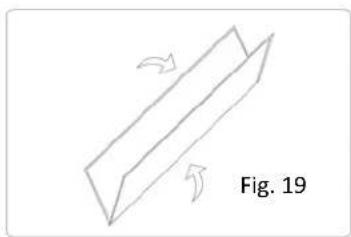
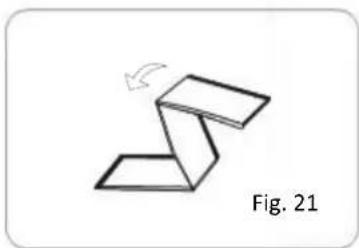
Illustration of hands holding a dark object with small dots, no text or symbols present- Fold screen material (D) in half, folding the bottom of the screen towards the top. Then, fold in half again in the same way. Lastly, fold the material into thirds to condense the length, see Fig. 19-21.
*If you prefer to roll the material, instead of folding into thirds, roll from one end to the other after folding in half twice.
natural_image
Simple line drawing of a 3D rectangular block with two curved arrows indicating rotation, labeled 'Fig. 19' (no text or symbols on the diagram itself)Rev.011817-DR

natural_image
Simple line drawing of a 3D rectangular object with two curved arrows indicating rotation or movement (no text or symbols)www.elitescreens.com
natural_image
Diagram of a folded paper or sheet with an arrow indicating rotation (no text or symbols)- Unlatch the hinged support bars in each corner of the folding frame (A).

text_image
Pull- Press in the silver locking buttons, near the folding joints, and slowly gather the sides of the folding frame.
natural_image
Illustration of a person climbing a ladder with a spring (no text or symbols)- Again, press in the silver locking buttons. Then, pick up one end of the folding frame, and walk it to the other end, folding the longer sections into thirds.

natural_image
Line drawing of a person using a treadmill with a tool, no text or symbols present
natural_image
Illustration of a person climbing a roller with a wooden bar (no text or symbols)- Store the screen in the provided carrying bag (h). Be sure to place folding frame, legs, and smaller parts into the carrying bag first and place the material on top to keep material from creasing or tearing.

text_image
ESTE MEADENCEFor a local Elite Screens contact or Technical Support, please visit www.elitescreens.com