
SLDV4KBK - Surveillance Camera SereneLife - Free user manual and instructions
Find the device manual for free SLDV4KBK SereneLife in PDF.

| Product Type | Action & Surveillance Camera |
| Model | SLDV4KBK (Black), SLDV4KBL (Blue) |
| Brand | SereneLife |
| Lens Angle | 160° |
| Display | 2.0" LTPS LCD |
| Video Resolution | Up to 3200×1800 @25fps; 2688×1520 @30fps; 1920×1080 @60fps; 1280×720 @120fps |
| Photo Resolution | 16MP, 12MP, 8MP, 5MP, 2MP |
| Video Format | MP4 (H.264 compression) |
| Photo Modes | Normal, Timed, Automatic, Sports Trail |
| Video Modes | Normal, Loop Recording (2/3/5 min), Time-Lapse (0.5s-60s) |
| Slow Motion | 1080P @60fps, 720P @120fps |
| Battery | Removable 1050mAh Li-ion, rechargeable via USB |
| Battery Life | ~90 minutes recording |
| Charging Time | ~3 hours |
| Storage | Micro SD card (class 10 recommended, not included) |
| Wi-Fi | Built-in Wi-Fi with "XDV" app control (Android/iOS) |
| Waterproof | Yes, with included waterproof case (depth not specified) |
| Mounting | Helmet mount, bike mount, clip, adhesive pads, and more |
| Dimensions | 2.32 × 1.61 × 0.83 inches (59 × 41 × 21 mm) |
| Weight | 56.5 g (camera only) |
| Languages | 11 languages including English, Chinese, Korean, Russian, French, German, Italian, Spanish, Portuguese, Japanese |
| System Requirements | Windows XP/7/8/Vista, Mac OS 10.5+, Android 4.1+, iOS 7+ |
| Included Accessories | Waterproof case, bicycle bracket, helmet pedestal, adhesive pads, clips, USB cable, adapter, cleaning cloth, manual |
Frequently Asked Questions - SLDV4KBK SereneLife
User questions about SLDV4KBK SereneLife
0 question about this device. Answer the ones you know or ask your own.
Ask a new question about this device
Download the instructions for your Surveillance Camera in PDF format for free! Find your manual SLDV4KBK - SereneLife and take your electronic device back in hand. On this page are published all the documents necessary for the use of your device. SLDV4KBK by SereneLife.
USER MANUAL SLDV4KBK SereneLife
natural_image
Blue Ultra HD camera with black body and circular lens, no visible text or symbols on device bodySereneLife™
MODELS: SLDV4KBK BLACK
SLDV4KBL BLUE
FOREWORD
The product is a high-end high definition and athletic camping product. This product has many functions, such as digital video photography, slow photography, voice, video display and a removable battery. Besides, the functions of outdoor sports, home security and deep waterproof can meet any need of photographing.
Multipurpose

Outdoor sports

Marine sports

Diving

Home burglar
ATTENTION
- This is a high-precision product, please do not let it fall or strike it.
- Please do not allow the camera to be near objects with strong-magnetic fields, such as strong magnets and power-driven machines. In addition, please also avoid objects that can send out strong radio waves. Strong magnetic fields may cause product breakdown, loss of data, and/or destroy the image and sound.
- Please do not place the camera in direct sunlight.
- Please choose a reliable Micro SD card with a trusteed brand, because generic card compatibility can not be guaranteed.
- During the process of charging the battery, if the product gives off heat and smoke, or gives off a peculiar smell, immediately unplug the power to avoid a fire.
- When charging the battery, please place the product in places children can not reach as the power cable is a potential risk for suffocation and electric shock.
- Please try to keep the product in shaded, dry and insulated places.

natural_image
Black-and-white photo of a motorcyclist mid-air during a jump, displayed on a flat-screen monitor with 'Ultra HD' and 4K signal icon (no text on the image itself)DISPLAY


waterproof case

bicycle bracket

pedestal 1

pedestal 2

Back clip

fixed base

switch support 1

switch support 2

switch support 3

commutator

helmet pedestal

bandage

shell

ribbon

3M mat

wire cable

data cable

adapter

user manual

cleaning cloth


natural_image
Exterior view of a modern camera module with visible lens and mounting base (no text or symbols)waterproof case
helmet pedestal
pedestal 1
long pole

camera
+

natural_image
Close-up of a mechanical camera module with no visible text or symbols=

natural_image
Black and white photo of a cycling helmet with an camera mounted on top (no visible text or symbols)


helmet pedestal pedestal 1/long pole short pole/support 3 short pole/support 2 waterproof case


+

natural_image
Exterior view of a silver and black action camera with visible lens and mount (no text or symbols)=

natural_image
Black-and-white photo of a cyclist riding a bicycle, no visible text or symbolswaterproof case
bicycle bracket /long pole
long pole/support 3

camera
-

back clip -

natural_image
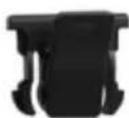
Person wearing a button-up shirt and pants, hands resting on hips (no visible text or symbols)clip
INSERT A MICRO SD CARD
NOTE: Please choose a Micro SD card with a trusted brand and use it after properly formatting on a computer. Generic off-brand cards can not be guaranteed to work properly.
INSTALL AND TAKE OUT THE BATTERY
a. stir downward the battery cover and turn on it.
b. according to the plus-minus pole and the arrow on the battery, take the battery into the product and install it correctly.
c. the quantity of electricity of the battery: please reference the diagram.
d. stir downward the battery cover then take out the battery
CHARGE THE BATTERY
a. use the USB cable to connect to a computer or adapter to charge the battery.
b. you're able to charge the battery and record video at the same time.
c. battery charging will is work when the product is off.
POWER ON AND POWER OFF THE CAMERA
Press the POWER/MODE button for about 3-5 seconds to power on/off
TURN ON/OFF THE WIFI
a. WIFI ON: shortly press the down button then open successfully. The LED light will turn to flashing red light.
b. WIFI OFF: after opening the WIFI, shortly press the down button. The light will turn off.
CHANGE THE MODE
Power on then shortly press the POWER/MODE. You can change the modes between record video/photography/slow photography/playback file and settings.
LED BEHAVIOR
WORKING LED: the red light is on.
WIFI LED: the red light flashes when WIFI is opening; the red light is bright when WIFI is connected; the red light turns off when WIFI is OFF.
CHARGING LED: the red light is bright when the battery is charging; the red light turns off when the battery is fully charged.
PHOTOGRAPHY & VIDEO SETTINGS
VIDEO: Select video mode. Press the OK button to start recording. When recording, the recording icon will flash. Press the OK button again to stop recording.
Video Options: Normal, loop recording (2 minutes, 3 minutes, 5 minutes), time-lapse video (0.5 seconds, 1 second, 2 seconds, 5 seconds, 10 seconds, 30 seconds, 60 seconds).
PICTURES: Select picture mode, the upper left corner of the screen will have a picture sign. Press the OK button to take the picture.
Picture Options: Normal, delayed timing (3 seconds, 5 seconds, 10 seconds, 20 seconds), automatic (3 seconds, 10 seconds, 15 seconds, 20 seconds, 30 seconds), trajectory (3P/S, 5P/S, 10P/S, 20P/S)
SLOW PHOTOGRAPHY: Select slow photography mode. Press the OK button to start recording. When recording, the recording icon will flash continuously. Press the OK button to stop recording.
Slow Photography Options: 1080P/60FPS, 720P/120FPS.
REMOVE STORAGE AND PLAYBACK: After completing the recording, you can either use a USB data cable to transfer recorded media, or take out the Micro SD card and use a card reader to read the Micro SD card.
Delete File: In the file playback screen, press the OK button for 3-5 seconds, and it will delete the selected file.
INSTALLATION AND USE OF WIFI
Before using the WIFI function, please install the "XDV" APP on a smart phone.
NOTE: Android smart phone need to download it from Google Play, Apple users will need to download it from the Apple Store.
Connection procedure:
a. After powering on, press the up button, "WIFI message" appears on the screen, then the WIFI light will flash;
b. Look for the WIFI SSID "DV560-0ccd" and connect to it (default password is 1234567890);
c. Open the "XDV" APP. You're able to preview the shooting screen on the APP, remote video, camera, file playback/download /delete /share.
d. For APP installation: the smartphone requires Android 4.1 and above or IOS7 or above. You're also able to scan the QR code below to install the app. Follow the prompts to complete the installation.

SOFTWARE UPGRADE
By APP : firstly make sure the phone networking, open APP ,after connecting the camera, if the new version is available.
it will be automatically prompted to upgrade.
Tip: When the poor operation of the product caused by the phenomenon of death, removable battery should be re-installed.
Then the machine returns to be normal.
| LCD screen 2.0LTPS | |
| Lens 160° | |
| Language Options English, Simplified Chinese, Traditional Chinese,Korean, Russian, French, German, Italian, Spanish,Portuguese, Japanese | |
| Supported Resolutions 3200*1800 | 25fps/2688*1520 30fps / 1920*108060fps /1920*1080 30fps /1280*720 120fps/1280*720 60fps /1280*720 30fps |
| Video Format MP4 | |
| Video Compression Format H.264 | |
| Resolution of Photos 16MP /12MP | /8MP /5MP/ 2MP |
| SD Card Type Micro SD | |
| Photo Modes Default, Timed, Automatic, Sports Trail | |
| Video Modes Default, Loop, Time-Lapse | |
| Slow Photography 1080P/60fps,720P/120fps | |
| Light frequency Automatically, 50Hz, 60Hz | |
| USB Version USB 2.0 | |
| Adapter | 5V/1A |
| Battery capacity | 1050mAh |
| Max Recording Time | ~90 Minutes |
| Battery Charge Time | ~3 Hours |
| OS | Windows XP/7/8 SP3/Vista and Mac10.5 or above |
| Dimensions 2.32 X 1.61 X 0.83 inches | |
| Weight | 56.5g |
Note: Specifications could be subjects to change due to upgrading.
SereneLife™
Brand : SereneLife
Model : SLDV4KBK
Category : Surveillance Camera