
ZX2JYSS - Hob GE - Free user manual and instructions
Find the device manual for free ZX2JYSS GE in PDF.

| Product Type | Outdoor Gas Range Top Burner |
| Brand | GE |
| Model | ZX2JYSS |
| Category | Hob / Range Top |
| Fuel Type | Natural Gas or LP (convertible with kit) |
| Burner Configuration | Dual burners |
| BTU Rating per Burner | 15,000 BTU |
| Total BTU | 30,000 BTU |
| Ignition Type | Manual spark igniter knob |
| Burner Material | Heavy cast iron with porcelain enamel coating |
| Grate Material | Porcelain enamel over cast iron |
| Cover Material | Stainless steel |
| Cover Function | Work surface on cart-mounted units |
| Drip Tray Material | Galvanized stainless steel |
| Control Knobs | Removable for cleaning |
| Installation | Outdoor use only; built-in or cart-mounted |
| Gas Connection | Type 1 LP tank connector or natural gas line |
| Warranty | Limited 1 year parts and labor; 5 years on burners and valves |
| Cleaning Method | Wipe with soapy water; use paper clip to clear burner ports |
| Safety Features | Spark igniter; wait 5 minutes after failed ignition |
| Spare Parts | Burners, valves, igniter, grates, drip tray, control knobs |
| Repairability | User-replaceable igniter; professional service for gas leaks |
Frequently Asked Questions - ZX2JYSS GE
User questions about ZX2JYSS GE
0 question about this device. Answer the ones you know or ask your own.
Ask a new question about this device
Download the instructions for your Hob in PDF format for free! Find your manual ZX2JYSS - GE and take your electronic device back in hand. On this page are published all the documents necessary for the use of your device. ZX2JYSS by GE.
USER MANUAL ZX2JYSS GE
Your new Monogram range top burners make an eloquent statement of style, convenience and home planning flexibility. Whether you chose them for their purity of design, assiduous attention to detail—or for both of these reasons—you'll find that your Monogram range top burner's superior blend of form and function will delight you for years to come.
The information on the following pages will help you operate and maintain your range top burners properly.
OR
Visit our Website at ge.com.
Contents
Care and Cleaning
Burner Grate 9
Burners 10, 11
Control Knobs 11
Drip Tray....9
Stainless Steel 9
Consumer Services
Important Phone Numbers ..... 13
Model and Serial Number .... 3, 16
Problem Solver 12
Product Registration ....3, 15, 16
Safety Instructions 2,4-6
Warranty 14
Using the Range Top Burners
Features 7
Lighting Instructions....8
FOR YOUR SAFETY
If you smell gas:
- Shut off gas to the appliance.
- Extinguish any open flame.
- If odor continues, immediately call your gas supplier or your fire department.
FOR YOUR SAFETY
- Do not store or use gasoline or other flammable vapors and liquids in the vicinity of this or any other appliance.
- An LP cylinder not connected for use shall not be stored in the vicinity of this or any other appliance.
▲ WARNING
Do not try lighting this appliance without reading the lighting instructions contained in this Owner's Manual.
TESTED IN ACCORDANCE WITH ANSI Z21.58, LATEST EDITION STANDARD FOR OUTDOOR COOKING GAS APPLIANCES. THIS DUAL RANGE TOP BURNER IS FOR OUTDOOR USE ONLY.
Check your local building codes for the proper method of installation. In the absence of local codes, this unit should be installed in accordance with the national Fuel Gas Code No. Z223.1, Latest Edition and the National Electric Code ANSI/NFPA No. 70, Latest Edition.
| Before using your range top burners | Read this manual carefully. It is intended to help you operate and maintain your new range top burners properly.Keep it handy for answers to your questions. | If you don’t understand something or need more help, there is a list of toll-free consumer service numbers included in the back section of this manual.ORVisit our Website at: ge.com |
| Write down the model & serial numbers | You’ll find them on a label in the rear of the burner box below the burner grates.These numbers are also on the Consumer Product Ownership Registration Card included in this manual. | Before sending in this card, please write these numbers here:Model NumberSerial NumberUse these numbers in any correspondence or service calls concerning your range top burners. |
| If you received damaged range top burners | Immediately contact the dealer (or builder) that sold you the range top burners. | |
| Save time & money | Before you request service, check the Problem Solver in the back of this manual. | It lists causes of minor operating problems that you can correct yourself. |
| If you need service | To obtain service, see the Consumer Services page in the back of this manual.We’re proud of our service and want you to be pleased. If for some reason you are not happy with the service you receive, here are three steps to follow for further help.FIRST, contact the people who serviced your appliance. Explain why you are not pleased. In most cases, this will solve the problem. | NEXT, if you are still not pleased, write all the details—including your phone number—to:Manager, Customer RelationsGE AppliancesAppliance ParkLouisville, KY 40225 |
IMPORTANT SAFETY NOTICE
- The California Safe Drinking Water and Toxic Enforcement Act requires the Governor of California to publish a list of substances known to the state to cause cancer, birth defects or other reproductive harm, and requires businesses to warn customers of potential exposure to such substances.
- Gas appliances can cause minor exposure to four of these substances, namely benzene, carbon monoxide, formaldehyde and soot, caused primarily by the incomplete combustion of natural gas or LP fuels.
Properly adjusted burners, indicated by a bluish rather than a yellow flame, will minimize incomplete combustion. Exposure to these substances is minimized because this is an outdoor unit.
SAFETY PRECAUTIONS
When using your appliance, follow basic safety precautions, including the following:
- Improper use or installation is dangerous. Carefully follow these instructions.
- Be sure your appliance is properly installed and grounded by a qualified technician in accordance with the provided installation instructions.
- Do not attempt to repair or replace any part of your range top burners unless it is specifically recommended in this manual. All other servicing should be referred to a qualified technician.
- Have the installer show you where the gas shut-off valve is located so that you know where to shut off the gas to the range top burners.
- Never use the range top burners if there is a gas leak present.
- If you smell gas, the installer has not done a proper job of checking for leaks. You can have a small leak and therefore a faint gas smell if the connections are not completely tight.
Finding a gas leak is NOT a do-it-yourself procedure. Some leaks can only be found with the burner control in the ON position and for your protection it must be done by a qualified service technician. Never use an open flame to locate a leak.
- Never connect an unregulated gas line to the range top burners.
- Your range top burners are for outdoor use only. Tested in accordance with ANSI Z21.58, Latest Edition standard for outdoor cooking gas appliances.
- Check your local building codes for the proper method of installation. In the absence of local codes, this unit should be installed in accordance with the National Fuel Gas Code No. Z223.1, Latest Edition and the National Electrical Code ANSI-NFPA No. 70, Latest Edition.
- Do not try lighting this appliance without reading the lighting instructions in this manual.
• Always remove the cover before lighting the range top burners.
• Always wait 5 minutes before relighting the burners to let any accumulated gas dissipate. - Read this manual carefully and completely before using your range top burners to reduce the risk of fire, burn hazard or other injury. Please retain this manual for future reference.
- Keep the area surrounding the range top burners clear and free from combustible materials, gasoline, other flammable liquids or vapors, charcoal lighter fluid and trash.
- Do not obstruct the flow of combustion and ventilation air to the range top burners. On cart-mounted units, keep the area beneath the burners free of debris. If the range top burners are built in do not store gas cylinders beneath the unit without adequate ventilation.
SAFETY PRECAUTIONS
- This outdoor cooking gas appliance is not intended to be installed in or on recreational vehicles and/or boats.
- Do not let children use the range top burners.
- Never let children crawl or hang on the range top burners.
- Children should not be left alone or unattended in an area where the range top burners are being used.
- Never let clothing, pot holders or other flammable materials come in contact with or too close to the grate, burners or hot surface until it has cooled. Fabric may ignite and result in personal injury.
- Do not use water on grease fires. Never pick up a flaming pan. Turn the controls off. Smother a flaming pan on a burner by covering the pan completely with a well-fitting lid, cookie sheet or flat tray. Use a multi-purpose dry chemical or foam-type fire extinguisher.
Flaming grease outside a pan can be put out by covering it with baking soda or, if available, by using a multi-purpose dry chemical or foam-type fire extinguisher.
- Use this appliance only for its intended use as described in this manual.
- For personal safety, wear proper apparel. Loose fitting garments or sleeves should never be worn while using this appliance. Some synthetic fabrics are highly flammable and should not be worn while cooking.
-
Only certain types of glass, heat-proof glass ceramic, earthenware or other glazed utensils are suitable for use on the range top burners. Unsuitable types of materials may break with sudden temperature changes. Use only on low or medium heat settings according to the manufacturer's directions.
-
Do not heat unopened food containers as a buildup of pressure may cause the container to burst.
- Use only dry pot holders—moist or damp pot holders on hot surfaces may result in burns from steam. Do not use a towel or other bulky cloth in place of a pot holder. Do not let pot holders touch the burner grate.
- Grease is flammable. Let hot grease cool before attempting to handle it.
- When using a range top burner, always use flat-bottomed pans which are large enough to cover the burner. Adjust the flame so that it heats only the bottom of the pan to avoid ignition of clothing. Position handles inward away from open edges of the unit to avoid burns associated with spillovers. Hold the handle of the pan with a pot holder when turning or stirring food.
- For proper lighting and performance of the burners it is necessary to keep the ports clean.
- Thoroughly clean the range top burners on a regular basis.
- Clean the range top burners with caution. To avoid steam burns, do not use a wet sponge or cloth to clean the range top burner while it is hot. Some cleaners produce noxious fumes or can ignite if applied to a hot surface.
SAFETY PRECAUTIONS
- At least once a year, the unit should be inspected for the presence of spiders, spider webs or other insects. The burner area is a common and desired spider haven and can present a dangerous condition which can damage the range top burners and render them unsafe for use. The presence of spiders, spider webs or other insects can cause the gas to flow from the front of the burner. This is a very dangerous condition which can cause a fire to occur behind the valve panel. Check the range top burners immediately if any of the following conditions exist:
- The smell of gas in conjunction with extreme yellow tipping of the burner flames.
- The burners do not reach temperature.
- The burners heat unevenly.
- The burners make popping noises.
- Should a burner go out during use, turn the control knob to OFF and wait 5 minutes before attempting to relight the burner. Always follow the lighting instructions.
- Never lean over a lit burner.
- Never cook without the drip tray in place and pushed all the way to the rear of the burner box.
- Do not operate the range top burners under combustible construction. Use only in well ventilated areas. Do not use in garages, breezeways, sheds or other such enclosed areas.
- If the range top burners have not been used for an extended period of time (over winter, for example) the unit should be checked for gas leaks and obstructions in the burner.
- Do not attempt to disconnect any gas connections while your burners are in use or the gas supply is on.
- When the range top burners are stored indoors the gas supply must be disconnected and, if using an LP gas cylinder, the cylinder must be stored outdoors in a well ventilated area.
- When the range top burners are stored outdoors ensure that they are kept in a well ventilated area.
- Keep any electrical supply cord away from the heated surface of the range top burners.
- On cart-mounted units never move without first allowing the range top burners and/or grill to cool and ensuring that the gas supply is turned off. Fold the side shelf down and push, never pull, the appliance.
- Never use the range top burners in a windy area.
- Only use with the type of gas specified on the rating plate. To change from LP gas from natural, or vice versa, a factory conversion kit is required.
- LP units are supplied with an LP tank equipped with a type 1 connector and an over-fill protection device. If you use a tank exchange system, be sure to exchange this tank for a similarly equipped tank.
SAVE THESE INSTRUCTIONS
Design information
(Not all features are on all models. Appearance may vary.)

| Feature Index Page | |
| 1 Model and Serial Numbers (in rear of burner box below grale) | 3, 16 |
| 2 Burner Cover 8 | |
| 3 Range Top Burners 8 | |
| 4 Burner Grate 8 | |
| 5 Power Burner Control 8 | |
| 6 Spark Igniter Knob 8 | |
| 7 Drip Tray 9 |
General information
Your range top burners are equipped with heavy cast iron burners. They are rated at 15,000 BTU and have a spark igniter knob for efficient lighting.
The range top burners come with a stainless steel cover. On cart-mounted units, the stainless steel cover doubles as a work surface. When using the grill burners with the work surface in place, be careful as heat can conduct from the grill section and cause the work surface to heat up.
Never attempt to light the range top burners with the work surface in place.
Cover the range top burners with the stainless steel cover when not in use.

natural_image
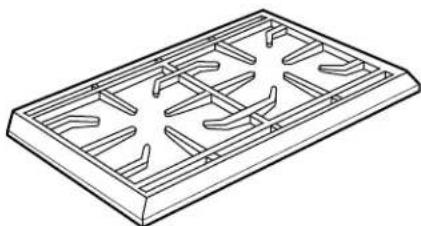
Technical line drawing of a structural frame with internal components (no text or symbols)The burner grate is porcelain enamel over cast iron for durability.
To light a range top burner
First remove the burner cover, by lifting up and to the side, or any cooking utensils from the burner grate.
CAUTION: On cart-mounted units, the burner cover may be hot if the grill burners are in operation.
Push and turn the control knob to the LITE position and immediately turn the igniter knob until the burner is lit or 4 seconds pass. It may be necessary to turn the igniter knob several times until the gas has filled the line.
If the burner doesn't ignite, wait 5 minutes for any accumulated gas to dissipate, then try again.
If the burner will not light after several attempts, wait 5 minutes. The burner can be lit by holding a lit match next to the burner ports and turning the control knob to LITE.
Move your hand immediately once the burner is lit. Turn the control knob to the desired setting.


natural_image
Line drawing of a hand using a tool to cut or inspect a grid-like structure with no visible text or symbolsIf the burner will not light you can use a match.
Flame height
The correct height of the flame depends on the size and material of the pan being used, the food being cooked and how much liquid is in the pan.
- The flame should never extend beyond the bottom of the pan.
- Pans that conduct heat slowly (such as glass-ceramic) should be used with low or medium flame unless you are cooking with a large amount of liquid.
Correct Incorrect


natural_image
Simple line drawing of a cooking pot with a crossed X mark and flames on a stove (no text or symbols)Note: The flame size on a gas burner should match the cookware you are using.
Burner grate
The range top burner grate is porcelain enamel over cast iron for durability. To avoid burns, do not clean the grate when hot. It may be wiped while in place with hot, soapy water, rinsed and wiped dry. Never immerse the grate in water when hot.
Due to rapid temperature changes, the porcelain may pop off the edges of the grate. Do not be concerned as the base metal, cast iron, soon darkens to blend with the porcelain enamel. Use care when wiping areas where the enamel has popped off. The edges may be sharp.
natural_image
Isometric line drawing of a rectangular tray with internal grid patterns (no text or symbols)If you remove the grate for cleaning, care should be taken in lifting it. It is very heavy. Place the grate on a protected surface.
Drip tray
A galvanized stainless steel drip tray is located under the burners. It collects any boilovers or spills. Pull forward to remove.
Spills should be washed off as soon as possible to prevent "baked on" soil.
Stainless steel
Do not use a steel-wool pad; it will scratch the surface.
To clean the stainless steel surface, use warm sudsy water or a stainless steel cleaner or polish. Always wipe the surface in the direction of the grain. Follow the cleaner instructions for cleaning the stainless steel surface.
To inquire about purchasing stainless steel appliance cleaner or polish, or to find the location of a dealer nearest you, please call our toll-free number, 800.626.2002 or visit ge.com.
Spider and insect warning
Spiders and insects can nest in the burners or orifices of this or any outdoor gas appliance. The presence of spiders, spider webs or other insects can cause the gas to flow from the front of the burner. This is a very dangerous condition which can cause a fire to occur behind the valve panel, damaging the range top burners and making them unsafe for use.
You should inspect the burners at least once a year or immediately if any of the following conditions occur:
- The smell of gas in conjunction with the burner flames appearing yellow.
- The burners do not reach temperature.
- The burners heat unevenly.
- The burners make popping noises.
If blockage exists, clean the burners immediately.
Burner removal
Ensure the gas supply is off, the knob is in the OFF position and all surfaces are cool before removing a burner.
The burners are cast iron coated with porcelain enamel. Occasionally it will be necessary to remove surface rust to ensure proper performance. Frequency of cleaning will depend on the climate and location and how often you use the range top burners. The walls of the burners are thick so they can withstand many years of use.
To remove a burner, remove the burner grate. Grasp the burner and pull it up slightly to the rear of the unit so that the venturi tube comes off the brass orifice at the front, and remove.
To reassemble the burner, replace the burner by sliding the air shutter over the brass orifice, centering it in the hole. Lower the burner head onto the support channel. Make sure the rectangular projection on the bottom of the burner drops into the cutout in the channel. Ensure that the burner is level and does not rock.
It is extremely important to center the burner on the orifice properly.
Be careful not to upset the air shutter's original position (unless readjusting). Lower the rear of the burner into the cutouts on the support channel at the rear of the burner box. Make sure it is level and does not rock.
If you remove the drip tray, replace it so that it sits level and does not rock.
Light the burner and check for proper flame characteristics. If adjustments are necessary refer to the installation instructions.


Burner cleaning
Clean the exterior of the burner with a wire brush.
Be sure burner ports are clear and free from debris. Clear any clogged ports with a straightened paper clip. Never use a wooden toothpick as it may break off and clog the port. Never enlarge the burner ports. Shake out any debris through the air shutter.
Use a flashlight to inspect the burner inlet to ensure it is not blocked. If obstructions can be seen, use a metal wire coat hanger that has been straightened out to clear them.
NOTE: To ensure warranty coverage and proper performance of the range top burners, monthly inspection and cleaning of all the burner orifices is recommended.

natural_image
Line drawing showing two hand positions: one holding a flashlight, the other holding a screwdriver (no text or symbols)Orifice cleaning
With the burner removed, remove the orifice and shine a flashlight through the opening to ensure there is no blockage.
Use a needle to clear any debris. Be extremely careful not to enlarge the hole or break off the needle.
Control knob
Clean up spatters with a damp cloth. Remove heavier soil with warm, soapy water.
Do not use abrasives of any kind.
The control knob may be removed for easier cleaning. To remove the knob, pull it straight off the stem. Wash the knob in soap and water but do not soak.

natural_image
Diagram showing a car inside a circular track and a book inside a ring, connected by a dashed line (no text or symbols)Replacing an igniter
Before replacing an igniter, perform this simple test.
-
From under and behind the valve panel, look upward and locate the end of the igniter wire where it is connected. Disconnect the wire and place the metal blade of a screwdriver about 1/8" from the terminal of the rotary igniter.
-
Turn the igniter knob. If the igniter is good, a spark will jump across to the screwdriver. If there is no spark, replace the igniter.
If there is a spark, examine the wire of the electrode for cracks and cuts. Also examine the electrode for grease and debris or see if the electrode tip is bent.
The igniter may be replaced from the front by removing the drip tray and reaching behind the valve panel to unplug the igniter wire. Remove the igniter knob and the two mounting screws. (Reverse the procedure to replace.) If removing the valve panel is necessary, begin by removing the control knob, then remove the 4 corner screws of the valve panel.
Questions?
Use this problem solver!
PROBLEM POSSIBLE CAUSE
| BURNER WON'T • RemLIGHT WHEN THE watch PUSH BUTTON a spark IGNITER KNOB IS TURNED | ove the burner grate. With the control knob in the OFF position, h the electrode while turning the igniter knob. You should see jump inside the electrode cap.Use a match to light the burner.Visually check the electrode and wire while turning the igniter knob. The only place a spark should appear is at the electrode tip. If the electrode or wire leaks voltage, remove and replace.Purge the gas line of any air.Check the orifice for blockage.Inspect the igniter tip to make sure it is clean and free from debris. Clean the area. Readjust for 1/8"gap. |
| BURNER FLAME IS YELLOW OR ORANGE IN CONJUNCTION WITH THE ODOR OF GAS | check the burner inlet for obstructions.Check the air shutter for proper adjustment.Do not place the range top burners in a dusty area. |
| LOW HEAT WITH • Ins CONTROL KNOB IN THE HI POSITION | pect the fuel hose to ensure it is not bent or kinked.Adequate gas supply may not be available. Check to make sure there is gas in the LP tank.The burner or burner orifice may need cleaning.The air shutter may need adjustment. |
With the purchase of your new Monogram appliance, receive the assurance that if you ever need information or assistance from GE, we'll be there. All you have to do is call—toll-free!
GE Answer Center®
800.626.2000
Whatever your question about any Monogram major appliance, GE Answer Center ^® information service is available to help. Your call—and your question—will be answered promptly and courteously. And you can call any time. GE Answer Center ^® service is open 24 hours a day, 7 days a week.
OR
Visit our Website at: ge.com
In-Home Repair Service
800.444.1845
A GE consumer service professional will provide expert repair service, scheduled at a time that's convenient for you. Many GE Consumer Service company-operated locations offer you service today or tomorrow, or at your convenience (7:00 a.m. to 7:00 p.m. weekdays, 9:00 a.m. to 2:00 p.m. Saturdays). Our factory-trained technicians know your appliance inside and out—so most repairs can be handled in just one visit.
For Customers With Special Needs...
800.626.2000

GE offers, free of charge, a brochure to assist in planning a barrier-free kitchen for persons with limited mobility.
Consumers with impaired hearing or speech who have access to a TDD or a conventional teletypewriter may call 800.TDD.GEAC (800.833.4322) to request information or service.
Service Contracts
800.626.2224
You can have the secure feeling that GE Consumer Service will still be there after your warranty expires. Purchase a GE contract while your warranty is still in effect and you'll receive a substantial discount. With a multiple-year contract, you're assured of future service at today's prices.
Parts and Accessories
800.626.2002
Individuals qualified to service their own appliances can have parts or accessories sent directly to their home. The GE parts system provides access to over 47,000 parts...and all GE Genuine Renewal Parts are fully warranted. VISA, MasterCard and Discover cards are accepted.
User maintenance instructions contained in this manual cover procedures intended to be performed by any user. Other servicing generally should be referred to qualified service personnel. Caution must be exercised, since improper servicing may cause unsafe operation.
WHAT IS COVERED
YOUR MONOGRAM RANGE TOP BURNERS WARRANTY
Staple sales slip or cancelled check here. Proof of original purchase date is needed to obtain service under warranty. Please have serial number and model number available when calling for service.
LIMITED ONE-YEAR WARRANTY
For one year from date of original purchase, we will provide, free of charge, parts and service labor in your home to repair or replace any part of the burner that fails because of a manufacturing defect.
LIMITED FIVE-YEAR WARRANTY
For five years from the date of original purchase, we will provide, free of charge, replacement burners and valves if they fail in normal use. You pay for the service trip to your home and all service labor charges.
This warranty is extended to the original purchaser and any succeeding owner for products purchased for ordinary home use in the 48 mainland states, Hawaii and Washington, D.C. In Alaska the warranty is the same except that it is LIMITED because you must pay to ship the product to the service shop or for the service technician's travel costs to your home.
All warranty service will be provided by our Factory Service Centers or by our authorized Customer Care ^® servicers during normal working hours.
Should your appliance need service, during warranty period or beyond, call 800.444.1845.
WHAT IS NOT COVERED
• Service trips to your home to teach you how to use the product.
- Replacement of push button igniter.
- Chipping of porcelain enamel grate or burner.
- Replacement of house fuses or resetting of circuit breakers.
• Damage caused after delivery.
- Damage to the product caused by accident, fire, floods or acts of God.
- Failure of the product if it is used for other than its intended purpose or used commercially.
- Improper installation, delivery or maintenance. If you have an installation problem, contact your dealer or installer. You are responsible for providing adequate electrical, gas, exhausting and other connecting facilities as described in the Installation Instructions provided with the product.
- Incidental or consequential damage caused by possible defects with this appliance.
- Product not accessible to provide required service.
EXCLUSION OF IMPLIED WARRANTIES—Your sole and exclusive remedy is product repair as provided in this Limited Warranty. Any implied warranties, including the implied warranties of merchantability or fitness for a particular purpose, are limited to one year or the shortest period allowed by law.
Some states do not allow the exclusion or limitation of incidental or consequential damages, so the above limitation or exclusion may not apply to you. This warranty gives you specific legal rights, and you may also have other rights which vary from state to state.
To know what your legal rights are in your state, consult your local or state consumer affairs office or your state's Attorney General.
Warrantor: General Electric Company, Louisville, KY 40225
Important Mail Today
Ownership Registration Consumer Product
GE Appliances

Place 1st Class Letter Stamp Here
General Electric Company
Warranty Registration Department
P.O. Box 34070
Louisville, KY 40232-4070
Consumer Product Ownership Registration
Dear Customer:
Thank you for purchasing our product and thank you for placing your confidence in us. We are proud to have you as a customer!
Follow these three steps to protect your new appliance investment:

Complete and mail your Consumer Product Ownership Registration today. Have the peace of mind of knowing we can contact you in the unlikely event of a safety modification.

After completing this registration, write your model and serial numbers in this manual. You will need this information should you require service. Our service number is 800.444.1845.

Read your "Owner's Manual" carefully. It will help you operate your new appliance properly. If you have questions, or need more information call the GE Answer Center® 800.626.2000.
Important: To ensure that your product is registered, fold and mail this form. No envelope is needed.
Consumer Product Ownership Registration

Product Model Serial
Dual Range Top Burner


GE Consumer & Industrial Appliances General Electric Company Louisville, KY 40225 ge.com
* Please provide your e-mail address to receive, via e-mail, discounts, special offers and other important communications from GE Appliances (GEA).
Check here if you do not want to receive communications from GEA's carefully selected partners. FAILURE TO COMPLETE AND RETURN THIS CARD DOES NOT DIMINISH YOUR WARRANTY RIGHTS.
For more information about GEA's privacy and data usage policy, go to ge.com and click on "Privacy Policy" or call 800.626.2224
CUT HERE

GE Consumer & Industrial Appliances General Electric Company Louisville, KY 40225 ge.com
49-80377
10756 Rev. B 12-05 JR
Printed in the United States


- OR
- Contents
- Care and Cleaning
- Consumer Services
- Using the Range Top Burners
- FOR YOUR SAFETY
- If you smell gas:
- ▲ WARNING
- IMPORTANT SAFETY NOTICE
- SAFETY PRECAUTIONS
- SAVE THESE INSTRUCTIONS
- Design information
- General information
- To light a range top burner
- Flame height
- Burner grate
- Drip tray
- Stainless steel
- Do not use a steel-wool pad; it will scratch the surface.
- Spider and insect warning
- You should inspect the burners at least once a year or immediately if any of the following conditions occur:
- Burner removal
- It is extremely important to center the burner on the orifice properly.
- Burner cleaning
- Orifice cleaning
- Control knob
- Replacing an igniter
- Questions?
- WHAT IS COVERED
- YOUR MONOGRAM RANGE TOP BURNERS WARRANTY
- LIMITED ONE-YEAR WARRANTY
- LIMITED FIVE-YEAR WARRANTY
- WHAT IS NOT COVERED
- Important Mail Today
- Ownership Registration Consumer Product
- Consumer Product Ownership Registration
Brand : GE
Model : ZX2JYSS
Category : Hob