
HIH-T895 - USB Drive HAIER - Free user manual and instructions
Find the device manual for free HIH-T895 HAIER in PDF.


| Product Type | Built-in Range Hood |
| Model | HIH-T895 |
| Brand | Haier |
| Overall Width | 895 mm |
| Overall Depth | 520 mm |
| Overall Height (Min-Max) | 610 - 990 mm |
| Net Weight | 31 kg |
| Rated Voltage | 230 V ~ |
| Rated Frequency | 50 Hz |
| Motor Rated Power | 219 W |
| Total Rated Power | 222 W |
| LED Lamp Power | 3 W (12 V) |
| Maximum Airflow | 22.5 m³/min |
| Noise Level | 58 dB(A) |
| Minimum Clearance (Gas Cooktop) | 650 mm |
| Fan Speed Control | Stepless sliding control |
| Special Functions | Boost (30 sec), Hood-Hob Connectivity, Wi-Fi control |
| Lighting Control | Independent on/off switch |
| Cleaning Requirements | Daily wipe; weekly oil cover; every 3 months fan; every 6 months full unit |
| Safety Features | Disconnect power before cleaning, electric shock warning |
| Warranty Period | 1 year comprehensive (excluding glass, filters, bulbs, etc.) |
| Ducting Diameter | 180 mm (universal hose included) |
| Included Accessories | Check valve assembly, duct, wall plate, oil collector, decorative cover holder, screws |
Frequently Asked Questions - HIH-T895 HAIER
User questions about HIH-T895 HAIER
0 question about this device. Answer the ones you know or ask your own.
Ask a new question about this device
Download the instructions for your USB Drive in PDF format for free! Find your manual HIH-T895 - HAIER and take your electronic device back in hand. On this page are published all the documents necessary for the use of your device. HIH-T895 by HAIER.
USER MANUAL HIH-T895 HAIER
1 Introduction 2
2 Safety and warnings 3
3 Installation instructions 4
4 About your rangehood 11
5 Operating instructions - Control panel 12
6 Cleaning and maintenance 13
7 Troubleshooting 15
8 Warranty 17
IMPORTANT!
SAVE THESE INSTRUCTIONS
The models shown in this user guide may not be available in all markets and are subject to change at any time. For current details about model and specification availability in your country, please contact your local Haier dealer.
Thank-you for purchasing a Haier range hood.
This user guide explains the features and functions, and will help you get the most out of your range hood.
We hope you enjoy your new range hood.


WARNING!

Electric Shock Hazard
Read and follow the safety and warnings outlined in this user guide before operating this appliance.
Never touch the power plug or electrical components, or manipulate the power switch with wet hands.
Altering of the internal wiring is strictly prohibited, unless performed by professional maintenance personnel.
When cleaning, never allow electrical components such as the motor, switch and connector to get wet.
Failure to do so can result in death, electric shock, fire or injury to persons.
Children should be supervised to ensure that they do not play with the appliance. Details for cleaning refer to part of ‘Cleaning and maintenance’.
IMPORTANT SAFETY INSTRUCTIONS
WARNING! When using this appliance always exercise basic safety precautions including the following:
- Disconnect the power supply when cleaning or inspecting the product.
- Do not damage or place heavy objects on the power cord.
- There must be adequate ventilation of the room when the range hood is used at the same time as appliances burning gas or other fuels. (A partial vacuum in the room could result in too high a concentration of gas in the air).
- Never expose the range hood to a burner or element that is turned on without a pot or pan covering it.
- If the hood is installed above the gas appliance, the minimum distance between the support surface of the cooking vessel on the cooktop and the lowest part of the range hood should be at least 650mm. If the gas stove installation instructions specify a larger installation distance, this should be considered.
- Never use aluminium foil on the cooktop.
- If using shared ducting, the air outlet must be well secured and sealed.
- Exhaust gases must not be discharged into a hot flue being used to vent appliances burning gas or other fuels.
- Do not flambe directly under the range hood.
- Children and persons with reduced physical, sensory or mental capabilities shall not use the range hood without supervision.
- This appliance can be used by children aged from 8 years and above and persons with reduced physical, sensory or mental capabilities or lack of experience and knowledge if they have been given supervision or instruction concerning use of the appliance in a safe way and understand the hazards involved. Children shall not play with the appliance. Cleaning and user maintenance shall not be made by children without supervision.
- There is a fire risk if cleaning is not carried out in accordance with the instructions.
- If installation is performed by a qualified person, the product should be tested to confirm proper operation, and the correct use of the product explained to the use r.
- If the power supply cord is damaged, it must only be replaced by your Haier trained and supported service technician or qualified person.
- Use a dedicated power outlet; the power cord must not be connected to an extension cord or multi-socket power board. Secure grounding is required, and the power cord should be 2000mm in length.
- Regulations regarding the discharge of air must be fulfilled.
- This appliance is an external exhaust hood, air and smoke is discharged to the outside through the air duct. To properly exhaust air ensure the duct is straight.
- Do not clean the inside of the range hood. If you need to clean the inside, please contact your Haier trained and supported service technician.
- The appliance shall be able to work normally under the following environmental conditions: temperature -15°C \~ 40°C, relative humidity ≤ 90% (at 25°C), altitude ≤ 1000m.
- Remove all packaging, including protective wrappings, before use.
- CAUTION: Accessible parts may become hot when used with cooking appliances.
Contents of packaging
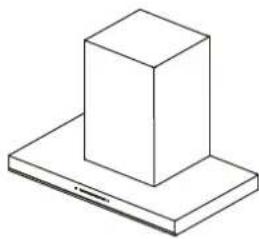
Range hood (1)

Check valve assembly (1)
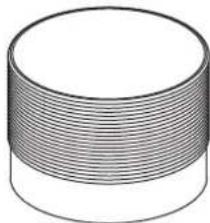
Duct (180) (2)

Check valve gasket (1)

Wall plate (1)
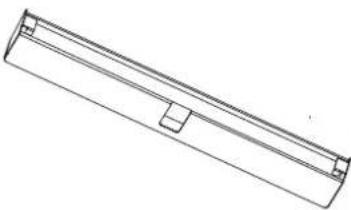
Oil collector (1)

Inner decorative cover holder (1)

Self-tapping screw
ST4 x 12 (4)
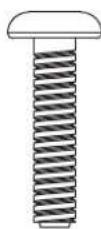
Cross recessed
pan head screw
M1 x 20 (8)

Mounting screw*
5 x 50 (7)

Expansion plug*
8 x 40 (7)

Self-tapping
screw ST3 x 8
(2)
* The screws and plugs are to be used in concrete or brick walls only. Different fixings will be required for other types of wall construction.
INSTALLATOIN INSTRUCTIONS
Names of principal components

Volute

Fan

Hand-tightened nut

Sealing ring

Main housing

Inner decorative cover

Outer decorative cover

Top cover

Check valve assembly
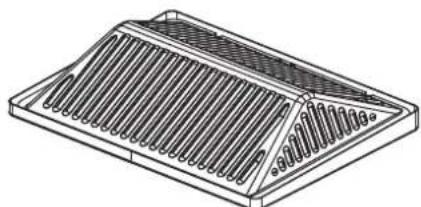
Oil filter assembly

LED Light (1)
Please read the entire instructions before installing the range hood.
Product dimensions


PRODUCT DIMENSIONS mm
| A | Overall height of product min. 610 - max. 990 |
| B | Overall width of product 895 |
| C | Overall depth of product 520 |
| D | Height of canopy 80 |
| E | Width of flue 375 |
| F | Depth of flue 320 |
| G | Centre of ducting to left edge of product 370 |
| H | Centre of ducting to back edge of product 170 |
| I | Outside diameter of check valve assembly 185 |
IMPORTANT!
Actual product dimensions may vary by ± 2 mm.
Height of range hood

| MINIMUM CLEARANCES mm | ||
| J | Height top of gas cooktop to base of rangehood min. 650 – max. 700 | |
| K | Height of rangehood installationif ducted through the ceilingif ducted through the rear | min. 610min. 990 |
| L | Depth of rangehood installation 533 | |
INSTALLATION INSTRUCTIONS
Installation
WARNING!
This product is heavy and requires two persons for installation.
WARNING!
Failure to install the screws or fixing device in accordance with these instructions may result in electrical hazards.
The manufacturer is not liable for any damage caused by not following these instructions.
1 Prepare the range hood for installation
- Before commencement, unpack the range hood and check that it functions correctly.
- The room in which the range hood is used should be well ventilated and contain no flammable, explosive or corrosive materials or articles.
- The wall used for mounting the range hood should have sufficient strength and a flat surface.
- When drilling holes in the wall, do so away from water, electricity or gas lines to prevent hazards such as electric shocks or gas leaks.
- Temporarily mark the height of the bottom of the range hood and the centre of the cooktop on the wall according to the information given on page 8.
2 Install the wall plate
- Use an impact drill with aφ 10mm masonry bit to drill 55mm deep holes in the wall in the locations of the wall plate holes and stopper screw holes as shown in Fig.1and 2.
- Fit the expansion plugs into the holes.
- Secure the wall plate to the wall using the mounting screws.
3 Install the decorative cover holder (if inner decorative cover extension is to be used)
- Use an impact drill with a φ 10 mm masonry bit to drill 55mm deep holes in the wall in the locations of the decorative cover holes as shown in Fig. 1 and 2.
• Fit the expansion plugs into the holes. - Secure the decorative cover holder to the wall using the mounting screws.

Fig. 1

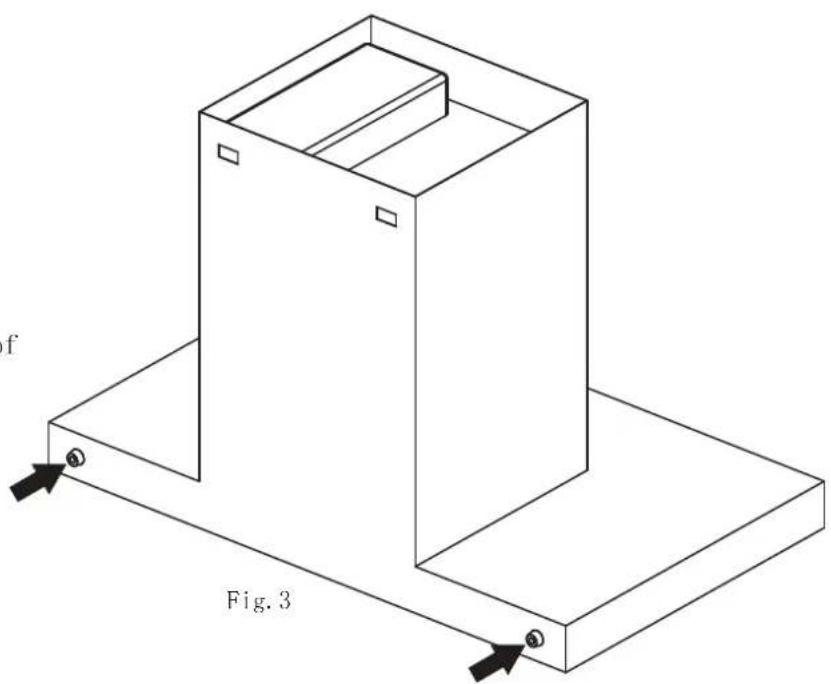
4 Install the supports
Attach the supports to the back of
the range hood as shown in Fig. 3.
INSTALLATION INSTRUCTIONS
5 Connect the check valve assembly
Place the check valve gasket and check valve assembly onto the air outlet on top of the main unit, and screw in place using the 8 cross recessed pan head screws.
6 Secure the main unit (this requires 2 persons)
Attach the main unit to the wall plate. Ensure the main unit and wall plate are firmly locked together.
7 Secure the stopper screw
Screw in the stopper screw at the top of the housing, ensuring that the screw is tightly secured against the main unit.
8 Connect the universal ducting hose
- Insert the unmarked end of the universal ducting hose into the recess of the check valve, and secure to the check valve assembly with the self-tapping screws.
- Connect the other end of the ducting hose to a shared flue or external wall hole.
- The length of the universal ducting hose should not exceed 3 metres to prevent impact on venting performance. The number of bends should be minimised. Flexible ducting should be stretched tight and trimmed to suit the installation.
9 Extend the inner decorative cover (if inner decorative cover extension is to be used)
Pull the inner decorative cover up and hook it onto the decorative cover holder.
10 Fit the oil receptacle
- Slide the oil receptacle into the slot on the oil cover.
• Make sure the oil receptacle is pushed all the way in.
11 Remove packaging
Remove all protective wrappings.
Technical Data
| LED Lamp | Input Power: 3 W ,Rated Voltage: 12 VCap Type: Buckle, Size: 220 mmX58 mm |
| Type of Power | Rated Voltage: 230V~ Rated Frequency: 50 Hz |
| Motor Rated Power Input | 219 W |
| Rated Power Input | 222 W |
| Air flow | 22.5m3/min |
| Air pressure | Maximum air pressure: ≥ 720 PaAt Air Flow of 7 m3/min ≥ 260 Pa |
| Noise | 58 dB(A) |
| Universal Ducting Hose | Outer Diameter 180 mm, Length 1500 mm |
| Net Weight | 31 Kg |
| Odour Removal Efficiency | Nominal ≥ 95% Instantaneous ≥ 70% |
| Grease Separation | ≥ 90% |
| Off Power | / |
| Standby Power | ≤ 2 W |
| Total Pressure Efficiency | ≥ 23% |


CONTROL PANEL FEATURES
 | Turns the light on or off. Lighting switch operates independently |
 | The front end of the collecting chamber forms an air curtain, preventing the oil smoke from spilling out from the front end of the range hood,so that the protecting user is not harmed by the oil smoke. |
| ||||| | Controls the fan speed.Slide on the buttons to change the speed, the fan speed is stepless variation. |
| Function 1: This key is for Boost function.Press this button to switch to Boost speed for 30 seconds.Function 2: This key is also for “Hood-Hob Connectivity” function.(It needs to be matched up and work together with Haier Gas Hob which also has the same “Hood-Hob Connectivity” function)(1) Match-up: While the Range Hood is at standby state, long press this button for 5 seconds, after a "ding dong" sound, the key start to blink for 15 seconds, within this 15 seconds, Rotate the Knob of the Hob,another “Ding dong sound” mean the match-up is done.(2) Hood-Hob Connectivity: After the match up is done, rotate the knob of the Hob and start the fire ,the Range Hood will start to work automatically; After turning off the knob of Hob, Range Hood will turn off automatically after 3 minutes.(3) Disconnetion: At the standby state, long press this button for 5 seconds, after "ding dong" sound, the key quickly flashing for 3 seconds, meaning disconnection success.Note: When the “Hood-Hob Connectivity” function is started, if touch the sliding bar and select other wind speed, the Range Hood would execute according to the latest instruction and change speed accordingly, Remember to turn off the Range Hood manually after usage because in this case, “Hood-Hob Connectivity” function will not be effective for the turn-off part. | |
| 1Press this button the hood will connect to electricity.2When fan is on, press this button the hood will enter Delay off mode and turns off in 3 minutes.3In Delay off mode press this button to turn off the hood.4Hold “( )” for 5 seconds at power off feature, then “( )” blinking, start to activate the wifi connect mode, connect the range hood with APP, then range hood can be controlled by mobile phone. |
We recommend turning your range hood on before starting cooking for optimal performance.
We recommend following ‘Cleaning and maintenance’ instructions for safety and optimal performance of your range hood.
Preparation for cleaning and maintenance
- Be sure to unplug the power cord before commencing cleaning or servicing of the range hood.
- Always wear rubber gloves during cleaning and maintenance to guard against injury from sharp metal parts.
• Always handle removed parts carefully to avoid damaging them. - Clean and service your range hood regularly, depending on the frequency of use.
Cleaning the main housing (daily)
• The outer surface of the rangehood and filter should be wiped every day after use.
- To protect the stainless steel finish, use a neutral detergent and a soft cloth. Never use hard brushes.
- Never wipe surfaces with corrosive chemicals such as gasoline or alcohol, or abrasive cleaning agents.
Cleaning the oil receptacle (as necessary)
- When the oil receptacle reaches the mark, it should be removed promptly to avoid overflow.
- Pull the oil receptacle straight out to detach it from the Oil Cover.
• Empty the oil receptacle. - The oil receptacle should be washed in warm water with detergent (do not use corrosive chemicals).
- To replace the oil receptacle slide it into the slot on the cover and ensure it is pushed all the way in.
Cleaning the oil cover(weekly)
- Remove oil receptacle (refer to instructions above).
- Loosen the screw securing the oil cover.
- The oil cover should be washed in warm water with detergent and left to soak. Wipe clean with a rag and rinse with fresh water.
- The inner part of the cover and the cover recess in the main housing should be cleaned every week.
- To reassemble; align the tabs and angle the cover into the recess as shown in Fig.5. Insert the screw and tighten it using a screwdriver.
- Slide oil receptacle into the slot on the cover and ensure it is pushed all the way in.


Fig.5
Cleaning the fan (every 3 months) (this requires 2 persons)
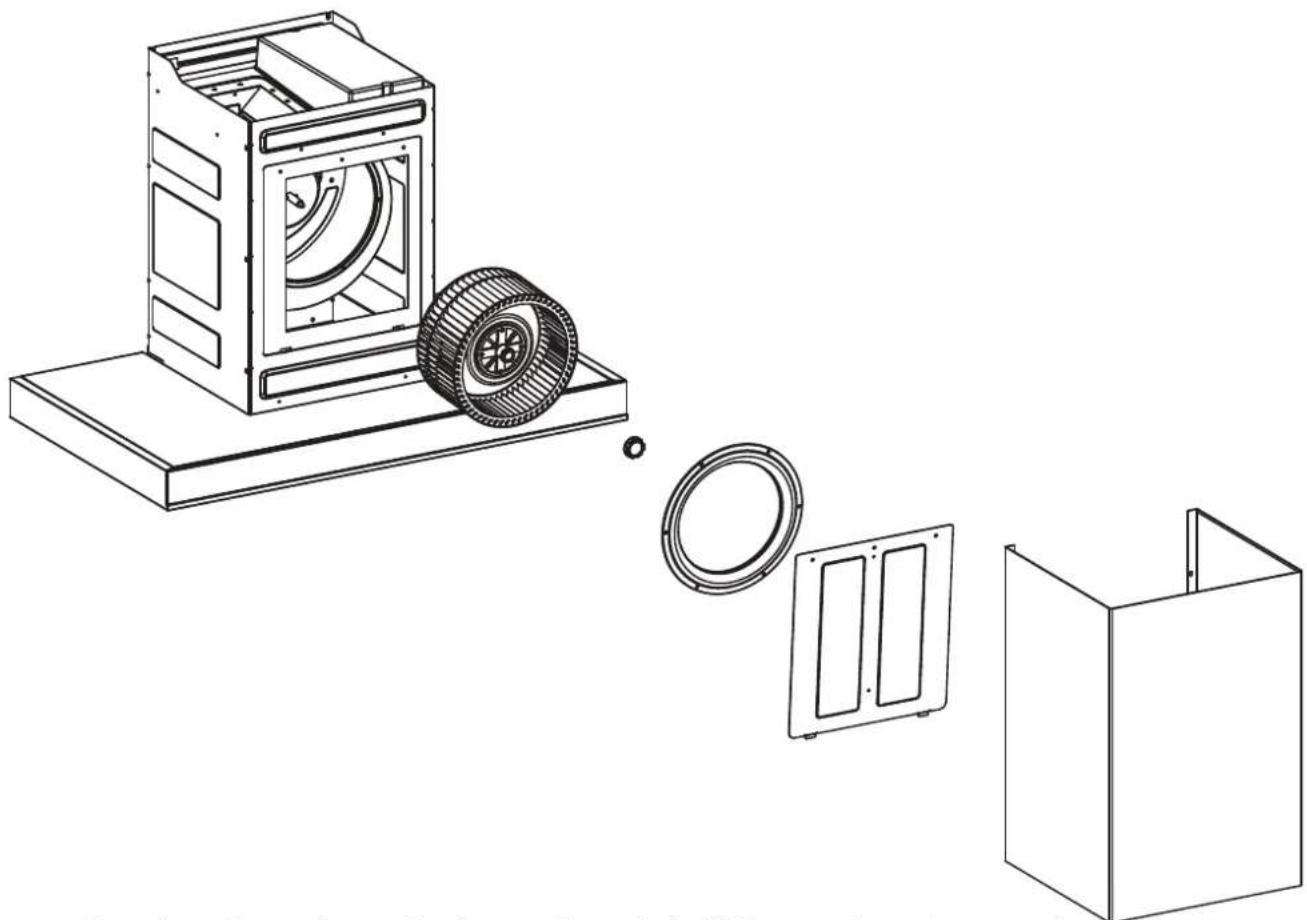
- Remove the oil receptacle. - If the inner decorative cover has been extended, unhook it from the decorative cover holder and slide it back down between the main housing and outer decorative cover.
- Loosen the screws attaching the ducting to the check valve assembly and remove the ducting from the check valve assembly.
- Loosen the stopper screw and detach the main unit from the wall plate.
- Remove the 4 screws that secure the outer decorative cover and remove the outer and inner decorative covers.
- Loosen the screws holding the main housing cover plate and remove the cover plate.
- Loosen the screws holding the intake ring and remove the intake ring.
- Twist the nut in a clockwise direction to remove the fan.
• Take particular care when cleaning the fan that the clips on the blades are not moved or lost, as this will imbalance the fan and cause vibration of the entire rangehood, leading to increased noise.
- To reassemble replace the parts in reverse order of disassembly.
• The fan should be cleaned once every 3 months.
Cleaning the entire unit (every 6 months) (this requires 2 persons)
- The entire unit should be cleaned once every six months so as to maintain venting performance and ensure a long service life.
- Unplug the power cord if the range hood will not be used for a prolonged period of time.
Solutions for common faults
In case of a fault, first try the suggestions below. If the problem cannot be fixed, please get in touch with your local Haier after-sales service centre. Only professional technicians may dismantle and repair the range hood.
| PROBLEM WHAT TO DO POSSIBLE CAUSE | ||
| No power. Power supply plug is not plugged in or not properly connected. | Connect the power plug. | |
| Product not working. | The power supply is not connected, or the voltage is incorrect. | Restore the power supply or contact an electrician for repair. |
| No fan speed has been selected. | Select a fan speed. | |
| Light not working. | Light button not pressed. Press | the light button. |
| Light has burned out. Replace the light (please contact the after-sales service centre). | ||
| Product vibrates. | Main unit is not securely fastened to wall. | Check that the main unit is fastened securely. |
| Fan is not well fitted. Fit the | fan properly. | |
| Fan is damaged. Replac | e the fan (please contact the service centre). | |
| Hand-tightened nut is loose. | Tighten the hand-tightened nut. | |
| Poor suction | Windows and doors are open too wide during use or are closed. | Open or close doors and windows as necessary to ensure venting performance. |
| Range hood body is not installed at the correct height. | Re-install the appliance at the required height. | |
| Universal ducting hose is too long, has not been stretched tight, or has too many bends. | Reduce the length of the ducting hose or the number of bends. | |
| Shared flue aperture is too narrow or the air outlet is poorly sealed. | Widen the flue aperture or improve the outlet sealing. | |
| The check valve blade is stuck and cannot function properly. | Fix the blade and ensure the valve is working correctly. | |
| Range hood has not been cleaned. | Clean the range hood in accordance with the instructions. | |
| PROBLEM POSSIBLE CAUSE WHAT TO DO | ||
| Oil leak. Too much oil in the oil receptacle. | Remove waste oil in the oil receptacle. | |
| Oil Cover is difficult to remove. | Cover and cover recess have not been cleaned. | Clean the oil cover and cover recess weekly in accordance with the instructions. |
Note: if you are unable to fix the problem by following the above prompts, or one of the situations below occurs, please unplug the range hood straight away and contact our after-sales service centre.
1 The range hood runs unevenly when turned on;
2 The range hood makes an unusual noise during operation;
3 Strange odours, heat or smoke are discovered, or other unusual circumstances not mentioned above occur.
The following phenomenon is not a malfunction
| PHENOMENON CAUSE | |
| The product makes a clicking noise after the power is switched off for a few seconds. | Air pressure causes the two blades of the check valve to open during operation. After the power supply is switched off, the fan gradually stops rotating and the blades fall back by themselves, emitting a clicking noise. |
Customer Name :- Address :-
Serial Number :- Date of Purchase :- Model No. :-
Dealer Seal :-
HAIER WARRANTY
HAIER APPLIANCES (INDIA) PVT. LTD (here-in-after referred to as "the Company") hereby offers the following warranty to the original domestic purchaser commencing from the Date of the Purchase (DOP). The Company at its sole discretion, will free of charge repair or replace any defective part or parts which prove to be defective in workmanship and/or materials and not due to abnormal or improper usage.
CONDITIONS OF WARRANTY
1) This warranty will be automatically terminated on the expiry of the warranty period from the Date of Purchase (DOP).
2) The Company is not liable for any delay in servicing due to reasons beyond the control of the Company or any of its authorized service center.
3) Parts replaced or repaired under this warranty are warranted throughout the remaining of the original warranty period.
4) It is entirely left to the Company's discretion to repair/replace parts at the site of installation or at the authorized service center.
5) This warranty shall be strictly limited to the repairs or replacement of the defective part specified in warranty. This warranty shall not cover any consequential or resulting liability.
6) This warranty shall not, in any case, extend towards payment of any monetary consideration whatsoever or replacement or return of the product.
7) The Company may repair/supply parts free of cost during the warranty period. This warranty does not cover any Excise duty, Central or Sales tax, Octrol and other local taxes or levies on the components/parts.
8) The parts shall be replaced by functionally operating equivalent material only and not with brand new ones and are likely to be different from the one originally fitted. The parts thus removed shall be taken back by the Company.
9) The Company reserves the right to retain any part or component replaced at its sole discretion during the warranty period.
10) In no event the Company or its authorized service center, be liable for any consequential damages or resulting liability, damage or loss arising directly or indirectly out of any defect in the product.
11) This warranty is not valid in case of the following events.
a) If the Product has been Installed/Serviced/Repaired/Opened or Tampered by any unauthorized personnel.
b) If defects arise/caused by accidents, alteration, misuse, neglect, substitution of original components with spurious/non-genuine components, attacked by household pest / rodents, fire, flood, earthquake, lightning and/or any other act of God/natural calamities.
c) The product is shitted outside India.
12) (a) For any service under this warranty beyond city/town/municipal limits from the Company/authorized service center, a fixed charge of Rs. 100 will be collected from the customer in addition to the actual to and for charges by the shortest route.
(b) Service charges applicable after expiry of comprehensive warranty.
13) Any change of location or change in the ownership during the warranty period must be intimated in writing to the Company.
14) The Company's employees or its authorized representatives have no authority to vary the terms of this warranty
15) Brass burners valve carry warranty against any manufacturing defect for 60 months. Warranty is not applicable for De-coloration of the burners.
16) The warranty does not cover rust, oxidation, discoloration, scratches, and wear & tear, plastic, rubber, aesthetic, filters, Consumable parts.
17) HOB Tempered glass top have 24 Month warranty for any manufacturing defect. The warrant of glass become null & void in following conditions.
a) Glass breakage due to improper use or accidental damage.
b) Use of gas tandoor / Gas Oven / Dosa Tawa.
c) Sprinkling of water on hot Glass surface.
d) Other safety norms / precaution not followed.
18) This warranty is affected in New Delhi and claims, if any, shall be made only before the courts having jurisdiction in New Delhi and no claim shall be made against the Company outside New Delhi not withstanding that the Appliance may have been sold or delivered elsewhere.
| Segment | Warranty | |
| Period | Parts not Covered | |
| BUILT - IN - HOB | 1 Year Comprehensive(1 + 1 Yr. on Glass) &(1 + 4 Yrs. On Burner & Valve ) | Pan Support, Leg, Drip Tray & Knob,Mixing tube, Plastic Parts, accidents ordamage, etc. |
| HYBTID - HOB | ||
| TABLET - HOB | ||
| HOOD | 1 Year Comprehensive | Glass, Duct Cover, Body, Filters, OilCollector & Cleaning, Bulbs, Switches,Knobs, Plastic Parts, accidents or damage,etc. |
| BUILT - MWO | 1 Year Comprehensive | Outer Body, Cavity, Door, Glass, Handle,Knob/ Touch Panel, bulbs, Plastic Parts,accidents or damage, etc. |
| BUILT - IN - OVEN | 1 Year Comprehensive | |
| BUILT - STERILIZER | 1 Year Comprehensive | |
Haier Appliances (India) Pvt. Ltd.
Building -1, Okhla Industrial Estate Phase III, New Delhi -110020
Tel- +91-1139496000,30674000,
Fax: +91-11-30674088

1800-102-9999, 1800-419-9999
(Toll Free - 24x7)
Email: customercare@haierindia.com
Whatsapp:8553049999
For Quick Connect to Haier India Scan QR Code

Haier
Inspired Living
Customer Name :- Address :-
Serial Number :- Date of Purchase :- Model No. :-
Dealer Seal :-
Brand : HAIER
Model : HIH-T895
Category : USB Drive