
Strobe SXP1001-DB - To scan XEROX - Free user manual and instructions
Find the device manual for free Strobe SXP1001-DB XEROX in PDF.


| Product Type | Sheet-fed scanner |
| Model | Xerox Strobe SXP1001-DB (equivalent to Visioneer Strobe XP 100) |
| Optical Resolution | 600 dpi |
| Bit Depth (Internal) | 36-bit color (12-bit A/D converter), 12-bit grayscale |
| Output Bit Depth | 24-bit color, 8-bit grayscale, 1-bit black & white |
| Scan Method | Single-page sheet-fed |
| Duplex Scanning | No (single-sided only) |
| Interface | USB 2.0 High Speed |
| Power Supply | USB bus-powered from computer (no external adapter required) |
| Dimensions (H x W x L) | 1.5 x 2.0 x 11.4 inches (3.81 x 5.08 x 28.96 cm) |
| Weight | 11.2 oz (0.350 kg) |
| Operating Temperature | 50°F to 104°F (5°C to 35°C) |
| Relative Humidity | 20% to 80% (non-condensing) |
| Certifications | UL, FCC Class B, VCCI Class B, CE, RoHS, WEEE |
| Warranty | One-year limited warranty (upon product registration) |
| Supported Operating Systems | Windows 2000 (SP4) / Windows XP (SP1 or later) |
| System Requirements | Pentium or AMD CPU, CD-ROM drive, USB port, 128 MB RAM (256 MB recommended for XP), 200 MB free disk space, VGA/SVGA monitor (800x600, 16-bit color) |
| Included Accessories | USB cable, calibration sheet (2 pages), cleaning sheet, software CD, Quick Install Poster, Technical Support Card, carrying case |
| Maintenance | Calibration and cleaning with included sheets; cleaning sheets can be reused with isopropyl alcohol |
| Software Features | AutoLaunch, OneTouch 4.0, TWAIN and WIA drivers, PaperPort document management, OmniPage Pro OCR (sold separately for this model) |
Frequently Asked Questions - Strobe SXP1001-DB XEROX
User questions about Strobe SXP1001-DB XEROX
0 question about this device. Answer the ones you know or ask your own.
Ask a new question about this device
Download the instructions for your To scan in PDF format for free! Find your manual Strobe SXP1001-DB - XEROX and take your electronic device back in hand. On this page are published all the documents necessary for the use of your device. Strobe SXP1001-DB by XEROX.
USER MANUAL Strobe SXP1001-DB XEROX
natural_image
Abstract geometric logo design with stylized eye and V-shape elements (no text or symbols)Visioneer®
RoadWarrior™
Strobe XP 100
Strobe XP 200
Strobe XP 300
User's Guide
visioneer

for Windows
Visioneer Strobe XP USB Scanner User's Guide
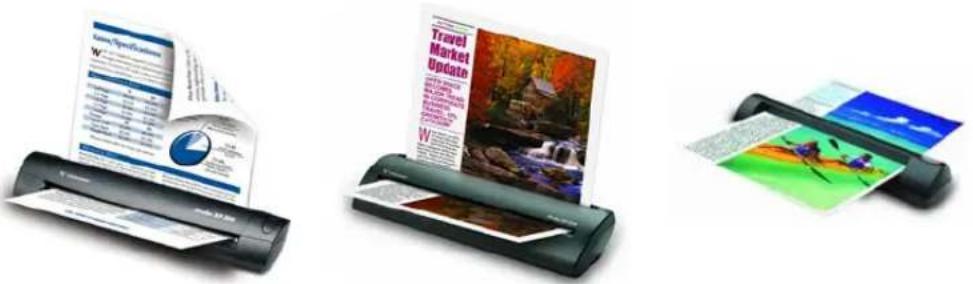
Visioneer RoadWarrior™
Strobe XP 100
Strobe XP 200
Strobe XP 300
FOR WINDOWS
COPYRIGHT INFORMATION
Copyright © 2006 Visioneer, Inc.
Reproduction, adaptation, or translation without prior written permission is prohibited, except as allowed under the copyright laws.
The Visioneer brand name and logo are registered trademarks, and the RoadWarrior brand name is a trademark of Visioneer, Inc. The PaperPort brand name and logo and the OmniPage Pro brand name are registered trademarks of Nuance Communications, Inc. The ArcSoft Scrapbook Suite®, Collage Creator®, and PhotoImpression® brand names are registered trademarks of ArcSoft, Inc. Adobe®, Adobe® Acrobat®, Acrobat® Reader®, and the Adobe® Acrobat® PDF® logo are registered trademarks of Adobe Systems Incorporated in the United States and/or other countries. The Adobe PDF logo will appear in this product's software, and full access to Adobe software features is only available if any Adobe product is installed on your computer.
This product is covered by one or more of the following patents: 6,480,304; 6,459,506; 6,054,707; 6,275,309; 5,818,976; 5,499,108; 5,517,332.
Microsoft is a U.S. registered trademark of Microsoft Corporation. Windows is a trademark of Microsoft Corporation. ZyINDEX is a registered trademark of ZyLAB International, Inc. ZyINDEX toolkit portions, Copyright © 1990-1998, ZyLAB International, Inc. All Rights Reserved. All other products mentioned herein may be trademarks of their respective companies.
Information is subject to change without notice and does not represent a commitment on the part of Visioneer. The software described is furnished under a licensing agreement. The software may be used or copied only in accordance with the terms of such an agreement. It is against the law to copy the software on any medium except as specifically allowed in the licensing agreement. No part of this document may be reproduced or transmitted in any form or by any means, electronic or mechanical, including photocopying, recording, or information storage and retrieval systems, or translated to another language, for any purpose other than the licensee's personal use and as specifically allowed in the licensing agreement, without the express written permission of Visioneer.
Part Number: 05-0718-000
Restricted Rights Legend
Use, duplication, or disclosure is subject to restrictions as set forth in contract subdivision (c)(1)(ii) of the Rights in Technical Data and Computer Software Clause 52.227-FAR14. Material scanned by this product may be protected by governmental laws and other regulations, such as copyright laws. The customer is solely responsible for complying with all such laws and regulations.
Visioneer's Limited Product Warranty
IF YOU FIND PHYSICAL DEFECTS IN THE MATERIALS OR THE WORKMANSHIP USED IN MAKING THE PRODUCT DESCRIBED IN THIS DOCUMENT, VISIONEER WILL REPAIR, OR AT ITS OPTION, REPLACE THE PRODUCT AT NO CHARGE TO YOU, PROVIDED YOU RETURN IT (POSTAGE PREPAID, WITH PROOF OF YOUR PURCHASE FROM THE ORIGINAL RESELLER) DURING THE 90-DAY PERIOD AFTER THE DATE OF YOUR ORIGINAL PURCHASE OF THE PRODUCT. UPON RECEIPT DURING THE INITIAL 90-PERIOD BY VISIONEER OF A VALID REGISTRATION OF THE PRODUCT, THIS LIMITED PRODUCT WARRANTY PERIOD IS EXTENDED TO THE 12-MONTH PERIOD AFTER THE DATE OF YOUR ORIGINAL PURCHASE. IF A VALID REGISTRATION IS NOT RECEIVED DURING THE INITIAL 90-DAY PERIOD, THE 12-MONTH WARRANTY IS NO LONGER AVAILABLE AND YOUR PRODUCT WARRANTY WILL TERMINATE AFTER THE 90-DAY INITIAL PERIOD EXPIRES.
THIS IS VISIONEER'S ONLY WARRANTY AND YOUR EXCLUSIVE REMEDY CONCERNING THE PRODUCT, ALL OTHER REPRESENTATIONS, WARRANTIES OR CONDITIONS, EXPRESS OR IMPLIED, WRITTEN OR ORAL, INCLUDING ANY WARRANTY OF MERCHANTABILITY, FITNESS FOR A PARTICULAR PURPOSE OR NON-INFRINGEMENT, ARE EXPRESSLY EXCLUDED. AS A RESULT, EXCEPT AS SET OUT ABOVE, THE PRODUCT IS SOLD "AS IS" AND YOU ARE ASSUMING THE ENTIRE RISK AS TO THE PRODUCT'S SUITABILITY TO YOUR NEEDS, ITS QUALITY AND ITS PERFORMANCE.
IN NO EVENT WILL VISIONEER BE LIABLE FOR DIRECT, INDIRECT, SPECIAL, INCIDENTAL OR CONSEQUENTIAL DAMAGES RESULTING FROM ANY DEFECT IN THE PRODUCT OR FROM ITS USE, EVEN IF ADVISED OF THE POSSIBILITY OF SUCH DAMAGES.
All exclusions and limitations in this warranty are made only to the extent permitted by applicable law and shall be of no effect to the extent in conflict with the express requirements of applicable law.
RoHS and WEEE Compliance
This product is compliant with RoHS Regulations of the European Parliament and Council Directive on the Restrictions of the Use of Certain Hazardous Substances in Electrical and Electronic Equipment (2002/95/EC), and with the Waste Electrical and Electronic Equipment (WEEE) Directive (2002/96/EC).
FCC Radio Frequency Interference Statement
This equipment has been tested and found to comply with the limits for the class B digital device, pursuant to part 15 of the FCC Rules. These limits are designed to provide reasonable protection against interference in a residential installation. This equipment generates, uses and can radiate radio frequency energy and if not installed, and used in accordance with the instructions, may cause harmful interference to radio communications. However, there is no guarantee that interference will not occur in a particular installation. If this equipment does cause harmful interference to radio or television reception, which can be determined by turning the equipment off and on, the user is encouraged to try and correct the interference by one or more of the following measures:
- Reorient or relocate the receiving antenna.
- Increase the separation between the equipment and receiver.
- Connect the equipment into an outlet on a circuit different from that to which the receiver is connected.
- Consult the dealer or an experienced radio/TV technician for help.
This equipment has been certified to comply with the limits for a class B computing device, pursuant to FCC Rules. In order to maintain compliance with FCC regulations, shielded cables must be used with this equipment. Operation with non-approved equipment or unshielded cables is likely to result in interference to radio and TV reception. The user is cautioned that changes and modifications made to the equipment without the approval of manufacturer could void the user's authority to operate this equipment.
This device complies with part 15 of the FCC Rules. Operation is subject to the following two conditions: (1) This device may not cause harmful interference, and (2) this device must accept any interference received, including interference that may cause undesired operation.
TABLE OF CONTENTS
Welcome 1
What's in the Box 2
What's in the Box—Visioner RoadWarrior 2
What's in the Box—Visioneer Strobe XP 100 .....3
What's in the Box—Visioneer Strobe XP 200 ..... 4
What's in the Box—Visioneer Strobe XP 300 ..... 5
The Visioneer Strobe XP 100 Scanner 6
The Visioneer RoadWarrior Scanner 7
The Visioneer Strobe XP 200 Scanner 8
The Visioneer Strobe XP 300 Scanner 9
What You Need 10
Documentation 11
Installing....12
Before You Begin 12
Step 1: Install the Software 13
Step 2: Connect the Scanner ..... 21
Connect the Visioneer RoadWarrior or Strobe XP 100 Scanner 21
Connect the Strobe XP 200 Scanner 22
Connect the Strobe XP 300 Scanner 23
Step 3: Calibrate the Scanner ..... 24
Install OmniPage Pro (Strobe XP 300 Only) ..... 29
Additional Applications for Your Scanner 30
Register Your Scanner 32
Set Up Your Scanner 33
Strobe XP 200 Paper Return Options 33
Strobe XP 300 Paper Return Options 34
Strobe XP 300 Stand 35
Scanning on the Go 36
Configure the Strobe XP 300 AC Power Adapter ..... 37
Scanning Basics 38
Adjust the Paper Guides 38
Scanning Photos and Thin Paper Items 39
Scanning 41
Scan Using AutoLaunch 42
Check the Scan Settings Before Scanning with AutoLaunch ... 43
Turn AutoLaunch Off/On 44
Scan from the OneTouch Panel 47
Using the OneTouch Panel 49
The OneTouch Properties Window 51
Selecting New OneTouch Scan Settings 54
Setting Destination Application Properties 56
Selecting Options for the OneTouch Properties Window .....70
Creating a New Scan Configuration 74
The Device Settings Tab 81
The Storage Options Tab (Archive) 82
Editing or Deleting Scan Configurations 84
Configuring Before Scanning 86
Scanning with Optical Character Recognition (OCR) ..... 87
Using OmniPage OCR Options 89
Scanning with sPDF or nPDF and Searching for Text ..... 98
Scan and Burn to a CD 101
Scanning with Event Forwarding 103
Creating an HTML Web Page from Your Scanned Documents....105
Transferring Scanned Documents to Storage ..... 107
Scanning to Multiple Folders 110
To Transfer Documents to a Server or Mapped Drive ..... 115
Check the Hardware and Select Device Settings ..... 117
Scanning from TWAIN Software 120
Scanning from PaperPort Using the TWAIN Interface ..... 121
Getting Help with the PaperPort Software 130
Setting Up Your Scanner to Work with PaperPort .... 131
Scanning from the WIA Interface 136
Maintenance 140
Recalibrating or Cleaning Your Scanner 140
Troubleshooting 145
How to Uninstall Your Scanner....147
Step 1: Uninstalling the OneTouch 4.0 Scanner Software .... 147
Step 2: Uninstalling the PaperPort Software ..... 147
To Install Another Driver 148
Visioner RoadWarrior and Strobe XP 100 Scanner Specifications 149
Visioner Strobe XP 200 Scanner Specifications ....150
Visioner Strobe XP 300 Scanner Specifications ..... 151
Visioneer Strobe XP Parts List 152
Index 155
TABLE OF CONTENTS
Welcome
Congratulations on purchasing your Visioneer scanner. Please note that this User's Guide covers the Visioneer family scanners—the Visioneer RoadWarrior™, Strobe XP 100, Strobe XP 200, and Strobe XP 300.
Visioneer RoadWarrior™
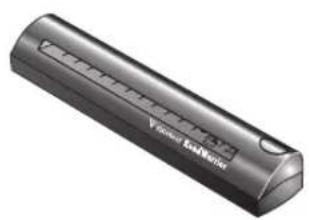
natural_image
Exterior view of a cylindrical electronic device with a label 'Vincent EasNumber' on its body (no other text or symbols visible)Visioneer Strobe XP 100
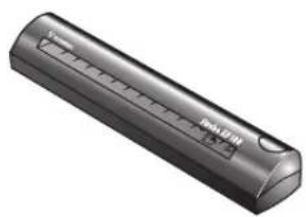
natural_image
Exterior view of a cylindrical electronic device with a button and indicator lights (no visible text or symbols)Visioneer Strobe XP 200 Visioneer XP Strobe 300
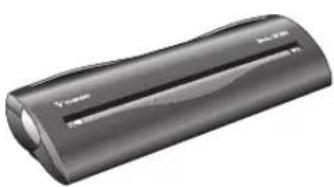
natural_image
Black cylindrical electronic device with visible internal components and branding (no readable text or symbols)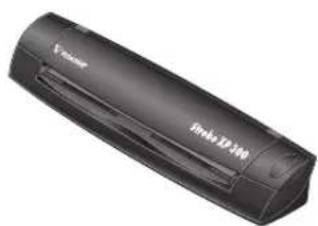
natural_image
Black handheld device labeled 'Jinko 12.140' with no visible text or symbols on its bodyNote: These Visioneer scanners share the same basic features, but some special features are specific to certain models. The model-specific features are identified in this User's Guide.
Note: The images and on-screen windows for the Strobe XP 300 in this User's Guide are used as representative examples of what you will see on the screen. Most of the images and screens are similar, and any significant model-specific differences are also shown.
WHAT'S IN THE BOX
Before starting the installation, check the contents of the box to make sure that all parts are included. If any items are missing or damaged, contact the dealer where you purchased the scanner. Please refer to the appropriate figures for the scanner you purchased.
WHAT'S IN THE BOX—VISIONEER ROADWARRIOR
natural_image
Exterior view of a black cylindrical electronic device labeled 'V Sincaser Road Harrier' (no additional text or symbols visible)
natural_image
Black rectangular object with a small metallic clip attached (no visible text or symbols)Carrying Case
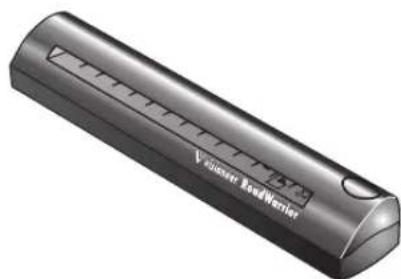
Visioner RoadWarrior Scanner

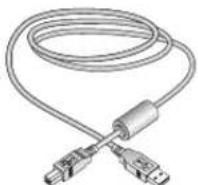
USB Cable Calibration Pages (2) Cleanin

Software CD Quick Install Poster and Technical Support Card
WHAT'S IN THE BOX—VISIONEER STROBE XP 100
natural_image
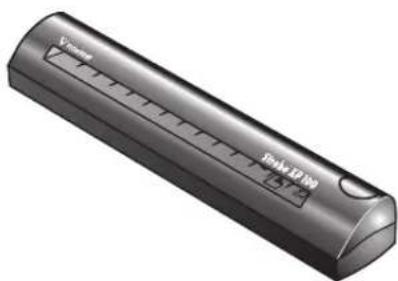
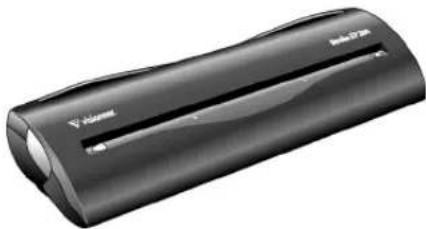
Exterior view of a cylindrical electronic device with labeled ports (no readable text or symbols beyond branding)Visioneer Strobe XP 100 Scanner
natural_image
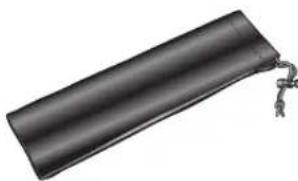
Black rectangular object with a small metallic chain attached, resembling a tool or device (no text or symbols visible)Carrying Case
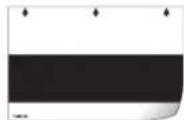
Calibration Pages (2)
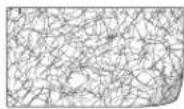
Cleaning Page
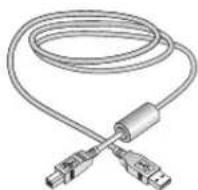
USB Cable
Software CD
Quick Install Poster and Technical Support Card
WHAT'S IN THE BOX—VISIONEER STROBE XP 200
natural_image
Black cylindrical electronic device labeled 'Viacom' with visible internal structure (no readable text beyond branding)Visioneer Strobe XP 200 Scanner
natural_image
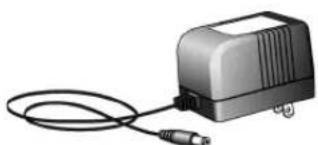
Illustration of a portable electronic device with a coiled cable (no text or symbols visible)AC Adapter
natural_image
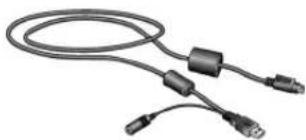
Coiled black cable with connectors and connectors (no text or symbols visible)USB/Power Connector Cable (called a USB "Y-Cable")

Photo Sleeve for scanning photos
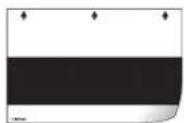
Calibration Page Cleaning Page
Software CD Quick Install Poster and Technical Support Card
WHAT'S IN THE BOX—VISIONEER STROBE XP 300
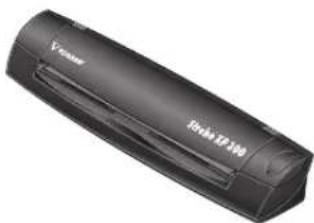
natural_image
Black cylindrical device labeled 'Zirba XP 140' with visible branding (no additional text or symbols)Visioneer Strobe XP 300 Scanner
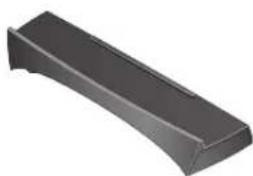
natural_image
3D rendering of a curved black rectangular object with a small hole, resembling a tool or bracket (no text or symbols visible)Mounting Stand
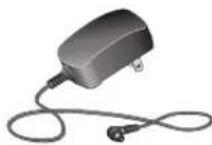
AC Power Adapter
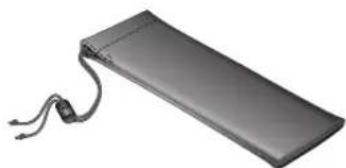
natural_image
Black rectangular electronic device with attached cable and ear (no visible text or symbols)Carrying Case
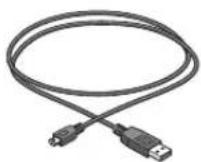
Mini USB Cable (uses power from computer)
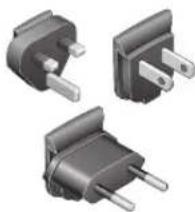
natural_image
Three black electrical plug terminals with metal leads, shown from different angles (no text or symbols visible)AC Plug Adapters

Calibration Pages (2)
Cleaning Page

Software CDs (2)
Quick Install Poster and Technical Support Card
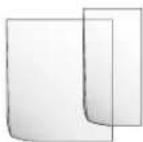
Transparency Sleeves (2) for scanning thin paper items
THE VISIONEER STROBE XP 100 SCANNER
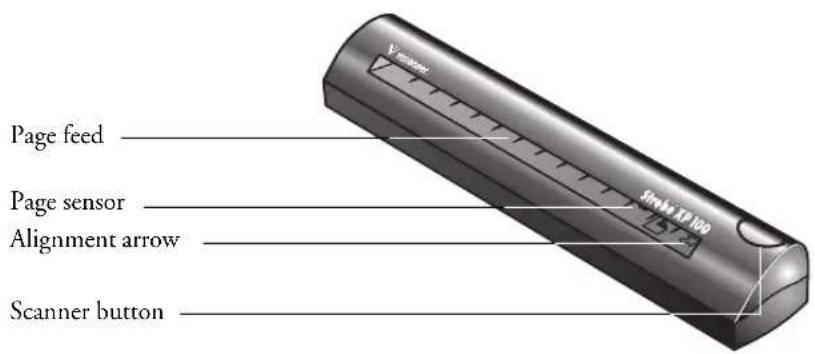
Page feed—Insert the item you want to scan into the page feed, face down. The scanner grabs the item and pulls it through while scanning.
Page sensor—Recognizes when an item is inserted into the page feed so the scanner knows to begin scanning.
Alignment arrow—Shows where to align the top right corner of the item you're scanning.
Scanner Button—If a OneTouch scan is in progress, cancels the scan and the paper comes out of the scanner. If a OneTouch scan is not in progress, opens the OneTouch 4.0 window so you can adjust the scanner settings.
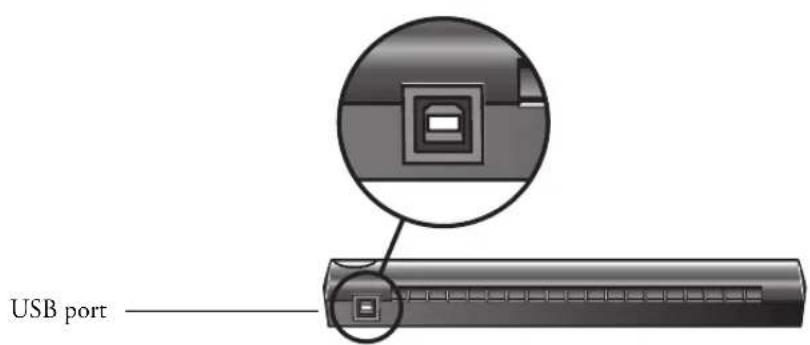
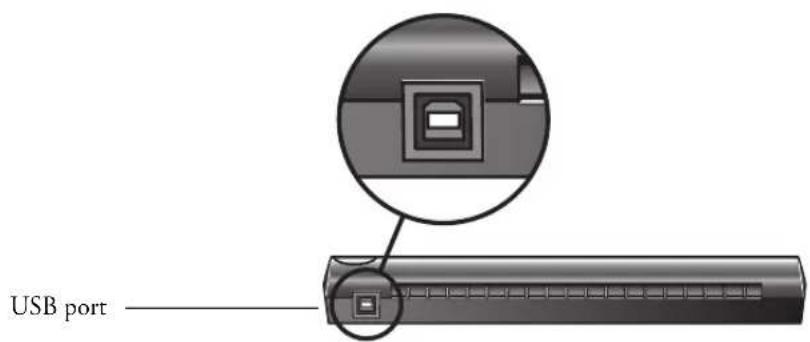
Universal Serial Bus (USB) port—Plug the USB cable into this port. The scanner draws power from the computer through the USB cable.
Note: The scanner does not have an on/off switch. Just insert a document into the page feed and the scanner will start scanning.
THE VISIONEER ROADWARRIOR SCANNER
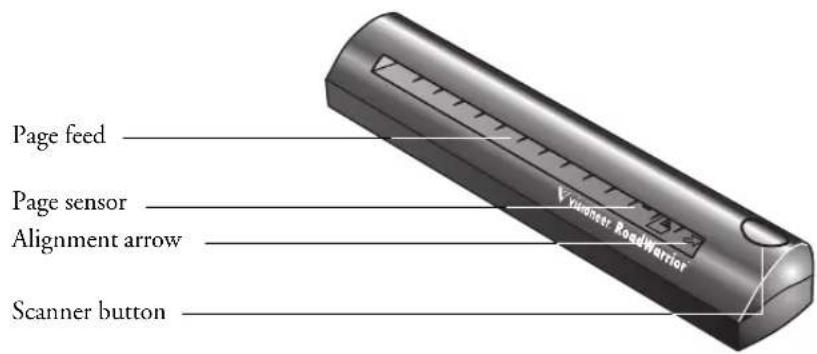
Page feed—Insert the item you want to scan into the page feed, face down. The scanner grabs the item and pulls it through while scanning.
Page sensor—Recognizes when an item is inserted into the page feed so the scanner knows to begin scanning.
Alignment arrow—Shows where to align the top right corner of the item you're scanning.
Scanner Button—If a OneTouch scan is in progress, cancels the scan and the paper comes out of the scanner. If a OneTouch scan is not in progress, opens the OneTouch 4.0 window so you can adjust the scanner settings.
Universal Serial Bus (USB) port—Plug the USB cable into this port. The scanner draws power from the computer through the USB cable.
Note: The scanner does not have an on/off switch. Just insert a document into the page feed and the scanner will start scanning.
THE VISIONEER STROBE XP 200 SCANNER
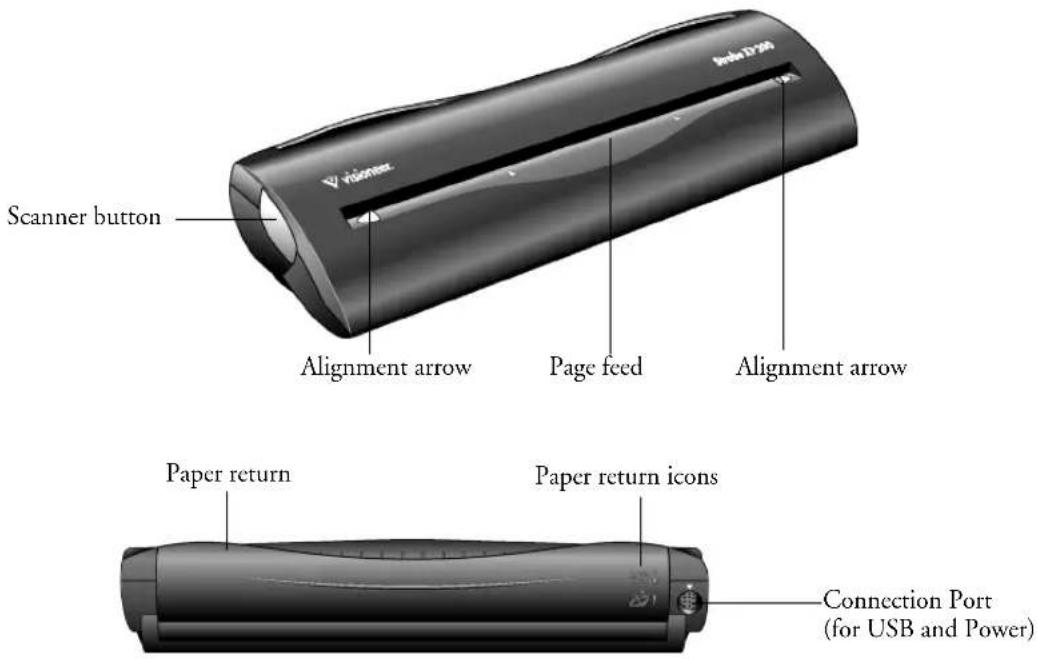
Scanner Button—If a OneTouch scan is in progress, cancels the scan and the paper comes out of the scanner. If a OneTouch scan is not in progress, opens the OneTouch 4.0 window so you can adjust the scanner settings.
Alignment arrows—Indicates where to align the edges of the document when inserted into the scanner.
Page feed—Automatically feeds the document through the scanner when the sensor detects the presence of a document.
Paper return—Can be positioned to feed a document either straight through the scanner or returned back towards you.
Paper return icons—Indicates how to position the paper return: up to feed the document straight through the scanner, and down to return the document back towards you.
Connection port—Connects the scanner to the cable provided for connection to the computer and power outlet.
Note: The scanner does not have an on/off switch. Just insert a document into the page feed and the scanner will start scanning.
THE VISIONEER STROBE XP 300 SCANNER
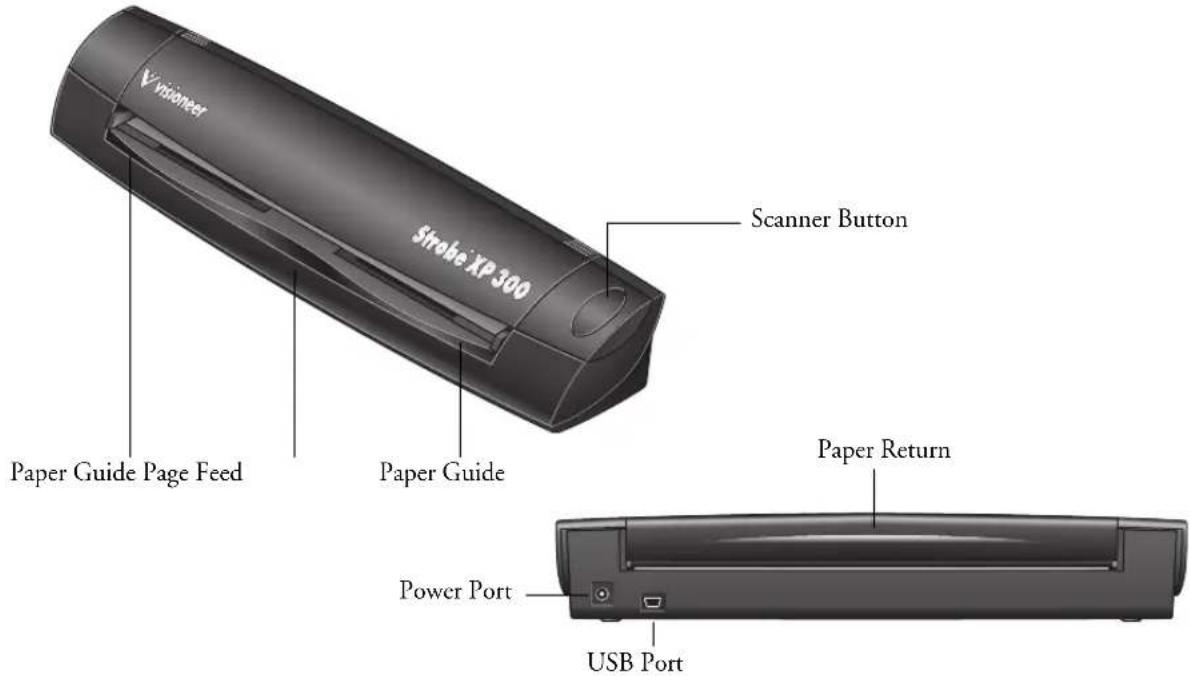
Scanner Button—If a OneTouch scan is in progress, cancels the scan and the paper comes out of the scanner. If a OneTouch scan is not in progress, opens the OneTouch 4.0 window so you can adjust the scanner settings.
Paper Guides—Adjusts to the size of the paper being scanned.
Page Feed—Automatically feeds documents through the scanner when its sensors detect the presence of a document.
Paper Return—Can be positioned to feed a document either straight through the scanner or returned back towards you.
Universal Serial Bus (USB) Port—Connects the scanner to the USB port on your computer. Scanner can draw power from the computer through the USB port if you're using the scanner on an airplane, in your car, or at a remote location where electrical power is not available.
Power Port—Connects power adapter for powering the scanner from a wall outlet if you do not want to use power from the computer to run the scanner. In general, you should use the power port except when electrical power is not available.
Note: The scanner does not have an on/off switch. Just insert a document into the page feed and the scanner will start scanning.
WHAT YOU NEED
An IBM-compatible Pentium PC, or AMD equivalent with:
■A CD-ROM drive
■An available Universal Serial Bus (USB) port; 1.1 or 2.0
■Microsoft Windows XP (Service Pack 1 or 2) or Windows 2000 (Service Pack 4)
■Available internal memory (RAM) as follows:
■128 MB or more
■256 MB recommended for Windows XP
■200 MB minimum of free hard disk space
A VGA or SVGA Monitor
The recommended settings for your monitor are:
■High Color (16-bit) or True Color (24-bit or 32-bit)
■Resolution set to at least 800 x 600 pixels
To set your monitor's colors and resolution:
■Open the Windows Control Panel
■ Double-click on Display then select the Settings tab
DOCUMENTATION
Your scanner is delivered with the following documentation:
■Quick Install Card—Abbreviated installation instructions.
■Visioneer Scanner User's Guide—On the Installation CD; contains detailed installation, scanning, configuration, and maintenance information.
■ScanSoft PaperPort User's Guide—On the Installation CD; contains detailed feature and configuration information for the PaperPort software.
■Technical Support Card—Contact information for technical support.
Installing

Warning: Do not plug in the USB cable until after you have installed the software. Complete the installation steps in the order described in the installation procedure below.
BEFORE YOU BEGIN
Please make sure of the following before you begin installation:
■ If your computer has AntiVirus or AntiSpyware software running, you may see messages during installation asking you to allow the installation to proceed. Although the messages will differ based on the software your computer is running, in each case you should allow the installation to proceed. Alternatively, you can turn off the AntiVirus or AntiSpyware software before installing your scanner. But if you do, make sure to turn it back on again when installation is finished.
If you already have a scanner connected to your computer, you need to remove its driver programs first before beginning the installation of your Visioneer Strobe XP scanner. Please see “How to Uninstall Your Scanner” on page 147 for basic instructions, or see the User’s Guide that you received with your other scanner for specific instructions.
■The information in this guide may cover software not provided with the scanner you purchased. Please disregard any information about the software not applicable to your chosen product. Visit our web site at www.visioneer.com for the latest software updates for your scanner.
STEP 1: INSTALL THE SOFTWARE
Note: You must install the software before connecting the scanner to your computer. Otherwise, the correct driver software for your scanner will not be installed and it may not work properly.
Note: If you intend to use the scanner with your laptop, as well as your office computer, make sure to install the software on both computers.
Note: For the Strobe XP 300 only: The software is on 2 CDs. Please be sure to install from Disc 1 first. Disc 2 contains the OmniPage software that you install after the scanner software.
To install the software:
- Start Microsoft Windows and make sure no other applications are running.
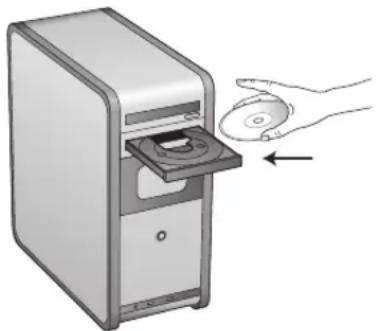
- Insert the Installation CD into your computer's CD-ROM drive. For the Strobe XP 300 only: Insert Disc 1.
natural_image
Illustration of a desktop computer tower with an open disc and a hand inserting a CD into it (no text or symbols)The CD automatically starts.
Note: If the CD does not start, check the following:
■Make sure the CD drive's door is completely shut.
■Make sure the CD was inserted in the drive in the proper direction (label side up).
To launch the CD manually:
■Open the Windows option for My Computer. You can do this by double-clicking on the My Computer icon on your desktop.
■Double-click the icon for your CD-ROM drive.
■The Installation menu for the CD should now open.
If the menu does not open:
■From the list of files on the CD, double-click the file named START32.EXE.
When the CD starts, the Visioneer Installation window opens automatically.
- On the Installation Menu, select Install Products.
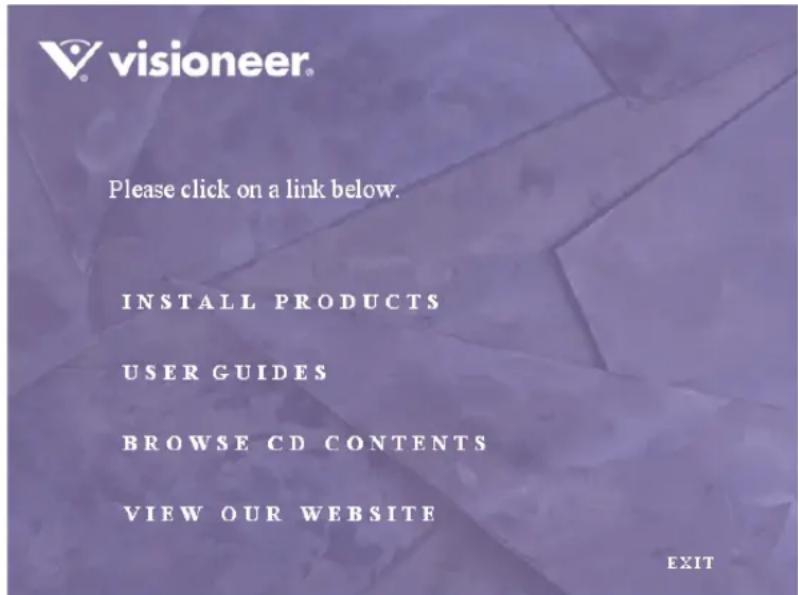
The next window lists the software that is available to install on your computer.
Reminder: The software available to install depends on the Visioner scanner you purchased. Therefore, you may see software options not available with your scanner. Please disregard any software choices that do not apply to your scanner.
4. Select ScanSoft PaperPort and Scanner Driver.
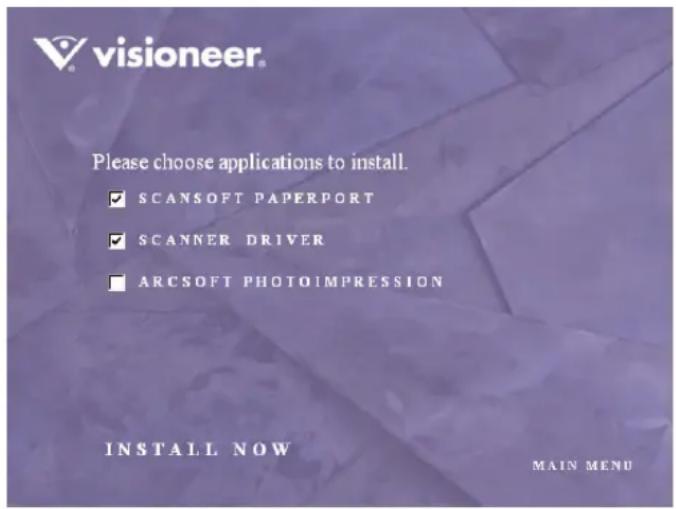
- Click Install Now. The PaperPort software will load first.
- The Select Language window opens for the PaperPort software.
Click the drop-down menu arrow and select the language you want to use. Click OK.
The first PaperPort Installation window opens.
-
Follow the instructions on the PaperPort installation windows.
-
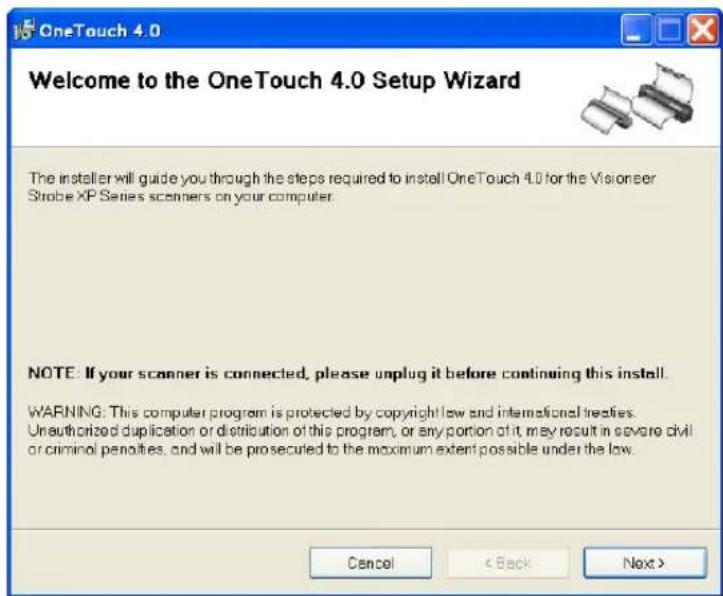
When installation of PaperPort is finished, the Welcome to the OneTouch 4.0 Setup Wizard opens.
-
Click Next.
-
On the Visioneer License Agreement window, read the license agreement. If you accept the terms, select I Agree.
If you choose not to accept the license agreement, the installation will terminate and the scanner driver will not be installed.
- Click Next.
The next window lists the choices of the drivers that you can install for your scanner.
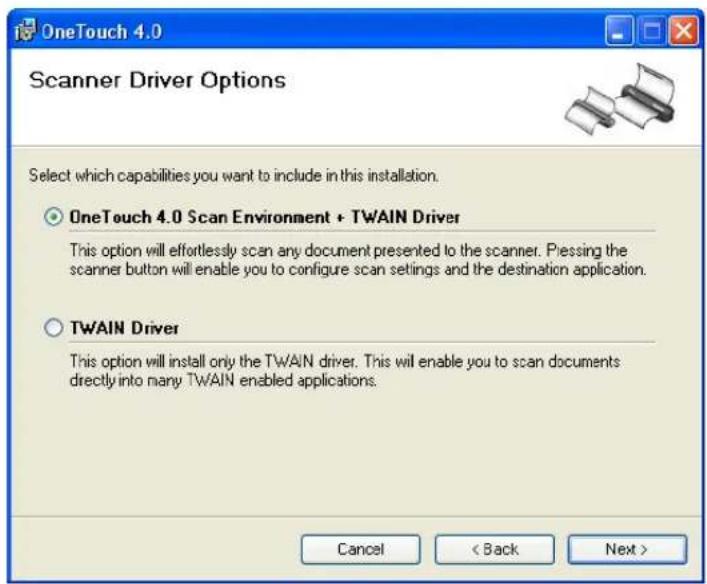
- Select the option you want.
■ OneTouch 4.0 Scan Environment + TWAIN Driver—This is the recommended installation. It installs the OneTouch 4.0 software which provides the necessary driver software for the scanner. It also installs scanning interfaces for TWAIN and Microsoft's Windows Image Acquisition (WIA). Installing this option means that you can use several different methods to scan, as explained in this User Guide.
■ TWAIN Driver—Only the TWAIN driver is installed. You will only have access to the Strobe XP TWAIN driver and WIA. You will not be able to use the OneTouch software. WIA is only available if your computer is running Windows XP.
Note: If you decide to change your scanner's installed drivers later on, you must first uninstall the drivers the scanner is currently using. See the section "To Install Another Driver" on page 148.
13. Click Next.
During installation you will see this window asking you to select one of the images for your Color Space setting.
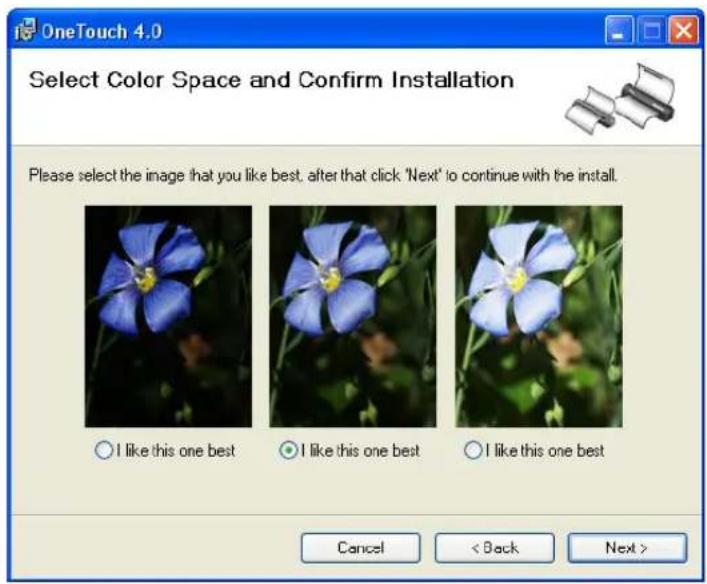
The Color Space setting sets the gamma value for the scanner so scanned items look good on your monitor. Gamma controls the brightness of the midtones of colors. That setting can be changed later on as you're scanning.
- Select the option that looks best to you and click Next.
The driver installation will now begin.
If you are installing the scanner on a Windows 2000 computer: During the software installation, this “Digital Signature Not Found” message may appear several times.
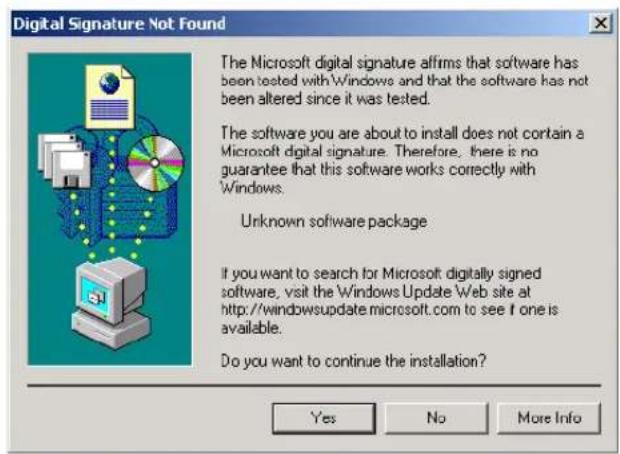
Each time this message appears, you can disregard it and click Yes. This window opens asking you to select which Visioneer scanner you are installing.
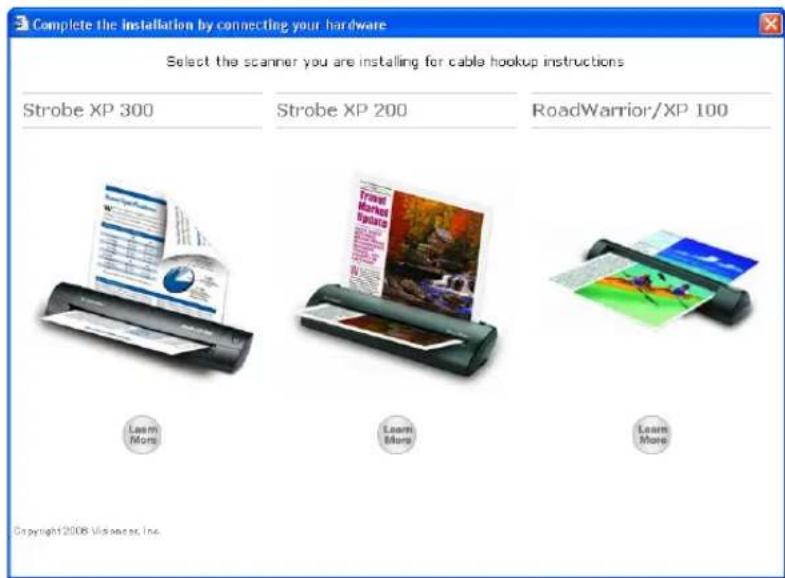
- Click the scanner that you are installing.
If you want to see more about the scanner before installing it, click the Learn More button.
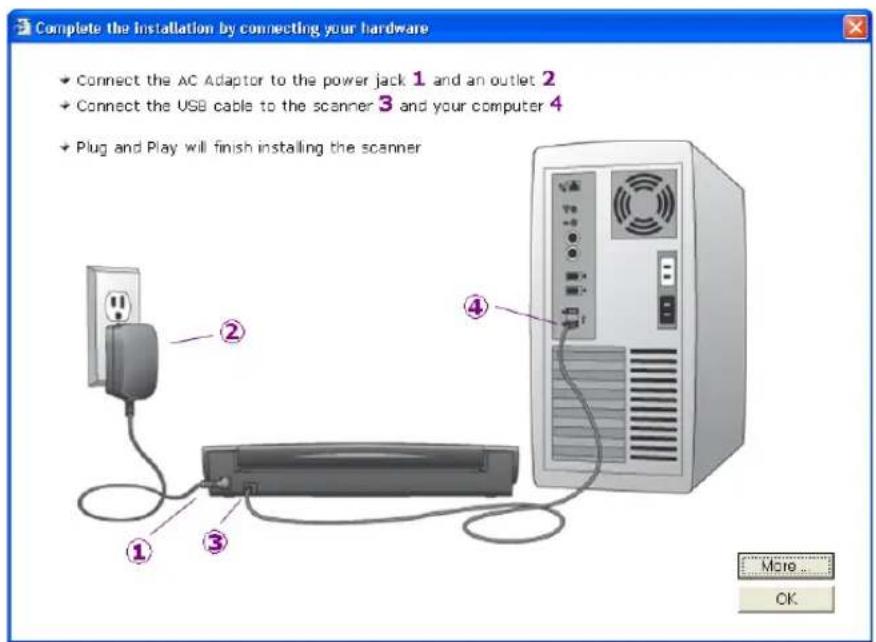
You will then see a window that explains how to connect the scanner to your computer.
- STOP when you see the "Complete the installation by connecting your hardware" window. Do NOT click OK yet.
This sample shows the window for the Strobe XP 300. The windows for the RoadWarrior, Strobe XP 100, and Strobe XP 200 are similar.

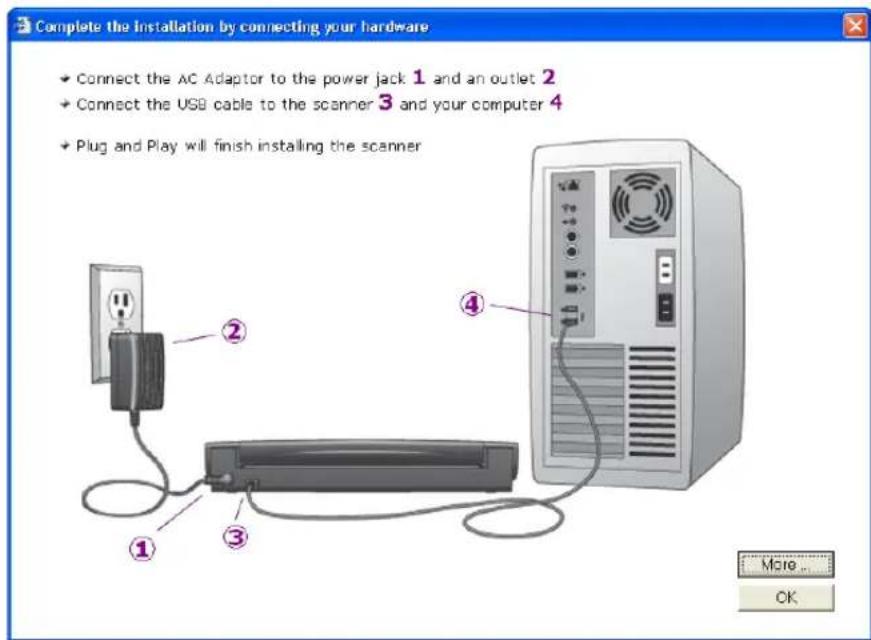
Reminder: If your computer is running AntiVirus or AntiSpyware software, you may see messages asking you to allow installation. Select the option to allow installation to proceed.
- Leave the window open and proceed to the next section, "Step 2: Connect the Scanner."
STEP 2: CONNECT THE SCANNER
Your Visioneer scanner connects to any available USB port. Check your computer's manual for USB port locations.
Note: You can connect the scanner to your computer while the computer is running. You do not have to shut down your computer.
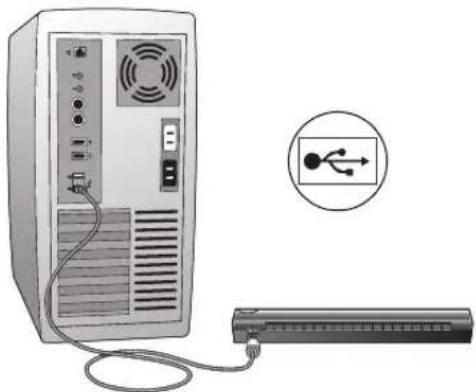
CONNECT THE VISIONEER ROADWARRIOR OR STROBE XP 100 SCANNER
natural_image
Illustration of a desktop computer tower connected to a USB drive (no text or symbols visible)- Using the on-screen window as your guide, plug one end of the USB cable into any USB port on your computer.
Note that the scanner does not have power ports. Your scanner gets power from the computer through the USB cable. - Plug the other end of the cable into the USB port on your scanner. The USB symbol identifies the location of the USB port on your computer. If the plug does not attach easily, make sure that you are plugging it in correctly. Do not force the plug into the connection.
Note: You can also connect the scanner to a USB hub if the hub has its own power supply plugged into an electrical outlet.
Your computer recognizes that a scanner has been plugged into the USB port and automatically configures its driver database with the appropriate software to run the scanner.
- Now proceed to "Step 3: Calibrate the Scanner" on page 24.
CONNECT THE STROBE XP 200 SCANNER
natural_image
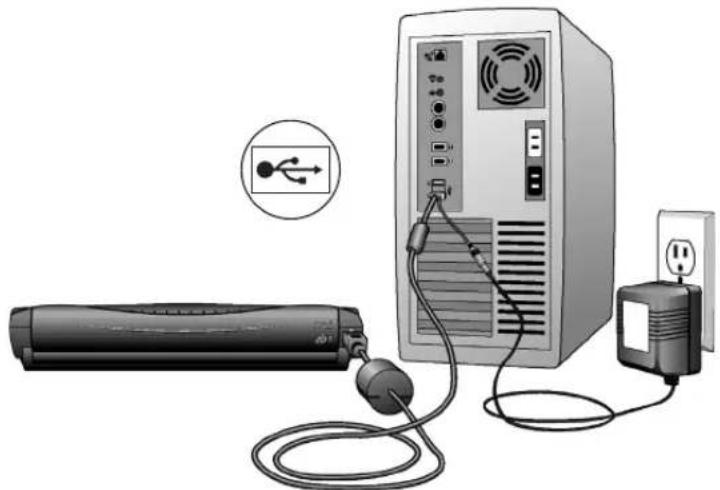
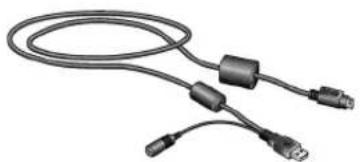
Illustration of a computer setup with a monitor, power plug, and USB symbol (no text or labels)The cable provided with the scanner is called a USB "Y-cable," and you will need to connect it to the scanner, computer, and a power outlet.
natural_image
Coiled black cable with connectors and connectors, no visible text or symbols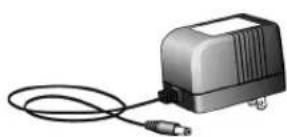
natural_image
Illustration of a portable electronic device with a coiled cable (no text or symbols visible)USB Y-Cable AC Adapter
- Using the on-screen window as your guide, plug the AC adapter cable into the power jack on the USB Y-cable. Then plug the AC adapter into an electrical outlet.
- Plug the cable into the connection port on the back of the scanner; please be sure the arrows on the cable line up with the arrows on the scanner to avoid pins getting bent while inserting the connection.
- Plug the cable's USB connector into a USB port on your computer. The USB symbol on your computer identifies the location of the USB port. If the plug does not attach easily, make sure that you are plugging it in correctly. Do not force the plug into the connection.
CONNECT THE STROBE XP 300 SCANNER
natural_image
Diagram showing a power outlet connected to a CD-ROM and a server tower, with a USB symbol indicating the connection (no text or labels present)-
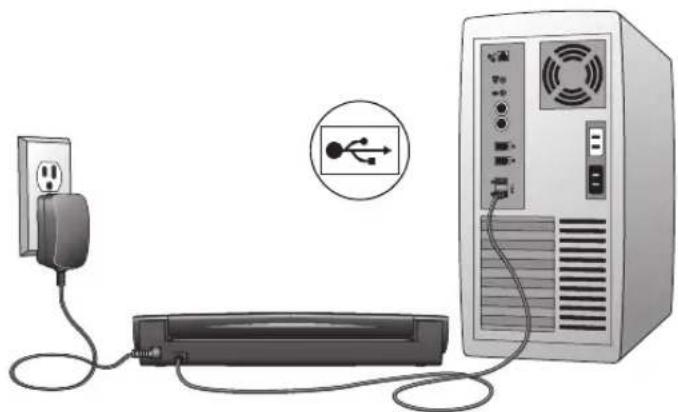
Using the on-screen window as your guide, plug the AC adaptor cable into the power jack on scanner, and then plug the AC adapter into an electrical outlet.
-
Plug the USB cable into the USB port on your scanner and then plug the other end into any USB port on your computer.
Connection to a USB 2.0 High Speed port provides optimum performance, but your scanner can also connect to a USB 1.1 port. The USB symbol identifies the location of the USB port on your computer. If the plug does not attach easily, make sure that you are plugging it in correctly. Do not force the plug into the connection.
Note: You can also connect the scanner to a USB hub if the hub has its own power supply plugged into an electrical outlet.
Your computer recognizes that a scanner has been plugged into the USB port and automatically configures its driver database with the appropriate software to run the scanner.
- Proceed to "Step 3: Calibrate the Scanner" on page 24.
STEP 3: CALIBRATE THE SCANNER
- For Windows XP users only, the Found New Hardware Wizard opens. Click Next.
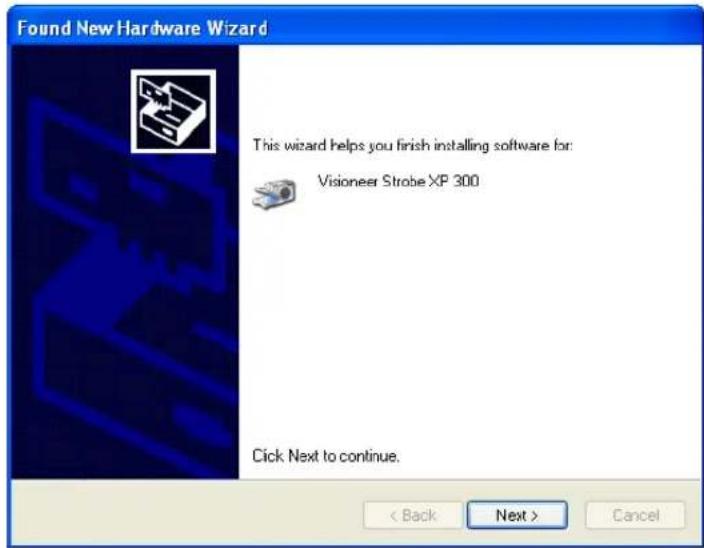
- For Windows 2000 users only, the Digital Signature Not Found dialog box appears. Click Yes to continue.
The Calibration window opens for your type of scanner. This example shows the Calibration window for the Strobe XP 300.
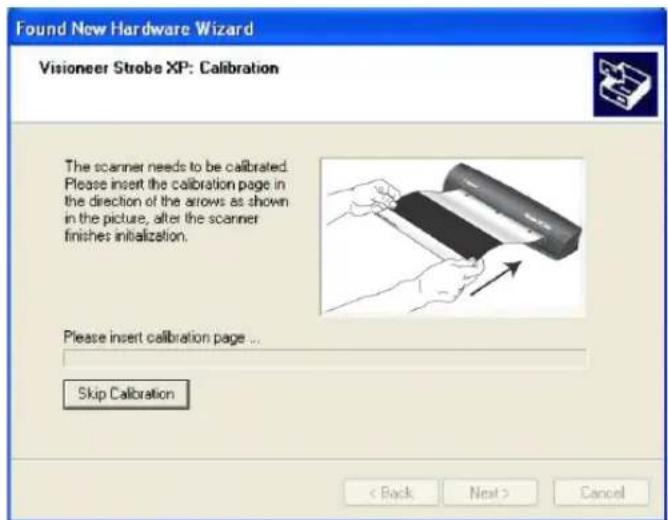
To calibrate the scanner:
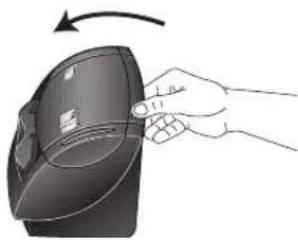
- Strobe XP 300 only: Close the scanner's paper return so the calibration paper will feed straight through the scanner.
natural_image
Hand holding a transparent computer case with an arrow indicating rotation (no text or symbols)Strobe XP 200 only: Move the scanner's Paper Return into the Up position so the calibration paper will feed straight through the scanner.
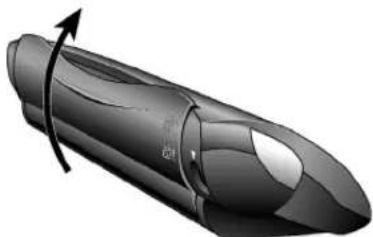
natural_image
3D rendered image of a sleek, elongated object with a curved top and internal features, no visible text or symbols.- Insert the calibration page into the page feed.
The scanner grabs the paper and feeds it through the scanner.
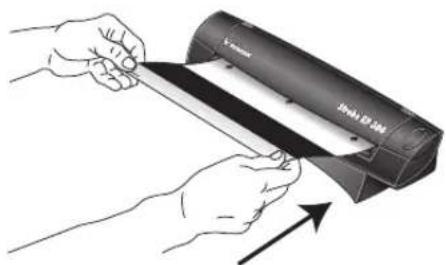
natural_image
Illustration of hands holding a device with an arrow indicating upward motion (no text or symbols)The scanner will automatically pass the sheet back and forth several times.
Do not remove the sheet until calibration is finished.
- When calibration is complete, the calibration paper will back out of the scanner.
Note: If the page does not back out of the scanner, the calibration may not have finished properly. Remove the page and complete the installation of your scanner, then see the section, “Recalibrating or Cleaning Your Scanner” on page 140 to run the calibration again.
- Remove the sheet and replace it in its plastic bag.
Do not discard the calibration sheet. You may need it periodically to calibrate the scanner to keep it operating at peak performance.
- For Windows XP users only, click Finish on the Completing the Found New Hardware Wizard window.
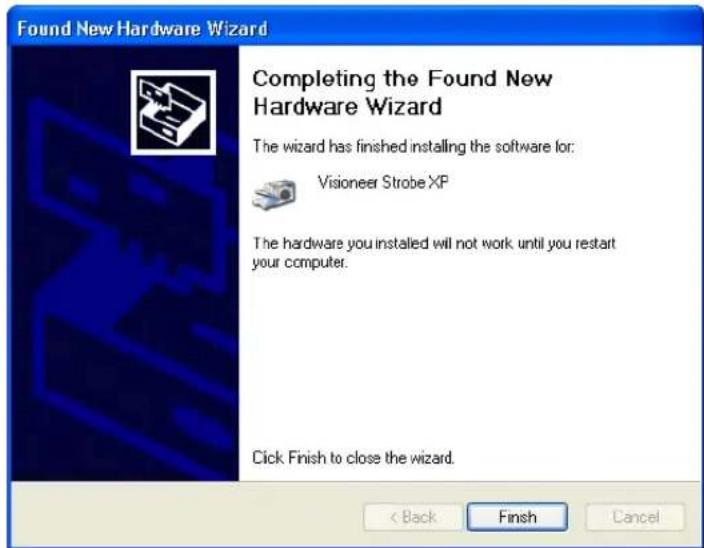
Do not proceed until you receive a message that your computer has found the new hardware, or updated the driver database. If your computer is running Windows XP, you will see the following message.
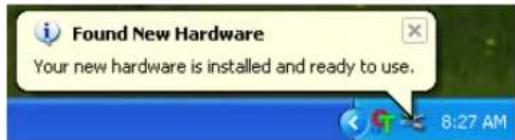
- When you are certain that the software has completely loaded, return to the "Complete the installation by connecting your hardware" window and click OK to complete the installation process.
You can also click More to see a quick overview about accessing and navigating the OneTouch Button Panel. When you're finished reading the additional information, click OK.
This example shows the window for the Strobe XP 300 scanner.
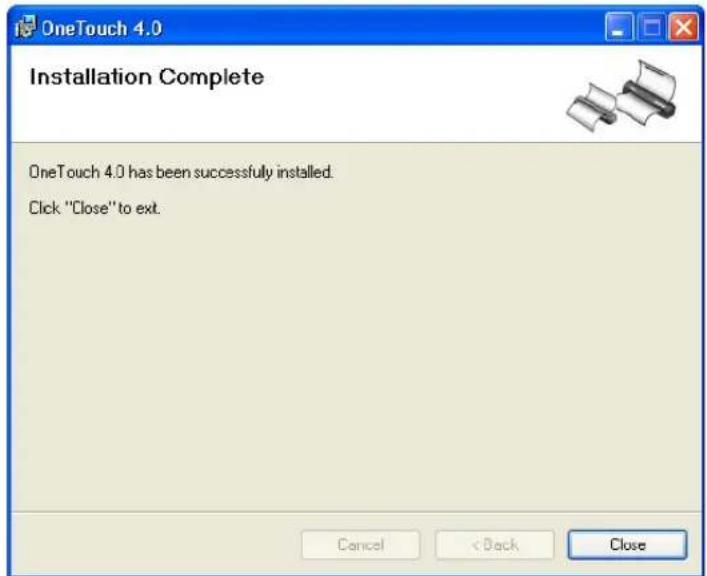
- Click Close on the OneTouch 4.0 Installation complete window.
- For the Strobe XP 300 only: Remove the Disc 1 Installation CD so you can install the OmniPage Pro software from the Disc 2 CD. See the steps in "Install OmniPage Pro (Strobe XP 300 Only)" on page 29.
Reminder: If you also plan to use the scanner with your laptop computer, be sure to install the scanner and software on the laptop as well.
INSTALL OMNIPAGE PRO (STROBE XP 300 ONLY)
Both CDs that you may have received contain additional software for your scanner:
■ Disc 1 contains a version of Adobe Acrobat Reader
■Disc 2 contains the OmniPage Pro software
Note: OmniPage is required for your scanner to have its full range of features. Please make sure to install OmniPage Pro before scanning.
To install OmniPage Pro:
- Make sure the Disc 1 Installation CD is removed from your computer's CD-ROM drive, and then insert Disc 2 into the drive.
The menu for the CD automatically opens.
If the menu does not automatically open, see the troubleshooting steps in the note on page 14. - Select OmniPage Pro to install.
- Follow the instructions on the screen.
- When installation is finished, remove Disc 2 and store it in a safe place.
- If you want to install other software from Disc 1, re-insert it into the CD-ROM drive now.
ADDITIONAL APPLICATIONS FOR YOUR SCANNER
Your scanner includes free, additional applications on the installation CD.
To install the additional applications:
- Return to the Installation window and select the additional applications you want to install on your computer.
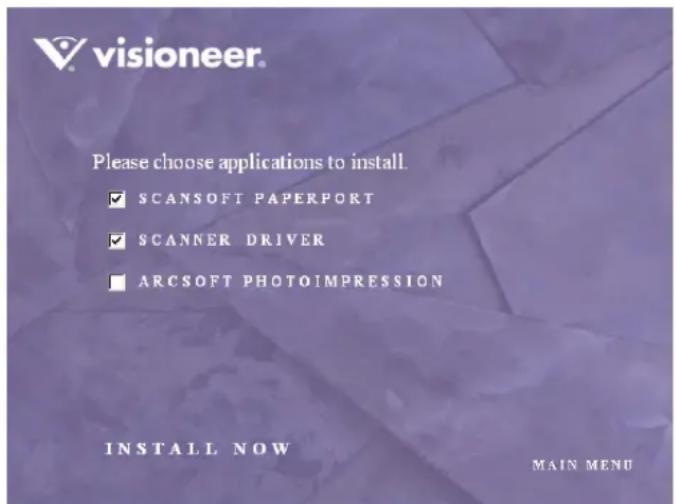
- Click Install Now.
- Follow the instructions on the installation windows.
-
When installation is finished, return to the Visioneer Installation window and click Main Menu.
-
On the Main Menu, click User Guides. The Visioneer User Guides window opens. Use this window to view and save the User Guides you want.
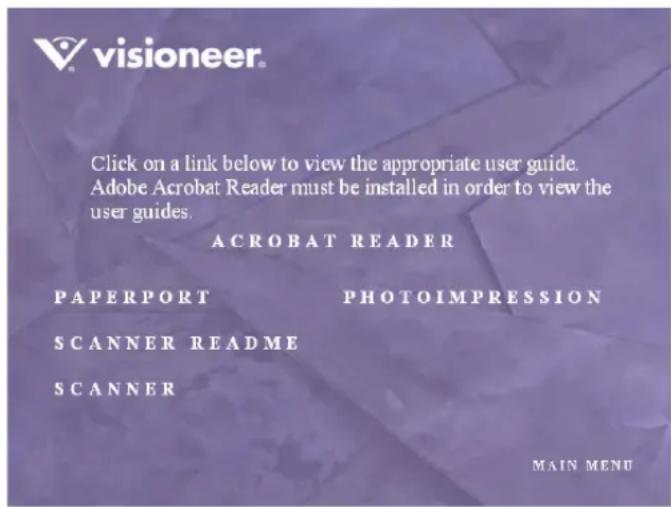
The User Guides are in Adobe ^® Acrobat ^® PDF format. The CD also includes a free copy of Acrobat ^® Reader ^® in case your computer does not have it already installed. The Scanner Readme file is in HTML format and will open in any standard browser.
If you need to, click Acrobat Reader to install it now. Follow the instructions on the installation windows.
To view and save the User Guides:
- Click the name of a User Guide you want to view and it will open in Acrobat Reader. Use the Acrobat Reader Save command to save that User Guide on your computer.
- Return to the Visioneer User Guides window and repeat the process to open, view, and save all the other User Guides you want. The Scanner Readme file has late-breaking news about your scanner.
- When you're finished, click Main Menu to return to the main Visioneer Installation window and click Exit.
That's it! Installation is finished and your Visioneer scanner is ready to scan.
REGISTER YOUR SCANNER
Registering your scanner is important as it provides you with access to our free telephone support service. Registration also gives you free access to software updates for your scanner.
To register your scanner:
-
Right-click on the OneTouch icon in the Windows Notification Area (at the bottom right corner of the screen).
-
Choose Check for Online Updates from the pop-up menu.
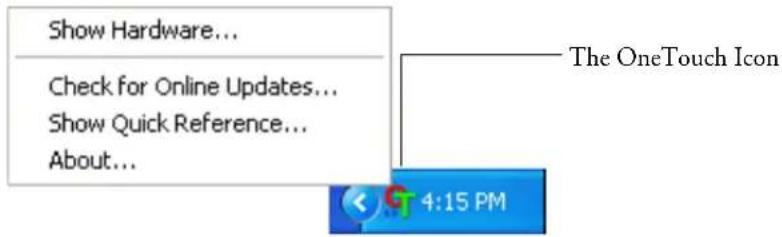
- Follow the instructions on the screen and register your scanner by entering your scanner's serial number and your email address.
Note: A valid email address is required.
The serial number is located on the underside of the scanner.

After registration is complete you will receive an email message with your RegID. Your RegID is very important because you will need it when accessing free telephone support, or checking for online updates.
- After receiving your RegID, write it down on a piece of paper and keep it with your scanner so you will be able to find it easily.
SET UP YOUR SCANNER
Your scanner is designed to use a minimum amount of space on your desk.
Note: When scanning heavier paper that does not bend easily, if your scanner has a Paper Return setting, set it so that the document feeds straight through the scanner.
STROBE XP 200 PAPER RETURN OPTIONS
The position of the Paper Return determines the path of the scanned document. You can set the paper return to feed the document back towards you, or straight through the scanner.
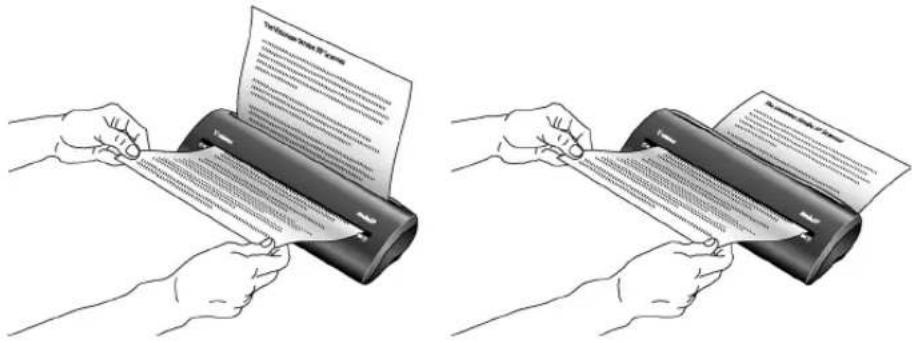
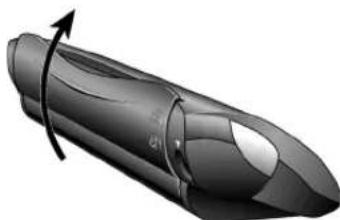
To return the scanned document back towards you, move the Paper Return to the Down position. To feed a document straight through the scanner, move the Paper Return to the Up position as shown below.
natural_image
3D rendering of a sleek, elongated object with curved surfaces and a directional arrow indicating rotation (no text or symbols)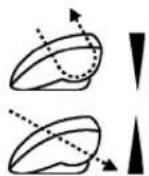
The Paper Return icons on the back of the scanner indicate the positioning of the Paper Return for each option.
STROBE XP 300 PAPER RETURN OPTIONS
The Paper Return opens and closes to determine the path of the scanned document.
■ To feed documents straight through the scanner, close the Paper Return.
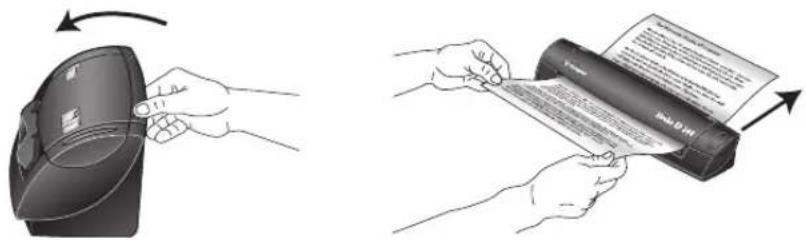
■To return scanned documents back toward you, open the Paper Return.
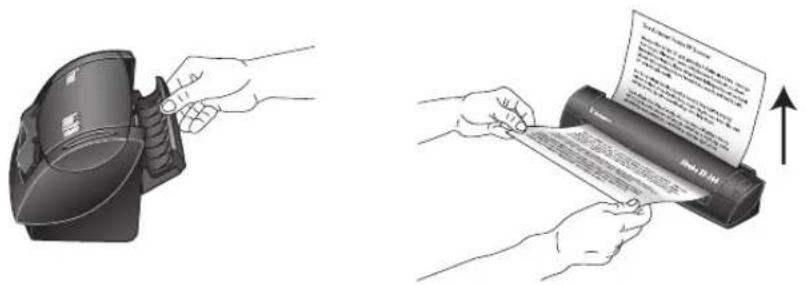
Note: When scanning heavier paper that does not bend easily, close the Paper Return so that the document feeds straight through the scanner.
STROBE XP 300 STAND
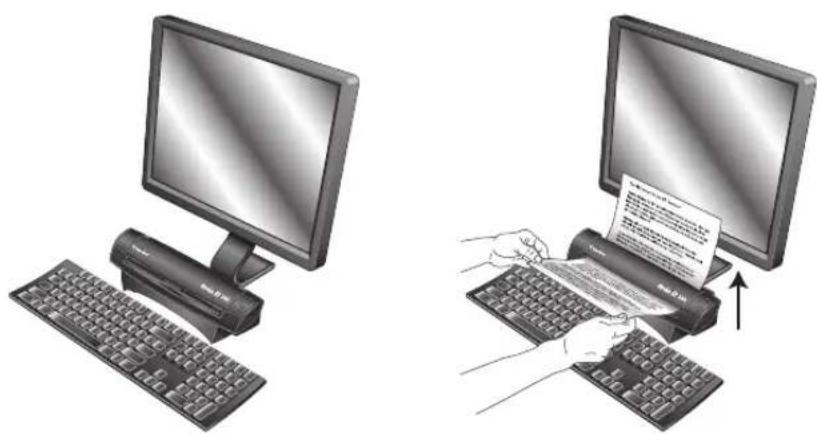
Your scanner is designed to fit within easy reach of your keyboard.
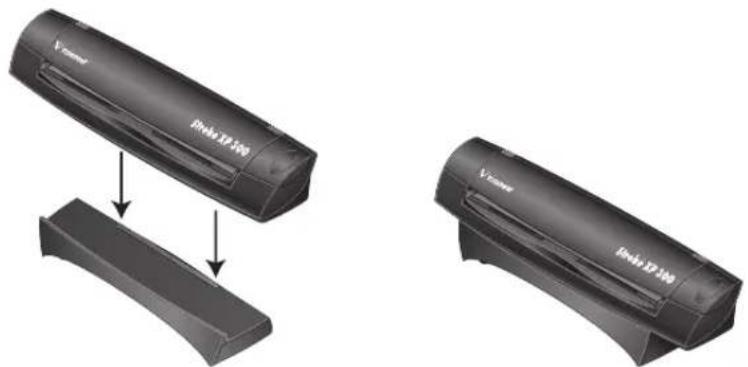
The stand that comes with the scanner is specifically designed so the scanner easily fits between your computer keyboard and monitor.
■ Place the scanner on its stand so the lip on the stand fits into the groove on the bottom of the scanner.
natural_image
Two black electronic devices labeled 'Vัน' with 'Dhilo XP 100' branding, shown from different angles (no text or symbols on the devices themselves)■Fit the scanner and stand between the keyboard and monitor. Make sure the Paper Return is open so the paper will return back towards you.
natural_image
Illustration of two computer monitors: one with a keyboard and the other showing hands typing on a keyboard (no text or symbols present)SCANNING ON THE GO
Because the RoadWarrior, Strobe XP 100, and XP 300 can draw power from the computer through the USB cable, you can use your scanner on an airplane, at a remote job site, in your car, or anywhere else where an electric outlet is not available.
Note: The Strobe XP 200 requires an external power supply.
■ Connect the scanner to your laptop with the USB cable. The scanner will draw its power from the laptop battery.
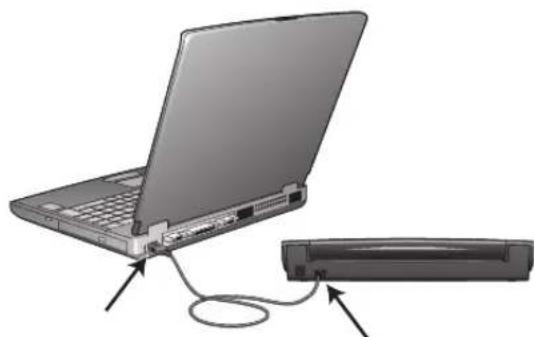
natural_image
Illustration of a laptop connected to a CD-ROM via cable (no text or symbols)■The Strobe XP 300 also connects to a power outlet. If the laptop battery is low, or if electric power is available, use the AC Power Adapter with the laptop.
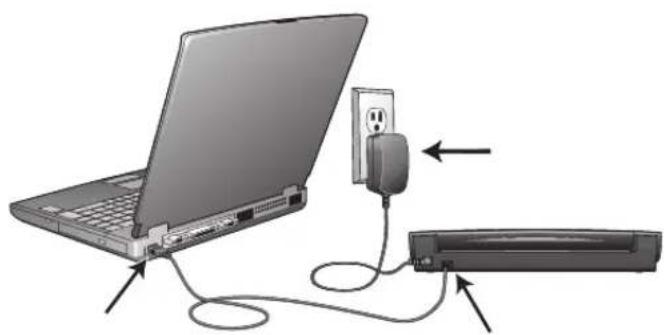
natural_image
Diagram showing a laptop connected to an electrical outlet via cable, with a separate CD inserted (no text or symbols present)Note: If electrical power is available for the Strobe XP 300, use the power adapter, even with your laptop computer. The scanner will scan faster when connected to an electrical wall outlet, and it won't drain the laptop's battery.
CONFIGURE THE STROBE XP 300 AC POWER ADAPTER
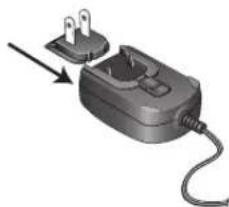
The Strobe XP 300 AC Power Adapter can be configured to operate with a variety of electric outlet plug configurations that are used in various countries.
The three plug adapters that you received with your scanner are interchangeable on the AC Power Adapter.
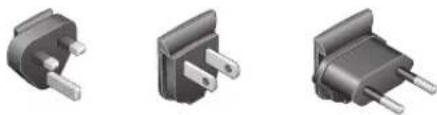
natural_image
Three identical black electronic component terminals with metallic leads, shown from different angles (no text or symbols visible)To replace the AC Power Adapter plug:
- Press down on the latch that holds the plug in place. Then slide the plug forward and out of the Power Adapter.
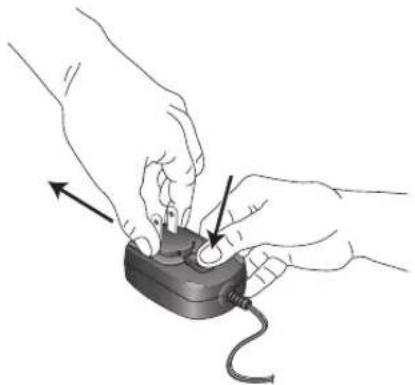
natural_image
Illustration of two hands holding a small electronic device with a cable, no text or symbols present- Slide one of the plug adapters into the empty slot on the Power Adapter until it snaps into place.
natural_image
3D illustration of a plug-in socket with a cable, showing internal components and a pull arrow (no text or symbols)SCANNING BASICS

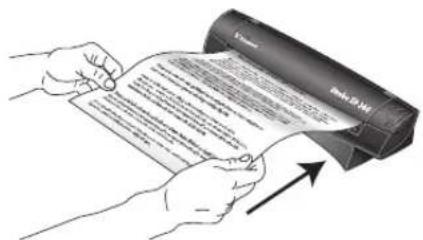
Note: Always remove any staples or paper clips from documents before inserting them into the scanner. Staples and paper clips can jam the feed mechanism and scratch the internal components. Do not scan any document with wet correction fluid, labels, stickers or Post-It™ notes on the pages. The correction fluid or glue from the stickers can leave residue on the lens that is difficult to clean. The residue also causes lines to occur in the scanned images. If a label, sticker or Post-It note comes off during the scanning process, the item can get stuck in the scanner and this will void your scanner's warranty.
■To scan a page, insert the paper face down. Strobe XP 200 only: insert the paper face up.
■ Strobe XP 300 only: Your scanner can scan both sides of a page (called duplex scanning), so either side can be face down because both sides are scanned.
ADJUST THE PAPER GUIDES
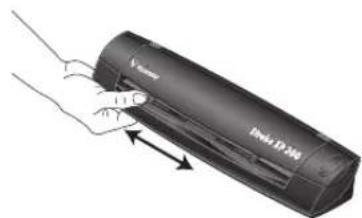
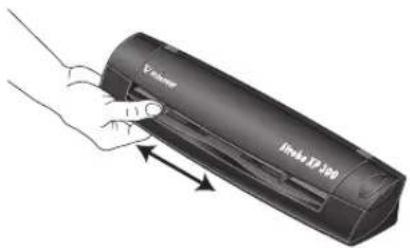
Strobe XP 300 only: Your scanner has Paper Guides on the Page Feed. Adjust them to the width of the item you're scanning.
- To adjust the Paper Guides slide them toward each other until they match the width of the item you're scanning.
SCANNING PHOTOS AND THIN PAPER ITEMS
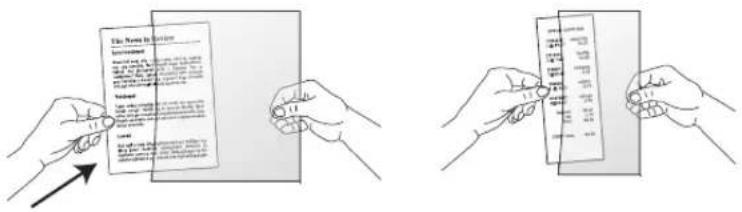
The two transparent sleeves for the Strobe XP 300 scanner are specifically designed for scanning thin paper items, such as credit cards receipts, newspaper articles, and retail receipts, especially when using duplex (two-sided) scanning.
Generally you should use the transparent sleeves for paper items on paper stock that is less than 20-lb.
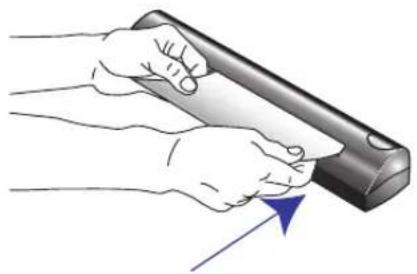
The photo sleeve for the Strobe XP 200 is for scanning photographs.
To scan a photo using the Strobe XP 200 photo sleeve:
- Separate the clear plastic sleeve from the paper backing and slide the photo into the sleeve so it fits snugly at the corners.
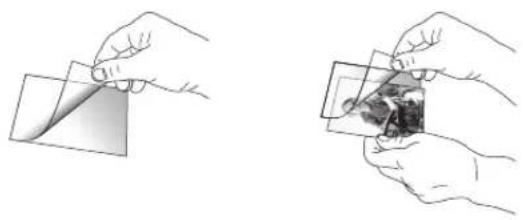
- Now insert the photo and sleeve into the scanner's paper feed slot with the clear plastic and image facing down.
natural_image
Illustration of hands using a tool to apply a blue arrow to a surface (no text or symbols present)To scan a thin paper item using the Strobe XP 300 sleeves:
- Slide the thin paper item into the appropriate sleeve.
- Adjust the Paper Guides for the size of the sleeve.
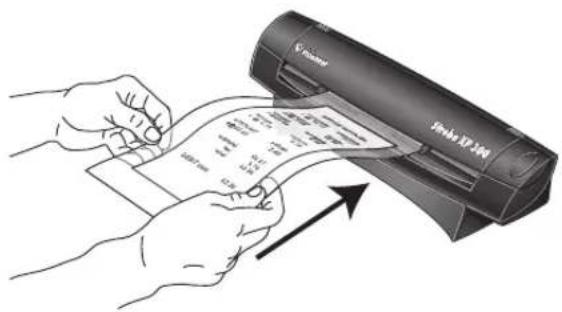
- Insert the sleeve with the item inside it. Insert face down to scan a single side. To scan both sides, either side can be face up.
Scanning
If you selected the recommended Full Install option for your scanner's driver you have several different options to scan with your Visioneer scanner. Each method scans equally well, so use the one with appropriate options for the item you are scanning.
- AutoLaunch—To use the scanner's AutoLaunch feature, simply insert a document in the scanner and it is automatically scanned using predefined settings from the OneTouch software. See “Scan Using AutoLaunch” on page 42.
- OneTouch—Use this scan option when you want to scan from the computer screen. Open the OneTouch scan panel and window, adjust the scan settings if you want, put the document in the scanner, and then click the icon on the OneTouch panel. Also use this OneTouch method of scanning if you want to access the advanced features of Optical Character Recognition (OCR) available from the OmniPage Pro application. See “Scan from the OneTouch Panel” on page 47.
- TWAIN software—This option uses your scanner's TWAIN interface to scan. Select scanning options before scanning, put the document in the scanner, and then click a button on the TWAIN interface window. The PaperPort software that you received with your scanner is a TWAIN application. See “Scanning from TWAIN Software” on page 120.
SCAN USING AUTOLAUNCH
When you insert an item into the scanner, it is automatically scanned and the image is sent to a software application on your computer.
To scan using AutoLaunch:
- Align a document with the Paper Guides and insert it into the paper feed slot. Insert face down to scan a single side. For Strobe XP 200 only: insert face up to scan a single side.
To scan both sides, either side can be face up.
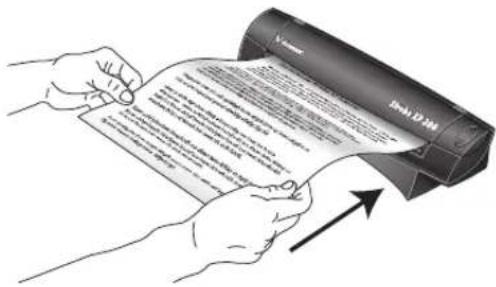
The scanner grabs the top edge of the paper and automatically begins to scan and feed the paper through the scanner.
- A scan progress window will open and the image is sent to the selected application from the OneTouch utility. In the following example, the destination software is the PaperPort desktop.
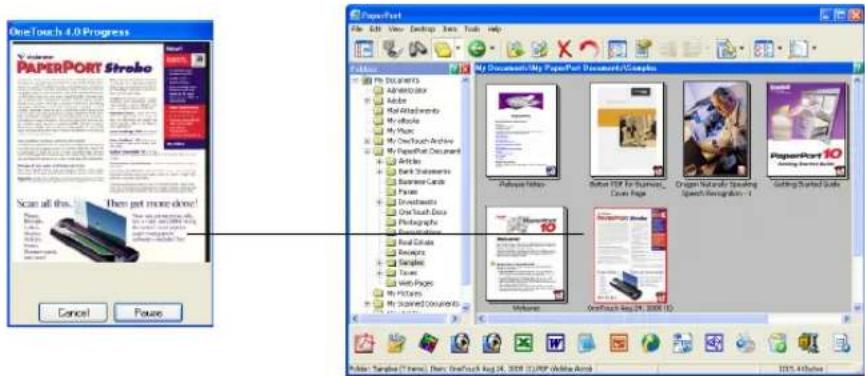
The item is scanned using predefined settings from the OneTouch software. To change OneTouch settings, see “Selecting New OneTouch Scan Settings” on page 54.
CHECK THE SCAN SETTINGS BEFORE SCANNING WITH AUTOLAUNCH
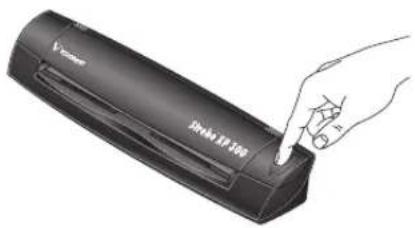
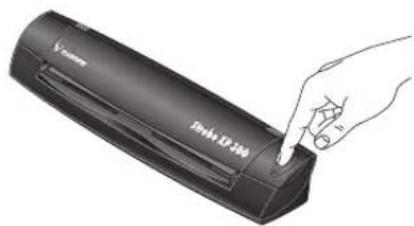
Press the button on the top of the scanner.
natural_image
Illustration of a hand inserting a pen into a black device labeled 'Jinko 12.50', with no visible text or symbols beyond the label.Note: You can also check the scan settings before scanning by clicking the OneTouch icon, and then right-clicking on the PaperIn icon. See "Scan from the OneTouch Panel" on page 47 for an example.
The OneTouch Panel appears with the description of the current settings for the scanner.
The icon indicates the Destination Application, and the current settings — for the scanner. US Letter Document (Duplex) (PDF) - Mode: Black&White @ 200 dpi Duplex - Page: 8.50" x 11.00" - Settings: Brightness: 50 %
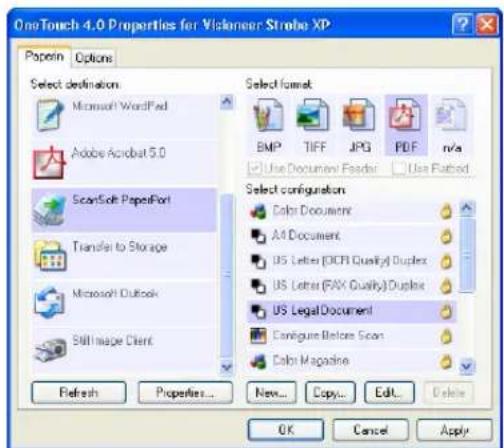
The OneTouch Properties window also appears so you can choose new settings before scanning. Use this window to select a new destination application, file format, and so forth. See “Selecting New OneTouch Scan Settings” on page 54 to modify the settings.
TURN AUTO LAUNCH OFF/ON
In some instances, you may not want to use the scanner's AutoLaunch technology. In that case, you can turn it off so the scanner will not automatically scan when you insert a document. Then, you can use the TWAIN interface, or some other application's interface for scanning.
You can turn the AutoLaunch technology off and on from either the OneTouch icon, or from the Windows Control Panel.
To turn the AutoLaunch Off/On from the OneTouch icon:
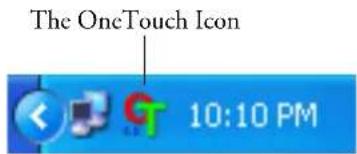
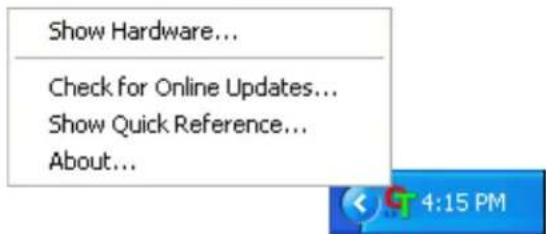
- Right-click on the OneTouch icon in the Windows Notification Area (at the bottom right corner of the screen).
- Choose Show Hardware from the pop-up menu.
Note: If you're working with the TWAIN interface, you can also click the small Strobe XP icon in the upper right corner of the window to open the Visioneer Strobe XP Properties window. See the example on page 142.
The Hardware Properties window opens.
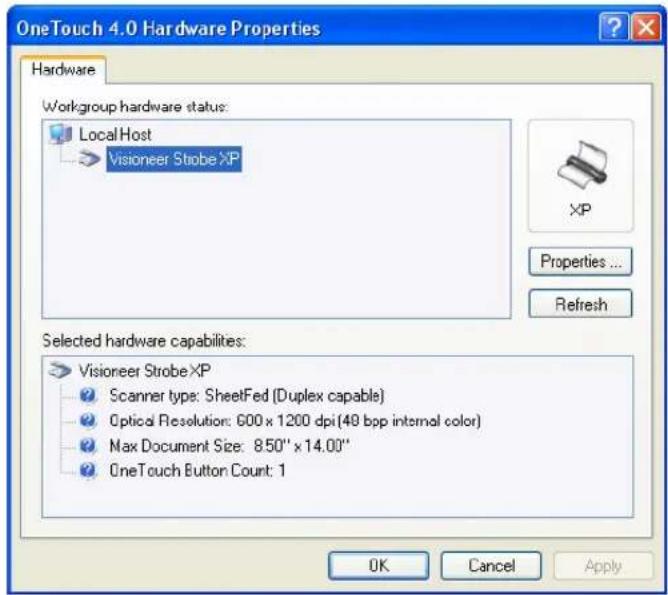
3. Click the Properties button.
The Device Configuration Properties window for the Visioneer Strobe XP opens.
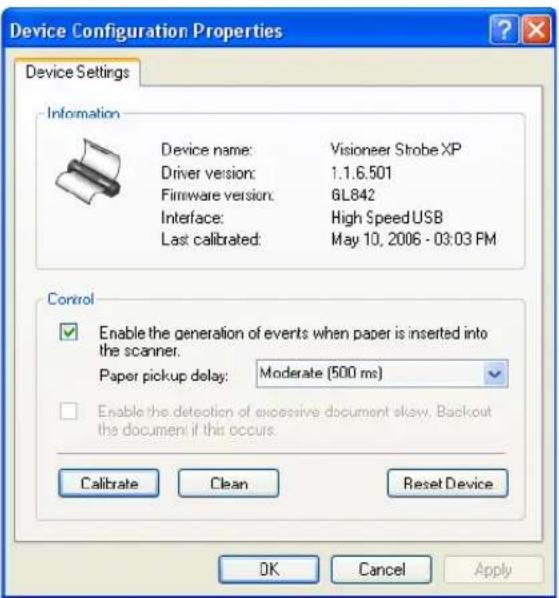
- Uncheck the option, Enable the generation of events when paper is inserted into the scanner. This turns off the AutoLaunch feature.
- Click OK, then click OK on the Hardware Properties window.
- To turn the AutoLaunch feature back on later, follow the same process, but click Reset Device or re-select the AutoLaunch option, and click OK.
You can also scan from the computer screen using the OneTouch panel.
- Press the button on the top of the scanner, or click the OneTouch icon.
The OneTouch Icon
natural_image
Illustration of a hand inserting a pen into a device labeled 'Drake ID 240' (no additional text or symbols visible)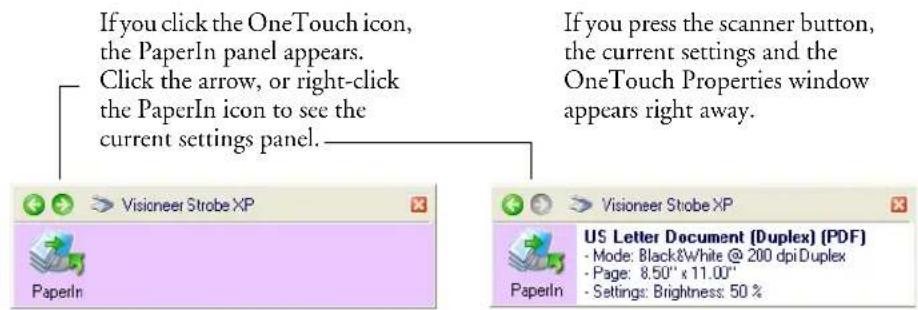
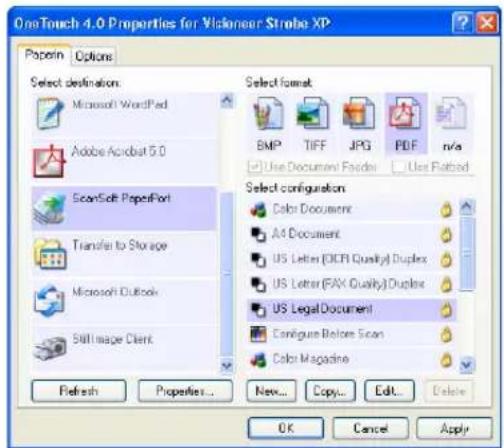
Use this window to select a new destination application, file format, and scan configuration. See “Selecting New OneTouch Scan Settings” on page 54 to modify the settings.
- When you're ready to scan, align a document between the Paper Guides if your scanner has them, and insert the document into the paper feed slot. Insert face down to scan a single side. To scan both sides, either side can be face up. Duplex scanning is available with the Strobe XP 300 scanner.
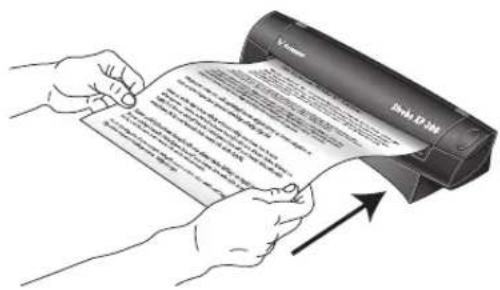
The scanner grabs the top edge of the paper and automatically begins to scan and feed the paper through the scanner.
- You can also click the icon on either OneTouch panel to start scanning. For instance, you can click the PaperIn icon to start scanning.
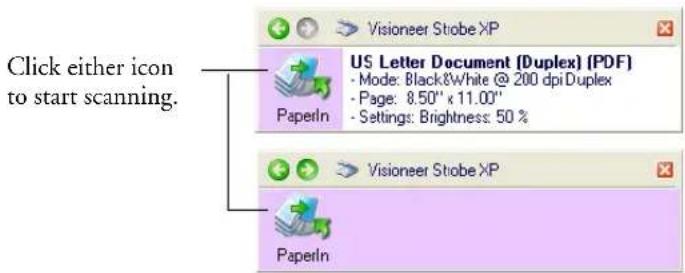
The item is scanned using predefined settings from the OneTouch software, such as color for magazine articles or black and white for faxes. To change OneTouch settings, see “Selecting New OneTouch Scan Settings” on page 54.
A scan progress window opens and then a thumbnail of the scanned image appears in the destination software.
The OneTouch panel is also your on-screen set of controls for the scanner. The OneTouch panel shows information about the scanner and its settings.
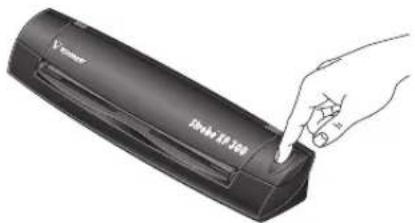
- To open the OneTouch panel, press the button on the top of the scanner, or click the OneTouch icon.
natural_image
Illustration of a hand inserting a device into a device labeled 'Jupiter 10.100', with no visible text or symbols on the device itself.The OneTouch Icon

- To see the details for the current scan settings, right-click on the PaperIn icon. The Properties window also appears.
Right-click the PaperIn icon to see the current scan settings and the OneTouch Properties Window.
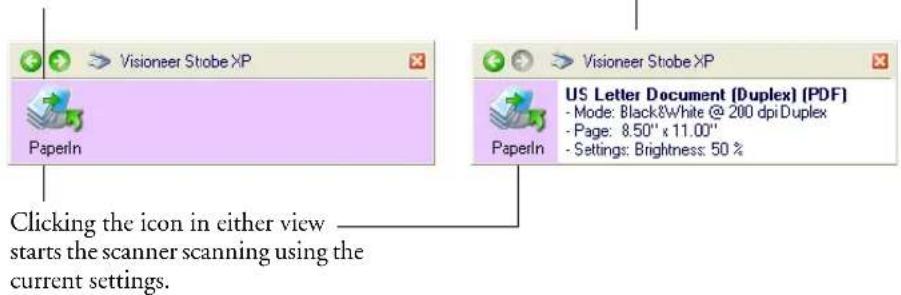
- To navigate through the panel's three views, click the green arrows at the top of the panel.

The PaperIn View

The Hardware View The Detail View
■The PaperIn View reminds you to insert paper before scanning from the OneTouch Panel.
■The Detail View shows the current scan settings.
■The Hardware View shows the current scanners connected to your computer.
If the Properties window is not open, right-click the icon on the Detail View or PaperIn View to open it.
From the Hardware View and Detail View, click the green arrow to return to the PaperIn View. You can also click on the hardware icon to return to the PaperIn View.
- To close the OneTouch panel, click the close button on the panel.
The OneTouch Properties window lists the scanning settings for your scanner. It also has special scanning features such as scanning and burn to a CD, scanning and converting text directly into an HTML web page, and scanning with Optical Character Recognition (OCR) that turns a scanned image into text that you can edit.
Note: Some of the options on the OneTouch Properties Window (and other OneTouch windows and dialog boxes) may be “greyed out” and are not available. Greyed out options are not appropriate for your Visioneer Strobe XP scanner.
To use the OneTouch Properties window:
- Open the OneTouch Properties window by either of the following methods:
■Press the button on the top of the scanner
- Click the OneTouch icon at the bottom right of the screen, then right-click the PaperIn icon.
Remember that left-clicking an icon on the OneTouch panel starts the scanner scanning. Right-clicking opens the OneTouch Properties window.
The OneTouch Properties window opens and shows the current options selected for your scanner.
The description on the OneTouch panel shows which options you selected on the window.
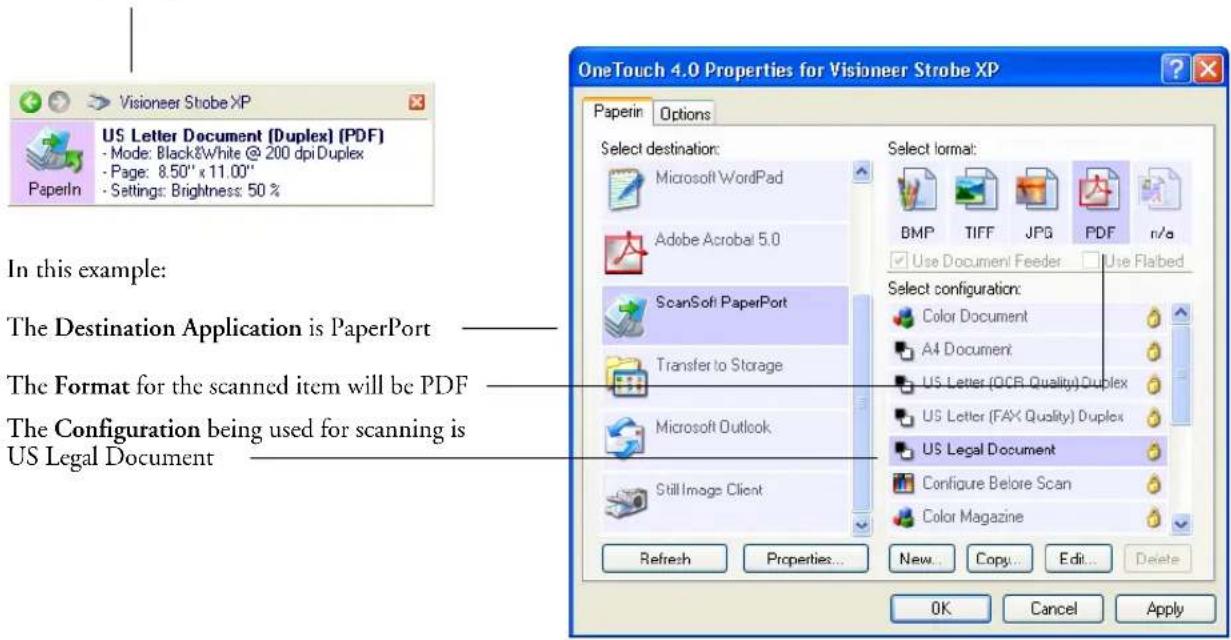
The settings on the OneTouch Properties window are:
Select Destination—The list of applications that can open to display the scanned image. To configure the list of available applications, click the Options tab at the top of the dialog box and select the desired options. See “Selecting Options for the OneTouch Properties Window” on page 70 for more information.
Select Configuration—The list of available scan configurations. The configuration settings include: scanning mode, resolution (dpi), page size, brightness, color saturation, hue, and gamma. To see a selected scan configuration's settings, click its icon. Click the icon again to close the detailed information.
Click the icon of a selected configuration — to view its settings.
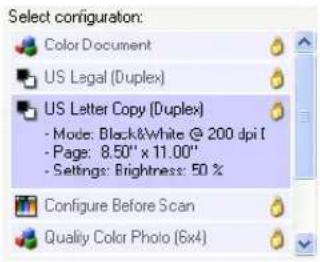
The icons next to each scan configuration indicate the scanning mode.

Color GreyScaleBlack and White


Configure Before Scan
Note: Use Configure Before Scan if you want to set the scanning mode manually before scanning. See "Configuring Before Scanning" on page 86.
You can also click the Edit button or double click the configuration to see more detailed information about the selected configuration.
Select Format and Page(s)—A set of file formats for the scanned image. The formats are based on the type of destination application you select. This example shows the formats that apply to Adobe Acrobat. The available formats depend on the scanner you purchased and its installed software. The sPDF and nPDF formats are only available if OmniPage Pro is installed on your computer.
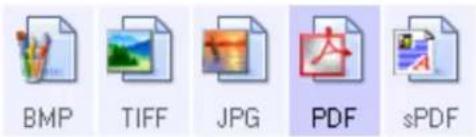
The icon names indicate their file types. See “Selecting Page Format Options” on page 65 for more about the formats.
Options tab—Displays a window for selecting options related to the selected destination application for the scanned image.
SELECTING NEW ONE TOUCH SCAN SETTINGS
The OneTouch settings consist of a Destination Application, a Scan Configuration, and a Document Format. The OneTouch Properties window is where you select these three elements.
Select a software application as the destination to send scanned documents.
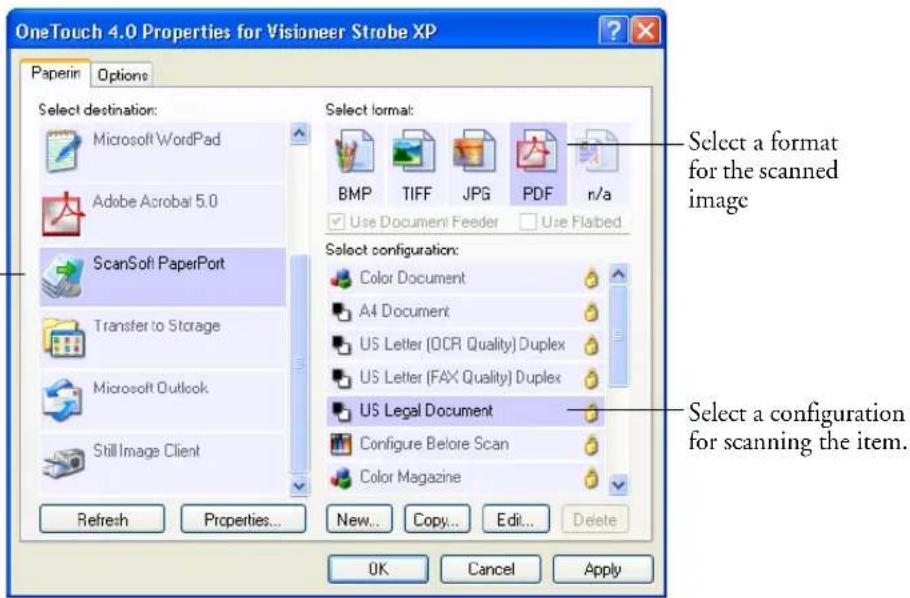
To select new settings for the scanner:
- From the Select Destination list, select the application where you want documents sent when scanning is finished.
See “Selecting Options for the OneTouch Properties Window” on page 70 to display a full list of the Destination Applications that you can use with the scanner.
Note: If you select a word processing program such as Microsoft WordPad or Microsoft Word and a page format that can be used for OCR (such as TEXT or RTF), the text in scanned images is automatically converted to word processing text.
- From the Select Configuration list, select a scan configuration.
The scan configuration list is preset for the application you select in the Select Destination list. If you select a different application, the configurations are for that application. However, you can create your own scan configurations as well.
- Select a Format and Page(s) option.
The available options apply to the Destination Application you select. For example, if you select Microsoft Word as the Destination Application, the available formats are for text, such as .txt and .rtf. However, if you select Microsoft Paint as the Destination Application, then the available formats are for graphics, such as .bmp, and .jpg.
Note: If a format is listed as n/a, that means the text format is not available for that Destination Application.
- Click OK, or if you want to keep the window open and work with other features, click Apply.
Note that while the OneTouch Properties window is open, you cannot scan yet by clicking on the OneTouch Panel. You must click OK or close the OneTouch Properties window first.
SETTING DESTINATION APPLICATION PROPERTIES
The different types of Destination Applications have various properties that you can select.
- On the OneTouch Properties window, click a Destination Application.
- Click the Properties button.
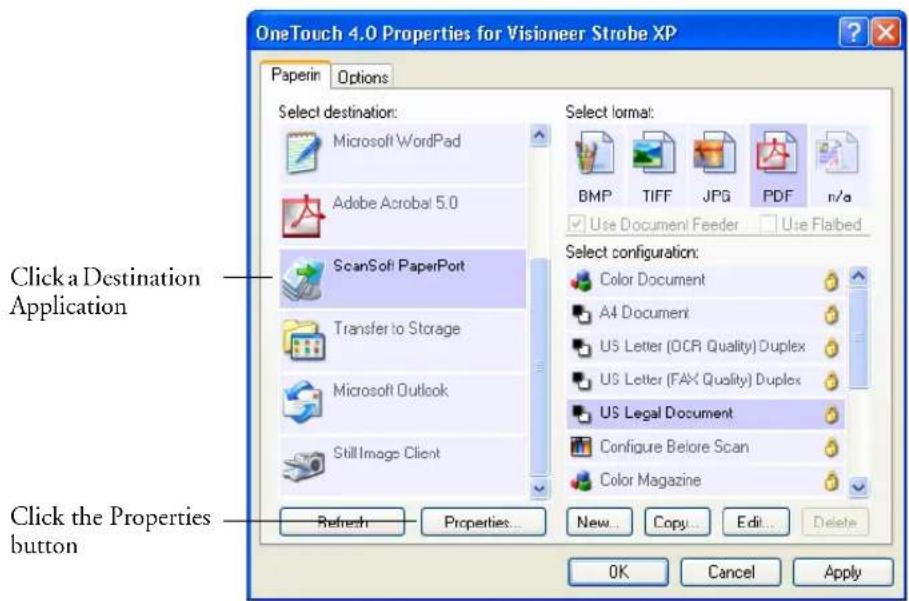
A OneTouch 4.0 Link Properties dialog box appears for the type of Destination Application you selected, and the available options are for that type of application.
PAPERPORT PROPERTIES
These properties apply to PaperPort, and are for designating the folder to receive your scanned items.
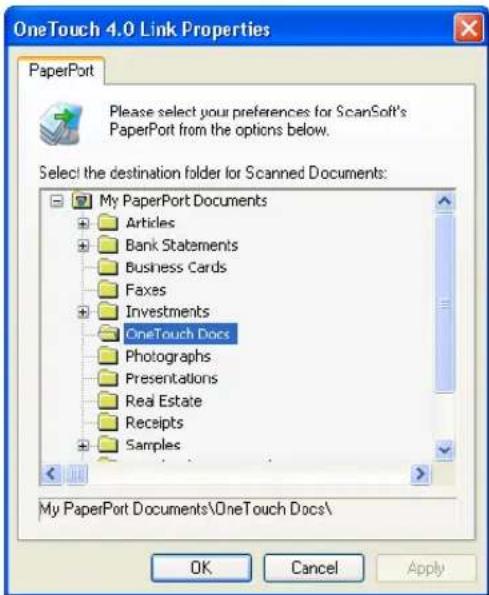
-
Select the PaperPort folder where you want the file of the scanned image to be located.
-
Click OK.
-
Click OK or Apply on the OneTouch Properties window.
When PaperPort opens after you finish scanning, the thumbnails of your scanned documents are on the Desktop in that folder.
TEXT DOCUMENTS PROPERTIES
These properties apply to Microsoft Word, Microsoft Excel ^® , Adobe Acrobat Reader, and the other applications indicated by their icons in the list. The properties apply to the OCR settings for the applications.
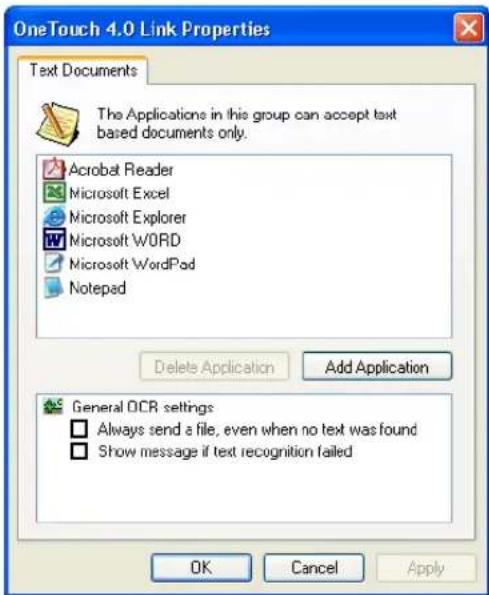
- Click in the OCR settings boxes for the options you want.
The options will apply to all the applications in the group.
Always send a file, even when no text was found—The scanned file is sent to the OCR reader even if the image does not appear to contain text. This could occur if you scanned a photograph with a OneTouch button set for text applications.
Show message if text recognition failed—A message will appear on the screen if the OCR reader does not detect text in the image.
- To add another application to the list, click the Add Application button.
The Add Text Based Link dialog box appears.
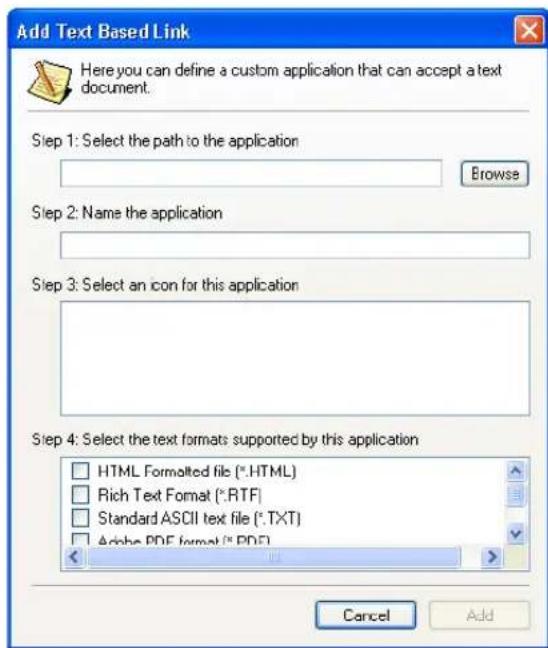
- Click Browse to find the application you want to add to the list.
When you select the application using the Browse button, steps 1 and 2 on the dialog box are automatically filled in, and the application icon appears in step 3.
-
Select the icon in step 3 of the dialog box. That is the icon that will appear in the OneTouch Destination List.
-
In step 4 of the dialog box, select the file formats that the application will accept.
Refer to the documentation that you received with the application to see which text formats the application accepts.
The options you select under step 4 determine the page format icons that appear in the OneTouch Properties window for that group of applications.
-
Click the Add button.
-
Click OK or Apply on the OneTouch Properties window.
- Click Refresh on the OneTouch Properties window.
IMAGE DOCUMENTS PROPERTIES
These properties apply to Microsoft Paint and other image processing applications, including ScanSoft OmniPage Pro.
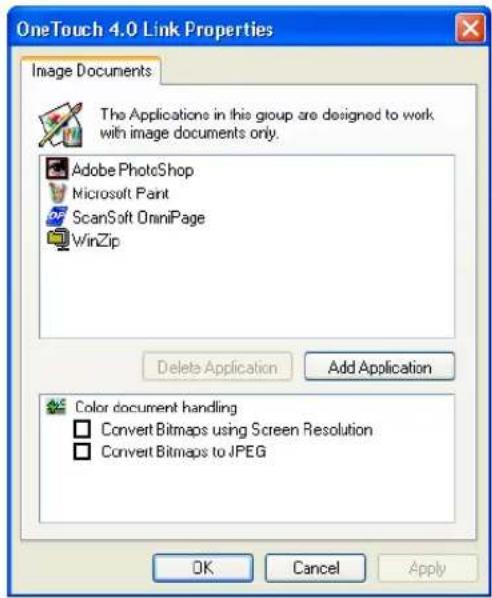
- Click in the Color document handling settings boxes for the options you want.
The options will apply to all the applications in the group.
Convert Bitmaps using Screen Resolution—Use this option to ensure that an image will fit on the computer's screen. When a computer screen is set to a lower resolution, bitmap images with a higher resolution may be too big to fit on the screen. Converting the bitmap image to match the screen resolution ensures that the image fits on the screen.
Convert Bitmaps to JPEG—JPEG files can be compressed to produce smaller file sizes and, therefore, shorter transmission times. Use this option to provide that compression capability to image files.
- To add another application to the list, click the Add Application button.
See the steps on page 59 to add an application to the list.
-
Click OK.
-
Click OK or Apply on the OneTouch Properties window.
-
Click Refresh on the OneTouch Properties window.
STORAGE PROPERTIES
These properties apply to the Destination Application named Transfer to Storage. If a CD burner is attached to your computer, you also use this dialog box to start the Burn to CD process.
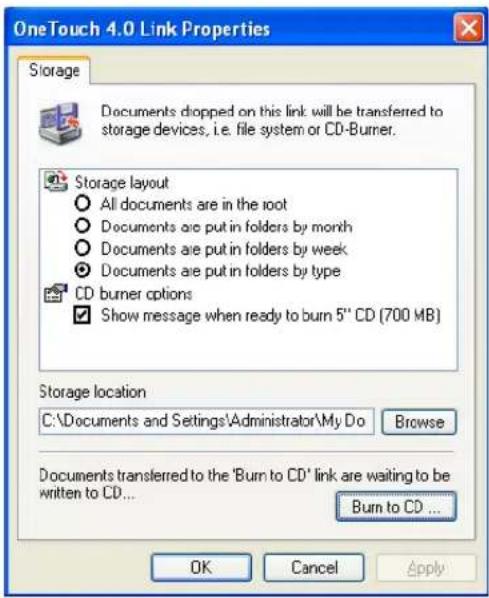
Note: If you do not have a CD burner attached to your computer, the CD options are not shown on the dialog box. The Burn to CD option is only available for Windows XP.
- Click the Storage Layout options you want.
All documents are in the root—The scanned documents are saved in the root of the folder specified in the Storage Location.
Documents are put into folders by month, week, or type—Folders are created based on your selection (month, week, or type) and the scanned documents are saved in those folders. New folders are created for each month and week so you can keep track of when you scanned the documents.
- Click the Browse button to specify the location to store the scanned documents, or type a location directly into the box.
If you are scanning to a shared network drive, it must be a mapped drive. For more information about mapped drives, see your network administrator.
- If you have a CD burner attached to your computer, the option Show message when ready to burn 5" CD (700MB), should be selected.
You'll see a message when it's time to click the Burn to CD button.
- Click OK on the Link Properties window to accept the changes and close the window.
EMAIL PROPERTIES
These properties apply to email applications so you can specify the folder for documents that you will attach to an email message. Microsoft Outlook® will accept direct attachment of documents to a blank email message as soon as scanning is finished, but other email applications do not. If you're using one of those applications, such as America Online® (AOL), you need to know which folder contains the scanned documents so you can manually attach them to your email messages.
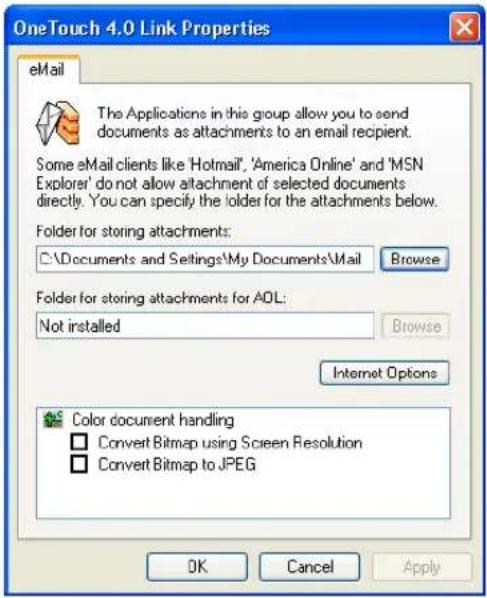
- Click the Browse button under Folder for storing attachments and choose a folder for your eMail attachments to be stored, or type a location directly into the box.
See the steps on page 59 to add an application.
- If you are using AOL on your computer, and the folder name for AOL is incorrect, click the Browse button and find the correct AOL folder.
For scanned images to be auto-attached to a blank email address, you must have the specific folder location AOL uses to find the attachments. Please contact AOL for more information about the folder location in which AOL stores attachments.
- If you need to set or change any internet options for AOL click the Internet Options button.
The Windows Internet Options Control Panel opens. See your Windows documentation and AOL user manual for the settings on the Windows Control Panel.
- Select the options for color document handling.
Convert Bitmaps using Screen Resolution—Use this option to ensure that an image will fit on the computer's screen. When a computer screen is set to a lower resolution, bitmap images with a higher resolution may be too big to fit on the screen. Converting the bitmap image to match the screen resolution ensures that the image fits on the screen.
Convert Bitmaps to JPEG—JPEG files can be compressed to produce smaller file sizes and, therefore, shorter transmission times. Use this option to provide that compression capability to image files.
-
Click OK.
-
Click OK on the OneTouch Properties window to accept the changes and close the window.
SELECTING PAGE FORMAT OPTIONS
The Page Format options that you select determines the file format of the scanned document. Appropriate page format options and file types are available for the type of Destination Application selected.
The available file types depend on the type of scanner you purchased.
The available options are for images and text.
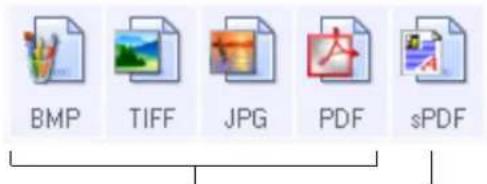
Note: The sPDF and nPDF text formats are only available if the OmniPage Pro software is installed on your computer.
Image Formats Text Formats; sPDF is only one of several text formats available.
The Text Formats are for text file types. The names of the formats indicate their file types. See “Text Formats” on page 67 for details.

Note: The available text format options depend on the software installed on your computer. For example, the nPDF and sPDF options are only available if you have OmniPage Pro installed on your computer.
IMAGE FORMATS
Select an image file format for photos, artwork or other documents that you want to save as images. BMP and TIFF are standard image file formats generally used if you want to do additional image processing, such as photo touch-up or color correction. Both of those file formats tend to be larger than the JPEG format.
Because JPEG image files can be reduced in size, the JPEG format is often used for images on web pages, or if file size might be a problem when electronically sending the files. JPEG files are reduced in size by lowering their image quality, and you can select the degree of quality for your scanned images from the JPEG file format icon.
The PDF format is often used to create images of text pages. You may want to select PDF as the page format when scanning text pages that do not require OCR processing or other processing. The PDF format is also used to put multi-page documents on web sites as PDF-readable files. As with the JPEG option, the PDF format can be reduced in size or quality.
Note: The two other PDF formats—nPDF and sPDF—are for scanning with OCR processing and with the ability to search the scanned text. See the next section, “Text Formats,” and also “Scanning with sPDF or nPDF and Searching for Text” on page 98 for details.
To select a JPEG or PDF file size:
-
Select JPG or PDF as the page format.
-
Right-click on the JPG or PDF icon.
A menu appears.
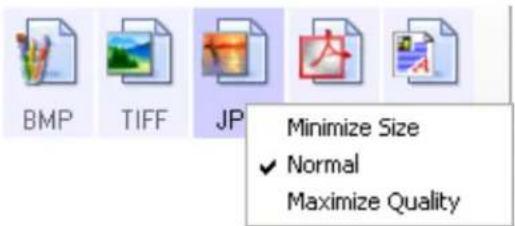
- Choose the file size/image quality option for your scanned images.
Minimize Size—Smallest file size, lowest image quality.
Normal—Medium file size, some loss of image quality.
Maximum Quality—Largest file size, no loss of image quality.
Your selection pertains only to the Destination Application currently selected on the OneTouch Properties window. Other Destination Applications that have JPG or PDF selected as the Page Format are not affected, so you can set the JPEG or PDF file size/image quality independently of Destination Applications.
- Click OK or Apply on the OneTouch Properties window.
TEXT FORMATS
Selecting the text format option also selects OCR processing as an automatic step for scanning. Therefore, when you scan a document with the text format selected, the text portions of the document are automatically converted to editable text. For additional OCR processing features, see “Using OmniPage OCR Options” on page 89.
Select a text format for documents with text or numbers, such as a business letter, report, or spreadsheet. The text format icon has several file formats available, depending on the Destination Application you select.
The specific file format is the file name extension on the text format icon.
The specific text format; this example is for Microsoft Word format (.txt).
As you select Destination Applications that are text applications, the text format icon changes to match the file type of the application. In some cases, the Destination Application supports several file types, and you can right-click on the icon to choose the particular file type for that application.
To select a file type for the text format:
-
Select the Destination Application.
-
Right-click on the text format icon.
A menu appears. The following figure shows samples for different formats. The nPDF format is only available if the OmniPage Pro software is installed on your computer.
Note: The available text format options depend on the software you received with your scanner and installed on your computer.
Example menu for the DOC text format.
Example menu for the nPDF text format.
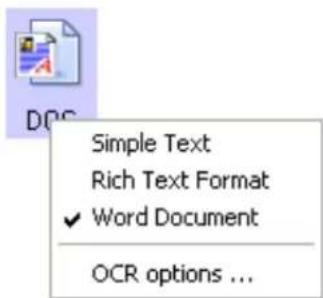
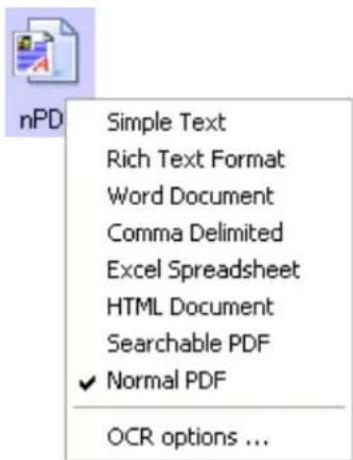
- Choose the file type that you want for the text format.
Your selection of a file type pertains only to the Destination Application currently selected on the OneTouch Properties window. Other Destination Applications that have a text option selected as the Page Format are not affected.
Simple Text—The .txt file format. Text with no formatting; used by the standard Microsoft Notepad application.
Rich Text Format—The .rtf file format. Text that retains formatting when converted. Available with Microsoft Wordpad and Word.


Word Document—The .doc file format used by Microsoft Word.
Comma Delimited—The .csv file format; used for database or spreadsheet data with fields separated by commas. When the document is converted into editable text by the OCR software, the fields are maintained so you can copy and paste them to a database or spreadsheet application.
Excel Spreadsheet—The .xls file format used by Microsoft Excel.

HTML Document—The .htm file format used to create web pages.

Searchable PDF—The .sPDF file format used by Adobe Acrobat and OmniPage Pro. This format converts scanned text into PDF with text search and OCR capabilities. It is only available if you have installed OmniPage Pro on your computer. See “Scanning with sPDF or nPDF and Searching for Text” on page 98 for details.

Normal PDF—The .nPDF file format used by Adobe Acrobat and OmniPage Pro. This format also converts scanned text into PDF with text search and OCR capabilities, plus you can edit the text in an nPDF image if you have a PDF editing program. The nPDF format is also only available if you have installed OmniPage Pro on your computer. See “Scanning with sPDF or nPDF and Searching for Text” on page 98 for details.

- To change the OmniPage OCR settings, choose OCR Options.
The OCR Options provide a series of selections for the OCR feature when you scan text. This menu option is only available if you have installed OmniPage Pro on your computer. See “Scanning with Optical Character Recognition (OCR)” on page 87 and “Selecting OmniPage OCR Options” on page 89 for details.
Note that the OCR Options settings apply to all the Destination Applications for which OCR applies. If you change them for one Destination Application, those changes apply to the others as well.
- Click OK or Apply on the OneTouch Properties window.
SELECTING OPTIONS FOR THE ONETOUCH PROPERTIES WINDOW
The OneTouch Options determine the types of Destination Applications available on the window, as well as the location of the files of your scanned items.
- To select options:
- Open the OneTouch Properties window and click the Options tab.
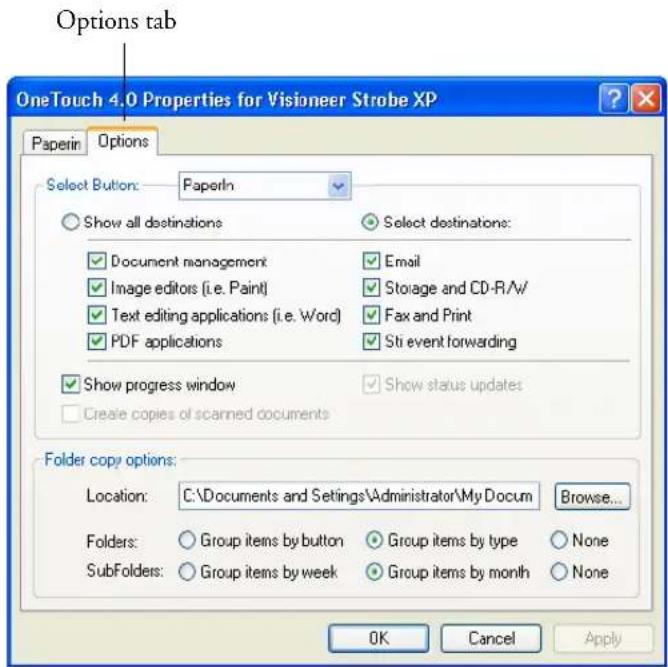
- Select options as described below.
Show All Destinations—This option selects all the Destination Application categories. The list of Destination Applications available will include all the applications on your computer that fall into these categories. The list also includes printers and other devices connected to your computer so, for example, you can scan an item and have it printed immediately.
Select Destinations—Select this option to individually choose the types of applications to include in the list of Destination Applications. Check the boxes for the type of application to include.
■ Document Management includes PaperPort and other applications for processing and keeping track of your scanned documents.
■ Image Editors include Microsoft Paint and other drawing and graphics applications.
■ Text Editors include Microsoft Word and WordPad, Microsoft Excel, and other word processing and spreadsheet applications. Select this option if you want OCR processing to convert your scanned documents to text that you can edit.
■ PDF applications are for documents scanned to PDF format.
- Email includes Microsoft Outlook and other email applications. See “eMail Properties” on page 63 for details about attaching scanned documents to your email messages.
■ Storage and CD-R/W is for either storing scanned documents in a folder, or sending them to a CD burner to create a CD containing the scanned documents. See “Transferring Scanned Documents to Storage” on page 108 and “Scan and Burn to a CD” on page 101 for details.
■ Fax and Print is for sending your scanned documents directly to your printer or fax software for faxing.
■ Sti event forwarding is for using another application's interface for scanning. The OneTouch Event Forwarding dialog box opens so you can select which application to use to continue scanning. See “Scanning with Event Forwarding” on page 103 for details.
- After selecting a new category of Destination Applications, click the Multi Function tab to see which ones are added to the list.
Show Progress Window—Select this option to display the progress window of the document(s) during scanning.
Create copies of scanned documents—Sometimes the image of a scanned document is only saved as a temporary file until its Destination Application is finished using it. In those cases you may want an additional, permanent copy saved on your hard drive.
For example, if you scan a picture to an email application, the scanned image is saved as a temporary file, then attached to the email, and the email is sent. Later, the temporary file of the scanned picture is deleted. The same situation may occur when you scan directly to a printer or scan to a fax application. After a scanned item is printed or faxed, its temporary file is deleted. However, by selecting this Create copies of scanned documents option, you can choose to save permanent copies of the scanned items on your hard drive.
The copies will be saved in the folder specified in the Folder Copy Options section (see the figure on page 73 and the description below).
You can selectively choose the types of Destination Applications that will have their scanned images saved permanently. For example, if your computer is connected to multiple printers and fax machines, each one is considered a separate Destination Application. By selecting the Fax and Print box and clicking the Create copies of scanned documents option, every scanned document you fax or print from the scanner is also saved as a permanent file on your hard drive.
This option is not available if either the Document Management or Storage and CD-R/W options are selected because, by default, file copies for those types of Destination Applications are already automatically saved in the folder for copies.
For that reason, this option is not available if the PaperPort software is the Destination Application because it is already Document Management applications.
Folder Copy Options—This section of the dialog box sets the location for copies of your scanned documents and how you want to group them.
All copies of your scanned documents, regardless of type of Destination Application, are saved in this folder.
Note that if Transfer to Storage is the Destination Application, and the type of application is Storage and CD-R/W, the location in this section is where your scanned documents are stored. When you use the OneTouch 4.0 Burn to CD feature, the location is where scanned documents are stored before they are burned onto the CD.
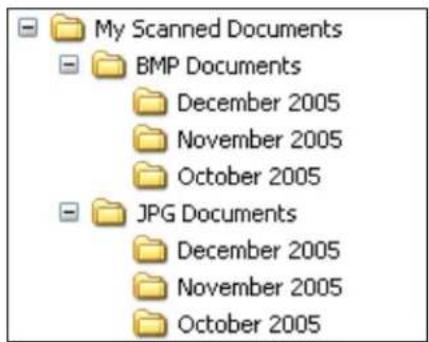
Click the Browse button and find the folder for the copies. Select the grouping option for the documents. Group by type arranges the scanned documents by the type of file, such as .doc or .jpg. If you also want to group them by date you can choose the week and month options.
The following example shows the folders when the selections are Group items by type and Group items by month.
- Click OK to save the options.
CREATING A NEW SCAN CONFIGURATION
The scan configurations are where you select the scanning resolution, brightness, mode (color, black&white, or grayscale), and a number of other settings.
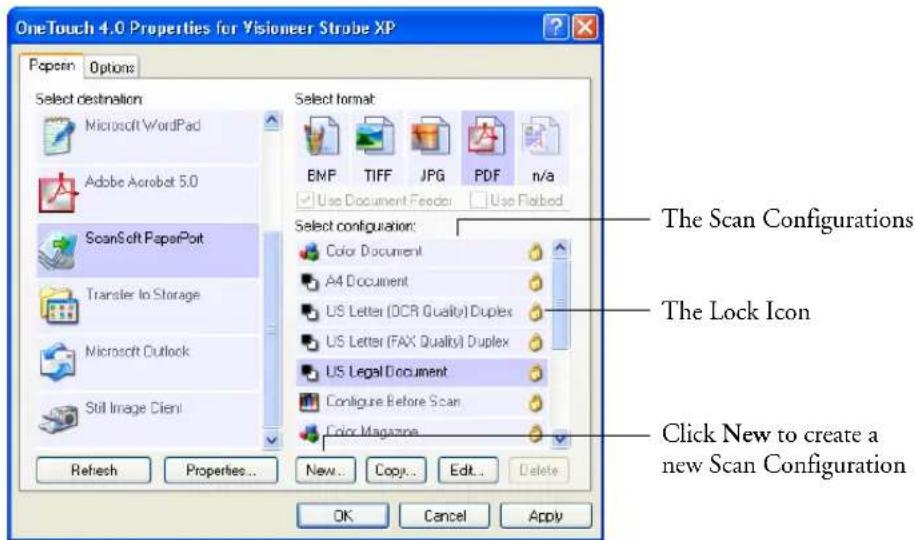
Note the lock icon on the preset configurations. Although you can unlock and edit the preset configurations, we recommend that you leave them locked, and only add new configurations. That way, you will always have the original, factory-set configurations available. New configurations will be unlocked until you manually lock them.
To create a new configuration:
-
Open the OneTouch Properties window and make sure the PaperIn tab is selected.
-
Scroll through the applications in the Select Destination list and click the type of application for which you want to create a new scan configuration.
When you create a new scan configuration, it will appear for the same types of Destination Applications. For example, if you create a new configuration for image editor applications, that new configuration also appears for any other image editors, but not for
text editing applications. Thus, you can create specific sets of scan configurations for specific functions and they appear only when appropriate.
- Click the New button.
If you want to start from the settings of another configuration, select the configuration, then click the Copy button.
If the Scan Settings tab is not selected, click it.
- On the Scan Configuration Properties dialog box, type a name.
Tip: If you're going to set up the new configuration to scan duplex (two-sided), include that in the name, such as "Scan for Dark Print (Duplex)," to remind you that it is a duplex scan.
Type a new name for the configuration.
Select the scan mode and drag the slider to set the resolution.
Drag the sliders to set the Brightness and Contrast.
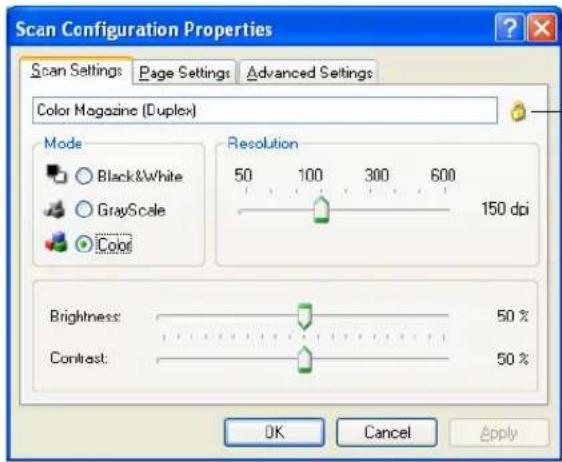
If the configuration is locked, click the lock to unlock it. The icon becomes a key.
New configurations are unlocked until you manually lock them.
Note: If you select a printer or other device in the Select Destinations list, the dialog box may have an additional Device Settings tab for setting specific options for the particular device.
- Select scan settings for the new scan configuration.
Mode—Select a scanning mode:
■ Black&White to scan in black and white. For example, letters and memos are usually scanned in black and white. This scan mode produces the smallest file size.
■ GrayScale to scan items such as documents containing drawings or black and white photographs. The scanning produces an image of up to 256 shades of gray.
■ Color to scan color photographs and other color items. Color scans have the largest file size.
Resolution—Drag the slider to the right or left to adjust the dots per inch (dpi) of the resolution. The maximum resolution is 600 dpi; the minimum is 75 dpi. The higher the dpi setting, the sharper and clearer the scanned image. However, higher dpi settings take longer to scan and produce larger files for the scanned images.
Brightness and Contrast—Sometimes an item is scanned with the brightness and contrast set too light or too dark. For example, a note written with a light pencil may need to be scanned darker to improve legibility.
Brightness refers to the lightness or darkness of the image. Contrast is the range between the darkest and lightest portions of the image. The greater the contrast, the more difference between the lighter and darker shades in the image.
Drag the sliders to the right or left to adjust the brightness and contrast of the scanned image. The Contrast setting does not apply to the Black&White mode.
-
If you want to lock the configuration, click the Key icon to change it from a Key to a Lock.
-
Click the Page Settings tab to select page settings.
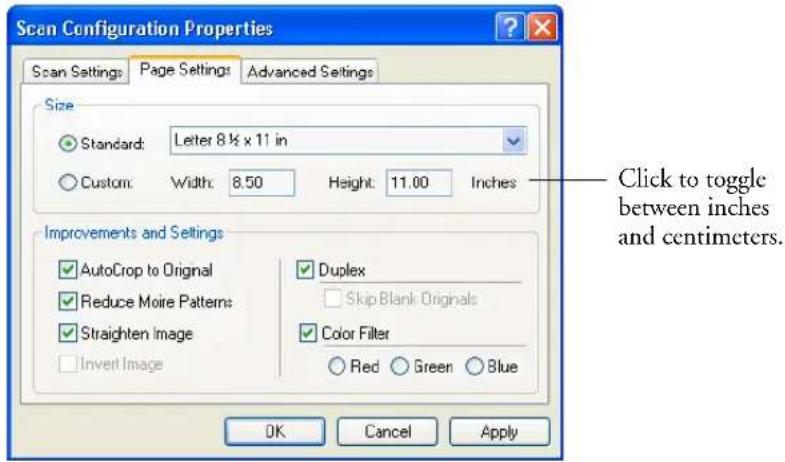
Size—Click Standard, click the menu arrow and choose a page size from the list, or click Custom and enter the horizontal and vertical page dimensions in the boxes. The maximum size is 8.5" x 14". The units of measurement can be inches or centimeters. Click the name of the units, inches or centimeters, to toggle between them.
Improvements and Settings—Only the options that apply to the selected Destination Application are available.
■ AutoCrop to Original—Select this option to let the scanner automatically determine the size of the item being scanned. For example, if you scan a 5" x 7" photo, the scanner will determine the size of the photo.
When using the AutoCrop to Original option, make sure to use the paper guides on the scanner so the page is inserted straight.
For single-sided scans, the scan area is the size of the image. For double-sided scans, the scan area is the size of the larger of the two areas on the front and back of the page.
Note: Also make sure to set the page size larger than the item that you're scanning so the Autocrop process will have sufficient room on the page to crop the image properly.
■ Reduce Moire Patterns—Moire patterns are wavy, rippled lines that sometimes appear on the scanned images of photographs or illustrations, particularly newspaper and magazine illustrations. Selecting Reduce Moire Patterns will limit or eliminate moire patterns in the scanned image. This option is only available for the GrayScale or Color Mode at 200dpi or less.
■ Straighten Image—Select this option to let the scanner automatically determine if a page is skewed, and then straighten its image. The scanner detects page edges and can sense when the page is fed through at an angle. However, if the page is fed through at too great an angle, the image may not scan correctly. In that case, re-scan the page using the paper guides to feed the paper in straight.
■ Invert Image—Only available for Black&White Mode, this option reverses the black and whites of an image.
Original Image Inverted Image

natural_image
Close-up black-and-white photo of a cow's face with open mouth, standing on grass (no text or symbols visible)
natural_image
Black-and-white photo of a cow lying down with its head raised, showing its large body and visible horns (no text or symbols)■ Duplex—Scan both sides of the page if your scanner has this capability. If this option is not selected, the scanner will only scan the side of the page facing down when you insert it into the scanner.
- Skip Blank Originals—Skips pages that are completely blank. Typically you use this option when you will scan a stack of two-sided pages which have a number of blank sides. This option is only available for Duplex scanning.
■ Color Filter—Color filter is the ability of your scanner to automatically remove a color from a scanned item. For example, if you are scanning a letter with a red watermark, you can choose to filter out the red so the scanned letter just shows the text and not the red watermark. Color filter applies to Black&White or GrayScale Mode.
The original with a red watermark over black text.
The scanned item with the red filtered out.
Marketing
ABC, Inc. distributes and sells its product worldwide through OEMODIA, and is a solution. As of June 1999, ABC has employed over 21 well trained marketing, sales and sales personnel. To better revenue customers, ABC has assigned an account manager for each of its OEMOD customer. These account managers are responsible for effectively coordinate the outstanding issues in sales, manufacturing, or development and assure the status of each customer's product is properly monitored. Our goals to achieve and maintain complete customer satisfaction.
Pakeling
ABC Inc. distributes and sells product worldwide through OEMsOEMs, and distributors. As of June 1999, ABC has employed over 20 years trained marketing, sales, and support personnel. To better serve its customers, ABC has assigned an account manager for each of the OEMsOEM customers. These accounts manage a responsibility for effectively all rights to the outstanding issue in sales, manufacturing, or development and assure the data of each customer's product is properly monitored. Our goal is to achieve and maintain complete customer satisfaction.
8. Click the Advanced Settings tab.
The options of the Advanced Settings tab are for the Color or GrayScale scanning mode.
Saturation is the strength or purity of a color, hue is the color your eyes see as reflected from the image, and gamma controls the brightness of the midtones of the color.
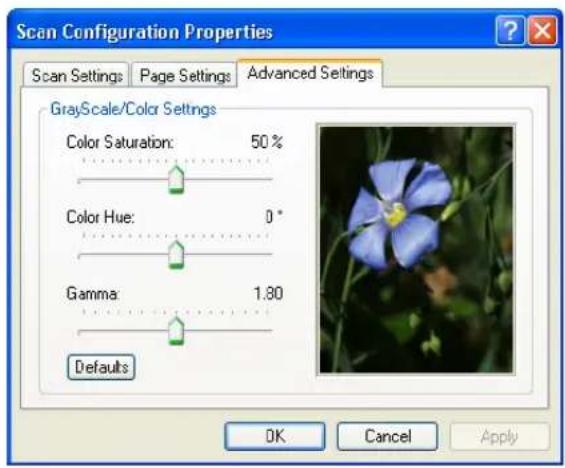
-
Drag the sliders to the left and right to change the color settings. As you do, the image changes to show the effects of the new settings.
-
Click OK to save the new configuration.
It will now appear in the list of Scan Configurations on the OneTouch Properties window for the appropriate Destination applications.
THE DEVICE SETTINGS TAB
A Device Settings tab appears on the Scan Configurations dialog box when your selected Destination Application sends the scanned image to a printer, fax application, or other device. You use the options on the Device Settings tab to select settings for the device.
To select Device Settings:
- Click on the Device Settings tab.
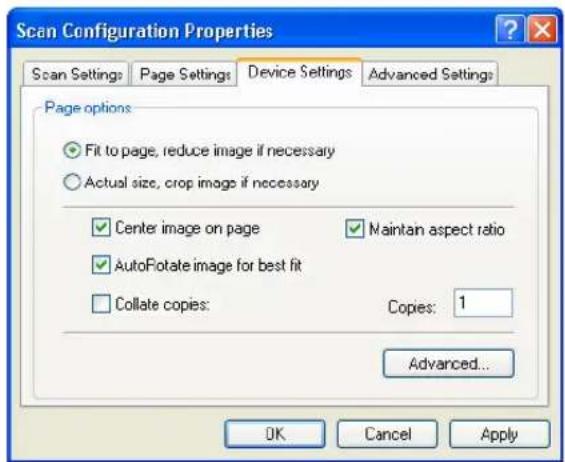
Fit to page, reduce image if necessary—If the scanned image is too big to be printed or faxed on a single page, the image will automatically be reduced to fit the page.
Actual size, crop image if necessary—If the scanned image is too big to be printed or faxed on a single page, the image will automatically be cropped around its edges to fit on the page.
Center image on page—The image will be printed in the center of the page instead of at the top right corner.
Maintain aspect ratio—The aspect ratio is the length-to-width relationship of the image's dimensions. Select this option so the image's relative proportions remain constant.
AutoRotate image for best fit—If the image is a Landscape format and the device is printing in the Portrait mode, or vice versa, rotate the image to fit on the page.
Collate copies—If you're printing more than one page, collate the copies. Enter the number of copies in the Copies box.
Advanced—Click to see additional settings for the device. The dialog that appears is specific to the device. For example, if the device is your printer, the dialog box is your printer's setup settings.
2. Click OK or Apply.
THE STORAGE OPTIONS TAB (ARCHIVE)
A Storage Options tab appears on the Scan Configurations dialog box when the selected Destination Application is set as Transfer to Storage. You use the options on this tab to select where you want to save your scanned items for storage when scanning with that particular Scan Configuration.
To select Storage Options:
- Click on the Storage Options tab.
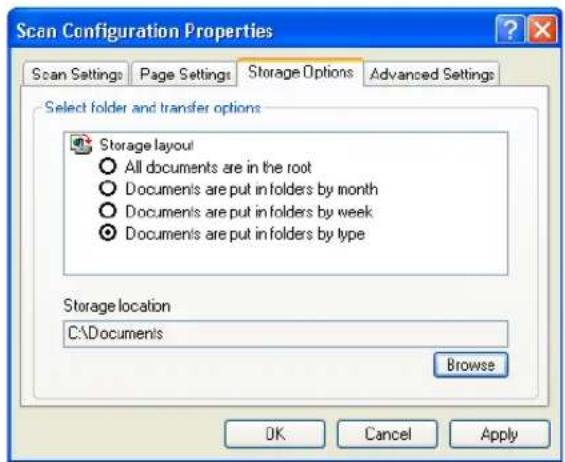
- Click the Storage Layout options you want.
All documents are in the root—The scanned documents are saved in the root of the folder specified in the Storage Location.
Documents are put into folders by month, week, or type—Folders are created based on your selection (month, week, or type) and the scanned documents are saved in those folders. New folders are created for each month and week so you can keep track of when you scanned the documents.
- Click the Browse button to specify the location to store the scanned documents, or type a location directly into the box.
- Click OK or Apply.
Note: The selections you make using the Storage Options tab override the storage options that apply to the Storage Properties. This means that you can create separate Scan Configurations to store scanned items at various locations in addition to the main location set by the Storage Properties. See “Storage Properties” on page 61, “Transferring Scanned Documents to Storage” on page 108 and “Scanning to Multiple Folders” on page 110 for details.
EDITING OR DELETING SCAN CONFIGURATIONS
Note: The original scan configurations listed on the OneTouch Properties window should not be edited or deleted in case you need to return the scanner and OneTouch software to their factory settings. Editing or deleting should only be for those scan configurations that you created yourself.
To edit or delete a scan configuration:
- Open the OneTouch Properties window.
- Select the scan configuration you want to edit or delete.
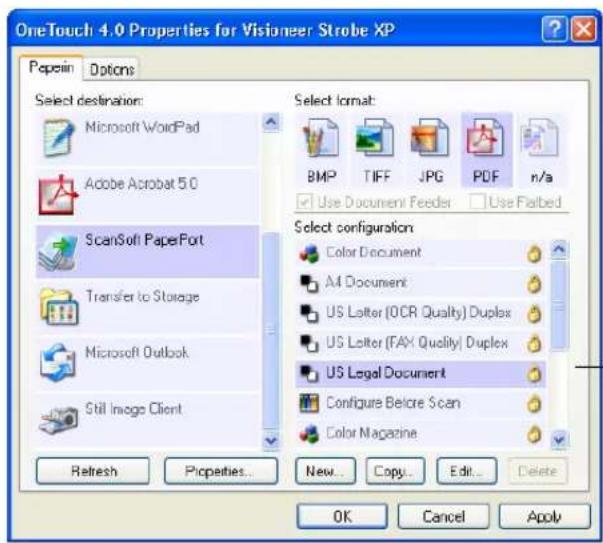
Select the configuration to edit or delete. It must be unlocked, as indicated by not having a lock displayed here.
-
To delete the configuration, click the Delete button.
-
To edit the configuration, click the Edit button.
The Scan Configuration Properties dialog box opens for that configuration.
If you manually locked a scan configuration, it must first be unlocked before you can edit or delete it. Click the Lock icon to unlock the configuration. Clicking it toggles between locking and unlocking the configuration.
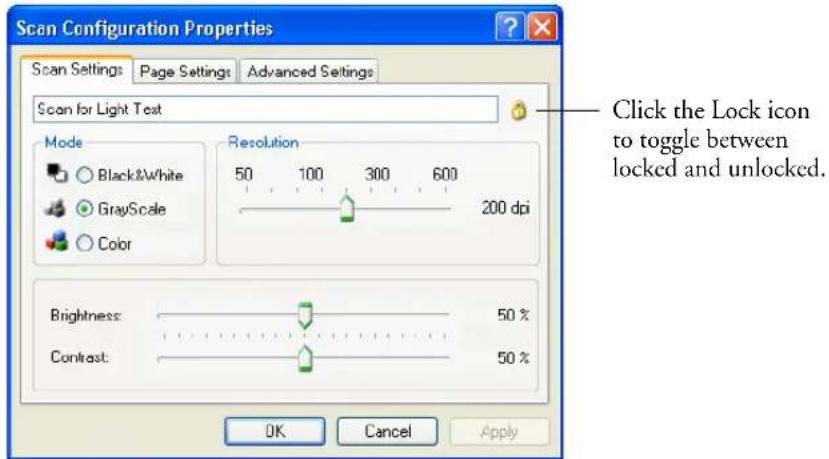
- Edit the settings and click OK.
- Click OK to close the dialog box.
CONFIGURING BEFORE SCANNING
You can manually configure the scan settings before beginning the scanning process. In that case, you select Configure Before Scan as the Configuration. When you start to scan, the scanning stops and one of the scanning interfaces opens for you to set the scanning options.
To configure before scanning:
- Open the OneTouch Properties window.
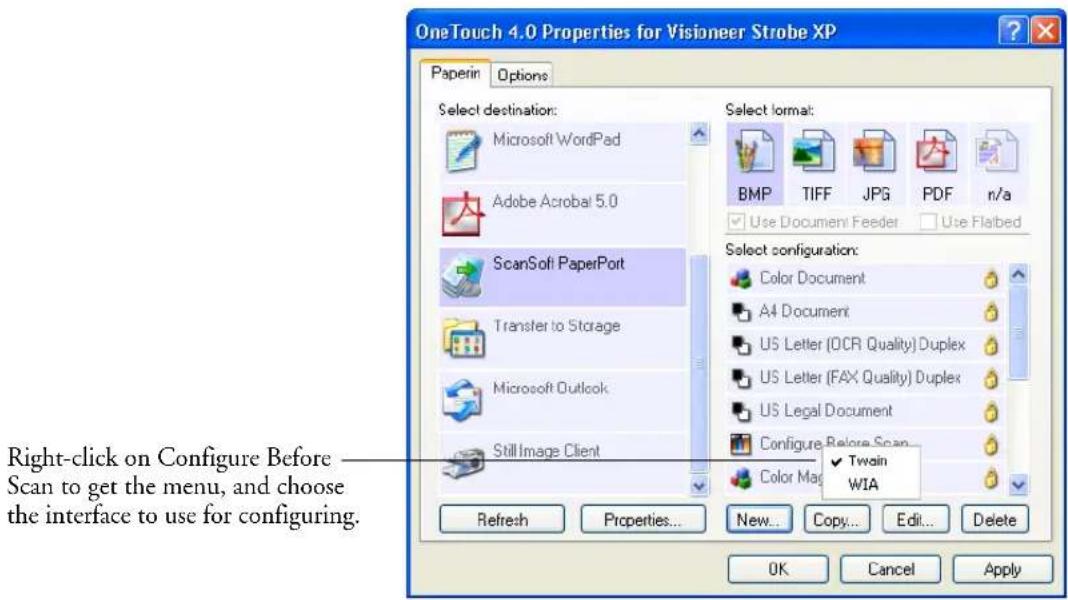
Right-click on Configure Before — Scan to get the menu, and choose the interface to use for configuring.
- Right-click on Configure Before Scan and choose an interface to use for configuring before scanning.
TWAIN—The TWAIN Interface appears for you to configure the scanning. See “Scanning from PaperPort Using the TWAIN Interface” on page 121.
WIA—The Windows Image Acquisition Interface (WIA) appears for you to configure the scanning. See “Scanning from the WIA Interface” on page 136.
Note: The WIA option is only available if your computer is running Microsoft Windows XP.
- Click OK or Apply on the OneTouch Properties window.
SCANNING WITH OPTICAL CHARACTER RECOGNITION (OCR)
Optical Character Recognition (OCR) converts text and numbers on a scanned page into editable text and numbers. You can then work with the text and numbers to edit, spellcheck, change font or type size, sort, calculate, and so forth.
To scan with OCR:
- Select a Destination Application that has one of the Text formats (TEXT, RTF, XLS, or HTML).
- Scan the document.
Your scanned pages appear in the Destination Application with their text ready for editing and other text processing.
Note: OCR scanning is also for spreadsheets so you can work in Microsoft Excel (or other spreadsheet applications) with the figures and text from the original spreadsheets.
To select OCR settings:
- Select the Destination Application.
- Right-click on a text format icon.
A menu appears. The following figure shows a sample for the Text format for the RoadWarrior, Strobe XP 100, and Strobe XP 200. If you are using the Strobe XP 300 scanner and have installed the OmniPage software, please see the section “Using OmniPage OCR Options” on page 89.
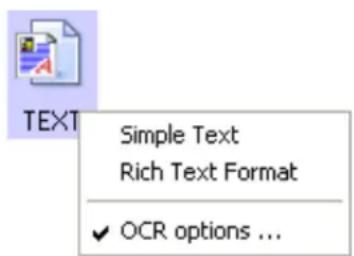
3. Choose OCR options.
A dialog box of OCR options opens.
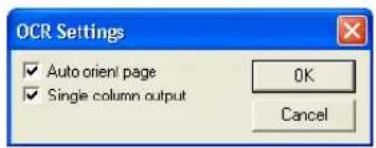
- Select the option you want for the OCR conversion of your documents.
Auto orient page—Select this option to check the page orientation and automatically rotate an improperly oriented page image so the text is recognizable by the OCR process.
Single column output— Select this option to produce a single column of text in the Destination Application, even if the original image had multiple columns of text.
5. Click OK.
Note that the OCR options apply to all the Destination Applications for which OCR applies. If you change them for one Destination Application, those changes apply to the others as well.
USING OMNIPAGE OCR OPTIONS
If you installed OmniPage Pro with your Strobe XP 300 scanner, additional OCR options are available. OneTouch 4.0 and OmniPage Pro work together to combine scanning with OCR processing into one integrated step. OmniPage Pro is on the Disc 2 CD that you received with your Strobe XP 300 scanner in case you haven't installed it yet.
Note: If OmniPage Pro is not installed on your computer, items scanned as a text format are still converted with the OCR process.
SELECTING OMNIPAGE OCR OPTIONS
The OmniPage OCR Options are only available if you have installed OmniPage Pro on your computer.
Note: OmniPage OCR options apply globally to all the OneTouch destinations that perform OCR. For example, if you select the OCR options for Acrobat Reader, they also apply to WordPad.
To select OmniPage OCR options:
- Open the OneTouch Properties window.
- Select the Destination Application to get one of the text format file types as the page format.
- Right-click on the page format icon to see the menu.
- Choose OCR Options from the menu.
Simple Text Rich Text Format Word Document
√ OCR options ...
The OmniPage OCR Options window opens with the OCR tab selected.
![Options OCR | Process | Format | Languages in document: English Afrikaans Albanian Aymara Basque Bemba Blackfoot Breton Bugotu Bulgarian User dictionary [none] Professional dictionaries Dutch Legal Dutch Medical English Financial English Legal English Medical Optimize the OCR process for... Speed Accuracy Reject character Character Map... Font Matching... OK Cancel Use Defaults](/content/2026/06/1202649/images/f2726308fcc8b10c0b676f1ff26506fe7dbd4d9f0adccbe4d96cab72af376462.jpg)
- Choose the options you want from the OCR window.
Languages in Document—Select the language(s) in the documents to be scanned. These are the languages that will be recognized during the OCR process. For faster and more reliable language recognition, select only the languages in the document.
The languages at the top of the list are your recent choices. Below that, the languages are in alphabetical order. Type a letter to jump to one of the languages in the list that correspond to that letter.
The dictionary icon indicates a language with dictionary support available. The dictionary is consulted to help in the OCR process. It can also offer suggestions during proofing.
User Dictionary—A user dictionary is your personal dictionary with words that you want the OCR proofreading process to recognize as legitimate words. For example, if you scan documents with highly technical terms not found in typical dictionaries, you can add them to your personal dictionary. You can also add names

that you expect to be in the documents too. That way, when the OCR process proofreads the text, names will not be considered misspelled words. You can create multiple user dictionaries.
Click the menu arrow and select a user dictionary from the list. Any Microsoft Word user dictionaries detected on your computer system are also listed. A dictionary named Custom is your default Word dictionary.
To create a user dictionary, click the button next to the menu arrow. Click New, type a name for the dictionary, and click OK. Click Close and then choose your new dictionary from the list. It will be used during the OCR process. You add words to a dictionary during the proofreading process. To turn on the proofreading process for your scanned documents, see the OmniPage Pro documentation.
Professional Dictionaries—These are legal and medical dictionaries containing highly specialized words and phrases. The options are: Dutch Legal, Dutch Medical, English Legal, English Medical, French Legal, French Medical, German Legal, and German Medical. Click the checkbox next to a dictionary name to select it.
Optimize the OCR process for—Select the option for the OCR process. Click Speed for good quality documents with acceptable accuracy. Click Accuracy to optimize recognition for the best accuracy. When you choose Speed, advanced formatting such as colored texts and backgrounds or inverted text is not retained.
Additional Characters—Enter accented characters here that you want to be recognized, in addition to those already recognized by the language you selected. For example, you can add characters such

as ç, ñ, and ö. Type characters from your keyboard, or select them from the Windows character map. Click Character Map to see the Windows character map.
Character Map—Click to see the Windows system character map, which shows all the characters for a font. Use the Character map to copy and paste accented characters to the Additional Characters box above. You can also use characters from the character map when editing your dictionary entries.
![Character Map Font: O Arial Help I J K L M N O P Q R S T U V W X Y Z [ \ ] ^ _ ` a b c d e f g h i j k l m n o p q r s t u v w x y z { | } ~ , i ¢ £ o ¥ | § ` © a « ¬ - ® ~ ° ± 2 3 ' μ ¶ - , 1 ° » ¼ ½ ¾ ↓ À À À À À A A E Ç É É É É I í î ì D Ñ Ó Ó Ó Ó × Ø Ú Ú Û Ù Ù P ß á a à à a à æ ç é é é è l í í l ó ŋ o ó ó ó o ÷ ø ú ú ú ú y p ç ā ā ā ä A a C c Č c Č c Ç c Č c Č d' Ï d É e E e Ė Ė Ė Ė Ė Ė Ė Ė Ė Ė Ė Ė Ė Ė Ė Ė Ė Ė Ė Ė Ė Ė Ė Ė Ė Ė Ė Ė Ė Ė Ė Ė Ė Ė Ė Ė Ė Ė Ė Ė Ė Ė Ė Ė Ė Ė Ė Ė Ė Ė Ę Ę Ę Ę Ę Ę Ę Ę Ę Ę Ę Ę Ę Ę Ę Ę Ę Ę Ę Ę Ę Ę Ę Ę Ę Ę Ę Ę Ę Ę Ę Ę Ę Ę Ę Ę Ę Ę Ę Ę Ę Ę Ę Ę Ę Ę Ę Ę Ę Ę ĥ ĥ ĥ ĥ ĥ ĥ ĥ ĥ ĥ ĥ ĥ ĥ ĥ ĥ ĥ ĥ ĥ ĥ ĥ ĥ ĥ ĥ ĥ ĥ ĥ ĥ ĥ ĥ ĥ ĥ ĥ ĥ ĥ ĥ ĥ ĥ ĥ ĥ Š Š Š Š Š Š Š Š Š Š Š Š Š Š Š Š Š Š Š Š Š Š Š Š Š Š Š Š Š Š Š Š Š Š Š Š Š Š Š Š Š Š Š Š Š Š Š Š Š Š Ō Ō Ō Ō Ō Ō Ō Ō Ō Ō Ō Ō Ō Ō Ō Ō Ō Ō Ō Ō Ō Ō Ō Ō Ō Ō Ō Ō Ō Ō Ō Ō Ō Ō Ō Ō Ō Ō Ō Ō Ō Ō Ō Ō Ō Ō Ō Ō Ō Ō Ş Ş Ş Ş Ş Ş Ş Ş Ş Ş Ş Ş Ş Ş Ş Ş Ş Ş Ş Ş Ş Ş Ş Ş Ş Ş Ş Ş Ş Ş Ş Ş Ş Ş Ş Ş Ş Ş Ş Ş Ş Ş Ş Ş Ş Ş Ş Ş Ş Ş Ŝ Ŝ Ŝ Ŝ Ŝ Ŝ Ŝ Ŝ Ŝ Ŝ Ŝ Ŝ Ŝ Ŝ Ŝ Ŝ Ŝ Ŝ Ŝ Ŝ Ŝ Ŝ Ŝ Ŝ Ŝ Ŝ f̂ f̂ f̂ f̂ f̂ f̂ f̂ f̂ f̂ f̂ f̂ f̂ f̂ f̂ f̂ f̂ f̂ f̂ f̂ f̂ f̂ f̂ f̂ f̂ f̂ f̂ f̂ f̂ f̂ f̂ f̂ f̂ f̂ f̂f̂ f̂ f̂ f̂ f̂ f̂ f̂ f̂ f̂ f̂ f̂ f̂ f̂ f̂ f̂ f̂ f̂ f̂ f̂ f̂ f̂ f̂ f̂ f̂ f̂ f̂ f̂ f̂ f̂ f̂ f̂ f̂ f̂ f⟩ Characters to copy: Select Copy Advanced view U-0115: Latin Small Letter E With Breve](/content/2026/06/1202649/images/e5e746ef69608c40589b46edd1821ed089c94e9c4e8c1f6d881882809a7e34ee.jpg)
To add an accented character to the Additional Characters box:
- Click the down Font down arrow and select a font from the drop-down menu.
- Scroll through the character map to find the accented character you want to add.
- Click the character in the map. A larger version appears so you can make sure it's the character you want.
- Click Select. The Copy button becomes active.
- Click Copy.
-
Close the Character Map window.
-
Click in the Additional Characters box.
-
Press Ctrl-V on the keyboard to paste the additional character into the box.
For more details or to use the Advanced View option, click Help button on the Character Map window.
Font Matching—Your computer system usually has a number of fonts available for the OCR process to use to recognize text. However, not all of the fonts may be selected for the OCR process. Using Font Matching you can select the fonts on your computer that match the fonts in your documents.
Click the Font Matching button to see the Font Matching dialog box.
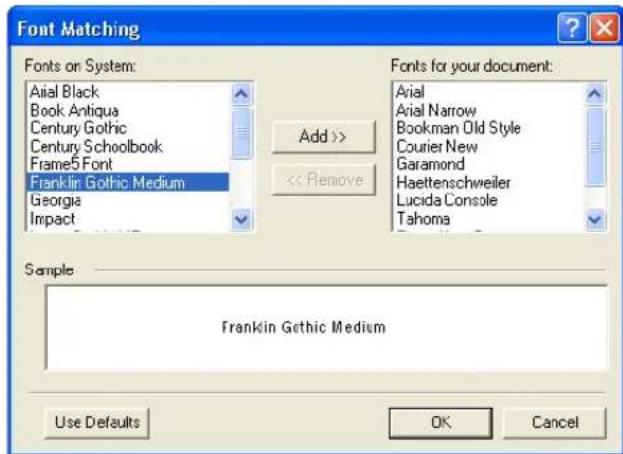
The list on the left are the fonts available on your computer system. The list on the right are the fonts that will be used by the OCR process to recognize the text in your documents. If possible, the list of Fonts for your document should include all the fonts in the documents you plan to scan. To add new fonts to that list, select a font in the Fonts on System list and click Add. Note that when you select a font, a sample appears in the text box so you can compare it
with the fonts in your document to see if that's the right font. To remove a font, select it and click Remove. To return the lists to their defaults, click Use Defaults. Click OK when you're finished.
Use Defaults—Click to return all the settings in the Options dialog box to their original, default settings.
- Click the Process tab and choose the options from the Process window.
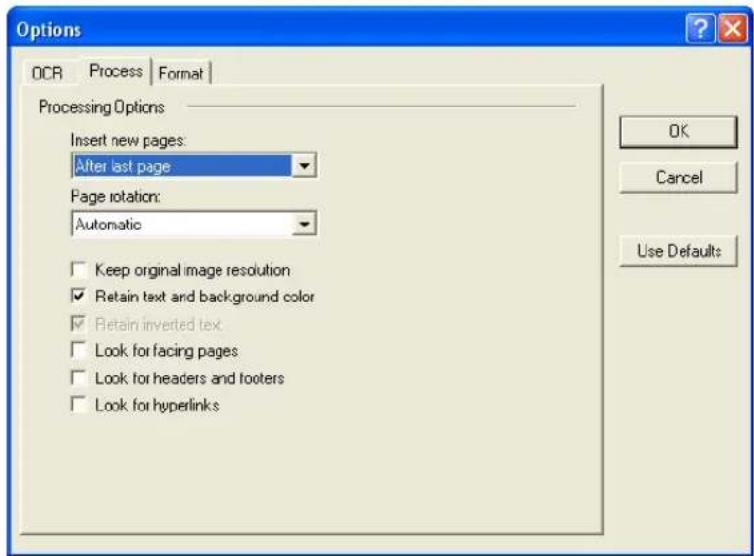
Keep original image resolution—As part of the OCR process, the resolution of grayscale and color images is reduced to 75-150 dpi (dots per inch). Select this option to keep original resolutions for grayscale and color images entering the program. Do this if you need high quality image export, for page image saving and for images embedded in recognized pages. Deselect this to have grayscale and color images reduced to about 300 dpi.
Retain text and background color—If your document contains colored text or backgrounds, select this option to have them detected and displayed in the text editing application you have selected. The colored text and backgrounds will also be available for export. Deselect this option if you want color pictures in the document but do not want colored text and backgrounds. You can
change the color of texts and backgrounds in the OmniPage Pro Text Editor. This option is not available if the Speed option for the Optimize the OCR process is turned on.
Retain inverted text—Inverted text is white or pale letters on a black or dark background. Select this option to retain inverted text, deselect it to have inverted text transformed to normal text of black text on a white background. This option is not available if the Speed option for the Optimize the OCR process is turned on.
Look for facing pages—Select this option if you want to scan two facing pages of an open book in one step, and then to recognize and store them as two separate pages (as if they had come from two separate scannings).
Look for headers and footers—Select this option to have headers and footers detected and available for export. Deselect this to have headers and footers treated as ordinary text.
Look for hyperlinks—Select this option to have hyperlinks detected, displayed as functioning links in the OmniPage Text Editor, and available for export.
Use defaults—Click to return all the settings in the Options dialog box to their original, default settings.
- Click the Format tab and choose the options you want from the Format window.
Note that as you select formats, the image changes to represent the selection so you can see, at a glance, what the layout will look like.
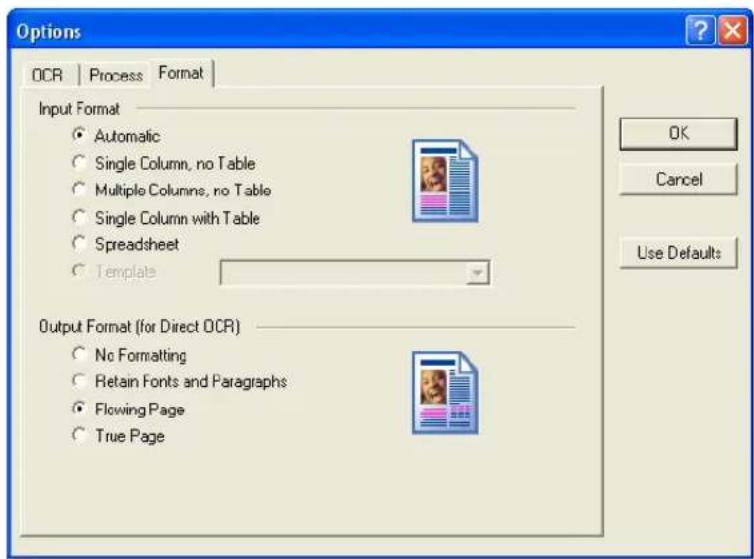
Automatic—Choose this option to let the OCR process determine the layout of the pages. It is the fastest type of format processing. Typically you select this option when the document has different or unknown types of layouts, pages with multiple columns and a table, or pages containing more than one table. The OCR process will then determine if text is in columns, an item is a graphic or text, and tables are present.
Single Column no Table—Choose this option if the document contains only one column of text and no tables. Business letters are normally in this form. You can also use this option for documents with words or numbers in columns if you do not want them placed in a table or decolumnized or treated as separate columns.
Multiple Columns, no Table—Choose this option if some document pages contain text in columns and you want it kept in separate columns, similar to the original layout. If table-like data is encountered, it is placed in columns, not in a gridded table.
Single Column with Table—Choose this option if your document contains only one column of text and a table. The table will be placed in a grid in the text editing application you have selected. You can later specify whether to export it in a grid or as tab-separated text columns.
Spreadsheet—Choose this option if the entire document consists of a table that you want to export to a spreadsheet program, or have treated as a table. No flowing text or graphics zones will be detected.
Template—If you created a zone template in OmniPage Pro, choose a zone template file to have its background value, zones and zone properties applied to all OCR scanned pages from now on.
No Formatting (NF)—The document will be plain text, decolumnized and left-aligned in a single font and font size. You can export plain text to nearly all file types and target applications, and graphics, tables and bullets can be retained. When exporting to Text or Unicode file types, graphics and tables are not supported.
Retain Fonts and Paragraphs (RFP)—This output format retains the font and paragraph styling, including graphics and tables without columnized text. This output format is available for nearly all file types.
Flowing Page (FP)—This format keeps the original layout of the pages, including columns. This is done wherever possible with column and indent settings, but not with text boxes or frames. Text will then flow from one column to the other, which does not happen when text boxes are present.
True Page (T P)—This output format keeps the original layout of the pages, including columns. This is done with text, picture and table boxes and frames. True page is offered only for target applications capable of handling the formatting. True Page formatting is the only choice for XML export and for all PDF export, except to the file type “PDF Edited”.
- When you're finished selecting the OCR options, click OK on the Options window.
These options will now apply to the OCR processing when you select any text format as the page format.
SCANNING WITH SPDF OR NPDF AND SEARCHING FOR TEXT
The searchable PDF (sPDF) and Normal PDF (nPDF) are special forms of an Adobe PDF file. sPDF and nPDF are only available as page format options if you have installed OmniPage Pro on your computer with your Strobe XP 300 scanner. OmniPage Pro is available on the installation CDs you received with your scanner. If you have not installed it yet, please see “Install OmniPage Pro (Strobe XP 300 Only)” on page 29.
sPDF converts scanned text into the PDF format with text search and OCR capabilities. nPDF has those same features, plus you can edit the text in an nPDF image if you have a PDF editing program. These two PDF formats can also produce images with different image quality, so you may want to experiment with them to determine which is better for your scanned documents.
To scan with sPDF or nPDF:
- Open the OneTouch Properties window.
-
Select a Destination Application that uses a text format as the page format. For example, select Transfer to Storage as the Destination Application.
-
Right-click on the text format icon.
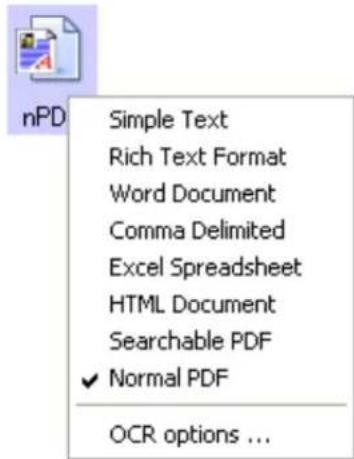
- Choose the Searchable PDF or Normal PDF option for the page format.
Note: Not all Destination Applications have the sPDF and nPDF options. Microsoft Word, for example, does not have them as scanning options.
The settings now show your page format selection.
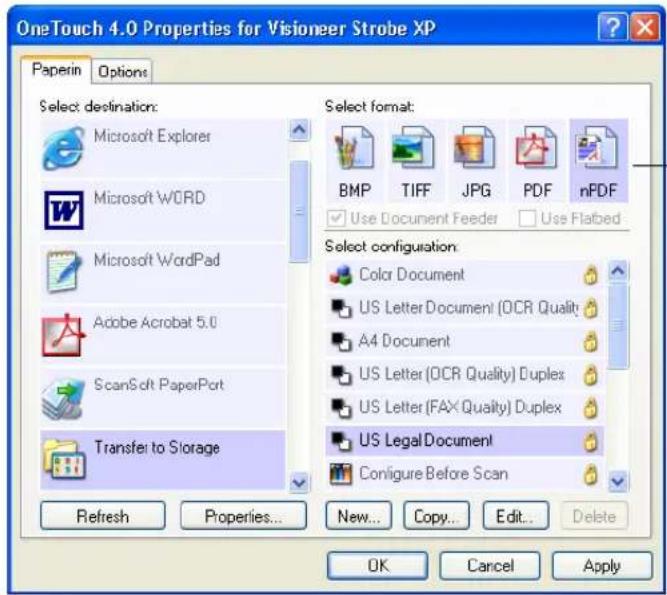
-The page format icon is now set to the selection from the menu.
-
Choose a Scan Configuration.
-
Click Apply or OK.
Now when you scan with that Destination Application selected, the scanned document will be in the sPDF or nPDF format that was selected for it.
Note: The Transfer to Storage selection for a Destination Application also has the sPDF and nPDF options. That means you can scan and store items directly to a server in these formats.
- To search for the text, open Adobe Acrobat Reader or Adobe Acrobat.
-
From the Adobe Acrobat File menu choose Open, and open the file you just scanned.
-
From the Adobe Acrobat Edit menu choose Find.
The Find dialog box appears.
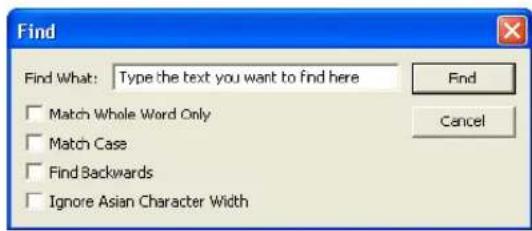
- Enter the text you want to find, and click the Find button.
See the Adobe Acrobat user manual for more about finding text in a PDF file, or about editing PDF text.
SCAN AND BURN TO A CD
If you have a CD burner attached to your computer, you can scan directly from your Visioner scanner onto a CD. This feature is available only on computers running Windows XP.
To scan and burn to a CD:
-
Put a blank CD into your computer's CD Drive.
-
Open the OneTouch Properties window.
-
Select Burn to CD as the Destination Application.
The Burn to CD Destination Application is only available if you have a CD burner attached to your computer, but you do not need to have a CD in the burner to select the destination. If a CD burner is not attached, scanned items will be sent to the Transfer to Storage destination by default.
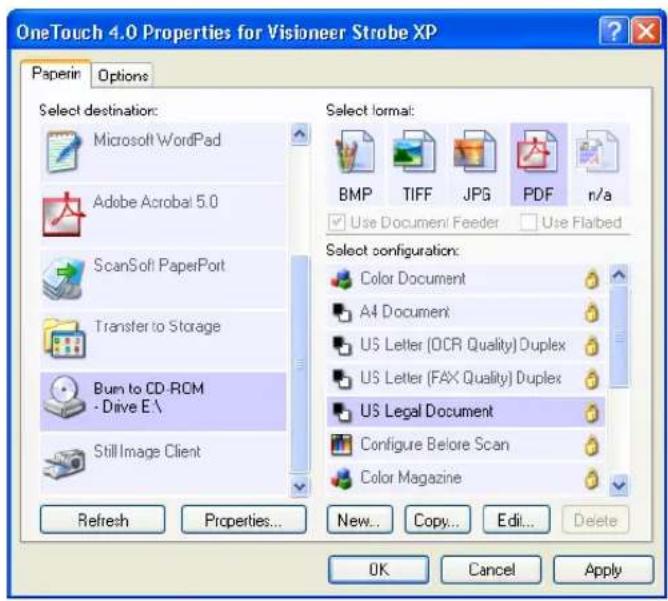
-
Choose a Page Format and a Scan Configuration.
-
Click Apply or OK.
-
Start scanning a page.
When scanning is finished, a bubble message on the screen tells you that files are waiting to be burned to the CD.
-
On the OneTouch window, make sure that the Burn to CD Destination Application is still selected and click the Properties button.
-
The OneTouch 4.0 Link Properties window appears,
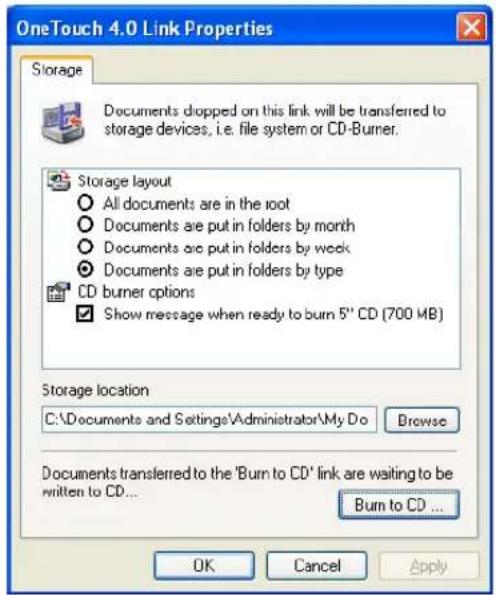
-
Make sure a CD is in the CD burner.
-
Click the Burn to CD button.
The CD burner begins and your scanned documents are written to the CD.
SCANNING WITH EVENT FORWARDING
If you want to specify an application to use for scanning at the start of the process, you can use event forwarding. The scanner will feed in the first page, but will then stop until you select the application to use. After you select the application, its interface will open and you can use it to continue with the scanning.
To scan with event forwarding:
-
Open the OneTouch Properties window.
-
Select Still Image Client as the Destination Application.
Note that you cannot choose a page format for this option because the actual destination application is not selected until after the scanner feeds in the first page of your document.
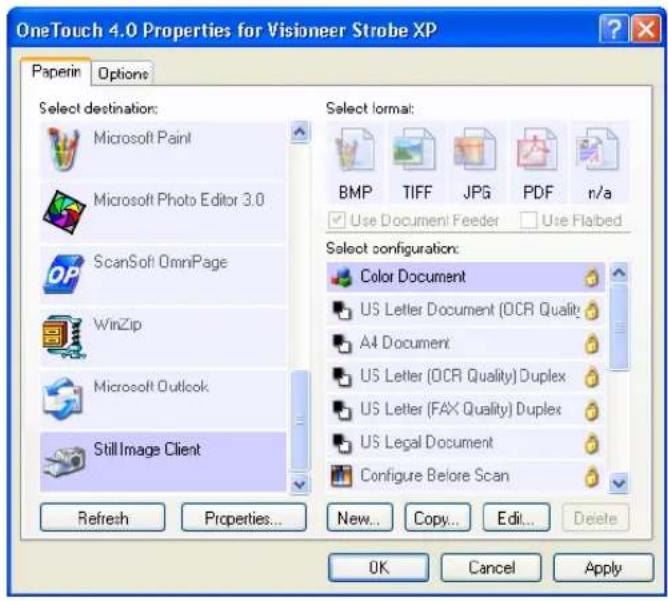
- Choose a Scan Configuration.
-
Click Apply or OK.
-
Start scanning a page.
A dialog box appears for you to select the application to use for scanning.
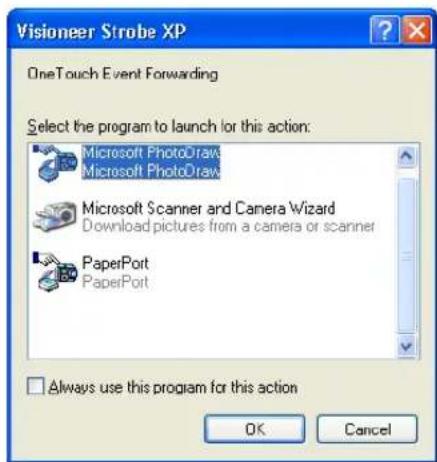
- Select the application in the box and click OK.
Now the application you selected opens and you can continue the scanning from that application's TWAIN interface.
CREATING AN HTML WEB PAGE FROM YOUR SCANNED DOCUMENTS
If you scan a document, whether a single page or multiple pages, you can have the pages converted directly to HTML formatted pages for posting directly to your web site. Those pages are then viewable by visitors to your web site without the need for any internet plug-ins or other special processing. This is, essentially, from your scanner to a web-ready format in one automatic step.
To scan and create an HTML web page:
- Open the OneTouch Properties window.
-
Select Microsoft Explorer as the Destination Application.
-
Choose HTML as the Page Format.
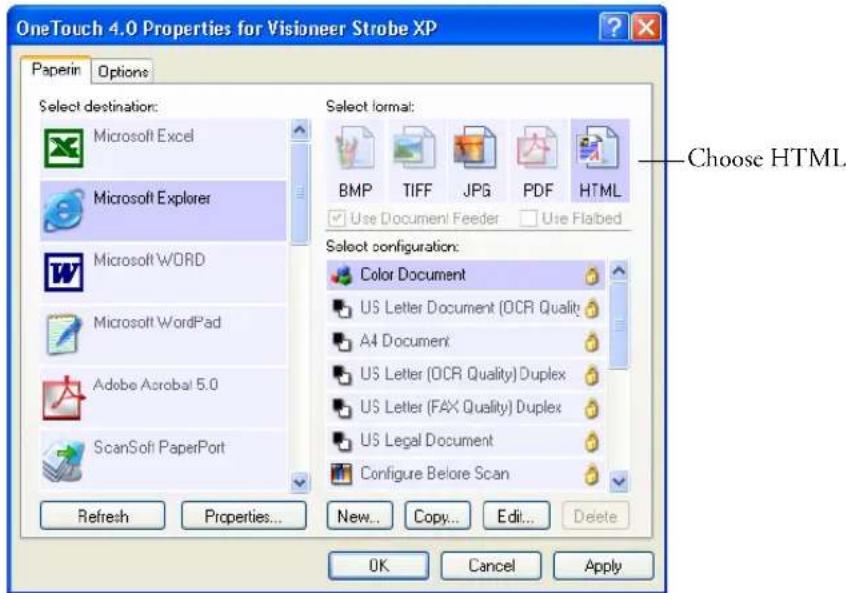
- Choose a Scan Configuration that has the settings for the image on the HTML page.
For example, if you want the image to be in color on the HTML page, choose a color configuration.
- Click OK.
The OneTouch Properties window closes.
- Now scan the image from the OneTouch Button Panel.
When scanning is finished, the document is first converted to editable text using the OCR process, then is converted into an HTML format. Microsoft Internet Explorer then opens showing your converted page.
Note: Depending on the complexity of the document, its conversion to the HTML format may take a few moments.
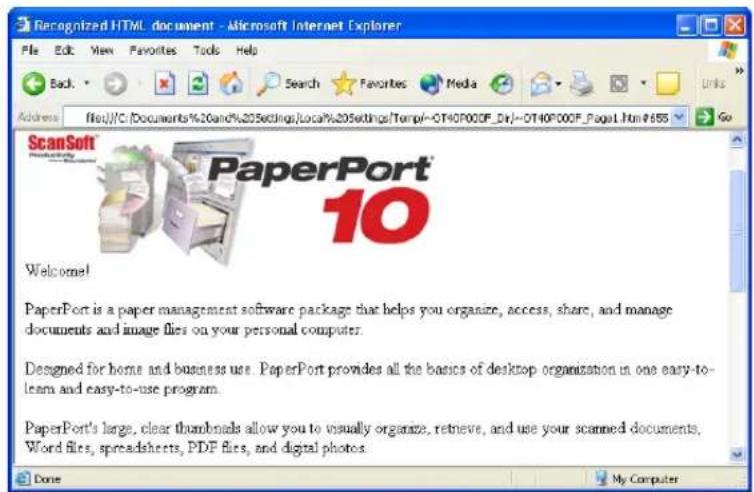
- Choose Save As from the Internet Explorer File menu, give the page a name, and save it in the location you use for your web page files.
You may also want to write down the address shown in the Address bar to make sure you'll know where to find your new HTML page later on.
- You can now use Microsoft Internet Explorer or other application to post the document to your web page as you would any other HTML page.
TRANSFERRING SCANNED DOCUMENTS TO STORAGE
With the Transfer to Storage scanning process, you can scan documents and save them in a folder in one step. The process is ideal for archiving documents without having to manually save or process them in any other way. If you choose a text format for the file format, the documents are also automatically converted by the OCR process into editable text and numbers before being stored.
To scan to a shared folder on a network server, make sure the network folder is a mapped drive. For more information about network mapped drives, see your network administrator.
To scan and transfer to storage:
- Open the OneTouch Properties window.
- Select Transfer to Storage as the Destination Application.
- Choose a Page Format. For example, choose sPDF if you want to save your documents in the special sPDF format that provides searchable text in the file. The sPDF format is only available if you have OmniPage Pro installed on your computer.
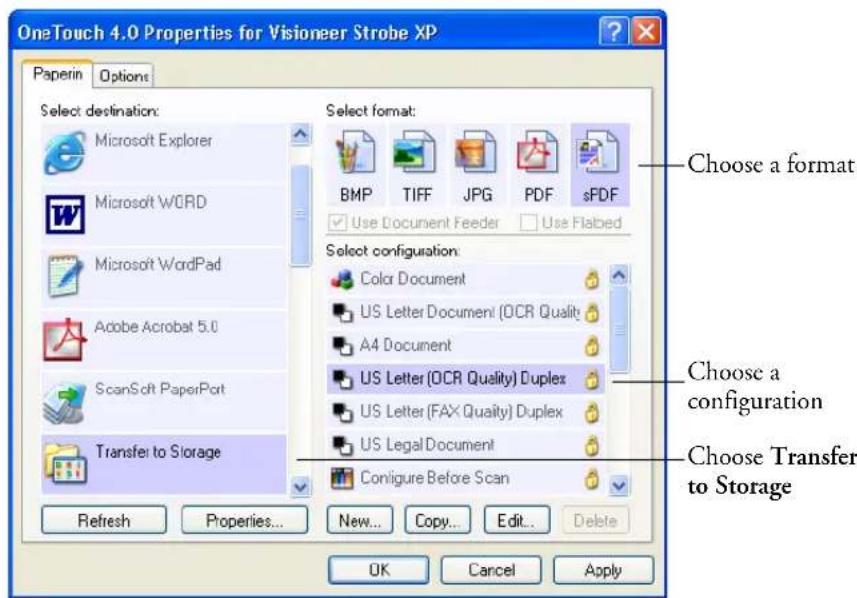
-
Choose a Scan Configuration.
-
Click Apply or OK.
Your scanned pages are stored in the location that you specified on the OneTouch 4.0 Link Properties window.
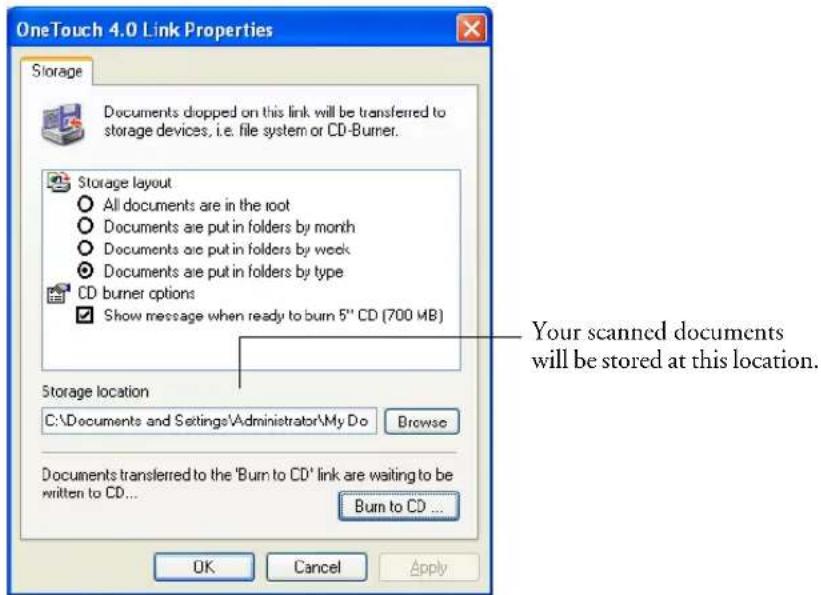
To Use OCR Before TRANSFERRING TO STORAGE
If the documents you want to transfer to storage are text documents or spreadsheets, you can have them converted by the OCR process prior to being stored.
- Open the OneTouch Properties window.
- Select Transfer to Storage as the Destination Application.
-
Choose a text format as the file format.
-
Right-click on the text format icon and choose the file format for the scanned documents.
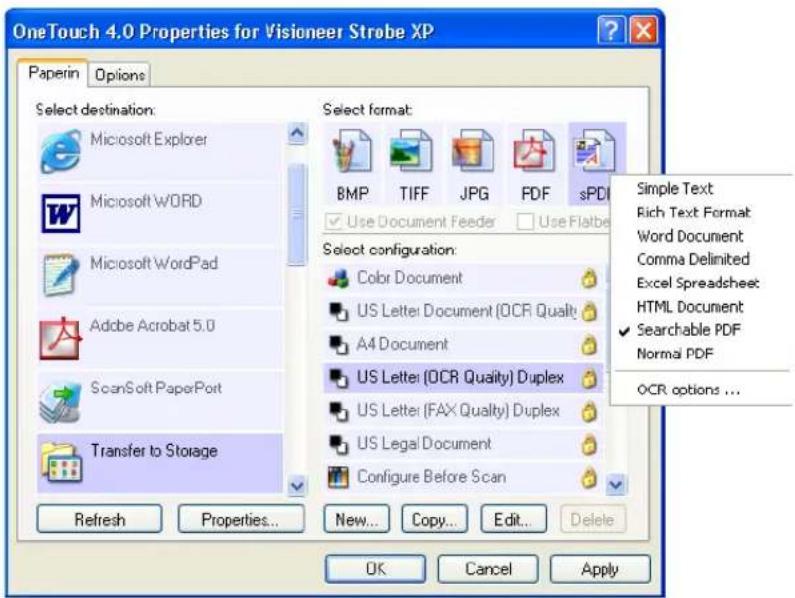
-
Choose a Scan Configuration.
-
Click Apply or OK.
Now when scanning with Transfer to Storage as the Destination Application, the documents are saved as OCR-converted text in the selected file format.
SCANNING TO MULTIPLE FOLDERS
When archiving documents with the Transfer to Storage option, you can scan them to multiple folders. For example, one folder might be for “Business Receipts,” a second folder might be for “Personal Receipts,” and a third folder might be for “Annual Receipts.”
To scan to multiple folders, you create multiple scan configurations with Transfer to Storage as the Destination Application.
Setting up multiple folders for transfer to storage:
- Using Microsoft Windows, create the folders that you want to use for storing scanned items. Note that you can also create the folders later while creating the new scan configurations.
- Open the OneTouch Properties window.
- Select Transfer to Storage as the Destination Application.
- Click the New button.
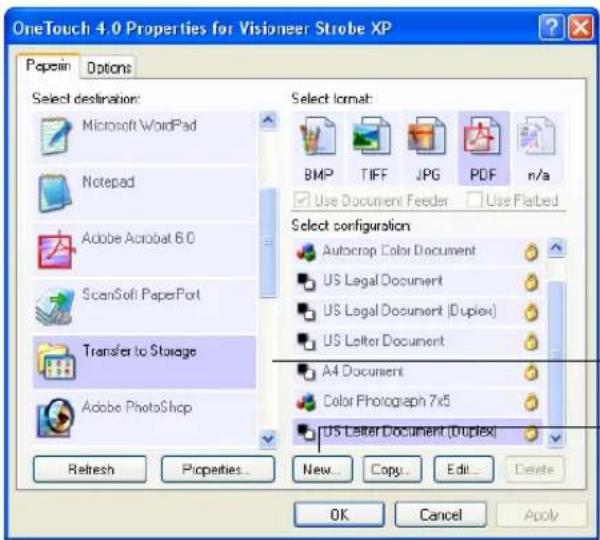
Select Transfer to Storage.
Click the New button.
The Scan Configuration Properties dialog box opens.
- Click the Scan Settings, Page Settings, and Advanced Settings tabs, and select the settings you want.
To help you remember which folder it is, give the new configuration a name that indicates the folder name, such as "Storage for Business Receipts."
- Click the Storage Options tab.
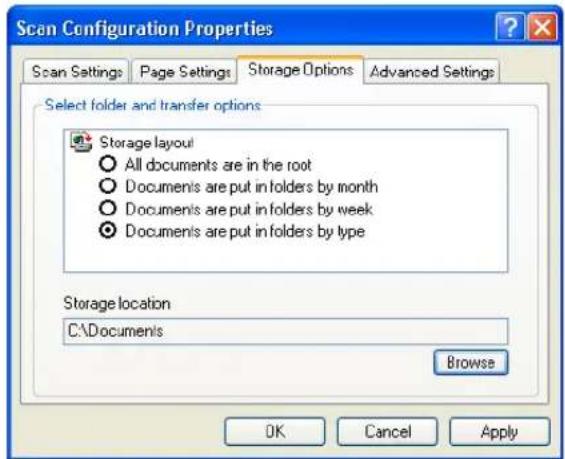
-
Click the Browse button.
-
Select the folder you created for storing the scanned documents.
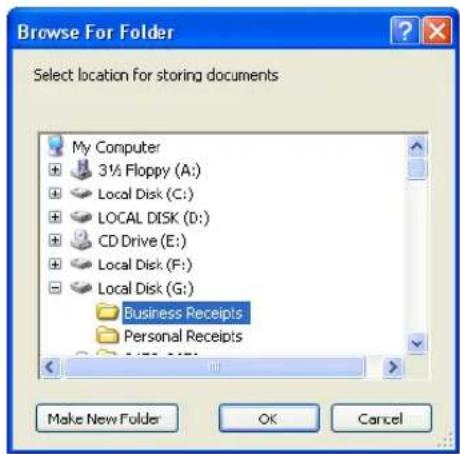
If you haven't created the folder yet, you can click the Make New Folder button and type the name for the new folder.
- Click OK. The selected folder will now be set as the Storage Location, such as "Business Receipts."
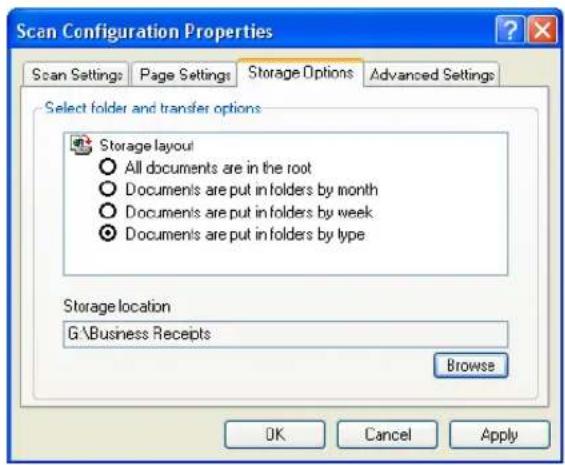
- Click Apply. The new configuration is now listed as a Transfer to Storage configuration.
-
Repeat the process to create additional new configurations, such as one named "Storage for Personal Receipts."
-
Make sure to designate separate folders as the Storage Locations for the new configurations.
You will now have multiple configurations set up for the Transfer to Storage destination, and each configuration scans documents to separate folders.
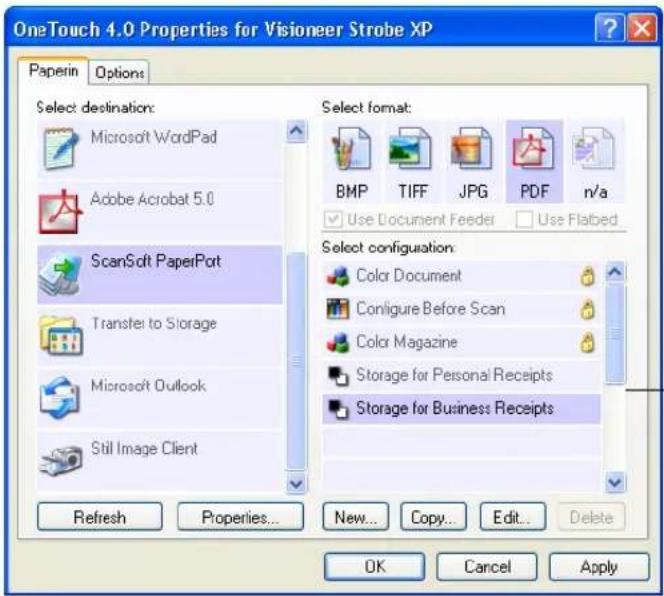
The new configurations apply to the Transfer to Storage Destination Application.
Scan to multiple storage folders:
-
Click the OneTouch icon.
-
If the Transfer to Storage option is not selected, right-click the PaperIn icon to see the OneTouch Properties window.
-
Select Transfer to Storage as the Destination Application.
-
Select one of the configurations you created for storage.
The OneTouch panel will show the name of the configuration.
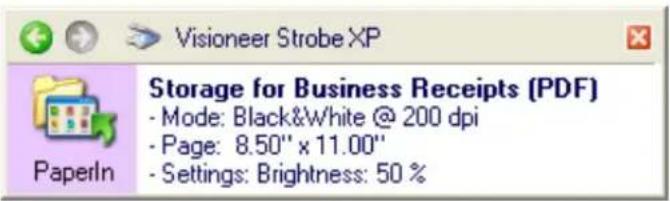
- Scan the documents you want to store in multiple storage folders.
The documents are scanned to the folder specified for the configuration.
-
When scanning is finished, select the other configuration you created for storage.
-
Now, scan the documents again.
When scanning is finished, the documents are stored in the two separate folders.
TO TRANSFER DOCUMENTS TO A SERVER OR MAPPED DRIVE
When selecting the storage location for scanned documents, you can select a local folder, or a folder on a server or mapped drive. You select a mapped drive using the Browse button.
- See “Scanning to Multiple Folders” on page 110 or “Transferring Scanned Documents to Storage” on page 108 for the steps to select the Transfer to Storage options.
On either the OneTouch 4.0 Link Properties window, or from the Scan Configuration Properties window, click the Browse button.
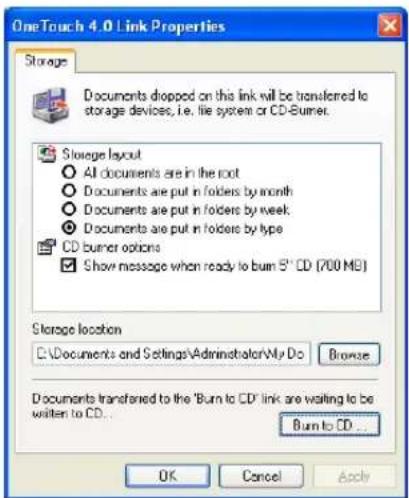
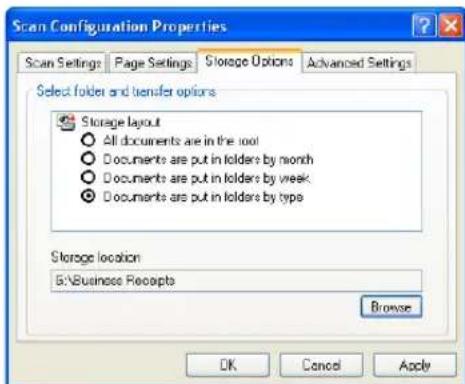
The Browse For Folder window opens.
- Select a storage location on the mapped drive or server for the scanned documents.
Servers and mapped drives are represented by an icon that indicates its network connection.
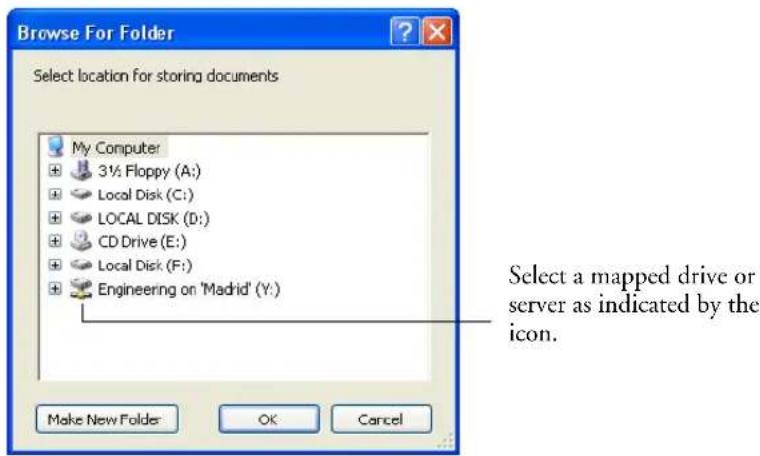
- Click OK.
Now when you scan using Transfer to Storage as the Destination Application, the documents are stored on the server or mapped drive.
CHECK THE HARDWARE AND SELECT DEVICE SETTINGS
- Right-click on the OneTouch icon and choose Show Hardware from the pop-up menu.
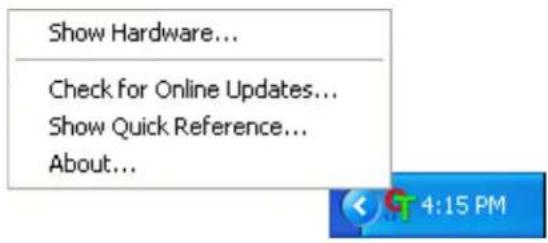
You can also click the scanner icon at the top of the OneTouch Button Panel.
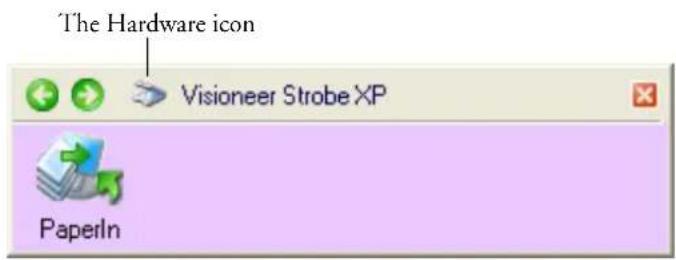
If the Hardware View of the panel is open you can also right-click on the Visioneer Strobe XP icon.
The Hardware Properties dialog box appears and shows information about your Visioneer Strobe XP scanner.
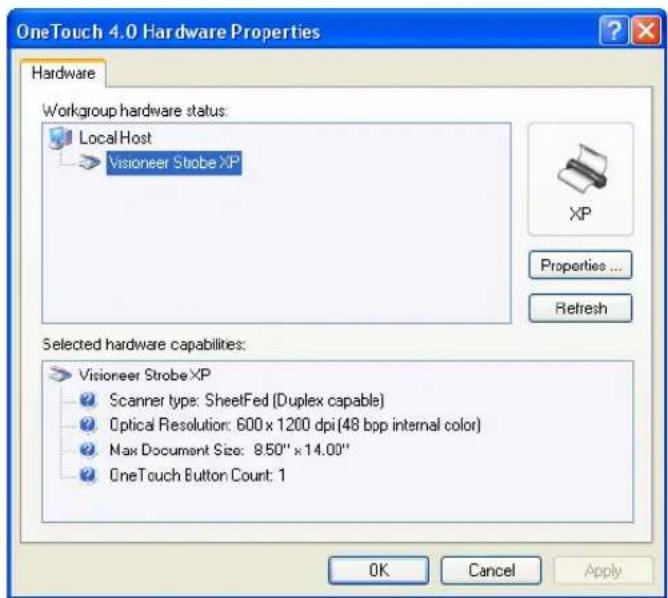
2. Click the Properties button.
The Device Configuration Properties window opens. You use this window to select new device settings for you scanner.
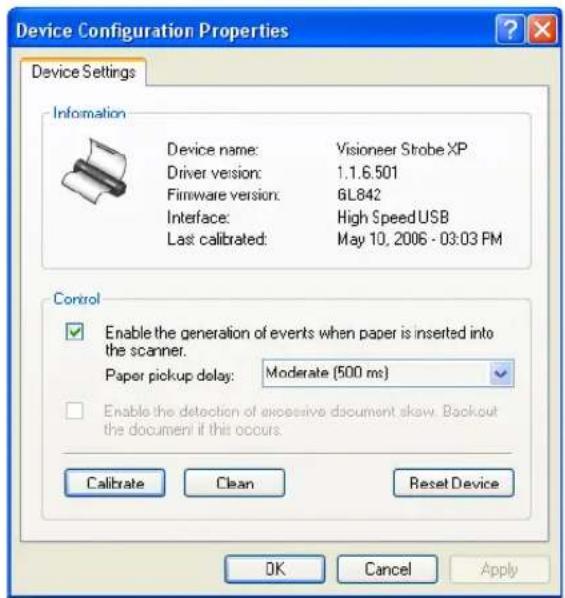
The Interface information refers to the USB port where your scanner is connected. The scanner automatically detects the type of USB port and displays the information here. The example above shows a scanner connected a USB 2.0 High Speed port. Your scanner may also be able to connect to a USB 1.1 Full Speed port.
- The option Enable the generation of events when paper is inserted into the scanner enables your scanner's "AutoScan" feature. The scanner senses when an item is inserted into the scanner's page feed, grabs the item, and feeds it into the scanner automatically. You don't need to click a Scan button to start the scanning.
If this option is not enabled, the scanner will still grab the item, but will then wait until you click the Scan button to start scanning.
If the “AutoScan” option is enabled, the Paper pickup delay also becomes available. The Paper pickup delay is the amount of time you want the scanner to wait until it feeds the item into the scanner to start scanning.
-
To set the Paper pickup delay, click the drop-down arrow and choose from the list of 5 options. The settings are in milliseconds, so 1250 ms is 1.25 seconds.
-
The option Enable the detection of excessive document skew. Backout the document if this occurs, is for sensing if a document is being fed into the scanner skewed to such an extent that the scan image will be degraded.
If this option is selected and you insert a document skewed, the scanner will start to scan, but then scanning will stop and the document will back out of the page feed so you can re-insert it straight. This option is greyed out if it is not available for your scanner.
-
Click OK to enable the new settings.
-
To return the scanner to its original factory settings, click Reset Device.
Note: The Calibrate and Clean buttons are for maintaining your scanner in optimum operating condition. See “Maintenance” on page 140 for the steps to calibrate or clean your scanner.
SCANNING FROM TWAIN SOFTWARE
In addition to scanning from the on-screen OneTouch panel, you can scan from the TWAIN software. The PaperPort software is an example of a TWAIN application. This scanning method is particularly helpful when you're using PaperPort to file and save scanned items, or if you want to adjust scanning settings prior to scanning.
■ If your computer is running Windows XP—you can scan using either the Visioneer TWAIN Interface or the Microsoft Windows Image Acquisition (known as WIA).
■ If your computer is running Windows 2000—using WIA is not available.
A Note About Your Scanner and the TWAIN standard: TWAIN is a widely recognized standard that computers use to receive images from scanners, digital cameras, and other digital devices. This guide shows how to scan with the PaperPort TWAIN interface, but many other graphics and imaging applications also comply with the TWAIN standard, so you can use your scanner with those applications too. To use your scanner with other TWAIN software, please refer to their user guides.
Note: If the OneTouch configuration you are using to scan is set to Configure Before Scan, and the selected option is TWAIN, the TWAIN interface opens right away without opening PaperPort first.
SCANNING FROM PAPERPORT USING THE TWAIN INTERFACE
The instructions in this section are for scanning with your scanner's TWAIN interface.
To scan an item using PaperPort:
- On the Windows taskbar, click Start, point to Programs, point to ScanSoft PaperPort, and then click PaperPort.
The PaperPort desktop opens.
Scan icon Folders pane
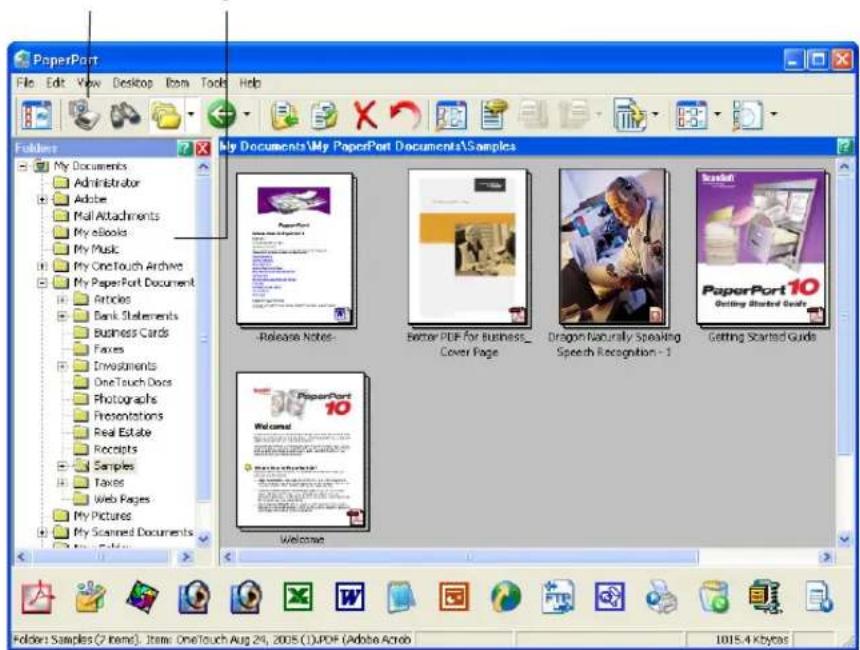

- Click the Scan icon on the PaperPort command bar.
The Folders pane is replaced by the Scan pane.
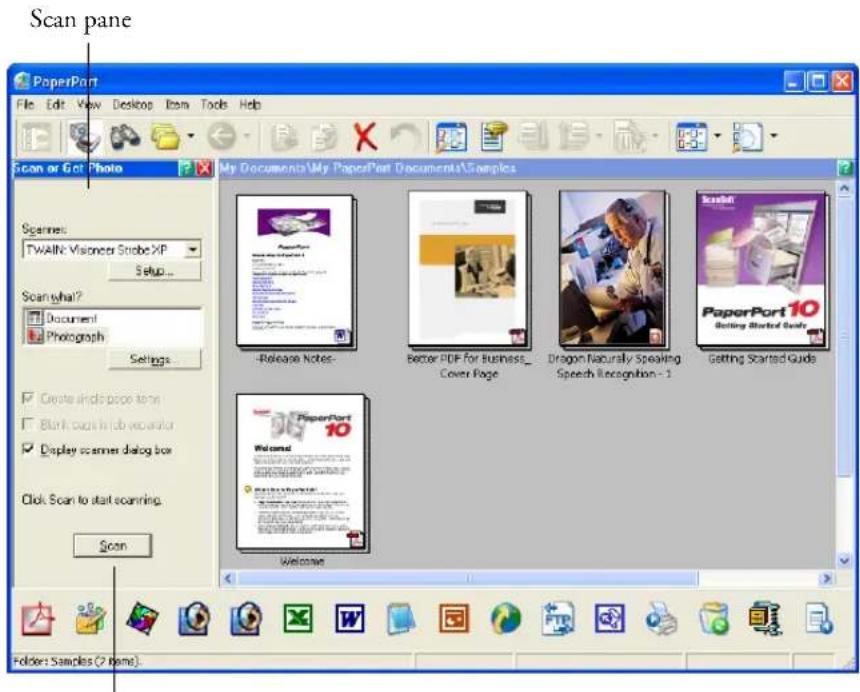
If this Scan button is not active, see the section on page 129 to setup your computer.
- From the Scanner drop-down list, select TWAIN: Visioneer Strobe XP.
Note: Please wait a few moments for your selection from the dropdown list to become active. This delay only occurs the first time you select from the list while PaperPort initializes the scanner. Later on, the scanner initializes immediately when you select it from the list.
Note: If the Scan button at the bottom of panel is not available when you make a selection from the Scanner drop-down list, your computer needs to be setup to use the scanner. See the section, "Setting Up Your Scanner to Work with PaperPort" on page 131.
- In the “Scan what?” section, choose to scan a Document or Photograph.
If you want to change the format of the scanned item's file name or file type before you start scanning, click Settings. The default file type for documents is .pdf and the default for photographs is .jpg. See “Getting Help with the PaperPort Software” on page 130 for more information about the PaperPort Settings.
√ Create single page items
- When scanning documents, use the Create single page items check box as follows:
■ When the check box is selected, a scanned document is placed as a single page on the PaperPort desktop and the TWAIN interface closes.
- When the check box is not selected, the scanned pages are not placed on the PaperPort desktop until you indicate the scanning job is finished by clicking Done on the TWAIN interface and then clicking Done on the PaperPort-Scan window. Multiple pages are “stacked” on the PaperPort desktop if the type of file can be stacked. Not all file types can be stacked on the desktop. Please see the ScanSoft PaperPort User's Guide for more information about stacks.
Scan
- Click the Scan button on the Scan pane.
The PaperPort TWAIN interface opens. Use it to select scanning options and to start the scanner.
This TWAIN interface is an example of the window you will see for your scanner. Some of the options on the window may not be available, and will be greyed out if they are not available with your scanner.
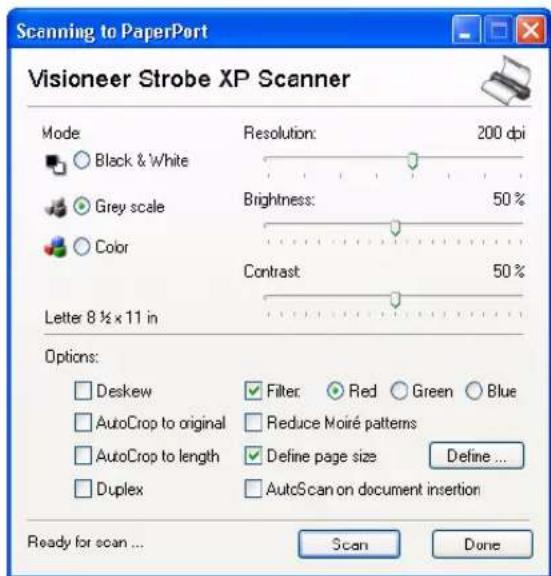
The options on the Visioneer Strobe XP TWAIN interface are:
■Mode—Select a scanning mode:
Black&White to scan in black and white. The scanning pixels are all the same size and are either black or white. Use this setting for letters, memos, and other black and white material. This scan mode produces the smallest file size.
GreyScale to scan items such as documents containing drawings or black and white photographs. The scanning produces an image of up to 256 shades of gray. You can also scan a color document to turn its colors into gray shades. The file size is about one third that of a color scan.
Color to scan magazine articles, photographs, and other color images in full color. Color scans have the largest file size.
■ Resolution—Drag the slider to the right or left to adjust the dots per inch (dpi) of the resolution. The maximum resolution is 600 dpi; the minimum is 75 dpi. This option determines the amount of detail you can see in the scanned image. The higher the dpi
setting, the sharper and clearer the scanned image. However, higher dpi settings take longer to scan and produce larger files for the scanned images. Usually the higher resolution settings are used for precision work, such as photographs or fine artwork.
■ Brightness and Contrast—Sometimes an image is scanned with the brightness and contrast set too light or too dark. For example, a note written with a light pencil may need to be scanned darker to improve legibility. Increasing or decreasing the brightness makes the scanned image lighter or darker. Contrast refers to the difference between the lighter and darker portions of the image. Increasing the contrast emphasizes the difference between the lighter and darker portions, decreasing the contrast de-emphasizes that difference. Contrast is used in conjunction with brightness.
■ Deskew—Select this option to let the scanner automatically determine if a page is skewed, and then straighten its image. The scanner detects page edges and can sense when the page is fed through at an angle. However, if the page is fed through at too great an angle, the page will back out of the scanner automatically. In that case, feed the paper in straight and re-scan the image.
■ AutoCrop to Original—Select this option to let the scanner automatically determine the size of the item being scanned. For example, if you scan a 5" x 7" photo, the scanner will determine the size of the photo, and the scan area is the size of that photo.
When using the AutoCrop to Original option, always use the paper guides on the scanner so the page is not skewed.
Note: Also make sure to set the page size larger than the item that you're scanning so the Autocrop process will have sufficient room on the page to crop the image properly.
■ AutoCrop to Length—Select this option to let the scanner automatically crop the scanned document from the top to the bottom edge of the page, affecting only the length of the document. The width of the scan area is not affected. The scan width is determined by the chosen page size.
■ Duplex—Scan both sides of the page. If this option is not selected, the scanner will only scan the side of the page facing down when you insert it into the scanner.
■ Filter—The Filter is the ability of your scanner to automatically remove a color from a scanned item. For example, if you are scanning a letter with a red watermark, you can choose to filter out the red so the scanned letter just shows the text and not the red watermark. The Filter option applies to Black&White or GreyScale Mode.
The original with a red watermark over black text.
The scanned item with the red filtered out.

■ Reduce Moire Patterns—Moire patterns are wavy, rippled lines that sometimes appear on the scanned images of photographs or illustrations, particularly newspaper and magazine illustrations.
Selecting Reduce Moire Patterns will limit or eliminate moire patterns in the scanned image. This option is only available for the GreyScale or Color Mode at 200dpi or less.
■ Define page size—Click this option to activate the Define button. Then click the Define button to see the Define page size dialog box for selecting a specific page size.
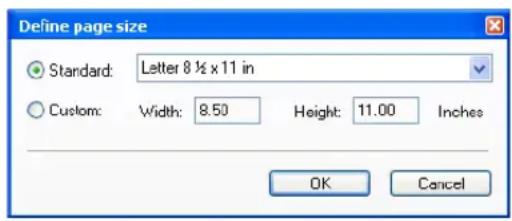
Click Standard, click the menu arrow and choose a page size from the list, or click Custom and enter the horizontal and vertical page dimensions in the boxes. The maximum size is 8.5" x 14". The units of measurement can be inches or millimeters. Click the name of the units, inches or mm (millimeters), to toggle between them.
Click OK.
The currently selected page size appears in the middle of the TWAIN interface on the lefthand side.
The Define page size option cannot be used with AutoCrop to Length or AutoCrop to Original options.
■ AutoScan on document insertion—Your Visioneer scanner includes AutoLaunch technology that senses when an item is inserted into the paper feed and starts scanning immediately. Select this option to turn on the AutoLaunch feature. The item is scanned with the current scan settings on the TWAIN interface. If this option is not selected, the scanner waits for you to click the Scan button.
- When you're ready to scan, align the document between the Paper Guides if your scanner has them, and insert the document into the paper feed. To scan a single side, insert the page face down. For Strobe XP 200: insert the page face up. To scan both sides, either side can be face up.
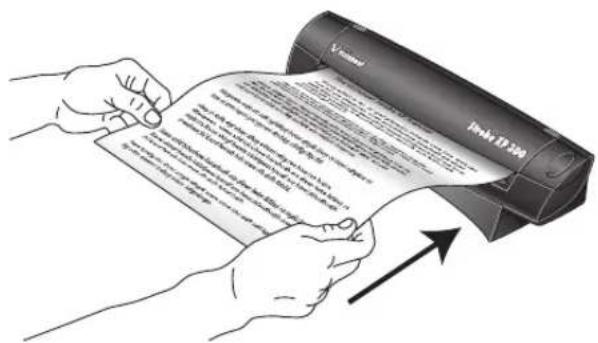
Scan
Done
-
Click the Scan button (if the AutoScan feature is not turned on). The scanner starts scanning and a progress box shows the image.
-
If you are scanning multiple pages, click the Done button on the TWAIN interface when the scanning is finished, and then click Done on the PaperPort-Scan window.
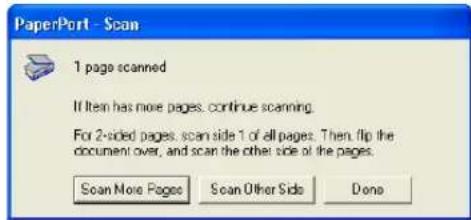
If you are scanning a single page, the TWAIN interface closes automatically.
When scanning is complete, thumbnail images appear on the PaperPort Desktop
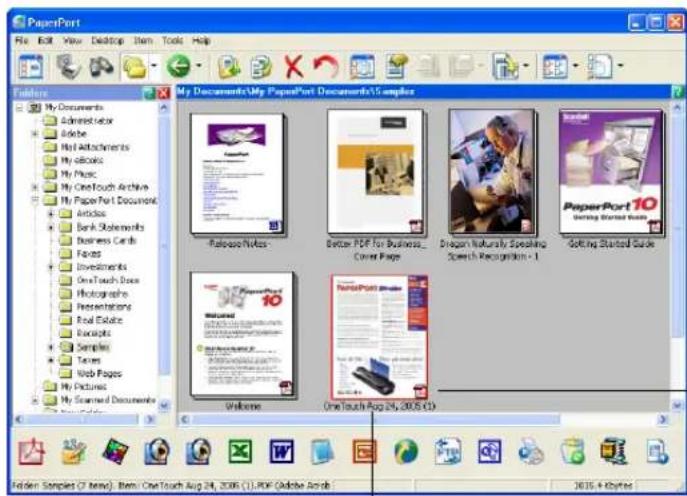
The small icon represents the file format, in this case the .pdf format
A thumbnail image of the scanned item appears on the PaperPort desktop
ON THE PAPERPORT DESKTOP
Unless you changed it with the Settings option, the name of the scanned image is the day, date, and number of scanned items that day. For example, the second item scanned on a day is followed by a (2), the third by a (3) and so on. To change a name, click it to select its text and type a new name.
The thumbnail images of a stack of documents has “go to page arrows” at their top right corners so you can click to flip through the pages in the stack. The page counter underneath the thumbnail name shows which page you’re viewing.
The small icon at the bottom right corner of the thumbnail image indicates the file format of the scanned item.
THE CREATE SINGLE PAGE ITEMS CHECK BOX
√ Create single page items
The Create single page items check box (on the PaperPort Desktop Scan Pane) provides the option to add additional items to a scanning job. If the check box is selected, scanned items immediately appear on
the PaperPort desktop. If the check box is not selected (this is the default), the following message box appears when you close the TWAIN Interface.
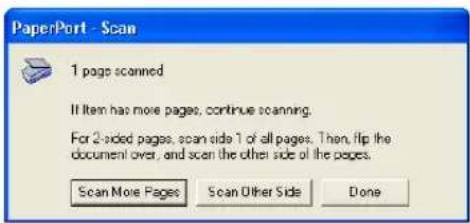
■ Click Scan More Pages to scan additional pages and add them to the stack of items placed on the PaperPort desktop.
■ Click Scan Other Side to reload and scan the other side of the page you just scanned. This option is only available once.
■ Click Done if you are finished scanning. The scanned items are placed on the PaperPort desktop.
GETTING HELP WITH THE PAPERPORT SOFTWARE
The PaperPort software includes a complete set of help topics that answer questions about each feature of the software. To open the Help Topics window, press the F1 key or choose PaperPort Help from the Help menu.
You can also refer also to the PaperPort Getting Started Guide and PaperPort User's Guide on the CD.
SETTING UP YOUR SCANNER TO WORK WITH PAPERPORT
When you selected a scanning option from the Scanner drop-down list, such as TWAIN: Visioneer Strobe XP, the Scan button at the bottom of the panel should become active after approximately 5 to 10 seconds. If it doesn't, you need to set up your scanner to work with the selected option.
If this Scan button is not active, you need to setup your computer.
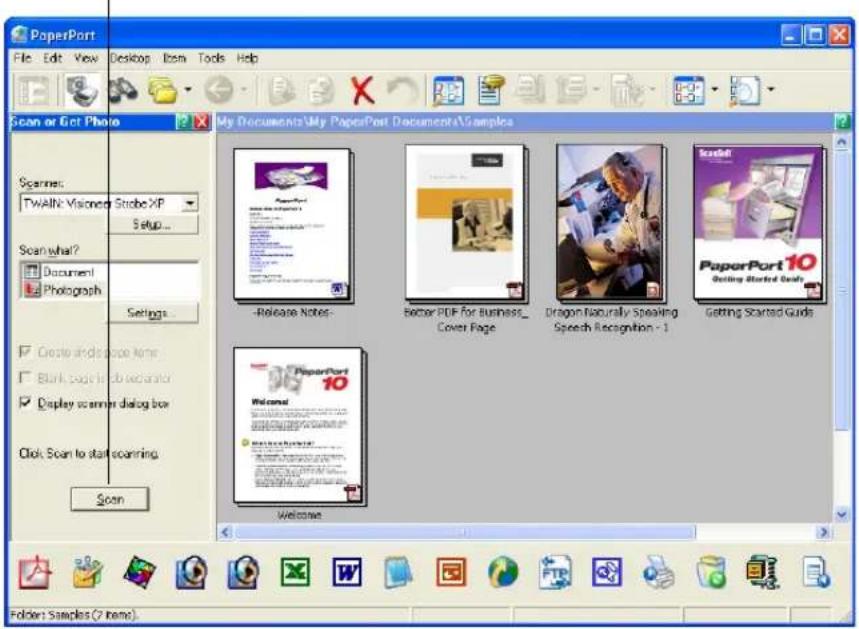
Note: Setting up your scanner is a one-time-only process for each option from the Scanner drop-down list. Therefore, you may have to set up your scanner once each for TWAIN: Visioneer Strobe XP and WIA: Visioneer Strobe XP. The setup process, described below, is the same for each option. You will not have to set up the scanner again for an option unless you uninstall the scanner and PaperPort software, then re-install them.
To set up your scanner:
-
From the Scanner drop-down list, select one of the options, such as TWAIN: Visioneer Strobe XP.
-
Click the Setup button.
A window opens to begin the setup process.
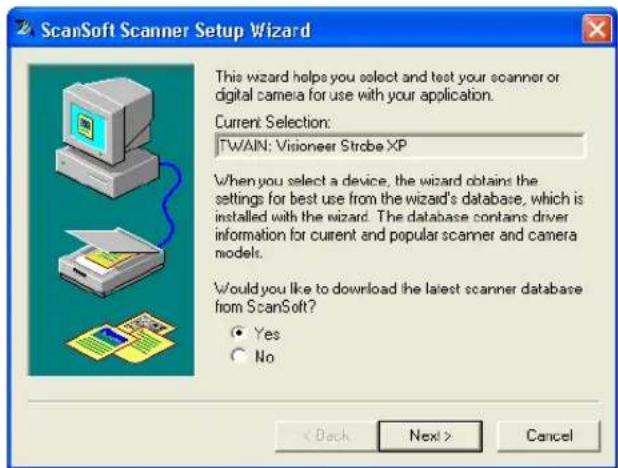
- Click Yes then click Next.
The next window offers you the option to run hardware diagnostics.
![ScanSoft Scanner Setup Wizard Your scanner or digital camera is now set to: TWAIN: Visioner Strobe XP This scanner or camera is not in the Scanner Setup database. It is recommended that you run the diagnostic tests to set it up for use with: PaperPort Scan Manager Yes [recommended] No < Back Next > Cancel](/content/2026/06/1202649/images/e726a557e27450eb714ea76fb372afb05e2df4ee20084e3a2869a6f8ad4196f8.jpg)
4. Click Yes (recommended) then click Next.
The next window is for checking the connection between your scanner and the computer.
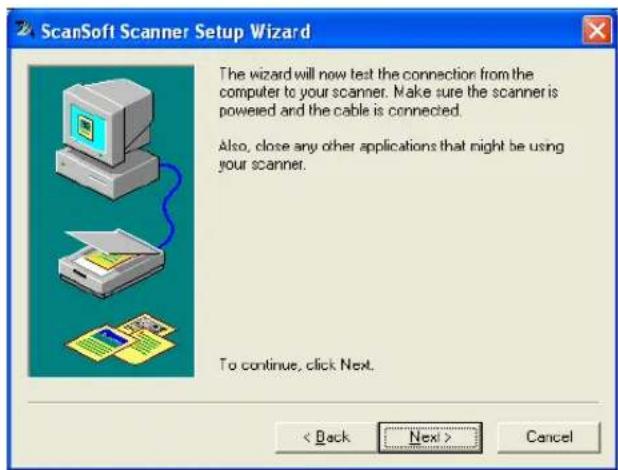
5. Click Next.
After the Setup Wizard checks the connections, the next window is displayed. It has a series of setup options, but only the Basic scan test is necessary because your scanner was already tested when you installed the OneTouch 4.0 software.
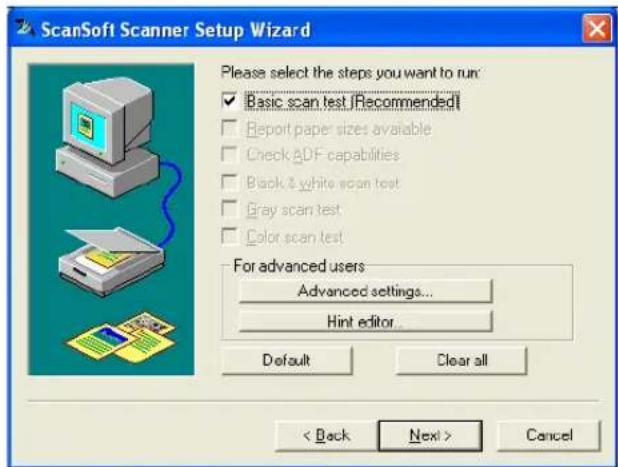
6. Click Next.
The TWAIN Interface opens.
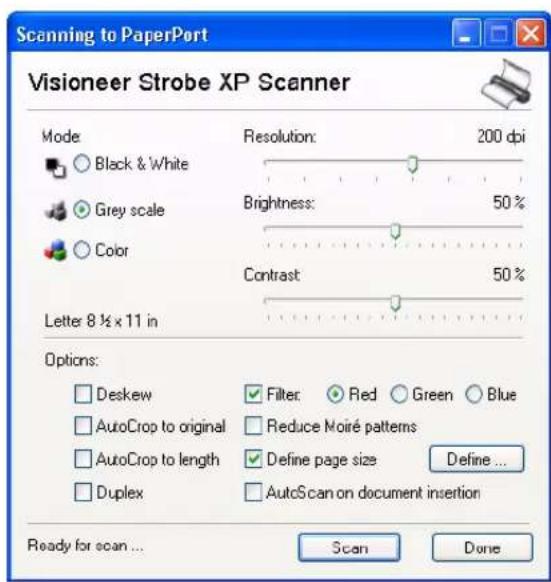
Note: If you are setting up the scanner for the WIA scanning options, the WIA interface opens instead.
- Insert a page into the scanner and the Scan button on the TWAIN Interface will become active.
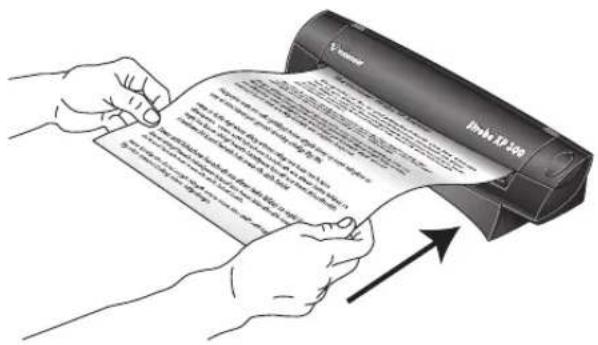
- Click the Scan button.
The Setup Wizard runs the scan test.
A message window opens that says "Basic scan test passed."
- Click Next on the message window.
The final Setup window opens to let you know the setup process is finished.
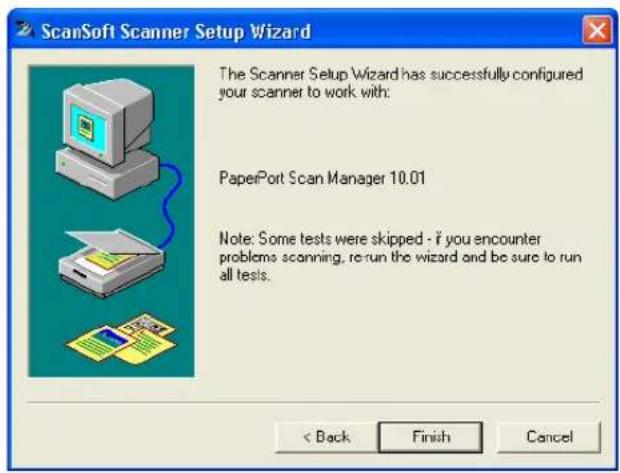
- Click Finish.
Your scanner is now setup for the scanning option you selected (in the example above, it's the TWAIN option) and the Scan button on the PaperPort window will now become active.
Scan
SCANNING FROM THE WIA INTERFACE
The instructions in this section are for scanning using WIA on computers running Windows XP. If your computer is running an earlier version of Windows, it cannot use WIA to scan. See “Scanning from PaperPort Using the TWAIN Interface” on page 121.
This section shows how to use Microsoft Paint to scan using the WIA interface
To scan an item:
- On the Windows taskbar, click Start, point to All Programs, point to Accessories, and then click Paint.
The Paint window opens.
- From the File menu choose From Scanner or Camera.
The Scan using Visioneer Strobe XP window opens. Use this window to select scanning options and start the scanner.
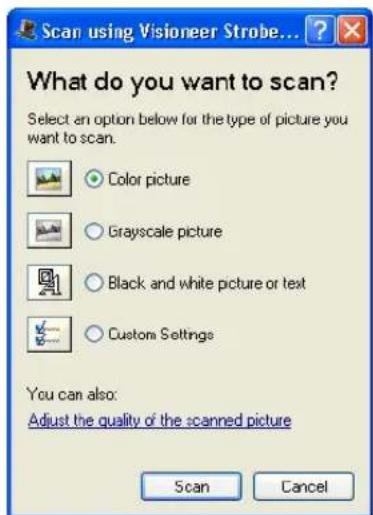
- Click the button most appropriate for the item you're scanning.
To scan with the Custom Settings option see the next section, "Fine Tuning Your Scans".
- Align the document between the Paper Guides and insert it into the paper feed. Insert the page face down.
For the Strobe XP 200: insert the page face up.
You can only scan a single side at a time with the WIA interface.
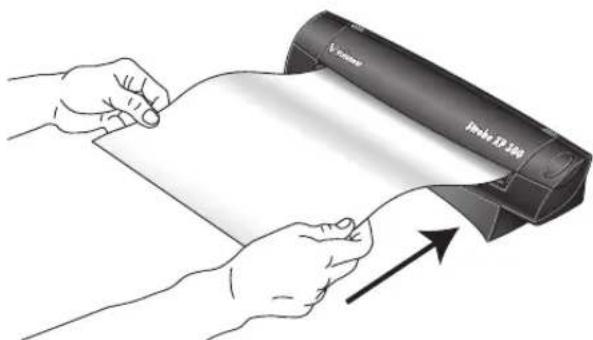
natural_image
Illustration of hands holding a rolled-up document with an arrow indicating upward motion (no text or symbols)- Click the Scan button.
FINE TUNING YOUR SCANS
You can select new settings before you scan an item to fine tune exactly how you want to scan a particular item.
To select the scanner settings before you scan:
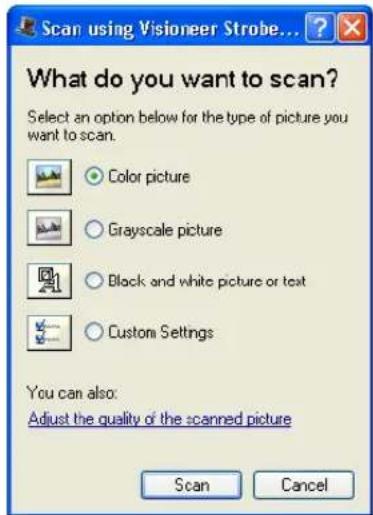
- On the Scan using Visioneer Strobe XP window, click Adjust the quality of the scanned picture.
The Advanced Properties dialog box opens.
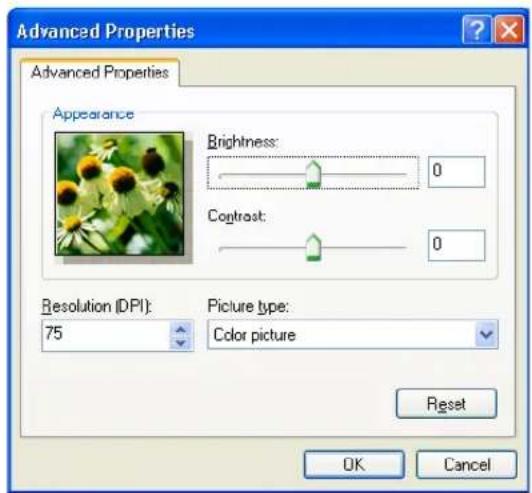
- Select the options for scanning.
Brightness and Contrast—Drag the sliders to the right or left to adjust the brightness and contrast of the scanned image. The Contrast setting does not apply to the setting Black and White picture or text.
Resolution (DPI)—Click the drop-down list and choose the dots per inch (dpi) of the resolution. The maximum resolution is 600 dpi; the minimum is 75 dpi. The higher the dpi setting, the sharper and clearer the scanned image. However, higher dpi settings take longer to scan and produce larger files for the scanned images.
Picture type—Click the drop-down menu and choose the most appropriate type for the item you're scanning.
- Click OK.
The Custom Settings button is now set to scan with the options you selected.
If you want to reset the settings and start over, click Reset.
Maintenance
This chapter contains information on recalibrating, troubleshooting, cleaning, uninstalling, and scanner specifications.
RECALIBRATING OR CLEANING YOUR SCANNER
You calibrated your scanner during installation, but after many hours of use you may find that scanned images may not be a sharp and clear as when you began using the scanner. In that case, recalibration may solve the problem.
If your scanned images have streaks, smudges, or dirt spots, you may need to clean the scanner with the Cleaning Paper.
To recalibrate your scanner:
- Strobe XP 300 only: Close the scanner's paper return so the calibration paper will feed straight through the scanner.
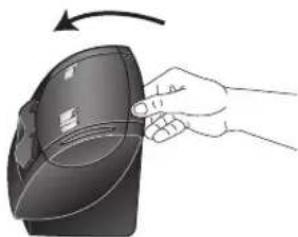
natural_image
Illustration of a hand holding a transparent object with an arrow indicating rotation (no text or symbols)Strobe XP 200 only: Move the scanner's Paper Return into the Up position so the calibration paper will feed straight through the scanner.
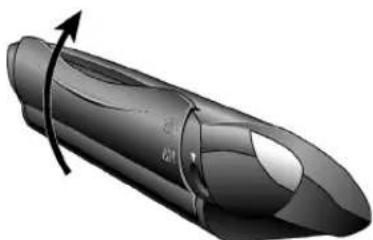
natural_image
3D rendered image of a sleek, elongated object with a curved arrow indicating rotation or motion (no text or symbols)- Use any of the following methods to start the recalibration or cleaning:
■ Right-click on the OneTouch icon in the Windows Notification Area (at the bottom right corner of the screen) and choose Show Hardware from the pop-up menu.
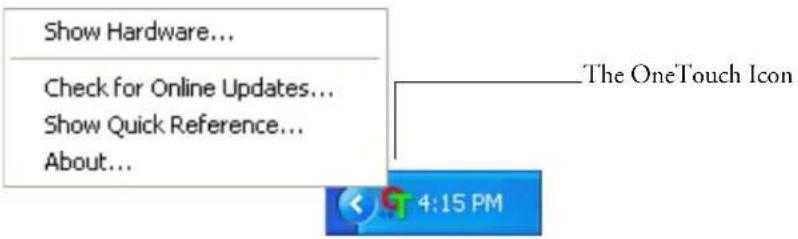
- Click the small scanner icon on a OneTouch Panel, or right-click the scanner icon on the OneTouch Hardware Panel to open the Hardware Properties window right away.
Right-click this icon...
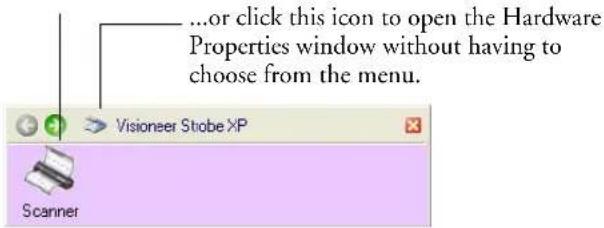
■If you scanning from PaperPort or other TWAIN application, click the scanner icon at the top right corner of the window.
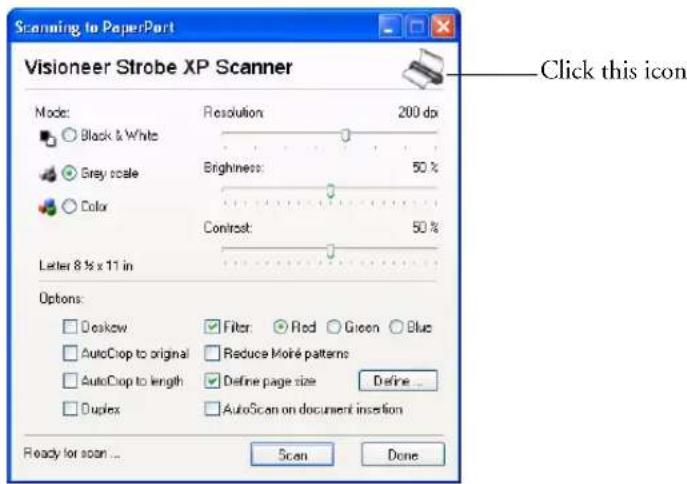
- When the Hardware Properties window appears, click the Properties button
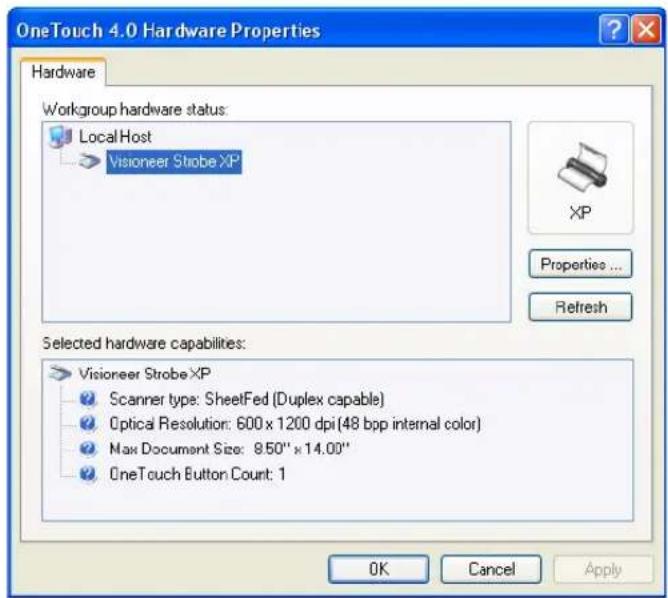
The Device Configuration Properties window opens and shows the Device Settings. Note that the “Last calibrated” date is red, indicating that calibration is now due.
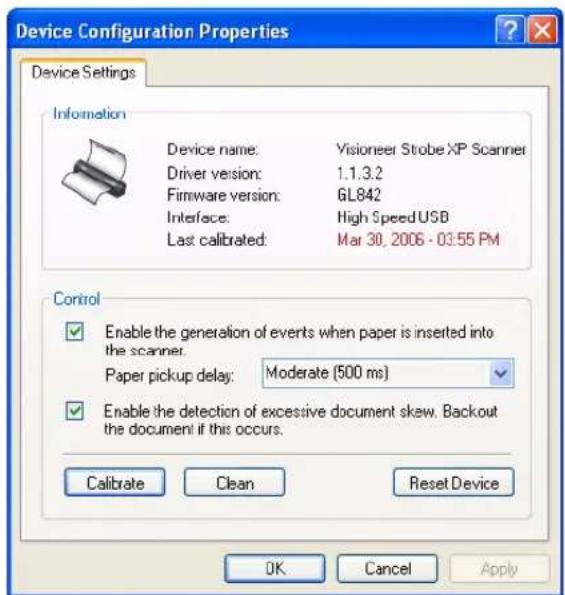
- To recalibrate the scanner, click the Calibrate button.
To clean the scanner, click the Clean button.
A message appears for you to insert the calibration or cleaning page. This sample shows the message for inserting the calibration page. The message for inserting the cleaning page is similar.
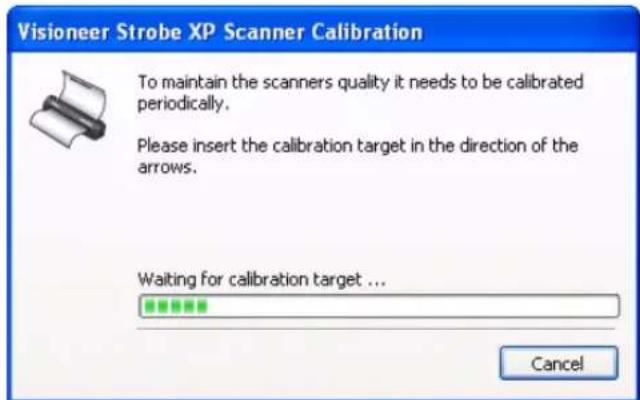
- Insert the calibration page into the page feed.
The scanner grabs the paper and feeds it through the scanner.
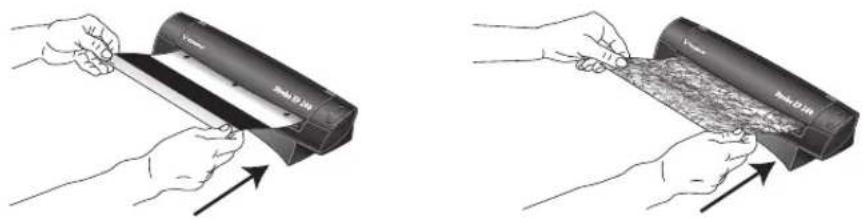
natural_image
Two-step illustration showing hands using a device to lift a textured surface, with arrows indicating direction (no text or symbols)The scanner will automatically pass the calibration sheet back and forth several times.
Do not remove the sheet until calibration is finished.
- When calibration or cleaning is complete, the page will back out of the scanner.
If the page passes straight through and does not back out at the end of the calibration, repeat the process.
Note: If scanned images or autocropped images still are of poor quality after calibration, please call Visioneer Technical Support.
- Close the Device Configuration Properties window, and remove the calibration paper, or cleaning paper and replace it in its plastic bag.
Note: Do not discard the cleaning paper. You can use it several times. If additional cleaning is necessary, add a few drops of isopropyl alcohol (rubbing alcohol) to the cleaning paper and use it again.
Note: If the calibration page is not available, you can use a piece of blank white paper as a substitute. However, calibration will not be as precise as with the regular calibration page.
TROUBLESHOOTING
In addition to the troubleshooting information contained in this section, please see the Readme file in the PaperPort directory on your computer's hard drive. The Readme file contains additional information that may help you diagnose problems with the scanner.
If you try all the troubleshooting procedures described in this section and in the Readme file, and the scanner still has problems, you may have a malfunctioning scanner. Refer to the technical support card you received with your scanner for technical support information.
Problem: The scanner icon disappeared from the Windows taskbar.
Check for one of these possible problems:
- Are the cables loose or not plugged in securely? Inspect the cable connections. Make sure all cables are plugged in securely.
- Is the AC adapter plugged in? Make sure the AC adapter is securely plugged into a working electrical outlet.
Problem: The scanner won't scan. What's wrong?
Check for one of these possible problems:
- Are the cables loose or not plugged in securely? Inspect the cable connections. Make sure the cables are plugged in securely.
- Did you restart the computer after installing the software? If you didn't restart the computer, it may not have loaded all of the software files. Try restarting your computer.
- Did you plug the scanner into a USB hub? If you're using a USB hub to connect the scanner, the hub must have its own power supply. If the hub does not have its own power supply, plug the scanner into a different USB port on the computer.
- Did you select another scanning source in the PaperPort Scan Pane? If you use multiple devices with your computer, you may have selected another source for images. Start the PaperPort software and click the Scan icon and then make sure Visioneer Strobe XP is selected as the scanner.
Problem: During installation I got the error message: PaperPort Installation is not complete. What do I do?
The installation procedure was not successful. You need to reinstall the PaperPort software.
Problem: I got the error message: PaperPort cannot allocate enough memory to perform internal critical operations. What do I do?
Close any other active applications so that additional memory is available. If you click Continue, PaperPort moves the file to the PaperPort data directory and renames the file with the prefix “bad”. This allows you to recover the file later. To recover the file, import it into PaperPort by using the Import command in the File menu.
Problem: The installation will not complete successfully. If installation finishes, the scanner's OneTouch 4.0 options do not seem to work properly. What do I do?
A likely cause is that some driver programs are already installed on your computer for another scanner. They are interfering with the installation and OneTouch options, and you need to remove those other drivers and re-install your Visioneer Strobe XP scanner. Please see the documentation that you received with the other scanner for the steps to remove its driver programs. You can also use the basic steps in the section “To Install Another Driver” on page 148, but instead of uninstalling OneTouch 4.0, uninstall the other scanner’s driver programs. After uninstalling the other scanner’s driver programs, uninstall OneTouch 4.0 using the steps on page 147, then reinstall it.
Problem: The scanned images are of poor quality even after I recalibrated and cleaned the scanner. What do I do?
The calibration procedure was not successful. You may have a defective scanner. Please see the Technical Support Card that you received with your scanner for the telephone number or email address to contact Visioneer Technical Support.
Problem: How do I uninstall PaperPort?
See the next section. Uninstalling does not delete your scanned items; they remain in the PaperPort Data folder.
HOW TO UNINSTALL YOUR SCANNER
To uninstall the Visioneer Strobe XP scanner, remove the OneTouch 4.0 scanner software first, and then remove PaperPort, or other scanner software.
STEP 1: UNINSTALLING THE ONE TOUCH 4.0 SCANNER SOFTWARE
-
On the Windows taskbar, click Start, point to Settings, then click Control Panel.
-
Double-click the Add or Remove Programs icon.
The Add or Remove Programs window opens.
-
Select OneTouch 4.0 then click the Remove button.
-
An "Add or Remove" message box opens and asks if you are sure you want to remove OneTouch 4.0 from your computer. Click Yes.
The OneTouch 4.0 software is removed from your computer.
-
Unplug the scanner USB cable from the computer.
-
Close all open windows and reboot (restart) your computer.
STEP 2: UNINSTALLING THE PAPERPORT SOFTWARE
-
On the Windows taskbar, click Start, point to Settings, then click Control Panel.
-
Double-click the Add or Remove Programs icon.
The Add or Remove Programs window opens.
-
Select PaperPort and click Remove.
-
An "Add or Remove" message box opens and asks if you are sure you want to remove PaperPort from your computer. Click Yes.
The PaperPort software is removed from your computer.
- Close all open windows and reboot (restart) your computer.
TO INSTALL ANOTHER DRIVER
Before you can install another driver for your scanner, you must remove the currently installed driver first. Then the new driver can be installed.
- Uninstall the OneTouch 4.0 driver.
a. Open the Windows Control Panel.
b. Double-click the Add or Remove Programs icon.
c. Select OneTouch 4.0 then click on the Remove button.
d. An "Add or Remove" message box opens and asks if you are sure you want to remove OneTouch 4.0 from your computer. Click Yes.
The OneTouch 4.0 software is removed from your computer.
- Unplug the scanner USB cable.
- Reboot (restart) your computer.
- Follow the instructions in "Step 1: Install the Software" on page 13 of this User Guide and follow steps for installing one of the other driver options.
VISIONEER ROADWARRIOR AND STROBE XP 100 SCANNER SPECIFICATIONS
Optical resolution 600 dpi
Bit Depth 36-Bit color (internal, 12-bit a/d converter recognition, over 68 billion colors) 12-Bit gray (internal, 4096 shades of gray)
Output Bit Depth 24-bit color, 8-bit grayscale, 1-bit black and white
Scan Method Fast Sheet fed
Interface USB 2.0 High Speed
Scanner dimensions
Height 1.5 inches (3.81 cm)
Width 2.0 inches (5.08 cm)
Length 11.4 inches (28.96 cm)
Weight 11.2 ounces (0.350 kg)
Operating temperature 50^-104^ F ( 5^-35^ C without condensation)
Relative humidity 20%–80% (@35°C without condensation)
Safety and agency certifications UL, FCC Class B, VCCI Class B, CE
Hardware warranty One-year limited warranty upon registration of scanner
VISIONEER STROBE XP 200 SCANNER SPECIFICATIONS
Optical resolution 600 dpi
Bit Depth 48-bit color (internal, 16-bit a/d converter recognition, over 68 billion colors) 16-bit gray (internal, 4096 shades of gray)
Output Bit Depth 24-bit color, 8-bit grayscale, 1-bit black and white
Scan Method Fast Sheet fed
Interface USB 1.1 Full Speed
Scanner dimensions
Height 2.0 inches (5.08 cm)
Width 2.5 inches (6.40 cm)
Length 11.0 inches (28.45 cm)
Weight 1.3 pounds (0.59 kg)
Operating temperature 50^-104^ F ( 5^-35^ C without condensation)
Relative humidity 20%–80% (@35°C without condensation)
Safety and agency certifications UL, FCC Class B, VCCI Class B, CE
Hardware warranty One-year limited warranty upon registration of scanner
VISIONEER STROBE XP 300 SCANNER SPECIFICATIONS
Optical resolution 600 dpi
Bit Depth 48-bit color (internal, 16-bit a/d converter recognition, over 68 billion colors) 16-bit gray (internal, 4096 shades of gray)
Output Bit Depth 24-bit color, 8-bit grayscale, 1-bit black and white
Scan Method Fast Sheet fed
Interface USB 2.0 High Speed
Scanner dimensions
Height 1.75 inches (4.45 cm)
Width 2.0 inches (5.08 cm)
Length 11.75 inches (29.85 cm)
Weight 1.3 pounds (0.59 kg) (without stand)
Operating temperature 50^-104^ F ( 5^-35^ C without condensation)
Relative humidity 20%–80% (@35°C without condensation)
Safety and agency certifications UL, FCC Class B, VCCI Class B, CE
Hardware warranty One-year limited warranty upon registration of scanner
VISIONEER SCANNER PARTS LIST
Please use the following part names and part numbers when ordering replacements for your scanner. Visit our web site at www.visioneer.com to order replacement parts.
| Part Part Name Part Number | |||
 |  | RoadWarrior, Strobe XP 100, and Strobe XP 300 Calibration Sheet and Cleaning Sheet | 05-0679-000 |
 |  | Strobe XP 200 Calibration Sheet and Cleaning Sheet | 05-0621-000 |
 | Strobe XP 300 Duplex Document Sleeve and Duplex Receipt Sleeve | 05-0680-000 | |
 | Strobe XP 200 Photo Sleeve | 05-0680-000 | |
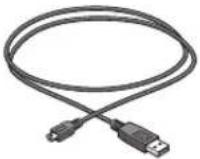 | Strobe XP 300 Mini USB 2.0 High Speed Certified Cable | 35-0100-000 | |
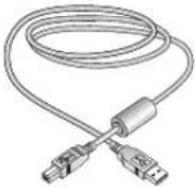 | RoadWarrior and Strobe XP 100 High Speed USB 2.0 Certified Cable | 35-0065-000 | |
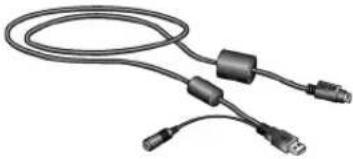 | Strobe XP 200 USB Y-Cable | 35-0064-000 | |
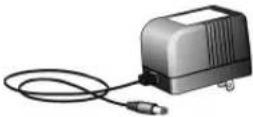 | Strobe XP 200 Power Supply | 37-0055-000 | |
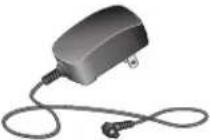 | Strobe XP 300 Power Supply | 37-0066-000 | |
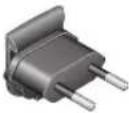 | Strobe XP 300 Europe Clip, JF16, A3 | 37-0068-000 | |
 | Strobe XP 300 UK Clip, 15RPK-N, A2 | 37-0069-000 | |
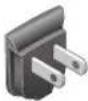 | Strobe XP 300 US Clip, RPA 10, D2 | 37-0073-000 | |
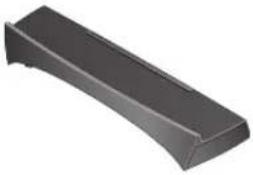 | Strobe XP 300 Plinth, Scanner Mounting Stand | 85-0237-000 | |
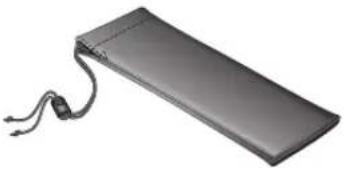 | RoadWarrior, Strobe XP 100, and Strobe XP 300 Carrying Bag | 88-0489-000 | |
INDEX
A
advanced settings 79
aspect ratio 81
Autocrop to Length 126
Autocrop to Original 77, 125
AutoLaunch 41
AutoRotate image 81
AutoScan 42
B
background color 94
Black&White 76, 124
BMP 66
Brightness 76, 125
brightness 139
Burn to CD 61, 101
Destination Application 102
button options 70
button settings 54
C
calibration 140
during installation 25, 144
CD-ROM drive 10
Character Map 92
Color 76, 124
color configuration 124
color filter 79, 126
Comma Delimited 69
components 6, 8, 9
Configure Before Scan 86
Contrast 76, 125
contrast 139
create single page items check box 123, 129
csv file format 69
D
Destination Application 54
OCR 54, 55, 62, 65, 66, 68, 75, 78, 83, 86, 87,
89, 99, 100, 119, 125
text file format 67
destination software 48
Device Settings 75, 81
Document Format 54
Document Management 71
documentation 11
dots per inch (dpi) 139
E
eMail 71
eMail Properties 63
Excel Spreadsheet 69
F
Fax and Print 71
file format 68
file storage location 109
flowing page 97
Font Matching 93
Format and Page(s) 55
G
gamma 79
grayed out options 51
GrayScale 76, 124
H
help 130
htm file format 69
HTML Document 69
HTML page 107
HTML Web Page 105
hue 79
|
icons
paper return 8
Image Documents Properties 60
Image Editors 71
image file 66
image file format 66
improvements and settings 77
invert image 78
inverted text 95
J
JPG 66
JPG file size 66
L
Languages in Document 90
Link Properties 56
M
Microsoft Internet Explorer 106
Microsoft Outlook 63
Moire Patterns 78, 126
monitor 10
N
Normal PDF 69, 98
nPDF 69, 98
0
OCR 67
columns 88, 96
optical character recognition 87
storage 109
tables 97
OCR Dictionary 90
OCR Options 89
OCR options 87
OmniPage Pro 12 60, 69
One Touch Button Panel 43
Detail View 50
Hardware View 50
One Touch Properties window 43, 52, 56
options 70, 74
P
Page Format
HTML 106, 108
page format options 65
page settings 77
page size 77, 127
paper return
icons 8, 33, 34
options 33
PaperPort 120
help topics 130
thumbnail 129
PaperPort Properties 57
parts 2
PDF 66, 71
PDF file size 66
R
recalibration 140
Resolution 76, 124
resolution 139
Rich Text Format 68
rtf file format 68
S
saturation 79
scan
file name 129
multiple pages 129
PaperPort desktop 129
Scan Configuration 54
scan with event forwarding 104
scanner
components 6, 7, 8, 9
recalibration 140
specifications 150, 151
troubleshooting 145
uninstall 147
scanning
AutoScan 42
from PaperPort 120
Visioneer Scan Manager 121
Windows Image Acquisition (WIA) 136
Searchable PDF 69, 98
Select Configuration 52, 55
Select Destination 52, 54, 71
Select Format and Page(s) 53
Show All Destinations 70
Show Hardware 117
Simple Text 68
size 77, 127
skewed page 77, 125
skip blank originals 79
sPDF 69, 98
specifications 150, 151
spreadsheet 97
spreadsheets
OCR 87
Sti event forwarding 71
Storage and CD-R/W 71
Storage Properties 61
Straighten Image 78, 125
system requirements 10
T
template 97
text color 94
Text Documents Properties 58
Text Editors 71
text file format 67
Text Formats 67
thumbnail icon 129
TIFF 66
Transfer to Storage 107
troubleshooting 145
true page 97
TWAIN 86, 105
TWAIN standard 120
U
uninstall 147
Use Defaults 94, 95
W
watermark, remove 79, 126
WIA 86, 120, 136
adjust picture quality 138
Windows Image Acquisition (WIA) 120
Windows XP 136
Word Document 69
X
xls file format 69
visioneer

- visioneer
- Visioneer Strobe XP USB Scanner User's Guide
- COPYRIGHT INFORMATION
- Restricted Rights Legend
- Visioneer's Limited Product Warranty
- RoHS and WEEE Compliance
- FCC Radio Frequency Interference Statement
- TABLE OF CONTENTS
- Welcome 1
- Installing....12
- Welcome
- WHAT'S IN THE BOX
- WHAT'S IN THE BOX—VISIONEER ROADWARRIOR
- WHAT'S IN THE BOX—VISIONEER STROBE XP 100
- WHAT'S IN THE BOX—VISIONEER STROBE XP 300
- THE VISIONEER STROBE XP 100 SCANNER
- THE VISIONEER ROADWARRIOR SCANNER
- THE VISIONEER STROBE XP 200 SCANNER
- THE VISIONEER STROBE XP 300 SCANNER
- WHAT YOU NEED
- An IBM-compatible Pentium PC, or AMD equivalent with:
- A VGA or SVGA Monitor
- DOCUMENTATION
- Installing
- BEFORE YOU BEGIN
- STEP 1: INSTALL THE SOFTWARE
- To install the software:
- Select ScanSoft PaperPort and Scanner Driver.
- Click Next.
- STEP 2: CONNECT THE SCANNER
- CONNECT THE VISIONEER ROADWARRIOR OR STROBE XP 100 SCANNER
- CONNECT THE STROBE XP 200 SCANNER
- CONNECT THE STROBE XP 300 SCANNER
- STEP 3: CALIBRATE THE SCANNER
- To calibrate the scanner:
- INSTALL OMNIPAGE PRO (STROBE XP 300 ONLY)
- To install OmniPage Pro:
- ADDITIONAL APPLICATIONS FOR YOUR SCANNER
- To install the additional applications:
- To view and save the User Guides:
- REGISTER YOUR SCANNER
- To register your scanner:
- SET UP YOUR SCANNER
- STROBE XP 200 PAPER RETURN OPTIONS
- STROBE XP 300 PAPER RETURN OPTIONS
- STROBE XP 300 STAND
- SCANNING ON THE GO
- CONFIGURE THE STROBE XP 300 AC POWER ADAPTER
- To replace the AC Power Adapter plug:
- SCANNING BASICS
- ADJUST THE PAPER GUIDES
- SCANNING PHOTOS AND THIN PAPER ITEMS
- To scan a photo using the Strobe XP 200 photo sleeve:
- To scan a thin paper item using the Strobe XP 300 sleeves:
- Scanning
- SCAN USING AUTOLAUNCH
- To scan using AutoLaunch:
- CHECK THE SCAN SETTINGS BEFORE SCANNING WITH AUTOLAUNCH
- TURN AUTO LAUNCH OFF/ON
- To turn the AutoLaunch Off/On from the OneTouch icon:
- Click the Properties button.
- To use the OneTouch Properties window:
- SELECTING NEW ONE TOUCH SCAN SETTINGS
- To select new settings for the scanner:
- SETTING DESTINATION APPLICATION PROPERTIES
- PAPERPORT PROPERTIES
- TEXT DOCUMENTS PROPERTIES
- IMAGE DOCUMENTS PROPERTIES
- STORAGE PROPERTIES
- EMAIL PROPERTIES
- SELECTING PAGE FORMAT OPTIONS
- IMAGE FORMATS
- To select a JPEG or PDF file size:
- TEXT FORMATS
- To select a file type for the text format:
- SELECTING OPTIONS FOR THE ONETOUCH PROPERTIES WINDOW
- CREATING A NEW SCAN CONFIGURATION
- To create a new configuration:
- Marketing
- Pakeling
- Click the Advanced Settings tab.
- THE DEVICE SETTINGS TAB
- To select Device Settings:
- Click OK or Apply.
- THE STORAGE OPTIONS TAB (ARCHIVE)
- To select Storage Options:
- EDITING OR DELETING SCAN CONFIGURATIONS
- To edit or delete a scan configuration:
- CONFIGURING BEFORE SCANNING
- To configure before scanning:
- SCANNING WITH OPTICAL CHARACTER RECOGNITION (OCR)
- To scan with OCR:
- To select OCR settings:
- Choose OCR options.
- Click OK.
- USING OMNIPAGE OCR OPTIONS
- SELECTING OMNIPAGE OCR OPTIONS
- To select OmniPage OCR options:
- SCANNING WITH SPDF OR NPDF AND SEARCHING FOR TEXT
- To scan with sPDF or nPDF:
- SCAN AND BURN TO A CD
- To scan and burn to a CD:
- SCANNING WITH EVENT FORWARDING
- To scan with event forwarding:
- CREATING AN HTML WEB PAGE FROM YOUR SCANNED DOCUMENTS
- To scan and create an HTML web page:
- TRANSFERRING SCANNED DOCUMENTS TO STORAGE
- To scan and transfer to storage:
- To Use OCR Before TRANSFERRING TO STORAGE
- SCANNING TO MULTIPLE FOLDERS
- Setting up multiple folders for transfer to storage:
- Scan to multiple storage folders:
- TO TRANSFER DOCUMENTS TO A SERVER OR MAPPED DRIVE
- CHECK THE HARDWARE AND SELECT DEVICE SETTINGS
- Click the Properties button.
- SCANNING FROM TWAIN SOFTWARE
- SCANNING FROM PAPERPORT USING THE TWAIN INTERFACE
- To scan an item using PaperPort:
- ON THE PAPERPORT DESKTOP
- THE CREATE SINGLE PAGE ITEMS CHECK BOX
- GETTING HELP WITH THE PAPERPORT SOFTWARE
- SETTING UP YOUR SCANNER TO WORK WITH PAPERPORT
- To set up your scanner:
- Click Yes (recommended) then click Next.
- Click Next.
- Click Next.
- SCANNING FROM THE WIA INTERFACE
- To scan an item:
- FINE TUNING YOUR SCANS
- Maintenance
- RECALIBRATING OR CLEANING YOUR SCANNER
- To recalibrate your scanner:
- TROUBLESHOOTING
- Problem: The scanner icon disappeared from the Windows taskbar.
- Problem: The scanner won't scan. What's wrong?
- Problem: During installation I got the error message: PaperPort Installation is not complete. What do I do?
- Problem: I got the error message: PaperPort cannot allocate enough memory to perform internal critical operations. What do I do?
- Problem: The scanned images are of poor quality even after I recalibrated and cleaned the scanner. What do I do?
- Problem: How do I uninstall PaperPort?
- HOW TO UNINSTALL YOUR SCANNER
- STEP 1: UNINSTALLING THE ONE TOUCH 4.0 SCANNER SOFTWARE
- STEP 2: UNINSTALLING THE PAPERPORT SOFTWARE
- TO INSTALL ANOTHER DRIVER
- VISIONEER ROADWARRIOR AND STROBE XP 100 SCANNER SPECIFICATIONS
- VISIONEER STROBE XP 200 SCANNER SPECIFICATIONS
- VISIONEER STROBE XP 300 SCANNER SPECIFICATIONS
- VISIONEER SCANNER PARTS LIST
- INDEX
- A
- B
- C
- D
- E
- F
- G
- H
- |
- J
- L
- M
- N
- 0
- P
- R
- S
- T
- U
- W
- X
Brand : XEROX
Model : Strobe SXP1001-DB
Category : To scan