
Mobile 100N02838 - To scan XEROX - Free user manual and instructions
Find the device manual for free Mobile 100N02838 XEROX in PDF.


| Product Type | Mobile Document Scanner |
| Model | Xerox Mobile 100N02838 |
| Dimensions (W x D x H) | 11.50 x 2.75 x 2.00 in (293 x 70 x 51 mm) |
| Weight | 22.5 oz (638 g) |
| Power Supply | 5Vdc, models ADS-5N-06 05005G (HONOR) or DSA-10CU-05 050200 (DVE) |
| Battery | Rechargeable Li-ion, 3.7V 1700mAh (model NP120), up to 300 pages per charge |
| Scan Method | Single sheet fed, automatic document feeder |
| Optical Resolution | 300 dpi |
| Bit Depth | 24-bit color, 1-bit black & white |
| Scan Speed | 10 seconds per page at 300 dpi (all color modes) |
| Max Document Size | 8.5 x 14 in (216 x 356 mm) |
| Min Document Size | 2.0 x 2.0 in (51 x 51 mm) |
| Paper Thickness | 14–28 lbs (53–105 g/m²) |
| Image Sensor | Contact Image Sensor (CIS) |
| Light Source | 3-color RGB LED |
| Interface | Hi-Speed USB 2.0 (Mini-USB) |
| Storage Media | SD/SDHC memory card, USB flash drive |
| Wireless Transfer | Via included Eye-Fi SDHC card (802.11b/g/n), Direct Mode |
| Supported Operating Systems | Windows XP (SP2/3), Vista (32/64-bit), 7 (32/64-bit); Mac OS X 10.6 Snow Leopard, 10.7 Lion |
| Bundled Software | XMS PC Connect, XMS Mac Connect, Eye-Fi Center, DocToMe (iOS), Eye-Fi Mobile (Android) |
| Certifications | UL, C-UL, FCC Class B, CE, WEEE, RoHS, ENERGY STAR |
| Power Consumption | ≤3.85 W operating, ≤1.86 W standby |
| What's in the Box | Scanner, Quick Install Guide, Technical Support Card, Windows Installation Disc, Carrying Bag, USB Cable, Cleaning Swab, Battery, Calibration Page, Plug Adapters (US/EU/UK), Power Supply, Eye-Fi Memory Card |
| Maintenance | Monthly calibration with included page; cleaning with isopropyl alcohol swab; no user-serviceable parts inside |
Frequently Asked Questions - Mobile 100N02838 XEROX
User questions about Mobile 100N02838 XEROX
0 question about this device. Answer the ones you know or ask your own.
Ask a new question about this device
Download the instructions for your To scan in PDF format for free! Find your manual Mobile 100N02838 - XEROX and take your electronic device back in hand. On this page are published all the documents necessary for the use of your device. Mobile 100N02838 by XEROX.
USER MANUAL Mobile 100N02838 XEROX
Xerox® Mobile Scanner User Guide

natural_image
Abstract blue wave pattern with overlapping curved bands (no text or symbols)Design © 2012 Xerox Corporation. All rights reserved. XEROX®, XEROX and Design® are registered trademarks of Xerox Corporation in the United States and/or other countries. BR111
Content © 2012 Visioneer, Inc. All rights reserved. The Visioneer brand name and OneTouch® logo are registered trademarks of Visioneer, Inc.
Copyright protection claimed includes all forms of matters of copyrightable materials and information now allowed by statutory or judicial law or hereinafter granted, including without limitation, material generated from the software programs which are displayed on the screen such as styles, templates, icons, screen displays, looks, etc.
Reproduction, adaptation, or translation without prior written permission is prohibited, except as allowed under the copyright laws.
The PaperPort and OmniPage brand name and logo are registered trademarks of Nuance Communications, Inc.
Adobe, Adobe Acrobat, Adobe Reader, and the Adobe PDF logo are registered trademarks of Adobe Systems Incorporated in the United States and/or other countries. The Adobe PDF logo will appear in this product's software, and full access to Adobe software features is only available if an Adobe product is installed on your computer.
Microsoft is a U.S. registered trademark of Microsoft Corporation. Windows ^™ is a trademark and SharePoint is a registered trademark of Microsoft Corporation.
ZyINDEX is a registered trademark of ZyLAB International, Inc. ZyINDEX toolkit portions, Copyright © 1990-1998, ZyLAB International, Inc.
Document Version: 05-0844-200 (June 2012)
All Rights Reserved. All other products mentioned herein may be trademarks of their respective companies.
Information is subject to change without notice and does not represent a commitment on the part of Visioneer. The software described is furnished under a licensing agreement. The software may be used or copied only in accordance with the terms of such an agreement. It is against the law to copy the software on any medium except as specifically allowed in the licensing agreement. No part of this document may be reproduced or transmitted in any form or by any means, electronic or mechanical, including photocopying, recording, or information storage and retrieval systems, or translated to another language, for any purpose other than the licensee's personal use and as specifically allowed in the licensing agreement, without the express written permission of Visioneer.
Restricted Rights Legend
Use, duplication, or disclosure is subject to restrictions as set forth in contract subdivision (c)(1)(ii) of the Rights in Technical Data and Computer Software Clause 52.227-FAR14. Material scanned by this product may be protected by governmental laws and other regulations, such as copyright laws. The customer is solely responsible for complying with all such laws and regulations.
Changes are periodically made to this document. Changes, technical inaccuracies, and typographic errors will be corrected in subsequent editions.
Table of Contents
1 Safety
Safety Introduction 6
Operational Safety Information 7
Electrical Information 8
Warning - Electrical Safety Information 8
Electrical Supply 8
Emergency Power Off 9
Maintenance Information 10
Product Safety Certification 11
Environmental Health and Safety Contacts 12
2 W e l c o m e
What's in the Box 14
The Xerox Mobile Scanner 15
Insert the Battery 17
Connect the Scanner to Charge the Battery 18
Register Your Scanner 20
3 Scanning to Removeable Media
Memory Card or USB Flash Drive ....22
Creating Multiple Page PDF Files 23
Retrieving the Scanned Images 23
Android® Devices (Smartphones and Tablets) 25
Retrieving the Scanned Images 26
Troubleshooting Connection Issues 26
Apple iPad 28
Other Mobile Devices 30
4 Scan and Transfer Images Wirelessly with Eye-Fi
Install the Eye-Fi Center Application 32
Log In and Activate the Eye-Fi Card 35
The Eye-Fi Card Settings 39
The Eye-Fi Helper Utility 39
Adding or Removing Private Wireless Networks 40
Direct Mode 41
Transferring Photo Files (JPG Files) 41
Transferring RAW Files (PDF Files) 42
Eye-Fi View 43
Transfer Mode 43
Scan and Send Files to a Computer 45
Creating Multiple Page PDF Files 45
Scan to a Windows Computer 46
Scan to a Mac Computer 47
Access Images from Eye-Fi Web Site 47
Scan and Send Files to aniOS Mobile Device (iPad, iPod, and iPhone) 49
Download and Install Xerox DocToMe 49
Xerox Mobile Scanner
User's Guide
Connecting to the Eye-Fi Direct Mode Network 52
Using DocToMe 58
Scanning to DocToMe 61
Creating Multiple Page PDF Files 62
Troubleshooting 62
iCloud and DocToMe 62
Scan and Send Files to an Android Mobile Device 63
Download and Install the Eye-Fi Mobile Application 63
Connecting to the Eye-Fi Direct Mode Network 65
Scanning to Eye-Fi 68
Creating Multiple Page PDF Files 68
PDF File Transfer using Evernote 70
Configure Eye-Fi to Share with Evernote 70
Transfer Images to Evernote on Windows 70
Access and Delete Images from the Eye-Fi Card 72
Automatically delete transferred files from the Eye-Fi card 72
Airplane Mode 73
Troubleshooting and Error Messages 74
5 Maintenance
Calibrating Your Scanner 76
Cleaning Your Scanner 77
Status LEDs 78
Normal Operation 78
Status Light Troubleshooting Codes 78
Xerox Mobile Scanner Specifications 79
Xerox Mobile Scanner Spare Part List 80
A R e g u l a t o r y I n f o r m a t i
Basic Regulations 82
United States (FCC Regulations) 82
European Union 82
Other Regulations 83
Copy Regulations 84
United States 84
Canada 85
Other Countries 86
B Compliance Information
Product Recycling & Disposal 88
USA & Canada 88
European Union 88
Energy Star for the USA 89
Safety
1
This chapter includes:
• Safety Introduction on page 6
• Operational Safety Information on page 7
• Electrical Information on page 8
• Emergency Power Off on page 9
• Maintenance Information on page 10
• Product Safety Certification on page 11
• Environmental Health and Safety Contacts on page 12
Safety Introduction
Notices and Safety
Please read the following instructions carefully before operating the machine and refer to them as needed to ensure the continued safe operation of your machine.
Your Xerox product and supplies have been designed and tested to meet strict safety requirements. These include safety agency evaluation and certification, and compliance with electromagnetic regulations and established environmental standards.
The safety and environment testing and performance of this product have been verified using Xerox materials only.
Warning: Unauthorized alterations, which may include the addition of new functions or connection of external devices, may impact the product certification. Please contact your Xerox representative for more information.
Operational Safety Information
Your Xerox equipment and supplies have been designed and tested to meet strict safety requirements. These include safety agency examination, approval, and compliance with established environmental standards.
To ensure the continued safe operation of your Xerox equipment, follow these safety guidelines at all times:
Do These
• Always follow all warnings and instructions that are marked on or supplied with the equipment.
- Before cleaning this product, unplug the product from the USB port. Always use materials specifically designated for this product, the use of other materials may result in poor performance and create a hazardous situation. Do not use aerosol cleaners, they may be explosive and flammable under certain conditions.
• Always exercise care when moving or relocating equipment.
• Always unplug this equipment from the electrical outlet before cleaning.
Note: Your Xerox machine is equipped with an energy saving device to conserve power when the machine is not in use. The machine may be left on continuously.
Do Not Do These
- Never use a ground adapter plug to connect the equipment to a power outlet that lacks a ground connection terminal.
• Never attempt any maintenance function that is not specifically described in this documentation. - Never remove covers or guards that are fastened with screws. There are no operator serviceable areas within these covers.
- Never locate the machine near a radiator or any other heat source.
- Never override or "cheat" any of the electrical or mechanical interlock devices.
- Never place this equipment where people might step on or trip on the power cord.
Electrical Information
Warning - Electrical Safety Information
- The power receptacle for the machine must meet the requirements stated on the data plate on the rear of the machine. If you are not sure that your electrical supply meets the requirements, please consult your local power company or an electrician for advice.
- The socket outlet shall be installed near the equipment and shall be easily accessible.
- Use the power cable that is supplied with your machine. Do not use an extension cord or remove or modify the power cord plug.
- Plug the power cable directly into a correctly grounded electrical outlet. If you are not sure whether or not an outlet is correctly grounded, consult an electrician.
- Do not use an adapter to connect any Xerox equipment to an electrical outlet that lacks a ground connection terminal.
- Do not place this equipment where people might step or trip on the power cable.
- Do not place objects on the power cable.
- Do not override or disable electrical or mechanical interlock devices.
- Do not push objects into slots or openings on the machine. Electrical shock or fire may result.
Electrical Supply
- This product shall be operated from the type of electrical supply indicted on the product's data plate label. If you are not sure that your electrical supply meets the requirements, please consult your local power company for advice.

Emergency Power Off
If any of the following conditions occur, turn off the machine immediately and disconnect the power cable(s) from the electrical outlet(s). Contact an authorized Xerox Service Representative to correct the problem:
- The equipment emits unusual odors or makes unusual noises.
• The power cable is damaged or frayed. - A wall panel circuit breaker, fuse, or other safety device has been tripped.
- Liquid is spilled into the machine.
• The machine is exposed to water. - Any part of the machine is damaged.
Maintenance Information
- Any operator product maintenance procedures will be described in the user documentation supplied with the product.
- Do not carry out any maintenance on this product which is not described in the customer documentation.
- Do not use aerosol cleaners. The use of cleaners that are not approved may cause poor performance of the equipment, and could cause a dangerous condition.
- Use supplies and cleaning materials only as directed in this manual.
- Do not remove covers or guards that are fastened with screws. There are no parts behind these covers that you can maintain or service.
- Do not perform any maintenance procedures unless you have been trained to do them by an authorized local dealer or unless a procedure is specifically described in the user manuals.
Product Safety Certification
This product is certified by the following Agency using the Safety standards listed:
| Standard |
| UL60950-1 (USA)CSA 22.2 No. 60950-1 (Canada) |
| IEC 60950-1 |
Environmental Health and Safety Contacts
Contact Information
For more information on Environment, Health, and Safety in relation to this Xerox product and supplies, please contact the following customer help lines:
USA & Canada: 1-800-828-6571
Europe: +44 1707 353 434
Welcome
2
This chapter includes:
• What's in the Box on page 14
• The Xerox Mobile Scanner on page 15
- Insert the Battery on page 17
• Connect the Scanner to Charge the Battery on page 18
- Register Your Scanner on page 20
Thank you for purchasing the Xerox Mobile Scanner. With this scanner you can scan directly to a memory card or USB flash drive without connecting the scanner to a computer.
What's in the Box
Before proceeding, check the contents of the box. If items are missing or damaged, contact the dealer where you purchased the scanner.
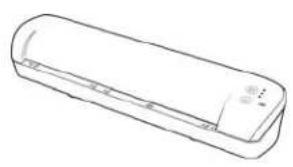
natural_image
Line drawing of a cylindrical air conditioner unit (no text or symbols)

Xerox Mobile Scanner Quick Install Guide Technical Support Card
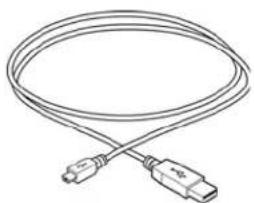
natural_image
Line drawing of a USB cable with two connectors (no text or symbols)
Windows™ Installation Disc
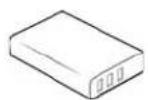
Carrying bag USB Cable Cleaning swab Battery
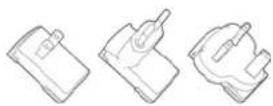
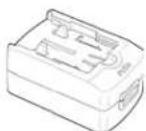
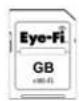
Calibration page Plug adapters Power Supply
Eye-Fi™ Memory card
The Xerox Mobile Scanner
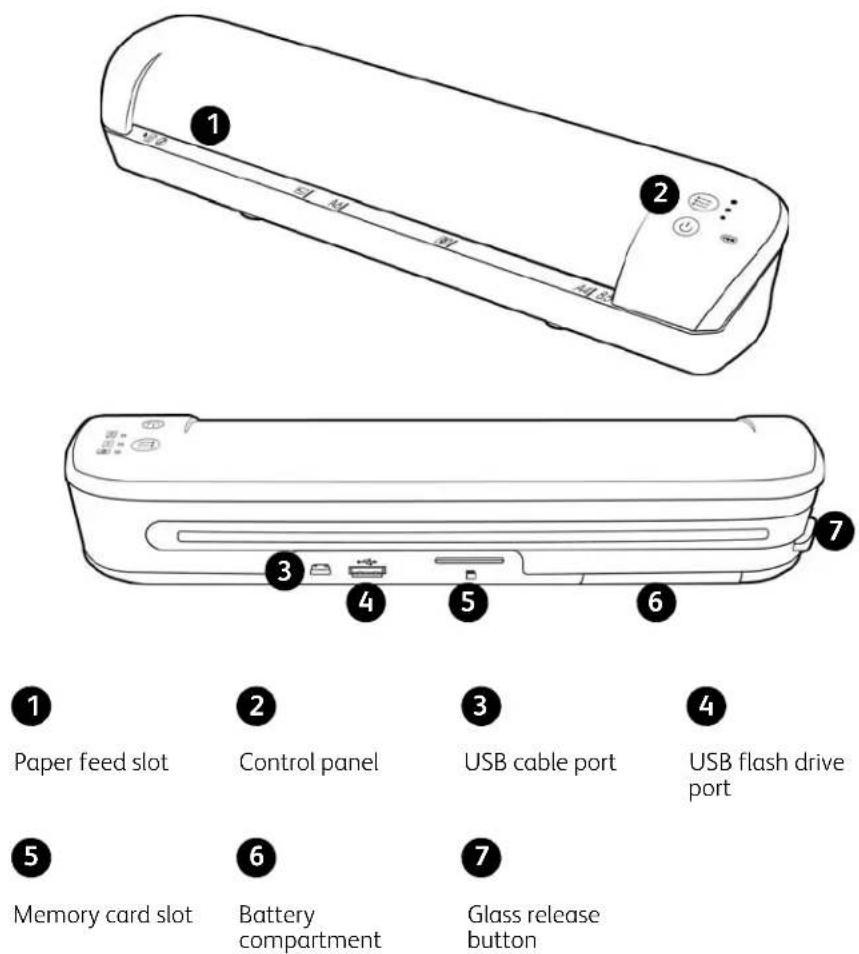
Paper feed slot—Insert an item face up in the scanner, aligned to the arrow at the end of the paper feed slot.
Control panel—Scanner controls.
- Power button—Press, hold-down for 3 seconds, then release the power button to turn the scanner on or off. Note that the scanner will automatically power off after 2 minutes if not in use.
• Function button—Tap this button to cycle through the scan functions. - Status LEDs—these lights indicate the scanner's current status. When a single LED is lit next to one of the icons, this is the currently selected scan function. That LED will blink continuously while scanning to indicate the scanner is busy. When the scanner is busy or an error has occurred, all 3 LEDs will blink simultaneously, pause, and then blink again in the same pattern. Please refer to Status LEDs on page 78 for more information.
- Scan functions—The icon represents the color mode and file format for the scanned image.

Scans in color at 300dpi and creates a JPG (*.jpg) file.

Scans in black & white at 300dpi and creates an Adobe PDF (*.pdf) file.

Scans in color at 300dpi and creates an Adobe PDF (*.pdf) file.
- Battery LED—This light indicates the scanner's power status. Please refer to Status LEDs on page 78 for more information.
USB cable port—Connect the provided USB cable to charge the scanner. When connected to a computer, you can transfer images from the USB flash drive or memory card.
USB flash drive port—Insert a USB flash drive into this port to scan directly to the flash drive.
Memory card slot—Insert an SD memory card into this slot to scan directly to a memory card.
Battery compartment—Holds the rechargeable battery that powers the scanner.
Glass release button—Separates the glass and rollers inside the scanner so that you can clean the scanner using the cleaning swab.
Insert the Battery
The battery comes pre-installed in the scanner's battery compartment. Open the battery compartment, on the underside of the scanner, and pull out the Mylar strip. Close the battery compartment and proceed with charging the scanner.
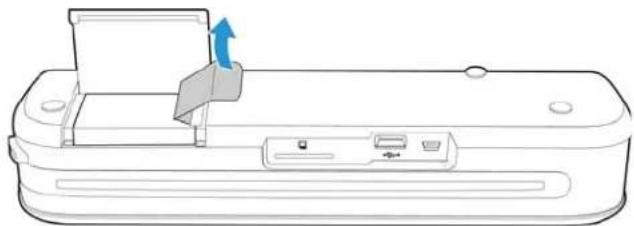
natural_image
Line drawing of a device with a blue arrow indicating direction, no text or symbols presentIf the battery is not pre-installed in your unit, or if you need to replace the battery for any reason, please follow these instructions for installing the battery.
Warning: Only use the battery model provided with the scanner (NP120 for 3.7V 1700mAh).
- Open the battery cover on the underside of the scanner.

natural_image
Two technical line drawings of a device casing with a highlighted internal component, shown from front and side views (no text or symbols)- Insert the battery into the compartment. Make sure the battery is inserted in the correct position.
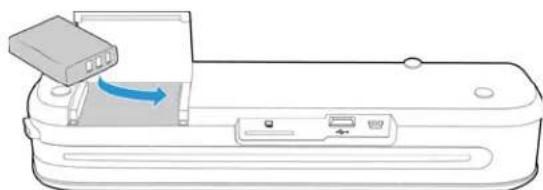
natural_image
Diagram of a printer with a paper feeding into a slot, showing the printer's internal structure and airflow direction (no text or symbols)- Lower the compartment lid and slide the lid in place to lock it.

natural_image
Two technical line drawings of a device casing with a slide and a separate panel, showing internal components without any text or symbols.Connect the Scanner to Charge the Battery
Important
- Allow the battery to charge for at least 8 hours before using the scanner the first time.
Note that recharging the battery, after using the scanner, takes only 4 hours for a completely drained battery. - Note that you cannot scan and charge the battery at the same time. Make sure the scanner power is not on if you want to charge the scanner battery.
Note: only use the power adapter provided with the scanner (ADS-5N-06 05005G made by HONOR or DSA-10CU-05 050200 made by DVE).
Assemble the power adapter:
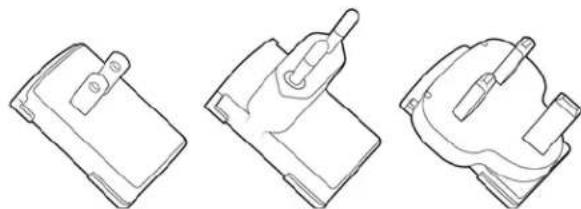
- Select the power plug adapter that is appropriate for the wall outlet in your country.
natural_image
Three technical line drawings of mechanical components (no text or symbols)North America, U.K., Europe
- Slide the power plug adapter into the power supply base.
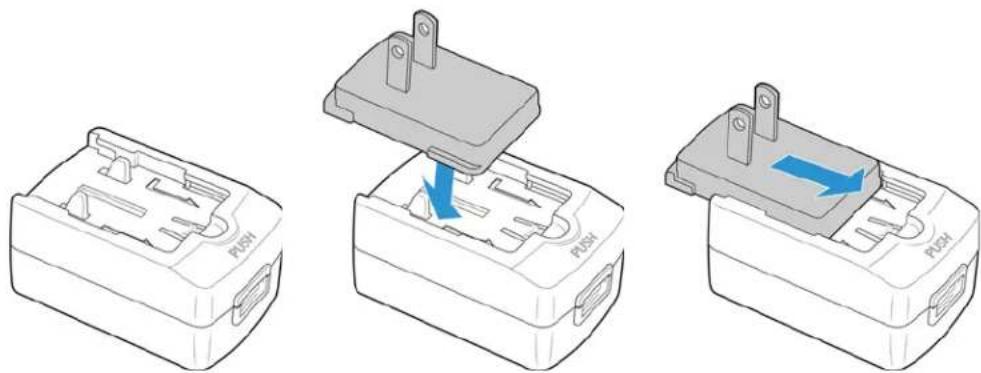
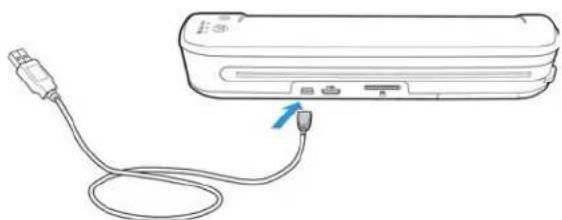
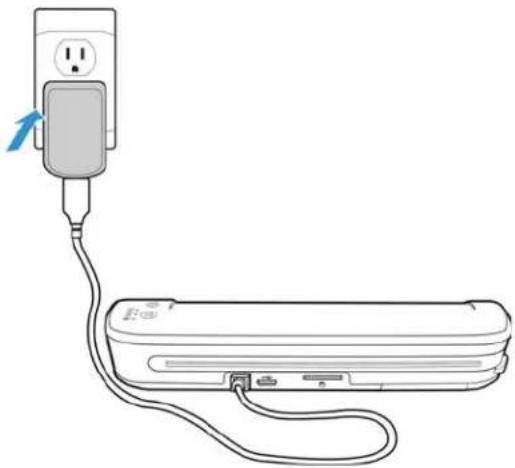
Charging the Battery:
- Insert the small end of the USB cable into the USB port on the back of the scanner.
natural_image
Line drawing of a device with a cable and connector, no text or symbols present- Plug the flat end into the power supply base.
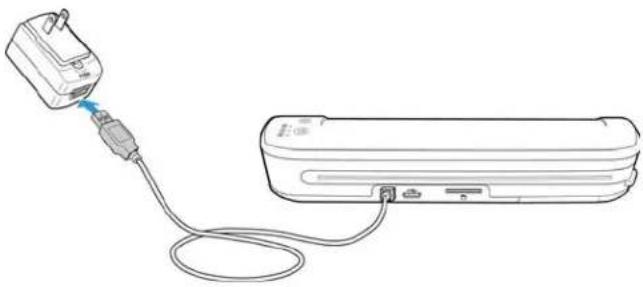
natural_image
Line drawing of a device with a cable and connector, no text or symbols present- Plug the power supply into a wall outlet.
natural_image
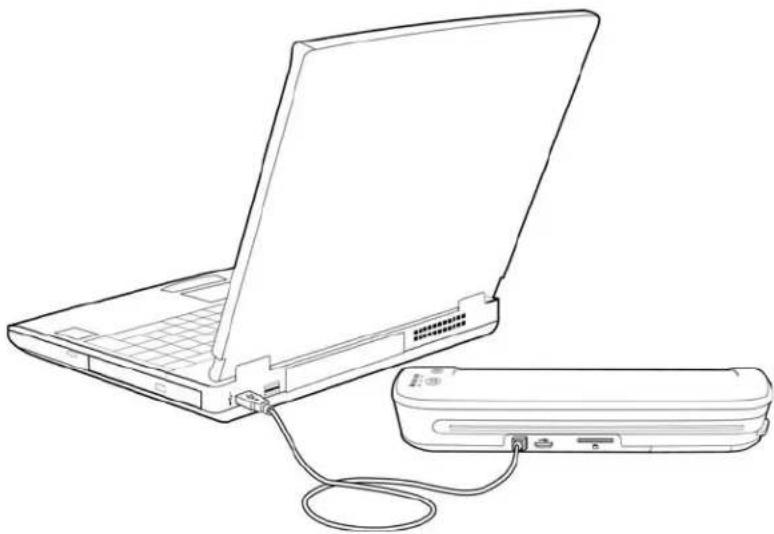
Line drawing of a plug connected to a rectangular device with cables (no text or symbols)Note: You can also charge the scanner battery when it is connected to a USB port in your computer.
natural_image
Line drawing of a laptop connected to a USB cable via a separate USB drive (no text or symbols)Register Your Scanner
Registering your scanner is important as it provides you with access to our free telephone support service. Registration also gives you free access to software updates for your scanner.
You will need an active internet connection to register your scanner. If you do not have internet access, you can contact our Customer Service department to register the scanner. Please refer to the Technical Support Card, that your received with the scanner, for our contact information.
- Open an Internet Explorer window, or other internet browser that you have installed on your computer.
- In the web address field type: www.xeroxscanners.com
- Press Enter on your computer's keyboard or click the option on screen to go to the web address.
- When the Xerox scanners web page loads click on Register Your Product.
- Fill in the registration form, all required fields have an asterisk (*).
Note: A valid e-mail address is required for registration.
- You will be asked to enter the serial number for the scanner, it is located on either the back or underneath the scanner.
- After filling in the form, click on Submit Your Registration to complete the registration.
Scanning to Removeable Media
3
This chapter includes:
• Memory Card or USB Flash Drive on page 22
• Android® Devices (Smartphones and Tablets) on page 25
- Apple iPad on page 28
• Other Mobile Devices on page 30
You can scan approximately 300 pages on each battery charge. You can scan items between 2"x2" and 8.5"x14", and the scanner will automatically crop the scanned image to the width and height of the item scanned.
Follow the instructions in this section to scan and transfer images with a standard SDHC memory card or USB thumb drive. If you want to transfer images wirelessly, please refer to Scan and Transfer Images Wirelessly with Eye-Fi on page 31 for configuring the Eye-Fi card for wireless image transfer.
Memory Card or USB Flash Drive
You can only scan to either a memory card or a USB flash drive. If you have both inserted in the scanner, the scanner will detect and use the memory card for scanning.
-
Remove the memory card from its case.
-
Place the memory card, with the copper strips face down, in the SD slot on the back of the scanner. Press on the card until it "clicks" into place.
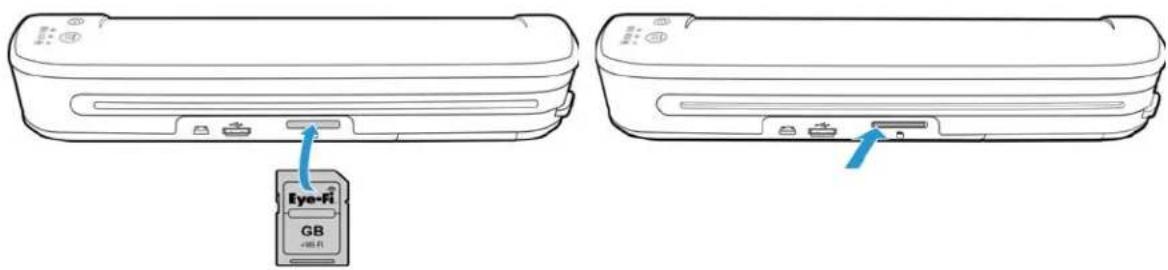
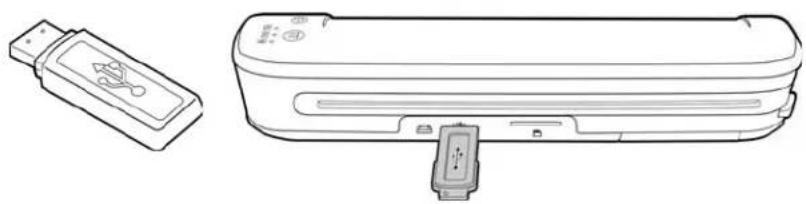
If you have a USB flash drive, you can connect it to the USB port on the back of the scanner instead of using a memory card.
natural_image
Line drawings of a USB flash drive and its internal components (no text or symbols)-
Turn on the scanner power.
-
All of the LEDs will flash as the scanner initializes. When the scanner is ready to scan, a single LED will be lit next to the first function represented by a camera icon.
-
Tap the function button on the scanner to cycle through the scan options until the LED is lit next to the option you want to use to scan.

Scans in color at 300dpi and creates a JPG (*.jpg) file.

Scans in black & white at 300dpi and creates an Adobe PDF (*.pdf) file.

Scans in color at 300dpi and creates an Adobe PDF (*.pdf) file.
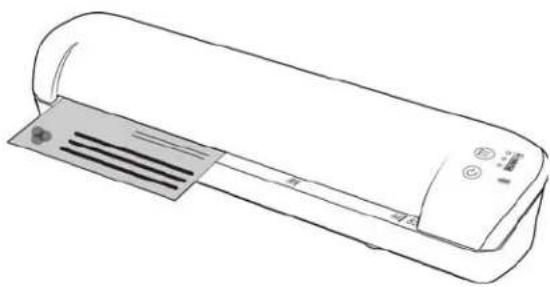
- Insert an item face up in the paper feed slot, aligned to the left side of the scanner.
natural_image
Line drawing of a refrigerated air conditioner unit with ventilation slots and control panel (no text or symbols)- The scanner detects the page and starts to feed it through the scanner.
Note that there will be a short pause after you insert the page before the scanner starts to feed the page. This pause allows you to straighten the item in the paper feed slot.
- When scanning is finished, the image is saved on the memory card or USB flash drive.
Creating Multiple Page PDF Files
-
Turn on the scanner
-
Tap the function button until the light is lit next to one of the PDF function icons. The PDF functions are represented by the page icons on the scanner.

Scans in black & white at 300dpi and creates an Adobe PDF (*.pdf) file.
Scans in color at 300dpi and creates an Adobe PDF (*.pdf) file.
-
Insert an item in the scanner.
-
The scanner scans and the LED for the PDF function will flash rapidly. This means that the scanner is waiting for an additional item.
-
You have 10 seconds from the last page scanned to insert a another item. Continue scanning until all pages have been scanned.
-
When you are finished you can let the timer run out, or simply press the function button.
-
When the LED stops flashing the PDF file is saved with all items scanned in one file.
Retrieving the Scanned Images
-
Remove the memory card from the scanner and insert it into the memory card reader in your computer. If you are using a USB flash drive, remove it from the scanner and plug it into a USB port on your computer.
-
The memory card or USB flash drive will be detected by the computer as a disc drive from which you can copy or move the images.
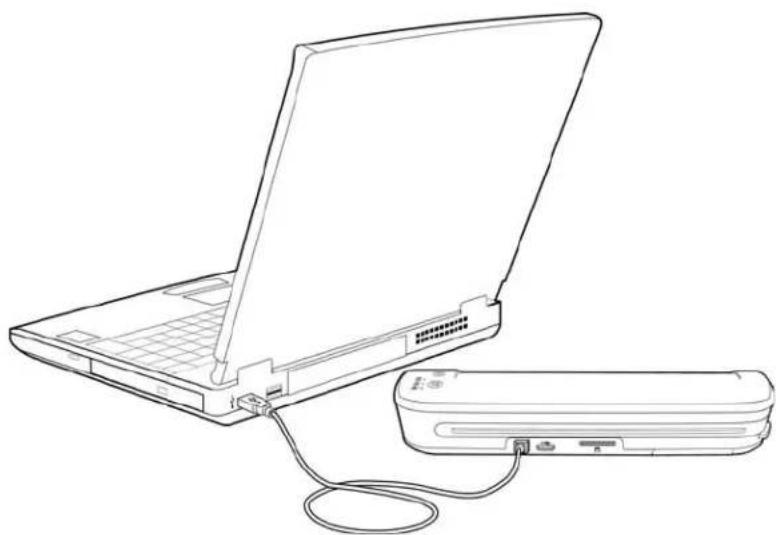
Alternatively, you can copy the images directly from the scanner when the scanner is connected to a computer with its USB cable.
natural_image
Line drawing of a laptop connected to a USB drive via cable (no text or symbols)Turn on the scanner power and the scanner will be detected as a disc drive for you to copy the images from the scanner.
Android ^® Devices (Smartphones and Tablets)
You can connect the scanner to an Android mobile technology based Smartphone or tablet and scan directly to the device's memory card.
Before proceeding, please note the following requirements for scanning:
- Scanning to a mobile device using a USB cable is only supported when the phone or tablet is able to be used as a disc drive.
To test this function for your device, attach it to your computer using its USB cable. If the device is detected as a disc drive you should be able to scan directly to it when it is attached to the scanner. If it is not detected as a disc drive, you will not be able to attach it to the scanner and scan. However, as indicated in the troubleshooting steps in this section of the user guide, the device may have several USB connection options (including auto-sync, disc drive, and charging). Please refer to your device's user documentation for information about the USB connection types.
- An external memory card must be installed in the mobile device for the scanner to detect it as a storage device.
Tip: the scanner automatically powers off after 2 minutes to conserve battery power. Tap the function button occasionally to keep the scanner powered on while initiating the connection between your mobile device and the scanner.
Note: If a memory card is in the scanner, remove it before proceeding with these instructions.
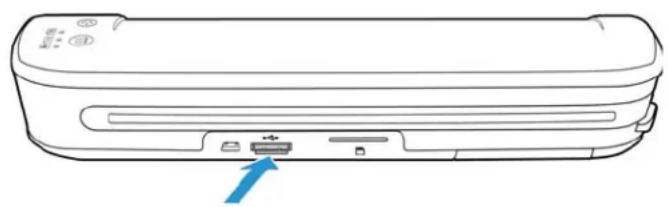
- Connect the phone's USB cable to the phone.
- Connect the other end of the USB cable to the USB port in the back of the scanner.
natural_image
Line drawing of a rectangular electronic device with a blue arrow pointing to a small component (no text or symbols)- Turn on the scanner.
The LEDs on the scanner will flash until the phone is properly detected as a USB flash drive.
- Your phone should now prompt you to choose the USB connection type. On your phone choose the USB connection type to mount it as a disc drive.
This is the same prompt you would receive when you plug your phone into a computer with a USB cable. If you do not see this prompt, refer to the troubleshooting steps below. - The LEDs on the scanner will stop flashing when the phone is properly set and detected as a USB storage device. When the scanner is ready to scan, a single LED will be lit next to the currently selected scan function.
- Tap the function button on the scanner to cycle through the scan options until the LED is lit next to the option you want to use to scan.
Scans in color at 300dpi and creates a JPG (*.jpg) file.

Scans in black & white at 300dpi and creates an Adobe PDF (*.pdf) file.
Scans in color at 300dpi and creates an Adobe PDF (*.pdf) file.
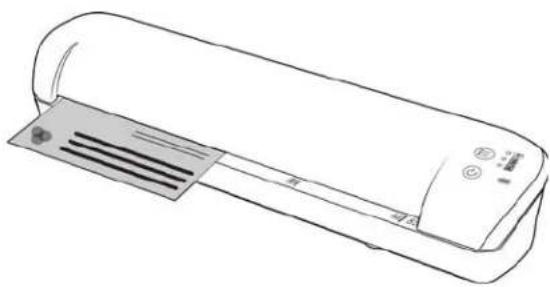
- Insert an item face up in the paper feed slot, aligned to the left side of the scanner.
natural_image
Line drawing of a refrigerated air conditioner unit with ventilation slots and control panel (no text or symbols)- The scanner detects the page and starts to feed it through the scanner.
Note that there will be a short pause after you insert the page before the scanner starts to feed the page. This pause allows you to straighten the item in the paper feed slot.
- When scanning is finished, the image is saved to the phone.
Retrieving the Scanned Images
Please follow your normal process for viewing, saving, or forwarding files on your phone. In most cases, you will need to disconnect the device from the scanner to be able to access the scanned files.
Troubleshooting Connection Issues
While several models of Google Android mobile technology devices have been tested to work with the scanner, we cannot guarantee that every Android-based device will work, nor guarantee that every device will work as described above.
Here are some basic troubleshooting steps you can try if your scanner is unable to recognize the device as a destination drive.
Problem: The device did not display a prompt to choose the USB connection type.
Refer to your device's user manual for the available USB connection options when you plug the device into a computer.
Most devices have at least 3 USB options and they are usually to either "charge" the phone via the USB cable, "sync" the phone with the software on the computer, or mount it as a "disc drive" to transfer files to/from the phone.
These are the same options you should see when you plug the USB cable into the scanner instead of to the computer. If you do not see the prompt, check your device's USB connection settings and change it to be a disc drive if that option is not already selected.
The phone may have an option to always choose the previously selected USB connection and never prompt you to make the selection again. This may be why you are not getting a prompt to choose your connection type.
Problem: The phone is connected as a disc drive but the LEDs never stop flashing.
- Solution 1 :
Check to see if you have a memory card installed on the phone (such as a mini-SD or micro-SD card).
- Solution 2 :
Some of the devices we tested did not work immediately when selecting the option to use it as a disc drive. If you run into this problem with your device, try the workaround steps listed below. If you find that this procedure works, it must be used each time you connect the scanner to the device:
- Connect the device's USB cable to the device.
- Connect the other end of the USB cable to the USB port in the back of the scanner.
- Turn on the scanner.
- Select the "disc drive" option on your device when prompted.
- At this time the scanner LEDs just continuously flash.
- Change the device's USB connection type from the "disc drive" option to the "sync" option.
- Immediately change the device's USB connection type back to "disc drive".
- The device should now initialize its storage properly and the scanner LEDs should stop flashing.
Apple iPad
Important: you must have an iPad Camera Connection Kit from Apple to use the scanner with an iPad. The camera connection kit contains a USB adapter that plugs into the dock connector on the iPad. You need to attach the USB adapter to the iPad before proceeding with these instructions.
You can only scan using the JPG function, represented by the camera icon, when scanning to the iPad.
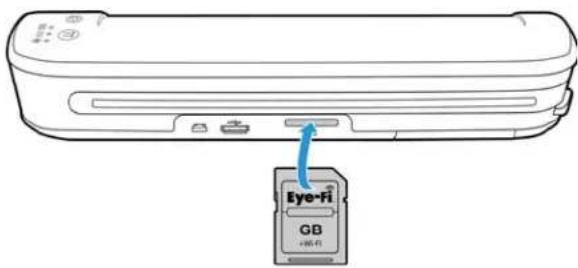
- Insert a memory card into the memory card slot on the scanner.
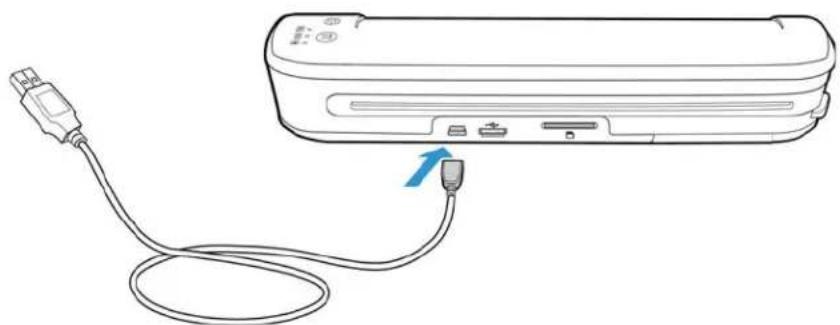
- Plug the small end of the scanner's USB cable into the mini-USB port on the back of the scanner.
natural_image
Line drawing of a device with a USB cable and a blue arrow pointing to the cable (no text or symbols)-
Connect the other end of the USB cable to the tablet.
-
Turn on the scanner power.
-
All of the LEDs will flash as the scanner initializes. When the scanner is ready to scan, a single LED will be lit next to the first function represented by a camera icon.
-
Make sure the camera function on the scanner is selected.

Scans in color at 300dpi and creates a JPG (*.jpg) file.
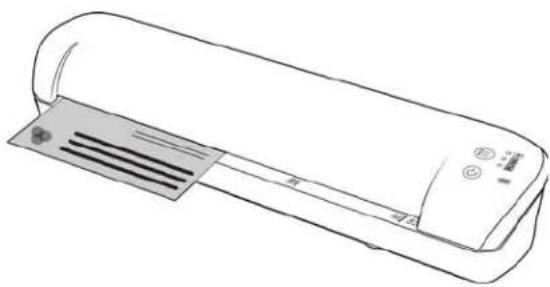
- Insert an item face up in the paper feed slot, aligned to the left side of the scanner.
natural_image
Line drawing of a refrigerated air conditioner unit with ventilation slots and control panel (no text or symbols)- The scanner detects the page and starts to feed it through the scanner.
Note that there will be a short pause after you insert the page before the scanner starts to feed the page. This pause allows you to straighten the item in the paper feed slot.
- When scanning is finished, the images show in the iPad gallery ready to be imported. Please follow your normal process for importing and viewing files in the iPad.
Please disconnect the scanner's USB cable from the iPad after scanning and transferring images using the CCK. When the scanner is plugged in, but turned off, the scanner will attempt to charge the battery. This is the expected behavior and will result in a message displaying on the iPad that the device is requiring too much power.
Other Mobile Devices
iPod and iPhone, Blackberry, and Windows Mobile Devices
The device you want to scan to must have external media installed (e.g. a mini-SD or micro-SD card), and the device must be able to be recognized as a disc drive when connected with a USB cable (i.e. assigned a drive letter in Windows Explorer or detected as a removable disc drive in Mac Finder).
Because of these requirements, the scanner cannot connect and scan directly to an iPhone or iPod using a USB cable at this time. Some BlackBerry and Windows based mobile devices may have similar limitations. For example, we connected and successfully scanned to the BlackBerry Curve 8530, but we were unable to connect and scan to the BlackBerry Curve 9300. If you have a BlackBerry or Windows mobile device, you can try following the directions in Android® Devices (Smartphones and Tablets) on page 25 to see if you can connect your scanner and scan.
Scan and Transfer Images Wirelessly with Eye-Fi
This chapter includes:
• Install the Eye-Fi Center Application on page 32
• Log In and Activate the Eye-Fi Card on page 35
• The Eye-Fi Card Settings on page 39
• Scan and Send Files to a Computer on page 45
• Scan and Send Files to aniOS Mobile Device (iPad, iPod, and iPhone) on page 49
• Scan and Send Files to an Android Mobile Device on page 63
• PDF File Transfer using Evernote on page 70
• Access and Delete Images from the Eye-Fi Card on page 72
• Airplane Mode on page 73
• Troubleshooting and Error Messages on page 74
An Eye-Fi card is a secure digital high-capacity (SDHC) memory card with wireless function. Using an Eye-Fi card you can scan and transfer images wirelessly from the Xerox Mobile Scanner to your computer, online file sharing site, or mobile device.
The Eye-Fi card provided with your scanner can transfer both JPG and PDF files, including multi-page PDF files. The instructions in this section will take you through configuring the card settings to transfer both file types.
You will need to install the Eye-Fi Center software on your computer to activate the card and register it to an Eye-Fi account. The Eye-Fi Center software installer is located on the Eye-Fi card. After you have activated the Eye-Fi card with your account, you can then configure the options to send the image files to your computer, online account, or mobile device.
Currently you can transfer images to iOS and Android based mobile devices. BlackBerry and Windows mobile devices are not supported at this time.
Install the Eye-Fi Center Application
Before you begin installing the software, make sure you have an active Internet connection. The Eye-Fi software will look for updated software during installation and you will be prompted to install any available updates.
You can use either a standard memory card reader or install the software with the Eye-Fi card in the scanner, connected and powered on.
Note: Do not delete any files or folders that are already on the Eye-Fi card when you first use it. A folder named DCIM is created when images are saved to the card. This is the only folder that you should modify or delete from the card.
Tip: the scanner automatically powers off after 2 minutes to conserve battery power. If you decide to install the software using the scanner as the memory card reader, tap the function button occasionally to keep the scanner powered on while installing the software.
-
With the scanner off and Eye-Fi card in the scanner, connect the cable to the scanner.
-
Press and hold the power button on the scanner until you see a light flash on the scanner. The computer detects the scanner as a disc drive.
-
Windows users—AutoRun will display a list of options for you to choose how to view the folder. Select the option to "Open folder to view files".
Mac users—an Eye-Fi icon appears on the desktop.
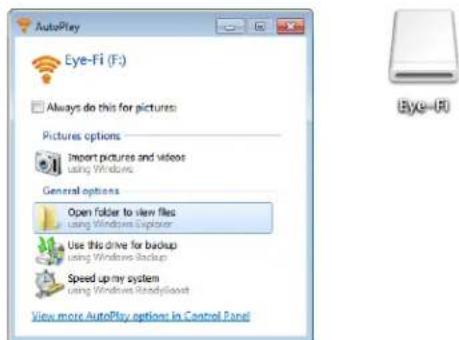
Note: if Eye-Fi does not appear on the desktop (Mac users) or if AutoRun does not prompt you (Windows users), open a computer window to locate the disc drive. You can also try plugging the scanner into a different USB port if the scanner is not being detected properly.
- Click or double-click the EYE-FI drive to open it.

-
Open the START HERE folder.
-
Open the Mac OS X or Windows folder.
-
Windows—double-click on Setup to launch the Eye-Fi installer.
Mac—double-click on Eye-Fi and then double-click on Eye-Fi Installer to launch the Eye-Fi installer.
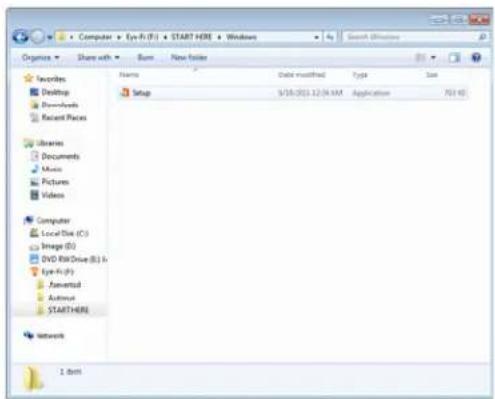
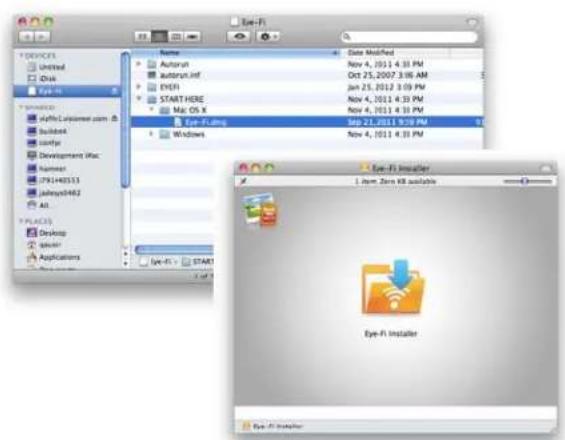
If there is an active Internet connection to your computer, the Eye-Fi installer will automatically check to see if there is a newer version of the software. If a newer version is found it will be downloaded to your computer and then the installer will launch when the download is complete.
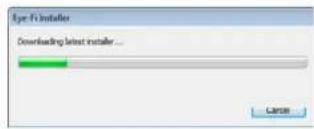
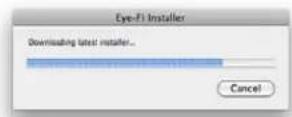
- Follow the installation prompts on-screen to install the Eye-Fi Center application.
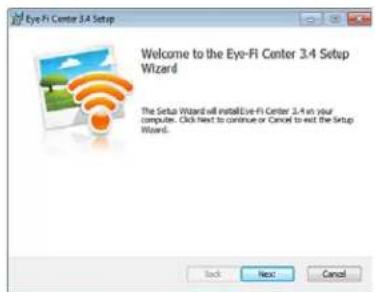
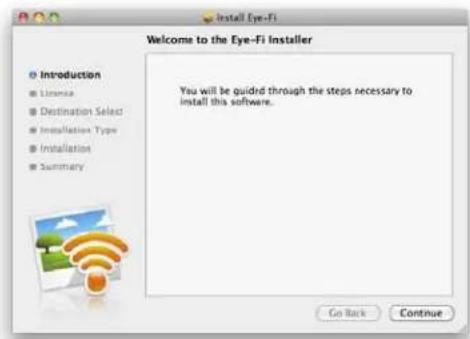
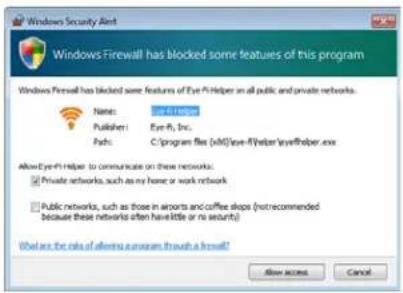
- Windows users—at the end of the installation the Eye-Fi Helper Firewall Tuning utility will open. Read the instructions on screen and follow the steps to configure Windows Firewall to allow access for the Eye-Fi Helper.
- The Eye-Fi Center automatically opens when you click on Close or Finish at the end of the installation.
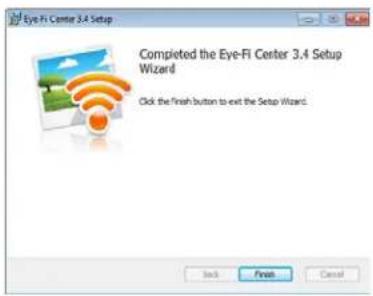
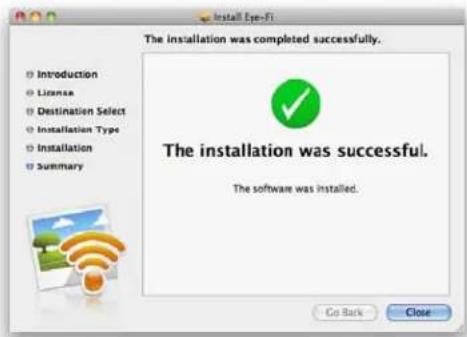
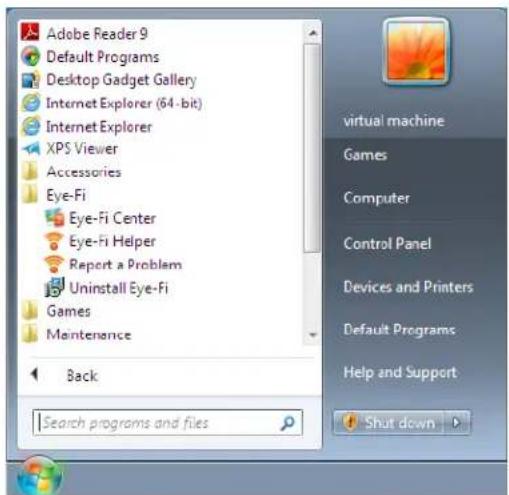
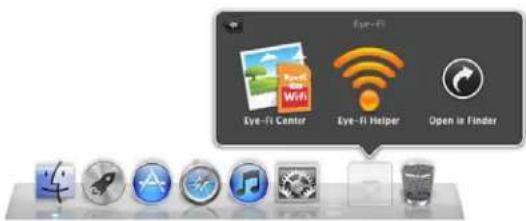
If the application does not open automatically, launch the application from the programs list for your computer.
Log In and Activate the Eye-Fi Card
Make sure the Eye-Fi card is in a memory card reader or in the scanner with the power on before you continue.
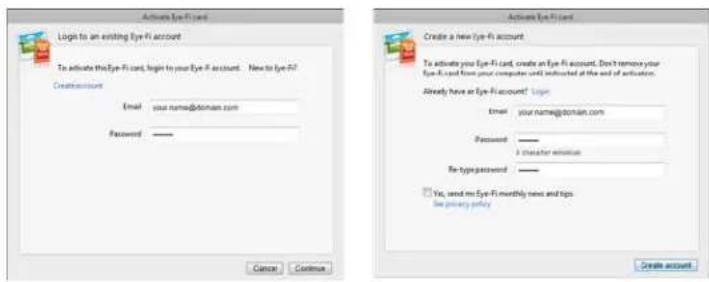
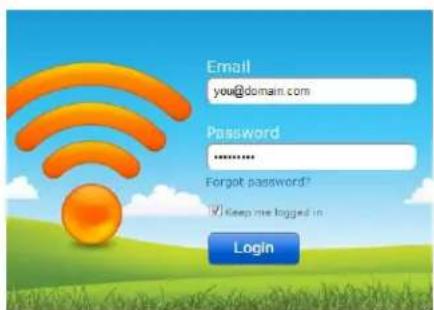
When the Eye-Fi Center opens the first time after installation, a login window is displayed. If you already have an Eye-Fi account please login now. Your new Eye-Fi card will be activated to your existing account. If this is your first time using Eye-Fi, you need to create an account. A valid Email address is required for registering, activating, and using the Eye-Fi card.
As you go through the card activation steps described below, you will also be configuring the Eye-Fi card's network settings and image transfer options. We recommend that you leave the default options selected during setup. You can change these options later.
Note: If the scanner times out during the registration process, turn it on again by pressing the power button until a light flashes.
- Launch the Eye-Fi Center application as follows:
Windows users—open Start > Eye-Fi > Eye-Fi Center.
Mac users—open the Applications folder, access the Eye-Fi folder, then Eye-Fi Center.
- Input your email address and password in the appropriate fields. If you are logging into an existing account click the login button. If you are creating an account, re-type the password and click the option to create the account.
- If prompted to update the firmware on the card, do so by clicking the Update button.

During the firmware update it is important that the Eye-Fi card is not removed from the computer. If you are using an memory card reader, make sure you leave the card in the computer until the Eye-Fi application displays a window that the firmware update is complete. If the Eye-Fi card is in the scanner, the scanner lights will continuously flash while the update is in process. The lights will stop flashing when the firmware update is complete.
When the firmware update is complete, you can proceed with activating the card and configuring the card settings.
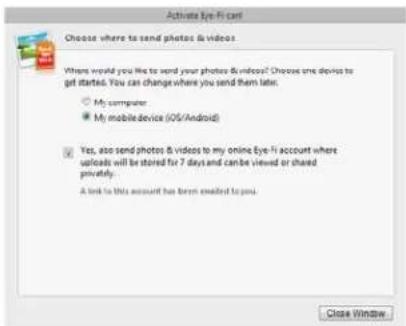
- At the Choose where to send photos & videos dialogue, select the options you want and then click on Continue.
My computer—images are transferred to your computer when you are within range of your configured wireless network. This is the default option and the rest of the instructions in this section proceed from this option being selected.
However, if you do not have a wireless network, or you do not want to add a wireless network to Eye-Fi card, select the second option.
My mobile device (iOS / Android)—images are transferred to your mobile device. You will need to download and install a mobile application onto your device to be able to connect to, and receive images from, the Eye-Fi card. The Alternate activation option instructions below describes the activation process from selecting this option.
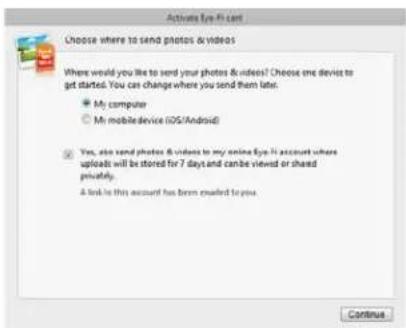
Yes, also send photos...—when this option is selected, all images are also saved to Eye-Fi View online where you can access them by logging into your account at www.eye.fi.
- The next window allows you to select the Wi-Fi network you want to add to the Eye-Fi card. Select your network from the list and then input the network password. Click Continue.
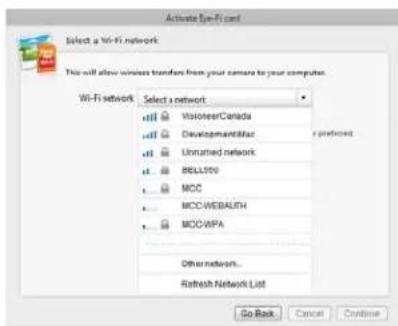
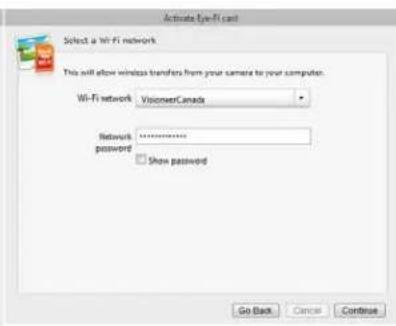
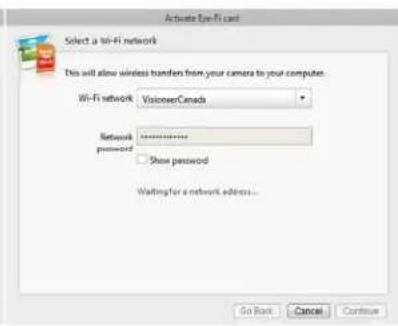
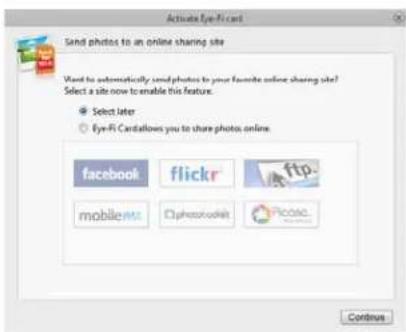
- At the Send photos to an online sharing site dialogue, leave the Select later option selected then click on Continue. You can configure file sharing later.
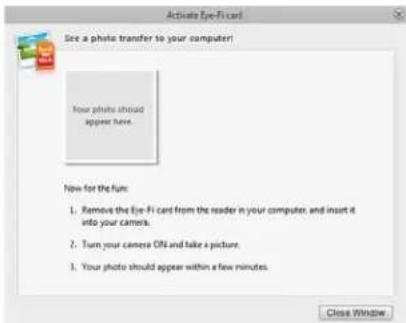
- Click on Close Window on the final Eye-Fi card activation dialogue.
If you want to see a test scan using the Eye-Fi card, you need to disconnect the scanner from the computer and then power cycle the scanner before you do a sample scan and transfer.
-
If you created an account, an email is sent to you. Click the link in the email to verify the account. A welcome email is then sent to you.
-
Click Close on the Eye-Fi Center welcome screen.
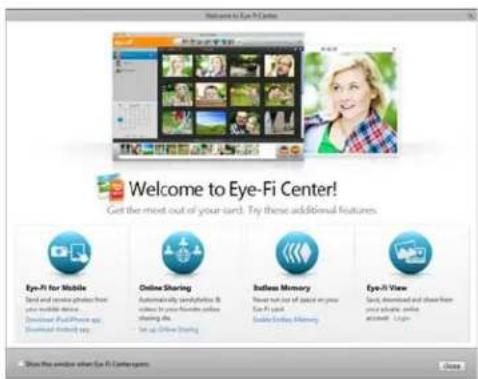
That's it! If you selected the option to send scanned images to your computer, and you configured a wireless network for the Eye-Fi card, simply disconnect the scanner from the computer and power cycle the scanner. When the scanner power is back on, insert a page into the front of the scanner. When scanning is finished the image is saved to the Eye-Fi card and transmitted over your wireless network to your computer. It will display in the Eye-Fi Center application when the transfer is complete.
Alternate activation option
- At the Choose where to send photos & videos dialogue, select My mobile device (iOS/Android) as the destination, and then click on Close Window.
- Select your mobile device type at the Choose your mobile device dialogue and then click on Close Window.
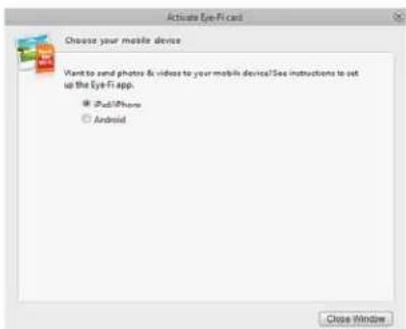
- Click Continue on each successive dialogue that displays on-screen, and then click on Close Window on the final screen.
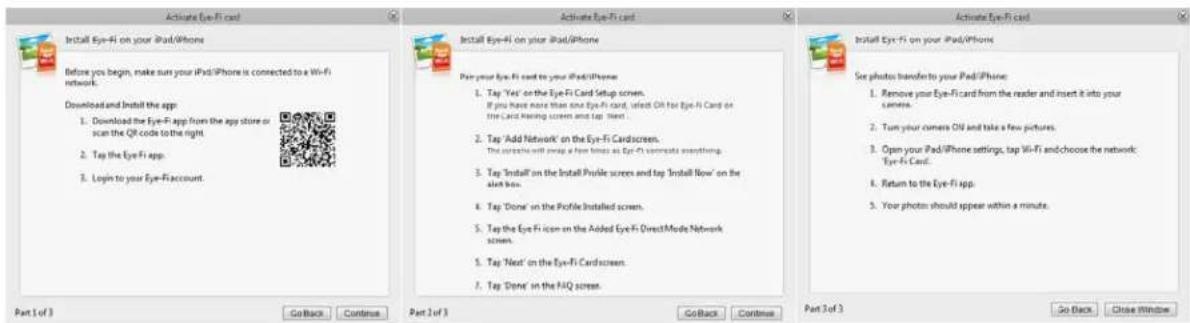
The instructions in these dialogues describe the process for downloading and installing the mobile application on your device. We recommend that you instead refer to the user guide section linked below for detailed instructions specific to you mobile device type.
- Scan and Send Files to aniOS Mobile Device (iPad, iPod, and iPhone) on page 49
• Scan and Send Files to an Android Mobile Device on page 63
The Eye-Fi Card Settings
This section describes configuring the Eye-Fi card settings for scanning and wireless transfer of images. For any options not described here-in, clicking on the help button in the Eye-Fi center window will open the online help site for the Eye-Fi Center application.
Many of the options discussed in this section will have already been configured based on your selections while registering and activating the card. The purpose of this section is to describe the most commonly configured options for the Eye-Fi card.
Some of the options in the Eye-Fi Center can only be configured when the Eye-Fi card is connected to the computer as those settings are saved to the Eye-Fi card. Other options do not require the Eye-Fi card to be connected as the settings are saved in the Eye-Fi Center and to your Eye-Fi account when applicable.
The Eye-Fi Helper Utility
The Eye-Fi Helper utility is the link between your computer and your online account and is responsible for routing files to your computer from the Eye-Fi Servers. The Eye-Fi Helper also relays the settings you choose in the Eye-Fi Center application to your online account as needed. For example, when you enable Eye-Fi View in the Eye-Fi Center, the Eye-Fi Helper passes this setting to the Eye-Fi servers, and when you log into your account at www.eye.fi, the you will be able to view your files online after you scan. Alternatively, if you do not enable Eye-Fi View in the Eye-Fi Center, when you go to www.eye.fi and log into your account, you will have the option to enable Eye-Fi View at that time. When you enable Eye-Fi view online, the Eye-Fi Helper utility passes this information to the Eye-Fi Center on your computer, and the next time you open the settings for your account, you will see that Eye-Fi View is enabled in the Eye-Fi Center. The Eye-Fi Helper maintains a constant link between your computer and the Eye-Fi servers.
The Eye-Fi Helper, which is installed when you install the Eye-Fi center application, starts automatically at the end of the installation and each time the computer starts. When the Eye-Fi Helper is running it displays an icon next to your system clock.
To close the Eye-Fi Helper utility, click on the icon and select Exit or Quit from the menu. You can start the Eye-Fi Helper by clicking on its icon in the Eye-Fi folder located in the applications list for your computer.
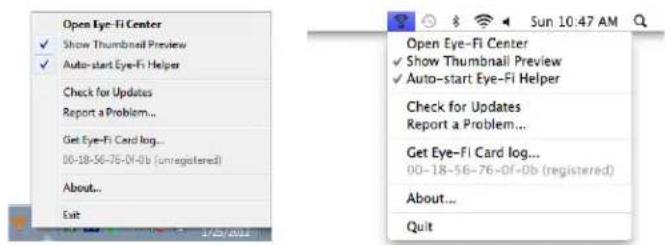
To prevent the Eye-Fi Helper utility from starting automatically each time the computer starts, click on the icon and then click on Auto-start Eye-Fi Helper to deselect that option.
Adding or Removing Private Wireless Networks
Note: you will need to have the Eye-Fi Card connected to the computer to configure the network options for the card. You can either insert the card into the scanner, connect it the computer and turn on the power, or you can use a standard SDHC memory card reader.
- Open the Eye-Fi Center software and log in.
- Click on the gear icon next to the Eye-Fi card to open the settings window.
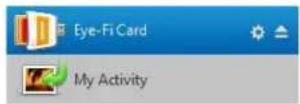
Use the Private Networks tab to add or change a wireless network for your Eye-Fi card. You can have multiple networks configured for the Eye-Fi card so that if you are within range of any one of these networks the Eye-Fi card will be able to transfer the scanned images.
- Click the Networks tab, then the Private Networks tab.
Wireless networks that are already configured for the Eye-Fi card are displayed in the lower part of the screen.
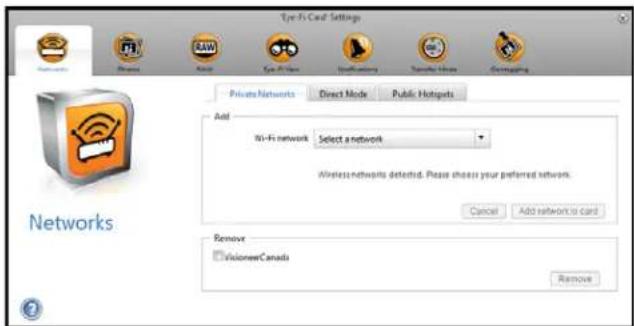
- Click on the drop menu arrow and select a wireless network from the list. This list includes all wireless networks within range of the Eye-Fi card.
To refresh the list select Refresh Network List.
-
Input the network password and fill in any other fields required to access the network.
-
Click the Add network to card button to use the wireless network.
Other Networks
If you want to connect to a network that you are not within range of at this time, select Other network in the list and then configure the settings for that network.
- Enter the name for the other network.
- Select the security type for the other network from the drop down menu.
- Enter that network's password.
- Select Network is out of range.
- Click add Network to Card.
Direct Mode
Note: you will need to have the Eye-Fi Card connected to the computer to configure the network options for the card. You can either insert the card into the scanner, connect it the computer and turn on the power, or you can use a standard SDHC memory card reader.
Direct Mode is the Eye-Fi card's ability to transfer images directly to a mobile device when the Eye-Fi card is not in range of a configured wireless network. Please click on one of the links below to go to the section of this user's guide for instructions on configuring your mobile device to receive images from the Eye-Fi card.
• Scan and Send Files to aniOS Mobile Device (iPad, iPod, and iPhone) on page 49
• Scan and Send Files to an Android Mobile Device on page 63
Transferring Photo Files (JPG Files)
Note: you do not need to have the Eye-Fi card connected to the computer to change these settings. The Eye-Fi Helper utility will route the files to the appropriate locations based on the settings you choose in this window.
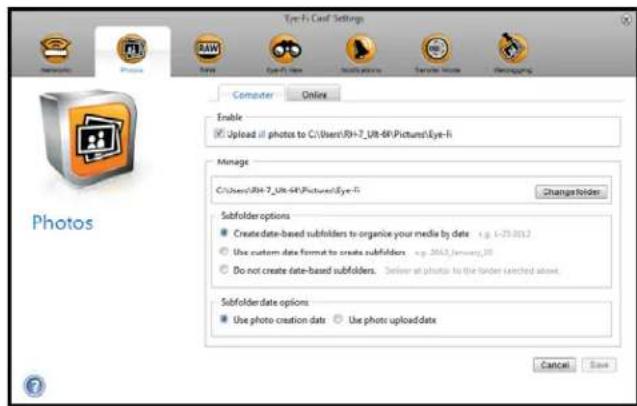
Click on the Photos tab to select where you want JPG files transferred. The JPG scan function is indicated on the scanner with a camera icon.
- Computer—select Upload photos to this computer option to have images transferred to your computer when the scanner is in range of a wireless network you configured for the Eye-Fi card. Your computer must be on to receive the scanned images. Select the other options in this dialogue as needed for where you want files saved on your computer. If your computer is not always on, we recommend that you also enable the Transfer Mode type Relayed Transfer if you want images to be saved on the Eye-Fi servers, and then routed to your computer the next time you turn it on.
If you have configured a mobile device to receive scanned images, the device that the files will be sent to is displayed in this dialogue.
Click on the Save button when you are done making changes in this dialogue.
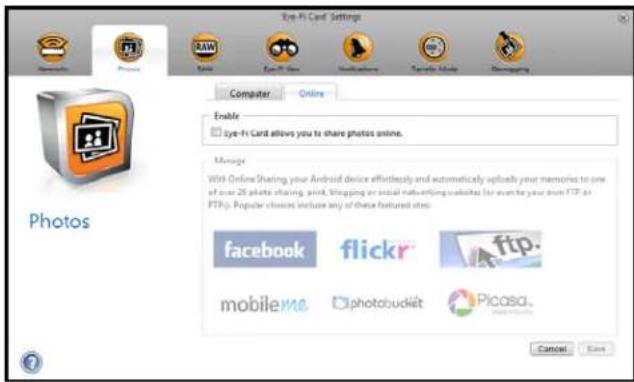
• Online—select Eye-Fi Card allows you to share photos online and then choose the file sharing site that you want to use for uploading and sharing files. Follow the dialogue prompts on-screen to configure these options.
If your site is not shown in the list click on More Sites, and then select the option to display all sites from the menu.
If you enable this option the Transfer Mode type Relayed Transfer is automatically enabled.
Note that even if you configure an online sharing site, images are still transferred to your computer unless you deselect the option to upload photos to your computer on the Computer tab.
Click on the Save button when you are done making changes in this dialogue.
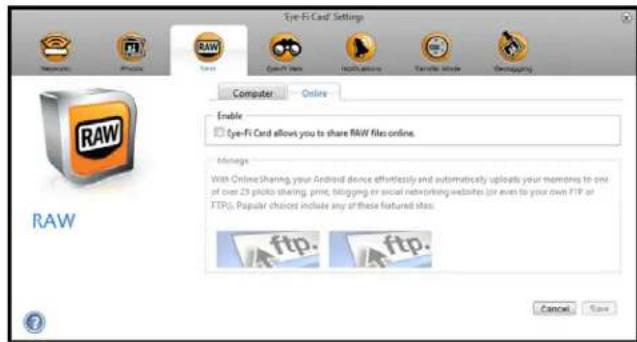
Transferring RAW Files (PDF Files)
Note: you do not need to have the Eye-Fi card connected to the computer to change these settings. The Eye-Fi Helper utility will route the files to the appropriate locations based on the settings you choose in this window.
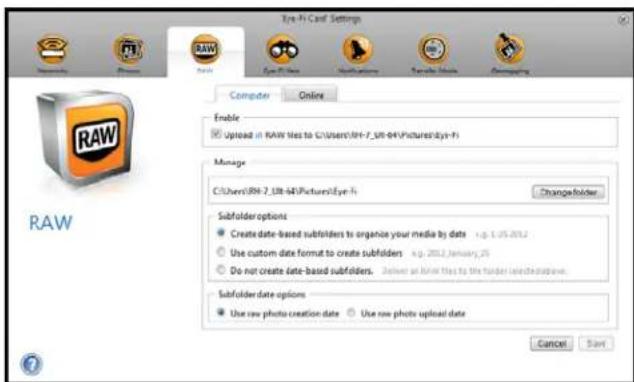
Click on the RAW tab to select where you want PDF files transferred. The PDF scan functions are indicated on the scanner with page icons.
- Computer—select Upload RAW files to this computer option to have files transferred to your computer when the scanner is in range of a wireless network you configured for the Eye-Fi card. Select the other options in this dialogue as needed for where you want files saved on your computer. If your computer is not always on, we recommend that you also enable the Transfer Mode type Relayed Transfer if you want images to be saved on the Eye-Fi servers, and then routed to your computer the next time you turn it on.
If you have configured a mobile device to receive scanned files, the device that the files will be sent to is displayed in this dialogue.
Click on the Save button when you are done making changes in this dialogue.
- Online—select Eye-Fi Card allows you to share RAW files online and then choose the file sharing site that you want to use for uploading and sharing files. Follow the dialogue prompts on-screen to configure these options. If your site is not shown in the list click on Add New Online Destination and follow the prompts on-screen to configure a new online destination.
If you enable this option the Transfer Mode type Relayed Transfer is automatically enabled.
Note that even if you configure an online sharing site, images are still transferred to your computer unless you deselect the option to upload photos to your computer on the Computer tab.
Click on the Save button when you are done making changes in this dialogue.
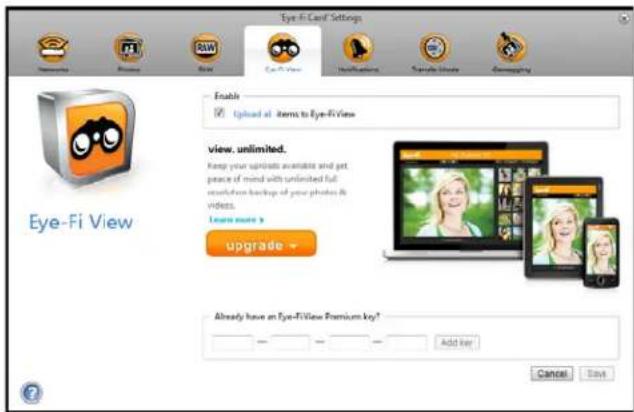
Eye-Fi View
Note: you do not need to have the Eye-Fi card connected to the computer to change these settings. The Eye-Fi Helper utility will route the files to the appropriate locations based on the settings you choose in this window.
Select Send items to my Eye-Fi View to have all scanned files also sent to your online account for you to access from any computer. With the free Eye-Fi account the files are available for up to 7 days. Note that if you enable this option Transfer Mode is automatically enabled.
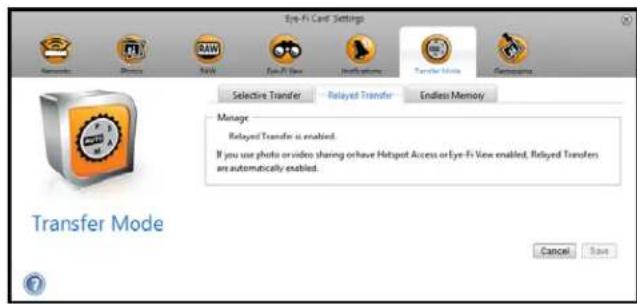
Transfer Mode
Selective Transfer—the options in this window are for choosing how you want protected files to be transferred. At this time you cannot protect files on the card using the scanner. With digital camera you can protect a file and whatever options you select in this dialogue will apply only when you use this Eye-Fi card in your digital camera.
Relayed Transfer—this option is enabled by default if you are uploading photos to an Online Sharing site. If you are only uploading media to a computer destination, the Relayed Transfer option will give you the ability to automatically transfer the media even when your computer is off. Your media will be automatically transferred via a configured wireless network on the card to the Eye-Fi servers. When your computer is turned back on and the Eye-Fi Software is running, it will contact the Eye-Fi Servers to download the staged media. You do not need to have the Eye-Fi card connected to the computer to turn this option on or off.
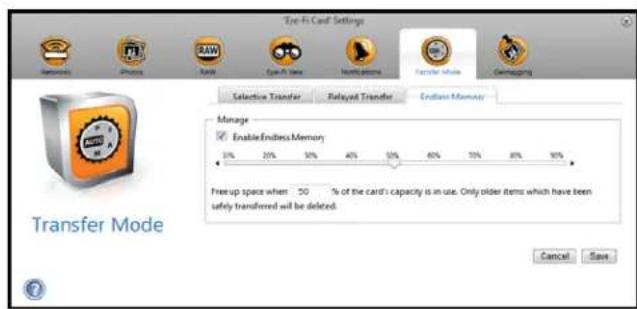
Endless Memory—when images are transferred, they are copied to the computer/device. The original images remain on the Eye-Fi card until deleted from the card. So even if the images do not transfer as expected, they can be accessed from the card later. When you select Enable Endless Memory and move the slider to a specific percentage, the Eye-Fi card will automatically delete the oldest files to keep that percentage of free space on the card. Only files that have been transferred will be deleted. The Eye-Fi card must be connected to the computer for you to configure the options in this dialogue.
Endless Memory—the Endless Memory option in the Eye-Fi Center software may not work with the custom Eye-Fi card provided with your scanner. Please refer to Access and Delete Images from the Eye-Fi Card on page 72 for instructions on how to enable the option for automatically deleting transferred files.
Scan and Send Files to a Computer
When images are transferred, they are copied to the computer/device. The original images remain on the Eye-Fi card until deleted from the card. So even if the images do not transfer as expected, they can be accessed from the card later. Before scanning, make sure you have configured your Eye-Fi card for wireless image transfer as described in the previous section.
- Turn on the scanner power.
- All of the LEDs will flash as the scanner initializes. When the scanner is ready to scan, a single LED will be lit next to the first function represented by a camera icon.
- Tap the function button on the scanner to cycle through the scan options until the LED is lit next to the option you want to use to scan.

- Insert an item face up in the paper feed slot, aligned to the left side of the scanner.
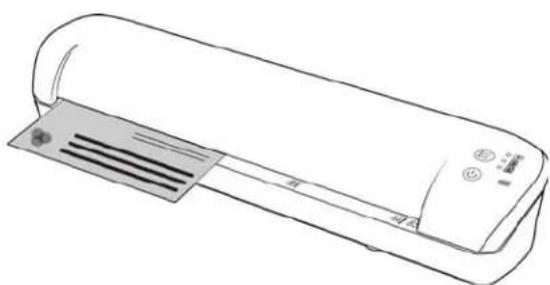
natural_image
Line drawing of a refrigerant air conditioner unit with ventilation slots and control panel (no text or symbols)- The scanner detects the page and starts to feed it through the scanner.
Note that there will be a short pause after you insert the page before the scanner starts to feed the page. This pause allows you to straighten the item in the paper feed slot.
Creating Multiple Page PDF Files
- Turn on the scanner
- Tap the function button until the light is lit next to one of the PDF function icons. The PDF functions are represented by the page icons on the scanner.


Scans in black & white at 300dpi and creates an Adobe PDF (*.pdf) file.
Scans in color at 300dpi and creates an Adobe PDF (*.pdf) file.
-
Insert an item in the scanner.
-
The scanner scans and the LED for the PDF function will flash rapidly. This means that the scanner is waiting for an additional item.
- You have 10 seconds from the last page scanned to insert a another item. Continue scanning until all pages have been scanned.
- When you are finished you can let the timer run out, or simply press the function button.
- When the LED stops flashing the PDF file is saved with all items scanned in one file.
Scan to a Windows Computer
On a Windows computer, when the Eye-Fi software is running in the background and scanning is performed within the wireless network, a visual indicator appears for each image being transferred automatically. The following figure shows that the Eye-Fi software is running in the background (second icon).
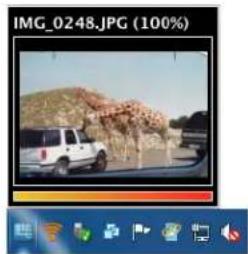
natural_image
Photo of a white pickup truck parked on a road with rocky terrain in the background (no visible text or symbols)- To view the images, open the Eye-Fi Center application, either by clicking the icon on the taskbar or launching from the menu, for example Start > Eye-Fi > Eye-Fi Center.
- Double-click the icon that displays the images for that date. The folder expands to display the images as icons.
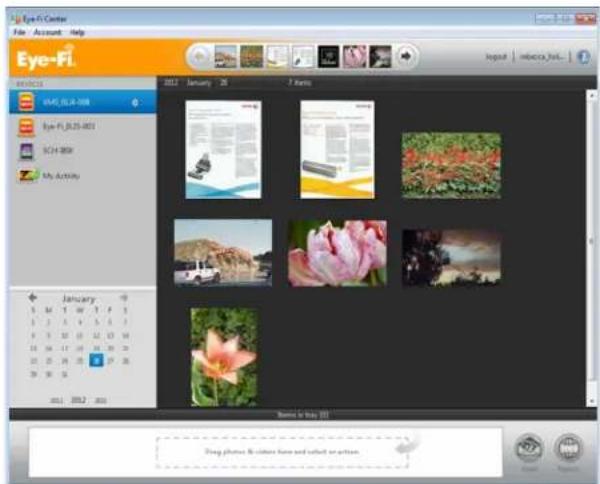
- Double-click an image icon to view the image.
Scan to a Mac Computer
On a Mac computer, when the Eye-Fi software is running in the background and scanning is performed within the wireless network, the images are transferred automatically to the computer. There is no visual indicator that the transfer is taking place.
- To view the images, open the Eye-Fi Center application, either by clicking the icon on the dock or by accessing the Applications folder. The following figure shows the Eye-Fi software running on the dock (second icon).

natural_image
Row of eight computer and app icons on a silver surface, including iPad, macOS, compass, gear, and smartwatch (no text or symbols visible)-
Double-click the icon that displays the images for that date. The folder expands to display the images as icons.
-
Double-click an image icon to view the image.
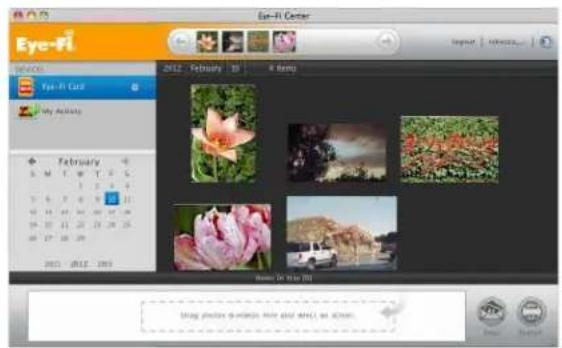
Access Images from Eye-Fi Web Site
When the option to send items to Eye-Fi View is enabled, you can access your scanned images from any computer through the Eye-Fi website.
Images are stored for seven days in the Eye-Fi account using the free account.
To access images:
-
In a web browser, access http://www.eye.fi
-
Click the login link.
-
Log in.
Xerox Mobile Scanner
User's Guide
- Select the specific card from the drop-down list on the left side instead of the device or My Activity.
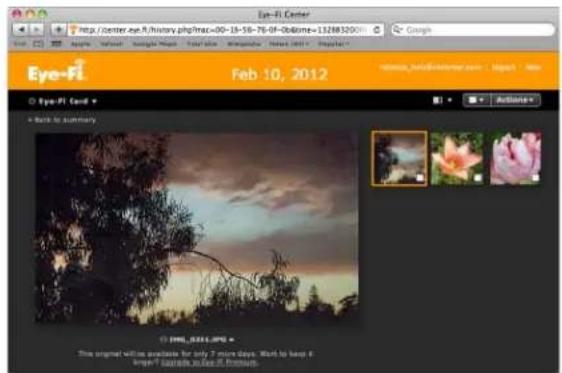
- Click an image icon to access the folder.
Scan and Send Files to aniOS Mobile Device (iPad, iPod, and iPhone)
Important: make sure Wi-Fi access is enabled on your mobile device.
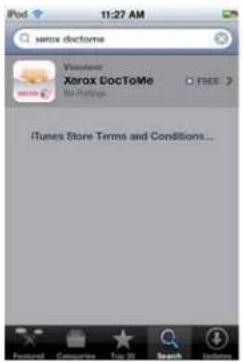
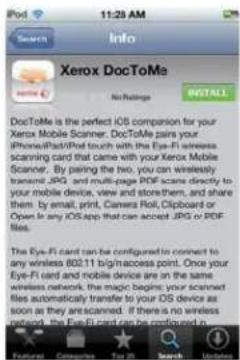
Download and Install Xerox DocToMe
- Open the App Store from your mobile device.
- Open the search field and then input: Xerox DocToMe
- Tap Search.
- Select Xerox DocToMe and follow the on-screen steps to download the mobile application to your device.
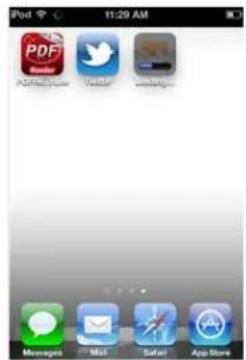
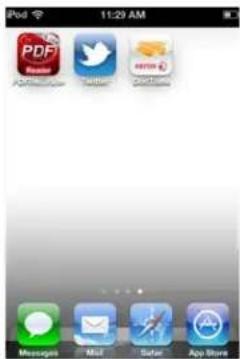
- Tap DocToMe to open the application.
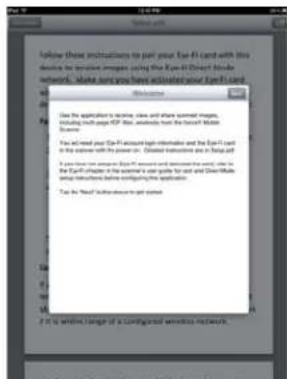
- Tap Next on the Welcome screen.
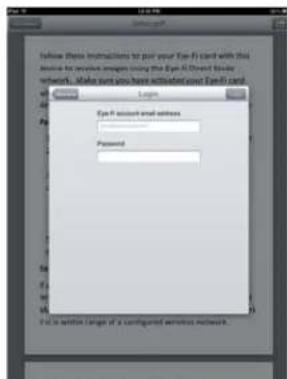
- Input your Eye-Fi account email address and password, and then tap Login. If the Eye-Fi card is in the scanner, make sure the scanner is powered on.
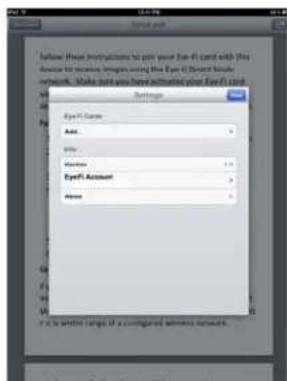
- Tap Add... under Eye-Fi Cards.
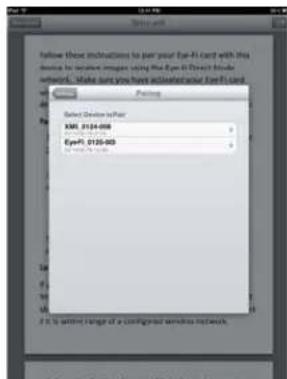
- Select your Eye-Fi card under Select Device to Pair.
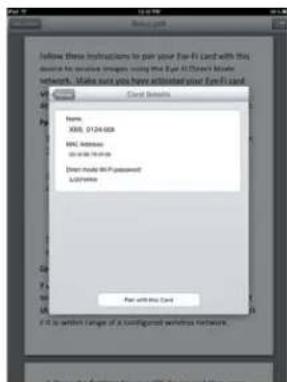
- Tap Pair with this Card to pair your mobile device with the Eye-Fi card.
- Tap Done on the settings Window.
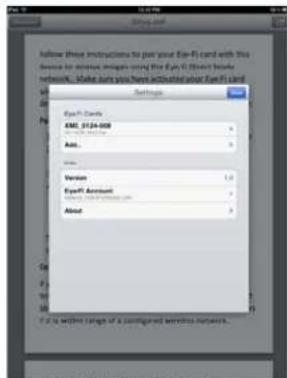
You will now be in the DocToMe mobile application. When you are within range of your configured wireless network, scanned images will be sent directly to your mobile device from the Eye-Fi card in your Xerox Mobile Scanner. Please refer to Using DocToMe on page 58 for instructions on scannig and sending images to your mobile device.
If you want to be able to scan and send files to your mobile device when you are not in range of a wireless network, you will need to connect to the Eye-Fi card's Direct Mode network. Please follow the instructions in the next section for configuring your mobile device to connect to the Eye-Fi card's Direct Mode Network.
Connecting to the Eye-Fi Direct Mode Network
The Eye-Fi card has the ability to create a network access point, for your to connect your mobile device, to receive images when you are not in range of your wireless network. When a Wi-Fi network is unavailable to transfer images, images can be transferred wirelessly from the Eye-Fi card to a mobile device. This is referred to as Direct Mode.
After you connect to the Eye-Fi Direct Mode network as described below, you will not need to follow these instructions again unless you intentionally remove the Eye-Fi network from you mobile device.
While going through these instructions you will be configuring the Eye-Fi Card settings using the Eye-Fi Center application on your computer, and configuring the mobile application on your mobile device.
Tip: the scanner automatically powers off after 2 minutes to conserve battery power. Tap the function button occasionally to keep the scanner powered on while initiating the connection between your mobile device and the scanner. Alternatively, if you have a memory card reader, you can insert the Eye-Fi card into the card reader for configuring the connection between your mobile device and the Eye-Fi card's Direct Mode network.
- On your computer—open the Eye-Fi Center application.
- With the Eye-Fi card in the scanner, connect the scanner to the computer and turn on the power.
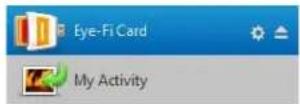
- When the Eye-Fi card shows as connected in the Eye-Fi Center application, click on the gear icon to open the settings for your Eye-Fi card.
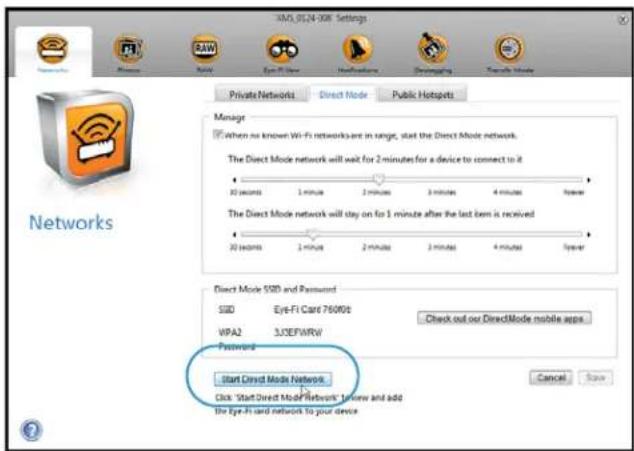
- Click the Networks tab, then the Direct Mode tab.
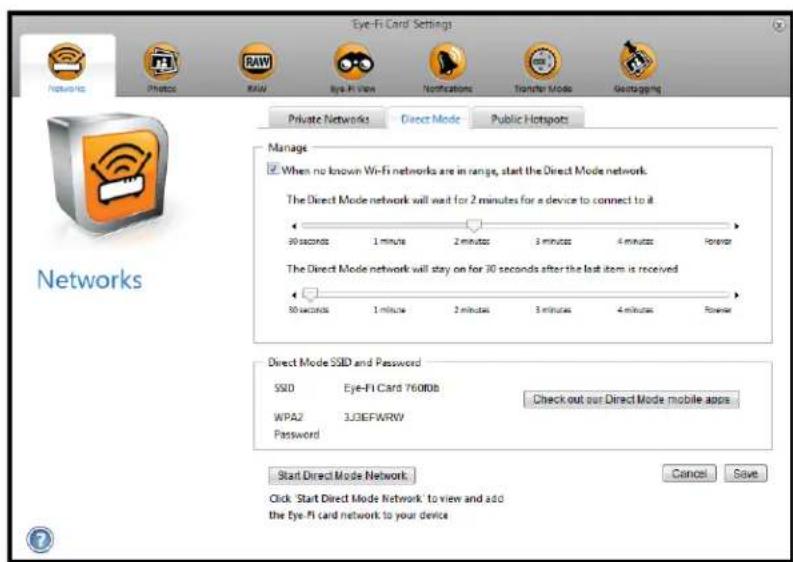
- Make sure the option to use Direct Mode when no known Wi-Fi networks are in range is selected.
- Move the sliders left or right to change the wait times for the Eye-Fi card. When the Eye-Fi card is broadcasting a network it is using the scanner battery to power the network. The recommended settings are:
Select 2 minutes for Direct Mode to wait for a device to connect to it.
Select 30 seconds for the Direct Mode to stay on after the last item is received.
52 Xerox Mobile Scanner
User's Guide
- Click the Save button.
Do not close this window yet. You will need to have this window open to start the direct mode network.
- On your mobile device—tap DocToMe to open the application.
These instructions assume that you have already logged into your Eye-Fi account, and paired to the Eye-Fi card, as indicated in the instructions for Download and Install Xerox DocToMe on page 49.
- Tap the gear icon to show the settings for DocToMe.
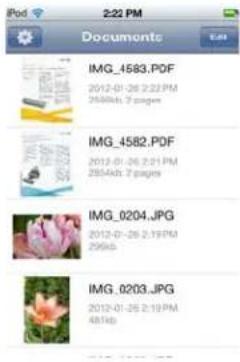
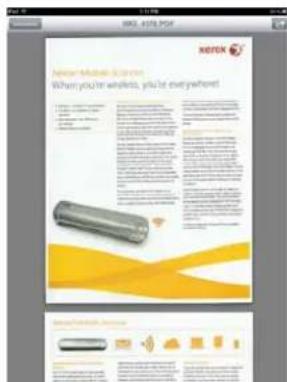
If you are looking at a document tap Documents to show the documents list and then tap the gear icon.
- Tap your Eye-Fi card in the Eye-Fi Cards list.
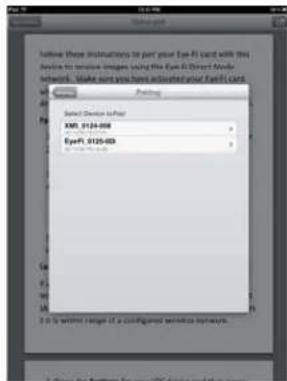
- The next screen displays your Eye-Fi card's network information, including the password for the Direct Mode Network. You can either write down the Direct mode Wi-Fi password, or you can press, hold, then release your finger on the password to highlight it, and then tap Copy when that prompt displays.
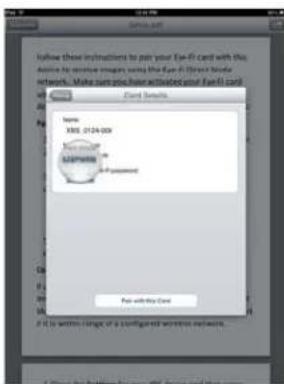
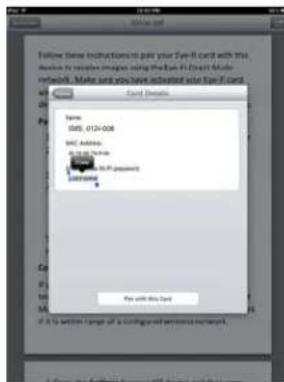
- Tap Pairing to return to the Settings screen.
- Tap Done on the Settings screen.
- Open the Wi-Fi settings for your mobile device.
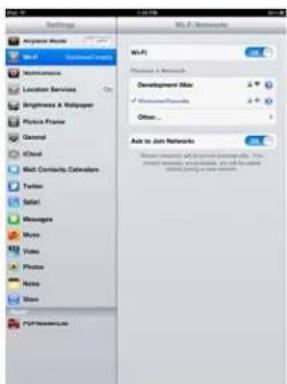
-
If the Eye-Fi card is in the scanner, make sure the scanner is still connected to the computer and powered on.
-
On your computer—in the Eye-Fi Center application on your computer, click on Start Direct Mode Network. If the card is in your scanner, the lights on the scanner will start flashing indicating that the Direct Mode Network has been initialized.
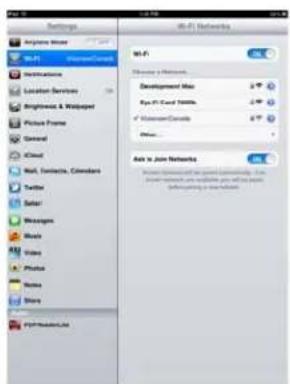
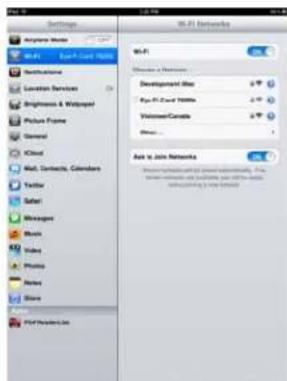
- On your mobile device—tap the Eye-Fi Card when it displays in the list of available networks under Choose a Network.
-
Tap in the password field for the Eye-Fi Card network.
-
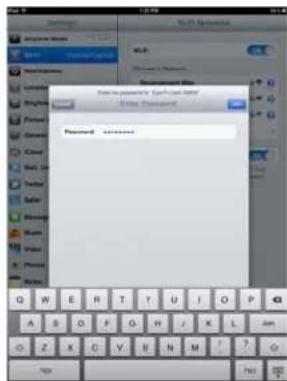
Input the password for the Direct Mode Network that was described in step 11 of theses instructions.
If you copied the password, press, hold, and then release in the password field, and then tap Paste when that prompt displays.
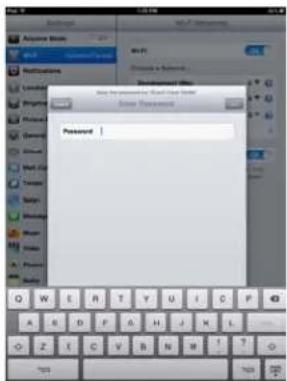
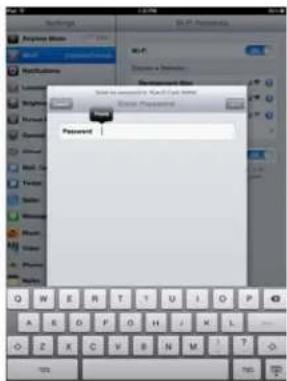
- Tap Join.
- The Settings for the mobile device will now show that it is connecting to the Eye-Fi Card network.
Technical note: if the Eye-Fi card doesn't display in the list of available networks for your mobile device after a minute, try clicking Start Direct Mode Network in the Eye-Fi Center application again.
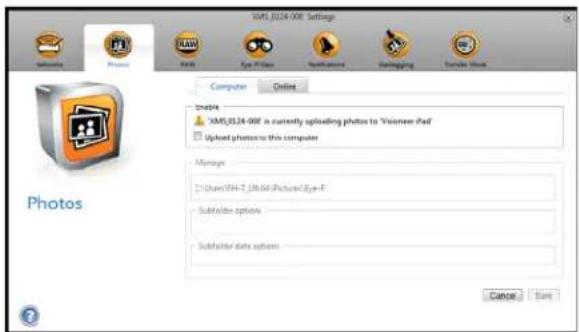
Note that if you had previously selected Photos and RAW files to be sent to your computer during the initial setup, pairing your mobile device with the Eye-Fi card automatically changes Photos and RAW files to be transferred to your mobile device.
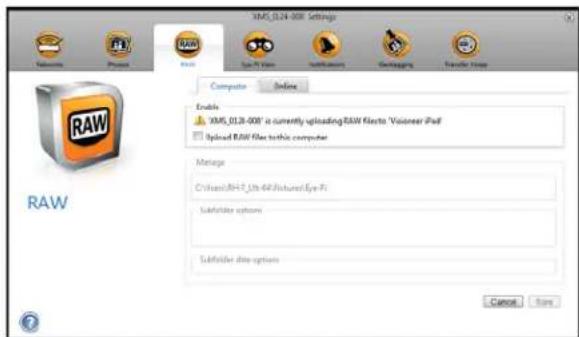
Testing the Direct Mode Network
After you have connected to the Direct Mode network we recommend that you run a test scan to verify the software is working as expected.
Note: if you have configured a wireless network for the Eye-Fi card, you will need to either temporarily disable your wireless network if possible, or remove the wireless network from the Eye-Fi card and then add it back again when you are done. If the Eye-Fi card is within range of a configured wireless network the scanned images will be transferred using the wireless network. Please refer to Adding or Removing Private Wireless Networks on page 40.
Test Scan for the Direct Mode Network
- Disable your wireless network or remove the network from the Eye-Fi card.
- Disconnect the scanner from the computer and power cycle the scanner.
- When the scanner power is back on, insert a photo in the scanner.
- The scanner scans saves the image to the Eye-Fi card, and the card starts transmitting the image.
- Open the DocToMe application.
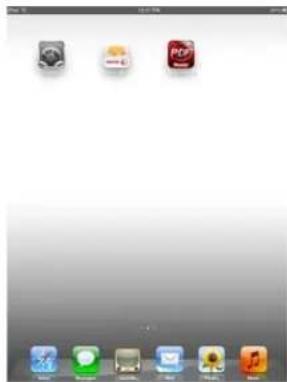
- The scanned image file will now start transferring into the DocToMe application.
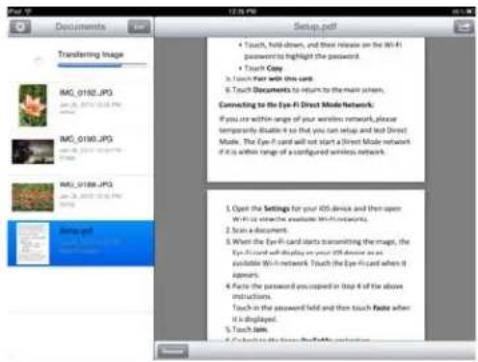
- When the scanned image appears in the document list you know that the Direct Mode connection is working as intended.
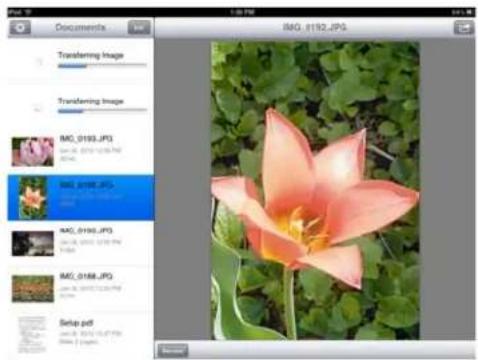
Depending on how you chose to set your wireless network for this test, you can either re-enable the network or connect the Eye-Fi card to the computer and add the wireless network to the Eye-Fi card. Please refer to Adding or Removing Private Wireless Networks on page 40.
Now that your mobile device has been configured for first time use, you should not have to repeat these steps. You can turn your wireless access point back on and whenever you are away from your network, you can scan directly to your tablet or phone.
Using DocToMe
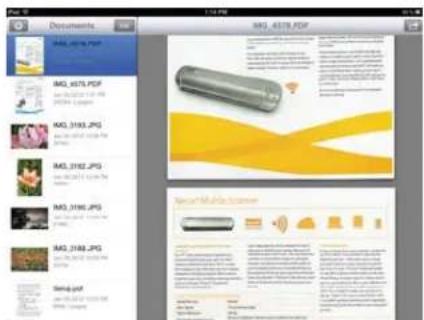
After you have configured the software to connect to the Eye-Fi card, you can use DocToMe to view and share scanned images, including multi-page PDF files. The scanned images that are transferred to your mobile device and will be displayed in the Documents list in the application.
Documents list and Image view
iPod and iPhone—when the full image view is open, tap the Documents icon to show the full documents list. You can scroll the list up and down. Tap on a document in the documents list to show the full image view.
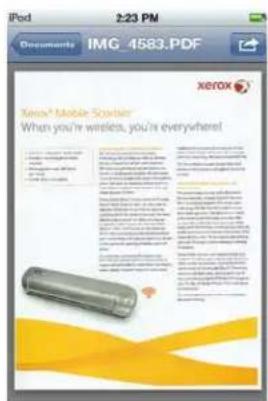
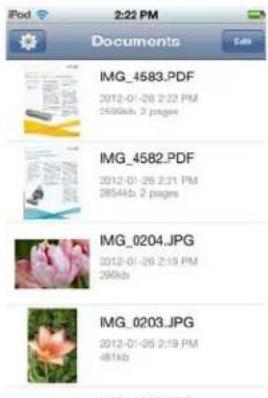
iPad portrait—tap the Documents icon to show a drop menu of the full document list. You can scroll the list up and down. Tap on a document to show the full image view and close the document list.
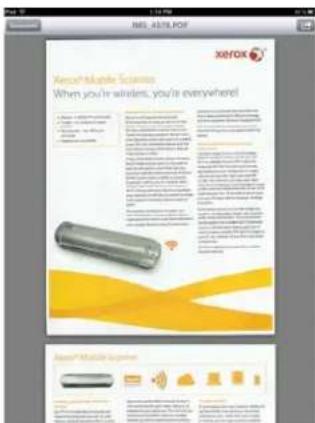
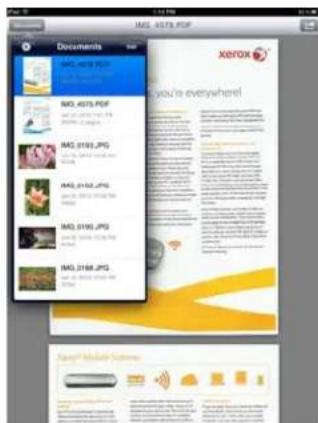
iPad landscape—the Document list always appears on the left side of the full image view. You can scroll the list up and down. Tap on a document to show the full image view on the right side.
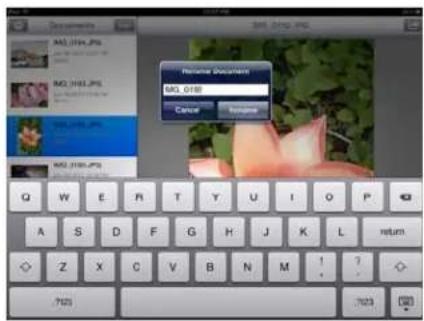
Renaming Documents
-
In the Documents list, tap the file you want to rename.
-
Tap the Rename button.
-
Type a name for the file and then tap Rename to save the changes.
Sharing Documents
- In the Documents list, tap the Edit button.
A selection circle will be displayed next to each time in the documents list.
- Tap on each file name that you want to send.
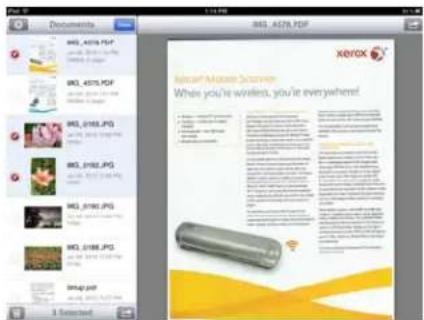
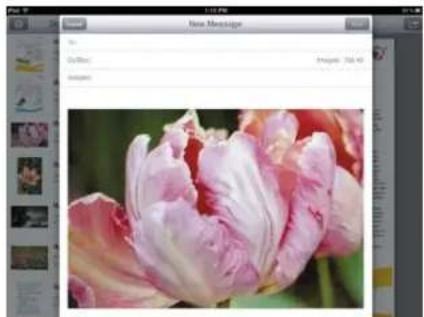
- Tap the share icon.
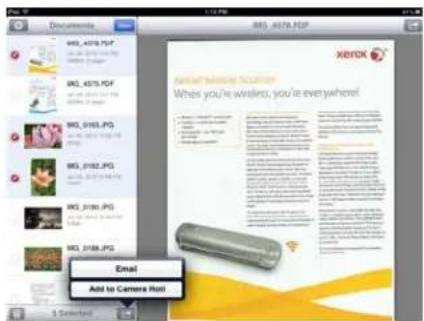
- Select the option you want to use to share the files. For example, tap Email to have the images attached to a blank email message.
natural_image
Close-up photo of a pink tulip with white and pink petals, displayed within a photo editing interface (no text or symbols on the flower itself)Deleting Documents
- In the Documents list, tap the Edit button. A selection circle will be displayed next to each time in the documents list.
- Tap on each file name that you want to delete.
- Tap the trash can icon.
- Tap the option to confirm that you want to delete the files you selected.
Scanning to DocToMe
After you have successfully configured your mobile device, you can then scan any time following these simple steps:
- Open DocToMe on your mobile device.
- Turn on the scanner power.
- All of the LEDs will flash as the scanner initializes. When the scanner is ready to scan, a single LED will be lit next to the first function represented by a camera icon.
- Tap the function button on the scanner to cycle through the scan options until the LED is lit next to the option you want to use to scan.


Scans in color at 300dpi and creates a JPG (*.jpg) file.

Scans in black & white at 300dpi and creates an Adobe PDF (*.pdf) file.

Scans in color at 300dpi and creates an Adobe PDF (*.pdf) file.
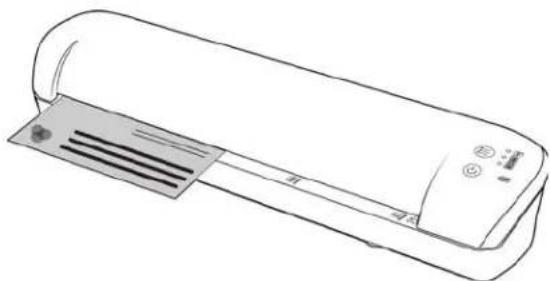
- Insert an item face up in the paper feed slot, aligned to the left side of the scanner.
natural_image
Line drawing of a refrigerated air conditioner unit with ventilation slots and control panel (no text or symbols)- The scanner detects the page and starts to feed it through the scanner.
Note that there will be a short pause after you insert the page before the scanner starts to feed the page. This pause allows you to straighten the item in the paper feed slot.
- The scanner starts scanning, when finished it is saved to the Eye-Fi card and the card starts transmitting the file. In the DocToMe application on your mobile device, you will see images loading into the software.
Creating Multiple Page PDF Files
-
Turn on the scanner
-
Tap the function button until the light is lit next to one of the PDF function icons. The PDF functions are represented by the page icons on the scanner.
Scans in black & white at 300dpi and creates an Adobe PDF (*.pdf) file.
Scans in color at 300dpi and creates an Adobe PDF (*.pdf) file.
-
Insert an item in the scanner.
-
The scanner scans and the LED for the PDF function will flash rapidly. This means that the scanner is waiting for an additional item.
-
You have 10 seconds from the last page scanned to insert a another item. Continue scanning until all pages have been scanned.
-
When you are finished you can let the timer run out, or simply press the function button.
-
When the LED stops flashing the PDF file is saved with all items scanned in one file to the Eye-Fi card and the card starts transmitting the file. In the DocToMe application on your mobile device, you will see images loading into the software.
Troubleshooting
Problem – not all of my scanned files are showing up in DocToMe.
We recommend that you disable Eye-Fi View if you want to use Xerox DocToMe for scanning and transmitting images to your mobile device. Images will not be transferred to Eye-Fi View when the destination is DocToMe on your mobile device. However, when you are within range of a configured wireless network, and Eye-Fi View is enabled, images may instead be transferred to Eye-Fi View and your computer instead of DocToMe.
iCloud and DocToMe
You can connect DocToMe to iCloud to have your scanned files synchronized between DocToMe and other devices you have configured to connect to your iCloud account.
- You need to enable iCloud in the Settings for your mobile device and log into your iCloud account.
• T u r n o n Photo Stream to synchronize JPG files.
• Turn on Documents & Data to synchronize PDF files.
- In the Settings for DocToMe tap iCloud Document Storage to enable or disable synchronization between DocToMe and iCloud.
If you have not turned on iCloud and logged into your account through the main Settings options for your iOS device, then the option for iCloud Document Storage will be disabled in DocToMe.
Scan and Send Files to an Android Mobile Device
Download and Install the Eye-Fi Mobile Application
- On your Android device, access the Google Play application.
- Search for the Eye-Fi application. You want the free one by Eye-Fi, Inc.
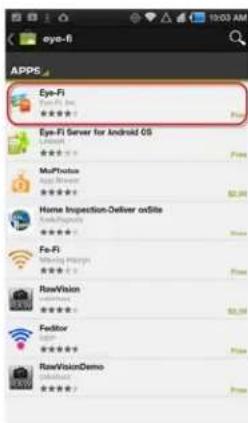
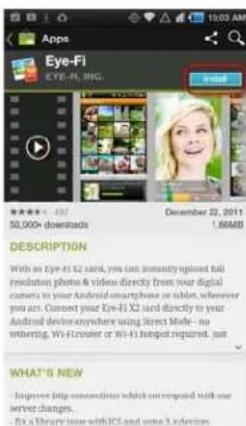
- Download the application to install it.
- Upon installation, touch the Open button to launch the application.
- Input your Eye-Fi account email address and password, and then tap Login.
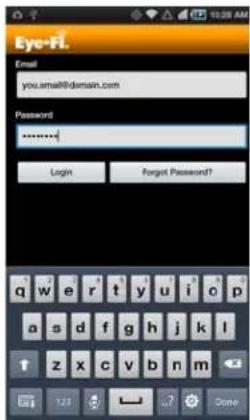
If the Eye-Fi card is in the scanner, make sure the scanner is powered on.
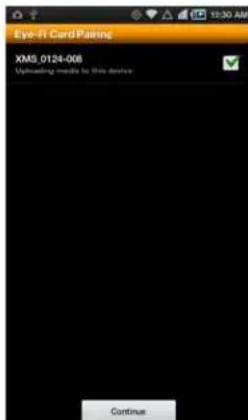
- Select your Eye-Fi card in the Pairing screen and then tap Continue.
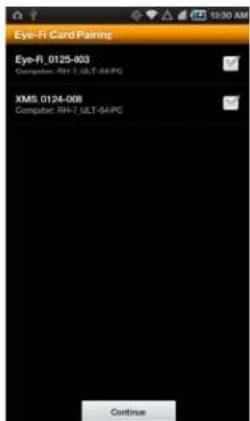
- A confirmation dialogue will display on your device. Make sure the options for Photos (JPG files) and RAW photos (PDF files) is selected, and then tap the option to Switch to [your mobile device model].
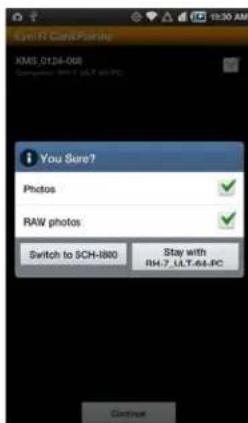
- Tap Continue on the Eye-Fi Card Pairing screen.
- Tap Continue on the FAQ screen.
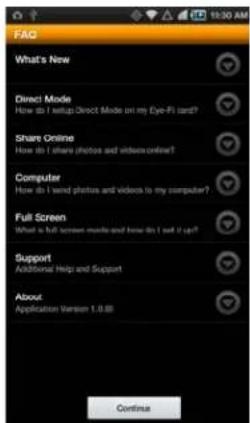
- Touch Ok on the What's New screen if one is displayed.
You will now be in the Eye-Fi mobile application. When you are within range of your configured wireless network, scanned images will be sent directly to your mobile device from the Eye-Fi card in your Xerox Mobile Scanner.
Note that if you had previously selected Photos and RAW files to be sent to your computer during the initial setup, pairing your mobile device with the Eye-Fi card automatically changes Photos and RAW files to be transferred to your mobile device.
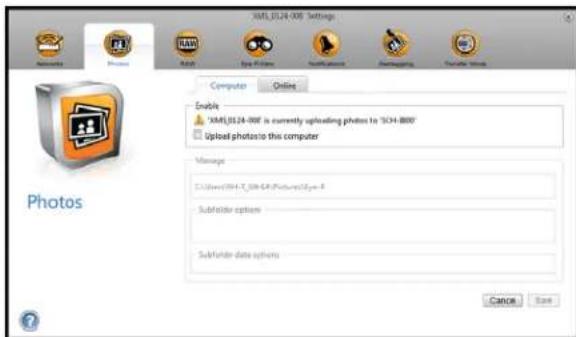
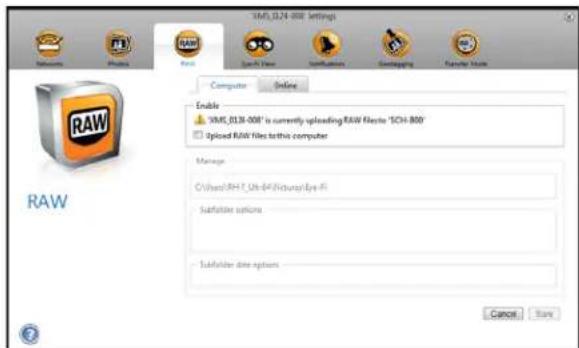
If you want to be able to scan and send files to your mobile device when you are not in range of a wireless network, you will need to connect to the Eye-Fi card's Direct Mode network. Please follow the instructions in the next section for configuring your mobile device to connect to the Eye-Fi card's Direct Mode Network.
Connecting to the Eye-Fi Direct Mode Network
The Eye-Fi card has the ability to create a network access point, for your to connect your mobile device, to receive images when you are not in range of your wireless network. When a Wi-Fi network is unavailable to transfer images, images can be transferred wirelessly from the Eye-Fi card to a mobile device. This is referred to as Direct Mode.
After you connect to the Eye-Fi Direct Mode network as described below, you will not need to follow these instructions again unless you intentionally remove the Eye-Fi network from you mobile device.
Tip: the scanner automatically powers off after 2 minutes to conserve battery power. Tap the function button occasionally to keep the scanner powered on while initiating the connection between your mobile device and the scanner. Alternatively, if you have a memory card reader, you can insert the Eye-Fi card into the card reader for configuring the connection between your mobile device and the Eye-Fi card's Direct Mode network.
-
On your computer—open the Eye-Fi Center application.
-
With the Eye-Fi card in the scanner, connect the scanner to the computer and turn on the power.
-
When the Eye-Fi card shows as connected in the Eye-Fi Center application, click on the gear icon to open the settings for your Eye-Fi card.
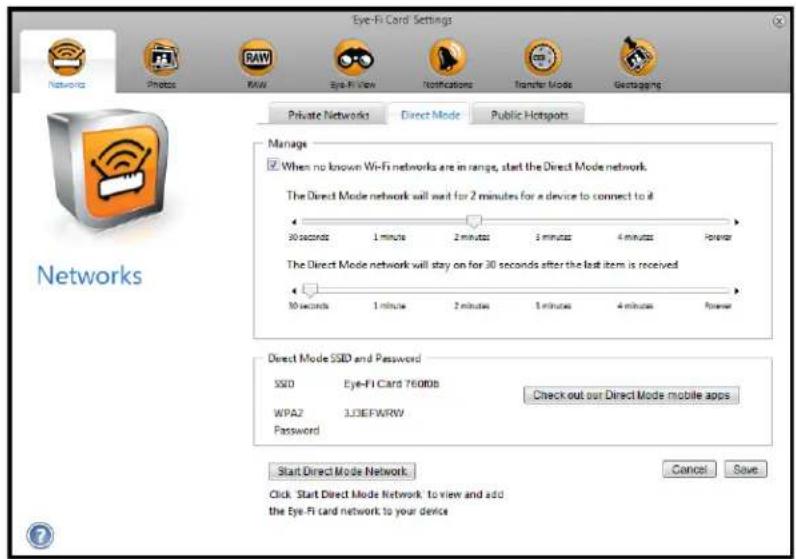
- Click the Networks tab, then the Direct Mode tab.
-
Make sure the option to use Direct Mode when no known Wi-Fi networks are in range is selected.
-
Move the sliders left or right to change the wait times for the Eye-Fi card. When the Eye-Fi card is broadcasting a network it is using the scanner battery to power the network. The recommended settings are:
Select 2 minutes for Direct Mode to wait for a device to connect to it.
Select 30 seconds for the Direct Mode to stay on after the last item is received.
-
Click the Save button.
-
Disconnect the scanner from your computer and power cycle the scanner.
Testing the Direct Mode Network
After you have configured the Direct Mode network we recommend that you run a test scan to verify the software is working as expected.
Note: if you have configured a wireless network for the Eye-Fi card, you will need to either temporarily disable your wireless network if possible, or remove the wireless network from the Eye-Fi card and then add it back again when you are done. If the Eye-Fi card is within range of a configured wireless network the scanned images will be transferred using the wireless network. Please refer to Adding or Removing Private Wireless Networks on page 40.
Test Scan for the Direct Mode Network
- Disable your wireless network or remove the network from the Eye-Fi card.
- Disconnect the scanner from the computer and power cycle the scanner.
- When the scanner power is back on, insert a photo in the scanner.
- The scanner scans saves the image to the Eye-Fi card, and the card starts transmitting the image.
- Open the Eye-Fi application.
- Tap Connect to connect your mobile device to the Eye-Fi Direct Mode network.
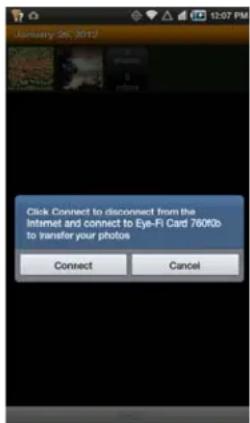
- When the scanned image appears in the document list you know that the Direct Mode connection is working as intended.
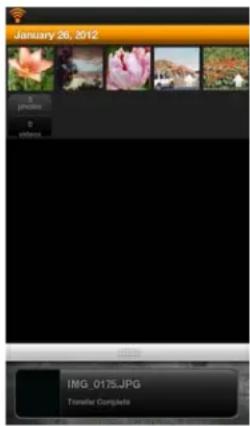
Note: You can set the application to automatically connect to the Eye-Fi network. When the option is selected, each time that you scan and open the Eye-Fi application, the device is automatically switched to the Eye-Fi network without being prompted. From the menu options, press Settings, then Application Preferences, and Automatically Connect.
Depending on how you chose to set your wireless network for this test, you can either re-enable the network or connect the Eye-Fi card to the computer and add the wireless network to the Eye-Fi card. Please refer to Adding or Removing Private Wireless Networks on page 40.
Now that your mobile device has been configured for first time use, you should not have to repeat these steps. You can turn your wireless access point back on and whenever you are away from your network, you can scan directly to your tablet or phone.
Scanning to Eye-Fi
After you have successfully configured your mobile device, you can then scan any time following these simple steps:
-
Open Eye-Fi on your mobile device.
-
Turn on the scanner power.
-
All of the LEDs will flash as the scanner initializes. When the scanner is ready to scan, a single LED will be lit next to the first function represented by a camera icon.
-
Tap the function button on the scanner to cycle through the scan options until the LED is lit next to the option you want to use to scan.


Scans in color at 300dpi and creates a JPG (*.jpg) file.
(note that a thumbnail of the image is displayed in the document view for this file type)
Scans in black & white at 300dpi and creates an Adobe PDF (*.pdf) file.
(note that a generic palm tree icon is displayed in the document view for this file type)
Scans in color at 300dpi and creates an Adobe PDF (*.pdf) file.
(note that a generic palm tree icon is displayed in the document view for this file type)
- Insert an item face up in the paper feed slot, aligned to the left side of the scanner.
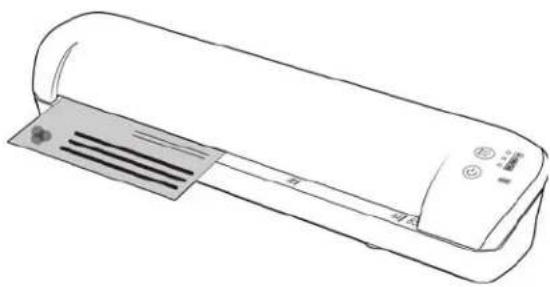
natural_image
Line drawing of a refrigerated air conditioner unit with ventilation slots and control panel (no text or symbols)- The scanner detects the page and starts to feed it through the scanner.
Note that there will be a short pause after you insert the page before the scanner starts to feed the page. This pause allows you to straighten the item in the paper feed slot.
- The scanner starts scanning, when finished it is saved to the Eye-Fi card and the card starts transmitting the file. In the Eye-Fi application on your mobile device, you will see images loading into the software.
Creating Multiple Page PDF Files
-
Turn on the scanner
-
Tap the function button until the light is lit next to one of the PDF function icons. The PDF functions are represented by the page icons on the scanner.
Scans in black & white at 300dpi and creates an Adobe PDF (*.pdf) file.
(note that a generic palm tree icon is displayed in the document view for this file type)
Scans in color at 300dpi and creates an Adobe PDF (*.pdf) file.
(note that a generic palm tree icon is displayed in the document view for this file type)
- Insert an item in the scanner.
- The scanner scans and the LED for the PDF function will flash rapidly. This means that the scanner is waiting for an additional item.
- You have 10 seconds from the last page scanned to insert a another item. Continue scanning until all pages have been scanned.
- When you are finished you can let the timer run out, or simply press the function button.
- When the LED stops flashing the PDF file is saved with all items scanned in one file to the Eye-Fi card and the card starts transmitting the file. In the Eye-Fi application on your mobile device, you will see images loading into the software.
PDF File Transfer using Evernote
Evernote is an application that allows you to store notes and content. Using Eye-Fi and Evernote, you can scan and send PDF files from your scanner to your iPad or any other mobile device.
You can also configure Eye-Fi to send scans automatically to Evernote, after which you simply need to email them to your computer or device.
Configure Eye-Fi to Share with Evernote
- In the Eye-Fi Center software, click File > Settings > Eye-Fi Card.
- Click the Photos, then the Online tab.
- Configure Eye-Fi for your Evernote account. The user accounts for Evernote and Eye-Fi do not need to be the same. When scanning, to automatically send images to Evernote, enable the Share photos online or the Upload all photos to 'My Evernote' check box.
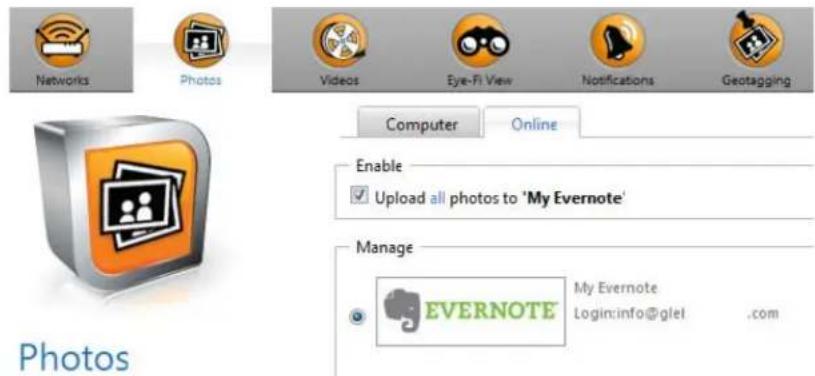
Transfer Images to Evernote on Windows
- In the Eye-Fi Center, if a required image is not already in the tray at the bottom of the window, drag and drop it to the tray or right-click the image and add it to the tray.
- Delete any other images in the tray.
- Click the Publish button. A window opens.
![Items in tray [4 photos] Email Publish](/content/2026/06/1202618/images/2a0b6af29475a5db87b7dc97202174aeca58ccdc6539d41b844d3b530a7e7df2.jpg)
- Select Evernote, and click Share Now. The images are sent to your Evernote account, as shown here.
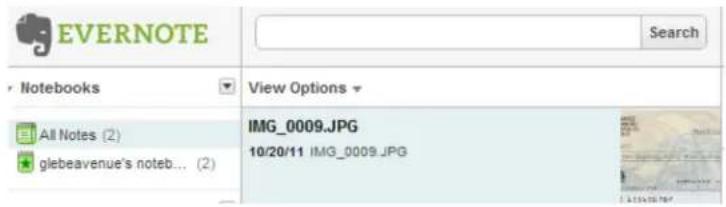
- Send them by email to your computer/device.
Access and Delete Images from the Eye-Fi Card
To copy or delete the images from the card manually, connect the scanner to a computer and turn it on. The scanner will be detected as a disc drive. Open the option on your computer to display the disc drives and then open the drive for your scanner. You can also remove the card from the scanner and insert it into a memory card reader in the computer.
Automatically delete transferred files from the Eye-Fi card
If you want to have files automatically deleted from the Eye-Fi card after they have been successfully transferred, please install the XMS PC Connect (Windows users) or XMS Mac Connect (Mac OS X users). Connect the scanner to your computer using its USB cable, turn on the scanner, and open the scanner application.
Select Yes from the menu list next to Automatically delete transferred files from the Eye-Fi card. When this feature is enabled, only images that have been transferred wirelessly using the Eye-Fi card will be deleted. If you have the scanner in Airplane Mode, the images are not automatically deleted until you turn Airplane Mode off and the files are transferred.
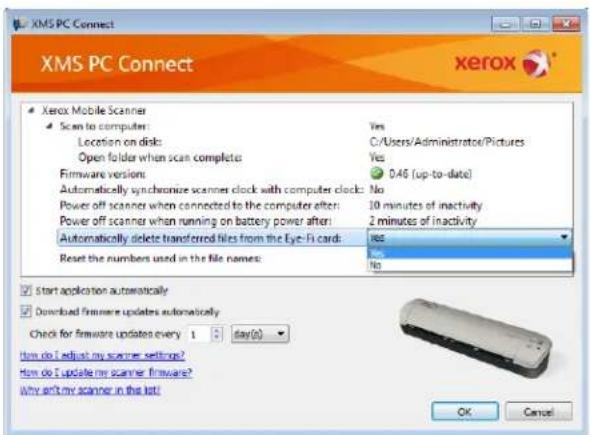
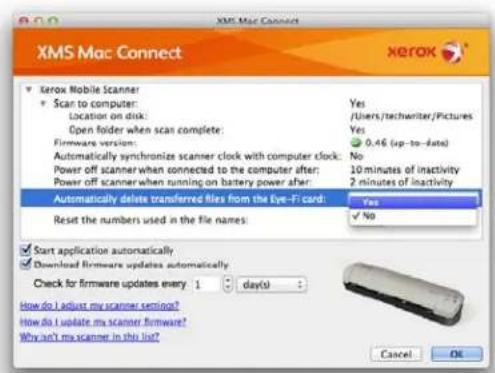
The setting is saved to the scanner firmware and not to the Eye-Fi card, so you can enable or disable this feature whether or not an Eye-Fi card is currently in the scanner.
If you are using a standard SDHC memory card or USB flash drive, the files will not automatically be deleted.
Airplane Mode
You can turn off the Eye-Fi card's WiFi function so that you can use your scanner while traveling on an airplane.
To turn off WiFi:
- Turn on the scanner.
- Tap the function button until the light is lit next to the black and white PDF icon. This is the second icon on scanner represented by a black page.
- Press and hold the function button for approximately 2 seconds.
- The battery LED will start to slowly flash in 2 second intervals. This means that the Eye-Fi card is no longer using wireless connection.
To turn Wi-Fi back on simply repeat the steps as listed above. When Wi-Fi is turned back on the battery LED will stop flashing.
Troubleshooting and Error Messages
Inserted device does not belong to this account—this message means that the user account was open on one computer while the card was added to the user account on another computer. Log out and in again as prompted.
Not in range, secured with WPA/WPA2 PSK—this message appears in the Wi-Fi networks on an Android device, for example. Connect the scanner to the computer with Eye-Fi Center software installed, and click the Start Direct Mode Network button in the Direct Mode tab. On the mobile device, check that Wi-Fi is on and select the Eye-Fi card if it does not automatically connect. If that does not work, change one of the sliders in the Direct Mode tab, click Save, click the Start Direct Mode Network button, and repeat the Wi-Fi connection.
Unpaired card. Please pair card in Settings—this message appears in Eye-Fi on an iPad or iPhone. It means that the card has not been set to work with the device. Press the gear icon at the top left, press Eye-Fi Card Settings. If Card Pairing window is blank, it means that there is no Internet connection.
We are having difficulty connecting to the Eye-Fi servers. Please check your network connection to access this functionality.—Try accessing the Settings for the device, turn on Wi-Fi, and select the Eye-Fi card. If you cannot connect to the card because of a “not in range” message, connect the scanner to the computer with Eye-Fi Center software installed, and click the Start Direct Mode Network button in the Direct Mode tab.
Maintenance
5
This chapter includes:
• Calibrating Your Scanner on page 76
• Cleaning Your Scanner on page 77
• Status LEDs on page 78
• Xerox Mobile Scanner Specifications on page 79
• Xerox Mobile Scanner Spare Part List on page 80
This section contains scanner information about regular maintenance, specifications and spare parts.
Calibrating Your Scanner
The scanner needs to be calibrated as part of your monthly maintenance of the scanner. If your scanned images have black or colored vertical lines this may be a sign that you need to perform a calibration. If calibrating the scanner does not resolve the problem, please go to the next section and follow the steps for cleaning the scanner.
You will need to have the calibration page ready.
Important: The top of the page is covered with a blue protective film to prevent damage during shipping. You need to remove the calibration page from the plastic bag and then peel off and discard the blue film. The calibration page is now ready to use.
- Make sure the LED is lit next to the JPG scan function represented by the camera icon.
-
Press and hold down the function button on the scanner for at least 2 seconds.
This starts the hardware calibration routine. -
Insert the Calibration page in the scanner, in the direction of the arrow(s) on the page.
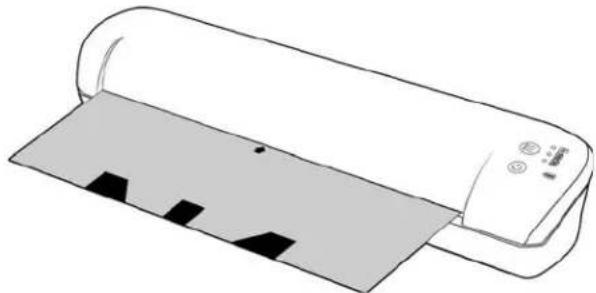
natural_image
Line drawing of a roll-up printer with paper cutouts and control buttons (no text or symbols)- When calibration is complete the scanner will eject the page out of the scanner. Do not forcefully pull the page out, the scanner will release the page when the calibration process is completed.
Place the calibration page back in the clear plastic bag and keep it in a safe place. The calibration page needs to be kept clean and in good condition. Calibrating the scanner with a dirty or creased calibration page may cause the image quality to worsen.
Note: if calibration fails, the function LEDs will start blinking. Simply insert the calibration page while the lights are still flashing to try the calibration again.
Cleaning Your Scanner
If you still see streaks or lines in the scanned image after calibrating the scanner, use the cleaning swab to clean the scanner glass.
- Dampen the tip of the cleaning swab with some Isopropyl rubbing alcohol (95%)
-
Facing the back of the scanner, press and hold the button on the side of the scanner. This button separates the glass from the rollers for cleaning.
Note that if you release the button, the glass will be set back in place for scanning. You must press and hold the button while cleaning. -
Insert the tip of the cleaning swab into the back of the scanner.
-
Swipe the tip across the inside of the scanner from right-to-left. Repeat this 5 or 6 times to thoroughly clean the scanner.
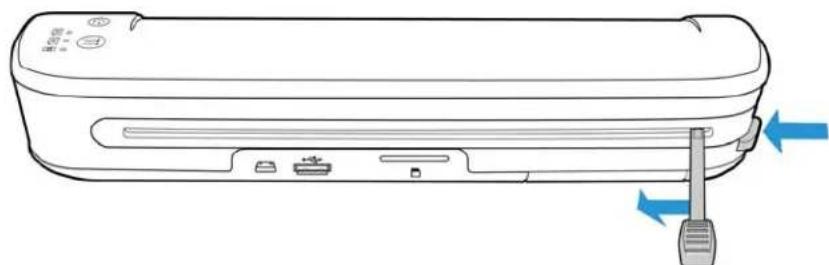
natural_image
Line drawing of a rectangular electronic device with ports and a USB port, showing no text or symbols- When you are finished cleaning the scanner, release the button on the side of the scanner. Store the cleaning swab in a clean, dust-free area.
Status LEDs
The status light indicates the current state of the scanner. Descriptions of the most common patterns are listed below. Contact Xerox Technical Support if you experience a different blinking pattern.
Normal Operation
- Function LEDs—When a single LED is lit next to one of the icons, this is the currently selected scan function. That LED will blink continuously while scanning to indicate the scanner is busy.
- Battery LED—This light indicates the scanner's power status.
Off The scanner is not plugged in, the battery is not in the scanner, or the scanner is turned off.
On The scanner power is on.
Status Light Troubleshooting Codes
Function LEDs—When the scanner is busy or an error has occurred, all 3 LEDs will blink simultaneously, pause, and then blink again in the same pattern.
| LED pattern Scanner status | |
| 2 blinks | Paper jam—the scanner has detected that a page is stuck. If possible, pull the page out of the scanner from the back. Power cycle the scanner if needed. |
| 3 blinks | Scanner not linked—the scanner does not detect a storage device. Make sure a USB flash drive or memory card is fully inserted into the back of the scanner. Power cycle the scanner if needed. |
| 4 blinks | Calibration error—the scanner needs to be calibrated or the scanner failed to calibrate successfully during a calibration routine. Re-start the calibration routine by press, hold-down for 2 seconds, then release the function button. Please see Calibrating Your Scanner on page 76. |
| 5 blinks Timeout | the scanner timeout has started. |
| Continuous | Scanner busy—either the scanner is scanning, saving files to the attached device, or it is being calibrated.Multiple page PDF file—when you are scanning using one of the PDF functions, after the scan is complete the LED for the current function will blink rapidly indicating that the scanner is waiting for another page. The scanner will automatically timeout after 10 seconds and save the PDF file, or you can press the function button on the scanner to manually stop the timer. |
Battery LED—this light shows the scanner's power status and indicates if the wireless transfer options for the Eye-Fi card have been turned off. The LED will flash, pause, and then flash again. The number of flashes between pauses indicates the scanner's status.
| LED pattern Scanner status | |
| 1 blink The battery power is getting low and needs to be recharged. | |
| 2 blinks | Airplane mode has been enabled for scanning and saving images to the Eye-Fi card without attempting to transmit the image wirelessly. |
| 3 blinks | The battery power is getting low and the scanner is in airplane mode. |
Xerox Mobile Scanner Specifications
Optical resolution 300 dpi
Bit depth 24-bit color, 1-bit bitonal (black & white)
Maximum item size 8.5" x 14" (216 mm x 356 mm)
Minimum item size 2.0" x 2.0" (51 mm x 51 mm)
Scan method Single Sheet Fed
Scanning specifications
Scanning Speed 10 seconds per page @ 300 dpi in all color modes
Paper Thickness 14 - 28 lbs. (53 - 105 g/m ^2 )
Image Sensor Contact Image Sensor
Light source 3-color RGB-LED
Interface Hi-Speed USB 2.0
Scanner body dimensions
Width 11.50 inches (293 mm)
Depth 2.75 inches (70 mm)
Height 2.00 inches (51 mm)
Weight 22.5 ounces (638 g)
Operating temperature 68°\~95°F (20°\~35°C without condensation)
Relative humidity 10%\~85% (@35°C without condensation)
Battery EM-HG001-NP120, DEAN, CAPACITY:3.7V/1700mAh, Internal Resistance ≤ 220mΩ,0\~45°, RoHS
Power 5Vdc
Power consumption ≤ 3.85 Watts (during operation); ≤ 1.86 Watts (on standby)
Power supply model ADS-5N-06 05005G made by HONOR
or
DSA-10CU-05 050200 made by DVE
USB cable Mini-USB Cable
Safety and agency certifications UL, C-UL, FCC Class B, CE, WEEE, RoHS, ENERGY STAR
Supported Operating Systems Microsoft Windows
- 32-bit XP (Service Pack 2 or 3)
- 32-bit or 64-bit Vista (with or without Service Pack 1 or 2)
- 32-bit or 64-bit 7
Apple Mac OS X
- Snow Leopard
- Lion
Bundled Software XMS PC Connect
XMS Mac Connect
Xerox Mobile Scanner Spare Part List
Please use the following part name and number when ordering a replacement part for your scanner.
| Part Name Part Number | ||
 | Carrying bag 88-0630-001 | |
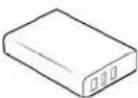 | Battery 28-0008-000 | |
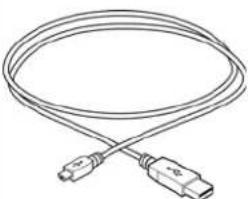 | USB Cable 35-0238-000 | |
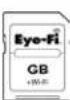 | Memory card 51-0004-100 | |
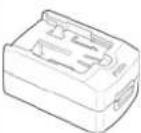 | Power Supply 37-0096-000 | |
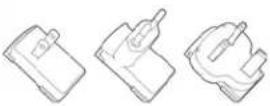 | Plug adapters 35-0096-000 (U.S.)35-0097-000 (EUR)35-0098-000 (U.K.) | |
 | Calibration page 05-0823-000 | |
 | Cleaning swab 33-0007-000 | |
Regulatory Information
A
This chapter includes:
• Basic Regulations on page 82
• Copy Regulations on page 84
Basic Regulations
United States (FCC Regulations)
This equipment has been tested and found to comply with the limits for a Class B digital device, pursuant to Part 15 of the FCC Rules. These limits are designed to provide reasonable protection against harmful interference in a residential installation. This equipment generates, uses, and can radiate radio frequency energy and, if not installed and used in accordance with the instruction manual, may cause harmful interference to radio communications.
However, there is no guarantee that interference will not occur in a particular installation. If this equipment does cause harmful interference to radio or television reception, which can be determined by turning the equipment off and on, the user is encouraged to try to correct the interference by one or more of the following measures:
- Reorient or relocate the receiving antenna.
- Increase the separation between the equipment and receiver.
- Connect the equipment into an outlet on a circuit different from that to which the receiver is connected.
- Consult the dealer or an experienced radio/TV technician for help.
This device complies with Part 15 of the FCC Rules. Operation is subject to the following two conditions: (1) This device may not cause harmful interference, and (2) this device must accept any interference received, including interference that may cause undesired operation.
Changes and modifications to this equipment not specifically approved by Xerox may void the user's authority to operate this equipment.
Shielded cables must be used with this equipment to maintain compliance with FCC regulations.
European Union
CE
The CE mark applied to this product, symbolizes Xerox's declaration of conformity with the following applicable European Union Directives, as of the dates indicated:
| December 12, 2006: | Council Directive 2006/95/EC as amended. Approximation of the laws of the member states related to low voltage equipment. |
| December 31, 2004: | Council Directive 2004/108/EC as amended. Approximation of the laws of the member states related to electromagnetic compatibility. |
A full declaration of conformity, defining the relevant directives and referenced standards, can be obtained from your Xerox Limited representative or by contacting:
Environment, Heath and Safety
The Document Company Xerox
Bessemer Road
Welwyn Garden City
Herts
AL7 1HE
England, Telephone +44 (0) 1707 353434
Other Regulations
Turkey (RoHS Regulation)
In compliance with Article 7 (d) We hereby certify "It is in compliance with the EEE Regulation".
Congress, by statute, has forbidden the reproduction of the following subjects under certain circumstances. Penalties of fine or imprisonment may be imposed on those guilty of making such reproductions.
- Obligations or Securities of the United States Government, such as:
Certificates of Indebtedness National Bank Currency
Coupons from Bonds Federal Reserve Bank Notes
Silver Certificates Gold Certificates
United States Bonds Treasury Notes
Federal Reserve Notes Fractional Notes
Certificates of Deposit Paper Money
Bonds and Obligations of certain agencies of the government, such as FHA, etc.
Bonds. (U.S. Savings Bonds may be photographed only for publicity purposes in connection with the campaign for the sale of such bonds.)
Internal Revenue Stamps. (If it is necessary to reproduce a legal document on which there is a canceled revenue stamp, this may be done provided the reproduction of the document is performed for lawful purposes.)
Postage Stamps, canceled or uncanceled. (For philatelic purposes, Postage Stamps may be photographed, provided the reproduction is in black and white and is less than 75% or more than 150% of the linear dimensions of the original.)
Postal Money Orders.
Bills, Checks, or Drafts of money drawn by or upon authorized officers of the United States.
Stamps and other representatives of value, of whatever denomination, which have been or may be issued under any Act of Congress.
- Adjusted Compensation Certificates for Veterans of the World Wars.
- Obligations or Securities of any Foreign Government, Bank, or Corporation.
- Copyrighted material, unless permission of the copyright owner has been obtained or the reproduction falls within the "fair use" or library reproduction rights provisions of the copyright law. Further information of these provisions may be obtained from the Copyright Office, Library of Congress, Washington, D.C. 20559. Ask for Circular R21.
- Certificates of Citizenship or Naturalization. (Foreign Naturalization Certificates may be photographed.)
- Passports. (Foreign Passports may be photographed.)
- Immigration Papers.
-
Draft Registration Cards.
-
Selective Service Induction Papers that bear any of the following Registrant's information:
Earnings or Income Dependency Status
Court Record Previous military service
Physical or mental condition
Exception: U. S. Army and Navy discharge certificates may be photographed.
-
Badges, Identification Cards, Passes, or Insignia carried by military personnel, or by members of the various Federal Departments, such as FBI, Treasury, etc. (unless photograph is ordered by the head of such department or bureau.)
-
Reproducing the following is also prohibited in certain states: Automobile Licenses — Drivers' Licenses — Automobile Certificates of Title.
The above list is not all inclusive, and no liability is assumed for its completeness or accuracy. In case of doubt, consult your attorney.
Canada
Parliament, by statute, has forbidden the reproduction of the following subjects under certain circumstances. Penalties of fines or imprisonment may be imposed on those guilty of making such copies.
- Current bank notes or current paper money.
- Obligations or securities of a government or bank.
- Exchequer bill paper or revenue paper.
- The public seal of Canada or of a province, or the seal of a public body or authority in Canada, or of a court of law.
- Proclamations, orders, regulations or appointments, or notices thereof (with intent to falsely cause same to purport to have been printed by the Queen's Printer for Canada, or the equivalent printer for a province).
- Marks, brands, seals, wrappers or designs used by or on behalf of the Government of Canada or of a province, the government of a state other than Canada or a department, board, Commission or agency established by the Government of Canada or of a province or of a government of a state other than Canada.
- Impressed or adhesive stamps used for the purpose of revenue by the Government of Canada or of a province or by the government of a state other than Canada.
- Documents, registers or records kept by public officials charged with the duty of making or issuing certified copies thereof, where the reproduction falsely purports to be a certified copy thereof.
- Copyrighted material or trademarks of any manner or kind without the consent of the copyright or trademark owner.
The above list is provided for your convenience and assistance, but it is not all inclusive, and no liability is assumed for its completeness or accuracy. In case of doubt, consult your solicitor.
Other Countries
Copying certain documents may be illegal in your country. Penalties of fine or imprisonment may be imposed on those found guilty of making such reproductions.
- Currency notes
• Bank notes and cheques
• Bank and government bonds and securities
• Passports and identification cards
• Copyright material or trademarks without the consent of the owner - Postage stamps and other negotiable instruments
Note: This list is not inclusive and no liability is assumed for either its completeness or accuracy. In case of doubt, contact your legal counsel.
Compliance Information
B
This chapter includes:
• Product Recycling & Disposal on page 88
• Energy Star for the USA on page 89
Product Recycling & Disposal
USA & Canada
If you are managing the disposal of your Xerox product, please note that the product may contain lead, mercury, Perchlorate, and other materials whose disposal may be regulated due to environmental considerations. The presence of these materials is fully consistent with global regulations applicable at the time that the product was placed on the market. For recycling and disposal information, contact your local authorities. In the United States, you may also refer to the Electronic Industries Alliance web site: http://www.eiae.org.
Perchlorate Material - This product may contain one or more Perchlorate-containing devices, such as batteries. Special handling may apply, please see: http://www.dtsc.ca.gov/hazardouswaste/perchlorate/.
European Union
RoHS and WEEE Compliance
This product is compliant with RoHS Regulations of the European Parliament and Council Directive on the Restrictions of the Use of Certain Hazardous Substances in Electrical and Electronic Equipment (2002/95/EC), and with the Waste Electrical and Electronic Equipment (WEEE) Directive (2002/96/EC).
Some equipment may be used in both a domestic/household and a professional/business application.
Professional/Business Environment
Application of this symbol on your equipment is confirmation that you must dispose of this equipment in compliance with agreed national procedures. In accordance with European legislation, end of life electrical and electronic equipment subject to disposal must be managed within agreed procedures.

Energy Star for the USA
Energy Program Compliance
The Xerox Mobile Scanner is ENERGY STAR qualified under the ENERGY STAR Program Requirements for Imaging Equipment.

The ENERGY STAR and ENERGY STAR MARK are registered United States trademarks. The ENERGY STAR Imaging Equipment Program is a team effort between U.S., European Union and Japanese governments and the office equipment industry to promote energy-efficient copiers, printers, fax, multifunction machine, personal computers, and monitors. Reducing product energy consumption helps combat smog, acid rain and long-term changes to the climate by decreasing the emissions that result from generating electricity.
- Xerox® Mobile Scanner User Guide
- Table of Contents
- Safety
- W e l c o m e
- Scanning to Removeable Media
- Scan and Transfer Images Wirelessly with Eye-Fi
- Maintenance
- A R e g u l a t o r y I n f o r m a t i
- B Compliance Information
- Safety
- 1
- This chapter includes:
- Safety Introduction
- Notices and Safety
- Operational Safety Information
- Do These
- Do Not Do These
- Electrical Information
- Warning - Electrical Safety Information
- Electrical Supply
- Emergency Power Off
- Maintenance Information
- Product Safety Certification
- Environmental Health and Safety Contacts
- Contact Information
- Welcome
- 2
- What's in the Box
- The Xerox Mobile Scanner
- Insert the Battery
- Connect the Scanner to Charge the Battery
- Important
- Assemble the power adapter:
- Charging the Battery:
- Register Your Scanner
- Scanning to Removeable Media
- Memory Card or USB Flash Drive
- Creating Multiple Page PDF Files
- Retrieving the Scanned Images
- Android ® Devices (Smartphones and Tablets)
- Troubleshooting Connection Issues
- Apple iPad
- Other Mobile Devices
- iPod and iPhone, Blackberry, and Windows Mobile Devices
- Scan and Transfer Images Wirelessly with Eye-Fi
- Install the Eye-Fi Center Application
- Log In and Activate the Eye-Fi Card
- Alternate activation option
- The Eye-Fi Card Settings
- The Eye-Fi Helper Utility
- Adding or Removing Private Wireless Networks
- Other Networks
- Direct Mode
- Transferring Photo Files (JPG Files)
- Transferring RAW Files (PDF Files)
- Eye-Fi View
- Transfer Mode
- Scan and Send Files to a Computer
- Scan to a Windows Computer
- Scan to a Mac Computer
- Access Images from Eye-Fi Web Site
- Scan and Send Files to aniOS Mobile Device (iPad, iPod, and iPhone)
- Download and Install Xerox DocToMe
- Connecting to the Eye-Fi Direct Mode Network
- Testing the Direct Mode Network
- Test Scan for the Direct Mode Network
- Using DocToMe
- Documents list and Image view
- Renaming Documents
- Sharing Documents
- Deleting Documents
- Scanning to DocToMe
- Troubleshooting
- iCloud and DocToMe
- Scan and Send Files to an Android Mobile Device
- Download and Install the Eye-Fi Mobile Application
- Scanning to Eye-Fi
- PDF File Transfer using Evernote
- Configure Eye-Fi to Share with Evernote
- Transfer Images to Evernote on Windows
- Access and Delete Images from the Eye-Fi Card
- Automatically delete transferred files from the Eye-Fi card
- Airplane Mode
- Troubleshooting and Error Messages
- Maintenance
- 5
- Calibrating Your Scanner
- Cleaning Your Scanner
- Status LEDs
- Normal Operation
- Status Light Troubleshooting Codes
- Xerox Mobile Scanner Specifications
- Xerox Mobile Scanner Spare Part List
- Regulatory Information
- A
- Basic Regulations
- United States (FCC Regulations)
- European Union
- CE
- Other Regulations
- Turkey (RoHS Regulation)
- Canada
- Other Countries
- Compliance Information
- B
- Product Recycling & Disposal
- USA & Canada
- RoHS and WEEE Compliance
- Professional/Business Environment
- Energy Star for the USA
- Energy Program Compliance
Brand : XEROX
Model : Mobile 100N02838
Category : To scan