
Style Cover Window SCR42 - Accessory SONY - Free user manual and instructions
Find the device manual for free Style Cover Window SCR42 SONY in PDF.


| Product Type | Smartphone Protective Cover with Smart Window |
| Brand | Sony |
| Model | Style Cover Window SCR42 |
| Compatible Devices | Select Sony Xperia smartphones (NFC enabled) |
| Dimensions | Approx. 145 x 75 x 12 mm |
| Weight | Approx. 30 g |
| Material | Polycarbonate, adhesive gel pad |
| NFC Support | Yes (one-touch setup) |
| Smart Window | Yes, with touch interaction (swipe, tap) |
| Main Functions | View notifications, answer calls, control music, camera, alarm, widgets |
| Power Source | None (passive, uses smartphone power) |
| Attachment Method | Adhesive gel pad + NFC pairing |
| Cleaning | Damp cloth for gel pad |
| Security Features | Disables Smart call handling and Glove mode when closed |
| Regulatory Compliance | FCC Part 15, Industry Canada RSS-210, ICES-003 |
| Color | Black (default) |
| Package Contents | Style Cover Window, User Guide |
| Warranty | Standard Sony warranty (refer to legal) |
Frequently Asked Questions - Style Cover Window SCR42 SONY
User questions about Style Cover Window SCR42 SONY
0 question about this device. Answer the ones you know or ask your own.
Ask a new question about this device
Download the instructions for your Accessory in PDF format for free! Find your manual Style Cover Window SCR42 - SONY and take your electronic device back in hand. On this page are published all the documents necessary for the use of your device. Style Cover Window SCR42 by SONY.
USER MANUAL Style Cover Window SCR42 SONY
One-touch setup....4
Learning the basics....5
Interacting with the window....5
Dimming and waking up the screen....5
Home screen....6
Using the Style Cover Window....7
Handling incoming calls....7
Camera....7
Alarm....7
Music player....8
Widgets....8
Disabled smartphone features....8
Cleaning the adhesive gel pad....8
Legal information....9
Getting started
Introduction
The Style Cover Window is a protective cover that protects your smartphone while still letting you view and use dedicated functions. When you close the cover, the smart window function becomes active and selected widgets from your smartphone status bar or Home screen appear in the window. You can then interact with these selected widgets and features. For example, you can see and read an incoming message, activate your smartphone camera, control your music, and answer an incoming call – all without opening the cover.
Overview

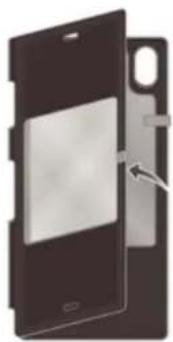
1 Window
2 Adhesive gel pad
3 NFC ^TM detection area
Charging
Before you use your Style Cover Window for the first time, make sure the smartphone that you want to use with it is fully charged. The Style Cover Window does not work if your smartphone has no power. You can charge your smartphone with or without the cover attached.
To charge your smartphone with the cover attached

flowchart
graph TD
    A["Laptop"] -->|USB cable| B["Switch"]
    C["Battery"] -->|USB cable| B
    B --> D["Smartphone with USB cable"]
    D --> E["Device with USB cable"]
    style A fill:#f9f,stroke:#333
    style C fill:#ccf,stroke:#333
    style D fill:#cfc,stroke:#333
1 Make sure that the Style Cover Window is properly attached to your phone and that the cover is closed.
2 Plug one end of the USB cable into the Micro USB port of your phone.
3 Plug the other end of the cable into the charger or into the USB port of a computer.
4 Make sure the charger or computer is connected to an active power source.
Avoid opening the cover while the USB cable is attached as such action could damage the cable connector and/or Micro USB port over time.
One-touch setup
With one-touch setup, all you have to do is touch the NFC area of your smartphone to the NFC area of the Style Cover Window. The NFC function launches the setup procedure and you can then customise your smart window functions and settings.
To set up the Style Cover for use
1
natural_image
Close-up of a smartphone showing the front panel and side door (no visible text or symbols)2

natural_image
Illustration of a smartphone with a hand interacting with a device, showing wireless signal icons and a 'N' symbol (no text or labels present)
natural_image
Diagram showing a device being cut off into a screen, with an inset close-up of the screen highlighting the lens (no text or symbols present)1 Open the Style Cover.
2 Make sure that the phone has the NFC function turned on and that the screen is active and unlocked. Place the back of the phone over the NFC detection area of the Style Cover, as indicated in the illustration. The NFC area of each device should touch the other.
3 Position the back cover of the phone over the adhesive gel pad in such a way that the camera lens fits directly over the corresponding opening on the cover. Once the phone is in the correct position, press down firmly on the front of the phone so that it becomes firmly attached to the adhesive gel pad.
! If your phone has a protective film on the back, you must remove the film before attaching your phone to the adhesive gel pad.
Learning the basics
Interacting with the window
Once the Style Cover Window is set up and attached to your phone, you have to close the cover to activate the smart window function. When the smart window function is active, the display of your phone is shrunk to fit in the window of the cover. This window is similar to a mini version of your phone screen and you can interact with it in the same way. For example, you can swipe on or tap the window screen to navigate your way around.
Swiping

natural_image
Illustration of a finger pressing a button on a smartphone screen (no text or symbols)Swipe left or right
• See more widgets and actions.
Tapping

natural_image
Illustration of a finger pressing a button on a smartphone screen (no text or symbols visible)- Open or select an item.
Dimming and waking up the screen
When the Style Cover Window is attached and left idle for a certain period of time, the window screen dims automatically. You can also dim the window screen manually and wake it up at any time.
To wake up the window screen
• Double tap the window screen or briefly press the power key.
To dim the window screen manually
- Briefly press the power key.
Home screen
When the Style Cover Window is attached and the smart window function is active, a Home screen appears in the window. This Home screen is the main screen from which you can navigate to other screens and take various actions. It is similar to the Home screen of your phone. From here, you can, for example, view notifications of missed calls or unread SMS messages and take pictures.
Using the Style Cover Window
Handling incoming calls
When a call comes in on your smartphone, you can see who is calling on the screen of the Style Cover Window. You can then interact with the window screen to accept or decline the call.
To answer an incoming call
• To accept the incoming call, slide from left to right on the window screen.
To decline an incoming call
- Slide from right to left on the window screen.
Answering a video call
When a video call comes in while the Style Cover window is attached, you are prompted to open the cover to launch the front camera on your phone.
To answer a video call
- Open the cover of the Style Cover Window and look into the front camera on your phone.
Camera
From the Home screen of the Style Cover Window, you can launch the camera application and take pictures in portrait or landscape orientation.
To take a photo from the Home screen of the Style Cover Window
1 To activate the window screen, briefly press the power key ⏻.
2 To activate the camera, touch and hold and drag upwards.
3 After the camera opens, tap
Alarm
You can view an activated alarm from the Home screen of the Style Cover Window. To set an alarm, you must first access the smartphone, that is, when the cover is open or not attached.
To set an alarm
1 Open the front cover of your accessory so that you can access the Home screen of your phone directly.
2 From the Home screen of your phone, tap 📄
3 Find and tap Alarm & clock.
4 Tap +
5 Tap Time and adjust the time by scrolling up and down.
6 Tap Set.
7 If desired, edit other alarm settings.
8 Tap Done. This alarm is now displayed on the Home screen of the Style Cover Window.
To snooze an alarm when it sounds
- Tap Snooze when it appears on the window screen.
To turn off an alarm when it sounds
- On the window screen, drag to the right.
To turn off a snoozed alarm
1 Open the Style Cover Window.
2 From the Home screen of your phone, drag down the status bar to open the Notification panel, then tap .
Music player
You can access the music player application directly from the Home screen of the Style Cover Window.
To access the music player
- Swipe from right to left on the Home screen of the Style Cover Window.
Widgets
Widgets are small applications that you can use directly on the window screen. They also function as shortcuts. For example, the Calendar widget allows you to see basic calendar information directly on the window screen. You can download additional widgets from Google Play™.
To add a widget to the window screen
1 To activate the window screen, briefly press the power key ⏻.
2 Swipe to the right until + appears, then tap it. You are then promoted to open the cover to add a widget directly on your phone.
3 If required, enter your PIN code, pattern or password to unlock the screen of your phone.
4 Find and tap the widget that you want to add.
! The items that appear when you tap + are available by default and cannot be modified.
To move a widget on the window screen
1 To activate the window screen, briefly press the power key ⏻.
2 Touch and hold the widget that you want to move, then drag it to the new location.
To remove a widget from the window screen
1 To activate the window screen, briefly press the power key ⏻.
2 Touch and hold the widget that you want to remove, then drag it to
The camera icon and the music player appear on the screen by default and cannot be removed.
Disabled smartphone features
The Smart call handling and Glove mode features get disabled when the cover of your accessory is closed. For more information about these features, refer to the User guide for your phone.
Cleaning the adhesive gel pad
If the adhesive gel pad loses its adhesive properties, you can clean it.
To clean the adhesive gel pad
• Gently rub a slightly damp cloth over the gel so that dust and other small particles get removed. After the gel dries, its adhesive properties are restored.
Legal information
Sony SCR24
Prior to use, please read the Important information leaflet separately provided.
This User guide is published by Sony Mobile Communications Inc. or its local affiliated company, without any warranty. Improvements and changes to this User guide necessitated by typographical errors, inaccuracies of current information, or improvements to programs and/or equipment, may be made by Sony Mobile Communications Inc. at any time and without notice. Such changes will, however, be incorporated into new editions of this User guide.
All rights reserved.
©2014 Sony Mobile Communications Inc.
Sony is the trademark or registered trademark of Sony Corporation.
All product and company names mentioned herein are the trademarks or registered trademarks of their respective owners. Any rights not expressly granted herein are reserved. All other trademarks are property of their respective owners.
Visit www.sonymobile.com for more information.
All illustrations are for illustration only and may not accurately depict the actual accessory.
FCC Statement
This device complies with Part 15 of the FCC rules. Operation is subject to the following two conditions: (1) This device may not cause harmful interference, and (2) This device must accept any interference received, including interference that may cause undesired operation.
Any change or modification not expressly approved by Sony may void the user's authority to operate the equipment.

This equipment has been tested and found to comply with the limits for a Class B digital device, pursuant to Part 15 of the FCC Rules. These limits are designed to provide reasonable protection against harmful interference in a residential installation. This equipment generates, uses and can radiate radio frequency energy and, if not installed and used in accordance with the instructions, may cause harmful interference to radio communications. However, there is no guarantee that interference will not occur in a particular installation.
If this equipment does cause harmful interference to radio or television reception, which can be determined by turning the equipment off and on, the user is encouraged to try to correct the interference by one or more of the following measures:
• Reorient or relocate the receiving antenna.
• Increase the separation between the equipment and receiver.
• Connect the equipment into an outlet on a circuit different from that to which the receiver is connected.
• Consult the dealer or an experienced radio/TV technician for help.
Industry Canada Statement
This device complies with RSS-210 of Industry Canada.
Operation is subject to the following two conditions: (1) this device may not cause interference, and (2) this device must accept any interference, including interference that may cause undesired operation of the device. This Class B digital apparatus complies with Canadian ICES-003.
- Learning the basics....5
- Using the Style Cover Window....7
- Legal information....9
- Getting started
- Introduction
- Charging
- One-touch setup
- Learning the basics
- Interacting with the window
- Dimming and waking up the screen
- Home screen
- Using the Style Cover Window
- Handling incoming calls
- To answer an incoming call
- To decline an incoming call
- Answering a video call
- To answer a video call
- Camera
- To take a photo from the Home screen of the Style Cover Window
- Alarm
- To set an alarm
- To snooze an alarm when it sounds
- To turn off an alarm when it sounds
- To turn off a snoozed alarm
- Music player
- To access the music player
- Widgets
- To add a widget to the window screen
- To move a widget on the window screen
- To remove a widget from the window screen
- Disabled smartphone features
- Cleaning the adhesive gel pad
- To clean the adhesive gel pad
- Legal information
- Sony SCR24
- FCC Statement
- Industry Canada Statement
Brand : SONY
Model : Style Cover Window SCR42
Category : Accessory