
SAT-HD100 - Digital decoder SONY - Free user manual and instructions
Find the device manual for free SAT-HD100 SONY in PDF.


| Product Type | High Definition Digital Satellite Receiver |
| Brand | Sony |
| Model | SAT-HD100 |
| Compatibility | DIRECTV satellite service |
| Video Output Formats | 480i, 1080i (selectable via OUTPUT SELECT) |
| Video Connections | Composite (RCA), S-Video, Component (Y/Pb/Pr), VGA |
| Audio Output | Stereo RCA, Optical digital (Dolby Digital capable) |
| Inputs | Satellite IN, VHF/UHF IN, VHF/UHF IN (DTV) |
| Remote Control | IR and RF, programmable for TV/VCR/DVD/AMP |
| Dimensions (Approx.) | 17 x 3 x 10 inches (W x H x D) |
| Weight (Approx.) | 5 lbs |
| Power Supply | AC 120V, 60Hz |
| Power Consumption | Approx. 30W |
| Warranty | 1 year parts, 90 days labor |
| Included Accessories | Remote control, AA batteries, A/V cable, S-Video cable, Y/Pb/Pr cable, RF coaxial cable, telephone cord, VCR controller, Access Card |
| Key Features | Program Guide with Media Window, Favorite Stations, Locks & Limits, Dolby Digital, VCR timer recording, RF remote operation, Non-satellite station setup |
| Safety | Do not expose to rain/moisture; proper grounding per NEC for satellite dish and CATV |
| Care and Cleaning | Wipe with a dry, soft cloth; do not use liquid or aerosol cleaners |
| Reparability | Service by Sony authorized DIRECTV system service facility; do not attempt repairs yourself |
Frequently Asked Questions - SAT-HD100 SONY
User questions about SAT-HD100 SONY
0 question about this device. Answer the ones you know or ask your own.
Ask a new question about this device
Download the instructions for your Digital decoder in PDF format for free! Find your manual SAT-HD100 - SONY and take your electronic device back in hand. On this page are published all the documents necessary for the use of your device. SAT-HD100 by SONY.
USER MANUAL SAT-HD100 SONY
HDTV Receiver DIRECTV Digital Satellite Receiver
Operating Instructions
Before you begin using your Digital Satellite Receiver for the first time, follow the instructions in "Connecting Your Digital Satellite Receiver" on pages 6–15 and "Setting Up Your Digital Satellite Receiver (SYSTEM)" on pages 26–42. To receive satellite programming, make sure your Satellite Dish Antenna is properly installed. Then call DIRECTV to begin service.
DIRECTV: 1-800-DIRECTV (347-3288)


SAT-HD100
WARNING
To reduce the risk of fire or shock hazard, do not expose the unit to rain or moisture.
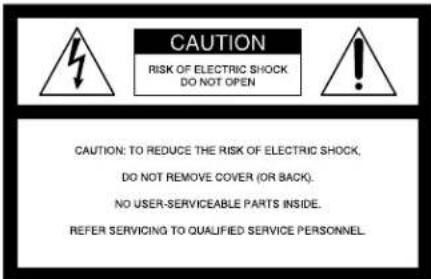
This symbol is intended to alert the user to the presence of uninsulated "dangerous voltage" within the product's enclosure that may be of significant magnitude to constitute a risk of electric shock to persons.

This symbol is intended to alert the user to the presence of important operating and maintenance (servicing) instructions in the literature accompanying the appliance.
Note to the CATV Installer
This reminder is provided to call the CATV system installer's attention to Article 820-40 of the NEC that provides guidelines for proper grounding and, in particular, specifies that the cable ground shall be connected to the grounding system of the building as close to the point of cable entry as practical.
Note to the Satellite Dish Antenna Installer
This reminder is provided to call the Satellite Dish Antenna installer's attention to Article 810 and in particular Article 810-15 of the NEC (National Electrical Code), which covers proper installation and grounding of television receiving equipment, as well as to Article 820-40 of the NEC, which specifies that the Satellite Dish Antenna cable ground shall be connected to the grounding system of the building as close to the point of cable entry as practical.
Attention
Telephone Line Interruption
Periodically, information on your DIRECT TICKET ^® and Pay Per View selections is sent, free of charge, via your telephone line to an 800 number. If you use your telephone during the time the information is being forwarded, you will hear static noise for approximately 30 seconds. If you would like to use your telephone while the information is being sent, you can interrupt the sending of this information at any time by temporarily unplugging the phone line to the receiver.
Local Programming
With this Digital Satellite Receiver and the proper satellite dish antenna, you may be able to receive local channels from DIRECTV in certain areas. Additional equipment may be required in some markets. Check with your retailer or visit www.DIRECTV.com for information on availability of local channels from DIRECTV in your area.
High Definition Programming
Due to copyright restrictions, you may not be able to view some high definition programs in high definition format using this product.
Note on Recording Programming
Programming may be taped for home viewing only. All other taping is expressly prohibited. Some programming may not be taped. An additional taping fee may be applied. Call your program providers for details.
Sony Software License Agreement
ATTENTION: USE OF THE SOFTWARE IS SUBJECT TO THE SONY SOFTWARE LICENSE TERMS SET FORTH ON PAGE 92. USING THE SOFTWARE OR THE PRODUCT IN WHICH IT IS INCORPORATED INDICATES USER'S ACCEPTANCE OF THESE LICENSE TERMS. IF THE USER DOES NOT ACCEPT THESE LICENSE TERMS, THE USER SHOULD IMMEDIATELY RETURN THE ENTIRE PRODUCT IN ITS ORIGINAL PACKING IN ORDER TO RECEIVE A FULL REFUND OF THE PURCHASE PRICE.
You are cautioned that any changes or modifications not expressly approved in this manual could void your authority to operate this equipment.
The Digital Satellite Receiver is intended for use only within the United States.
Owner's Record
The model and serial numbers are located on the bottom of the Digital Satellite Receiver. The number for the Access Card is on the back of the card and on the carton label. Record these numbers in the space provided below. Refer to these numbers whenever you need to call your sales or service representative regarding this product.
Model Number:
Serial Number:
Access Card Number:
Customer Support
For Programming
For subscription information, or to resolve problems related to programming, call DIRECTV at: 1-800-DIRECTV (347-3288)
For Hardware and Installation
To arrange for the installation of your Digital Satellite Receiver, call the dealer from whom you purchased your system. For general information, or to resolve problems related to the operation of your Digital Satellite Receiver or Satellite Dish Antenna, please contact your Sony dealer. If your dealer or installer is unable to answer your questions, call the Sony Satellite System Information Center at 1-800-838-7669. You may also contact Sony Electronics by visiting www.sony.com/support.
Trademark, Copyright, and License Information
Sony, Media Window, SmartFile, SignalSeeker, and Remote Commander are trademarks and The Sony Partnership and Express Support are service marks of Sony. DIRECTV, DIRECT TICKET and the Cyclone Design logo are trademarks of DIRECTV, Inc., a unit of Hughes Electronics Corp., and are used with permission. Manufactured under license from Dolby Laboratories. "Dolby", the double-D symbol and Pro Logic are trademarks of Dolby Laboratories. Confidential Unpublished Works. © 1992–1997 Dolby Laboratories Inc. All rights reserved. Macrovision is a trademark of Macrovision Corporation.
Macrovision Information
This product incorporates copyright protection technology that is protected by U.S. patents and other intellectual property rights. Use of this copyright protection technology must be authorized by Macrovision, and is intended for home and other limited pay-per-view uses only unless otherwise authorized by Macrovision. Reverse engineering or disassembly is prohibited.
StarSight Licensed
The manufacture and sale of the television schedule feature of this product was licensed under one or more of the following patents of StarSight Telecast, Inc.: U.S. Patent Nos. 4,706,121; 4,977,455; 5,151,789; and 5,353,121; with use rights reserved.
About These Operating Instructions
The z icon indicates hints and tips for making the task easier. A Note provides information that may be necessary to complete the task.
Getting to Know Your Digital Satellite Receiver
Connecting Your Digital Satellite Receiver (Page 6)
natural_image
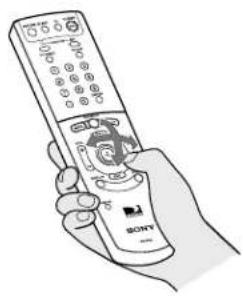
Simple line drawing of a rectangular box connected to a coiled cable (no text or symbols)Using Your Remote Control (Page 16)
natural_image
Line drawing of a hand holding a Sony mobile phone with keypad and control buttons (no text or symbols on device)Using the Program Guide (Page 45)
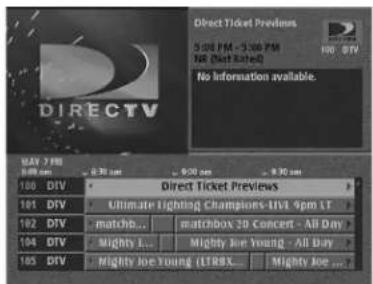
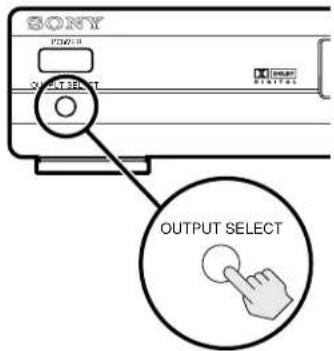
Selecting High or Standard Definition Output (Page 11)
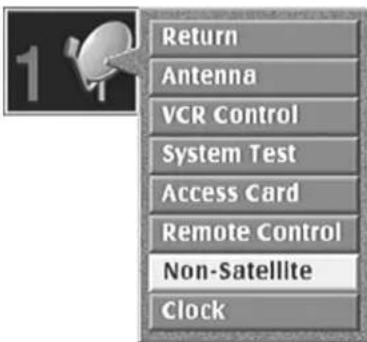
Setting Up Non-Satellite Stations (Page 38)
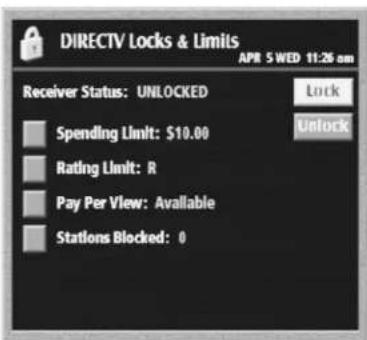
Setting Locks & Limits (Page 65)
Features
Congratulations on your purchase of the Sony Digital Satellite Receiver. This manual can help you to become familiar with the many great features of the Digital Satellite Receiver. Check below to find out about some of the most exciting features.
Convenience and Ease-of-Use
- The Program Guide shows the picture and sound in the Media Window™ while you check station and program information. See page 45.
- Operate your Digital Satellite Receiver from another room or from outside a cabinet by setting up the RF feature on your remote control. See pages 35–37.
Excellent Performance
- Connect your Digital Satellite Receiver to a digital monitor to enjoy digital high definition programming. See pages 10–11.
- Select Dolby Digital audio to truly make your home theater come alive. See page 80.
Easy to Customize
- Organize the channels your family watches most often by setting up the Favorite Stations guide. See pages 48–50.
- Control access to programming with the Locks & Limits feature. See pages 65–71.
Receiving Signals
You may enjoy many types of broadcasts with your Digital Satellite Receiver. Your Digital Satellite Receiver has three input jacks to accommodate the types of broadcasts you want to receive.
| Broadcast | Reception | Input JackDigital Satellite Receiver | ||
| Analog TV | 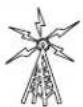 | 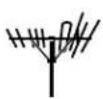 | 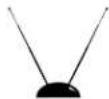 |  VHF/UHF IN VHF/UHF IN |
| TV Antenna | ||||
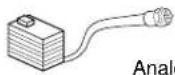 | cg Cable TV | 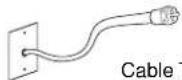 | TV connection | |
| AH8Y]Digital TV | 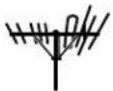 TV Antenna TV Antenna |  VHF/UHF IN (DTV) VHF/UHF IN (DTV) | ||
| Standard Definition Digital Satellite TV | 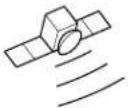 | Round 18-inchSatellite DishAntenna | Oval 24-inchSatellite DishAntenna |  SATELLITE IN SATELLITE IN |
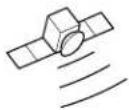 | High Definition Digital Satellite TV | 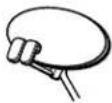 | Oval 24-inchSatellite Dish Antenna | |
Table of Contents
Connecting Your Digital Satellite Receiver
Carton Contents ......6
Setup and Connections.... 7
Connection Overview 7
Step 1: Connecting the Antennas or Cable TV....8
Step 2: Connecting Your Analog TV Set or Digital Monitor....9 Connecting Your Analog TV Set ..... Connecting Your Digital Monitor ....10
Step 3: Selecting High or Standard Definition Output .... 11
Step 4: Connecting Your VCR 12
Step 5: Connecting the VCR Controller....13 Connecting a Sony SmartFile™ VCR....13
Step 6: Connecting an Audio System...... 14
Step 7: Connecting the RF Antenna .....14
Step 8: Connecting the Telephone Line and AC Power Cord ....15
Step 9: Inserting the Access Card ...... 15
Using Your Remote Control
Inserting the Batteries 16
Selecting Items 16
Understanding the Buttons....17
Setting Up the Remote Control....19
Manufacturer Codes.... 20
Viewing Pictures From Your Digital Satellite Receiver
Television Features.... 22
Turning On the Power 23
Changing Channels 24
Using the On-Screen Displays
Using the Main Menu 25
Setting Up Your Digital Satellite Receiver (SYSTEM).... 26
Setting Up the Satellite or Digital TV Antenna 27
Setting Up the VCR Control Feature.... 30
Performing a System Test 33
Replacing Your Access Card 34
Selecting RF or IR Remote Control Reception.... 35
Setting Up Non-Satellite Stations.... 38
Setting the Clock.... 42
Viewing Station and Program Information
(GUIDES)....43
Using the Alpha List.... 44
Using the Program Guide 45
Using the Category Guide 46
Using the Station Index....47
Using the Favorite Stations Guide.... 48
Using Other Guides.... 51
Viewing Pay Per View Programs.... 53
Setting Preferences
(PREFERENCES)....54
Setting Display Options....55
Setting Up Custom Stations ....58
Selecting Data Service.... 60
Adjusting TV Properties
(TV PROPERTIES) 61
Setting Locks and Limits
(LOCKS & LIMITS)....65
DIRECTV Locks & Limits and TV Locks & Limits...... 67
Locking Your Receiver....70
Unlocking Your Receiver....71
Checking Service Provider Information
(DIRECTV) 72
Viewing Messages....73
Checking Your Purchases.... 74
Scheduling Programs
(TIMER & REC) 75
Recording Programs.... 75
Using One Button Timer & Rec.... 76
Using the Timer & Rec Feature....77
Editing Timer & Rec Events.... 79
Setting Audio Options
(AUDIO) 80
Changing the Current Audio....81
Changing the Default Audio 81
Setting Dolby Digital Options.... 82
Setting Closed Captioning.... 83
Other Information
Location and Function of Controls ....84
Front Panel....84
Display Window 84
Back Panel....85
Specifications 86
Troubleshooting 87
FCC Regulations and Information....90
Limited Warranty....91
Software License Agreement....92
Index....93
Connecting Your Digital Satellite Receiver
Carton Contents
Check to make sure the following items are in the Digital Satellite Receiver's carton. If you are missing any items, contact your Sony dealer.
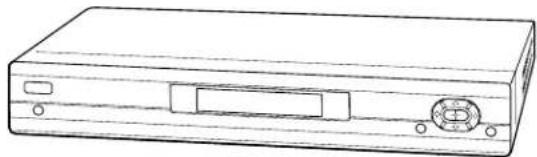
natural_image
Line drawing of a rectangular electronic device with a slot and button (no text or symbols)Digital Satellite Receiver
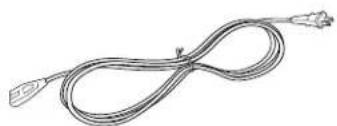
natural_image
Line drawing of a coiled electrical plug with two terminal connectors (no text or symbols)AC Power Cord

Access Card

Size AA Batteries
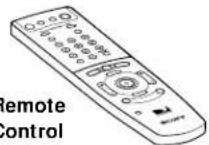
Remote Control
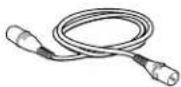
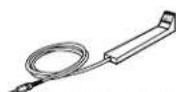
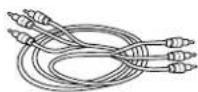
VCR Controller Audio/Video CableRF Coaxial Cable
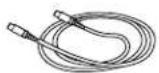
S-Video Cable Y/P
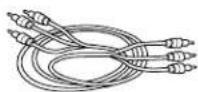
B/PR Cable
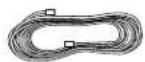
Telephone Cord
Note
Keep the original carton and packing materials to safely transport your Digital Satellite Receiver in the future.
Setup and Connections
Below is a description of the jacks and cables you can use to make connections. Some cables are not supplied with your Digital Satellite Receiver.
VHF/UHF Jacks and Coaxial (RF) Cable
Use the VHF/UHF IN jacks to receive signals from a TV antenna or from a cable TV connection. You can also use the VHF(SAT)/UHF OUT jack to send audio and video signals to your TV.
SATELLITE IN Jack and RG-6 Coaxial Cable
Use the SATELLITE IN jack to receive signals from your Satellite Dish Antenna with RG-6 coaxial cable (not supplied).
Audio/Video Jacks and Audio/Video Cables (RCA-type)
Use the audio/video jacks to send good quality analog video and stereo audio signals.
S-VIDEO Jacks and S-VIDEO Cables
Use the S-VIDEO jacks to send excellent quality analog video signals.
DIGITAL AUDIO OUT (OPTICAL) Jack and Optical Cable

Use the DIGITAL AUDIO OUT (OPTICAL) jack to send excellent quality audio signals. If connecting to a Dolby Digital receiver, select "Auto Select" from the Dolby Digital pop-up in the Audio display to enjoy Dolby Digital sound (see page 82) (not supplied).
Y/PB/PR Jacks and Y/PB/PR Cables
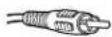
Use the Y/PB/PR jacks to send excellent quality digital video signals.
VGA OUT Jack and VGA Cable
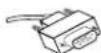
Use the VGA OUT jack to send excellent quality digital video signals to compatible monitors (not supplied).
LOW SPEED DATA Jack and RS232 Cable
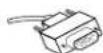
Use the LOW SPEED DATA jack to send information to certain compatible devices, such as Personal Video Recorders (not supplied).
TEL LINE Jack and RJ-11 Telephone Cable

Use the TEL LINE jack to connect to a telephone outlet. If you subscribe to DIRECTV programming, some services require a continuously connected telephone line. The telephone line connection is used to periodically call out to DIRECTV.
Connection Overview
Follow the procedures or make the connections in each of the steps to connect your Digital Satellite Receiver.
Step 1: Connecting the Antennas or Cable TV
Page 8

Step 2: Connecting Your Analog TV Set or Digital Monitor
Page 9

Step 3: Selecting High or Standard Definition Output
Page 11

Step 4: Connecting Your VCR (advanced connection) Page 12

Step 5: Connecting the VCR Controller
(advanced connection)
Page 13

Step 6: Connecting an Audio System
(advanced connection)
Page 14

Step 7: Connecting the RF Antenna
(advanced connection)
Page 14

Step 8: Connecting the Telephone Line and AC Power Cord
Page 15

Step 9: Inserting the Access Card
Page 15
Step 1: Connecting the Antennas or Cable TV
The SATELLITE IN jack sends power to, and receives satellite signals from, the Satellite Dish Antenna. The VHF/UHF IN and VHF/UHF IN (DTV) jacks receive signals from your TV antenna(s) or cable company service.
① If you have a local TV antenna or cable company service
Connect it to the VHF/UHF IN jack on your Digital Satellite Receiver using a coaxial cable or RF adapter (not supplied).
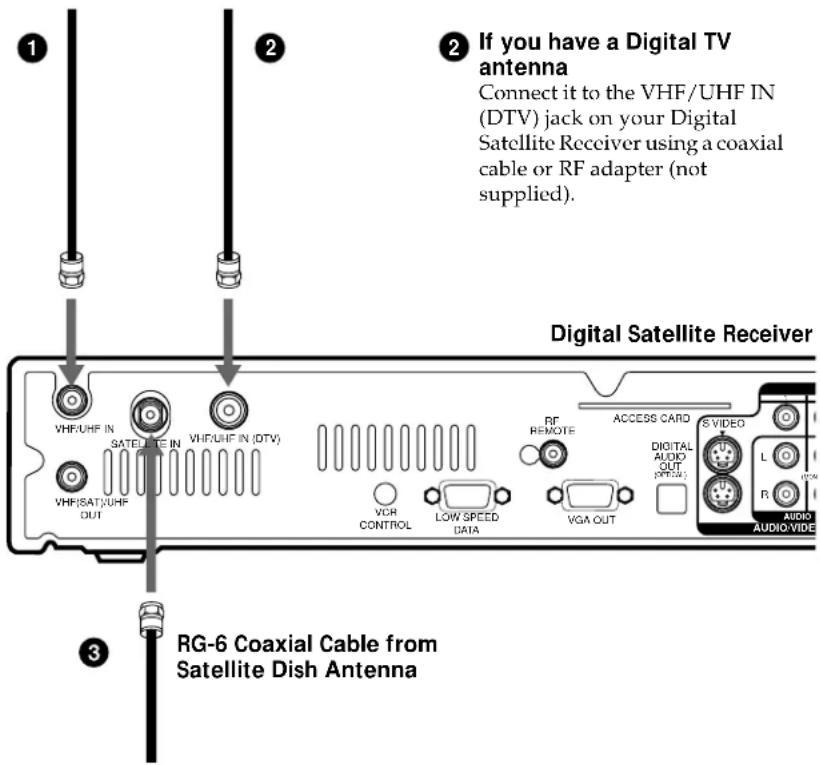
3 If you have a Satellite Dish Antenna
Connect it to the SATELLITE IN jack on your Digital Satellite Receiver using RG-6 coaxial cable (not supplied).
CAUTION
Only connect your authorized Satellite Dish Antenna to the SATELLITE IN jack as described in the Installation Instructions. Connecting any other equipment to this jack could result in damage to the equipment and/or receiver.
Note
Your Satellite Dish Antenna Installation Instructions provides detailed instructions on how to install RG-6 coaxial cable from your Satellite Dish Antenna.

Tip
For best reception performance, use the Sony SAN-18D3 or SAN-24MD1 Satellite Dish Antenna.
Step 2: Connecting Your Analog TV Set or Digital Monitor
Connecting Your Analog TV Set
Connect your TV to the Digital Satellite Receiver as shown below.
Digital Satellite Receiver
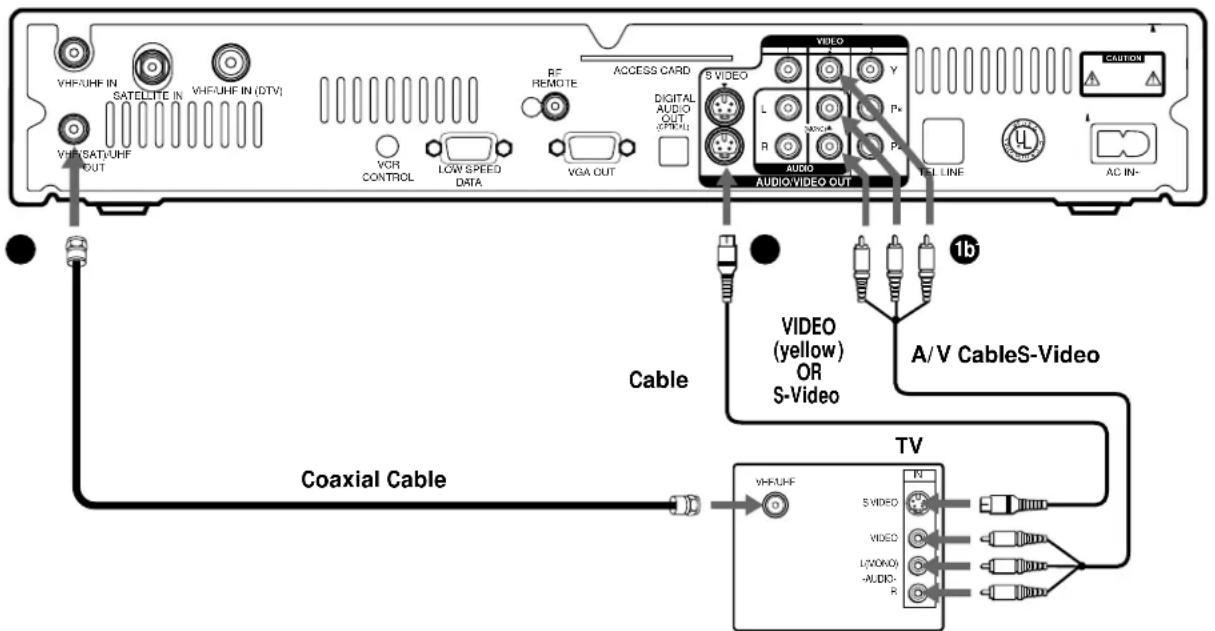
1a If your TV does not have A/V input jacks
Connect the VHF(SAT)/UHF OUT jack to the VHF/UHF input jack on your TV using coaxial cable.
Note
With this connection, your input source is channel 3 or channel 4 depending on how you set the RF Output setting in the TV Properties display (see page 61).
If your TV has A/V input jacks Connect the AUDIO/VIDEO1 or AUDIO/VIDEO2 jacks on your Digital Satellite Receiver to the A/V input jacks on your TV using the supplied A/V cable. (Be sure to match the colors on the jacks with the colored plugs on the A/V cable.) If your TV has only one audio input, connect it to the L(MONO) jack on the receiver.
1c If your TV has an S-Video input jack
Use the S-Video cable instead of the yellow video connection.
Step 2: Connecting Your Analog TV Set or Digital Monitor (continued)
Connecting Your Digital Monitor
Connect your TV to the Digital Satellite Receiver as shown below.
Digital Satellite Receiver
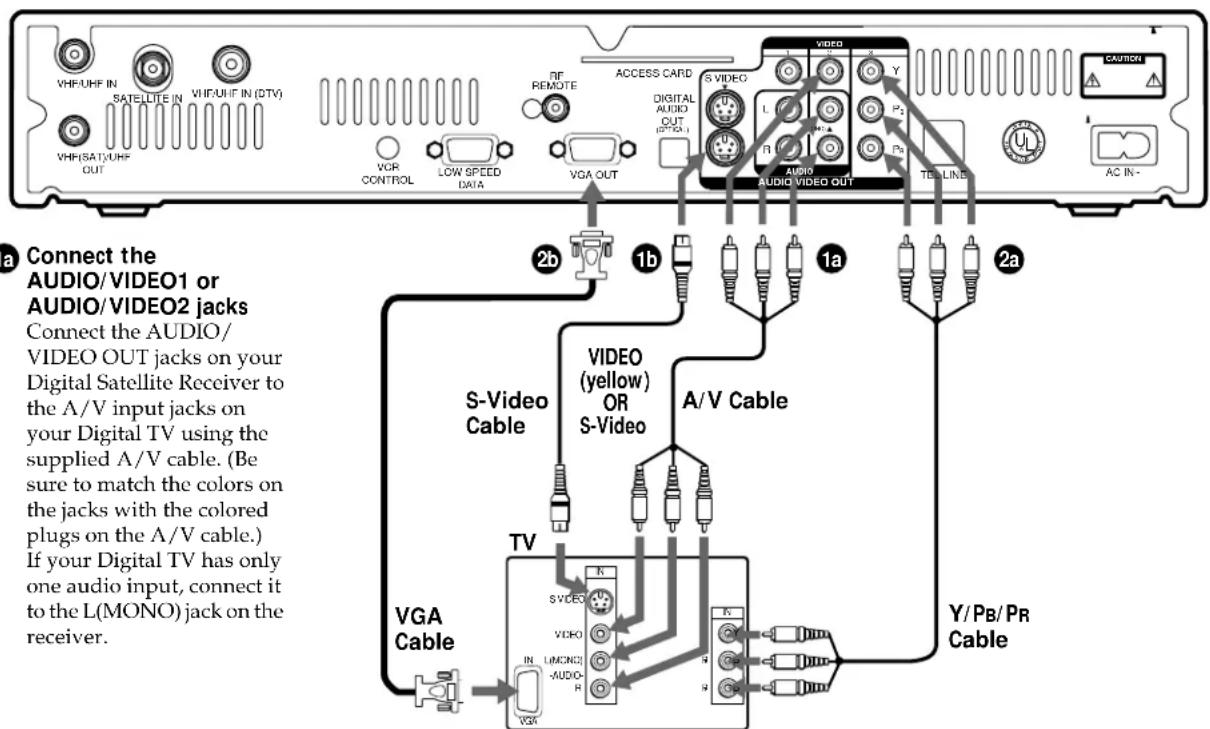
1a Connect the
AUDIO/VIDEO1 or AUDIO/VIDEO2 jacks
Connect the AUDIO/VIDEO OUT jacks on your Digital Satellite Receiver to the A/V input jacks on your Digital TV using the supplied A/V cable. (Be sure to match the colors on the jacks with the colored plugs on the A/V cable.) If your Digital TV has only one audio input, connect it to the L(MONO) jack on the receiver.
1b If your Digital TV has an S-Video input jack
Use the S-Video cable instead of the yellow video connection.

Tip
Use both the VIDEO 1 or VIDEO 2 OUT jacks and the VIDEO 3 or VGA OUT jacks to connect your Digital Satellite Receiver to your digital monitor. The VIDEO 3 or VGA OUT jacks will send the best quality signal to your digital monitor. The VIDEO 1 or VIDEO 2 OUT jacks will give you the option to view or record programs with high definition copyright restrictions.
2a If your Digital TV has Y/PB/PR input jacks
Connect the Y/PB/PR OUT jacks to the Y/PB/PR input jacks on your TV using the supplied Y/PB/PR cable.
2b If your Digital TV has a VGA input jack
Connect the VGA OUT jack to the VGA input jack on your TV using VGA cable (not supplied).
Step 3: Selecting High or Standard Definition Output
After you connect your analog TV set or digital monitor to the Digital Satellite Receiver, use the OUTPUT SELECT button to select the correct type of output for the connection you made.
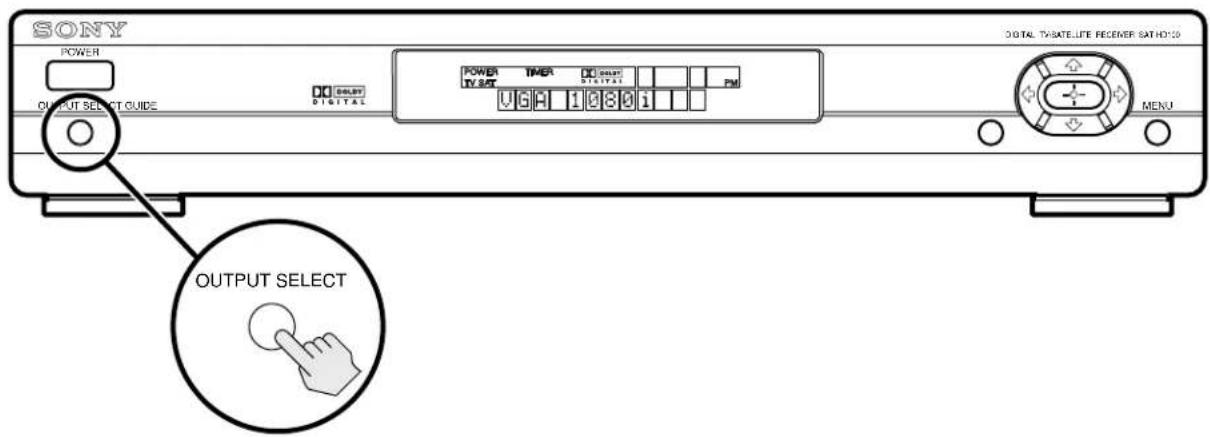
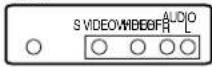
1a Video 1/2, UHF/UHF 480i
If you connect to your analog TV set, digital monitor or VCR using the following outputs, select Video 1/2, VHF/UHF 480i.
• VIDEO 1
- VIDEO 2
• S-VIDEO
• VHF (SAT)/UHF OUT
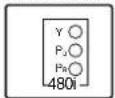
1b Video 3 480i
If you connect to your analog TV set or digital monitor using the following output, and it accepts only 480i digital signals, select Video 3 480i to send standard definition digital video.
• VIDEO 3 (Y/PB/PR)
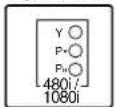
1c Video 3 variable
If you connect to your digital monitor using the following output, and it accepts both 480i and 1080i digital signals, select Video 3 variable to send standard or high definition digital video.
• VIDEO 3 (Y/PB/PR)
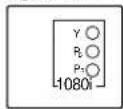
1d Video 3 1080i
If you connect to your digital monitor using the following output, and it accepts only 1080i digital signals, select Video 3 1080i to send high definition digital video.
• VIDEO 3 (Y/PB/PR)
1e VGA 1080i
If you connect to your digital monitor using the following output, select VGA 1080i to send high definition digital video.
• VGA
TV or
Digital Monitor
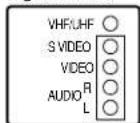
VCR
TV or
Digital Monitor
Digital Monitor
Digital Monitor
Digital Monitor
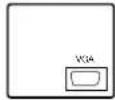
Notes
- You must select "Video 1/2, VHF/UHF 480i" if you plan to record a program with your VCR.
- Only one Output Select setting can be active at one time. For example, if your Digital Satellite Receiver is connected to your Digital Monitor using only the VGA jack, you must select the "VGA 1080i" Output Select setting.

Tips
- You can also use the OUTPUTSELECT button on the remote control to change the OUTPUT SELECT setting (see page 18).
- You may need to change your TV, VCR or digital monitor input as you change the OUTPUT SELECT.
Step 4: Connecting Your VCR
You can record programs by connecting a VCR.
Digital Satellite Receiver
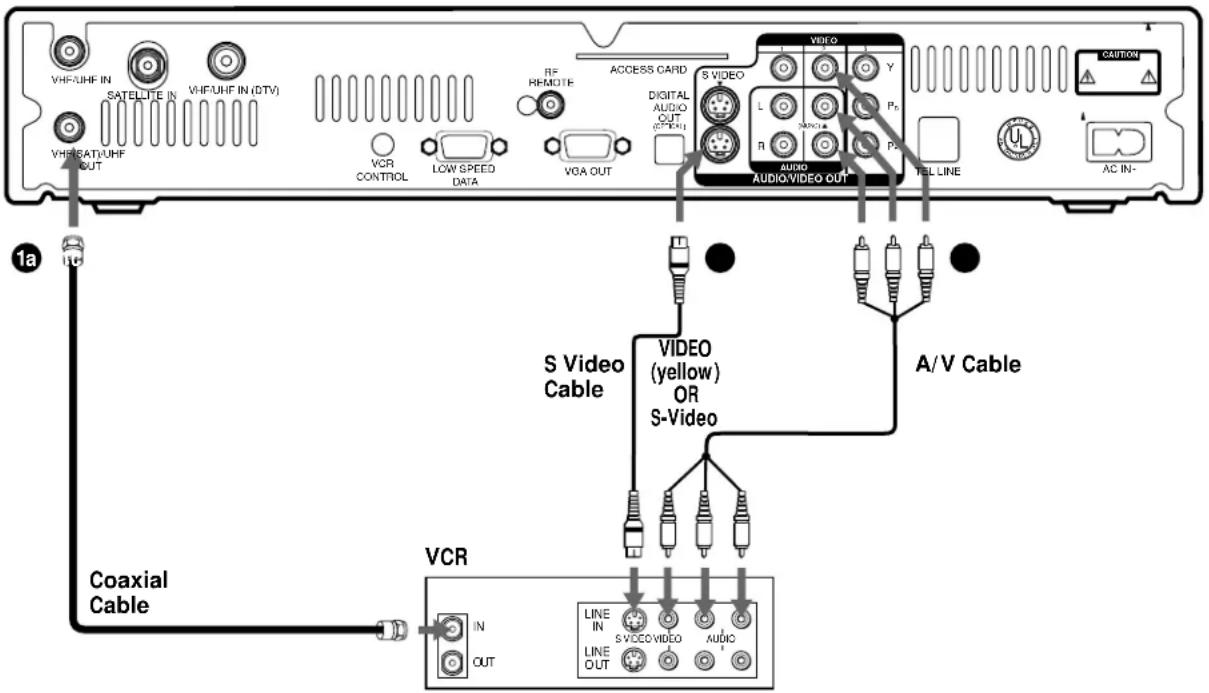
1a If your VCR does not have A/V jacks
Connect the VHF(SAT)/UHF OUT jack on the Digital Satellite Receiver to the VHF/UHF input jack on your VCR using coaxial cable.

Tip
To allow your Digital Satellite Receiver to control the recording functions of your VCR, see "Step 5: Connecting the VCR Controller" on page 13.
● If your VCR has A/V jacks
Connect the AUDIO/VIDEO1 or AUDIO/VIDEO2 jacks of your Digital Satellite Receiver to the A/V input jacks of your VCR using the supplied A/V cable. (Be sure to match the colors on the jacks with the colored plugs on the A/V cable.) If your Digital TV has only one audio input, connect it to the L(MONO) jack on the receiver.
1c If your VCR has S-Video jacks
Use the S-Video cable instead of the yellow video connection.
Step 5: Connecting the VCR Controller
Connect the VCR Controller to allow the Timer & Rec feature to automatically operate your VCR.
See "Setting Up the VCR Control Feature" on page 30 for information about setting up the Digital Satellite Receiver to work with your VCR.
Digital Satellite Receiver
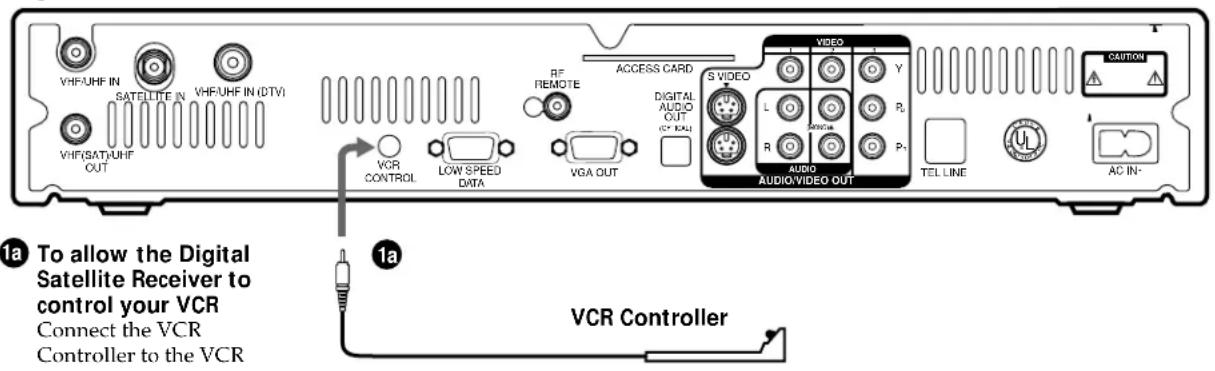

To allow the Digital Satellite Receiver to control your VCR
Connect the VCR
Controller to the VCR
CONTROL jack on the
receiver.
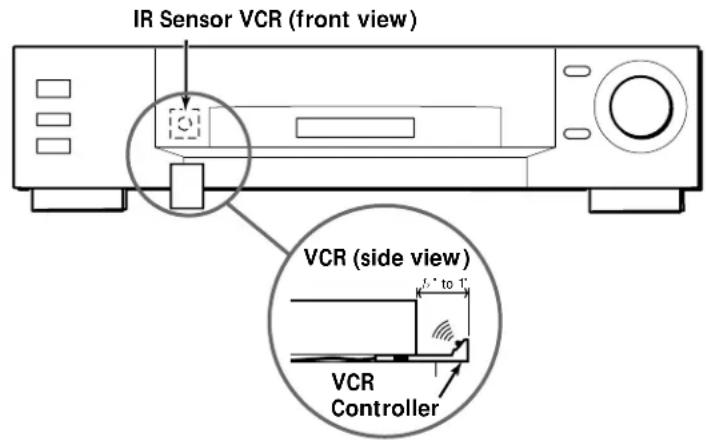
In front of the VCR
Place the VCR Controller under and in front of the VCR.
The VCR Controller must extend just in front of the infrared sensor of the VCR.

Tip
If the infrared sensor is not marked on your VCR, shine a flashlight into the front panel of the VCR to locate the sensor.
Connecting a Sony SmartFile™ VCR
Digital Satellite Receiver
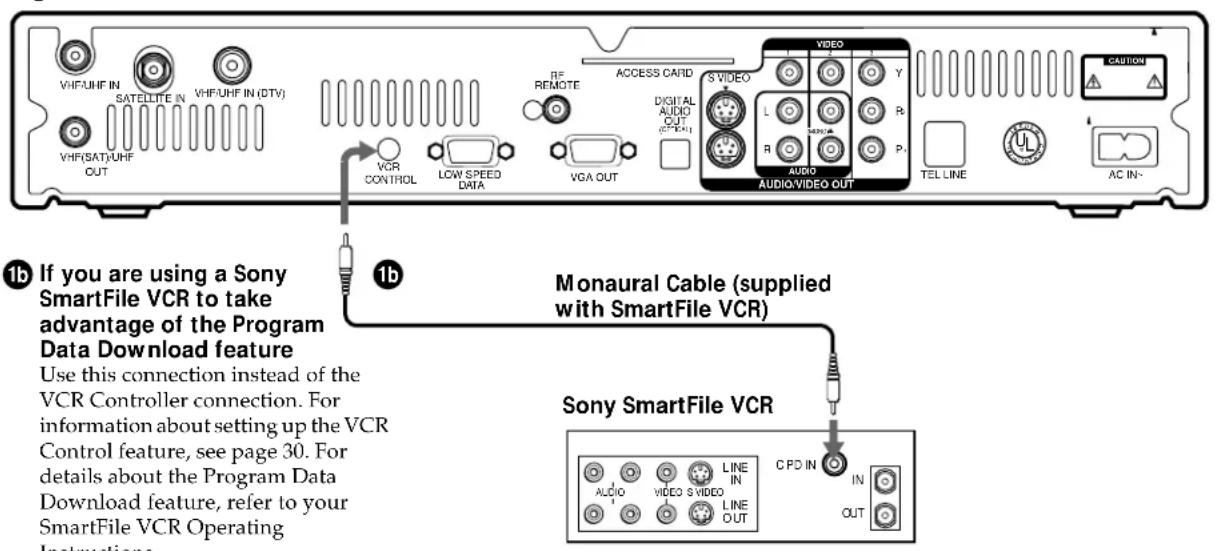
Step 6: Connecting an Audio System
You can connect your Digital Satellite Receiver to an audio system for enhanced sound enjoyment.
1a If you have a digital or Dolby® Digital audio system
Connect the DIGITAL AUDIO OUT (OPTICAL) of the Digital Satellite Receiver to the optical digital input of your audio system.

Tip
If you connect your Digital Satellite Receiver to a Dolby Digital receiver, set the Dolby Digital option of the Audio display to Auto Select. See "Setting Audio Options (AUDIO)" on page 80 for more information.
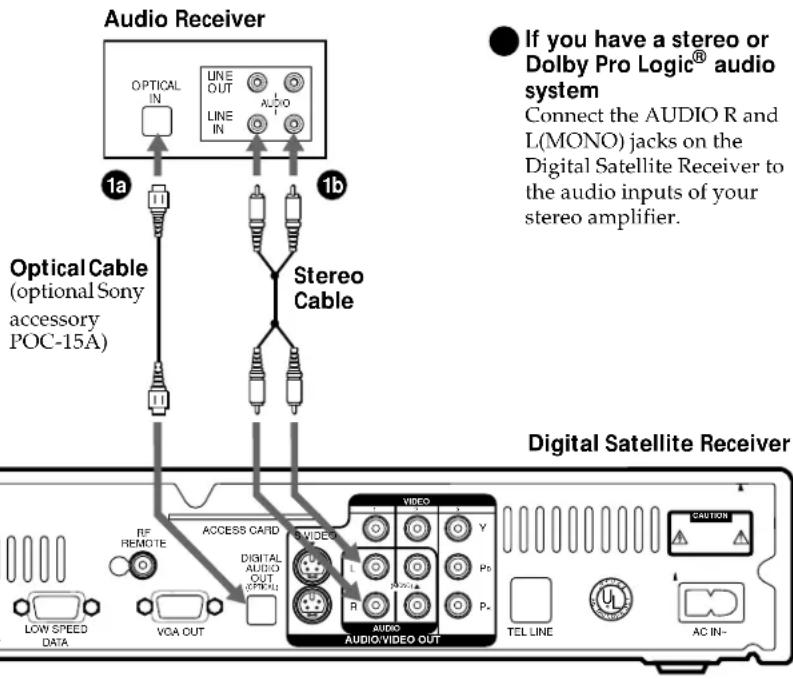
- If you have a stereo or Dolby Pro Logic® audio system
Connect the AUDIO R and L(MONO) jacks on the Digital Satellite Receiver to the audio inputs of your stereo amplifier.
Step 7: Connecting the RF Antenna
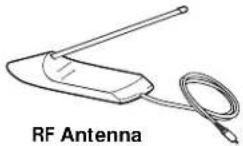
You can connect the RF Antenna and operate the Digital Satellite Receiver when installed in a cabinet or from another room in your house using the remote control. See page 35 for information about how to set up the Digital Satellite Receiver to use the RF feature.
Notes
- Do not place the RF Antenna directly on top of the Digital Satellite Receiver or any other metal object. For best results, place the RF Antenna in a visible location.
- The operating range of the remote control is about 100 feet when using the RF feature. This may decrease due to ambient reception conditions, weak batteries, etc.
① If you want to use the RF feature
Connect the RF Antenna to the RF REMOTE jack of the Digital Satellite Receiver. Then, place the RF Antenna in a convenient location.
Digital Satellite Receiver

Step 8: Connecting the Telephone Line and AC Power Cord
The telephone line connection periodically sends information about your receiver and Access Card to your service provider.
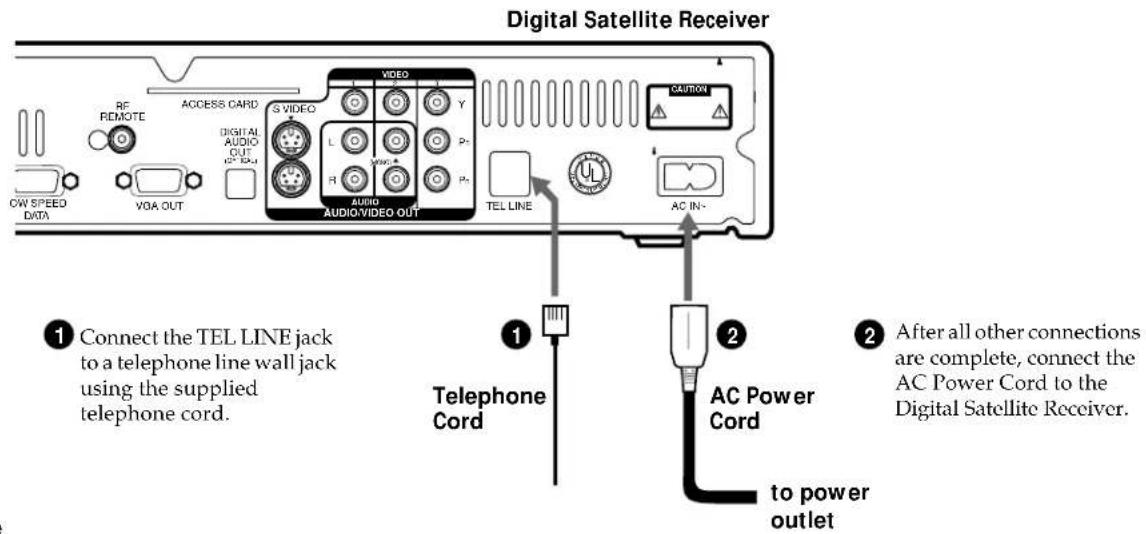
Note
The Digital Satellite Receiver must be continuously connected to a land-based phone line to receive certain programming and to order using the remote control.
Step 9: Inserting the Access Card
After you insert the Access Card and your Satellite Dish Antenna is installed, you are ready to begin enjoying digital satellite programming. Call DIRECTV at 1-800-DIRECTV (347-3288) to begin service.
Digital Satellite Receiver
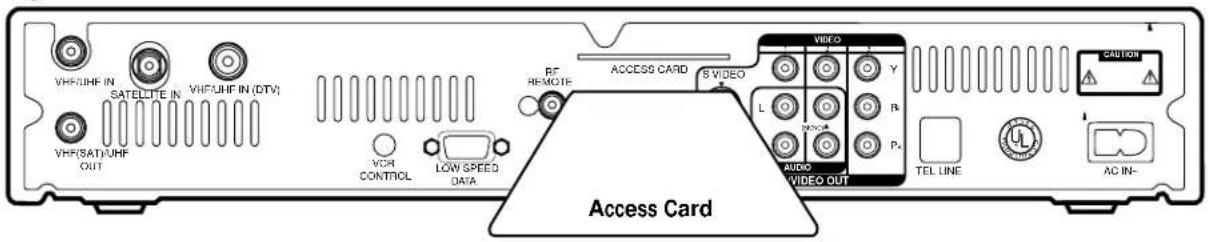
Using Your Remote Control
Inserting the Batteries
Before you can use the remote control, you must insert the supplied batteries. If you want to use this remote control to operate other audio/video equipment, such as a TV or VCR, you must set up the remote control (see page 19).
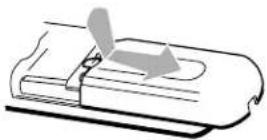
①Push and slide open the battery compartment.
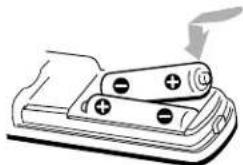
natural_image
Illustration of a battery stack with two stacked batteries and a plug inserted (no text or symbols)②Insert two size AA batteries (supplied). Be sure to match the + and - marks on the batteries with the + and - marks inside the battery compartment.
Notes
- When the batteries become weak, the Function button indicators flash. If the remote control does not work properly, the batteries may be weak.
- When replacing batteries, replace both batteries with new ones. Do not mix different types of batteries together.
- When you remove the batteries, any manufacturer codes you've set up may be erased. To set up the remote control again, see "Setting Up the Remote Control" on page 19.
Selecting Items
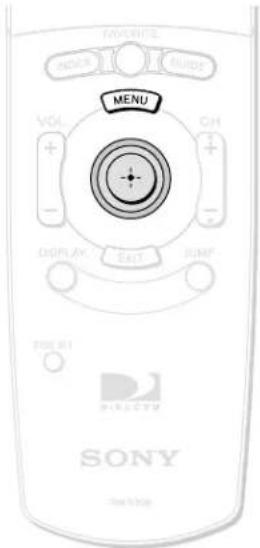
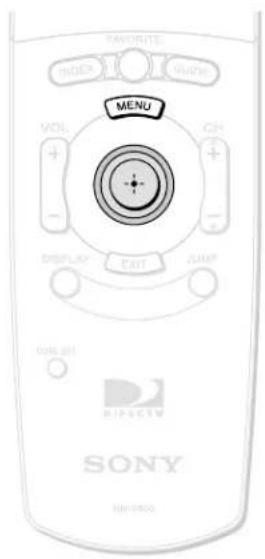
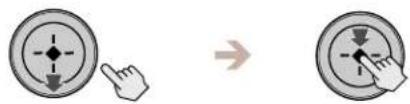
In on-screen displays such as the Main Menu and program guides, you must first move the highlight to the item you want, then select the item.
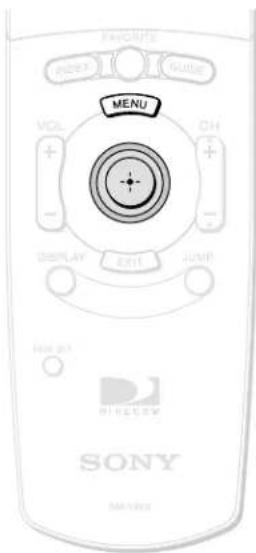
RM-Y808 Remote Control
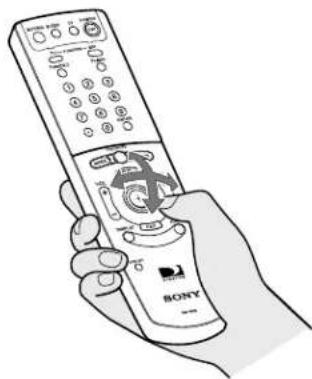
natural_image
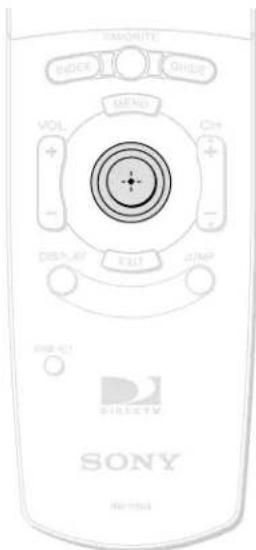
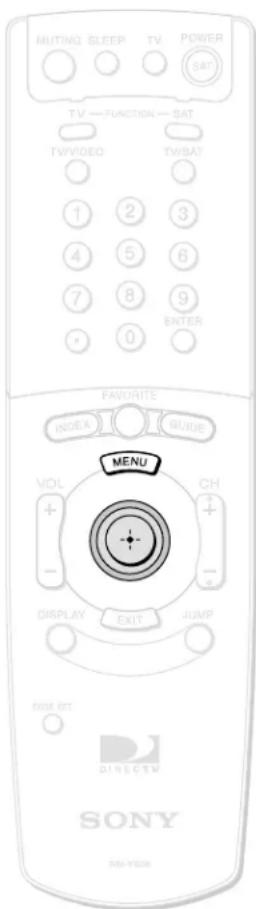
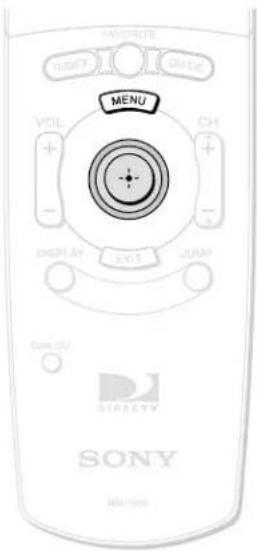
Line drawing of a hand holding a Bony remote control with keypad and function buttons (no text or symbols)①Move the joystick in any direction to move the highlight to the item you want.
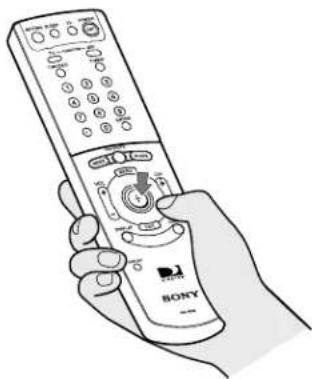
natural_image
Illustration of a hand holding a Sony remote control device (no text or symbols on the device itself)②Press down on the joystick to select the item.
Understanding the Buttons
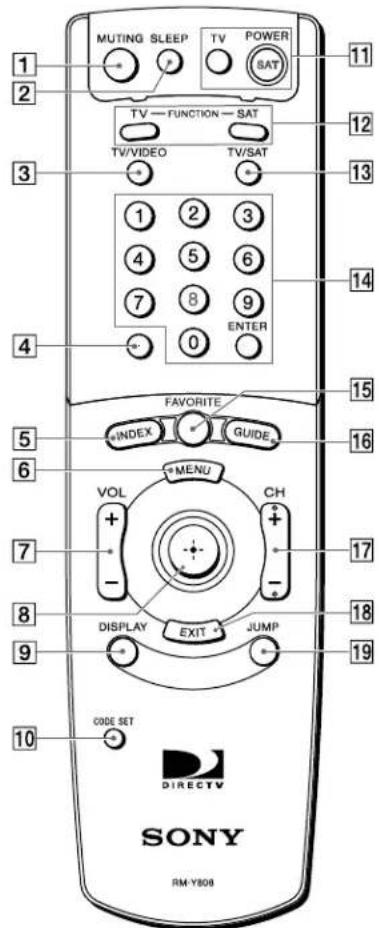
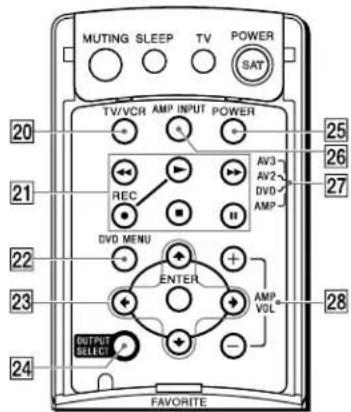
Note
You may need to set up the remote control to operate your other audio/video equipment. See "Setting Up the Remote Control" on page 19 for details.
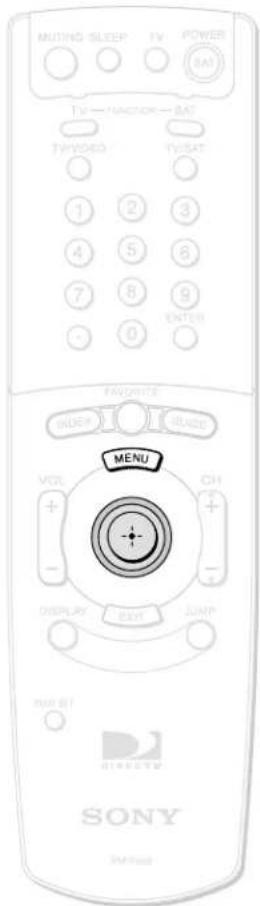
1 MUTING button
Mutes the volume. Press again to restore the volume. To operate your TV, you must first set up the remote control (see page 19).
2 SLEEP button
Sets the TV to turn off automatically after a certain amount of time (if your TV has the Sleep feature). To operate your TV, you must first set up the remote control (see page 19).
3 TV/VIDEO button
Switches between the various inputs of your TV. To operate your TV, you must first set up the remote control (see page 19).
4 (Dot) button
Use with the 0–9 and ENTER buttons to select subchannels (for example, 2.1).
5 INDEX button
Opens the Station Index.
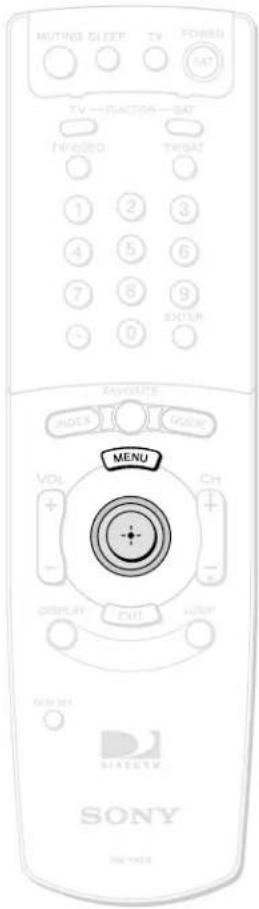
6 MENU button
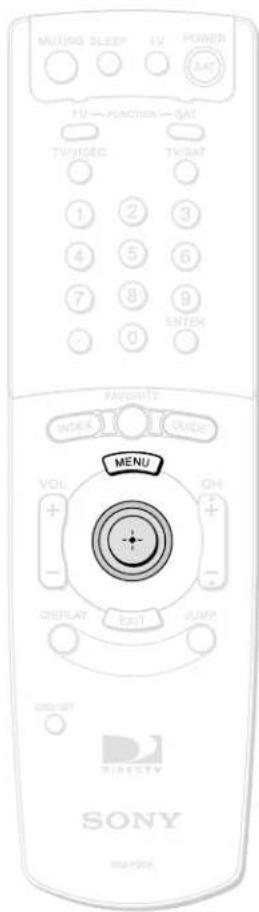
Opens the Main Menu.
7 VOL (Volume) +/- button
Adjusts the volume. To operate your TV, you must first set up the remote control (see page 19).
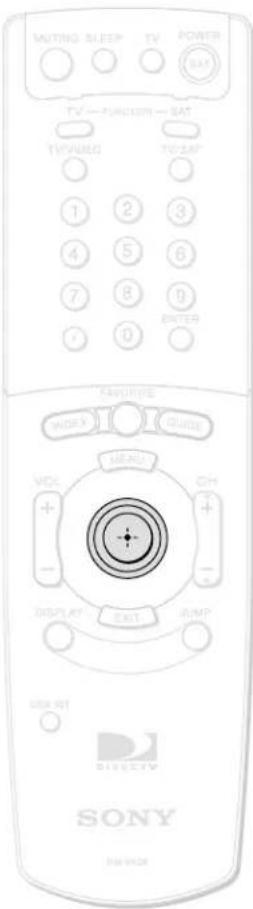
8Joystick
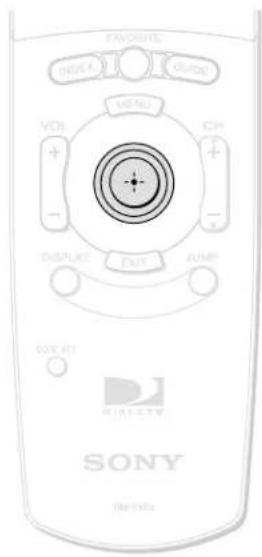
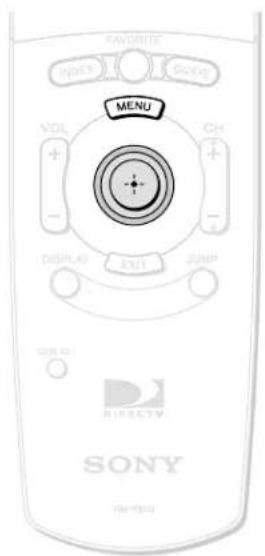
Moving the joystick up, down, left, and right moves the highlight in on-screen displays. Press the joystick to select the highlighted item.
9 DISPLAY button
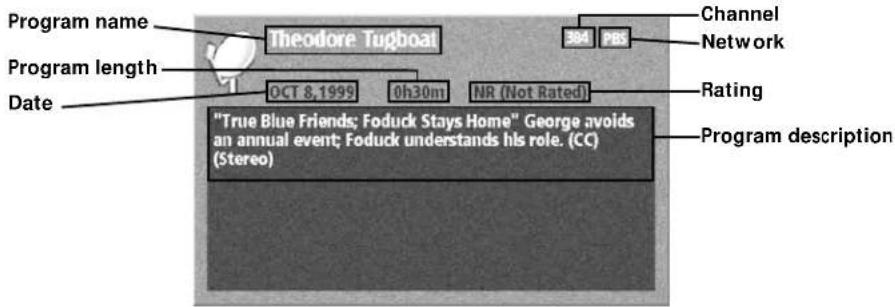
Opens the program information display for the current program.
10 CODE SET button
Lets you program the remote control to operate your TV and other audio/video equipment (see page 19).
11 POWER buttons
Turn on and off the Digital Satellite Receiver and TV. To operate your TV, you must first set up the remote control (see page 19).
continued
Understanding the Buttons (continued)
12FUNCTION buttons
Select the equipment (TV or SAT) that you want to operate. The indicators light up to show which device the remote control is operating. To operate your TV, you must first set up the remote control (see page 19).
13 TV/SAT button
Switches the signal being output by the VHF(SAT)/UHF OUT jack (see page 85).
140-9 and ENTER buttons
Change channels directly, and enter numerical values in on-screen displays.
15FAVORITE button
Opens the Favorite Stations guide.
16 GUIDE button
Opens the Program Guide.
17 CH (Channel) +/- button
Changes channels. When a program guide is open, pressing the CH button pages through the guide.
18 EXIT button
Closes all on-screen displays including program guides and menus.
19JUMP button
Changes channels to the previously tuned channel.
20TV/VCR button
Switches between the inputs of your VCR. To operate your VCR, you must first set up the remote control (see page 19).
21 VCR/DVD Control buttons
Operate VCR/DVD features such as play, record, pause, stop, and fast wind. To operate your VCR/DVD, you must first set up the remote control (see page 19).
22 DVD MENU button
Opens the menu system of the current DVD. To operate your DVD player, you must first set up the remote control (see page 19).
23 DVD Control buttons
Let you highlight and select items in DVD Menus. To operate your DVD player, you must first set up the remote control (see page 19).
24 OUTPUT SELECT button
Changes the video output of your Digital Satellite Receiver (see page 11). The available settings are:
• Video 1/2, VHF/UHF 480i
- Video 3 480i
- Video 3 variable
- Video 3 1080i
• VGA 1080i
25 POWER button
Turns on or off other devices in your A/V system selected with the AV3/AV2/DVD/AMP switch. To operate these other devices, you must first set up the remote control (see page 19).
26 AMP INPUT button
Selects the main input of your audio receiver. To operate your audio receiver, you must first set up the remote control (see page 19).
27 AV3/AV2/DVD/AMP switch
Sets the remote to operate other devices in your home theater. To operate these other devices, you must first set up the remote control (see page 19).
28 AMP VOL (Amplifier Volume) +/- buttons
Adjust the volume of your audio receiver. To operate your audio receiver, you must first set up the remote control (see page 19).
Setting Up the Remote Control
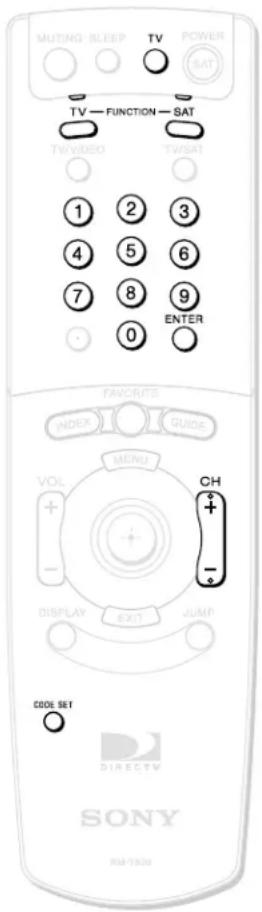

Tips
- Remember to aim the remote control at the device you are trying to operate.
- To control extra VCRs, a DVD player or an audio receiver (AMP) with the RM-Y808 remote control, slide the device switch to AV2, AV3, DVD or AMP after you have set up the remote with the correct manufacturer code.
The RM-Y808 remote control can be programmed to operate most audio/video equipment.
The remote control comes from the factory ready to control most Sony TVs, VCRs, DVD players, and amplifiers.
1 Find the code(s) for the manufacturer of the device you want to operate with this remote control.
You can find these codes on pages 20 and 21.
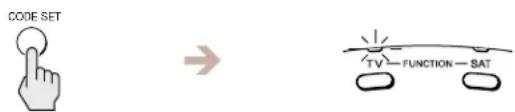
2 Press the CODE SET button.
The TV function indicator begins flashing.
3 Press the 0–9 buttons to input the manufacturer code, then press the ENTER button.
The function indicator goes off, and the remote is setup to operate that device.
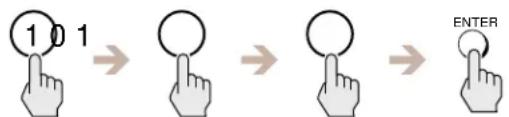
4 Test the remote control.
Press the POWER button for that equipment, then press other operation controls such as the CH (channel) +/- button. If the device does not respond to the remote control, repeat from step 2 and enter a different manufacturer code in step 3.
Manufacturer Codes
The RM-Y808 remote control is compatible with most models of the following brands.
TV Codes VCR Codes
| Manufacturer Code | |
| Sony | 101 |
| Admiral (M. Wards) 102, 114, 109 | |
| ABC 112 | |
| Bell & Howell(M. Wards) | 114, 109, 138 |
| Broksonic 103, 112 | |
| Craig 122, 123, 120, 121 | |
| Croslex 111 | |
| Curtis Mathis 103, 119, 123 | |
| Daewoo 135, 136, 103 | |
| Daytron 113 | |
| Emerson 122, 113, 120, 121, 123, 103, 115 | |
| Fisher 125 | |
| General Electric 102, 118, 103, 107 | |
| Goldstar 103, 113, 112, 130 | |
| Hitachi | 131, 113, 103, 132 |
| JCPenney | 103, 102, 130, 107 |
| JVC | 128, 129 |
| KTV | 133, 113, 103, 123, 134 |
| Loewe | 111 |
| LXI (Sears) | 102, 103, 111, 125, 119, 112 |
| Magnavox | 111, 112, 113, 107 |
| Mitsubishi/MGA | 124, 103, 112 |
| NEC | 103, 112 |
| Panasonic | 118, 116, 117, 107 |
| Philco | 111, 118, 109 |
| Philips | 111 |
| Pilot | 103 |
| Pioneer | 137, 118, 119 |
| Portland | 103, 108 |
| Quasar | 110, 107 |
| Radio Shack | 102, 112, 124, 123 |
| RCA/Proscan | 102, 103, 104, 105, 106, 107, 108 |
| Samsung | 126, 112, 113, 103 |
| Sanyo | 125 |
| Scott | 123, 112 |
| Sharp | 114, 113, 115 |
| Signature 2000(M. Wards) | 114, 109 |
| Sylvania | 111, 112, 108 |
| Symphonic | 123, 139 |
| Teknika | 109 |
| Toshiba | 119, 114 |
| Videch | 131, 103, 112 |
| Wards | 113, 103, 115, 112 |
| Zenith | 108, 110 |
| Manufacturer Code | |
| Sony | 301, 302, 303 |
| Aiwa 338 | |
| Audio Dynamic | 314, 347 |
| Bell & Howell (M. Wards) | 330, 343 |
| Broksonic 317, 319 | |
| Canon | 309, 308 |
| Citizen | 332 |
| Craig 315, 302, 332 | |
| Curtis Mathis | 304, 338, 309 |
| Daewoo 341, 312, 309 | |
| DBX | 314, 336, 337 |
| Dimensia | 304 |
| Emerson 319, 320, 316, 317, 318, 341 | |
| Fisher 330, 334, 335, 333 | |
| Funai | 338 |
| General Electric 329, 304, 309 | |
| Go Video | 322, 339, 340 |
| Goldstar | 332 |
| Hitachi | 306, 304, 305, 338 |
| HQ | 315 |
| Instant Replay 309, 308 | |
| JCPenney | 309, 305, 304, 330, 314, 336, 337 |
| JVC | 314, 336, 337 |
| Kenwood | 314, 336, 332, 337 |
| LXI (Sears) | 332, 305, 333, 334, 330, 335, 338 |
| Magnavox | 310, 308, 309 |
| Marantz | 314, 336, 337 |
| Marta | 332 |
| Memorex | 309, 335 |
| Minolta | 305, 304 |
| Mitsubishi/MGA | 323, 324, 325, 326 |
| Multitech | 325, 338, 321 |
| NEC 314, 336, 337 | |
| Olympic | 309, 308 |
| Optimus 327 | |
| Panasonic | 308, 309, 306, 307 |
| Pentax | 305, 304 |
| Philco | 308, 309 |
| Philips | 310, 308, 309 |
| Pioneer | 308 |
| Quasar | 306, 308, 309 |
| RCA/Proscan | 304, 305, 308, 309, 310, 311, 312, 313 |
| Realistic 309, 330, 328, 335, 324, 338 | |
| Sansui 314 | |
| Singer 315 | |
| Samsung 322, 313, 321 | |
| Sanyo 330, 335 | |
| Scott 312, 313, 321, 335, 323, 324, 325, 326 | |
| Sharp 327, 325, 328 | |
| Shintom 315 | |
| Signature 2000 (M. Wards) | 336, 327 |
| Sylvania 310, 308, 309, 338 | |
| Symphonic 338 | |
| Tashiro 332 | |
| Tatung 314, 336, 337 | |
| Teac | 314, 336, 338, 337 |
| Technics 309, 308 | |
| Teknika | 338, 342 |
| Toshiba | 312, 311 |
| Wards | 327, 328, 335, 331, 332 |
| Yamaha | 330, 314, 336, 337 |
| Zenith 331 | |
DVD Codes
| Manufacturer Code | |
| Sony | 601 |
| Panasonic | 604 |
| Pioneer | 605 |
| RCA 602 | |
| Toshiba | 603 |
AMP (Amplifier) Codes
| Manufacturer Code | |
| Sony | 501 |
| Denon (Sharp) 516, 517, 518 | |
| Harmon 519 | |
| JVC | 506, 507, 508 |
| Kenwood | 504, 505 |
| McIntosh | 520 |
| Onkyo | 512, 513 |
| Pioneer | 502, 503 |
| Technics 509, 510, 511 | |
| Yamaha | 514, 515 |
Viewing Pictures From Your Digital Satellite Receiver
Television Features
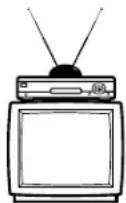
Your Digital Satellite Receiver can receive several different types of broadcasts and display them on your analog TV set or digital monitor. Each type of broadcast that you receive has different qualities that can affect the way you enjoy your programming.
Analog Television Broadcast
Most people are familiar with the features of analog television broadcasts.
- Signals received with a TV antenna or cable TV company connection
• Good quality audio and video
natural_image
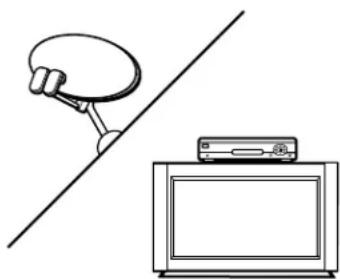
Simple line drawing of a satellite dish connected to a TV (no text or symbols)Satellite Television Broadcast
Satellite television can deliver a variety of high quality programming features.
- Signals received with an 18-inch Round Satellite Dish Antenna or 24-inch Oval Satellite Dish Antenna
• Excellent quality audio available with a Dolby Digital audio receiver - Great quality video always available in standard or "480i" definition
- Excellent quality video available in high or "1080i" definition with a 24-inch oval Satellite Dish Antenna and a digital monitor
- On-screen Program guides always available
- Programming may be available in both standard aspect ratio (4:3) and wide aspect ratio (16:9)
natural_image
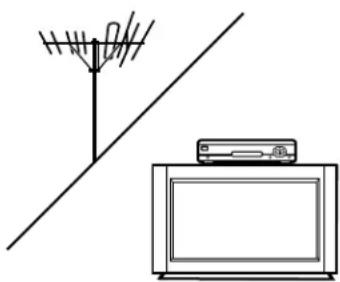
Simple line drawing of a TV setup with an antenna and a monitor (no text or symbols)Digital Television Broadcast
Digital television broadcasts are now available in many areas, providing high quality programming features.
• Signals received with a TV antenna
• Excellent quality audio available with a Dolby Digital audio receiver
- Great quality video always available in standard or "480i" definition
- Excellent quality video available in high or "1080i" definition with a digital monitor
- Programming may be available in both standard aspect ratio (4:3) and wide aspect ratio (16:9)
Turning On the Power
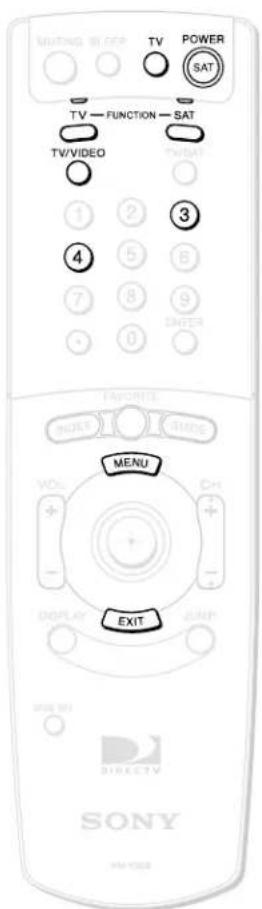
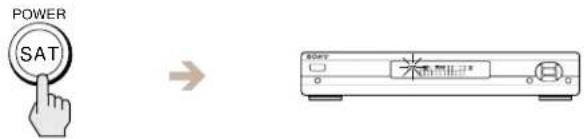
1 Press the POWER SAT button to turn on the Digital Satellite Receiver.
The POWER indicator lights up.
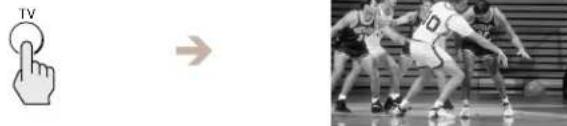
2 Press the TV button to turn on the TV.
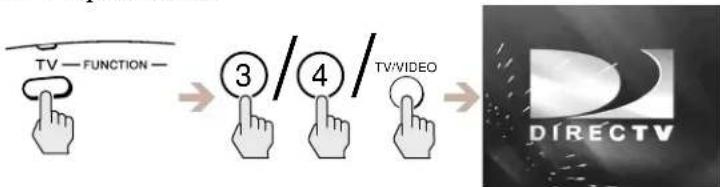
3 Press the TV FUNCTION button, then select the TV's input source to which you connected the Digital Satellite Receiver.
Depending on how you connected your Digital Satellite Receiver to your TV, the input source could be channel 3 or channel 4, or you may need to use the TV/VIDEO button to select one of the A/V input sources.
flowchart
graph LR
    A["TV — FUNCTION —"] --> B["3 / 4 / TV/VIDEO"]
    B --> C["→"]
    C --> D["DIRECTV"]
To make sure you are viewing satellite pictures
Press the SAT FUNCTION button, then press the MENU button to open the Main Menu.

Tip
The FUNCTION button indicators light up to show you which equipment the remote control is operating.
Note
You may need to set up the remote control to operate your other audio/video equipment. See "Setting Up the Remote Control" on page 19 for details.
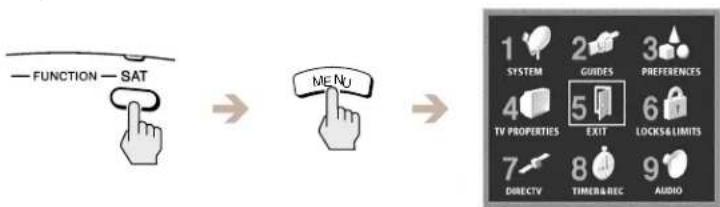
flowchart
graph LR
    A["FUNCTION SAT"] --> B["MENU"]
    B --> C["SYSTEM GUIDES PREFERENCES"]
    C --> D["TV PROPERTIES EXIT LOCKS&LIMITS"]
    D --> E["DIRECTV TIMER&REC AUDIO"]
If the Main Menu does not appear, turn off your equipment, check your connections and repeat from step 1.
Press the EXIT button to close the Main Menu.
Changing Channels
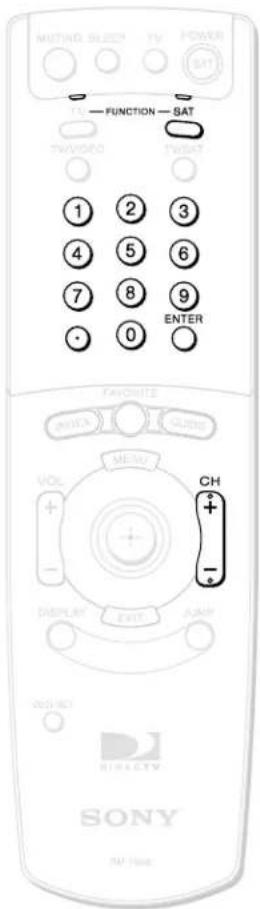
1
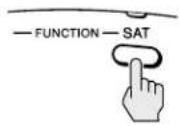
Press the SAT FUNCTION button.
2
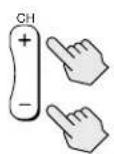
Press the CH +/- buttons.
The Digital Satellite Receiver tunes to the next channel, and the Station ID and channel number appear in the upper right corner of your TV screen.

You can also change channels by entering the channel number using the 0–9 buttons, and either pressing the ENTER button or waiting several seconds.
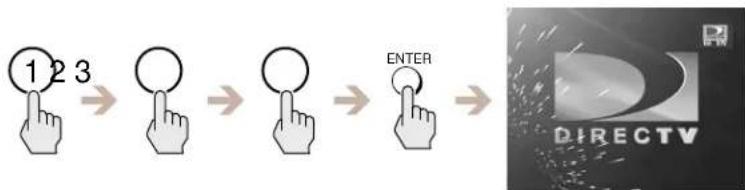
flowchart
graph LR
    A["1 2 3"] --> B["Circle"]
    B --> C["Circle"]
    C --> D["ENTER"]
    D --> E["DIRECTV"]
The Digital Satellite Receiver tunes to that channel, and the Station ID and channel number appear in the upper right corner of your TV screen.
Note
Use the (dot) button when entering channel numbers to directly tune to a digital TV subchannel (for example channel 10.2).

Tip
You can see information about a program you are watching by pressing the DISPLAY button.
Using the On-Screen Displays
Using the Main Menu
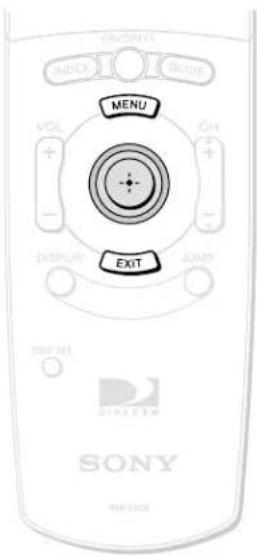
The Main Menu acts as a gateway to all of the features your Digital Satellite Receiver has to offer.
1 Press the MENU button.
The Main Menu appears.


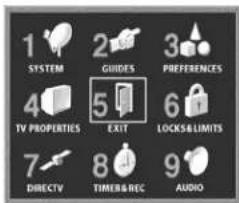
2 Highlight and select the feature you want to access.
SYSTEM (Page 26)
Adjust and test your Digital Satellite Receiver's settings.
- Antenna
• VCR Control - System Test
- Access Card
- Remote Control
• Non-Satellite - Clock
TV Properties (Page 61)
Adjust your Digital Satellite Receiver to work with your TV.
- Aspect Ratio
•Screen Format
• High Definition Output Select
• RF Output
DIRECTV (Page 72)
Read messages from your service provider and review pay per view purchases.
- Messages
• Purchases
GUIDES (Page 43)
Access the many guides that help you find the program you want.
- Alpha List
• Program Guide - Category Guide
- Station Index
- Favorite Stations
- Other Guides

SYSTEM

GUIDES

PREFERENCES
TV PROPERTIES
EXIT

LOCKS&LIMITS
DIRECTV

TIMER&REC

AUDIO
TIMER & REC (Page 75)
Schedule program tuning and recording.
PREFERENCES (Page 54)
Adjust the way menus and information appear.
- Display Options
- Custom Stations
- Data Service
Control access to your Digital Satellite Receiver.
AUDIO (Page 80)
Choose a preferred language for the default audio and current audio for multiple language programs.
Select the Dolby Digital and closed caption settings.
Closing the Main Menu
- Highlight and select EXIT to close the Main Menu (the current program appears on your screen). You can also press the EXIT button on your remote control.
- The on-screen displays close automatically after several minutes.
Setting Up Your Digital Satellite Receiver (SYSTEM)
Using the System Menu
The System Menu provides many ways to adjust your Digital Satellite Receiver so it matches your preferences and optimizes the conditions of your home entertainment system.
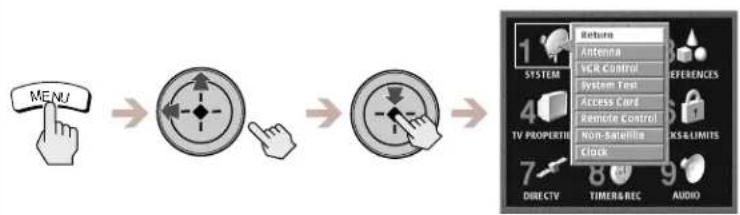
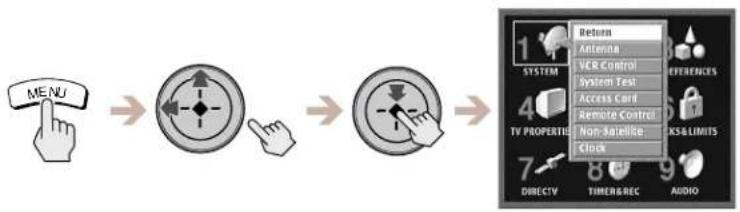
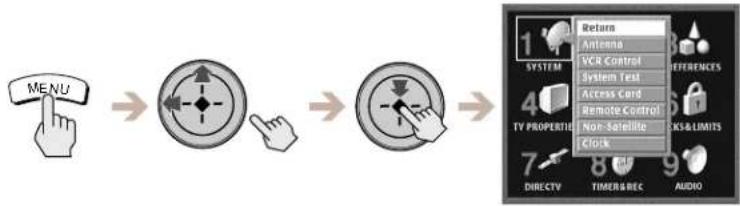
1 Press the MENU button, then highlight and select SYSTEM.
The SYSTEM pop-up appears.
flowchart
graph LR
    A["MENU"] --> B["Switch Icon"]
    B --> C["Clock Icon"]
    C --> D["Radio System"]
    D --> E["Return"]
    style A fill:#f9f,stroke:#333
    style B fill:#ccf,stroke:#333
    style C fill:#cfc,stroke:#333
    style D fill:#fcc,stroke:#333
    style E fill:#ffc,stroke:#333
2 Highlight and select the item you want to set up.
Return
Closes the SYSTEM pop-up to show the Main Menu.
Antenna
Lets you find the position of the satellite and helps you get the strongest signal from your Satellite Dish Antenna and digital TV antenna. (see page 27).
VCR Control
Lets you set up and test your VCR using the VCR Controller (see page 30).
System Test
Lets you test the connections to your Satellite Dish Antenna, and telephone line (see page 33).
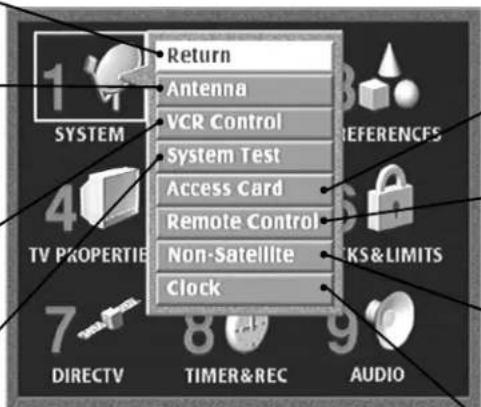
Access Card
Lets you initialize a replacement card (see page 34).
Remote Control
Lets you set up the receiver so the remote control can operate the receiver from outside a cabinet or from another room (see page 35).
Non-Satellite
Lets you set up your Digital Satellite Receiver to receive signals from a local TV antenna or analog cable TV connection (see page 38).
Clock
Lets you set the clock only if you do not receive satellite signals (see page 42).
Setting Up the Satellite or Digital TV Antenna
This display helps you or your professional installer aim your Satellite Dish Antenna or your digital TV antenna to get the strongest signal. For complete information on installation of your Satellite Dish Antenna, see the Satellite Dish Antenna Installation Instructions.
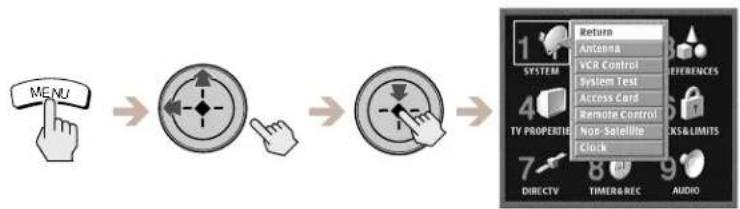
1 Press the MENU button, then highlight and select SYSTEM.
The SYSTEM pop-up appears.
flowchart
graph LR
    A["MENU"] --> B["Switch Icon"]
    B --> C["Switch Icon"]
    C --> D["Radio Button"]
    D --> E["Return"]
    E --> F["Antenna"]
    E --> G["VCR Control"]
    E --> H["System Test"]
    E --> I["Access Card"]
    E --> J["Remote Control"]
    E --> K["Non-Satellite"]
    E --> L["Clock"]
2 Highlight and select "Antenna".
The Antenna display appears.
Antenna Type
Select Round, Oval 2-Sat, Oval 3-Sat, or Digital TV depending on your Antenna type.
Transponder
Selects a transponder for the satellite signal strength meter.
Antenna Location
Lets you find out the direction of the satellite from your location.
Azimuth, Elevation and Tilt
Shows how to aim your Satellite Dish Antenna depending on your antenna type and location.
Status
"Locked" shows that your Satellite Dish Antenna is receiving a signal. "Unlocked" shows that a signal is not being received.
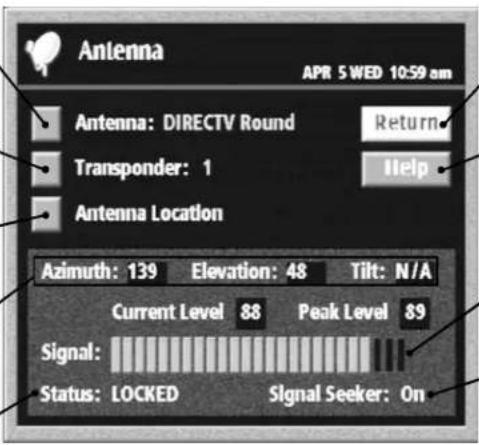
Return
Closes the Antenna display to show the Main Menu.
Help
Opens information about the Antenna display.
Signal Strength Meter
Shows the current and peak levels of the signal strength.
Signal Seeker™
When using a Round antenna, shows that your Satellite Dish Antenna's Signal Seeker can be used.
Note
Most areas of the United States will not receive a peak satellite signal strength of 100. Although there is no picture quality difference between a signal strength of 70 and 100 for satellite signals and 80 and 100 for digital TV signals, a higher signal strength will limit any negative effects in degraded conditions such as rain or snow.
Setting Up Your Digital Satellite Receiver (SYSTEM) (continued)
Selecting an Antenna
You or your professional installer can choose to view information about your Satellite Dish Antenna or your digital TV antenna. After you have entered your antenna type, you can use the Antenna Location pop-up to help aim your Satellite Dish Antenna or the Signal Strength Meter to help aim your Satellite Dish Antenna or your digital TV antenna.
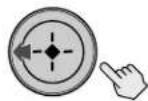
1 Highlight and select "Antenna" from the Antenna display.
The Antenna Type display appears.


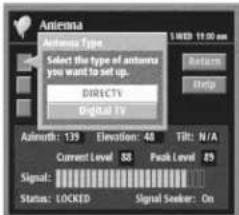
2 Highlight and select either "DIRECTV" or "Digital TV" depending on which type of antenna you will check.
The DIRECTV Antenna Type display appears if you selected "DIRECTV".
The digital TV antenna information appears on the antenna display if you selected "Digital TV". You can then use the Signal Strength Meter to help aim your digital TV antenna.
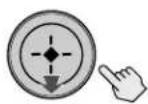


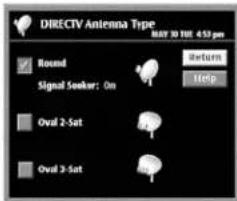
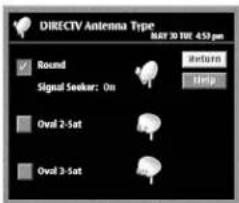
3 If you selected "DIRECTV" in step 2, highlight and select the Satellite Dish Antenna type you have installed
The Signal Seeker pop-up appears on the Antenna display if you selected "Round". Skip to step 5 if you selected "Oval 2-Sat" or "Oval 3-Sat".
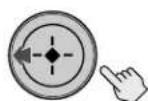


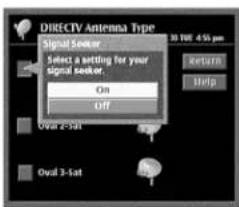
4 If you selected "Round" in step 3, highlight and select "On".
The Signal Seeker pop-up closes to show the DIRECTV Antenna Type Display.



Tip
Selecting "off" in the Signal Seeker pop-up may allow you to see the Signal Strength Meter if you use a diplexer or certain other accessories with your Satellite Dish Antenna.
Note
The Signal Seeker feature is available only with the Sony Round Antenna. See your Satellite Dish Antenna Installation Instructions for more information about this feature.

Tip
If it is more convenient for you to enter latitude and longitude, select "Latitude & Longitude" instead of "Zip Code".
Note
Round Satellite Dish Antennas do not have a Tilt setting.
5 Select "Return".
The DIRECTV Antenna Type display closes to show the Antenna display. You can then use the Antenna Location pop-up and the Signal Strength Meter to help aim your Satellite Dish Antenna.
Entering Your Antenna Location
The Antenna Location pop-up helps you or your professional installer aim your Satellite Dish Antenna based on your zip code or your latitude and longitude location.
1 Highlight and select "Antenna Location" from the Antenna display.
The Antenna Location pop-up appears.
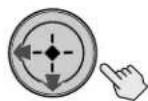


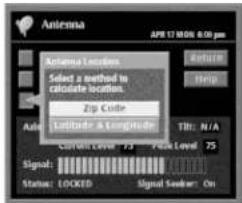
2 Select "Zip Code".
The Zip Code pop-up appears.


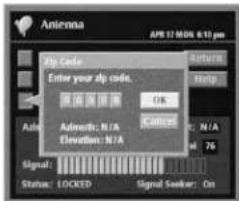
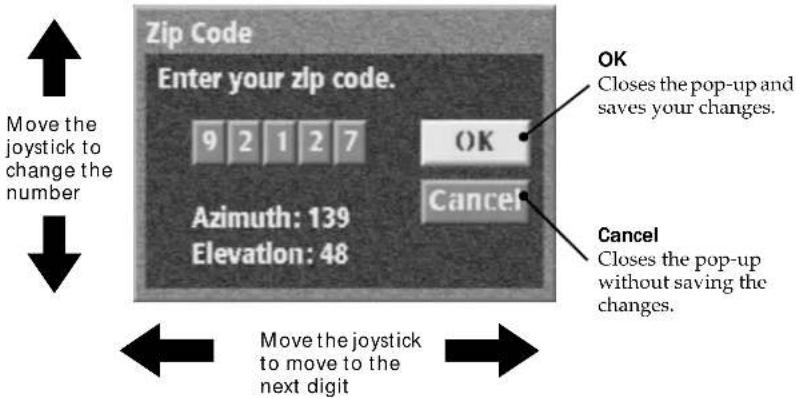
3 Enter your Zip Code, then select "OK".
If you have a Round Satellite Dish Antenna, you or your professional installer can use the azimuth and elevation readings to aim the antenna. If you have an Oval 2-Sat or Oval 3-Sat Satellite Dish Antenna, you or your professional installer can use the azimuth, elevation and tilt readings to aim the antenna.
Setting Up Your Digital Satellite Receiver (SYSTEM) (continued)
Setting Up the VCR Control Feature
The VCR Control feature lets the Digital Satellite Receiver control your VCR using the Timer & Rec feature (see page 75). To use the VCR Control feature you must connect the VCR Controller or a Sony SmartFile VCR (see page 13).
1 Press the MENU button, then highlight and select SYSTEM.
The SYSTEM pop-up appears.
flowchart
graph LR
    A["MENU"] --> B["Switch Icon"]
    B --> C["Switch Icon"]
    C --> D["Radio Button"]
    D --> E["Return"]
    E --> F["Antenna"]
    F --> G["VCR Control"]
    G --> H["System Test"]
    H --> I["Access Card"]
    I --> J["Remote Control"]
    J --> K["Non-Satellite"]
    K --> L["Clock"]
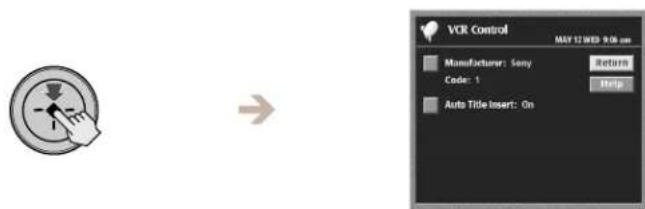
2 Highlight and select "VCR Control".
The VCR Control display appears.
Manufacturer
Lets you select the manufacturer code for your VCR (see page 31).
Auto Title Insert
Lets you turn on the Auto Title Insert feature (see page 32).
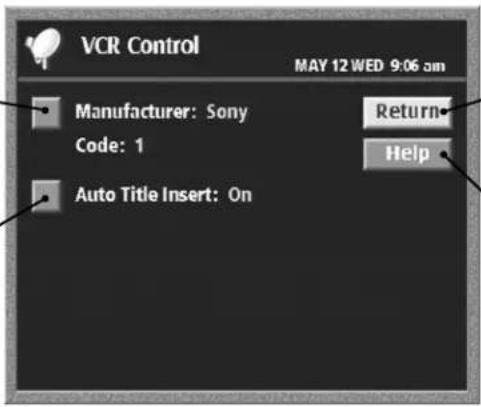
Return
Closes the VCR Control display to show the Main Menu.
Help
Opens information about the VCR Control display.
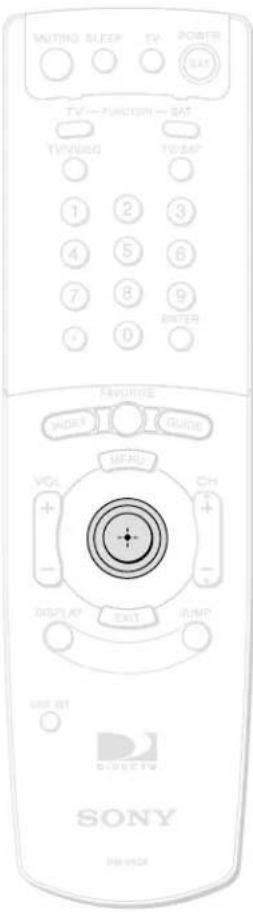
Setting the VCR Manufacturer Code
The VCR Manufacturer Code allows the Digital Satellite Receiver to control your VCR using the VCR Controller or a Sony SmartFile VCR.
1 Highlight and select "Manufacturer" from the VCR Control display (see page 30).
The Manufacturer pop-up appears.
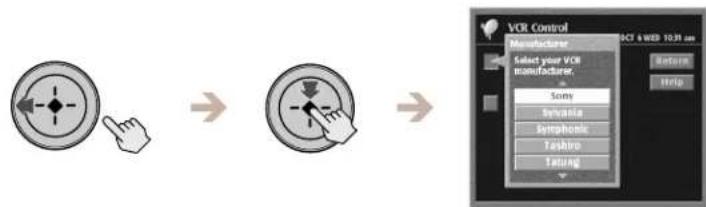
flowchart
graph LR
    A["Mouse cursor clicking"] --> B["Device with mouse click"]
    B --> C["Device with mouse click"]
2 Highlight and select the manufacturer of your VCR.
The manufacturer's pop-up appears.
flowchart
graph LR
    A["Left Click Icon"] --> B["Right Click Icon"]
    B --> C["Control Panel"]
    C --> D["OK/Cancel"]
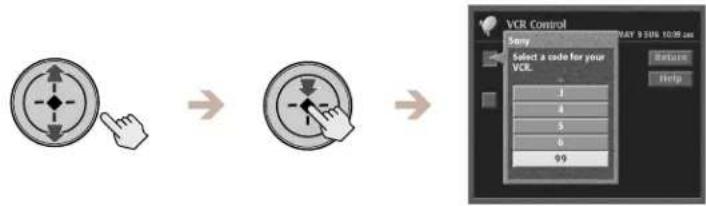
3 Select a VCR manufacturer code from the list.
The Test pop-up appears. Some manufacturers have more than one code to choose from. If the VCR manufacturer code you select does not work in step 4 below you can select another code for that manufacturer.
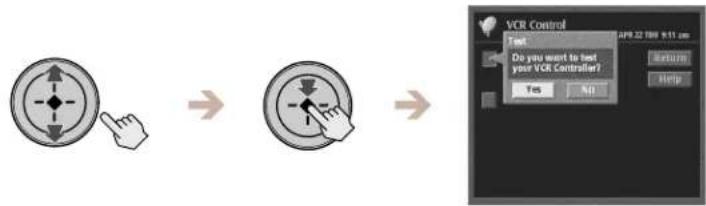
flowchart
graph LR
    A["Left: Directional Arrow"] --> B["Right: Directional Arrow"]
    B --> C["Control Panel: VCR Control with Text, Do you want to test your VCR Controller?"]
    C --> D["OK/Cancel"]
4 Select "Yes" to perform a VCR test.
If you select "Yes", a pop-up appears giving you instructions on how to perform a VCR test.
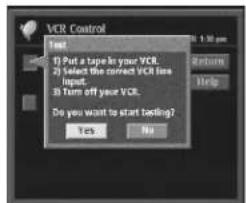

Tip
If you connected a Sony SmartFile VCR, use the manufacturer code of 99.
Note
Do not stop or interrupt the VCR test by pressing any buttons until after the VCR test is complete.
If the test is unsuccessful, check your connections and the VCR Controller placement, then repeat this procedure selecting a different VCR manufacturer code in step 3 (if your VCR manufacturer has more than one code).
Setting Up Your Digital Satellite Receiver (SYSTEM) (continued)
Setting Up Auto Title Insert
The Auto Title Insert feature lets you display information about the program at the beginning of a Timer & Rec event. This is convenient if you want a "title" to appear at the beginning of programs you schedule or record.
1 Highlight and select "Auto Title Insert" from the VCR Control display (see page 30).
The Auto Title Insert pop-up appears.
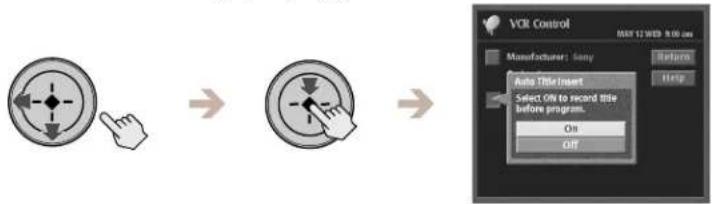
flowchart
graph LR
    A["Mouse Icon"] --> B["Arrow to Pin"]
    B --> C["Arrow to Display"]
    C --> D["Output: VCR Control\nAUTO 12 WED 9.00 sec\nManufacturer: Sony\nAuto Title Insert\nSelect Off to record title before program.\nOn\nOff\nReturn\nHelp"]
2 Select "On" or "Off".
The Auto Title Insert pop-up closes to show the VCR Control display.
When the scheduled event begins
A title appears at the beginning of any Timer & Rec event.
Note
When you schedule two or more consecutive programs, the Auto Title Insert feature will only appear before the first program.
Performing a System Test
The system test checks your Access Card, telephone line, and Satellite Dish Antenna connections for proper operation.
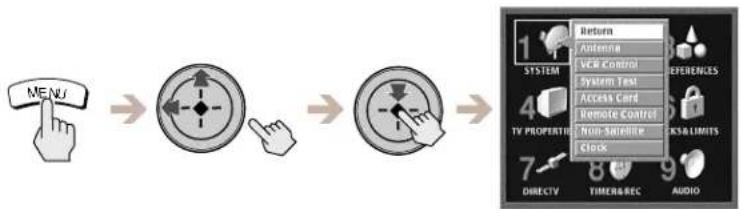
1 Press the MENU button, then highlight and select SYSTEM.
The SYSTEM pop-up appears.
flowchart
graph LR
    A["MENU"] --> B["←"]
    B --> C["←"]
    C --> D["→"]
    D --> E["SYSTEM"]
    E --> F["1 Return"]
    E --> G["2 Antenna"]
    E --> H["3 VCR Control"]
    E --> I["4 System Test"]
    E --> J["5 Access Cord"]
    E --> K["6 Remote Control"]
    E --> L["7 Non-Satellite"]
    E --> M["8 Clock & Limits"]
    E --> N["9 LKS & LIMITS"]
    E --> O["10 DIRECTV"]
    O --> P["8 TIMERS & BEC"]
    O --> Q["9 AUDIO"]
2 Highlight and select "System Test".
The System Test display appears.
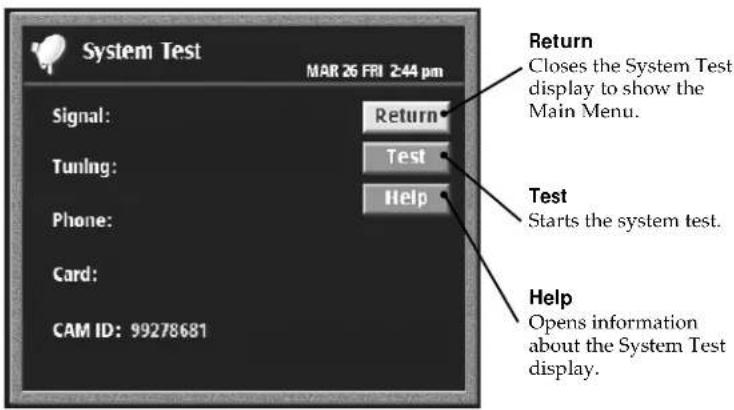
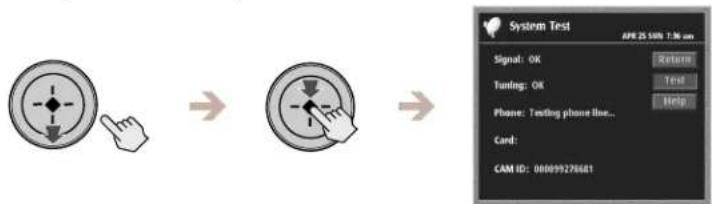
3 Highlight and select "Test".
The system test begins.
If the system test fails, check your connections before calling your service provider or Sony.
flowchart
graph LR
    A["Input: Dial Indicator"] --> B["Add: Display"]
    B --> C["Transfer to System Test"]
    C --> D["Output: Test Check/Help"]
4 Select "Return".
The System Test display closes to show the Main Menu.
Setting Up Your Digital Satellite Receiver (SYSTEM) (continued)
Replacing Your Access Card
Occasionally your service provider may send you a new Access Card. Use this display to set up your new card. See "Inserting the Access Card" on page 15 for information about inserting the Access Card into the Digital Satellite Receiver.
1 Press the MENU button, then highlight and select SYSTEM.
The SYSTEM pop-up appears.
flowchart
graph LR
    A["MENU"] --> B["Keyboard Display"]
    B --> C["Display Button"]
    C --> D["Control Panel"]
    D --> E["Return"]
    D --> F["Antenna"]
    D --> G["Frequency"]
    D --> H["System Test"]
    D --> I["Access Card"]
    D --> J["Remote Control"]
    D --> K["Non-Satellite"]
    D --> L["Clock"]
    D --> M["RS & Limits"]
    D --> N["7"]
    D --> O["8"]
    D --> P["9"]
    D --> Q["DIRECTV"]
    D --> R["TIMER&REC"]
    D --> S["AUDIO"]
2 Highlight and select "Access Card" from the System pop-up.
The Access Card display appears.
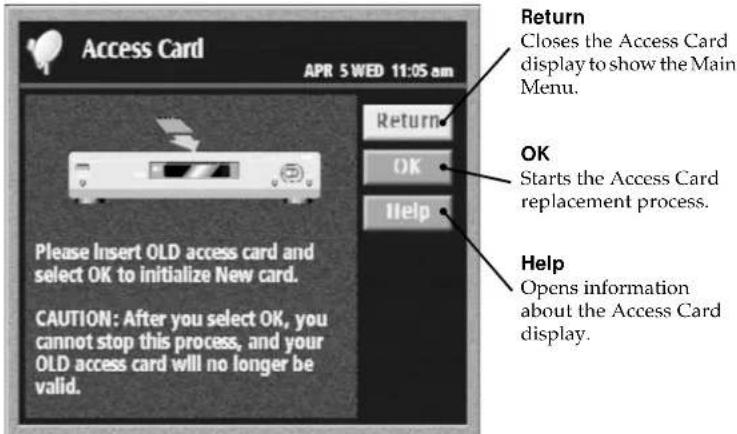
3 Highlight and select "OK".
The display shows instructions on how to proceed.
4 Follow the instructions in each display to complete the replacement process.
Selecting RF or IR Remote Control Reception
The RF feature allows you to operate the Digital Satellite Receiver from outside a cabinet or from another room within your home. The RF Antenna must be connected to use the RF feature (see page 14).
1 Press the MENU button, then highlight and select SYSTEM.
The SYSTEM pop-up appears.
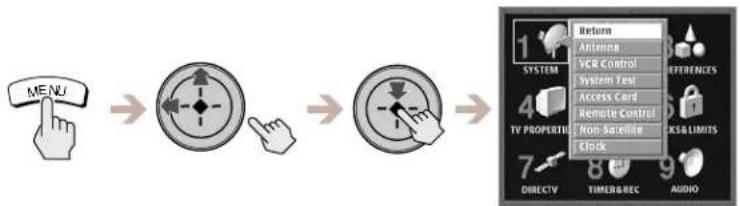
flowchart
graph LR
    A["MENU"] --> B["Switch Icon"]
    B --> C["Switch Icon"]
    C --> D["Display Screen"]
    D --> E["Return"]
    D --> F["Antenna"]
    D --> G["VCR Control"]
    D --> H["System Test"]
    D --> I["Access Card"]
    D --> J["Remote Control"]
    D --> K["Non Satellite"]
    D --> L["Clock"]
2 Highlight and select "Remote Control".
The Remote Control display appears.
Remote Signal
Lets you select IR (infrared) or RF (radio frequency) as the type of signal the receiver accepts.
RF Security Control
Lets you change the security code. RF signals are used to control many devices. You may need to change the security code so that this remote control operates the Digital Satellite Receiver only.
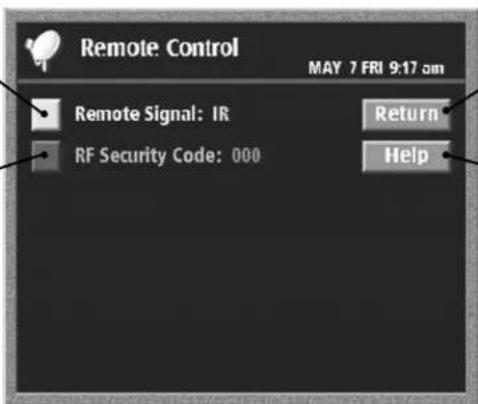
Return
Closes the Remote Control display to show the Main Menu.
Help
Opens information about the Remote Control display.
3 Highlight and select "Remote Signal".
The Remote Signal pop-up appears.
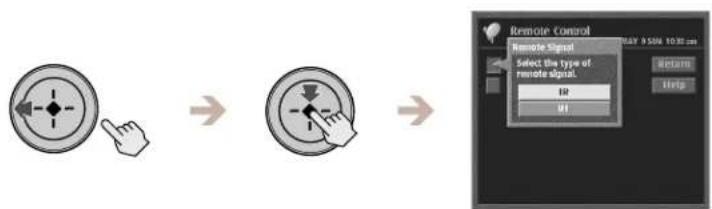
flowchart
graph LR
    A["Mouse cursor"] --> B["Remote Control"]
    B --> C["Select the type of remote signal."]
    C --> D["IP2"]
    C --> E["IP1"]
Setting Up Your Digital Satellite Receiver (SYSTEM) (continued)
4
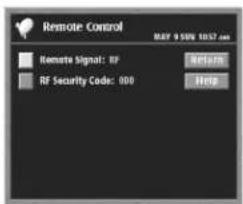
Highlight and select "RF".
The Remote Signal pop-up closes to show the Remote Control display.



5
Highlight and select "Return".
The display closes to show the Main Menu, and the Digital Satellite Receiver is set to receive RF signals from the remote control.
Setting the Security Code
If you set the Remote Signal setting to "RF" and the Digital Satellite Receiver is receiving signals from another RF remote control in your home (or from your neighbor's home), you can eliminate this problem by changing the security codes for the Digital Satellite Receiver and remote control, or by selecting IR control. Both the Digital Satellite Receiver and the remote control must use the same three digit security code.
1 Highlight and select "RF Security Code" from the Remote Control display (see page 35).
The confirmation pop-up appears.
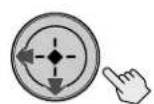

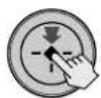

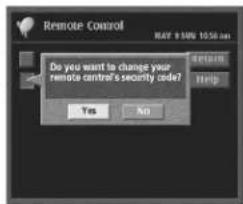
2 Select "Yes".
The RF Security Code pop-up appears.
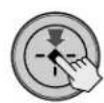

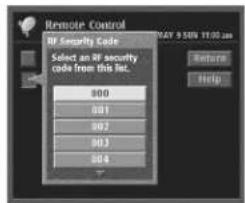
3 Select a different security code.
The conformation pop-up appears.
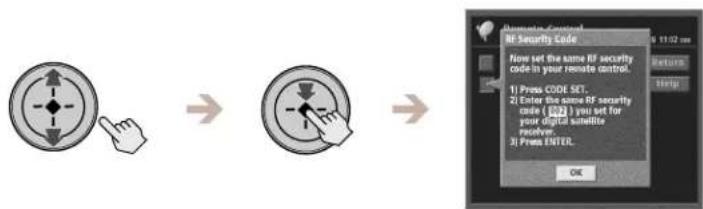
flowchart
graph LR
    A["Input icon"] --> B["Processing icon"]
    B --> C["Output dialog box with 'Press ENTER!' command"]
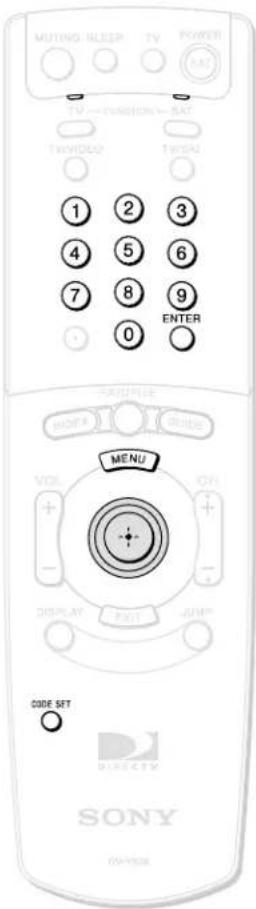
4 Press the CODE SET button on the remote control.
The TV FUNCTION indicator flashes.

5 Enter the three digit security code you selected for the receiver in step 3 above.
6 Press the enter button.
The remote control and Digital Satellite Receiver are now set to a new security code.

7 Select "OK" to save your changes.
The Remote Control display appears.
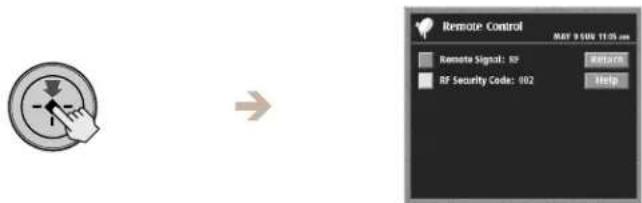
Note
If the remote control no longer operates your Digital Satellite Receiver after completing this procedure, use the controls on the front panel to open the Remote Control display (see pages 35 and 84). Then repeat the steps in "Setting the Security Code" to try again.
Setting Up Your Digital Satellite Receiver (SYSTEM) (continued)
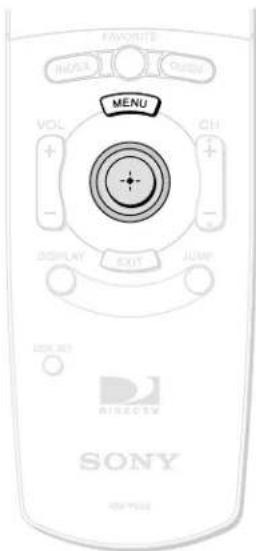
Setting Up Non-Satellite Stations
The Non-Satellite Setup display lets you set your Digital Satellite Receiver to receive signals from a local TV antenna or analog cable TV connection. You must make a TV antenna or a cable TV connection to use this feature (see page 8).
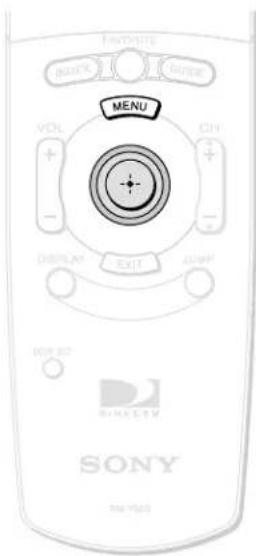
1 Press the MENU button, then highlight and select SYSTEM.
The SYSTEM pop-up appears.
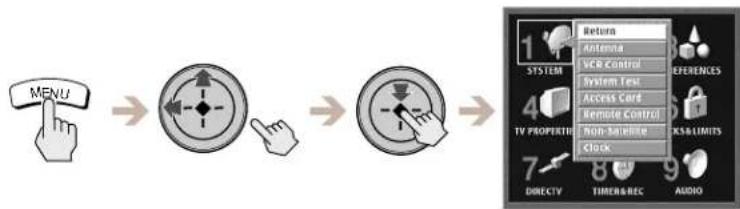
flowchart
graph LR
    A["MENU"] --> B["→"]
    B --> C["→"]
    C --> D["→"]
    D --> E["1 Return"]
    D --> F["2 Antenna"]
    D --> G["3 SCR Control"]
    D --> H["4 System Test"]
    D --> I["5 Access Card"]
    D --> J["6 Remote Control"]
    D --> K["7 Non-baseline"]
    D --> L["8 Clock"]
    D --> M["9 K/S & LIMITS"]
    D --> N["10 DIRECTV"]
    D --> O["11 TIMER&REC"]
    D --> P["12 AUDIO"]
2 Highlight and select "Non-Satellite".
The Non-Satellite Setup display appears.
Auto Program
Instructs the Digital Satellite Receiver to program the available non-satellite stations.
Add/Skip Stations
Adds stations that did not appear during Auto Program or skips stations that you want to remove.
Edit Station Name
Lets you edit the names of analog TV and cable TV stations so that they are easily recognizable.
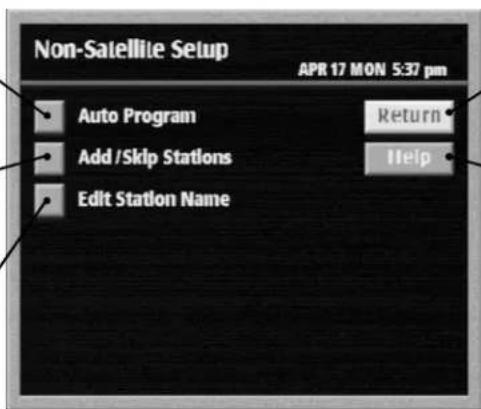
Return
Closes the Non-Satellite Setup display to show the Main Menu.
Help
Opens information about the Non-Satellite Setup display.
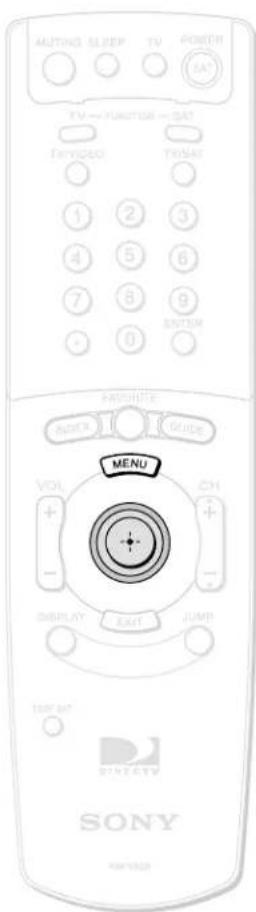
Setting Up Analog TV Stations and Digital TV Stations
The Auto Program feature lets you set up your Digital Satellite Receiver to automatically tune in all the available stations that you can receive with your TV antenna or cable TV connection.
1 Highlight and select "Auto Program" from the Non-Satellite Setup display (see page 38).
The Auto Program display appears.
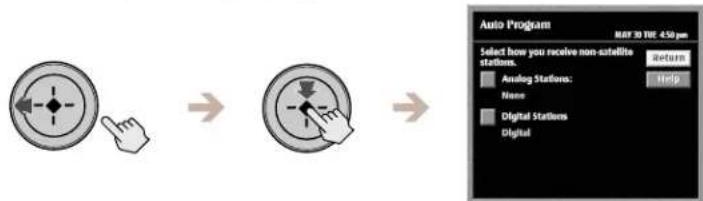
2 Highlight and select "Analog Stations" if you want to receive analog TV broadcasts and "Digital Stations" if you want to receive digital TV broadcasts.
The Analog Stations pop-up appears if you selected "Analog Stations", and the Digital Stations pop-up appears if you selected "Digital Stations".
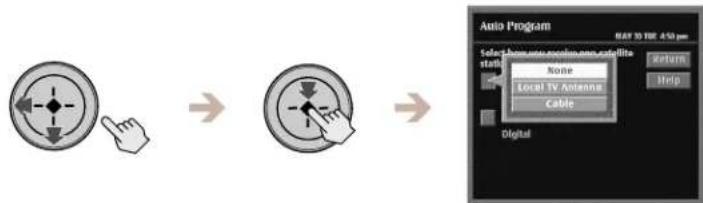
flowchart
graph LR
    A["Left Click Icon"] --> B["Right Click Icon"]
    B --> C["Auto Program: None, Local 3V Antenna, Cable, Digital"]
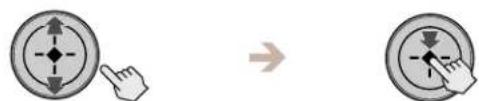
3 Highlight and select either "Local TV Antenna" or "Cable" if you selected "Analog Stations" depending on how you receive analog TV broadcasts. Highlight and select "Digital" if you selected "Digital Stations".
Auto Program begins and adds available stations to your channel list.
Note
If you receive both analog TV broadcasts and digital TV broadcasts, you will need to follow these steps once for each type of broadcast you receive.
Setting Up Your Digital Satellite Receiver (SYSTEM) (continued)
Adding and Skipping Stations
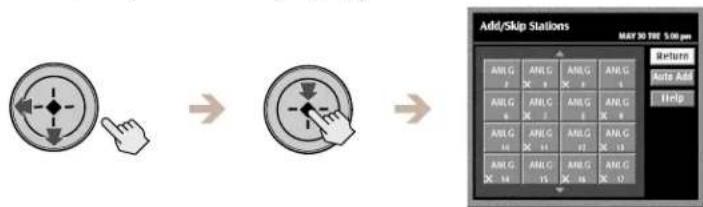
If you followed the Auto Program steps (see page 39), the Add/Skip Stations feature lets you add a station to your station guides that did not appear during Auto Program or lets you remove a station.
1 Highlight and select "Add/Skip Stations" from the Non-Satellite Setup display (see page 38).
The Add/Skip Stations display appears.
flowchart
graph LR
    A["Input: Left Hand Icon"] --> B["Add: Circular Control Panel"]
    B --> C["Add/Skip Stations: Table with ANL G X 10, ANL G X 11, ANL G X 12, ANL G X 13, ANL G X 14, ANL G X 15"]
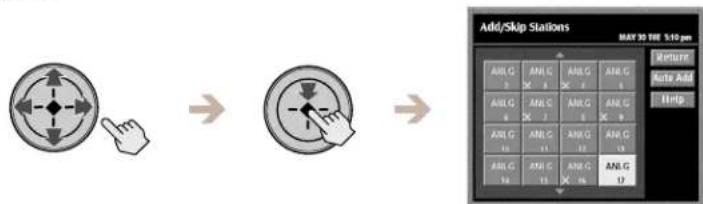
2 Highlight and select the stations you want to add or skip by adding or removing the "X" from the station icon.
The stations marked with an "X" will not appear in your station guides.
flowchart
graph LR
    A["Directional Control"] --> B["Arrow pointing to Pin 1"]
    B --> C["Arrow pointing to Pin 2"]
    C --> D["Add/Skip Stations MAY 30 THE 5:10 pm"]
    D --> E["Return"]
    E --> F["Auto Add"]
    E --> G["Help"]
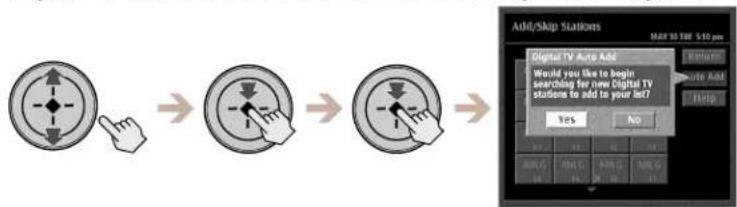
3 Highlight and select "Auto Add", then select "Yes" from the Digital TV Auto Add pop-up to search for any additional digital TV stations that were not found during Auto Program.
The Digital Satellite Receiver searches and adds any additional digital TV stations that were not found during Auto Program.
flowchart
graph LR
    A["Start"] --> B["Step 1: Click to Add Digital TV Station"]
    B --> C["Step 2: Click to Add Digital TV Station"]
    C --> D["Result Display with 'Add/Skip Stations' dialog box"]
4 Highlight and select "Return" to confirm your Add/Skip selections and return to the Non-Satellite Setup display.
The Non-Satellite Setup display appears.

Tip
You may want to adjust your TV antenna before using the Auto Add feature. By adjusting your TV antenna, you may be able to receive a digital station that did not appear during Auto Program.
Editing Station Names
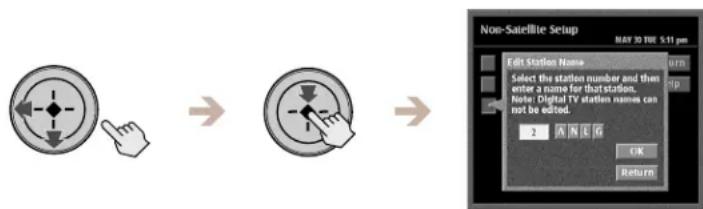
If you followed the Auto Program steps (see page 39), the Edit Station Name feature lets you edit the names of analog TV and cable TV stations so that you can easily recognize them in the guides. For example, you could change the name of channel 6 from "ANLG" or "CABL" to "WXYZ" or to "FOX". Digital TV station names are set by the broadcaster and cannot be changed.
1 Highlight and select "Edit Station Name" from the Non-Satellite Setup display (see page 38).
The Edit Station Names display appears.
flowchart
graph LR
    A["Start"] --> B["Select the station number and then enter a name for that station. Note: Digital TV station names can not be edited."]
    B --> C["Edit Station Name: 0/10"]
    C --> D["OK: Return"]
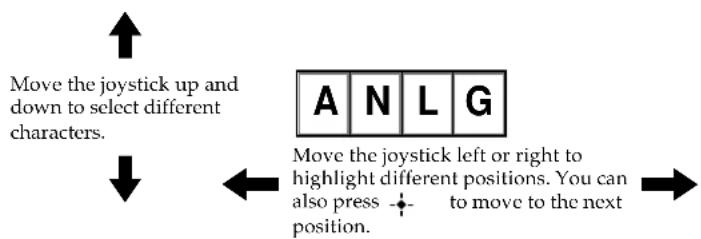
2 Select a station number from the list and enter the four letters or characters you would like to use to identify that station.
flowchart
graph TD
    A["Move the joystick up and down to select different characters."] --> B["Move the joystick left or right to highlight different positions. You can also press + to move to the next position."]
    B --> C["→"]
3 Highlight and select "OK" to confirm your changes and select "Return" to return to the Non-Satellite Setup display.
The Non-Satellite Setup display appears.
Setting Up Your Digital Satellite Receiver (SYSTEM) (continued)
Setting the Clock
The Digital Satellite Receiver's clock is automatically set when it receives programming from a satellite dish antenna. The clock feature is most accurate when it is automatically set, but you may use the clock feature to set the time and date if you do not receive satellite programming.
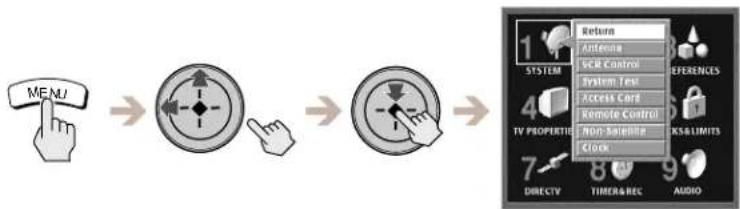
1 Press the MENU button, then highlight and select SYSTEM.
The SYSTEM pop-up appears.
flowchart
graph LR
    A["MEM"] --> B["Action"]
    B --> C["Control Panel"]
    C --> D["Output"]
2 Highlight and select "Clock".
The Clock display appears.
If you do not receive programming from a Satellite Dish Antenna
Clock Set
Lets you enter the current month, date, year and time (including daylight saving time).
Time Zone
Lets you select the time zone for your area
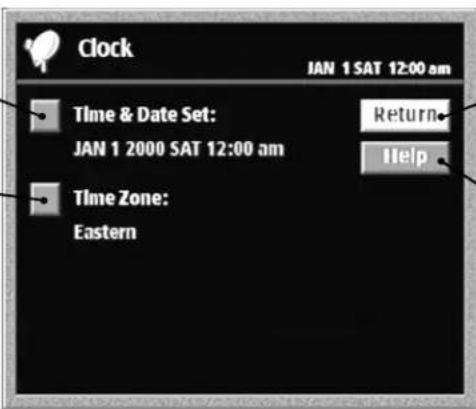
Return
Closes the Clock display to show the Main Menu.
Help
Shows information about the Clock display.
Viewing Station and Program Information (GUIDES)
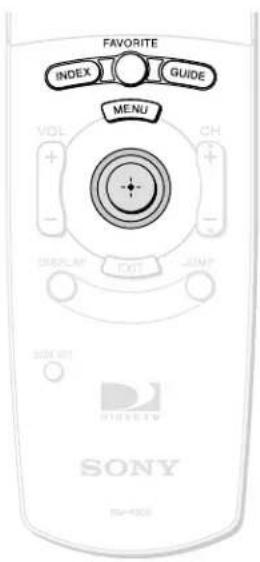
Using the Guides Menu
The Guides Menu helps you find the program you want to watch. You can choose to see all stations or just a few. You can also create your own favorite station guides for fast access to your favorite stations.
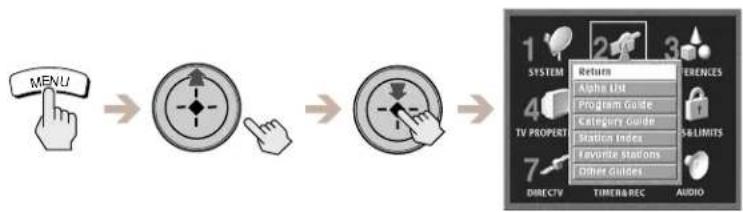
1 Press the MENU button, then highlight and select GUIDES.
The GUIDES Menu appears.
flowchart
graph LR
    A["MENU"] --> B["FUNCTION"]
    B --> C["FUNCTION"]
    C --> D["RETURN"]
    D --> E["CHANGE"]
    E --> F["ACCESS"]
    F --> G["OPEN"]
    G --> H["OPEN"]
    H --> I["OPEN"]
2 Highlight and select the guide you want to use.
Return
Closes the GUIDES Menu to show the Main Menu.
Alpha List
Shows a list of categories (movies, sports, etc.) and only the programs that match the category you select in alphabetical order (see page 44).
Program Guide
Opens your custom list of stations and shows program information for up to three days in advance (see page 45).
Category Guide
Shows a list of categories (movies, sports, etc.) and only those stations broadcasting programs that match the category you select (see page 46).
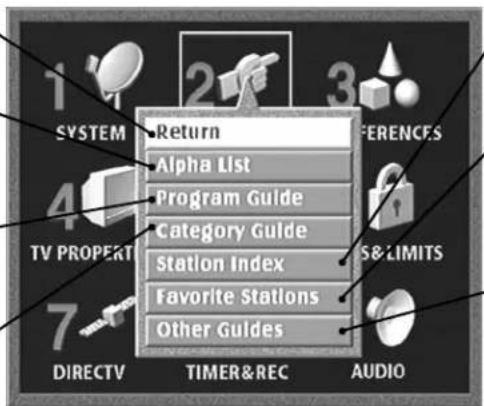
Station Index
Opens your custom list of stations as a grid of station logos (see page 47).
Favorite Stations
Opens the Favorite Stations guide which allows you to create and access up to four different sets of stations you enjoy watching most (see page 48).
Other Guides
Opens the Other Guides display which shows a variety of special categories provided by DIRECTV. Each category is divided into subcategories so you can find exactly the kind of program you want (see page 51).

Tips
- Be sure to press the SAT FUNCTION button before operating the Digital Satellite Receiver with the remote control.
- You can see information about a program you are watching by pressing the DISPLAY button.
Viewing Station and Program Information (GUIDES) (continued)
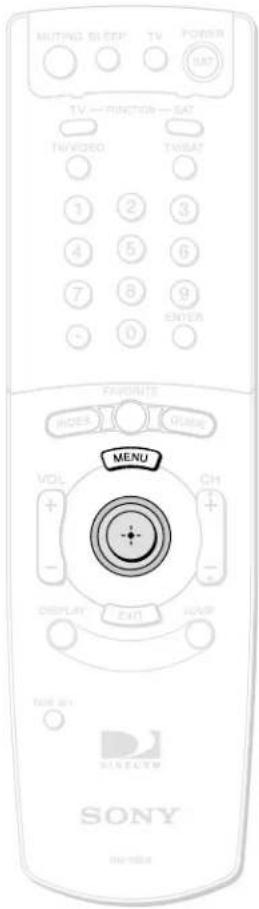
Using the Alpha List
The Alpha List shows program information for satellite programs in the category you select (such as movies, sports, etc.) in alphabetical order. Program information is available for up to four hours in advance.
1 Press the MENU button, then highlight and select GUIDES.
The GUIDES Menu appears.
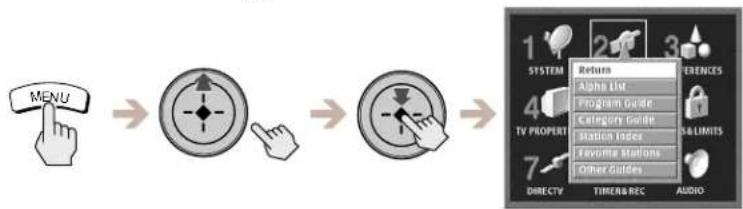
flowchart
graph LR
    A["MENU"] --> B["Function Button"]
    B --> C["Function Button"]
    C --> D["System Selection"]
    D --> E["Return"]
    D --> F["Alpha List"]
    D --> G["Program Guide"]
    D --> H["Category Guide"]
    D --> I["Station Index"]
    D --> J["Favorite Stations"]
    D --> K["Other Guides"]
2 Highlight and select "Alpha List".
The Alpha List guide appears.
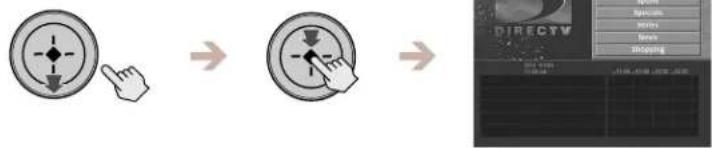
flowchart
graph LR
    A["User Hand Icon"] --> B["User Inverter Icon"]
    B --> C["User Interface Panel"]
    style A fill:#f9f,stroke:#333
    style B fill:#f9f,stroke:#333
    style C fill:#ccf,stroke:#333
3 Highlight and select a category.
Programs appear in alphabetical order.
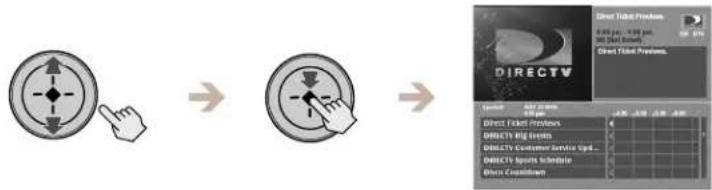
flowchart
graph LR
    A["Hand Click"] --> B["Arrow to Left"]
    B --> C["Arrow to Right"]
    C --> D["Arrow to Bottom"]
    D --> E["Direct TV Preview"]
    E --> F["Direct Film Preview"]
    F --> G["Direct Event Preview"]
    G --> H["Direct TV Big Events"]
    H --> I["Direct TV Customer Service Up..."]
    I --> J["Direct TV Sports Schedule"]
    J --> K["Other Contextion"]
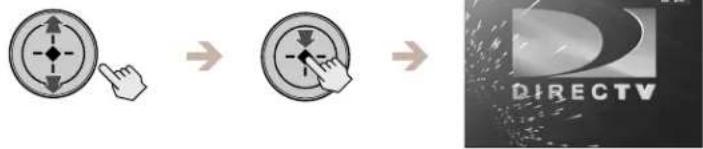
4 Highlight and select a program.
If you select a current program, the Alpha List guide closes. For information about selecting a future program see "Using One Button Timer & Rec" on page 76.
flowchart
graph LR
    A["Hand cursor clicking target icon"] --> B["Click to target icon"]
    B --> C["Direct V waveform display"]
Using the Program Guide
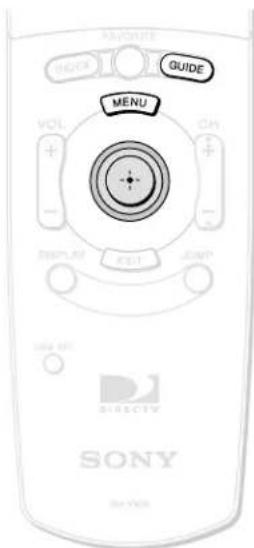
The Program Guide shows program information for satellite and non-satellite stations for up to three days in advance. You can open the Program Guide using the Main Menu or by pressing the GUIDE button.
1 Press the GUIDE button.
The Program Guide opens. If a current standard definition satellite program is highlighted, it appears in the Media Windows.


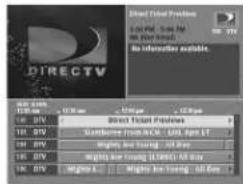
2 Highlight the program you want.
The sound and the picture in the Media Window change as you highlight different programs. Skipped stations do not appear (see page 58).
Media Window
Shows audio and video of standard definition satellite programming.

Move the joystick up and down to highlight different stations.
Press the CH + / - button to move the highlight to the next page of stations.

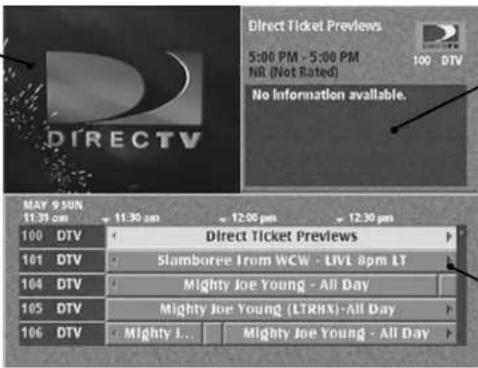

Move the joystick right to highlight future programs.

Information Area
Shows program information for satellite programming.
List Area
Shows program schedules for satellite programming.

Tip
Press the EXIT button to close the Program Guide and return to the previous station.
Note
If you select a program and the station is blocked or a limit has been reached, you can temporarily unlock your Digital Satellite Receiver using your passcode. See "Locking Your Receiver" on page 70 for information about the passcode.
3 Select the program you want.
If you select a current program, the Program Guide closes. For information about selecting a future program, see "One Button Timer & Rec" on page 76.



Viewing Station and Program Information (GUIDES) (continued)

Tip
Press the EXIT button to close the Category Guide and return to the previous station.
Using the Category Guide
The Category Guide shows satellite programs in the category you select (such as movies, sports, etc.). Program information is available for up to three days in advance.
1 Press the MENU button, then highlight and select GUIDES.
The GUIDES menu appears.
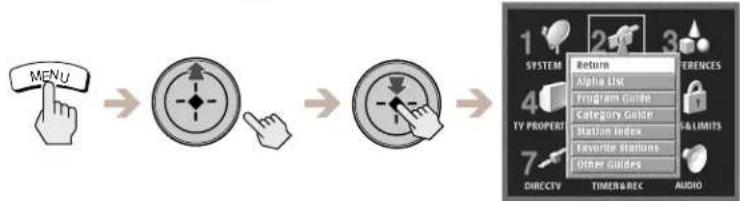
flowchart
graph LR
    A["MENU"] --> B["Function Icon"]
    B --> C["Function Icon"]
    C --> D["System Selection"]
    D --> E["Return"]
    E --> F["Preference"]
    G["TV PROPERTY"] --> H["Category Guide"]
    H --> I["Station Index"]
    I --> J["Favorite Station"]
    J --> K["Other Guides"]
    K --> L["TIME&REC"]
    L --> M["AUDIO"]
2 Highlight and Select "Category Guide".
The Category Guide opens and the current program appears in the Media Window.
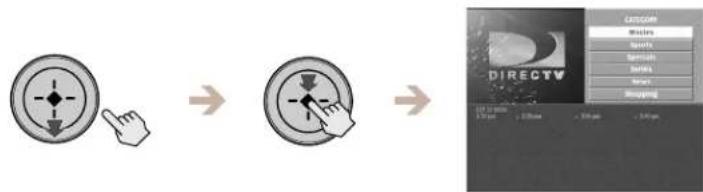
flowchart
graph LR
    A["User Hand Icon"] --> B["User Display Icon"]
    B --> C["User Interface Screen"]
    C --> D["Preview Window"]
3 Highlight and select the category you want.
The program list changes each time you select a different category. Skipped stations do not appear (see page 58).
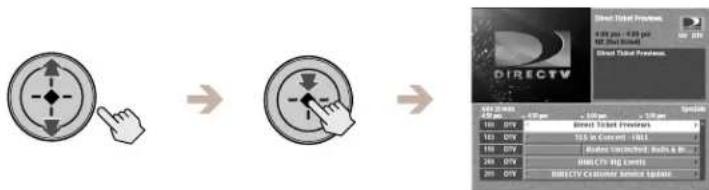
flowchart
graph LR
    A["Hand Icon"] --> B["Navigation Icon"]
    B --> C[" broadcast screen"]
    C --> D[" Broadcast Screen Setup"]
4 Highlight and select the program you want.
If you select a current program, the Category Guide closes. For information about selecting a future program, see "One Button Timer & Rec" on page 76.
flowchart
graph LR
    A["Hand Click Icon"] --> B["Clocked Action Icon"]
    B --> C["Directed TV logo"]

Tips
- Press the EXIT button to close the Station Index and return to the previous station.
- To view the current program while checking the program information of other stations, turn on the Surf feature (see page 57).
Using the Station Index
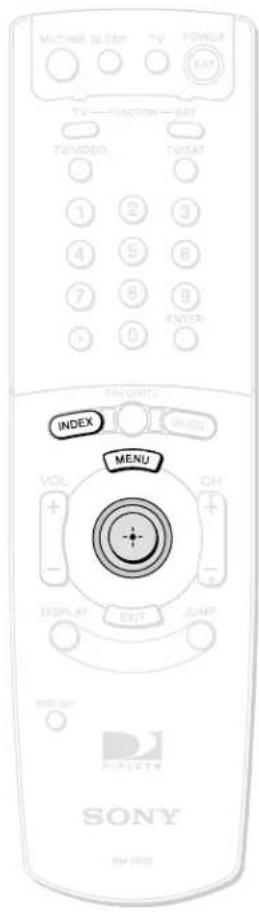
The Station Index displays each satellite and non-satellite station's logo and channel number in a grid format. Program information is available for the current time only. You can open the Station Index using the Main Menu or by pressing the INDEX button.
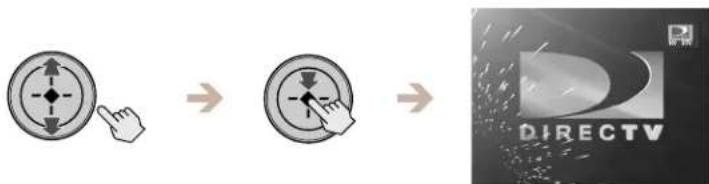
1
Press the INDEX button.
The Station Index opens and the current program appears in the Media Window.


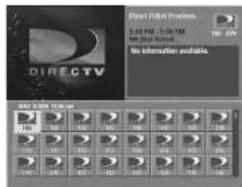
2
Highlight the station you want.
The sound and the picture in the Media Window change as you highlight different stations.
Skipped stations do not appear (see page 58).

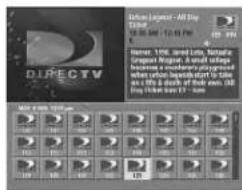
3
Select the station you want.
The Station Index closes and the program broadcast by the station you selected appears on your TV screen.



Viewing Station and Program Information (GUIDES) (continued)

Tip
Press the EXIT button to close the Favorite Stations guide and return to the previous station.
Using the Favorite Stations Guide
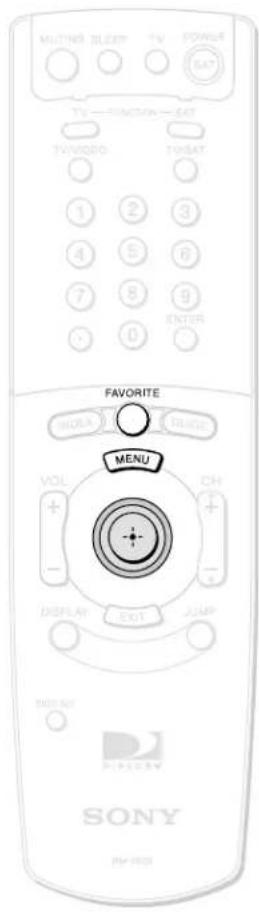
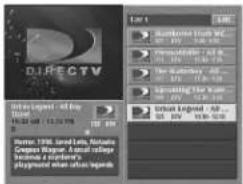
The Favorite Stations guide shows four Favorite Titles that you can customize with eight satellite or non-satellite stations each. Program information is available for the current time only. You can open the Favorite Stations guide using the Main Menu or by pressing the FAVORITE button. Before you can use the Favorite Stations guide, you must set up your favorite stations in a personal guide by following the steps on the next page.
1
Press the FAVORITE button.
The Favorite Stations guide opens and the current program appears in the Media Window.


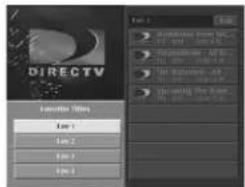
2
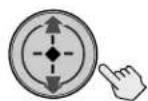
Highlight and select the Favorite Title you want.
The station list in the right half of the display changes as you highlight different Favorite Titles.


3
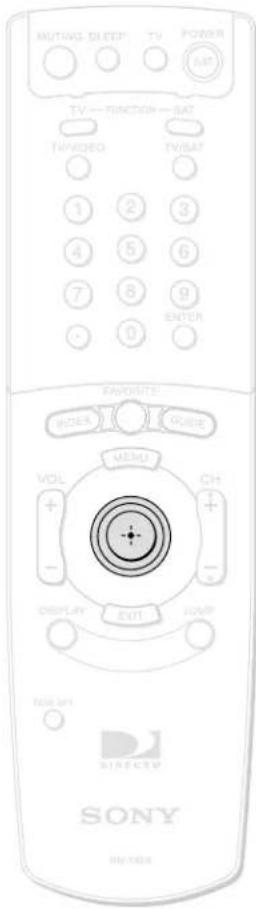
Highlight and select the station you want.
The Favorite Stations guide closes and the program broadcast by the station you selected appears.



Tip
Press the EXIT button to close the Favorite Stations guide and return to the previous station.
Note
The "Count" box indicates how many stations are included in the personal guide.
Customizing the Favorite Stations Guide
1 Highlight and select the Favorite Title you want to customize.
The station list appears in the right half of the display.
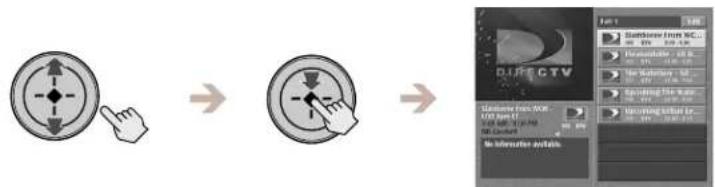
flowchart
graph LR
    A["Mouse Hand Icon"] --> B["Mouse Display Icon"]
    B --> C["Video Screen Display Panel"]
    C --> D["Screen capture from 100% to 100% on TV"]
    style A fill:#f9f,stroke:#333
    style B fill:#f9f,stroke:#333
    style C fill:#ccf,stroke:#333
    style D fill:#cff,stroke:#333
2 Highlight and select "Edit".
The Edit pop-up appears.
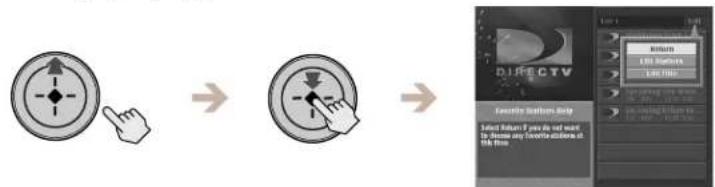
flowchart
graph LR
    A["Hand Click"] --> B["Arrow to Screen"]
    B --> C["Return: Select Return if you do not want by these any favorite actions at this film"]
3 Highlight and select "Edit Stations".
The station index appears in the right half of the display.
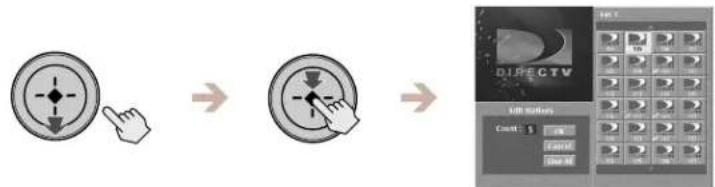
flowchart
graph LR
    A["User Hand Icon"] --> B["Navigation Icon"]
    B --> C["Edit Button"]
    C --> D["Direct V Control Panel"]
4 Highlight and select a station in the index.
A checkmark appears in the lower left part of the icon to indicate that the station is included in the Favorite Title, and the number in the "Count" box increases by one.
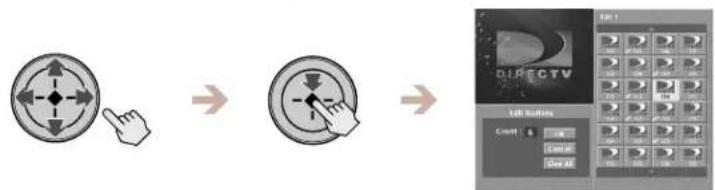
flowchart
graph LR
    A["User Hand Icon"] --> B["Navigation Icon"]
    B --> C["Video Editor Panel"]
    C --> D["Next Step"]
    style A fill:#f9f,stroke:#333
    style B fill:#ccf,stroke:#333
    style C fill:#cfc,stroke:#333
    style D fill:#fcc,stroke:#333
5 Repeat step 4 to add up to eight stations to this Favorite Title.
When you have added all the stations you want in this Favorite Title, highlight and select OK.
Viewing Station and Program Information (GUIDES) (continued)
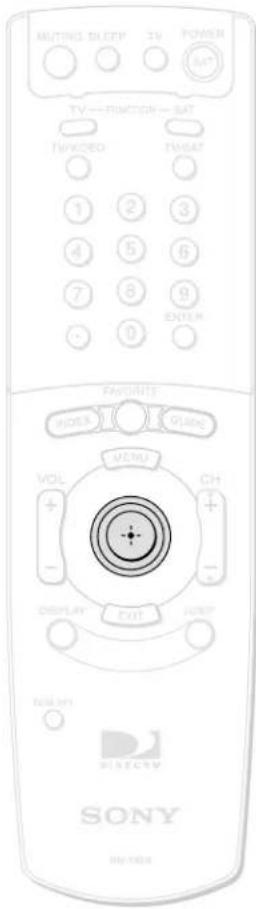
Editing the Title of a Favorite Title
1 Highlight and select the Favorite Title you want to edit. The station list appears in the right half of the display.
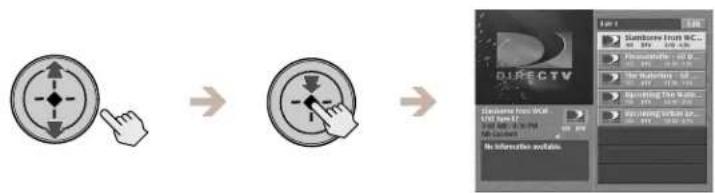
flowchart
graph LR
    A["Hand icon"] --> B["Arrow pointing to target"]
    B --> C["Arrow pointing to target with key switch"]
    C --> D["→"]
    D --> E["→"]
    E --> F["DACTV audio player control panel"]
    F --> G["Top 1: Sumbore Iron SC..."]
    F --> H["Bottom 2: Medium-40.0"]
    F --> I["Bottom 3: High-50.0"]
    F --> J["Bottom 4: Low-50.0"]
    F --> K["Bottom 5: High-50.0"]
2 Highlight and select "Edit". The Edit pop-up appears.
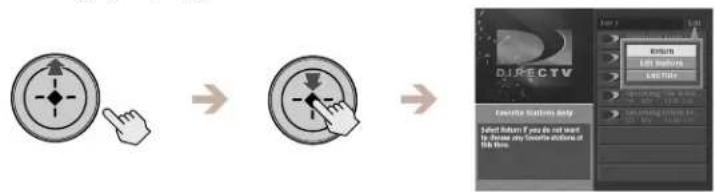
flowchart
graph LR
    A["Hand Click"] --> B["Arrow to Left"]
    B --> C["Arrow to Right"]
    C --> D["Next Step to Close DirectV Button"]
    D --> E["User Interface: Return, Lift Buttons, Last File"]
    style A fill:#f9f,stroke:#333
    style B fill:#f9f,stroke:#333
    style C fill:#f9f,stroke:#333
    style D fill:#ccf,stroke:#333
    style E fill:#cfc,stroke:#333
3 Select "Edit Title" from the pop-up menu. The Edit Title display appears in the lower left part of the display.
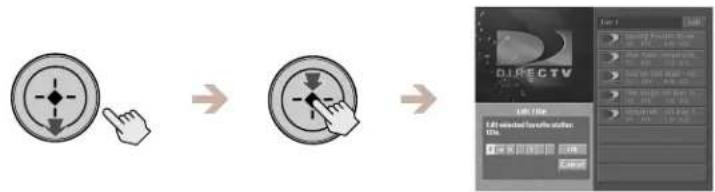
flowchart
graph LR
    A["Hand Click"] --> B["Arrow to Screen"]
    B --> C["Arrow to Display"]
    C --> D["Preview Panel"]
    style A fill:#f9f,stroke:#333
    style B fill:#f9f,stroke:#333
    style C fill:#ccf,stroke:#333
    style D fill:#cff,stroke:#333
4 Enter a seven character title for this Favorite Title. You can enter upper and lower case letters, numbers, and symbols in the title.
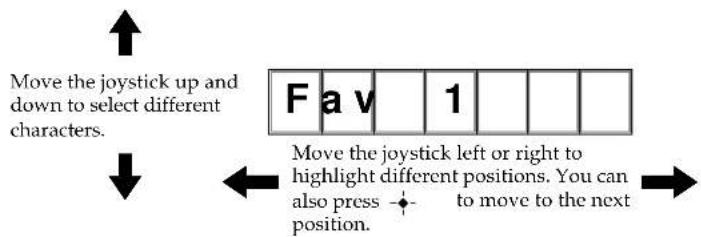
flowchart
graph TD
    A["Move the joystick up and down to select different characters."] --> B["Move the joystick left or right to highlight different positions. You can also press - to move to the next position."]
    B --> C["F a v 1"]
5 When your title is complete, highlight and select "OK". The Edit Title display closes to show the Favorite Stations guide.

Tip
Press the EXIT button to close the Favorite Stations guide and return to the previous program.
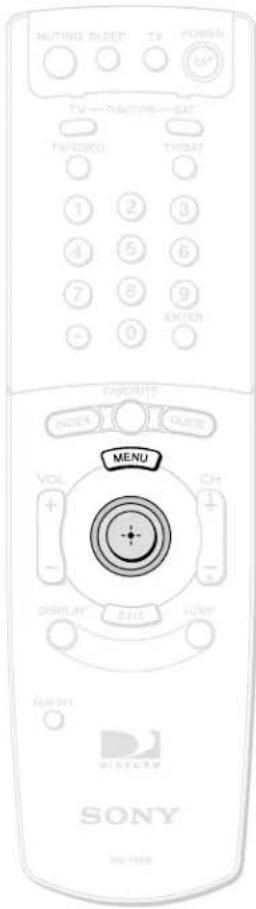

Tip
Press the EXIT button to close the Other Guides display and return to the previous station.
Note
DIRECTV occasionally changes the contents of the category and subcategory lists.
Using Other Guides
The Other Guides display provides special categories supplied by DIRECTV for satellite programs. Each category is divided into subcategories to help you find the exact program you want to watch. Program information is available for up to three days in advance.
1 Press the MENU button, then highlight and select GUIDES.
The GUIDES pop-up appears.
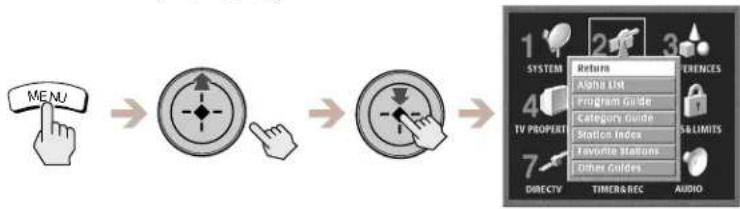
flowchart
graph LR
    A["MENU"] --> B["→"]
    B --> C["→"]
    C --> D["1 SYSTEM Return 2 3 ENRENCES"]
    C --> E["4 TV PROPERTY Return"]
    C --> F["7 DIRECTV TIMERRABC AUDIO"]
    D --> G["High Level Alpha List"]
    D --> H["Medium Level Program Guide"]
    D --> I["Low Level Category Guide"]
    D --> J["Low Level Status Index"]
    D --> K["Low Level Favorite Status"]
    D --> L["Low Level Other Guides"]
2 Highlight and select "Other Guides".
The Other Guides display appears.
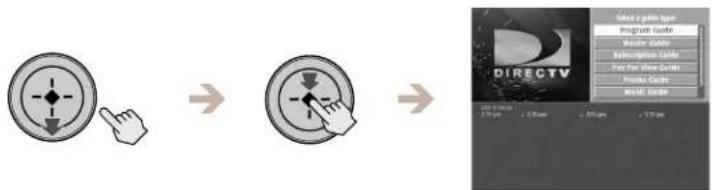
flowchart
graph LR
    A["Start"] --> B["Step 1: Directional Arrow"]
    B --> C["Step 2: Directional Arrow"]
    C --> D["Next Step"]
    D --> E["Preview Panel"]
    style A fill:#f9f,stroke:#333
    style B fill:#ccf,stroke:#333
    style C fill:#cfc,stroke:#333
    style D fill:#fcc,stroke:#333
    style E fill:#cff,stroke:#333
3 Select the Guide Type you want.
The available time ranges appear.
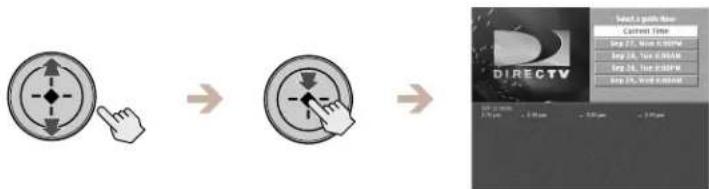
flowchart
graph LR
    A["Start"] --> B["Step 1: Click to Image"]
    B --> C["Step 2: Click to Image"]
    C --> D["Next Step: Direct View"]
    D --> E["Preview: 3.0 µm, 4.0 µm, 5.0 µm"]
4 Select the time range you want.
The available categories appear.
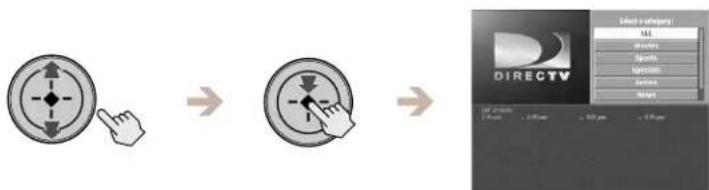
flowchart
graph LR
    A["Hand icon"] --> B["Arrow pointing to target"]
    B --> C["Arrow pointing to target with key point"]
    C --> D["Arrow pointing to target with key point"]
    D --> E["Selected view: OUT<br>✓ Forward<br>✓ Right<br>✓ Inside<br>✓ Inside<br>✓ Inside<br>✓ Inside<br>✓ Inside<br>✓ Inside<br>✓ Inside"]
    E --> F["Select 2 views:<br>OUT<br>✓ Forward<br>✓ Right<br>✓ Inside<br>✓ Inside<br>✓ Inside<br>✓ Inside<br>✓ Inside"]
continued
Viewing Station and Program Information (GUIDES) (continued)
5
Select the category you want.
If the category you select has subcategories, the available subcategories appear.


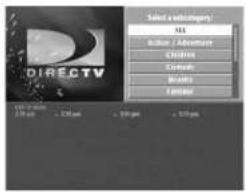
6
Select the subcategory you want.
The programs that match your selections appear in the lower half of the display.


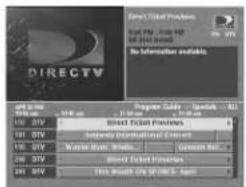
7
Highlight and select the program you want.
If you select a current program, the Other Guides display closes. For information about selecting a future program, see "Using One Button Timer & Rec" on page 76.



Viewing Pay Per View Programs
Many programs are available as pay per view. By selecting a pay per view program you agree to be charged for that program.
Select a pay per view program using any of the methods described in the “Viewing Station and Program Information (GUIDES)” section on pages 43 through 52.
The Purchase Program display appears. This display shows detailed information about the program including the cost.
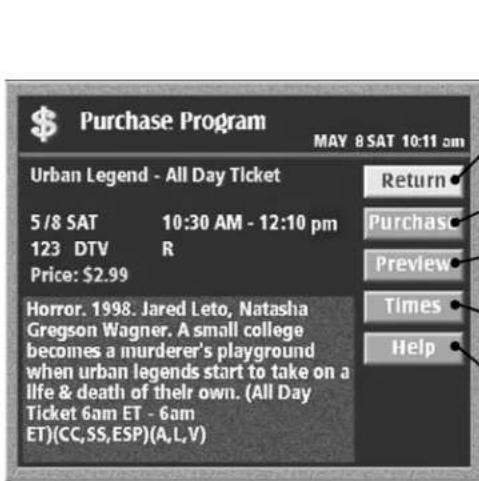
Return
Closes the Purchase Program display to show the previous screen.
Purchase
Opens the Purchase pop-up.
Preview
Closes the Purchase Program display to show a preview of the program if available.
Times
Opens the Other Show Times display so you can select another time to view the program.
Help
Opens information about the Purchase Program display.
Note
To order pay per view by remote, a DIRECTV ^® subscription is required and the Digital Satellite Receiver must be continuously connected to a land-based phone line.
Setting Preferences (PREFERENCES)
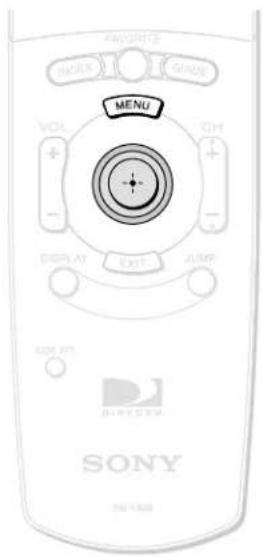
Using the Preferences Menu
The Preferences Menu lets you change the appearance of the on-screen displays, the stations you want to appear in the program list area, and the order in which the stations are listed.
1
Press the MENU button, then highlight and select PREFERENCES.
The PREFERENCES Menu appears.
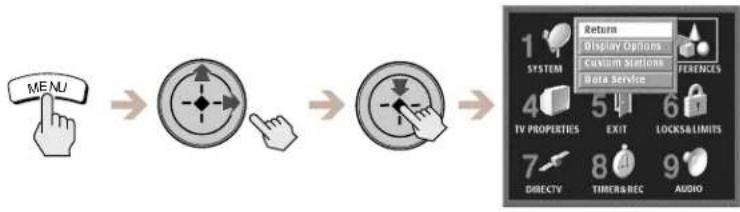
flowchart
graph LR
    A["MENU"] --> B["FUNCTION"]
    B --> C["DATA SERVICE"]
    C --> D["SYSTEM"]
    D --> E["Return"]
    E --> F["Display Options"]
    E --> G["Custom Stations"]
    E --> H["Data Service"]
    C --> I["TV PROPERTIES"]
    C --> J["EXIT"]
    C --> K["LOCKS&LIMITS"]
    C --> L["DIRECTV"]
    C --> M["TIMERS&REC"]
    C --> N["AUDIO"]
2
Highlight and select the item you want to adjust.
Return
Closes the PREFERENCES Menu to show the Main Menu.
Display Options
Lets you change the color scheme of the on-screen displays, choose how the stations are ordered in the guides and select what is displayed in the Media Window when surfing through the Station Index (see page 55).
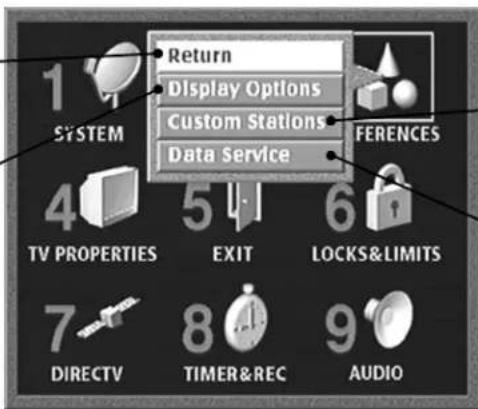
Custom Stations
Lets you customize which stations appear in the program guides (see page 58).
Data Service
A future application (see page 60).
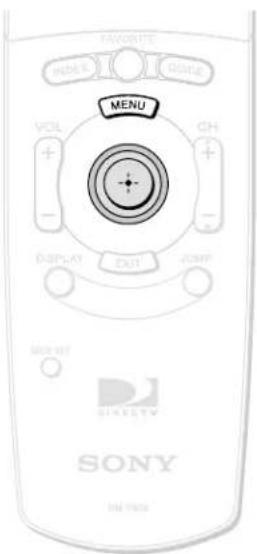
Setting Display Options
Display Options lets you choose the color scheme of the on-screen displays and the order in which stations are listed in the program list area. You can also turn the surf option on or off.
1 Press the MENU button, then highlight and select PREFERENCES.
The PREFERENCES Menu appears.
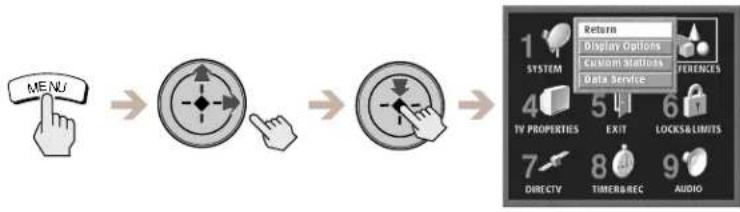
flowchart
graph LR
    A["MENU"] --> B["FUNCTION"]
    B --> C["FUNCTION"]
    C --> D["SYSTEM"]
    D --> E["Display Options"]
    D --> F["Custom Stations"]
    D --> G["Data Service"]
    E --> H["TV PROPERTIES"]
    F --> I["EXIT"]
    G --> J["LOCKS & LIMITS"]
    H --> K["7 DIRECTY"]
    I --> L["8 TIMER&REC"]
    J --> M["9 AUDIO"]
2 Highlight and select "Display Options".
The Display Options display appears.
Colors
Lets you change the color of the on-screen displays (see page 56).
Station Order
Lets you select the order in which stations appear in the list area (see page 57).
Surf
Lets you view the Current Program in the Station Index while viewing other program information (see page 57).
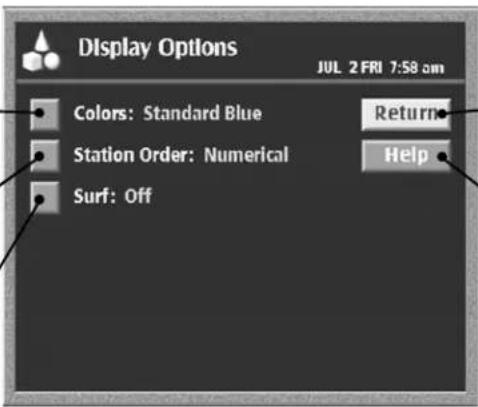
Return
Closes the Display Options display to show the Main Menu.
Help
Opens information about the Display Options display.
Setting Preferences (PREFERENCES) (continued)
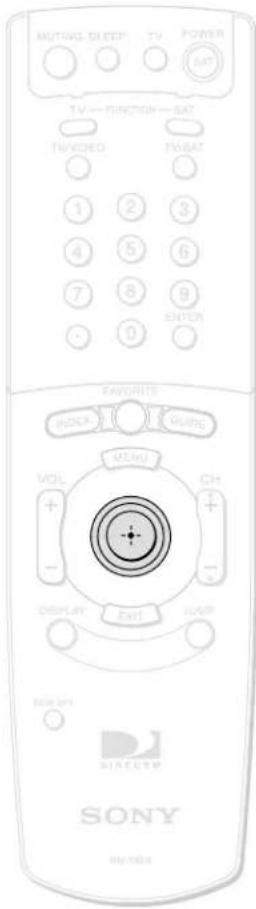
Changing the Color Scheme
1 Highlight and select "Colors" from the Display Options display (see page 55).
The Colors pop-up appears.
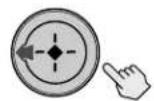


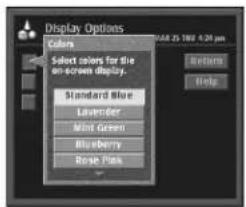
2 Highlight and select the color scheme you like.
The display changes colors as you highlight each color scheme.



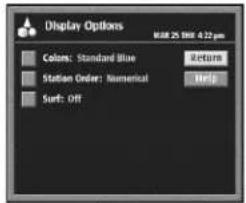
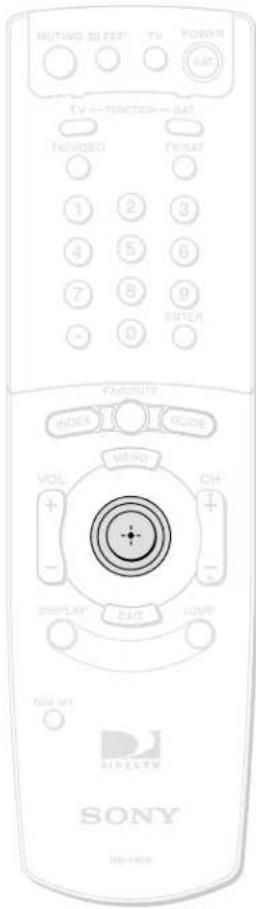
Changing the Station Order
You can select numerical or alphabetical for the order in which stations appear in the List Area of the Program Guide, Category Guide and Other Guides display.
1 Highlight and select "Station Order" from the Display Options display (see page 55).
The Station Order pop-up appears.
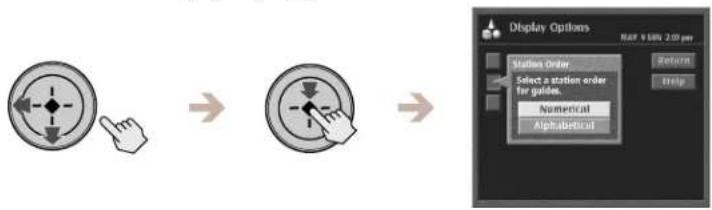
flowchart
graph LR
    A["Start"] --> B["Select a station order for guides."]
    B --> C["Return"]
    C --> D["Help"]
2 Highlight and select the order you like.
The Station Order pop-up closes to show the Display Options display.
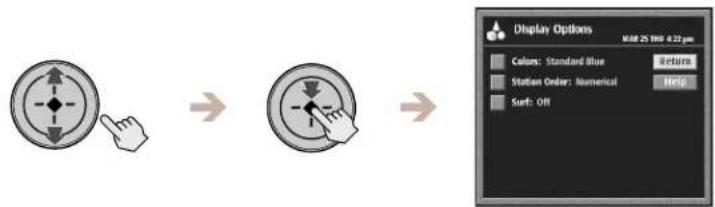
flowchart
graph LR
    A["Hand Click"] --> B["Arrow to Top Right"]
    B --> C["Arrow to Bottom Left"]
    C --> D["Next Step"]
    D --> E["Display Options"]
    E --> F["Color: Standard Blue Return"]
    E --> G["Station Order: Numerical Help"]
    E --> H["Surf: Off"]
Changing the Surf Setting
When the Surf setting is On you can view the current program in the Media Window of the Station Index while viewing the program information of other programs as you highlight them in the Station Index.
1 Highlight and select "Surf" from the Display Options display (see page 55).
The Surf pop-up appears.
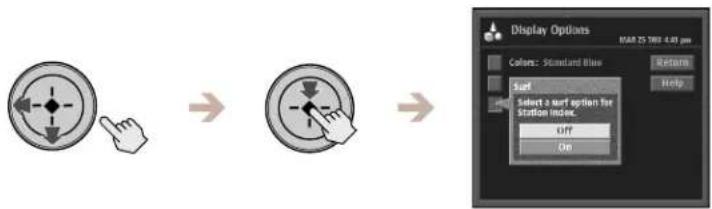
flowchart
graph LR
    A["Hand icon with arrow"] --> B["Arrow pointing to square icon"]
    B --> C["Arrow pointing to circle icon"]
    C --> D["Display Options: Colors: Standard Blue, Returns, Help"]
    D --> E["Select a surf option for Station icon.<br>Off<br>On"]
2 Highlight and select "On" or "Off".
The Surf pop-up closes to show the Display Options display.
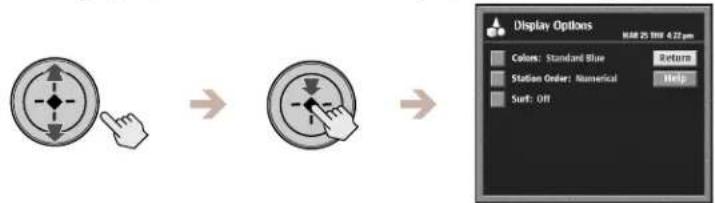
flowchart
graph LR
    A["Circle Icon"] --> B["Square Button"]
    B --> C["Display Options"]
    C --> D["Colors: Standard Blue Return"]
    C --> E["Station Order: Numerical Help"]
    C --> F["Surf: Off"]
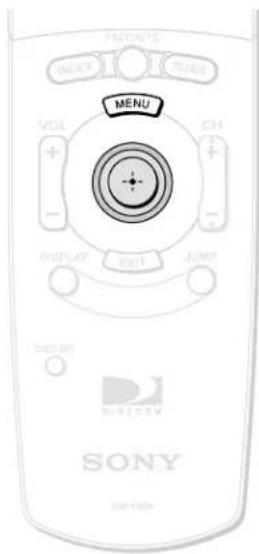
Setting Up Custom Stations
The Custom Stations display lets you choose which stations will be skipped in the Program Guide, Category Guide and Station Index, and when you change channels using the CH +/- button. You can reduce the number of stations that appear by skipping unwanted stations.
1 Press the MENU button, then highlight and select PREFERENCES.
The PREFERENCES Menu appears.
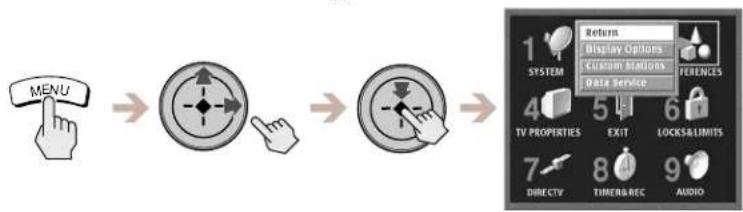
flowchart
graph LR
    A["MENU"] --> B["Data Service"]
    B --> C["Output Options"]
2 Highlight and select "Custom Stations".
The Custom Stations display appears.
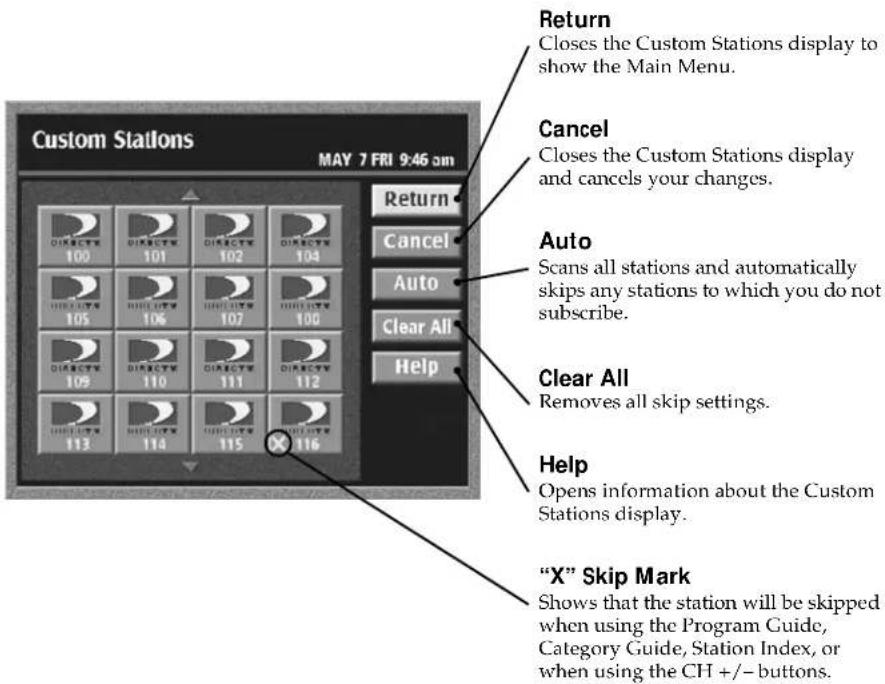
3
Highlight and select a station icon to add or remove the "X" mark.
The "x" mark indicates that the station will be skipped when you open the Program Guide, Category Guide or Station Index, or change channels using the CH +/- button.
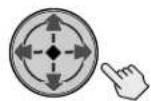


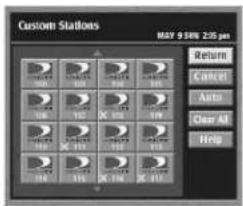
4
Highlight and select "Return".
The Custom Stations display closes to show the Main Menu.
Selecting Data Service
The Data Service feature is reserved for future applications.
Adjusting TV Properties (TV PROPERTIES)
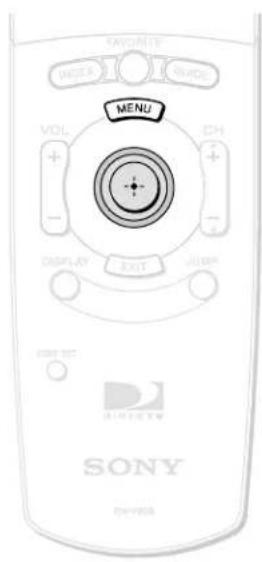
Adjusting TV Properties
The TV Properties display lets you adjust your Digital Satellite Receiver to get the best picture for your TV.
1 Press the MENU button, then highlight and select TV PROPERTIES.
The TV PROPERTIES display appears.
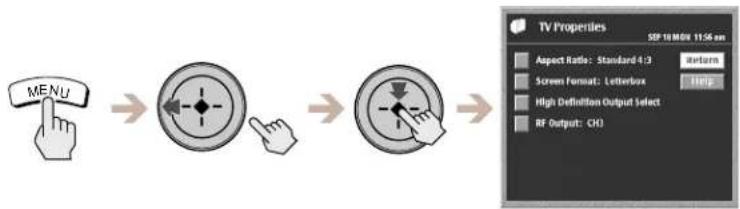
flowchart
graph LR
    A["MENU"] --> B["Screen Format: Letterbox"]
    B --> C["High Definition Output Select"]
    C --> D["RF Output: CHO"]
2 Highlight and select the item you want to set.
Aspect Ratio
Select "Standard" aspect ratio if your TV is a standard 4:3 aspect ratio TV set. Select "Wide" aspect ratio if your TV is a wide-screen 16:9 aspect ratio TV set (see page 62).
Screen Format
If you selected Standard 4:3 aspect ratio, you may select "Letterbox" or "Pan/Scan" screen format. Select "Letterbox" to view wide aspect ratio programming in its original format. Select "Pan/Scan" to have wide aspect ratio programming fill the screen (see page 62).
High Definition Output Select
Shows information about selecting high definition outputs (see page 63).
RF Output
If your TV receives signals from / your Digital Satellite Receiver with a coaxial (RF) cable, select CH3 and set your TV to channel 3. If channel 3 receives any interference, select CH4 and set your TV to channel 4 (see page 64).
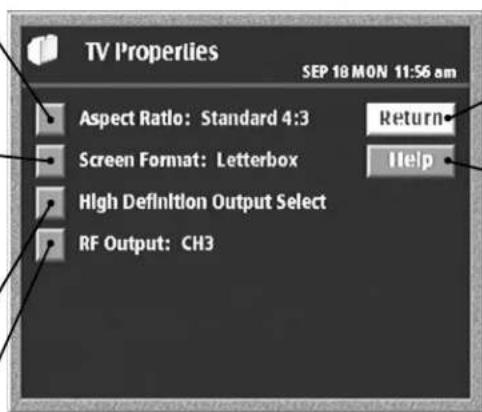
Return
Closes the TV Properties display to show the Main Menu.
Help
Shows information about the TV Properties display.
Note
To enjoy the "Wide" aspect ratio feature, you must receive 16:9 wide aspect ratio programming and your TV must be capable of displaying a 16:9 wide aspect ratio signal.
Adjusting TV Properties (TV PROPERTIES) (continued)
Aspect Ratio
The Aspect Ratio setting refers to the proportion of your TV screen. Some high definition monitors may offer the wide (16:9) aspect ratio which is similar to the proportions of a movie screen. Many TVs and digital monitors have a standard (4:3) aspect ratio screen.
1 Highlight and select "Aspect Ratio" from the TV Properties display (see page 61).
The Aspect Ratio pop-up appears.
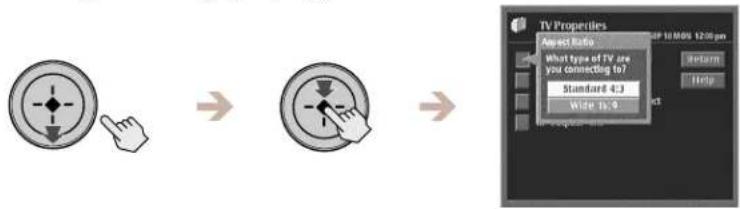
flowchart
graph LR
    A["Mouse Icon"] --> B["Arrow to Screen"]
    B --> C["Arrow to TV Panel"]
    C --> D["TV Properties Panel"]
2 Highlight and select the correct aspect ratio for your TV or digital monitor.
The aspect ratio is set to your selection.
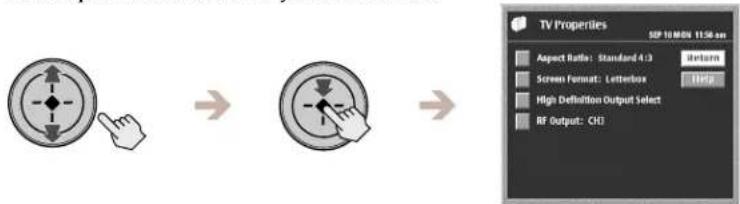
flowchart
graph LR
    A["Icon with arrow pointing"] --> B["Icon with cursor clicking"]
    B --> C["TV Properties: SEP 10/MON 11:56 am"]
    C --> D["Aspect Ratio: Standard 4.3"] --> E["Screen Format: Letterbox"] --> F["High Definition Output Select"] --> G["RF Output: CHJ"]
Note
The Aspect Ratio is automatically set with the selection of certain Output Select settings (see page 11). Selecting "Video 3 variable" automatically sets the Aspect Ratio to "Standard 4:3". Selecting "Video 3 1080i" automatically sets the Aspect Ratio to "Wide 16:9".

CAUTION
When viewing letterbox or windowbox content on your TV or digital monitor, keep the brightness and contrast functions at low settings. If a fixed pattern (for example, a letterbox pattern) is left on the screen for long periods of time at a high brightness or contrast setting, the pattern can be permanently imprinted on the screen.
Screen Format
The Screen Format setting is available when the "Standard 4:3" Aspect Ratio setting is selected. The Screen Format setting allows programming that is delivered in wide (16:9) format to be displayed in "Letterbox" format or "Pan/Scan" format.
1 Highlight and select "Screen Format" from the TV Properties display (see page 61).
The Screen Format pop-up appears.
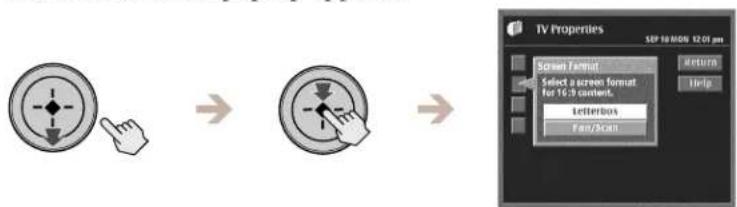
flowchart
graph LR
    A["Icon with arrow pointing to right"] --> B["Transformation to Screen Icon"]
    B --> C["→"]
    C --> D["→"]
    D --> E["Screen Format: Select a screen format for 16.9 content; Letterbox, Fan/Scan"]
    E --> F["Return: Help"]
2 Highlight and select "Letterbox" or "Pan/Scan".
Any wide (16:9) programming that you receive is now available to be viewed in the format that you've selected.
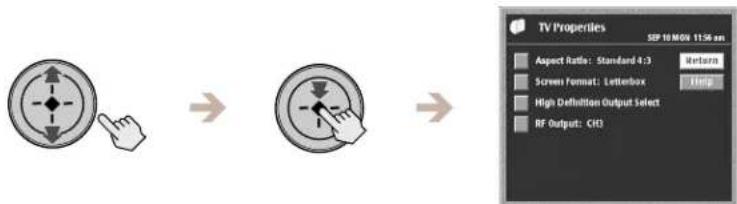
flowchart
graph LR
    A["Left Image"] --> B["Right Image"]
    B --> C["TV Properties"]
    C --> D["Aspect Ratio: Standard 4:3"]
    C --> E["Screen Format: Letterbox"]
    C --> F["High Definition Output Select"]
    C --> G["RF Output: CRT"]
Recommended Aspect Ratio and Screen Format Settings
If you have a standard TV (4:3 aspect ratio) set the Aspect Ratio to "Standard" and the Screen Format to "Letterbox" (see page 62).
When viewing 4:3 content
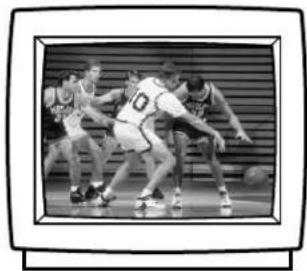
natural_image
Black-and-white action photo of a basketball game in progress, showing players competing for the ball (no visible text or symbols)When viewing 16:9 content

natural_image
Black-and-white photo of a tennis player mid-swing, no visible text or symbolsIf you have a wide screen TV (16:9 aspect ratio) set the Aspect Ratio to "Wide" (see page 62).
When viewing 16:9 content When viewing 4:3 content
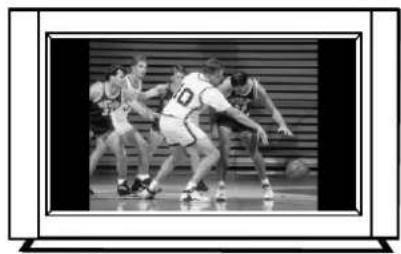
natural_image
Black-and-white photo of a basketball game in progress, showing players competing for the ball (no visible text or symbols)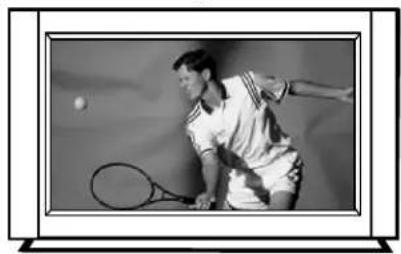
natural_image
Black-and-white photo of a tennis player mid-swing, hitting a ball (no text or symbols visible)High Definition Output Select
The High Definition Output Select display gives information about using the OUTPUT SELECT button on the front panel of your Digital Satellite Receiver.
1 Highlight and select "High Definition Output Select" from the TV Properties display (see page 61).
The High Definition Output Select pop-up appears.
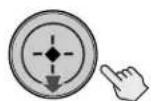



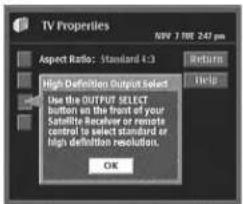
2 Highlight and select "OK".
The High Definition Output Select pop-up closes.
Adjusting TV Properties (TV PROPERTIES) (continued)
RF Output
The RF Output setting determines the channel that signals are sent to your TV from the VHF (SAT)/UHF OUT jack.
1 Highlight and select "RF Output" from the TV Properties display (see page 61).
The RF Output pop-up appears.
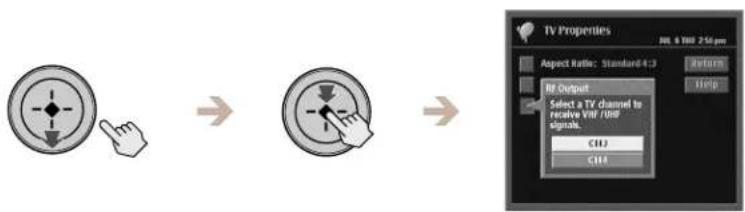
flowchart
graph LR
    A["Input Image"] --> B["Transformation"]
    B --> C["Output Panel: TV Properties"]
2 Highlight and select "CH3" or "CH4" depending on which channel does not receive broadcasts in your area.
You can view programming on the selected channel of your TV.
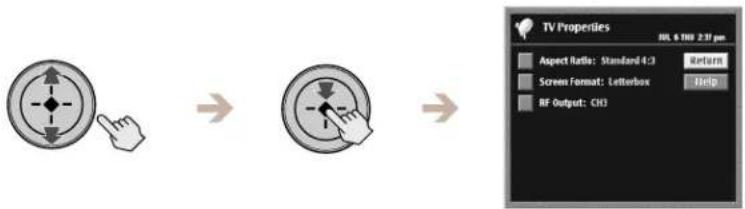
flowchart
graph LR
    A["Hand Icon"] --> B["Screen Icon"]
    B --> C["→"]
    C --> D["→"]
Setting Locks and Limits (LOCKS & LIMITS)
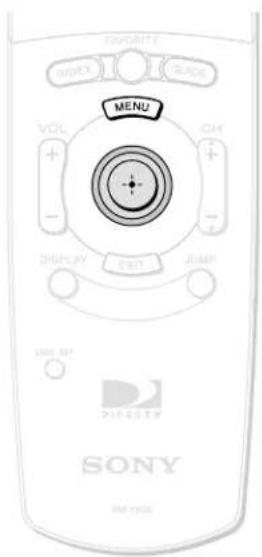
Using the Locks & Limits Feature
The Locks & Limits feature gives you control over access to your Digital Satellite Receiver. You can set different Locks & Limits for programming that you receive from DIRECTV and for programming that you receive from your TV antenna or cable company connection.
1 Press the MENU button, then highlight and select LOCKS & LIMITS.
The Locks & Limits menu appears.
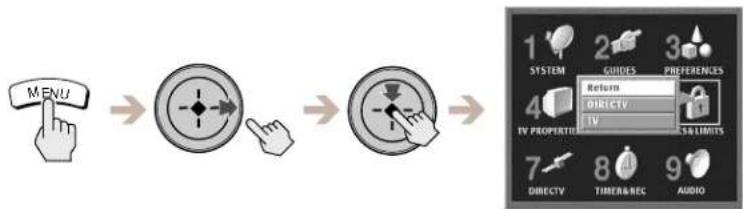
flowchart
graph LR
    A["MENU"] --> B["→"]
    B --> C["→"]
    C --> D["→"]
    D --> E["1 SYSTEM 2 GUIDES 3 PREFERENCES Return"]
    D --> F["4 TV PROPERTIES DIRECTV IV"]
    D --> G["7 DIRECTV 8 TIMER&REC 9 AUDIO"]
2 Highlight and select either "DIRECTV" or "TV" depending on which programming you want to limit, then select "Edit".
Either the DIRECTV Locks & Limits display or the TV Locks & Limits display appears.
DIRECTV Locks & Limits
Receiver Status
Shows if your Digital Satellite Receiver is now locked or unlocked.
Spending Limit
Sets a maximum limit on charges per event (see page 67).
Rating Limit
Sets a maximum limit on rated content (see page 68).
Pay Per View
Blocks access to pay per view programs (see page 68).
Stations Blocked
Blocks access to specific stations (see page 69).
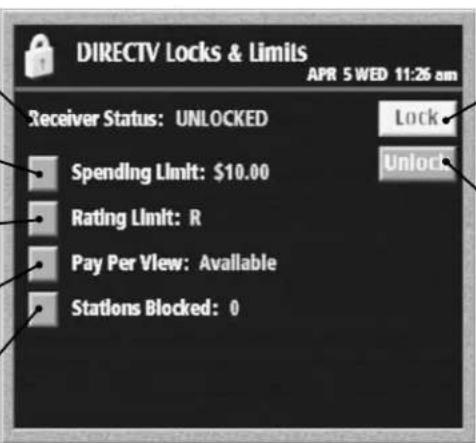
Lock
Locks the DIRECTV Locks & Limits settings.
Unlock
Opens the DIRECTV Locks & Limits edit display.
Setting Locks and Limits (LOCKS & LIMITS) (continued)
TV Lock Status
Shows if the TV Locks & Limits feature is locked or unlocked.
TV Rating
Blocks access to rated TV programming received from your local TV antenna or cable provider.
Movie Rating Limit
Sets a maximum limit on rated movie programming received from your local TV antenna or cable provider.
Unrated
Blocks access to any unrated programming received from your local TV antenna or cable provider.
Stations Blocked
Blocks access to specific stations received from your local TV antenna or cable provider.
TV Locks & Limits
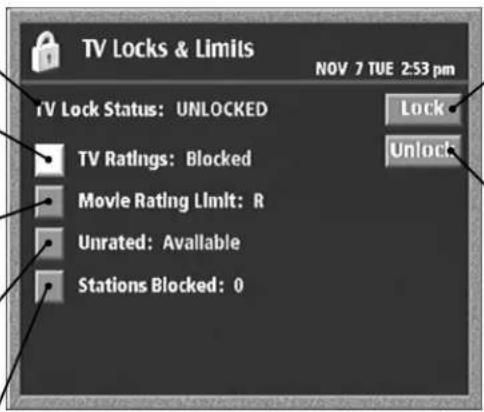
Lock
Locks the TV Locks & Limits settings.
Unlock
Lets you make changes to the current TV Locks & Limits settings.
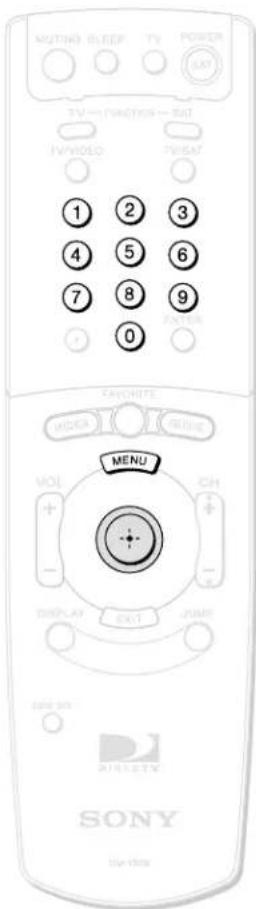
DIRECTV Locks & Limits and TV Locks & Limits
This section describes the use of the DIRECTV Locks & Limits feature. The way you use the TV Locks & Limits feature is the same as the DIRECTV Locks & Limits feature except for the different rating limit settings that are available.
Changing the Spending Limit
The spending limit pop-up lets you limit the amount you can spend per event on pay per view purchases.
1 Highlight and select "Spending Limit" from the Locks & Limits edit display (see page 65).
The Spending Limit pop-up appears.
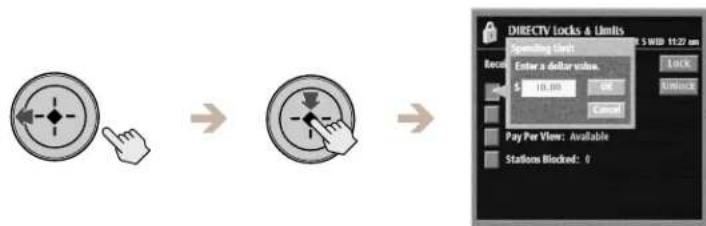
flowchart
graph LR
    A["Hand icon"] --> B["Arrow pointing to screen"]
    B --> C["Arrow pointing to button"]
    C --> D["Arrow pointing to lock limit with '10.00' value and 'OK' button"]
    D --> E["Display dialog box: 'DIRECTV locks & Limits', '5 WIB 10.22 nm', 'Lock', 'DR/LOCK'"]
    E --> F["Pay Per View: Available, Stations Blocked: 0"]
2 Press the 0–9 buttons to enter the dollar value.
You can enter a value of less than \$656.
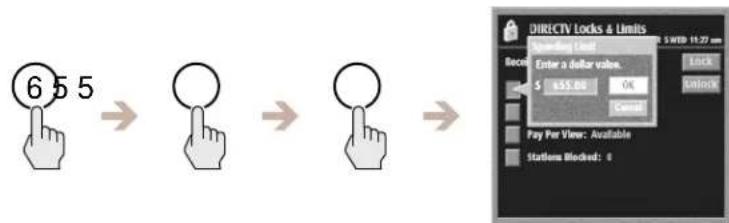
3 Highlight and select "OK".
The Spending Limit pop-up closes to show the Locks & Limits edit display.
Select "Cancel" to close the Spending Limit pop-up without saving changes.
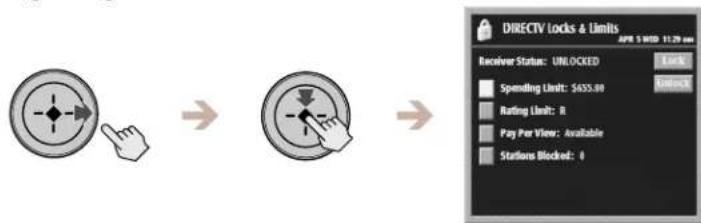
Setting Locks and Limits (LOCKS & LIMITS) (continued)
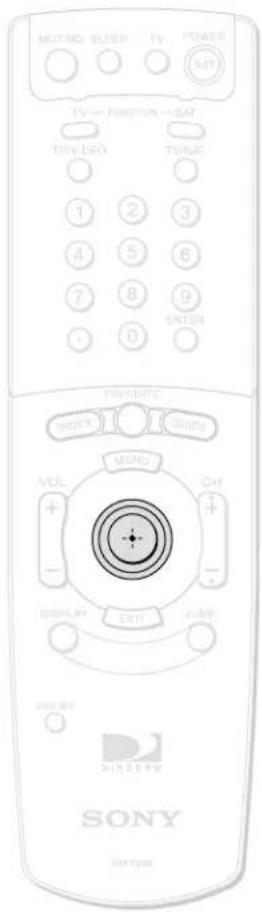
Changing the Rating Limit
The Rating Limit pop-up lets you limit programs according to the content rating.
1 Highlight and select "Rating Limit" from the Locks & Limits edit display (see page 65).
The Rating Limit pop-up appears.
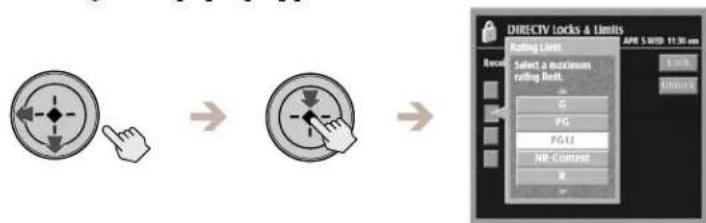
flowchart
graph LR
    A["Hand Click"] --> B["Rotating"]
    B --> C["Lock Select"]
    C --> D["Select a maximum reading belt"]
    D --> E["OK"]
    D --> F["Cancel"]
2 Highlight and select the highest content rating you want your Digital Satellite Receiver to access.
The Rating Limit pop-up closes to show the Locks & Limits edit display.
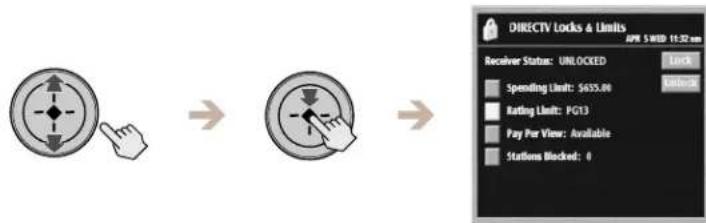
Changing the Pay Per View Access Setting
The pay per view access setting lets you block access to pay per view programs.
1 Highlight and select "Pay Per View" from the Locks & Limits edit display (see page 65).
The Pay Per View Access pop-up appears.
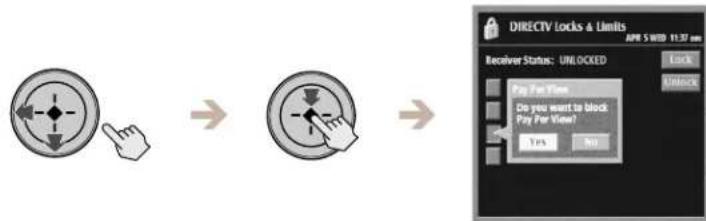
flowchart
graph LR
    A["Hand icon"] --> B["Function call"]
    B --> C["Connect button"]
    C --> D["Connect button"]
    D --> E["Connect button"]
    E --> F["Connect button"]
    F --> G["Connect button"]
    G --> H["Connect button"]
    H --> I["Connect button"]
    I --> J["Connect button"]
    J --> K["Connect button"]
    K --> L["Connect button"]
    L --> M["Connect button"]
    M --> N["Connect button"]
    N --> O["Connect button"]
    O --> P["Connect button"]
    P --> Q["Connect button"]
    Q --> R["Connect button"]
    R --> S["Connect button"]
    S --> T["Connect button"]
    T --> U["Connect button"]
    U --> V["Connect button"]
    V --> W["Connect button"]
    W --> X["Connect button"]
    X --> Y["Connect button"]
2 Select "Yes" to block access to pay per view programs.
Select "No" to allow access to pay per view programs.
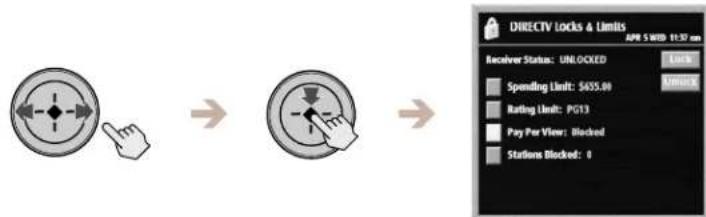
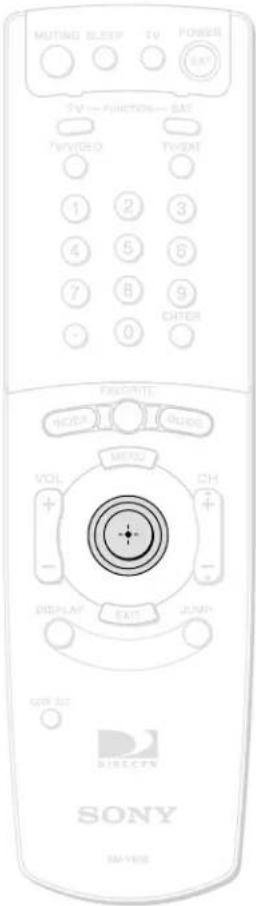
Changing the Stations Blocked Settings
The Stations Blocked feature lets you block access to specific stations.
1 Highlight and select "Stations Blocked" from the Locks & Limits edit display (see page 65).
The Stations Blocked display appears.
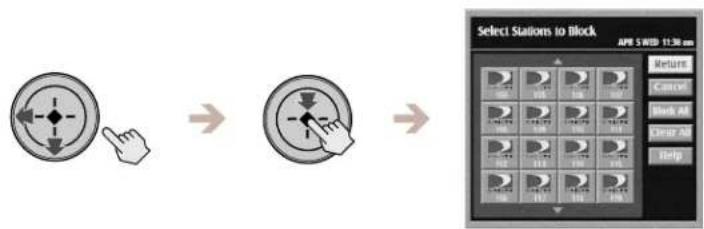
flowchart
graph LR
    A["Hand with directional arrow"] --> B["Rotation knob"]
    B --> C["Display screen with icons"]
    C --> D["Select Stations to Block AM8 5 WBD 11:30 mm"]
2 Highlight and select a station icon to block that station.
The block symbol appears in the station icon to indicate that the station is blocked.
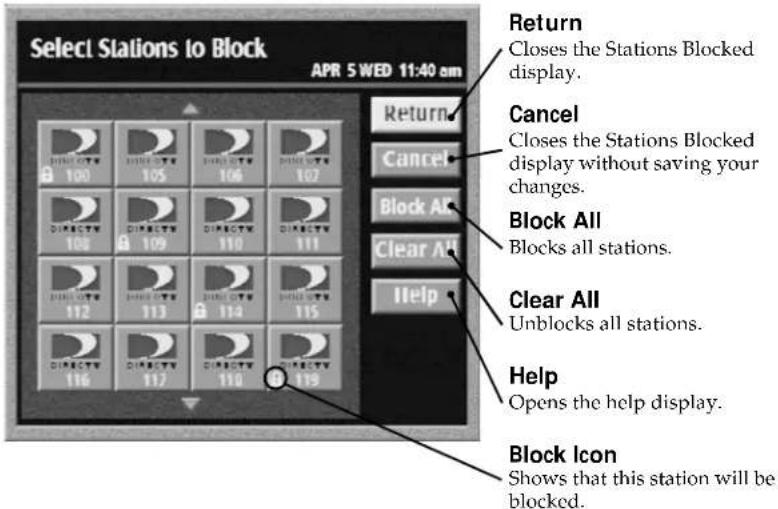
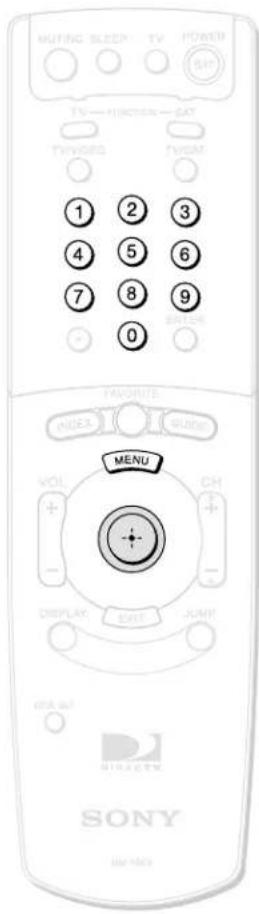

Tips
- Do not forget your passcode. You will need this number to unlock your receiver or make any changes to the limits you have set. If you forget your passcode, contact your service provider for assistance. If you do not receive satellite service, see "Lost Passcode" on page 89.
- You may want to update your settings in the Locks & Limits feature if the programming you receive changes. For example, if you subscribe to new stations or if you use the Auto Program or Add/Skip features to receive new broadcast stations, you may want to limit access to any new stations.
Locking Your Receiver
After you have made the changes you want to the DIRECTV Locks & Limits settings or to the TV Locks & Limits settings, you must enter a passcode to lock the receiver.
1
Press the MENU button, then highlight and select LOCKS & LIMITS and select "DIRECTV" or "TV".
The Locks & Limits display appears.
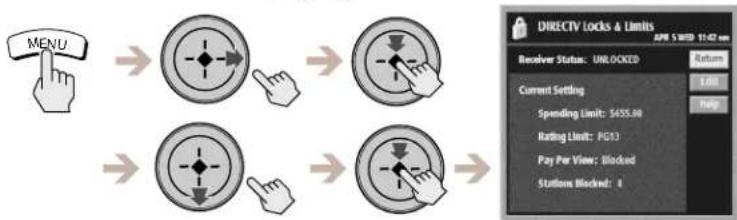
flowchart
graph TD
    A["MENU"] --> B["Arrow 1"]
    B --> C["Arrow 2"]
    C --> D["Arrow 3"]
    D --> E["Arrow 4"]
    E --> F["Arrow 5"]
2
Highlight and select "Edit", then select "Lock".
The Lock Receiver pop-up appears.
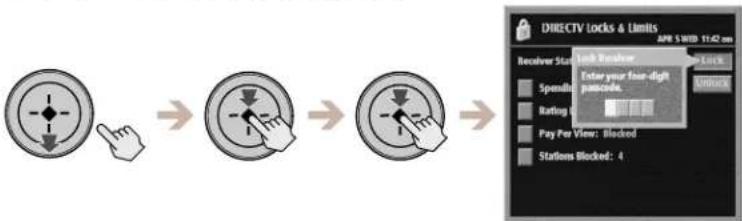
flowchart
graph LR
    A["Input"] --> B["Arrow pointing to the lock icon"]
    B --> C["Arrow pointing down the lock icon"]
    C --> D["Arrow pointing down the lock icon"]
    D --> E["Arrow pointing down the lock icon"]
    E --> F["Connect to the lock with 'OK' button"]
    F --> G["Enter your four-digit postcode."]
    G --> H["Register the lock with 'OK' button"]
    H --> I["Pay Per View: Blocked"]
    I --> J["Stations Blocked: 4"]
3
Enter a four digit passcode using the 0–9 buttons.
Each number you enter appears as an asterisk ( ^* ) which keeps your passcode secret.
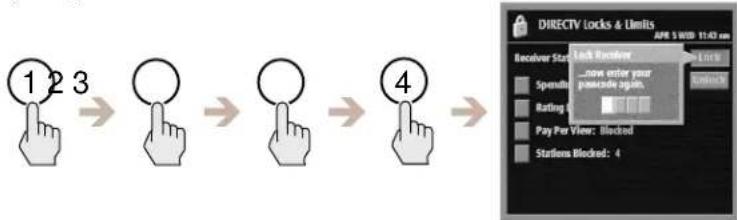
flowchart
graph LR
    A["1"] --> B["2"] --> C["3"]
    B --> D["4"]
    D --> E["→"]
4
Enter your passcode again.
This confirms your selection of a passcode number.
5
Highlight and select "Return".
The Main Menu appears.
Your receiver is now locked with your passcode using the locks and limits you have set.
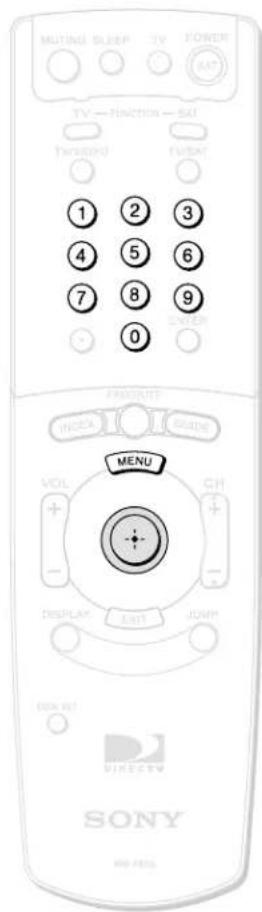

Tip
You can temporarily unlock your Digital Satellite Receiver with your passcode if you select a program from a guide and the station is locked or a limit has been reached.
Unlocking Your Receiver
If you want to make changes to the DIRECTV Locks & Limits settings or to the TV Locks & Limits settings, you must enter your passcode to unlock the receiver.
1
Press the MENU button, then highlight and select LOCKS & LIMITS and select "DIRECTV" or "TV".
The Locks & Limits display appears.
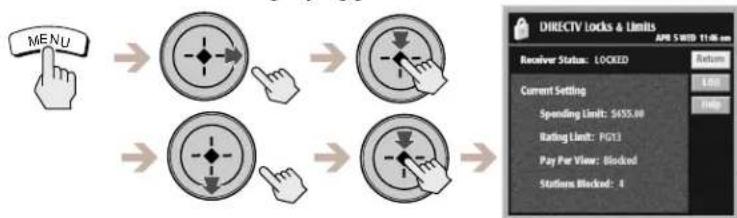
flowchart
graph LR
    A["MENU"] --> B["Directional Click"]
    B --> C["Directional Click"]
    C --> D["Directional Click"]
    D --> E["Directional Click"]
    E --> F["Directional Click"]
2
Highlight and select "Edit".
The Unlock Receiver pop-up appears.
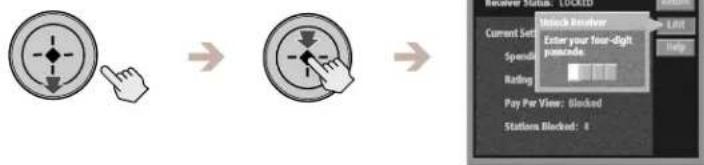
flowchart
graph LR
    A["User Hand Icon"] --> B["Arrow to Button"]
    B --> C["Arrow to Square"]
    C --> D["Next Step"]
    D --> E["Update Status: October"]
    E --> F["Current Settings: Unlock Receiver, Enter your Four-digit Panama, Rating: 1"]
    F --> G["Help"]
3
Enter your four digit passcode using the 0–9 buttons.
Each number you enter appears as an asterisk (*) which keeps your passcode secret.
The Locks & Limits edit display appears.
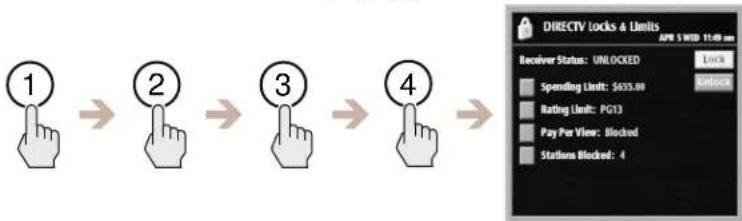
flowchart
graph LR
    A["1"] --> B["2"]
    B --> C["3"]
    C --> D["4"]
    D --> E["→"]
4
Highlight and select "Unlock".
Your receiver is now unlocked.
5
Highlight and select "Return".
The Main Menu appears.
Checking Service Provider Information (DIRECTV)
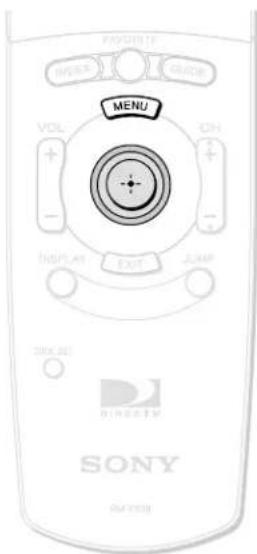
Using the DIRECTV Menu
The DIRECTV Menu lets you access messages from your service provider. You can also view a list of pay per view programs you have purchased.
1
Press the MENU button, then highlight and select DIRECTV.
The DIRECTV menu appears.
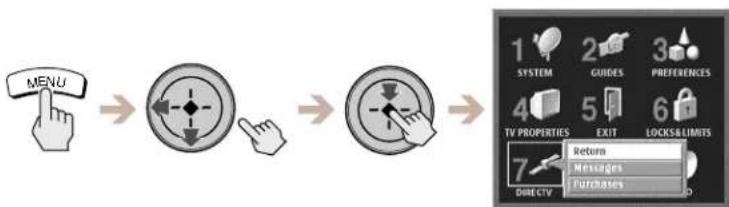
flowchart
graph LR
    A["MENU"] --> B["FUNCTION"]
    B --> C["FUNCTION"]
    C --> D["TV PROPERTIES"]
    D --> E["EXIT"]
    E --> F["LOCKS & LIMITS"]
    F --> G["RETURN"]
    F --> H["Messages"]
    F --> I["FUCHASES"]
2
Highlight and select the item you want to access.
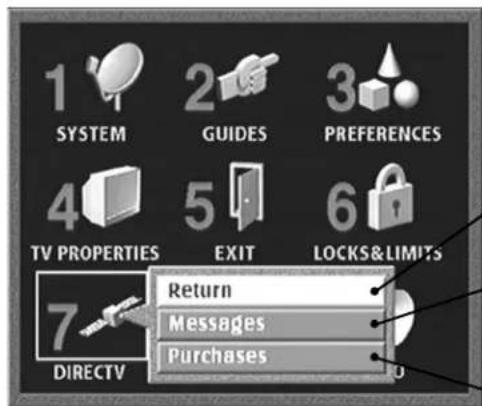
Return
Closes the DIRECTV menu to show the Main Menu.
Messages
Lets you view messages from your service provider (see page 73).
Purchases
Lets you view a list of pay per view programs you have purchased (see page 74).
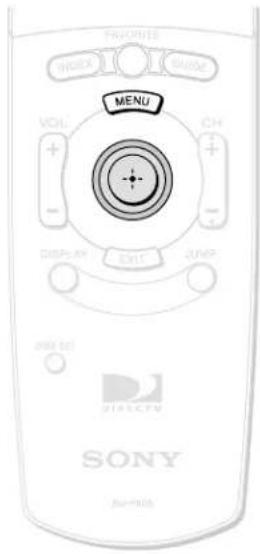
Viewing Messages
Your service provider may occasionally send messages to your Digital Satellite Receiver to inform you of changes to your service and other special announcements.
1 Press the MENU button, then highlight and select DIRECTV.
The DIRECTV menu appears.
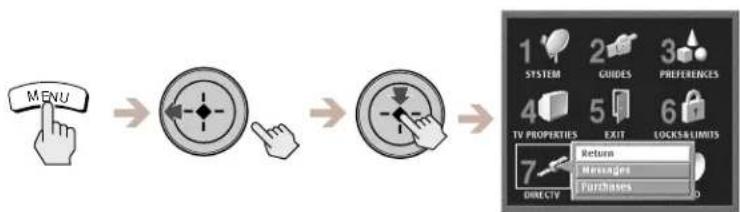
flowchart
graph LR
    A["MENU"] --> B["Switch"]
    B --> C["Switch"]
    C --> D["TV PROPERTIES EXIT LOCKS/LIMITS"]
    D --> E["Return"]
    D --> F["Messages"]
    D --> G["Furchases"]
2 Highlight and select "Messages".
The Messages display appears.
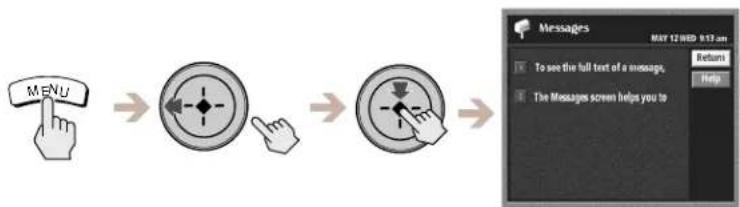
flowchart
graph LR
    A["MENU"] --> B["←"]
    B --> C["←"]
    C --> D["→"]
3 Highlight and select the message you want to read.
The message pop-up appears.
Delete
Closes the message pop-up and deletes the message.
Return
Closes the message pop-up and saves the message.
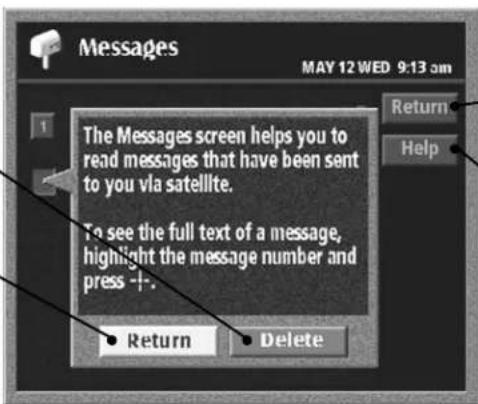
Return
Closes the Messages display to show the Main Menu.
Help
Opens information about the Messages display.
4 Highlight and select "Return" or "Delete".
The message pop-up closes to show the Messages display.
Checking Service Provider Information (DIRECTV) (continued)
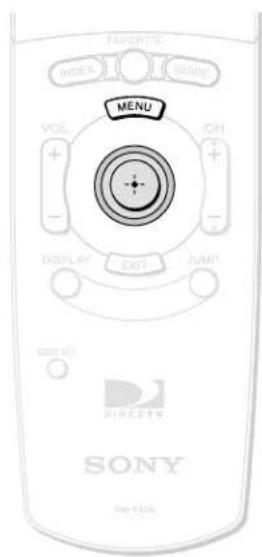
Checking Your Purchases
You can view a history of the pay per view purchases you have made. This display also shows the future purchases you have ordered and those that you have cancelled.
1 Press the MENU button, then highlight and select DIRECTV.
The DIRECTV menu appears.
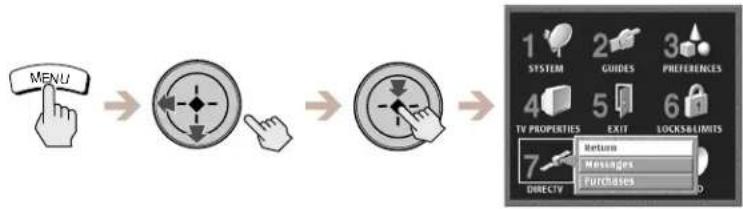
flowchart
graph LR
    A["MENU"] --> B["Navigation Button"]
    B --> C["Navigation Button"]
    C --> D["TV Properties"]
    D --> E["EXIT"]
    E --> F["LOCKS/LIMITS"]
    F --> G["Return"]
    F --> H["Messages"]
    F --> I["FUCHASES"]
2 Highlight and select "Purchases".
The Purchases display appears.
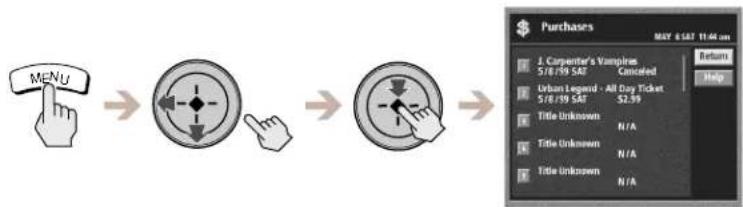
flowchart
graph LR
    A["MENU"] --> B["Arrow pointing to a circular icon"]
    B --> C["Arrow pointing to a circular icon"]
    C --> D["Arrow pointing to a circular icon"]
    D --> E["Purchases"]
3 Highlight and select the purchase number you want to view.
The information pop-up for that purchase appears.
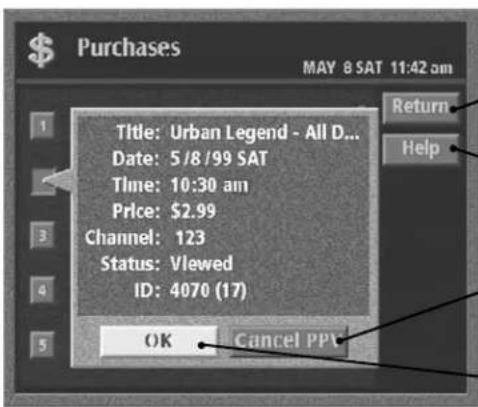
Return
Closes the Purchases display to show the Main Menu.
Help
Opens information about the Purchases display.
Cancel PPV
Cancels the Pay Per View program.
OK
Closes the information pop-up to show the Purchases display.

Tip
You can purchase pay per view programs from any guide. See "Viewing Pay Per View Programs" on page 53.
4 Highlight and select "OK".
The information pop-up closes to show the Purchases display.
Scheduling Programs (TIMER & REC)
Recording Programs
The following information reviews the highlights of recording with your Digital Satellite Receiver. You can schedule and record programs with your Digital Satellite Receiver if you have connected a VCR (see "Connecting Your VCR" on page 12 and "Setting Up the VCR Control Feature" on page 30).
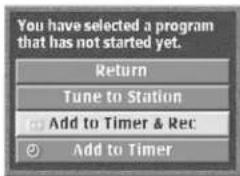
One Button Timer & Rec
The One Button Timer & Rec feature allows you to schedule the recording of a future satellite program by selecting that program from any of the program guides (see "Using One Button Timer & Rec" on page 76).
Timer & Rec
The Timer & Rec feature allows you to schedule the recording of any future program from the Main Menu by selecting the date, time, and channel that you want to record (see "Using the Timer & Rec Feature" on page 77).
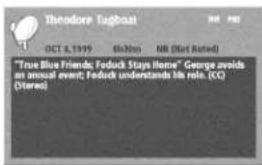
Auto Title Insert
You can set up your Digital Satellite Receiver to send information to your VCR so that program information appears at the beginning of your recordings. This way you can have a convenient "title" recorded on your tapes (see "Setting Up Auto Title Insert" on page 32).
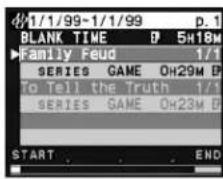
Data Download with a Sony SmartFile™ VCR
Your Digital Satellite Receiver has a Program Data Download feature that will automatically send the following information when you record a program with a Sony SmartFile VCR: program title, program category, program time/date and duration.
For more information on the SmartFile function, see your Sony SmartFile VCR Operating Instructions.
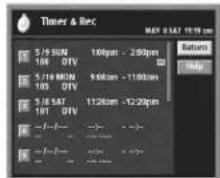
Programs not available for recording
Due to copyright restrictions, some programs may not be available to record or may only be available to record in standard definition. You may need to set the OUTPUT SELECT to "Video 1/2, VHF/UHF 480i" (see page 11).
Notes
- When using the VCR Control feature to record a future program, make sure that your VCR is turned off before the program begins. The VCR Control feature will turn on your VCR and start recording.
- When you schedule two or more continuous events to be recorded, the Auto Title Insert and Program Data Download features will only send information about the first program.
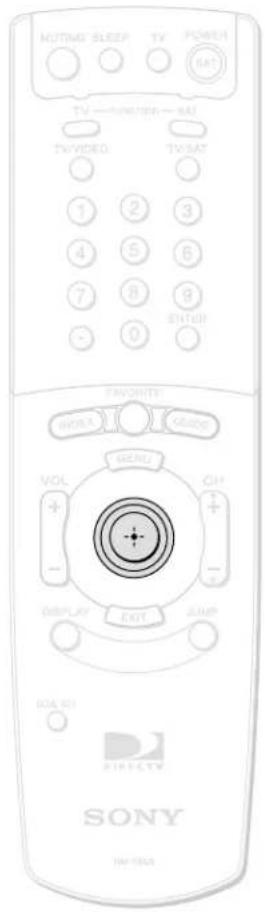
Note
When using the VCR Control feature to record a future program, make sure that your VCR is turned off before the program begins. The VCR Control will turn on the VCR and start recording automatically.
Using One Button Timer & Rec
You can schedule to view or record a future satellite program by selecting the program you want from any of the program guides. To record a future satellite program, use the VCR Control feature to turn on your VCR and start recording automatically. See "Setting Up the VCR Control Feature" on page 30 for more information.
1
Highlight and select a future satellite program using any of the program guides (see "Viewing Station and Program Information (GUIDES)" on pages 43 through 52 for more information).
The future program pop-up appears.
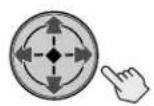


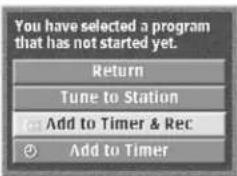
2
Highlight and select "Add to Timer & Rec".
The schedule pop-up appears.
If you did not want to record a future program, you may also select "Add to Timer".



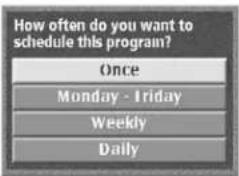
3
Highlight and select how often you want to schedule the program.
The Timer & Rec display appears.
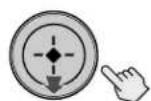


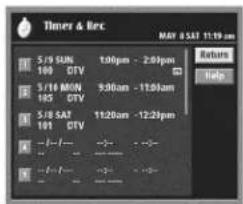
4
Highlight and select "Return" to confirm the scheduled recording.
The Timer & Rec display closes.
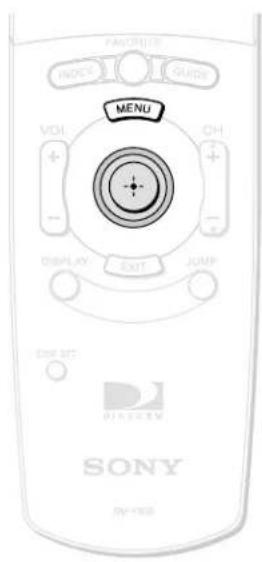
Using the Timer & Rec Feature
The Timer & Rec feature lets you set up the Digital Satellite Receiver to automatically tune to a program scheduled at a future time. To record a future program, use the VCR Control feature to turn on your VCR and start recording automatically. For information on how to set up the VCR Control feature see page 30.
1
Press the MENU button, then highlight and select TIMER & REC.
The Timer & Rec display appears.
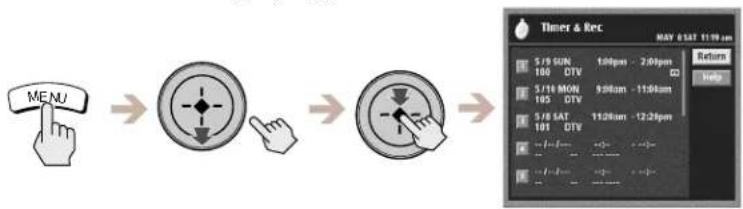
flowchart
graph LR
    A["MENU"] --> B["Timer & Record Display"]
    B --> C["5/8 SUN 100 DTV 1:00pm - 2:00pm"]
    B --> D["5/8 MON 105 DTV 9:00am - 11:00am"]
    B --> E["5/8 SAT 101 DTV 11:26am - 12:24pm"]
2
Highlight and select the next available timer event number.
The Date/Day field is highlighted and the current day and date appear.
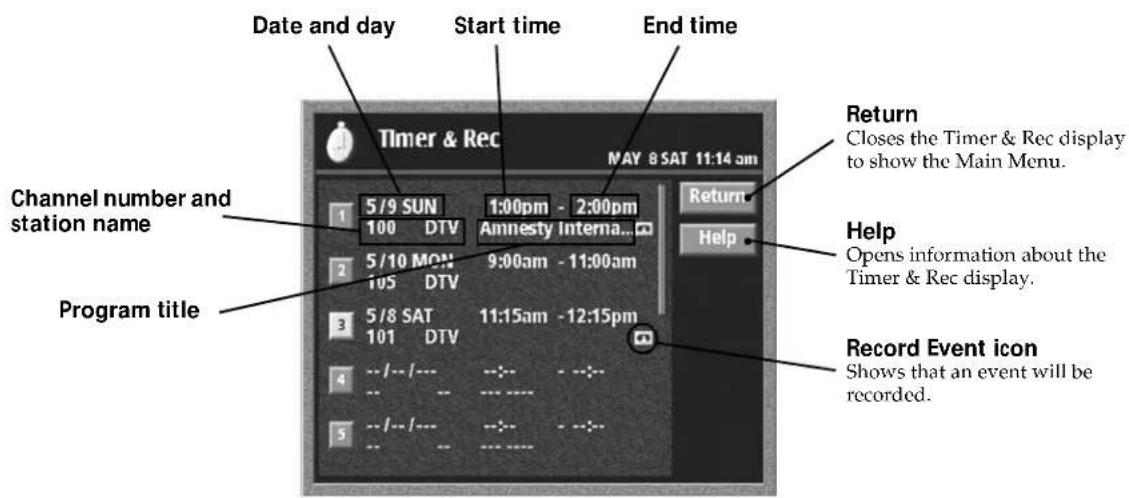
Note
When using the VCR Control feature to record a future program, make sure that your VCR is turned off before the program begins. The VCR Control feature will turn on the VCR and start recording.
continued
Scheduling Programs (TIMER & REC) (continued)
3 Follow the steps below to set the timer.
Move the joystick in the direction indicated in these steps.
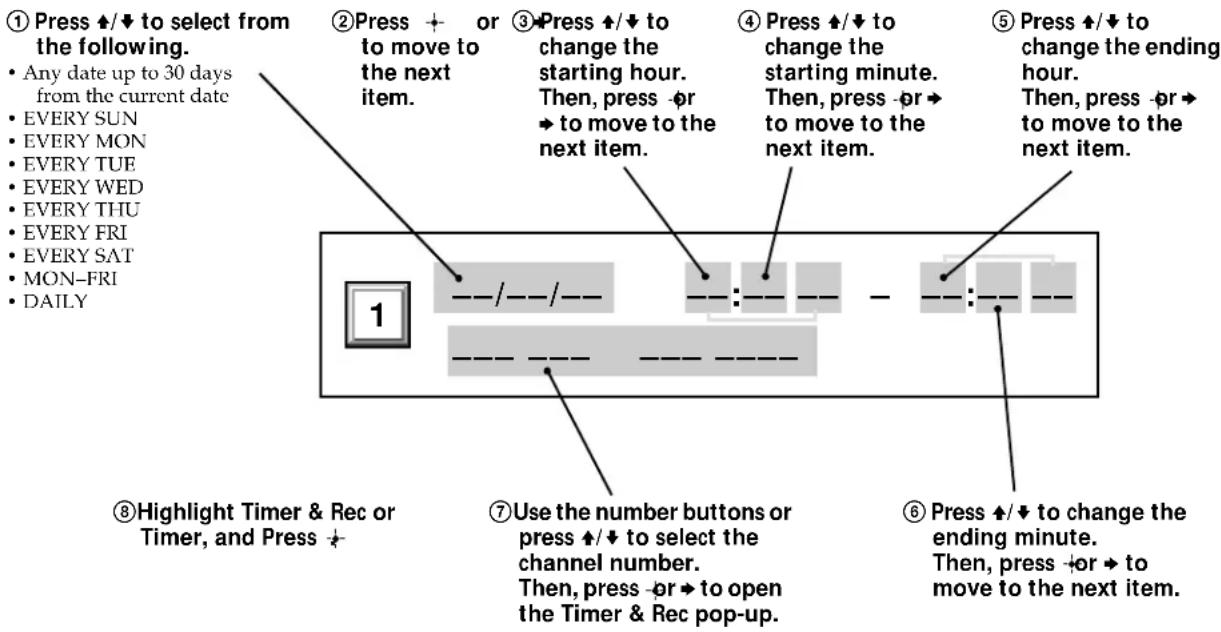
flowchart
graph TD
    A["① Press ↑/↓ to select from the following.<br>• Any date up to 30 days from the current date<br>• EVERY SUN<br>• EVERY MON<br>• EVERY TUE<br>• EVERY WED<br>• EVERY THU<br>• EVERY FRI<br>• EVERY SAT<br>• MON-FRI<br>• DAILY"] --> B["② Press + or to move to the next item."]
    B --> C["③ Press ↑/↓ to change the starting hour.<br>Then, press -or → to move to the next item."]
    C --> D["④ Press ↑/↓ to change the starting minute.<br>Then, press -or → to move to the next item."]
    D --> E["⑤ Press ↑/↓ to change the ending hour.<br>Then, press -or → to move to the next item."]
    E --> F["⑥ Press ↑/↓ to change the ending minute.<br>Then, press -or → to move to the next item."]
    F --> G["⑦ Use the number buttons or press ↑/↓ to select the channel number.<br>Then, press -or → to open the Timer & Rec pop-up."]
    G --> H["⑧ Highlight Timer & Rec or Timer, and Press +"]
4 Highlight and select "Return" to close the TIMER & REC display.
The Main Menu appears.

Tips
- Shortly before beginning a scheduled timer event, an information box appears on your screen. You can press the EXIT button on your remote control to cancel the timer event.
- If the Auto Title Insert feature is on (see page 32), the Auto Title will appear 10 seconds before the scheduled program.
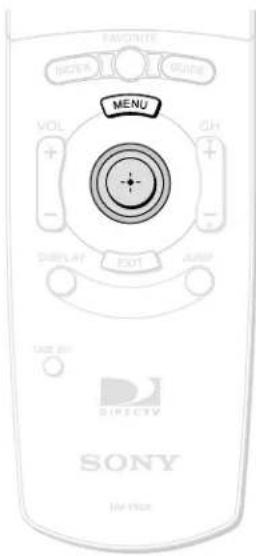
Editing Timer & Rec Events
You can easily edit or delete Timer & Rec events.
1
Press the MENU button, then highlight and select TIMER & REC.
The Timer & Rec display appears.
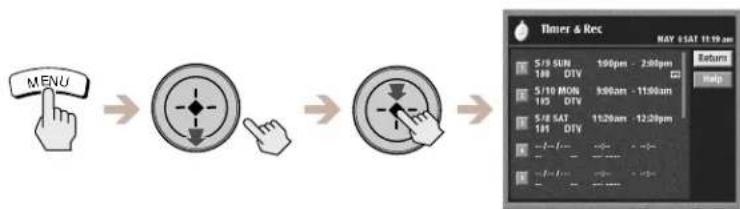
flowchart
graph LR
    A["MENU"] --> B["Timer & Rec"]
    B --> C["Timer & Rec"]
2
Highlight and select the number of the event you want to edit.
The edit pop-up appears.
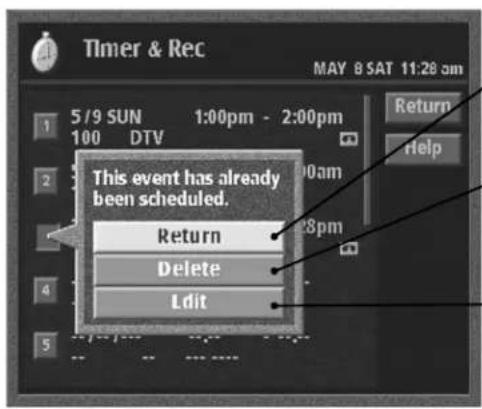
Return
Closes the edit pop-up to show the Timer & Rec display.
Delete
Removes the event from the list. Higher numbered events move up to fill the gap.
Edit
Closes the edit pop-up to highlight the date of that event.
See page 78 for instructions on how to change the timer settings.
Setting Audio Options (AUDIO)
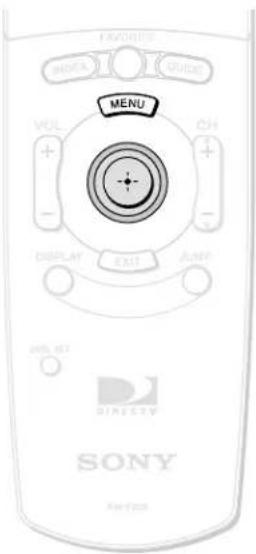
Using the Audio Display
You can set your Digital Satellite Receiver to play the audio track in the language you prefer if that language is available. You can also set your Digital Satellite Receiver to output Dolby Digital audio signals when they are available. You may also set the receiver to display the closed captioning and text of programs.
1
Press the MENU button, then highlight and select AUDIO.
The Audio display appears.
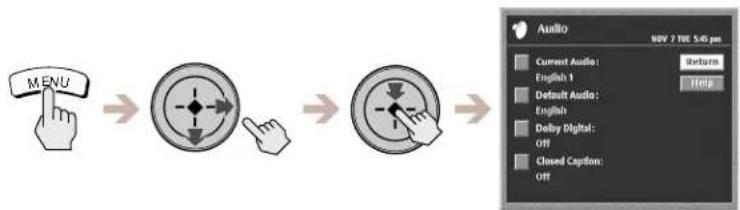
flowchart
graph LR
    A["MENU"] --> B["播放按钮"]
    B --> C["播放按钮"]
    C --> D["Audio"]
2
Highlight and select the setting you want to change.
Current Audio
Shows which track you are currently hearing. If a program has more than one audio track, you can select the audio track you want to hear.
Default Audio
Lets you change the audio track for all satellite system and digital TV stations. If the default audio track you selected is not available, you will hear the Current Audio track. Analog TV and Cable TV programs do not have Default Audio options.
Dolby Digital
Lets you receive Dolby Digital audio signals from satellite and digital TV programs when they are available. You must have a Dolby Digital audio system to enjoy Dolby Digital sound.
Closed Caption
Lets you display the closed captioning or text of programs.
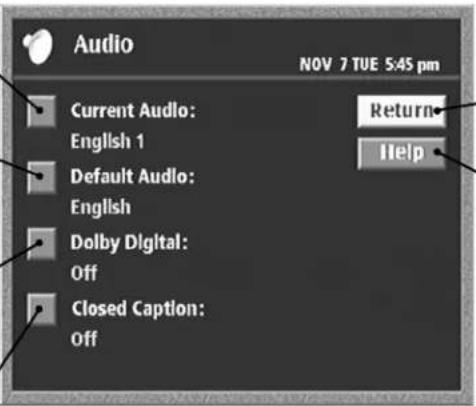
Return
Closes the Audio display to show the Main Menu.
Help
Shows information about the Audio display.
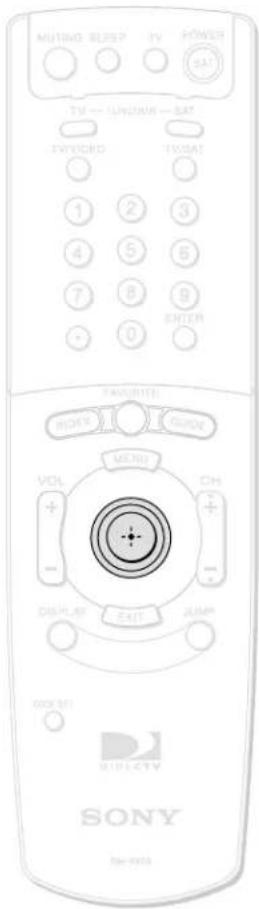
Changing the Current Audio
Use Current Audio to change the audio track of the current program (if available).
1 Highlight and select "Current Audio" from the Audio display (see page 80).
The Current Audio pop-up appears.
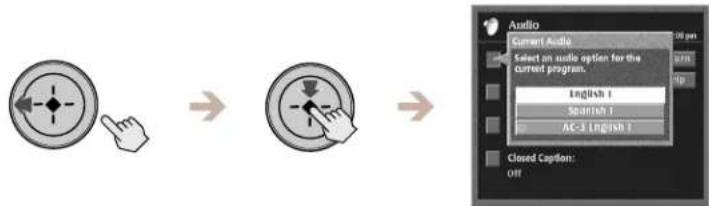
flowchart
graph LR
    A["Mouse Icon"] --> B["Arrow to Scale"]
    B --> C["Arrow to Scale"]
    C --> D["Audio Selection Panel"]
    D --> E["Select an audio option for the current program, English 1, Spanish 1, AC-3 English 1"]
    D --> F["Closed Caption: Off"]
2 Highlight and select the audio track you want to hear.
You will hear the audio track you selected.
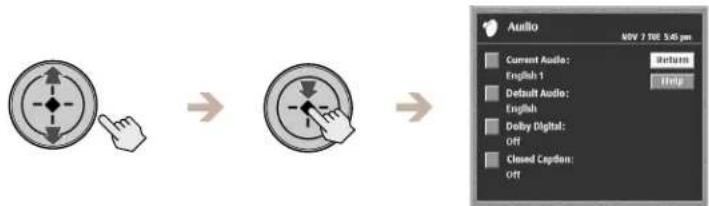
flowchart
graph LR
    A["Input Image"] --> B["Transformation"]
    B --> C["Output Audio"]
Changing the Default Audio
Use the Default Audio display to change the audio track for all satellite system and digital TV stations (if available).
1 Highlight and select "Default Audio" from the Audio display (see page 80).
The Default Audio pop-up appears.
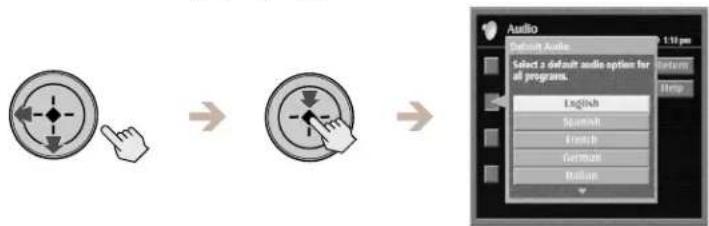
flowchart
graph LR
    A["User Icon"] --> B["Mouse Icon"]
    B --> C["User Icon with Clicker"]
    C --> D["User Icon with Mouse Icon"]
    D --> E["User Icon with Audio Options"]
2 Highlight and select the audio track you want to hear.
If the default audio track that you selected is available in a satellite system or digital TV program, you will hear that track.
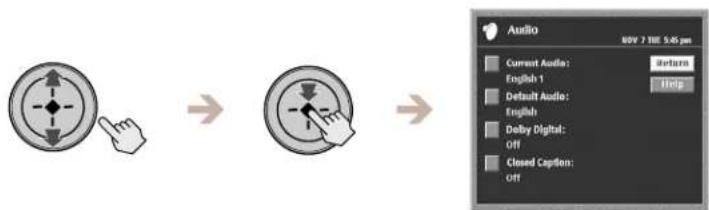
flowchart
graph LR
    A["Hand Clicker"] --> B["Clicker Pin"]
    B --> C["Audio Output"]
Setting Audio Options (AUDIO) (continued)
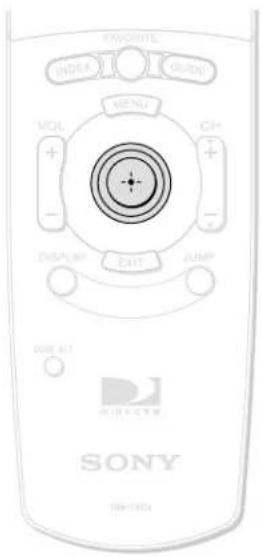
Setting Dolby Digital Options
You can enjoy Dolby Digital sound by connecting your Digital Satellite Receiver to a Dolby Digital audio receiver (see "Step 6: Connecting an Audio System" on page 14).
1 Highlight and select "Satellite Dolby Digital" from the Audio display (see page 80).
The Dolby Digital pop-up appears.
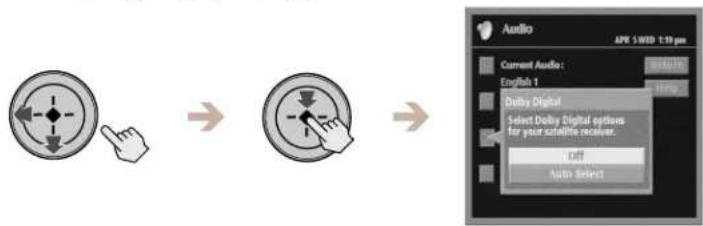
flowchart
graph LR
    A["Hand Click"] --> B["Dial Shift"]
    B --> C["Auto Select"]
2 Highlight and select "Auto Select" if your Digital Satellite Receiver is connected to a Dolby Digital audio receiver.
If Dolby Digital audio is available and your Digital Satellite Receiver is connected to a Dolby Digital audio receiver, you will hear Dolby Digital sound.
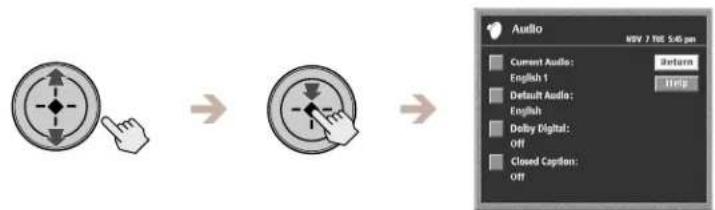
flowchart
graph LR
    A["Directional Shift"] --> B["Navigation Icon"]
    B --> C["Actuator Icon"]
    C --> D["Audio Level: Current Audio: English 1 Default Audio: English Dolby Digital: Off Closed Caption: Off"]
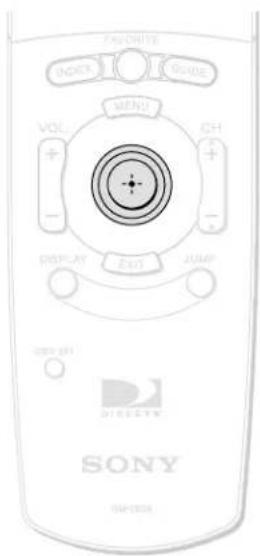
Setting Closed Captioning
Your Digital Satellite Receiver can display the closed captioning or text of programs.
1 Highlight and select "Closed Caption" from the Audio display (see page 80).
The Closed Caption pop-up appears.
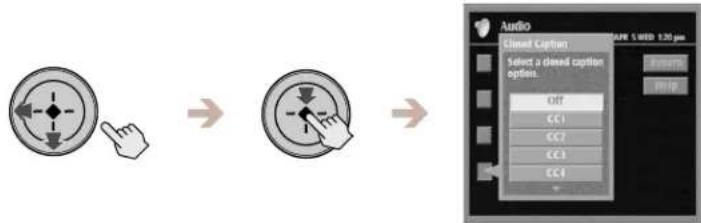
flowchart
graph LR
    A["Hand icon"] --> B["Arrow pointing to button"]
    B --> C["Arrow pointing to button with cursor"]
    C --> D["Arrow pointing to button with cursor"]
    D --> E["Audio Panel with Open/USB settings: 1.20 µm"]
    style A fill:#fff,stroke:#333
    style B fill:#fff,stroke:#333
    style C fill:#fff,stroke:#333
    style D fill:#fff,stroke:#333
    style E fill:#fff,stroke:#333
2 Highlight and select the closed captioning or text option you want to view.
If the closed captioning or text option that you selected is available for the program you are viewing, you will see the closed captioning or text.
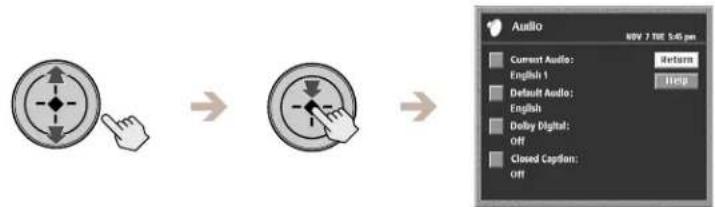
flowchart
graph LR
    A["Hand Click"] --> B["Click Button"]
    B --> C["Audio Level"]
Note
Program providers make closed captioning and text features available for many, but not all, programs.

Tip
You may choose to use your TV's closed caption feature instead of your Digital Satellite Receiver closed caption feature.
Front Panel
![SONY POWER OUTPUT SELECT GUIDE 1 2 3 DIGITAL TW/SATE LITE RECEIVER 6ATHD-30 OUTPUT SELECT GUIDE DIGITAL POWER TV SAT TIMER DEC DT [input] PIM AM PM 5 MENU 4 6](/content/2026/06/1198821/images/e7e99b0323f87a9a57c172071b899f0ddc9f5251a4cb3864e75e1bee0e555d2d.jpg)
1 POWER Button
Turns your Digital Satellite Receiver on and off.
2 Display Window
Displays information about your Digital Satellite Receiver.
3 Arrow and + Buttons
The arrow buttons move the highlight in the on-screen displays. The + button selects the highlighted item.
4 MENU Button
Opens the Main Menu.
5 GUIDE Button
Opens the Program Guide.
6 OUTPUT SELECT button
Changes the video output of your Digital Satellite Receiver. The available settings are:
• Video 1/2, VHF/UHF 480i
- Video 3 480i
- Video 3 variable
- Video 3 1080i
• VGA 1080i
Display Window
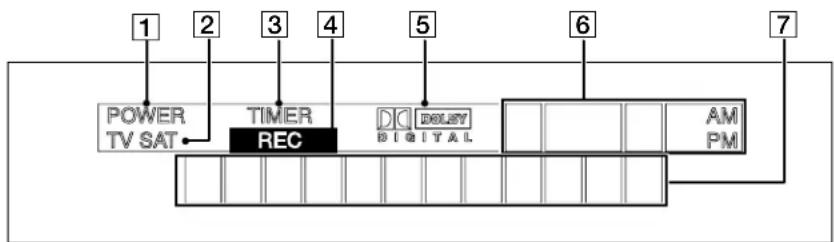
flowchart
graph TD
    A["POWER TV SAT"] --> B["TIMER REC"]
    B --> C["DC DIGITAL"]
    C --> D["AM/PM"]
    D --> E["7"]
    style A fill:#f9f,stroke:#333
    style B fill:#ccf,stroke:#333
    style C fill:#cfc,stroke:#333
    style D fill:#fcc,stroke:#333
    style E fill:#ffc,stroke:#333
1 Power indicator
Shows that the Digital Satellite Receiver is on.
2 TV/SAT indicator
The TV indicator shows that signals from the VHF/UHF IN jack are being output from the VHF(SAT)/UHF OUT jack. The SAT indicator shows that signals from all three inputs are being output from the VHF(SAT)/UHF jack. Use the TV/SAT button on the remote control to change the output.
3 TIMER indicator
Shows that a Timer event is scheduled.
4 TIMER REC indicator
Shows that a Timer& Rec event is scheduled.
5 Dolby Digital Indicator
Shows that Dolby Digital audio signals are available.
6Clock Display
Shows time information. The time is automatically set by your service provider if you receive satellite signals.
7 Channel Number/Station Name Display
Shows channel number and station name information. Shows the OUTPUT SELECT status. Shows the antenna signal strength level. Shows the status of Timer and Timer & Rec events. It may also display song, artist, and other information from certain satellite music channels.
Back Panel
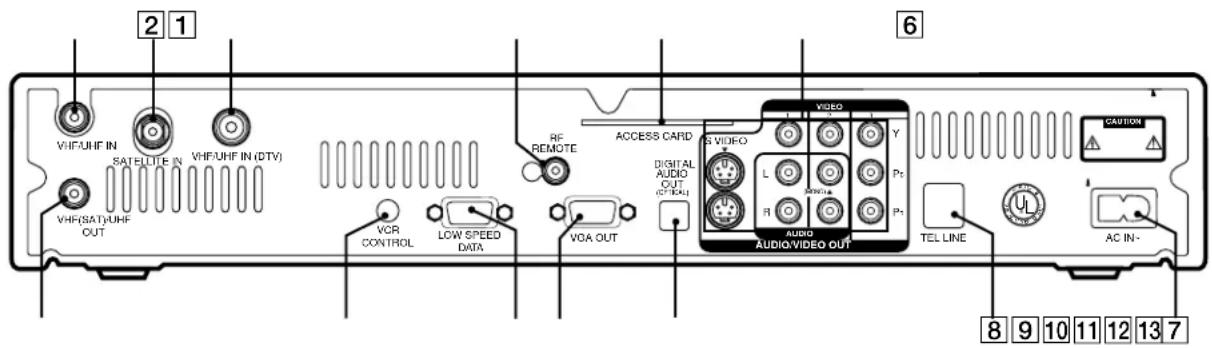
1 VHF/UHF IN jack
Inputs analog non-satellite signals from your TV antenna or cable TV connection. Some antennas require an adapter (not supplied).
② SATELLITE IN jack
Inputs satellite signals from your Satellite Dish Antenna using RG-6 coaxial cable.
③ VHF/UHF IN (DTV) jack
Inputs digital non-satellite signals from your TV antenna. Some antennas require an adapter (not supplied).
4 RF REMOTE jack
Inputs remote control signals using the RF Antenna.
5 ACCESS CARD slot
After you have inserted the Access Card, do not remove the Access Card unless instructed to do so by your service provider.
6 AUDIO/VIDEO OUTPUT jacks
Output audio and video signals to your TV, digital monitor, or other audio/video equipment using A/V, S-Video and/or Y/PB/PR cables.
7 AC IN jack
Inputs AC power from a power outlet using the AC Power Cord.
8 TEL LINE jack
Connects the Digital Satellite Receiver to a telephone outlet using a telephone line cable.
9 DIGITAL AUDIO OUT (OPTICAL) jack
Outputs digital audio signals to the digital optical input of your audio receiver.
10 VGA OUT jack
Outputs digital video signals to your TV or digital monitor using a VGA cable.
11 LOW SPEED DATA jack
Can be used to connect your Digital Satellite Receiver to certain products such as Personal Video Recorders.
12 VCR CONTROL jack
Allows the VCR Controller to control a VCR. Also allows connection of a monaural cable for use with Sony SmartFile VCRs.
13 VHF(SAT)/UHF OUT jack
Outputs audio and video signals to the VHF/UHF input on your TV or VCR using coaxial (RF) cable. The TV/SAT button on your remote control can change the output from the VHF/UHF IN jack to the VHF/UHF IN, SATELLITE IN and VHF/UHF(DTV) jacks.
Specifications
Input Jacks Cable Type
VHF/UHF IN 75 ohm f-type
SATELLITE IN 75 ohm f-type
VHF/UHF IN (DTV) 75 ohm f-type
RF REMOTE Supplied RF Antenna
AC IN (120 V, 60 Hz) Supplied AC Power
Cord
Output Jacks Cable Type
VHF (SAT)/UHF OUT 75 ohm f-type
VGA OUT VGA cable
VCR CONTROL Supplied VCR
Controller (or
monaural cable for
Sony SmartFile VCRs)
LOW SPEED DATA 9-pin D-Sub Female
DIGITAL AUDIO OUT
Optical Rectangular
(OPTICAL)
Supplied Accessories
Remote Control RM-Y808
Size AA Batteries (2)
Access Card
Audio/Video Cable
Y/PB/PR Cable
S-Video Cable
Coaxial (RF) Cable
Telephone Line Cord
AC Power Cord (1)
VCR Controller (1)
S-Video Cable
RF Antenna
Optional Sony-brand Digital Satellite Receiver Accessories
Satellite Antenna
SAN-18D3
Satellite Antenna
SAN-24MD1
Local TV Antenna
ANJ-AA1
Installation Kit
ANJ-DS2
Amplifier
EAC-DA1
Diplexer
EAC-DD1
Voltage Switch
EAC-DV2
RF Universal Remote Commander™ Remote Control RM-Y802
Design and specifications are subject to change without notice.
Troubleshooting
Problem What you can do
| Poor picture quality or no picture | ·If you are receiving only a few satellite stations (only 2 or 3 channels for example), call your service provider to have your programming activated.·Some pay per view programs may be protected by Macrovision copy protection at the discretion of the copyright owner. You may want to connect the Digital Satellite Receiver directly to your TV.·Check the connections to your TV and other equipment (see pages 7–15).·Make sure that the Output Select setting is the correct setting for the connection to your TV or digital monitor (see pages 11 and 63).·Make sure that your TV and other equipment are set to the input source to which you connected your Digital Satellite Receiver, for example, channel 3 or 4, Video 1 or 2 (see pages 9–14).·Check the signal strength of the Satellite Dish Antenna or Digital TV Antenna (see page 27). If needed, adjust the antenna as recommended by the antenna installation instructions.·Make sure the RG-6 coaxial cable is properly connected to the Satellite Dish Antenna.·If the cable distance between the Satellite Dish Antenna and the Digital Satellite Receiver is more than 100 feet, you must use the Sony Amplifier EAC-DA1.·Make sure your Access Card is inserted correctly (see page 15).·Move any antenna cables that may be directly above your Digital Satellite Receiver.·If you connect your Digital Satellite Receiver to your TV with a coaxial cable, make sure the RF Output of your Digital Satellite Receiver (see page 61) and the RF input of your TV are both set to either channel 3 or channel 4. |
| Analog TV stations or Digital TV stations are not available | ·Use the Auto Program feature in the Non-Satellite Setup menu to add available stations (see page 38). |
| Poor picture quality or no picture when it rains or snows | ·Heavy rain or snow may degrade the strength of the signal coming from the satellite to your Satellite Dish Antenna. To limit any negative effects during degraded conditions, make sure that your professional installer has aimed your Satellite Dish Antenna so that you are receiving a high signal strength level (see page 27, or refer to your Satellite Dish Antenna Installation Instructions). |
| You cannot turn on the unit | ·Make sure that the AC Power Cord is plugged in (see page 15).·If the AC Power Cord is plugged in, unplug the AC Power Cord, wait a few minutes, then plug in the AC Power Cord again. |
| You cannot access a program | ·Make sure you subscribe to the station you are trying to access. Your service provider can tell you to which stations you subscribe.·Make sure the station you are trying to access is not set to be skipped (see pages 58–59).·Make sure the system is not locked (see page 71).·Use the Program Guide to access the station (see page 45).·Press the SAT FUNCTION button on the remote control before you select a channel (see page 24). |
continued
Troubleshooting (continued)
| Problem What you can do | |
| You cannot order a pay per view program | Make sure your Digital Satellite Receiver is connected to a telephone line (see page 15).Make sure the system is not locked (see page 71).Use the Program Guide to access the station (see page 45).If the message “Purchase information not available” appears, you must contact your service provider to order the program.Your Access Card may be full. If so, contact your service provider.It may be too late to order the program you want. If so, check for other show times (see page 53). |
| You cannot find the station of the pay per view program that you ordered | See “Checking Your Purchases” on page 74 to get information (station, start time, etc.) about programs that you have ordered. |
| You cannot cancel a pay per view order | You cannot cancel pay per view orders that you have watched. Contact your service provider for details. |
| The program highlighted in the Program Guide does not appear | Highlight and select the program. Although the program you highlight appears in the Media Window, you must press the + button to complete your selection (see page 45). |
| You cannot see any Favorite Stations | Set up your personal Favorite Titles before you try to use the Favorite Stations guide (see page 49). |
| Language of audio track is incorrect or audio track is not available | Check the default language setting. The program provider may not broadcast all of the languages in the Default Audio pop-up (see page 80).Some programs may not offer audio tracks. |
| Picture is too small or distorted | Select another Output Select setting (see pages 11 and 63). |
| You cannot see all of the picture or the picture does not fill the screen | Change the Aspect Ratio or Screen Format settings (see page 62). |
| You cannot record programs with your VCR | Make sure that your VCR is connected correctly (see page 12).Make sure the Output Select setting is “Video 1/2, VHF/UHF 480i” (see page 11).Make sure that your Digital Satellite Receiver’s clock is set to the correct time if you do not receive satellite programming.If you want to use the VCR Control feature, make sure that the VCR Controller is connected correctly (see page 13). Also make sure that you have selected the correct VCR Manufacturer Code (see page 31).If you are using the VCR Control feature to record a future program, make sure that your VCR is turned off before the program begins. The VCR Control feature will turn on the VCR and start recording.Make sure that the program you are trying to record doesn't conflict with any Locks & Limits you have set.If you are trying to record a pay per view program, you must first order the program (see page 53).Some pay per view programs may be protected by Macrovision copy protection at the discretion of the copyright owner. If so, it may not be possible to record these programs. |
Problem What you can do
| Access Card problems | Make sure your Access Card is inserted correctly (see page 15).Contact your service provider with any other Access Card problems. |
| Remote control does not work | Make sure that the batteries are inserted correctly and that the batteries are not weak (see page 16).Remove and then reinsert the batteries without pressing any buttons on the remote control.To operate your TV or other equipment, make sure that the remote control is set up to operate that equipment (see page 19). If the batteries are removed or become weak, you may need to set up the remote control to operate other equipment again.Press the FUNCTION button on the remote control of the equipment you want to operate (SAT or TV). These buttons will flash to show which equipment the remote control is set to operate.If there is a problem when using the RF function, check that the RF Antenna is connected correctly (see page 14).Make sure that the remote control and the Digital Satellite Receiver are both using the same security code (see page 36). |
| Audio noise | If you connect the DIGITAL OUT jack to equipment that is not Dolby Digital compatible, set the Dolby Digital option to “off” (see page 80). Not all optical jacks on audio systems are Dolby Digital compatible. |
| “Frozen” picture or display | Press both the GUIDE and ARROW DOWN buttons at the same time on the front panel of the Digital Satellite Receiver to reset the receiver. |
| Locks & Limits feature not working properly | Make sure that the Spending, Rating, Pay Per View, and Stations Blocked are set as you want them (see pages 65–69). Then, make sure that the system is locked (see page 70). |
| You cannot access the Locks & Limits screens | The system must be unlocked before you can make changes to the Locks & Limits (see page 71). |
| You cannot unlock the system | Make sure that you entered the passcode correctly. If you forget your passcode, see “Lost Passcode” below. |
| Lost Passcode | If you forget the passcode that you used to lock your Digital Satellite Receiver, contact your service provider for assistance. If you do not receive satellite service, enter the master passcode, 4357, to unlock the TV Locks & Limits. |
FCC Regulations and Information
Your Digital Satellite Receiver has been registered by the Federal Communication Commission (FCC) as not being harmful to the telephone network when connected directly to the telephone lines. In order to fully comply with the Rules of the FCC, the following instructions should be read carefully and followed completely where applicable:
1 The Federal Communication Commission (FCC) has established Rules which permit this device to be directly connected to the telephone network. Standardized jacks are used for these connections. This equipment should not be used on party lines or coin phones.
2 If this device is malfunctioning, it may also be causing harm to the telephone network; this device should be disconnected until the source of the problem can be determined and until repair has been made. If this is not done, the telephone company may temporarily disconnect service.
3 The telephone company may make changes in its technical operations and procedures; if such changes affect the compatibility or use of this device, the telephone company is required to give adequate notice of the changes. You will be advised of your right to file a complaint with the FCC.
4 If the telephone company requests information on what equipment is connected to their lines, inform them of:
a. The telephone number to which this unit is connected.
b. The ringer equivalence number.
c. The USOC jack required.
d. The FCC Registration Number.
5 Items (b) and (d) are indicated on the label. The Ringer Equivalence Number (REN) is used to determine how many devices can be connected to your telephone line. In most areas, the sum of the RENs of all devices on any one line should not exceed five (5). If too many devices are attached, they may not ring properly.
Service Requirements
In the event of equipment malfunction, all repairs should be performed by our Company or an authorized agent. It is the responsibility of users requiring service to report the need for service to our company or to one of our authorized agents.
For service, call 1-800-838-7669.
Declaration of Conformity
Trade Name: Sony
Model No.: SAT-HD100
Responsible Party: Sony Electronics Inc.
Address: 1 Sony Drive, Park Ridge, NJ. 07656 USA
Telephone No.: 201-930-6972
This device complies with Part 15 of the FCC rules. Operation is subject to the following two conditions: (1) This device may not cause harmful interference, and (2) this device must accept any interference received, including interference that may cause undesired operation.
Radio Interference Information
This equipment has been tested and found to comply with the limits for a Class B digital device, pursuant to Part 15 of the FCC Rules. These limits are designed to provide reasonable protection against harmful interference in a residential installation. This equipment generates, uses and can radiate radio frequency energy and, if not installed and used in accordance with the instructions, may cause harmful interference to radio communications. However, there is no guarantee that interference will not occur in a particular installation. If this equipment does cause interference to radio or television reception (which you can determine by turning the equipment off and on), you are encouraged to try to correct the interference by one or more of the following measures:
- Reorient or relocate the receiving antenna (the antenna for radio or television that is receiving the interference)
- Change the position of the Digital Satellite Receiver with respect to the radio or television equipment that is receiving the interference
- Move the Digital Satellite Receiver away from the equipment that is receiving the interference
- Plug the Digital Satellite Receiver into a different outlet so that the Digital Satellite Receiver and the equipment receiving the interference are on different branch circuits
Shielded cables and I/O cords must be used for this equipment to comply with the relevant FCC regulations. Changes or modifications not expressly approved in writing by Sony Electronics, Inc., void the user's authority to operate this equipment.
If these measures do not eliminate the interference, you should consult your Digital Satellite Receiver dealer or an experienced radio/television technician for additional suggestions. In addition, you may find the following booklet prepared by the Federal Communications Commission helpful: "How to Identify and Resolve Radio-TV Interference Problems." This booklet is available from the U.S. Government Printing Office, Washington, D.C., 20402 Stock No. 004-000-00345-4.
Limited Warranty
Digital Satellite Receivers
SONY ELECTRONICS INC. ("SONY") warrants this Product against defects in material or workmanship as follows:
- Labor: For a period of 90 days from the original date of purchase, if the Product is determined to be defective, SONY will repair or replace the Product at no charge. After this 90 day period, you must pay for all labor charges.
- Parts: For a period of one year from the original date of purchase, SONY will supply, at no charge, new or rebuilt replacements in exchange for defective parts. Any replacements will be warranted for the longer of the remainder of the original warranty period or 90 days from the installation of the parts by a SONY authorized DIRECTV System installer or facility.
To obtain warranty service:
- If the Product was installed by a SONY authorized DIRECTV System installer, contact that installer for instructions.
- If the Product was not installed by a SONY authorized DIRECTV System installer, you must take the Product or deliver the Product in either its original packaging or packaging affording an equal degree of protection (with freight prepaid), to a SONY authorized DIRECTV System service facility. To locate the closest such facility, please call the telephone number listed below.
This warranty does not cover customer instruction, installation, set up adjustments or signal reception problems. This warranty does not cover cosmetic damage or damage due to acts of God, accident, misuse, abuse, negligence, commercial use, or modification of, or to any part of the Product. This warranty does not cover improper installation (if not installed by a SONY authorized DIRECTV System installer), loss of use of the Product, or wasted programming charges due to Product malfunction. This warranty does not cover damage due to improper operation or maintenance, connection to improper voltage supply, or attempted repair by anyone other than a facility authorized by SONY to service the Product. This warranty does not cover Products sold AS IS or WITH ALL FAULTS. This warranty is valid only in the United States. Proof of purchase in the form of a bill of sale or receipt invoice which is evidence that the Product is within the Warranty period must be presented to obtain warranty service.
REPAIR OR REPLACEMENT AS PROVIDED UNDER THIS WARRANTY IS THE EXCLUSIVE REMEDY OF THE CONSUMER. SONY SHALL NOT BE LIABLE FOR ANY INCIDENTAL OR CONSEQUENTIAL DAMAGES FOR BREACH OF ANY EXPRESS OR IMPLIED WARRANTY ON THIS PRODUCT. IN NO EVENT SHALL SONY BE LIABLE FOR ANY INCIDENTAL OR CONSEQUENTIAL DAMAGES WHATSOEVER ARISING OUT OF THE USE OR INABILITY TO USE THE PRODUCT. UNDER NO CIRCUMSTANCES SHALL. SONY'S LIABILITY, IF ANY, EXCEED THE PURCHASE PRICE PAID FOR THE PRODUCT. EXCEPT TO THE EXTENT PROHIBITED BY APPLICABLE LAW, ANY IMPLIED WARRANTY OF MERCHANTABILITY OR FITNESS FOR A PARTICULAR PURPOSE ON THIS PRODUCT IS LIMITED IN DURATION TO THE DURATION OF THIS WARRANTY.
This warranty is invalid if the factory applied serial number has been altered or removed from the Product. Some states do not allow the exclusion or limitation of incidental or consequential damages, or allow limitations on how long an implied warranty lasts, so the above limitations or exclusions may not apply to you. In addition, if you enter into a service contract with the SONY Partnership within 90 days of the date of sale, the limitation on how long an implied warranty lasts does not apply to you. This warranty gives you specific legal rights, and you may have other rights which vary from state to state.
For your convenience, SONY ELECTRONICS INC. has established telephone numbers for frequently asked questions:
For assistance with installation, contact the dealer from whom you purchased your Digital Satellite Receiver.
For product information or operation, for service assistance or for resolution of a service problem, call:
SONY SATELLITE SYSTEM INFORMATION CENTER 1-800-838-SONY (7669)
For an accessory or part not available from your authorized dealer, call:
1-800-488-SONY (7669)
About Sony Customer Support
Every DIRECTV System manufactured by Sony comes with Sony's Express Support at no charge to you. In the event of a system failure, our Express Support Program can have a replacement receiver on its way to you via overnight Federal Express (for calls Monday-Friday until 7:30 pm Eastern Time; Saturday delivery depends upon zip code). All it takes is a valid credit card to cover a security deposit, and Sony will pay freight in both directions. Our Express Support continues with our 800 number, staffed by dedicated technical representatives who can answer questions on dealer locations, system operation, installation, hookup, accessories, and how to get the most out of your home entertainment system. Sony's Express Support program: another expression of our commitment to excellence in customer service.
Software License Agreement
License and Restrictions
Sony Electronics Inc. ("Sony") grants User a license to Use one copy of the software which is provided to you as part of this Sony product ("Software"). "Use" means storing, loading, installing, executing or displaying the Software. User may not copy, modify the Software or disable any licensing or control features of the Software. No portion of the Software may be reproduced in any form, or by any means, without prior written permission from Sony. User is not permitted to modify, distribute, publish, transmit or create derivative works of any Software included for any public or commercial purposes. In consideration of this authorization, User agrees that any copy of this Software which User makes shall retain all copyright and other proprietary notices in the same form and manner as on the original. Except as specified above, nothing contained herein shall be construed as conferring by implication, estoppel or otherwise any license or right under any patent, trademark or copyright of Sony, its affiliates or any third party licensor. User may not in any way sell, lease, rent, license, sublicense or otherwise distribute the Software. The Software may only be accessed by the functionality of the Sony product in which the Software is incorporated by Sony (the "Product(s)"), and a User shall not intentionally make the Software directly accessible to others or to hardware other than the Products, or otherwise expose an API. Nothing in this Agreement grants User any rights, license or interest with respect to source code of the Software. User shall not modify, translate, reverse engineer, decompile or disassemble the Software or any part thereof or otherwise attempt to derive source code or create derivative works therefrom, and shall not authorize any third party to do any of the foregoing unless Sony's prior written consent is obtained. Sony may elect to provide to User updates and other support services for the licensed Software. All updates provided to User shall constitute licensed Software under this License, and such updates shall be governed by the terms hereof.
Intellectual Property
The Software is owned and copyrighted by Sony, its affiliates or its third party licensors. User's license confers no title or ownership in the Software and is not a sale of any rights in the Software. Sony's affiliates and/or third party suppliers may protect their rights directly in the event of any User's violation of this Agreement. The trademarks, tradenames, Product designation, logos and service marks ("Marks") displayed with this Software are the property of Sony, its affiliates or third party licensors, and User shall acquire no rights of any kind in or to any Mark under which the Software and/or Products are marketed. User is not permitted to use these Marks without the prior written consent of Sony, its affiliates or the applicable third party licensor which may own the Mark. "Sony" is a registered trademark of Sony Corporation. User agrees not to remove, alter or destroy any patent, trademark or copyright markings or notices placed upon or contained within the Software, User Manuals or documentation. User further agrees to insert and maintain with the Software and any documentation a copyright notice in User's name.
Termination
User's license will automatically terminate upon any transfer of the Product. Upon transfer, User must deliver the Software, including any copies and related documentation, to the transferee. The transferee must accept these License Terms as a condition to the transfer. Otherwise, Sony does not authorize the transfer and the User and transferee will be in violation of this Agreement should the transferee use the Product. This license will automatically terminate upon User's failure to comply with any of these License Terms. Upon termination, User must stop using the Product and immediately destroy the Software, together with all copies, adaptations and merged portions in any form and/or return it to Sony.
Export Requirements and U.S. Government Restricted Rights
User may not export or re-export the Software or any copy or adaptation in violation of any applicable laws or regulations. The Software and documentation have been developed entirely at private expense and are provided as "Commercial Computer Software – Restricted Rights" in accordance with FAR 52.227-19 (1987) or limited rights in technical data in accordance with FAR 52.227-14 (1987). User has only those rights provided for such Software and documentation by the applicable FAR or DFARS clause or this Sony Software License Agreement.
Limited Warranty
Sony warrants to User that the Software will not fail to execute its programming instructions due to defects in material and workmanship for a period equal to the warranty period provided for the Product when properly installed and used. Warranty does not apply to defects resulting from (a) improper or inadequate maintenance, (b) software, interfacing, parts or supplies not supplied by Sony, (c) unauthorized modification of the Software or the Product, or (d) improper site preparation or maintenance. If Sony receives notice of a covered defect(s) during the warranty period, Sony will replace Software that does not execute its programming instructions due to such defect(s). Sony does not warrant that the operation of the Software and/or Product will be uninterrupted or error free. If Sony is unable, within a reasonable time, to repair or replace any Software to a condition as warranted, User shall be entitled to a refund of the purchase price upon prompt return of the Product. EXCEPT AS SPECIFICALLY STATED ABOVE, THE SOFTWARE IS PROVIDED "AS IS" WITHOUT WARRANTY AND SONY, IT S AFFILIATES AND ITS THIRD PARTY LICENSORS DISCLAIM ANY IMPLIED WARRANTY OF NONINFRINGEMENT, MERCHANTABILITY OR FITNESS FOR A PARTICULAR PURPOSE. THE REMEDIES IN THIS WARRANTY STATEMENT ARE USER'S SOLE AND EXCLUSIVE REMEDIES. EXCEPT AS INDICATED ABOVE, IN NO EVENT WILL SONY, ITS AFFILIATES OR ANY OF ITS THIRD PARTY LICENSORS BE LIABLE FOR LOSS OF DATA OR FOR DIRECT, INDIRECT, SPECIAL, INCIDENTAL, CONSEQUENTIAL (INCLUDING LOST PROFIT), EXEMPLARY, OR OTHER DAMAGE, WHETHER BASED IN CONTRACT, TORT, OR OTHERWISE, EVEN IF SUCH PARTY HAS BEEN ADVISED OF THE POSSIBILITY OF SUCH DAMAGES. IN NO EVENT WILL SONY OR ANY OF ITS AFFILIATES OR THIRD PARTY LICENSOR'S LIABILITY UNDER AGREEMENT, WHETHER IN CONTRACT, TORT OR OTHERWISE, EXCEED THE COST OF THE PRODUCT.
General
This Agreement shall be deemed to have been made and executed in the State of California and both parties agree that any dispute arising hereunder related to this Agreement or the Product will be governed by laws of the State of California, exclusive of its conflicts of law principles and that the courts in the County of San Diego, California will have exclusive jurisdiction over all such disputes. FURTHER THE PARTIES HEREBY WAIVE TRIAL BY JURY IN CONNECTION WITH ANY ACTION OR SUIT ARISING UNDER THIS AGREEMENT OR OTHERWISE ARISING FROM THE RELATIONSHIP BETWEEN THE PARTIES HERETO. This Agreement shall be binding upon the parties' authorized successor and assignees. Neither party's waiver of any breach or failure to enforce any of the provisions of this Agreement at any time shall in any way affect, limit or waive such party's right thereafter to enforce and compel strict compliance with every other provision. No modification of this Agreement shall be effective unless in writing signed by both parties.
Index
A
AC Power Cord, connecting, 15
Access Card, inserting, 15
replacing, 34
slot, 15, 85
Adding Stations, 40
Adjusting the on-screen displays, 55–57
Alert. See Timer & Rec.
Alpha List, 44
AMP VOL button, 18
AMP INPUT button, 18
Analog TV set, connecting, 9
Analog TV stations, setting up, 39
Antenna. See RF antenna, Satellite Dish Antenna, and Local TV antenna.
Arrow buttons, on front panel, 84
Aspect Ratio, setting, 61
Audio, display, 80 track, 80, 81
AUTO skip feature, 58
Auto Title Insert, 32
AV3/AV2/DVD/AMP switch, 18
Azimuth, 29
B
Back panel, 85
Batteries, inserting into remote control, 16
Blocking, pay per view, 68 stations, 69
Broadcast signals, 4, 22
C
Carton contents, 6
Category Guide, 43, 46
CH (channel) +/- button, 18
Clock setting, 42
Closed caption, 83 setting, 83
CODE SET button, 17, 19
Codes, Manufacturer, 20–21
RF security, 36
VCR Manufacturer, 31
Color, setting, 56
Connecting, AC power cord, 15
Analog TV set, 9
antennas, 8
audio system, 14
cable company service, 8
digital monitor, 10
RF Antenna, 14
Sony SmartFile VCR, 13
Telephone line, 15
VCR, 12
VCR Controller, 13
Connection overview, 7
Controls, location and function, 84
Custom stations, 58
Customer support, 2
Customizing the Favorite Stations guide, 49
D
Data services, 60
Delimiter button. See Dot button.
DIGITAL AUDIO OUT (OPTICAL) jack, 14, 85
Digital monitor, connecting, 10
Digital TV stations, setting up, 39
DIRECTV Locks & Limits, 65 pop-up, 72
DISPLAY button, 17
Display options, 55
Display, changing the colors, 56
Dolby Digital, 14, 80
Dot button, 17
DVD MENU button, 18
DVD Control buttons, 18
E
Editing Favorite Stations, 49
Favorite Titles, 50
Station names, 41
Timer & Rec events, 77
Elevation, 29
ENTER button, 18
EXIT button, 18
F
FAVORITE button, 18, 48
Favorite Stations guide, 48
changing a Favorite Title, 50 setting up, 48
FCC Regulations, 90
Features, 4
Front panel controls, 84
FUNCTION buttons, 18
G
GUIDE button, 18, 45
Guides Menu, 43
Guides, using, 43
H
Highlight and Select, 16
continued
Index (continued)
|
INDEX button, 17, 47
Information Area, 45
Input source, 9, 23
IR remote control reception 19, 35
J
Joystick, 16, 17
JUMP button, 18
L
Languages, 80
Limited Warranty, 91
List Area, 45
Local TV antenna, connecting, 8
Locking your receiver, 65, 70
Locks and limits, 65
DIRECTV, 65
display, 65–66
locking, 70
TV, 65
unlocking, 71
LOW SPEED DATA jack, 85
M
Macrovision copy-protection, 2
Mail. See Messages.
Manufacturer codes, 20–21
Media Window, 45
MENU button, 17, 25, 84
Messages, 73
MUTING button, 17
N
Non-Satellite stations, setting up, 38
0
One Button Timer & Rec, 76
Other Guides, 51
Output Select, setting, 11
button, 11, 18
P
Passcode, setting, 70
Pay per view, cancelling programs, 74
blocking, 68
purchasing programs, 53
POWER buttons, 18, 23
Preferences Display, 54
Problems, troubleshooting, 87
Program Data Download, 13
Program Guide, 45
Purchases display, 74
R
Rating limit, setting, 68
Recording programs, 75 with Timer, 75–79
Reminder. See Timer & Rec.
Remote control, buttons and functions, 17–18 manufacturer codes, 20–21
setting IR and RF, 35
setting up, 19
RF Antenna, connecting, 14
RF Output, setting, 61
RF remote control reception, 19, 35
RF REMOTE jack, 85
RF security code, setting, 35
S
Satellite Dish Antenna, connecting, 8 setting, 27
SATELLITE IN jack, 8, 85
Security code. See RF security code and Passcode.
Setting up, the receiver, 26, 42 the remote control, 19
Signal Seeker 27
Signal Strength meter, 27
Signals, receiving, 4
Skipping stations, 58
SLEEP button, 17
Software License Agreement, 92
Specifications, 86
Spending limit, 67
Station and program information order, 57
Station Index, 47
Stations Blocked, setting, 69
Subchannel button. See Dot button.
Surf setting, 57
S-VIDEO jack, 9, 10, 12
System Menu, 26
System test, performing, 33
T
Testing the system, 33
Tilt, 27
Timer & Rec, checking and editing, 79 display, 77
setting up, 77
Timer events, 76–79
Transponder, 27
Troubleshooting, 87
TV Properties, adjusting, 61
TV, connecting, 9, 10, 12
Locks & Limits, 65
TV/SAT button, 18
TV/VCR button, 18
TV/VIDEO button, 17
U
Unlocking your receiver, 71
V
VCR Control feature, 13, 30
VCR CONTROL jack, 13, 85
VCR Controller, connecting, 13
VCR, connecting, 12
Viewing satellite pictures, 23
VOL (volume) +/- button, 17
W
Warranty. See Limited Warranty.
Z
Zip code, for setting antenna, 29
Contact Sony with questions about your
Digital Satellite Receiver:
1-800-838-SONY (7669)
Sony online
www.sony.com
Printed in U.S.A.
Contact DIRECTV with questions about
service or programming:
1-800-DIRECTV (347-3288)
www.DIRECTV.com
www.sony.com/support
- HDTV Receiver DIRECTV Digital Satellite Receiver
- WARNING
- Note to the CATV Installer
- Note to the Satellite Dish Antenna Installer
- Attention
- Telephone Line Interruption
- Local Programming
- High Definition Programming
- Note on Recording Programming
- Sony Software License Agreement
- Owner's Record
- Customer Support
- For Programming
- For Hardware and Installation
- Trademark, Copyright, and License Information
- Macrovision Information
- StarSight Licensed
- About These Operating Instructions
- Getting to Know Your Digital Satellite Receiver
- Features
- Convenience and Ease-of-Use
- Excellent Performance
- Easy to Customize
- Receiving Signals
- Table of Contents
- Connecting Your Digital Satellite Receiver
- Using Your Remote Control
- Viewing Pictures From Your Digital Satellite Receiver
- Using the On-Screen Displays
- Other Information
- Carton Contents
- Note
- Setup and Connections
- VHF/UHF Jacks and Coaxial (RF) Cable
- SATELLITE IN Jack and RG-6 Coaxial Cable
- Audio/Video Jacks and Audio/Video Cables (RCA-type)
- S-VIDEO Jacks and S-VIDEO Cables
- DIGITAL AUDIO OUT (OPTICAL) Jack and Optical Cable
- Y/PB/PR Jacks and Y/PB/PR Cables
- VGA OUT Jack and VGA Cable
- LOW SPEED DATA Jack and RS232 Cable
- TEL LINE Jack and RJ-11 Telephone Cable
- Connection Overview
- Step 1: Connecting the Antennas or Cable TV
- ① If you have a local TV antenna or cable company service
- If you have a Satellite Dish Antenna
- CAUTION
- Tip
- Step 2: Connecting Your Analog TV Set or Digital Monitor
- Connecting Your Analog TV Set
- 1a If your TV does not have A/V input jacks
- 1c If your TV has an S-Video input jack
- Step 2: Connecting Your Analog TV Set or Digital Monitor (continued)
- Connecting Your Digital Monitor
- 1a Connect the
- AUDIO/VIDEO1 or AUDIO/VIDEO2 jacks
- 1b If your Digital TV has an S-Video input jack
- 2a If your Digital TV has Y/PB/PR input jacks
- 2b If your Digital TV has a VGA input jack
- Step 3: Selecting High or Standard Definition Output
- 1a Video 1/2, UHF/UHF 480i
- 1b Video 3 480i
- 1c Video 3 variable
- 1d Video 3 1080i
- 1e VGA 1080i
- Notes
- Tips
- Step 4: Connecting Your VCR
- 1a If your VCR does not have A/V jacks
- ● If your VCR has A/V jacks
- 1c If your VCR has S-Video jacks
- Step 5: Connecting the VCR Controller
- In front of the VCR
- Connecting a Sony SmartFile™ VCR
- Step 6: Connecting an Audio System
- 1a If you have a digital or Dolby® Digital audio system
- - If you have a stereo or Dolby Pro Logic® audio system
- Step 7: Connecting the RF Antenna
- ① If you want to use the RF feature
- Step 8: Connecting the Telephone Line and AC Power Cord
- Step 9: Inserting the Access Card
- Inserting the Batteries
- Selecting Items
- RM-Y808 Remote Control
- Understanding the Buttons
- MUTING button
- SLEEP button
- TV/VIDEO button
- (Dot) button
- INDEX button
- MENU button
- VOL (Volume) +/- button
- 8Joystick
- DISPLAY button
- CODE SET button
- POWER buttons
- Understanding the Buttons (continued)
- 12FUNCTION buttons
- TV/SAT button
- 140-9 and ENTER buttons
- 15FAVORITE button
- GUIDE button
- CH (Channel) +/- button
- EXIT button
- 19JUMP button
- 20TV/VCR button
- VCR/DVD Control buttons
- DVD MENU button
- DVD Control buttons
- OUTPUT SELECT button
- POWER button
- AMP INPUT button
- AV3/AV2/DVD/AMP switch
- AMP VOL (Amplifier Volume) +/- buttons
- Setting Up the Remote Control
- Find the code(s) for the manufacturer of the device you want to operate with this remote control.
- Press the CODE SET button.
- Press the 0–9 buttons to input the manufacturer code, then press the ENTER button.
- Test the remote control.
- Manufacturer Codes
- Television Features
- Analog Television Broadcast
- Satellite Television Broadcast
- Digital Television Broadcast
- Turning On the Power
- Press the POWER SAT button to turn on the Digital Satellite Receiver.
- Press the TV button to turn on the TV.
- Press the TV FUNCTION button, then select the TV's input source to which you connected the Digital Satellite Receiver.
- To make sure you are viewing satellite pictures
- Changing Channels
- 1
- Press the SAT FUNCTION button.
- 2
- Press the CH +/- buttons.
- Using the Main Menu
- Press the MENU button.
- Highlight and select the feature you want to access.
- SYSTEM (Page 26)
- TV Properties (Page 61)
- DIRECTV (Page 72)
- GUIDES (Page 43)
- TIMER & REC (Page 75)
- PREFERENCES (Page 54)
- AUDIO (Page 80)
- Closing the Main Menu
- Setting Up Your Digital Satellite Receiver (SYSTEM)
- Using the System Menu
- Press the MENU button, then highlight and select SYSTEM.
- Highlight and select the item you want to set up.
- Return
- Antenna
- VCR Control
- System Test
- Access Card
- Remote Control
- Non-Satellite
- Clock
- Setting Up the Satellite or Digital TV Antenna
- Highlight and select "Antenna".
- Antenna Type
- Transponder
- Antenna Location
- Azimuth, Elevation and Tilt
- Status
- Help
- Signal Strength Meter
- Signal Seeker™
- Setting Up Your Digital Satellite Receiver (SYSTEM) (continued)
- Selecting an Antenna
- Highlight and select "Antenna" from the Antenna display.
- Highlight and select either "DIRECTV" or "Digital TV" depending on which type of antenna you will check.
- If you selected "DIRECTV" in step 2, highlight and select the Satellite Dish Antenna type you have installed
- If you selected "Round" in step 3, highlight and select "On".
- Select "Return".
- Entering Your Antenna Location
- Highlight and select "Antenna Location" from the Antenna display.
- Select "Zip Code".
- Enter your Zip Code, then select "OK".
- Setting Up the VCR Control Feature
- Highlight and select "VCR Control".
- Manufacturer
- Auto Title Insert
- Setting the VCR Manufacturer Code
- Highlight and select "Manufacturer" from the VCR Control display (see page 30).
- Highlight and select the manufacturer of your VCR.
- Select a VCR manufacturer code from the list.
- Select "Yes" to perform a VCR test.
- Setting Up Auto Title Insert
- Highlight and select "Auto Title Insert" from the VCR Control display (see page 30).
- Select "On" or "Off".
- When the scheduled event begins
- Performing a System Test
- Highlight and select "System Test".
- Highlight and select "Test".
- Select "Return".
- Replacing Your Access Card
- Highlight and select "Access Card" from the System pop-up.
- Highlight and select "OK".
- Follow the instructions in each display to complete the replacement process.
- Selecting RF or IR Remote Control Reception
- Highlight and select "Remote Control".
- Remote Signal
- RF Security Control
- Highlight and select "Remote Signal".
- 4
- Highlight and select "RF".
- 5
- Highlight and select "Return".
- Setting the Security Code
- Highlight and select "RF Security Code" from the Remote Control display (see page 35).
- Select "Yes".
- Select a different security code.
- Press the CODE SET button on the remote control.
- Enter the three digit security code you selected for the receiver in step 3 above.
- Press the enter button.
- Select "OK" to save your changes.
- Setting Up Non-Satellite Stations
- Highlight and select "Non-Satellite".
- Auto Program
- Add/Skip Stations
- Edit Station Name
- Setting Up Analog TV Stations and Digital TV Stations
- Highlight and select "Auto Program" from the Non-Satellite Setup display (see page 38).
- Highlight and select "Analog Stations" if you want to receive analog TV broadcasts and "Digital Stations" if you want to receive digital TV broadcasts.
- Highlight and select either "Local TV Antenna" or "Cable" if you selected "Analog Stations" depending on how you receive analog TV broadcasts. Highlight and select "Digital" if you selected "Digital Stations".
- Adding and Skipping Stations
- Editing Station Names
- Highlight and select "Edit Station Name" from the Non-Satellite Setup display (see page 38).
- Select a station number from the list and enter the four letters or characters you would like to use to identify that station.
- Highlight and select "OK" to confirm your changes and select "Return" to return to the Non-Satellite Setup display.
- Setting the Clock
- Highlight and select "Clock".
- If you do not receive programming from a Satellite Dish Antenna
- Clock Set
- Time Zone
- Viewing Station and Program Information (GUIDES)
- Using the Guides Menu
- Press the MENU button, then highlight and select GUIDES.
- Highlight and select the guide you want to use.
- Alpha List
- Program Guide
- Category Guide
- Station Index
- Favorite Stations
- Other Guides
- Viewing Station and Program Information (GUIDES) (continued)
- Using the Alpha List
- Highlight and select "Alpha List".
- Highlight and select a category.
- Highlight and select a program.
- Using the Program Guide
- Press the GUIDE button.
- Highlight the program you want.
- Media Window
- Information Area
- List Area
- Select the program you want.
- Using the Category Guide
- Highlight and Select "Category Guide".
- Highlight and select the category you want.
- Highlight and select the program you want.
- Using the Station Index
- Press the INDEX button.
- Highlight the station you want.
- 3
- Select the station you want.
- Using the Favorite Stations Guide
- Press the FAVORITE button.
- Highlight and select the Favorite Title you want.
- Highlight and select the station you want.
- Customizing the Favorite Stations Guide
- Highlight and select the Favorite Title you want to customize.
- Highlight and select "Edit".
- Highlight and select "Edit Stations".
- Highlight and select a station in the index.
- Repeat step 4 to add up to eight stations to this Favorite Title.
- Editing the Title of a Favorite Title
- Using Other Guides
- Highlight and select "Other Guides".
- Select the Guide Type you want.
- Select the time range you want.
- Select the category you want.
- 6
- Select the subcategory you want.
- 7
- Highlight and select the program you want.
- Viewing Pay Per View Programs
- Purchase
- Preview
- Times
- Setting Preferences (PREFERENCES)
- Using the Preferences Menu
- Press the MENU button, then highlight and select PREFERENCES.
- Display Options
- Custom Stations
- Data Service
- Setting Display Options
- Press the MENU button, then highlight and select PREFERENCES.
- Highlight and select "Display Options".
- Colors
- Station Order
- Surf
- Setting Preferences (PREFERENCES) (continued)
- Changing the Color Scheme
- Highlight and select "Colors" from the Display Options display (see page 55).
- Highlight and select the color scheme you like.
- Changing the Station Order
- Highlight and select "Station Order" from the Display Options display (see page 55).
- Highlight and select the order you like.
- Changing the Surf Setting
- Highlight and select "Surf" from the Display Options display (see page 55).
- Highlight and select "On" or "Off".
- Setting Up Custom Stations
- Highlight and select "Custom Stations".
- Highlight and select a station icon to add or remove the "X" mark.
- Selecting Data Service
- Adjusting TV Properties (TV PROPERTIES)
- Adjusting TV Properties
- Press the MENU button, then highlight and select TV PROPERTIES.
- Highlight and select the item you want to set.
- Aspect Ratio
- Screen Format
- High Definition Output Select
- RF Output
- Adjusting TV Properties (TV PROPERTIES) (continued)
- Highlight and select "Aspect Ratio" from the TV Properties display (see page 61).
- Highlight and select the correct aspect ratio for your TV or digital monitor.
- Highlight and select "Screen Format" from the TV Properties display (see page 61).
- Highlight and select "Letterbox" or "Pan/Scan".
- Recommended Aspect Ratio and Screen Format Settings
- Highlight and select "High Definition Output Select" from the TV Properties display (see page 61).
- Highlight and select "OK".
- Setting Locks and Limits (LOCKS & LIMITS)
- Using the Locks & Limits Feature
- Press the MENU button, then highlight and select LOCKS & LIMITS.
- Highlight and select either "DIRECTV" or "TV" depending on which programming you want to limit, then select "Edit".
- Receiver Status
- Spending Limit
- Rating Limit
- Pay Per View
- Stations Blocked
- Lock
- Unlock
- Setting Locks and Limits (LOCKS & LIMITS) (continued)
- TV Lock Status
- TV Rating
- Movie Rating Limit
- Unrated
- DIRECTV Locks & Limits and TV Locks & Limits
- Changing the Spending Limit
- Highlight and select "Spending Limit" from the Locks & Limits edit display (see page 65).
- Press the 0–9 buttons to enter the dollar value.
- Changing the Rating Limit
- Changing the Pay Per View Access Setting
- Changing the Stations Blocked Settings
- Highlight and select "Stations Blocked" from the Locks & Limits edit display (see page 65).
- Highlight and select a station icon to block that station.
- Locking Your Receiver
- Press the MENU button, then highlight and select LOCKS & LIMITS and select "DIRECTV" or "TV".
- Highlight and select "Edit", then select "Lock".
- Enter a four digit passcode using the 0–9 buttons.
- Enter your passcode again.
- Unlocking Your Receiver
- Highlight and select "Edit".
- Enter your four digit passcode using the 0–9 buttons.
- Highlight and select "Unlock".
- Checking Service Provider Information (DIRECTV)
- Using the DIRECTV Menu
- Press the MENU button, then highlight and select DIRECTV.
- Messages
- Purchases
- Viewing Messages
- Press the MENU button, then highlight and select DIRECTV.
- Highlight and select "Messages".
- Highlight and select the message you want to read.
- Delete
- Highlight and select "Return" or "Delete".
- Checking Service Provider Information (DIRECTV) (continued)
- Checking Your Purchases
- Highlight and select "Purchases".
- Highlight and select the purchase number you want to view.
- Cancel PPV
- OK
- Highlight and select "OK".
- Scheduling Programs (TIMER & REC)
- Recording Programs
- One Button Timer & Rec
- Timer & Rec
- Data Download with a Sony SmartFile™ VCR
- Programs not available for recording
- Using One Button Timer & Rec
- Using the Timer & Rec Feature
- Press the MENU button, then highlight and select TIMER & REC.
- Highlight and select the next available timer event number.
- Scheduling Programs (TIMER & REC) (continued)
- Follow the steps below to set the timer.
- Highlight and select "Return" to close the TIMER & REC display.
- Editing Timer & Rec Events
- Highlight and select the number of the event you want to edit.
- Edit
- Setting Audio Options (AUDIO)
- Using the Audio Display
- Press the MENU button, then highlight and select AUDIO.
- Current Audio
- Default Audio
- Dolby Digital
- Closed Caption
- Changing the Current Audio
- Highlight and select "Current Audio" from the Audio display (see page 80).
- Highlight and select the audio track you want to hear.
- Changing the Default Audio
- Highlight and select "Default Audio" from the Audio display (see page 80).
- Setting Audio Options (AUDIO) (continued)
- Setting Dolby Digital Options
- Highlight and select "Satellite Dolby Digital" from the Audio display (see page 80).
- Highlight and select "Auto Select" if your Digital Satellite Receiver is connected to a Dolby Digital audio receiver.
- Setting Closed Captioning
- Highlight and select "Closed Caption" from the Audio display (see page 80).
- Highlight and select the closed captioning or text option you want to view.
- Back Panel
- VHF/UHF IN jack
- ② SATELLITE IN jack
- ③ VHF/UHF IN (DTV) jack
- RF REMOTE jack
- ACCESS CARD slot
- AUDIO/VIDEO OUTPUT jacks
- AC IN jack
- TEL LINE jack
- DIGITAL AUDIO OUT (OPTICAL) jack
- VGA OUT jack
- LOW SPEED DATA jack
- VCR CONTROL jack
- VHF(SAT)/UHF OUT jack
- Specifications
- Input Jacks Cable Type
- Output Jacks Cable Type
- Supplied Accessories
- Optional Sony-brand Digital Satellite Receiver Accessories
- Troubleshooting
- Troubleshooting (continued)
- FCC Regulations and Information
- Service Requirements
- Declaration of Conformity
- Radio Interference Information
- Limited Warranty
- Digital Satellite Receivers
- SONY SATELLITE SYSTEM INFORMATION CENTER 1-800-838-SONY (7669)
- About Sony Customer Support
- Software License Agreement
- License and Restrictions
- Intellectual Property
- Termination
- Export Requirements and U.S. Government Restricted Rights
- General
- Index
- A
- B
- C
- D
- E
- F
- G
- H
- Index (continued)
- |
- J
- L
- M
- N
- 0
- P
- R
- S
- T
- U
- V
- W
- Z
Brand : SONY
Model : SAT-HD100
Category : Digital decoder