
PRSM600 - Kitchen machine BLACK & DECKER - Free user manual and instructions
Find the device manual for free PRSM600 BLACK & DECKER in PDF.


| Brand | Black & Decker |
| Model | PRSM600 |
| Product Type | Stand Mixer with Multiple Attachments |
| Power Consumption | 800 W |
| Voltage | 230 V |
| Weight | 10.5 kg |
| Bowl Capacity | 4.5 L & 3 L Stainless Steel |
| Blender Jar Capacity | 1.25 L |
| Housing Material | Aluminium |
| Speed Control | Electronic Variable Speed Dial |
| Included Attachments | Beater, Whisk, Dough Hook, Meat Mincer, Cookie Shape Selector, Kebbe Attachment |
| Additional Features | Overload Protection, Head Release Lever, Bowl Lock, Bayonet Fittings |
| Cord Length | Approx. 1.2 m |
| Cleaning | Wipe motor unit with damp cloth; wash attachments in warm soapy water |
| Safety Certifications | Class I (Earthed), Overheat Protection |
| Warranty | 2 Years |
| Intended Use | Household only – mixing, blending, mincing, extruding |
Frequently Asked Questions - PRSM600 BLACK & DECKER
User questions about PRSM600 BLACK & DECKER
0 question about this device. Answer the ones you know or ask your own.
Ask a new question about this device
Download the instructions for your Kitchen machine in PDF format for free! Find your manual PRSM600 - BLACK & DECKER and take your electronic device back in hand. On this page are published all the documents necessary for the use of your device. PRSM600 by BLACK & DECKER.
USER MANUAL PRSM600 BLACK & DECKER
Multi Purpose Kitchen Machine
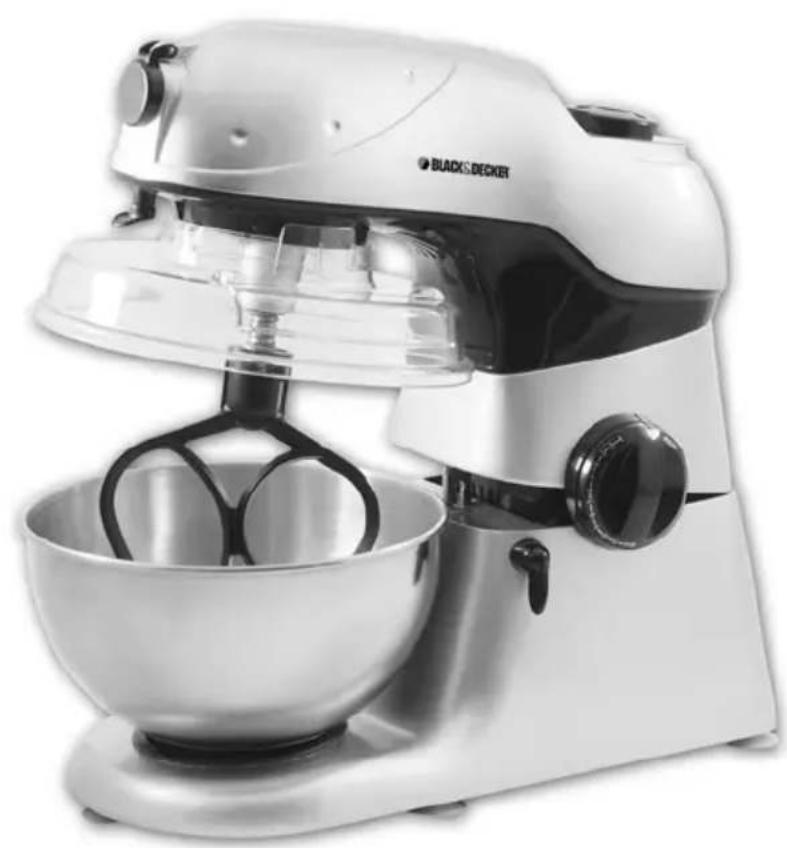
natural_image
White black-and-white kitchen stand mixer with a bowl of dough, no visible text or symbols on the device itself.First Use Safety Recommendation
Please read through this booklet for safe and efficient use of the appliance. We urge you to read the "Hint's" section and also follow all detailed instructions even if you are familiar with using this appliance.
Keep this guide handy for future reference.
IMPORTANT SAFEGUARDS
While using electrical appliances, in order to reduce the risk of fire, electric shock, and/or injury to persons, basic safety precautions should be followed, including the following:
- Read all instructions carefully, even if you are familiar with the appliance.
- To protect against the risk of electric shock, DO NOT IMMERSE the appliance, cord set or plug in water or other liquids.
• To clean, wipe the exterior with a damp cloth. - Close supervision is necessary when any appliance is used near children. Never leave an appliance unattended when in use.
- If the supply cord is damaged, it must be replaced by the manufacturer or its service agent or a similarly qualified person in order to avoid a hazard.
- Switch off and remove the plug from the power outlet when not in use before assembling or disassembling parts, cleaning or carrying out any maintenance of the appliance. Never pull the cord while unplugging out from power outlet.
- Do not operate the appliance if its damage in any manner. Return the complete appliance to your nearest authorized service facility for examination, electrical repair, mechanical repair or adjustments to avoid any hazard.
- The use of attachments or accessories not recommended or sold by this appliance manufacturer may result in fire, electric shock or personal injury.
- Do not let the cord hang over the edge of a table, counter, or touch hot surfaces.
- Avoid touching hot surfaces, use handles and knobs.
- Do not operate or place any part of this appliance on or near any hot surfaces (such as gas or electric burner or in a heated oven).
- Do not abuse the cord. Never carry the appliance by the cord or yank it to disconnect it from the outlet; instead, grasp the plug and pull to disconnect.
- When using an extension cord with your appliance, make sure the extension cord is correctly wired, and rated for its use.
• This product is intended for household use only. - Do not attempt to repair the appliance yourself; instead, take it to your Black & Decker-owned or Authorized Service Centre for repair.
SAVE THESE INSTRUCTIONS

Fig A

natural_image
Simple line drawing of a bowl with an arrow pointing to the side (no text or symbols)
natural_image
Simple line drawing of a bowl with an arrow pointing to the side (no text or symbols)
natural_image
Line drawing of a knitted or braided object with a numbered label '14' pointing to it (no text or symbols on the object itself)
natural_image
Line drawing of a mechanical component with no text or symbols
natural_image
Technical line drawing of a mechanical component with a curved base and circular housing (no text or symbols)
natural_image
Technical line drawing of a mechanical component with a circular top and flange (no text or symbols)Fig B

natural_image
Line drawing of a mechanical component or bracket with no visible text or symbols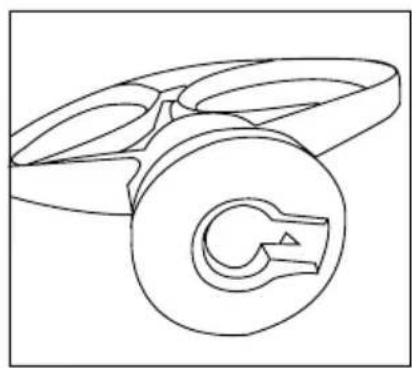
natural_image
Technical line drawing of a mechanical component with a circular base and central knob (no text or symbols)
natural_image
Technical line drawing of a mechanical assembly with insulator and bolt (no text or symbols)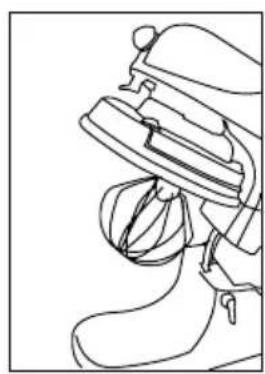
natural_image
Line drawing of a mechanical device with a handle and lever mechanism (no text or symbols)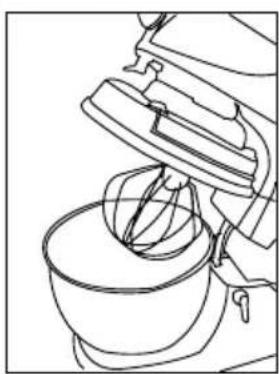
natural_image
Line drawing of a kitchen mixer blending a bowl with a sphere (no text or symbols)
natural_image
Line drawing of a kitchen mixer (no text or symbols)
Fig C

natural_image
Pure line drawing of a 3D geometric shape resembling a lens or frustum, without any text, numbers, or symbols.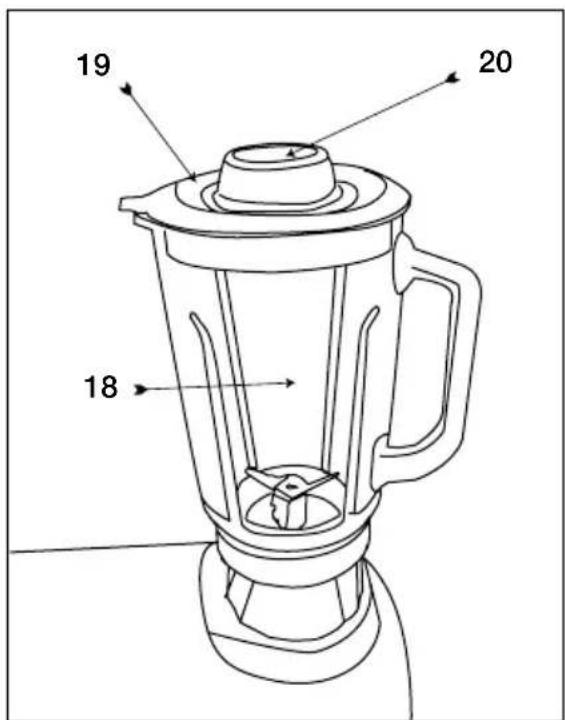

natural_image
Abstract geometric diagram with concentric and nested curved lines forming a spiral-like structure (no text or symbols)Fig D
natural_image
Simple line drawing of a coiled pipe or tube with no text or symbols
natural_image
Simple line drawing of a mechanical component with concentric grooves (no text or symbols)
natural_image
Diagram of a mechanical component with spiral and cylindrical parts, no text or symbols present
natural_image
Line drawing of a mechanical connector or connector with no visible text or symbols
natural_image
Line drawing of a foot and ankle mechanism (no text or symbols)
natural_image
Abstract line drawing of a stylized, curved shape resembling a folded or organic form (no text or symbols)
natural_image
Line drawing of a mechanical component with a circular housing and protruding arm (no text or symbols)
natural_image
Two circular electronic components with perforated surfaces, labeled 25 and 26 (no text or symbols on the components themselves)
natural_image
Simple line drawing of a mechanical component with a circular base and a central cylindrical feature, labeled with number 27 (no text or symbols beyond the label)

natural_image
Simple line drawing of a bowl with no text or symbols
natural_image
Line drawing of a helical screw or drill bit with no text or symbols
natural_image
Technical line drawing of a mechanical component with no visible text or symbols
Fig E

natural_image
Line drawing of a mechanical component with concentric grooves and a flared end (no text or symbols)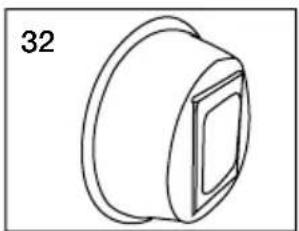
natural_image
Simple line drawing of a mechanical component with a circular top and rectangular cutout (no text or symbols)
natural_image
Simple line drawing of a cylindrical object with three cloud-like shapes and a star-like symbol on the right end (no text or labels)
natural_image
Technical line drawing of a mechanical component (no text or symbols)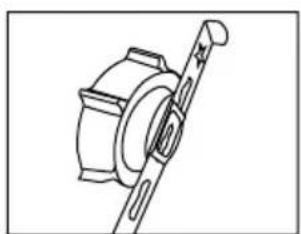
natural_image
Technical line drawing of a mechanical component with a cylindrical shaft and flange (no text or symbols)
natural_image
Pure mechanical component diagram without any text, numbers, or symbolsFig F

natural_image
Technical line drawings of mechanical components including a brush, coiled spring, and threaded fastener (no text or labels)Intended use
Your Black & Decker stand mixer has been designed for blending and mixing food and beverage ingredients. With the attachments provided, it is also possible to mince ingredients & extrude cookie dough into various shapes. Do not use this appliance for any other purpose.
This product is intended for household use only.
Safety instructions
Warning! When using mains-powered appliances, basic safety precautions, including the following, should always be followed to reduce the risk of fire, electric shock, personal injury and material damage.

Read all of this manual carefully before using the appliance.
- The intended use is described in this manual. The use of any accessory or attachment or the performance of any operation with this appliance other than those recommended in this instruction manual may present a risk of personal injury.
- Retain this manual for future reference.
Using your appliance
- Make sure that the appliance is switched off before connecting to or disconnecting from the power supply.
• Always take care when using the appliance. -
Do not use the appliance outdoors.
-
Always protect the motor unit from water or excessive humidity.
- Do not operate the appliance if your hands are wet.
- Do not operate the appliance if you are barefoot.
- Do not touch moving parts. Keep long hair and loose clothing out of the way of the moving parts.
- Guide the power supply cord neatly so it does not hang over the edge of a work top and cannot be caught accidentally or tripped over.
- Never pull the power supply cord to disconnect the plug from the socket. Keep the power supply cord away from heat, oil and sharp edges.
- Switch off and wait for the motor to stop running before disconnecting the appliance from the power supply.
- Never detach any part or accessory while the appliance is still connected to the power supply. Always disconnect the appliance from the power supply first.
- If the power supply cord is damaged during use, disconnect the appliance from the power supply immediately. Do not touch the power supply cord before disconnecting from the power supply.
- Disconnect the appliance from the power supply when not in use, before fitting or removing parts and before cleaning.
- Misuse could cause an injury.
- Keep loose clothing, hair, jewellery etc. away from moving parts.
English
- Care is needed when handling cutting blades, especially when removing the blades and during cleaning.
- After cleaning, refit the bowl. This ensures the coupling underneath is protected.
- This appliance is fitted with overload protection. If the unit stops working, switch the unit off and remove the plug from the power supply, wait for 5 minutes then replace the plug.
- If the unit does not function please return it to your local service agent.
Safety of others
- Do not allow children or any person unfamiliar with these instructions to use the appliance.
- Do not allow children or animals to come near the work area or to touch the appliance or power supply cord. Close supervision is necessary when the appliance is used near children.
- This appliance is not intended for use by persons (including children) with reduced physical, sensory or mental capabilities, or lack of experience and knowledge, unless they have been give supervision or instruction concerning use of the appliance by a person responsible for their safety.
- Children must be supervised to make sure that they do not play with the appliance.
After use
- Switch off the appliance before cleaning, changing accessories or approaching parts which move in use.
- Switch off and remove the plug from the socket before leaving the appliance unattended and before changing, cleaning or inspecting any parts of the appliance.
- When not in use, the appliance should be
stored in a dry place. Children should not have access to stored appliances.
Inspection and repairs
- Before use, check the appliance for damaged or defective parts. Check for breakage of parts, damage to switches and any other conditions that may affect its operation.
- Do not use the appliance if any part is damaged or defective.
- Have any damaged or defective parts repaired or replaced by an authorised repair agent.
- Before use, check the power supply cord for signs of damage, ageing and wear.
- Do not use the appliance if the power supply cord or mains plug is damaged or defective.
- If the supply cord is damaged, it must be replaced by the manufacturer or an authorised Black & Decker Service Centre in order to avoid a hazard.
- Never attempt to remove or replace any parts other than those specified in this manual.
Electrical safety
This product must be earthed. Always check that the power supply corresponds to the voltage on the rating plate.
Power plugs must match the outlet. Never modify the plug in any way. Do not use any adapter plugs with earthed (Class 1) appliances. Unmodified plugs and matching outlets will reduce the risk of electric shock.
Extension cables & Class 1 product
A 3 core cable must be used as your appliance is earthed and of Class 1 construction. Up to 30m (100 ft) can be used without loss of power.
To avoid the risk of electric shock, do not immerse the cord, plug or motor unit in water or other liquid.
English
Features
- Aluminium body
- 4.5L and 3L Stainless steel bowl
- 1.25L Blender jar
- Electronic speed control
- Meat mincer attachment
- Beater, whisk and dough hook.
- Cookie attachment
Parts Identification
- Mixer head
- Outlet cover
- peed control dial
- Head release lever
- Mixer base
- Release lever
- Coupling
- Bowl lid holder
- Front cap
- Recess
- Power cord
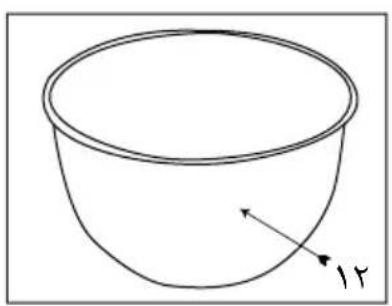
12 & 13. Steel bowls - Whisk
- Beater
- Dough hook
- Bowl lid
- Blender jar
- Blender lid
- Filler cap
-
Mincer
-
Blade
- Nut
- Slotted coupling
- Coarse mincing die
- Fine mincing die
- Tray
- Pusher
- Spanner
- Plastic bowl
- Mincer feeder tube
- Cookie cup
- Cookie shape selector
- Screw
- Kebbe attachment
Unpacking
Remove the unit from the packaging.
Wash thoroughly before first use.
Assembly
Warning! Before assembly, make sure that the appliance is switched off and unplugged.
Use
Figures A&B: Using the Whisk, Beater & Dough Hook:
Place the Mixer on a flat surface. With one hand on top of the Mixer to prevent sudden movement, rotate the head release lever (4) to the "UNLOCKED" 3 position & raise the head to the upper position.
Releasing the lever "LOCKS" 🔒 the bowl in the raised position.
English
If required, the bowl lid (17) can be fitted over the location (8) on the mixer head (making sure the door is facing you once it is fitted) & turned anti-clockwise. The bayonet fittings on the 2 parts will lock the lid in place. Push the required attachment - whisk (14), beater (15) or dough hook (16) onto the coupling (7) & washer so the horizontal pin enters the slot in the attachment. Turning the attachment clockwise will lock it in place. Place the required bowl (12 or 13) in the recess (10) in the stand & rotate it clockwise to lock it in position
Add the required ingredients to the bowl. Press the head release lever (4) and lower the head. Releasing the lever will lock the head in position.
Connect the Mixer to a suitable electrical supply.
For short operation, hold the control dial (3) & rotate it anti-clockwise. Once complete, release the dial. It will automatically return to the "0" (OFF) position.
For longer operating times, rotate the control dial clockwise to select the appropriate speed.
Once mixing is completed and the unit turned off, the head can be raised and the bowl & ingredients removed.
Never approach any moving parts until they have come to a complete stop.
Figure C: Using the Blender:
Remove the blender lid (19) & filler cap (20)
from the blender jar (18), and add the ingredients. Replace the lid & cap.
Place the Mixer on a flat surface.
Ensure the Mixer head (1) is locked in the horizontal position.
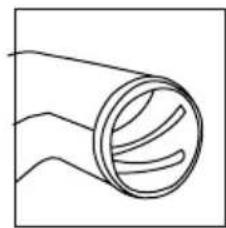
Remove the outlet cover (2) from the Mixer head. Place the Blender (17) onto the outlet & rotate it anti-clockwise until it locks in place.
Connect the appliance to a suitable electrical supply.
For short operation, hold the control dial (3) & rotate it anti-clockwise. Once complete, release the dial. It will automatically return to the "0" (OFF) position.
For longer operating times, rotate the control dial clockwise to select the appropriate speed.
Once blending is completed and the unit turned off, the blender can be removed by rotating it clockwise to overcome the bayonet fitting.
Always operate the blender with the lid fitted.
Never approach any moving parts until they have come to a complete stop.
Figure D: Using the Mincer:
Place the Mixer on a flat surface.
Ensure the Mixer head (1) is locked in the horizontal position.
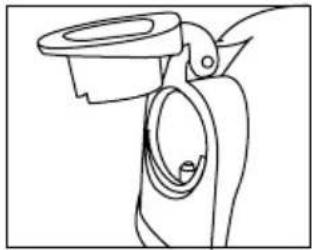
Press the attachment release lever (6) down and lift the front cap (9) to reveal a hole and slotted coupling.
English
Holding the release button (6) down, fit the assembled Mincer (21) into the hole, and turn it to make sure the flat on the end of the screw engages in the slotted coupling. Release the button, & rotate the Mincer assembly again. The screw should be connected to the coupling. When the pin on the release button aligns with the hole in the Mincer, the spring will push the pin through, locking it in place.
The feeder tube should be facing up. Fit the tray (30) into the feeder (31) in the Mincer head.
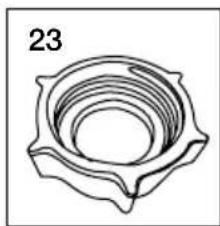
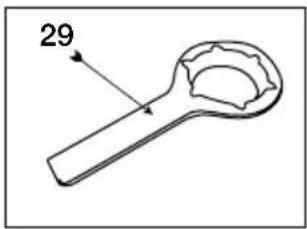
Remove the nut (23) by rotating it in an anti-clockwise direction. The spanner (29) may be required. Remove the round die (25 or 26) & replace with the one required for the task. Locate the cut-out in the die with the tab on the Mincer head. Replace the nut. Place the ingredients on the tray, and a bowl under the Mincer head.
Connect the appliance to a suitable electrical supply.
Rotating the control dial clockwise, select a slow speed. Using the pusher (28), push the ingredients into the hole in the tray & down into the Mincer.
The screw will collect the ingredients, compressing them & moving them forward. The blade will cut the ingredients, which will then be forced through the die and fall into the bowl.
Never insert fingers into the feed chute. Only use the pusher provided.
Never approach any moving parts until they have come to a complete stop.
The tray (27) can be used as lid on plastic bowl (30) making it a storage bowl.
Figure E: Using the Cookie shape selector:
Place the Mixer on a flat surface.
Ensure the Mixer head (1) is locked in the horizontal position.
Press the attachment release lever (6) down and Lift the front cap (9) to reveal a hole and slotted coupling.
Holding the release button (6) down, fit the Mincer (21) into the hole, and turn it to make sure the flat on the end of the screw engages in the slotted coupling. Release the button, & rotate the Mincer assembly again. The screw should be connected to the coupling. When the pin on the release button aligns with the hole in the Mincer, the spring will push the pin through, locking it in place.
The feeder tube should be facing up. Fit the tray (23) into the feeder (31) in the Mincer head.
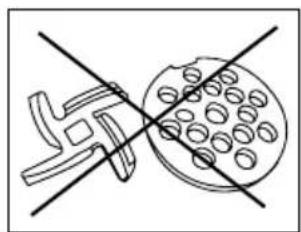
Remove the nut (23) by rotating it in an anti-clockwise direction. The spanner (29) may be required. Remove the round die (25 & 26) and blade (22).
Place the cookie cup (32) (without shape selector (33)) in the nut, and fasten it back onto the Mincer head.
Fit the shape selector through the 2 slots in the cookie attachment. Fit the tray (27) into the vertical tube (31) in the Mincer head.
English
Place the ingredients on the tray, and place a tray under the Mincer head.
Connect the appliance to a suitable electrical supply.
Rotate the control dial clockwise & select a slow speed. Using the pusher, push the ingredients into the hole in the tray & down into the Mincer.
The screw will collect the ingredients, compressing them & moving them forward. They will then be forced through the selected shape in the shape selector. This should be collected on the tray.
The machine should be stopped before changing the shape in the shape selector.
Never approach any moving parts until they have come to a complete stop.
Never insert fingers into the feed chute. Only use the pusher provided.
Using the Kebbe attachment (Fig. F)
The Kebbe attachment is used with the meat mincer attachment.
The Kebbe maker attachment (35) has two parts, the shaper and the cone.
Follow the assembly instructions of the mincer through to the assembly of the worm (34) (do not assemble the cutting blade (22) or the fine or course mincing dies (25 or 26)).
Insert the shaper and the cone onto the end of the worm.
Secure the Kebbe in place using the securing nut (23).
Feed the Kebbe mixture through the food feeder tube and use the pusher provided. The mince will roll out as a hollow cylinder. Cut the continuous hollow cylinder into the desired lengths while it flows out.
Operating times and preparations
| Attachment | Function | Suggested Types Of | Recommended | |
| Food | Speed | |||
 | Mixing Making cakes, 5-9mashed potatoes & cookie | |||
 | Mixing & Mixes & kneads all kinds of yeast 2-6kneading mixtures for homemade bread | |||
 | Whisking Used for egg, meringues, 10-12creams & mousses | |||
 | Blending Soups*, purees, 10-12drinks, milkshakes | |||
 | Mincing Mincing meat, cookies 1-3(with cookie attachment) | |||
 | Mincing Kebbe | 1-3 | ||
 | Shredding vegetables (PRSM600VS - Optional Accessory) | Slicer, fine shredding & coarse shredding vegetables, such as carrots, beets, turnips, potatoes, coconut & celery | 4 | |
 | Extruding pasta (PRSM600PM - Optional Accessory) | Making pasta & Macaroni | 1-3 | |
* Do not blend hot liquids, allow to cool first
English
Switching On and Off
For short operation, hold the control dial (3) & rotate it anti-clockwise. Once complete, release the dial. It will automatically return to the "0" (OFF) position.
For longer operating times, rotate the control dial clockwise to select the appropriate speed.
Warning! Never run the mixer for longer than 10 minutes to prevent over-heating. After 10 minutes of continuous operation, allow the mixer to cool to room temperature before re-using.
Warning! After switching off always allow the motor to stop before approaching the blade.
Warning! All loose clothing and hair must be kept clear of moving parts.
Warning! Always discount the unit from the supply if it is to be left unattended and before assembling, dissembling or cleaning.
Warning! Never raise the mixer head when the blender, mincer, pasta maker or shredder attachments are fitted. Remove all attachments before lifting or moving the mixer.
Warning! Never run the Mixer, the Blender and the front attachment simultaneously - the unit will overheat. All other combinations will work fine.
Cleaning and maintenance
Warning! Switch the appliance off and unplug it before cleaning or maintenance. Be careful when cleaning the blades; they are sharp.
Warning! Care is needed when handling cutting blades, especially when removing blades and during cleaning.
Warning! Do not immerse the appliance, the cord set or the plug in water or any other liquid.
- Wash the attachments in warm soapy water and dry well.
- Wipe the motor unit (2) with a damp cloth. Do not use any abrasive or solvent-based cleaner.
Always clean the appliance immediately after use. Do not let food dry on to the blades as this will make cleaning difficult.
Technical data
| PRSM600 | ||
| Voltage | V | 230 |
| Wattage | W | 800 |
| Weight | Kg | 10.5 |
English
Protecting the environment

Separate collection. This product must not be disposed of with normal household waste.
Should you find one day that your Black & Decker product needs replacement, or if it is of no further use to you, do not dispose it off with other household waste. Make this product available for separate collection.
Separate collection of used products and packaging allows materials to be recycled and used again. Use of recycled materials helps prevent environmental pollution and reduces the demand for raw materials.

Local regulations may provide for separate collection of electrical products from the household, at municipal waste sites or by the retailer when you purchase a new ct.
Black & Decker provides a facility for the collection and recycling of Black & Decker products once they have reached the end of their working life. To take advantage of this service please return your product to any authorised repair agent who will collect them on our behalf. You can check the location of your nearest authorised repair agent by contacting your local Black & Decker office at the address indicated in this manual. A list of authorised Black & Decker repair agents and full details of our after-sales service and contact are available on the Internet at: www.2helpU.com
BLACK & DECKER HOME APPLIANCE 2 YEAR WARRANTY
Black & Decker provides a 2 Year Warranty for this product from the date of purchase against defects due to defective materials or workmanship. Motor/element burn-outs due to voltage fluctuations are not covered under warranty. If the product should become defective within the warranty period, Black & Decker will repair or (at Black & Decker's discretion) replace it free of charge.
The warranty provisions do not cover failure due to accident, misuse, abuse, negligence or non observation of local regulations on the part of the user. Equally, the warranty provisions do not apply where the appliance has been serviced by a person not authorized by Black & Decker or serviced with non-approved parts and this has contributed to the fault of the product. Superseded models without a replacement equivalent will either be repaired or (at Black & Decker's discretion) replaced with another product of similar retail value.
UPON PURCHASE
Fill in the Warranty Registration Card with the original Authorized Dealer's stamp (indicating date of purchase) and attach your purchase receipt to it. Retain in case of claims in the future.
MAKING A CLAIM
Take your defective product together with the Warranty Registration Card & purchase receipt to your local service Centre. You can either do this in person or send it freight prepaid. If mailing or shipping your appliance, ensure that it is packed carefully in a sturdy carton with enough packing material to prevent damage. Include a note describing the problem to the service Centre and be sure to give your return address.
DESIGNED FOR DOMESTIC PURPOSES ONLY.
natural_image
Line drawing of a mechanical component resembling a worm or worm gear (no text or symbols)
natural_image
Line drawing of a mechanical component with two circular parts and a central spherical part (no text or symbols)
natural_image
Technical line drawing of a mechanical component with threaded ends and a tapered tip (no text or symbols)
natural_image
Technical line drawing of a mechanical component with no visible text or symbolsnatural_image
Pure electrical circuit lines without any symbols
natural_image
Simple line drawing of a circular mechanical component with concentric grooves (no text or symbols)
natural_image
Simple line drawing of a cylindrical object with a rectangular cutout, no text or symbols present
natural_image
Simple line drawing of a cylindrical object with cloud shapes and stars, no text or symbols present
natural_image
Technical line drawing of a mechanical component (no text or symbols)
natural_image
Technical line drawing of a mechanical component with a cylindrical housing and diagonal rod (no text or symbols)
natural_image
Technical line drawing of a mechanical component with no visible text or symbolsالشكل ب

natural_image
Line drawing of a mechanical component with no visible text or symbols
natural_image
Technical line drawing of a mechanical component with a circular housing and central key (no text or symbols)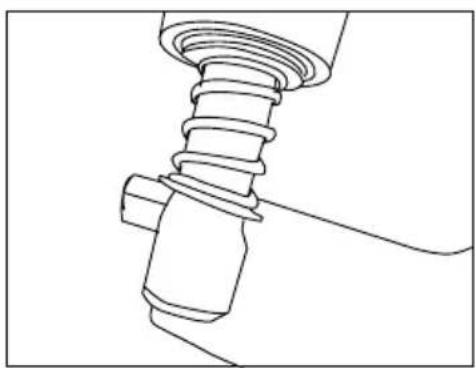
natural_image
Technical line drawing of a mechanical assembly with threaded and straight components (no text or symbols)
natural_image
Line drawing of a mechanical device with a handle and lever mechanism (no text or symbols)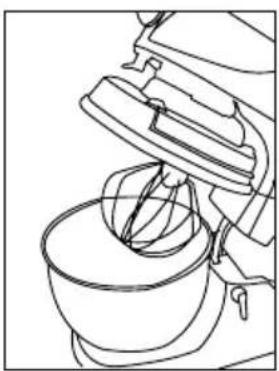
natural_image
Line drawing of a kitchen mixer with a bowl and handle (no text or symbols)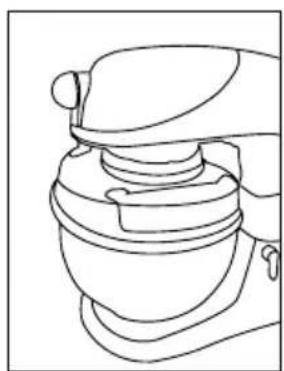
natural_image
Line drawing of a kitchen mixer (no text or symbols)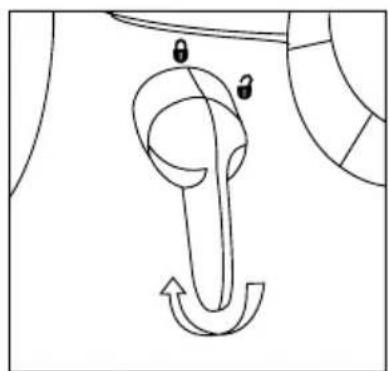
natural_image
Diagram of a mechanical hook with two circular components and directional arrows indicating motion (no text or labels)الشكل ج

natural_image
Abstract line drawing of a curved, segmented shape resembling a 3D object or mechanical part (no text or symbols)

natural_image
Abstract line drawing of concentric and overlapping curved shapes with no text or symbols
(الشكل أ)
natural_image
Simple line drawing of a bowl with an arrow pointing to the side (no text or symbols)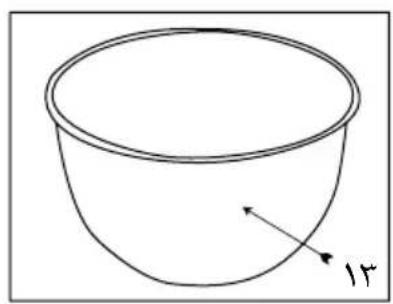
natural_image
Simple line drawing of a bowl with an arrow pointing to its side (no text or symbols)
natural_image
Line drawing of a knitted fabric or rope with a loop and a small cap, no text or symbols present
natural_image
Simple line drawing of a mechanical component with no text or symbols
natural_image
Pure mechanical diagram showing a curved component with a circular base and arrow indicating direction (no text or symbols)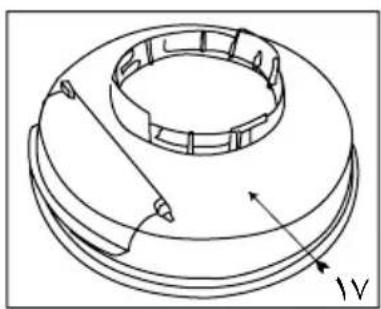
natural_image
Technical line drawing of a mechanical component with concentric rings and a central slot (no text or symbols)إرشادات هامة
Names & Addresses for Black & Decker Service Concessionaries
Afghanistan: Ishan National Co., Opp. Ministry of Justice, Kabul. Tel.: +93-2-2101727. Algeria: SARL Outillage Corporation, 04 Route De Dely Brahim Cheraga, Alger. Tel.: +213-21-364363/508, Fax: +213-21-369667. Bahrain: Fawaz Al Zayani, P.O.Box 26563, Adliya, Manama. Tel.: +973-17-715252/712756, Fax: +973-17-713789. Bangladesh: Ultra Corporation, 8, Kushol Centre, Uttara, Dhaka 1230. Tel.: +880-2-8919272/9756 Ext.28, Fax: +880-2-9887167. Egypt: Anasia Egypt for Trading S. A. E., P.O.Box 2443, 110 Mostafa Refaat Street, Sheraton Heliopolis 11361, Cairo. Tel.: +20-2-2684159, Fax: +20-2-2684169. Ethiopia: Tewfik Sherif & Co. Ltd., P.O.Box 5583, Debre Zeit Road, Addis Ababa. Tel.: +251-1-651700/601, Fax: +251-1-650570. India: Gryphon Impex Pvt. Ltd., D-6/4, Okhla Industrial Area, Phase-I, New Delhi-110020. Tel.: +91-11-26372602-4, Fax: +91-11-26372601. Iran: Tehran - Service Centre of Iran, No 510, South Karger Ave, Below Pasteur Sq. Tehran. Tel.: +98-21-6490608/0656/6407672. Kish Island: Cayhan Electric Co., No. 69, Paradise Shopping Centre, Kish Island. Tel.: +98-76444-22894. Jordan: Bashiti Hardware, P.O.Box 1564, TLA Ali, Amman. Tel.: +962-6-5350009/4770741, Fax: +962-6-5350012/4789783. Kenya: Zylog Enterprises, IPS Building, Kuanda Street, P.O.Box 40877, Nairobi. Tel.: +254-2-338188/199, Fax: +254-2-330642. Kuwait: Al Omar Technical Co., P.O.Box 4062, 13041 Safat, Kuwait. Tel.: +965-4848595/0039, Fax: +965-4845652. Lebanon: Est. F.A. Kettaneh SA, P.O.Box 110242, Dora Highway, Kettaneh Building, Beirut. Tel.: +961-1-255860/6, Fax: +961-1-255891. Libya: El Ghoul Brothers, P.O.Box 348, Islamic Call Bldg., Office 201-202, Benghazi. Tel.: +218-61-9097681/4183, Fax: +218-61-9094123. Madagascar: Group Tana Confort S. A. R. L., B. P. 1770, Antananarivo. Tel.: +261-20-2264505, Fax: +261-20-2264244. Malta: John G. Cassar Ltd., 36 Victory Str, Qormi QRM 06, Malta. Tel.: +356-21-493251, Fax: +356-21-483231. Mauritius: Happy World Marketing Ltd., Block 2, Industrial Estate, Coromandel, P.O.Box 429, Port Louis. Tel.: +230-2076700, Fax: +230-2337330/7400. Nepal: Universal Trading Centre, P.O.Box 1947, Tripureswor, Kathmandu. Tel.: +977-1-262192/260587/785, Fax: 261154. Nigeria: Amin Bros. Eng. Co. Ltd., 30A (Plot 1291), Akin Adesola Street, Victoria Island, Lagos. Tel.: +234-1-3201778, Fax: +234-1-2613667. Oman: Oman Mktg. & Service Co., P.O.Box 2734, Ruwi, Muscat. Tel.: +968-560232, Fax: +968-560255. Pakistan: Karachi - Ammar Service & Spares, 60, Bank Arcade, Serai Road, Karachi. Tel.: +92-21-2426905, Fax: 2427214/5243. Pakistan: Lahore - Electronics Inn, 212-G Raja Centre, Main Market, Gulberg, Lahore. Tel.: +92-42-5756750. Philippines: Modern House International Enterprises, 213 Rizal Ave. Extension, between 2nd and 3rd Ave. Kalookan City. Tel.: +632 366-4487, Fax: +632 366-4489. Qatar: Al Muftah Trading & Cont., P.O.Box 875, Doha. Tel.: +974-4650880/4446868, Fax: +974-4441415. Saudi Arabia: Dammam - Ebrahim Fawaz Al Zayani, P.O.Box 76026, Al Raka, Dammam. Tel.: +966-3-8140914, Fax: +966-3-8140824. Jeddah: Anasia Trading Co. Ltd. Caravan Shopping Centre, Hail Street. P.O. Box 50959, Jeddah-21477, Tel. 02 650 0948/02 636 3825, Fax 02 638 0720. Madina: Garziz Trdg. for Bldg. Mat.&Decor., P.O.Box 3364, Madina. Tel.: +966-4-8261490/8227636, Fax: +966-4-8265741. Riyadh: Anasia Trading Co Ltd. New Akaria Building, 60th St., 3rd Floor, Building # 4, Office # 3402, Malaz. P.O. Box. 18689, Riyadh-11425, Tel.: 01 478 2549, Fax: 01 478 2761. Yanbu: Bin Afif, P.O.Box 530 Yanbu, Al Bahr. Tel.: +966-4-3222626/8867, Fax: +966-4-3222210. Sri Lanka: Delmege Gen. Equip. Pvt. Ltd., No. 428/ATB. B., Jaya Mawatha (Darley Road), Colombo-10. Tel.: +94-11-2665914, Fax: +94-11-2665915. Sudan: United Distribution Company, P.O.Box 325, Sayed Abdul Rehman Street, Khartoum. Tel.: +249-11-772612/777296, Fax: +249-11-770919. Tanzania: General Motors Investment, P.O Box 16541, 14 Vingunguti Nyerere Road, Dar Es Salaam. Tel.: +255-22-2862661/5022, Fax: +255-22-2862667/5412/3. Tunisia: STE Tunisienne De Quincaillerie Stq., Nvelle Z.I 2013, Ben Arous, Tunis, Tunisia, Tel.: +216 71386102, Fax: +216 71380412. UAE: Abu Dhabi - Light House Electric., P.O.Box 120, Abu Dhabi. Tel.: +971-2-6726131, Fax: +971-2-6720667. Dubai - Black & Decker (O) A.G., P.O.Box 5420, Dubai. Tel.: +971-4-7028234/233, Fax: +971-4-2822765. Ideal Mach. & Equipt. R.W/shop P.O.Box 37116,Al Quoz,Dubai.Tel.:+971-4-3474160,Fax:+971-4-3474157.Sharjah - McCoy Middle East LLC,P.O.Box 20228 SharjahTel.:+971-6-5336321,Fax:+971-6-5336320.Uganda:The Building Centre, Kitgum House, 52 Station Road,P.O.Box 7436,Kampala.Tel.:+256-41-234567,Fax:+256-41-236413.Yemen: Aden - Middle East Trad.Co.Ltd., Mulla Dakka Aden.Tel.:+967-2-240950,Fax:+967-2-240952.Sana'a: Middle East Trad.Co.Ltd.,P.O.Box 12363,Hayel Street,Sana'a.Tel.:+967-1-204201,Fax:+967-1-204204.Taiz: Middle East Trad.Co.Ltd., Campa area near Al-Kair mosque,Taiz.Tel.:+967-4-231610/232033,Fax:+967-4-219869.Zimbabwe: J.D.Distributors,P.O.Box 226, 17 Bessemer Road,Graniteside,Harare.Tel.:+263-4-753913-7,Fax: 753918.Cyprus: G.Kyprianou Trading Co Ltd., 51 Prodromou AVE.Strovolos, 1681,P.O.Box 23318 Nicosia Cyprus.Tel.:00357 22 468170/1,Fax: 00357 22 468186Email gktltd@spidernet.com.cy

BLACK & DECKER®
WARRANTY REGISTRATION CARD
YOUR NAME/الإسم
PRODUCT MODEL NO. PRSM600

- Multi Purpose Kitchen Machine
- First Use Safety Recommendation
- IMPORTANT SAFEGUARDS
- SAVE THESE INSTRUCTIONS
- Intended use
- Safety instructions
- Using your appliance
- English
- Safety of others
- After use
- Inspection and repairs
- Electrical safety
- Extension cables & Class 1 product
- Features
- Parts Identification
- Unpacking
- Assembly
- Use
- Figures A&B: Using the Whisk, Beater & Dough Hook:
- Figure C: Using the Blender:
- Figure D: Using the Mincer:
- Figure E: Using the Cookie shape selector:
- Using the Kebbe attachment (Fig. F)
- Switching On and Off
- Cleaning and maintenance
- Protecting the environment
- BLACK & DECKER HOME APPLIANCE 2 YEAR WARRANTY
- UPON PURCHASE
- MAKING A CLAIM
- DESIGNED FOR DOMESTIC PURPOSES ONLY.
- إرشادات هامة
- Names & Addresses for Black & Decker Service Concessionaries
- BLACK & DECKER®
- WARRANTY REGISTRATION CARD
Brand : BLACK & DECKER
Model : PRSM600
Category : Kitchen machine