MSP 225 - Audio/Video Equipment RGBlink - Free user manual and instructions
Find the device manual for free MSP 225 RGBlink in PDF.


| Product Type | HDMI to H.264 Streaming Encoder |
| Brand | RGBlink |
| Model | MSP 225 |
| Dimensions (W x D x H) | 98 mm x 92.9 mm x 44 mm |
| Net Weight | 0.27 kg |
| Power Supply | 12V DC via universal plug pack |
| HDMI Inputs | 2 x HDMI-A (HDMI 1.3) |
| H.264 Outputs | 2 x RJ45 |
| Supported Input Resolutions | 480i/576i to 1080p60; VESA up to 1920x1080@60 |
| Supported Output Resolutions | 176x144 to 1920x1080 |
| Encoding Protocols | H.264 baseline/main/high profile L4.2, MJPEG/JPEG baseline |
| Frame Rate | 10 ~ 60 FPS |
| Communication Interface | USB (for control) |
| Management Software | MSP management software via web browser |
| Operating Temperature | 0°C to 45°C |
| Storage Humidity | 10% ~ 85% |
| Warranty | 3 years parts and labor |
Frequently Asked Questions - MSP 225 RGBlink
User questions about MSP 225 RGBlink
0 question about this device. Answer the ones you know or ask your own.
Ask a new question about this device
Download the instructions for your Audio/Video Equipment in PDF format for free! Find your manual MSP 225 - RGBlink and take your electronic device back in hand. On this page are published all the documents necessary for the use of your device. MSP 225 by RGBlink.
USER MANUAL MSP 225 RGBlink
■ 1U Frame
■ HDMI 1.3 Input
■ H.264 Output
■ Controlled by USB
■ Preview via Webpage
CONTENT
Product Introduction......2
Packing Configuration....3
Hardware Orientation....4
Interface....4
Button Panel....4
Operating Instruction....5
System Connection....5
How to Work....5
Specification....6
Using Software....7
Installing Software....7
Using Software.... 12
Log in the Software....12
Web Links....13
Connect the Device....13
I/O Set....15
Network Set....16
System Set....17
Factory Reset....19
Logout....19
Contact Information....20
Product Introduction
This compact convertor provides encoding of HDMI signals to H.264 internet streaming video over IP. Now any video can be streamed to a connected website for viewing, expanding the reach possibilities. MSP 225 offers two HDMI input channels and dual RJ45 connectors for IP output and connection to LAN/WAN.
Configuration of MSP 225 is made via a web browser interface, providing settings for encoding formats and connection settings for web applications.
Packing Configuration
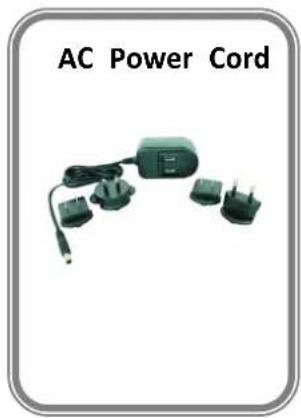
Operating Instruction
System Connection
Connect the computer with HDMI interface to the HDMI input port of MSP 225 with HDMI cable.
Connect the H.264 input port of MSP 226 to the H.264 output port of MSP 225 with network cable.
Connect power cable to device and plug into wall socket. In order to avoid the damage of device, please use the standard power adapter.
How to Work

flowchart
graph LR
    A["HDMI 1 IN"] --> B["Receiver"]
    C["HDMI 2 IN"] --> D["Receiver"]
    B --> E["Format Detection Encoding"]
    D --> E
    E --> F["H.264 1 OUT"]
    E --> G["H.264 2 OUT"]
Specification
| HDMI Input | |
| Number of Inputs | 2 |
| Connector | HDMI-A |
| Supported Resolution | SMPTE: 480i60 | 576i50 | 720P50/59.94/60 | 1080i50/59.94/60 | 1080P25/29.97/30/50/59.94/60VESA: 1024x768x60/75/85 | 1280x800x60 | 1280x1024x60/75/85 | 1360x768x60 | 1366x768x60 | 1400x1050x60 |1440x900x60 | 1600x1200x60 |1680x1050x60 | 1920x1080x60 |
| Signal Level | TMDS pwl, single pixel input,165MHz bandwidth |
| Supported Standard | HDMI 1.3 |
| H.264 Output | |
| Number of Outputs | 2 |
| Connector | RJ45 |
| Supported Resolution | 176x144 | 240x180 | 320x180 | 320x240 | 320x256 | 352x228 | 352x400x224 | 400x320 | 480x270 | 480x272 | 480x320 | 480x360 | 480x480x480 | 544x480 | 608x448 | 640x360 | 640x480 | 704x576 | 720x720x480 | 720x540 | 720x576 | 850x480 |1024x576 | 1280x720 | 1680x1056 | 1920x1080 |
| Refresh Rates | 10~60FPS |
| Encoding Protocols | H.264 baseline/main/high profile L4.2, MJPEG/JPEG baseline |
| Supported Standard | H.264/MPEG-4 AVC |
| Extras | |
| Communication | USB |
| Power Supply | 12V DC (via universal Plug Pack) |
| Working Environment | 0°C~45°C |
| Stored Environment | 10%~85% |
| Net Weight | 0.27kg |
| Device Dimension | 98mm x 92.9mm x 44mm |
| Product Warranty | 3 years parts and labor warranty |
Using Software
Installing Software
Environment Requirements:
Processor: 1 GHz or above 32 bit or 64 bit processor
Memory: 2 GB or more
Graphics: Support DirectX 9 128M or above (open AERO effect)
Hard disk space: Above 16G (primary partitions, NTFS format)
Monitor: Resolution must be 1280 x720 pixel or above (it can not display normally if the resolution is lower than 1280 x720)
Operating system: Windows 7 or above (full version, not Ghost version or compact version)

AVMSPSof
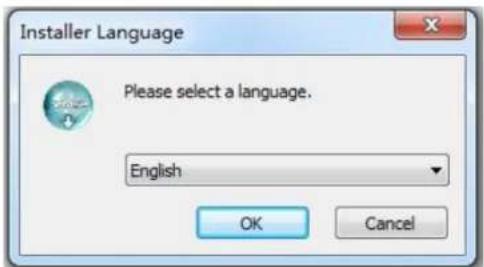
Double click icon, it will pop-up the installer language box, select the language, for example, select "English", and click "OK" to confirm.
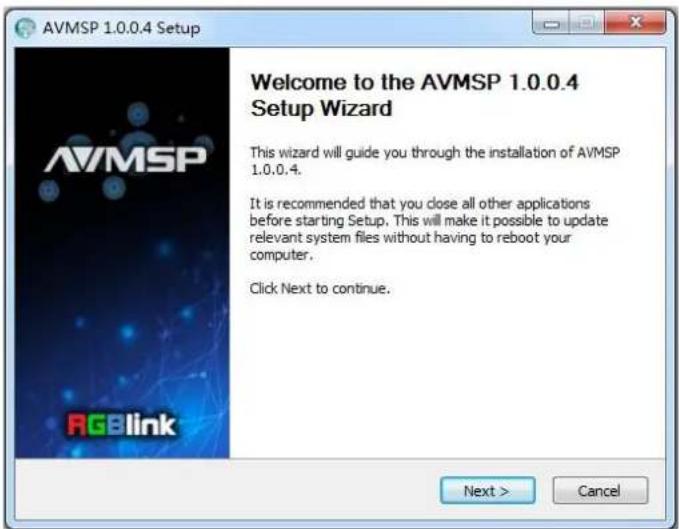
Click "Next" to install:
Select "Browse..." to select the MSP software install location:
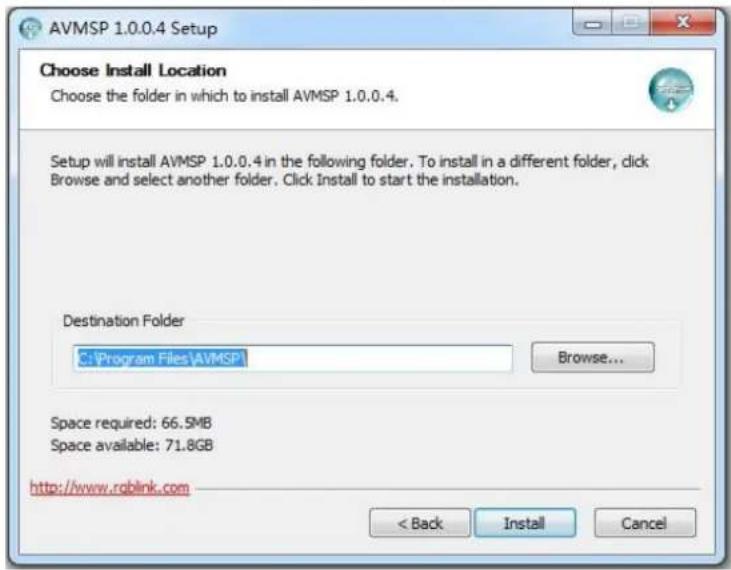
Click "Install":
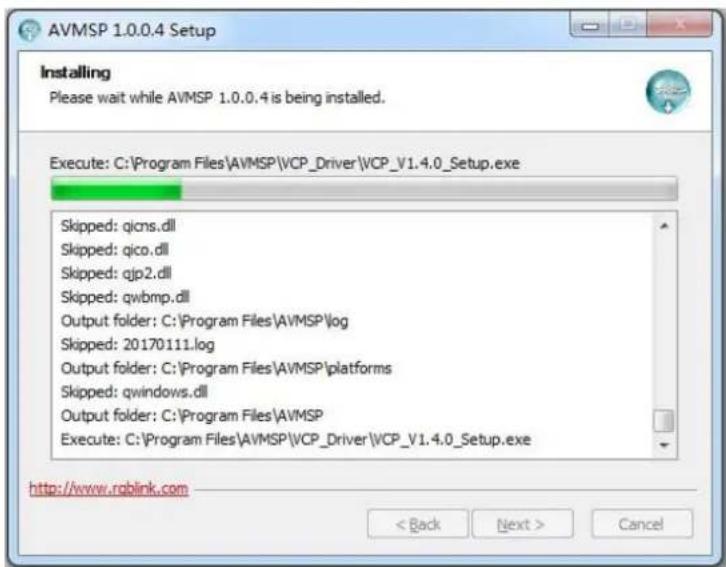
During installation, it will pop up the window of InstallShield Wizard for Virtual Com port:
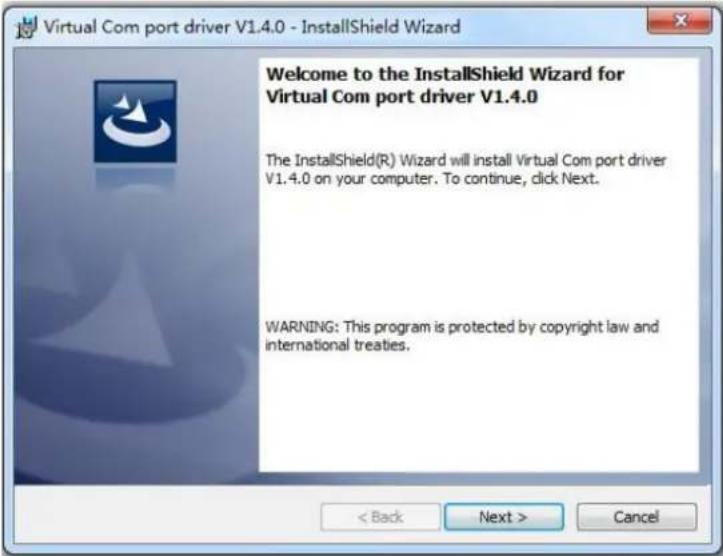
(1) If user install the MSP software for the first time, click "Next":
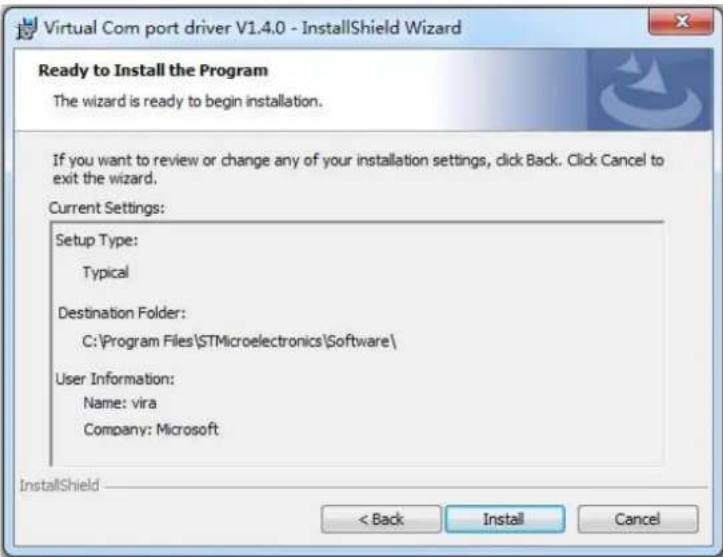
Then click "Install", as shown in the figure below:
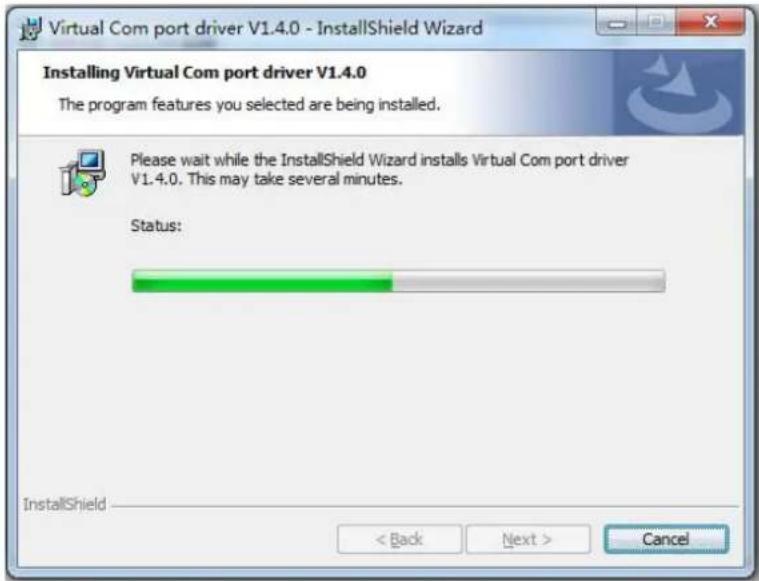
Click "Finish" and complete the installation, as shown in the figure below:
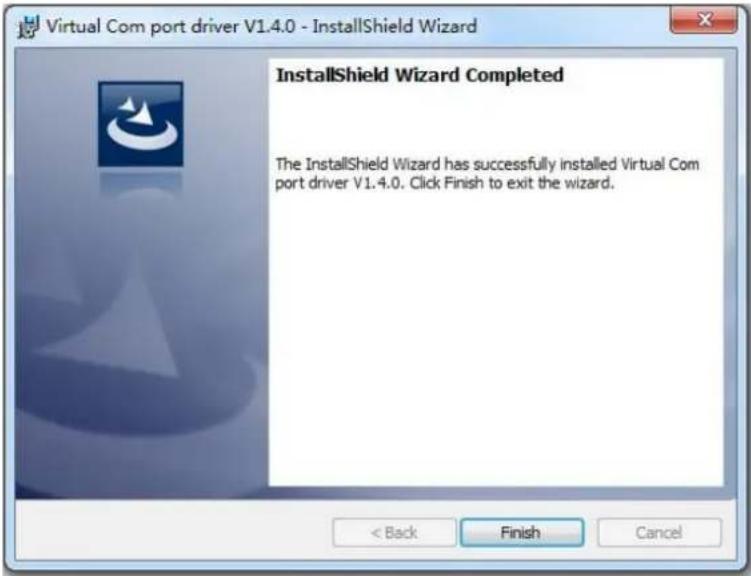
Then it will pop up the window of installation wizard for device driver, click "Next" to complete the installation.
(2) If user have installed the MSP software before, click "Cancel", and it will pop up the window as below:
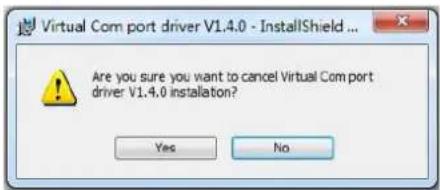
Click "Yes" to cancel installation.
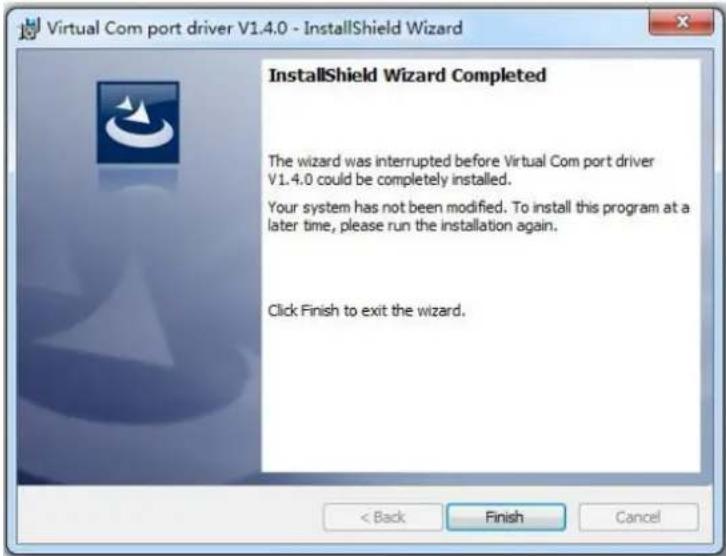
Click "Finish" to exit installation.
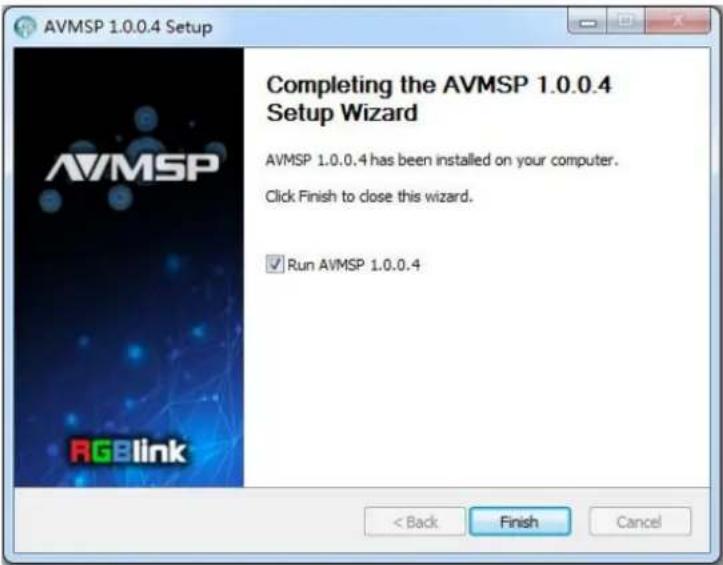
Then it will pop up the window of installation wizard for device driver, click "Cancel" to exit the installation. Click "Finish" and is ready to run the MSP management software:
Log in the Software

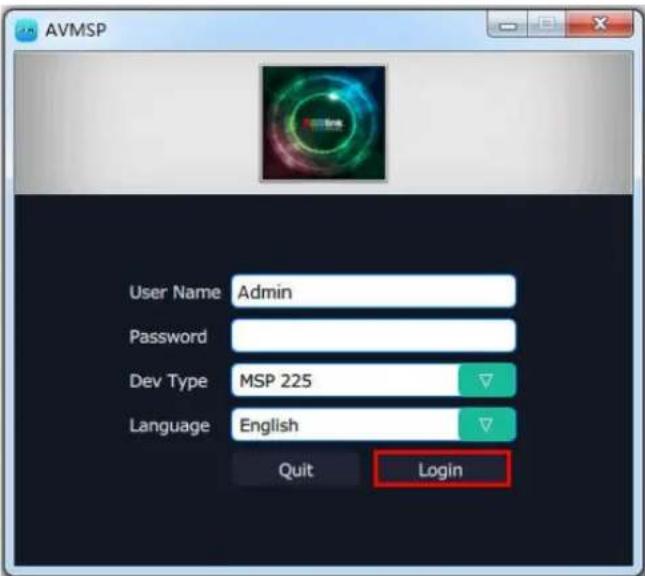
Double click the icon on the desktop. Log in interface will be enter after opening, the user name is Admin, and there is no password, select "MSP 225", and enter into the software by clicking "Login".
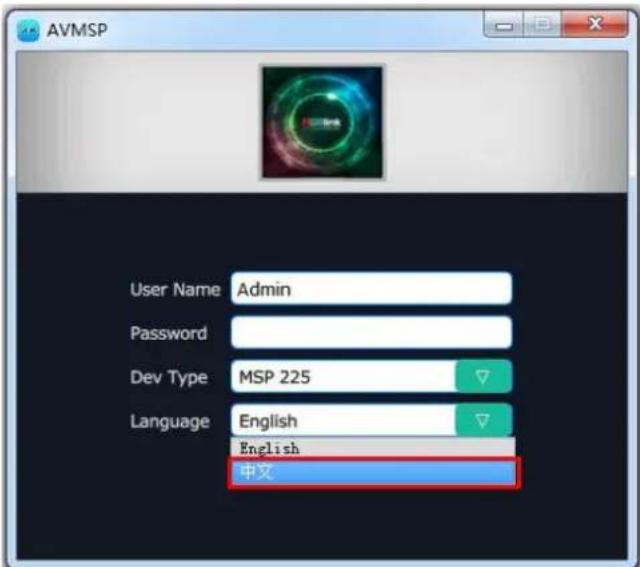
If user want to change the language to Chinese, click the drop down arrow after "Language" and select "Chinese", as shown in the figure below, then click "Login" to enter into the software.
MSP management software interface is shown as follows.
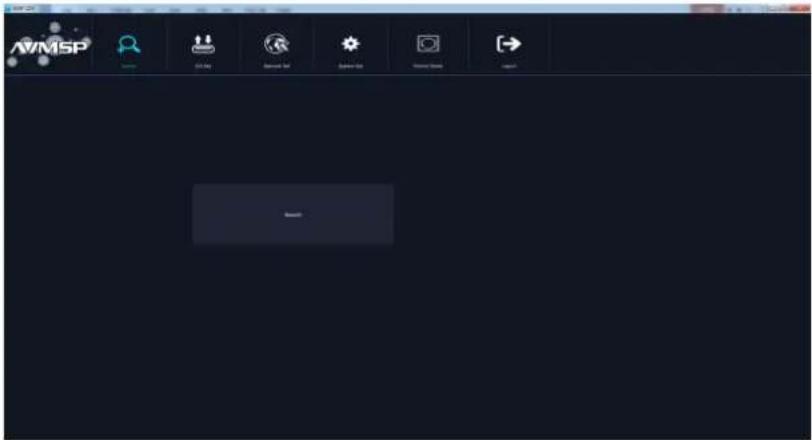
MSP management software contains the functions including: web links, search, I/O set, network set, system set, factory reset and logout. In the following parts, we will introduce these in detail.
Web Links
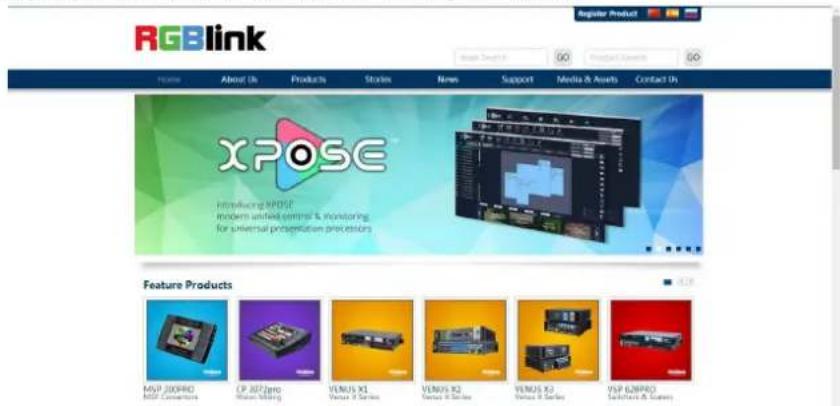
MSP management software sets up the web links. Click the web links icon on the top left corner, and enter the company's website, as shown in the figure below:
Connect the Device
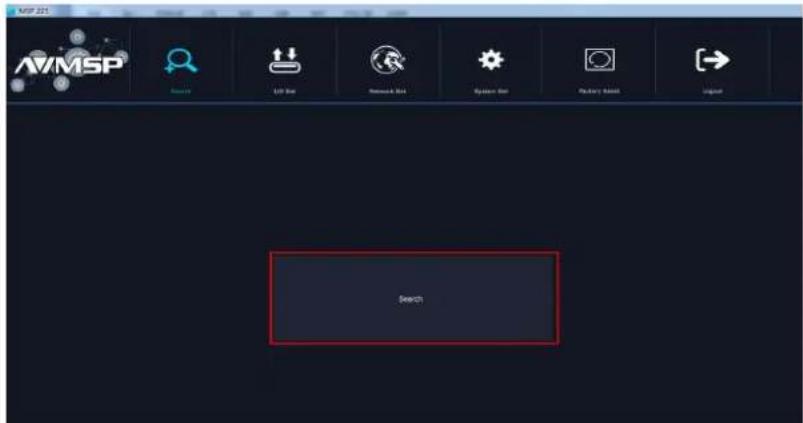
First, set up the device IP, and ensure the IP of the computer and device is on the same network segment. Connect the MSP management software to the computer with the network cable and power up the device. Then, click the shortcut "Search" on the operation interface.
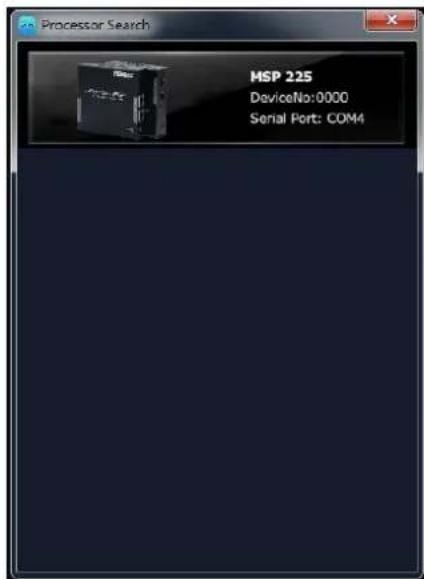
Then it will search the device, and show the device name, device number and connect information after search, as shown in the figure below:
Finally, click the device to connect, as shown in the figure below:
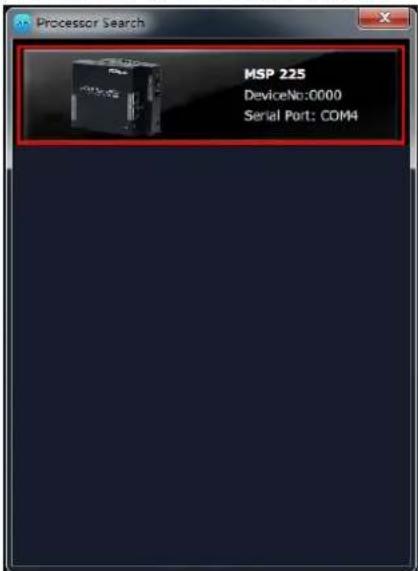
The software will enter to the I/O Set interface after connection, as shown in the figure below:
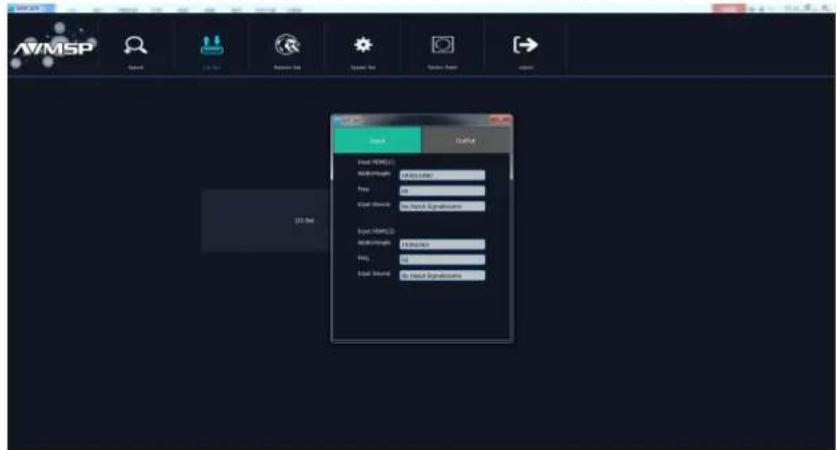
I/O Set
Click the "I/O Set", and enter to the interface as follows:
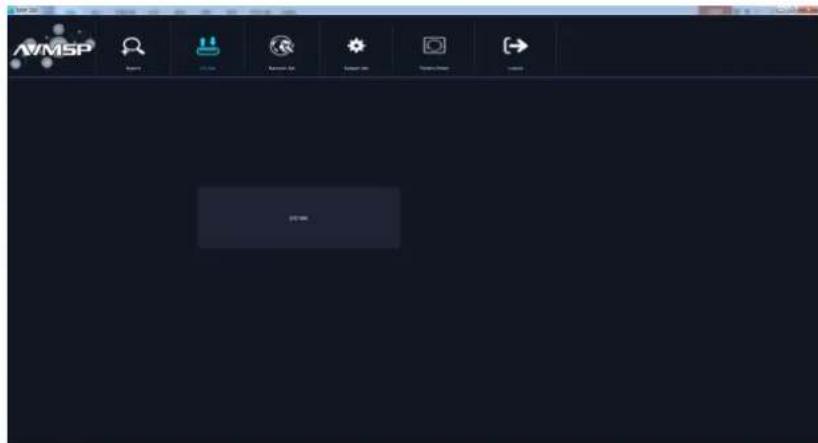
User can view the input information and set output width/height and FTS, specific as follows:
Input
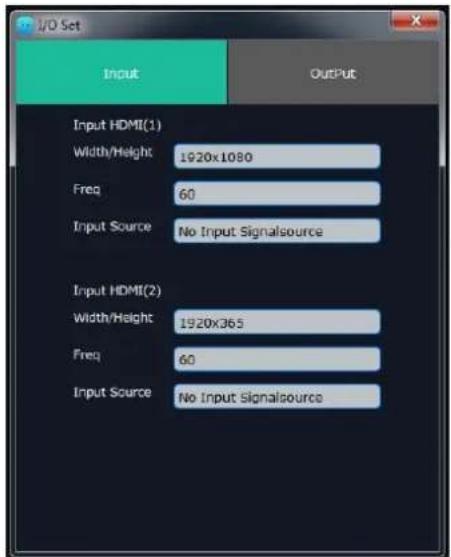
Display the input information, including input signal, width/height and Freq.
Output
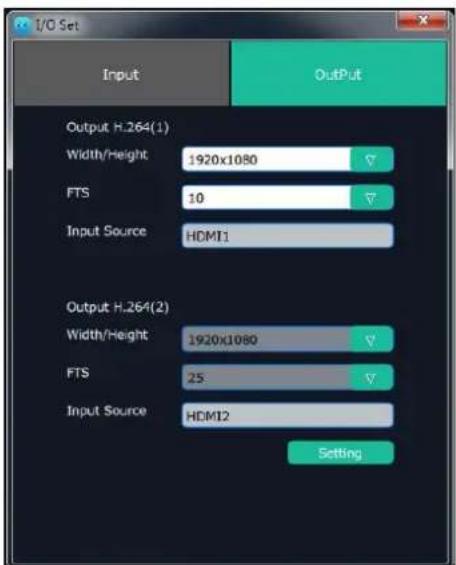
Click the pull-down menus, and select the width/height and FTS. Click "Setting" to confirm.
Network Set
Click "Network Set", and enter the interface as follows:
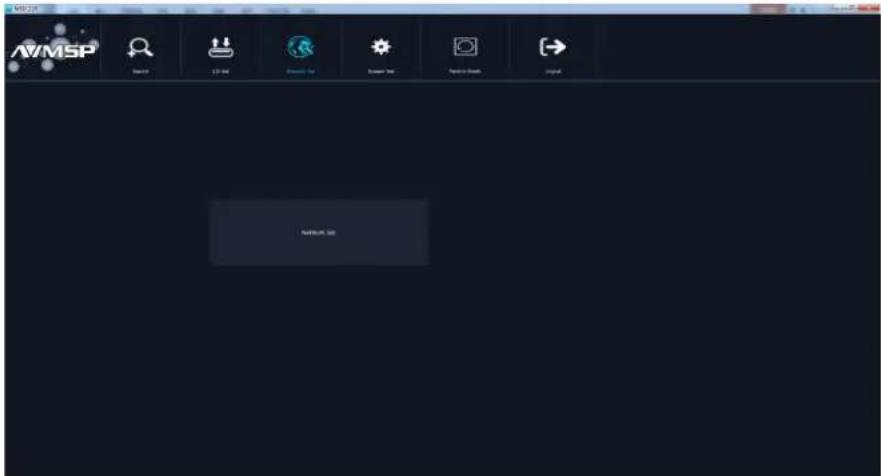
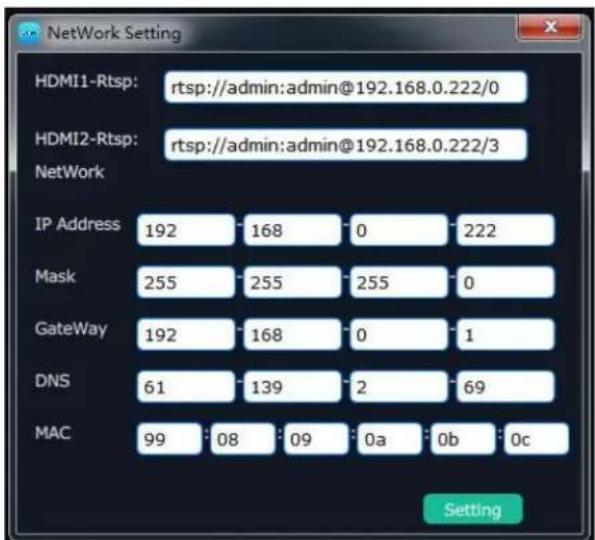
Click "Network Set", user can view the URL play address, and set IP address, Mask, GateWay, DNS and MAC. As shown in the figure below:
System Set
Click "System Set", and enter the interface as follows:
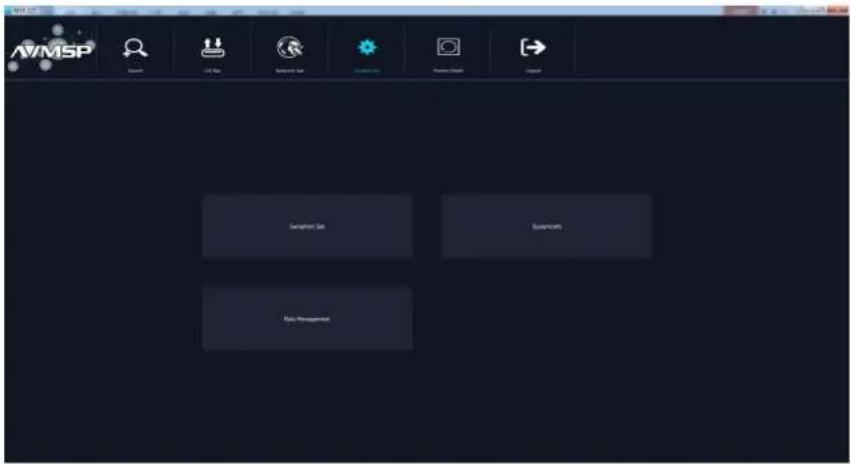
SerialPort Set, System Info and role management are included in system set, specific as follows:
SerialPort Set
Click "SerialPort Set", and pop-up window as follows:
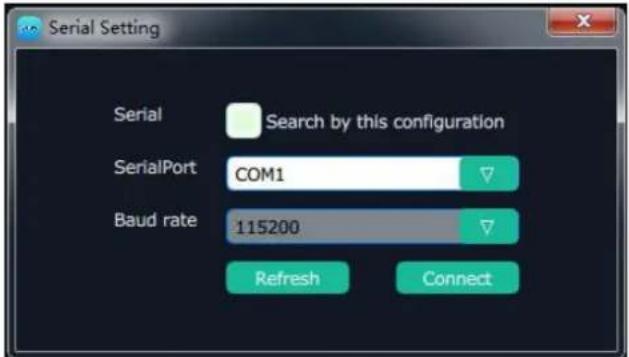
Select the corresponding serial number. If select "Search by this configuration", the software will search all the devices with corresponding serial number.
System Info
Click "System Info", and pop-up window as follows:
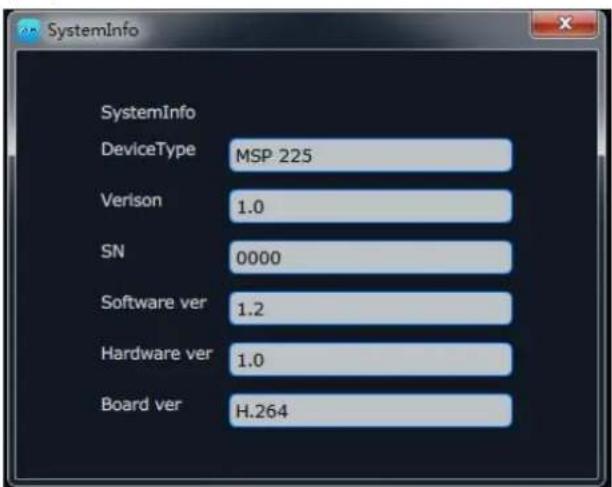
Display the device type, software version, serial number, software, hardware and board version.
Role Management
Click "Role Management", and pop-up window as follows:
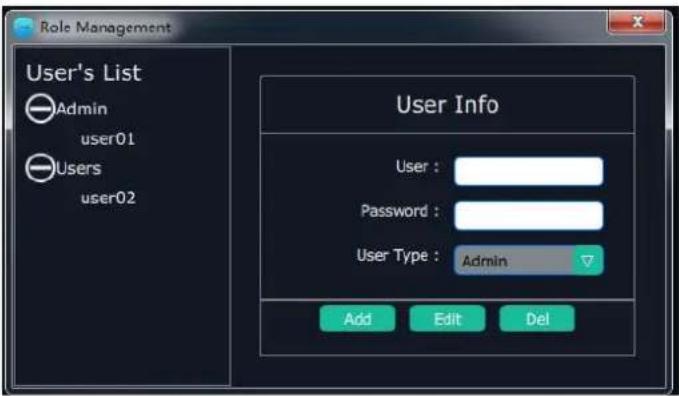
Add: Select the user type as "Admin" or "Users" in User's List, and input the user name and password. Click "Add" after setting.
Edit: Select the admin or users in user's list, then edit the password or user type, click "Edit" after setting. Del: Select the admin or users in user's list, then click "Del", the selected user will be deleted.
Factory Reset
Click "Factory Reset", and pop-up window as follows:
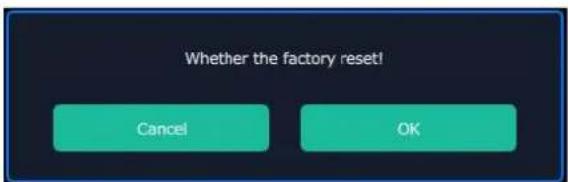
Select "OK", all the settings will be recover to factory setting.
Logout
Click the "Logout", and enter the interface as follows:
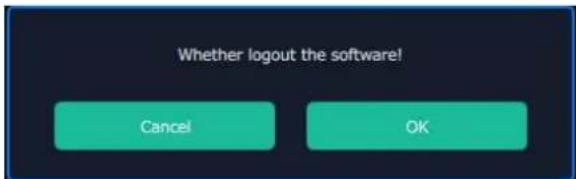
Click "OK" will logout the software.
Contact Information
Warranty:
All video products are designed and tested to the highest quality standard and backed by a full 3 years parts and labor warranty. Warranties are effective upon delivery date to customer and are non-transferable. RGBlink warranties are only valid to the original purchase/owner. Warranty related repairs include parts and labor, but do not include faults resulting from user negligence, special modification, lighting strikes, abuse(drop/crush), and/or other unusual damages.
The customer shall pay shipping charges when unit is returned for repair.
Headquarter: S603\~604 Weiye Building Torch Hi-Tech Industrial Development Zone Xiamen, Fujian Province, P.R.C
• Tel: +86-592-5771197
• Fax: +86-592-5788216
- Customer Hotline: 4008-592-315
- Web:
\~ http://www.rgblink.com
\~ http://www.rgblink.cn
• E-mail: support@rgblink.com
- CONTENT
- Product Introduction......2
- Packing Configuration....3
- Hardware Orientation....4
- Operating Instruction....5
- Using Software....7
- Contact Information....20
- Product Introduction
- Packing Configuration
- Operating Instruction
- System Connection
- How to Work
- Specification
- Using Software
- Installing Software
- Environment Requirements:
- Log in the Software
- Web Links
- Connect the Device
- I/O Set
- Input
- Output
- Network Set
- System Set
- SerialPort Set
- System Info
- Role Management
- Factory Reset
- Logout
- Contact Information
- Warranty:
Brand : RGBlink
Model : MSP 225
Category : Audio/Video Equipment