
ICA-TB TPM-3 - Tablet Techly - Free user manual and instructions
Find the device manual for free ICA-TB TPM-3 Techly in PDF.

| Product Type | Mobile Stand Up Workstation for Tablet |
| Brand | Techly |
| Model | ICA-TB TPM-3 |
| Main Function | Height adjustable worktable for standing use |
| Height Adjustment Mechanism | Pull-up with locking sound ("KA") |
| Lowering Method | Pull to top, then lower slowly until "KA" sound |
| Max Height Indicator | "MAX" mark on the leg |
| Safety Features | Ensure both legs at same height; listen for "KA" click |
| Mobility | Equipped with wheels |
| Assembly Required | Yes (instructions included) |
| Material | Metal |
| Color | Black (typical) |
| Weight Capacity | Up to 15 kg (estimated) |
| Recommended Use | Indoor office or home |
| Compatibility | Tablets, laptops |
| Construction | Multi-tiered with legs and central rotating component |
| Maintenance | Clean with dry cloth |
| Package Contents | Stand, assembly hardware, user manual |
Frequently Asked Questions - ICA-TB TPM-3 Techly
User questions about ICA-TB TPM-3 Techly
0 question about this device. Answer the ones you know or ask your own.
Ask a new question about this device
Download the instructions for your Tablet in PDF format for free! Find your manual ICA-TB TPM-3 - Techly and take your electronic device back in hand. On this page are published all the documents necessary for the use of your device. ICA-TB TPM-3 by Techly.
USER MANUAL ICA-TB TPM-3 Techly
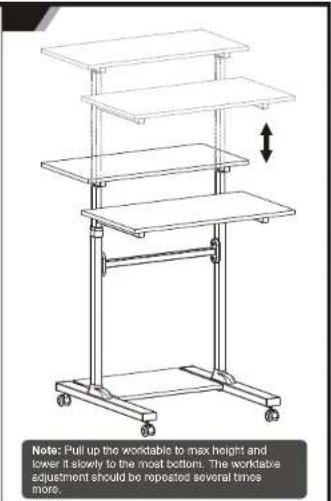
HOW TO ADJUST HEIGHT
Worktable can be adjusted to the
desired height by pulling up, until you
hear sound "KA" from both legs of
worktable. Then the worktable is fixed on this height.
HOW TO LOWER HEIGHT
Pull up worktable directly to the top, until
you see mark "down" on the leg of
worktable, then lover it slowly to the
most bottom, until you hear sound "KA"
from both legs of worktable. Then pull up to the right height.
to the right height
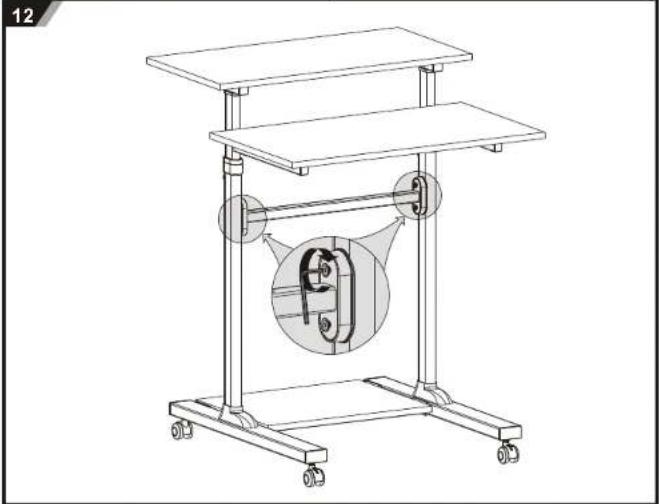
NOTE:
1. Loosen the knows to adjust the
worktable to the desired height, then
tighten the knobe to secure.
2. Please do not put anything on the
worktable when adjusting the worktable
heights
3. Make sure both legs of worktable are
at same height while finished height
adjustment
4. Make sure you hear sound 'KA' while
you adjust workable to your desired
height. This means the worktable is
fixed at the height, it without this sound, it means the workable in not found at this
It means the workable is not fixed at the height.
HEART
5. MAX mark on the leg means the max height which workable can be fixed.
Hight which worked can be fixed.
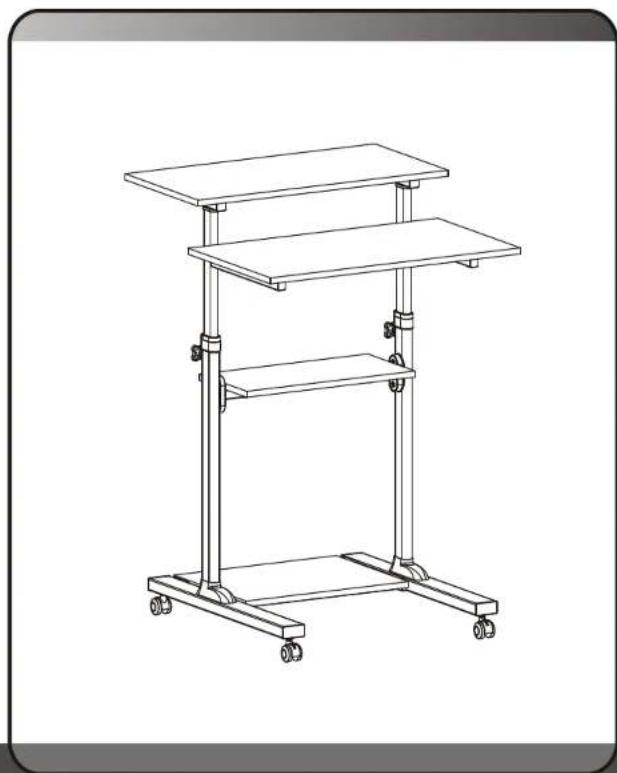
natural_image
Line drawing of a multi-tiered mechanical stand with wheels and legs (no text or symbols)Mobile Stand Up Workstation
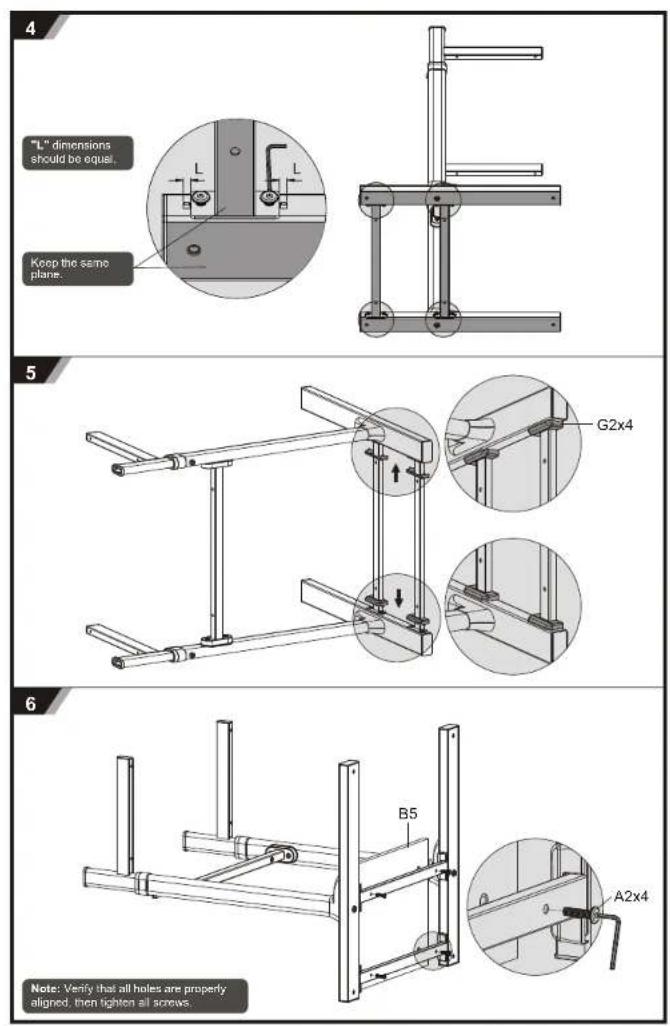
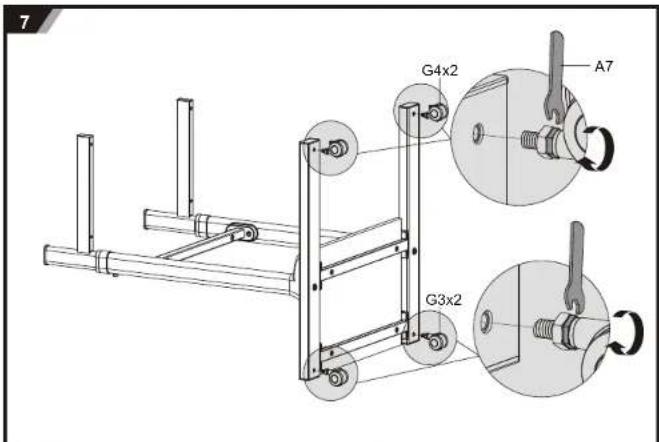
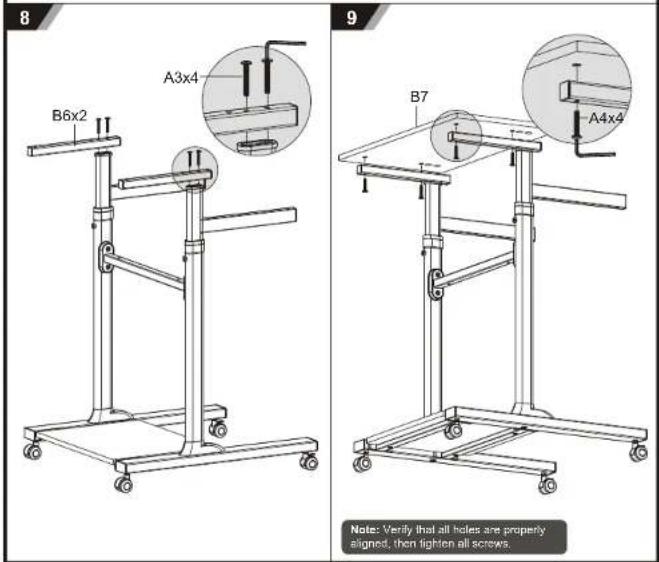
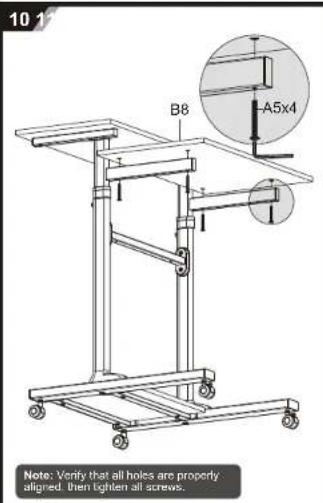
ASSEMBLY INSTRUCTIONS
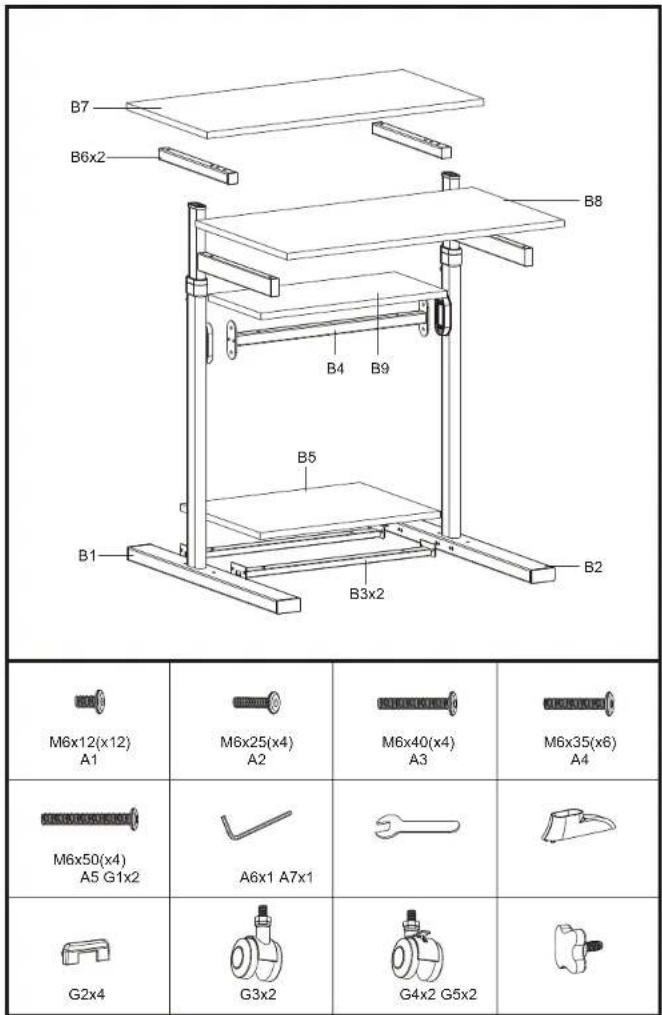

natural_image
Technical line drawing of a multi-level mechanical device with wheels and a central rotating component (no text or symbols)


Brand : Techly
Model : ICA-TB TPM-3
Category : Tablet