LCM1X2U - Monitor Stand Chief - Free user manual and instructions
Find the device manual for free LCM1X2U Chief in PDF.

User questions about LCM1X2U Chief
0 question about this device. Answer the ones you know or ask your own.
Ask a new question about this device
Download the instructions for your Monitor Stand in PDF format for free! Find your manual LCM1X2U - Chief and take your electronic device back in hand. On this page are published all the documents necessary for the use of your device. LCM1X2U by Chief.
USER MANUAL LCM1X2U Chief
INSTALLATION INSTRUCTIONS
natural_image
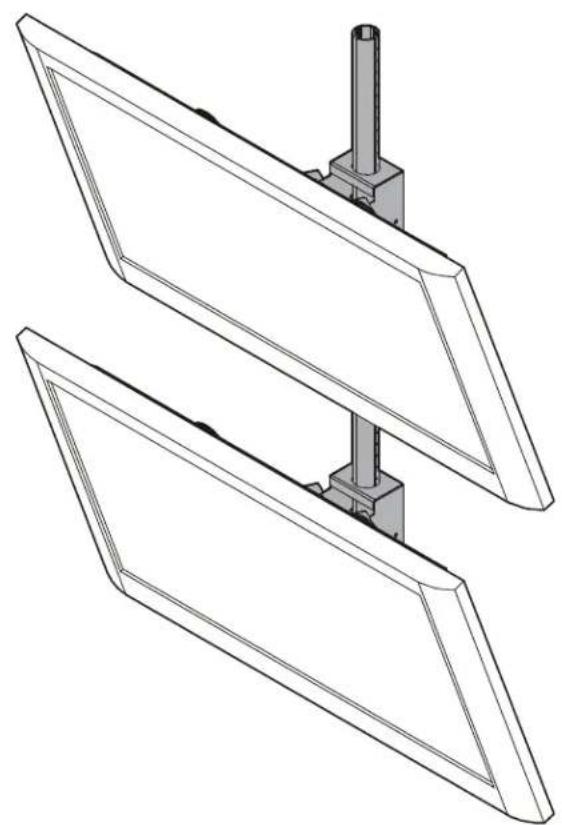
Technical line drawing of two identical metal frame components mounted on a support bracket (no text or symbols)Stacking Ceiling Mounts
DISCLAIMER
Milestone AV Technologies and its affiliated corporations and subsidiaries (collectively "Milestone"), intend to make this manual accurate and complete. However, Milestone makes no claim that the information contained herein covers all details, conditions or variations, nor does it provide for every possible contingency in connection with the installation or use of this product. The information contained in this document is subject to change without notice or obligation of any kind. Milestone makes no representation of warranty, expressed or implied, regarding the information contained herein. Milestone assumes no responsibility for accuracy, completeness or sufficiency of the information contained in this document.
Chief® is a registered trademark of Milestone AV Technologies. All rights reserved.

WARNING: Exceeding the weight capacity can result in serious personal injury or damage to equipment! It is the installer's responsibility to make sure the combined weight of all components located within the mounting system of the model does not exceed maximum weights listed in table below.
| MODEL Max Weight Allowed for EACH Display | Max Weight Capacity of Mounting System | |
| Medium | 125 lbs | 250 lbs |
| Stacker | (56.7 kg) | (113.4 kg) |
| Large | 125 lbs | 250 lbs |
| Stacker | (56.7 kg) | (113.4 kg) |
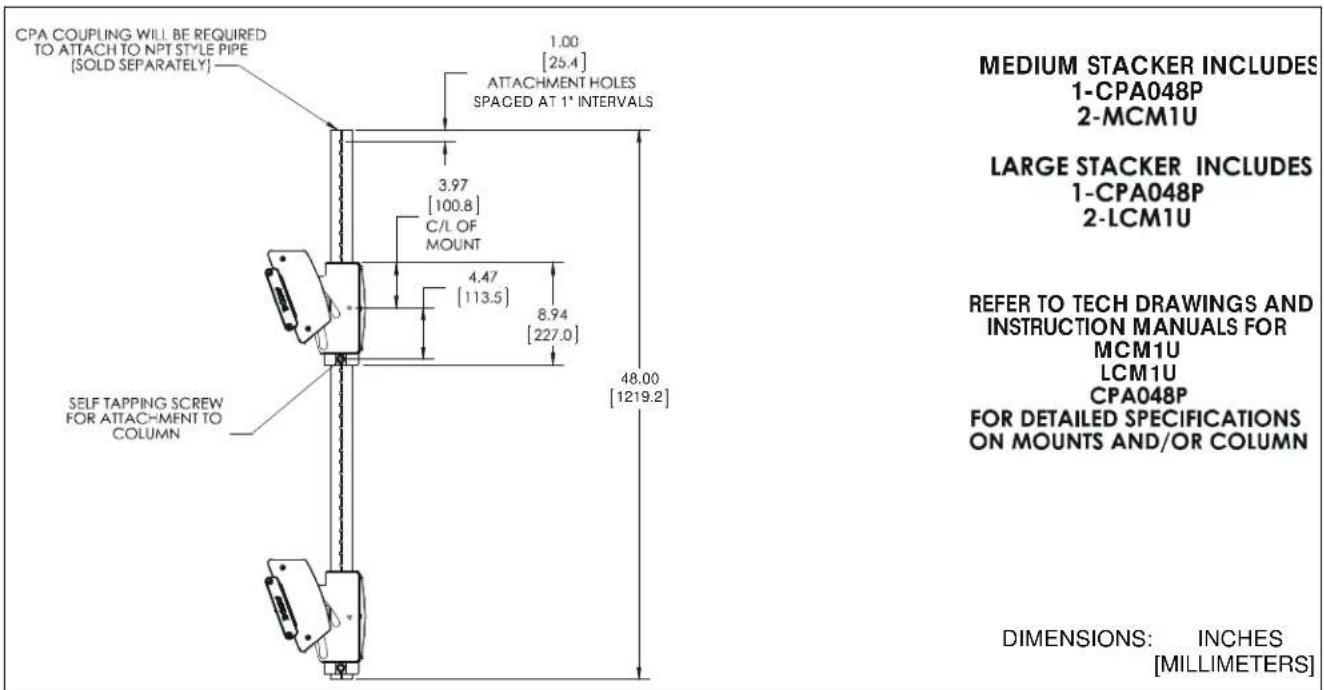
DIMENSIONS
text_image
CPA COUPLING WILL BE REQUIRED TO ATTACH TO NPT STYLE PIPE (SOLD SEPARATELY) 1.00 [25.4] ATTACHMENT HOLES SPACED AT 1' INTERVALS 3.97 [100.8] C/L OF MOUNT 4.47 [113.5] 8.94 [227.0] 48.00 [1219.2] SELF TAPPING SCREW FOR ATTACHMENT TO COLUMN MEDIUM STACKER INCLUDES 1-CPA048P 2-MCM1U LARGE STACKER INCLUDES 1-CPA048P 2-LCM1U REFER TO TECH DRAWINGS AND INSTRUCTION MANUALS FOR MCM1U LCM1U CPA048P FOR DETAILED SPECIFICATIONS ON MOUNTS AND/OR COLUMN DIMENSIONS: INCHES [MILLIMETERS]INSTALLATION
IMPORTANT ! : Refer to Dimensions section to find specific Medium Stacker or Large Stacker dimension requirements BEFORE proceeding with installation.
NOTE: The following procedure assumes that a UL Listed CPA or CMA ceiling plate (not included) has been properly installed following instructions provided with ceiling plate.
Installing Column
- Lay column on floor and carefully place displays next to column. (See Figure 1)
- Mark center of lower display onto column. (See Figure 1)
- Measure one screen height up on the column from the first mark. Add approximately 2 inches extra length to allow for display tilt, and add additional length for any extra space desired between displays. (See Figure 1)
- Mark center of upper display onto column. (See Figure 1)

text_image
4 2 3 Center of displayFigure 1
- Install column following instructions included with column.
Installing MCM1U / LCM1U
- Install MCM1U / LCM1U onto column following instructions included with MCM1U/LCM1U.
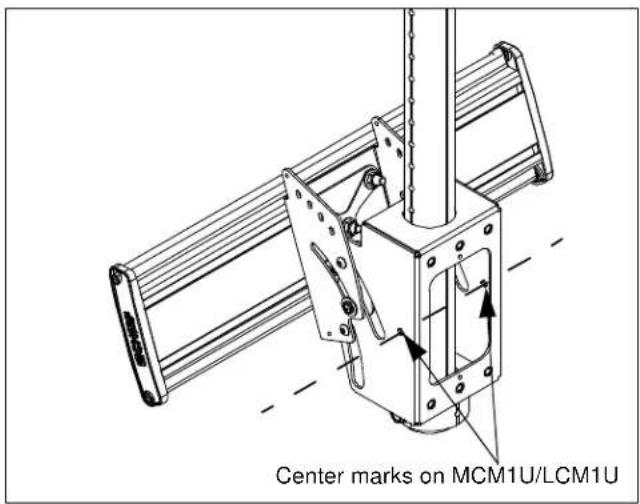
IMPORTANT ! : Match the center marks on the MCM1U/LCM1U with the marks on the column. (See Figure 2)
text_image
Center marks on MCM1U/LCM1UFigure 2
- Complete installation following instructions included with MCM1U/LCM1U.
Medium/Large Stacker Ceiling Mounts
Installation Instructions