
HWS401 - Smoke detector CALIBER - Free user manual and instructions
Find the device manual for free HWS401 CALIBER in PDF.


| Product Type | Smoke and Heat Detector (Wi-Fi enabled) |
| Product Dimensions | ∅68mm x 28mm (H) |
| Weight | Approx. 150g (including batteries) |
| Power Supply | 2x CR2 3V batteries (included) |
| Standby Current | 24.8μA |
| Working Current (max) | 100mA |
| Battery Life (standby) | Up to 5 years |
| Battery Life (active, 20 alarms/day) | Approx. 1 year |
| Alarm Temperature | >50°C (122°F) |
| Sound Level | 90dB at 1m |
| Smoke Detection | Photoelectric sensor |
| Wireless Protocol | IEEE 802.11b/g/n (2.4GHz only) |
| Wireless Range | Up to 45m (open area) |
| Operating Humidity | 20% - 85% RH |
| Operating Temperature | 0°C to 60°C (32°F to 140°F) |
| App Compatibility | Caliber Smart Home (iOS/Android) |
| Voice Control | Works with Amazon Alexa and Google Assistant |
| IFTTT Support | Yes |
| Notification | Push notifications on smartphone |
| History Log | Motion and alarm records with timestamp |
| Installation Method | Adhesive sticker or screws (hardware included) |
| Pairing Modes | EZ (easy) and AP (access point) modes |
| Reset Function | Factory reset via app or button (press 5s) |
| Maintenance | Vacuum dust from vents monthly; test weekly |
| Replaceable Batteries | Yes (CR2); replace when low battery warning in app |
| Included Accessories | Smoke sensor, mounting bracket, screws/anchors, adhesive sticker, 2x CR2 batteries, user manual |
Frequently Asked Questions - HWS401 CALIBER
User questions about HWS401 CALIBER
0 question about this device. Answer the ones you know or ask your own.
Ask a new question about this device
Download the instructions for your Smoke detector in PDF format for free! Find your manual HWS401 - CALIBER and take your electronic device back in hand. On this page are published all the documents necessary for the use of your device. HWS401 by CALIBER.
USER MANUAL HWS401 CALIBER

EASY INSTALL
ANYONE CAN DO IT
Instruction manual for HWS 401
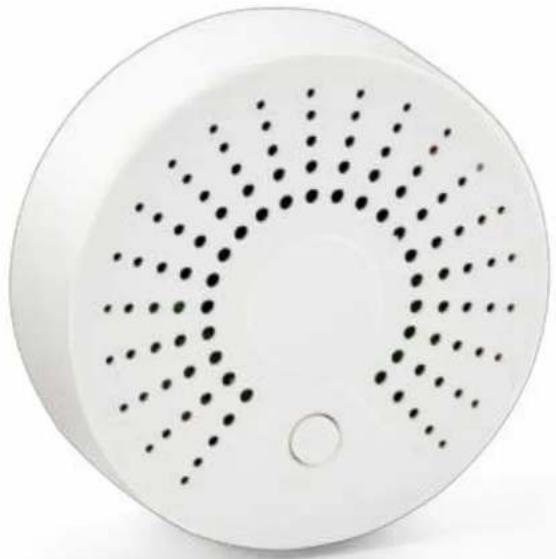
The pictures/screenshots/illustrations used in this manual are subject to change without notification. Also they may differ in appearance, depending on the device you use, iOS or Android, tablet or phone etc. Product and software update periodically, the number and app interface in this manual are only shown as an example. No extra notification on further changes.

Index:
No. 1 Caliber Smart Home app
No. 2 Register / Login
No. 3 Add device('s) • EZ-mode • AP-mode
No. 4 Control device
No. 5 Profile
No. 6 Scene's& Automation
No. 7 Voice control
No. 8 Trouble shooting
No. 9 Specifications

Click to jump to
No. 1
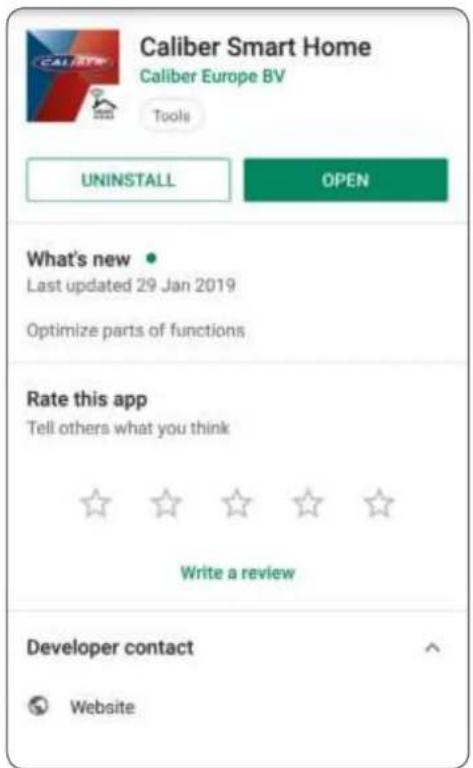
Download and install Caliber Smart Home app

Use your phone to scan the QR code below or search "Caliber Smart Home" in the app Store or Google play to download and install the app

Index:
No. 1 Caliber Smart Home app
No. 2 Register / Login
No. 3 Add device('s) • EZ-mode • AP-mode
No. 4 Control device
No. 5 Profile
No. 6 Scene's& Automation
No. 7 Voice control
No. 8 Trouble shooting
No. 9 Specifications

No. 2
Register / Login / Request password

Register
Setup an account for 'Caliber Smart Home', or sign-in if you already have an account.
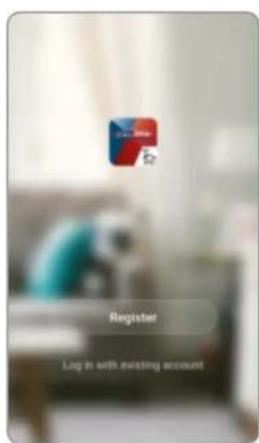
- Tap "Register" in the lower centre "img 1"
-
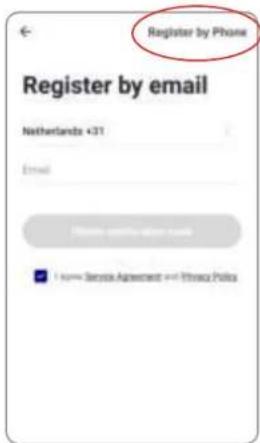
The system automatically determines your country / area. You can also select your country code by yourself.
Enter the cellphone number / E-mail and tap "Obtain verification code" "img 2" note: Change to "register by phone" for using a phone number to register. -
Enter the verification code you received "img 3". If you didn't received the verification code within 30min. please try the previous step again
-
Choose a password for your account "img 4", tap "Completed" to finish your registration.
img 1 img 2
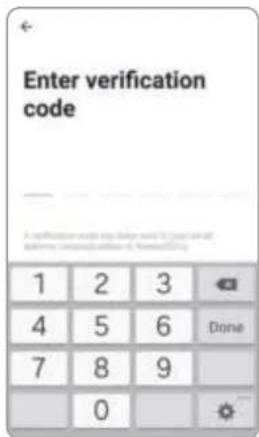
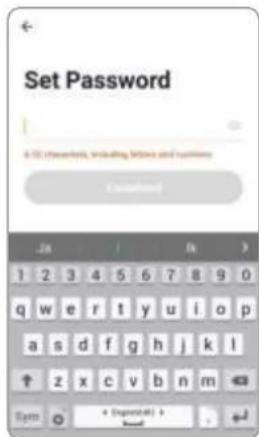
img 3 img 4
Index:
No. 1 Caliber Smart Home app
No. 2 Register / Login
No. 3 Add device('s) • EZ-mode • AP-mode
No. 4 Control device
No. 5 Profile
No. 6 Scene's& Automation
No. 7 Voice control No. 8 Trouble shooting
No. 9 Specifications

No. 2
Register / Login / Request password

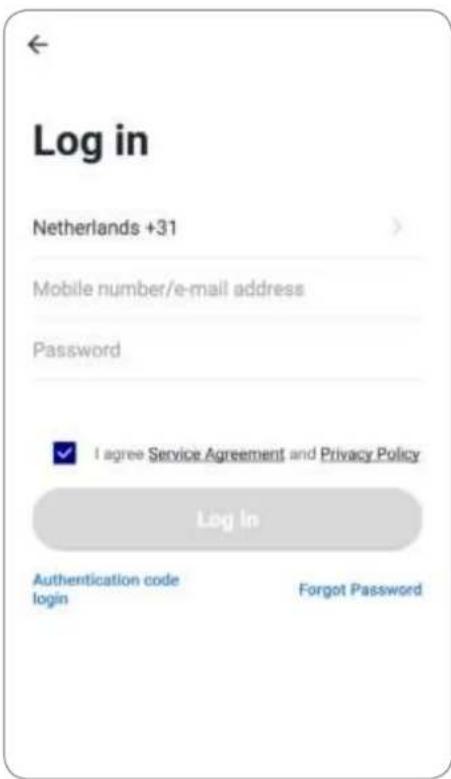
Account+password sign-in
- The system will automatically determine your country / area or you could select manually
- Enter your registered cellphone number or email and password, sign in to the system
Index:
No.1 Caliber Smart Home app
No.2 Register/Login
No. 3 Add device('s) • EZ-mode • AP-mode
No. 4 Control device
No. 5 Profile
No. 6 Scene's& Automation
No. 7 Voice control
No. 8 Trouble shooting
No. 9 Specifications
No. 2
Register / Login / Request password

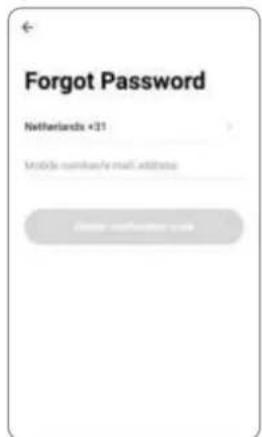
Forgot password
If you forgot your account of "Caliber Smart Home", you can reset the account password by "Forgot password"
- Tap "Forgot password", as shown in "img 1"
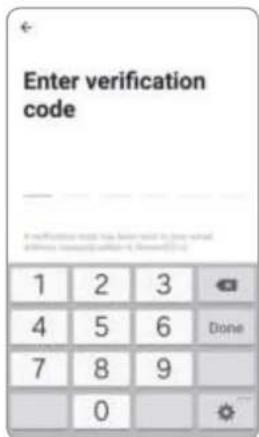
- The system automatically determines your country / area. You can also select your country code by yourself. Enter the cellphone number/E-mail and tap "Obtain verification code", as shown in "img 3"
-
Enter the verification code you received "img 3". If you didn't received the verification code within 30min. please try the previous step again.
-
Choose a password for your account "img 4", tap "Completed" to finish your registration.
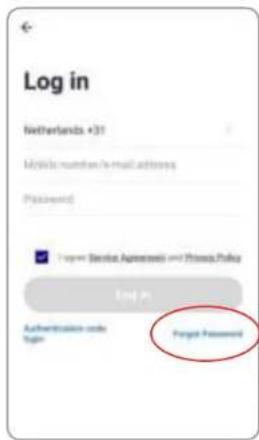

img 2 img 3 img 4 img 1
Index:
No. 1 Caliber Smart Home app
No. 2 Register / Login
No. 3 Add device('s)
• EZ-mode
• AP-mode
No. 4 Control device
No. 5 Profile
No. 6 Scene's& Automation
No. 7 Voice control
No. 8 Trouble shooting
No. 9 Specifications

No. 3 ADD device('s) EZ-mode

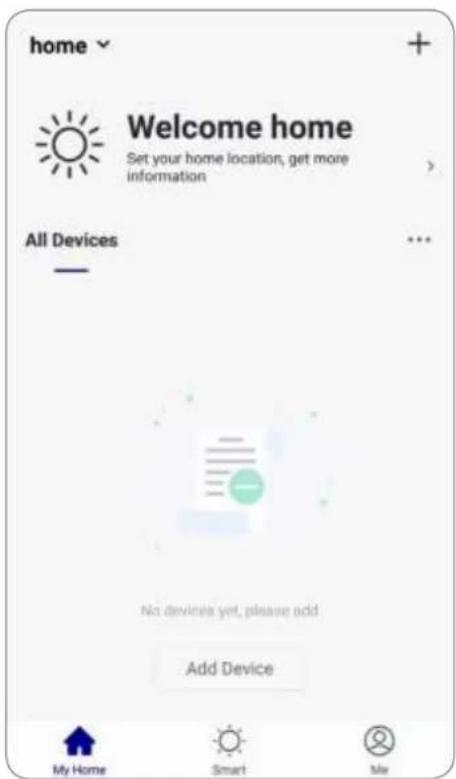
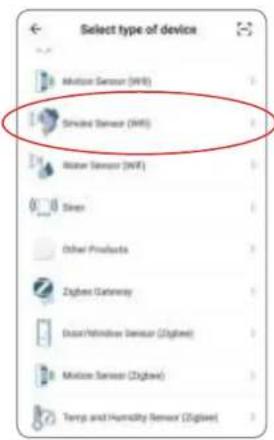
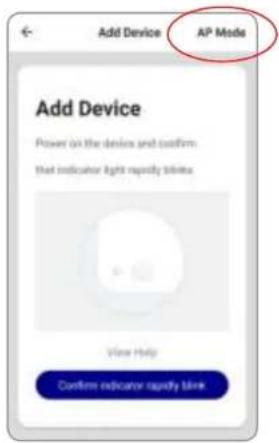
- Go to the app, tap "+" in the upper right of this page to add device's as shown in the picture to the left.
- In this case, select "Smoke Sensor (Wifi)"
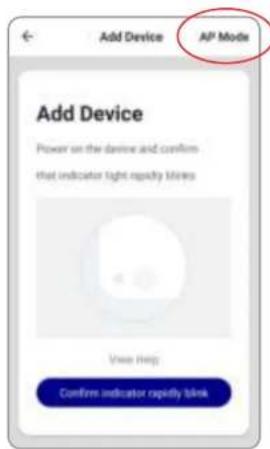
- For EZ (Easy install) mode, please make sure the device's indicator light flashes quickly, tap "Confirm indicator rapidly blink" to continue.
Remarks:
App provides two methods of network connection: EZ mode and AP mode. Please use EZ mode as default. If it failed, please tap "AP mode" in the upper right to try connecting again.
Index:
No. 1 Caliber Smart Home app
No. 2 Register / Login
No. 3 Add device('s)
• EZ-mode
• AP-mode
No. 4 Control device
No. 5 Profile
No. 6 Scene's& Automation
No. 7 Voice control
No. 8 Trouble shooting
No. 9 Specifications

No. 3 ADD device('s) EZ-mode

ADD device in EZ mode (default)
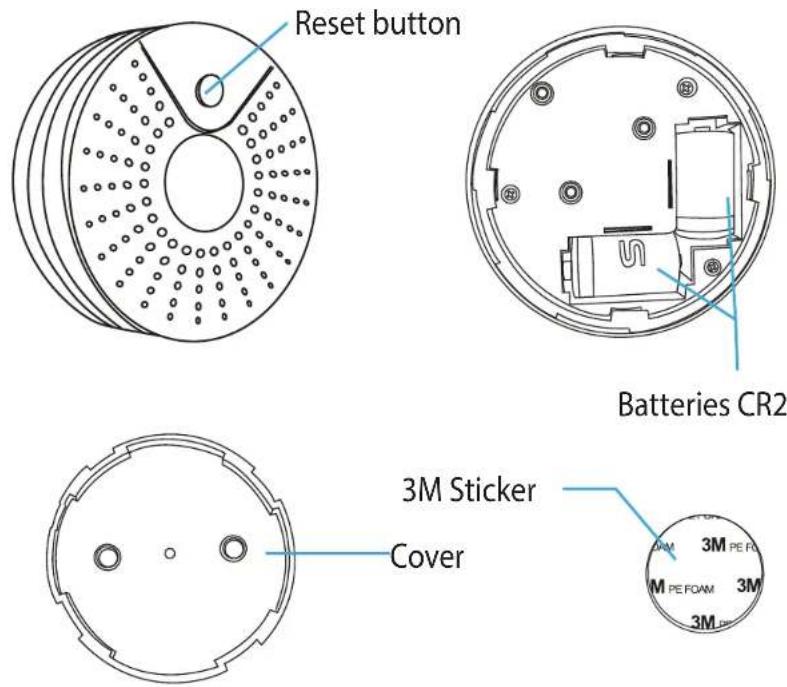
Press and hold the reset button (3) on the rear for 5 sec. The LED will blink fast in EZ mode (3 times/per second).
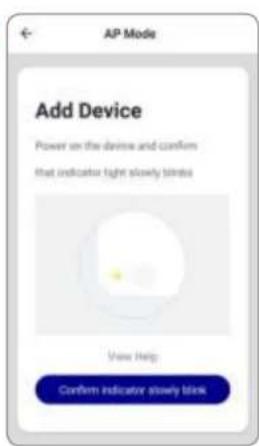
Remarks: If indicator light is slowly flashing (Once per 2s), it indicates that device is under AP mode. Long press reset button for 5 seconds to switch the modes.
Index:
No. 1 Caliber Smart Home app
No. 2 Register / Login
No. 3 Add device('s) • EZ-mode • AP-mode
No. 4 Control device
No. 5 Profile
No. 6 Scene's& Automation
No. 7 Voice control
No. 8 Trouble shooting
No. 9 Specifications

No. 3 ADD device('s) EZ-mode

ADD device in EZ mode (default)
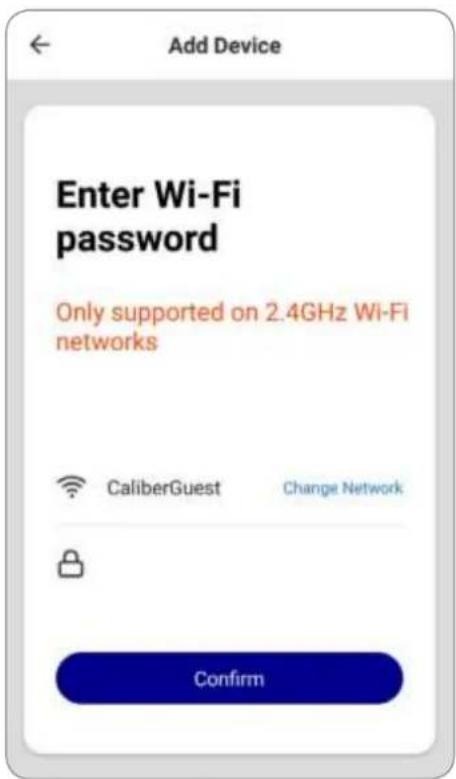
Next step: confirm the WiFi for device connection and enter the password. Tap "Confirm" and start connecting the device. (remarks: only supports 2.4G Wi-Fi network), as shown in the picture. The connection process takes up to 30 sec. If EZ mode fails, try AP mode.
Remarks:
The purpose of this step is to let the "Caliber Smart Home" app know which router to use for Wi-Fi network connection. After a successful setup, the device will automatically connect to the Wi-Fi network.
Index:
No. 1 Caliber Smart Home app
No. 2 Register / Login
No. 3 Add device('s) • EZ-mode • AP-mode
No. 4 Control device
No. 5 Profile
No. 6 Scene's& Automation
No. 7 Voice control
No. 8 Trouble shooting
No. 9 Specifications
No. 3
ADD device('s) €Z-mode successful

Connecting
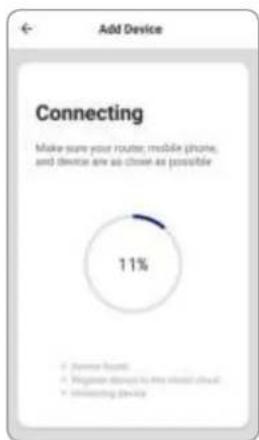
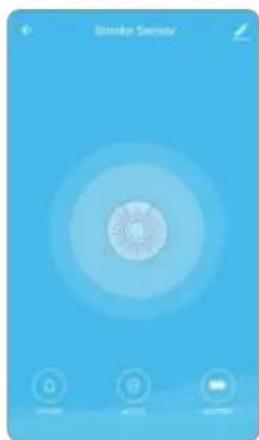
Now the connection status shows. "Device added!" notification will show after device is successfully connected. Tap "Completed" and the interface jump to the device's user interface. Then you could start making changes or monitor the device.
Tap the edit symbol : or to make changes in the name etc.


img 1 img 2 img 3 img 4
Index:
No. 1 Caliber Smart Home app
No. 2 Register / Login
No. 3 Add device('s) • EZ-mode • AP-mode
No. 4 Control device
No. 5 Profile
No. 6 Scene's& Automation
No. 7 Voice control
No. 8 Trouble shooting
No. 9 Specifications
No. 3
ADD device('s) AP-mode

ADD device in AP mode (alternative mode, Hotspot)
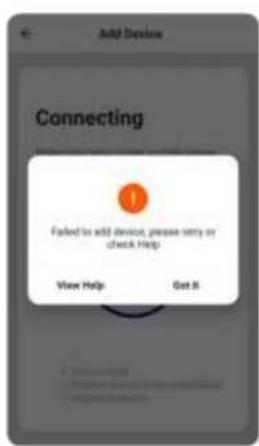
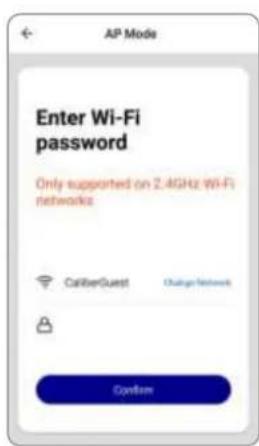
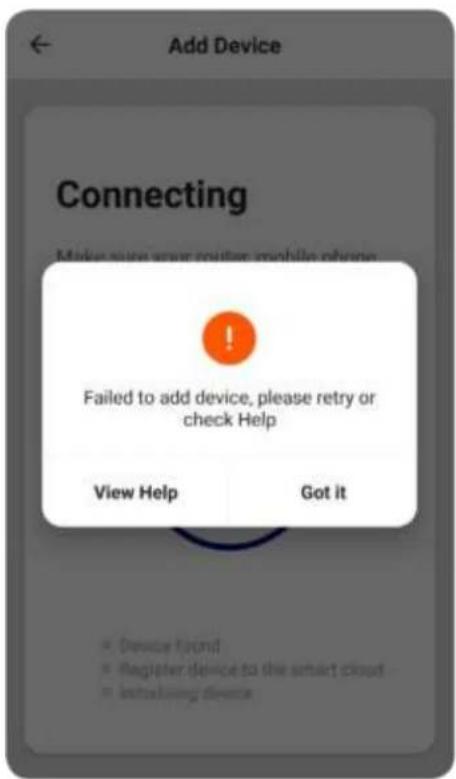
When the internet connection is unstable, the app will show a message as in "img 1" The connection has failed, now it's time to try again in AP-mode
- Tap "+" (ADD Device)
- Choose AP-Mode on the top right of the screen.
- Press and hold the reset button (3) on the rear for 5 sec.
Press and hold the button again for 5sec. The LED indicator will blink slowly in blue. - Enter the password of your Wi-Fi network and confirm.
Note: If you're installing a different product, please tap "view help" to see product specific instructions per connection mode on screen.
Index:
No. 1 Caliber Smart Home app
No. 2 Register / Login
No. 3 Add device('s)
• EZ-mode
• AP-mode
No. 4 Control device
No. 5 Profile
No. 6 Scene's& Automation
No. 7 Voice control
No. 8 Trouble shooting
No. 9 Specifications
img 1 img 2 img 3 img 4

No. 3
ADD device('s) AP-mode successful

ADD device in AP mode (manual mode, Hotspot)
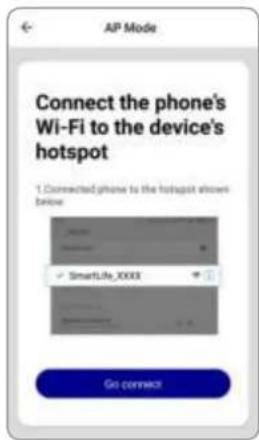
- Connect to device's hotspot in Wi-Fi list 'SmartLife_xxxx' to finish the Wi-Fi connection. App will jump to "connection successful" page when the Wi-Fi connection process is complete.
Note: In some cases, depending on your phone or table, you might have to return to the "Caliber Smart Home" app manually for the connection to continue.
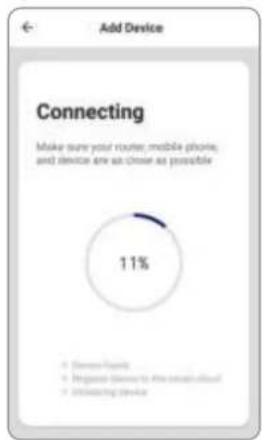
Connecting
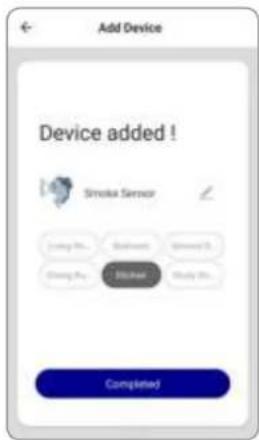
Now the connection status shows. "Device added!" notification will show after device is successfully connected. Tap "Completed" and the interface jump to the device's user interface. Then you could start making changes or monitor the device.
Tap the edit symbol : √or to make changes in the name etc.
img 1 img 2 img 3 img 4
Index:
No. 1 Caliber Smart Home app
No. 2 Register / Login
No. 3 Add device('s) • EZ-mode • AP-mode
No. 4 Control device
No. 5 Profile
No. 6 Scene's& Automation
No. 7 Voice control
No. 8 Trouble shooting
No. 9 Specifications
CALIBER
No. 3
ADD device('s) AP-mode fail

Remarks:
If your app interface is shown as in the picture, it means that the network connection failed. You could try connecting again. If connection is fails, please refer to the Trouble shooting page or "View Help". If you can't find your answers, please submit the user feedback in the app. Our staff will help you to solve the problems.
Index:
No. 1 Caliber Smart Home app
No. 2 Register / Login
No. 3 Add device('s) • EZ-mode • AP-mode
No. 4 Control device
No. 5 Profile
No. 6 Scene's& Automation
No. 7 Voice control
No. 8 Trouble shooting
No. 9 Specifications
No. 4 Control device

Control device
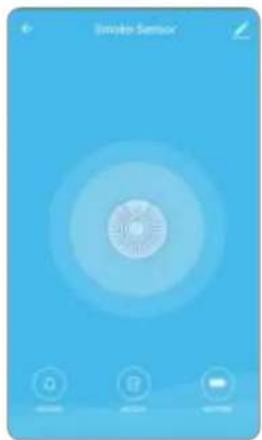
After the device is connected successfully, tap "My Home" at the bottom. The device name shows in the list. Tap it to enter the control panel of the device (motion sensor)
Remarks:
When device is online, operation via shortcuts is supported; When the device is offline, device displays "device is offline" and is greyed out.

Index:
No. 1 Caliber Smart Home app
No. 2 Register / Login
No. 3 Add device('s) • EZ-mode • AP-mode
No. 4 Control device
No. 5 Profile
No. 6 Scene's& Automation
No. 7 Voice control
No. 8 Trouble shooting
No. 9 Specifications
No. 4 Control device


Control device
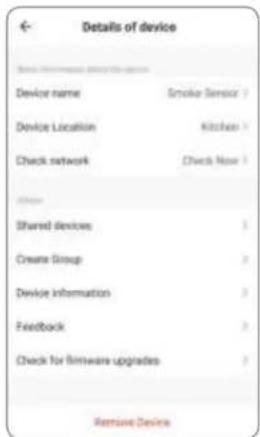
From this page, all device settings can be altered.
Tap the edit symbol : or to make changes in name, location, share settings etc.
Index:
No. 1 Caliber Smart Home app
No. 2 Register / Login
No. 3 Add device('s) • EZ-mode • AP-mode
No. 4 Control device
No. 5 Profile
No. 6 Scene's& Automation
No. 7 Voice control
No. 8 Trouble shooting
No. 9 Specifications
No. 4 Control device


History
Motion records with date and time
Setting
Enable or disable push notifications. Events will still be written in the history
Restore factory defaults
This deletes all motion records and will remove the device.
Index:
No. 1 Caliber Smart Home app
No.2 Register/Login
No. 3 Add device('s)
• EZ-mode
• AP-mode
No. 4 Control device
No. 5 Profile
No. 6 Scene's& Automation
No. 7 Voice control
No. 8 Trouble shooting
No. 9 Specifications
No. 5
Profile

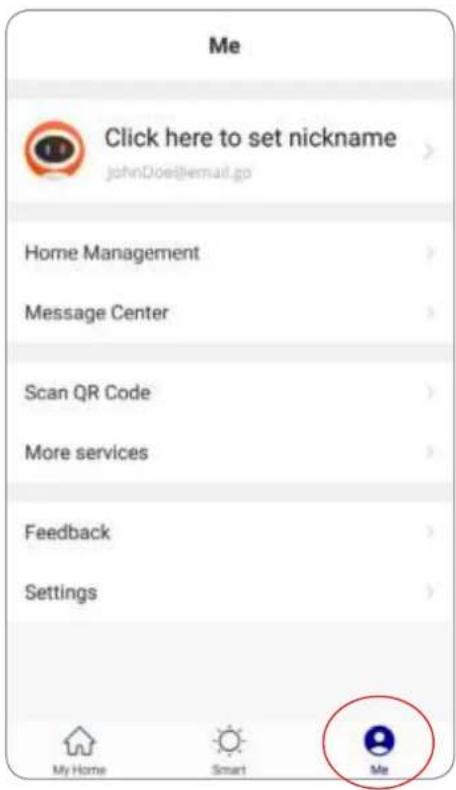
Profile (Me)
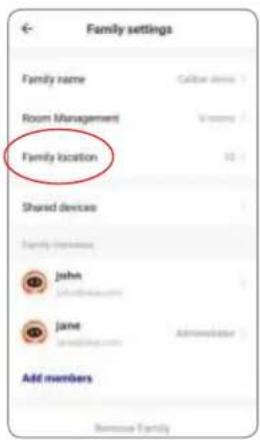
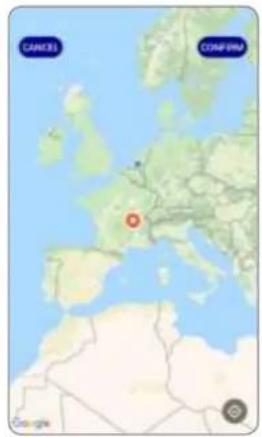
In order to make full use of the functionality of this app and your Caliber Smart Home devices, make your home situation match the situation in the app.
- Choose family name
- Manage your rooms
- Set the location, for area automations
- Add members to the family
Index:
No. 1 Caliber Smart Home app
No. 2 Register / Login
No. 3 Add device('s) • EZ-mode • AP-mode
No. 4 Control device
No. 5 Profile
No. 6 Scene's& Automation
No. 7 Voice control
No. 8 Trouble shooting
No. 9 Specifications

No. 6
Scene's & Automation

Scene's
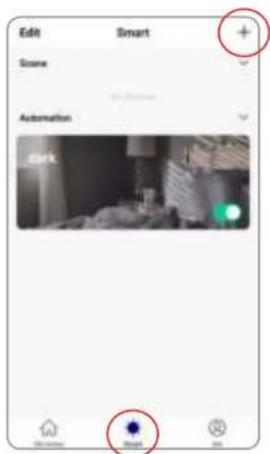
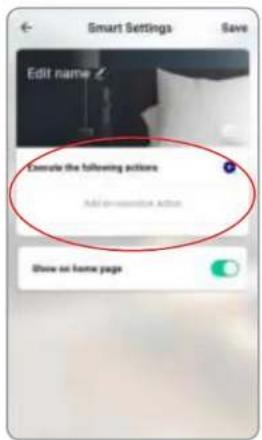
You can combine devices to do 'tasks' in a "scene". Go to Smart (img1)
The next pages describes general information. Some products cannot preform scene's
- Tap“+” in the upper right of the page to create a new smart scene.
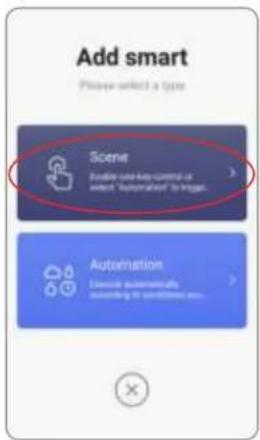
- Tap "scene" img 2
- Enter life scene name, add task, tap "Save", as shown in the picture. A smart scene has been created.
- You can also change the scene you have already created (img1), change scene name, change task or delete smart scene etc.
img 1 img 2 img 3 img 4
Index:
No. 1 Caliber Smart Home app
No. 2 Register / Login
No. 3 Add device('s) • EZ-mode • AP-mode
No. 4 Control device
No. 5 Profile
No. 6 Scene's& Automation
No. 7 Voice control
No. 8 Trouble shooting
No. 9 Specifications
CALIBER
No. 6
Scene's & Automation

Automation
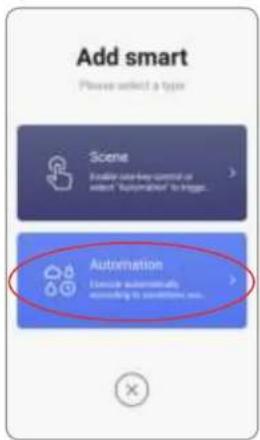
You can execute automations, when conditions are met.
- Tap“+” in the upper right of the page to create a new smart scene
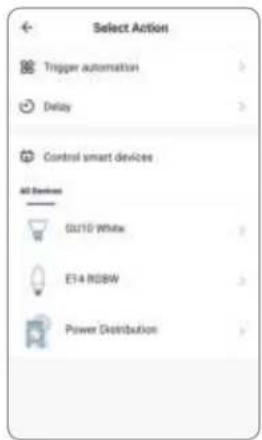
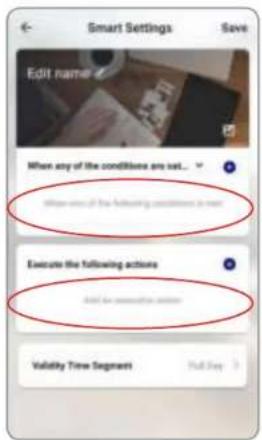
2.Tap"Automation" - Choose which conditions should be met "img3".
- Choose what 'task /action' should be executed "img3".
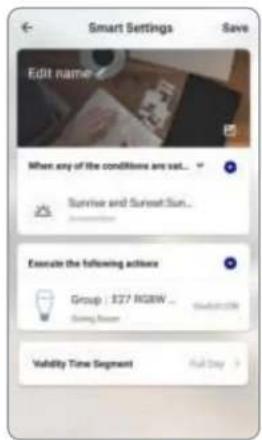
- img4 shows an example (This might include a different product). The Smart light group "E27 RGBW" switches ON when the sun sets. For this function you need to set your location, see control device.
Index:
No. 1 Caliber Smart Home app
No. 2 Register / Login
No. 3 Add device('s)
• EZ-mode
• AP-mode
No. 4 Control device
No. 5 Profile
No. 6 Scene's& Automation
No. 7 Voice control
No. 8 Trouble shooting
No. 9 Specifications

img 1 img 2 img 3 img 4

No. 7
3RD Party voice control

Voice control
Most of our Smart Home products support 3rd party voice control. Instructions how to connect can be found in the links below:
Connect with Google Home
Webshop.caliber.nl/media/SmartHome/Caliber_in_GoogleHome.pdf
Connect with Amazon Alexa
Webshop.caliber.nl/media/SmartHome/Caliber_with_Amazon-Alexa.pdf
Index:
No. 1 Caliber Smart Home app
No. 2 Register / Login
No. 3 Add device('s) • EZ-mode • AP-mode
No. 4 Control device
No. 5 Profile
No. 6 Scene's& Automation
No. 7 Voice control
No. 8 Trouble shooting
No. 9 Specifications
No. 8
Trouble shooting

Possible reasons why a device cannot be added:
- The device is not powered on
- WiFi signal is strong and stable, distance between device and router should be not too far
- The smartphone cannot connect to WiFi
- Wifi password not correct
- The device is in configuration state (When a device needs to be added, you need to bring it into WiFi configuration state)
- You selected a 5GHz network (with dual band routers) Devices only support 2.4GHz network
Router issues:
- Encryption mode should be WPA2-PSK type, Authentication type AEX or set to "automatic".
- Wireless mode cannot be 11n only
- Max number of connected devices has reached upper limit of router. Disconnect other devices from WiFi
Index:
No. 1 Caliber Smart Home app
No. 2 Register / Login
No. 3 Add device('s) • EZ-mode • AP-mode
No. 4 Control device
No. 5 Profile
No. 6 Scene's& Automation
No. 7 Voice control
No. 8 Trouble shooting
No. 9 Specifications
No. 9
Specifications

1. PRODUCT DESCRIPTION
HWS401 is a Smoke and heat detector. When the local temperature exceeds 50°C, the sensor will trigger an alarm. When smoke is detected, the sensor will sound an alarm ringtone and push notification to your smartphone.
2. FEATURES
- Works with IFTTT
• Wireless smoke sensor
• Activation when smoke and/or heat is detected - 90dB acoustic siren
- Push notification on app
• History records - Trigger for scenario's (E.G: turn lights ON when smoke is detected)
• Works on 2x CR2 batteries (included)
• Size: ∅68mm x 28(H) mm
Working current: Max 100mA
Standby current: 24.8μA
Battery capacity: 2x CR2 3V
Standby time ± 5 years
Working time ± 1 years (20 times/day)
Alarm temperature: >50°C
Working humidity: 20% \~ 85%
Sound intensity: 90dB/1m
Wireless transmitting/
Receiving: 2.4GHz-2.484Ghz
Network protocol: IEEE802.11b/g/n
Wireless distance: Max. 45m
Working temp.: -0°-+60°C
Set consists of: Smoke sensor HWS401
Manual
Bag mounting material
Mounting sticker
Batteries 2x CR2
We are continuously improving / updating our products and product information. It's therefore possible that there is a slight difference between the description in this manual to the operation of the product.
If something is different or not clear; always check our website for the most current manual version. The (app) images and illustrations used are indicative and may vary per device and version
Index:
No. 1 Caliber Smart Home app
No. 2 Register / Login
No. 3 Add device('s)
- EZ-mode
- AP-mode
No. 4 Control device
No. 5 Profile
No. 6 Scene's&
Automation
No. 7 Voice control
No. 8 Trouble shooting
No. 9 Specifications

No. 10
Legal

All rights reserved
The pictures used in this manual are Android app interface, iOS version is a bit different
Product and software update periodically, the number and app interface in this manual are only shown as an example. No extra notification on further changes.
Wifi Freq range: 2402-2480 Mhz, Max e.r.p: <100mW/20dBm
The Apple logo is a trademark of Apple Inc., registered in the U.S. and other countries.
Tuya word mark and logos are registered trademarks owned by Tuya, Inc. and any use of such marks by Caliber Europe BV is under license. Other trademarks and trade names are those of their respective owners.
Google Play and the Google Play logo are trademarks of Google LLC. Amazon Alexa logo are trademarks of Amazon Alexa. IFTTT logo are trademarks of IFTTT.
Index:
No. 1 Caliber Smart Home app
No. 2 Register / Login
No. 3 Add device('s) • EZ-mode • AP-mode
No. 4 Control device
No. 5 Profile
No. 6 Scene's& Automation
No. 7 Voice control
No. 8 Trouble shooting
No. 9 Specifications
CALIBER

Thank you!
Index:
No. 1 Caliber Smart Home app
No. 2 Register / Login
No. 3 Add device('s) • EZ-mode • AP-mode
No. 4 Control device
No. 5 Profile
No. 6 Scene's& Automation
No. 7 Voice control
No. 8 Trouble shooting
No. 9 Specifications

- INSTRUCTION MANUAL FOR HWS 401
- INDEX
- NO. 1
- DOWNLOAD AND INSTALL CALIBER SMART HOME APP
- NO. 2
- REGISTER / LOGIN / REQUEST PASSWORD
- REGISTER
- ACCOUNT+PASSWORD SIGN-IN
- FORGOT PASSWORD
- NO. 3 ADD DEVICE('S) EZ-MODE
- REMARKS
- ADD DEVICE IN EZ MODE (DEFAULT)
- NO. 3
- ADD DEVICE('S) €Z-MODE SUCCESSFUL
- CONNECTING
- ADD DEVICE('S) AP-MODE
- ADD DEVICE IN AP MODE (ALTERNATIVE MODE, HOTSPOT)
- ADD DEVICE('S) AP-MODE SUCCESSFUL
- ADD DEVICE IN AP MODE (MANUAL MODE, HOTSPOT)
- ADD DEVICE('S) AP-MODE FAIL
- NO. 4 CONTROL DEVICE
- CONTROL DEVICE
- HISTORY
- SETTING
- RESTORE FACTORY DEFAULTS
- NO. 5
- PROFILE
- PROFILE (ME)
- NO. 6
- SCENE'S & AUTOMATION
- SCENE'S
- AUTOMATION
- NO. 7
- 3RD PARTY VOICE CONTROL
- VOICE CONTROL
- CONNECT WITH GOOGLE HOME
- CONNECT WITH AMAZON ALEXA
- NO. 8
- TROUBLE SHOOTING
- POSSIBLE REASONS WHY A DEVICE CANNOT BE ADDED
- ROUTER ISSUES
- NO. 9
- SPECIFICATIONS
- PRODUCT DESCRIPTION
- FEATURES
- THANK YOU
Brand : CALIBER
Model : HWS401
Category : Smoke detector