
DS 805 - Cordless phone UNIDEN - Free user manual and instructions
Find the device manual for free DS 805 UNIDEN in PDF.


| Product Type | Cordless Phone Handset (Optional) |
| Brand | Uniden |
| Model | DS805 |
| Technology | 900 MHz Digital Spread Spectrum |
| Compatibility | Uniden DS815, DS825, DS845, DS875 Base Units |
| Display | 3-Line, 16-Character Backlit LCD |
| Keypad | Backlit |
| Caller ID | Yes, 60 Number Memory |
| Speed Dial Memory | 29 Numbers |
| Redial Memory | Last 3 Numbers (32 Digits) |
| Talk Time | Up to 4.5 Hours |
| Standby Time | Up to 10 Days |
| Battery Type | Rechargeable Ni-MH (Included) |
| Charging Time | Approximately 12 Hours for Full Charge |
| Range (Outdoor) | Up to 300 Meters (Typical) |
| Belt Clip | Included |
| Headset Jack | Yes (2.5 mm) |
| Paging/Intercom | Yes |
| Call Transfer | Yes (Between Handsets) |
| Key Lock | Yes |
| Hearing Aid Compatible | Yes |
| Power Adapter | AC Adapter (Supplied), 9V DC |
| Warranty | 1 Year Limited |
Frequently Asked Questions - DS 805 UNIDEN
User questions about DS 805 UNIDEN
0 question about this device. Answer the ones you know or ask your own.
Ask a new question about this device
Download the instructions for your Cordless phone in PDF format for free! Find your manual DS 805 - UNIDEN and take your electronic device back in hand. On this page are published all the documents necessary for the use of your device. DS 805 by UNIDEN.
USER MANUAL DS 805 UNIDEN
Start Here! 123 Quick Start Guide next page -
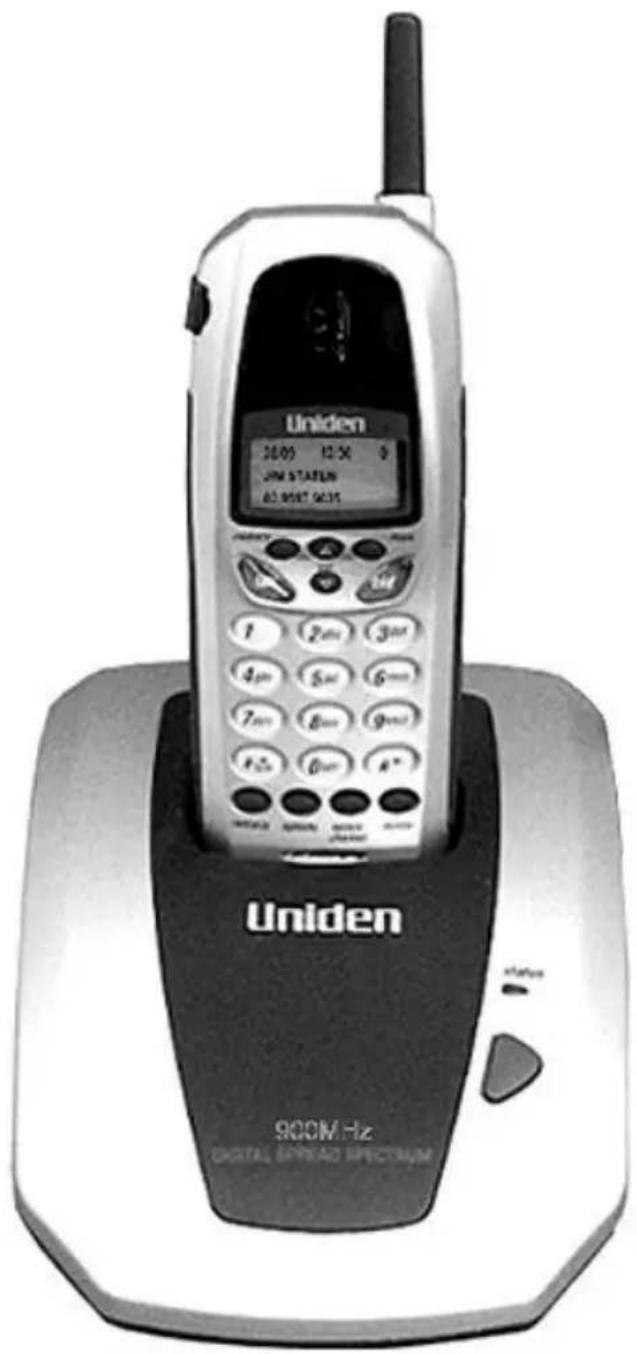
QUICK START
DS 805
Optional Handset and
Charge Base
Suits models -
DS815
DS825
DS845
DS875

This symbol indicates important operating and servicing instructions.
INSTALLATION & SAFETY
Choosing the best location for your telephone
When choosing a location for your phone there are a number of appliances the phone should not be near, and areas you should avoid.
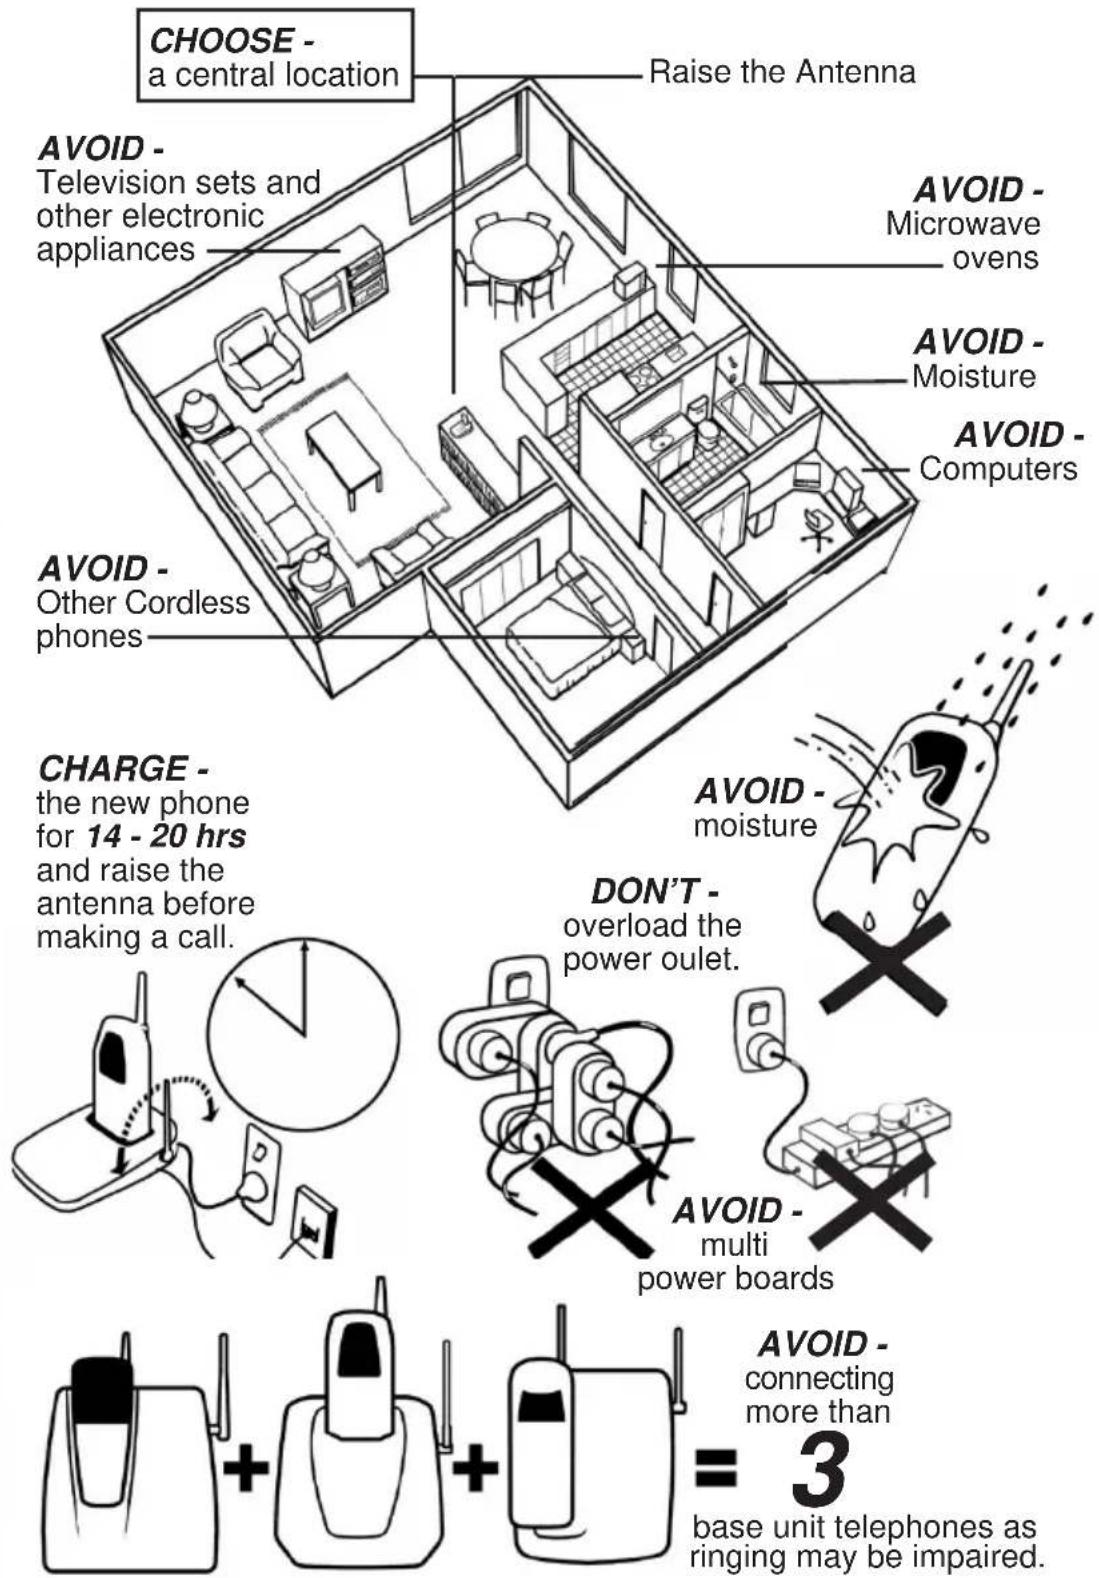
NOTE: Ringing will not be impaired by adding extra cordless handsets.
This page is a very condensed version of the Owners Manual. It is designed to allow you to get your phone installed and operating as quickly as possible - however it does not attempt to explain any of the advanced features of the DS805.


The AC Adaptor must remain plugged in and switched on at all times.
Use only the AC Adaptor supplied with this unit.
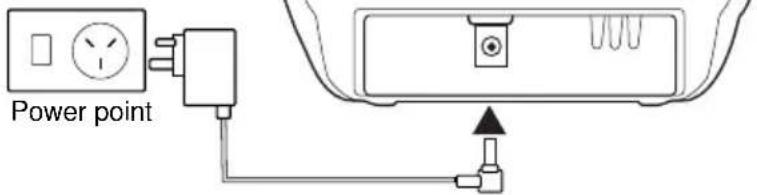

Installing the Charge Base
● Plug the power cable into the Base Unit, then into the wall power point.
- Press the power cable into the curved recess under the Charge Base.

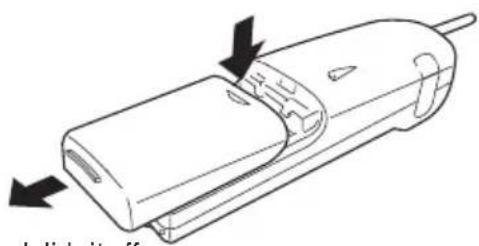
Installing the Handset Batteries
- Press the battery cover and slide it off.
natural_image
Technical line drawing of a mechanical component with directional arrows indicating movement (no text or symbols)- Connect the battery plug to the socket at the rear of the battery compartment.
Make sure the plug is the right way round.
The RED and BLACK battery wires must match the RED and BLACK printed on the phone case for the plug to fit properly.
Press firmly until it clicks into place.
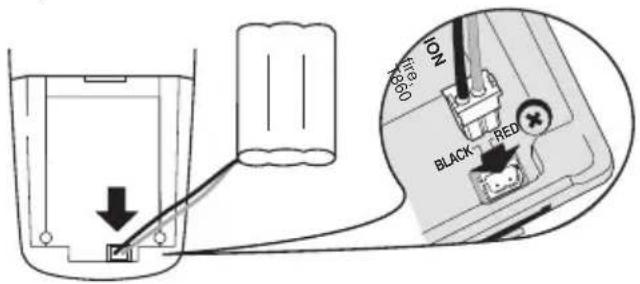

Place the handset on the Base Unit and charge it uninterrupted for 20 hours.
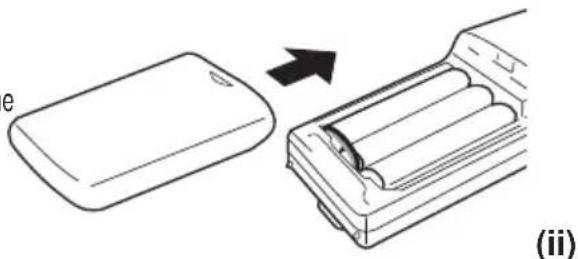
- Position the battery in the compartment and slide the cover into place.
natural_image
Diagram showing a device being placed into a battery pack, with an arrow indicating the process (no text or symbols present)
Registering your phone
This additional Handset is able to be used in conjunction with models DS815, DS825, DS845 and DS875 cordless telephones.
The new handset needs to be allocated a handset number and registered to the Main Base (DS815, DS825, DS845 & DS875). The Main Base has a telephone cord plugged into it and also has an Antenna, not to be confused with the additional charger(s).
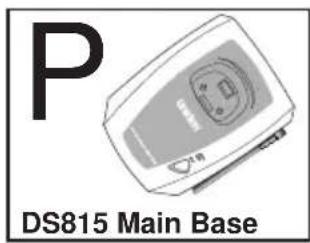
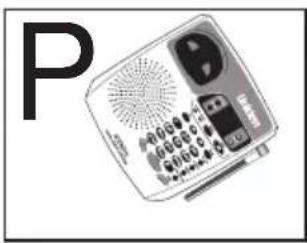
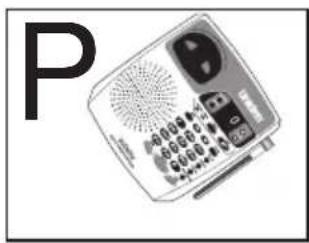
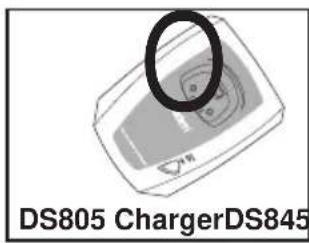
Main BaseC
The original handset supplied with the Main Base is already registered as handset 1, this leaves handset numbers 2 - 7 available. It is very important to allocate each handset a different number to enable functions such as Call Transfer.
Registration Process
Follow this process for each DS805 additional handset that needs to be registered to the Main Base.
- Remove the handset from its charger
- Press flash/ reg on the handset (Fig 1).
3 Press the number 2 (Fig 2) for handset 2.
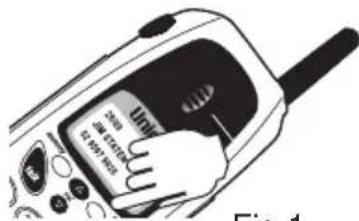
Fig 1.

If you have additional handsets, repeat the same process, but at Step 2 select a number from 3 - 7 to register the next handset as (fig 3)
REGISTER AS HAND #2
Fig 2.
REGISTER AS HAND # (3 - 7)
Fig 3.
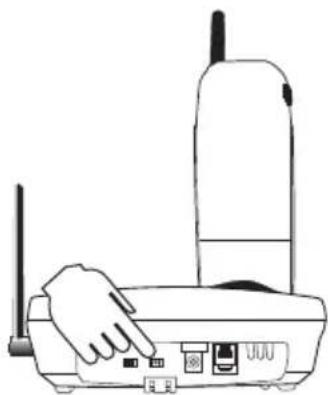
- Place the handset in the Main Base Unit (Fig 4).
- Press and hold the Registration button located on the back of the Main Base unit near the DC power jack (Fig 4). Hold the Registration button in until a long beep confirms the handset has been registered.
natural_image
Line drawing of a hand interacting with a wireless router device (no text or symbols visible)Fig 4.

The Registration process needs to be completed within 15 seconds, 3 beep tones will indicate that the time has been exceeded. Please start the process again.
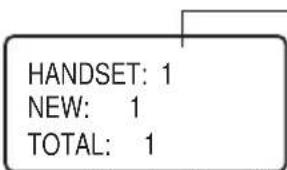
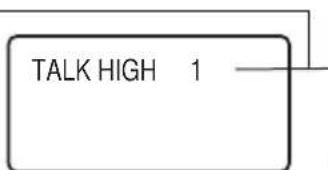
Handset Registration number displayed
Call Fig 5.
(iii)

After Registration the handset number is shown on the Display screen either during a call or while the handset is charging (Fig 5).

If a handset is registered at any time as handset 1, all other handsets will need to be registered again from Step 1.

CONTENTS
Installation & Safety ____ i
Quick Start Guide ii, iii
Contents 1
Introduction 4
Welcome 4
Features 4
Included in your Package 5
Battery Maintenance 6
Preparing the Battery Pack 6
Battery use time (per charge) 6
When the Battery Charge becomes Low 6
Cleaning the Battery Contacts 6
Adjusting the Ringer and Earpiece Volume 7
Installing the Belt Clip 7
Headset Installation 7
Using Your New Phone 8
Making and Receiving Calls 8
Call Transfer 9
Redialling a Call 9
Travelling out of Range 10
Keylock / Unlock 10
Paging 10
Storing Phone Numbers and Names 11
Making Calls with Memory Dialling 12
Editing a Stored Name and Phone Number 13
Erasing a Stored Name and Phone Number 14
Caller ID 15
Options - Dial Prefix 17
Troubleshooting 18
Warranty 19
CONTROLS & FUNCTIONS

The DS805 is an optional handset and charger. It can only be used in conjunction with a compatible telephone such as the DS815, DS825, DS845 and DS875.
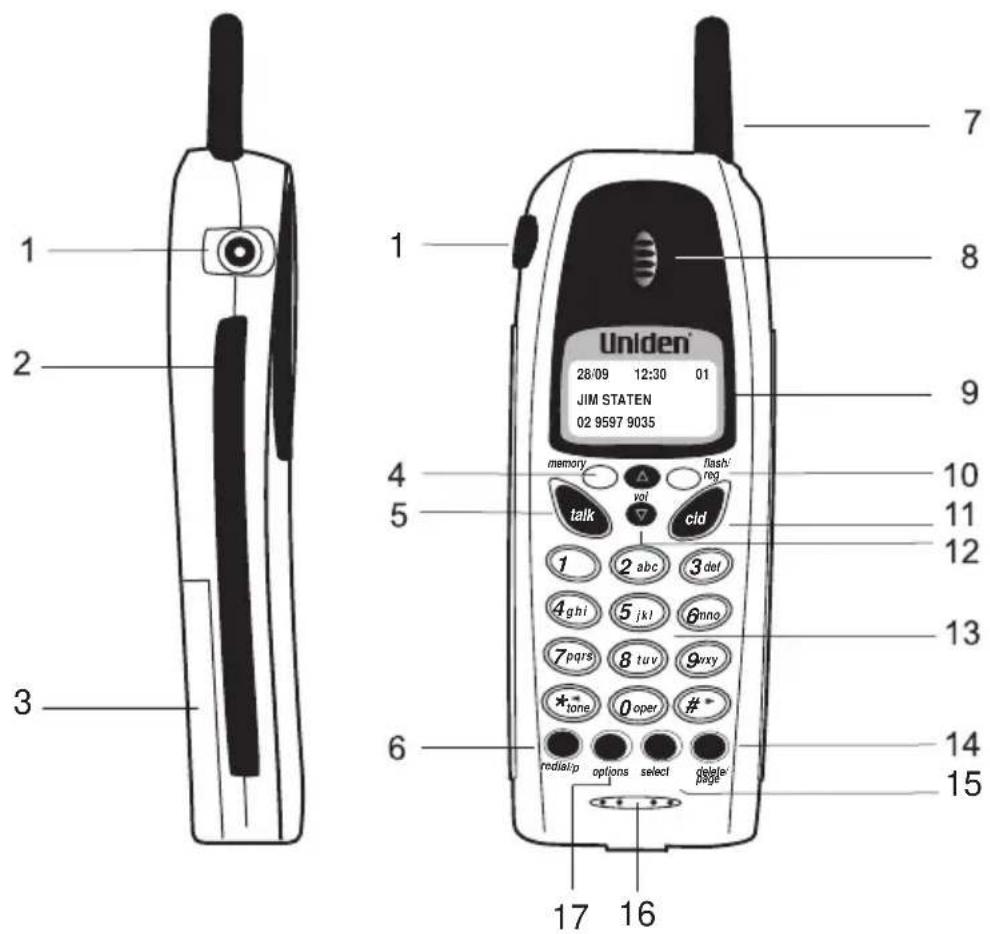
1 Headset jack
2 Belt clip slot
3 Battery compartment
4 Memory key
5 Talk key
6 Redial/ Pause key
7 Handset aerial
8 Handset speaker
9 Display screen
10 Flash/ Reg key
11 CID key
12 Volume control keys
13 Alpha Numeric keypad
14 Delete/ Page key
15 Select key
16 Handset Microphone
17 Options key
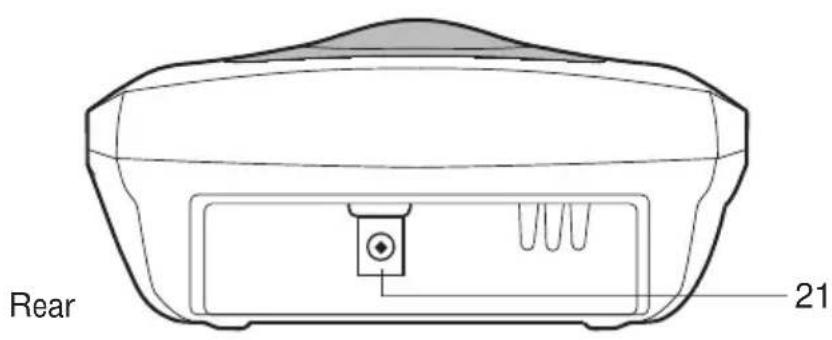
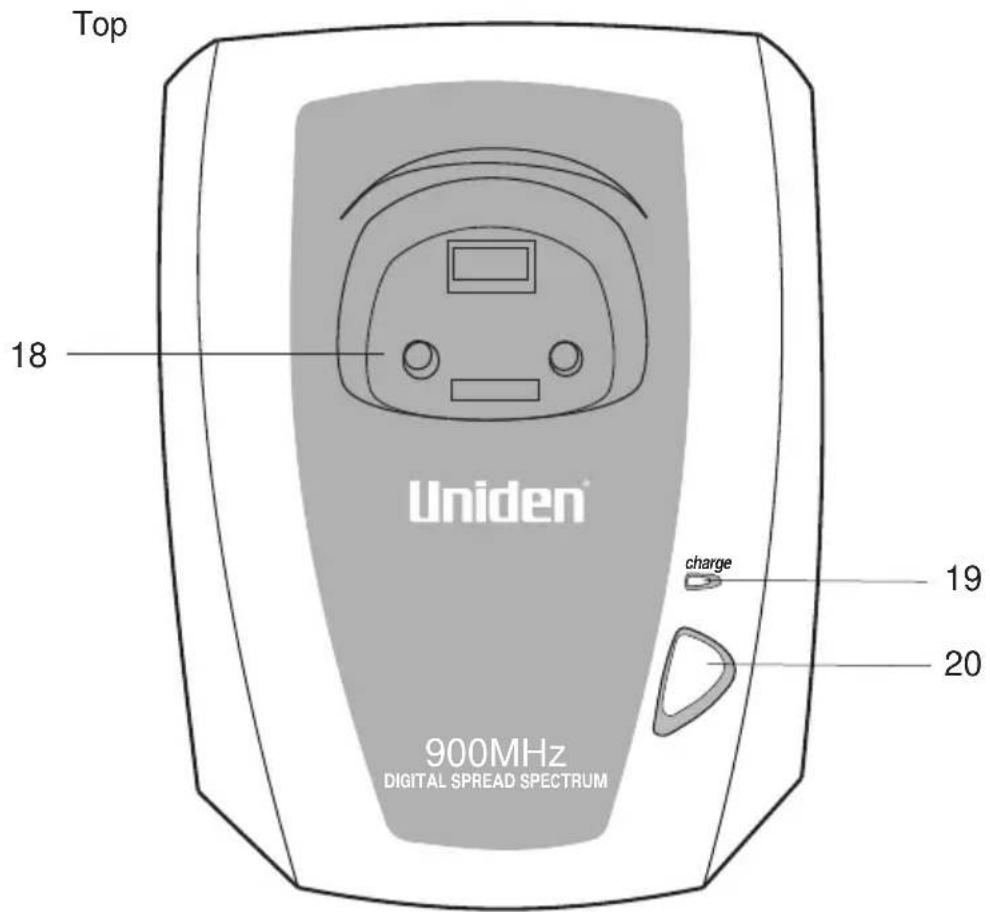
Charge Base
18 Charging contacts
19 Charge LED
20 Non functional key
21 AC power adaptor input
WELCOME
Congratulations on your purchase of the Uniden DS805 extra handset.
This phone is designed for reliability, long life and outstanding performance utilising the latest in 900MHz Digital Spread Technology.
The DS805 is an optional handset and charger. It can only be used in conjunction with a compatible telephone such as the DS815, DS825, DS845 and DS875.
FEATURES
900MHz Digital Spread Spectrum Technology
Caller ID Function
60 Number Caller ID Memories
Backlit Keypad
3-Line, 16 Character Backlit Handset Display
32 Digit Redial
3 Redial Memories
Flash
Pause
10 Days Standby Battery Life
4.5 Hours Talk Time
Handset Earpiece and Ringer Volume Control
Hearing Aid Compatible
Name Tagging
29 Alpha Numeric Speed Dial Memories
Digital Spread Spectrum Technology utilises a digital transmission
and a “wider frequency band” compared to a “single narrow band” 30/39 Standard Analogue transmission. The result is a more secure conversation with the clarity of digital sound, extended range, and minimal interference from other cordless phones.
Random Code TM digital security automatically selects one of over 16 million codes for the handset and base. This feature prevents unauthorised calls as a result of your phone being activated by other equipment.
INCLUDED IN YOUR PACKAGE
TIP
To get the most from your phone, please read this Owner's Manual thoroughly. Be sure to complete and mail the product consumer support card.
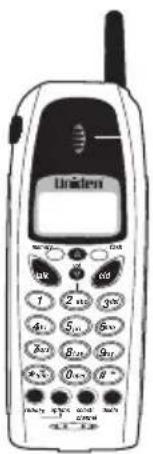
Handset
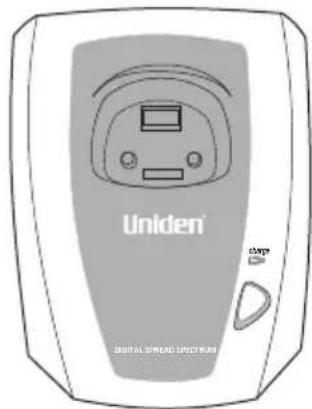
Charge Base
NOTE
If any of these items are missing or damaged, contact your place of purchase.

natural_image
Simple line drawing of a rectangular electronic device with a small protrusion attached (no text or symbols)Rechargeable Battery
natural_image
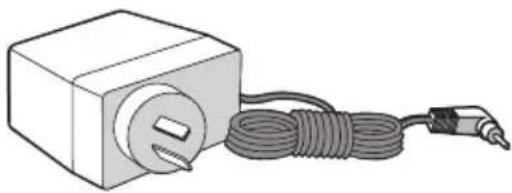
Illustration of a small rectangular device connected to a coiled cable with a terminal connector (no text or symbols)AC Adaptor

Refer to the CONTROLS & FUNCTIONS diagram at the front of this Owner's Manual for feature layout.
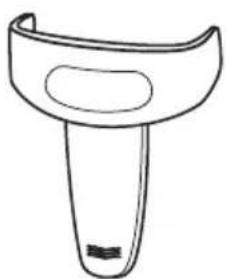
natural_image
Line drawing of a handheld device with a curved handle and circular top (no text or symbols)Belt Clip
This Owner's Manual, Consumer Support Card and other printed material.
NOTE
Use only the genuine Uniden Battery supplied with your phone. Replacement batteries are also available through the Uniden Parts Department.
NOTE
The built-in memory backup can hold numbers and names stored in the memory even if the battery pack is completely discharged.
BATTERY MAINTENANCE
Battery use time (per charge)
From fully charged
• Four and half hours continuous use.
- Ten days when the handset is in the standby mode.
- A full charge will take at least 12 hours if 'Battery Low' is displayed - however the phone will be ready for a short call after one hour.
When the battery charge becomes low
If the phone is not in use, “Low Battery” flashes and none of the keys will operate if the phone is in use, “Low Battery” flashes and the handset beeps. Complete your conversation as quickly as possible and return the handset to the base unit for charging.
BATTERY LOW
- You cannot over charge the battery.
- You may return the handset to the charger after each call or when the battery is low.
Genuine handset batteries
The high quality rechargeable batteries supplied with your phone perform for up to two years or more. In order to enjoy the best performance from your phone, we recommend you replace your batteries every two years with a genuine Uniden Battery.
Simply order a replacement battery from:
Uniden Australia PTY Limited Uniden New Zealand Limited
Service Division Service Division
Toll Free: 1300 366 895 Toll Free: 0800 4 UNIDEN (0800 4 864 336)
www.uniden.com.au www.uniden.co.nz
Cleaning the battery contacts
To maintain a good charge, it is important to clean the battery contacts on the handset and base unit with a dry cloth or a pencil eraser about once a month.
Do not use any liquids or solvents.
ADJUSTING THE RINGER AND EARPIECE VOLUME
Ringer tone and volume
The phone has four ringer tone and volume combinations.
In the standby mode, press ▲ or ▼ on the handset repeatedly.
The display shows the setting.
Earpiece volume
Pressing ▲ or ▼ during a call will change the earpiece volume of the handset. The telephone will keep this setting for all calls and display the setting for each call.
Loud → High → Mid → Low
RINGER A HIGH
TALK LOUD 1
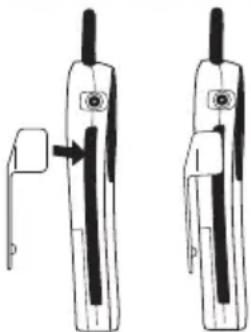
INSTALLING THE BELTCLIP
To attach the beltclip
Press the beltclip against the rear of the handset until it clicks into place.
natural_image
Two identical diagrams of a handheld device with a pull-up cable and a directional arrow, no text or symbols present.To remove the beltclip
Gently pull one side of the beltclip to release.
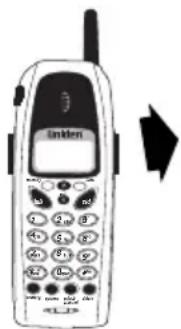

If you are using an optional headset, you must still use the handset keypad for phone operations.
HEADSET INSTALLATION
Your phone may be used with an optional headset.
To use this feature, simply plug the headset into the headset jack.
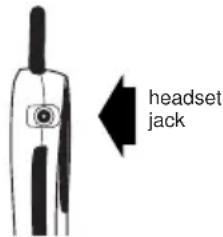
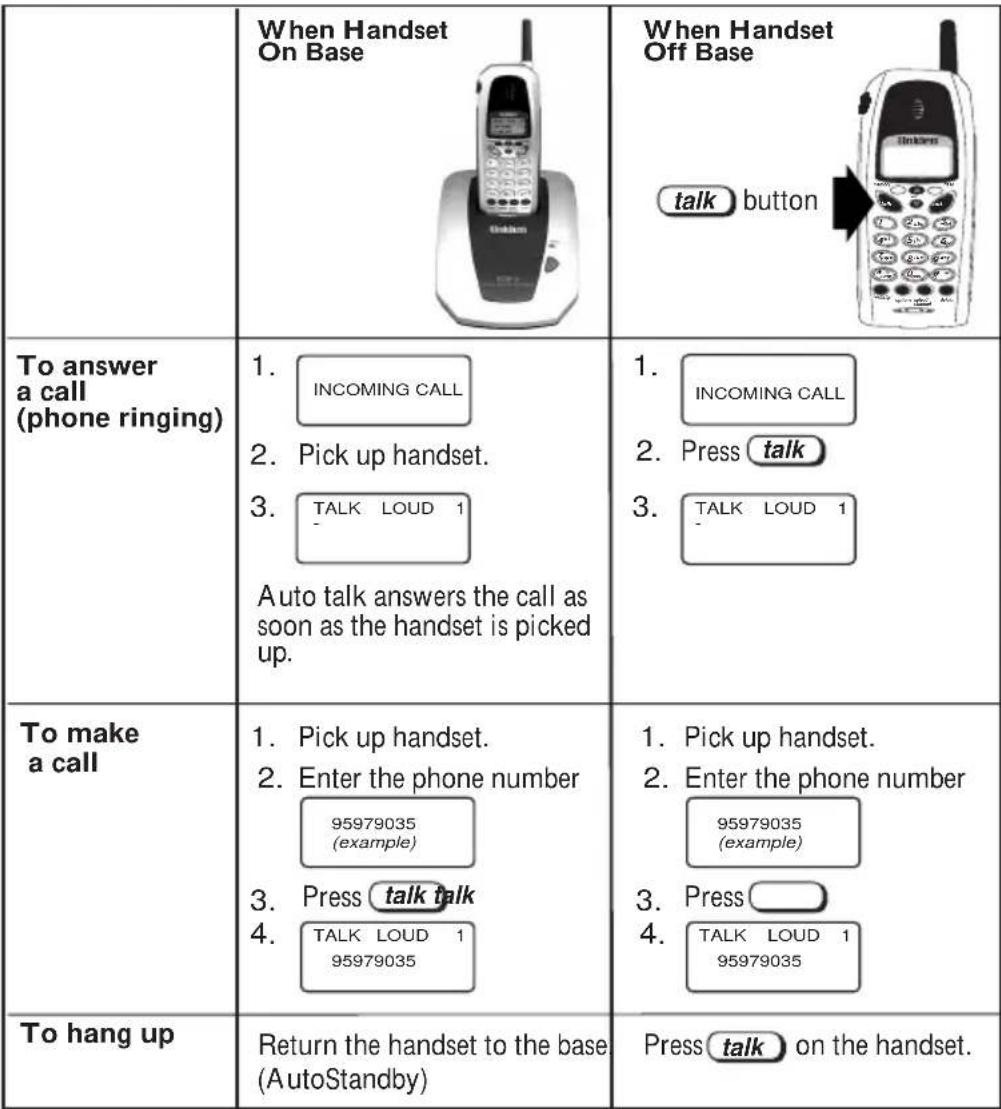
MAKING AND RECEIVING CALLS
Up to 7 Handsets may be registered to any one compatible Telephone Base such as the DS815, DS825, DS845 and DS875.
One handset can talk to an outside line, while at the same time two other handsets may have an internal call with each other using the Page feature (see page 13).
Basic phone operation
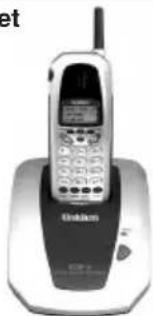 | 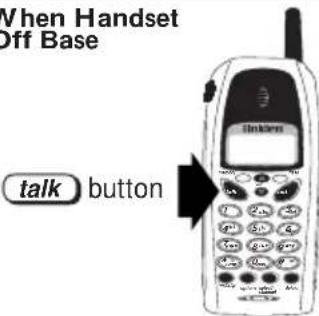 | |
 |
NOTE
If the called handset is not answered within 20 seconds, the call will return to the original handset.
NOTE
If any key is pressed before pressing redial/p the last number dialled will not redial.
NOTE
Only the last number dialled can be accessed after talk has been pressed.
CALL TRANSFER
During a call, you can transfer the call to another optional handset (maximum 7 handsets).
- Press delete/page
-
Press [handset No.(1-7)]
The handset number is shown on the right side of the display. -
Press talk
-
Called handset rings.
-
Press talk on the called handset and Call
TRANSFER TO HAND # (1 - 7)
REDIALLING A CALL
The last three phone numbers dialled can be quickly redialled.
Redial from standby
- Press redial/p
The most recent phone number that was dialled will be displayed on the screen. - Press redial/p again and the 2nd most recent number dialled, will be displayed.
- Repeat to display the 3rd most recent number dialled.
Example:
Press redial/p
REDIAL 1 95979035
Most recent number dialled is displayed.
Press redial/p again
REDIAL 2 95993355
2nd ‘most recent number dialled’ is displayed.
Press redial/p again
REDIAL 3 95983577
3rd ‘most recent number dialled’ is displayed.
- Press talk and the number will be dialled.
Redial from talk mode
- Press talk
- Press redial/p - the last number dialled will be displayed and redialled.
TALK LOUD 1
TALK LOUD 1 95979035
NOTE
When an incoming call is received during paging, paging is cancelled and the telephone is switched to the incoming call.
CALL WAITING/FLASH
If the Call Waiting tone sounds during a call -
Australia: Press flash/reg, then ② to switch between callers.
New Zealand: Press flash/reg to switch between callers.
TRAVELLING OUT OF RANGE
During a call, noise will increase if you move your handset too far from your base unit. If the range limit of your base unit is exceeded, your call will terminate within 30 seconds.
KEY LOCK / UNLOCK
When the handset is in the ST/BY mode, press and hold flash/reg a beep confirms and the screen displays KEY LOCK.
During the 'Key Locked' condition, the keys will only operate when on an incoming call. To unlock the keys, press and hold (flash/reg) again.
KEY LOCKED
KEY UNLOCKED
PAGING/INTERCOM
Paging from base unit to the handset
- Press page/int' on the base.
- The handset beeps for 60 seconds.
- Press the delete/page button on the handset to end the page.
From handset to Base Unit
- Press delete/page → 0 on the handset (If there is no answer, press delete/page again to disconnect).
- At the Base Unit, press page/int ^2 to answer. Speak into the Base Unit microphone.
- To turn off the intercom, press page/int on the Base Unit or delete/page on the handset.
From handset to an optional handset
- Press
delete/page → [handset No.(①-⑦)] on the handset.
- The paged handset beeps for 20 seconds.
PAGING
PAGING HAND 5
INTERCOM
- Press delete/page key on the paged handset to talk to each other.
- To end the intercom, press delete/page again.
- Both handsets go to standby.
2 way radio feature (using an optional handset)
2 way communications between the handsets using the intercom feature, can be achieved without the base anywhere, anytime.
STORING PHONE NUMBERS AND NAMES
NOTE
When storing a number, always include your access code (eg: 02), so name tagging will operate.
NOTE
The pause feature is useful for long distance calling, credit card dialling, or sequences that require a pause between digits.
Memory Dialling allows you to dial a number using just a few key strokes. You can store up to 29 phone numbers in the memory.
-
Press and hold memory until MEMORY Store is displayed.
-
Press ▲ or ▼ or enter a two-digit number (0 1 - 2 9) to select the memory location where you would like to store the number.
-
Press select - Store Name is displayed and a cursor flashes indicating that the display is ready for the name to be entered. If this screen appears, the selected memory location has a number already stored.
-
Use numeric key to enter the name. The name cannot exceed 13 characters.
Use #▶ and ✕◀ to move the cursor to the next letter - or to create a space. Use delete/page to delete characters a needed.
-
Press select - Store Number is displayed.
-
Use the number keypad to enter the phone number. It cannot exceed 24 digits.
Use redial/p to enter a pause. The screen displays P. Each pause counts as one digit and represents one and half second delay in time between digits. Use delete/page to delete digits as needed.
-
Press select - the handset beeps and displays the confirmation screen.
-
Press memory to return to standby mode or select another location to programme.
MEMORY STORE
01▶EMPTY
02 EMPTY
STORE NAME
EDIT MEMORY 01 DELETE MEMORY 01 GO BACK
STORE NUMBER
STORE NUMBER 95979035
MEMORY 01 STORE
MEMORY STORE
01▶FRED
02 JOHN SMITH
MAKING CALLS WITH MEMORY DIALING

When the stored phone number has 14 or more digits, + is displayed next to the 12^th digit. Press #▶ to see the extra digits and ✕◀ to return.
Memory Dialing from Standby
- Press memory once, the handset displays your programmed memory locations.
- Press ▲ and ▼ or enter a two-digit number (0 1 - 2 9) to select the memory location you would like to dial.
- Press talk - the displayed number is dialled.
01▶FRED
02 JOHN SMITH
03 KAY JONES
TALK LOUD 1 0295979035
Display a Memory Number or Name
Use #▶ and ✕◀ to toggle between the names display and the numbers display.
Programme name
01 FRED
02▶JOHN SMITH
03 KAY JONES

Programme number
01 0295979035
02▶ 0295738645
03 0205477631
Memory Dialing from Talk Mode
- Press Talk
- Press memory
- Enter a two-digit number (01-29) to select the memory location of the desired phone number. The selected phone number is displayed. Then the number is dialed.
TALK LOUD 1
TALK LOUD 1
00182326634488-
Chain Dialing
On certain occasions after dialing a number, you may be requested to enter an access code, such as your account number for phone banking. You can enter this number into a memory location for later use by doing the following:
- Store the access code into one of the memory locations (01-29) following the steps STORING PHONE NUMBERS AND NAMES
- Dial the party or service main number.
- When you need to enter the special number, press Memory followed by the two digit memory location (01-29).
EDITING A STORED NAME AND PHONE NUMBER
- Press and hold memory until MEMORY STORE is displayed.
- Press ▲ and ▼ or enter a two-digit number (0 1 - 2 9) to select the memory location you would like to edit.
- Press select - the screen displays the memory location number you have selected.
- Press ▲ or ▼ to select 'Edit Memory', then press select. The cursor flashes to indicate the display is ready for editing the name. When a name has not been stored, the cursor appears at the beginning of the second line.
- Press #▶, *◀, or delete/page to edit the name. To edit only the phone number, skip this step.
- Press select - STORE NUMBER is displayed
- Use #▶ ✦ and the number keypad to edit the phone number.
The phone number cannot exceed 24 digits.
If you don't want to change the phone number, skip this step. - Press select the handset beeps and displays the confirmation screen.
- Press memory to return to standby mode or select another memory location to edit.
MEMORY STORE
01▶FRED
02 JOHN SMITH
▶ EDIT MEMORY 01 DELETE MEMORY 01 GO BACK
STORE NAME FRED
STORE NUMBER 0295979035
MEMORY 01 STORED
MEMORY STORED
01▶FRED
02 JOHN SMITH
ERASING A STORED NAME AND PHONE NUMBER
- Press and hold memory until MEMORY STORE is displayed.
- Press ▼ and ▲ or enter a two-digit number (0 1 - 2 9) to select the memory location you would like to edit.
- Press select - the memory location number that you have selected is displayed.
- Press ▼ to move the pointer down to the DELETE MEMORY command line.
- Press select - the confirmation screen is displayed.
- Press ▲ to move the pointer to YES.
- Press select - MEMORY DELETED is displayed.
- After a few seconds the display returns to the MEMORY STORE screen. You may select another number to delete (return to step 2) or press memory to return to standby.
MEMORY STORE
01 FRED
02▶JOHN SMITH
▶EDIT MEMORY 02 DELETE MEMORY 02 GO BACK
EDIT MEMORY 02
▶DELETE MEMORY 02 GO BACK
DELETE MEMORY 02
▶ YES
NO
MEMORY 02 DELETED
MEMORY STORE
02▶EMPTY
03 KAY JONES
NOTE
Caller ID information may not be displayed until the second ring
CALLER ID
You must subscribe to the Caller ID service from your local telephone company to use these features.
When the telephone rings, the Caller ID feature allows you to view the caller's name and phone number on the display before you answer the phone. The handset displays the phone number of the incoming call, the name, time and the number of calls.
Additionally, you can dial the displayed number and store the information for memory dialling.
When the Telephone Rings
When the Caller ID message is received, the display shows the caller's phone number along with the date and time.
The incoming call information is stored in the Caller ID record. If the Caller ID service included the caller's name, the caller's name appears on the display (up to 15 letters).
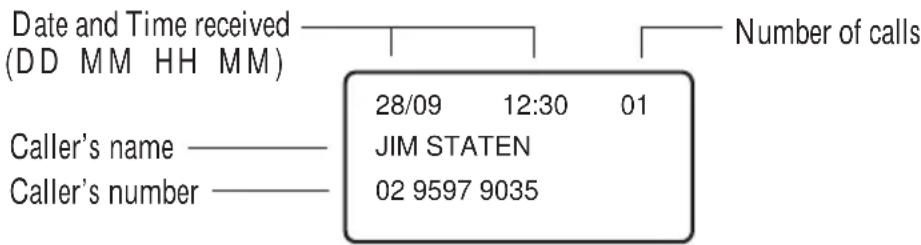
Some typical Displays:
When the phone number, name and date are received
28/09 12:30PM 01
FRED
959 7935
When invalid data is received
INCOMPLETE DATA
When a private number is received
28/09 12:30PM 01
PRIVATE
When an unknown number is received
28/09 12:30PM 01
UNAVAILABLE
When a call is coming from overseas (New Zealand only)
28/09 12:30PM 01
0000
When a call is coming from a payphone (Australia only)
28/09 12:30PM 01
PAYPHONE
UNAVAILABLE
Name tagging
If the displayed call ID telephone number is the same as a number stored in memory, then the stored name will also be displayed with the incoming Caller ID telephone number. dial number, then display the Name and Number from stored memory.
Viewing the Caller ID Message List
The Caller ID list stores information for up to 60 incoming calls-even unanswered calls.
- Press cid - the summary screen is displayed. The screen shows the number of new messages and total messages.
- Press ▼ to display the latest Caller ID message.
- Press ▼ to see the next message, or press ▲ to see previous message.
- Press cid again to return to standby.
HANDSET 1
NEW 1
TOTAL 3
5/11 12:30 PM 01
FRED
02 9597 9035
Deleting Information from the Caller ID List
The DS805 stores up to 60 messages. If the phone receives the 61 ^st message, the oldest one in the list is automatically deleted. Caller ID data can also be deleted manually.
Deleting a Caller ID message
-
Press cid - display the message to be deleted from the Caller ID list by pressing ▲ or ▼.
-
Press delete/page.
-
Press ▲ or ▼ to indicate "Yes" or "No".
-
Press select .
When you indicate 'Yes' -
a tone sounds and the Caller ID message is deleted. The screen displays the next Caller ID message.
When you indicate 'No' -
the display returns to the Caller ID screen.
Deleting all Caller ID names/numbers
- Press cid .
- Press delete/page .
- Press ▲ or ▼ to indicate 'Yes' or 'No'
- Press select .
When you indicate 'Yes' -
a tone sounds and all stored Caller ID messages are deleted.
When you indicate 'No' -
the display returns to the Summary screen.
5/11 12:30 PM 01
FRED
02 9597 9035
DELETE MESSAGE?
YES
NO
NEW: 01
TOTAL: 03
DELETE ALL?
YES
NO
TOTAL: 00
NOTE
If a message has already been stored in the selected memory number location, a confirmation screen is displayed.
Press ▲ to indicate "Yes".
Press select to overwrite.
Using the Caller ID List
Calling a party from the Caller ID list
You can place a call from the Caller ID list.
The DS805 stores up to 60 messages.
- Press cid - select the phone number that you want to dial by pressing ▲ or ▼.
- Press talk - the displayed phone number will be dialled automatically.
Storing Caller ID messages in Memory dialling
The phone number of the party on the Caller ID list can be stored in memory dialling.
- Press cid - select the phone number to be stored from the Caller ID list by pressing ▲ or ▼.
- Press memory.
- Press ▲ or ▼ or enter a two-digit number (0 1 - 2 9) to select the memory location.
- Press select - a confirmation tone will sound. The number is stored in memory, and the screen displays the Caller ID list.
- To add a name to the stored number refer to page 17.
5/11 12:30 PM 01
FRED
9597 9035
TALK LOUD 1
9597 9035
5/11 12:30 PM 01
FRED
9597 9035
SELECT LOCATION
01▶FRED
02 JOHN SMITH
5/11 12:30 PM 01
FRED
9597 9035
REPLACE MEMORY
YES
NO
OPTIONS - DIAL PREFIX
Some telephone systems may require a digit to be inserted prior to dialling.
- Press options - DIAL PREFIX is displayed.
- Enter the one digit dial prefix using the number keys.
- Press options again to store your setting.
DIAL PREFIX
QUICK REFERENCE CHART
If your phone is not performing to your expectations, please try these simple steps first before calling Uniden customer service -
| PROBLEM | SUGGESTION |
| No dial tone | Check that the phone line cord connectors at both ends are pushed in until they click.If you have had a power failure or have unplugged the base unit, replace the handset on the base unit for two to five seconds to reset the system.Check the handset has been registered (see page 11). |
| No power on the handset | Check the battery pack plug, inside the battery compartment of the handset, is fully pushed in.The handset rechargeable Ni-Cad battery pack may need to be charged.Check the AC Adaptor is plugged in at both ends and switched On. |
| Does not charge | Make sure the charging contacts on both the handset and the base unit are in contact during charging.The charging contacts may need to be cleaned with a dry cloth or pencil eraser.The battery pack may need to be discharged first before a full charge can be accomplished.Check the AC Adaptor is plugged in at both ends and switched On. |
| Range is limited | Make sure the base antenna is vertical.Move the base unit so that it is centrally located in your residence or office and make sure that the base unit is not located near electrical appliances. |
| Calls received, flutter or fade | The handset rechargeable battery pack may need charging.You may be out of normal operating range. Move closer |
| Cannot store or recall phone numbers from memory | When storing phone numbers, make sure that the handset is in the standby position.When recalling stored numbers, check first for a dial tone. |

Please check our Website for the latest, up to date problem solving and frequently asked questions - Australia: www.uniden.com.au New Zealand: www.uniden.co.nz
WARRANTY
One Year Limited Warranty
Important: Evidence of original purchase is required for warranty service.
Warrantor: Uniden Australia Pty Limited ABN 58 001 865 498 Uniden New Zealand Limited
ELEMENT OF WARRANTY: Uniden warrants to the original retail owner for the duration of this warranty, its DS805 (herein after referred to as the Product), to be free from defects in materials and craftsmanship with only the limitations or exclusions set out below.
WARRANTY DURATION: This warranty to the original retail owner only, shall terminate and be of no further effect 12 months after the date of original retail sale. This warranty will be deemed invalid if the product is; (A) Damaged or not maintained as reasonable and necessary, (B) Modified, altered or used as part of any conversion kits, subassemblies or any configurations not sold by Uniden, (C) Improperly installed, (D) Repaired by someone other than an authorised Uniden Repair Agent for a defect or malfunction covered by this warranty, (E) Used in conjunction with any equipment or parts or as part of a system not manufactured by Uniden. (F) Only available in the original country of sale.
PARTS COVERED: This warranty covers for one (1) year, the Base/ Charging Unit and Handset only. All accessories (AC Adaptor, battery etc.) are covered for 90 days only.
STATEMENT OF REMEDY: In the event that the product does not conform to this warranty at any time while this warranty is in effect, the warrantor at its discretion, will repair the defect or replace the product and return it to you without charge for parts or service. THIS WARRANTY DOES NOT COVER OR PROVIDE FOR THE REIMBURSEMENT OR PAYMENT OF INCIDENTAL OR CONSEQUENTIAL DAMAGES. THIS GUARANTEE IS IN ADDITION TO AND DOES NOT IN ANY WAY AFFECT YOUR RIGHTS UNDER THE CONSUMER GUARANTEE ACT.
PROCEDURE FOR OBTAINING PERFORMANCE OR
WARRANTY: In the event that the product does not conform to this warranty, the Product should be shipped or delivered, freight pre-paid, with evidence of original purchase (eg. a copy of the sales docket), to the warrantor at:
UNIDEN AUSTRALIA PTY LIMITED
SERVICE DIVISION
345 Princes Highway,
Rockdale NSW 2216
Ph (02) 9599 3577 Fx (02) 9599 3278
Toll Free 1300 366 895
www.uniden.com.au
UNIDEN NEW ZEALAND LIMITED
SERVICE DIVISION
150 Harris Road,
East Tamaki, Auckland
Ph (09) 273 8383 Fx (09) 274 4253
Toll Free 0800 4 UNIDEN
(864 336)
www.uniden.co.nz
Customers in other States should ship or deliver the Product freight pre-paid to their nearest Uniden Authorised Repair Centre. See Uniden's Website for the nearest Repair Centre.
THANK YOU
FOR PURCHASING A UNIDEN PHONE!
Uniden
© 2001 Uniden Australia Pty Limited Uniden New Zealand Limited
- Start Here! 123 Quick Start Guide next page -
- QUICK START
- DS 805
- INSTALLATION & SAFETY
- Choosing the best location for your telephone
- Installing the Charge Base
- Installing the Handset Batteries
- Registering your phone
- CONTENTS
- CONTROLS & FUNCTIONS
- *
- Charge Base
- WELCOME
- FEATURES
- INCLUDED IN YOUR PACKAGE
- TIP
- NOTE
- BATTERY MAINTENANCE
- Battery use time (per charge)
- When the battery charge becomes low
- BATTERY LOW
- Genuine handset batteries
- Uniden Australia PTY Limited Uniden New Zealand Limited
- Cleaning the battery contacts
- ADJUSTING THE RINGER AND EARPIECE VOLUME
- Ringer tone and volume
- Earpiece volume
- INSTALLING THE BELTCLIP
- To attach the beltclip
- To remove the beltclip
- HEADSET INSTALLATION
- MAKING AND RECEIVING CALLS
- CALL TRANSFER
- During a call, you can transfer the call to another optional handset (maximum 7 handsets).
- REDIALLING A CALL
- Redial from standby
- Redial from talk mode
- CALL WAITING/FLASH
- TRAVELLING OUT OF RANGE
- KEY LOCK / UNLOCK
- PAGING/INTERCOM
- STORING PHONE NUMBERS AND NAMES
- MAKING CALLS WITH MEMORY DIALING
- Memory Dialing from Standby
- Display a Memory Number or Name
- Programme name
- Programme number
- Memory Dialing from Talk Mode
- Chain Dialing
- EDITING A STORED NAME AND PHONE NUMBER
- ERASING A STORED NAME AND PHONE NUMBER
- CALLER ID
- When the Telephone Rings
- Name tagging
- Viewing the Caller ID Message List
- Deleting Information from the Caller ID List
- Deleting a Caller ID message
- When you indicate 'Yes' -
- When you indicate 'No' -
- Deleting all Caller ID names/numbers
- Using the Caller ID List
- Calling a party from the Caller ID list
- Storing Caller ID messages in Memory dialling
- OPTIONS - DIAL PREFIX
- QUICK REFERENCE CHART
- WARRANTY
- One Year Limited Warranty
- PROCEDURE FOR OBTAINING PERFORMANCE OR
- THANK YOU
- Uniden
Brand : UNIDEN
Model : DS 805
Category : Cordless phone