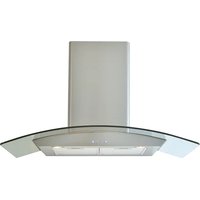
AAG9SE3 - Range hood ARC - Free user manual and instructions
Find the device manual for free AAG9SE3 ARC in PDF.


| Product Type | Range Hood |
| Brand | ARC |
| Model | AAG9SE3 |
| Installation Type | Wall-Mounted |
| Versions | Ducting (Air Exhaust), Filtering (Recirculation), External Motor |
| Control Type | Mechanical Buttons |
| Speeds | 3 + Intensive Speed (15 min timer) |
| Timer | 15-minute auto-off |
| Lighting | Halogen bulbs, max 20W per bulb |
| Minimum Distance from Hob | 65 cm |
| Air Evacuation | External duct Ø 150 mm (typical) |
| Filters | Aluminum grease filters (washable), Charcoal filters (replaceable, max 4 months) |
| Maintenance - Grease Filters | Clean every 2 months (dishwasher safe) |
| Maintenance - Charcoal Filters | Replace every 4 months |
| Electrical Connection | 220-240 V, 50/60 Hz; Class II (no earth required) |
| Motor Power | 150 W (typical) |
| Total Power Consumption | Approx. 170 W (including lighting) |
| Product Dimensions (W x D x H) | 60 cm x 50 cm x 30-100 cm (adjustable flue) |
| Weight | Approx. 15 kg |
| Safety Features | Class II insulation, automatic motor cut-off on overheat, fire prevention warnings |
| Spare Parts Available | Charcoal filters, halogen bulbs, grease filters |
Frequently Asked Questions - AAG9SE3 ARC
User questions about AAG9SE3 ARC
0 question about this device. Answer the ones you know or ask your own.
Ask a new question about this device
Download the instructions for your Range hood in PDF format for free! Find your manual AAG9SE3 - ARC and take your electronic device back in hand. On this page are published all the documents necessary for the use of your device. AAG9SE3 by ARC.
USER MANUAL AAG9SE3 ARC
flowchart
graph TD
    A["Top Channel"] --> B["Downward Flow"]
    B --> C["Left Channel"]
    C --> D["Right Channel"]
    D --> E["Bottom Channel"]
    E --> F["Downward Flow"]
    F --> G["Left Channel"]
    G --> H["Right Channel"]
    H --> I["Bottom Channel"]
    I --> J["Downward Flow"]
    J --> K["Left Channel"]
    K --> L["Right Channel"]
    L --> M["Bottom Channel"]
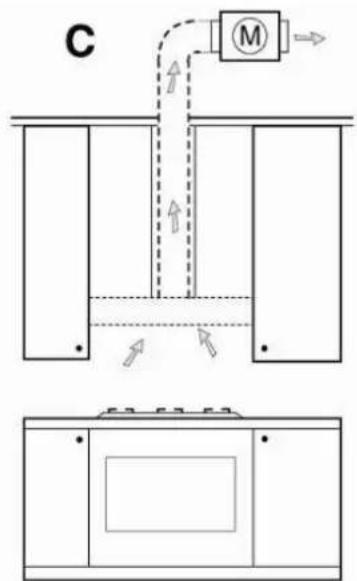
Fig. 1
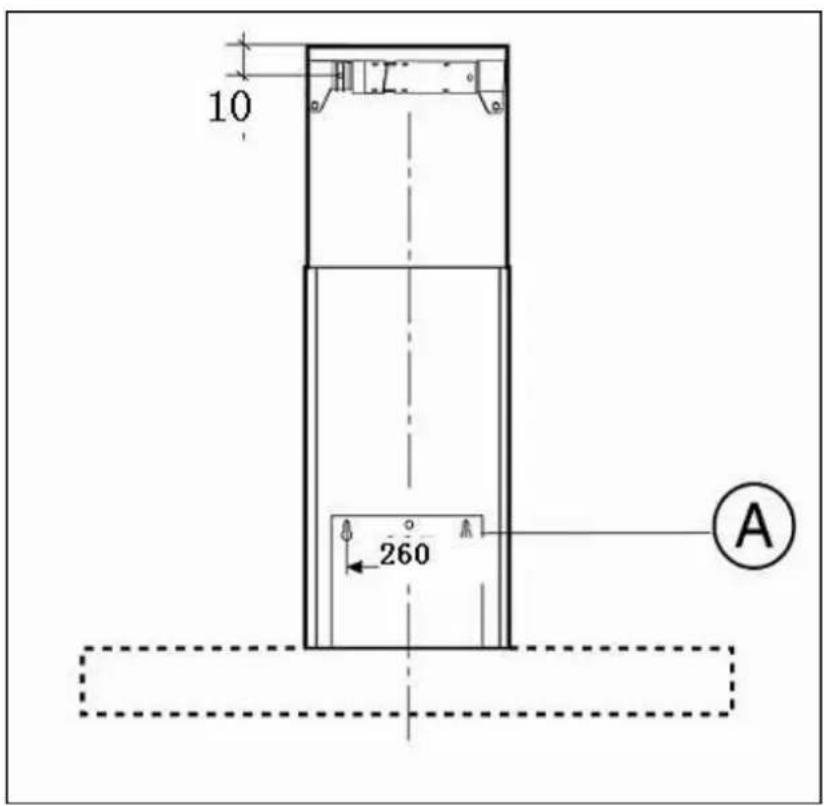

Fig. 3

natural_image
Diagram of a device with a box and base, showing a downward arrow and a circled symbol (no text or labels present)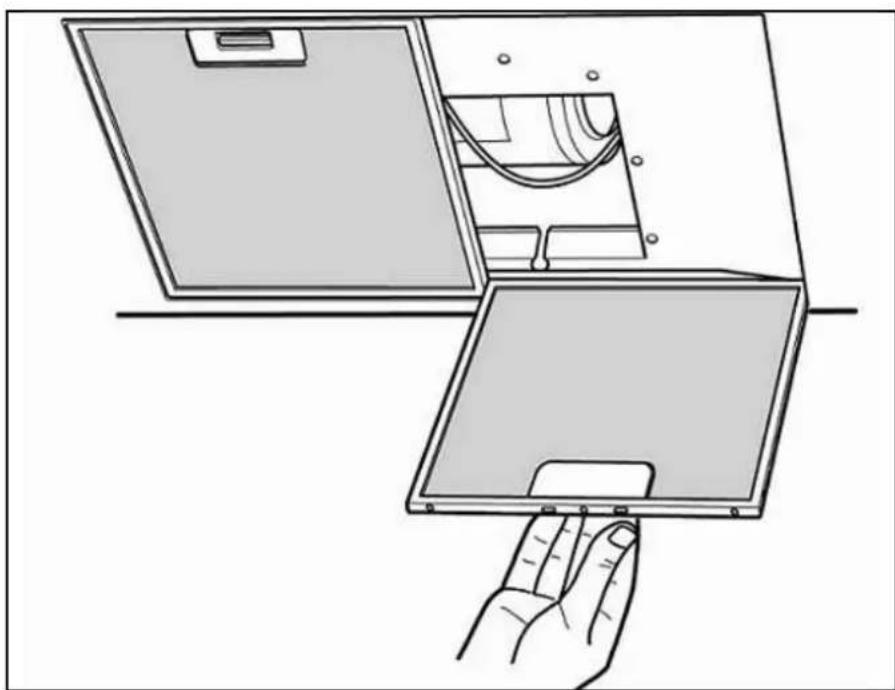
natural_image
Illustration of a hand holding a flatboard with a curved component inside, next to an open panel (no text or symbols)Fig. 5

natural_image
Illustration of a hand holding a small circular object with a screwdriver, alongside a magnified view of the interior (no text or symbols)Fig. 7
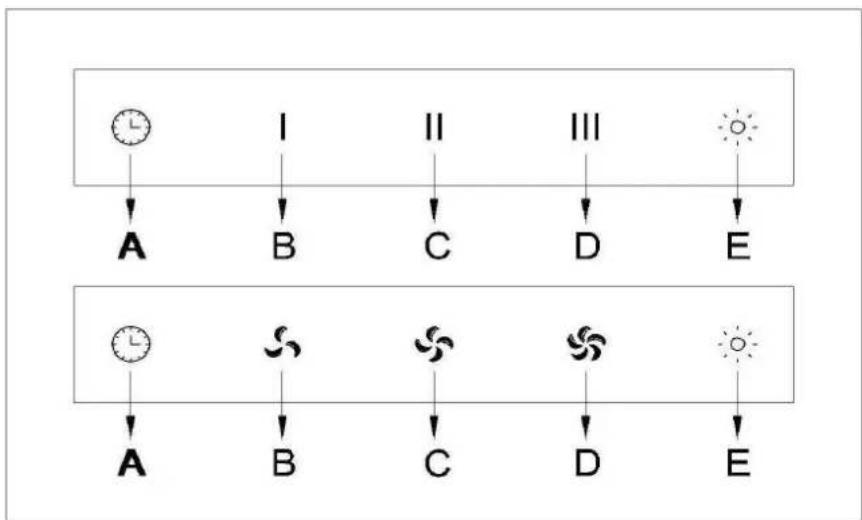
flowchart
graph TD
    A["Sun"] --> B["A"]
    C["I"] --> D["B"]
    E["II"] --> F["C"]
    G["III"] --> H["D"]
    I["Sun"] --> J["E"]
    K["A"] --> L["B"]
    M["S"] --> N["C"]
    O["S"] --> P["D"]
    Q["S"] --> R["E"]
Fig. 8
GENERAL
Carefully read the following important information regarding installation safety and maintenance. Keep this information booklet accessible for further consultations. The appliance has been designed for use in the ducting version (air exhaust to the outside – Fig.1B), filtering version (air circulation on the inside – Fig.1A) or with external motor (Fig.1C).
SAFETY PRECAUTION
- Take care when the cooker hood is operating simultaneously with an open fireplace or burner that depend on the air in the environment and are supplied by other than electrical energy, as the cooker hood removes the air from the environment which a burner or fireplace need for combustion. The negative pressure in the environment must not exceed 4Pa (4x10⁻⁵ bar). Provide adequate ventilation in the environment for a safe operation of the cooker hood. Follow the local laws applicable for external air evacuation.
Before connecting the model to the electricity network:
- control the data plate (positioned inside the appliance) to ascertain that the voltage and power correspond to the network and the socket is suitable. If in doubt ask a qualified electrician.
2. WARNING!
In certain circumstances electrical appliances may be a danger hazard. A) Do not check the status of the filters while the cooker hood is
operating
B) Do not touch bulbs or adjacent areas, during or straight after prolonged use of the lighting installation.
C) Flambe cooking is prohibited underneath the cooker hood
D) Avoid free flame, as it is damaging for the filters and a fire hazard
E) Constantly check food frying to avoid that the overheated oil may become a fire hazard
F) Disconnect the electrical plug prior to any maintenance.
G) This appliance is not intended for use by young children or infirm persons without supervision
H) Young children should be supervised to ensure they do not play with the appliance
I) There shall be adequate ventilation of the room when the rangehood is used at the same time as appliances burning gas or other fuels
L) There is a risk of fire if cleaning is not carried out in accordance with the instructions
INSTALLATION INSTRUCTIONS
Assembly and electrical connections must be carried out by specialized personnel.
• Electric Connection
The appliance has been manufactured as a class II, therefore no earth cable is necessary.
The connection to the mains is carried out as follows:
BROWN = L line
BLUE = N neutral
If not provided, connect a plug for the electrical load indicated on the description label. Where a plug is provided, the cooker hood must be installed in order that the plug is easily accessible.
An omnipolar switch with a minimum aperture of 3mm between contacts, in line with the electrical load and local standards, must be placed between the appliance and the network in the case of direct connection to the electrical network.
- The minimum distance between the support surfaces of the cooking pots on the cooker top and the lowest part of the cooker hood must be at least 65~cm . If a connection tube composed of two parts is used, the upper part must be placed outside the lower part.
Do not connect the cooker hood exhaust to the same conductor used to circulate hot air or for evacuating fumes from other appliances generated by other than an electrical source.
Before proceeding with the assembly operations, remove the anti-grease filter(s) (Fig.5) so that the unit is easier to handle.
In the case of assembly of the appliance in the suction version prepare the hole for evacuation of the air.
• FIXING TO THE WALL
Drill the holes A respecting the distances indicated (Fig.2).
Fix the appliance to the wall and align it in horizontal position to the wall units. When the appliance has been adjusted, definitely fix the hood using the screws A.
For the various installations use screws and screw anchors suited to the type of wall (e.g. reinforced concrete, plasterboard, etc.). If the screws and screw anchors are provided with the product, check that they are suitable for the type of wall on which the hood is to be fixed.
• FIXING THE DECORATIVE TELESCOPIC FLUE
Arrange the electrical power supply within the dimensions of the decorative flue. If your appliance is to be installed in the ducting version or in the version with external motor, prepare the air exhaust opening. Adjust the width of the support bracket of the upper flue (Fig.3). Then fix it to the ceiling using the screws A (Fig.2) in such a way that it is in line with your hood and respecting the distance from the ceiling indicated in Fig.2. Connect the flange C to the air exhaust hole using a connection pipe (Fig.4).
To transform the hood from a ducting version into a filtering version, ask your dealer for the charcoal filters and follow the installation instructions.
• FILTERING VERSION
Install the hood and the two flues as described in the paragraph for installation of the hood in ducting version. To assemble the filtering flue refer to the instructions contained in the kit. If the kit is not provided, order it
from your dealer as accessory. The charcoal filters must be fitted in the ducting unit located inside the hood.
USE AND MAINTENANCE
- It is recommended to operate the appliance prior to cooking.
It is recommended to leave the appliance in operation for
15 minutes after cooking is terminated in order to completely eliminate cooking vapours and odours.
The proper function of the cooker hood is conditioned by the regularity of the maintenance operations, in particular, the active carbon filter.
- The anti-grease filters capture the grease particles suspended in the air, and are therefore subject to clogging according to the frequency of the use of the appliance.
In order to prevent fire hazard, it is recommendable to clean the filter at a maximum of 2 months by carrying out the following instructions:
- Remove the filters from the cooker hood and wash them in a solution of water and neutral liquid detergent, leaving to soak.
- Rinse thoroughly with warm water and leave to dry.
- The filters may also be washed in the dishwasher.
The aluminium panels may alter in colour after several washes. This is not cause for customer complaint nor replacement of panels.
- The active carbon filters purify the air that is replaced in the environment. The filters are not washable nor reusable and must be replaced at maximum every four months. The saturation of the active carbon filter depends on the frequency of use of the appliance, by the type of cooking and the regularity of cleaning the anti-grease filters. (Fig 6) To remove the charcoal filters place on hand on one filter at a time and turn it toward the front part. The charcoal filter can now be removed. Always ensure to replace both filters at the same time.
- Clean the fan and other surfaces of the cooker hood regularly using a cloth moistened with denatured alcohol or non abrasive liquid detergent.
- The illumination installation is designed for use during cooking and not for prolonged general illumination of the environment. Prolonged use of the illumination installation notably reduces the duration of the bulb.
Use a one-edged screwdriver or any other appropriate tool to lift and remove
the overhead light fixture. Replace the damaged lamp. Use only halogen lamps of a maximum of 20w, avoiding contact with hands. Return the light fixture to its position (snap fastening). (Fig. 7)
• COMMANDS: (Fig.8)
A = TIMER - 15 MINUTES
B = SPEED I / OFF
C = SPEED II / OFF
D = SPEED III/OFF
E = LIGHT
- If your appliance does not have the INTENSIVE speed function, press key A for two seconds and it will be activated for 15 minutes after which it will return to the previously set speed. When the function is active the LED flashes.
By pressing any key for the exclusion of the hood light the hood will return immediately to its normal functioning.
The “automatic stop timer” delays stopping of the hood, which will continue functioning for 15 minutes at the operating speed set at the time this function is activated.
Troubleshooting
| Problem Possible reason Solution | ||
| Check the plug is connected Hood do | ||
| Check the main switch is turned on | ||
| Poor airflow | Aluminum grease filters clogged | Clean the filters and replace when dry |
| Charcoal filters clogged | Replace the charcoal filters | |
| Motor running but no air flow | Butterfly valve jammed | Contact technician |
| Motor cuts after a few minutes | High temperature safety device activated | The kitchen is not sufficiently ventilated |
| The hood is installed too near the cooking stove | The hood must be least 65cm from stove | |
| Strong cooking smell | Charcoal filters not installed | In re-circulating mode, charcoal filters must be installed |
| Oil dripping onto stove | Oil cup missing or not installed | Remove aluminum filter and replace oil cup |
| Aluminum grease filter saturated | Wash the aluminum grease filters | |
| Whirring sound | Something in contact with fan blade | Contact with technician |
THE MANUFACTURORY DECLINES ALL RESPONSIBILITY FOR EVENTUAL DAMAGES CAUSED BY BREACHING THE ABOVE WARNINGS.
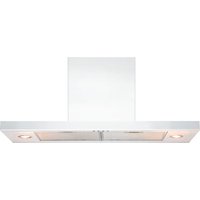
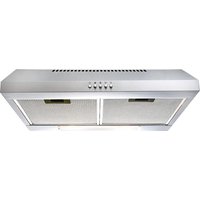
Brand : ARC
Model : AAG9SE3
Category : Range hood