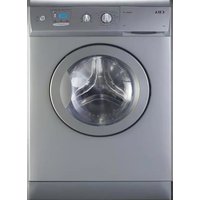
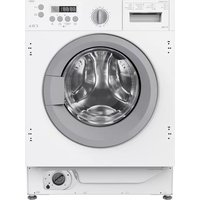
CI830SI - Washing machine CDA - Free user manual and instructions
Find the device manual for free CI830SI CDA in PDF.


| Product Type | Freestanding or built-in washer-dryer |
| Brand | CDA |
| Model | CI830SI |
| Washing Capacity | 6 kg (max load for normal programmes) |
| Drying Capacity | 4 kg (wash+dry), 1.5 kg (delicate dry) |
| Dimensions (H x W x D) | 850 mm x 600 mm x 540 mm (approximate) |
| Energy Efficiency Class | Not specified |
| Water Pressure Range | 0.05 - 1 MPa (0.05 - 10 kg/cm²) |
| Spin Speed | Up to 1000 rpm (adjustable with options: 0, 400, 600, 800, 1000) |
| Number of Programmes | 15 |
| Detergent Compartments | 3 (prewash, main wash, fabric softener) |
| Additional Functions | Intensive wash, easy iron, extra rinse, no spin, anti-crease |
| Delay Start | Not specified |
| Display Type | Digital display showing remaining time and programme phases |
| Water Connection | Cold and hot water inlets (hot water inlet with red connector) |
| Drain Hose Length | Not specified |
| Power Supply | 230 V, 50 Hz (typical, check rating plate) |
| Guarantee | 5 years (requires registration within 30 days) |
| Maintenance | Clean detergent dispenser and filter regularly; descale as needed |
| Safety Features | Door lock, child lock not specified, overfill protection, unbalanced load detection |
| Noise Level | Not specified |
| Weight | Not specified |
Frequently Asked Questions - CI830SI CDA
User questions about CI830SI CDA
0 question about this device. Answer the ones you know or ask your own.
Ask a new question about this device
Download the instructions for your Washing machine in PDF format for free! Find your manual CI830SI - CDA and take your electronic device back in hand. On this page are published all the documents necessary for the use of your device. CI830SI by CDA.
USER MANUAL CI830SI CDA
Passionate about style
INSTRUCTION MANUAL

natural_image
Front view of a washing machine with control knobs and a circular vent (no visible text or symbols)WASHING MACHINES
Cl230
Cl330
WASHER DRYERS
CI830
C1930
Thank you
for purchasing this |C|D|A| product
which comes to you with a 5 year guarantee*
Please don't forget to REGISTER THIS APPLIANCE WITHIN 30 DAYS by completing the Registration of Purchase Card enclosed.
Having bought your new appliance, it is important to register the purchase.
This ensures you receive prompt and efficient service in the event that the product requires attention during its guarantee period.
If you have any queries please contact us in one of the following ways:
T:01949 862 012
F:01949 862 003
E:service@cda.eu
contents
WARNINGS 4
SPECIFICATIONS 5
INSTALLATION AND ASSEMBLY 6
USING THE APPLIANCE.
PRACTICAL TIPS 10
MAINTENANCE
AND CLEANING 19
SAFETY
AND TROUBLESHOOTING 21
ENVIRONMENTAL
WARNINGS 24
warnings
To avoid the risk of fire, electric shocks, injury or damage when using your washing machine, please take the following precautions:
■ This washing machine comes with a manual that includes operating, maintenance and installation instructions. Please read all the instructions before using the washing machine.
■ Do not wash items that have previously been cleaned, washed, soaked or treated with petrol, solvents for dry cleaning, other inflammable substances or explosives, as they produce fumes that could catch fire or explode.
■ Do not add petrol, solvents for dry cleaning or other inflammable or explosive substances to the wash water as they produce fumes that could catch fire or explode.
■ Do not repair or replace any part of the washing machine or try to carry out any type of servicing unless it is recommended in the maintenance instructions in the manual.
■ Do not climb onto the machine or stand on the open hatch door.
■ Do not use an extension lead or adaptor to connect your washing machine to the mains supply.
■ The machine should only be used for the purpose it is designed for.
■ Follow the washing instructions recommended by the manufacturer of the garment to be washed.
■ Do not turn your washing machine on until you are sure that:
- It has been installed in accordance with the installation instructions.
- All the water, drainage, mains electricity and earth connections meet the local regulations and/or other applicable regulations.
washing machine specifications

ACCESSORIES
natural_image
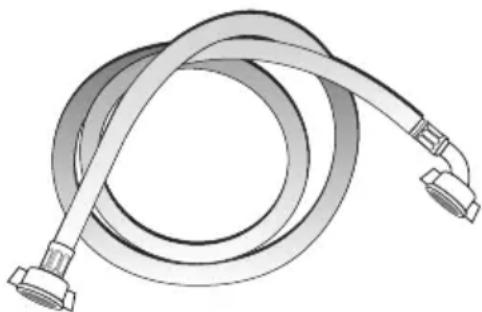
Illustration of a coiled flexible hose with connectors (no text or symbols)Water inlet hose.
washing machine installation and assembly
1 UNPACKING AND UNBLOCKING THE WASHING MACHINE
UNPACKING
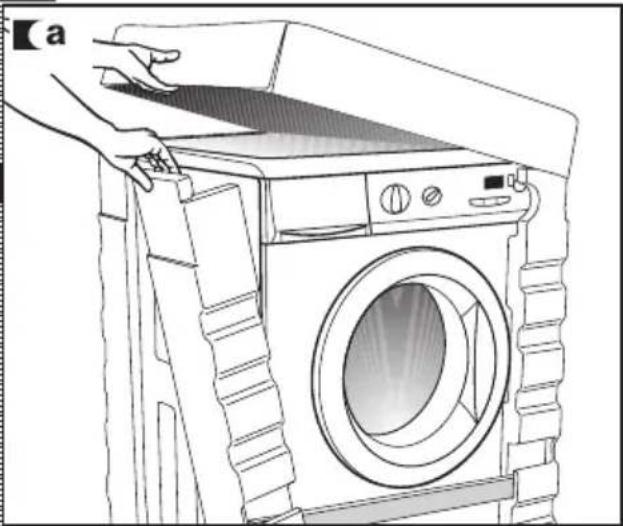
a Remove the base, corner protectors and top cover.
natural_image
Line drawing of a hand installing or adjusting the front panel of a washing machine (no text or symbols present)UNBLOCKING
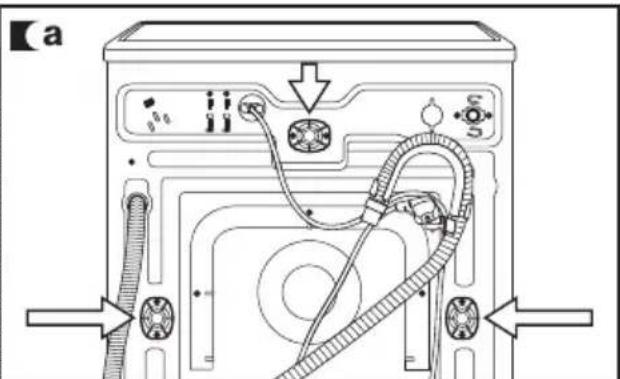
a Remove the screws holding the plastic covers to the back of the washing machine.
b Loosen and remove the 3 blocking screws.
c Cover the holes with the plastic covers you have just removed.

Important
Do not throw the blocking screws away. You may need to move the washing machine at a later date.
natural_image
Illustration of a hand using a wrench to adjust or install a component on a device (no text or symbols visible)CONNECTION TO THE
MAINS WATER SUPPLY
The water supply hose is inside the drum:
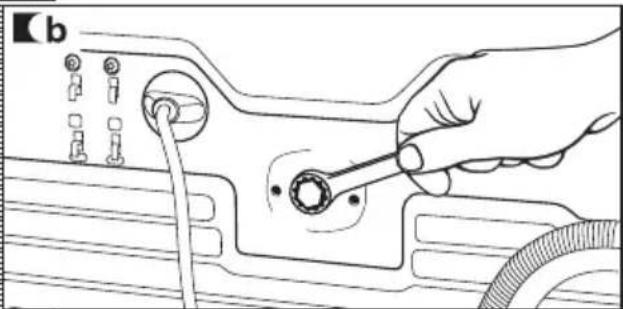
a Connect the bent end of the hose to the threaded inlet of the electrovalve located at the rear of the washing machine.
b Connect the other end of the hose to the water intake. Then securely tighten the connection nut.
It is important that the drain hose bend is correctly fastened to the outlet, to prevent any risk of it becoming detached and causing flooding.
I find your washing machine has a hot water intake, connect the hose with the red threaded end to the hot water tap, and to the electrovalve with the red filter.
The washing machine must be connected to the mains water supply, using the new supply hoses supplied with the appliance. Do not use water supply hoses that have been used before. For your washing machine to work properly, the mains water pressure must be between 0.05 and 1MPa (0.05 and 10 Kgr/cm²).

natural_image
Illustration of a hand operating a washing machine with a circular component being turned (no text or symbols)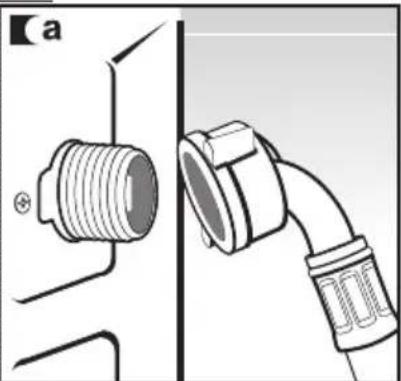
natural_image
Technical diagram showing a threaded connector attached to a pipe, with no visible text or symbols
natural_image
Technical diagram of a mechanical assembly with two views (top and bottom) showing different connection points (no text or symbols)
natural_image
Diagram of three different pipe fittings with threaded connectors, shown in mechanical assembly (no text or labels)DRAINAGE
CONNECTION
a It is recommended that you have a fixed drainage outlet 50 to 70 cm from the floor.
Avoid the drain hose being too tight, kinked or restricted.

3 LEVELING THE WASHING MACHINE AND CONNECTING IT TO THE MAINS ELECTRICITY SUPPLY
installation and assembly
LEVELLING
Important
Use the adjustable feet to level the washing machine. This will reduce the noise level and prevent it from moving during use.
Do not bring the feet too far out, you will achieve better stability.
You need to use a spanner for the models that have a nut.

natural_image
Line drawing of a hand holding a spiral-shaped object, possibly a tool or device (no text or symbols present)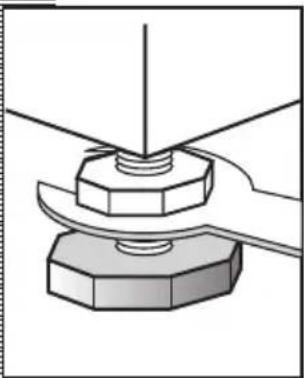
natural_image
Mechanical assembly diagram showing a bolt and nut assembly (no text or symbols)
natural_image
Illustration of a hand holding a hexagonal nut with a pointed tip above it, no text or symbols present.ELECTRICAL CONNECTION
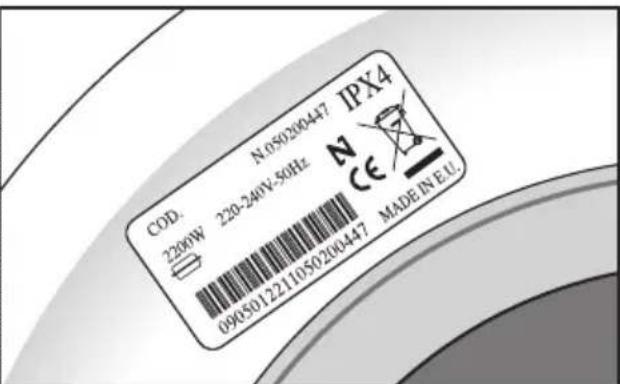
Consult the specifications plate located on the hatch door of the washing machine before making the electrical connections. Ensure that the voltage reaching the plug is the same as that on the plate.
Do not remove the specifications plate.
The information on it is important.
Important
It is very important to correctly earth the washing machine. The electrical installation, plug, socket, fuses or automatic switch and counter must be correctly dimensioned for the maximum power indicated on the specifications plate.
Do not plug the washing machine plug into the socket with wet or damp hands.
To remove the power cord, pull on the body of the plug.
If the power cord is damaged, it must be replaced by a cord or special unit provided by either the manufacturer or your after-sales service.
With built-in washing machines, the plug must be accessible after installation.
4 INSTALLING THE WASHING MACHINE UNDER A KITCHEN WORKTOP AND PRE-CLEANING
INSTALLATION UNDER
A WORKTOP
Your washing machine may be fitted underneath a kitchen worktop.
If you need to remove the washing machine's worktop, for safety reasons you need to fit a protection plate which you can obtain from your Dealer or CDA Customer Care.
Follow these steps to fit the plate:
a Remove the washing machine work top by taking out the side screws and moving it gently back.
b Take out the screws and remove the parts holding the worktop in place.
c Put the protection plate into place and screw it to the washing machine so it can then be inserted in the place you wish, fitting spongy adhesive all around the perimeter first to prevent noise.

natural_image
Line drawing of hands installing or adjusting a component with a tool (no text or symbols visible)
natural_image
Hand holding a screwdriver inserted into a rectangular object (no text or symbols visible)
natural_image
Line drawing of a hand opening a front-loading washing machine (no text or symbols)PRE-CLEANING
When your washing machine has been correctly installed, we recommend that you pre-clean the machine.
This is to check that the installation, the connections and the drainage are all correct, and to thoroughly clean the inside of the washing machine before any wash programmes are run (see the operating instructions on the following pages).
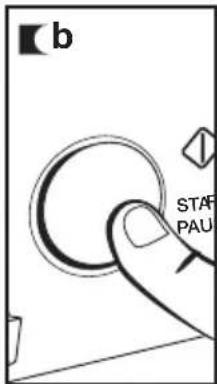
a Select the normal programme at 60°C.
b Press the Start/Stop button.

washing machine using the appliance and practical tips

1 PREPARING GARMENTS FOR WASHING
PREPARATION
Important
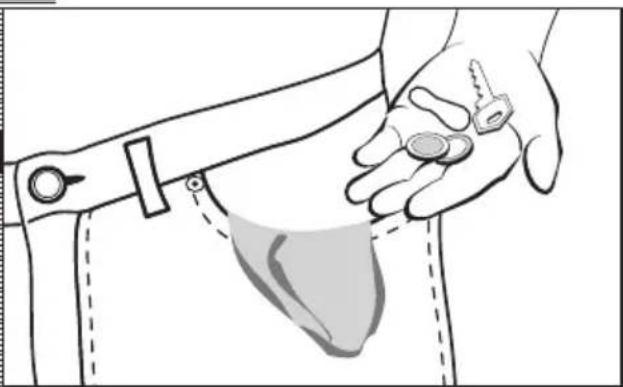
Before placing the clothes in the drum, make sure all the pockets are empty.
Any small objects may block the drain pump.
natural_image
Line drawing of a hand holding keys and coins, with a shaded area highlighting the lower portion of the object (no text or symbols present)SORTING THE CLOTHES
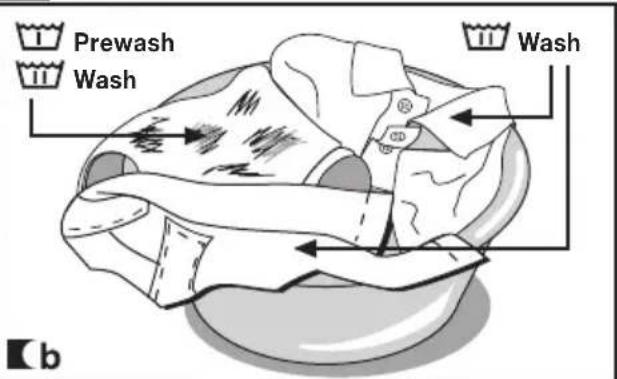
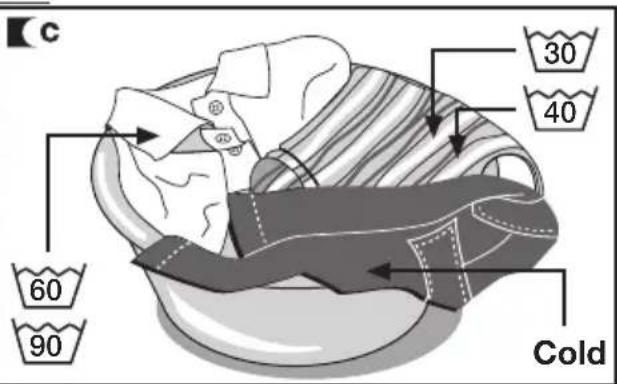
a Sort the clothes according to fabric and how they are made:
We recommend using the delicate programmes for sensitive fabrics. There is a special wool programme for woollens.
b Sort clothes according to how soiled they are.
- Wash lightly soiled garments using a short programme.
- Use a programme without prewash for medium-soiled garments.
- Wash heavily soiled garments using a long programme with prewash.
a Sort your clothes according to colour.
Wash whites and coloured separately.
The Ground Truth image displays a single, solid horizontal line. According to Rule 2 (UNDERSCORE & LINE RULES), this is a stylistic or background line, not a placeholder underscore. Therefore, the OCR result must ignore it and output nothing or only meaningful text. The provided OCR content is "\_\_\_\_", which consists of four underscores. This is an incorrect interpretation of the line as a placeholder, violating the rule that stylistic lines must be ignored. The OCR has hallucinated underscores where none should exist based on the GT's visual context. Hence, the OCR result is inconsistent with the Ground Truth.
We recommend loading the washing machine to its full capacity. This means savings on water and energy.
Whenever possible, we recommend that you wash garments of different sizes within the same wash programme. This improves the washing action and also aids the correct distribution of the garments in the drum when spin-drying, and the washing machine will therefore be quieter.
It is a good idea to put small garments in a wash bag.
a

Important

Make sure beforehand that your woollens can be machine-washed.
Before using the drying programme, first check the label on the garment to make sure it can be tumble dried.
2 USING DETERGENT AND ADDITIVES
using the appliance and practical tips
DETERGENT AND
ADDITIVES
a Your washing machine's detergent dispenser has three compartments.
b Put the detergent or additive into the detergent dispenser before starting the wash programme.
c Liquid detergents may also be used in this washing machine.
Important
The level of liquid must never be higher than the MAX mark printed on the dispenser wall.
Remember that the amount of detergent to be used will always depend on:
■ The amount of clothes to be washed.
■ How heavily the clothes are soiled.
■ The hardness of the water (Information on water hardness in your area can be obtained from the local authorities).
Important
We recommend the use of a decalcifying product if the water hardness is high in your area.
a



FABRIC SOFTENERPREWASH
WASH

natural_image
Technical line drawing of a mechanical component with three vertical supports and mounting holes (no text or symbols)b

natural_image
Illustration of a hand washing a washing machine with a cloth, no text or symbols presentC

natural_image
Line drawing of hands washing a microwave oven with a hand pouring liquid from a bag into the drawer (no text or symbols)eco-note
Remember that concentrated detergents exist which are more environment- and nature-friendly.
The use of more detergent than necessary will not improve you washing results, and apart from costing
you money it will have a negative effect on the preservation of the environment.
We therefore recommend you follow the detergent manufacturer's instructions.

3 SELECTION OF WASHING AND DRYING PROGRAMME
using the appliance and practical tips

To select a wash programme, proceed as follows:
a Starting from the off "0" position, the washing machine turns on when selecting the desired wash programme, (see programme table).
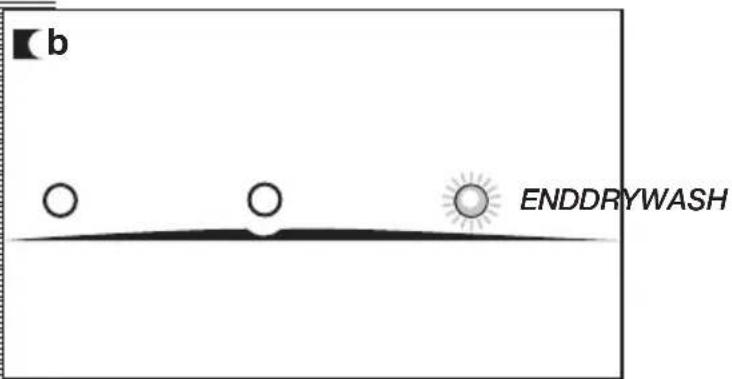
b In the command carrier the End of Programme pilot light flashes on and off.

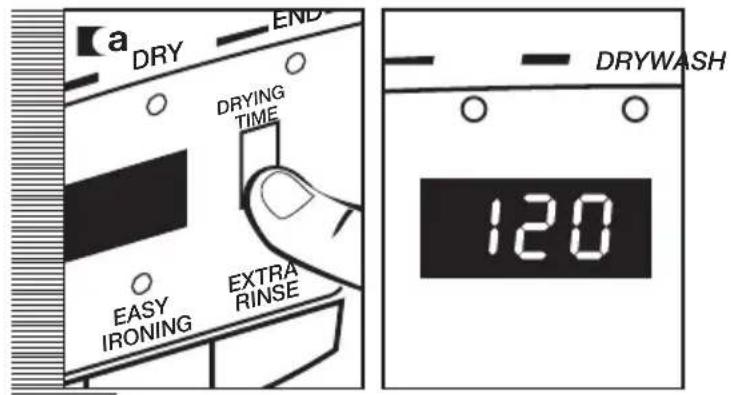
The procedure for selecting the drying time is as follows:
a Select drying time in minutes using the drying time button.
The time will appear on the display, increasing each time the drying time button is pressed.

If you select a wash + dry option, the load must not be over 4 kg. (1.5 kg. for delicate wash programmes).
There are five types of programme:
Normal programmes Auxiliary programmes Wool programmes Delicate programmes Drying programmes
PROGRAMMES
| Normal | Auxiliary Wool Delicate | Drying | ||
| 1 Quick 30°C | 8 Rinses | 10 Wool 35°C Delicate 40°C | 14 Delicate dry | |
| 2 Normal cold | 9 Spin-drying | 12 Delicate 30°C | 15 Normal dry | |
| 3 Normal 30°C | 13 Delicate cold | |||
| 4 Normal 40°C | ||||
| 5 Normal 60°C | ||||
| 6 Normal 90°C | ||||
| 7 Prewash 60°C | ||||
eco-note
We recommend you choose a wash programme without prewash whenever possible. This will save you money and help protect the environment.

natural_image
Abstract black-and-white line art design featuring two interlocking leaf-like shapes within a circular frame (no text or symbols)| Programme | Recommended temperature | Fabric type | Possible option buttons | |||||||
| Extra rinse | Intensive wash | Easy-iron | Spin speed selection | No spin | Anti-crease | |||||
| Normal programmesDelicate program | 1 | Quick 30°C |  | Cotton/Linen whites/colours very light soil | YES | NO | YES | |||
| 2 | Normal cold | Cold | Cotton/Linen delicate colours very light soil | YES | ||||||
| 3 | Normal 30°C |  | Cotton/Linen delicate colours light soil | YES | ||||||
| 4 | Normal 40°C |  | Cotton/Linen fast colours light soil | YES | ||||||
| 5 (*) | Normal 60°C |  | Cotton/Linen fast colours medium soil | YES | ||||||
| 6 | Normal 90°C |  | Cotton/Linen whites heavy soil | YES | ||||||
| 7 | Prewash 60°C |  | Cotton/Linen whites/fast colours heavy soil | YES | ||||||
| Auxiliary prog. | 8 | Rinses | — | Cotton/cotton mix Synthetic/Delicate Wool/wool mix | YES | NO | YES | |||
| 9 | Spin-drying | — | Cotton/cotton mix Synthetic/Delicate Wool/wool mix | NO NO | YES | |||||
| Wool P. | 10 | Wool 35°C | WOOL 35 | Wool/wool mix whites/colours light soil | YES | NO | YES | |||
| 11 | Delicate 40°C |  — — — — — — | Synthetic/cotton mix delicate colours medium soil | YES | ||||||
| 12 | Delicate 30°C |  — — — — — — | Synthetic/cotton mix delicate colours light soil | YES | ||||||
| 13 | Delicate cold | Cold | Synthetic/cotton mix delicate colours very light soil | YES | ||||||
| Drying prog. | 14 | Delicate dry | — | Synthetic/mixed fabrics | — | |||||
| 15 | Normal dry | — | Cotton/Linen | — | ||||||
(*) Programme for wash and energy consumption assessment in accordance with standard EN60456, press intensive wash button.
| Max load of clothes (Kg) | Wash product compartment | Programme description | Total consumption kWh/litres | Approx. duration (minutes) |
| 1,5 |   | SHORT wash, rinses, fabric conditioner if desired and long final spin | 0,20/30 | 30 |
| 6 | Normal wash, rinses, fabric conditioner if desired and long final spin | 0,15/49 | 60 | |
| 6 | Normal wash, rinses, fabric conditioner if desired and long final spin | 0,40/49 | 82 | |
| 6 | 0,65/49 | 87 | ||
| 6 | 1,02/49 | 91 | ||
| 6 | 1,90/55 | 120 | ||
| 6 |    | Prewash, normal wash, rinses, fabric conditioner if desired and long final spin | 1,45/60 | 105 |
| 6 |  | Rinses, fabric conditioner if desired and long final spin | 0,05/30 | 23 |
| 6 | — | Drain and long final spin | 0,05/0 | 10 |
| 1 | WOOL wash, rinses, fabric conditioner if desired and gentle final spin | 0,50/60 | 40 | |
| 3 |   | Delicate wash, rinses, fabric conditioner if desired and gentle final spin | 0,60/55 | 60 |
| 3 | 0,35/55 | 55 | ||
| 3 | 0,15/55 | 55 | ||
| 1,5 | — | Delicate dry | 1,2/26 | 95 |
| 4 | — | Normal dry | 2,8/48 | 160 |
| 3 | 1,8/27 | 100 |
NOTE: the KWh and litre consumptions and programme durations may vary depending on the type and amount of clothes, mains water pressure, etc.
4 SELECTING THE ADDITIONAL FUNCTIONS
using the appliance and practical tips
SPIN-DRYING
The selected programme is associated with spin-drying revolutions.
a It can be changed by turning the spin-drying selector command.
b Elimination of spin-drying 0
By turning the spin-drying selector command we come to the spin-drying elimination command. A programme without final spin-drying; it is used for avoiding the formation of creases in special fabrics.
a

b

radar
| Angle | Value | |-------|-------| | 0 | 0 | | 400 | 200 | | 600 | 400 | | 800 | 600 | | 1000 | 800 | | 1200 | 1000 |STOP/ANTI-CREASE
The washing process stops at the last rinse, leaving clothes soaked in water. To finish the programme select the spin speed desired and push the Start/Stop button. It is used, for example, when you are not at home and want to delay the spin-drying until you get home, to prevent the clothes creasing after spin-drying and being left in the drum to be removed.

radar
| Metric | Value | | -------------- | ----- | | SPIN-DRYING | 200 | | Anti-crease | 100 | | Current | 0 | | Current | 400 | | Current | 600 | | Current | 800 | | Current | 1000 |INTENSIVE WASH
This option, specially recommended for heavily soiled, stained clothes, achieves better results by extending the normal wash cycle.

EASY IRONING
This option avoids the formation of creases in the garments by the operation of a special programme with special turns to soften the clothes after the spin so as to make ironing easier.
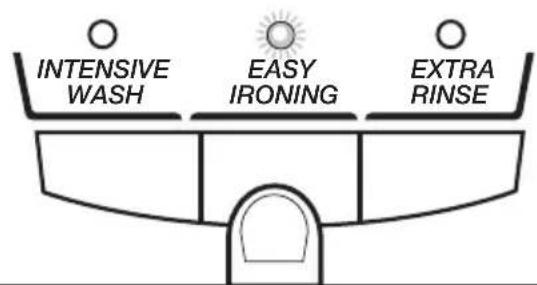
EXTRA RINSE
Increases the level of the final rinse obtained in the clothes; suitable for large loads and garments belonging to people with sensitive skin. Increases water consumption!

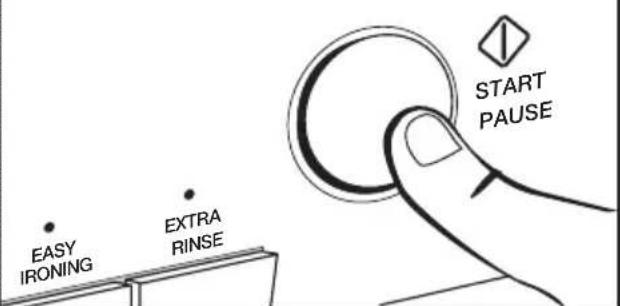
STARTING UP
To start the washing machine push the Start/Stop button.
OFF
Switching the program selection dial to the "0" position turns the machine off.
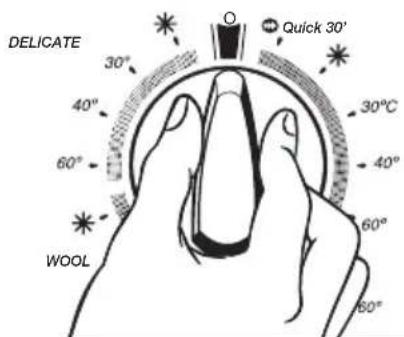
5 WASH/DRY PROGRAM STATUS AND POWER CUTS
using the appliance and practical tips
PROGRAMME
PHASES
Once started, current programme status and time remaining till completion can be ascertained from the screen.
The active phases will appear successively at the top of the display as the programme progresses. The time remaining until the end of the programme will also appear on the display. It updates at regular intervals, but not minute by minute.
Any option button can be selected provided the wash phase in which it takes effect has not been passed and when the programme accepts the option.
Pressing the start/stop button during the wash activates the PAUSE function.
Important
If the programme is changed on the selector dial during the washing and drying process, the washer-dryer will go onto PAUSE status and the programme will be cancelled.
If you need to add or remove a garment, press the start/stop button and make sure that the water level is not above the door overflow level and that the temperature inside is not high. Press the start/stop button again to restart the wash from the same cycle phase it had stopped at.
POWER CUTS
If there is a power cut, the washing machine will continue to operate from the point at which it stopped when power is reconnected (its memory lasts for a few hours).


ENDDR
YWASH
warnings
■ Level the washing machine by adjusting the feet to reduce the noise caused by spin-drying.
■ Try and wash clothes of different sizes in the same wash programme to favour the distribution of the clothes inside the drum during spin-drying.
■ All the models have a safety system for spin-drying that prevents spin-drying from being carried out if the distribution of the clothes inside the drum is too concentrated. This prevents the appliance from vibrating too much.
If you find that the clothes are not properly wrung out, try spin-drying them again after having distributed the clothes more evenly in the drum.
washing machine maintenance and cleaning
MAINTENANCE
After each wash, leave the door open for a while to allow the air to circulate freely inside the machine.
From time to time, depending on the hardness of your water, it is recommendable to run a full wash cycle using a decalcifying product. This will extend the life of your washing machine.
The washing machine should be disconnected from the mains electricity supply before any cleaning or maintenance is carried out.
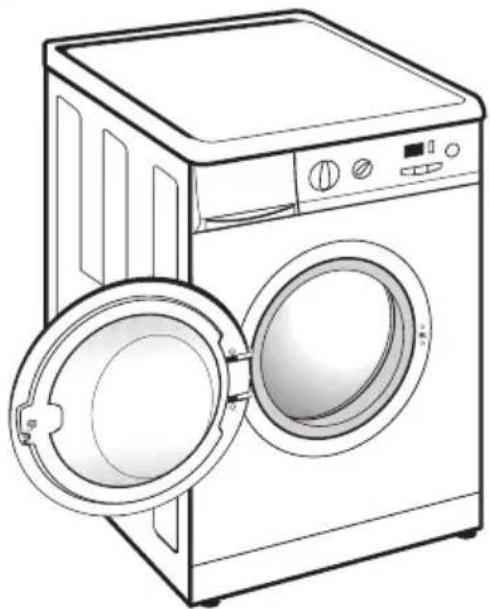
natural_image
Line drawing of a front-loading washing machine with two doors open, showing front panel and side control buttons (no text or symbols)1 CLEANING THE DETERGENT DISPENSER
Clean the detergent dispenser whenever there is any washing product residue left inside.
a Pull outwards on the detergent dispenser to remove it completely.
b Use warm water and a brush to clean the compartments.
c Also clean the additive compartment siphons, having removed them first. Once they have been cleaned, put them back making sure that they fit right in to the back.
Put the dispenser back into the washing machine.
A dirty or incorrectly fitted siphon will prevent the additives from being taken in and leave water inside the compartment at the end of the wash.

natural_image
Illustration of a hand placing a drawer into an oven with a directional arrow indicating motion (no text or symbols)
natural_image
Line drawing of hands using a drain to lift or remove a sink (no text or symbols present)
natural_image
Illustration of a hand washing a faucet with liquid, no text or symbols presentCLEANING THE FILTER
Clean the accessible filter if the drain pump is blocked by any foreign objects.
a Remove the kickplate by pulling gently on its edges and turning it downwards, to release the clips.
If you do not have access from the side, insert a small screwdriver into the three slots at the top of the kickplate, in order to get leverage and release the clips.
b Place a container under the drain pump filter to collect any water that comes out of it.
c Half- or quarter-turn the filter to the left. Water will start to come out.
d When all the water has drained out of the washing machine, turn the filter several times until it can be completely removed by gently pulling on it.
e Remove the objects or fluff caught in the filter or the drain pump.
f Put the filter and kickplate back in place again.
Important
To avoid burns, do not carry out this operation when the wash water is at a temperature of over 30^ C.

natural_image
Line drawing of hands operating a mechanical device with a knob and adjustment lever (no text or symbols)
natural_image
Line drawing of a hand holding a tool near a vehicle (no text or symbols)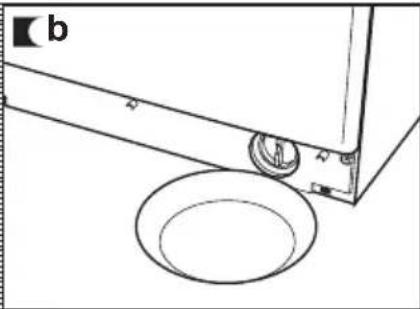
natural_image
Technical line drawing of a mechanical component with a circular base and mounting bracket (no text or symbols)
natural_image
Diagram of a mechanical or fluid system with directional arrows and labeled components (no readable text or symbols)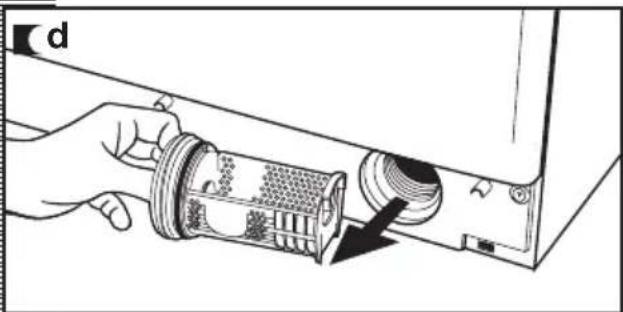
natural_image
Illustration of a hand inserting a component into a device (no text or symbols visible)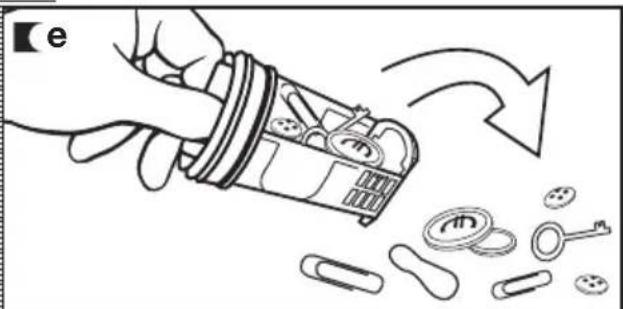
natural_image
Illustration of a hand pouring liquid into a container with scattered coins and keys, no text or symbols presentCLEANING THE OUTSIDE
The outside of the washing machine should be cleaned with warm soapy water or a gentle cleaning agent. Do not use abrasive cleaning products or solvents.
It should then be thoroughly dried with a soft cloth.
Important
When there have been spillages of detergent or additives from the dispenser onto the washing machine cabinet, clean them up right away as they are corrosive.
washing machine safety and troubleshooting
If you detect any problems with your washing machine, you will probably be able to rectify them yourself by consulting the following instructions.
If this is not the case, unplug the appliance and contact CDA CUSTOMER CARE.
Important
Never open up the appliance. There is no fuse or similar component inside that can be replaced by the user.
| Indicator | Problems |
| FO1 | No water coming in |
| FO2 | Does not drain or spin-dry |
| CO3 | Does not spin-dry |
| FO4 | Does not start |
| FO5 F10 | Call CDA Customer Care |
PROBLEMS
Why won't the washing machine start?
Why is the washing machine vibrating or making too much noise?
This may be due to the following:
■ Check the door is properly shut.
■ The washing machine is not plugged into the mains or there is no voltage in the mains supply.
■ The Start/Stop button has not been pressed.
If the washing machine door is not properly shut, F04 will appear on the display.
This may be due to the following:
■ The blocking and transport screws have not been removed.
■ The washing machine has not been correctly levelled.
Why doesn't the washing machine take in water?
Why doesn't the washing machine drain or spin-dry?
Why doesn't the washing machine spin-dry?
Why can't I see any water in the drum during the wash?
■ Indicator F01, no water coming in, this may be due to a cut in the water supply, a tap turned off or a blocked water inlet filter.
The possible solutions are as follows: wait for the water supply to be reconnected, turn on the tap, or remove the water inlet hose and clean the filter. If this failure is detected, F01 will appear on the display.
The reasons for the F02 indicator may be the following: washing machine drain pump blocked, building drainage pipes blocked, or incorrect pump electrical connection.
■ Solution: if the pump is blocked, gain access to it as described in section 2, maintaining and cleaning the appliance. If this failure is detected, F02 will appear on the display.
This may be due to an uneven distribution of clothes in the drum and may cause an excessive level of vibrations.
■ The solution is to select a spin-drying programme. If this failure is detected, C3 will appear on the display.
This is due to the fact that the washing machine is provided with a system which is able to adapt to the load and type of fabrics, adjusting the levels of water and energy used, in order to preserve the environment. So, although the water level you can see through the hatch may look low, there is no cause for concern as washing and rinsing efficiency will still be optimum.
Why is there still some water in the dispenser?
Why can't I open the hatch immediately after the wash has finished?
Why doesn't the remaining time shown on the clock coincide with the real time left until the selected cycle finishes?
Other indications
This may be because the dispenser needs cleaning. This simple operation is described in Maintaining and cleaning the appliance.
1- Cleaning the detergent dispenser.
Washing machines today are provided with safety systems for users. One of them is that the washing machine cannot be opened until it is certain that the drum is quite still. This is why the hatch cannot be opened for 2 minutes.
This time is for guidance purposes only and may be affected by the conditions under which the selected programme is being run, e.g. initial water temperature, size of load or unbalance caused by the garments during spin drying.
The washing machine can detect other indications. When this happens a number of other indicators appear on the display: F05, F06..., F10. If this happens, call CDA Customer Care.
eco-note
INFORMATION FOR THE CORRECT DISPOSAL OF WASTE ELECTRICAL AND ELECTRONIC APPLIANCES
When your appliance is of no further use, it should not be disposed of together with general domestic waste.
It can be taken, free of charge, to a specific waste collection centre, run by your local authority, or dealers who provide this service.
Disposing of waste domestic appliances separately means avoiding possible negative consequences for the environment and health, derived from incorrect disposal. This will enable the materials in them to be treated and recycled, obtaining important savings in energy and resources.
To highlight the obligation of collaborating with selective waste collection, the product is marked with a symbol to warn against using traditional containers for disposing of the appliance.

natural_image
Symbol of a waste bin with no text or labels, crossed by two diagonal lines and a solid black rectangle below (no text or symbols present)For further information, contact your local authority or the shop where you purchased the product.

natural_image
Abstract black-and-white line art featuring two interlocking leaf-like shapes within a circular frame (no text or symbols)
|C|D|A|
Passionate about style
natural_image
Front view of a washing machine with control knobs and a partially visible front panel (no text or symbols)The |C|D|A| Group Ltd
A: Harby Road • Langar • Nottingham • NG13 9HY • UK
T:01949 862 012 • F:01949 862 003
E:service@cda.eu • W:www.cda.eu


- INSTRUCTION MANUAL
- Thank you
- contents
- warnings
- washing machine specifications
- washing machine installation and assembly
- UNPACKING AND UNBLOCKING THE WASHING MACHINE
- UNPACKING
- UNBLOCKING
- Important
- CONNECTION TO THE
- MAINS WATER SUPPLY
- The water supply hose is inside the drum:
- DRAINAGE
- CONNECTION
- LEVELING THE WASHING MACHINE AND CONNECTING IT TO THE MAINS ELECTRICITY SUPPLY
- LEVELLING
- ELECTRICAL CONNECTION
- INSTALLING THE WASHING MACHINE UNDER A KITCHEN WORKTOP AND PRE-CLEANING
- INSTALLATION UNDER
- A WORKTOP
- Your washing machine may be fitted underneath a kitchen worktop.
- PRE-CLEANING
- washing machine using the appliance and practical tips
- PREPARING GARMENTS FOR WASHING
- PREPARATION
- SORTING THE CLOTHES
- The Ground Truth image displays a single, solid horizontal line. According to Rule 2 (UNDERSCORE & LINE RULES), this is a stylistic or background line, not a placeholder underscore. Therefore, the OCR result must ignore it and output nothing or only meaningful text. The provided OCR content is "\_\_\_\_", which consists of four underscores. This is an incorrect interpretation of the line as a placeholder, violating the rule that stylistic lines must be ignored. The OCR has hallucinated underscores where none should exist based on the GT's visual context. Hence, the OCR result is inconsistent with the Ground Truth.
- USING DETERGENT AND ADDITIVES
- using the appliance and practical tips
- DETERGENT AND
- ADDITIVES
- eco-note
- SELECTION OF WASHING AND DRYING PROGRAMME
- SELECTING THE ADDITIONAL FUNCTIONS
- SPIN-DRYING
- STOP/ANTI-CREASE
- INTENSIVE WASH
- EASY IRONING
- EXTRA RINSE
- STARTING UP
- OFF
- WASH/DRY PROGRAM STATUS AND POWER CUTS
- PROGRAMME
- PHASES
- POWER CUTS
- washing machine maintenance and cleaning
- MAINTENANCE
- CLEANING THE DETERGENT DISPENSER
- CLEANING THE FILTER
- CLEANING THE OUTSIDE
- washing machine safety and troubleshooting
- PROBLEMS
- INFORMATION FOR THE CORRECT DISPOSAL OF WASTE ELECTRICAL AND ELECTRONIC APPLIANCES
- |C|D|A|
Brand : CDA
Model : CI830SI
Category : Washing machine