SB220 - Blender N'oveen - Free user manual and instructions
Find the device manual for free SB220 N'oveen in PDF.

User questions about SB220 N'oveen
0 question about this device. Answer the ones you know or ask your own.
Ask a new question about this device
Download the instructions for your Blender in PDF format for free! Find your manual SB220 - N'oveen and take your electronic device back in hand. On this page are published all the documents necessary for the use of your device. SB220 by N'oveen.
USER MANUAL SB220 N'oveen
natural_image
White blender with orange and green fruit topping, labeled 'NOVENER' on the side (no other text or symbols visible)
natural_image
White and green blender with colorful fruit topping (no visible text or symbols)SB210 / SB220 / SB230 / SB550 / SB560
SPORT MIX & FIT
- BLENDER – INSTRUKCJA OBSŁUGI
- BLENDER - USE INSTRUCTIONS
natural_image
Close-up of a white kitchen pot with a metallic spoon and a label 'E' pointing to the lid (no other text or symbols visible)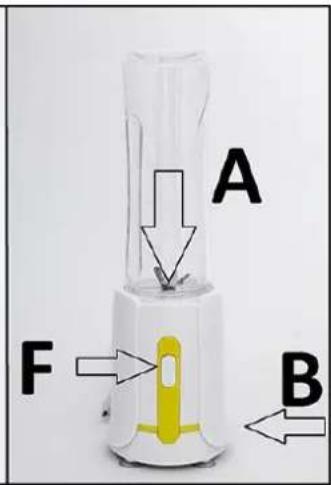
text_image
A F B2

natural_image
Hand holding a white plastic container with a downward arrow and gray curved arrows indicating rotation (no text or symbols)3
natural_image
Simple illustration of a transparent cylindrical container with small dark fragments inside, no text or symbols present.4

natural_image
Close-up of a white blender with a yellow handle and arrow indicator (no text or symbols)5
natural_image
Close-up of a yellow plastic jar with handle and lid, no visible text or symbolsWhen using electrical equipment, the following safety rules should always be observed: READ ALL INSTRUCTIONS BEFORE USING THE DEVICE. KEEP THE DEVICE AWAY FROM WATER.
NOTE: For most electrical equipment, all electrical parts are in a state of arousal even when the equipment is switched off. BE CAREFUL!
To reduce the risk of injury or even death through electric shock:
- Always turn the device off when not in use.
- Do not use the device while bathing. Store the device in a place where it cannot fall into the bath or sink.
- Do not place the device in water or other liquids.
- If the appliance falls into the water, disconnect it immediately. DO NOT REACH INTO THE WATER!
CAUTION: To reduce the risk of burns, electric shock, fire or other injury:
- Do not leave the device while it is running or plugged into an outlet.
-
Supervision is necessary when the appliance is used by children or people with disabilities.
-
Use the device only for the purpose for which it is intended. Use of additives not recommended by the manufacturer may be dangerous.
-
Never use the device if its cable or plug is damaged. Also if it does not function properly, or has been dropped or otherwise damaged. All the more so when it has fallen into the water. Bring the device to the nearest service centre for inspection or repair.
-
Keep the power cord away from hot surfaces or any other heat source.
-
Never throw or insert any objects into the unit. This can be dangerous.
-
Components may become hot during use. Allow them to cool down after finishing work before storing the device.
The device is designed for domestic use and should not be used for commercial or industrial purposes.
This device complies with Directive 2006/95/EC, EMC 2004/108/EC and (EC).
Regulation No. 1935/2004 of 27/10/2004 for food contact materials.
INSTRUCTIONS FOR USE
NOTE: Before using the device, we recommend that you wash out all replaceable parts that come into contact with food. Use hot water, rags with mild detergent. Allow to dry completely.
PART DESCRIPTION
A. Container socket
B. Base
C. Container
D. Container lid
E. Set of blades
F. Activation button
1

text_image
D C E A F B2
natural_image
Hand holding a white spray bottle with a downward arrow indicating rotation (no text or symbols)3

natural_image
Simple illustration of a transparent cylindrical container with a small object at the bottom, no text or symbols present.4

natural_image
Close-up of a white blender with a yellow handle and arrow indicator (no text or symbols)5

natural_image
Close-up of a yellow plastic jar with handle and lid (no text or symbols visible)- Place the container (C) on a flat, horizontal surface with the hole facing upwards. and enter the ingredients you want to use by cutting them into small pieces if it is necessary. Do not exceed the maximum level marked on the container.
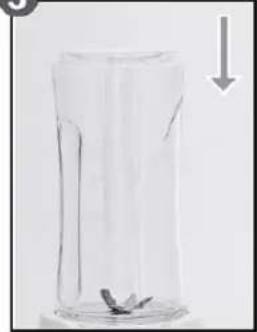
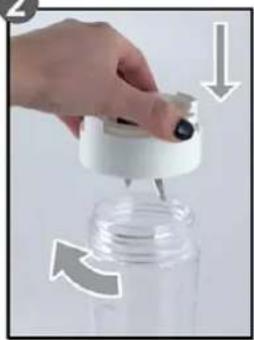
- Place the blade set (E) in the container opening (C) and turn clockwise to latch. (Fig. 2).
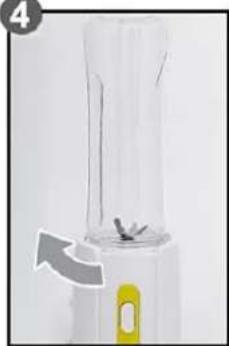
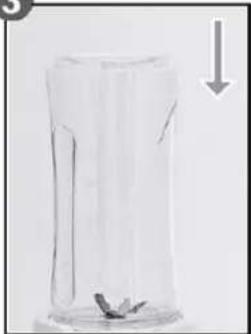
- Place the container (C) upside down and place it in the socket (A) on the base (B), making sure that the arrows on the base match the arrows on the blade set (E) (Fig. 3).
- Connect the device to the power supply.
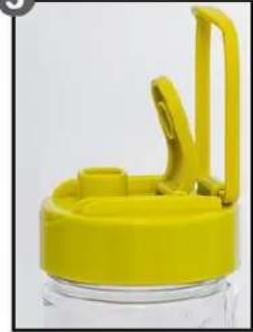
- Press the button on the front of the device (F), the blender will start working and it will work as long as the button remains pressed.
- After use, remove the plug from the socket and wait until the blades come to a standstill before using it before removing the container (C) from the base (B).
- Place the container (C) upright and place it on a flat surface. To open the container, unscrew the blade set (E).
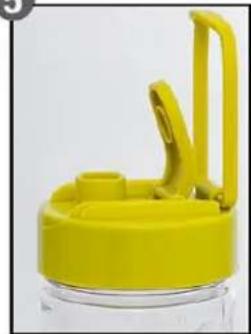
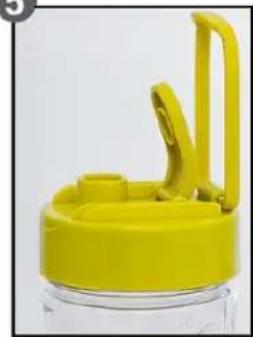
- Pour the contents into a glass or mount the lid (D) on the container (C) to carry it separately (Fig. 5).
- Wash the container (C) after use.
NOTE
Prepare the food to be processed, place it in a container (C) and close it correctly with the balde set (E) before mounting it to the base (B), then connect the device to the mains power supply. Otherwise there is the risk of accidental operation of the device.
Caution: blades are sharp.
Do not leave the appliance in continuous operation for more than 30 seconds.
Short pulses for a few seconds are suitable.
Never place hot liquids or fruits with seeds inside the container (C), this can damage the blades.
TIPS FOR USE
- Place the liquid in the container first, unless the recipe states otherwise.
- Cut hard fruits and vegetables into 1.8 to 2.5 cm pieces.
- Do not exceed the maximum capacity of the container (C). If the blender remains locked, turn off the power immediately, disconnect it from the socket and allow to cool for at least 15 minutes. Remove ingredient excess and continue to use.
- This device must not be used to prepare potato puree, for whisking egg white or dairy products, mixing cakes or mincing meat.
- To obtain the best results, the following ingredients should be added in order: liquids, fresh, frozen ingredients, fruits, yoghurt and ice cream.
CLEANING
CAUTION:
Before cleaning, disconnect the appliance and make sure that the blades are stopped. Blades are sharp; be careful when cleaning.
- The container (C), blade set (E) and lid (D) can be cleaned in the dishwasher.
- The base (B) should be cleaned with a damp cloth. Do not use abrasive detergents.
TECHNICAL DATA
Power: 300 W
Power supply: 230 V \~50 Hz
Example recipes for fruit cocktails
"Fruit white" "Fruit craze"
4 tablespoons of yoghurt 300 ml of apple juice
200 ml of milk 1 kiwis
2 tablespoons of oatmeal 150 g melon
1 banana, 2 apples
2 tablespoons of honey
"Chocolate pear" "Vitamin bomb"
300 ml of chocolate milk 200 ml orange juice
2 pears 200 ml cranberry juice
1 banana
"Apricot flavour" "Honey mangoes"
4 halves of apricots 200 ml of yoghurt
80 ml of apricot juice 1 mango
2 peaches 200 ml of milk
4 tablespoons of yoghurt 1 tablespoon of honey
200 ml of milk
2 tablespoons of honey
"Vanilla note"
300 ml of milk
1 banana
4 tablespoons of honey
2 tablespoons of vanilla extract
ΕΛΛΗΝΙΚΑ
ΜΕΤΡΑ ΑΣΦΑΛΕΙΑΣ
natural_image
Hand holding a small white spray bottle with a droplet, partially removed by a hand (no text or symbols visible)3

natural_image
Simple line drawing of a glass beaker with a small leaf inside, no text or symbols present4
natural_image
Close-up of a small glass blender with a yellow handle and arrow indicator (no text or symbols)5
natural_image
Close-up of a yellow plastic jar with handle and lid, no visible text or symbolsnatural_image
Hand holding a white plastic jar with a downward arrow and curved arrows indicating rotation (no text or symbols)3
natural_image
Simple line drawing of a glass container with a small object inside, no text or symbols present4

natural_image
Close-up of a white blender with a yellow handle and arrow indicator (no text or symbols)5