KA5MWPLTSPA - Lighting Kogan - Free user manual and instructions
Find the device manual for free KA5MWPLTSPA Kogan in PDF.


| Product Type | Smart LED Light Strip |
| Model Number | KA5MWPLTSPA (also KA2MWPLTSPA, KA10MWPLTSA for 2m/10m versions) |
| Length Options | 2m, 5m, 10m |
| Operating Voltage | DC 12V |
| Power Consumption | 4 W/m |
| LED Brightness | 25 lm per LED |
| Number of LEDs | 90 pcs (for 5m version) |
| Colour Options | 15 colours + white and warm white + adjustable colour temperature (3000K-6500K) |
| Scene Modes | 8 preset scenes |
| Water Resistance (Strip only) | IP68 (Note: ends and controller not waterproof) |
| Control Methods | IR Remote Control, Kogan SmarterHome app (Wi-Fi), Voice via Google Home or Amazon Alexa |
| Remote Control Range | 10m |
| Cuttable | Yes, every 10cm (cuts void IP68 rating) |
| Installation | Self-adhesive 3M tape backing |
| Wi-Fi Compatibility | 2.4GHz only |
| Safety Features | Do not cover power supply/controller/ strip; avoid over-bending; keep controller dry; ensure correct polarity |
| Maintenance | Keep clean with dry soft cloth; avoid water on controller/adaptor |
| Package Contents | LED light strip, Wi-Fi controller, IR remote, power adaptor, user guide |
Frequently Asked Questions - KA5MWPLTSPA Kogan
User questions about KA5MWPLTSPA Kogan
0 question about this device. Answer the ones you know or ask your own.
Ask a new question about this device
Download the instructions for your Lighting in PDF format for free! Find your manual KA5MWPLTSPA - Kogan and take your electronic device back in hand. On this page are published all the documents necessary for the use of your device. KA5MWPLTSPA by Kogan.
USER MANUAL KA5MWPLTSPA Kogan
natural_image
Close-up of a film strip with illuminated light source and segmented film strips (no text or symbols visible)KOGAN SMARTERHOME™ IP68 COLOUR & WHITES SMART LED LIGHT STRIP
(2M/5M/10M)
KA2MWPLTSPA, KA10MWPLTSA & KA5MWPLTSPA
SAFETY & WARNINGS
- Do not place any metal objects around the Wi-Fi controller.
- Ensure power supply and controllers are connected correctly.
- The power supply output voltage should be the same as the LED strip working voltage.
- Do not cover the surface of the power supply, Wi-Fi controller or LED strip.
- Do not over-bend the strip as it may damage the product.
- Only the light strip is IP68 rated. Keep the adaptor and the Wi-Fi controller properly protected from outdoor weather conditions.
- Ensure to not apply excessive force at the connector between the Wi-Fi controller and the light strip as it may easily get damaged.
COMPONENTS

Light Strip

natural_image
Pure electrical connector diagram without any text, numbers, or symbolsWi-Fi Controller
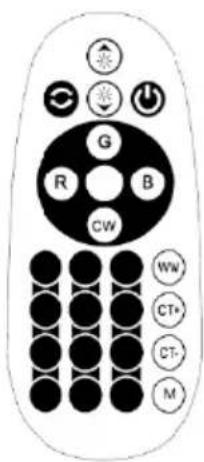
Remote Control Adaptor
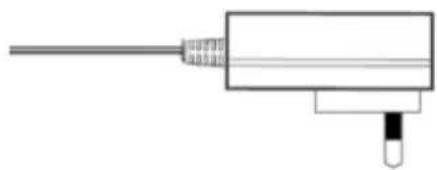
natural_image
Simple line drawing of a mechanical component with a shaft and base (no text or symbols)
User Guide
OVERVIEW
Wi-Fi Controller
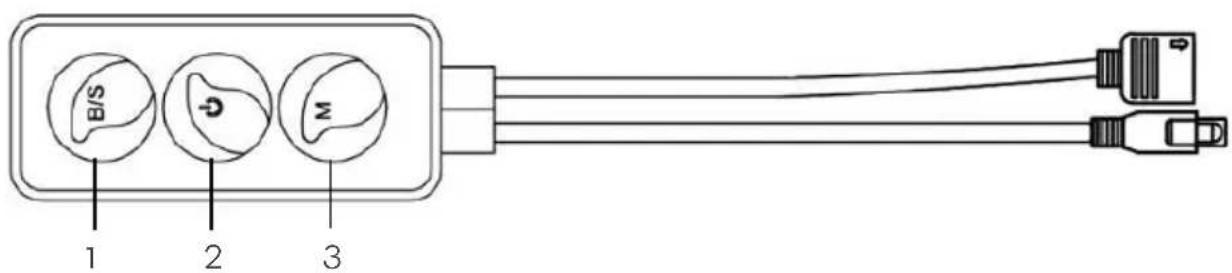
1 Brightness Button Increase or decrease brightness
2 Power Button Long press for 5 seconds to reset Wi-Fi connection
3 Scene Button Change scenes
IR Remote Control
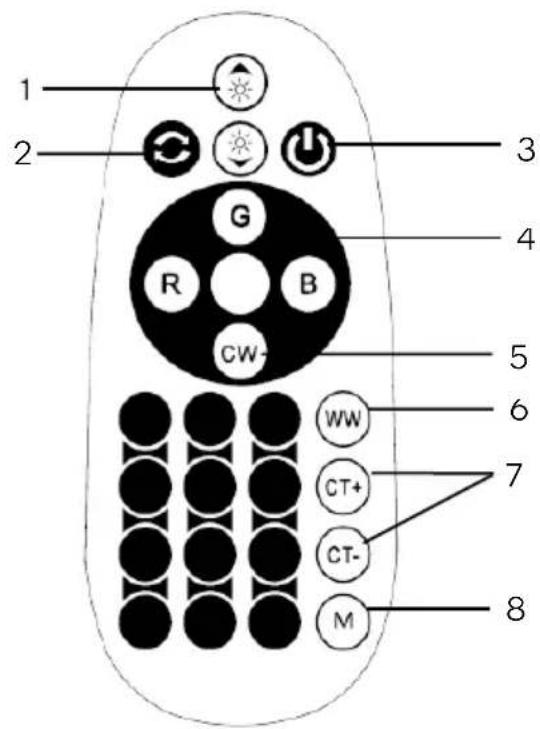
1 Brightness Buttons
2 Colour/White Change Button
3 Power Button
4 RGB Colour Buttons
5 White Colour Button
6 Warm White Button
7 Colour Temperature Buttons
8 Scene Button
SETUP
- Turn off the main power supply.
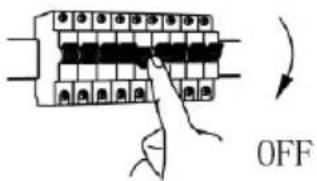
-
Connect the controller to an adaptor and then to a power supply.
-
Unfold the LED strip: if it is coiled up, there is a risk of overheating.
-
Connect LED strip to the controller.
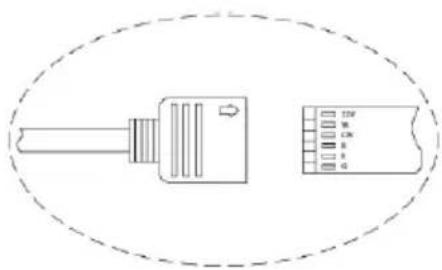
natural_image
Pure electrical connector diagram without any text, numbers, or symbolsNote: Ensure the arrow on the Wi-Fi controller cable is aligned with the 12V power marker on the light strip.
- Use the 3M adhesive tape to stick the light strip and secure it.
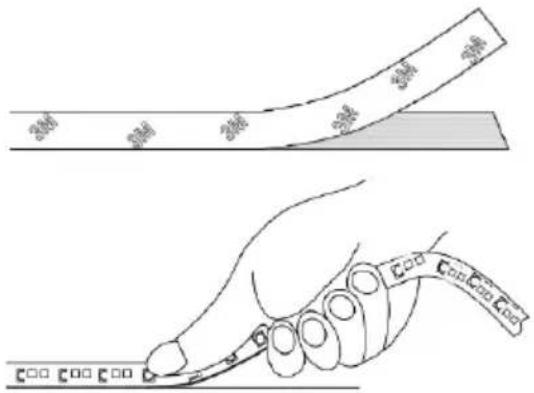
- If required, you can cut the light strip into 10cm small strips as shown in the image.
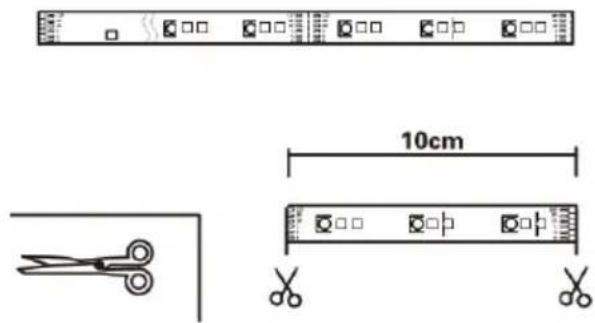
- Ensure you stick the light strip in a correct angle as shown in the below image.
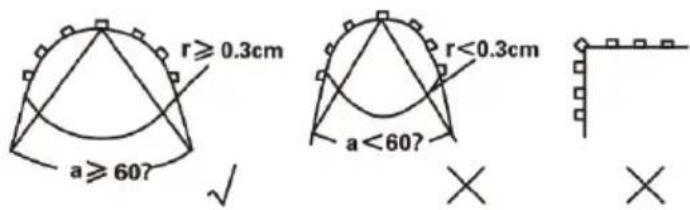
- Turn on the main power supply.
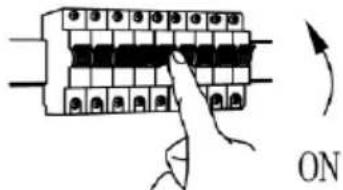
- You can now control the light strip using IR Remote Control.
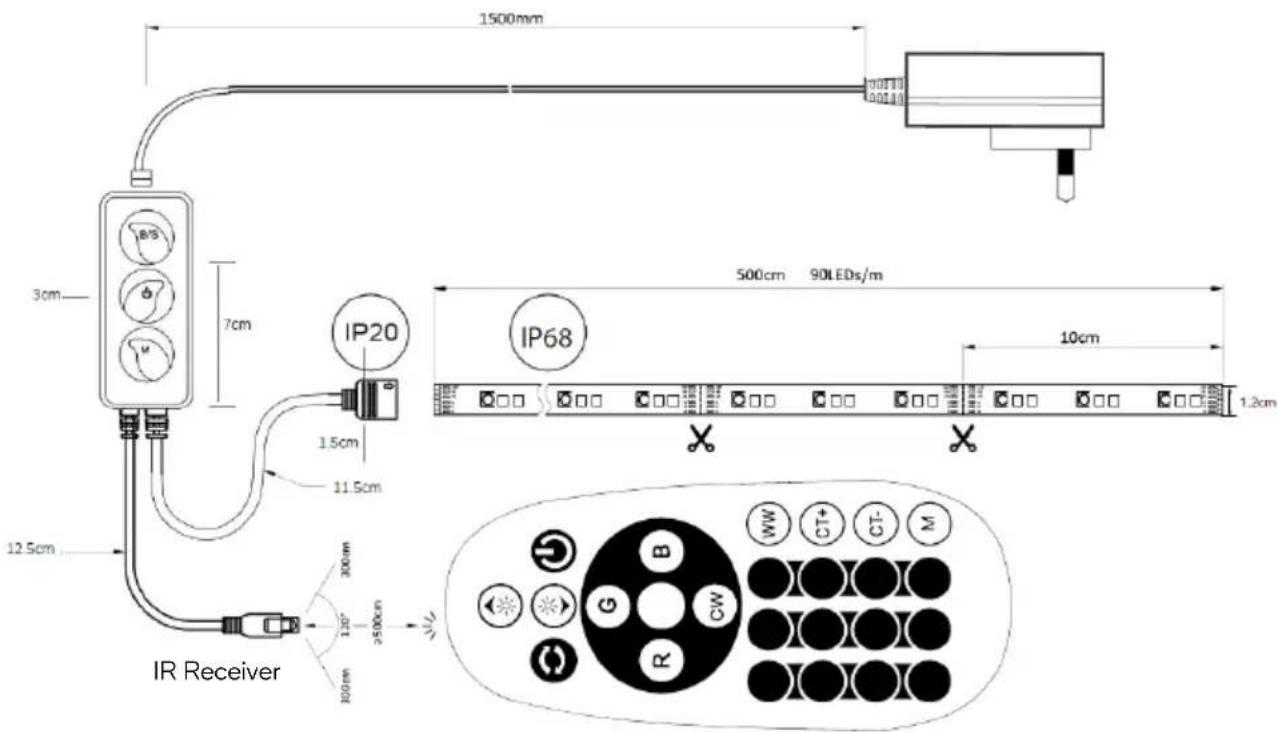
CONNECT TO SMARTERHOME™ APP
Install App
Download the "Kogan SmarterHome" app from the Play Store (Android) or App Store (iOS).
Register
If you do not have a Kogan SmarterHome™ account, register or sign in with a verification code sent by SMS.
To register:
- Tap to enter registration page.
- The system automatically recognises your country/area. You can also select your country code manually. Enter your email address and tap 'Next.'
- Alternatively, you can select 'Register by mobile number' and enter the verification code sent to you by SMS.
- Create a profile on the next page to define your location and room.
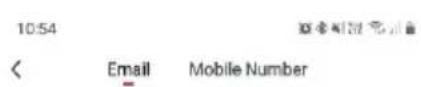

Register by Email
Australia +61
YourEmailAddress@gmail.com
Get Verification Code
Register by Mobile Number
Australia +61
0412345678
Get Verification Code
Set device in pairing mode
When the device is first turned on, it may automatically enter pairing mode. This is indicated by light flashing rapidly.
If not automatically in pairing mode when powered on, you can manually set the device in pairing mode by long pressing the Power Button on the Wi-Fi controller for 5 seconds to reset connection.
If unsuccessful, then turn on and off the light for 3 times at the power switch until the light starts flashing rapidly.
Add device through network
- Once registered, tap "+" in the upper right corner of the app's home page to add a new device through the network.
- Select the product type from the list of options in the app (Lighting > LED Strip Light).
- Ensure that the device is in pairing mode, with the light flashing rapidly, and tap "Confirm indicator is rapidly flashing".
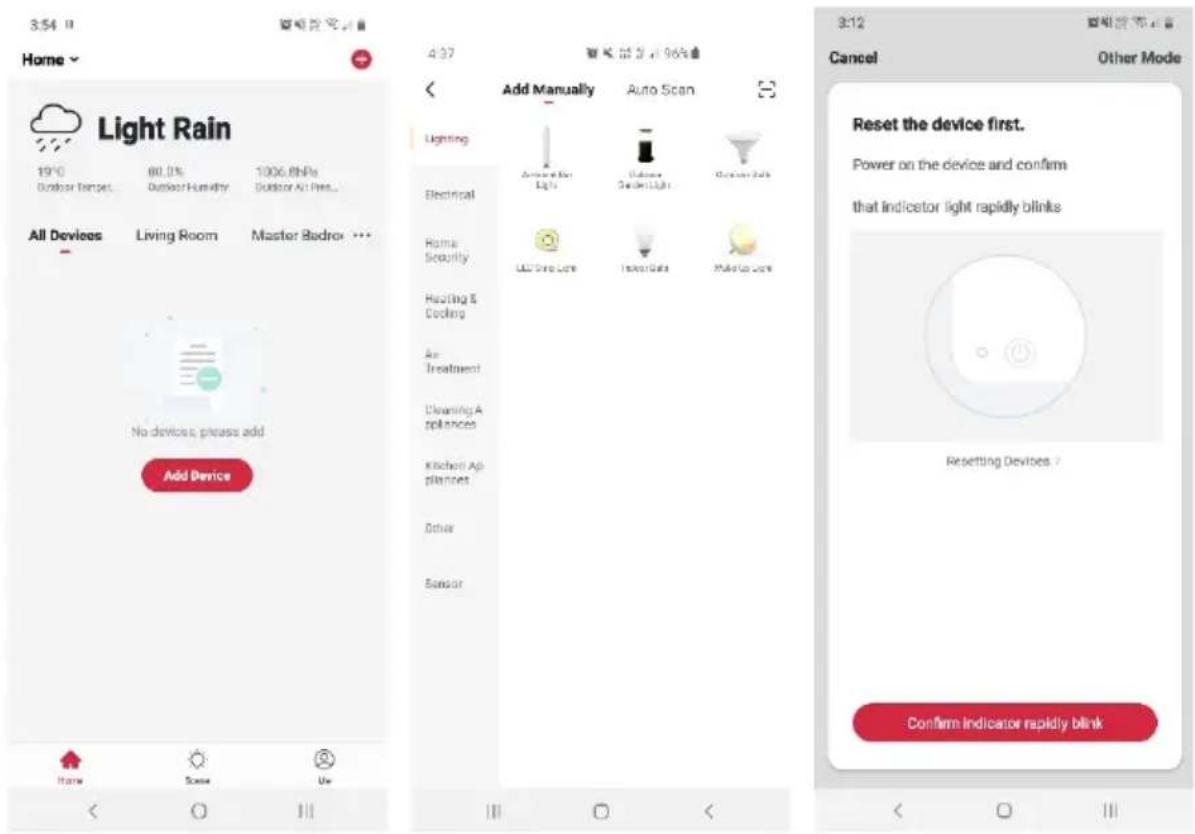
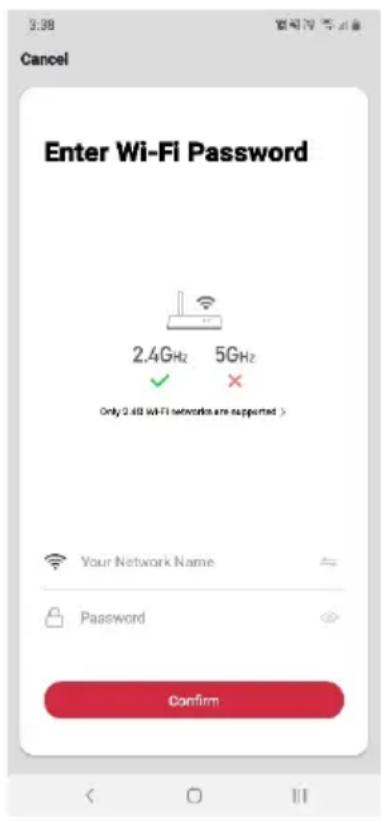
- Upon successfully confirming pairing mode, enter your Wi-Fi details. It is important that your SmarterHome™ device and the app are connected to the same Wi-Fi network during setup.
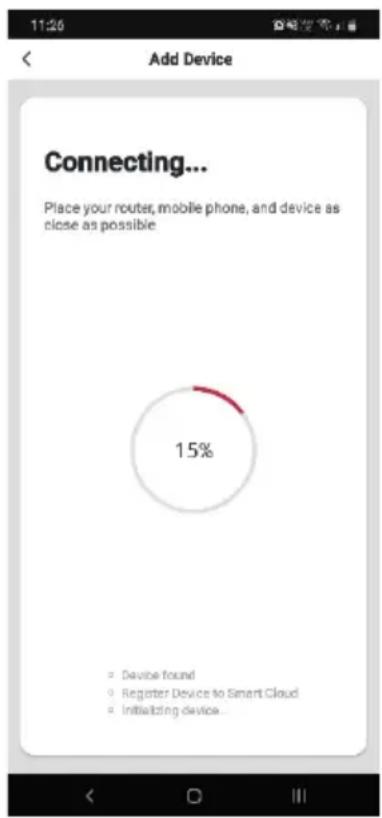
- The device will commence the pairing process and connect to the app. Ensure your Wi-Fi router, mobile phone, and the SmarterHome™ device are kept close until connection is complete.
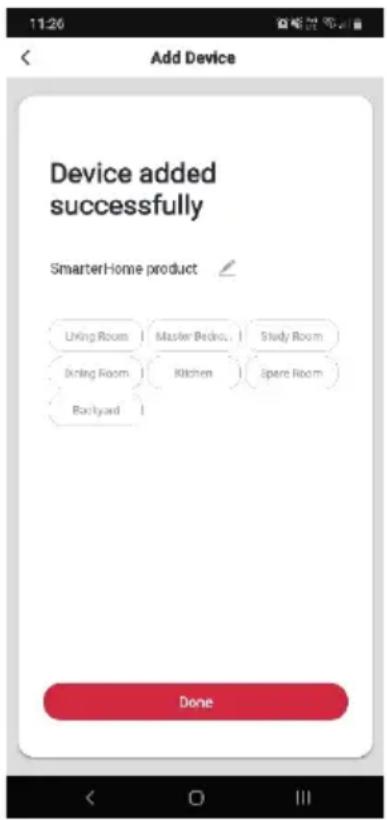
- After successfully being added, you will have the option to rename the device and assign it to a location. It will now be listed on the app's home page. Tap the device listing to enter its control page.
Notes:
• The device and the app must use the same Wi-Fi network.
• The device is only compatible with 2.4Ghz networks.
OPERATION
Power On/Off
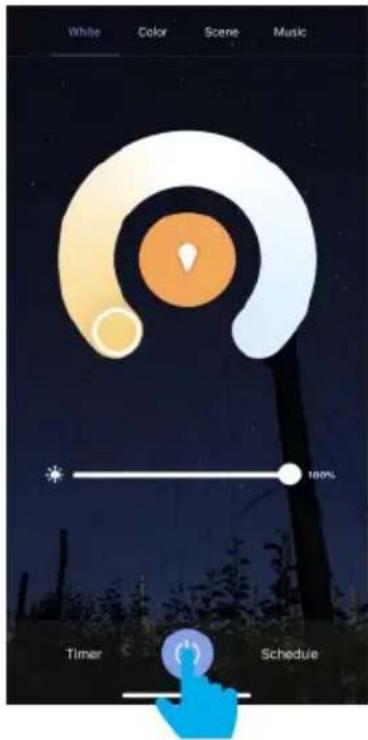
To turn the light on or off, tap the power icon.
Reset
To reset the device to its default settings, turning the light on and off for 10 times.
Control Page
-
Tap device name to enter the control page.
-
Tap the power icon at the bottom of the screen to turn the light on or off.
White Light
- Tap the White tab at the top of the screen to enter the white light control menu.
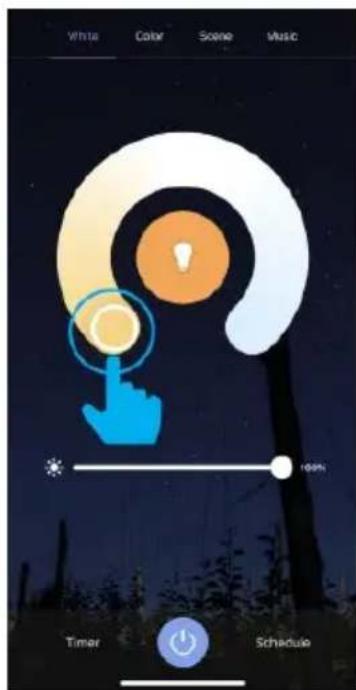
- Slide the dimming bar left or right to set the colour temperature from warm (3000K) to cool (6500K).
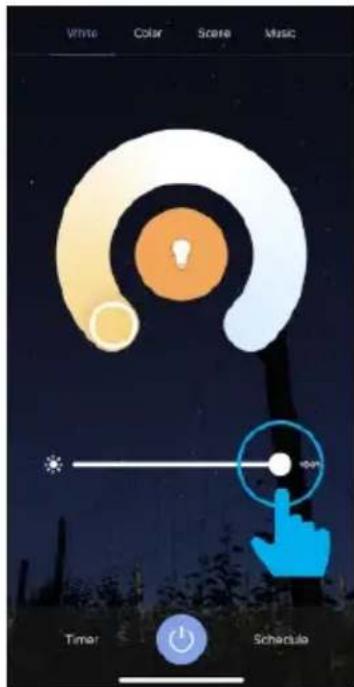
- Slide the brightness horizontal bar left or right to set the desired brightness level.
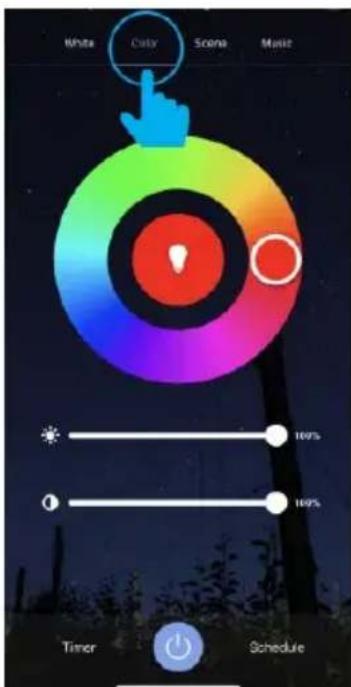
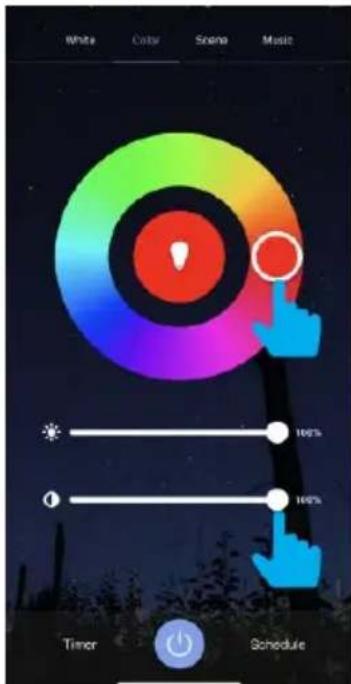
Colour Light
- Tap the Colour tab at the top of the screen.
- Tap on any part of the colour picker to select a desired colour or choose a pre-set colour.
- Slide the horizontal bars left or right to adjust the colour saturation and brightness.
Scene
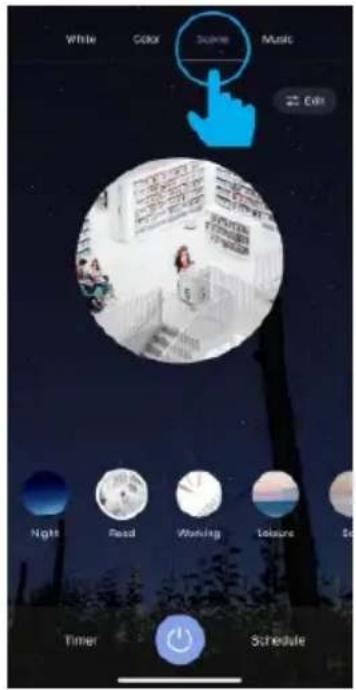
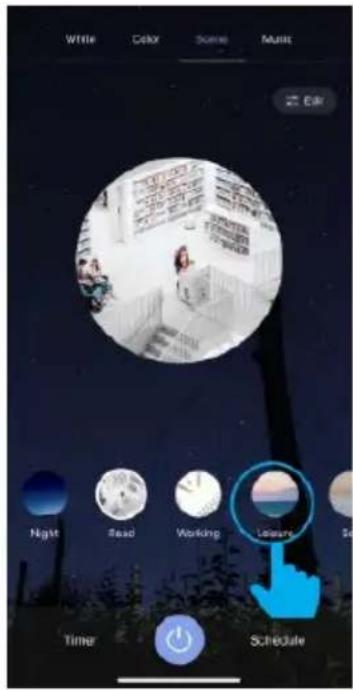
- Tap the Scene tab at the top of the screen.
- Tap on any of the scene icons to select the desired scene.
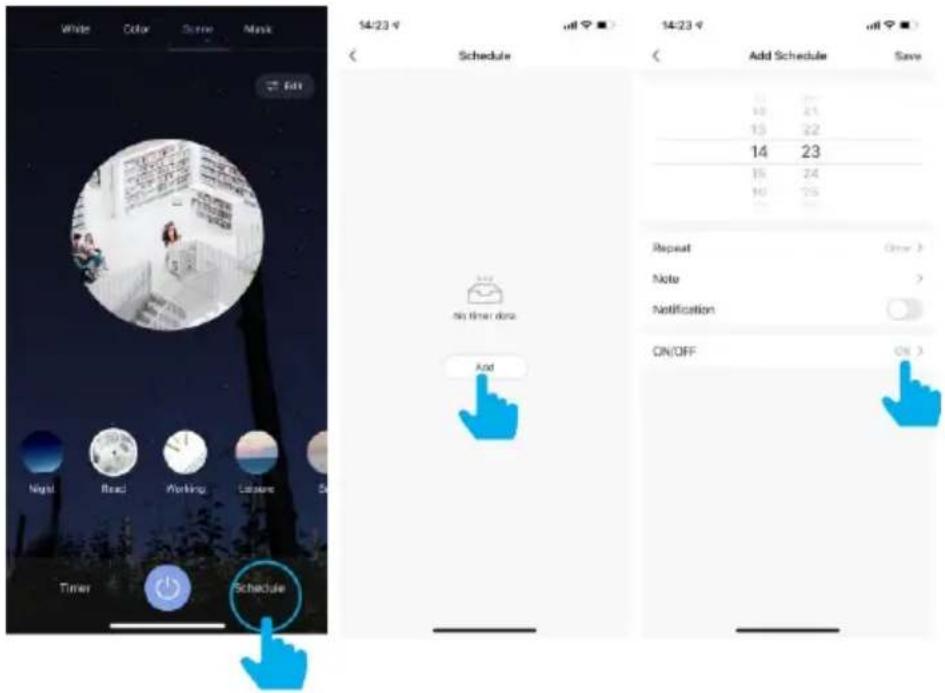
Schedule
- Tap the Schedule tab at the bottom right of the screen.
- Tap the Add Schedule tab at the bottom of the screen.
- Choose a start time and end time. By default, the schedule will only occur once. If you want to repeat on certain days of the week, tap the Repeat icon and select the required option.
Additional Settings
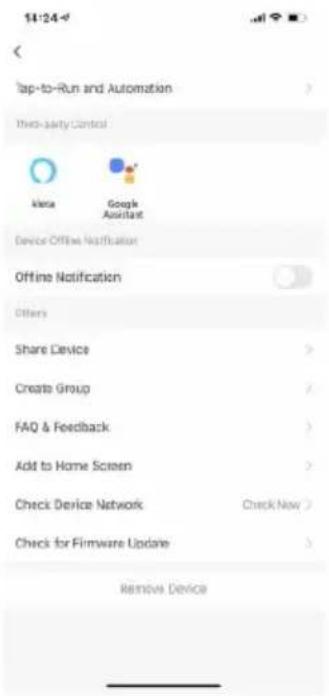
- Tap the edit menu in the upper right corner, represented by the pen icon.
- Additional features are available in the settings menu, including renaming and removing devices.
Grouping devices
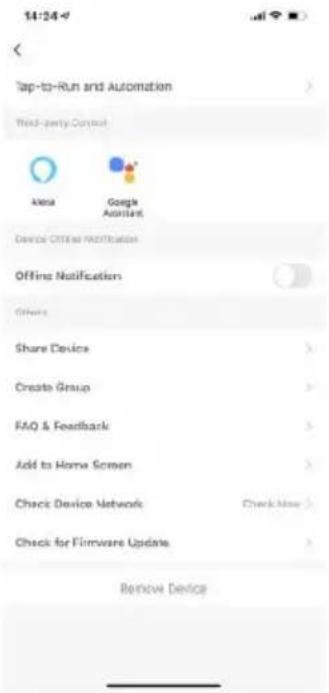
- From the edit menu, tap the Create Group option.
- Select the lights you want to group then tap Confirm.
- Enter the desired name for the group and tap Save.
- Tap the name of the created group in the device menu.
- Tap the edit menu in the upper right corner, represented by the pen icon.
- From the edit menu, you can rename the group or remove a light from the group. Once complete, tap Save in the upper right corner.
Device Sharing
- Tap the name of the light or group you wish to share from the device menu.
- Tap the edit menu in the upper right corner, represented by the pen icon.
- Tap the Share Group option, then tap Add Sharing at the bottom of the Device Sharing screen.
- Enter the new user's mobile phone number or email address, then tap Done.
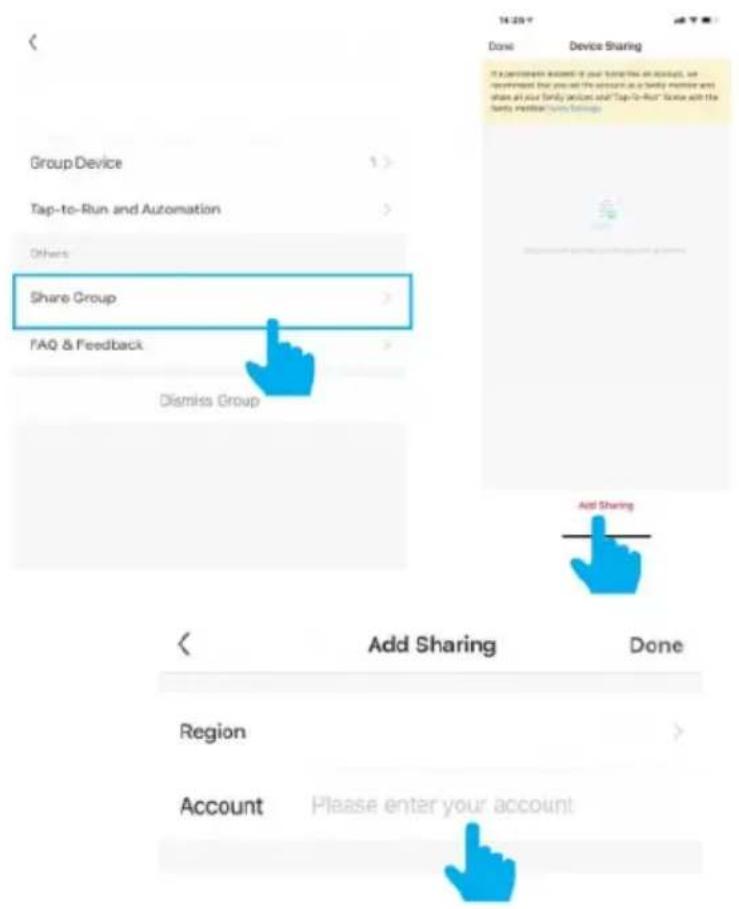
Note: Ensure new users have set up the Kogan SmarterHome™ account before device sharing.
GOOGLE HOME CONTROL
Note:
You will need to have set up a Google Home account prior to linking your Kogan SmarterHome™ device.
Adding "SmarterHome" to the Google Home app
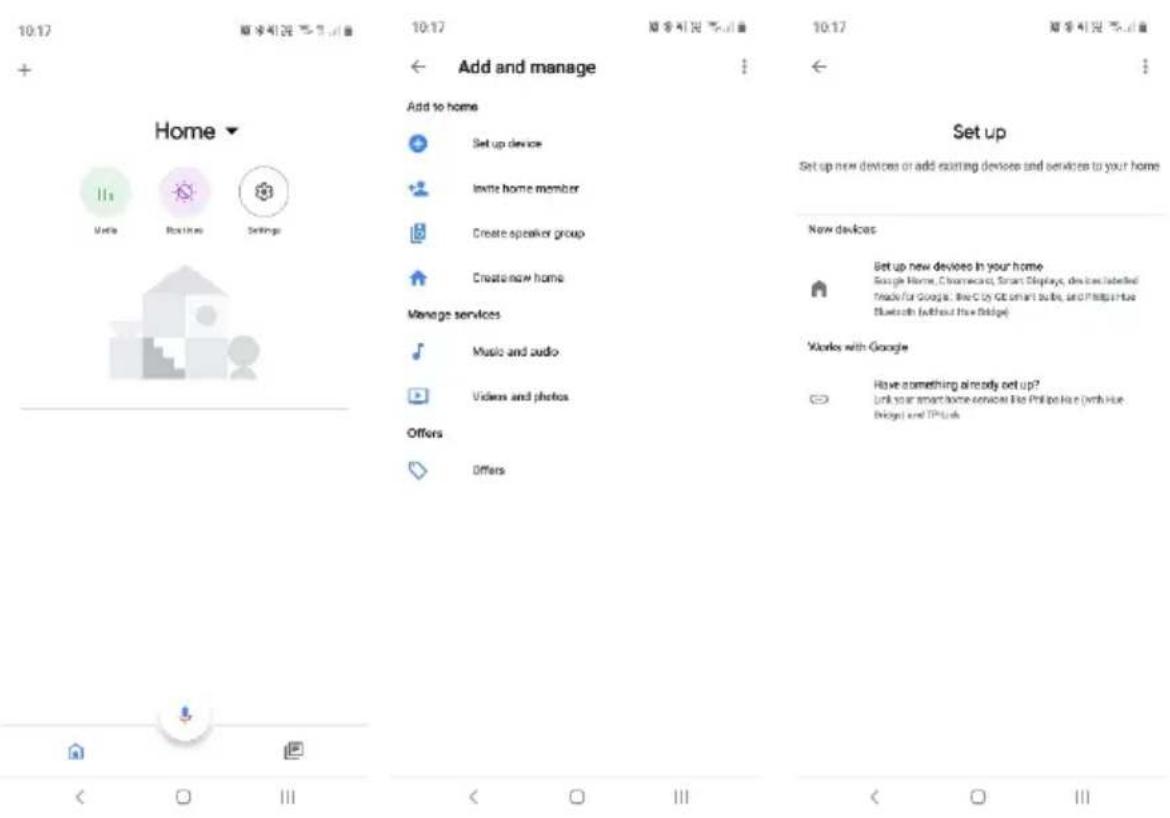
- From the home page of the Google Home app, select the "+" icon to access the 'Add and manage' page.
- Select 'Set up device', then under the Works with Google banner, select 'Have something already set up?'
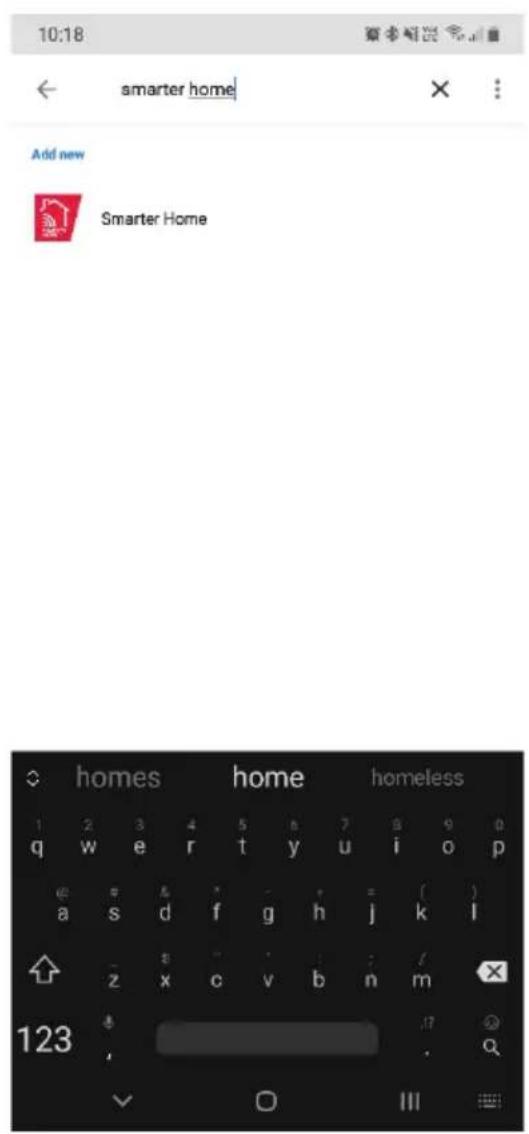
- Select the search bar and type 'Smarter Home' to locate the Kogan SmarterHome™ service.
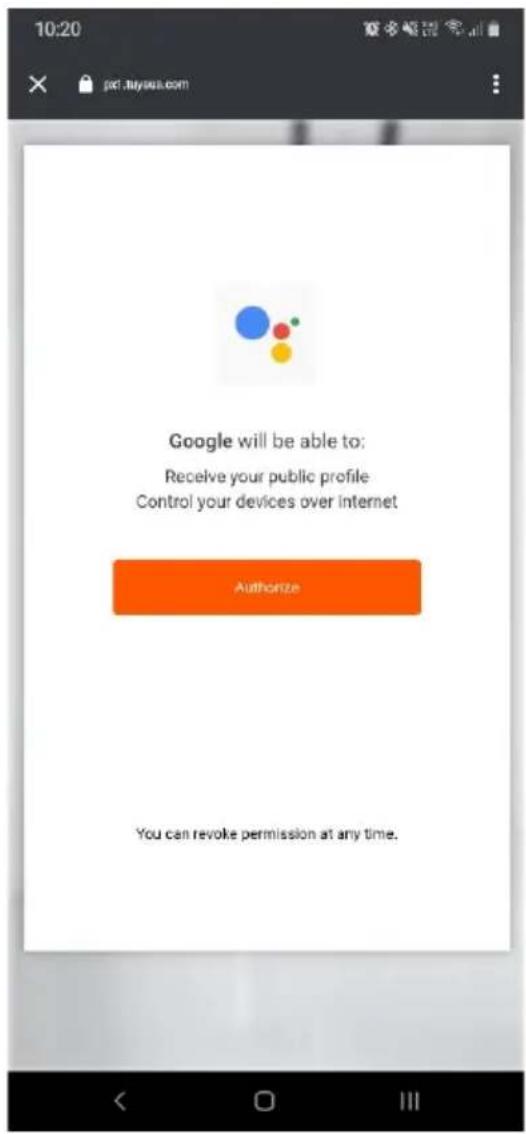
- Tap 'Authorise' to grant Google permission to access the SmarterHome™ app and your devices.
- From here, you will be prompted to sign into your SmarterHome™ account using either your email or mobile phone number, depending on which method you used to register your account.
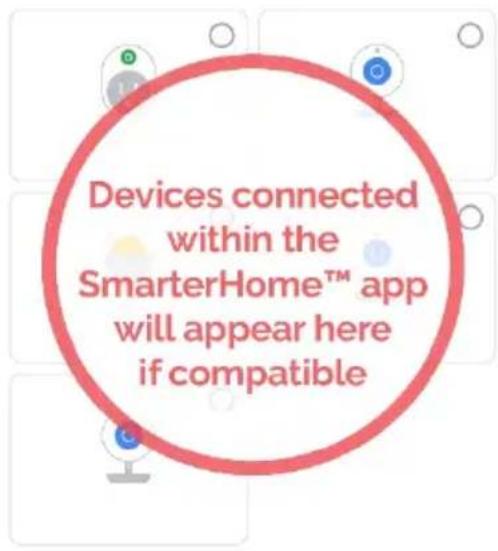
- Once connected, the app will display any compatible devices linked to your SmarterHome™ account. From here you can assign them to rooms and set up any routines.
- Tap on any of the devices to view a list of available commands.
10:21

夏求斯国家
10:23
夏多殿混

Add smart home devices
Select devices and add to a room
Home

Media

Routines

Settings
Back garden
2 devices

Dog Cam (Backyard)

Dog Cam (Undercover)
Kitchen
1 device

Cat Cam (Kitchen)
ADD TO A ROOM


Other cast devices
8 devices


Note:
Please note that Google Home can only control the base/core functions of any compatible SmarterHome™ devices. To make full use of this product's smart functionality, please use the Kogan SmarterHome™ app.
AMAZON ALEXA CONTROL
Note:
You will need to have set up an Alexa account prior to linking your Kogan SmarterHome™ device.
Adding "SmarterHome" to the Alexa app
- From the home page of the Alexa app, select the “≡” icon in the top-right and select Skills & Games from the sidebar.
- Select the search bar and type 'Smarter Home' to locate the Kogan SmarterHome™ skill.
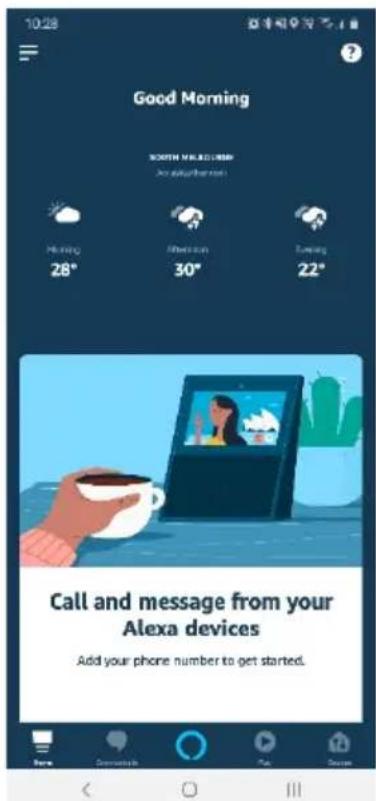
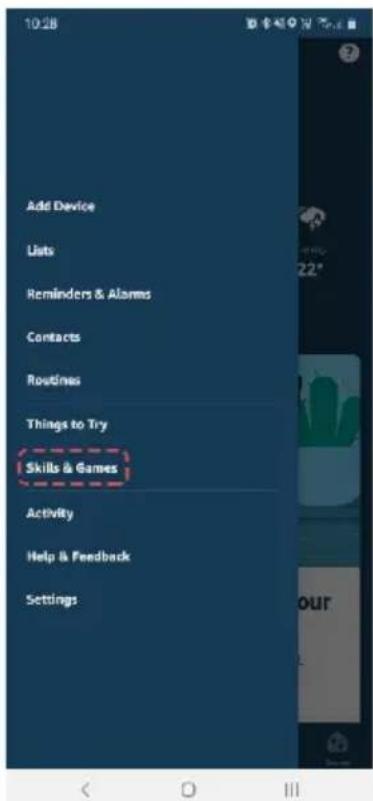
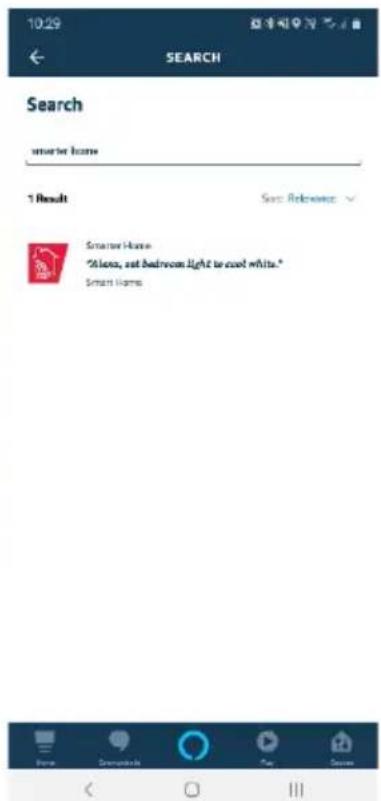
-
Tap 'Enable to Use' to add the Kogan SmarterHome™ skill to Alexa.
-
From here, you will be prompted to sign into your SmarterHome™ account using either your email or mobile phone number, depending on which method you used to register your account.
-
Tap 'Authorise' to grant Alexa permission to access the SmarterHome™ app and your devices.
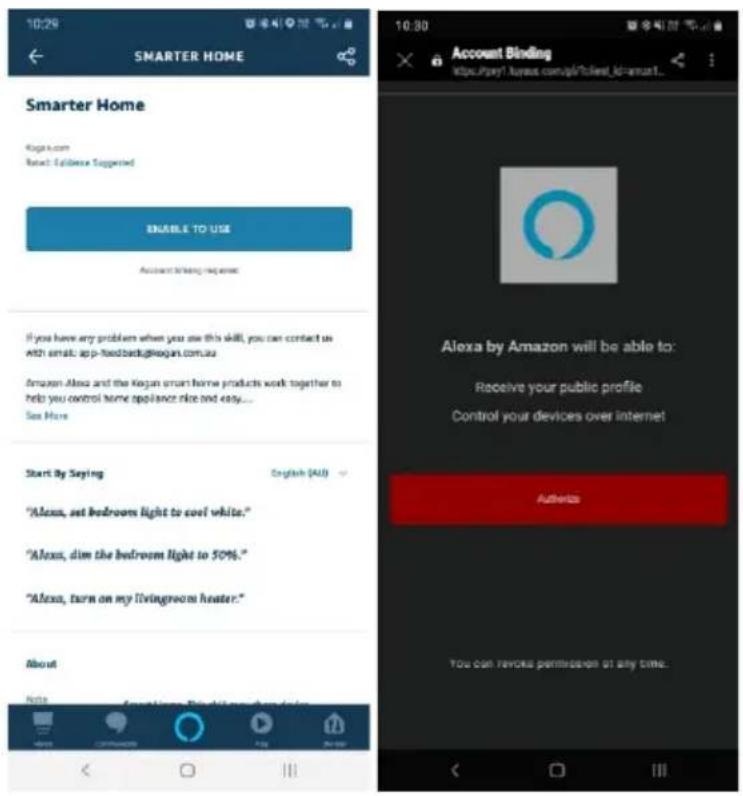
- Once connected, the app will perform a search and display the devices linked to your SmarterHome™ account.
- When your devices have successfully connected to the Alexa app, you will be able to control your Kogan SmarterHome™ devices via Alexa's voice commands.
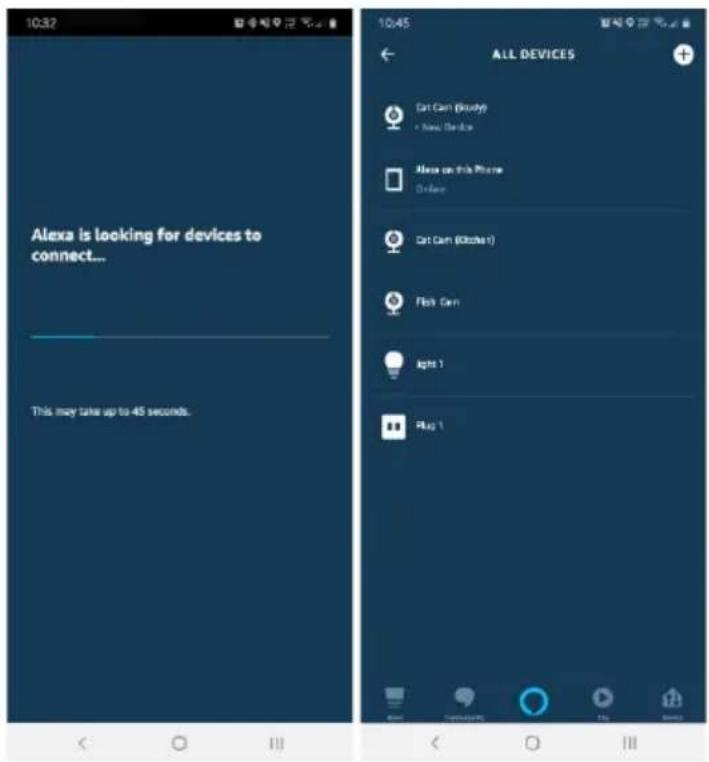
Note: Alexa can only control the base/core functions of any compatible SmarterHome™ devices. To make full use of this product's smart functionality, please use the Kogan SmarterHome™ app.
SPECIFICATIONS
| Operating Voltage | DC 12V |
| Power | 4 W/m |
| Remote Control Range | 10m |
| LED Brightness | 25 LM/pcs |
| LED | 90 pcs |
| Colours | 15 types |
| Scenes | 8 types |
| Water Resistance | IP68 |
Note: If you cut the light strip, the water resistance rating will no longer be IP68.
NOTES
Need more information?
We hope that this user guide has given you the assistance needed for a simple set-up. For the most up-to-date guide for your product, as well as any additional assistance you may require, head online to help.kogan.com
kogan.com
- KOGAN SMARTERHOME™ IP68 COLOUR & WHITES SMART LED LIGHT STRIP
- SAFETY & WARNINGS
- COMPONENTS
- OVERVIEW
- SETUP
- CONNECT TO SMARTERHOME™ APP
- Install App
- Register
- To register:
- Register by Email
- Register by Mobile Number
- Set device in pairing mode
- Add device through network
- Notes:
- OPERATION
- Power On/Off
- Reset
- Control Page
- White Light
- Colour Light
- Scene
- Schedule
- Additional Settings
- Grouping devices
- Device Sharing
- GOOGLE HOME CONTROL
- Note:
- Adding "SmarterHome" to the Google Home app
- AMAZON ALEXA CONTROL
- Adding "SmarterHome" to the Alexa app
- SPECIFICATIONS
- NOTES
- Need more information?
Brand : Kogan
Model : KA5MWPLTSPA
Category : Lighting