
PT4500S-TM-V3 - Teleprompter Ikan - Free user manual and instructions
Find the device manual for free PT4500S-TM-V3 Ikan in PDF.


| Type | Teleprompter |
| Brand | Ikan |
| Model | PT4500S-TM-V3 |
| Screen Size | 15.6 inches |
| Dimensions (L x W x H) | 405 x 330 x 250 mm |
| Weight | 5.5 kg (12 lbs) |
| Power Input | AC 100-240V, 50/60Hz |
| Power Output | 12V DC, 2A |
| Maximum Camera Payload | 5 kg |
| Included Accessories | Hood, remote control, AC adapter, HDMI cable |
| Compatible Cameras | DSLRs, mirrorless, camcorders up to 5 kg |
| Display Type | LCD, with mirror flip support |
| Maximum Text Speed | Adjustable via remote, up to 600 WPM |
| Control Type | Infrared remote control included |
| Material | Aluminum frame with fabric hood |
| Maintenance Instructions | Clean with soft, dry cloth; avoid solvents |
| Safety Precautions | Use only supplied AC adapter; keep dry; do not disassemble |
| Spare Parts Availability | Screen, hood, remote control available from Ikan |
| Repairability | Designed for repair by qualified technician |
| Warranty | 1 year limited warranty |
Frequently Asked Questions - PT4500S-TM-V3 Ikan
User questions about PT4500S-TM-V3 Ikan
0 question about this device. Answer the ones you know or ask your own.
Ask a new question about this device
Download the instructions for your Teleprompter in PDF format for free! Find your manual PT4500S-TM-V3 - Ikan and take your electronic device back in hand. On this page are published all the documents necessary for the use of your device. PT4500S-TM-V3 by Ikan.
USER MANUAL PT4500S-TM-V3 Ikan
Professional 19" High-Bright Beam SDI Splitter Teleprompter w/ Talent Monitor

OVERVIEW
Ikan's professional teleprompter series is designed for a quick and easy setup to work efficiently in studio or broadcast applications. The teleprompter includes a 65/35 reflective glass that makes the reflection easier to see for the presenter. The lightweight aluminum teleprompter has multiple 1/4-20" and 3/8-16" threads for mounting to a tripod or pedestal. The monitor includes SDI, HDMI, and VGA video inputs. Its high bright screen ensures clear visibility in any lighting condition. An intuitive image flip button allows for easy adjustment of the display orientation. The monitor also features a wide viewing angle.
What's Included
natural_image
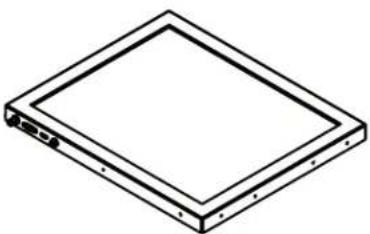
Isometric line drawing of a rectangular frame with mounting holes (no text or symbols)Monitor
natural_image
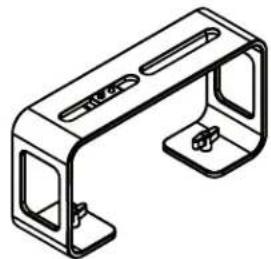
Isometric line drawing of a metal bracket with cutouts and mounting holes (no text or symbols)Tall Riser
natural_image
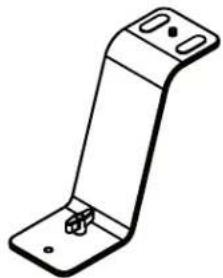
Technical line drawing of a metal bracket with mounting holes (no text or symbols)DSLR/Mirrorless Riser

natural_image
Technical line drawing of a metal plate with slots and mounting feet (no text or symbols)Short Riser

natural_image
Technical line drawing of a mechanical component with slots and a curved end (no text or symbols)Sled

natural_image
Pure technical line drawing of a rectangular electronic component (no text or symbols)Base

natural_image
Technical line drawing of a mechanical component with no visible text or symbolsGlass Frame Holder Bracket
w/ Rod Clamps

natural_image
Simple line drawing of a square frame with vertical and horizontal bars (no text or symbols)Glass

natural_image
Simple line drawing of a rectangular frame with rounded corners and corner dots (no text or symbols)Hood Attachment Frame
natural_image
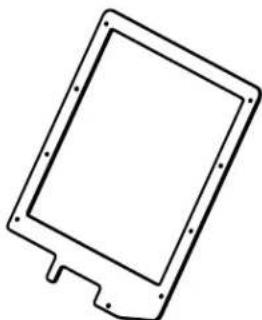
Simple line drawing of a rectangular electronic component with mounting holes (no text or symbols)Glass Holder Hood

natural_image
Pure technical line drawing of a mechanical component or bracket (no text or symbols)

natural_image
Technical line drawing of two mechanical components with mounting holes (no text or symbols)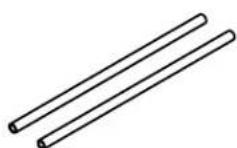
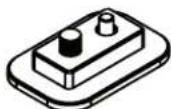
Glass Frame Screws 15mm Rod Clamps 15mm Rods Large Riser
Bracket
What's Included

natural_image
Technical line drawing of a mechanical component with multiple holes (no text or symbols)Height Adjustment Plate

natural_image
Isometric line drawing of a rectangular panel with mounting holes and dot patterns (no text or symbols)Talent Monitor

natural_image
Technical line drawing of a mechanical component with mounting holes and a cylindrical shaft (no text or symbols)Rod Adapter

natural_image
Technical line drawing of a mechanical flange component (no text or symbols)VESA Adapter


Thumb Screws

Screws
Teleprompter Assembly Setup
Step 1
Place the Hood Attachment Frame over the Glass Holder. Then place the glass against the Glass Holder. Make sure the screws pass through the holes on the both the Hood Attachment Frame and the Glass Holder.

natural_image
Diagram of a mechanical component with red arrows indicating force or movement, no text or symbols presentStep 3
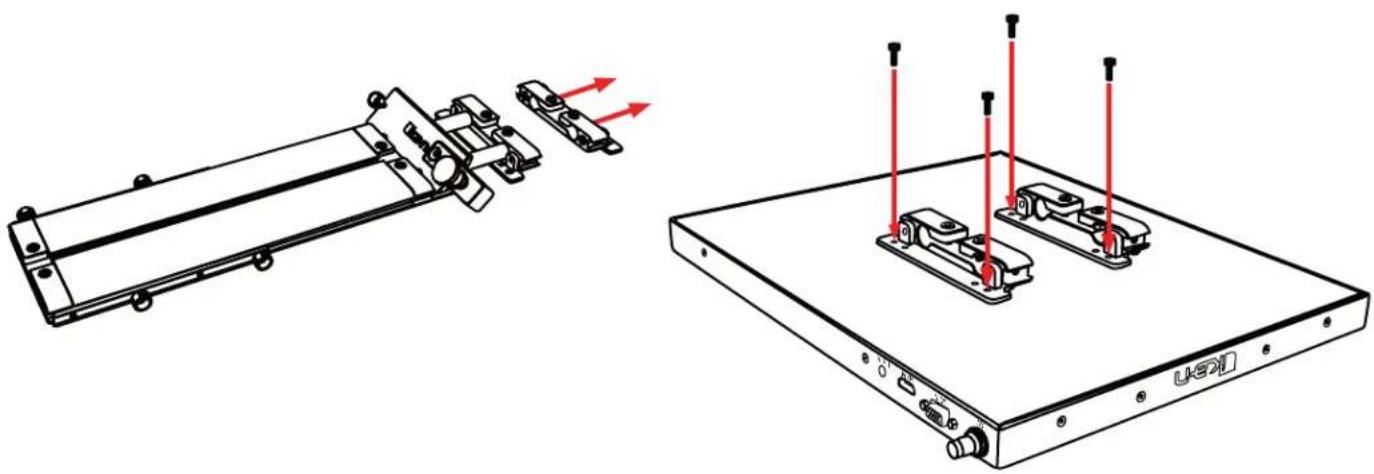
Remove the monitor mounts from the teleprompter base using the included larger 4mm hex key to loosen from the 15mm rods.
Step 2
Secure the Glass Holder by fastening the knurled nuts to the screws as pictured below.

natural_image
Technical line drawing of a rectangular frame with vertical red arrows indicating force or movement (no text or symbols)Step 4
Put the washers on before tightening the screws. The washers and 4 additional screws are inside a bag on the bottom foam.
natural_image
Technical illustration of a mechanical assembly with red arrows indicating motion, showing internal components and mounting base (no text or symbols)Step 5
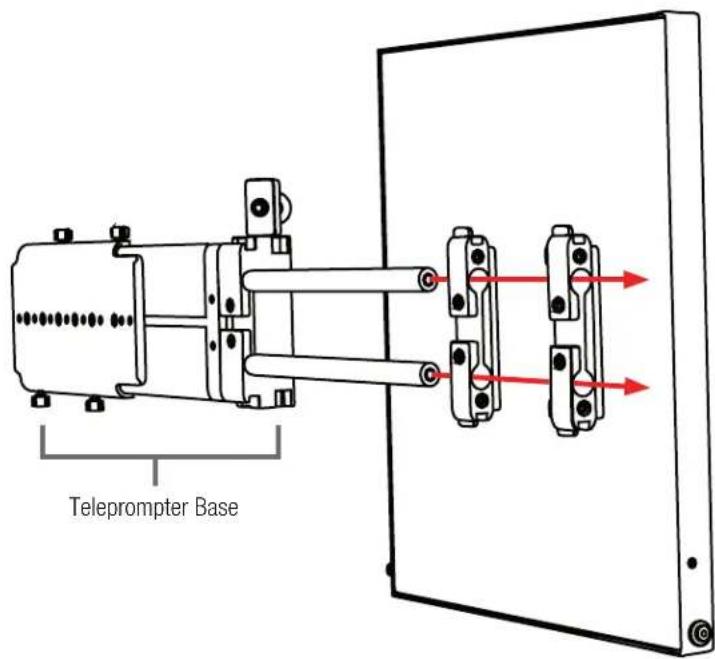
After the monitor mounts are attached, adjust the 15mm rods to accommodate the monitor. Leave about 1 inch of room for the teleprompter bracket. Make sure the 15mm rods go through both set of monitor mounts. Please ensure that all screws are properly tightened after inserting the monitor. *SAFETY NOTE* Make sure to leave at least 2 inches of the rods inside the teleprompter base.
Step 6
While sliding the teleprompter bracket into the slot of the Glass Frame Holder Bracket, pull on the red knob to allow the bracket to fully slide in.

natural_image
Technical line drawing of a mechanical assembly with a rectangular component and a base plate, showing red arrows indicating assembly or connection points (no text or symbols present)Step 7
Once the bracket is in place, tighten the side screw to lock in place. Double check and make sure all the screws are tightened with the included hex keys.

natural_image
Technical diagram of a mechanical assembly with a red arrow indicating a specific component (no text or symbols present)Step 8
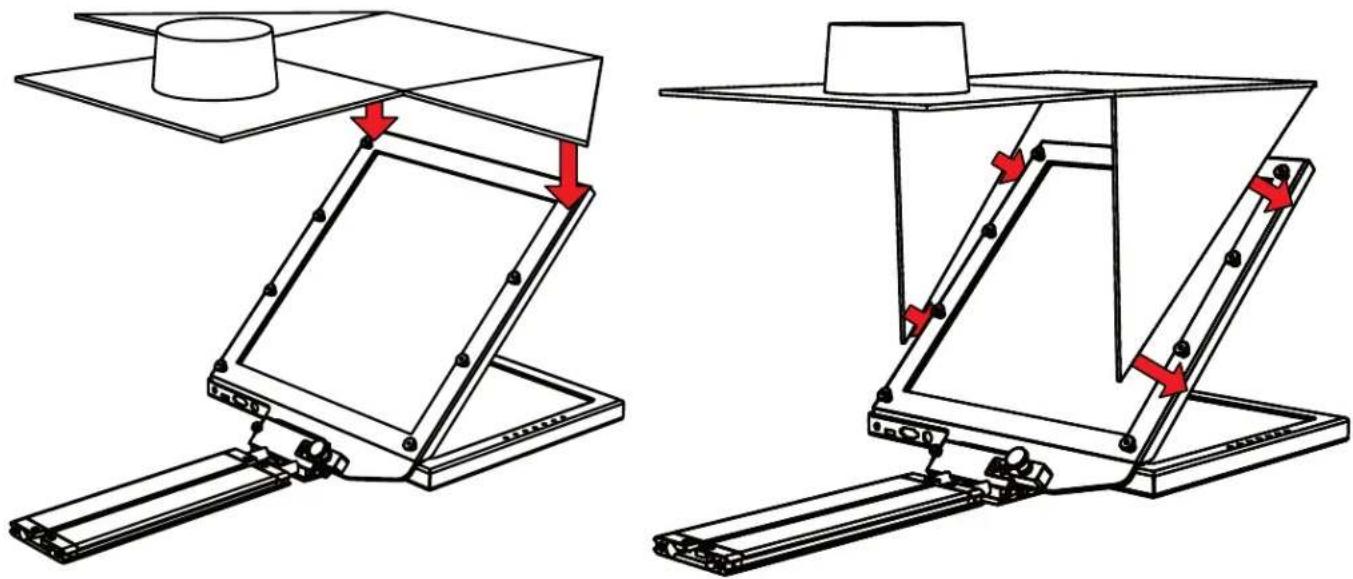
Fold the flaps of the Hood alongside the edges of the Hood Attachment Frame. The Hood Attachment Frame includes six threaded clinch studs. Make sure to put the holes on the hood through the threaded clinch studs. The flaps of the Hood are magnetic so they will automatically attach and give extra support.
natural_image
Technical line drawing of a mechanical assembly with red arrows indicating motion or force directions (no text or symbols present)Step 9
To prevent light from leaking through the hood, seal both zippers down.

natural_image
Diagram of a mechanical device with red arrows indicating assembly or force direction (no text or symbols present)Step 10
Locate the threaded clinch studs on the Hood Attachment Frame and fasten the included nuts to the clinch studs.

Step 11
Fasten all six of the nuts to the threads on the hood frame to secure the hood to the teleprompter.

natural_image
Technical line drawing of a mechanical assembly with no visible text or symbolsStep 12
If you need to use the Tall Riser Plate, you will need to use the Large Riser Bracket. Insert the Large Riser Bracket through the channel on the Tall Riser Plate The Large Riser Bracket includes a location pin for use with cameras that feature a location pin hole. If your camera does not feature a location pin, you can remove the location pin by unscrewing it.

natural_image
Technical line drawing of a mechanical component with a red arrow indicating direction (no text or symbols present)Step 13
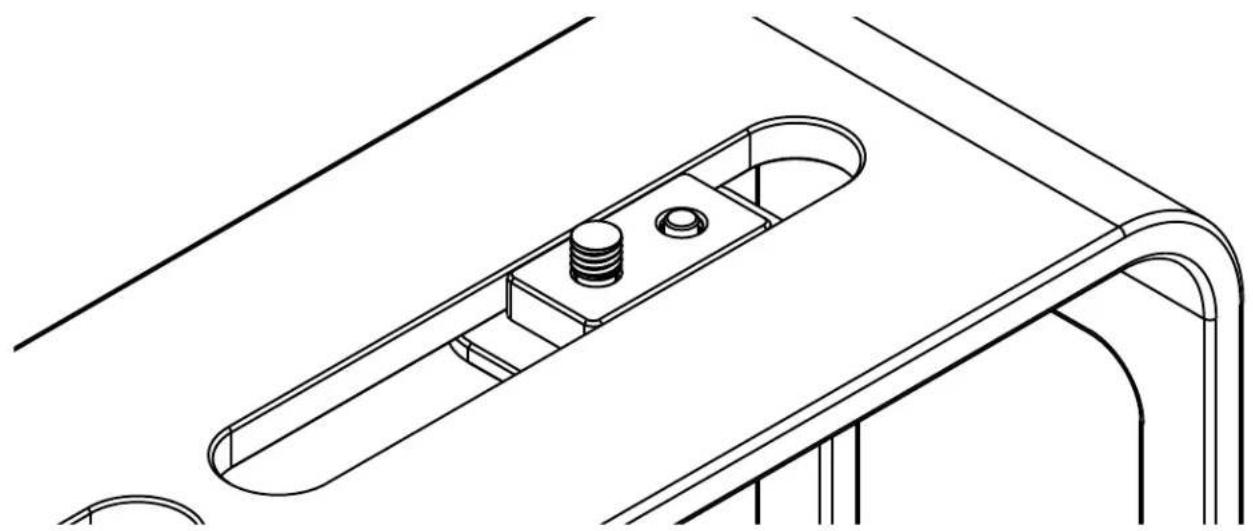
Once the Large Riser Bracket is inserted into the channel. Hold it in place and move on to Step 14.
natural_image
Technical line drawing of a mechanical component with a handle and mounting bracket (no text or symbols)Step 14
Place the riser below your camera and fasten the 1/4-20 camera screw to the bottom of your camera to secure it to the riser plate.
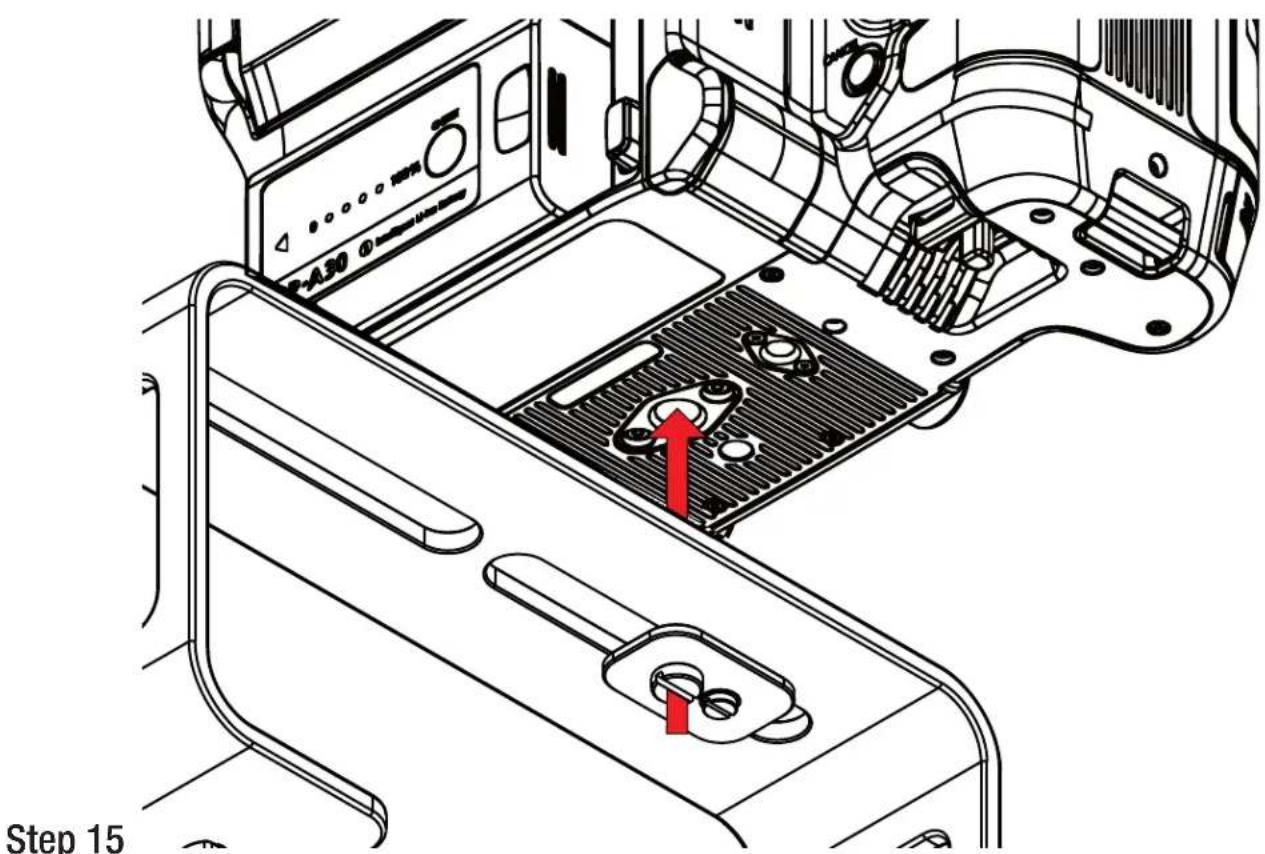
Slide the threaded studs into the channel of the base. Make sure they are aligned to the spacing of the holes on the riser plate.

natural_image
Mechanical assembly diagram showing a linear component with red directional arrows indicating motion or force (no text or symbols present)Step 16
Once the threaded studs are aligned to the holes of the riser plate, put the threaded studs through the holes of the riser plate.

natural_image
Technical line drawing of a mechanical assembly with red arrows indicating assembly steps (no text or symbols present)Step 17
Fasten the screws to the threaded studs to secure the riser plate to the base.

Step 18
Mount your own tripod plate to the sled by aligning the 1/4-20 and/or 3/8-16 screws and fastening them to the Sled. It is recommended that you connect your tripod plate to front of the Sled so that you can balance your teleprompter easier. Once your tripod plate is connected to the Sled, mount the tripod plate to your tripod head.

natural_image
Technical line drawing of a mechanical component with dotted lines and red arrows indicating assembly or force (no text or symbols)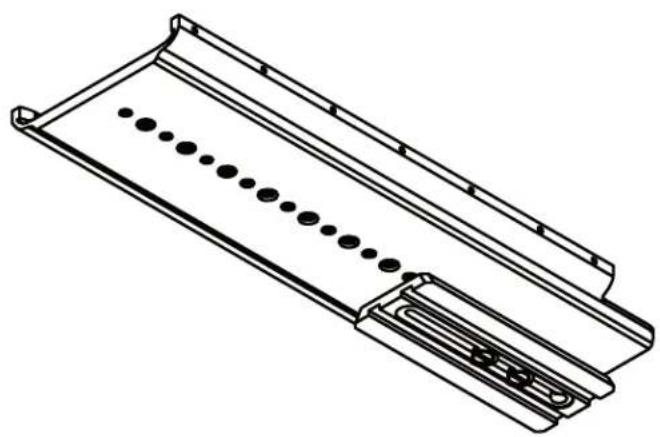
natural_image
Technical line drawing of a mechanical component with dotted internal lines and mounting brackets (no text or symbols)Step 19
Slide the entire teleprompter system into the Sled. Once the teleprompter system is inserted, you can balance it by sliding it along the Sled until the center of gravity is determined.
Step 20
Once the center of gravity has been determined, tighten the thumb screws to keep the base from sliding.

natural_image
Diagram of a vehicle chassis with a red arrow pointing to a component, no text or symbols present
natural_image
Technical diagram of a vehicle chassis frame with red directional arrows indicating movement or force (no text or labels)Step 21
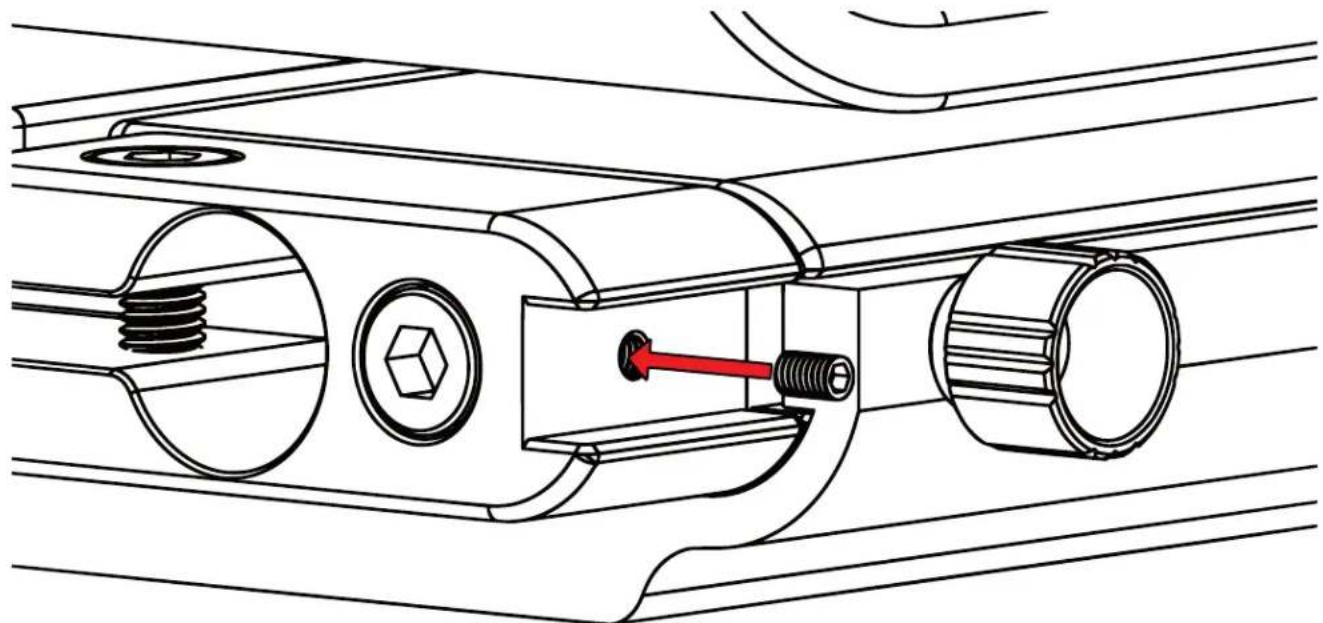
To secure your teleprompter system, insert the included headless screws into the threads behind and in front of the Base.
natural_image
Technical line drawing of a mechanical assembly with springs and shafts (no text or symbols)Step 22
The headless screws should be inserted to the threads as pictured below.

natural_image
Technical line drawing of a mechanical assembly with no visible text or symbolsStep 12
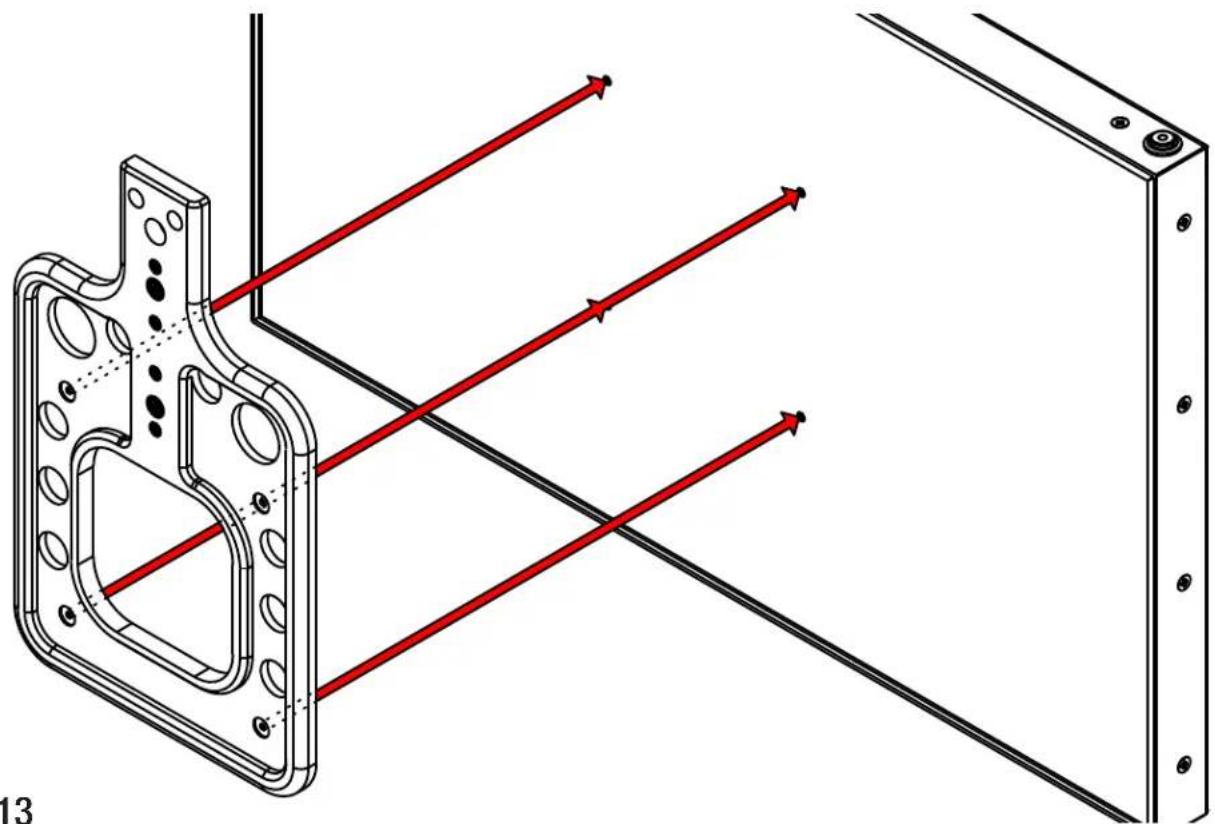
Align the holes of the monitor to the VESA Adapter.
natural_image
Technical diagram showing light ray paths through a mechanical component with no visible text or symbolsStep 13
Attach the VESA adapter to the monitor by fastening the screws to the monitor

natural_image
Technical line drawing of a mechanical bracket assembly with mounting holes and mounting holes (no text or symbols)Step 12
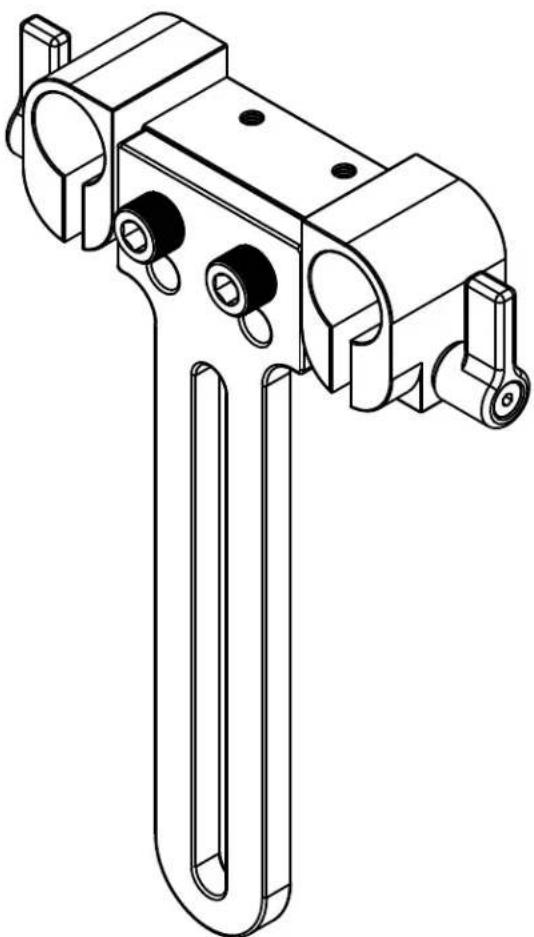
Place the Height Adjustment Plate in the Rod Adapter and align the holes.

Step 13
Fasten the screws to attach the Height Adjustment Plate and the Rod Adapter.
natural_image
Technical line drawing of a mechanical clamp or lever assembly (no text or symbols)Step 12
Align the threads of the 1/4-20 thumb screw to the threads on the VESA Adapter.

natural_image
Technical diagram of a mechanical assembly with red directional arrows indicating motion or force vectors (no text or symbols present)Step 13
Fasten the screws to secure the Talent Monitor to the Rod Adapter.

natural_image
Technical line drawing of a mechanical assembly with no visible text or symbolsStep 12
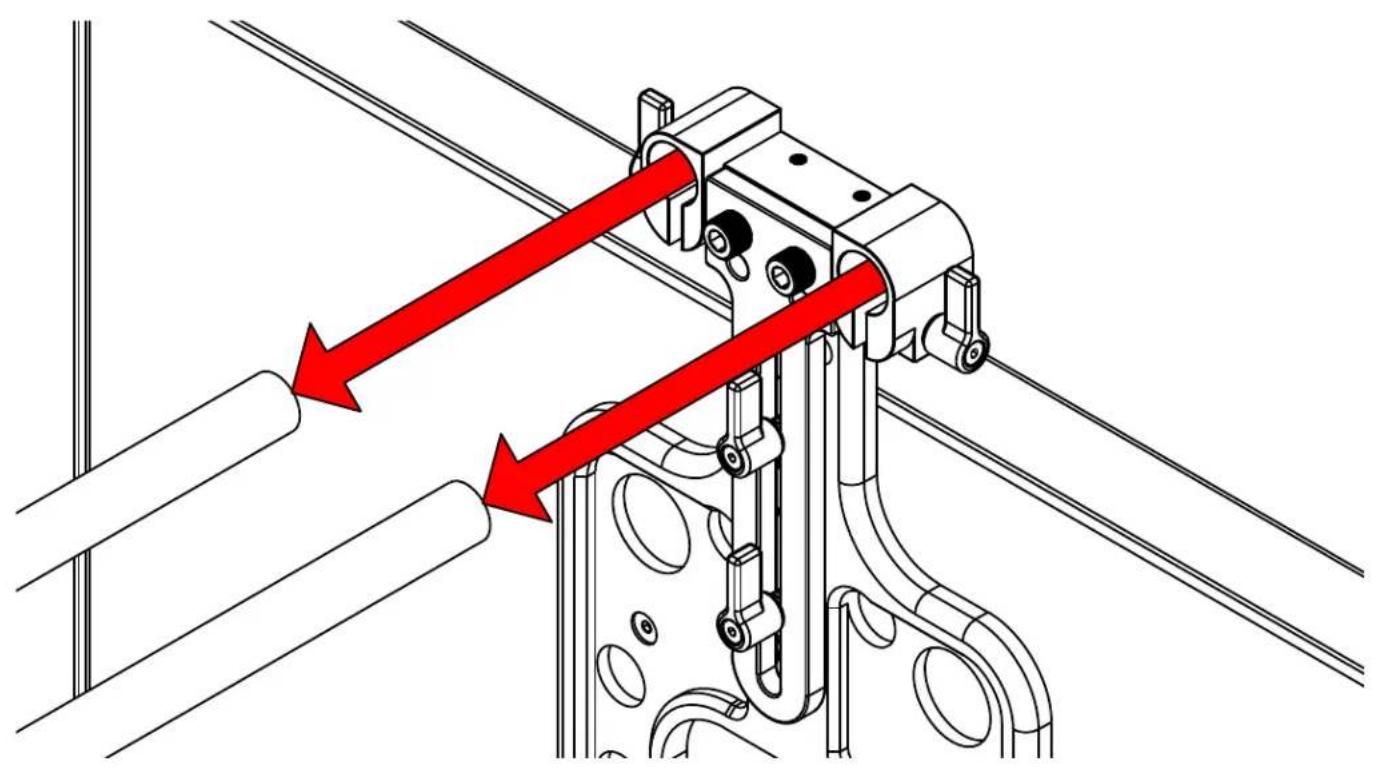
Attach the Talent Monitor Mount to the Teleprompter system by inserting the Rod Adapter to the 15mm.
natural_image
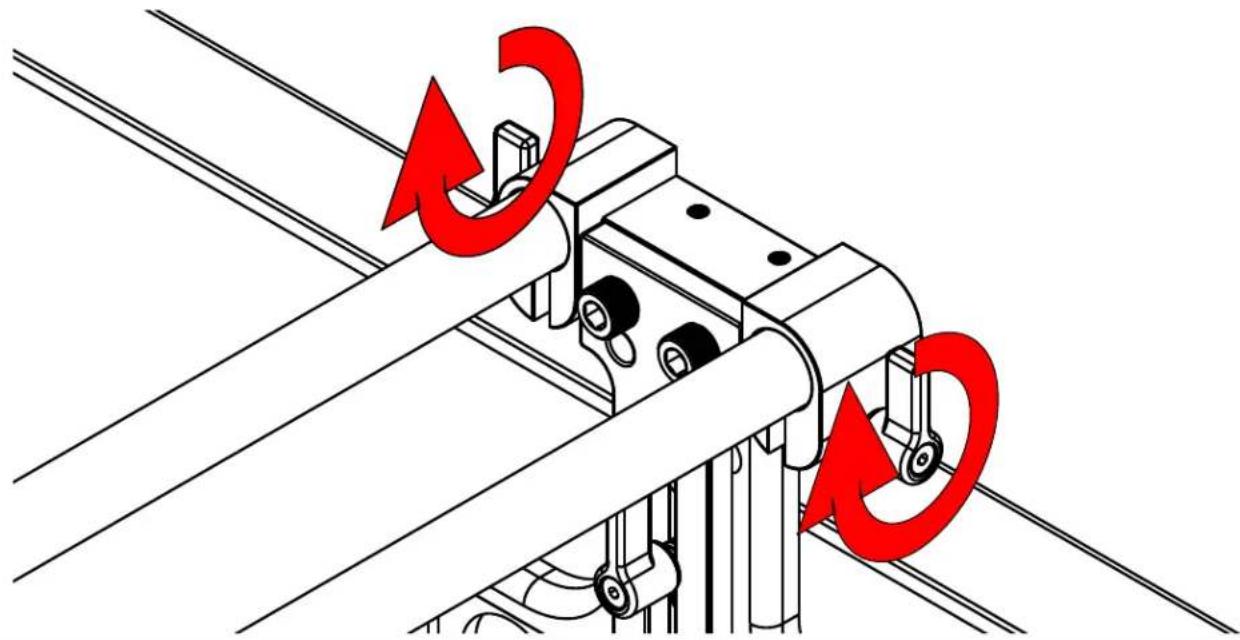
Technical diagram of a mechanical assembly with red arrows indicating force directions (no text or symbols present)Step 13
Once the Talent Monitor Mount has been inserted to the 15mm rods, secure the Talent Monitor by fastening the thumb screws.
natural_image
Mechanical assembly diagram showing two red curved arrows indicating rotational or mechanical motion (no text or symbols present)Monitor Ports

natural_image
Line drawing of a computer monitor rear panel with ports labeled HDMI and HDMI (no text or symbols beyond labels)BNC - 3G-SDI Input
VGA – Video Graphics Array DE15 Connection
HDMI – High-Definition Multimedia Interface Input Connection
Power Port - 12-24v Input
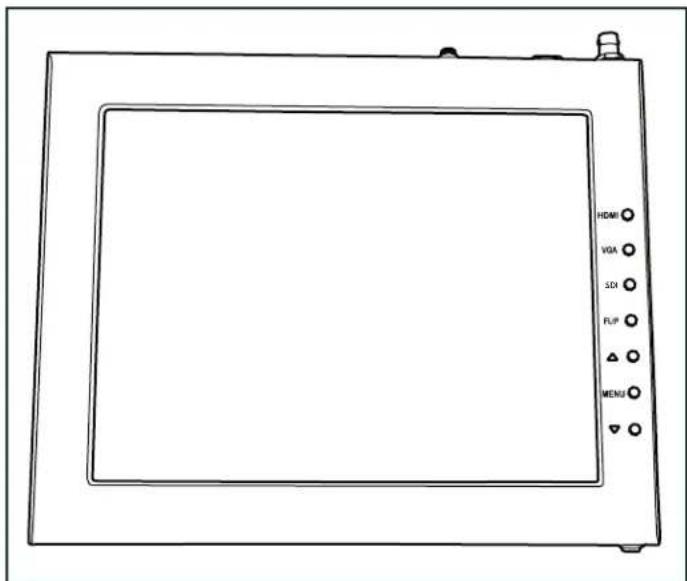
HDMI – Switch HDMI input
VGA – Switch to VGA input
SDI – Switch to 3G-SDI input
Flip - Toggle image flip
(Can be set to horizontal, vertical, or both via menu)
Up Arrow – Toggle up to adjust setting
Menu – Access to monitor settings
Down Arrow – Toggle down to adjust setting
Monitor Menu Settings
Video Config
Contrast (White Level)
Brightness (Black Level)
Tint (Chroma Hue)
Chroma (Chroma Saturation)
Sharpness (Detail)
RGB Setup – Manually configure RGB
Return
System Config
Menu Duration – Set duration of how long menu stays on screen
Video Ratio - Set screen aspect ratio 16:9 or 4:3 (4:3 is
native resolution, 16:9 will create black bars)
Flip-H – Assign toggle button to flip image horizontally
Flip-V – Assign toggle button to flip image vertically
Reset - Factory reset
Return
PC Setup (Only available for VGA)
H-Position - Adjust horizontal position
V-Position - Adjust vertical position
Auto - Monitor automatically adjust position
Return
Exit
How to set-up FLIP button feature:
- Press MENU button
- Navigate to SYSTEM CONFIG.
- Navigate to FLIP-V or FLIP-H
- Change FLIP-V and/or FLIP-H to "ON"
- Exit MENU
- The FLIP button should now be activated and can be pressed to mirror the image Horizontally or Vertically
- When FLIP-H is ON, the image will flip Horizontally
- When FLIP-V is ON, the image will flip Vertically
- If both are ON, the FLIP button will toggle both Horizontal and Vertical flip
Watch our VIDEO TUTORIAL on how to assemble PT4500-V3 Teleprompters:
https://ikancorp.com/pt4900-v2-tutorial-videos/

Optional Accessories
PT4U-G
Replacement Glass for PT4500S-V3
M15W
15" Talent Monitor Add On Kit for PT4500S-V3
PT-PEDAL
Teleprompter Foot Control Pedal
PT-CONTROLLER
Teleprompter Rotary Controller
PT-CASE-4U
Rolling Hard Case for PT4500S-V3 Teleprompter
Specifications Continued
15 in. Talent Monitor
| Aspect Ratio 16:9 | |
| Maximum Brightness 1 | 1000 cd/m2 |
| Screen Size (Diagonal) | 19 in. |
| Mount VESA 100mm | |
| Video Inputs | 3G-SDI, HDMI, VGA |
| Input Voltage DC 12v | |
| Power Consumption 26.5W | |
| Product Weight 3.73 lbs. | |
| Product Dimensions 15.7 in. x 10.6 in. x 1.1 in. | |
| Native Resolution 1920 | x 1080 |
| Viewing Angle 178° (H) | / 178° (V) |
| Build Material | Aluminum Chassis |
| Image Flip | Horizontal: Yes | Vertical: Yes |
| Tally Interface | RJ45 |
Optional Accessories
PT4U-G
Replacement Glass for PT4500-V3
M15W
15" Talent Monitor Add On Kit for PT4500-V3
PT-PEDAL
Teleprompter Foot Control Pedal
PT-CONTROLLER
Teleprompter Rotary Controller
PT-CASE-4U
Rolling Hard Case for PT4500-V3 Teleprompter
Foam Case
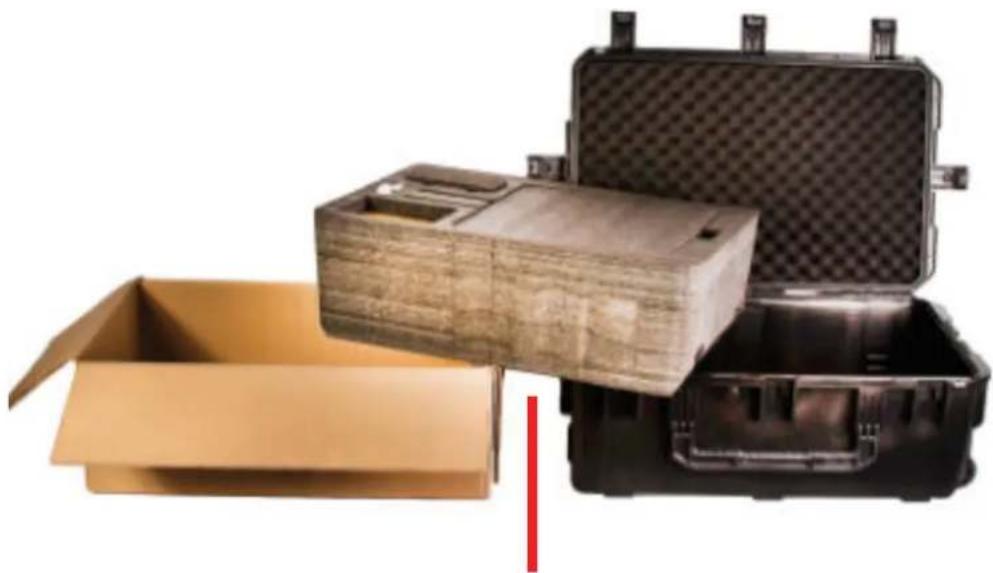
To make your teleprompter more portable, we packed it in a reusable, high-quality foam. The shape and size of the foam was designed to fit into Ikan's PT-CASE-4U
natural_image
Stacked cardboard and black plastic case units, no visible text or symbols**DO NOT THROW AWAY FOAM CASE**
Learn More
More dynamic information at official website: www.ikancorp.com
Support
Contact email: support@ikancorp.com
CONDITIONS OF WARRANTY SERVICE
- Free service for one year from the day of purchase if the problem is caused by manufacturing errors.
- The components and maintenance service fee will be charged if the warranty period is expired.
Free Service will not be Provided in the Following Situations:(*Even if the product is still within the warranty period.)
- Damage caused by abuse or misuse, dismantling, or changes to the product not made by the company.
- Damage caused by natural disaster, abnormal voltage, and environmental factors, etc.
©2024 Ikan International. All rights reserved.


- Professional 19" High-Bright Beam SDI Splitter Teleprompter w/ Talent Monitor
- OVERVIEW
- What's Included
- Teleprompter Assembly Setup
- Step 1
- Step 3
- Step 2
- Step 4
- Step 5
- Step 6
- Step 7
- Step 8
- Step 9
- Step 10
- Step 11
- Step 12
- Step 13
- Step 14
- Step 16
- Step 17
- Step 18
- Step 19
- Step 20
- Step 21
- Step 22
- Monitor Ports
- Monitor Menu Settings
- How to set-up FLIP button feature:
- Watch our VIDEO TUTORIAL on how to assemble PT4500-V3 Teleprompters:
- Optional Accessories
- Specifications Continued
- Foam Case
- Learn More
- Support
- CONDITIONS OF WARRANTY SERVICE
Brand : Ikan
Model : PT4500S-TM-V3
Category : Teleprompter