Octacool-9 - Lighting Impact - Free user manual and instructions
Find the device manual for free Octacool-9 Impact in PDF.


| Product Type | Continuous Fluorescent Light Kit |
| Model | Octacool-9 |
| Brand | Impact |
| Softbox Size | 29.5 inches (75 cm) diameter |
| Light Head Diameter | 9 inches (29 cm) |
| Lamps | 9 x 28W screw-in fluorescent (daylight balanced 5000°-5500°K) |
| Total Lumen Output | 12,600 lumens at 3.3 feet |
| Input Voltage | 110-120V AC, 60Hz |
| Current Draw | 3.5A |
| Power Cord | 120V AC, 3-prong grounded plug |
| Mounting | Standard 5/8 inch stud |
| Weight (Light Head) | 3.2 lb (1.45 kg) |
| Weight (Complete Kit) | 12.5 lb (5.6 kg) |
| Lamp Life Expectancy | 6000-8000 hours |
| Noise Level | Noiseless operation |
| Cooling | Cool output for heat-sensitive subjects |
| Fuse Rating | 3.15A 250V (spare included) |
| Warranty | One-year limited warranty |
| Included Accessories | Softbox, tension rods, internal diffusion baffle, diffuser, power cord |
| Safety Features | Grounded plug, ventilation holes, no user-serviceable parts |
Frequently Asked Questions - Octacool-9 Impact
User questions about Octacool-9 Impact
0 question about this device. Answer the ones you know or ask your own.
Ask a new question about this device
Download the instructions for your Lighting in PDF format for free! Find your manual Octacool-9 - Impact and take your electronic device back in hand. On this page are published all the documents necessary for the use of your device. Octacool-9 by Impact.
USER MANUAL Octacool-9 Impact
Congratulations on your purchase of the Impact OctaCool Fluorescent Light Kit. Enjoy the many benefits of a continuous fluorescent light, such as less power used than typical flash units, cooler operation, cheaper replacement lamps, and "what you see is what you get" lighting as there are no surprises as to how the light will fall. Please read these operating instructions and safety precautions before operating this equipment.
Features
- Includes a 29.5" OctaCool softbox that provides a soft, uniform, diffused light
- Noiseless operation allows clear audio for video productions
- Cool output allows heat-sensitive subjects to be photographed up close with ease
- 28W screw-in fluorescent lamps with a life expectancy of 6000-8000 hours*
What's Included
- OctaCool 6- or 9-light head
- 6 or 9 28W screw-in fluorescent lamps (daylight balanced 5000^ - 5500^ K)
• 29.5" (75 cm) OctaCool Softbox - 8 tension rods
- Internal diffusion baffle
- OctaCool softbox diffuser
- 120V AC power cord
Power Requirements
This light is designed for use with 110/120V AC power only, and is supplied with a 3-prong, grounded plug. Do not attempt to defeat this safety feature. If necessary, use only grounded extension cords rated for 10 amps or greater.
Caution
There are no user-serviceable parts inside the unit. Only qualified service engineers should access the inside of the case (Danger – high voltage parts inside). If any of the lamps become cracked or damaged in any way, they should be replaced immediately. Do not use the light unit in an environment where it is likely to come in contact with moisture or flammable vapors. Turn the power off and unplug the power cord when the unit is not in use. Always remove the lamps when transporting the unit.
Assembly
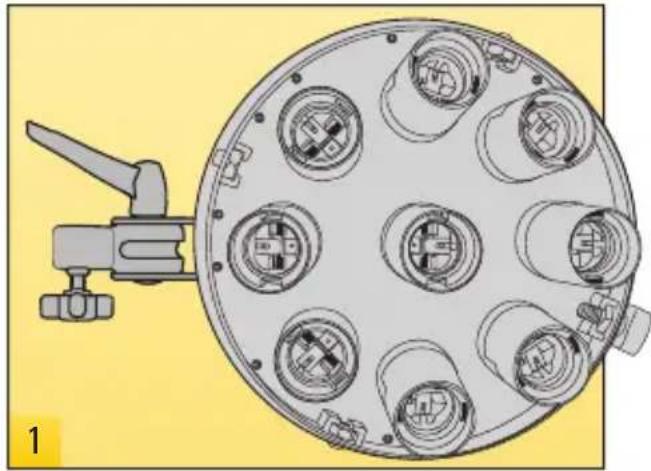
The Impact OctaCool Fluorescent Light comes in 6-light and 9-light models. The illustrations in this guide show a 9-light model, but the 6-light model is assembled the same way.
Place the OctaCool light head face up on a flat surface.
Place the OctaCool softbox around the light head. It will take shape with the following steps.
Insert the first tension rod in any of the eight pockets at the outer edge of the OctaCool softbox.
natural_image
Diagram of a mechanical device with multiple circular components and a lever, no text or symbols present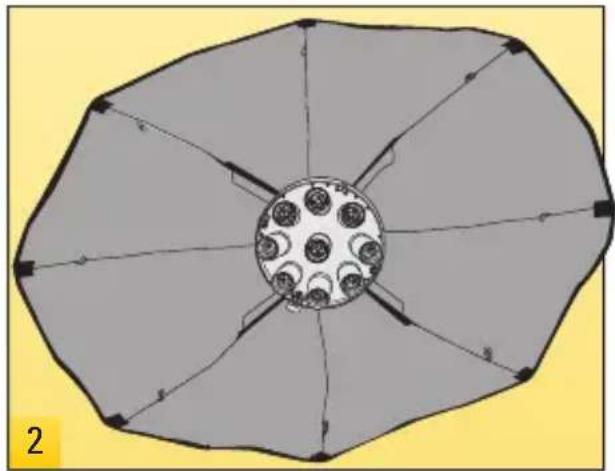
natural_image
Diagram of a geometric fan or optical array with radial lines and central circular pattern (no text or symbols)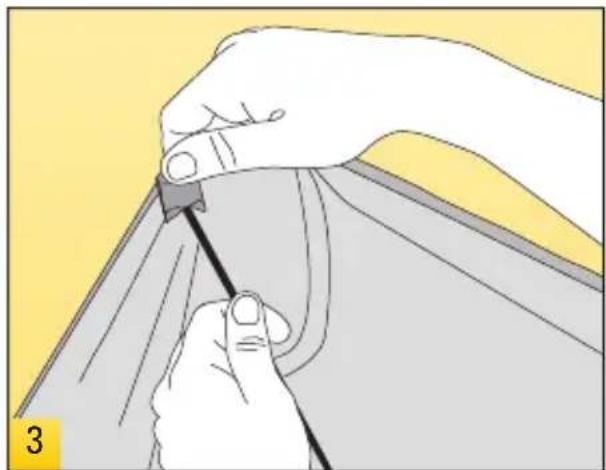
natural_image
Illustration of hands using a tool to cut or mark a curved object, no text or symbols presentAssembly (continued)
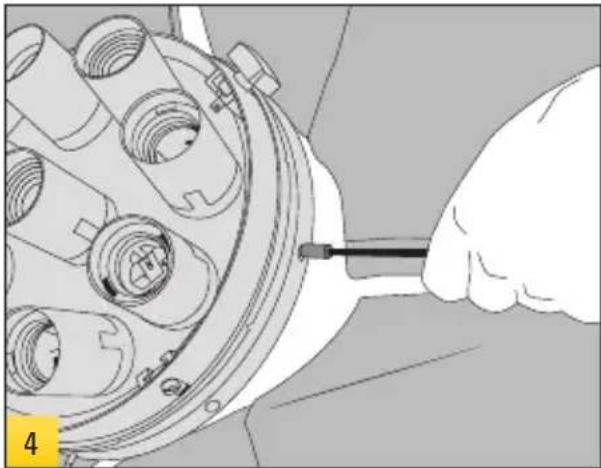
Insert the other end of the tension rod into the speedring hole on the side of the light head.
Insert the next rod at the exact opposite side (180°) of the first rod that was inserted. Insert one end into the correct pocket on the OctaCool softbox first, and then insert the other end into the light head.
Insert the next two rods at a 90^ angle from the first two rods that were inserted. Follow the same steps as the first two rods. Insert one end into a pocket on the OctaCool soft-box first, and then insert the other end into the light head.
natural_image
Close-up of a hand using a tool to adjust or install a mechanical component (no visible text or symbols)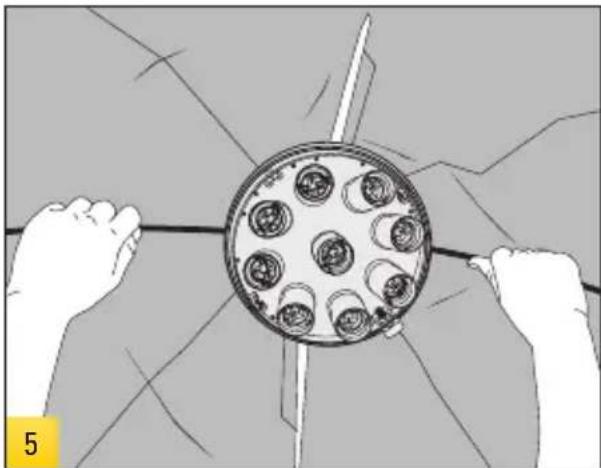
natural_image
Illustration of two hands holding a circular object with multiple circular elements, no text or symbols present.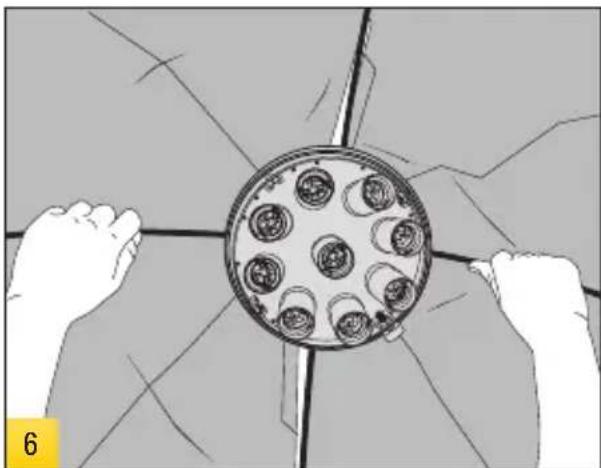
natural_image
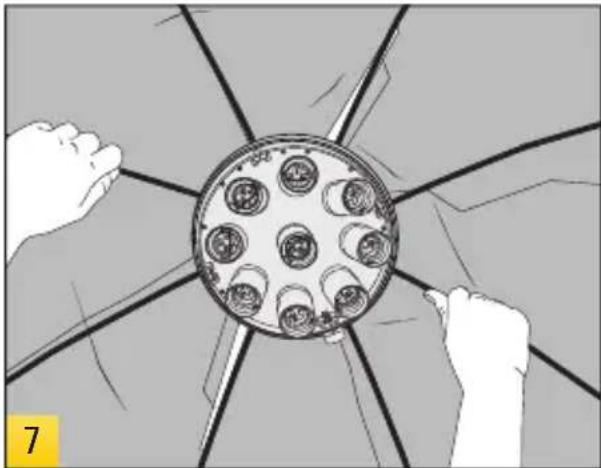
Illustration of two hands holding a circular object with multiple circular elements, no text or symbols present.Insert the remaining rods, always placing one rod, and then the next on the opposite side. Once all rods are placed, the OctaCool softbox will firm up and take shape.
Close the touch-fastener strips on the back of the OctaCool softbox to ensure that it fits tightly. This will prevent any light leaks.
Close the touch-fastener strips on the back of the OctaCool softbox to ensure that it fits tightly. This will prevent any light leaks.
natural_image
Illustration of hands holding a circular object with multiple small items, no text or symbols present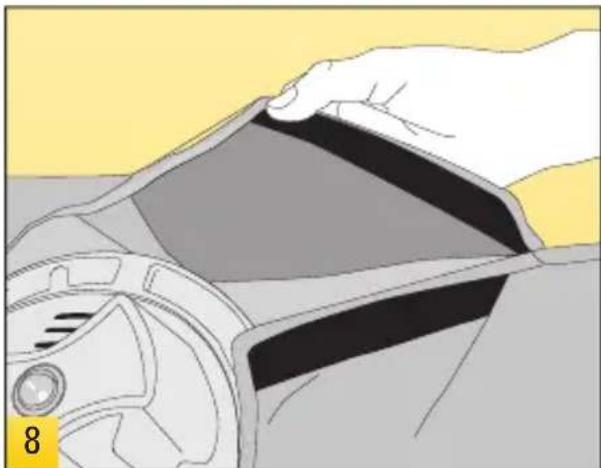
natural_image
Illustration of a hand pressing down a car steering wheel (no text or symbols)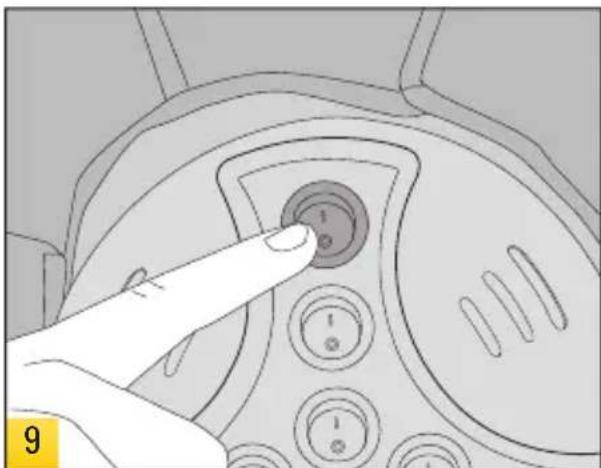
natural_image
Hand pointing at a button on a device control panel (no text or symbols visible)Assembly (continued)
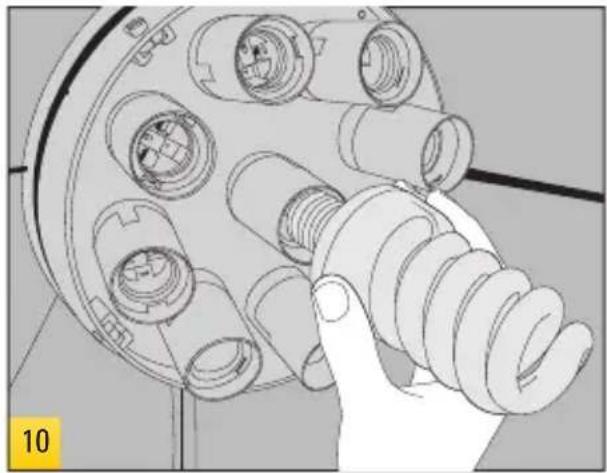
Screw in all of the fluorescent lamps. Only touch the base of the lamp; never touch the glass itself. The oils on your hand can shorten the life of the bulb.
natural_image
Hand holding a coiled spring component, no visible text or symbols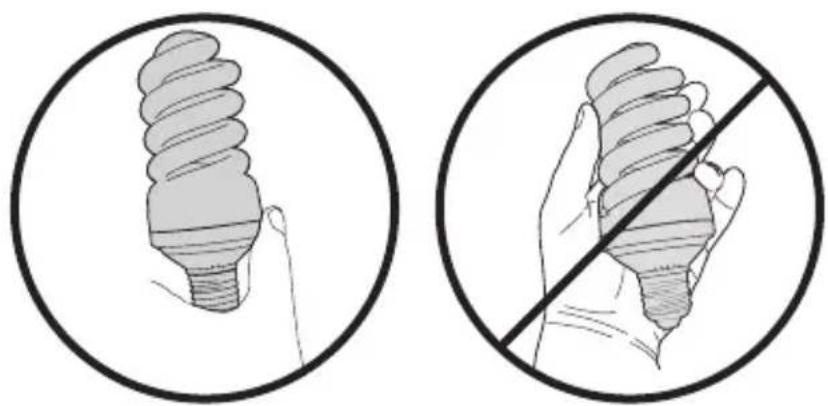
natural_image
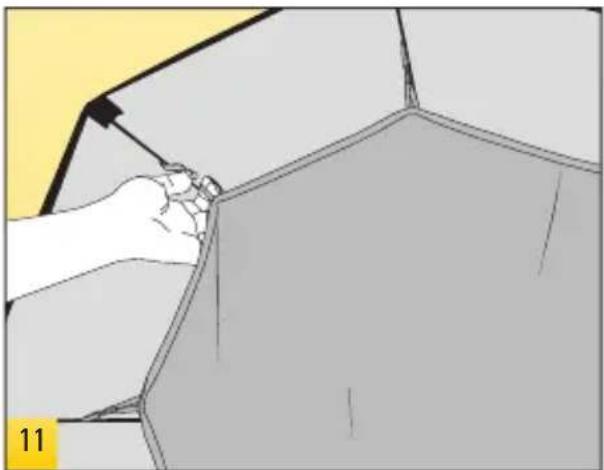
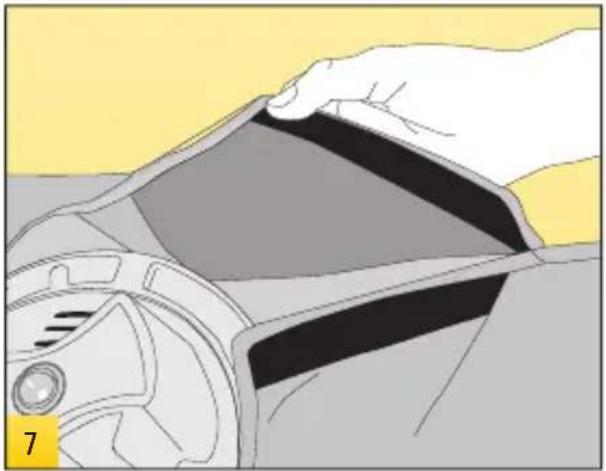
Two circular diagrams showing a hand holding a light bulb, one with a crossed-out line and the other without (no text or symbols)If desired, attach the internal diffusion baffle to the metal clips hanging on the inside of the OctaCool softbox. For stronger light, you can leave out the internal diffuser.
natural_image
Illustration of a hand using a tool to cut or mark a polygonal structure, no text or symbols presentStretch the diffuser over the edge of the OctaCool softbox. Make certain that the diffuser fits tightly on all sides.
Mount the light head onto a light stand with a standard 5/8" stud and use the four-pronged knob to tighten it.
Use the ratcheting tilt lock handle to adjust the head's tilt. To adjust the ratchet, pull the handle outward and move to the desired position.
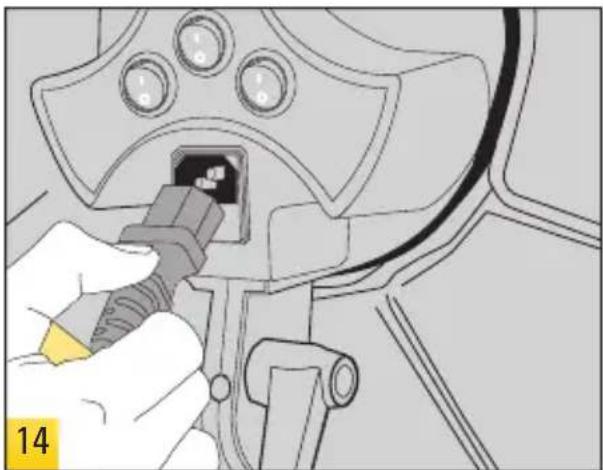
Insert the included power cable to the back of the light head. Plug the other end into a power outlet.

natural_image
Illustration of a hand pressing down on a mountain peak (no text or symbols)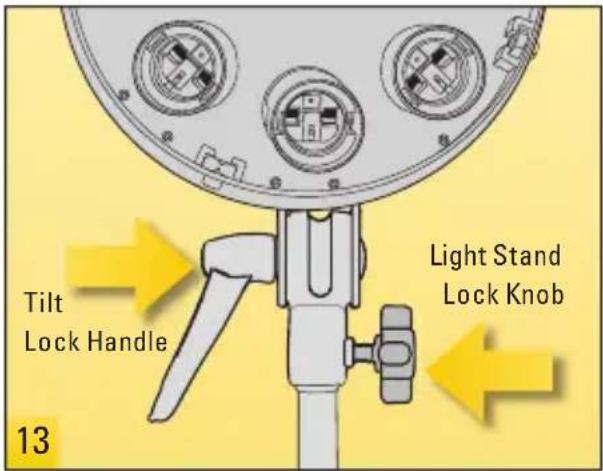
natural_image
Illustration of a hand inserting a plug into a car's internal panel (no text or symbols visible)Operating Instructions
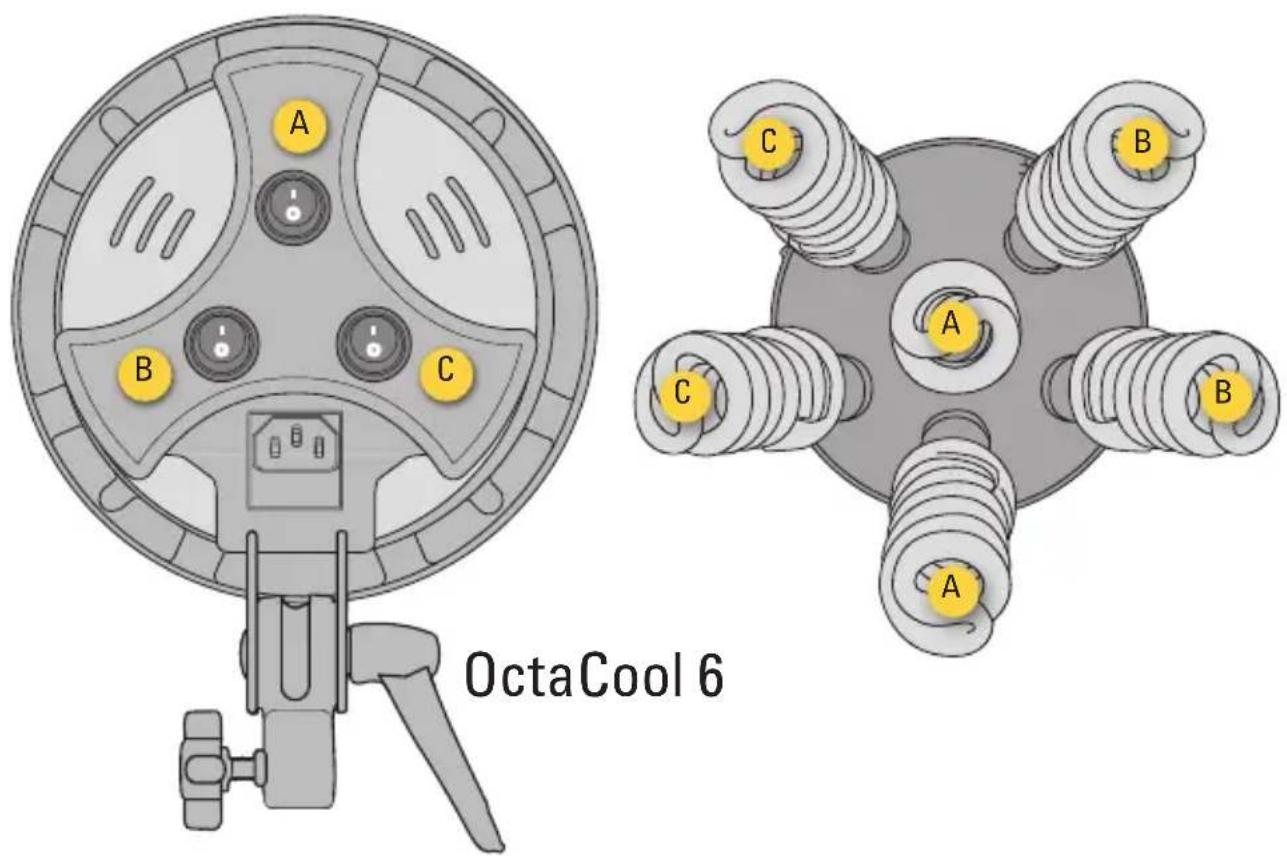
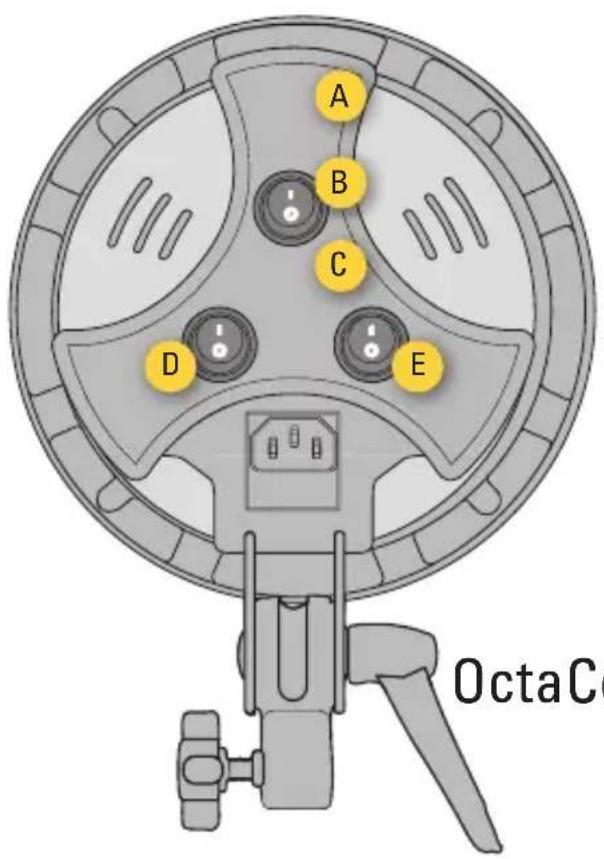
Each switch on the back panel controls either one or two bulbs. With the OctaCool 9 you can select to have only one bulb on, all bulbs on, or any number of bulbs in between. The OctaCool 6 allows you to select 2, 4 or 6 bulbs. Each compact fluorescent bulb may take up to five minutes to reach its full brightness, but will output 1400 lumens. All six bulbs in the OctaCool 6 will give off 8400 lumens. All nine bulbs in the OctaCool 9 will give off 12,600 lumens (both lumen calculations at 3.3 feet).
Refer to the diagrams below for the exact relationship between the switches and the corresponding bulb(s) There are also markings next to the switches that indicate which bulbs are powered by the switch.
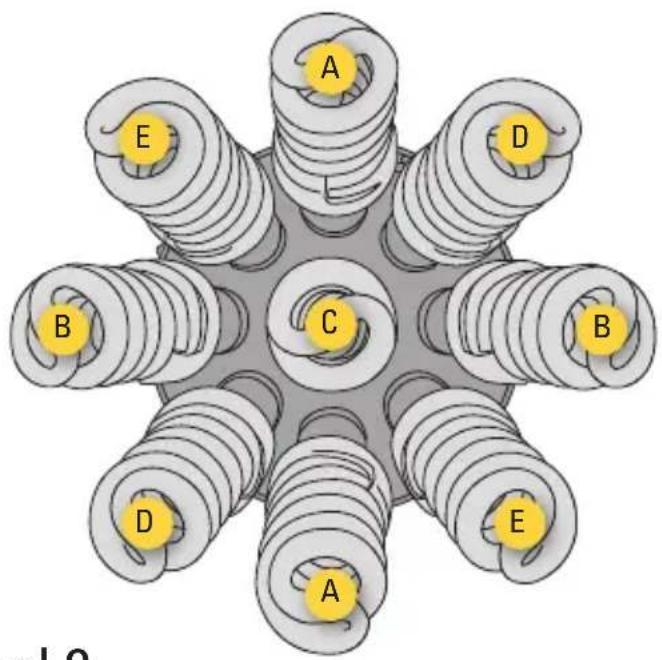
OctaCool 9
Disassembly
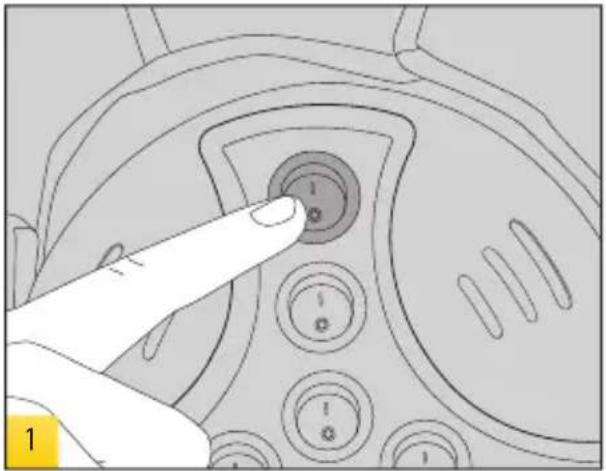
Ensure that all of the power controls on the back of the light head are in the OFF position. Unplug the power cord from the wall outlet.
Unplug the power cord from the back of the light head.
Release the light stand locking knob and remove the light head from the light stand.
natural_image
Close-up of a finger pressing a button on a device panel (no text or symbols visible)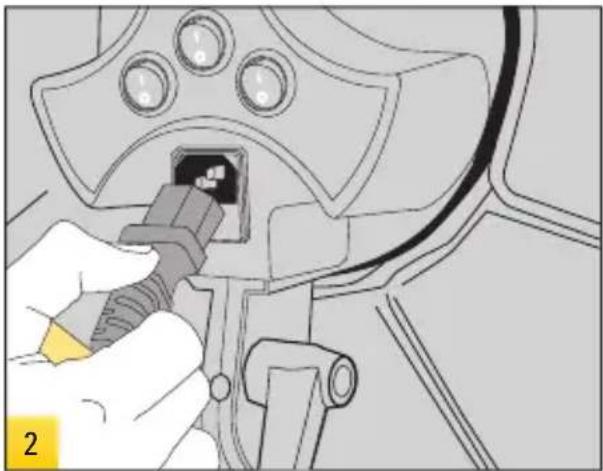
natural_image
Illustration of a hand inserting a plug into a car interior (no text or symbols visible)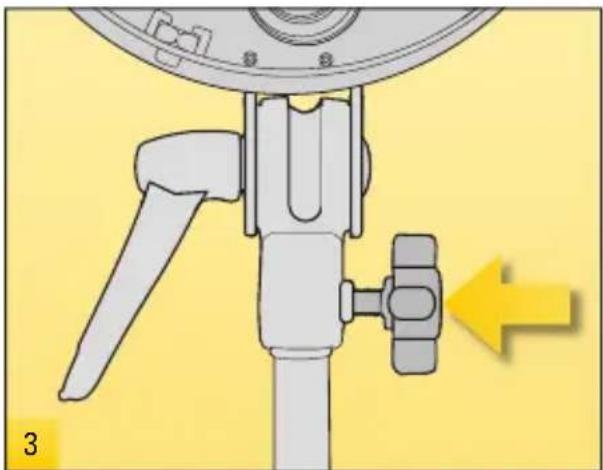
natural_image
Mechanical assembly diagram showing a lever mechanism with a yellow arrow indicating direction (no text or symbols present)Remove the OctaCool diffuser by pulling it off.
Detach the internal diffusion baffle from the metal clips hanging on the inside of the OctaCool softbox.
Unscrew all of the fluorescent lamps. Only touch the base of the lamp; never touch the glass itself. The oils on your hand can shorten the life of the bulb. Never transport your OctaCool light head without first removing all of the fluorescent lamps.

natural_image
Illustration of a hand pressing down on a mountain peak (no text or symbols)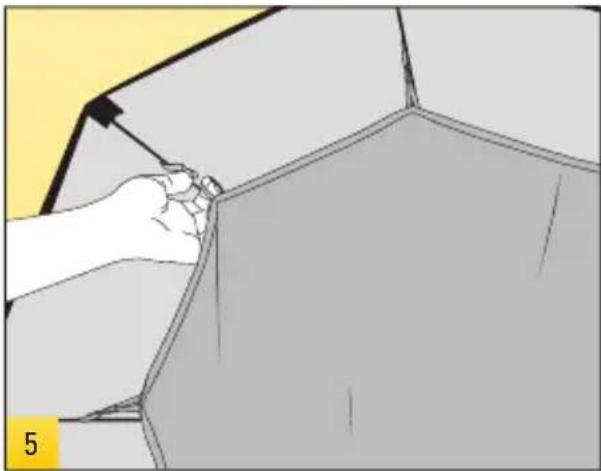
natural_image
Illustration of a hand using a tool to cut or mark a geometric shape, no text or symbols present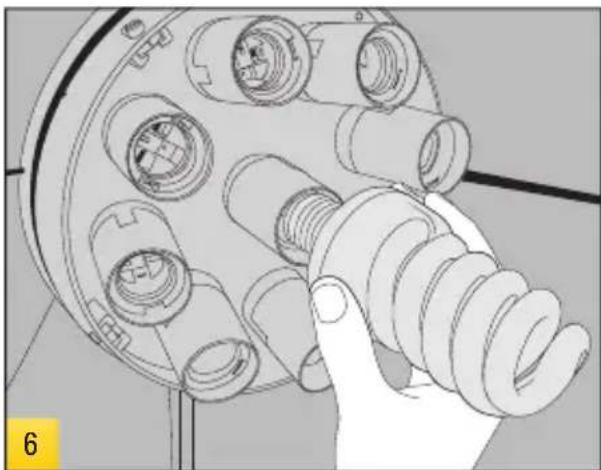
natural_image
Hand holding a coiled mechanical component with multiple cylindrical parts (no visible text or symbols)Disassembly (continued)
Detach all the touch-fastener strips on the back of the OctaCool softbox.
Remove any single tension rod from the light unit.
Remove the rod from the pocket on the opposite end. Next, remove the rod at the exact opposite side, and repeat the process until all rods are removed.
natural_image
Illustration of a hand pressing down a car seatbelt, showing the blade and wheel (no text or symbols)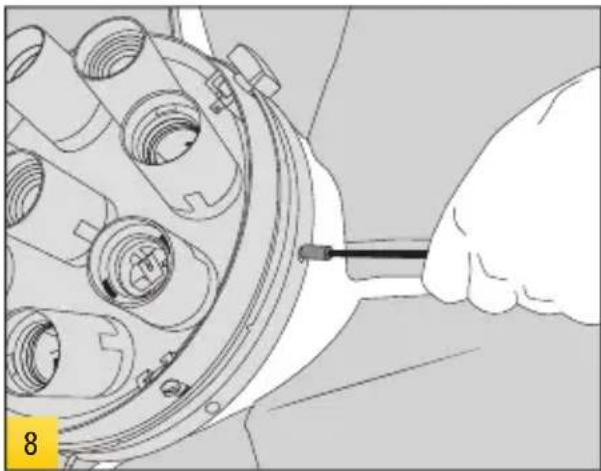
natural_image
Close-up of a hand using a tool to adjust or install a mechanical component (no visible text or symbols)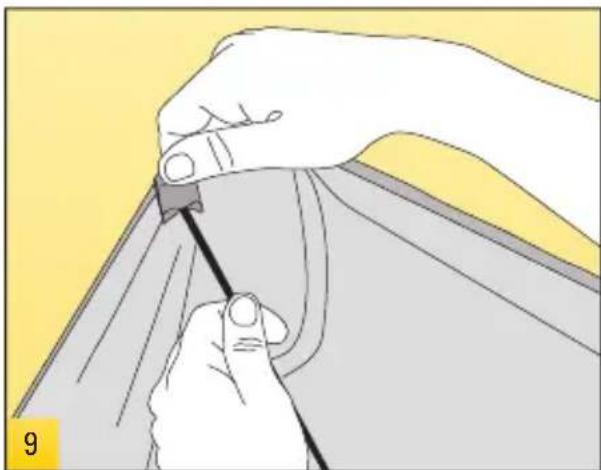
natural_image
Illustration of hands using a tool to cut or mark a curved object, no text or symbols presentSpecifications
Input Voltage 110-120V AC; 60Hz; 3.5A draw
Lamps 27-32W screw-in fluorescent
(daylight balanced 5000°-5500°K)
Ballast In lamps
Mounting 5/8" standard stud
Octacool 6 Weight Light head: 2.8 lb. (1.2 kg)
Complete Kit: 10.1 lb. (4.6 kg)
Octacool 9 Weight Light head: 3.2 lb. (1.45 kg)
Complete Kit: 12.5 lb. (5.6 kg)
Dimensions Light head: 9" (29 cm) diameter
OctaCool softbox: 29.5" (75 cm) diameter
Safety and Maintenance
Safety Notes
- Turn the power OFF and unplug the power cord when the light is not in use
- Do not use the light in an environment where moisture may come in contact with the unit
- A fire hazard exists if flammable materials are placed in close proximity to the lamps
- Do not use your light in an environment where flammable vapors are present
- Do not restrict the ventilation holes when the light is in use
- Always switch OFF the power and disconnect the power cord before removing or replacing any lamp(s)
- Avoid placing cables where they can be tripped over
- Replace damaged cords immediately
- Never use a light head with damaged covers, moldings, or lamps
- If the unit is dropped or damaged, have it checked by a professional repair service before using
- Due to the high-voltage circuitry inside this device, do not attempt to disassemble or repair the unit yourself
- Keep out of the reach of children
Changing the Fuse
A 3.15A 250 V fuse is mounted in the rear panel and protects the circuitry of the light head. Turn off the unit and disconnect the power supply before changing the fuse. Never replace with a fuse of a different type or rating. A spare fuse is fitted within the fuse holder. Use a small screwdriver to release the fuse cover. Remove the old fuse, place the new fuse in the slot, then replace the fuse holder.
One-Year Limited Warranty
This Impact product is warranted to the original purchaser to be free from defects in materials and workmanship under normal consumer use for a period of one (1) year from the original purchase date or thirty (30) days after replacement, whichever occurs later. The warranty provider's responsibility with respect to this limited warranty shall be limited solely to repair or replacement, at the provider's discretion, of any product that fails during normal use of this product in its intended manner and in its intended environment. Inoperability of the product or part(s) shall be determined by the warranty provider. If the product has been discontinued, the warranty provider reserves the right to replace it with a model of equivalent quality and function.
This warranty does not cover damage or defect caused by misuse, neglect, accident, alteration, abuse, improper installation or maintenance. EXCEPT AS PROVIDED HEREIN, THE WARRANTY PROVIDER MAKES NEITHER ANY EXPRESS WARRANTIES NOR ANY IMPLIED WARRANTIES, INCLUDING BUT NOT LIMITED TO ANY IMPLIED WARRANTY OF MERCHANTABILITY OR FITNESS FOR A PARTICULAR PURPOSE. This warranty provides you with specific legal rights, and you may also have additional rights that vary from state to state.
To obtain warranty coverage, contact the Impact Customer Service Department to obtain a return merchandise authorization ("RMA") number, and return the defective product to Impact along with the RMA number and proof of purchase. Shipment of the defective product is at the purchaser's own risk and expense.
For more information or to arrange service, visit www.impactstudiolighting.com or call Customer Service at 212-594-2353.

IMPACT™ A Gradus Group Brand
Product warranty is provided by the Gradus Group.
www.gradusgroup.com
Impact is a registered trademark of the Gradus Group.
© 2014 Gradus Group LLC. All Rights Reserved.
To see all of our lighting equipment, please visit our website.
impact™
www.impactstudiolighting.com
Brand : Impact
Model : Octacool-9
Category : Lighting