
SRLADDERATTACH - Ladder Tripp Lite - Free user manual and instructions
Find the device manual for free SRLADDERATTACH Tripp Lite in PDF.


| Product Type | Cable Ladder Attachment Kit |
| Model | SRLADDERATTACH |
| Brand | Tripp Lite |
| Compatibility | Works with Tripp Lite SRCABLELADDER and SRCABLETRAY (sold separately) |
| Material | Steel with zinc-plated finish |
| Mounting Configurations | Wall, 2-Post Rack (parallel/perpendicular), 4-Post Rack (parallel/perpendicular) |
| Bracket Hole Spacing | 18.819 in (478 mm) or 16 in (406 mm) |
| Bracket Hole Diameter | 0.433 in (11 mm) |
| Included Components | 1 Bracket, 1 Perpendicular Junction Plate, 4 Adjustable J-Hook Clamps, 4 M8 Threaded J-Hooks, 6 M8 Washers, 6 M8 Hex Nuts, 2 M8 Hex Head Machine Screws |
| Installation Hardware | User-supplied bolts for wall mounting |
| Warranty | 5-year limited |
| Operating Environment | Indoor, controlled environment; avoid moisture, extreme temperatures, flammable gases |
| Storage Temperature | Less than 40°C (104°F) |
| Storage Humidity | Less than 90% non-condensing |
| Safety | Not for climbing or walking; sharp edges hazard; not for life support |
| Documentation | User manual available in PDF |
Frequently Asked Questions - SRLADDERATTACH Tripp Lite
User questions about SRLADDERATTACH Tripp Lite
0 question about this device. Answer the ones you know or ask your own.
Ask a new question about this device
Download the instructions for your Ladder in PDF format for free! Find your manual SRLADDERATTACH - Tripp Lite and take your electronic device back in hand. On this page are published all the documents necessary for the use of your device. SRLADDERATTACH by Tripp Lite.
USER MANUAL SRLADDERATTACH Tripp Lite
SmartRack™ Accessories
Model: SRLADDERATTACH

1 – Introduction 2
2 – Parts List 2
3 – Important Safety Instructions 2
4 – Installation 2
4-1 Planning 2
4-2 Mounting the Bracket 3
4-3 Attaching the Ladder 3
4-4 Parallel Rack Attachment 4
4-5 Perpendicular Rack Attachment (2-Post Racks) 5
4-6 Perpendicular Rack Attachment (4-Post Racks) 6
5 – Storage and Service 8
6 – Warranty and Warranty Registration
8

Tripp Lite World Headquarters
1111 W. 35th Street, Chicago, IL 60609 USA
www.tripplite.com/support
1 - Introduction
SRLADDERATTACH works in conjunction with the SRCABLELADDER to provide roof-mounted cable routing from Tripp Lite's SmartRack Enclosures to a wall, or between 2- and 4-Post Open Frame Racks in either parallel or perpendicular configurations. Now, cable bundles can span aisles, spaces between enclosures in the same row and to spaces not occupied by another rack enclosure. Note: Standard installation of SRLADDERATTACH requires Tripp Lite's SRCABLELADDER and SRCABLETRAY accessories, sold separately.
2 - Parts List
A Bracket (1)
B Perpendicular Junction Plate (1)
C Adjustable J-Hook Clamps (4)
D M8 Threaded J-Hooks (4)
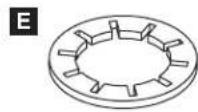
E M8 Washers (6)
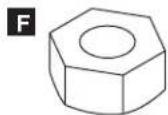
F M8 Hex Nuts (6)
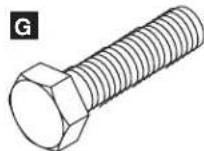
G M8 Hex Head Machine Screws (2)
If any parts are missing, visit www.tripplite.com/support.

natural_image
Simple line drawing of a long rectangular metal rod or beam with evenly spaced holes (no text or symbols)


3 – Important Safety Instructions
SAVE THESE INSTRUCTIONS
This manual contains instructions and warnings that must be followed during the installation and operation of the product described in this manual. Read all instructions and warnings thoroughly before attempting installation. Failure to comply may invalidate the warranty and cause property damage and/or personal injury.
• Install in a controlled indoor environment, away from moisture, temperature extremes, flammable liquids and gasses, conductive contaminants, dust and direct sunlight.
- Provide suitable grounding in accordance with all applicable electrical wiring regulations.
- Do not attempt to climb or walk across any part of the ladder.
- Use caution and wear safety gloves when handling metal parts that have been cut to length. Sharp edges can cause personal injury and property damage.
- Use of this equipment in life support applications where failure of this equipment can reasonably be expected to cause the failure of the life support equipment or to significantly affect its safety or effectiveness is not recommended. Do not use this equipment in the presence of a flammable anesthetic mixture with air, oxygen or nitrous oxide.
4 – Installation
4-1 Planning
The SRLADDERATTACH provides rack-to-wall or rack-to-rack cable routing either between racks, or to areas not occupied by another rack (e.g. a wall). It is advised that you sketch out your rack configuration. Use a tape measure to determine distances that the corresponding SRCABLELADDERS will bridge and modify all ladders accordingly before beginning.
4 – Installation (continued)
4-2 Mounting the Bracket (Wall-Mounting)
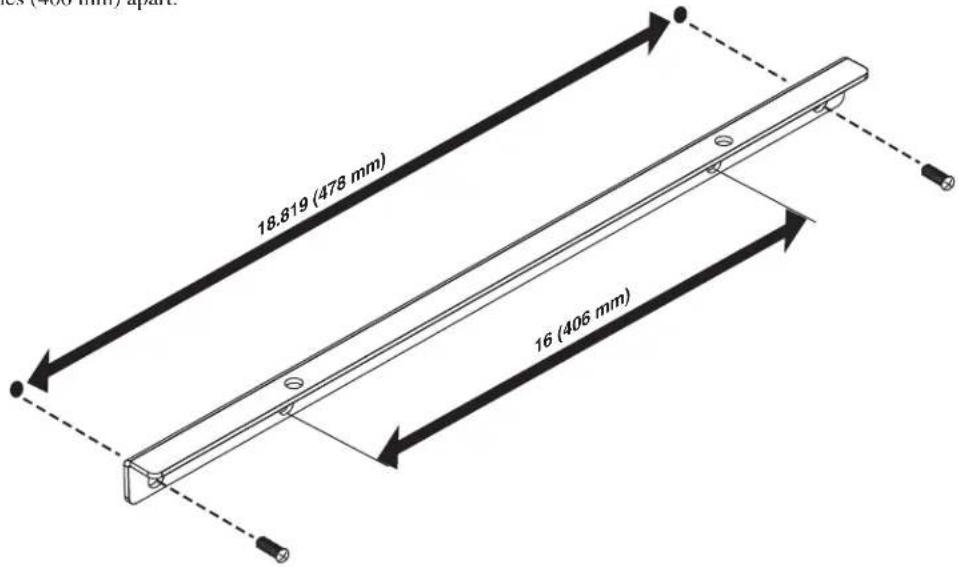
After measuring for distance and modifying the SRCABLELADDER parts, mount the SRLADDERATTACH wall bracket to a wall or other appropriate surface with user supplied bolts. The bracket's pre-drilled holes are .433 inches (11 mm) in diameter and are spaced 18.819 inches (478 mm)/or 16 inches (406 mm) apart.
Warning: Be sure to mount the bracket in a location able to bear the load.
Note: The SRLADDERATTACH wall bracket can also be attached to Tripp Lite's 2- and 4-Post Rack Kits. If existing brackets on the 2 or 4 post kits do not include pre-drilled holes, use the bracket included in your SRLADDERATTACH kit.
4-3 Attaching the Ladder
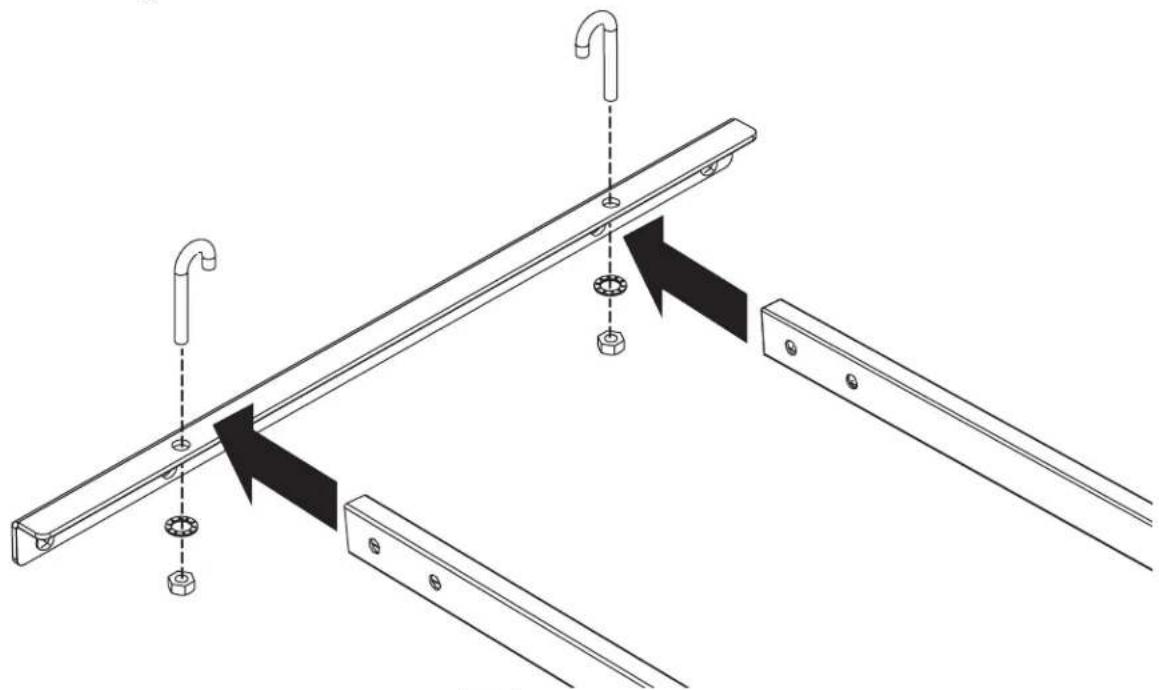
Extend the SRCABLELADDER from your rack enclosure to the bracket mounted on the wall and secure it to the bracket by hooking two of the J-Hooks around the ladder frame and into the pre-drilled holes in the bracket. Secure the ladder by attaching two M8 Washers and M8 Hex Nuts to the J-Hooks as shown in the diagram.
natural_image
Technical line drawing of a mechanical assembly with two parts, one showing a bracket and the other a plate (no text or symbols present)4 – Installation (continued)
4-4 Parallel Rack Attachment (2-Post or 4-Post Racks)
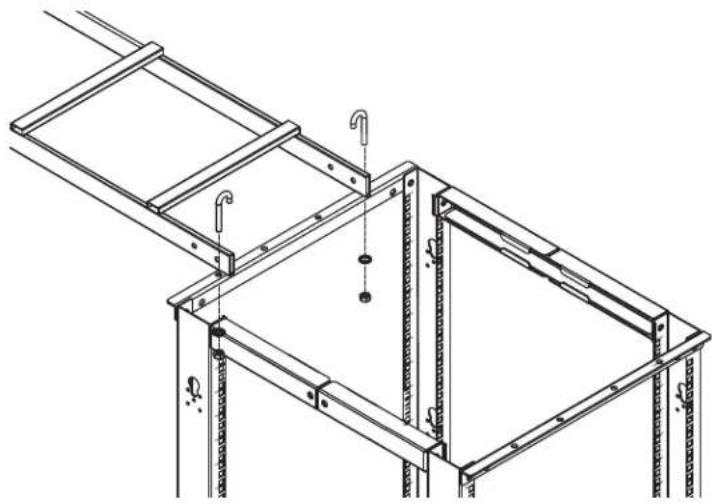
If attaching an SRCABLELADDER in a parallel configuration between two Tripp Lite 2-Post or 4-Post Open Frame Racks, you will need all four M8 Threaded J-Hooks and four M8 Hex Nuts and Washers. The mounting bracket included in this kit for wall mounting should already be installed on both 2- and 4-Post Racks (Tripp Lite brand).
Simply extend the SRCABLELADDER between your two racks and secure both ends to the mounting bracket by hooking all four J-Hooks around the ladder frame at both sides and into the pre-drilled holes in the brackets. Attach the M8 Washers and Hex Nuts to the J-Hooks as shown in the diagram. Note: You can also make parallel to perpendicular attachment between racks. See the next section for details.
2-Post Rack

natural_image
Technical line drawing of a metal ladder structure with support beams and mounting points (no text or symbols)4-Post Rack
natural_image
Technical line drawing of a structural frame with supports and rebar (no text or symbols)4 – Installation (continued)
4-5 Perpendicular Rack Attachment (2-Post Racks)
Step 1. In order to make perpendicular attachments to a 2-post rack, you will first need to install the Perpendicular Junction Plate. To do so, simply secure the Junction Plate to the two top mounting brackets on the 2-post rack (Tripp Lite brand) using two M8 Hex Head Machine Screws, M8 Washers and M8 Hex Nuts. Note: Diagram is showing the installation of two separate SRLADDERATTACH and SRCABLELADDER units. Only one Junction Plate is included per SRLADDERATTACH unit.

natural_image
Technical line drawing of a structural support frame with vertical columns and mounting holes (no text or symbols)Step 2. To attach the ladder, extend the SRCABLELADDER between your two intended racks (or wall) and attach the ladder to the Perpendicular Junction Plate by hooking two J-Hooks around the ladder frame and into the outside holes on the Junction Plate. Secure the two hooks using two of the included M8 Washers and M8 Hex Nuts. Note: Diagram shows installation of two separate SRLADDERATTACH and SRCABLELADDER units.

natural_image
Technical line drawing of a structural ladder assembly with support columns and vertical supports (no text or symbols)4 – Installation (continued)
4-6 Perpendicular Rack Attachment (4-Post Racks)
Step 1. In order to make perpendicular attachments to a 4-post rack, you will need to utilize two Adjustable J-Hook Clamps. To make perpendicular attachments between two 4-post racks, you will need all four Adjustable J-Hook Clamps. Extend the SRCABLELADDER between your two intended racks (or wall). Take one of the Adjustable J-Hook Clamps and insert one of the J-Hooks into its hole. (It is important that you use the hole with the raised edge to insert your hook. The raised edge accommodates the edge of the rack's perpendicular frame.)

natural_image
Technical line drawing of a pipe fitting with a base plate and a hook, no text or symbols presentStep 2. Wrap the J-Hooks and clamps around the frame of the ladder. The other side of the clamp (without the J-Hook installed) will wrap underneath the perpendicular frame on the 4-post rack. Tighten this system by securing the J-Hook to the Adjustable J-Hook Clamp using the included M8 Washers and M8 Hex Nuts. Repeat this procedure for the other side of the ladder frame, if making attachments between two 4-post racks.

natural_image
Technical line drawing of a metal shelving unit with ladder and support structures (no text or symbols)4 – Installation (continued)
4-6 Perpendicular Rack Attachment (4-Post Racks) (continued)
As stated earlier, you can make SRCABLELADDER attachments to walls and between racks in parallel or perpendicular configurations. This kind of flexibility can lend itself to many different layouts or configurations such as the one we show in the following diagram:

5 – Storage and Service
Storage
The unit must be stored in a clean, secure environment with a temperature less than 40^ C ( 104^ F) and a relative humidity less than 90% (non-condensing). Store the unit in its original shipping container if possible.
Service
Your Tripp Lite product is covered by the warranty described in this manual. A variety of Extended Warranty and On-Site Service Programs are also available from Tripp Lite. For more information on service, visit www.triplite.com/support. Before returning your product for service, follow these steps:
- Review the installation and operation procedures in this manual to insure that the service problem does not originate from a misreading of the instructions.
- If the problem continues, do not contact or return the product to the dealer. Instead, visit www.tripplite.com/support.
- If the problem requires service, visit www.triplite.com/support and click the Product Returns link. From here you can request a Returned Material Authorization (RMA) number, which is required for service. This simple on-line form will ask for your unit's model and serial numbers, along with other general purchaser information. The RMA number, along with shipping instructions will be emailed to you. Any damages (direct, indirect, special or consequential) to the product incurred during shipment to Tripp Lite or an authorized Tripp Lite service center is not covered under warranty. Products shipped to Tripp Lite or an authorized Tripp Lite service center must have transportation charges prepaid. Mark the RMA number on the outside of the package. If the product is within its warranty period, enclose a copy of your sales receipt. Return the product for service using an insured carrier to the address given to you when you request the RMA.
6 – Warranty and Warranty Registration
Limited Warranty
Seller warrants this product, if used in accordance with all applicable instructions, to be free from original defects in material and workmanship for a period of 5 years from the date of initial purchase. If the product should prove defective in material or workmanship within that period, Seller will repair or replace the product, in its sole discretion.
THIS WARRANTY DOES NOT APPLY TO NORMAL WEAR OR TO DAMAGE RESULTING FROM ACCIDENT, MISUSE, ABUSE OR NEGLECT. SELLER MAKES NO EXPRESS WARRANTIES OTHER THAN THE WARRANTY EXPRESSLY SET FORTH HEREIN. EXCEPT TO THE EXTENT PROHIBITED BY APPLICABLE LAW, ALL IMPLIED WARRANTIES, INCLUDING ALL WARRANTIES OF MERCHANTABILITY OR FITNESS, ARE LIMITED IN DURATION TO THE WARRANTY PERIOD SET FORTH ABOVE; AND THIS WARRANTY EXPRESSLY EXCLUDES ALL INCIDENTAL AND CONSEQUENTIAL DAMAGES. (Some states do not allow limitations on how long an implied warranty lasts, and some states do not allow the exclusion or limitation of incidental or consequential damages, so the above limitations or exclusions may not apply to you. This Warranty gives you specific legal rights, and you may have other rights which vary from jurisdiction to jurisdiction.)
Tripp Lite; 1111 W. 35th Street; Chicago IL 60609; USA
WARNING: The individual user should take care to determine prior to use whether this device is suitable, adequate or safe for the use intended. Since individual applications are subject to great variation, the manufacturer makes no representation or warranty as to the suitability or fitness of these devices for any specific application.
Warranty Registration
Visit www.triplite.com/warranty today to register the warranty for your new Tripp Lite product. You'll be automatically entered into a drawing for a chance to win a FREE Tripp Lite product!*
* No purchase necessary. Void where prohibited. Some restrictions apply. See website for details.
Tripp Lite has a policy of continuous improvement. Specifications are subject to change without notice.

Tripp Lite World Headquarters
1111 W. 35th Street, Chicago, IL 60609 USA
www.tripplite.com/support
201007003·932870-EN
- SmartRack™ Accessories
- - Introduction
- - Parts List
- – Important Safety Instructions
- SAVE THESE INSTRUCTIONS
- – Installation
- 4-1 Planning
- – Installation (continued)
- 4-2 Mounting the Bracket (Wall-Mounting)
- 4-3 Attaching the Ladder
- 4-4 Parallel Rack Attachment (2-Post or 4-Post Racks)
- 2-Post Rack
- 4-Post Rack
- 4-5 Perpendicular Rack Attachment (2-Post Racks)
- 4-6 Perpendicular Rack Attachment (4-Post Racks)
- 4-6 Perpendicular Rack Attachment (4-Post Racks) (continued)
- – Storage and Service
- Storage
- Service
- – Warranty and Warranty Registration
- Limited Warranty
- Warranty Registration
Brand : Tripp Lite
Model : SRLADDERATTACH
Category : Ladder