
DVD-K32 - DVD player PANASONIC - Free user manual and instructions
Find the device manual for free DVD-K32 PANASONIC in PDF.


| Product Type | DVD Player |
| Brand | Panasonic |
| Model | DVD-K32 |
| Dimensions (W x D x H) | 430 mm x 251 mm x 43 mm |
| Weight | 2.2 kg |
| Power Supply | AC 110-240 V, 50/60 Hz |
| Power Consumption (Standby) | Less than 1.5 W |
| Disc Formats Supported | DVD-Video, Video CD, CD, CD-R/RW (MP3, JPEG), DVD-R/RW (MP3, JPEG), +R/+RW, +R DL |
| Video Outputs | Composite, S-Video, Component (YPbPr), SCART (for UK models) |
| Audio Outputs | 2-channel analog (RCA), Coaxial digital |
| Karaoke | Microphone input (3.5 mm mono), microphone volume control, vocal cancel |
| Remote Control | Included (N2QAYB000014 for Asia) |
| Playback Features | Program play, random play, repeat, A-B repeat, zoom, quick replay, skip (30s/1min), frame-by-frame, slow motion |
| On-Screen Menus | Yes, with language selection |
| Region Code | 3 (Asia) / ALL |
| Maintenance | Clean with soft dry cloth; do not use alcohol or solvents |
| Safety Class | Class 1 laser (wave length 653/790 nm) |
| Accessories Included | Remote control, AC mains lead, batteries, audio/video cable |
Frequently Asked Questions - DVD-K32 PANASONIC
User questions about DVD-K32 PANASONIC
0 question about this device. Answer the ones you know or ask your own.
Ask a new question about this device
Download the instructions for your DVD player in PDF format for free! Find your manual DVD-K32 - PANASONIC and take your electronic device back in hand. On this page are published all the documents necessary for the use of your device. DVD-K32 by PANASONIC.
USER MANUAL DVD-K32 PANASONIC
The illustration shows DVD-S32.
Operating Instructions DVD/CD PLAYER
Model No. DVD-S32/DVD-K32
DVD-S32 is only for the United Kingdom, Australia, N.Z. and Unit with PX printed on the outer packaging.
DVD-K32 is only for Asia.
Dear customer
Thank you for purchasing this product. Before connecting, operating or adjusting this product, please read the instructions completely. Please keep this manual for future reference.


Region number
The player plays DVD-Video marked with labels containing the region number or "ALL".
Region Number Example:
| Unit with PX printed on the outer packaging | 1 |
| The United Kingdom 2 | |
| Asia 3 | |
| Australia and N.Z. 4 |
EB GN GCS PX
The United Kingdom


Panasonic®
Table of contents
Getting started
Caution for AC Mains Lead/Accessories 2
Safety precautions ....3
Discs that can be played....4
STEP 1 Connection to a television .... 5
STEP 2 The remote control 6
STEP 3 Setting up the unit 7
Operations
Basic play....8
Playing MP3/JPEG discs....9
Convenient functions ....10
Displaying current playback condition (Quick OSD)/ Skipping 30 seconds forward/Skipping a minute forward/Quick replay/Zoom . . . 10
Enjoying Karaoke ....10
Changing the play sequences....11 Program play/Random play....11
Using On-Screen Menus....12
On-Screen Menu 1 12 On-Screen Menu 2 13
Changing the player settings....14
Reference
Troubleshooting guide....16
Maintenance....18
Specifications 18
Tips for making data discs....19
Index .... Back cover
Unless otherwise indicated, illustrations in these operating instructions are DVD-K32.
Note
"EB" on the packaging indicates the United Kingdom.
RQT8685-2B
Caution for AC Mains Lead
(For United Kingdom)
("EB" area code model only)
For your safety, please read the following text carefully. This appliance is supplied with a moulded three pin mains plug for your safety and convenience.
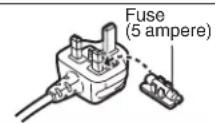
A 5-ampere fuse is fitted in this plug.
Should the fuse need to be replaced, please ensure that the replacement fuse has a rating of 5 amperes and that it is approved by ASTA or BSI to BS1362.
Check for the ASTA mark or the BSI mark on the body of the fuse.
If the plug contains a removable fuse cover, you must ensure that it is refitted when the fuse is replaced.
If you lose the fuse cover, the plug must not be used until a replacement cover is obtained.
A replacement fuse cover can be purchased from your local dealer.
CAUTION!
IF THE FITTED MOULDED PLUG IS UNSUITABLE FOR THE SOCKET OUTLET IN YOUR HOME, THEN THE FUSE SHOULD BE REMOVED AND THE PLUG CUT OFF AND DISPOSED OF SAFELY. THERE IS A DANGER OF SEVERE ELECTRICAL SHOCK IF THE CUT-OFF PLUG IS INSERTED INTO ANY 13-AMPERE SOCKET.
If a new plug is to be fitted, please observe the wiring code as stated below.
If in any doubt, please consult a qualified electrician.
IMPORTANT
The wires in this mains lead are coloured in accordance with the following code:
Blue: Neutral, Brown: Live.
As these colours may not correspond with the coloured markings identifying the terminals in your plug, proceed as follows:
The wire which is coloured Blue must be connected to the terminal which is marked with the letter N or coloured Black or Blue.
The wire which is coloured Brown must be connected to the terminal which is marked with the letter L or coloured Brown or Red.
WARNING: DO NOT CONNECT EITHER WIRE TO THE EARTH TERMINAL WHICH IS MARKED WITH THE LETTER E, BY THE EARTH SYMBOL OR COLOURED GREEN OR GREEN/YELLOW.
THIS PLUG IS NOT WATERPROOF—KEEP DRY.
Before use
Remove the connector cover.
How to replace the fuse
The location of the fuse differs according to the type of AC mains plug (figures A and B). Confirm the AC mains plug fitted and follow the instructions below.
Illustrations may differ from actual AC mains plug.
- Open the fuse cover with a screwdriver.

- Replace the fuse and close or attach the fuse cover.

Accessories

Use numbers when asking for replacement parts. (Product numbers correct as of January 2006. These may be subject to change.)

1 Remote control
The United Kingdom, Asia, Australia and N.Z.
(N2QAYB000014)
Unit with PX printed on the outer packaging
(N2QAYB000013)
□ 1 AC mains lead
The United Kingdom (K2CT3CA00004)
Australia and NZ (K2CJ2DA00008)
Asia and Unit with PX printed on the outer packaging
(K2CQ2CA00006)
- For use with this unit only. Do not use it with other equipment. Also, do not use the lead for other equipment with this unit.
2 Remote control batteries
Australia and N.Z.
Asia and Unit with PX printed on the outer packaging
□ 1 Audio/video cable (K2KA6BA00004)
Unit with PX printed on the outer packaging
□ 1 Power plug adaptor (K2DA42E00001)
The United Kingdom and Republic of Ireland
Sales and Support Information
Customer Care Centre
For customers within the UK: 08705 357357
For customers within the Republic of Ireland: 01 289 8333
Visit our website for product information
E-mail: customer.care@panasonic.co.uk
Direct Sales at Panasonic UK
Order accessory and consumable items for your product with ease and confidence by phoning our Customer Care Centre Monday-Thursday 9:00am–5:30pm, Friday 9:30am–5:30pm (Excluding public holidays).
- Or go online through our Internet Accessory ordering application at www.panasonic.co.uk
- Most major credit and debit cards accepted. All enquiries, transactions and distribution facilities are provided directly by Panasonic UK Ltd.
- It couldn't be simpler!
- Also available through our Internet is direct shopping for a wide range of finished products, take a browse on our website for further details.
Safety precautions
Placement
Set the unit up on an even surface away from direct sunlight, high temperatures, high humidity, and excessive vibration. These conditions can damage the cabinet and other components, thereby shortening the unit's service life. Do not place heavy items on the unit.
Voltage
Do not use high voltage power sources. This can overload the unit and cause a fire. Do not use a DC power source. Check the source carefully when setting the unit up on a ship or other place where DC is used.
AC mains lead protection
Ensure the AC mains lead is connected correctly and not damaged. Poor connection and lead damage can cause fire or electric shock. Do not pull, bend, or place heavy items on the lead.
Grasp the plug firmly when unplugging the lead. Pulling the AC mains lead can cause electric shock. Do not handle the plug with wet hands. This can cause electric shock.
Foreign matter
Do not let metal objects fall inside the unit. This can cause electric shock or malfunction.
Do not let liquids get into the unit. This can cause electric shock or malfunction. If this occurs, immediately disconnect the unit from the power supply and contact your dealer.
Do not spray insecticides onto or into the unit. They contain flammable gases which can ignite if sprayed into the unit.
Service
Do not attempt to repair this unit by yourself. If sound is interrupted, indicators fail to light, smoke appears, or any other problem that is not covered in these instructions occurs, disconnect the AC mains lead and contact your dealer or an authorized service center. Electric shock or damage to the unit can occur if the unit is repaired, disassembled or reconstructed by unqualified persons.
Extend operating life by disconnecting the unit from the power source if it is not to be used for a long time.
CAUTION!
THIS PRODUCT UTILIZES A LASER.
USE OF CONTROLS OR ADJUSTMENTS OR PERFORMANCE OF PROCEDURES OTHER THAN THOSE SPECIFIED HEREIN MAY RESULT IN HAZARDOUS RADIATION EXPOSURE.
DO NOT OPEN COVERS AND DO NOT REPAIR YOURSELF. REFER SERVICING TO QUALIFIED PERSONNEL.
WARNING:
TO REDUCE THE RISK OF FIRE, ELECTRIC SHOCK OR PRODUCT DAMAGE, DO NOT EXPOSE THIS APPARATUS TO RAIN, MOISTURE, DRIPPING OR SPLASHING AND THAT NO OBJECTS FILLED WITH LIQUIDS, SUCH AS VASES, SHALL BE PLACED ON THE APPARATUS.
CAUTION!
- DO NOT INSTALL OR PLACE THIS UNIT IN A BOOKCASE, BUILT-IN CABINET OR IN ANOTHER CONFINED SPACE. ENSURE THE UNIT IS WELL VENTILATED. TO PREVENT RISK OF ELECTRIC SHOCK OR FIRE HAZARD DUE TO OVERHEATING, ENSURE THAT CURTAINS AND ANY OTHER MATERIALS DO NOT OBSTRUCT THE VENTILATION VENTS.
- DO NOT OBSTRUCT THE UNIT'S VENTILATION OPENINGS WITH NEWSPAPERS, TABLECLOTHS, CURTAINS, AND SIMILAR ITEMS.
- DO NOT PLACE SOURCES OF NAKED FLAMES, SUCH AS LIGHTED CANDLES, ON THE UNIT. •DISPOSE OF BATTERIES IN AN ENVIRONMENTALLY FRIENDLY MANNER.
This product may receive radio interference caused by mobile telephones during use. If such interference is apparent, please increase separation between the product and the mobile telephone.
The socket outlet shall be installed near the equipment and easily accessible or the mains plug or an appliance coupler shall remain readily operable.
Asia
THIS UNIT IS INTENDED FOR USE IN TROPICAL CLIMATES.
The United Kingdom, Australia, N.Z. and Unit with PX printed on the outer packaging THIS UNIT IS INTENDED FOR USE IN MODERATE CLIMATES.
Discs that can be played
Commercial discs
| DiscLogo | Indicated in these instructions by | Remarks |
| DVD-Video | DVD-V | High quality movie and music discs |
| Video CD | VCD | Music discs with video Including SVCD (Conforming to IEC62107) |
| CD | CD Music discs |
■ Discs that cannot be played
DVD-Audio, DVD-RAM, Version 1.0 of DVD-R/RW, DVD-ROM, CD-ROM, CDV, CD-G, SACD, WMA Discs, DivX video Discs, Photo CD, and "Chaoji VCD" available on the market including CVD, DVCD and SVCD that do not conform to IEC62107.
■ Built-in decoder
This unit has a Dolby Digital decoder so you can play DVDs with this mark.

This unit does not have a DTS decoder. Connect this unit to equipment that has a DTS decoder to enjoy DTS sound.
Recorded discs (✓: Available, X: Not available)
| DiscLogo | Recorded on a DVD video recorder, etc. | Recorded on a personal computer, etc. | Necessity of finalize ※4 | |
| DVD-V ※2 | MP3 | JPEG | ||
| DVD-R/RWDVDR4.7 | √ | √ | √ | Necessary |
| DVD-R DLDVDRR DL | √ | × | × | Necessary |
| +R/+RW— | (V)※3 | × | × | Necessary |
| +R DL— | (V)※3 | × | × | Necessary |
| CD-R/RW ※1 — | — | √ | √ | Necessary ※5 |
- It may not be possible to play the above discs in all cases due to the type of discs, the condition of the recording, the recording method and how the files were created (→ page 19, Tips for making data discs). *1 This unit can also play CD-R/RW recorded with CD-DA or Video CD format. *2 Discs recorded on DVD video recorders or DVD video cameras using DVD-Video Format. *3 Recorded using a format different from DVD-Video Format, therefore some functions cannot be used. *4 A process that allows play on compatible equipment. To play a disc that is displayed as "Necessary" on this unit, the disc must first be finalized on the device it was recorded on. *5 Closing the session will also work.
■ Handling precautions
- Do not attach labels or stickers to discs (This may cause disc warping, rendering it unusable).
- Do not write on the label side with a ball-point pen or other writing instrument.
- Do not use record cleaning sprays, benzine, thinner, static electricity prevention liquids or any other solvent.
- Do not use scratch-proof protectors or covers.
- Do not use the following discs:
– Discs with exposed adhesive from removed stickers or labels (rented discs etc).
– Discs that are badly warped or cracked. - Irregularly shaped discs, such as heart shapes.
STEP 1 Connection to a television
- Do not place the unit on amplifiers or equipment that may become hot. The heat can damage the unit.
- Do not connect through the video cassette recorder. Due to copy guard protection, the picture may not display properly.
- Turn off all equipment before connection and read the appropriate operating instructions.
- Connect the terminals of the same colour.
- Unless otherwise indicated, illustrations are of the models for areas except the United Kingdom. (The United Kingdom: There is no S VIDEO OUT terminal on the unit.)
With VIDEO IN or S VIDEO IN
* When using this connection, the audio cable (red and white plugs) should also be connected. *2 Australia and N.Z.: included Unit with PX printed on the outer packaging: included Asia: included The United Kingdom: not included
You can connect the audio cable to the 2-channel audio input terminals of an analog amplifier or system component to enjoy stereo sound.
Television With COMPONENT VIDEO IN![graph TD A["Audio IN R L"] --> B["Audio/video cable®2"] C["COMPONENT VIDEO IN"] --> D["Not used"] D --> E["Video cables"] F["AUDIO OUT"] --> G["VIDEO OUT"] G --> H["VIDEO OUT"] H --> I["COMPONENT VIDEO OUT"] J["LED indicators"] --> K["Pin 1"] J --> L["Pin 2"] J --> M["Pin 3"]](/content/2026/06/1146877/images/6580780d3860b5a78f82964f2056104af26415f4a0efe60ab9cebe02ce559315.jpg)
Unit with PX printed on the outer packaging Select "DARKER" from the "BLACK LEVEL" (→ page 14, "VIDEO" tab).
To enjoy progressive video
Connect to a progressive output compatible television.
① The United Kingdom
Set "VIDEO OUT-SCART" to "VIDEO/YPbPr" for component terminals. (→ page 14, "VIDEO" tab).
② Set "VIDEO OUT (I/P)" to "PROGRESSIVE", then follow the instructions on the menu screen (→ page 14, "VIDEO" tab).
The United Kingdom
Panasonic televisions with 625 (576)/50i · 50p, 525 (480)/60i . 60p input terminals are progressive compatible.
Back of the unit
The United Kingdom
With SCART (AV) IN
SCART (AV) IN
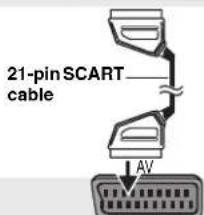
- If the television is compatible with S-video, select "S-VIDEO/YPbPr", or compatible with RGB, select "RGB/NO OUTPUT" for the AV terminals (→ page 14, "VIDEO" tab).
(Continued on the next page)
STEP 1 Connection to a television
■ Enjoying multi-channel surround sound
Change "DOWN SAMPLING", "DOLBY DIGITAL", "DTS" and "MPEG" (→ page 15, "AUDIO" tab).
The United Kingdom, Australia and N.Z.
■ Connect the AC mains lead last FOR THE UNITED KINGDOM ONLY
READ THE CAUTION FOR AC MAINS LEAD ON PAGE 2 BEFORE CONNECTION.
Configuration of the AC inlet differs according to the area.
Unit with PX printed on the outer packaging
If the power plug does not fit your AC outlet, use the power plug adaptor (included).
If it still doesn't fit, contact an electrical parts distributor for assistance.

DVD-K32 only
■ Connect to the ground terminal
Ground the unit by connecting a copper wire to the screw on the back of the unit and the ground terminal to prevent static electricity buildup caused by the karaoke microphone.

STEP 2 The remote control
■ Batteries
- Insert so the poles (+ and -) match those in the remote control.
- Do not use rechargeable type batteries. Do not:
- mix old and new batteries.
- use different types at the same time.
- heat or expose to flame. • take apart or short circuit.
- attempt to recharge alkaline or manganese batteries.
- use batteries if the covering has been peeled off.
Mishandling of batteries can cause electrolyte leakage which can damage items the fluid contacts and may cause a fire.
Remove if the remote control is not going to be used for a long period of time. Store in a cool, dark place.
Use
Aim at the remote control sensor (→ page 8), avoiding obstacles, at a maximum range of 7 m directly in front of the unit.
STEP 3 Setting up the unit
Changing the unit's setting to suit your television.

Preparation
Turn on the television and select the appropriate video input on the television to suit the connections for the player.
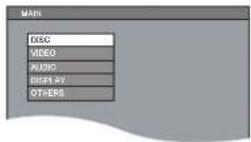
1 Press [⏻] to turn on the unit. 2 Press [SETUP] to display "MAIN" menu.
Selecting menu language
Choose the preferred language for these menus and the on-screen messages (Default setting is "ENGLISH").
3 Press [▲▼] to select "DISPLAY" tab and press [ENTER]. 4 Press [▲▼] to select "LANGUAGE" and press [ENTER]. 5 Press [▲▼] to select the language and press [ENTER].

Selecting aspect ratio
Select the TV type and how to show images (Default setting is "4:3PAN&SCAN").
3 Press [▲▼] to select "VIDEO" tab and press [ENTER]. 4 Press [▲▼] to select "TV ASPECT" and press [ENTER]. 5 Press [▲▼] to select the item and press [ENTER].
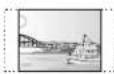
To select how to show images made for 16:9 aspect screens on a 4:3 aspect television.
4:3 PAN & SCAN:
The sides of the picture are cut off so it fills the screen (unless prohibited by the disc).
4:3 LETTERBOX:
Picture is shown in the letterbox style.
4:3 ZOOM:
If you select 4:3 PAN & SCAN and there is no effect, select this and the image will display in 4:3 PAN & SCAN.
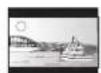

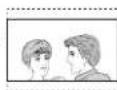
To select how to show images made for 4:3 aspect screens on a 16:9 aspect television.
16:9 NORMAL:
The picture is displayed as a horizontally stretched 16:9 image.

16:9 SHRINK:
The picture is displayed as a 4:3 ratio image in the center of the screen.

16:9 ZOOM:
The picture is adjusted horizontally to display a full screen image in 16:9 aspect ratio.
- Press [RETURN] to go back to the previous screen.
- Press [SETUP] to exit the screen.
Basic play
① Power ON.

② Open the disc tray.

Pause Stop


DVD-K32 only
Enjoying KARAOKE → page 10

③ Load the disc.
- Load double-sided discs so the label for the side you want to play is facing up.

Remote control sensor
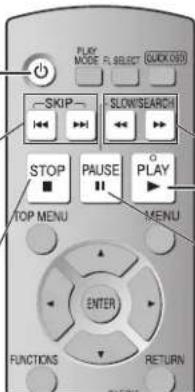
④ Start play.

Skip
Press [|◀◀▶▶] to skip chapters or tracks.
1
4
Search (during play)
Slow-motion (during pause)
- Up to 5 steps
- Press [▶] (PLAY) to restart play. • VCD Slow-motion, forward direction only
Pause
- Press [▶] (PLAY) to restart play.
Repeat play (→ page 12, On-Screen Menu 1)
Standby/on switch (⏻/l)
Press to switch the unit from on to standby mode or vice versa. In standby mode, the unit is still consuming a small amount of power.
Standby/on indicator (⏻)
When the unit is connected to the AC mains supply, this indicator lights up in standby mode and goes out when the unit is turned on.
Note
- DISCS CONTINUE TO ROTATE WHILE MENUS ARE DISPLAYED. Press [■] when you finish to preserve the unit's motor and your television screen.
- Total title number may not be displayed properly on R/+RW.
If you are experiencing problems, refer to troubleshooting guide (→ page 16, 17).
| Frame-by-frame(during pause)DVD-V VCD |    , ,  | •VCD forward direction only |
| Return toprevious screen |   NCTONM NCTONM   | |
| Disc menu |  [17MP-51][6CKH] [17MP-51][6CKH]  [G38X1 [G38X1     | DVD-VShows a disc top menu. |
| DVD-VShows a disc menu. | ||
| VCD with playback controlShows a disc menu. | ||
| On-screen itemselect |    X X  | Select |
| Number select | V1000 [GS] n playback control1 1000 the disc menu is displayed, press[ ] [ E S S [ ◀1>9to select "".E S S [ ▲▼] to select the track number a[ ] [ER]. | |
| Main unit display | Number display↑↓Time display | |


Convenient functions

Displaying current playback condition (Quick OSD)
Press [QUICK OSD].
e.g. VCD
Current playback number
Press [▲▼] to change current/elapsed play time.

- To exit the screen, press [QUICK OSD].


Convenient when you want to skip commercials etc.
During play, press [M.SKIP] or [CM SKIP].
- This may not work depending on the play position.


Press [QUICK REPLAY] to skip back a few seconds.
- This may not work depending on the disc's recording.
- This does not work with +R/+RW.


1 JPEG Press [II].
2 Press [ZOOM] to select the zoom ratio.
NORMAL→×2→×4
e.g. VCD

Enjoying Karaoke DVD-K32 only
①Connect the microphone to the microphone jack (MIC). • The microphone plug: 3.50 mm, monaural

②Start playing the Karaoke disc.

- Adjust the volume of the connected equipment (e.g. Television).
③Turn [VOLUME] (microphone volume controller) to adjust the volume of the microphone.

To turn on or off of vocal
1 Press [FUNCTIONS] several times to display the On-Screen Menu as below.
e.g. DVD-V (Karaoke discs)

2 Press [◀▶] to select “”.
3 Press [▲ ▼] to turn on or off of vocal.
- Depending on the type of disc, the settings may be different. Please read the disc's instructions for more details.
- If the picture is distorted when you enjoying karaoke, set Attenuator to "ON" (→ page 13, On-Screen Menu 2).
Changing the play sequences

Program play (up to 20 items)
1 While stopped, press [PLAY MODE] several times to select "OOO PROGRAM".
- When playing a disc with both MP3 and JPEG recorded, select "MUSIC PROGRAM" for MP3 or "PICTURE PROGRAM" for JPEG pictures. You cannot set both "MUSIC PROGRAM" and "PICTURE PROGRAM".
e.g. DVD-V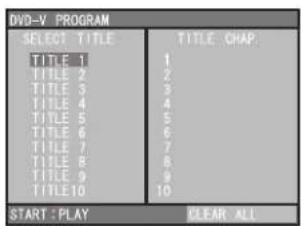
2 Press [▲▼] to select an item and press [ENTER].
- Repeat this step to program other items. - To select all items in a disc, title, or group, select "ALL" and press [ENTER]. - Press [▲▼] several times to go to the next page or previous page if any. - Press [RETURN] to return to the previous menu.

3 Press [▶] (PLAY) to start play.
Clearing the program
Press [▶] and then press [▲ ▼] to select the item and press [RETURN].
Clearing the whole program
Press [▶] several times to select "CLEAR ALL" and press [ENTER]. The whole program is also cleared when the unit is turned off or the disc tray is opened.
To exit the program screen
Press [PLAY MODE] several times.

Random play
CD VCD (up to 20 tracks)
MP3 JPEG (up to 24 groups/999 contents)
1 While stopped, press [PLAY MODE] several times to select "OOO RANDOM".
- When playing a disc with both MP3 and JPEG recorded, select "MUSIC RANDOM" for MP3 or "PICTURE RANDOM" for JPEG pictures.
e.g. VCD
VCD RANDOM
PRESS PLAY TO START
2 MP3 JPEG
Only when the disc has a group (folder)
Press [▲▼] to select a group and press [ENTER].
- “*” will be displayed next to the selected groups.
Press [ENTER] again to clear.
- To select multiple groups, repeat this step.
- To select all items in a disc, select "ALL".
- Press [▲▼] several times to go to the next page or previous page if any.
3 Press [▶] (PLAY) to start play.
To exit the random screen
Press [PLAY MODE] several times.
Using On-Screen Menus

1
FUNCTIONS

Press.
Each time you press the button:
On-Screen Menu 1 (→ below) → On-Screen Menu 2 (→ page 13)
↑ exit
2

Select the item. Make
3

the settings. Press to
4
RETURN

On-Screen Menu 1
Items shown differ depending on the type of software.
On-Screen Menu 1
| Audio(Soundtrack) | Motion picturesPress [▲▼] to select the soundtrack.VCD CDPress [▲▼] to select "L", "R", "L+R" or "L R". | |
| Subtitle | Discs with subtitlesPress [▲▼] to select the subtitle language or "OFF".● On +R/+RW, a subtitle number may be shown for subtitles that are not displayed. | |
| Angle | DVD-V with multiple anglesPress [▲▼] to select the angle. |
| [DDOX] | Repeat | (Only when the elapsed play time can be displayedJPEG: you can use even if there is no elapsed time display.)1 Press [ ▲▼ ] to select an item to be repeated.2 A-B repeat onlyPress [ENTER] at the starting and ending points.● Press [ENTER] again to cancel. |
| 1~99 | Playback control | VCD with playback controlSee page 9, Number select. |
| [HYTD] | Rotate | JPEGDuring pause, press [▲▼ ] to select “0”, “90”, “180” or “270”. |
On-Screen Menu 2 Advanced Surround Dialogue Enhancer e.g. DVD-V A. SURROUND1
OFF
Zoom
VIDEO

NORMAL Transfer Mode Picture mode
DVD-K32 only Attenuator ON
NORMAL
On-Screen Menu 2
| Advanced Surround | Motion pictures with 2 or more channelsEnjoy a surround-like effect when using 2 front speakers.Press [▲▼] to select the item.A.SURROUND 1: Light effectA.SURROUND 2: Medium effectA.SURROUND 3: Strong effectOFFWhen using discs recorded with surround sound, sound seems to come from speakers on either side of you.Optimum seating position is 3 to 4 times the distance between the front left and right speakers or the width of the television if using the television's speakers.Do not use in combination with surround effects on other equipment. | |
| Zoom | Motion picturesPress [▲▼] to select the zoom ratio.JPEGDuring pause, press [▲▼] to select the zoom ratio.NORMAL × 2 × 4 | |
| OnlyDVD-K32 | Attenuator | When using AUDIO OUT connections ( → page 5) or enjoying Karaoke ( → page 10).If sound is distorted, press [▲▼] to select “ON”.ONOFF |
| Dialogue Enhancer | To make the dialogue in movies easier to hearDVD-V(Dolby Digital, MPEG®, 3-channel or over, with the dialogue recorded in the center channel)Press [▲▼] to select “ON”.ONOFF*The United Kingdom, Australia and N.Z. |
Transfer Mode
If you have set "VIDEO OUT (I/P)" to "PROGRESSIVE"
(→ page 14, "VIDEO" tab), press [▲ ▼] to select the
method of conversion for progressive output to suit the type of material.
- When the tray is opened, the setting will return to AUTO or AUTO1.
When playing PAL discs
AUTO: Automatically detects the film and video content, and appropriately converts it.
VIDEO: Select when using AUTO, and the content is distorted.
CINEMA: Select this if the edges of the film content appear jagged or rough when AUTO is selected. However, if the video content is distorted as shown in the illustration to the right, then select AUTO.

When playing NTSC discs
AUTO1 (normal): Automatically detects the film and video content, and appropriately converts it.
AUTO2: In addition to AUTO1, automatically detects film contents with different frame rates and appropriately converts it.
VIDEO: Select when using AUTO1 and AUTO2, and the content is distorted.

Press [▲▼] to select the mode.
NORMAL: Normal images
CINEMA1: Mellows images and enhances detail in dark scenes.
CINEMA2: Sharpens images and enhances detail in dark scenes.
DYNAMIC: Enhances the contrast for powerful images. ANIMATION: Suitable for animation
Changing the player settings
1

Shows Setup menu. Select the tab. Select the item.
2

3

Make the settings. Press to
4

5

• Referring to page 14 to 15, change as required. - The settings remain intact even if you switch the unit to standby. • Underlined items are the factory preset.
“DISC” tab
| SETTING STATE Display the current setting of the items below | |
| AUDIOChoose the audio language. | ENGLISH (LANGUAGE OPTIONS)*1 ORIGINAL *2OTHER----*3 |
| SUBTITLEChoose the subtitle language. | AUTO *4 ENGLISH (LANGUAGE OPTIONS) *1OTHER----*3 |
| MENUSChoose the language for disc menus. | ENGLISH (LANGUAGE OPTIONS)*1 OTHER----*3 |
| RATINGSSet a ratings level to limit DVD-Video play. | Setting ratings (When level 8 is selected)0 LOCK ALL: To prevent play of discs without ratings levels.1 to 7: To prohibit play of DVD-Video with corresponding ratings recorded on them.8 NO LIMITWhen setting a ratings level, a password screen is shown.Enter the password with [▲▼] and [▶], then press [ENTER].Do not forget your password.A message screen will be shown if a DVD-Video exceeding the ratings level is inserted in the unit. Follow the on-screen instructions. |
| PASSWORDChange the password for “RATINGS”(→ above). | 1 Select “CHANGE” and press [ENTER].2 Enter the current password with [▲▼] and [▶], then press [ENTER].3 Enter the new password with [▲▼] and [▶], then press [ENTER].If “VERIFY” is displayed, please verify the password and insert it again. |
■ "VIDEO" tab
| SETTING STATE Display the current setting of the items below | ||
| TV ASPECTChoose the setting to suit your television and preference. (→ page 7, Selecting aspect ratio) | 4:3PAN&SCAN4:3ZOOM16:9SHRINK | 4:3LETTERBOX16:9NORMAL16:9ZOOM |
| TV TYPESelect to suit the type of television. | STANDARD LCD PLASMA | CRT PROJECTION |
| NTSC DISC OUT a5,8,7 Choose PAL60 or NTSC output when playing NTSC discs. | NTSC: Output signals from NTSC discs remain as NTSC.PAL60: NTSC disc can be viewed on PAL television.Asia: “NTSC” is the factory preset. | |
| STILL MODESpecify the type of picture shown when paused. | AUTOFIELD: The picture is not blurred, but picture quality is lower.FRAME: Overall quality is high, but the picture may appear blurred. | |
| VIDEO OUT-SCART b5 Choose the video signal format to be output from the SCART and COMPONENT VIDEO OUT terminals (→ page 5) | VIDEO/YPbPrS-VIDEO/YPbPrRGB/NO OUTPUT | |
| BLACK LEVEL a8 Change the black level of the picture if you connected a television through the COMPONENT VIDEO OUT terminals. | LIGHTER: When connected through VIDEO OUT or S VIDEO OUT.DARKER: When connected through COMPONENT VIDEO OUT. | |
| VIDEO OUT (I/P)Select “PROGRESSIVE” only if connecting to a progressive output compatible television. | INTERLACE PROGRESSIVEWhen you select “PROGRESSIVE”, a message screen will appear.For progressive output, press [▲] and then press [ENTER].Press [RETURN] to cancel. | |
■ "AUDIO" tab
| SETTING STATE Display the current setting of the items below | ||
| DOWN SAMPLINGCheck the digital input limitations of the equipment you connect using COAXIAL terminal and select the maximum sampling frequency of PCM digital output. | ON: When connected to equipment compatible with 44.1 or 48 kHzOFF: When connected to equipment compatible with 88.2 or 96 kHzSignals from copy-protected discs are converted to 48 or 44.1 kHz.Some equipment cannot handle sampling frequencies of 88.2 kHz, even if they can handle 96 kHz. Read your equipment's operating instructions for details. | |
| DOLBY DIGITALWith COAXIAL connections (→ page 6) | BITSTREAM PCM | Select "BITSTREAM" when the equipment can decode the bitstream (digital form of multi-channel data). Otherwise, select "PCM" or "OFF". (If the bitstream is output to the equipment without a decoder, high levels of noise can be output and may damage your speakers and hearing.) |
| DTSWith COAXIAL connections (→ page 6) | BITSTREAM OFF | |
| MPEG 5 6 With COAXIAL connections (→ page 6) | BITSTREAM PCM | |
| DYNAMIC RANGE ON: | Adjusts for clarity even when the volume is low through compressing the range of the lowest sound level and the highest sound level. Convenient for late night viewing. (Only works with DOLBY DIGITAL) | |
| OFF | ||
■ "DISPLAY" tab
| SETTING STATE Display the current setting of the items below | |
| LANGUAGE(→ page 7, Selecting menu language) | **ENGLISH FRANÇAIS ESPAÑOL DEUTSCHITALIANO SVENSKA NEDERLANDS POLSKI**ENGLISH FRANÇAIS ESPAÑOL DEUTSCHITALIANO PYCCKI/M NEDERLANDS PORTUGUÊS**ENGLISH 繁體中文**ENGLISH FRANÇAIS ESPAÑOL |
■ "OTHERS" tab
| SETTING STATE Display the current setting of the items below | |
| JPEG TIME | To change the slideshow timing1 SEC to 15 SEC (in 1 unit) 15 SEC to 60 SEC (in 5 unit)60 SEC to 180 SEC (in 30 unit)● “3 SEC” is the factory preset. |
| FL DIMMERChanges the brightness of the unit's display. | BRIGHT DIMAUTO: The display is dimmed, but brightens only when you perform some operations. |
| AUTO POWER OFF | ON: The unit switches to standby mode after about 30 minutes in the stop mode.OFF |
| DEFAULTSThis returns all values in the setup menus to the default settings. | RESETThe password screen is shown if “RATINGS” (→ page 14) is set. Please enter the same password with [▲▼] and [▶], then press [ENTER], then turn the unit off and on again. |
κ1 Language options
The United Kingdom
FRENCH, SPANISH, GERMAN, ITALIAN, SWEDISH, DUTCH and POLISH
Australia and N.Z.
FRENCH, SPANISH, GERMAN, ITALIAN, RUSSIAN, DUTCH and PORTUGUESE
Asia: CHINESE
Unit with PX printed on the outer packaging: FRENCH and SPANISH
*2 The original language designed on the disc is selected.
*3 Input a code number referring to the table (→ below).
*4 If the language selected for “AUDIO” is not available, subtitles appear in that language (If available on the disc).
*5 The United Kingdom
*6 Australia and N.Z.
Table 7 Asia
Unit with PX printed on the outer packaging
Language code list
| Abkhazian: | 6566 | Hausa: | 7265 | Romanian: | 8279 |
| Afar: | 6565 | Hebrew: | 7387 | Russian: | 8285 |
| Afrikaans: | 6570 | Hindi: | 7273 | Samoan: 8377 | |
| Albanian: | 8381 | Hungarian: 7285 | Sanskrit: | 8365 | |
| Ameharic: | 6577 | Icelandic: | 7383 | Scots Gaelic: | 7168 |
| Arabic: | 6582 | Indonesian: 7378 | Serbian: | 8382 | |
| Armenian: | 7289 | Interlingua: | 7365 | Serbo-Croatian: | 8372 |
| Assamese: | 6583 | Irish: | 7165 | Shona: | 8378 |
| Aymara: | 6589 | Italian: | 7384 | Sindhi: | 8368 |
| Azerbaijani: 6590 | Japanese: | 7465 | Singhalese: | 8373 | |
| Bashklr: | 6665 | Javanese: | 7487 | Slovak: | 8375 |
| Basque: | 6985 | Kannada: | 7578 | Slovenian: | 8376 |
| Bengall; Bangla: | 6678 | Kashmiri: | 7583 | Somali: | 8379 |
| Bhutani: | 6890 | Kazakh: | 7575 | Spanish: | 6983 |
| Bihari: | 6672 | Kirghiz: | 7589 | Sundanese: | 8385 |
| Breton: | 6682 | Korean: | 7579 | Swahili: | 8387 |
| Bulgarian: | 6671 | Kurdish: | 7585 | Swedish: | 8386 |
| Burmese: | 7789 | Laotian: | 7679 | Tagalog: | 8476 |
| Byelorussian: | 6669 | Latin: | 7665 | Tajik: | 8471 |
| Cambodian: 7577 | Latvian, Lettlish: | 7686 | Tamil: | 8465 | |
| Catalan: | 6765 | Lingala: | 7678 | Tatar: | 8484 |
| Chinese: 9072 | Lithuanian: | 7684 | Telugu: | 8469 | |
| Corsican: | 6779 | Macedonian: | 7775 | Thal: | 8472 |
| Croatian: 7282 | Malagasy: | 7771 | Tibetan: | 6679 | |
| Czech: | 6783 | Malay: | 7783 | Tigrinya: | 8473 |
| Danish: | 6865 | Malayalam: | 7776 | Tonga: | 8479 |
| Dutch: | 7876 | Maltese: | 7784 | Turkish: | 8482 |
| English: | 6978 | Maori: | 7773 | Turkmen: | 8475 |
| Esperanto: | 6979 | Marathi: | 7782 | Twi: | 8487 |
| Estonian: | 6984 | Moldavian: | 7779 | Ukrainian: | 8575 |
| Faroese: | 7079 | Mongolian: | 7778 | Urdu: | 8582 |
| Fiji: | 7074 | Nauru: | 7865 | Uzbek: | 8590 |
| Finnish: | 7073 | Nepali: | 7869 | Vietnamese: | 8673 |
| French: | 7082 | Norwegian: | 7879 | Volapük: | 8679 |
| Frisian: | 7089 | Oriya: | 7982 | Welsh: | 6789 |
| Galician: | 7176 | Pashto, Pushto: | 8083 | Wolof: | 8779 |
| Georgian: | 7565 | Persian: | 7065 | Xhosa: | 8872 |
| German: | 6869 | Polish: | 8076 | Yiddish: | 7473 |
| Greek: | 6976 | Portuguese: 8084 | Yoruba: | 8979 | |
| Greenlandic: | 7576 | Punjabi: | 8065 | Zulu: | 9085 |
| Guaranl: | 7178 | Quechua: | 8185 | ||
| Gujaratl: | 7185 | Rhaeto-Romance: | 8277 |
Troubleshooting guide
Before requesting service, make the following checks. If you are in doubt about some of the check points, or if the solutions indicated in the chart do not solve the problem, consult your dealer for instructions. (Reference pages are shown in parentheses.)
Power
| No power. | Insert the AC mains lead securely into the household mains socket. (6) |
| The unit is automatically switched to the standby mode. | When “AUTO POWER OFF” is set to “ON”, the unit automatically switches to standby after approximately 30 minutes in the stop mode. (15) |
No operation
| No response when any buttons pressed. | This unit cannot play discs other than the ones listed in these operating instructions. (4)The unit may not be operating properly due to lightning, static electricity or some other external factor. Turn the unit off and then back to ON. Alternatively, turn the unit off, disconnect the AC mains lead, and then reconnect it.Condensation has formed: Wait 1 to 2 hours for it to evaporate. |
| No response when remote control buttons pressed. | Check that the batteries are installed correctly. (6)The batteries are depleted: Replace them with new ones. (6)Point the remote control at the remote control sensor and operate. (8)When operating the On-Screen Menus, even if the items are lined up vertically, select the item with [◀▶] and then set the item using [▲▼]. |
| No picture or sound. | Check the video or audio connection. (5, 6)Check the power or input setting of the connected equipment.Check that the disc has something recorded on it. |
| You have forgotten your ratings password.Reset all the settings to Factory Preset. | While stopped, remove the disc, and then press and hold [▶] (PLAY) and [▲OPEN/CLOSE] on the unit and then also press and hold [○/I] on the unit until “INITIALIZED” disappears from the television. Turn the unit off and on again. All settings will return to the default values. |
Specific operation impossible or incorrect
| It takes time before play starts. | ● Play may take time to begin when an MP3 track has still picture data. Even after the track starts, the correct play time will not be displayed, however this is normal. |
| The program play function do not work. | ● These functions do not work with some DVD-Videos. |
| Menu doesn't appear. VCD with playback control | ● Press [■] twice and then press [▶] (PLAY). |
| Play doesn't start. | ● If a disc contains CD-DA and other formats, proper playback may not be possible. |
| No subtitles. | ● Display the subtitles. (12) |
| The subtitles overlap closed captions recorded on discs. 21 | ● Clear the subtitles. (12) |
| In A-B Repeat, point B is automatically set. | ● The end of an item becomes point B when it is reached. |
| Repeat play is automatically canceled. | ● A-B Repeat is canceled when you press [QUICK REPLAY].● Repeat play may be canceled when you press [M.SKIP] or [CM SKIP]. |
Picture incorrect
| Picture distorted. | ·Ensure that the unit is not connected through a video cassette recorder. (5)·Make sure that progressive output has not been selected when the connected television is not progressive compatible. Press and hold [RETURN] until the picture displays correctly. The settings will return to “INTERLACE”. |
| Picture size doesn’t fit the screen. | ·Change “TV ASPECT” in “VIDEO” tab. (14)·Use the television to change the aspect. If your television does not have that function, change “TV ASPECT”. (14)·Change the Zoom setting. (10) |
| When playing PAL disc, picture distorted. | ·Set “Transfer Mode” to “AUTO”. (13) |
| The television may display incorrectly or colours appear faded. | Unit with PX printed on the outer packaging·PAL discs cannot be played.The United Kingdom, Asia, Australia and N.Z.·The unit and television are using different video systems.Asia Use a multi-system or NTSC television.The United Kingdom, Australia and N.Z.Use a multi-system or PAL television.The United Kingdom, Asia, Australia and N.Z.·The system used on the disc doesn’t match your television.-PAL discs cannot be correctly viewed on an NTSC television.-This unit can convert NTSC signals to PAL60 for viewing on a PAL television (“NTSC DISC OUT” in “VIDEO” tab). (14) |
| Menu not displayed correctly. | ·Restore the zoom ratio to “NORMAL”. (10)·Change “TV ASPECT” in “VIDEO” tab. (14) |
Progressive video
| There is ghosting when progressive output is on. | This problem is caused by the editing method or material used on DVD-Video, but should be corrected if you use interlace output. Change “VIDEO OUT (I/P)” in “VIDEO” tab to “INTERLACE”. (14) |
| Pictures not in progressive output. | If the unit is connected to the television through VIDEO OUT or S VIDEO OUT *2 , output will be interlace. |
| Closed captions not displayed. *1 | When progressive output is on, closed captions will not be displayed. |
Sound incorrect
| Sound distorted. | Set Advanced Surround to “OFF”. (13)Set Attenuator to “ON” if it causes distortion. (13) |
| Piercing noise comes from the speakers. | If you have connected a digital amplifier which does not include decoder, be sure to set “DOLBY DIGITAL”, “MPEG 2 3 to “PCM” and set “DTS” to “OFF” in “AUDIO” tab. (15) |
| Effects do not work. | None of the audio effects work when the unit is outputting bitstream signals from the COAXIAL terminal. (6)Some audio effects do not work or have less effect with some discs. |
Recording
| Cannot record to digital recording equipment. (Incorrect sound recorded.) | You cannot record MP3.You cannot record DVDs that have protection preventing digital recording.You cannot record DVDs if the recording equipment cannot handle signals with a sampling frequency of 48 kHz.Make the following settings:- Advanced Surround: OFF (13)- DOWN SAMPLING: ON (15)- DOLBY DIGITAL/MPEG a3 : PCM (15)- DTS: O |
Unit displays
| “noPLAy” | ● You inserted a disc the unit cannot play; insert one it can. (4)● You inserted a blank disc.● You inserted a disc that has not been finalized. (4) |
| “U11” | ● The disc may be dirty. (18)● You haven't inserted the disc correctly: Insert it correctly. (8) |
| “H□□”(□□ stands for a number.) | ● Trouble may have occurred. The number following “H” depends on the status of the unit. Turn the unit off and then back to ON. Alternatively, turn the unit off, disconnect the AC mains lead, and then reconnect it.● If the service numbers fail to clear, note the service number and contact a qualified service person. |
| “nodISC” ● You haven't inserted a disc: Insert one.● You haven't inserted the disc correctly: Insert it correctly.(8) | |
Television displays
| “ ”“NODISC”●You haven’t inserted a disc: Insert one. | ●The operation is prohibited by the unit or disc. |
| “THIS TYPE OF DISC CANNOT BE PLAYED. PLEASE INSERT A DIFFERENT DISC.” | ●You inserted a disc the unit cannot play; insert one it can. (4)●You inserted a disc that has not been finalized. (4)●You inserted a blank disc. |
| “THIS DISC MAY NOT BE PLAYED IN YOUR REGION.” | ●You can only play DVD-Video if their region number is the same or includes the same region number as the unit or if the DVD-Video is marked “ALL”. Confirm the region number for the unit on the rear panel. (Cover) |
§1 Unit with PX printed on the outer packaging *2 Except The United Kingdom *3 The United Kingdom, Australia and N.Z.
F
Maintenance
■ Clean this unit with a soft, dry cloth
- Never use alcohol, paint thinner or benzine to clean this unit.
- Before using chemically treated cloth, read the instructions that came with the cloth carefully.
- Cleaning of the lens is generally not necessary although this depends on the operating environment.
- Do not use commercially available lens cleaners as they may cause malfunction.
■ Clean discs
Wipe with a damp cloth and then wipe dry.

Specifications
Signal system:
Unit with PX printed on the outer packaging NTSC
Others PAL 625/50, PAL525/60, NTSC
Operating temperature range:
+5 to +35 °C
Operating humidity range:
5 to 90 % RH (no condensation)
Discs played [8 cm (3") or 12 cm (5")]:
(1) DVD (DVD-Video) (2) DVD-R (DVD-Video, MP3 ※2.4 , JPEG ※3.4 ) (3) DVD-R DL (DVD-Video) (4) DVD-RW (DVD-Video, MP3*2, 4, JPEG=3, 4) (5) +R/+RW (Video) (6) +R DL (Video) (7) CD, CD-R/RW (CD-DA, Video-CD, SVCD*1, MP3※2,4, JPEG※8,4)
Video output:
Output level: 1 Vp-p (75 Ω)
Output terminal:
The United Kingdom
Others
Pin jack (1 system)/AV
Pin jack (1 system)
S-video output:
Unit with PX printed on the outer packaging
Y output level: 1 Vp-p (75 Ω)
C output level: 0.286 Vp-p (75 Ω)
Others
Y output level: 1 Vp-p (75 Ω)
C output level: NTSC; 0.286 Vp-p (75 Ω)
/p-p (75 Ω)
PAL; 0.300 Vp-p (75 Ω)
Output terminal:
The United Kingdom
Others
AV
S terminal (1 system)
Component video output:
Unit with PX printed on the outer packaging
[NTSC: 525 (480)p/525 (480)i]
Others
[NTSC: 525 (480)p/525 (480)i, PAL: 625 (576)p/625 (576)i]
Y output level: 1 Vp-p (75 Ω)
PB output level: 0.7 Vp-p (75 Ω)
PR output level: 0.7 Vp-p (75 Ω)
Output terminal:
Pin jack (Y: green, PB: blue, PR: red) (1 system)
RGB video output: The United Kingdom
R output level: 0.7 Vp-p (75 Ω)
G output level:
B output level: 0.7 Vp-p (75 Ω)
Output terminal: AV
0.7 Vp-p (75 Ω)
Audio output:
Output level: 2 Vrms (1 kHz, 0 dB)
Output terminal:
The United Kingdom
Others
Pin jack/AV
Pin jack
Number of terminals:
2 channel: 1 system
Audio performance:
(1) Frequency response:
●DVD (linear audio)
4 Hz to 22 kHz (48 kHz sampling)
4 Hz to 44 kHz (96 kHz sampling)
- CD Audio: 4 Hz to 20 kHz
(2) S/N ratio:
- CD Audio: 115 dB
(3) Dynamic range:
●DVD (linear audio): 92 dB
●CD Audio: 90 dB
(4) Total harmonic distortion:
- CD Audio: 0.003 %
Digital audio output:
Coaxial digital output: Pin jack
Pickup:
Wavelength: 653 nm/790 nm
Laser power: CLASS 1/CLASS 3A
Power supply:
The United Kingdom, Australia and N.Z.
AC 230 to 240 V, 50 Hz
Asia and Unit with PX printed on the outer packaging
AC 110 to 240 V, 50/60 Hz
Power consumption:
Power consumption in standby mode:
DVD-S32 approx. 1 W
DVD-K32 less than 1.5 W
Dimensions (W×D×H): 430 mm ×251 mm×43 mm
Mass: 2.2 kg
Note
Specifications are subject to change without notice. Mass and dimensions are approximate.
*1Conforming to IEC62107
*2 MPEG-1 Layer 3, MPEG-2 Layer 3
*3Exif Ver 2.1 JPEG Baseline files
Picture resolution:
between 320×240 and 6144×4096 pixels
(Sub sampling is 4:2:2 or 4:2:0)
*4The total combined maximum number of recognizable
audio and picture contents and groups: 1000 audio and picture contents and 256 groups.
Tips for making data discs
| Format | Disc Extension | Reference | |
| MP3 | DVD-R/RWCD-R/RW | ".MP3".".mp3" | Sampling frequency:DVD-R/RW:11.02, 12, 22.05, 24, 44.1, and 48 kHzCD-R/RW:8, 11.02, 12, 16, 22.05, 24, 32, 44.1, and 48 kHzThis unit is not compatible with ID3 tags. |
| JPEG | DVD-R/RWCD-R/RW | ".JPG",".jpg",".JPEG"".jpeg" | JPEG files taken on a digital camera that conform to DCF Standard Version 1.0 are displayed.- Files that have been altered, edited or saved with computer picture editing software may not be displayed.This unit cannot display moving pictures, MOTION JPEG and other such formats, still pictures other than JPEG (e.g. TIFF) or play pictures with attached audio. |
- There may be differences in the display order on the menu screen and computer screen.
- This unit cannot play files recorded using packet write.
Naming folders and files (Files are treated as contents and folders are treated as groups on this unit.)
At the time of recording, prefix folder and file names. This should be with numbers that have an equal number of digits, and should be done in the order you want to play them (this may not work at times).
DVD-R/RW
• Discs must conform to UDF bridge (UDF 1.02/ISO9660). - This unit is not compatible with multi-session. The default session only is played.
CD-R/RW
• Discs must conform to ISO9660 level 1 or 2 (except for extended formats). - This unit is compatible with multi-session but if there are a lot of sessions it takes more time for play to start. Keep the number of sessions to a minimum to avoid this.
![graph TD A[" root "] --> B[" C01 group "] A --> C[" C05 group "] B --> D[" 001 track.mp3 "] B --> E[" 002 track.mp3 "] B --> F[" 003 track.mp3 "] B --> G[" 002 group "] C --> H[" 001 track.mp3 "] C --> I[" 002 track.mp3 "] C --> J[" 003 track.mp3 "] C --> K[" 004 track.mp3 "]](/content/2026/06/1146877/images/616f5bb3e1e3bdb95eee61de6de1dbfc112c4eadb2612da393582429ea31f1ff.jpg)
Manufactured under license from Dolby Laboratories. "Dolby" and the double-D symbol are trademarks of Dolby Laboratories.
"DTS" and "DTS Digital Out" are trademarks of Digital Theater Systems, Inc.
This product incorporates copyright protection technology that is protected by method claims of certain U.S. patents and other intellectual property rights owned by Macrovision Corporation and other rights owners. Use of this copyright protection technology must be authorized by Macrovision Corporation, and is intended for home and other limited viewing uses only unless otherwise authorized by Macrovision Corporation. Reverse engineering or disassembly is prohibited.
MPEG Layer-3 audio decoding technology licensed from Fraunhofer IIS and Thomson multimedia.
-If you see this symbol-
Information on Disposal for Users of Waste Electrical & Electronic Equipment (private households)
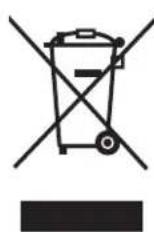
This symbol on the products and/or accompanying documents means that used electrical and electronic products should not be mixed with general household waste.
For proper treatment, recovery and recycling, please take these products to designated collection points, where they will be accepted on a free of charge basis. Alternatively, in some countries you may be able to return your products to your local retailer upon the purchase of an equivalent new product.
Disposing of this product correctly will help to save
valuable resources and prevent any potential negative effects on human health and the environment which could otherwise arise from inappropriate waste handling. Please contact your local authority for further details of your nearest designated collection point. Penalties may be applicable for incorrect disposal of this waste, in accordance with national legislation.
For business users in the European Union
If you wish to discard electrical and electronic equipment, please contact your dealer or supplier for further information.
Information on Disposal in other Countries outside the European Union
This symbol is only valid in the European Union.
If you wish to discard this product, please contact your local authorities or dealer and ask for the correct method of disposal.

(Inside of product)

The illustration shows DVD-S32 for the United Kingdom. (Back of product)
Index
A-B Repeat....12 Advanced Surround....13 Angle select....12
©CM SKIP....10
DDialogue Enhancer....13 Dolby Digital....15
Finalize 4
JPEG....9,19
kKaraoke 10
Menu language .....7 MPEG .....15 MP3.....9,19 M. SKIP.....10
NNumber select 9,12
On-Screen Menus....12
Picture Mode....13 Program play....11 Progressive....14
Quick OSD....10 Quick replay....10
R Random play....11 Ratings....14 Repeat....12 Resume play....8
Setup ....14 Soundtrack ....12 Subtitle ....12
Zoom....10,13
The United Kingdom, Asia, Australia and N.Z.
Matsushita Electric Industrial Co., Ltd.
Web Site: http://panasonic.net
Unit with PX printed on the outer packaging En
Matsushita Electric Industrial Co., Ltd.
Corporate Management Division for the Americas
Sales Office for North America
Tokyo Panasonic Sales Section
32nd Floor, World Trade Center 4-1, Hamamatsu-cho,
2-Chome, Minato-Ku, Tokyo 105-6132, Japan
Panasonic Marketing Europe G.M.B.H. Wiesbaden N. (a Division of Panasonic Marketing G.M.B.H.)
Military Sales Department
6200 Wiesbaden-Biebrich, Hagenauerstr. 43
Germany
RQT8685-2B
F0106AK2046


- OPERATING INSTRUCTIONS DVD/CD PLAYER
- MODEL NO. DVD-S32/DVD-K
- DEAR CUSTOMER
- REGION NUMBER
- PANASONIC®
- TABLE OF CONTENTS
- GETTING STARTED
- OPERATIONS
- REFERENCE
- NOTE
- CAUTION FOR AC MAINS LEAD
- (FOR UNITED KINGDOM)
- ("EB" AREA CODE MODEL ONLY)
- CAUTION
- IMPORTANT
- WARNING: DO NOT CONNECT EITHER WIRE TO THE EARTH TERMINAL WHICH IS MARKED WITH THE LETTER E, BY THE EARTH SYMBOL OR COLOURED GREEN OR GREEN/YELLOW
- THIS PLUG IS NOT WATERPROOF—KEEP DRY
- BEFORE USE
- HOW TO REPLACE THE FUSE
- ACCESSORIES
- AUSTRALIA AND N.Z
- SALES AND SUPPORT INFORMATION
- SAFETY PRECAUTIONS
- PLACEMENT
- VOLTAGE
- AC MAINS LEAD PROTECTION
- FOREIGN MATTER
- SERVICE
- WARNING
- ASIA
- DISCS THAT CAN BE PLAYED
- DISCS THAT CANNOT BE PLAYED
- BUILT-IN DECODER
- HANDLING PRECAUTIONS
- STEP 1 CONNECTION TO A TELEVISION
- TO ENJOY PROGRESSIVE VIDEO
- THE UNITED KINGDOM
- BACK OF THE UNIT
- UNIT WITH PX PRINTED ON THE OUTER PACKAGING
- DVD-K32 ONLY
- CONNECT TO THE GROUND TERMINAL
- STEP 2 THE REMOTE CONTROL
- USE
- STEP 3 SETTING UP THE UNIT
- SELECTING MENU LANGUAGE
- SELECTING ASPECT RATIO
- BASIC PLAY
- ① POWER ON
- ② OPEN THE DISC TRAY
- ③ LOAD THE DISC
- ④ START PLAY
- SKIP
- SEARCH (DURING PLAY)
- SLOW-MOTION (DURING PAUSE)
- PAUSE
- REPEAT PLAY (→ PAGE 12, ON-SCREEN MENU 1)
- STANDBY/ON SWITCH (⏻/L)
- STANDBY/ON INDICATOR (⏻)
- CONVENIENT FUNCTIONS
- ENJOYING KARAOKE DVD-K32 ONLY
- TO TURN ON OR OFF OF VOCAL
- CHANGING THE PLAY SEQUENCES
- PROGRAM PLAY (UP TO 20 ITEMS)
- USING ON-SCREEN MENUS
- CHANGING THE PLAYER SETTINGS
- TROUBLESHOOTING GUIDE
- MAINTENANCE
- CLEAN THIS UNIT WITH A SOFT, DRY CLOTH
- CLEAN DISCS
- SPECIFICATIONS
- NAMING FOLDERS AND FILES (FILES ARE TREATED AS CONTENTS AND FOLDERS ARE TREATED AS GROUPS ON THIS UNIT.)
- DVD-R/RW
- CD-R/RW
- INFORMATION ON DISPOSAL FOR USERS OF WASTE ELECTRICAL & ELECTRONIC EQUIPMENT (PRIVATE HOUSEHOLDS)
- FOR BUSINESS USERS IN THE EUROPEAN UNION
- INFORMATION ON DISPOSAL IN OTHER COUNTRIES OUTSIDE THE EUROPEAN UNION
- INDEX
Brand : PANASONIC
Model : DVD-K32
Category : DVD player