
DVD-S58G - DVD player PANASONIC - Free user manual and instructions
Find the device manual for free DVD-S58G PANASONIC in PDF.
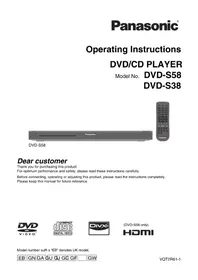


| Product Type | DVD Player |
| Brand | Panasonic |
| Model | DVD-S58G |
| Disc Compatibility | DVD-Video, DVD-R/RW, DVD+R/RW, CD, CD-R/RW, VCD, SVCD |
| Progressive Scan | Yes (576p/480p) |
| Video DAC | 108 MHz/12-bit |
| Audio DAC | 192 kHz/24-bit |
| Surround Sound | Dolby Digital, DTS |
| Video Outputs | 1 x Component, 1 x Composite, 1 x S-Video |
| Audio Outputs | 1 x Digital Coaxial, 1 x Digital Optical, 2 x Analog (RCA) |
| USB Port | 1 x USB 2.0 (front) for MP3/JPEG/DivX |
| Playback Formats | MP3, JPEG, DivX, WMA, MPEG-4 |
| Parental Control | Yes (rating levels) |
| Zoom | Yes (2x/4x) |
| Remote Control | Included |
| Dimensions (W x D x H) | 430 x 260 x 45 mm (16.9 x 10.2 x 1.8 inches) |
| Weight | 1.5 kg (3.3 lbs) |
| Power Supply | AC 100-240V, 50/60 Hz |
| Power Consumption | 12 W (standby: <0.5 W) |
| Warranty | 1 year limited |
Frequently Asked Questions - DVD-S58G PANASONIC
User questions about DVD-S58G PANASONIC
0 question about this device. Answer the ones you know or ask your own.
Ask a new question about this device
Download the instructions for your DVD player in PDF format for free! Find your manual DVD-S58G - PANASONIC and take your electronic device back in hand. On this page are published all the documents necessary for the use of your device. DVD-S58G by PANASONIC.
USER MANUAL DVD-S58G PANASONIC
Operating Instructions
DVD/CD PLAYER
Model No. DVD-S58
DVD-S38
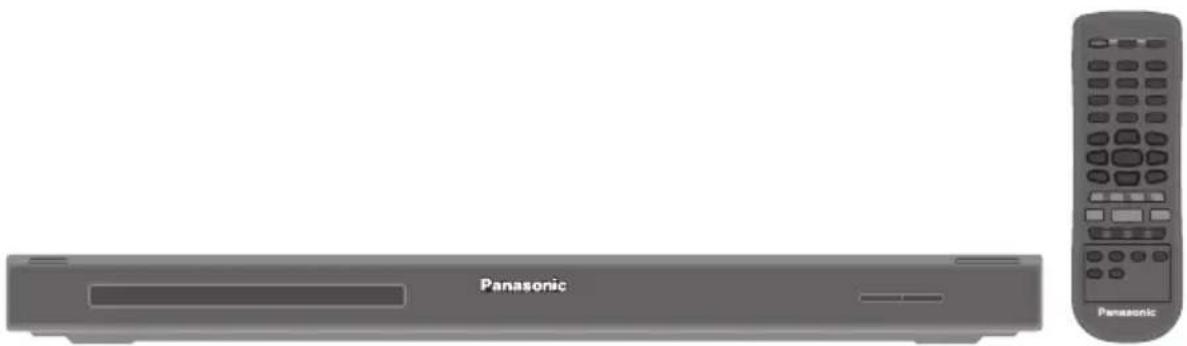
DVD-S58
Dear customer
Thank you for purchasing this product.
For optimum performance and safety, please read these instructions carefully.
Before connecting, operating or adjusting this product, please read the instructions completely.
Please keep this manual for future reference.


(DVD-S58 only)
HDMI
Model number suffix "EB" denotes UK model.
EB GN GA GU GJ GC GF GW
(For the United Kingdom, Republic of Ireland, Saudi Arabia, Kuwait and Africa) ("EB" or "GC" area code model only)
For your safety, please read the following text carefully.
This appliance is supplied with a moulded three-pin mains plug for your safety and convenience. A 5-ampere fuse is fitted in this plug.
Should the fuse need to be replaced, please ensure that the replacement fuse has a rating of 5-ampere and that it is approved by ASTA or BSI to BS1362.
Check for the ASTA mark or the BSI mark on the body of the fuse.
If the plug contains a removable fuse cover, you must ensure that it is refitted when the fuse is replaced.
If you lose the fuse cover, the plug must not be used until a replacement cover is obtained.
A replacement fuse cover can be purchased from your local dealer.
CAUTION!
IF THE FITTED MOULDED PLUG IS UNSUITABLE FOR THE SOCKET OUTLET IN YOUR HOME, THEN THE FUSE SHOULD BE REMOVED AND THE PLUG CUT OFF AND DISPOSED OF SAFELY. THERE IS A DANGER OF SEVERE ELECTRICAL SHOCK IF THE CUT OFF PLUG IS INSERTED INTO ANY 13-AMPERE SOCKET.
If a new plug is to be fitted, please observe the wiring code as stated below.
If in any doubt, please consult a qualified electrician.
IMPORTANT
The wires in this mains lead are coloured in accordance with the following code:
Blue: Neutral, Brown: Live.
As these colours may not correspond with the coloured markings identifying the terminals in your plug, proceed as follows:
The wire which is coloured Blue must be connected to the terminal which is marked with the letter N or coloured Black or Blue.
The wire which is coloured Brown must be connected to the terminal which is marked with the letter L or coloured Brown or Red.
WARNING: DO NOT CONNECT EITHER WIRE TO THE EARTH TERMINAL WHICH IS MARKED WITH THE LETTER E, BY THE EARTH SYMBOL OR COLOURED GREEN OR GREEN/YELLOW.
THIS PLUG IS NOT WATERPROOF-KEEP DRY.
Before use
Remove the connector cover.
How to replace the fuse
The location of the fuse differ according to the type of AC mains plug (figures A and B).
Confirm the AC mains plug fitted and follow the instructions below.
Illustrations may differ from actual AC mains plug.
- Open the fuse cover with a screwdriver.
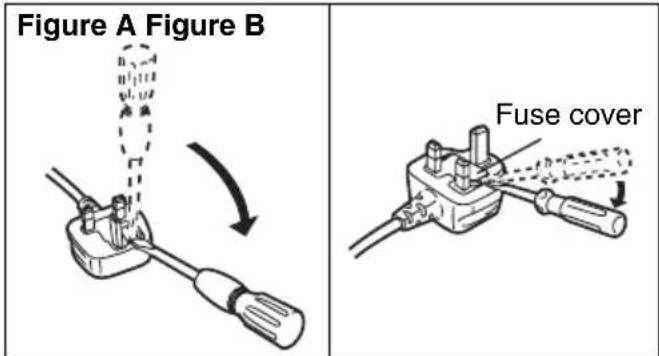
- Replace the fuse and close or attach the fuse cover.

Placement
Set the unit up on an even surface away from direct sunlight, high temperatures, high humidity, and excessive vibration. These conditions can damage the cabinet and other components, thereby shortening the unit's service life. Do not place heavy items on the unit.
Voltage
Do not use high voltage power sources. This can overload the unit and cause a fire. Do not use a DC power source. Check the source carefully when setting the unit up on a ship or other place where DC is used.
AC mains lead protection
Ensure the AC mains lead is connected correctly and not damaged. Poor connection and lead damage can cause fire or electric shock. Do not pull, bend, or place heavy items on the lead. Grasp the plug firmly when unplugging the lead. Pulling the AC mains lead can cause electric shock. Do not handle the plug with wet hands. This can cause electric shock.
Foreign matter
Do not let metal objects fall inside the unit. This can cause electric shock or malfunction.
Do not let liquids get into the unit. This can cause electric shock or malfunction. If this occurs, immediately disconnect the unit from the power supply and contact your dealer.
Do not spray insecticides onto or into the unit. They contain flammable gases which can ignite if sprayed into the unit.
Service
Do not attempt to repair this unit by yourself. If sound is interrupted, indicators fail to light, smoke appears, or any other problem that is not covered in these instructions occurs, disconnect the AC mains lead and contact your dealer or an authorized service center. Electric shock or damage to the unit can occur if the unit is repaired, disassembled or reconstructed by unqualified persons.
Extend operating life by disconnecting the unit from the power source if it is not to be used for a long time.
Manufactured under license from Dolby Laboratories. Dolby and the double-D symbol are trademarks of Dolby Laboratories.
Manufactured under license under U.S. Patent #: 5,451,942 & other U.S. and worldwide patents issued & pending. DTS and the Symbol are registered trademarks and DTS Digital Out and the DTS logos are trademarks of DTS, Inc. Product includes software. © DTS, Inc. All Rights Reserved.
HDMI, the HDMI Logo, and High-Definition Multimedia Interface are trademarks or registered trademarks of HDMI Licensing LLC in the United States and other countries.
DivX® is a registered trademark of DivX, Inc., and is used under license.
This product incorporates copyright protection technology that is protected by U.S. patents and other intellectual property rights. Use of this copyright protection technology must be authorized by Rovi Corporation, and is intended for home and other limited viewing uses only unless otherwise authorized by Rovi Corporation. Reverse engineering or disassembly is prohibited.
NOTE:
DVD-S58 for the United Kingdom and Republic of Ireland is used in the illustrations unless otherwise mentioned.
Illustrations shown may be different between models and countries.
Maintenance
Clean this unit with a soft, dry cloth.
- Never use alcohol, paint thinner or benzine to clean this unit.
- Before using chemically treated cloth, read the instructions that came with the cloth carefully.
- Cleaning of the lens is generally not necessary although this depends on the operating environment.
- Do not use commercially available lens cleaners as they may cause malfunction.
Clean discs
- Wipe with a damp cloth and then wipe dry.

Disc handling precautions
- Handle discs by the edges to avoid inadvertent scratches or fingerprints on the disc.
- Do not attach labels or stickers to discs.
- Do not use record cleaning sprays, benzine, thinner, static electricity prevention liquids or any other solvent.
- Do not use the following discs:
- Discs with exposed adhesive from removed stickers or labels (rented discs etc.). – Discs that are badly warped or cracked.
- Irregularly shaped discs, such as heart shapes.
Caution for AC Mains Lead 2
Safety precautions 3
Placement....3
Voltage 3
AC mains lead protection 3
Foreign matter 3
Service....3
Unit and disc care 4
Maintenance 4
Disc handling precautions 4
General Information 6
Accessories 6
Region codes 6
Playback from disc 7
Playable discs and supported formats ... 7
Product Overview 8
Front and Rear panels 8
Remote Control 9
Inserting Batteries 10
Connections....11
Connecting to television 11
Connecting digital AV receiver ..... 14
Connecting the AC mains lead.... 14
Getting Started 15
Step 1:
Selecting the Proper Video Input ...... 15
Step 2:
Setting up Progressive Scan feature .... 15
Step 3:
Selecting the matching color system ... 16
Step 4: Setting the language ..... 16
Playback Features 18
Starting disc playback 18
Basic playback controls 18
Operations for video playback
(DVD/VCD/SVCD)....19
Viewing the disc playback
information 20
Repeat play modes 20
Special Features 21
Special VCD & SVCD Features ...... 21
Playing MP3/JPEG.... 22
Playing a DivX® disc 23
Use HDMI CEC protocol 24
DVD Menu Options 25
Using the System setup menu 25
Using the Language setup menu ...... 27
Using the Audio setup menu 27
Using the Video setup menu 28
Using the Other setup menu 28
Specifications 30
Troubleshooting 31
Glossary 33
Accessories
□ 1 Audio/Video cable (K2KA2BA00003) □ 1 Remote Control (N2QAJA000002) □ 2 Batteries for remote control
Tips:
- The accessories and their shape will differ depending on the country or area where the unit was purchased.
- Product numbers correct as of February 2010. These may be subject to change.
(For the United Kingdom and Republic of Ireland customers)
Sales and Support Information
Customer Care Centre
- For customers within the UK: 0844 844 3852
- For customers within the Republic of Ireland: 01 289 8333
- Visit our website for product information www.panasonic.co.uk – E-mail: customer.care@panasonic.co.uk
Direct Sales at Panasonic UK
- For customers: 0844 844 3856
- Order accessory and consumable items for your product with ease and confidence by phoning our Customer Care Centre Monday–Thursday 9:00 a.m.–5:30 p.m., Friday 9:30 a.m.–5:30 p.m. (Excluding public holidays)
- Or go on line through our Internet Accessory ordering application at www.pas-europe.com.
- Most major credit and debit cards accepted.
- All enquiries transactions and distribution facilities are provided directly by Panasonic UK Ltd.
- It couldn't be simpler!
- Also available through our Internet is direct shopping for a wide range of finished products, take a browse on our website for further details.
Region codes
This DVD player is designed to support the Region Management System.
Confirm the region number for the unit on the rear panel. Check the regional code number on the disc package. If the number does not match the player's region number, the player may be unable to play back the disc.
Tips:
- It may not be possible to play CD-R/RW or DVD-R/RW in all cases due to the type of disc or condition of the recording.
- If you are having trouble playing a certain disc, remove the disc and try a different one. Improperly formatted discs will not play on this DVD player.
| Region Discs | that can be played | |
| U.S.A. and Canada regions |  |  |
| U.K and Europe regions |  |  |
| Asia Pacifi c, Taiwan |  |  |
| Australia, New Zealand, Latin America |  |  |
| Russia and India regions |  |  |
| China |  |  |
IMPORTANT!
- If '⊗' appears on the TV screen when a button is pressed, it means the function is not available on the current disc or at the current time.
- DVD discs and players are designed with regional restrictions. Before playing a disc, make sure the disc is for the same zone as your player.
Playable discs and supported formats
Using this DVD player, you can play back the following discs:
DVD Video
DVD-Video format

DVD-RW
DVD-Video format*1

DVD-R
DVD-R DL
DVD-Video format*1,
JPEG*2*3*4*5*6,
MP3*3*7*8*9, DivX*3*10*11*12*13

CD-R
CD-DA, JPEG*2*3*4*5*6,
MP3*3*7*8*9, DivX*3*10*11*12*13
Video CD, Super Video CD

CD-RW
CD-DA, JPEG*2*3*4*5*6,
MP3*3*7*8*9, DivX*3*10*11*12*13
Video CD, Super Video CD

Audio CD
CD-DA

Video CD
(Formats 1.0, 1.1, 2.0)

Super Video CD

+RW
+R
+R DL
Video *1*
*1 Finalizing is necessary. *2 The file extensions have to be '.JPG' or '.JPEG'. *3 ISO9660 level 1 or 2 (except for extended formats)
This unit is compatible with multi-session.
This unit is not compatible with packet writing.
*4 Picture resolution: between 34 × 34 and 6144 × 4096 pixels (sub sampling is 4:2:2 or 4:2:0) Motion JPEG is not supported. *5 The total combined maximum number of recognizable picture contents and folders: 9999 picture contents and 188 folders. *6 Files that have been altered, edited or saved with computer picture editing software may not be displayed. *7 The file extensions have to be '.mp3'. *8 Compression rate: 32 kbps to 320 kbps Sampling rate: 44.1 kHz, 48 kHz *9 Not compatible with ID3 tags. *10 The file extensions have to be '.DIVX,' '.divx,' '.AVI,' or '.avi'. *11 (For the United Kingdom and Republic of Ireland)
Subtitle text file is supported.
(For others)
Subtitle text file is not supported.
*12 Plays all versions of DivX video (including DivX 6) with standard playback of DivX media files.
Certified to the DivX Home Theater Profile V3.0.
GMC (Global Motion Compensation) not supported.
*13 The total combined maximum number of recognizable file contents and folders: 9999 file contents and 188 folders (including root folder).
Tips: Some discs cannot be played on this DVD player due to the configuration and characteristics of the disc, or due to the condition of recording and authoring software that was used.
Front and Rear panels

① Standby/on switch (⏻/l)
- Press to switch the unit from on to standby mode or vice versa. In standby mode, the unit is still consuming a small amount of power.
③ Disc tray
④ ■ (Stop)
- Stops playback
⑤ ▶ (Play)
- Starts playback
② ▲ OPEN/CLOSE
- Opens/closes the disc tray
(For the United Kingdom and Republic of Ireland)
① (AC mains lead)
- Connects to a standard AC outlet
② VIDEO OUT
- Connects to Video input of a TV COMPONENT VIDEO OUT (YPbPr)
- Connects to Component Video input of a TV
③ DIGITAL AUDIO OUT (PCM/BITSTREAM) (COAXIAL)
- Connects to coaxial Audio input of a digital audio equipment
④ AUDIO OUT (L, R)
- Connects to Audio input of a TV, an amplifier, receiver or stereo audio device
⑤ HDMI AV OUT (DVD-S58 only)
- Connects to HDMI input of a TV, an amplifier or receiver
⑥ AV (For the United Kingdom and Republic of Ireland only)
- Connects to Scart input of a TV
Remote Control

① Standby/on switch ⏻ – To switch the DVD player to standby mode or ON
DISPLAY - Displays information on TV screen during playback
OPEN/CLOSE ▲ - Opens/closes the disc tray
② Numeric keypad - Selects numbered items in a menu
③ SEARCH MODE - Starts to select the point
④ TOP MENU - Shows Top menu MENU - Shows Menu
⑤ ▲ ▼ ◀ ▶
▲/▼ - Cursor buttons for moving up/down ◀/▶ - Cursor buttons for moving to the left or right OK - Confirms menu selection SETUP - Enters or exits the system setup menu RETURN ➤ - Come/go back
⑥ SKIP
◀◀ - Skips to previous title/chapter/track
▶▶I - Skips to next title/chapter/track
SEARCH
◀ - Starts fast reverse
▶▶ - Starts fast forward
⑦ STOP ■ - Stops playback
PLAY/PAUSE ▶/■ - Starts or pauses playback
FRAME II▶ – Plays video frame by frame
⑧ REPEAT – Selects various repeat modes
A-B REPEAT – Repeats playback from point A to B on a disc
SLOW – Starts slow motion playback
CANCEL – Clears the input information
⑨ SUBTITLE – Switches between different subtitles
ANGLE – Switches the camera angle during playback
AUDIO – Changes soundtracks
ZOOM – Changes zoom ratio
RANDOM – Starts random playback
PROGRAM – Starts program playback
Inserting Batteries
① Open the battery compartment of the remote control. ② Insert two batteries of type R03 or AAA, following the indications (+/-) inside the compartment. ③ Close the cover.
CAUTION!
- Remove batteries if they are exhausted or if the remote control is not being used for a long time.
- Do not mix old and new or different types of batteries in combination.
- Batteries contain chemical substances, so they should be disposed of properly.
- Do not heat or expose to flame.
- Do not leave the battery(ies) in an automobile exposed to direct sunlight for a long period of time with doors and windows closed.
- Keep the AAA R03 batteries out of reach of children to prevent swallowing.
Using the remote control to operate the system
① Aim the remote control directly at the remote sensor on the front panel. ② Do not put any objects between the remote control and the DVD Player while operating the DVD Player.
CAUTION
Danger of explosion if battery is incorrectly replaced. Replace only with the same or equivalent type recommended by the manufacturer. Dispose of used batteries according to the manufacturer's instructions.
- Peripheral equipment and optional cables sold separately unless otherwise indicated.
- Do not place the unit on amplifiers/receivers or equipment that may become hot. The heat can damage the unit.
- Before making any connections we suggest you temporarily disconnect all the units from AC power.
- Do not connect video signals through a video recorder. Due to copy guard protection the picture may not be displayed properly.
Connecting to television
Using an AV Connection (AV Jack)
(For the United Kingdom and Republic of Ireland only)

Proceed to DVD Menu Options > {Video}. (→ page 25)
Using a Video Connection (VIDEO OUT Jack)

- Connect terminals of the same color.
Using a Component Video Connection (COMPONENT VIDEO OUT Jack) (YPBPR)
- Connect terminals of the same color. Proceed to Getting started > Step 2 for Progressive Scan set up. (→ page 15)
Using a HDMI Connection (HDMI AV OUT Jack) (DVD-S58 only)
With HDMI compatible television ■ With HDMI compatible television and amplifier

- Please use High Speed HDMI Cables that have the HDMI logo (as shown on the cover). When outputting 1080p signal, please use HDMI cables 5.0 meters or less. It is recommended that you use Panasonic's HDMI cable.
Recommended part number:
RP-CDHS15 (1.5 m), RP-CDHS30 (3.0 m), RP-CDHS50 (5.0 m), etc.
- Non-HDMI-compliant cables cannot be utilized.
- AUDIO terminals become impossible to use according to the kind of the cable that you use.
Proceed to DVD Menu Options > {HDMI CEC}. (→ page 26)
Connecting digital AV receiver

DVD-S58 DVD-S38
Set the DVD Player's Digital Audio Out to PCM or Bitstream depending on the capabilities of your Receiver (see DVD Menu options > {Audio Out}). (→ page 27)
Tip:
- If the audio format of the Digital Output does not match the capabilities of your receiver, the receiver will produce a strong, distorted sound or no sound at all.
Connecting the AC mains lead

FOR THE UNITED KINGDOM, REPUBLIC OF IRELAND, SAUDI ARABIA, KUWAIT AND AFRICA ONLY READ THE CAUTION FOR THE AC MAINS LEAD ON PAGE 2 BEFORE CONNECTION.
After everything is connected properly, plug in the AC mains lead to the mains socket.
Never make or change any connections with the standby/on switched on.
The socket outlet shall be installed near the equipment and easily accessible.
The mains plug of the power supply cord shall remain readily operable.
To completely disconnect this apparatus from the AC Mains, disconnect the power supply cord plug from AC receptacle.
- This unit consumes a small amount of AC power even when turned off. In the interest of power conservation, if you will not be using this unit for an extended period of time, it can be disconnected.
Step 1: Selecting the Proper Video Input
① Press ⏻/l on the DVD player to turn it on. ② Turn on the TV and select the correct video input.
→ The DVD background screen appears on the TV.
③ If you are using external equipment, (such as audio system or surround sound receiver), turn it on and select the appropriate input source for the DVD player output. Refer to the equipment user's manual for details.
Step 2: Setting up Progressive Scan feature
(for Progressive Scan TV only)
The progressive scan displays twice the number of frames per second than interlaced scanning (ordinary normal TV system). With nearly double the number of lines, progressive scan offers higher picture resolution and quality.
Before you start...
- Ensure that you have connected this DVD player to a progressive scan TV using the COMPONENT VIDEO OUT or HDMI AV OUT (DVD-S58 only).
- Ensure that you have completed the basic installation and set-up.
① Turn on your TV. ② Press ⏻ on the remote control to turn on the DVD player. ③ Select the correct video input channel.
→ The DVD background screen appears on the TV.
④ Press SETUP. ⑤ Press ▲▼ to select {SYSTEM}, then press ▶. ⑥ Press ▲▼ repeatedly to select {Video}, then press ▶. ⑦ Select {Progressive}, then press OK to confirm.
→ The menu will appear on the TV.
⑧ Press ◀ to select {YES} and press OK to confirm. ⑨ If necessary, turn on your TV progressive scan mode (refer to your TV user manual).
→ The setup is now completed and you can enjoy a high quality picture.
To deactivate Progressive Scan manually:
- In Step 7, wait for 15 seconds without doing the procedure after the menu appears for the auto recovery.
Tip:
- There are some progressive scan TVs and High-Definition TVs that are not fully compatible with this unit, resulting in an unnatural picture when playing back a DVD VIDEO disc in the progressive scan mode. In such a case, turn off the progressive scan feature on both the DVD player and your TV.
Step 3: Selecting the matching color system
The color system of the DVD player, disc and TV should match in order for the disc to play. Before changing the TV system, determine the color system of your TV.
① Press SETUP. ② Press ▲ ▼ to select {SYSTEM} and press ▶. ③ Press ▲ ▼ to select {TV System} and press ▶. ④ Use ▲ ▼ to select one of the options below: {NTSC}
Select this if the connected TV has the NTSC color system. It will change the video signal of a PAL disc and output it to NTSC format.
{PAL}
Select this if the connected TV has the PAL color system. It will change the video signal of an NTSC disc and output it to PAL format.
{PAL60}
Select this if the connected TV has the PAL 60 color system. It will change the video signal of an NTSC disc and output it to PAL 60 format.
{Auto}
(For the United Kingdom and Republic of Ireland)
Select this if the connected TV has the PAL color system. It will change the video signal of an NTSC disc and output it to PAL 60 format.
(For others)
Select this if the connected TV is compatible with both NTSC and PAL. The output format will be in accordance with the video signal of the disc.
⑤ Select an item and press OK.
Tips:
- Before changing the current TV color setting, ensure that your TV supports the 'selected TV System'.
Step 4: Setting the language
The language options are different depending on your country or region.
On-Screen Display (OSD) Language
The On-screen language for the system menu will remain as you set it, regardless of various disc languages.
① Press SETUP. ② Press ▲ ▼ to select {LANGUAGE} and press ▶. ③ Press ▲ ▼ to select {OSD} and press ▶. ④ Press ▲ ▼ to select a language and press OK.
Audio, Subtitle and Disc menu languages
You can choose your own preferred language or soundtrack from audio, subtitles and DVD menu languages. If the language selected is not available on the disc, the disc's default language will be used instead.
① Press SETUP. ② Press ▲ ▼ to select {LANGUAGE} and press ▶. ③ Press ▲ ▼ to select one of the options below, and press ▶. {Audio} Select this to change disc soundtrack language. {Subtitle} Select this to change the subtitle language. {Menu} Select this to change the language of the disc menu. ④ Press ▲ ▼ to select a language and press OK to confirm. ⑤ Repeat Steps ③ - ④ for other language settings.
Starting disc playback
① Turn on the TV and select the correct video input. ② Press ⏻/l to turn on the DVD player. ③ Press OPEN/CLOSE ▲ to open the disc tray. ④ Place a disc into the disc tray with the label facing up, then press OPEN/CLOSE
▲ to close the disc tray.
→ For double-sided discs, load the side which you want to play facing up.
⑤ Playback may start automatically. If not, press PLAY/PAUSE ▶/II.
- If a disc menu appears on the TV, see next page > Using the disc menu.
- If the child lock was activated for the inserted disc, you have to enter your four-digit password (see DVD Menu options > Password). (→ page 29)
- See the next few pages for other playback features under ‘Playback features ’.
Tips:
- Do not overturn the DVD player while disc loading, playing or ejecting.
- Do not close the disc tray manually even if the standby/on switched off.
Basic playback controls
Unless otherwise stated, all operations described are based on remote control use.
Pausing playback
① During playback, press PLAY/PAUSE ▶/II to pause playback and display a still picture. → Sound will be muted. ② To resume normal playback, press PLAY/PAUSE ▶/□ again.
Skipping title/chapter/track
To select sequentially
- Press SKIP ◀◀/▶▶ to go to the previous or next title/chapter/track.
To select directly (chapter/track only)
- Use the numeric keypad (0-9) to enter valid chapter/track number.
e.g., 5: 5
1 5: ≥ 1 0 → 1 → 5
Stopping playback
- Press STOP ■.
→ The stopped position is memorized.
Resume play function
Press PLAY/PAUSE ▶/II to restart from this position. → The position is cleared if the tray is opened or you press STOP ■ several times to display ‘■’ on TV’s display.
Tips:
- Screen saver will start automatically if the disc playback is stopped for about 5 minutes.
- The player will automatically switch to Power Standby mode if you do not press any buttons for about 25 minutes after the disc has stopped playing (only when {Auto Power Off} is set to {On}) (→ page 26).
Operations for video playback (DVD/VCD/SVCD)
Using the disc menu
Depending on the disc, a menu may appear on the TV screen once you load in the disc.
To select a playback feature or item
- Use ◀▶ ▲▼ keys then press OK or numeric keypad (0-9) on the remote to start playback.
To access or remove the menu
- Press MENU.
Zooming in
This function allows you to enlarge the picture on the TV screen and to pan through the enlarged picture.
① During playback, press ZOOM repeatedly to display the picture with different scales.
→ Use ◀▶ ▲▼ keys to pan through the enlarged picture. → Playback will continue.
② Press ZOOM repeatedly to return to the original size.
Forward/Reverse Searching
You can fast forward or fast reverse a disc during playback and select a desired search speed.
For DVD, VCD, SVCD, CD
① Press ◀◀ or ▶▶ once or more during playback to select the required speed: X2, X4, X8, X20 (backward or forward). → Sound will be muted (DVD/VCD/CD). ② To return to normal speed, press PLAY/PAUSE ▶/II.
Slow motion playback
① Press SLOW repeatedly to select the required speed. ② To return to normal speed, press PLAY/PAUSE ▶/II.
Viewing the disc playback information
You can view the disc information (such as current title/chapter/track number, current playing time on the disc) without interrupting the disc playback.
- During playback, press DISPLAY repeatedly.
→ A list of available current disc information appears on the TV screen.
Selecting title/chapter/track on the disc information
① Press SEARCH MODE, then use ◀▶ keys to select an option. ② Use numeric keypad (0-9) to enter valid title/chapter/track number or hours, minutes and seconds from left to right in the time edit box, then press OK. Playback will change to the chosen time or to the selected title/chapter/track.
For DVD
{TT XX/XX CH XXX/XXX}: displays the total available title and chapters in the disc and enables you to select a chapter for viewing.
{∅ XX:XX:XX}: displays the elapsed play time in the disc and enables you to select the hour, minute and second for viewing.
For Super VCD or VCD
{TRK XX/XX}: displays the total available tracks in the disc and enables you to select a track for viewing.
{∅ XX:XX:XX}: displays the elapsed play time in the disc and enables you to select the hour, minute and second for viewing.
Repeat play modes
The repeat play options vary depending on the disc type.
Press REPEAT repeatedly to select the following repeat modes.
For DVD
- REP CHAPTER (currently playing chapter)
- REP TITLE (currently playing title)
- REP ALL (entire disc)
- REP OFF (cancel)
For VCD, Audio CD
- REP 1 (currently playing track)
- REP ALL (entire disc)
- REP OFF (cancel)
Tip:
- For VCD, repeat playback is not possible if the PBC mode is switched on.
Repeating a section within a chapter/track
You can repeat the playback of a specific segment within a title/chapter/track. To do this, you must mark the start and end of the segment you want.
① Press A-B REPEAT to choose your starting point ‘REPEAT A-’. ② Press A-B REPEAT again at your chosen end point ‘REPEAT A-B’. → The section from point ‘REPEAT A-’ to ‘REPEAT A-B’ will now repeat continuously. ③ Press A-B REPEAT the third time to exit (A-B CANCEL).
Special Features
Changing the Audio Language
For DVD
- Press AUDIO repeatedly to select the audio language that the DVD title being viewed offers.
For VCD
- Press AUDIO repeatedly to select the audio channel (Stereo, Mono L, Mono R, Mix Mono).
Subtitles
- Press SUBTITLE repeatedly to select the subtitle language.
Angle
- Press ANGLE repeatedly to select the angle.
Frame by frame
① Press FRAME II▶ to advance a disc frame by frame ahead.
② To resume normal playback, press PLAY/PAUSE ▶/II.
Random playback
- Press RANDOM to start playback in random order.
Program playback
1 Press PROGRAM.
→ The program menu appears on the TV screen.
② Use the ▲▼◀▶ keys to select an option.
③ Use the numeric keypad (0-9) to enter a valid title/chapter/track number.
To cancel: Press CANCEL.
④ Use the ▲▼◀▶ keys to select 'PLAY', and press OK.
To clear the whole program
- In Step 3, use the ▲▼◀▶ keys to select 'CLEAR', and press OK.
Special VCD & SVCD Features
Playback Control
For VCD with Playback Control (PBC) feature (version 2.0 only)
- Press MENU to toggle between 'PBC: On' and 'PBC: Off'.
→ If you select 'PBC: On', the disc menu (if available) will appear on the TV. → Use the SKIP |◀◀ / ▶▶▶ keys to turn to the previous/next page or use the numeric keypad (0-9) to select a play option.
If you want to skip the index menu and play back directly from the beginning
- Press MENU to select 'PBC: Off'.
Playing MP3/JPEG
General Operation
① Load an MP3/JPEG disc.
→ The data disc menu appears on the TV screen.
② Press ◀▶ to select the menu and press OK.
③ Press ▲▼ to select the folder, and press OK.
④ Press ▲▼ to select a track/file, and press OK.
→ Playback will start.
(JPEG only)
- In Step 4, when you press MENU instead of OK, thumbnail pictures will appear.
Use ▲▼◀▶ to select one of the pictures, and press OK to start playback.
- In Step 4, when you press PLAY/PAUSE
▶/II instead of OK, you can start the slide show.
Playing MP3 music and JPEG picture simultaneously (DVD-S58 only)
- When you start JPEG playback by using a disc that contains MP3 music and JPEG picture files, you can listen to MP3 music simultaneously.
Tip:
- Some files on JPEG disc may be distorted during playback due to the configuration and characteristics of the disc.
- During simultaneous playback, it is not possible to select a file of MP3. – During simultaneous playback, fast forward/reverse or slow forward is not available.
Playback selection
During playback, you can;
- Press SKIP ◀◀◀ / ▶▶▶ to select another track/file in the current folder.
- Press PLAY/PAUSE ▶/II repeatedly to pause/resume playback.
Repeat
Press REPEAT repeatedly to select the following repeat modes.
REP 1
- Keep a JPEG image still on the screen or play an MP3 file repeatedly.
REP DIR
- Play all the same type of files in the selected folder repeatedly.
REP ALL
- Play all the same type of files on the discs.
REP OFF
- Turn off REPEAT mode.
Zooming Picture (JPEG)
During playback, press ZOOM repeatedly to display the picture with different scales. → Use ◀▶ ▲▼ keys to pan through the enlarged picture.
② Press ZOOM repeatedly to return to the original size.
Playback with Multi-angle (JPEG)
- During playback, press ▲▼◀▶ to rotate the picture on the TV screen.
▲ : reverse the picture up and down by 180° ▼ : reverse the picture right and left by 180° ◀: rotate the picture anti-clockwise by 90° ▶ : rotate the picture clockwise by 90°
Tip:
- It may not be possible to play certain JPEG discs due to the configuration and characteristics of the disc or condition of the recording.
Tips: The operating features described here might not be possible for certain discs.
Always refer to the instructions supplied with the discs.
Playing a DivX® disc
ABOUT DIVX VIDEO:
DivX® is a digital video format created by DivX, Inc. This is an official DivX Certified device that plays DivX video. Visit www.divx.com for more information and software tools to convert your files into DivX video.
① Load a DivX disc.
→ The data disc menu appears on the TV screen.
② Press ◀▶ to select the menu and press OK.
③ Press ▲▼ to select the folder, and press OK.
4 Press ▲▼ to select a file, and press PLAY/PAUSE ▶/II.
→ Playback will start.
ABOUT DIVX VIDEO-ON-DEMAND:
This DivX Certified® device must be registered in order to play DivX Video-on-Demand (VOD) content.
To generate the registration code, locate the DivX VOD section in the device setup menu.
Go to vod.divx.com with this code to complete the registration process and learn more about DivX VOD.
- You can only play DivX videos that were rented or purchased with the DivX registration code of this DVD player. For details, see DVD Menu Options > {DivX(R) VOD} (→ page 29).
Regarding DivX VOD content that can only be played a set number of times
Some DivX VOD content can only be played a set number of times. When you play this content, the remaining number of plays is displayed. You cannot play this content when the number of remaining plays is zero.
- The remaining number of plays decreases each time a program is played. However, when playing from the point where play was previously stopped, the remaining number of plays does not decrease due to the resume play function.
Displaying subtitles text (For the United Kingdom and Republic of Ireland only)
You can display subtitles text onto the DivX video disc on this unit. This function has no relation to the subtitles specified in DivX standard specifications and has no clear standard. The operation might be different or it may not operate properly depending on the way the file was made or the state of this unit (playing, stopped, etc.). See Subtitles (→ page 21).
Tip:
- Subtitle files with the following filename extensions (.srt, .sub, .txt) are supported but do not appear on the file selection menu.
- The subtitle file name has to be saved under the same file name as the movie in the same folder.
- If the subtitle does not appear correctly, change the subtitle language. For details, DVD Menu Options > {DivX Subtitle} (→ page 27).
Use HDMI CEC protocol
(DVD-S58 only)
The DVD player supports HDMI CEC (Consumer Electronics Control) protocol. Panasonic does not guarantee 100% interoperability with all HDMI CEC devices.
① Turn on the HDMI CEC operations on the TV and other connected devices. See TVs/devices manual for details. ② You can now enjoy the following HDMI CEC controls.
One Touch Play
When you press ⏻, it turns on the TV and this DVD player, then disc play starts.
- To enable One-touch play, a video disc must be placed in the disc compartment before operation.
System Standby
When you turn off the TV, all connected HDMI CEC devices switch to standby mode simultaneously.
Control with TV's remote control
Playback Control
You can play discs.
Disc Menu Control
By displaying the disc menu, you can play discs using the disc menu.
Device Select
When you select this unit as an input source, this unit turns on automatically.
Tips:
- The default setting for HDMI CEC features is on. You can change the default setting, see DVD Menu options > {HDMI CEC}. (→ page 26)
Tips: The operating features described here might not be possible for certain discs.
Always refer to the instructions supplied with the discs.
This DVD Player setup is carried out via the TV, enabling you to customize the DVD player to suit your particular requirement.
Using the System setup menu
① Press SETUP. ② Press ▲ ▼ to select 'SYSTEM' and press ▶. ③ Press ▲ ▼ to select below items and press ▶ to confirm your selection.
TV System
This menu contains the options for selecting the color system that matches the connected TV. For details, see Getting started > Step 3 for details. (→ page 16)
Screen Saver
① In 'SYSTEM', press ▲ ▼ to select {Screen Saver}, then press ▶. ② Press ▲ ▼ to select one of the options below: {On}
Select this if the unit starts the screen saver after about 5 minutes in the stop mode.
{Off}
Select this to disable the screen saver.
Video
① In 'SYSTEM', press ▲▼ to select {Video}, then press ▶. ② Press ▲ ▼ to select one of the options below:
{Interlace}
Select when a TV is connected that can receive an interlace signal.
{Progressive}
Select when a TV is connected that can receive a progressive signal.
{RGB/SCART}
(For the United Kingdom and Republic of Ireland only)
Select when a TV is connected by using the 21-pin SCART cable.
③ Press ▲▼ to select a setting and press OK to confirm.
Resolution
(DVD-S58 only)
Select a video resolution that is compatible with the TV display capability.
① In 'SYSTEM', press ▲ ▼ to select {Resolution}, then press ▶. {Auto}
It detects and selects the best supported video resolution automatically.
{480P/576P}, {720P}, {1080i}, {1080P}
Select a video resolution that best supported by the TV. See the TVs manual for details.
② Press ▲▼ to select a setting and press OK to confirm.
HDMI CEC
(DVD-S58 only)
This feature is only applicable when you connect this DVD player and TV with a HDMI cable. See Playback features > Use HDMI CEC protocol (→ page 24).
In 'SYSTEM', press ▲ ▼ to select {HDMI CEC}, then press ▶. {On}
Select this to use HDMI CEC protocol. {Off}
Select this to deactivate HDMI CEC protocol.
② Press ▲ ▼ to select a setting, then press OK to confirm your selection.
TV Type
Set the TV Type on the DVD player according to the TV you have connected.
The format you select must be available on the disc. If it is not, the setting for TV display will not affect the picture during playback.
① In 'SYSTEM', press ▲ ▼ to select {TV Type}, then press ▶.
② Press ▲ ▼ to select one of the options below: {4:3PS}*
Select this if you have a normal TV and want both sides of the picture to be trimmed or formatted to fit your TV screen. {4:3LB}
Select this if you have a normal TV. In this case a wide picture with black bands on the upper and lower portions of the TV screen will be displayed.
{16:9}
Select this if you have a wide screen TV. Video recorded for 4:3 aspect screen is displayed as a 4:3 ratio image in the center of the screen.
* (For Australia and New Zealand:
"16:9" is the factory default setting.)
{16:9full}
Select this if you have a wide screen TV. Video recorded for 4:3 aspect screen is displayed as a horizontally stretched 16:9 image.
③ Press ▲ ▼ to select a setting, then press OK to confirm your selection.
Auto Power Off
The unit switches to standby mode after about 25 minutes in the stop mode.
In 'SYSTEM', press ▲ ▼ to select {Auto Power Off}, then press ▶. {On}
Select this to activate.
{Off}
Select this to deactivate.
② Press ▲ ▼ to select a setting, then press OK to confirm your selection.
Using the Language setup menu
The language options are different depending on your country or region.
① Press SETUP. ② Press ▲ ▼ to select {LANGUAGE} and press ▶. ③ Press ▲ ▼ to select below items and press ▶ to confirm your selection.
OSD Language
This menu contains various language options for display language on the screen. See Getting Started > Step 4 for details.
Audio, Subtitle, Menu Language
These menus contain various language options for audio, subtitle and disc menu which may be recorded on the DVD. See Getting Started > Step 4 for details.
DivX Subtitle
(For the United Kingdom and Republic of Ireland only)
You can set the font type that supports the recorded DivX subtitle.
① In 'LANGUAGE', press ▲ ▼ to select {DivX Subtitle}, then press ▶.
{Latine 1}, {Latine 2}, {Cyrillic}, {Turkish}
Select the font type for the recorded title.
② Press ▲ ▼ to select a setting, then press OK to confirm your selection.
Using the Audio setup menu
① Press SETUP. ② Press ▲ ▼ select {AUDIO} and press ▶. ③ Press ▲ ▼ to select below items and press ▶ to confirm your selection.
Audio Out
Set this if you connect a digital AV receiver.
In 'AUDIO', press ▲ ▼ to select {Audio Out}, then press ▶.
{Bitstream}
Select this if the connected device has a built-in multichannel decoder that supports one of the multichannel audio format (Dolby Digital, DTS).
{PCM}
Select this if the connected device is not capable of decoding multichannel audio. The DVD player will convert the Dolby Digital multichannel signals to PCM (Pulse Code Modulation).
② Press ▲ ▼ to select a setting, then press OK to confirm your selection.
Dynamic Range
Adjusts for clarity even when the volume is low through compressing the range of the lowest sound level and the highest sound level. Convenient for late night viewing. (Only works with Dolby Digital)
① In 'AUDIO', press ▲ ▼ to select {Dynamic Range}, then press ▶. ② Press ▲ ▼ to select a setting, then press OK to confirm your selection.
Using the Video setup menu
① In disc mode, press SETUP. ② Press ▲ ▼ to select {VIDEO} and press ▶. ③ Press ▲ ▼ to select below items and press ▶ to confirm your selection.
Brightness/Contrast
Increasing the value will brighten the picture or vice versa.
In 'VIDEO', press ▲▼ to select {Brightness} or {Contrast}, then press ▶. → The menu appears. ② Press ▲ ▼ to adjust the setting that best suit your personal preference. ③ Press OK to confirm.
Hue
① In 'VIDEO', press ▲ ▼ to select {Hue}, then press ▶. ② Press ▲▼ to move the slider to adjust the hue of the video output. ③ Press OK to confirm.
Saturation
① In 'VIDEO', press ▲▼ to select {Saturation}, then press ▶. ② Press ▲ ▼ to move the slider to adjust the saturation of the video output. ③ Press OK to confirm.
Sharpness
You can personalize picture color by adjusting sharpness.
① In 'VIDEO', press ▲▼ to select {Sharpness}, then press ▶. ② Press ▲▼ to select a setting, then press OK to confirm your selection.
Using the Other setup menu
① Press SETUP. ② Press ▲ ▼ to select {OTHER} and press ▶. ③ Press ▲ ▼ to select the items below and press ▶ to confirm your selection.
Rating
This feature lets you set a playback limitation level. The rating levels are from 0 to 8 and are country dependent. You can prohibit the playing of certain discs that are not suitable for your children or have certain discs played with alternative scenes.
- Unlock the disc by entering the four-digit password before you can access the {Rating} menu. ① In 'OTHER', press ▲▼ to select {Password}, then press ▶. ② Use the numeric keypad (0-9) to enter the four-digit password, then press OK (see Password) (→ page 29). ③ Press ▲ to select {Rating}, then press ▶. ④ Press ▲ ▼ to select a rating level for the disc inserted and press OK.
→ To disable parental controls and have all discs play, select {8 No Limit}.
- DVDs that are rated above the level you selected will not be played unless you enter your four-digit password.
Tips:
- This feature will not limit viewing if the disc manufacturer did not code the disc.
- VCD, SVCD, CD have no level indication, so parental control has no effect on these types of discs. This also applies to most illegal DVDs.
- Some DVDs are not coded with a rating though the movie rating may be printed on the disc cover. The rating level feature does not prohibit play of such discs.
Password
You need to enter a four-digit password to play a prohibited disc or if prompted for a password.
If the disc is locked, set the Rating to (8 No Limit) to have all discs play.
① In 'OTHER', press ▲▼ to select {Password}, then press ▶.
→ You will be prompted to enter your four-digit password.
② Use the numeric keypad (0-9) to enter your old four-digit password, then press OK.
→ When doing this for the first time, key in '0000'.
If you forget your old four-digit password, key in '0000'.
③ Press ▶, then enter the new four-digit password.
④ Press OK to confirm.
DivX(R) VOD
DivX VOD (Video On Demand) registration code allows you to rent and purchase movies using the DivX VOD service from the internet. For more information, visit website: http://vod.divx.com.
① In 'OTHER', press ▲▼ to select {DivX(R) VOD}, then press ▶.
The registration code will appear.
② Use the registration code to rent or purchase the movies from DivX VOD service at http://vod.divx.com. Follow the instructions and download the movie from your computer onto a disc for playback on this DVD player.
Tip:
- All the downloaded movies from DivX VOD can only be played back on this DVD player.
Default
Setting the Default function will reset all options and your personal settings to the factory defaults, including your password for rating.
① In 'OTHER', press ▲▼ to select {Password}, then press ▶.
② Use the numeric keypad (0-9) to enter the four-digit password, then press OK (see Password).
③ Press ▼ to select {Default}, then press ▶ to select {Restore}.
④ Press OK to confirm. → All settings will now reset to factory defaults.
[For the United Kingdom and Republic of Ireland]
Signal system: PAL/NTSC
Operating temperature range: +5 °C to +35 °C
Operating humidity range:
20 % to 80 % RH (no condensation)
Video output:
Output level: 1.0 Vp-p (75 Ω)
Output connector: Pin jack (1 system)
AV (21 pin) (1 system)
Component video output: (480p/480i: 60 Hz)
(576p/576i: 50 Hz)
Y output level: 1.0 Vp-p (75 Ω)
PB output level: 0.7 Vp-p (75 Ω)
PR output level: 0.7 Vp-p (75 Ω)
Output connector:
Pin jack (Y: green, PB: blue, PR: red)
RGB output:
Output level: 0.7 Vp-p (75 Ω)
Output connector: AV (21 pin) (1 system)
Audio output:
Output level: 2 Vrms (1 kHz, 0 dB)
Output connector: Pin jack (1 system)
AV (21 pin) (1 system)
Number of connectors: 2 channel
Digital audio output:
Coaxial digital output: Pin jack
[DVD-S58] HDMI AV output:
Output format: 1080p/1080i/720p/576p/480p
Output connector: Type A (19 pin)
- This unit supports "HDMI CEC" function.
LASER Specification
Class I LASER Product:
Wave Length:
770 to 800 nm (CD)/645 to 660 nm (DVD)
Power supply: AC 230 to 240 V, 50 Hz
Power consumption: Approx. 10 W
Power consumption in standby mode:
Less than 1 W
Dimensions (W x D x H):
[DVD-S58]:430 mm x 209 mm x 38 mm
[DVD-S38]: 360 mm x 209 mm x 38 mm
Mass: [DVD-S58] Approx. 1.8 kg
[DVD-S38] Approx. 1.6 kg
Specifications are subject to change without notice.
[For others]
Signal system: PAL/NTSC
Operating temperature range: +5 °C to +35 °C
Operating humidity range:
20 % to 80 % RH (no condensation)
Video output:
Output level: 1.0 Vp-p (75 Ω)
Output connector: Pin jack (1 system)
Component video output: (480p/480i: 60 Hz)
(576p/576i: 50 Hz)
Y output level: 1.0 Vp-p (75 Ω)
PB output level: 0.7 Vp-p (75 Ω)
PR output level: 0.7 Vp-p (75 Ω)
Output connector:
Pin jack (Y: green, P B: blue, PR: red)
Audio output:
Output level: 2 Vrms (1 kHz, 0 dB)
Output connector: Pin jack (1 system)
Number of connectors: 2 channel
Digital audio output:
Coaxial digital output: Pin jack
[DVD-S58] HDMI AV output:
Output format: 1080p/1080i/720p/576p/480p
Output connector: Type A (19 pin)
- This unit supports "HDMI CEC" function.
LASER Specification
Class I LASER Product:
Wave Length:
770 to 800 nm (CD)/645 to 660 nm (DVD)
Power supply: [Australia and New Zealand]
AC 230 to 240 V, 50 Hz
[Saudi Arabia, Kuwait and Africa]
AC 220 to 240 V, 50/60 Hz
[India] AC 230 V, 50/60 Hz
[Others] AC 110 to 240 V, 50/60 Hz
Power consumption: Approx. 10 W
Power consumption in standby mode:
Less than 1 W
Dimensions (W x D x H):
[DVD-S58]: 430 mm x 209 mm x 38 mm
[DVD-S38]: 360 mm x 209 mm x 38 mm
Mass: [DVD-S58] Approx. 1.8 kg
[DVD-S38] Approx. 1.6 kg
Specifications are subject to change without notice.
Before requesting service, make the following checks. If you are in doubt about some of the check points, or if the remedies indicated in the chart do not solve the problem, consult your dealer for instructions.
Problem Solution
| No power. | - Press ⬆/l on the front of the DVD player to turn on the system.- Make sure the AC mains socket has power. |
| Remote control does not work. Aim the remote control directly at the sensor on the front of the DVD player (not towards TV). | - Remove any obstacles between DVD player and the remote control.- Batteries are weak, replace the batteries.- Check the polarities of the batteries are as indicated on the remote control (± signs). |
| No picture. Turn on your TV and set to the correct Video In channel for the DVD player. | - Check the video connection between the DVD player and the TV. |
| The picture is distorted or black & white during playback. | - The disc does not match with the TV color system standard (PAL/NTSC).- The disc is dirty, clean the disc.- Sometimes a small amount of picture distortion may appear. This is not a malfunction.- Make sure that progressive output has not been selected when the connected television is not progressive compatible. If the connected television is not progressive compatible, connect to television with VIDEO OUT jack (→ page 11) and set {Video} in DVD Menu Option to {Interlace} (→ page 25). |
| No sound. Check the audio connections, the red and white jacks are connected correctly. | - Set the Digital output correctly, based on the equipment you connected to the DVD player. (→ page 27) |
| The aspect ratio of the screen cannot be changed. | - The aspect ratio is fixed on the DVD disc.- Depending on the TV, it may not be possible to change the aspect ratio. |
| Not able to select some items in the setup/system menu. | - Press STOP ■ twice before selecting the setup/system menu.- Depending on the disc availability, some menu items cannot be selected. |
Problem Solution
The DVD player does not start playback. Insert a readable disc with the playback side facing down.
- Check the disc type, color system (PAL/NTSC) and region code.
- Check for any scratches or smudges on the disc.
- Press SETUP to turn off the setup menu screen.
- You may need to enter the password in order to change the parental rating level or to unlock the disc for playback.
- Moisture may have condensed inside the system. Remove the disc and leave the system turned on for about an hour.
- Disconnect the AC mains lead from the mains socket for a few minutes. Reconnect the AC mains lead and try to operate again as usual.
- Check the disc for fingerprint/scratches and clean with a soft cloth wiping from center to edge.
- Check that the output of the video signal is turn to {Progressive}.
- Reset the DVD player to the factory defaults. 1) Press ⏻/I on the DVD player to turn it on. 2) Press OPEN/CLOSE ▲ to open the disc tray. 3) Press and hold ■ and ▶ on the DVD player at the same time for more than 5 seconds with the tray open.
All the settings return to the factory preset.
Picture freezes momentarily during playback.
Unable to select Progressive Scan on/off.
Images from this DVD player do not appear on the television.
You forget your password.
When the following messages appear on the unit's display.
LOAD (LOAD)
STOP (STOP)
(No text)
OPEN (OPEN)
TITLE (TITLE)
Loading the disc. Wait a moment.
Stopping the playback. Press PLAY/PAUSE ▶/II.
Insert a readable disc with the playback side facing down.
Press OPEN/CLOSE ▲ to close the tray.
Press ▲▼◀▶ to select the title, then press OK.
Analogue: Sound that has not been turned into numbers. Analogue sound varies, while digital sound has specific numerical values. These jacks send audio through two channels, the left and right.
Aspect ratio: The ratio of vertical and horizontal sizes of a displayed image. The horizontal vs. vertical ratio of conventional TVs is 4:3, and that of wide screens is 16:9.
AUDIO OUT jacks: Jacks on the back of the DVD System that send audio to another system (TV, Stereo, etc.).
Bit Rate: The amount of data used to hold a given length of music; measured in kilobits per seconds, or kbps. Or, the speed at which you record. Generally, the higher the bit rate, or the higher the recording speed, the better the sound quality. However, higher bit rates use more space on a disc.
Chapter: Sections of a picture or a music piece on a DVD that are smaller than titles. A title is composed of several chapters. Each chapter is assigned a chapter number enabling you to locate the chapter you want.
Component Video Out jacks: Jacks on the back of the DVD System that send high-quality video to a TV that has Component Video In jacks.
Disc menu: A screen display prepared for allowing of selection of images, sound, subtitle, multi-angles etc. recorded on the DVD.
Digital: Sound that has been converted into numerical values. Digital sound is available when you use the DIGITAL AUDIO OUT COAXIAL jack. These jacks send audio through multiple channels, instead of just two channels as analogue does.
Dolby Digital: A surround sound system developed by Dolby Laboratories containing up to six channels of digital audio (front left and right, surround left and right, center and subwoofer).
HDMI (High-Definition Multimedia Interface):
HDMI is a digital interface for consumer electronic products. Unlike conventional connections, it transmits uncompressed digital video and audio signals on a single cable.
JPEG: A very common digital still picture format. A still-picture data compression system proposed by the Joint Photographic Expert Group, which features small decrease in image quality in spite of its high compression ratio.
Multichannel: DVD is specified to have each soundtrack constitute one sound field. Multichannel refers to a structure of soundtracks having three or more channels.
Parental Control: A function of the DVD to limit playback of the disc by the age of the users according to the limitation level in each country. The limitation varies from disc to disc; when it is activated, playback will be prohibited if the software's level is higher than the user-set level.
PCM (Pulse Code Modulation): A system for converting analogue sound signal to digital for later processing, with no data compression used in conversion.
Playback control (PBC): Refers to the signal recorded on Video CDs or SVCDs for controlling reproduction. By using menu screens recorded on a Video CD or SVCD that supports PBC, you can enjoy interactive-type software as well as software having a search function.
Progressive Scan: It displays all the horizontal lines of a picture at one time, as a signal frame. This system can convert the interlaced video from DVD into progressive format for connection to a progressive display. It dramatically increases the vertical resolution.
Region Code: A system for allowing discs to be played back only in the region designated beforehand.
This unit will only play discs that have compatible region codes. You can find the region code of your unit by looking on the product label. Some discs are compatible with more than one region (or All regions).
Title: The longest section of a picture or music feature on DVD, music, etc., in video software, or the entire album in audio software. Each title is assigned a title number enabling you to locate the title you want.
VIDEO OUT jack: Jack on the back of the DVD System that sends video to a TV.
WARNING:
TO REDUCE THE RISK OF FIRE, ELECTRIC SHOCK OR PRODUCT DAMAGE,
● DO NOT EXPOSE THIS APPARATUS TO RAIN, MOISTURE, DRIPPING OR SPLASHING AND THAT NO OBJECTS FILLED WITH LIQUIDS, SUCH AS VASES, SHALL BE PLACED ON THE APPARATUS. - USE ONLY THE RECOMMENDED ACCESSORIES. ● DO NOT REMOVE THE COVER (OR BACK); THERE ARE NO USER SERVICEABLE PARTS INSIDE. REFER SERVICING TO QUALIFIED SERVICE PERSONNEL.
CAUTION!
- DO NOT INSTALL OR PLACE THIS UNIT IN A BOOKCASE, BUILT-IN CABINET OR IN ANOTHER CONFINED SPACE. ENSURE THE UNIT IS WELL VENTILATED. TO PREVENT RISK OF ELECTRIC SHOCK OR FIRE HAZARD DUE TO OVERHEATING, ENSURE THAT CURTAINS AND ANY OTHER MATERIALS DO NOT OBSTRUCT THE VENTILATION VENTS.
- DO NOT OBSTRUCT THE UNIT'S VENTILATION OPENINGS WITH NEWSPAPERS, TABLECLOTHS, CURTAINS, AND SIMILAR ITEMS.
● DO NOT PLACE SOURCES OF NAKED FLAMES, SUCH AS LIGHTED CANDLES, ON THE UNIT.
● DISPOSE OF BATTERIES IN AN ENVIRONMENTALLY FRIENDLY MANNER.
CAUTION!
THIS PRODUCT UTILIZES A LASER. USE OF CONTROLS OR ADJUSTMENTS OR PERFORMANCE OF PROCEDURES OTHER THAN THOSE SPECIFIED HEREIN MAY RESULT IN HAZARDOUS RADIATION EXPOSURE. DO NOT OPEN COVERS AND DO NOT REPAIR YOURSELF. REFER SERVICING TO QUALIFIED PERSONNEL.
This product may receive radio interference caused by mobile telephones during use. If such interference is apparent, please increase separation between the product and the mobile telephone.
(For the United Kingdom, Republic of Ireland, Australia and New Zealand) THIS UNIT IS INTENDED FOR USE IN MODERATE CLIMATES. (For others) THIS UNIT IS INTENDED FOR USE IN TROPICAL CLIMATES.

Illustrations show the model for the United Kingdom and Republic of Ireland.
Information for Users on Collection and Disposal of Old Equipment and used Batteries

These symbols on the products, packaging, and/or accompanying documents mean that used electrical and electronic products and batteries should not be mixed with general household waste.
For proper treatment, recovery and recycling of old products and used batteries, please take them to applicable collection points, in accordance with your national legislation and the Directives 2002/96/EC and 2006/66/EC.
By disposing of these products and batteries correctly, you will help to save valuable resources and prevent any potential negative effects on human health and the environment which could otherwise arise from inappropriate waste handling.
For more information about collection and recycling of old products and batteries, please contact your local municipality, your waste disposal service or the point of sale where you purchased the items.
Penalties may be applicable for incorrect disposal of this waste, in accordance with national legislation.

For business users in the European Union
If you wish to discard electrical and electronic equipment, please contact your dealer or supplier for further information.
[Information on Disposal in other Countries outside the European Union]
These symbols are only valid in the European Union. If you wish to discard these items, please contact your local authorities or dealer and ask for the correct method of disposal.
![PANASONIC DVD-S58G - [Information on Disposal in other Countries outside the European Union] - 1](/content/2026/05/1144584/images/fb375ba57af74fc51e7afe5ad96e781f1700e8e0318dc0cc4e5ae79128d3e931.jpg)
Note for the battery symbol (bottom two symbol examples):
This symbol might be used in combination with a chemical symbol. In this case it complies with the requirement set by the Directive for the chemical involved.

Panasonic Corporation
Web Site: http://panasonic.net
EU
Pursuant to at the directive 2004/108/EC, article 9(2)
Panasonic Testing Centre
Panasonic Marketing Europe GmbH
Winsbergring 15, 22525 Hamburg, Germany
En
VQT2R61-1
H0210HM1040


- OPERATING INSTRUCTIONS
- DVD/CD PLAYER
- DEAR CUSTOMER
- (FOR THE UNITED KINGDOM, REPUBLIC OF IRELAND, SAUDI ARABIA, KUWAIT AND AFRICA) ("EB" OR "GC" AREA CODE MODEL ONLY)
- CAUTION
- IMPORTANT
- THIS PLUG IS NOT WATERPROOF-KEEP DRY
- BEFORE USE
- HOW TO REPLACE THE FUSE
- PLACEMENT
- VOLTAGE
- AC MAINS LEAD PROTECTION
- FOREIGN MATTER
- SERVICE
- NOTE
- MAINTENANCE
- CLEAN THIS UNIT WITH A SOFT, DRY CLOTH
- CLEAN DISCS
- DISC HANDLING PRECAUTIONS
- CAUTION FOR AC MAINS LEAD
- SAFETY PRECAUTIONS
- UNIT AND DISC CARE
- GENERAL INFORMATION
- PLAYBACK FROM DISC
- PRODUCT OVERVIEW
- CONNECTIONS
- GETTING STARTED
- PLAYBACK FEATURES
- DVD MENU OPTIONS
- SPECIFICATIONS
- TROUBLESHOOTING
- GLOSSARY
- ACCESSORIES
- TIPS
- SALES AND SUPPORT INFORMATION
- DIRECT SALES AT PANASONIC UK
- REGION CODES
- PLAYABLE DISCS AND SUPPORTED FORMATS
- DVD VIDEO
- DVD-RW
- DVD-R
- DVD-R DL
- CD-R
- CD-RW
- AUDIO CD
- VIDEO CD
- SUPER VIDEO CD
- FRONT AND REAR PANELS
- REMOTE CONTROL
- SEARCH
- INSERTING BATTERIES
- USING THE REMOTE CONTROL TO OPERATE THE SYSTEM
- CONNECTING TO TELEVISION
- USING AN AV CONNECTION (AV JACK)
- USING A VIDEO CONNECTION (VIDEO OUT JACK)
- CONNECTING DIGITAL AV RECEIVER
- CONNECTING THE AC MAINS LEAD
- STEP 1: SELECTING THE PROPER VIDEO INPUT
- STEP 2: SETTING UP PROGRESSIVE SCAN FEATURE
- BEFORE YOU START
- TO DEACTIVATE PROGRESSIVE SCAN MANUALLY
- TIP
- STEP 3: SELECTING THE MATCHING COLOR SYSTEM
- STEP 4: SETTING THE LANGUAGE
- ON-SCREEN DISPLAY (OSD) LANGUAGE
- AUDIO, SUBTITLE AND DISC MENU LANGUAGES
- STARTING DISC PLAYBACK
- BASIC PLAYBACK CONTROLS
- PAUSING PLAYBACK
- SKIPPING TITLE/CHAPTER/TRACK
- TO SELECT SEQUENTIALLY
- TO SELECT DIRECTLY (CHAPTER/TRACK ONLY)
- STOPPING PLAYBACK
- RESUME PLAY FUNCTION
- OPERATIONS FOR VIDEO PLAYBACK (DVD/VCD/SVCD)
- USING THE DISC MENU
- TO SELECT A PLAYBACK FEATURE OR ITEM
- TO ACCESS OR REMOVE THE MENU
- ZOOMING IN
- FORWARD/REVERSE SEARCHING
- FOR DVD, VCD, SVCD, CD
- SLOW MOTION PLAYBACK
- VIEWING THE DISC PLAYBACK INFORMATION
- SELECTING TITLE/CHAPTER/TRACK ON THE DISC INFORMATION
- FOR DVD
- FOR SUPER VCD OR VCD
- REPEAT PLAY MODES
- FOR VCD, AUDIO CD
- REPEATING A SECTION WITHIN A CHAPTER/TRACK
- SPECIAL FEATURES
- CHANGING THE AUDIO LANGUAGE
- FOR VCD
- SUBTITLES
- ANGLE
- FRAME BY FRAME
- RANDOM PLAYBACK
- PROGRAM PLAYBACK
- TO CLEAR THE WHOLE PROGRAM
- SPECIAL VCD & SVCD FEATURES
- PLAYBACK CONTROL
- FOR VCD WITH PLAYBACK CONTROL (PBC) FEATURE (VERSION 2.0 ONLY)
- PLAYING MP3/JPEG
- GENERAL OPERATION
- PLAYING MP3 MUSIC AND JPEG PICTURE SIMULTANEOUSLY (DVD-S58 ONLY)
- PLAYBACK SELECTION
- REPEAT
- REP
- REP DIR
- REP ALL
- REP OFF
- ZOOMING PICTURE (JPEG)
- PLAYBACK WITH MULTI-ANGLE (JPEG)
- PLAYING A DIVX® DISC
- ABOUT DIVX VIDEO
- ABOUT DIVX VIDEO-ON-DEMAND
- REGARDING DIVX VOD CONTENT THAT CAN ONLY BE PLAYED A SET NUMBER OF TIMES
- DISPLAYING SUBTITLES TEXT (FOR THE UNITED KINGDOM AND REPUBLIC OF IRELAND ONLY)
- USE HDMI CEC PROTOCOL
- ONE TOUCH PLAY
- SYSTEM STANDBY
- CONTROL WITH TV'S REMOTE CONTROL
- DISC MENU CONTROL
- DEVICE SELECT
- USING THE SYSTEM SETUP MENU
- TV SYSTEM
- SCREEN SAVER
- VIDEO
- {INTERLACE}
- {PROGRESSIVE}
- {RGB/SCART}
- RESOLUTION
- HDMI CEC
- TV TYPE
- {16:9}
- {16:9FULL}
- AUTO POWER OFF
- {OFF}
- USING THE LANGUAGE SETUP MENU
- OSD LANGUAGE
- AUDIO, SUBTITLE, MENU LANGUAGE
- DIVX SUBTITLE
- USING THE AUDIO SETUP MENU
- AUDIO OUT
- {BITSTREAM}
- {PCM}
- DYNAMIC RANGE
- USING THE VIDEO SETUP MENU
- BRIGHTNESS/CONTRAST
- HUE
- SATURATION
- SHARPNESS
- USING THE OTHER SETUP MENU
- RATING
- PASSWORD
- DIVX(R) VOD
- DEFAULT
- PROBLEM SOLUTION
- HDMI (HIGH-DEFINITION MULTIMEDIA INTERFACE)
- WARNING
- INFORMATION FOR USERS ON COLLECTION AND DISPOSAL OF OLD EQUIPMENT AND USED BATTERIES
- FOR BUSINESS USERS IN THE EUROPEAN UNION
- [INFORMATION ON DISPOSAL IN OTHER COUNTRIES OUTSIDE THE EUROPEAN UNION]
- NOTE FOR THE BATTERY SYMBOL (BOTTOM TWO SYMBOL EXAMPLES)
- EU
Brand : PANASONIC
Model : DVD-S58G
Category : DVD player