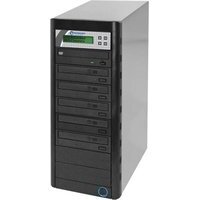
QD-DVD-125 - DVD Burner Microboards - Free user manual and instructions
Find the device manual for free QD-DVD-125 Microboards in PDF.


| Product Type | DVD Duplicator |
| Disc Capacity | 125 discs per load |
| Supported Disc Formats | DVD±R, DVD±RW, CD-R, CD-RW |
| Copy Speed | Up to 12x DVD write speed |
| Read Speed | Up to 16x DVD-ROM read |
| Interface | USB 2.0, standalone operation |
| Dimensions (W x D x H) | 430 x 320 x 180 mm |
| Weight | 4.5 kg |
| Power Supply | AC 100-240V, 50/60Hz |
| Power Consumption | 60W maximum |
| Operating Temperature | 5°C to 35°C |
| Functions | Disc duplication, compare, erase; standalone copying without PC |
| Display | LCD screen with status information |
| Controls | Front panel buttons for copy, erase, compare |
| Safety | Overheat protection, CE, FCC certified |
| Maintenance | Clean lens with dry cloth; avoid dust |
| Spare Parts Available | Replacement power adapter, disc tray, front panel |
| Repairability | Modular design; user-replaceable drive modules |
| Warranty | 1 year limited warranty |
| Manual Languages | English, Spanish, French |
Frequently Asked Questions - QD-DVD-125 Microboards
User questions about QD-DVD-125 Microboards
0 question about this device. Answer the ones you know or ask your own.
Ask a new question about this device
Download the instructions for your DVD Burner in PDF format for free! Find your manual QD-DVD-125 - Microboards and take your electronic device back in hand. On this page are published all the documents necessary for the use of your device. QD-DVD-125 by Microboards.
USER MANUAL QD-DVD-125 Microboards
natural_image
Abstract geometric logo with black and white angular shapes inside a circle (no text or symbols)MICROBOARDS®
Technology

natural_image
Four black desktop computer towers with visible drive indicators and control panels, no text or symbols present.QD-DVD
Series
User's Manual
Microboards Technology, LLC
Table of Contents
Introduction 5
Unpacking your system 5
Installation....5
Basic Instructions....5
Buttons and LCD 5
Hardware Description 6
Main Menu 7
Setting Counters 9
Using the QD Series Duplicator 9
Copy 9
Test 10
Compare 10
Test + Copy 11
Copy + Compare 11
Select Burn Speed 11
Select Source 11
▲ rase.... 11
Hard Drive Setup 11
Mix Audio Tracks 12
Setup....13
Utilities.... 13
AutoCopy 13
Shutdown 13
The Setup Menu 14
The Utilities Menu 16
Specifications – QD-DVD Series.... 18
Technical Support.... 18
Appendix 1: List of ▼unctions with Optional Hard Drive 19
Appendix 2: List of ▼unctions without Hard Drive .... 20
Appendix 3: ▲rror Messages ...... 21

Any unauthorized modification to this equipment may result in the revocation by the ▼CC of the user's authority to operate this equipment.
NOT▲: This equipment has been tested and found to comply with the limits for a Class B digital device, pursuant to Part 15 of the ▼CC Rules. These limits are designed to provide reasonable protection against harmful interference in a
residential installation. This equipment generates, uses, and can radiate radio frequency energy and, if not installed and used in accordance with the instructions, may cause harmful interference to radio communications. However, there is no guarantee that interference will not occur in a particular installation. If this equipment does cause harmful interference to radio or television reception, which can be determined by turning the equipment off and on, the user is encouraged to try to correct the interference by one or more of the following measures:
- Reorient or relocate the receiving antenna
- Increase the separation between the equipment and antenna
- Connect the equipment into an outlet on a circuit different than that to which the receiver is connected
- Consult the dealer or an experienced radio/TV technician for help

This product is in conformity with the ▲MC Directive (89/336/▲▲C) through compliance with the following ▲european standards: ▲N 55022, ▲N 55024. The C▲ mark has been affixed in accordance with the C▲ Marking Directive 93/68/▲▲C.
Canadian Department of Communications (DOC) Statement
This Class B digital apparatus complies with the Canadian IC▲S-003 Issue 4:2004. Cet appareil numerique de la classe B est conforme a la norme NMB-003 du Canade.
Introduction
The QD-DVD Series includes models containing 1, 3, 5, 7, and 10 recorders. Each is a high speed CD and DVD Recordable duplication system from Microboards Technology, LLC. The QD-DVD-H models include an integrated hard drive for master storage.
Regardless of the number of drives, the QD-DVD is perfect for any user requiring easy copying of audio, video, or Data DVD/CDs. The 2-line 20 character LCD panel provides the user with status of the duplication process, information on the process being run, master size, and other information.
Applications suited for the QD-DVD include Pro Audio, Multimedia, Government / Education, Software Development, Medical Imaging, and Data Interchange.
Unpacking your system
When unpacking your duplicator, confirm the following items are included:
- QD-DVD duplicator
- USB cable
- Power cable
- Zulu2 CD/DVD recording software Installation Disc
If any of these items are missing, please contact Microboards Technology Technical Support.
IMPORTANT: Please keep all the packing for your QD-DVD duplicator. If your unit ever needs to be sent in for service, it must be returned in the original packing or the warranty will be voided.
Installation
- Connect the supplied power cable to the QD-DVD duplicator and plug in to a protected power outlet strip or UPS power supply.
Note for Installation:
1) Please verify that the voltage switch above the power connection is set correctly for your local power specifications.
2) The socket outlet should be installed near the equipment and be easily accessible.
3) Do not block cooling fans.
- Turn on power to the duplicator.
- The system will go through initialization and then display: 1. Copy.
- The system is now ready to use.
- For USB Mode, connect to a PC via an unoccupied USB port. To access the drive, the External Connection mode must be turned ON in the Setup Menu (See page 14).
Basic Instructions
Buttons and LCD
There are four buttons and an LCD on the front panel of the QD-DVD duplicator.
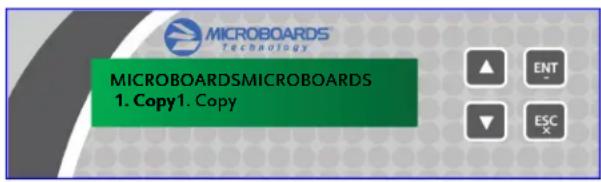
The LCD display shows the menu items and any status messages that may come up during operation.
| Control | Name | Function |
| ▲ | Up | Scroll up through the menu or list. |
| ▼ | Down | Scroll down through the menu or list. |
| ENT | OK | Execute the function. Also called OK in the Menus. |
| ESC | ESC | Go back to the previous function. |
Microboards Technology, LLC
Hardware Description

The QD-DVD system consists of a DVD reader, DVD Recorders (based on model), USB Connection, and Controller module. An optional Hard Drive is included in the QD-DVD-H models.
The master discs always go into the DVD reader drive (top).
The blank media will always go into the DVD Recorder drives.
The power switch and power L▲D are also located on the front of the QD-DVD duplicator.
The USB Connection is located on the back of the QD-DVD.
The LCD display will show the different menu selections and also information pertaining to the recording process. Here is a typical example of what is displayed during the COPY process:

Main Menu
This section provides an overview of the menu options. These menu options are explained in detail in the Using the QD Series Duplicator section starting on page 9.
Copy
Use the Copy menu to make CD and DVD copies. Before you start a copy, make sure you have selected the correct Master Source.
Test
Use the Test menu to simulate the copy process. With simulation, write once recordable discs such as DVD-R, or CDR will be reusable.
Note: DVD+R recordable media is not compatible with simulation mode. If you try to simulate DVD+R copying, you will encounter failure messages. If you are using Rewritable discs as your blank media during the simulation, the content on those discs will be permanently erased.
Compare
Use the Compare function to perform a bit-by-bit comparison between the content of your master disc and the contents of all discs it copied. This ensures that all of your copies are identical to original master disc.
Note: The bit-by-bit comparison will only apply on all DVDs and Data CDs. The readability check will be applied for other formats like Audio CDs, CD+G, and Video CDs discs due to their lack of error correction mechanisms.
Test + Copy
Use the Test + Copy menu option to simulate the copying process initially. Then, the duplicator performs the copy process on the blank disc(s) that passed the simulation.
Copy + Compare
Use the Copy + Compare menu option to make 100% reliable copies. After the copy process is done, the duplicator automatically compares the copies from the content of your original master disc.
Select Burn Speed
Use the Select Burn Speed menu option to adjust the duplication speed for the various blank disc formats. For additional information, see Select Burn Speed on page 11.
Select Source
Use the Select Source menu option to specify which drive is being used as the master drive. You should always select the DVD-ROM drive or the hard drive (if available) as the source unless there is a specific need to use one of the recorders as the master drive.
Erase
Use the Erase menu to erase your Rewritable discs.
Hard Drive Setup (if Optional Hard Drive is included)
This menu item only appears if your QD-DVD was originally purchased with the optional Hard Drive. This option is not available on the 1-recorder model.
Use the Hard Drive Setup menu to access the Hard Drive functions. You can scroll between the various options using the ▲ Up or ▼ Down button. For information on the Hard Drive Setup functions, please see page 11.
- Select Partition
- Load Partition
- Rename Partition
- Delete Partition
- Partition Info
- Select Loading Drive
- Format Hard Drive
Mix Audio Tracks
Use the Mix Audio Tracks menu option to select and burn specific tracks from Audio CDs onto your blank CDs. This function will not operate if CD+G Support is ON (page 15).
Setup
Use the Setup menu options to control how the Duplicator operates. You can scroll between the various options using the ▲ Up or ▼ Down button.
- Language
- Auto Start
- Read Error Skip
- CD Writing Mode
- Max Audio, VCD & CDG Speed
- Buzzer
- Startup Menu
- Screen Saver
- Duplication Mode
- Counter
- DVD+R High Compatibility Mode
- ISRC
- Disable Drives
- External Connection
- CD+G Support
Utilities
The Utilities menu includes a number of functions that are not related to the actual duplication process.
- Disc Info
- Prescan
- System Info
- Device Info
- Load Default
- Update Firmware
- Save
AutoCopy
The AutoCopy function simplifies the copy process. After the initial round of blanks is burned, you only need to load the drives again and close them. Once the drives detect the new blank media in the drives, duplication begins without you having to touch the control panel.
Shutdown
Use this menu option to save any setting changes you may have made and turn off your system. Once you see the "Ready to Power Off" message, you can safely turn off the machine using the power switch.
Turning off your duplicator without performing this function increases the risk of damaging it. Additionally, if you made any setting changes, those changes may not be saved if you simply turn off the power to the duplicator.
Setting Counters
The QD DVD Series gives you the option to set a counter so that the machine can keep track of the number of copies made. Follow
these steps when you see a Counter Selection Menu:
Microboards B.30 1. Copy
Counter: No Counter
The Counter Selection Menu lets you set how many copies you want to make for your project. The Counter Selection feature tells the duplicator
to count the number of successful copies you have made and stop the job when the desired number of copies has been reached.
You can select "No Counter" if you prefer to copy continuously with no interruption. (It will still count the number of copies, but it will not notify you when to stop.) To select the "No Counter", simply press the ENT button when you see the screen above.
Counter: Specify Counter
Or, you can select "Specify Counter" between 1 to 9999 by pressing the ▲ Up or ▼ Down button to go to the Specify Counter menu:
Specify Counter menu.
Press the ENT button to select this option. You will see the next
Specify Counter: [0] OK?
To specify the number of copies for your project, you need to input a four-digit number. If you need to specify a number that is less than four digits, fill the leading spaces with zeros. Examples are “0234” (two hundred and thirty four), or “0010” (ten).
To enter the number, you need to use the ▲ Up or ▼ Down button to select the number for each digit and use the ENT button or the ESC button to move the cursor position right or left. Once you've finished, move the cursor to "OK" and press the ENT button.
To input the desired quantity, do the following:
Make sure the cursor is located at the first position (First blinking position):
➢ Press the ▼ Down button repeatedly until "0" is displayed.
➢ Press the ENT button once to move the cursor to the next position.
➢ Press the ▼ Down button repeatedly until "0" is displayed.
➢ Press the ENT button once to move the cursor to the next position.
➢ Press the ▼ Down button repeatedly until "2" is displayed.
➢ Press the ENT button once to move the cursor to the next position.
➢ Press the ▼ Down button repeatedly until "1" is displayed.
With "0021" displayed, press the ENT button once and the cursor moves to "OK".
➢ Press the ENT button once more to submit your counter value and start duplication.
Using the QD Series Duplicator
Copy
This process will copy your master disc on to several blank discs simultaneously.
Use the ▼▲ buttons to navigate to the 1. Copy Menu.
Insert your blank discs in the recorder drives. Next, you will see the Counter Selection menu:
Counter: No Counter
Follow the instructions shown in Setting Counters (above) to continue. Once the counters have been set, press the ENT button to confirm.
As the blank discs are recognized, the number detected will increase. Press the ENT button to start the duplication. If you have Autostart set, duplication will begin either once all recorders have been found to contain blank media or until the Autostart time interval passes.
Preparing... 4063MB 3 Discs Detected, Go?
Microboards Technology, LLC
After a few seconds of processing time, one of the following Copy Progress screens will appear.
| Copying... 4063MB0/21 12% 488MB | or: | Copying... 4063MB0 12% 488MB |
| “4063MB” indicates the capacity of the master disc.“0/21” indicates you have a project size of 21 copies and you have made 0 copies so far.“12%” indicates the current progress of the duplication.488MB indicates the amount of data burned so far. | “4063MB” indicates the capacity of the master disc.“0” indicates you have made 0 copies so far.“12%” indicates the current progress of the duplication.488MB indicates the amount of data burned so far. |
Note: It is normal to see the progress indicator stay at 0%-10% and 100% for approximately 30 seconds for CD duplication and up to one minute for DVD duplication. That is caused by the initializing and finalizing stages.
Once the duplication run is completed, the recorder drives will eject and the number of successful and failed discs will be displayed.
Pass 3 Fail 0 (3) Waiting for Blanks
At this point, you can add more blank discs to the recorder drives and repeat the process. If you have the Counter set, only the number of discs selected will be burned.
Test
The Test function is useful to determine if your master disc can be successfully read.
Microboards B.30 2. Test
This process is identical to the Copy process, with the one exception being that the discs will not be burned to if the media supports test mode.
DVD+R media does not support test mode.
Running rewritable media in Test mode will cause any data on the discs to be erased.
Compare
The Compare function is used to compare the master disc with the copied discs. The Compare function will only work with Data masters. If your master disc has audio or video (VCD) on it, the Compare function will not work.
Microboards B.30 3. Compare
To use the Compare function, press the ▼▲ buttons until 3. Compare is displayed.
Place your master disc into the DVD reader drive and your copied discs into the DVD recorder drives.
Press the ENT button on the controller interface.
The duplicator will now compare the copies to the master disc. When completed, the display will read:
Compare OK: 7 Fail: 0 Diff: 0
Press the ▼ button and the following screen will appear:
Src:01 CD-RW Total: 15.2MB
Press the ▼ button again and the following screen will appear. Use the ▼ button to scroll through each drive that was used during the Compare
Tgt: 00 CD-RW Identical
Test + Copy
The Test + Copy function first simulates the burn to the media and then burns to the media if the Test simulation is successful.
Microboards B.30 4. Test+Copy
DVD +R media does not support test mode.
Copy + Compare
The Copy + Compare function first burns to the media and then runs a comparison of the burned discs to the master disc.
Microboards B.30 5. Copy+Compare
Select Burn Speed
This menu option allows you to change the duplication speed for each of the duplication job types. Available burn speeds will vary, depending on the model of the recorder drives installed in your duplicator. Press the ENT button to change burn speeds.
Microboards B.30 6. Select Burn Speed
Since speeds can be set based on media type being used or whether the hard drive is being used as the source, press the ▼▲ buttons to navigate to the duplication type whose burn speed you wish to change, then press the ENT button. Use the ▼▲ buttons again to display the burn speed you would like to choose and press ENT.
When you have changed the burn speed, press ESC to return to the main menu.
Select Source
Use this menu to select which drive will be used as the master drive, in which you would load your master disc. By default, the top drive is set as the source.
Microboards B.30 7. Select Source
Press the ENT button to change the source drive. Use the ▼▲ buttons to navigate through the drives, pressing ENT when the drive you want to use is shown.
It is not recommended that you change the source to anything other than the top drive or the hard drive unless it is necessary to do so.
Additionally, you should never select the bottom drive as the source, as this drive is used for the USB External Connection. If the External Connection is active, the bottom drive will not be available and the source drive will be reassigned to one of the other drives in the duplicator.
Erase
This menu option is used to erase rewritable media placed in the recorder drives. The Erase function has 2 options:
Microboards B.30 8. Erase
➢ Full Erase: This option erases the entire disc, destroying all previously written data in the process.
Quick Erase: This option erases the index (TOC) of the Rewritable disc, not the data section. It is much faster than Full Erase. However, the data section is still recoverable. If you prefer the old content not to be recovered for security purpose, please perform Full Erase.
Hard Drive Setup
This menu option is only available if you purchased your QD-DVD Series Duplicator with the optional hard drive. It is used to access the Hard Drive functions.
If it is not already set so, you will be asked if you want the set the hard drive as the source. Press the ENT button to set the hard drive as the source and enter the Hard Drive Setup menu.
1. Select Partition
This function is used to select the default partition on the hard drive for duplication. Use the ▼▲ buttons to move between the available partitions, pressing the ENT button when the partition you want is displayed. The partition selected will become the first that is displayed after you press the ENT button when the display reads 1. Copy.
2. Load Partition
Use this function when you want to add a new master disc partition to your hard drive.
Load Partition[231GB] Load- New Partition
After pressing ENT when the display reads 2. Load Partition, you will be asked to verify that you want to load a partition. Press ENT to continue loading.
Enter in the partition name of up to 14 characters, using the ▼▲ buttons to change the first character. Press ENT when the character you want is in the cursor position. To leave a position blank, press ENT when the space is empty.
After entering in all 14 characters, press ENT to highlight OK on the display. If the name is correct, press ENT. If you need to make changes, press the ESC button until the cursor is on the character that needs to be changed.
You will be asked to verify the name one last time before the master inserted in the reader drive is copied to the hard drive. The copy progress will be sown on the display. Once the master disc is copied to the hard drive, the reader drive will be ejected.
The master under the partition name you entered will now be available for duplication from the hard drive.
3. Rename Partition
The Rename Partition function allows you to change the name of an existing partition on the hard drive.
Use the ▼▲ buttons to move through the list of partitions until you get to the partition you want to rename. Press ENT, then use the ▼, ▲, and ENT buttons as in the Load Partition function to change the name. Press the ENT button when the cursor is on OK to save the new partition name.
4. Delete Partition
Use the Delete Partition function to remove a master partition that is no longer in use or if you need to clear hard drive space for new partitions to be added. Use the ▼▲ buttons to select the partition to delete, then press ENT. You will be asked to confirm deletion of the selected partition; press ENT if you are sure you want to remove the partition from the hard drive.
The Delete Partition function cannot be undone.
5. Partition Info
Use the ▼▲ buttons to scroll through the loaded partitions. The type of master used, size of the data in the partition, and the name will be displayed.
6. Select Loading Drive
By default, the drive selected as the source will be used for transferring a master from disc to hard drive, but you can use this function to select a different source drive. Use the ▼▲ buttons to scroll through the available drives to find the drive you want to use.
Press ENT to select the displayed drive.
This will not change the Source Drive in the Main Menu; it will only be used as the source for loading discs to the hard drive.
7. Format Hard Drive
The Format Hard Drive function will clear all contents from the hard drive. If you want to delete all partitions from the hard drive, this function is a quicker method than using the Delete Partition function on each individual partition.
The Format Hard Drive function cannot be undone.
Mix Audio Tracks
If your QD-DVD Series Duplicator does not include a hard drive, the display will show this menu item as 9, not 10.
You can use the Mix Audio Tracks feature to combine specific tracks from multiple audio CD masters onto a single disc. Insert your first master disc and at least one blank, then press ENT when the display shows Mix Audio Tracks.
Microboards B.30 10. Mix Audio Tracks
After the master audio disc is analyzed and any blank discs recognized, you will be able to select tracks from the master by using the ▼▲ buttons to navigate through the tracks and pressing ENT to select the tracks you want to burn.
The top line of the display will show the number of tracks currently selected and the total time of selected tracks. The bottom line of the display will show the track number and time for the current track.
Total: 0 Trk 0m:00s Track 1: 4m:24s
If a track is selected for the audio mix, the bottom line will begin with an asterisk (*). In the example to the right, 4 tracks have been selected, totaling 12 minutes 43 seconds; track 6 is 3 Total: 4 Trk 12m:43s *Track 6: 3m:56s
minutes and 56 seconds in length and has been selected for burning, as indicated by the asterisk.
When you use the ▼▲ buttons to go past the last track, you will be asked if you are done. Press ENT to burn the selected tracks from the current master to the blank media, or ESC to add more tracks from the same master. If you want to add tracks from another audio CD, you will have to burn the selected tracks from the current master before doing so.
After pressing ENT to burn the tracks, you will be asked if you are finished mixing. If you are, press ENT and the burned discs will be finalized. If you want to add tracks from another audio CD, press ▼ and you will be asked to insert the next master. Follow the same procedure to select and burn tracks for each master disc.
Discs must be finalized before they will be playable.
Please note that the Mix Audio Tracks function cannot be performed with the CD+G Support setting ON.
Setup
If your QD-DVD Series Duplicator does not include a hard drive, the display will show this menu item as 10, not 11.
Microboards B.30 11. Setup
The Setup menu includes many functions that affect the operation of the QD-DVD Duplicator. Please see page 14 for more information on the Setup menu options.
Utilities
If your QD-DVD Series Duplicator does not include a hard drive, the display will show this menu item as 11, not 12.
Microboards B.30 12. Utilities
The Utilities menu provides you with hardware information and a few maintenance functions. Please see page 16 for more information on the Utilities menu.
AutoCopy
If your QD-DVD Series Duplicator does not include a hard drive, the display will show this menu item as 12, not 13.
Microboards B.30 13. AutoCopy
The AutoCopy function simplifies the copy process. After the initial round of blanks is burned, you only need to load the drives again and close them. Once the drives detect the new blank media in the drives, duplication begins without you having to touch the control panel (Auto Start must be set to Auto or Full).
Shutdown
If your QD-DVD Series Duplicator does not include a hard drive, the display will show this menu item as 13, not 14.
When turning off your QD-DVD Duplicator, it is highly recommended that you do so using the Shutdown menu option.
Microboards B.30 14. Shutdown
Not only does this function save any system settings that you may have changed in the Setup menu, it also shuts down the duplicator components in a safe way.
When the display reads Ready to Power OFF after selecting the Shutdown function, you can use the power switch on the front.
Microboards Technology, LLC
The Setup Menu
The Setup menu includes many settings the user can select to customize the use of the QD-DVD duplicator. A description of the options in the setup menu follows.
Note: You must use either the Shutdown menu or manually run the Save function from the Utilities menu, or any changes you make to the Setup Menu settings will be lost when you turn off your duplicator.
Language
The QD-DVD duplicator has multiple language options, with ▲nglish being the default setting.
Auto Start
The Auto Start feature is used to automatically start recording, once the master disc and blank discs are inserted into the drives. The Auto Start feature applies to Copy, Test, Test + Copy, Copy + Compare, and ▲rase.
There are 3 options for this setting, Auto, Full, and Off.
- Auto: Starts the duplication process when all detect recordable media or the specified time period has passed after the last-detected blank disc is recognized, allowing you to leave some recorders empty while still using the Auto Start feature. You can specify 30, 20, 10, or 5 seconds for the time period.
• Full: Only starts the duplication when all drives report media as being present. - Off: You must press the ▲NT button to begin the duplication process, regardless of the number of discs loaded.
Read Error Skip
With Read ▲rror Skip OFF, the duplicator will halt any job when the reader encounters an error on your master disc. By changing this setting to ON, duplication will continue after finding a read error on the master. Please note that this does not fix the error, and may result in unusable discs.
It is strongly recommended that you do not change this setting from the default value of OFF.
CD Writing Mode
This setting allows you to change the CD writing mode between the 2 options, Disc at Once and Track at Once. The default setting is Disc at Once, which should be used unless you have a specific need to change the mode.
Max Audio, VCD, CDG Speed
Audio CD, Video CD and CD+G disc formats do not have internal error checking capabilities, so duplicating at high speeds may cause more instances of errors on the copies. This setting allows you to reduce the burn speed of these specific types of discs without lowering the burn speed of Data CD discs.
Buzzer
The Buzzer function will turn the beeper on the controller ON or OFF. Using the default of ON, a beep is heard when a button is pressed or when any job completes.
Startup Menu
Allows you to specify what the default menu item will be when the QD-DVD is turned on.
Screen Saver
Use this setting to enable or disable the Screen Saver feature. When this is enabled, a screen saver is displayed whenever your duplicator has been idle for a set period of time.
Duplication Mode
This menu option can only be changed on the QD-DVD-H Series.
There are 3 options available in the Duplication Mode menu: Load and Copy, Prompt, and On the Fly. These options do not apply if the hard drive is selected as the source.
The Load and Copy setting will load the master to the hard drive during the first burn cycle; subsequent burns without leaving Copy mode will use the hard drive image as the source for added stability.
To use a new master disc in Load and Copy mode, you must press ESC to return to the Copy menu!
The Prompt setting will ask you to specify Load and Copy or On the Fly when the Copy button is pressed.
The On the Fly setting will use the loaded master disc in the reader drive as the source at all times.
Counter
Use the Counter menu to enable or disable the Counter feature. The counter tells you how many discs have copied and how many discs are left to go during the duplication process stopping the job once the desired number of copies has been made.
DVD+R High Compatibility Mode
This feature allows you to turn the DVD+R High Compatibility Mode feature ON or OFF. The purpose of this feature is to increase the compatibility of DVD+R media with a broader range of DVD Video players.
ISRC
This option will allow you to enable/disable copying the ISRC code of an Audio CD. ISRC is the serial number of the audio track that uniquely identifies the song in that audio track. This ISRC code is commonly found in commercial Audio CDs and rarely seen on home made Audio CDs. By enabling this feature, the duplication performance will be lowered.
Disable Drives
Use this utility to allow the system to disable certain drives/trays when certain drives/trays are producing high failure rates.
External Connection
Use this setting to enable the bottom recorder drive to be used as an external drive connected to your PC via a USB 2.0 connection. Please note that while this setting is ON, the bottom drive will be unavailable for burning to the duplicator.
If you have a QD-DVD with one reader drive and one recorder drive, you will not be able to use the duplicator while the External Connection is ON. The QD-DVD multi-drive models will function with the remaining recorder drives as a stand-alone duplicator with the External Connection ON.
To connect the bottom drive to your PC, you will need to connect your PC and the duplicator using the supplied USB cable. Plug the flat end of the USB cable to your PC and the square end to the connection on the back of the duplicator, shown to the right.

Select the Setup menu and use the ▼▲ buttons and press the ENT button the display reads External Connection. If the display indicates that the connection is OFF, use either arrow key to change the setting to ON, then press ENT to save the setting. The duplicator will be briefly unresponsive as the bottom drive is released from duplication mode. Press ESC to leave the Setup menu.
To shut off the External Connection, simply change the External Connection setting to OFF. This setting can be changed any time both the tower and bottom drive are idle, but you may need to remove any media from the bottom drive before the drive will be recognized again. You do not need to disconnect the USB cable.
Microboards Technology, LLC
CD+G Support
This feature allows CD+G content to be copied from master disc to blank CDs. The default is OFF.
Please note that the Mix Audio Tracks function cannot be performed with the CD+G Support setting ON.
Remember, you must use the Shutdown menu or manually Save the settings under the Utilities menu if you want any changes you have made to remain after the Duplicator is shut down!
The Utilities Menu
A description of the options in the Utilities menu follows. Use the ▼▲ buttons to scroll through the menu, pressing the ENT button when the display shows the function you want to perform.
Disc Info
The Disc Info function will display the information regarding the blank recordable media you have loaded in the recorders. The media format, capacity, manufacture ID, and certified writing speed of the media will be displayed.
Information regarding any master disc loaded into the reader drive will also be displayed.
Load your media into the drives before pressing ENT when the display shows Disc Info. Each drive will be checked to see if media is present. If all drives are not filled, you will be shown the number of discs detected and be prompted to press the ENT again.
Use the ▼▲ buttons to scroll through the drives in which media has been detected.
Prescan
The Prescan function is used to verify the readability of the master disc by scanning for bad sectors on the master. Performing the Prescan on your masters before duplicating will help reduce the number of duplication failures caused by a master that contains uncorrectable errors.
You should load your master into the source drive prior to pressing the ENT button when the display shows Prescan. Your master will be scanned, with the results being displayed when the analysis is complete.
If the results show that the master disc Failed, you should not attempt to use that master as a source disc.
System Info
The System Info menu selection displays the model and firmware versions of the installed controller. Use the ▼▲ buttons to scroll through the system information.
Device Info
The Device Info menu selection displays the model and firmware versions of the drives installed in your QD-DVD Duplicator. Use the ▼▲ buttons to scroll through the device information.
Load Default
This option restores all Setup and Advanced Setup options to the default settings, as well as the default Burn Speed and the selected Source drive settings.
Update Firmware
Use the Update Firmware menu option to update the programming on your Duplicator. To update the firmware, you will need to have the correct firmware file burned to a CD.
Please note that "drag-and-drop" burn methods such as the Windows XP burn utility generally will not be recognized as valid as the disc format they create is not recognizable by the duplicator.
Use a disc burning application such as the Zulu2 Disc Burning application provided with your QD-DVD to burn the Update files to a CD.
Firmware Updates should only be performed after contacting Technical Support to ensure that you are attempting to install the correct firmware for your duplicator.
Save
This function will save any system settings that you have changed since the last time the duplicator was booted. This function is part of the process that occurs when you run the Shutdown process from the Shutdown menu.
Microboards Technology, LLC
Specifications – QD-DVD Series
| Model Recorders | Dimensions, inches (H x W x D) | Weight (Ibs) | Buffer (MB) | Power Rating | |
| QD-DVD | 1 6.75 | x 7.5 x 11.5 11 Ibs 32 | Rated: 100-240V~, 47-63 HzOutput: 5Vdc, 5A; 12Vdc, 5A85W Max | ||
| QD-DVD-123 | 3 | 11 x 7.5 x 17.5 | 21 Ibs 64 | Rated: 115/230V~, 8/5A, 60/50HzOutput: 5Vdc, 18A; 12Vdc, 20A320W Max | |
| QD-DVD-125 | 5 | 17.75 x 7.5 x 17.5 | 28 Ibs | 128 | |
| QD-DVD-127 | 7 | 17.75 x 7.5 x 17.5 | 31 Ibs | 128 | |
| QD-DVD-1210 | 10 | 24.5 x 7.5 x 16.5 43 Ibs | 128 | Rated: 115/230V~, 8/5A, 60/50HzOutput: 5Vdc, 25A; 12Vdc, 28A400W Max | |
• Max Read Speeds: CD 48x, DVD 16X
• Max Write Speeds: CD 48x, DVD 24X
- System Display L▲D
• Write Method Auto Detect ( DAO, TAO)
• Operation Mode COPY, T▲ST, PR▲SCAN
- ▼irmware Upgrade Via CD-ROM
• AC Input: 115/230 VAC; 8/5 AMPS MAX; 50-60Hz
• Maximum Operating Temperature: 25 Degrees C.
- Relative Humidity: 30% - 80% non-condensing.
- Supported ▼ormats: CD-ROM Mode 1 & 2 CD-DA, CD-ROM/XA Video CD, Game CD, Mix Mode, Multisession, H▼S CD Bridge, Photo CD, CD ▲xtra, CD Text; DVD-ROM, DVD-+R, DVD-+RW, DVD-+R DL, DVD-VID ▲O
CAUTION: Disconnect AC Power Cord Before Servicing. High Voltages Present with Unit Powered Off and Line Cord Connected.
Technical Support
▼ or technical questions or support issues, contact Microboards Technology technical support:
United States
PH: 952-556-1639
▼AX: 952-556-1628
support@microboards.com
www.microboards.com
Europe
PH: +44 (0) 845 230 7800
www.microboards.co.uk
Japan
PH: 03-3561-2266
www.microboards.co.jp
Please have the Model and Serial Number of your QD-DVD available when contacting Technical Support.
Your master discs should always be clean and free of scratches. If you notice your master disc has a dirty or scuffed data surface, you should replace the master as soon as possible!
Remember – the quality of duplication depends on the quality of master and blank discs used!
Appendix 1: List of Functions with Optional Hard Drive
- Copy
- Test
- Compare
- Test + Copy
- Copy + Compare
- Select Burn Speed
- Select Source
- Erase
-
Hard Drive Setup
-
Select Partition
- Load Partition
- Rename Partition
- Delete Partition
- Partition Info
- Select Loading Drive
-
Format Hard Drive
-
Mix Audio Tracks
-
Setup
-
Language
- Auto Start
- Read Error Skip
- CD Writing Mode
- Max Audio, VCD & CDG Speed
- Buzzer
- Startup Menu
- Screen Saver
- Duplication Mode
- Counter
- DVD+R High Compatibility Mode
- ISRC
- Disable Drives
- External Connection
-
CD+G Support
-
Utilities
-
Disc Info
- Prescan
- System Info
- Device Info
- Load Default
- Update Firmware
-
Save
-
AutoCopy
-
Shutdown
Appendix 2: List of Functions without Hard Drive
- Copy
- Test
- Compare
- Test + Copy
- Copy + Compare
- Select Burn Speed
- Select Source
-
Erase
-
Mix Audio Tracks
-
Setup
-
Language
- Auto Start
- Read Error Skip
- CD Writing Mode
- Max Audio, VCD & CDG Speed
- Buzzer
- Startup Menu
- Screen Saver
- Duplication Mode
- Counter
- DVD+R High Compatibility Mode
- ISRC
- Disable Drives
- External Connection
-
CD+G Support
-
Utilities
-
Disc Info
- Prescan
- System Info
- Device Info
- Load Default
- Update Firmware
-
Save
-
AutoCopy
-
Shutdown
Appendix 3: Error Messages
Master Discs should always be clean and free from scratches to reduce the number of duplication failures.
If an error situation occurs during duplication, the display will show both an error code and an error message.
| Error Code | Error Message Description and Recommended Solutions | |
| 200 Source Disc ▲mpty | The master disc was detected and identified successfully, but is blank.Check the master to ensure it contains data. | |
| 201 Bad Master | The master disc is detected but can't be identified.Check the master disc for defects or errors. | |
| 202 No Targets! | All blank discs are missing once the job has already started.Verify that blank discs are loaded into the recorders. | |
| 203 | Burner Mixed or▼irmware VersionMixed | The model or firmware versions of all installed recorders are not the same.Drive may have been replaced. Contact Tech Support. |
| 204 | Targets & Master Not Compatible! | The master disc and target discs do not have the same format.Verify that the master and target discs are the same format (CD master and CD blanks, for instance). You can use Disc Info in the Utilities menu to verify the disc formats. |
| 205 Targets Not Blank! | ▲xisting data has been detected on the target discs.Verify the discs are blank, replace if not. | |
| 206 | Targets & Master Size Mismatch! | During Compare: The sizes of the master disc and successful copies are different.During Copy: The capacity of the blank discs is less than the data size of the master.During Compare: Contact Tech SupportDuring Copy: Use Disc Info in the Utilities menu to verify that the blanks capacity is large enough for the data on the master disc. |
| 208 | Targets are not RW Discs! | The target discs are not Rewritable during an ▲rase attempt.Verify that each loaded disc is rewritable. |
| 209 | Master Disc is CSS Protected! | The master disc is copy protected.Copy protected masters cannot be duplicated. |
| 210 | Bad Discs! | The target discs are detected but cannot be identified.Replace discs that cannot be identified. |
| 211 | This format can not be tested! | Target discs during a Test attempt are DVD+R, DVD+RW, DVD+R DL, BD-R, or BD-R▲.Disc formats listed above are not supported by the test function. |
| 251 | Copy Audio ▲rror | Applies to Mix Audio Tracks. An error occurred during the Mix Audio process. Could be caused by either a master error or a recording error.Try a different master or blank disc. |
| 252 | Not Audio CD | Applies to Mix Audio Tracks. The master disc is not an Audio CD.Verify the master disc is an Audio CD. |
| 253 | Over Blank Disc Capacity | Applies to Mix Audio Tracks. The total size of the selected tracks is larger than the remaining capacity of the target discs.Select alternate track of smaller size, or remove selected track. |
| 260 No | Update▼ile | A valid firmware file was not detected on the disc during a▼irmware Update attempt.1. Confirm the file on the disc is not a “zip” file. If so, extract the file and burn to another disc.2. Confirm that the update disc was burned as a “Mode 1” Data CD. Drag-and-drop burn methods such as the Windows XP burn utility generally do not use this format and will not be recognized as valid.3. Verify that there are no other discs loaded into the duplicator. Insert the update disc in another drive tray and repeat. |
| 261 | Wrong Update▼ile | The▼irmware Update▼ile is either not compatible with your duplicator or is corrupted.Download and burn Update File again. Contact Tech Support if this error persists. |
| 262 | Unknown▼lash Model | The▼irmware Update▼ile is not intended for your duplicator.Contact Tech Support for the correct file. Have Duplicator Model and Serial Number available. |
| 263 | User Abort | A duplication job has been deliberately cancelled by the user by pressing the▲SC button for more than 5 seconds during a duplication attempt.Once the reason for cancellation has been corrected, restart the job after replacing any partially burned media. |


- MICROBOARDS®
- Technology
- QD-DVD
- Series
- User's Manual
- Table of Contents
- Canadian Department of Communications (DOC) Statement
- Introduction
- Unpacking your system
- Installation
- Note for Installation:
- Basic Instructions
- Buttons and LCD
- Main Menu
- Copy
- Test
- Compare
- Test + Copy
- Copy + Compare
- Select Burn Speed
- Select Source
- Erase
- Hard Drive Setup (if Optional Hard Drive is included)
- Mix Audio Tracks
- Setup
- Utilities
- AutoCopy
- Shutdown
- Setting Counters
- Using the QD Series Duplicator
- Hard Drive Setup
- Select Partition
- Load Partition
- Rename Partition
- Delete Partition
- Partition Info
- Select Loading Drive
- Format Hard Drive
- The Setup Menu
- Language
- Auto Start
- Read Error Skip
- CD Writing Mode
- Max Audio, VCD, CDG Speed
- Buzzer
- Startup Menu
- Screen Saver
- Duplication Mode
- To use a new master disc in Load and Copy mode, you must press ESC to return to the Copy menu!
- Counter
- DVD+R High Compatibility Mode
- ISRC
- Disable Drives
- External Connection
- CD+G Support
- The Utilities Menu
- Disc Info
- Prescan
- System Info
- Device Info
- Load Default
- Update Firmware
- Save
- Technical Support
- United States
- Europe
- Japan
- Appendix 1: List of Functions with Optional Hard Drive
- Appendix 2: List of Functions without Hard Drive
- Appendix 3: Error Messages
Brand : Microboards
Model : QD-DVD-125
Category : DVD Burner