
C52A1N4 - Audio recorder Dahua Technology - Free user manual and instructions
Find the device manual for free C52A1N4 Dahua Technology in PDF.


| Product Type | 4/8/16-Channel 4K 1U Digital Video Recorder |
| Brand | Dahua Technology |
| Model | C52A1N4 (part of C52A1N/C52A2N/C52A3N series) |
| Category | Digital Video Recorder (DVR) |
| Video Input | Up to 16 channels HDCVI (4/8/16 channel models) |
| Video Output | 1 VGA, 1 HDMI, 1 CVBS (video output) |
| Audio Input/Output | 1 audio input, 1 audio output |
| Recording Resolution | Up to 4K |
| Hard Drive Support | 1 SATA III port, supports up to 6TB HDD (7200 RPM or higher) |
| Network Interface | 1 Ethernet port (10/100/1000 Mbps) |
| USB Ports | 1 USB 2.0 (front panel), 1 USB (rear panel) |
| RS-485 Port | 1 RS-485 input port |
| Power Supply | AC 24V, SELV (Safety Extra Low Voltage) |
| Form Factor | 1U rackmount |
| Mounting | Rack-mountable or desktop placement |
| Web Access | Yes, via Internet Explorer (ActiveX required) |
| Default Login | Username: admin, Password: admin (change on first login) |
| Security Features | Password protection, account lockout after 5 failed attempts within 30 minutes |
| Included Accessories | Mouse, power cable, quick start guide |
| Compliance | FCC Part 15 |
| Cleaning | Use dry soft cloth; mild detergent with water for heavy dust; avoid volatile solvents |
Frequently Asked Questions - C52A1N4 Dahua Technology
User questions about C52A1N4 Dahua Technology
0 question about this device. Answer the ones you know or ask your own.
Ask a new question about this device
Download the instructions for your Audio recorder in PDF format for free! Find your manual C52A1N4 - Dahua Technology and take your electronic device back in hand. On this page are published all the documents necessary for the use of your device. C52A1N4 by Dahua Technology.
USER MANUAL C52A1N4 Dahua Technology
natural_image
Black rectangular electronic device labeled 'ethua' with no visible text or symbols on its body4/8/16-Channel 4K 1U Digital Video Recorder
C52A1N/C52A2N/C52A3N
Quick Start Guide
Version 001.002
Dahua Technology USA Inc.
Table of Contents
1 Welcome....1
1.1 Important Safeguards and Warnings....1
Electrical safety....1
Environmental Precautions ......2
Operation and Daily Maintenance....2
Warnings....2
1.2 FCC Information....3
FCC compliance: 3
1.3 Legal Notices .... 3
Copyright....3
Trademarks....3
5.1 Making Connections....7
5.2 Logging In 7
6 Accessing the DVR via the Web....8
1 Welcome
This manual offers reference material and general information about the basic operation, maintenance, and troubleshooting of the Dahua HCDVI Digital Video Recorder. Read, follow, and retain the following safety instructions. Heed all warnings on the unit and in the operating instructions before operating the unit. Keep this guide for future reference.
1.1 Important Safeguards and Warnings
Electrical safety
- Install the unit in accordance with the manufacturer's instructions and in accordance with applicable local codes.
• All installation and operation must conform to your local electrical safety codes.
• Do not overload outlets and extension cords, which may cause fire or electrical shock. - Do not place the camera near or in a place where the camera may contact overhead power lines, power circuits, or electrical lights.
- Ensure power conforms to SELV (Safety Extra Low Voltage) and that the limited power source is rated AC 24V as specified in IEC60950-1. (Power supply requirement is subject to the device label).
- All input/output ports are SELV circuits. Ensure that SELV circuits are connected only to other SELV circuits.
- Ground the unit using the ground connection of the power supply to protect the unit from damage, especially in damp environments.
- Protect the plug and power cord from foot traffic, being pinched, and its exit from the unit.
- Units with or without an ON/OFF switch have power supplied to the unit whenever the power cord is inserted into the power source; however, the unit is operational only when the ON/OFF switch is in the ON position. The power cord is the main power disconnect device for switching off the voltage for all units.
- Operate the unit only from the type of power source indicated on the label. Before proceeding, disconnect the power from the cable to be installed into the unit.
- For external power supplied units, use only the recommended or approved power supplies.
- Limited power sources must comply with EN 60950. Substitutions may damage the unit or cause fire or shock.
- For 24 VAC units, voltage applied to the unit's input power should not exceed ± 25% . User-supplied wiring must comply with local codes (Class 2 power levels). Do not ground the supply at the terminals or at the unit's power supply terminal.
- Contact the local dealer or the power company to verify the correct power supply.
- Do not attempt to service the unit. Opening or removing covers may expose you to dangerous voltage or other hazards. Refer all servicing to qualified personnel.
- If the unit is damaged and requires service, unplug the unit from the main power supply and refer to qualified service personnel. Damage may include, but is not limited to:
- The power supply cord or plug is damaged.
• Liquid has spilled in or on the unit. - An object has fallen on the unit.
- The unit has been dropped and the housing is damaged.
- The unit displays a marked change in performance.
- The unit does not operate in the expected manner when the user correctly follows the proper operating procedures.
- Ensure a service technician uses replacement parts specified by the manufacturer, or that have the same characteristics as the original parts. Unauthorized parts may cause fire, electrical shock, or other hazards. Dahua is not liable for any damage or harm caused by unauthorized modifications or repairs.
• Perform safety checks after completion of service or repairs to the unit.
- Use attachments and accessories only specified by the manufacturer. Any change or modification of the equipment, not expressly approved by Dahua, could void the warranty.
- Incorporate a readily accessible disconnect device in the building installation wiring for quick power disconnect to the unit.
- Dahua assumes no liability or responsibility for any fire or electrical shock caused by improper handling or installation.
Environmental Precautions
• Transport, use, and store the unit within the specified temperature and humidity range.
- Do not place the unit in a wet, dusty, extremely hot or an extremely cold environment; and avoid environments with strong electromagnetic radiation or unstable lighting.
- Never push objects of any kind into this unit through openings as they may touch dangerous voltage points or cause a short circuit that may result in fire or electrical shock. Take care to not spill any liquid on the unit.
- Do not use units intended for indoor applications near water, in damp or wet environments, or in any area classified as a wet location. Do not expose an indoor unit to rain or moisture to reduce the risk of fire or electric shock.
- Do not block or cover any openings in the unit enclosure. These openings are provided for ventilation to prevent overheating and to ensure reliable operation. Ensure the unit is placed in an area with adequate ventilation.
- Do not place the unit near a heat source such as heaters, stoves, radiators or other equipment that produces heat.
• Use the following guidelines if placing the unit in a rack-mount:
- The ambient temperature of a rack-mount environment may exceed the recommended operating temperature of the unit. Take care to read the ambient temperature before installation.
- A rack-mount environment may restrict the movement of air. Ensure the unit receives the proper amount of air flow required for safe operation or install the unit elsewhere.
- A rack mount is capable of supporting a maximum weight. Ensure the rack mount can support the additional weight of this unit.
- A rack mount environment requires proper and adequate circuitry. Ensure the circuits to the rack are capable of handling the electrical requirements of all units in the rack to protect against circuit overloads.
- Pack the unit with standard factory packaging or material of the same quality when transporting the unit.
- Take care to avoid heavy stress, violent vibration, or water spills to the camera unit during transportation, storage, and installation.
Operation and Daily Maintenance
- Do not touch the heat dissipation component of the unit. This part of the unit is hot and may cause a burn.
- Do not open or dismantle the device; there are no components that a user can fix or replace. Opening the unit may cause water leakage or expose components to direct light. Contact the manufacturer or a qualified service representative to service the camera or to replace a component, including the desiccant.
• Dahua recommends the use of a thunder-proof device in concert with the unit. - Use a dry soft cloth to clean the unit's housing. If the unit is particularly dusty, use water to dilute a mild detergent, apply the diluted detergent to a soft cloth, then gently clean the device. Finally, use a dry cloth to wipe the unit dry. Do not use a volatile solvent like alcohol, benzene, or thinner; or use a strong detergent with abrasives, which may damage the surface coating or reduce the working performance of the unit.
Warnings
- Change the default password after the initial login to protect the integrity of the network.
- Use the standard accessories provided by the manufacturer and ensure the unit is installed and commissioned by qualified professionals.
1.2 FCC Information
This device complies with part 15 of the FCC Rules. Operation is subject to the following two conditions:
• This device may not cause harmful interference;
- This device must accept any interference received, including interference that may cause undesired operation.
FCC compliance:
This equipment has been tested and found to comply with the limits for a digital device, pursuant to part 15 of the FCC Rules. These limits are designed to provide reasonable protection against harmful interference. This equipment generates uses and can radiate radio frequency energy and, if not installed and used in accordance with the instruction manual, may cause harmful interference to radio communication. However, there is no guarantee that interference will not occur in a particular installation. If this equipment does cause harmful interference to radio or television reception, which can be determined by turning the equipment off and on, the user is encouraged to try to correct the interference by one or more of the following measures:
• Reorient or relocate the receiving antenna.
- Increase the separation between the equipment and receiver.
- Connect the equipment into an outlet on a circuit different from that to which the receiver is connected.
- Consult the dealer or an experienced radio/TV technician for help.
1.3 Legal Notices
Copyright
This user guide is ©2017, Dahua Technology Company, LTD.
This user guide is the intellectual property of Dahua Technology Company, LTD and is protected by copyright. All rights reserved.
Trademarks
All hardware and software product names used in this document are likely to be registered trademarks and must be treated accordingly.
1.4 Disclaimer
- This user guide has been compiled with great care and the information it contains has been thoroughly reviewed and verified. The text was complete and correct at the time of printing. This guide may be periodically updated to reflect changes to the product or to correct previous information and the content of this guide can change without notice. If you encounter an error or have any questions regarding the contents of this guide, contact customer service for the latest documentation and supplementary information. Dahua accepts no liability for damage resulting directly or indirectly from faults, incompleteness, or discrepancies between this guide and the product described. Dahua is not liable for any loss caused by installation, operation, or maintenance inconsistent with the information in this guide.
- Video loss is inherent to all digital surveillance and recording devices; therefore Dahua cannot be held liable for any damage that results from missing video information. To minimize the occurrence of lost digital information, Dahua recommends multiple, redundant recording systems, and adoption of backup procedure for all data.
- Contact the supplier or customer service if you encounter any issue while using this unit.
2 Unpacking
This equipment should be unpacked and handled with care. If an item appears to have sustained damage during shipping, notify the shipper immediately.
Verify that all the parts are included. If an item is missing, contact customer support or your local representative.
The original packing carton is the safest container to transport the unit, in the event the unit must be returned for service. Retain the carton and all shipping material for future use.
Please refer to the enclosed CD for more details, to view the detailed User's Manual, and for configuration software.
3 DVR Components
Check the label on the bottom of the DVR and note the model number and the power requirements for this DVR. The label on the rear panel lists the serial number for the DVR. Please provide this serial number when requesting information or service for this device.
3.1 Front Panel
The figure below depicts the DVR front panel.

Figure 3-1
| Light | Name | Function |
| STATUS | Status indicator | The blue light is on when the device is working properly. |
| HDD | HDD status indicator | The blue light is on when the HDD is malfunctioning. |
| NET Network status indicator | The blue light is on when the network connection is abnormal. | |
| POWER | Power status indicator | The blue light is on when the power connection is OK. |
 USB 2.0 port USB 2.0 port | Connect to a peripheral USB 2.0 device (storage mouse, CD/DVD burner). | |
3.2 Rear Panel
The figure below depicts the DVR rear panel (image for reference only).

Figure 3-2
| Ref | Name | Ref | Name | Ref | Name |
| 1 | Video input | 2 | Video output | 3 | Audio output |
| 4 | Audio input | 5 | VGA Video output | 6 | HDMI port |
| 7 | USB port | 8 | Network port | 9 | RS-485 input port |
| 10 | Power socket | 11 | On/Off button | 12 | GND port |
4 Installing the Hard Drive
The Wi-Fi DVR uses one (1) SATA III Port that can accommodate a 6 TB HDD rated at 7200 RPM or higher. The installation requires a Phillips-head screwdriver.
-
Shut down the device and then unplug the power cable before you open the case to replace the HDD
-
Loosen the screws on the rear panel and side panels and remove the upper housing.

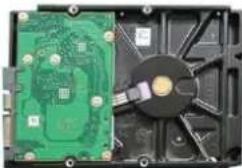
- Place four screws in the HDD casing, two on top and two on the bottom. Tighten each screw, turning the screwdriver just three times.
natural_image
Interior view of a computer drive showing green circuit board and black drive casing (no visible text or symbols)- Align the four screws in the HDD casing with the holes on the bottom of the DVR. Place the HDD into the DVR housing.

natural_image
Close-up of a gloved hand inserting electronic components into a device (no visible text or symbols)- Turn the DVR upside down and then firmly tighten each screw to secure the HDD to the DVR.

natural_image
Front view of a white electronic device with ventilation slots and mounting points (no visible text or symbols)- Turn the DVR over and connect the SATA cable and the power cable to the HDD. You can connect the HDD data cable and the power cable first and then fix the HDD in the device.

natural_image
Interior view of a computer case showing an open circuit board with cable and indicator lights (no visible text or symbols)-
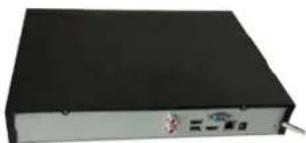
Align the upper housing with body of the DVR, then push the clips in and then place the cover back onto the DVR.
-
Secure the screws in the rear panel and the side panel.
natural_image
Black rectangular electronic device with a small indicator light and label (no visible text or symbols)5 DVR Setup
5.1 Making Connections
- Determine where you will install your system.
- Connect the mouse to the USB port on the rear panel.
- (Optional) Connect a network cable to the DVR and to a router or a modem.
- Connect a VGA or HDMI cable to the rear panel and to the display.
- Connect the power cable to your system and surge protector. The DVR enters the boot mood after power is applied and the DVR defaults to the multiple-window video mode.
5.2 Logging In
After the initial startup, the DVR opens the Admin Security page where you must supply the default username and password and then set your own credentials.

Figure 5-1
- Select "admin" from the User Name pull-down menu.
- Type a unique password for the admin account.
- Type the same password in the Confirm Password field.
- Supply answers for the security questions. This step is optional but aids in password recovery.
- Click OK. The DVR opens the Setup Wizard to configure the following areas:
- General: Device ID and operation, date/time, holiday schedule.
- Encode: Video and audio settings for each channel.
-
Schedule: Recording schedule configuration.
• Record: Main stream and sub-stream settings. -
Click OK at the last wizard screen to set the parameters. Right-click anywhere in the DVR screen to access the settings menu again.
Note:
• Three login failures within 30 minutes causes the system to issue an alarm.
- Five login failures within 30 minutes causes the system to lock the account.
6 Accessing the DVR via the Web
The DVR can be accessed directly from the Internet Explorer Web browser. The Web Interface allows you to set parameters, configure inputs and outputs, set recording options, view live camera images, and review recorded video.
Note: Different devices may have different Web interfaces, the figures below are for reference only, and may not represent the Web Interface for your device.
- Launch Internet Explorer and type the DVR's IP address in the address bar. Internet Explorer opens the Login page.
- Click Yes to install webrec.cab when the system displays the installation prompt. (Note: If you receive an error that the computer cannot download the ActiveX file, please modify the security settings in Internet Explorer to accept ActiveX downloads.)
- Type the Username and Password for the device. Then, click Login. The default Username and Password "admin".
Note: For security reasons, modify your password after your first login.

Figure 6-1
Dahua Technology USA Inc.
23 Hubble, Irvine, CA 92618
Tel: (949) 679-7777
Fax: (949) 679-5760
Email: sales.usa@global.dahuatech.com
Rev 001.002 © 2017 Dahua. All rights reserved. Design and specifications are subject to change without notice.


- 4/8/16-Channel 4K 1U Digital Video Recorder
- C52A1N/C52A2N/C52A3N
- Table of Contents
- Welcome....1
- Welcome
- Important Safeguards and Warnings
- Electrical safety
- Environmental Precautions
- Operation and Daily Maintenance
- Warnings
- FCC Information
- FCC compliance:
- Legal Notices
- Copyright
- Trademarks
- Disclaimer
- Unpacking
- DVR Components
- Front Panel
- Rear Panel
- Installing the Hard Drive
- DVR Setup
- Making Connections
- Logging In
- Note:
- Accessing the DVR via the Web
Brand : Dahua Technology
Model : C52A1N4
Category : Audio recorder