
SX-KN2400 - Musical instrument PANASONIC - Free user manual and instructions
Find the device manual for free SX-KN2400 PANASONIC in PDF.


| Product Type | Arranger Keyboard |
| Number of Keys | 61 |
| Key Sensitivity | Yes (Touch Response) |
| Display | Backlit LCD |
| Built-in Sounds | Over 600 voices including piano, organ, strings, brass, woodwinds, percussion |
| Rhythms/Accompaniment | 220 auto-accompaniment styles with intro, ending, and variations |
| Song Memory | 16 track recorder (up to 5 songs) |
| Effects | Reverb, chorus, DSP |
| Connectivity | MIDI In/Out, Headphone Jack, Aux In, Line Out, Pedal Jack, USB (with adapter) |
| Built-in Speakers | 2 x 12W stereo speakers |
| Power Supply | AC adapter (included) or 6 x D-size batteries |
| Dimensions (W x D x H) | 1000 x 400 x 150 mm (39.4 x 15.7 x 5.9 inches) |
| Weight | 13.5 kg (29.8 lbs) |
| Cleaning and Maintenance | Wipe with a soft dry cloth. Avoid solvents. Keep in dry environment. |
| Safety Features | Auto power-off after 30 minutes of inactivity. Overheat protection. |
| Repairability and Spare Parts | Serviceable by authorized technicians. Spare parts available through Panasonic support. |
Frequently Asked Questions - SX-KN2400 PANASONIC
User questions about SX-KN2400 PANASONIC
0 question about this device. Answer the ones you know or ask your own.
Ask a new question about this device
Download the instructions for your Musical instrument in PDF format for free! Find your manual SX-KN2400 - PANASONIC and take your electronic device back in hand. On this page are published all the documents necessary for the use of your device. SX-KN2400 by PANASONIC.
USER MANUAL SX-KN2400 PANASONIC
Matsushita Electric Industrial Co., Ltd. Web Site: http://www.panasonic.co.jp/global/
ENGLISH
CQT00582 5w070150

natural_image
Pure black horizontal lines on white background with no text or symbolsTechnics
KEYBOARD
sx-KN2400
sx-KN2600
Operating Instructions
natural_image
Black treble clef symbol on lined paper (no text or symbols)Before connecting, operating or adjusting this product, please read these instructions completely. Please keep this manual for future reference.

QDTG069ENGLISH
Caution for AC Mains Lead
(For United Kingdom) (For the type as shown in figures A and B)
For your safety, please read the following text carefully.
This appliance is supplied with a moulded three pin mains plug for your safety and convenience. A 5-ampere fuse is fitted in this plug. Should the fuse need to be replaced please ensure that the replacement fuse has a rating of 5-ampere and that it is approved by ASTA or BSI to BS1362.
Check for the ASTA mark on the BSI mark

on the body of the fuse.
If the plug contains a removable fuse cover you must ensure that it is refitted when the fuse is replaced. If you lose the fuse cover the plug must not be used until a replacement cover is obtained. A replacement fuse cover can be purchased from your local dealer.
CAUTION!
IF THE FITTED MOULDED PLUG IS UNSUITABLE FOR THE SOCKET OUTLET IN YOUR HOME THEN THE FUSE SHOULD BE REMOVED AND THE PLUG CUT OFF AND DISPOSED OF SAFELY. THERE IS A DANGER OF SEVERE ELECTRICAL SHOCK IF THE CUT OFF PLUG IS INSERTED INTO ANY 13-AMPERE SOCKET.
If a new plug is to be fitted please observe the wiring code as stated below. If in any doubt please consult a qualified electrician.
IMPORTANT
The wires in this mains lead are coloured in accordance with the following code:
Blue: Neutral, Brown: Live.
As these colours may not correspond with the coloured markings identifying the terminals in your plug, proceed as follows:
The wire which is coloured Blue must be connected to the terminal which is marked with the letter N or coloured Black or Blue.
The wire which is coloured Brown must be connected to the terminal which is marked with the letter L or coloured Brown or Red.
WARNING: DO NOT CONNECT EITHER WIRE TO THE EARTH TERMINAL WHICH IS MARKED WITH THE LETTER E, BY THE EARTH SYMBOL OR COLOURED GREEN OR GREEN/YELLOW.
THIS PLUG IS NOT WATERPROOF — KEEP DRY.
Before use
Remove the connector cover.
How to replace the fuse
The location of the fuse differ according to the type of AC mains plug (figures A and B). Confirm the AC mains plug fitted and follow the instructions below. Illustrations may differ from actual AC mains plug.
- Open the fuse cover with a screwdriver.
Figure A Figure B

- Replace the fuse and close or attach the fuse cover.
Figure A Figure B

For United Kingdom and Republic of Ireland
| shop@ Panasonicwww.panasonic.co.uk (for UK customers only) |
| Order accessory and consumable Items for your product with ease and confidence by telephoning our Customer Care Centre Mon-Friday 9:00am-5:30pm. (Excluding public holidays.)Or go on line through our Internet Accessory ordering application.Most major credit and debit cards accepted.All enquiries transactions and distribution facilities are provided directly by Panasonic UK Ltd.It couldn't be simpler! |
| Customer Care CentreFor UK customers: 08705 357357 For Republic of Ireland customers: 01 289 8333 |
| Technical SupportFor UK customers: 0870 1 505610This Technical Support Hot Line number is for Panasonic PC software related products only.For Republic of Ireland, please use the Customer Care Centre number listed above for all enquiries.For all other product related enquiries, please use the Customer Care Centre numbers listed above. |
Part II Playing the rhythm
Overview of rhythm performance
An explanation follows of the terms related to this instrument's rhythm performance.
Rhythm and accompaniment pattern
Each rhythm is comprised of not only a DRUMS pattern, but also of accompaniment patterns called BASS and ACCOMP. The combination of all of these is the rhythm.
- The accompaniment pattern sounds when you perform using the AUTO PLAY CHORD (APC). (Refer to page 52.).
Rhythm and Style
One rhythm of this instrument is comprised of four VARIATION patterns, and for each one the optimum sounds and effects are set. All of these together comprise one STYLE.
STYLE
| RHYTHM | |
| VARIATION 1 | PANEL setting |
| VARIATION 2 | PANEL setting |
| VARIATION 3 | PANEL setting |
| VARIATION 4 | PANEL setting |
• In the MUSIC STYLIST (page 60) and MUSIC STYLE ARRANGER (page 62) etc. this STYLE is summoned.
Part V Composer
Outline of the Composer

natural_image
Front panel of a computer interface with buttons and ports (no readable text or symbols)The COMPOSER enables you to create your own accompaniment patterns. A pattern is comprised of 8 parts: DRUMS 1, 2, BASS and ACCOMP1-5 parts. These parts would form the backing of a song.
Rhythm components which can be stored
Different INTRO 1, 2, VARIATION 1 to 4, FILL IN 1, 2 patterns can be created for each MEMORY (A, B, C).
• Each VARIATION is made of a PATTERN, FILL 1 and FILL 2.
- A Maj (major) and Min (minor) pattern is available for each of the INTRO and ENDING 1 and 2.
| INTRO VARI 1 VARI 2 | VARI 3 VARI | 4 ENDING | |||
| 1 Maj | PATTERN | PATTERN | PATTERN | PATTERN | 1 Maj |
| 1 Min | FILL IN 1 | FILL IN 1 | FILL IN 1 | FILL IN 1 | 1 Min |
| 2 Maj | FILL IN 2 | FILL IN 2 | FILL IN 2 | FILL IN 2 | 2 Maj |
| 2 Min | 2 Min | ||||
Memory capacity
Expressed in terms of notes, the total number of notes which can be stored in all the COMPOSER memories is about 13,000. The remaining memory available for recording is shown on the recording display as a percentage (%).
- When "Memory full!" appears on the display no more data can be stored in the COMPOSER.
■ MEMORY
Because the contents of the MEMORY are erased after the power is turned off, you should save the data on disks/SD cards if you wish to keep it. (Refer to pages 125, 140.)
Part IX Reverb & Effect
Outline of the Reverb & Effect
natural_image
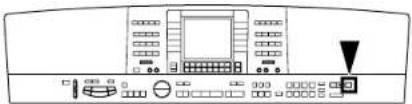
Front panel of a computer control interface with buttons and a monitor (no visible text or labels)In the REVERB & EFFECT mode, you can make detailed settings related to this instrument's effects.
- Press the PROGRAM MENUS button to turn it on.

• The display looks similar to the following.

- Select REVERB & EFFECT.
• The display looks similar to the following.

-
Select the desired menu.
-
Follow the procedures on the corresponding menu display.
- When the TEMPO/PROGRAM indicator is lit, it indicates that the TEMPO/PROGRAM is available for setting the current function.
- When you have finished setting the functions, press the PROGRAM MENUS button to turn it off.
Summary of the REVERB & EFFECT menu items
TONE CONTROL (page 156)
Settings for the entire instrument's final output sound quality.
REVERB:
REVERB type and detailed settings (page 43)
CHORUS:
CHORUS type and detailed settings (page 43)
MULTI:
MULTI EFFECT type and detailed settings (page 42)
MIC REVERB & EFFECT:
Settings for the effects that are applied to MIC. (page 44)
SOUND LOAD OPTION:
Specify whether the various data accompanying a sound, such as effects, are used when the sound is recalled. (page 153)
MIXER:
Use the MIXER display to visually adjust the major settings of each part. (page 150)


Part IX Reverb & Effect
Tone Control
Settings for the entire instrument's final output sound quality.
- On the REVERB & EFFECT display, select TONE CONTROL.
• The display looks similar to the following.

- Use the BASS ∧ and ∨ buttons to adjust the low range and the TREBLE ∧ and ∨ buttons for the high range.
- Raising the settings excessively may cause distorted sounds. Lower the setting or the MAIN VOLUME.
Reverb & Effect
Part X Sound Edit
Outline of the Sound Edit

natural_image
Front view of a computer control panel with buttons and indicator lights (no visible text or labels)SOUND EDIT enables you to create your own new sound by altering one of the this instrument's preset sounds. Your new sound can be stored in one of the sound memory locations. SOUND EDIT has two methods of use. You can edit in detail using functions more commonly associated with a synthesizer, or you can use EASY EDIT which allows you to change some basic parameters on one page.
- Select a sound to edit.
- Turn on the PROGRAM MENUS button.
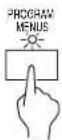
• The display looks similar to the following.

- Select SOUND EDIT. • The display looks similar to the following.
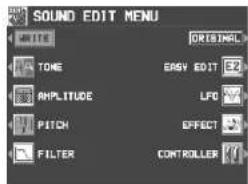
- Select the desired menu and follow the procedures on the corresponding setting display.
- To check the sound of a single tone, press the SOLO button to highlight the SOLO indication. Only the currently selected tone sounds when a key is played.
- When the TEMPO/PROGRAM indicator is lit, it indicates that the TEMPO/PROGRAM is available for setting the current function.
- When the sound is just the way you like it, on the SOUND EDIT MENU display press the WRITE button to store your new sound.
- Press the EDITED (or ORIGINAL) button to switch between the modified sound (EDITED) and the original sound (ORIGINAL). This allows you to compare the edited sound to the original sound as you are modifying it.
Summary of the SOUND EDIT menu items
EASY EDIT (page 158) The most often used edit functions—such as brightness and attack speed—are assembled on one display for easy sound modification.
TONE (page 159) Modify the tones which make up the sound.
PITCH (page 162) Adjust the settings related to the pitch.
FILTER (page 163) Adjust the amount of frequency cut in specific frequency ranges.
AMPLITUDE (page 165) Volume settings.
LFO (page 167) Cyclic modulation settings.
EFFECT (page 168) Settings related to the various effects applied to the sound.
CONTROLLER (page 169) Specify how wheel operation etc. affects the sound.
Part X Sound Edit
- When DRUM KIT sounds are selected and the SOUND EDIT is activated, the setting display looks different from that for other sounds, but the basic operation is the same. (To specify the percussion instrument you wish to edit, use the ∧ and ∨ buttons to select the sound name, or alternatively, while pressing the keyboard key for the corresponding sound, press the NOTE SELECT button.)
- To record the DIGITAL DRAWBAR settings, first adjust the settings, then enter the SOUND EDIT mode, press the WRITE button and follow the procedure on the display.
Easy Edit
The most commonly used edit functions are consolidated on one display, providing convenient and quick editing operation.
- On the SOUND EDIT menu display, select EASY EDIT.
• The display changes to the following.
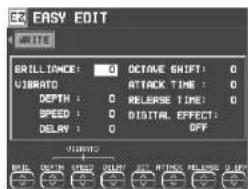
-
Use the buttons below the display to specify the value of the attribute.
-
An effect may remain unchanged when EASY EDIT is used to set the value, if another EDIT function was first used to set the value to its upper or lower limit.
- Press the WRITE button to store your new sound.
- Storing your new sound is explained on page 169.
- If a sound is stored in the EASY EDIT mode, and is later selected in the EASY EDIT mode, the displayed value of an attribute may be different from the value when it was stored. The sound itself, however, is exactly as it was stored.
Easy Edit items
BRILLIANCE:
Adjust the brightness of the sound.
VIBRATO DEPTH:
Set vibrato depth.
VIBRATO SPEED:
Set vibrato speed.
VIBRATO DELAY:
Set time delay between key played and vibrato start.
OCT SHIFT:
Shift the octave range.
ATTACK:
Adjust attack time.
RELEASE:
Adjust time of sound fade-out after key is released.
D. EFF:
Select type of effect. (Refer to page 168)
Part X Sound Edit
Tone Edit
Modify the separate tones which comprise the sound.
About tones
A sound may be made up of at most four tones.

flowchart
graph TD
    A["SOUND"] --> B["1st tone"]
    A --> C["2nd tone"]
    A --> D["3rd tone"]
    A --> E["4th tone"]
- A special process is used to produce real-sounding piano type tones. For this reason, some edit procedures for piano sounds, FILTER or AMPLITUDE for example, may differ from those for other sounds.
TONE SELECT
- On the SOUND EDIT menu, select TONE.
• The display looks similar to the following.

- Use the buttons to the left of the display to select the tone you wish to edit (1st, 2nd, 3rd, 4th).
- Use the ▲ and ▼ buttons to select a setting item and then the ∧ and ∨ buttons to specify a selection.
- Use the ON/OFF buttons to select ON or OFF.
- Select a sound for the tone.
- Use the GROUP and buttons to select the group, and the TONE NAME and buttons to select the sound.
- A “*” mark in the DYNAMICS column indicates that a TONE DYNAMICS change was made to the sound.
-
Use the LEVEL ∧ and ∨ buttons to adjust the volume.
-
Use the KEY ∧ and ∨ buttons to set the pitch of the output sound.
-
Use the DETUNE ∧ and ∨ buttons for fine adjustment of the pitch deviation.
-
Use the PANNING MODE ∧ and ∨ buttons to select mode. (NORMAL, RANDOM, STEREO R, STEREO L)
- If STEREO R or STEREO L is selected for the MODE, the balance is fixed (cannot be moved).
- Use the PAN ∧ and ∨ buttons to adjust the stereo balance.
- CTR is the center point. At L64, the sound is all the way to the left, at R63 all the way to the right.
- Use the DELAY ∧ and ∨ buttons to adjust the delay time of the sound.
- The higher the number, the longer the delay before sound output.
- Use the TRIGGER ∧ and ∨ buttons to select a trigger mode.
KEY ON:
The normal mode, in which sound is emitted when the key is played.
KEY OFF:
Sound is emitted when the key is released (like muted strings, for example).
LEGATO:
Sound is emitted only when the key is played legato.
NON LEG:
Sound is not emitted when the key is played legato.
Part X Sound Edit
PEDAL:
The sound is produced only while the SUS-TAIN button is on.
CHORD:
The sound is emphasized when chords are played (like the cutting sound of a guitar, for example).
■ TONE COPY
You can copy the tone of a particular sound to a specified tone in the sound you are editing.
- On the 1/4 display, press the TONE COPY button.
- Use the FROM ∧ and ∨ buttons to select the tone to copy from.
- Use the OPTION ∧ and ∨ buttons to select the item you wish to copy.
- Use the TO ∧ and ∨ buttons to select the tone you wish to copy to.
- Press the OK button.
- Tone copy is executed.
KEY LAYER
Adjust the relation of tone output to keyboard location.
- Use the PAGE buttons to view the 2/4 display.
• The display looks similar to the following.

- Use the buttons to the left of the display to select a tone (1st, 2nd, 3rd or 4th).
- Use the ▲ and ▼ buttons to select a setting item and then the ∧ and ∨ buttons to specify a selection.
- Use the L-FADE ∧ and ∨ buttons and the LOW ∧ and ∨ buttons to define the area of the lower range of tone output.
- By entering different values for the L-FADE and LOW settings, you can define a sloping volume increase to the peak output volume which corresponds to the note pitch.
- Use the HIGH ∧ and ∨ buttons and the H-FADE ∧ and ∨ buttons to define the area of the higher range of tone output.
- By entering different values for the H-FADE and HIGH settings, you can define a sloping volume decrease from the peak output which corresponds to the note pitch.
- By overlapping the L-FADE and H-FADE curves of each different tone, you can achieve a cross-fade effect, where the sound gradually changes in relation to pitch.
- Repeat steps 2 to 4 for the other tones, as desired.
Part X Sound Edit
VELOCITY LAYER
Adjust these settings to regulate the tone output relative to the velocity.
- Use the PAGE buttons to view the 3/4 display. • The display looks similar to the following.
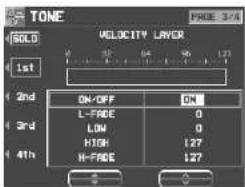
- Use the buttons to the left of the display to select a tone (1st, 2nd, 3rd or 4th).
- Use the ▲ and ▼ buttons to select a setting item and then the ∧ and ∨ buttons to specify a selection.
-
Use the L-FADE ∧ and ∨ buttons and the LOW ∧ and ∨ buttons to define the pp sound output area for the lower range.
-
Use the HIGH ∧ and ∨ buttons and the H-FADE ∧ and ∨ buttons to define the ff sound output area for the higher range.
- By overlapping the L-FADE and H-FADE curves of each different tone, you can change the way the tone sounds relative to how hard or softly the keyboard is played.
- Repeat steps 2 to 4 for the other tones, as desired.
TONE DYNAMICS
You can adjust the settings so that a different sound (tone) is output for each tone depending on the velocity (how hard the keys are played).
- Use the PAGE buttons to view the 4/4 display. • The display looks similar to the following.

-
Use the buttons to the left of the display to select a tone.
-
Use the ▲ and ▼ buttons to select the column for the function you wish to adjust.
-
Select the tone waveform.
- Use the GR ∧ and ∨ buttons to select the sound group. Use the TONE WAVEFORM ∧ and ∨ buttons to select the waveform.
-
Use the LEV ∧ and ∨ buttons to adjust the volume. Use the FLT ∧ and ∨ buttons to set the sound.
-
Use the VELOCITY ∧ and ∨ buttons to specify the velocity range.
- When the upper limit of a waveform is set to 127, no more waveforms can be added.
-
Repeat steps 3 to 6 to edit the other waveforms, as desired.
-
Repeat steps 2 to 7 for the other tones, as desired.


Part X Sound Edit
Pitch Edit
Adjust the settings related to the pitch of the sound.
KEY SHIFT & DETUNE
- On the SOUND EDIT menu display, select PITCH.
• The display looks similar to the following.

- Use the buttons to the left of the display to select a tone (1st, 2nd, 3rd or 4th).
- Use the ▲ and ▼ buttons to select a setting item and then the ∧ and ∨ buttons to specify a selection.
- Use the KEY SHIFT ∧ and ∨ buttons to specify the output pitch.
- Units are in semitones.
- Use the DETUNE ∧ and ∨ buttons to fine-adjust the pitch.
- Slight differences in the DETUNE values between the tones add fullness to the sound.
- Use the TONE SCALE ∧ and ∨ buttons to select the type of scale (NORMAL, 1/2, 1/4, 1/8, 1/16, 1/32, 1/64, FIX).
- NORMAL is the normal scale type. For example, when 1/2 is selected, a difference in pitch between one key and the adjacent key becomes half the normal pitch difference. When FIX is selected, the pitch is the same regardless of which key is played.
KEYBOARD OCTAVE
- Use the PAGE buttons to view the 2/4 display.
• The display looks similar to the following.

- Use the OCT SHIFT ∧ and ∨ buttons to set the octave of the sound.
162
QQTG0692
- Use the RIGHT SPLIT ∧ and ∨ buttons to set the octave of the right part when the keyboard is split.
- Use the LEFT SPLIT ∧ and ∨ buttons to set the octave of the left part when the keyboard is split.
PITCH ENVELOPE
Specify how the pitch changes over time, from the time the key is played to the time the sound dies out.
- Use the PAGE buttons to view the 3/4 display.
• The display looks similar to the following.
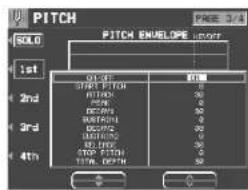
-
Use the buttons to the left of the display to select a tone.
-
Use the ▲ and ▼ buttons to select a setting item and then the ∧ and ∨ buttons to specify a selection.
-
Adjust the settings for the pitch change envelope.
-
Use the buttons below the display to set the corresponding values. The envelope is created on the display as you input the settings.
- Use the TOTAL DEPTH ∧ and ∨ buttons to specify the maximum level.
- Use the START PITCH ∧ and ∨ buttons to set the start point. Use the STOP PITCH ∧ and ∨ buttons to set the stop point.
- Repeat steps 2 and 3 for the other tones, as desired.


Part X Sound Edit
PITCH ENVELOPE TOUCH & KEY FOLLOW
Specify how the pitch envelope changes in relation to note pitch.
- Use the PAGE buttons to view the 4/4 display.

- Use the buttons to left of the display to select a tone.
- Use the ▲ and ▼ buttons to select a setting item and then the ∧ and ∨ buttons to specify a selection.
- Use the TOUCH ∧ and ∨ buttons to change the respective touch settings.
- Use the TIME ∧ and ∨ buttons to specify the time change depending on touch. Use the LEVEL ∧ and ∨ buttons to specify the pitch change level depending on touch.
- At a – setting, the softer the keys are pressed, the greater the change. At a + setting, the harder the keys are pressed, the greater the change.
- Change the key follow settings for the ATTACK, DECAY and RELEASE.
- Use the and buttons corresponding to the ENVELOPE KEY FOLLOW attributes to adjust the settings. Use the CENTER and buttons to select the center of the bend direction.
Filter Edit
Make major changes to the sound by eliminating specific frequency ranges.
FILTER & EQUALIZER
- On the SOUND EDIT menu, select FILTER.
• The display looks similar to the following.
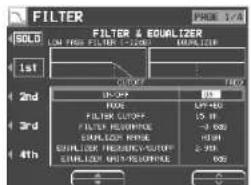
- Use the buttons to the left of the display to select a tone.
- Use the ▲ and ▼ buttons to select a setting item and then the ∧ and ∨ buttons to specify a selection.
- Use the MODE button to select the filter mode.
LPF(6)+EQ (low-pass filter + equalizer) Signals higher than the cut-off frequency are cut. Normal sounds are softened.
HPF(6)+EQ (high-pass filter + equalizer) Signals lower than the cut-off frequency are cut. Normal sounds are sharpened.
LPF24 (low-pass filter 24) A stronger low-pass filter than LPF+EQ.
HPF24 (high-pass filter 24) A stronger high-pass filter than HPF+EQ.
BPF (band-pass filter) Cuts off signals that are not within in the area between the two specified CUTOFF frequencies.
- For this mode, adjust the settings on the EQUALIZER/FILTER side as well.
THRU No filter effect is applied.
Part X Sound Edit
- Use the CUTOFF ∧ and ∨ buttons to set the frequency range which is cut by the filter.
- Use the RESONANCE ∧ and ∨ buttons to specify the resonance value (dB).
- Resonance is effect which adds character to the sound by emphasizing the harmonic components of frequencies close to the cut-off frequency.
For LPF(6)+EQ/HPF(6)+EQ filters, the sound quality can be modified by the EQUALIZER.
RANGE
Select the setting range (HIGH or LOW).
FREQUENCY
Set the standard frequency.
GAIN
Set the level increase or decrease from the value set for FREQ (dB).
- Repeat steps 2 to 5 for each tone, as desired.
TOUCH & KEY FOLLOW
Adjust how the filter is applied relative to touch and pitch.
- Use the PAGE buttons to view the 2/4 display.
• The display looks similar to the following.

-
Use the buttons to the left of the display to select a tone.
-
Use the ▲ and ▼ buttons to select a setting item and then the ∧ and ∨ buttons to specify a selection.
- Modify how the respective filters are applied relative to key touch.
- Use the TOUCH CUT OFF and buttons to specify the amount of change in the cut-off frequency. Use the TOUCH CURVE and buttons to specify the curve of change. Use the TOUCH RESONANCE and buttons to specify the degree of change in the resonance value.
- Modify how the respective filters are applied relative to note pitch.
- Use the KEY FOLLOW SLOPE ∧ and ∨ buttons to adjust the bend slope. Use the KEY FOLLOW RANGE ∧ and ∨ buttons to specify the pitch range.
- Repeat steps 2 to 4 for the other tones, as desired.
164
QQTG0692
FILTER ENVELOPE
Specify how the filter changes over time, from the time the key is played to the time the sound dies out.
- Use the PAGE buttons view the 3/4 display.
- The display looks similar to the following.

- Use the buttons to the left of the display to select a tone.
- Use the ▲ and ▼ buttons to select a setting item and then the ∧ and ∨ buttons to specify a selection.
- Use the ∧ and ∨ buttons to modify the respective filter envelopes.
- Use the buttons below the display to adjust the respective settings.
- You can use the CUTOFF ADJUST buttons to set the total upper and lower settings, the START POINT buttons to set the start point, and the STOP POINT buttons to set the stop point.
- Repeat steps 2 and 3 for the other tones, as desired.




Part X Sound Edit
FILTER ENVELOPE TOUCH & KEY FOLLOW
Specify how the filter envelope (curve) changes relative to touch or note pitch.
- Use the PAGE buttons to view the 4/4 display.
• The display looks similar to the following.

- Use the buttons to the left of the display to select a tone.
- Use the ▲ and ▼ buttons to select a setting item and then the ∧ and ∨ buttons to specify a selection.
- Modify how the respective filter envelopes change relative to touch.
- Use the TOUCH TIME ∧ and ∨ buttons to specify the time change, and the TOUCH LEVEL ∧ and ∨ buttons to specify the level, relative to touch.
- A t a - setting, the softer the keys are played, the greater the change. At a + setting, the harder the keys are played, the greater the change.
- Use the KEY FOLLOW ∧ and ∨ buttons to modify how the respective filter envelopes change relative to note pitch.
- Adjust the respective slopes for attack, decay and release. Use the CENTER ∧ and ∨ buttons to specify the center of the bend slope by note name.
Amplitude Edit
Adjust the settings related to the volume of the sound.
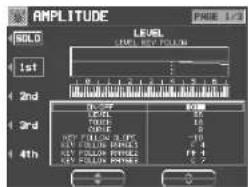
LEVEL
- On the SOUND EDIT menu, select AMPLITUDE.
• The display looks similar to the following.
- Use the buttons to the left of the display to select a tone.
- Use the ▲ and ▼ buttons to select a setting item and then the ∧ and ∨ buttons to specify a selection.
-
Use the LEVEL ∧ and ∨ buttons to select the volume.
-
Use the TOUCH ∧ and ∨ buttons to set the amount of volume change in relation to how hard the keyboard is played.
- A t a - value, the softer the keyboard is played, the louder the sound. At a + value, the harder the keyboard is played, the louder the sound.
-
Use the CURVE ∧ and ∨ buttons to select the type of volume curve depending on touch.
-
Change the respective key follow settings.
- Use the KEY FOLLOW SLOPE ∧ and ∨ buttons to adjust the bend slope. Use the KEY FOLLOW RANGE (1–3) ∧ and ∨ buttons to specify the pitch range by note name.
- Repeat steps 2 to 6 for the other tones, as desired.

Part X Sound Edit
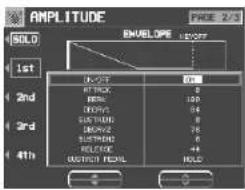
ENVELOPE
Specify how the volume changes over time, from the time the key is played to the time the sound dies out.
- Use the PAGE buttons to view the 2/3 display. • The display looks similar to the following.
- Use the buttons to the left of the display to select a tone.
- Use the ▲ and ▼ buttons to select a setting item and then the ∧ and ∨ buttons to specify a selection.
- Adjust the settings for the volume envelope.
- Use the buttons below the display to set the corresponding values. The envelope is created on the display as you input the settings.
- Use the SUSTAIN PEDAL ∧ and ∨ buttons to select the type of sustain.
LONG:
Extend the release time of the sound.
HOLD:
Maintain the key-pressed condition.
- Repeat steps 2 and 3 for the other tones, as desired.
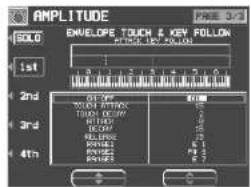
Specify how the volume changes relative to touch or note pitch over time.
- Use the PAGE buttons to view the 3/3 display.
-
Use the buttons to the left of the display to select a tone.
-
Use the ▲ and ▼ buttons to select a setting item and then the ∧ and ∨ buttons to specify a selection.
- Change the touch settings.
- Use the TOUCH ATTACK ∧ and ∨ buttons to specify the ATTACK time change depending on touch. Use the TOUCH DECAY ∧ and ∨ buttons to specify the DECAY time change depending on touch.
- At a – setting, the softer the keys are pressed, the greater the change. At a + setting, the harder the keys are pressed, the greater the change.
- Change the key follow settings for the ATTACK, DECAY and RELEASE.
- Use the RANGE buttons to specify the keyboard range.
Part X Sound Edit
LFO Edit
LFO can be applied to the pitch, amplitude, filter and/or pan to produce a cyclic modulation of the sound.
- Twelve LFO groups can be used.
LFO
- On the SOUND EDIT MENU display, select LFO.
• The display looks similar to the following.

- Use the PAGE buttons to select the respective characteristics.
PAGE 1/4: PITCH (vibrato effect)
PAGE 2/4: AMPLITUDE (tremolo effect)
PAGE 3/4: FILTER (wah-wah effect)
PAGE 4/4: PANNING (auto pan effect)
-
Use the buttons to the left of the display to select a tone.
-
Adjust the respective assigned LFO's.
- LFO which share the same number on other displays are also changed with this adjustment.
SELECT
Select the assigned LFO number (1 to 12)
SPEED
Adjust the modulation speed.
KEYSYNC
When playing more than one note, specify whether the LFO starts or not each time a key is pressed (ON/OFF).
- When KEYSYNC is set to ON: if, while playing one note, you play a second note, the LFO is applied to the second note as well.
PHASE
Degree of phase change.
- Use the CONNECTION buttons to specify whether or not the LFO is applied to the tone.
- An arrow mark indicates that the LFO is applied.
- Use the TONE SETTINGS ∧ and ∨ buttons to adjust the respective parameters.
PHASE
Phase
- A + indicates normal phase, and a – indicates an inverted phase.
WAVE
Modulate the waveform.
SINE: Sine wave
TRIANGLE: Triangle wave
SQUARE: Square wave
SAW TOOTH: Saw tooth wave
RANDOM: Irregular pattern
DELAY
Delay time is the time elapsed from when the keyboard key is pressed until the modulation begins.
DEPTH
Modulation depth
TOUCH
Degree of modulation change in relation to touch
- Repeat steps 2 to 6 for the other tones, as desired.
- You can press the OVERVIEW button to confirm the status of each LFO setting.
Part X Sound Edit
Effect Edit
These are settings related to the various effects applied to your edited sound.
EFFECT
- On the SOUND EDIT menu display, select EFFECT.
• The display looks similar to the following.

- Use the CHORUS ON/OFF buttons set CHORUS to on or off. Use the respective DEPTH and v buttons to specify how the CHORUS is applied.
- Use the REVERB ADJUST ∧ and ∨ buttons to specify how the REVERB is applied.
- Use the MONO/POLY ∧ and ∨ buttons to select the sound output mode.
- Use the PORTAMENTO ON/OFF buttons set portamento to on or off. Use the TIME ∧ and ∨ buttons to set the portamento time.
■ DIGITAL EFFECT
- Use the PAGE buttons to view the 2/2 display.
• The display looks similar to the following. - The display for the effect type which is best-suited for the sound currently being edited is selected.
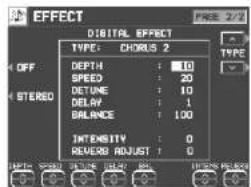
- Use the TYPE ∧ and ∨ buttons to select the type of effect.
Specify whether the DIGITAL EFFECT button turns on or off when the sound is selected. When set to ON, the DIGITAL EFFECT button turns on automatically when the sound is selected.
Select stereo (STEREO) or monaural (MONO) output of the effect.
- Use the buttons along the bottom of the display to select the attribute you wish to adjust.
- When the type is changed, the parameters revert to the factory defaults.
Part X Sound Edit
Controller Edit
Specify how operation of the controllers, such as the wheels, etc., affects the sound.
CONTROLLER
- On the SOUND EDIT menu display, select CONTROLLER.
• The display looks similar to the following.
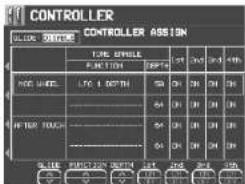
- Use the buttons to the left of the display to select a controller.
- Two functions can be assigned to each controller.
-
Use the FUNCTION ∧ and ∨ buttons to select a function for the controller.
-
Use the DEPTH _A and buttons to set the depth of the function applied by the controller.
-
Use the ON/OFF ∧ and ∨ buttons to set the controller to on or off for each tone.
- When set to INV, the effect is applied inversely.
- Repeat steps 2 to 5 for the other controllers, as desired.
- Use the GLIDE ∧ and ∨ buttons to select whether or not the glide effect is active.
ENABLE:
The glide effect is enabled.
DISABLE:
The glide effect is disabled.
- To assigning a function to the foot switch, refer to page 172.
Store the new sound
The MEMORY button in the SOUND GROUP section accesses memory banks reserved for the sounds you create with the SOUND EDIT. You can store up to 40 original sounds then select the sounds just like the other sounds in the SOUND GROUP.
Procedure
- When you have edited the sound to just the way you like it, on the SOUND EDIT menu display press the WRITE button.
- The display changes to the MEMORY WRITE display.

- To assign a name to your new sound, press the SOUND NAMING button.
- If you do not assign a name to your sound, the name becomes the same as the original sound from which you started. In this case, skip to step 5.
- The display changes to the SOUND NAMING display.

Part X Sound Edit
-
Use the buttons below the display to assign a name.
-
Set the character input position with the POSITION buttons, select the characters with the alphanumeric buttons and repeat name assignment.
- Switch from upper to lower case letters with the ABC, abc button.
- Press the INS button to enter a space at the cursor position.
- Press the DEL button to erase the character at the cursor position.
- Press the CLR button to erase the entire name.
-
Press the ← button to center the name.
-
When you have finished typing the name, press the OK button.
- The display returns to the MEMORY WRITE display.
- Use the ∧ and ∨ buttons to select the MEMORY number in which to store the new sound (1–40).
-
Press the OK button.
-
The new sound is stored, and "COMPLETED!" is shown on the display.
• The SOUND EDIT mode is turned off. - The stored sound memories can be saved on a disk/an SD card for recall at a later time. (Refer to pages 125, 140.)
Select a new sound
You can select your original sound just like the other sounds in the SOUND GROUP.
- In the SOUND GROUP section, press the MEMORY button.

- The list of sounds is shown on the display.
- Select the desired sound from the list on the display.
Part XI Control
Outline of Control functions

natural_image
Front panel of a computer interface with control panels and buttons (no visible text or labels)Various settings related to the operation of this instrument are adjusted with the CONTROL functions.
- Press the PROGRAM MENUS button to turn it on.

• The display looks similar to the following.

- Select CONTROL.
• The display looks similar to the following.

- Select a function.
INITIAL
Return the settings and memories to the factory-preset status. (Refer to page 186.)
OVERALL TOUCH SENSITIVITY (page 172)
Adjust the amount of keyboard touch response.
FOOT CONTROLLERS (page 172)
Assign functions to the separately sold Foot Switch and Foot Controller, etc.
PANEL MEMORY MODE
Define which panel settings are stored when the PANEL MEMORY is used. (Refer to page 66.)
Define which panel settings change by pressing a FILL IN button when the MUSIC STYLE ARRANGER is used. (Refer to page 63.)
FADE IN/OUT SETTING
Settings related to the FADE IN/FADE OUT. (Refer to page 58.)
- Follow the procedure to adjust the settings.
- While you are adjusting the settings, when the TEMPO/PROGRAM indicator is lit, it indicates that the TEMPO/PROGRAM is available for setting the current function.
- When you have finished setting the functions, press the PROGRAM MENUS button to turn it off.


Part XI Control
Overall Touch Sensitivity
This instrument features INITIAL TOUCH (the volume, for example, changes depending on how hard the keyboard is played).
- On the CONTROL MENU display, select OVERALL TOUCH SENSITIVITY.
• The display looks similar to the following.
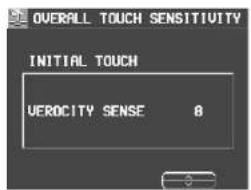
- Use the ∧ and ∨ buttons to adjust the amount of keyboard touch response (0 to 9).
- When set to 0, initial touch sensitivity is turned off.
Foot Controllers
If an optional Foot Switch and/or Expression Pedal (sold separately) is connected, you can assign it one of several functions, allowing convenient and fast control during your performance.
- On the CONTROL MENU display, select FOOT CONTROLLERS.
• The display looks similar to the following.
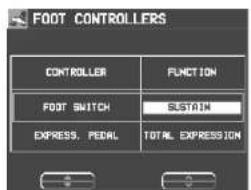
- Use the CONTROLLER ▲ and ▼ buttons to select a switch name, and the FUNCTION ▲ and ∨ buttons to select its function.
■ FOOT SWITCH
OFF:
No function is assigned.
SOFT PEDAL:
Soft on/off
SOSTENUTO PEDAL:
Sostenuto on/off
P. MEM INCREMENT:
Increment the PANEL MEMORY number selection by 1.
P. MEM DECREMENT:
Decrement the PANEL MEMORY number selection by 1.
P. MEM BANK INC.:
Change to the next PANEL MEMORY bank in order.
P. MEM BANK DEC.:
Change to the previous PANEL MEMORY bank in order.
Part XI Control
PANEL MEMORY 1 to 8: The specified PANEL MEMORY number is turned on.
P. MEM INC.+DEC.: Press the switch to increment the PANEL MEMORY number selection by one; release the switch to return to the previous number.
START/STOP: START/STOP button on/off
FILL IN 1:
FILL IN 1 button on
FILL IN 2: FILL IN 2 button on
INTRO & ENDING 1: INTRO & ENDING 1 button on
INTRO & ENDING 2: INTRO & ENDING 2 button on
SUSTAIN: SUSTAIN button on/off
GLIDE: Glide on/off (The glide effect "bends" the pitch down by about one semitone.)
TECHNI-CHORD: TECHNI-CHORD button on/off
DIGITAL EFFECT: DIGITAL EFFECT button on/off
MULTI EFFECT: MULTI EFFECT button on/off
ROTARY SLOW/FAST: TREMOLO SLOW/FAST of the DIGITAL DRAWBAR
MIC REVERB: MIC REVERB button on
MIC EFFECT: MIC EFFECT button on
PUNCH RECORD: Punch in/punch out
APC HOLD: Memorize the chord specified for the automatic accompaniment.
FADE IN: FADE IN button on/off
FADE OUT: FADE OUT button on/off
PAD 1 to 6: Specified PERFORMANCE PADS on
TAP TEMPO: TAP TEMPO button on.
■ EXPRESS. PEDAL
TOTAL EXPRESSION: The volume for all parts changes when the expression pedal is operated.
PART EXPRESSION: The volume changes only for parts for which PART EXP PEDAL was turned ON on the PART SETTING display for SOUND. (Refer to page 148.)
- The initialized settings are as follows:
| FOOT SWITCH SUSTAIN |
| EXPRESS. PEDAL TOTAL EXPRESSION |
- For connection of a Foot Switch, etc., refer to page 188.


Part XII Customize
Outline of Customize functions
natural_image
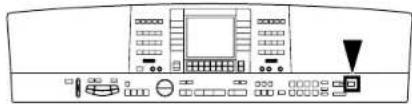
Front panel of a computer interface with control panels and buttons (no visible text or labels)Many of this instrument's settings can be customized for maximum playing convenience and ease.
- Press the PROGRAM MENUS button to turn it on.
• The display looks similar to the following.
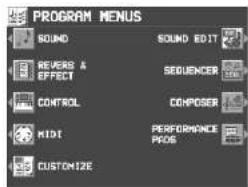
- Select CUSTOMIZE.
• The display looks similar to the following.

- Select a function.
FAVORITES SETTING
FAVORITES display settings (page 33)
DISPLAY TIME OUT (page 175)
Adjust settings related to the screen display.
DATA PROTECTION (page 176)
Specify when you don't want the data to change in cases where it normally does, for instance during disk load and when automatic settings are made, etc.
MIDI SETTING LOAD OPTION (page 176)
Specify how MIDI data is handled when data is loaded from a disk.
LANGUAGE SETTING
Select your preferred language for the displayed messages.
- The display is different, but the operation is the same as for HELP (page 33).
DISK PREFERENCES (KN2400)
Automatic display when a floppy disk is inserted (page 130).
SD PREFERENCES (KN2600)
Specify the desired priority of displays when the LOAD button is pressed on the control panel (page 145).
- Follow the procedure to adjust the settings.
- While you are adjusting the settings, when the TEMPO/PROGRAM indicator is lit, it indicates that the TEMPO/PROGRAM is available for setting the current function.
- When you have finished setting the functions, press the PROGRAM MENUS button to turn it off.
Part XII Customize
Display Time Out
Numerous message displays and setting displays conveniently guide you through the operation steps of this instrument. Once you become familiar with the operation of your instrument, however, you may wish to shorten or even suspend the display time of the message displays.
- On the CUSTOMIZE display, select DISPLAY TIME OUT.
• The display looks similar to the following.
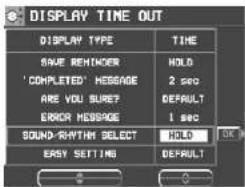
- Press the OK button.
- Some messages may be displayed even if they are set to OFF.
- Use the DISPLAY TYPE ∧ and ∨ buttons to select the function.
SAVE REMINDER:
Reminder display (OFF, DEFAULT, HOLD, 1 to 10 sec)
'COMPLETED' MESSAGE:
Operation successfully completed (OFF, DEFAULT, HOLD, 1 to 10 sec)
ARE YOU SURE?:
Display requires user action for confirmation (OFF, DEFAULT, HOLD)
ERROR MESSAGE:
Error notification display (DEFAULT, HOLD, 1 to 10 sec)
SOUND/RHYTHM SELECT:
Sound/rhythm and PERFORMANCE PADS BANK selection display (DEFAULT, HOLD, 1 to 10 sec)
EASY SETTING:
Display time when the setting display was accessed pressing and holding a panel button (DEFAULT, HOLD, 1 to 10 sec)
- When set the OFF, the display will not appear.
- When set to DEFAULT, the display time returns to the initialized setting.
- You can specify 1 to 10 seconds for the display time.
- When set to HOLD, the DISPLAY HOLD automatically turns on.
- Use the TIME ∧ and ∨ buttons to change the setting.
Part XII Customize
Data Protection
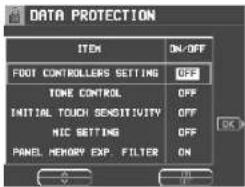
Data which you don't want to change but which is normally overwritten during disk load, song change, or the automatic setting functions, etc. can be protected from accidental overwriting.
- In the CUSTOMIZE MENU display, select DATA PROTECTION.
• The display looks similar to the following.
-
Use the ITEM ∧ and ∨ buttons to select an item.
-
Use the ON/OFF button to select ON or OFF.
ON:
The data is protected and will not be changed.
OFF:
The data is not retained.
-
Repeat steps 2 and 3 for each item.
-
Press the OK button.
MIDI Setting Load Option
Specify how MIDI data is handled when data is loaded from a disk.
- On the CUSTOMIZE MENU display, select MIDI SETTING LOAD OPTION.
• The display looks similar to the following.
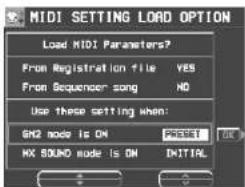
- Use the ▲ and ▼ buttons to select an item.
■ Load MIDI Parameters?
From Registration file: Specify whether MIDI data is also loaded when panel data is loaded (NO/YES).
From Sequencer Song:
Specify whether MIDI data is loaded or changed when SEQUENCER data is loaded or when the SONG is changed by the SEQUENCER SONG SELECT, SONG COPY or TRACK ASSIGN (NO/YES).
- The MIDI settings are always stored at the start of each recorded SEQUENCER SONG and when PANEL WRITE is executed. In the initialized state, the MIDI settings are not loaded even when the SONG is changed. However, changing this setting to YES will cause the stored MIDI settings to also load in these cases.
■ Use these settings when:
GM2 mode ON: Specify how the MIDI settings of this instrument are affected when GM2 is on.
- Select from INITIAL, (initialized settings), PRESET (MIDI PRESETS), and KEEP (the settings do not change).
NX SOUND mode ON: Specify how the MIDI settings of this instrument are affected when NX SOUND is ON.
- Select from INITIAL, (initialized settings), PRESET (MIDI PRESETS), and KEEP (the settings do not change).
-
Use the and buttons to change the setting.
-
Press the OK button.
Part XIII MIDI
What is MIDI?
MIDI (Musical Instrument Digital Interface) is the international standard for digital communication of electronic musical instrument data. This means that any equipment which has a MIDI terminal—such as electronic musical instruments and personal computers—can easily exchange digital data with other MIDI equipment without resorting to complicated conversions or connections.
MIDI terminals
(On the rear panel) IN:

The terminal by which this instrument receives data from other equipment.
OUT:
The terminal that transmits data from this instrument to other equipment.
- For these connections, use a commercially available MIDI cable.
Connection examples
■ To generate sound from a connected instrument by playing this instrument

flowchart
graph TD
    A["This instrument Another MIDI instrument"] -->|MIDI cable| B[" "]
    C["OUT IN"] --> A
■ To generate sound from this instrument by operating a connected instrument

flowchart
graph TD
    A["IN OUT"] --> B["MIDI cable"]
    C["This instrument"] --> D["Another MIDI instrument"]
■ To connect with a MIDI sequencer

flowchart
graph TD
    A["IN INOUTOUT"] --> B["MIDI cable"]
    C["This instrument"] --> D["Another MIDI instrument"]
    E[" "] --> F[" "]


Part XIII MIDI
MIDI channels
Many different kinds of performance data are sent using just one MIDI cable. This is possible because MIDI signals are sent and received through 16 different "basic channels" (numbered 1 to 16). In order for the exchange of data to take place, the channels on the transmission side must match the channels on the receiving side. This characteristic also makes it possible to link multiple sound generators and to control each by matching specific channels.
The following kinds of data can be transmitted/received.
■ NOTE data
This is the most basic kind of MIDI data which is exchanged, and is used to specify which keys are played and how hard they are played.
NOTE NUMBER: Number specifying which key is played.
NOTE ON: Specifies that a key is played.
NOTE OFF: Specifies that a key is released.
VELOCITY: Specifies how hard a key is struck.
- MIDI notes are assigned numbers from 0 to 127, with middle C (C3) as 60. Note pitches are in semitone increments, with the higher numbers assigned to the higher pitches.
■ PROGRAM CHANGE
This is sound change data. When a different sound is selected on the transmitting instrument, the sound on the receiving instrument also changes.
■ CONTROL CHANGE
These are volume, sustain, effect, etc. data used to enhance performance expression. Each function is distinguished by its control number, and the function which can be changed by the control differs depending on the instrument.
■ EXCLUSIVE data
This is data that is specific to this instrument, and data for the GENERAL MIDI LEVEL 2 mode setting.
Part XIII MIDI
Outline of MIDI functions
- Press the PROGRAM MENUS button to turn it on.
• The display looks similar to the following.

- Select MIDI.
• The display looks similar to the following.


natural_image
Front panel of a computer control interface with buttons and display (no visible text or symbols)- Select a function.
- Follow the procedure to adjust the settings.
- While you are adjusting the settings, when the TEMPO/PROGRAM indicator is lit, it indicates that the TEMPO/PROGRAM is available for setting the current function.
- When you have finished setting the functions, press the PROGRAM MENUS button to turn it off.
Summary of the MIDI menu items
PART SETTING (page 180)
Set the MIDI CHANNEL, OCTAVE and LOCAL CONTROL settings for each part.
CONTROL MESSAGES (page 181)
Enable or disable the exchange of various CONTROL data.
REALTIME MESSAGES (page 181)
Enable or disable the exchange of REAL-TIME COMMANDS, and select the CLOCK mode.
COMMON SETTING (page 182)
Set the functions which are common to all parts.
INPUT/OUTPUT SETTING (page 183)
Settings which determine how various performance data is treated during data transmission and reception.
MIDI PRESETS (page 184)
Establish the optimum settings depending on how this instrument is connected to other equipment.
- You can save the settings you specify yourself.
MODE SETTING (page 183)
NX SOUND and GM LEVEL 2 ON setting
COMPUTER CONNECTION (page 185)
Mode settings related to the flow of MIDI signals when this instrument is connected to a personal computer.
Part XIII MIDI
Part Setting
Follow this procedure to set the functions which can be set for each part: MIDI CHANNELs, the OCTAVE data to NOTE data during transmission, and LOCAL CONTROL (whether or not the sound generator of this instrument is active during transmission).
- On the MIDI MENU display, select PART SETTING.
• The display looks similar to the following.

- Use the PART ▲ and ▼ buttons to select a part.
- The list of parts covers 4 pages. Use the OTHER PARTS/TR button or PAGE button to view different parts.
-
Use the CHANNEL ∧ and ∨ buttons to select a MIDI CHANNEL for the part (OFF, 1 to 16).
-
A part which has been set to OFF cannot be used to transmit or receive MIDI data.
• The initialized settings are as follows:
| RIGHT 1 1 | |
| RIGHT 2 2 | |
| LEFT 3 | |
| PART 1 OFF | |
| PART 2 OFF | |
| PART 3 OFF | |
| PART 4 4 | |
| PART 5 5 | |
| PART 6 6 | |
| PART 7 7 | |
| PART 8 8 | |
| PART 9 9 | |
| PART 10 10 | |
| PART 11 11 | |
| PART 12 12 | |
| PART 13 13 | |
| PART 14 14 | |
| PART 15 15 | |
| PART 16 16 | |
| CONTROL OFF | |
| ACCOMP 1 – 5 | O F |
| BASS OFF | |
| DRUMS 1 – 2 | O F |
| CHORD OFF |
F
F
- Use the OCTAVE ∧ and ∨ buttons to set the octave shift value (-3 to 3).
- Octave shift is set for transmitted data only; however the transmitted and received octave shifts are linked. For example, if the transmitted octave shift is set to 1, the received octave shift is automatically set to -1.
- Use the LOCAL ∧ and ∨ buttons to enable or disable this instrument's sound generator.
- When set to ON, the performance from this instrument is transmitted as MIDI data and also sounds from this instrument. When set to OFF, the performance from this instrument is transmitted as MIDI data but does not sound from this instrument.
- Repeat steps 2 to 5 for each part as desired.
Part XIII MIDI
Control Messages
Enable or disable the exchange of various control data.
- On the MIDI MENU display, select CONTROL MESSAGES.
• The display looks similar to the following. - The CONTROL MESSAGES display consists of 3 pages. Use the PAGE buttons to switch between pages.

-
Use the MESSAGE ▲ and ▼ buttons to select the control message.
-
Use the ON and OFF ∧ and ∨ buttons to specify on or off for the control message.
ON:
Data for the control operation is exchanged.
OFF:
Data for the control operation is not exchanged.
• The BANK SELECT setting is effective only when PRG. CHANGE is set to ON.
• The EFFECT & REVERB setting controls the DIGITAL EFFECT, CHORUS, MULTI and REVERB on/off.
- RPN is the general term for KEY SHIFT, TUNING, PITCH BEND RANGE and MODULATION SENSITIVITY.
- Repeat steps 2 and 3 for each control as desired.
Realtime Messages
Enable or disable the exchange of START/STOP data (REALTIME COMMANDS), and select the CLOCK mode.
- On the MIDI MENU display, select REALTIME MESSAGES.
• The display looks similar to the following.

- Use the buttons on the left side of the display to select a function.
- Use the VALUE ∧ and ∨ buttons to change the setting.
REALTIME COMMANDS
ON:
Rhythm and SEQUENCER start/stop, continue, and song position pointer data can be transmitted/received.
OFF:
This data cannot be transmitted/received.
CLOCK
INTERNAL:
This instrument's internal clock is used to control the performance. The clock of the connected equipment is disabled.
MIDI:
The clock of the connected equipment is used to control the performance. This instrument's clock is disabled. (The tempo is displayed as "♩=---.")
- The CLOCK is set to INTERNAL when the power to this instrument is turned on.
- Repeat steps 2 and 3 for the other function if desired.
Part XIII MIDI
Common Setting
Set the functions which are common to all parts.
- On the MIDI MENU display, select COMMON SETTING.
• The display looks similar to the following.
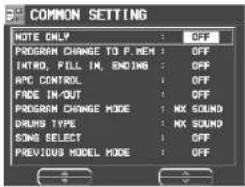
- Use ▲ and ▼ buttons to select the item.
NOTE ONLY:
Of the performance data, specify whether or not only note data is exchanged.
PROGRAM CHANGE TO P. MEM:
Enable or disable the exchange of program change numbers for the RIGHT 1 part by operation of the PANEL MEMORY buttons.
- For this setting, the PANEL MEMORY 1 to 8 program change numbers correspond to the bank numbers as follows:
BANK A = 0 to 7
BANK B = 8 to 15 ...
INTRO, FILL-IN, ENDING:
Enable or disable the exchange of intro, fill-in and ending data.
APC CONTROL:
Enable the exchange of data for the on/off status of the AUTO PLAY CHORD's BASIC, ADVANCED and PIANIST modes.
FADE IN/OUT:
Specify whether or not FADE IN/OUT data is exchanged.
PROGRAM CHANGE MODE
NX SOUND:
Program change numbers are standardized among NX SOUND Technics models which are set to this mode. The program change number assigned to a given sound on one model is assigned to the same sound on all models which are set to the same mode.
PREVIOUS TECH:
Program change numbers are standardized among non-NX SOUND Technics models which are set to this mode. The program change number assigned to a given sound on one model is assigned to the same sound on all models which are set to the same mode.
MAP R:
GS basic sounds are transmitted and received as GS program change numbers.
MAP Y:
XG basic sounds are transmitted and received as XG program change numbers.
*GS is a trademark of Roland Corporation. XG is a trademark of Yamaha Corporation.
DRUMS TYPE
NX SOUND:
Keyboard percussion instrument sounds correspond to the same key note numbers for connected NX SOUND Technics models that are set to this type.
PREVIOUS TECH:
Keyboard percussion instrument sounds correspond to the same key note numbers for connected non-NX SOUND Technics models that are set to this type.
SONG SELECT
ON:
Song number data can be exchanged.
OFF
Song number data cannot be exchanged.
PREVIOUS MODEL MODE
ON:
INTRO, FILL IN, ENDING and APC CONTROL, FADE IN/OUT data are converted to CONTROL CHANGE data for previous models * and then transmitted.
OFF:
The above settings are not converted.
* "Previous models" include all Technics instrument models except for:
KN7000/6500/6000
PR604/804/603/703/903/1000
- Use ∧ and ∨ buttons to change the setting.
- Repeat steps 2 and 3 for the other settings as desired.


Part XIII MIDI
Mode Setting
Initialize the settings for when the NX SOUND or GM LEVEL 2 mode is ON.
- On the MIDI MENU display, select MODE SETTING.
• The display looks similar to the following.

- Select the mode.
• There are two modes for GM LEVEL 2 depending on the parts to use.
- The confirmation display appears. Press the YES button to execute the function, or press the NO button to cancel the function.
Input/output Setting
Make the settings which determine how various performance data is treated during data transmission and reception.
- On the MIDI MENU display, select INPUT/OUTPUT SETTING.
• The display looks similar to the following.
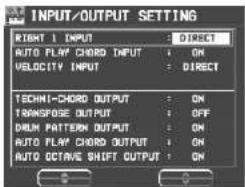
- Use the ▲ and ▼ buttons to select the item.
RIGHT 1 INPUT
CONDUCTOR:
When data for the RIGHT 1 part is received, the CONDUCTOR determines which part it is used for.
DIRECT:
When data for the RIGHT 1 part is received, it is treated as RIGHT 1 data, and performance data for all parts is received on their respective basic channels.
AUTO PLAY CHORD INPUT
ON: Input data for the ACCOMP, BASS, APC and CHORD parts is received.
OFF: Data for the above parts is not received.
- MIDI channels should be assigned to the above parts before exchanging data.
VELOCITY INPUT
DIRECT:
The VELOCITY value of received NOTE ON data is treated as is.
OFFSET:
The VELOCITY value of received NOTE ON data is offset (-50 to 50).
- Select VELOCITY OFFSET VALUE. Use the and buttons to change the value.
- All the values are offset from the current value by the fixed amount.
- The upper (127) and lower (1) limits cannot be exceeded.
FIX:
The VELOCITY value of all received NOTE ON data is set to a fixed value. (1 to 127)
- Select VELOCITY FIXED VALUE. Use the and buttons to change the value.
TECHNI-CHORD OUTPUT
ON: Keyboard notes generated by the TECHNI-CHORD function are also transmitted.
OFF: Only key note data of the pressed keys is transmitted.
TRANSPOSE OUTPUT
ON: The note data of the transposed notes is transmitted.
OFF: The note data of the played keys is transmitted.
Part XIII MIDI
DRUM PATTERN OUTPUT
ON: Data from the DRUMS part is transmitted.
OFF: Data from the DRUMS part is not transmitted.
AUTO PLAY CHORD OUTPUT
ON: The data for the ACCOMP and BASS parts is transmitted.
OFF: The data for the above parts is not transmitted.
- MIDI channels should be assigned to the above parts before exchanging data.
AUTO OCTAVE SHIFT OUTPUT
ON: If the octave has been automatically changed, the data of the transposed notes is transmitted, depending on the sound.
OFF: The note data of the played keys is transmitted.
-
Use the ∧ and ∨ buttons to select the setting.
-
Repeat steps 2 and 3 for each item as desired.
MIDI Presets
Establish the optimum settings depending on how this Keyboard is connected to other equipment, and on whether this Keyboard is used as the master or the slave.
- On the MIDI MENU display, select MIDI PRESETS.
• The display looks similar to the following.
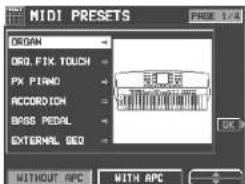
- Use the ▲ and ▼ buttons to select the connection setup.
- The PAGE 1/4 display shows connection setups with this instrument as the SLAVE. And the PAGE 2/4 display shows connection setups with this instrument as the MASTER.
- The MASTER is the instrument used to transmit data, and the SLAVE is the instrument used to receive the data.
- Use the buttons below the display to select WITHOUT APC (the AUTO PLAY CHORD is not used) or WITH APC (the performance includes AUTO PLAY CHORD).
- Press the OK button.
- When the settings have been successfully stored, "COMPLETED!" appears on the display.
Notice
When an instrument such as an organ or accordion with separate or divided keyboards dedicated to melody and chords is used as the master instrument, if this instrument's split point is set to a note below the lowest note of the melody keyboard of the master instrument, it is possible to produce melody notes on multiple parts by this instrument's CONDUCTOR settings.
- Assign the RIGHT 1 channel as the CHANNEL for the melody keyboard. Assign the CHORD channel (or if you also wish the played note to be produced, CHORD + LEFT) as the CHANNEL for the chord keyboard.
- You will also have to specify CONDUCTOR as the RIGHT 1 INPUT for the INPUT/OUTPUT SETTING.
Part XIII MIDI
■ Storing user settings
After you change the MIDI settings, you can store your customized settings in USER.
- Adjust the various MIDI settings.
- Go to PAGE 4/4 of the MIDI PRESETS display.
• The display looks similar to the following.
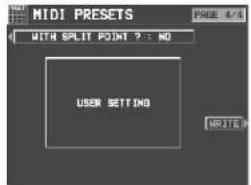
-
Use the WITH SPLIT POINT? button to specify whether or not to also store the keyboard split point (YES/NO).
-
Press the WRITE button.
■ Recalling the USER settings
- Go to PAGE 3/4 of the MIDI PRESETS display.

- Press the OK button.

Computer Connection
These settings are used to select the mode related to MIDI signal flow when a personal computer is connected to the USB terminal of this instrument.
- When connecting to a personal computer, install the USB driver on the included CD-ROM to the computer first. (Refer to the separate manual for more information.)
- Turn off the power to this instrument.
- Connect a personal computer to the USB terminal on the rear of this instrument.
- Turn on the power to this instrument.
- On the MIDI MENU display, select COMPUTER CONNECTION.
• The display looks similar to the following.

flowchart
graph TD
    A["PC"] --> B["USB1"]
    A --> C["USB2"]
    D["EXT. MODULE"] --> E["MIDI OUT"]
    D --> F["MIDI IN"]
- Use the and buttons to select a mode.
NORMAL: Ordinary mode
PC as master: The mode which is appropriate for data transmission
KN as master: The mode when this instrument is used as the master keyboard.
KN as slave: The mode when this instrument is used as a slave instrument.
INTERFACE: The mode when this instrument is used as a connecting device between a PC with only USB terminals and an instrument with only MIDI terminals.


Initialize
This Keyboard has many settable functions and storable memories. However, you can return the settings and memory to the factory-preset status.
INITIAL
- Press the PROGRAM MENUS button to turn it on.
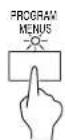
• The display changes to the following.

- Select CONTROL.
• The display looks similar to the following.
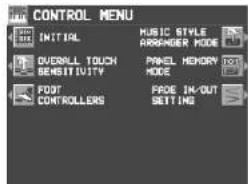
- Select INITIAL.
• This display changes to the following.

- Use the ▲ and ▼ buttons to select the desired type of initialization.
- PERFORMANCE includes all the items which are listed below it.
- Press the OK button.
- The display changes to the confirmation display. Press the YES button if you wish to execute the initialization. Press the NO button if you wish to cancel the procedure.

- Initialization begins. When initialization is completed, "COMPLETED!" is shown on the display and the Keyboard returns to the normal performance mode.
- The USER MIDI and FAVORITES are not initialized by this procedure.
You can also reset all the PERFORMANCE items with the following procedure:
Turn off the power to this instrument once. Then, while pressing the three lower left buttons in the RHYTHM GROUP section (JAZZ & SWING, BALLROOM & SHOW and LATIN & WORLD) at the same time, turn the power on again.
About the performance data
| PERFORMANCE | CURRENT PANEL settings |
| PANEL MEMORY | |
| SEQUENCER | |
| COMPOSER (MEMORY contents) | |
| PERFORMANCE PADS (USER memories) | |
| SOUND MEMORY | |
| EFFECT MEMORY | |
| BACKUP MIDI | (USER for the MIDI PRESETS) & FAVORITES |
- The BACK UP data will not be erased even with the passage of time.
- The backup memory does not function for the stored contents until the power has been on for about 10 minutes.
- If you wish to retain the settings and stored memory contents for recall at a later time, store the desired data on a disk/SD card.
- Data from previous Technics models may be limited to PERFORMANCE data.
Separately sold options

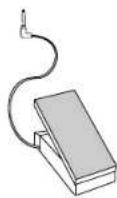
SZ-E2
Expression Pedal
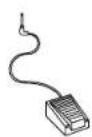
SZ-P1
Foot Switch
PLUG-IN feature
This model is compatible with third-party extension plug-in software for the KN2400/KN2600. See plug-in documentation for information about software features and operation.


Terminals
Back panel terminals

USB

OUTIN


EXP PEDA

OT SW

MIC

MIC

RMONO L


PHONES
USB
This terminal allows connection to a personal computer with a USB cable (commercially available type AB cable).
Used with the applications on the included CD-ROM, you can record this instrument's audio sound or manage the instrument data with your PC.
- Applications
Audio Recorder:
Application for Recording this instrument's sounds and for saving recorded digital audio files in WAV, WMA (Windows Audio Format) and MP3 formats.
Song Manager:
Application for managing this instrument's data on your PC by means of a USB cable.
MIDI
These terminals are for connection to another MIDI instrument. (Refer to page 177.)
EXP PEDAL
The optional SZ-E2 Expression Pedal (sold separately) can be connected to this terminal to control the volume.
FOOT SW
An optional SZ-P1 Foot Switch (sold separately) can be connected to each terminal to control various functions. (Refer to page 172.)
MIC
A microphone can be connected to this terminal. (Refer to page 44.)
- Adjust the volume using MIC VOLUME.
LINE OUT
The total sound of this instrument can be output from this terminal.
- For monaural output, connect the plug only in the R/MONO terminal.
PHONES
Headphones can be connected to this instrument.
- When headphones are plugged into this jack, the speakers of this instrument are disabled.
Symptoms which appear to be signs of trouble
The following changes in performance may occur in the Technics Keyboard but do not indicate trouble.
| Phenomenon Remedy | ||
| Sounds and effects | The buttons, keys, etc. malfunction. | Turn off the POWER button once, then turn it on again.If this procedure is not successful, turn off the POWERbutton once. Then, while pressing the three lower leftbuttons in the RHYTHM GROUP section (JAZZ &SWING, BALLROOM & SHOW and LATIN &WORLD) at the same time, turn the POWER button onagain. (Note that, in this case, all programmable set-tings, functions and memories return to their factory-preset status.) |
| No sound is produced when the keys arepressed. | The MAIN VOLUME is at the minimum setting. Adjustthe volume with the MAIN VOLUME control.The volumes for the selected parts are set to the mini-mum levels. Use the balance buttons to set the vol-umes of the relevant parts to appropriate levels. (Referto page 29.)The part is muted. (Refer to page 30.)The LOCAL CONTROL for a part performed on thekeyboard is set to OFF. Set the LOCAL CONTROL toON. (Refer to page 180.) | |
| Only percussive instrument sounds are producedwhen the keyboard is played. | In the SOUND GROUP section, the DRUM KITS but-ton is on. | |
| The volume is very low when the keyboard isplayed. | The volume setting in the SEQUENCER contents isvery low. Follow the INITIAL procedure to reset thesettings. (Refer to page 186.) | |
| The sound you hear is different from the soundyou selected. | This sometimes occurs when you play backSEQUENCER or COMPOSER data which was cre-ated on a different model, or when MIDI data isreceived from a connected instrument. Select thedesired sounds again. | |
| Rhythm | The rhythm does not start. | The DRUMS volume is set to the minimum level. Usethe balance buttons to set the DRUMS volume to anappropriate level.A SEQUENCER PLAY button is on. When you are notplaying back the SEQUENCER performance, turn offthe SEQUENCER PLAY button.CLOCK is set to MIDI. Set CLOCK to INTERNAL.(Refer to page 181.) |
| AUTO PLAYCHORD | No sound is produced for the automatic accom-paniment, or only the sounds of some parts areproduced. | An ACCOMP part does not sound if its correspondingvolume is set to the minimum level. Use the respectivebalance buttons to set the ACCOMP 1–5 volumes toappropriate levels. |
| SEQUENCER | Storage is not possible. | The remaining memory capacity of the SEQUENCERis 0. Follow the SONG CLEAR or TRACK CLEAR pro-cedure to erase the memory. (Refer to page 93.) |
| The playback measure indication is different fromwhen the performance was recorded. | The number of measures corresponds to the time sig-nature of the rhythm selected at the start of recording.To change the rhythm in the middle of the song, recordthe rhythm change in the RHYTHM part. (Refer topage 90.) | |
| COMPOSER | Storage is not possible. | The remaining memory capacity of the COMPOSER is 0. |
| Setting the time signature is not possible. | The time signature cannot be changed for a pattern which is currently recorded in the COMPOSER. If you wish to change the time signature, first follow the procedure to clear the memory. (Refer to page 107.) | |
| The playback timing of the rhythm pattern is different from the timing with which it was recorded. | The QUANTIZE function was on when the pattern was recorded and the timing was automatically corrected. Set the quantize level to a smaller note unit or to OFF when recording. (Refer to page 108.) | |
| Disk/SD card | The Disk Drive produces a noise during recording or playback. | This occurs when the Disk Drive is reading a disk. It does not indicate a problem. |
| When the procedure to load from a disk/SD card is performed, the contents of the keyboard memory are erased. | When performing the load operation from a disk/SD card, the keyboard memory changes to that of the data loaded from the disk. If you wish to preserve a song which is stored in the keyboard memory, save it on a disk/SD card before performing the load procedure. | |
| MIDI | Data cannot be exchanged through MIDI terminals. | Match the channels on the transmitting side and the receiving side. (Refer to page 180.) |
| The sound quavers or is distorted. | When the USB terminal or both the MIDI IN and OUT terminals are connected to a computer, depending on the computer software the received data may be sent back to the instrument just as it is. Because of this the sound generated from the keys and the sound generated from the returned data are both produced, causing undesirable effects, such as the sounds canceling each other out, for example. In this case, either change the software settings to prevent received data from being returned, or set the MIDI LOCAL CONTROL to off. | |
| Other | Noise from a radio or TV can be heard. | This sometimes occurs when electrical equipment such as a radio or TV is used near the instrument. Try moving such electrical equipment further away from the instrument.The sound may be coming from a nearby broadcast station or amateur radio station. If the sound is bothersome, consult your dealer or service center. |
| The cabinet becomes warm during use. | This instrument has a built-in power source that heats the cabinet to some degree. This is not an indication of trouble. | |
Error messages
| No. Contents | |
| 00 | The data on the disk that you are using is for a different product. |
| 01 | An error has occurred while the disk was loading.Please try again! |
| 02 There is no disk in the Disk Drive. | |
| 03 The file that you tried to load is empty. | |
| 05 | An error has occurred while the disk was saving.Please try again! |
| 06 | The disk that you are using is write protected.Please remove the write protection and try again. |
| 07 | The disk that you are using is full.Please use another disk. |
| 08 | An error has occurred while the disk was formatting. The disk that you are using may be faulty.Please try formatting another disk. |
| 10 The data is already copy protected. | |
| 15 | The song you are trying to save is empty. |
| 16 | This STANDARD MIDI FILE is incompatible with this instrument and cannot be loaded. |
| 17 This is not a STANDARD MIDI FILE. | |
| 18 | The timebase (PPQ resolution) that you tried to load is not 24/48/96/192/288/384 PPQ. |
| 20 | A problem has occurred with your SEQUENCER Data.This might be due to a damaged or faulty disk. |
| 21 Memory full | |
| 22 | It is necessary to press REC STOP to complete this procedure. |
| 23 | It is impossible to change the time signature because it has already been set in the existing tracks. |
| 24 | A rhythm track already exists. It is impossible to assign two tracks to rhythm. |
| 25 | It is only possible to change the velocity on a melody track. |
| 26 | It is only possible to merge melody tracks.Tracks such as rhythm, chord and control cannot be merged. |
| No. Contents | |
| 27 | It is only possible to copy melody tracks.Tracks such as rhythm, chord and control cannot be copied. |
| 28 | This song is too long to be saved as a MIDI file. |
| 29 | The MIDI file that you have tried to load exceeds the memory capacity of this instrument and cannot be played.The SEQUENCER memory has been cleared. |
| 30 | It is not possible to change the time signature of a COMPOSER pattern after it has been recorded.If you want to proceed, you must first clear the entire COMPOSER pattern. |
| 31 | The time signature of the pattern from which you are copying is different from the COMPOSER memory that you are using.Either: Change the time signature of the COMPOSER memoryor: Copy from a pattern that has the same time signature |
| 32 Memory full | |
| 33 | Select a Track before setting parameters for AUTO PUNCH RECORD. |
| 43 | The file that you are trying to load was saved on a previous KN keyboard. It is only possible to load using the “PERFORMANCE” option. |
| 44 | It is impossible to edit a Drum Kit.Please select a different sound from any group except Keyboard Percussion. |
| 46 | It is only possible to insert MELODY Tracks. Tracks such as RHYTHM, CHORD and CONTROL cannot be inserted. |
| 47 | This procedure is not possible with a composer pattern or the metronome.Please select a preset rhythm pattern. |
| 54 | It is not possible to record using preset banks, compile banks, or control banks. Please select one of the user banks. |
| 55 | Special tracks such as CHORD (APC), RHY and CTL exist in the song from which you are copying and are incompatible with the destination song because it is in the GM mode. |
| 56 | AUTO PUNCH recording has been unsuccessful because SEQUENCER operation was interrupted before the PUNCH OUT measure was reached. |
| 58 | The song that you have tried to load exceeds this instrument's available memory and cannot be loaded. The selected song memory has been cleared. |
| 62 | The computer connection is not active because the computer port switch is set to MIDI. Please turn the power off, set the switch to the desired setting and turn the power back on. |
| 63 | This Bitmap is in the wrong format for the KN and cannot be loaded. See the Owners Manual for more details. |
| 64 | Please select the Panel Memory that you want to name. |
| 65 | It is not possible to use the CHORD FINDER in this mode. Please select CHORD FINDER from HOME page or CHORD STEP RECORD page. |
| 66 | SOLO pads are special pads which include Chord information. Pleases use SOLO pads when the rhythm and accompaniment is playing. |
| 67 | There are no APC or CHORD tracks. Select and APC track or CHORD track, and try again. |
| 68 | It is not possible to record directly into the SOLO pads. Record on the SEQUENCER and Copy the melody and chord information into a SOLO pad. |
| 69 | It is not possible to delete all measures. |
| 70 | It is not possible to insert over 16 measures in a PATTERN. |
| 71 | It is not possible to set the start measure to the measures you set to copy. |
Index
A
ADVANCED 53
AMPLITUDE 165
APC CONTROL (MIDI) 182
AUTO PLAY CHORD....52
AUTO PLAY CHORD INPUT (MIDI) 183
AUTO PLAY CHORD OUTPUT (MIDI) 184
AUTO SETTING 68
B
BACKUP 117
Backup memory 187
BANK 67
BANK VIEW 64
BASIC 53
BEAT 50
BEND RANGE....149
C
CHORD FINDER 55
CHORD STEP RECORD....92
CHORUS 43
CLOCK (MIDI) 181
COMMON SETTING (MIDI)....182
COMPOSER 104
COMPUTER CONNECTION 185
CONDUCTOR 39
CONTRAST....32
CONTROL....171
CONTROL MESSAGES (MIDI) 181
COUNT INTRO 51
CUSTOMIZE 174
D
DEMO 16
DIGITAL DRAWBAR 37
DIGITAL EFFECT 41
DIRECT PLAY (KN2400) 122
Disk Drive (KN2400) 117
DISK (KN2400) 119
Display 30
DISPLAY TIME OUT 175
DISPLAY HOLD....32
DRUM EDIT 95
DRUM PATTERN OUTPUT (MIDI) 184
DRUMS TYPE (MIDI) 182
E
EASY COMPOSER....106
EASY EDIT 158
EASY REC. 77
Error messages 191
EXIT 32
EXP PEDAL....188
Expression Pedal....187
F
FADE IN/OUT 57
FAVORITES 33
FILL IN. 51
FILTER 163
FINGERED 53
SAVE (SD) (KN2600)....140
SD CARD (KN2600) 131
SET 64
SEQUENCER 73
SEQUENCER PLAY 81
SEQUENCER RESET 81
- Design and specifications are subject to change without notice.
• The SD logo is a trademark.

(For U.S.A.)
PANASONIC CONSUMER ELECTRONICS COMPANY,
DIVISION OF MATSUSHITA ELECTRIC CORPORATION OF AMERICA
One Panasonic Way, Secaucus. New Jersey 07094
PANASONIC SALES COMPANY, DIVISION OF MATSUSHITA ELECTRIC
OF PUERTO RICO, INC.,
San Gabriel Industrial Park, Carolina, Puerto Rico 00985
Panasonic / Technics Musical Instrument Products Limited Warranty
Limited Warranty Coverage
If your product does not work properly because of a defect in materials or workmanship, Panasonic Consumer Electronics Company or Panasonic Sales Company (collectively referred to as "the warrantor") will, for the length of the period indicated on the chart below, which starts with the date of original purchase ("warranty period"), at its option either (a) repair your product with new or refurbished parts, or (b) replace it with a new or a refurbished product. The decision to repair or replace will be made by the warrantor.
| Product Parts Labor Service | |||
| Technics Organs, Digital Pianos,Digital Ensemble Series, Tone Cabinets,Panasonic Digital Pianos | Three (3) Years One (1) Year In-Home or Carry-In | ||
| Technics Keyboards One (1) Year One | (1) Year In-Home or Carry-In | ||
| Panasonic Keyboards, Synthesthiers,Sound Modules, Expansion Boards,Disk Drives, Drum Percussion Units,MIDI Orchestra, Keyboard Amplifiers,Foot Pedals, Foot Controllers,Personal Music PA Systems | One (1) Year | One (1) Year | Carry-In or Mail-In |
| USB Reader/Winter, Personal ComputerCard Adaptors (in exchange for defective item) | One (1) Year | Not Applicable | Carry-In or Mail-In |
| SD Memory Cards (in exchange for defective item) | Ninety (90) Days | Not Applicable | Carry-In or Mail-In |
During the "Labor" warranty period there will be no charge for labor. During the "Parts" warranty period, there will be no charge for parts. You must carry-in or mail-in your product or arrange for in-home service, as applicable, during the warranty period. If non-rechargeable batteries are included, they are not warranted. This warranty only applies to products purchased and serviced in the United States or Puerto Rico. This warranty is extended only to the original purchaser of a new product which was not sold "as is". A purchase receipt or other proof of the original purchase date is required for warranty service.
Carry-In, Mail-In or In-Home Service
For Carry-In, Mail-In or In-Home Service (as applicable) in the United States call 1-800-211-
PANA(7262) or visit the website (http://www.panasonic.com).
For assistance in Puerto Rico call Panasonic Sales Company (787)-750-4300 or fax (787)-768-2910.
In-Home service, if applicable, requires clear, complete and easy access to the product by the authorized servicer and does not include removal or re-installation of an installed product. It is possible that certain In-home repairs will not be completed in-home, but will require that the product, or parts of the product, be removed for shop diagnosis and/or repair and then returned.
Limited Warranty Limits And Exclusions
This warranty ONLY COVERS failures due to defects in materials or workmanship, and DOES NOT COVER normal wear and tear or cosmetic damage. The warranty ALSO DOES NOT COVER damages which occurred in shipment, or failures which are caused by products not supplied by the warrantor, or failures which result from accidents, misuse, abuse, neglect, mishandling, misapplication, alteration, faulty installation, set-up adjustments, misadjustment of consumer controls, improper maintenance, power line surge, lightning damage, modification, rental use of the product. Service by anyone other than a Factory Servicenter or other Authorized Servicer, or damage that is attributable to acts of God.
THERE ARE NO EXPRESS WARRANTIES EXCEPT AS LISTED UNDER "LIMITED WARRANTY COVERAGE". THE WARRANTOR IS NOT LIABLE FOR INCIDENTAL OR CONSEQUENTIAL DAMAGES RESULTING FROM THE USE OF THIS PRODUCT, OR ARISING OUT OF ANY BREACH OF THIS WARRANTY, INCLUDING WITHOUT LIMITATION, LOSS OF GOODWILL, PROFITS OR REVENUE, LOSS OF USE OF THIS PRODUCT OR ANY ASSOCIATED EQUIPMENT, COST OF SUBSTITUTE EQUIPMENT, DOWNTIME COSTS, OR CLAIMS OF ANY PARTY DEALING WITH BUYER FOR SUCH DAMAGES. (As examples, this excludes damages for lost time, cost of having someone remove or re-install an installed unit if applicable, travel to and from the servicer, loss of media, data or other memory content. The items listed are not exclusive, but are for illustration only.) ALL EXPRESS AND IMPLIED WARRANTIES, INCLUDING THE WARRANTY OF MERCHANTABILITY, ARE LIMITED TO THE PERIOD OF THE LIMITED WARRANTY.
Some states do not allow the exclusion or limitation of incidental or consequential damages, or limitations on how long an implied warranty lasts, so the exclusions may not apply to you.
This warranty gives you specific legal rights and you may also have others rights which vary from state to state. If a problem with this product develops during or after the warranty period, you may contact your dealer or Servicenter. If the problem is not handled to your satisfaction, then write to the warrantor's Consumer Affairs Department at the addresses listed for the warrantor.
PARTS AND SERVICE (INCLUDING COST OF AN IN-HOME SERVICE CALL IF APPLICABLE) WHICH ARE NOT COVERED BY THIS LIMITED WARRANTY ARE YOUR RESPONSIBILITY.
Customer Services Directory
For Product Information, Operating Assistance, Literature Request, Dealer Locations, and all Customer Service inquiries please contact:
1-800-211-PANA (7262), Monday–Friday 9 am–9 pm; Saturated–Sunday 9 am–7pm, EST.
Web site: http://www.panasonic.com
You can purchase parts, accessories or locate your nearest servicenter by visiting our Web Site.
Accessory Purchases:
1-800-332-5368 (Customer Orders Only)
Panasonic Services Company 20421 84th Avenue South, Kent, WA 98032
(6 am to 5 pm Monday–Friday; 6 am to 10:30 am Saturday; PST)
(Visa, MasterCard, Discover Card, American Express, Check)
Service in Puerto Rico
Matsushita Electric of Puerto Rico, Inc. Panasonic Sales Company/Factory Servicenter:
Ave. 65 de Infanteria, Km. 9.5, San Gabriel Industrial Park, Carolina, Puerto Rico 00985
Phone (787) 750-4300 Fax (787) 768-2910

- Press the PROGRAM MENUS button to turn it on.
• The display looks similar to the following.

- Select COMPOSER.
• The display looks similar to the following.

Summary of the COMPOSER menu items
RECORDING MEMORY-A
Create a memory in the MEMORY A bank.
RECORDING MEMORY-B
Create a memory in the MEMORY B bank.
RECORDING MEMORY-C
Create a memory in the MEMORY C bank.
EASY COMPOSER (page 106)
Create a rhythm pattern with a simplified procedure.
PATTERN COPY (page 115)
Copy a rhythm pattern into a memory.
SEQ TO COMPOSER COPY (page 116)
Copy recorded data in the SEQUENCER to the COMPOSER.
LOAD SINGLE COMPOSER
Recall the desired COMPOSER data from data saved on a disk/card. This procedure is the same as when COMPOSER is selected for SINGLE LOAD. (Refer to pages 121, 134.)
Three ways to record in the COMPOSER
There are three ways to create and record a rhythm.
■ Simple recording method (page 106)
Use EASY COMPOSER to quickly create a unique rhythm just by selecting a pattern for each part.
■ Create a completely new rhythm (page 106) Compose all the parts of a completely new rhythm from scratch.
- You can use either realtime recording or step record for any part of the recording.
■ Pattern Copy (page 115)
Copy a preset rhythm or SEQUENCER data to a COMPOSER memory, edit it as you like, and then store it as a new rhythm.



Part V Composer
Simple recording method
With EASY COMPOSER you can easily create a unique rhythm pattern by selecting a different style for each part of the rhythm.
- On the COMPOSER MENU display, select EASY COMPOSER.
• The display looks similar to the following.

- Use the MEM ∧ and ∨ buttons to select the memory in which to record your rhythm.
- Select from A-vari 1 to 4, B-vari 1 to 4 and C-vari 1 to 4.
- Use the PART ▲ and ▼ buttons to select the part.
- In the EASY COMPOSER, the new rhythm pattern is divided into 9 parts, to each of which a style and variation is assigned.
-
Use the STYLE ∧ and ∨ buttons to select a style.
-
Use the VARI ∧ and ∨ buttons to select the variation number.
- The number of variations differs depending on the selected style.
- A part which is set to OFF does not sound. Note that the "BsDrum&Snare" part cannot be set to OFF.
-
Repeat steps 3 to 5 to select styles for the other parts.
-
Press the SET button.
• The rhythm pattern is played back.
- If you are not satisfied with the rhythm pattern, repeat steps 3 to 7.
- If you wish to correct the sounds or phrases in your rhythm pattern, press the EDIT button. The display changes to the recording display. (Refer to page 108.)
- For playback, refer to page 111.
Create a completely new rhythm
Clear the memories and compose a completely new rhythm from scratch.
- You can also use this method when copying a pattern from a preset rhythm or the SEQUENCER.
Prepare to record
- On the COMPOSER MENU display, select a memory in which to record (RECORDING MEMORY A, B, or C).
• The display looks similar to the following.

- Use the buttons below the display to select the pattern you want to create.
- If the MEM CLR button is pressed, all the current contents of the MEMORY (A/B/C) are erased (a confirmation display appears).
- You can press the NAMING button and assign a name to the MEMORY.
Composer
106
QQTG0692

Part V Composer

- To assign a name to each VARIATION, press the VARI button and select a number.
- On the RECORD MEMORY display, press the OK button.
• The display looks similar to the following.
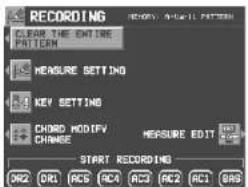
- Press the CLEAR THE ENTIRE PATTERN button.
• The display looks similar to the following.

- Press the YES button.
- All the data for the selected pattern is erased.
- Press the MEASURE SETTING button.

- Use the MEASURE and buttons to specify the number of measures in your new rhythm pattern (1 to 16).
- Use the TIME SIGNATURE ∧ and ∨ buttons to specify the meter of the pattern (1/4 to 8/4).
- When the settings for the MEASURE and TIME SIGNATURE of the INTRO or ENDING patterns are changed, the Maj and Min settings change at the same time.
- Press the OK button.
- Press the EXIT button.
KEY SETTING
Set the key and chord in which you wish the recorded pattern to be played. If the recorded performance is played in a key or chord different from this setting, the automatic accompaniment will not be able to distinguish the correct chord.
- On the RECORDING display press the KEY SETTING button.
• The display looks similar to the following.
- Use the KEY ∧ and ∨ buttons to set the key. Use the CHORD ∧ and ∨ buttons to set the chord type (Maj/Min).
- When you have finished making the settings, press the EXIT button.
- Use the KEY ∧ and ∨ buttons to set the key. Use the CHORD ∧ and ∨ buttons to set the chord type (Maj/Min).
- When you have finished making the settings, press the EXIT button.
Part V Composer
Recording procedure

- In the START RECORDING area on the display, select the rhythm part you want to record first.
BAS: BASS
AC1-5: ACCOMP 1-5
DR1, 2: DRUMS 1, 2
- The metronome sound starts and the display looks similar to the following.
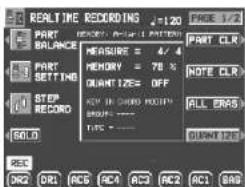
- Adjust the tempo.
• The tempo is shown on the display as ♪=.
- The tempo can be freely adjusted when you play back the rhythm pattern, so record at the tempo which is easiest for you to play.
-
Select the sound.
-
For the DRUMS part, only sounds from the DRUM KITS sound group can be selected.
- For the ACCOMP and BASS parts, select sounds from groups other than the DIGITAL DRAWBAR sound groups.
-
The sounds marked with # represent special guitar performances and changing them to other sounds may result in an unnatural, awkward sound expression.
-
Record the part.

- The specified number of measures are repeatedly played back, during which time any newly played notes are added to those already recorded. The current measure number is shown on the display as "MEASURE="
- Record the performance in C major for correct chord progressions during playback. Follow the KEY SETTING procedure if you wish to record the performance in a different scale.
- PITCH BEND, MODULATION (KN2600) (except for the DRUMS part) effects are also recorded.
- The SUSTAIN ON/OFF is also stored (except for the DRUMS part).
■ Button functions
PART BALANCE:
Adjust the volume of each part on the PART BALANCE display. (These settings are not recorded.)
PART SETTING:
You can make detailed settings for each part. (Refer to page 110.)
STEP RECORD:
Change to the STEP RECORD mode. (Refer to page 111.)
SOLO:
Mute all parts except the part which is currently being recorded.
- A MUTE mark is shown for the other parts on the display.
- To turn off the SOLO function, press this button again.
PART CLR:
Erase all recorded contents of the currently selected part.
NOTE CLR:
Data is erased one note or one percussion instrument (DRUMS part) sound at a time.
- Hold and press this button, and press the keyboard key that corresponds to the note or percussion instrument (DRUMS part) sound you wish to erase.
ALL ERAS:
The performance recorded in the selected part is erased for as long as this button is pressed.
QUANTIZE:
Smooth out any unevenness in the timing of your performance.
- Before recording, select the note value for the desired quantize level. (The quantize level is shown on the display as QUANTIZE=.)
Part V Composer
KEY IN CHORD MODIFY
Use the GROUP and TYPE ∧ and ∨ buttons to select the type of pattern progression.
- This setting is for the sound that is going to be recorded from this time.
- Use the buttons below the display to switch to a different recording part, and proceed to record each part in turn.
- When you have finished recording the rhythm, turn off the PROGRAM MENUS button.
Chord Modify Change
For data that has already been recorded, you can select the type of pattern progression for the bass and accomp parts.
- This function cannot be used for the INTRO and ENDING patterns.
- On the RECORDING display, press the CHORD MODIFY CHANGE button.
• The display looks similar to the following.

- Use the PART ▲ and ▼ buttons to select the part you wish to set.
- Use the GROUP and MODIFY TYPE ∧ and ∨ buttons to select the corresponding progression type.
- If a progression type for which the note name is displayed (in C key) was selected for the chord group, played notes which are not displayed are changed to notes which are displayed.
- Use the FUNCTION ∧ and ∨ buttons to enable or disable the function.
KEEP: No change.
CHANGE: The change is enabled.
- When you have finished making the settings for each part, press the OK button.
- Press the EXIT button.
Part V Composer
Part Setting
You can make detailed settings for each part.
- On the REALTIME RECORDING display, press the PART SETTING button.
- The settings comprise 3 pages of the display. Use the PAGE buttons to switch pages.
- Use the PART ▲ and ▼ buttons to select a part.
- Use the ∧ and ∨ buttons to set the corresponding item.

PITCH POINT:
The pitch at which the pattern progression sound is lowered by one octave.
- When the root note of the specified chord is higher than the set pitch point, the pitch of that part is automatically lowered by one octave, thus avoiding an unnaturally high accompaniment pitch.
- This is effective only for the part for which the Melody group was selected in CHORD MODIFY CHANGE.
SOUND:
Use the panel buttons to select the sound.
DIGI EFF:
Set the DIGITAL EFFECT to on or off.
• (SOUND) is the initialized setting of the sound.

BALANCE:
Adjust the volume balance.
110
QQTG0692
PAN:
Adjust the stereo balance of each part (LEFT 64 - CENTER - RIGHT 63).
- At "LEFT 64", the sound is all the way to the left, at "RIGHT 63" all the way to the right. The center point is CENTER.
REV:
Depth of the REVERB (0 to 127).
CHO:
Depth of the CHORUS (0 to 127).
BEND RANGE:
Adjust the range of pitch change when the PITCH BEND wheel is operated (0 to 12).

EQ-Hi:
Sound correction in the high range.
- Use t h and v buttons to adjust the standard frequency. Use the GAIN ∧ and ∨ buttons to set the ratio of change.
EQ-Low:
Sound correction in the low range.
- Use t h and √ buttons to adjust the standard frequency. Use the GAIN ∧ and √ buttons to set the ratio of change.

Part V Composer
Playback
- In the RHYTHM GROUP section, press the MEMORY button.

• The display looks similar to the following.

- Select the desired memory (A/B/C).
- Use the VARIATION buttons to select a variation.
- Press the START/STOP button.
• The DRUMS part begins to play back.
- The BASS and ACCOMP parts are played back when you use the AUTO PLAY CHORD.
Step Record
Use STEP RECORD to store the notes one-by-one on the display. This is a convenient way to store complicated patterns that are difficult to play.
Recording procedure
- While you are recording, press the STEP RECORD button.
- The display changes to the STEP RECORD display similar to the following.
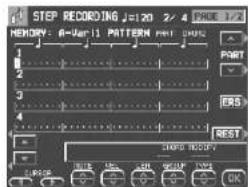
- Use the CURSOR buttons to move the cursor to the note position you are going to store.
• Each dot represents one-eighth of a quarter-note (a thirty-second note). -
When storing triplets, it may not be possible to match the timing exactly with the 1/32-note steps. However, if you select triplet-type notes for the note length (LENGTH) in step 4 below, the timing is automatically corrected.
-
Use the PAGE button to access the PAGE 2/2 display.

- Use the left LENGTH buttons to specify the note value. Select from ♩3, ♩3, ♩3, ♩3, ♩3, ♩3, ♩3, ♩3, ♩3, ♩3, ♩3, ♩3, ♩3, ♩3, ♩3, ♩3, ♩3, ♩3, ♩3, ♩3, ♩3, ♩3, ♩3, ♩3, ♩3, ♩3
- For note values other than these, use the right LENGTH buttons to specify the note value to be added to that which you specified with the left buttons.
Example: To record a dotted quarter-note (.)
$$ \text { ♩ } + ⓤ $$
(Continued on the next page)


Part V Composer
- Use the PHRS ∧ and ∨ buttons to specify the actual length of the produced sound for the desired legato or staccato effect.
TENU (tenuto): Sound is produced for 95% of the note length.
NORM (normal): 80%
-
Specify the pitch and velocity of the note by playing the keyboard.
-
The dot on the display where the note is stored changes to a * mark.
- When recording chords, you can store multiple notes at one position.
REST: To store a rest, after specifying the note LENGTH, press the REST button.
- Positions at which nothing is stored are read as rests.
ERS: If you make a mistake, move the cursor to the error, and after displaying the data you wish to erase, press the ERS button.
- Repeat steps 2 through 6 to continue storing notes.
- To record a different part, use the PART ^ and ∨ buttons to select another part.
- The NOTE, VELOCITY, LENGTH, CHORD MODIFY and CONTROL can be revised later. Press the OK button after the revision.
- You can easily switch between the REALTIME mode and the STEP mode any time during recording. To return to the realtime recording display during the STEP RECORD mode, press the EXIT button.
Measure Edit
You can edit the recorded data one measure at a time.
Select the function you wish to edit.
- During recording, press the MEASURE EDIT button.
• The display looks similar to the following.

- Select the function.
- Follow the procedure to edit the function (see below).
- Only the contents of the same pattern can be edited.
112
QQTG0692


Part V Composer
MEASURE COPY
Copy recorded data of specified measures to a specified point.
- On the destination track, the new data replaces the current measure contents.

- Specify the measures you wish to copy from the source track (FROM).
- On the FROM side, specify the settings with the corresponding buttons.
PART:
Select the part to copy from. (If ALL is selected, all parts are copied.)
FIRST MEASURE:
Specify the first measure to copy.
LAST MEASURE:
Specify the last measure to copy.
- Specify where you wish to copy the selected measures to.
- On the TO side, specify the settings with the corresponding buttons.
PART:
Select the part to copy to.
START MEASURE:
Specify the start point to copy the selected measures to.
- Press the OK button.
- The confirmation display appears. Press the YES button to execute the function, or press the NO button to cancel the function.
- If the FROM and TO parts are the same and the FROM and TO measures overlap, copy is not possible.
MEASURE ERASE
Erase the recorded contents of specific measures.
- Note that only the contents of the measures are erased, not the measures themselves; the length of the performance remains the same.

- Use the PART ∧ and ∨ buttons to specify the part.
- If ALL is selected, data is erased from the specified measures of all the parts at one time.
-
Use the FIRST MEASURE and buttons to specify the start point (measure number).
-
Use the LAST MEASURE ∧ and ∨ buttons to specify the end point (measure number).
-
Press the OK button.
- The confirmation display appears. Press the YES button to execute the function, or press the NO button to cancel the function.
Part V Composer
MEASURE DELETE
Delete specified measures from all parts at once.
- The length of the performance accordingly decreases by the number of deleted measures.

- Use the FIRST MEASURE and buttons, to specify the first measure to delete.
- Use the LAST MEASURE ∧ and ∨ buttons to specify the last measure to delete.
- One measure is the smallest unit that can be deleted.
- Press the OK button.
- The confirmation display appears. Press the YES button to execute the function, or press the NO button to cancel the function.
- When the INTRO or ENDING measures are deleted, the Maj and Min data are erased at the same time.
MEASURE INSERT
Insert blank measures at a specified point.
- The length of the performance accordingly increases by the number of inserted measures.

- Use the FIRST MEASURE button to select the point (measure) where the measures are to be inserted.
- Use the NUMBER OF MEASURE button to select the number of blank measures to insert.
- No more than 16 measures total can be inserted.
- Press the OK button.
- The confirmation display appears. Press the YES button to execute the function, or press the NO button to cancel the function.
- The Maj or Min data is inserted in the INTRO and ENDING at the same time.
Composer
114
QQTG0692
Part V Composer
Pattern Copy
Use this function to copy a pattern from a rhythm or from SEQUENCER data.
PATTERN COPY
Copy a rhythm to the COMPOSER.
- You can also copy a pattern from the MEMORY.
- On the COMPOSER MENU display, select PATTERN COPY.
• The display looks similar to the following.
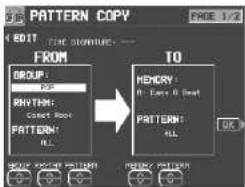
flowchart
graph LR
    A["GROUP: P2"] --> B["RHYTH: Connect Root"]
    B --> C["PATTERN: N"]
    C --> D["10"]
    D --> E["MEMORY: A: Cross & Beat"]
    E --> F["PATTERN: ALL"]
    F --> G["OK"]
- Select the pattern you wish to copy.
- In the FROM box, specify the settings with the corresponding buttons.
GROUP: Group name
RHYTHM: Rhythm name
PATTERN: Pattern name
- If ALL is selected, all the patterns are copied.
- Select the memory you wish to copy to.
- In the TO box, specify the settings with the corresponding buttons.
MEMORY: Memory name (A, B or C)
PATTERN: Pattern name
- If ALL is selected, all the patterns are copied.
- Press the OK button.
- When copying has been successfully completed, "COMPLETED!" appears on the display.
- If you wish to use the COMPOSER functions to edit the copied data, press the EDIT button, and follow the procedure to record a pattern.
■ Copying individual parts
- Use the PAGE ∧ and ∨ buttons to select PAGE 2/2.
• The display looks similar to the following.
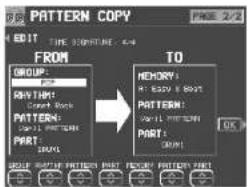
- On the FROM side, use the buttons to specify the part to copy from.
- For the DRUM part you can specify the DRUMS 1 or 2 part; for other parts you can specify a part other than a DRUMS part.
-
Specify the destination on the TO side to which the part will be copied.
-
Press the OK button.
Part V Composer
SEQ TO COMPOSER COPY
Data from the SEQUENCER can be copied to a COMPOSER memory. For example, you can use a rhythm pattern on a song disk as the automatic accompaniment for your own performance.
- Play back the song you wish to copy from SEQUENCER to confirm the tracks, the measures and the time signature you wish to copy.
- Follow the procedure in "Prepare to record" to prepare the COMPOSER memory you will be copying to. (Refer to page 106.)
- Be sure that time signature setting in the SEQUENCER data you are copying from and the time signature in the COMPOSER memory you are copying to are the same, or the data will not be copied successfully.
- On the COMPOSER MENU display, select SEQ TO COMPOSER COPY.
• The display looks similar to the following.

- Use the FIRST MEAS ∧ and ∨ buttons to specify the number of the first measure to copy.
- Use the LAST MEAS ∧ and ∨ buttons to specify the number of the last measure to copy.
-
Use the TRANSPOSE ∧ and ∨ buttons to change the key of the copied measures (-24 to +24).
-
Units are in semitones.
- Use the MEMORY ∧ and ∨ buttons to specify the COMPOSER memory to copy to.
- Use the PATTERN ∧ and ∨ buttons to specify the pattern to copy to.
Composer
-
For each COMPOSER part, specify the SEQUENCER track from which to copy data.
-
Use the PART ▲ and ▼ buttons to specify the part name, and the TRACK ∧ and ∨ buttons to specify the track number.
-
Parts which are set to OFF are blank.
-
Press the OK button.
-
"COMPLETED!" is shown on the display.
- If you wish to use the COMPOSER function to edit the copied data, press the EDIT button, and follow the procedure to record a pattern.
- In the case of INTRO or ENDING, if a measure contains a Maj or Min command, it is reproduced in the other pattern as well.
Part VI Disk Drive (KN2400)
Outline of the Disk Drive function
The Disk Drive enables you to store recorded and stored data from this instrument's memories on disks, as well as play commercial recorded disks on this instrument.
Internal memory and Disk Drive
The storable internal memory of this instrument as well as the backup time are limited. However, the Disk Drive maximizes your control of data management by allowing you to store (SAVE) this instrument's data on disks, and then to recall (LOAD) it at any time.
- The BACK UP data will not be erased even with the passage of time.
■ The following data can be saved/loaded:
PERFORMANCE
| CURRENT PANEL (The current panel settings) |
| PANEL MEMORY* |
| SEQUENCER |
| COMPOSER* (MEMORY contents) |
| SOUND MEMORY* |
| PERFORMANCE PADS (USER memories) |
| EFFECT MEMORY* |
BACKUP
MIDI & FAVORITES
- When creating or saving song data, it is recommended that you use the performance data in the PERFORMANCE group.

Floppy disk
• Instead of using MIDI & FAVORITES as frequently loaded and saved data, it is recommended that you save it with other data as Keyboard backup data.
- A * mark indicates that data can be loaded to and from a specific memory (SINGLE LOAD).
- The SEQUENCER contents can be saved in one-song increments (SEQUENCER SONG SAVE).
- Please use 2HD disks to load/save BACKUP data.
Main parts of the Disk Drive

Eject button
Press to remove the disk from the Disk Drive.
- You can use 3.5 inch 2DD (720 KB) or 2HD (1.44 MB) disks; however, 2HD disks formatted as 2DD cannot be used.


Part VI Disk Drive (KN2400)
Using commercial song disks
Not only disks recorded on this instrument, but also data from commercial song disks can be read on this instrument.
- This instrument accepts the following file formats:
TECHNICS File format
Standard MIDI File format
■ Loading Technics File format disks
Using Technics file format disks allows you load new SOUND EDIT, rhythm & accompaniments, PANEL MEMORY, PERFORMANCE PADS and Song data into your instrument to expand its potential even further.
■ About Standard MIDI Files
"Standard MIDI File" (SMF) is a standardized data format which makes it possible for music data to be exchanged among different sequencers. Data stored in this format on sequencers of different models can be played back on this instrument, and vice versa. Note, however, that Standard MIDI Files ensure the compatibility of data such as NOTE data (keyboard performance data), VELOCITY (how hard the keyboard is played), PROGRAM NUMBER data (voice number data), etc. Because it does not guarantee 100% faithful reproduction of recorded music which is replete with such data, it may be necessary for you to adjust the settings to your satisfaction.
- Only files with the ".MID" extension can be loaded.
- Standard MIDI File FORMAT 1 can be loaded, but not saved.
- This instrument's SEQUENCER data can be saved to a disk in Standard MIDI File (FORMAT 0) and can be used by other equipment.
Playback of commercial song disks
DIRECT PLAY lets you enjoy playing commercially sold song disks directly from a disk. It's fast because you don't have to load the disk data into your instrument's memory.
- DIRECT PLAY is possible from the following disks:
| Standard MIDI File |
| Standard MIDI File with Lyrics |
| DISK ORCHESTRACOLLECTIONTM (DOC) |
| PianoDiscTM |
* All product and company names are trademarks or registered trademarks of their respective owners. * DISK ORCHESTRA COLLECTION is a trademark of the YAMAHA Corporation.
■ SMF with LYRICS
SMF with LYRICS is a format in which character information that is included with the MIDI data, such as karaoke lyrics, can be displayed. This instrument supports this format, making it possible to view the lyrics on the display while a performance is played back.
SMF LYRICS
■ GENERAL MIDI LEVEL 2 (GM2)
This instrument complies with GENERAL MIDI (GM) LEVEL 2 standards. GM LEVEL 2 is a uniform world standard for MIDI sound generators that improves on existing GM standards, in order to realize an enhanced performance expression. Sound generators of this class can reproduce virtually the identical conditions that were in effect at the time of recording. Equipment which conforms to GENERAL MIDI LEVEL 2 standards is indicated by the following logo.

• This instrument also conforms to GENERAL MIDI playback.

Part VI Disk Drive (KN2400)
Outline of the procedure

natural_image
Front view of a control panel with buttons and display (no visible text or symbols)- Insert the disk into the Disk Drive slot. Push it all the way in until you hear a click.
- On this instrument, if the normal display is active, it automatically changes to the DISK MENU display when a disk is inserted into the Disk Drive (initialized settings). The PREFERENCES menu is used to specify which display is shown when a disk is inserted.
- Select a menu on the DISK MENU display.
- If the DISK MENU display does not appear, turn on the DISK button.
- Follow the procedure for the function (see below).
- When function is being set, if the TEMPO/PROGRAM indicator is lit, the TEMPO/PROGRAM is available for setting the current function.
- When you have finished setting the functions, turn off the DISK button.

■ DISK IN USE

This indicator lights when data is being loaded or saved.
- To prevent data loss, do not eject the disk or turn off the power while this indicator is lit.
This indicator is lit continuously as long as the power is on.
■About the menu

LOAD (page 120)
Load data from a disk into this instrument's memory.
SAVE (page 125)
Save data from this instrument's memory to a disk.
DIRECT PLAY (page 122)
Direct playback of SMF etc. commercial song disks and medley playback.
SONG MEDLEY (page 124)
Medley playback of songs in the disk (Technics format).
DISK TOOLS (page 128)
Disk management procedures, such as disk format.
PREFERENCES (page 130)
Used to specify which screen is to be jumped to as well as the preferred file when a disk is inserted.
Part VI Disk Drive (KN2400)
Loading data
Recall (load) the data from the disk to this instrument's memories.
- Note that the load procedure causes any data which is currently stored in the relevant memories to be erased.
LOAD
Load data that saved to a disk into this instrument's memory.
- Insert the disk with the stored data into the Disk Drive. Push it all the way in until you hear a click.

natural_image
Diagram of a computer RAM slot with an inserted slot and memory compartment (no text or symbols)- On the DISK MENU display, select LOAD.
• The display looks similar to the following.

- If there are only SMF files on the disk, the display automatically changes to the SMF LOAD display.
- Use the buttons below the display to select the song (Technics file) you wish to load.
- If there are SMF files on the disk and you wish to load an SMF file, press the SMF button. (Refer to next page.)
- Press the LOAD button.
• The LOAD operation begins.
- When the operation has been successfully completed, "COMPLETED!" is shown on the display.
- If song data was loaded, you can press the START/STOP button to begin playback when the SEQUENCER PLAY display is active.
- You can load the type of data for which only one song can be recorded in the SEQUENCER. (This type is available for disks used with older Technics models.) Note, however, that in this case, the song is loaded into SONG 1, but the data in SONG memories 2 to 10 are erased.
- You can also access the LOAD display by pressing the DISK button for a few seconds.
■ LOAD OPTION
Specify the kind of data you wish to load from the disk to your instrument.
- Use the PAGE buttons to access the PAGE 2/3 LOAD OPTION display.
• The display looks similar to the following.

- Use the buttons below the display to specify the types of data you wish to load (YES/NO).
- - - - - indicates that this type of data has not been saved.
- This setting is canceled when you quit the LOAD display or when another file is selected.
- Press the LOAD button.
• The LOAD operation begins.


Part VI Disk Drive (KN2400)
■ SINGLE LOAD
You can specify which data to load from a disk into a specific PANEL MEMORY, COMPOSER (MEMORY), SOUND MEMORY, EFFECT MEMORY or SEQUENCER (when SONG SAVE was executed) memory.
- Use the PAGE buttons to access the PAGE 3/3 SINGLE LOAD display.
• The display looks similar to the following.
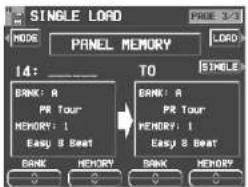
- Use the MODE button to select the data you wish to load.
- Use the BANK/SINGLE button to select the load increment. (except for SEQUENCER)
BANK:
Load one bank at a time.
SINGLE:
Load the smallest data increment.
- Follow the appropriate procedure to load the specified data.
- Specify the data source for SONG (left side), and the data destination (this instrument's memory location) for TO.
■ SMF LOAD
Load data which was saved in the "Standard MIDI File" (SMF) format.
- On the LOAD (PAGE 1/3) display, press the SMF button.
• The display looks similar to the following.

- For disks which contain SMF files only, this display appears automatically when LOAD is selected on the DISK MENU display.
-
Use the buttons below the display to select the filename you wish to load.
-
If the number of files is 10 or more, you can use the PREV and NEXT buttons to go back or advance 10 files at a time.
- If you press the TECH button, the display changes to the LOAD display for Technics format.
- You can use the INFORMATION button to switch the displayed data.
DISK: Disk name
SONG: Song name
-
Use the TO SONG button to select the number to load to (this instrument's SEQUENCER song number).
-
Songs to load are specified one at a time.
-
The song name to load to is shown below the TO SONG button.
-
Use the LOAD AS button to specify the load method.
Select from the following.
GM/GM2 → GM2:
Activate the GM2 initialized settings, and load GM/GM2 data.
NX → NX:
Active the NX SOUND settings, and load NX data.
GM/GM2 → NX:
Activate the NX SOUND initialized settings, and load GM/GM2 data.
PREV. TEC → NX:
Activate the NX SOUND initialized settings, and load SMF data that was saved in the TECHNICS mode on a previous model. (The volume balance and octave settings may differ from the saved settings.)
- If you select the setting which is different from that in which the song was stored, the sounds, octaves, and arrangement of percussion instrument sounds, etc. will be different.
5. Press the LOAD button.
• The LOAD operation begins.
- When the operation has been successfully completed, "COMPLETED!" is shown on the display.
- If you press the START/STOP button, playback of the loaded data begins.
- During the LOAD operation, data that cannot be processed by this instrument is ignored.


Part VI Disk Drive (KN2400)
■ COMPOSER LOAD
Load COMPOSER data only from a disk.
- In the RHYTHM GROUP section, press and hold the LOAD (MEMORY) button for a few seconds.

• The display looks similar to the following.

-
Select the name of the file you wish to load.
-
Press the LOAD button.
- Data is loaded to this instrument's COMPOSER memory (MEMORY).
Direct Play
You can enjoy immediate playback of "Standard MIDI File" (SMF), "Disk Orchestra Collection" (DOC) and "PianoDisc" disks—all without loading the song data.
-
Insert the disk with the stored data into the Disk Drive.
-
On the DISK MENU display, select DIRECT PLAY.
• The display looks similar to the following.

- Use the buttons below the display to select the song you wish to have played.
- If the number of files is 10 or more, you can use the PREV and NEXT buttons to go back or advance 10 files at a time.
- For SMF files, use the PLAY AS button to specify a sound arrangement mode.
GM2: GENERAL MIDI LEVEL 2
NX: NX SOUND
PREV. TEC: Data from Technics instruments not having NX SOUND capability.
- For SMF files, you can use the INFO button to switch the displayed data.
DISK: Disk name SONG: Song name
- For SMF files, use the MIDI OUT button to specify whether or not MIDI data is output during playback (ON/OFF). (This cannot be changed during playback.)
- Press the START button.
• The selected song is played back.
■ Adjusting the playback tempo
Even with a song having recorded tempo data, you can use TEMPO/PROGRAM or TAP TEMPO to adjust the tempo to your liking.
- When the tempo is changed, all the tempo data of that song is automatically changed by the same ratio. Accordingly, even in song data in which tempo change data is stored, a single adjustment of the tempo produces a natural-sounding playback.



Part VI Disk Drive (KN2400)
■ The display during playback

- During playback, the buttons below the display are used for player functions such as fast forward, pause, etc.
- During playback, if you press the MIXER button you can change the settings for each part.
- If you press the MIC button during playback, the display changes to the MIC REVERB & EFFECT setting display.
- For SMF disks:
For "SMF with LYRICS" disks, by pressing the LYRICS button, the lyrics are shown on the display.
For a "minus one" performance, use the TRACK MUTE ∧, v buttons to select the channel you wish to mute. Use the ON/OFF buttons and set the track you want to MUTE to ON. Following this, you can play a keyboard performance on the channel which was last set to MUTE.
- For DOC disks:
You can use the PART 1, PART 2 and ORCH (other accompaniment parts) buttons to set the respective parts to ON or OFF.
• For PIANO DISC playback:
You can use the PART 1 and ORCH (other accompaniment parts) buttons to set the respective parts to ON or OFF.
■ MEDLEY PLAY
With DIRECT PLAY, songs saved on a disk can be played back continuously in a medley.
-
On the DIRECT PLAY display, set the MEDLEY settings.
-
If ALL is pressed, all the files are selected, and the songs are played back in order in a medley. If ALL is pressed again, the files are deselected.
- You can use the buttons below the display to select a song to add to the song list, then press the ADD button to add it to the list. Repeat these steps to create your own list of songs to have played back. A M01, M02 etc. next to the file name indicates its order in the list.
- If the number of files is 10 or more, you can use the PREV and NEXT buttons to go back or advance 10 files at a time.
- You can delete a marked file from the medley song list by selecting it and pressing the ADD button.
-
Use the LOOP button to specify ON or OFF for repeat playback of the medley.
-
Press the START button.
• Medley playback begins.
- During medley playback, you can use the SKIP button to skip to the next song.



Part VI Disk Drive (KN2400)
Song Medley
Songs saved from the SEQUENCER to a disk (disk data) in the TECHNICS FORMAT can be played back in a medley.
- On the DISK MENU display, select SONG MEDLEY from the display.
• The display looks similar to the following.

-
Select the order of files in the medley.
-
If ALL is pressed, all the files are selected, and the songs are played back in numerical in a medley.
- You can select a file and song, then press the ADD button to add it to the song list. Repeat these steps to create your own list of songs to have played back. A M01, M02 etc. next to the file name indicates its order in the list.
- You can delete a marked file from the medley song list by selecting it and pressing the ADD button.
- Use the LOOP button to specify ON or OFF for repeat playback of the medley.
- You can use the MODE button to select the medley mode.
10 SNGS:
Songs 1 to 10 from each SONG are played in a medley.
1 SONG:
Only song 1 from each SONG is played back in a medley.
- Press the START button.
• Medley playback begins.
- During the performance, the display changes to the playback display.
- During a medley performance, if you press the MIXER button you can change the settings for each part.
- During a medley performance, you can use the SKIP button to skip to the next song.
- If the disk contains SMF or other files, but no TECHNICS FORMAT file, the display changes to the DIRECT PLAY display.



Part VI Disk Drive (KN2400)
Saving data
The recorded data and panel settings of this instrument can be saved on a disk.
Disks
You can use 3.5 inch 2DD (720KB) or 2HD (1.44MB) disks.
• How to distinguish the two disk types:

- Although 2HD disks can hold more data and are convenient for quick loading and saving, some models may be able to read only 2DD disks. Therefore, you may not be able to use your 2HD disk data with other musical instrument models.
- When saving data to the disk, the write-protect tab must be closed.

SAVE
- Insert a formatted disk into the Disk Drive slot. Push it all the way in until you hear a click.
- A disk which is used with this instrument for the first time must first be formatted.
- On the DISK MENU display, select SAVE.
• The display looks similar to the following.

- Select the type of data save you want.
TECHNICS FORMAT:
Save this instrument's data in the Technics File format.
SMF FORMAT 0:
Save the SEQUENCER data in the "Standard MIDI File" format (FORMAT 0).


Part VI Disk Drive (KN2400)
■ TECHNICS FORMAT
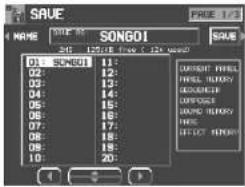
- Use the buttons below the display to specify the file number you wish to save to.
- The types of data that can be saved are shown in a frame on the right side of the display. If you press the SAVE button, all the indicated data is saved. Ordinarily PERFORMANCE data is selected, but you can use the SAVE OPTION to select specific data to save.
- If you wish to assign a name to the file, press the NAME button.
• The display looks similar to the following.
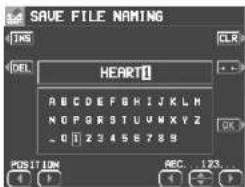
-
Use the buttons below the display to assign a name.
-
Set the character input position with the POSITION buttons, select the characters with the alphanumeric buttons and repeat name assignment.
- Press the INS button to enter a space at the cursor position.
- Press the DEL button to erase the character at the cursor position.
- Press the CLR button to erase the entire name.
-
Press the ← button to center the name.
-
Press the OK button.
- The display returns to the SAVE display.
- Press the SAVE button.
• The SAVE operation begins. - If you attempt to save data to a file number in which data is currently saved, the display changes to the confirmation display. Press the YES button to continue the SAVE procedure, or press the NO button if you wish to cancel it.
Specify the kind of data you wish to save to the disk. To maximize effective use of disk memory or to minimize the save time, select only the type of data you wish to save.
- Use the PAGE buttons to access the 2/3 SAVE OPTION display.
• The display looks similar to the following.
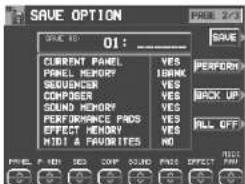
-
Use the buttons below the display to specify the types of data you wish to save (YES/NO).
-
For PANEL MEMORY, select from NO/1 BANK/ALL. Selecting 1 BANK will save only bank A.
- Press the PERFORM button to select all the performance data, or press the BACKUP button to select all the back up data at once.
-
If the ALL OFF button is pressed, all the settings change to NO.
-
Press the SAVE button.
• The SAVE operation begins.
Part VI Disk Drive (KN2400)
You can specify a single song in the SEQUENCER to save to the disk.
- Use the PAGE buttons to access the 3/3 SEQUENCER SONG SAVE display.
• The display looks similar to the following.

-
Use the buttons below the display to select the song number you wish to save.
-
Press the SAVE button.
• The SAVE operation begins.
■ SMF FORMAT 0
This instrument's SEQUENCER data can be saved in the "Standard MIDI File" format (FORMAT 0) for use on other instruments.
- What you can save in the SMF format (FORMAT 0) is ordinary performance data, such as note data. Data such as chord and rhythm data, COMPOSER data, etc. is not saved. If you wish to also save this special Technics data, save the data in the Technics File format.
- If you use the APC TO SMF CONVERT function of the SEQUENCER, you can convert the patterns of the automatic accompaniment, etc. to SMF data. (Refer to page 100.)
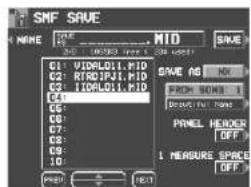
- To overwrite a file, use the ▲ and ▼ buttons and then select a song name.
- If the number of files is 10 or more, you can use the PREV and NEXT buttons to go back or advance 10 files at a time.
-
If you wish to assign a name to the file, press the NAME button.
-
Use the buttons below the display to assign a name.
-
Press the OK button.
- The display returns to the SAVE display.
- Use the FROM SONG buttons to select the SEQUENCER song number you wish to save.
- The song name to save from is shown below the FROM SONG button.
- Use the PANEL HEADER buttons to specify ON or OFF.
ON:
The sound and volume settings for each part are saved as data at the beginning of the file.
OFF:
This data is not saved.
(Continued on the next page)


Part VI Disk Drive (KN2400)
- Use the 1 MEASURE SPACE buttons to select ON or OFF.
ON:
A one-measure space is added to the beginning of the file.
OFF:
No space is added.
- When there is various data other than performance data stored at the beginning of a file, the start of playback may be delayed. This can be avoided by set the 1 MEASURE SPACE to ON to inserting a before the beginning of the performance.
- When set to ON, a space is added each time a file is saved. Therefore, if you have already saved a file once with the 1 MEASURE SPACE set to ON, please set it to OFF each time the file is subsequently saved.
-
Use the SAVE AS button to select the sound generator mode (GM/GM2/NX).
-
Press the SAVE button.
• The SAVE operation begins.
- When the operation has been successfully completed, "COMPLETED!" is shown on the display.
- If you attempt to save data to a file name in which data is currently saved, the display changes to the confirmation display. Press the YES button to continue the SAVE procedure, or press the NO button if you wish to cancel it.
Disk management
Various disk management procedures, such as file delete, file copy, and disk format, are available from the DISK TOOLS menu.
DISK TOOLS
-
Insert the disk into the Disk Drive slot.
-
On the DISK MENU display, select DISK TOOLS from the display.
• The display looks similar to the following.
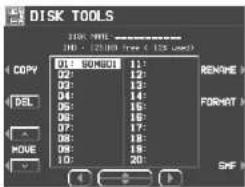
- Select a function and follow the procedure to execute it.
- Use the buttons below the display to select a file.
- You can press the SMF/TECH button to change to the display for procedures related to SMF/TECH files.
- Use the buttons to the left and right of the display to access the corresponding setting display.
■ RENAME: Assign a name to a file.
■ DEL: Delete a file.
■ COPY (TECH): Copy a file.
■ MOVE (TECH): Replace a file.
■ INFO (DISK/SONG) (SMF files only): Select whether to display the disk data or the song names.
■ FORMAT
Disks which are used for the first time with this instrument have to be formatted through the following procedure. When an unformatted disk is inserted into the Disk Drive slot and you attempt to execute the save or load procedure, the DISK FORMAT display appears. Follow the instructions shown to format the disk.
Part VI Disk Drive (KN2400)
- Note that this procedure clears any data which is currently stored on the disk.
- Select the type of format (2DD or 2HD).
- Be sure to select the type which is the same as your disk type.
- If the type is automatically detected, the display changes directly to the following display, without showing the type select display.
• The display looks similar to the following.

- If you wish to select the type again, use the PAGE button to access the PAGE 2/2 display.
- Press the YES button to format the disk, or press the NO button to cancel the format.
- When the YES button is pressed, disk format begins. After about 1–2 minutes, formatting is completed and DISK NAMING display is shown.
- Use the buttons below the display to assign a name.
- Set the character input position with the POSITION buttons, select the characters with the alphanumeric buttons and repeat name assignment.
- Switch from upper to lower case letters with the ABC, abc button.
- Press the INS button to enter a space at the cursor position.
- Press the DEL button to erase the character at the cursor position.
- Press the CLR button to erase the entire name.
- Press the ← button to center the name.
- Press the OK button.
Part VI Disk Drive (KN2400)
Set the automatic display when a disk is inserted
When a disk is inserted in the Disk Drive, the display automatically changes to a disk-procedure display. Follow this procedure to customize the automatic display.
PREFERENCES
- On the DISK MENU display, select PREFERENCES.
• The display looks similar to the following.

- Use the buttons to the left of the display to select the item, and the ∧ and ∨ buttons to change the setting.
DISK INSERT OPTION:
The display automatically changes to a disk-procedure display when a disk is inserted in the Disk Drive (OFF, DISK MENU, LOAD, DIRECT PLAY, SONG MEDLEY).
- During playback, recording or changing the settings, the displays unrelated to the settings made here do not change.
FILE TYPE PRIORITY:
Specify the desired priority ranking of displayed files when several types of files are recorded on one disk (TECHNICS/SMF).
- Press the OK button.
Part VII SD Card (KN2600)
Outline of the SD card

natural_image
Front panel of a computer interface with control panels and buttons (no text or symbols visible)The data generated by this instrument can be stored and managed on an SD card in SMF or TECHNICS format.
Structure of the SD card format
| SD-AUDIO Music (audio) data |
| SD-SOUND SMF data |
| PRIVATE local data of the instrument |
Management inner memory data
The instrument inner memory data can be managed using the high space capacity of the SD card. The data which can be saved and loaded is same as the DISK DRIVE (KN2400). (See page 119.)
Play an SD card
Besides saving, you can enjoy playback of audio or SMF data saved on the SD card. (Refer to pages 136, 137.)
SD-AUDIO
AUDIO data stored on an SD card using SD format software.
SD-SOUND
SMF data (SD-SOUND format) saved on the SD card
Outline of the procedure
- Open the lid of the SD slot.

natural_image
Diagram showing two mechanical or fluid dynamics states with directional arrows indicating movement (no text or symbols)- Open it completely.
- Insert the SD card.
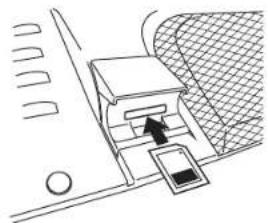
natural_image
Diagram of a mechanical device with a handle and control panel, no visible text or symbols- Push the card until it locks as shown in the figure.
- Close the lid.

natural_image
Diagram of a mechanical component with a downward arrow indicating force or direction (no text or symbols)- No operation is possible when the lid is open.
- Press the SD button to turn it on.
-
Select a menu on the SD MENU display.
-
Follow the procedure for the function (see below).
- When function is being set, if the TEMPO/PROGRAM indicator is lit, the TEMPO/PROGRAM is available for setting the current function.



Part VII SD Card (KN2600)
- When you have finished setting the functions, press the SD button to turn it off.
■ SD IN USE
■ SD IN USE
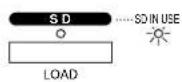
- This indicator lights when accessing to the SD card.
To prevent data loss, do not eject the card or turn off the power while this indicator is lit.
■ Removing the SD card

natural_image
Technical line drawing of a mechanical component with a highlighted section (no text or symbols)When the SD IN USE indicator is not lit, while opening the lid, push the center of the card to unlock it.
Attention
Note that no sound is produced when performing SD card operations, such as LOAD or SAVE. Also, the instrument produces no sound when one of following displays appears (The keyboard will emit sound):
- LOAD (TECH) PAGE 3
• SD SONG MEDLEY
• COPY FROM DISK (SD TOOLS) - SD-SOUND EXPORT/IMPORT (SD-TOOLS)
■ SD MENU

LOAD (page 130)
Load data into this instrument from the card.
SAVE (page 140)
Save data on the card from this instrument.
FAVORITE SONGS (page 143)
Arrange the order of your favorite songs stored on the card.
SD-AUDIO PLAY (page 136)
Play back audio data stored on the card.
SD-SOUND PLAY (page 137)
Play directory SD-SOUND (SMF) data on the card.
Play back music data on the card (TECHNICS format) successively in a medley.
SD TOOLS (page 144)
Card management procedures, such as card format.
SD PREFERENCES (page 145)
Set the priority for displaying while saving or loading data.


Part VII SD Card (KN2600)
Loading data
Load the data from the SD card to this instrument's memories.
- Note that the load procedure causes any data which is currently stored in the relevant memories to be erased.
SD LOAD
Load data that saved to a card into this instrument's memory.
- Insert the SD card with the stored data into the SD slot. (See page 131.)
- Close the lid securely.
- Press the SD button to turn it on.

- On the SD MENU display, select LOAD.
• The display looks similar to the following.
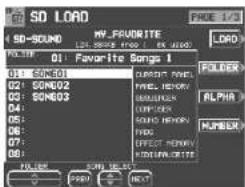
- If there are only SMF files on the card, the display automatically changes to the SD-SOUND (SMF) LOAD display.
- Use the buttons to the right of the display to select the type of loading.
FOLDER:
Select files to load from a list of all folders and of saved songs in each folder.
ALPHABET (See page 134.)
Select files to load from an alphabetical list of all songs.
NUMBER (See page 134.)
Select files to load specifying folder and song numbers.
- The priority that sets which display is shown first can be set at the SD PREFERENCES display. (Refer to page 145.)
■ FOLDER
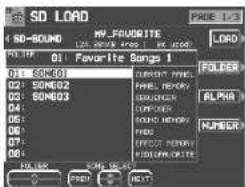
- Use the buttons below the display to select the SONG you wish to load.
- Select the folder name first, and then select the SONG name.
-
Press the PREV button for the previous page and the NEXT button for the next page.
-
Press the LOAD button.
• The LOAD operation begins.
- When the operation has been successfully completed, "COMPLETED!" is shown on the display.
- If song data was loaded, you can press the START/STOP button to begin playback when the SEQUENCER PLAY display is active.
- You can load the type of data for which only one song can be recorded in the SEQUENCER. (This type is available for cards used with older Technics models.) Note, however, that in this case, the song is loaded into SONG 1, but the data in SONG memories 2 to 10 are erased.
- You can also access the LOAD display by pressing the SD button for a few seconds.



Part VII SD Card (KN2600)
■ ALPHABET
Load the file from an alphabetical list of all songs saved in TECHNICS format on the SD card.

- Use the and buttons to change the alphabetical letter or the display page.
- Use the ▲ and ▼ buttons to specify the song to be loaded.
- Press the PREV button for the previous page and the NEXT button for the next page.
- Press the LOAD button.
Specify the kind of data you wish to load from the SD card to your instrument.
- Use the PAGE buttons to access the PAGE 2/3 display.
• The display looks similar to the following.

-
Use the buttons below the display to specify the types of data you wish to load (YES/NO).
-
-
-
-
- indicates that this type of data has not been saved.
-
-
-
-
This setting is canceled when you quit the LOAD display or when another file is selected.
-
Press the LOAD button.
• The LOAD operation begins.
■ NUMBER
From all songs saved in the TECHNICS FOR-MAT on the SD card, select a song by specifying the song number.

- Use the buttons below the display to specify the song number.
- Specify the FOLDER (01–99) first, and then select the SONG (01–20).
- A number should be specified as a 2-digits number. (Press 0, 1 for the number 1.)
- Press the LOAD button.
You can specify which data to load from an SD card into a specific PANEL MEMORY, COMPOSER (MEMORY), SOUND MEMORY, EFFECT MEMORY or SEQUENCER (when SONG SAVE was executed) memory.
- Use the PAGE buttons to access the PAGE 3/3 display.
• The display looks similar to the following.

- Use the MODE button to select the data you wish to load.
- Use the BANK/SINGLE button to select the load increment. (except for SEQUENCER) BANK:
Load one bank at a time.
SINGLE:
Load the smallest data increment.
- Follow the appropriate procedure to load the specified data.
- Specify the data source for SONG (left side), and the data destination (this instrument's memory location) for TO.
Part VII SD Card (KN2600)
■ COMPOSER LOAD
Load COMPOSER data only from a card.
- In the RHYTHM GROUP section, press and hold the LOAD (MEMORY) button for a few seconds.

• The display looks similar to the following.
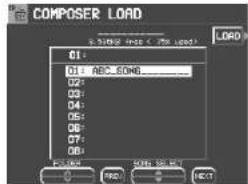
- Use the buttons below the display to select the SONG you wish to load.
- Select the folder name first, and then select the SONG name.
- Press the PREV button for the previous page and the NEXT button for the next page.
- Press the LOAD button.
- Data is loaded to this instrument's COMPOSER memory (MEMORY).
SD-SOUND LOAD (SMF)
Load SD-SOUND (SMF) data from the SD card.
- On the LOAD (PAGE 1/3) display, press the SD-SOUND button.
• The display looks similar to the following.

- For cards which contain SD-SOUND data only, this display appears automatically when LOAD is selected on the SD MENU display.
- Use the buttons below the display to select the SONG name you wish to load.
- Use the PLAYLIST button to specify the PLAYLIST (see page 138), the SONG SELECT button to specify the SONG.
- If you press the PLAYLIST EDIT button, the display changes to the PLAYLIST EDIT display. (See page 138.) If you press the TECH button, the display changes to the LOAD display for the TECHNICS SONG.
- Use the TO SONG button to select the number to load to (this instrument's SEQUENCER song number).
- Songs to load are specified one at a time.
- The SEQUENCER song name to load to is shown below the TO SONG button.
- Use the LOAD AS button to specify the load method.
- Select from the following.
GM/GM2 → GM2:
Activate the GM2 initialized settings, and load GM/GM2 data.
NX → NX:
Active the NX SOUND settings, and load NX data.
GM/GM2 → NX:
Activate the NX SOUND initialized settings, and load GM/GM2 data.
PREV. TEC → NX:
Activate the NX SOUND initialized settings, and load SMF data that was saved in the TECHNICS mode on a previous model. (The volume balance and octave settings may differ from the saved settings.)
- If you select the setting which is different from that in which the song was stored, the sounds, octaves, and arrangement of percussion instrument sounds, etc. will be different.
- Press the LOAD button.
• The LOAD operation begins.
- When the operation has been successfully completed, "COMPLETED!" is shown on the display.
- If you press the START/STOP button, playback of the loaded data begins.
- During the LOAD operation, data that cannot be processed by this instrument is ignored.

Part VII SD Card (KN2600)
SD-Audio Play
Play back audio data on the SD card saved by a PC, etc.
- Insert the SD card with the stored data to be played into the SD slot. (See page 131.)
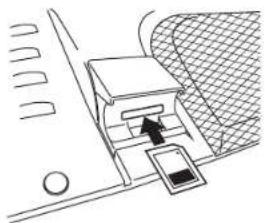
natural_image
Pure technical diagram of a mechanical assembly without any text, numbers, or symbols- Close the lid securely after inserting the card.
- Press the SD button to turn it on.

- On the SD MENU display, select SD-AUDIO PLAY.
• The display looks similar to the following.

- Using the PLAY MODE button, you can select the type of playback.
NORMAL:
For playing back the songs in sequential order.
ALL REPEAT:
For playing back all the songs repetitively.
1 SONG REPEAT:
For playing back a song repetitively.
- You can select PLAY LIST using the PLAYLIST SELECT button as necessary.
- Playback the data by pressing the button below the display.
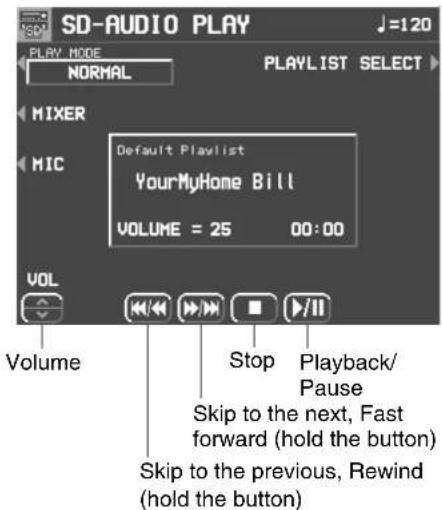
- Adjust the volume for playback using the VOL ∧ and ∨ buttons.


Part VII SD Card (KN2600)
SD-Sound Play
Play back SMF data saved on the SD card (SD-SOUND).
- Lyrics of the SMF with LYRICS files can be also displayed.
- Insert the SD card with the stored data to be played into the SD slot. (See page 131.)
- Close the lid securely after inserting the card.
- Press the SD button to turn it on.
- On the SD MENU display, select SD-SOUND PLAY.
• The display looks similar to the following.

-
Press the buttons above the display to play back the data.
-
For the function of each button, see page 136.
- Press the PLAYLIST SELECT button to select a PLAYLIST.

- Using the PLAY MODE button, you can select the type of playback.
NORMAL:
For playing back the songs in sequential order.
ALL REPEAT:
For playing back all the songs repetitively.
1 SONG:
For playing back only one song.
1 SONG REPEAT:
For playing back a single song repetitively.
- Press the LYRICS button to show the lyrics.
-
The PLAY AS button functions like as the LOAD AS button. (Refer to page 135.)
-
To have a minus-one play, use the ^ and ∨ buttons to select a part or parts and set ON/OFF to the part. The part being muted last is assigned to the keyboard, so that you can play the part with the keyboard. You can also assign the part to play with the keyboard using the CONDUCTOR.
- Adjust the volume for playback using VOL.
■ Adjusting the playback tempo
Even with a song having recorded tempo data, you can use TEMPO/PROGRAM or TAP TEMPO to adjust the tempo to your liking.
- When the tempo is changed, all the tempo data of that song is automatically changed by the same ratio. Accordingly, even in song data in which tempo change data is stored, a single adjustment of the tempo produces a natural-sounding playback.



Part VII SD Card (KN2600)
Playlist
The instrument handles the SD-AUDIO/SD-SOUND files in PLAYLIST units. The explanation of the PLAYLIST is as follows.
PLAYLIST type
There are two types of PLAYLIST.
A collection of all data saved in an SD card. If you delete a song from the default PLAYLIST, the song data itself will be deleted on the card.
When the music data is transferred to the SD card from a PC, a play list is created automatically on the card. You can freely name this type of play lists. Also, you can create a new PLAYLIST which contains your favorite songs selected from the DEFAULT PLAYLIST or other PLAYLISTs.
MEMO
You can create PLAYLISTs on an SD card within the following limits.
• Maximum number of PLAYLISTs: 99
• Maximum number of songs: 999
• Maximum number of songs in a PLAYLIST: 99
PLAYLIST EDIT
You can edit a PLAYLIST for SD-SOUND freely except for the DEFAULT PLAYLIST.
- You can edit the DEFAULT PLAYLIST on the SD TOOLS display. (Refer to page 144.)
-
On the PLAYLIST SELECT display, press the EDIT button.
-
The PLAYLIST SELECT display appears when you press the PLAYLIST SELECT button on the SD-SOUND display. (Refer to page 137.)
• The display looks similar to the following.
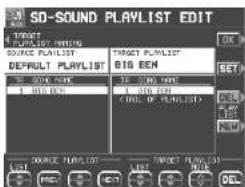
-
Edit the PLAYLIST.
-
Select the songs to copy from in the left column of the display, assign to them desired song numbers for the TARGET PLAYLIST and press the SET button. This creates a new PLAYLIST of the selected songs with assigned song numbers.
-
Use the MOVE button to change the order of the songs.
-
Press the DEL button to delete the songs which are currently selected on the "Target Playlist."
- Press the PLAYLIST NEW button to select a new, blank PLAYLIST as a TARGET PLAYLIST.
- Press the PLAYLIST DEL button to delete PLAYLIST which is currently selected as TARGET PLAYLIST.
-
Press the TARGET PLAYLIST NAMING button to name the PLAYLIST which is being currently edited.
-
Press the OK button.
SD Song Medley
Songs saved from the SEQUENCER to an SD card in the TECHNICS FORMAT can be played back in a melody.
- On the SD MENU display, select SD SONG MEDLEY.
• The display looks similar to the following.
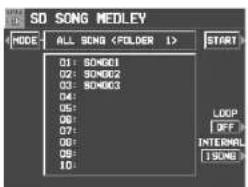
- Press the MODE button to select the type of medley list.
ALL SONG:
A list of all songs in all folders
FOLDER:
A list of all songs in a selected folder.
- Press the FOLDER SELECT button to select the folder to play.
USER LIST 1-3:
Lists which can be set freely. (See below.)
- Use the LOOP button to specify ON or OFF for repeat playback of the medley.
- You can use the INTERNAL button to select the medley mode.
10 SNGS:
Songs 1 to 10 from each SONG are played in a medley.
1 SONG:
Only song 1 from each SONG is played back in a medley.
- Press the START button.
• Medley playback begins.
- During the performance, the display changes to the playback display.
- During a medley performance, if you press the MIXER button you can change the settings for each part.
- During a medley performance, you can use the SKIP button to skip to the next song.
■ Making a USER LIST
You can create up to three USER LISTs.
-
Select one of three USER LISTs (1 to 3) using the MODE button and then press the USER LIST EDIT button.
-
Specify the order of songs to play in medley.
- Select FOLDER and SONG, specify the sequence of songs in the LIST column to the right, press the SET button, and repeat those steps.
- Press the DEL button to delete the songs selected in the LIST column.
- The USER LIST settings are memorised independently on each card.

Part VII SD Card (KN2600)
Saving Data
The internal data of this instrument can be saved on the SD card.
SAVE
- Insert an SD card for saving into the SD slot. (See page 131.)
- Press SD button to turn it on.
- On the SD MENU display, select SAVE.
• The display looks similar to the following.
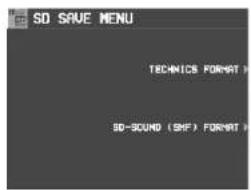
- Select the type of data save you want.
TECHNICS FORMAT: Save this instrument's data in the Technics File format.
SD-SOUND (SMF) FORMAT: Save the SEQUENCER data as SD-SOUND (SMF) data.
■ TECHNICS FORMAT

- Use the buttons below the display to specify the song number you wish to save to.
- Select the FOLDER number first, and select the SONG number.
- The types of data that can be saved are shown in a frame on the right side of the display. If you press the SAVE button, all the indicated data is saved. Ordinarily PERFORMANCE data is selected, but you can use the SAVE OPTION to select specific data to save.
- If you wish to assign a name to the file, press the SONG NAMING button.
• The display looks similar to the following.
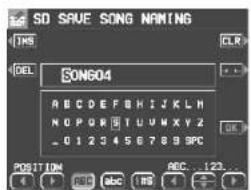
-
Use the buttons below the display to assign a name.
-
Set the character input position with the POSITION buttons, select the characters with the alphanumeric buttons and repeat name assignment.
- Switch from upper to lower case letters with the ABC, abc button.
- Press the INS button to enter a space at the cursor position.
- Press the DEL button to erase the character at the cursor position.
- Press the CLR button to erase the entire name.
-
Press the ← button to center the name.
-
Press the OK button.
• The display returns to the SAVE display.
- If you wish to assign a name to the folder, press the FOLDER RENAME button and follow the operation described above.
- Press the SAVE button.
• The SAVE operation begins.
- If you attempt to save data to a SONG number in which data is currently saved, the display changes to the confirmation display. Press the YES button to continue the SAVE procedure, or press the NO button if you wish to cancel it.


Part VII SD Card (KN2600)
Specify the kind of data you wish to save to the SD card. To maximize effective use of SD card memory or to minimize the save time, select only the type of data you wish to save.
- Use the PAGE buttons to access the 2/3 display.
• The display looks similar to the following.

- Use the buttons below the display to specify the types of data you wish to save (YES/NO).
- For PANEL MEMORY, select from NO/1 BANK/ALL. Selecting 1 BANK will save only bank A.
- Press the PERFORM button to select all the performance data, or press the BACKUP button to select all the back up data at once.
- If the ALL OFF button is pressed, all the settings change to NO.
- Press the SAVE button.
• The SAVE operation begins.
You can specify a single song in the SEQUENCER to save to the SD card.
- Use the PAGE buttons to access the 3/3 display.
• The display looks similar to the following.
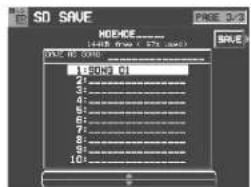
-
Use the buttons below the display to select the song number you wish to save.
-
Press the SAVE button.
• The SAVE operation begins.
MEMO
You can save data on an SD card within the limits as follows.
• Maximum number of folders: 99
• Maximum number of songs in a folder: 20
Maximum number of letters for the song or folder name: 16

■ SD-SOUND (SMF) FORMAT
This instrument's SEQUENCER data can be saved in the SD-SOUND format. SD-SOUND data can be converted to the "Standard MIDI File" (SMF Fromat 0) format for use on other instruments.
- What you can save in the SMF format (FORMAT 0) is ordinary performance data, such as note data. Data such as chord and rhythm data, COMPOSER data, etc. is not saved. If you wish to also save this special Technics data, save the data in the Technics File format.
-
If you use the APC TO SMF CONVERT function of the SEQUENCER, you can convert the patterns of the automatic accompaniment, etc. to SMF data. (Refer to page 100.)
-
To overwrite a song number that already has data, use the buttons below the display to select the song number you wish to save to.
- If you wish to assign a name to the file, press the NAME button.
-
Use the buttons below the display to assign a name.
-
Press the OK button.
- The display returns to the SAVE display.
(Continued on the next page)

Part VII SD Card (KN2600)
- Use the FROM SONG buttons to select the SEQUENCER song number you wish to save.
- The song name to save from is shown below the FROM SONG button.
- Use the PANEL HEADER buttons to specify ON or OFF.
ON:
The sound and volume settings for each part are saved as data at the beginning of the file.
OFF:
This data is not saved.
- Use the 1 MEASURE SPACE buttons to select ON or OFF.
ON:
A one-measure space is added to the beginning of the file.
OFF:
No space is added.
- When there is various data other than performance data stored at the beginning of a file, the start of playback may be delayed. This can be avoided by set the 1 MEASURE SPACE to ON to inserting a before the beginning of the performance.
-
When set to ON, a space is added each time a file is saved. Therefore, if you have already saved a file once with the 1 MEASURE SPACE set to ON, please set it to OFF each time the file is subsequently saved.
-
Use the SAVE AS button to select the sound generator mode (GM/GM2/NX).
-
Press the SAVE button.
• The SAVE operation begins.
- When the operation has been successfully completed, "COMPLETED!" is shown on the display.
- If you attempt to save data to a file number in which data is currently saved, the display changes to the confirmation display. Select the type of data saving.
AT CURSOR LOCATION:
The song is saved to where the cursor is currently located (overwrite).
AT A NEW LOCATION:
The song is saved as a newly added data with the last song number.


Create an album of your favorite songs
The FAVORITE SONGS display allows you to create an album of your favorite songs which are aligned in a desired order, making it easy to load your favorite song to play back immediately.
FAVORITE SONGS
- Insert the SD card which contains the songs into the SD slot.
- Press the SD button to turn it on.
- On the SD MENU display, select FAVORITE SONGS.
• The display looks similar to the following.

- Use the ▲ and ▼ buttons to select the BANK to use.
- Press the +10 button to jump up to the next group of 10 selections, press the -10 button to jump down a group.
- Press the FAVORITE SETTING button.
• The display looks similar to the following.

- Select the song.
• The TECHNICS files and SD-SOUND songs are selected differently. - Press and hold the SET button, and select the location to put the song.
- Press the BANK NAMING button to name the BANK.
- Repeat the steps 5 and 6.
- When you have finished making the settings, press the OK button.
■ Recalling the FAVORITE SONGS display
- On the SD MENU display, select FAVORITE SONGS.
- Select the BANK.
- Select the song.
• The load operation begins.
Part VII SD Card (KN2600)
SD card management
Various SD card management procedures, such as file delete, file copy, card format, and file rename are available from the SD TOOLS menu.
SD TOOLS
- Insert the SD card to manage into the SD slot.
- Press the SD button to turn it on.
- On the SD MENU display, select SD TOOLS.
• The display looks similar to the following.
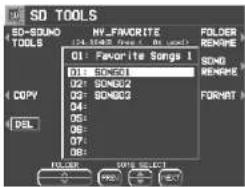
- Select a function and follow the procedure to execute it.
- You can press the SD-SOUND/TECH button to change to the display for setting relevant file types.
- If you press the FORMAT button, the display changes to the format display for SD CARD. (The current contents of the SD card are erased when the card is formatted.)
■ TECH TOOLS
SONG DELETE:
Delete a song.
SONG/FOLDER RENAME:
Change the name of a SONG or FOLDER.
COPY:
Copy songs on the SD card. Specify the FOLDER first and then the SONG to copy to.
■ SD-SOUND TOOLS
SONG DELETE:
When selecting a PLAYLIST other than the DEFAULT PLAYLIST, the specified SONG will be deleted from all the PLAYLISTs.
SONG RENAME:
Change the name of a SONG.
SD-SOUND EXPORT:
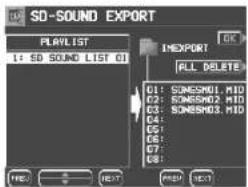
Convert SD-SOUND data to generic SMF data for use on an external instrument.
- SONGs in a specified PLAYLIST except for DEFAULT PLAYLIST are exported to the "IMEXPORT" directory at one time.
- Pressing ALL DELETE will delete all files; however, "read only" files will not be deleted.
SD-SOUND IMPORT:

Convert SMF data on the SD card to SD-SOUND data for use on this instrument.
- SMF files in the "IMEXPORT" directory are imported as SD-SOUND data, and they are used to create a new PLAYLIST.
- Specify the SMF files you wish to import using the SEL buttons. A “*” mark is shown on the selected files.


Part VII SD Card (KN2600)
Set the priority of displays
Specify the desired priority of displays when the LOAD button is pressed on the control panel.
SD PREFERENCES
- On the SD MENU display, select SD PREFERENCES.
• The display looks similar to the following.

- Use the ∧ and ∨ buttons to choose the SONG SELECT METHOD.
- Specify the top priority of the type of LOAD displays, when LOAD is selected on the SD MENU display (FOLDER LIST/LOAD BY NUMBER/ALPHABET SORT/SD-SOUND LOAD).
- Press the OK button.
Part VIII Sound
Outline of the Sound

natural_image
Front panel of a computer control interface with buttons and a monitor (no visible text or labels)The SOUND mode is used for making fine adjustments to the functions related to sound, such as tone, and tuning.
- Press the PROGRAM MENUS button to turn it on.

• The display looks similar to the following.

- Select SOUND.
• The display looks similar to the following.

- Follow the procedures on the corresponding menu display.
- When the TEMPO/PROGRAM indicator is lit, it indicates that the TEMPO/PROGRAM is available for setting the current function.
- When you have finished setting the functions, press the PROGRAM MENUS button to turn it off.
■ A word about parts
The organization of the sound parts is as follows.
Normal parts:
RIGHT 1, RIGHT 2, LEFT, PART 1 to 16
- It is suggested that PART 10 be used for the DRUMS part.
AUTO PLAY CHORD (automatic accompaniment) parts: ACCOMP 1–5, BASS, DRUMS 1, 2, CHORD, R.BASS.
PERFORMANCE PADS part: PADS
- Select the desired menu.
Summary of the SOUND menu items
PART SETTING (page 147) Set the various sound attributes for each part.
MIXER (page 150) Use the MIXER display to visually adjust the major settings of each part.
MASTER TUNING (page 152) Select the type of tuning for the instrument.
KEY SCALING (page 152) Select the type of scaling (tuning).
SOUND LOAD OPTION (page 153) Specify whether the various data accompanying a sound, such as effects, are used when the sound is recalled.
TECHNI-CHORD Select the TECHNI-CHORD harmony style. (Refer to page 47.)
APC REVERB SETTING (page 154) Adjust the degree of REVERB for each automatic accompaniment part.
SOUND ARRANGER Changes the sound of each automatic accompaniment part. (Refer to page 59.)
146
QQTG0692
Part VIII Sound
Part Setting
Set the various sound attributes for each part.
Selecting an attribute
- On the SOUND MENU display, select PART SETTING.
-
Use the PART SELECT ∧ and ∨ buttons to select the part.
-
Use the buttons below the display to adjust each attribute (explained in detail following).
- The settings display is comprised of 5 pages. Use the PAGE buttons to switch pages.
- When you have completed adjustment of an attribute, use the buttons along the bottom of the display to select the next attribute you wish to adjust.
- When you have completed adjusting all of the settings for one part, select another part and repeat the adjustment procedure as desired.
- The settings and effects of the PAN, EFFECT etc. may differ depending on the sound.

SOUND:
Use the SOUND ∧ and ∨ buttons to select a sound.
- The buttons on the control panel may also be used to select a sound.
VOLUME:
Use the VOL ∧ and ∨ buttons to adjust the volume (0 to 127).
PAN:
Use the PAN ∧ and ∨ buttons to adjust the stereo balance (L64–CENTER(CTR)–R63).
- At L64, the sound is completely to the left, at R63 completely to the right. At CENTER, the sound is at the center. The display indicates the selected position.
• Even at the same numerical value, the stereo balance may differ slightly depending on the sound.
SUSTAIN:
Use the SUSTAIN ON/OFF buttons to enable or disable the SUSTAIN function.
Use the and buttons to adjust the length of the sustain.
KEY SHIFT:
Use the KEY ∧ and ∨ buttons to specify the amount of key shift (-24 to +24).
- A value of 1 means a shift of one semi-tone. To raise (or lower) the pitch one octave, set the value to +12 (or -12).
- The button is used to lower the pitch, and the button to raise the pitch.
TUNING:
Use the TUNE ∧ and ∨ buttons to adjust the fine tuning (−128 to +127).
- The button is used to lower the pitch, and the button to raise the pitch.
Part VIII Sound
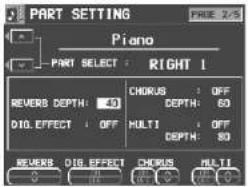
REVERB:
Use the REVERB ∧ and ∨ buttons to adjust the depth of the REVERB (0 to 127).
DIGITAL EFFECT:
Use the DIG. EFFECT ON/OFF buttons to set the DIGITAL EFFECT to on or off.
CHORUS:
Use the CHORUS ON/OFF button to set the CHORUS to on or off. Use the ∧ and ∨ buttons to adjust the depth of the effect (0 to 127).
MULTI:
Use the MULTI ON/OFF button to set the MULTI EFFECT to on or off. Use the ∧ and ∨ buttons to adjust the depth of the effect (0 to 127).
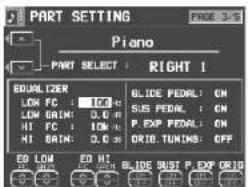
EQ LOW:
Use the EQ LOW FC, GAIN ∧ and ∨ buttons to adjust the sound quality in the lower range.
EQ HIGH:
Use the EQ HIGH FC, GAIN ∧ and ∨ buttons to adjust the sound quality in the upper range.
GLIDE PEDAL:
Use the GLIDE ON/OFF buttons to enable or disable the glide effect, if it has been assigned to the Foot Switch (sold separately).
- For Foot Switch settings, refer to page 172.
SUSTAIN PEDAL:
Use the SUST ON/OFF buttons to enable or disable the sustain effect, if it has been assigned to the Foot Switch (sold separately).
PART EXP PEDAL:
Use the EXP PDL ON/OFF buttons to enable or disable part expression by the expression pedal (sold separately).
- To enable the ON/OFF setting for each part, it is necessary to set EXPRESS. PEDAL to PART EXPRESSION on the FOOT CONTROLLERS display. (Refer to page 173.)
ORIGINAL TUNING:
Use the ORIG ON/OFF button to enable or disable the tuning for each sound.
- For details about ORIGINAL TUNING, refer to page 152.


Part VIII Sound
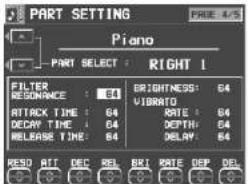
FILTER RESONANCE:
Use the RESO ∧ and ∨ buttons to adjust the amount of resonance (0 to 127).
ATTACK TIME:
Use the ATT ∧ and ∨ buttons to specify the attack time (0 to 127).
DECAY TIME:
Use the DEC ∧ and ∨ buttons to specify the decay time (0 to 127).
RELEASE TIME:
Use the REL ∧ and ∨ buttons to specify the release time (0 to 127).
BRIGHTNESS:
Use the BRI ∧ and ∨ buttons to adjust the brightness of the sound (0 to 127).
VIBRATO RATE:
Use the RATE ∧ and ∨ buttons to specify the vibrato speed (0 to 127).
VIBRATO DEPTH:
Use the DEP ∧ and ∨ buttons to specify the vibrato depth (0 to 127).
VIBRATO DELAY:
Use the DEL ∧ and ∨ buttons to specify the time interval from when the keys are played until the vibrato starts (0 to 127).
• The center value is 64 (±0).

MONO/POLY MODE:
Use the MONO/POLY ∧ and ∨ buttons to select the output mode.
PORTAMENTO:
Use the PORTAMENTO ON/OFF buttons to enable or disable the portamento function. (Portamento is a continuous gliding movement from one tone to another.)
Use the ∧ and ∨ buttons to specify the portamento time.
- PORTAMENTO does not function for the POLY MODE.
MODULATION SENSITIVITY:
Use the MOD SENS ∧ and ∨ buttons to adjust the sensitivity of the MODULATION.
- Use the MSB ∧ and ∨ buttons (half-tone increments) and the LSB ∧ and ∨ buttons to adjust the setting.
BEND RANGE:
Use the BEND RANGE ∧ and ∨ buttons to specify the PITCH BEND range (0 to 12). Increments are in semi-tones.
- The higher the number, the greater the change in pitch when the PITCH BEND wheel is operated.
Part VIII Sound
Mixer
Use the MIXER display to visually adjust the major settings of each part. Use this display to make broad, general changes to the settings.
-
On the SOUND MENU display, select MIXER.
• The MIXER display consists of 5 pages. Use the PAGE buttons to switch among the pages.
• Each time the OTHER PARTS/TR button is pressed, the part that is displayed changes. -
Adjust each parameter.

SOUND:
Select SOUND. Use the buttons below the display to set the sound for the corresponding part.
- The buttons in the SOUND GROUP can also be used to select the sound.
PAN:
Select PAN. Use the buttons below the display to adjust the stereo balance of the corresponding part (L64-CTR-R63).
VOLUME:
Select VOLUME. Use the buttons below the display to adjust the volume of the corresponding part (0 to 127).
- To mute a part, press both the corresponding balance buttons as the same time. To cancel the mute, press either balance button for the part.

REVERB:
Select REVERB. Use the buttons below the display to set the level of the REVERB for the corresponding part (0 to 127).
MULTI:
Select MULTI. Use the buttons below the display to set the MULTI EFFECT to ON or OFF for each part.
MULTI DEPTH:
Select MULTI DEPTH. Use the buttons below the display to adjust the depth of the MULTI EFFECT for the corresponding part (0 to 127).
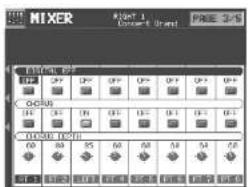
DIGITAL EFFECT:
Select DIGITAL EFF. Use the buttons below the display to set the DIGITAL EFFECT to ON or OFF for the corresponding part.
CHORUS:
Select CHORUS. Use the buttons below the display to set the CHORUS to ON or OFF for each part.
CHORUS DEPTH:
Select CHORUS DEPTH. Use the buttons below the display to set the depth of the CHORUS for the corresponding part (0 to 127).

EQUALIZER HIGH:
Sound quality correction in the high range. Select EQUALIZER HI FC; use the buttons below the display to set the standard frequency. Select EQUALIZER HI GAIN; use the buttons below the display to set the ratio of change.
Part VIII Sound
EQUALIZER LOW:
Sound quality correction in the low range. Select EQUALIZER LOW FC; use the buttons below the display to set the standard frequency. Select EQUALIZER LOW GAIN; use the buttons below the display to set the ratio of change.
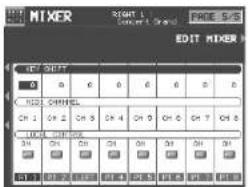
KEY SHIFT:
Select KEY SHIFT. Use the buttons below the display to adjust the shift width of the output pitch of each part (in semitone increments; -24 to +24).
MIDI CHANNEL:
Select MIDI CHANNEL. Use the balance buttons below the display to set the MIDI channel for each part (CH1–CH16).
• Information about MIDI channels can be found on page 190.
LOCAL CONTROL:
Select LOCAL CONTROL. Use the balance buttons below the display to turn LOCAL CONTROL ON or OFF for each part.
• Even at the same numerical value, the PAN and effects may differ depending on the sound.
- For some parts, such as the automatic accom-
paniment parts, the items that can be adjusted
are limited.
EDIT MIXER
If you press the EDIT MIXER button on the PAGE 5/5 display, the display changes the setting display to modify the sounds.

VIBRATO RATE:
Select VIBRATO RATE. Use the buttons below the display to adjust the vibrato speed for each part (0 to 127).
VIBRATO DEPTH:
Select VIBRATO DEPTH. Use the buttons below the display to adjust the vibrato depth for each part (0 to 127).
VIBRATO DELAY:
Select VIBRATO DELAY. Use the buttons below the display to specify the time interval from when the keys are played until the vibrato starts for each part (0 to 127).
FILTER RESONANCE:
Select FILTER RESONANCE. Use the buttons below the display to set the amount of resonance applied to each part (0 to 127).
BRIGHTNESS:
Select BRIGHTNESS. Use the buttons below the display to set the amount of brightness applied to each part (0 to 127).
ATTACK TIME:
Select ATTACK TIME. Use the buttons below the display to set the sound attack time for each part (0 to 127).
DECAY TIME:
Select DECAY TIME. Use the buttons below the display to set the sound decay time for each part (0 to 127).
RELEASE TIME:
Select RELEASE TIME. Use the buttons below the display to set the release time for each part (0 to 127).
Part VIII Sound
Master Tuning
This setting is used to fine-tune the pitch of the entire instrument. This is convenient when the Keyboard is played with other instruments or with a recorded performance.
- On the SOUND MENU display, select MASTER TUNING.
• The display changes to the following.

- Use the and buttons to adjust the pitch.
Key Scaling
For each part you can change the tuning of each key within a one-octave range. In addition to equal temperament tuning, you can perform in other types of scales, for example Arabic tuning.
- On the SOUND MENU display, select KEY SCALING.
• The display looks similar to the following.

- Press the OCTAVE TUNING TEMPLATE button.
• The display looks similar to the following.
![OCTAVE TUNING TEMPLATE PART TYPE SHIFT RIGHT 1 FLAT 0 ([\u00e6-6.]) SET](/content/2026/05/1106363/images/76b243b9ede526689d125a5e4613f221f4505de62911df15b6591c8eab552b3b.jpg)
- Use the PART ∧ and ∨ buttons to select the part to set.
- If ALL is selected, all the parts are set at once.
- Use the TYPE ∧ and ∨ buttons to select the type of tuning.
- Select from FLAT, WERCKMEISTER, KIRN-BERGER, ARABIC 1 to 5, SLENDRO, and PELOG.
-
Use the SHIFT ∧ and ∨ buttons to select the key to perform in.
-
Repeat steps 3 to 5 for each part, as necessary.
-
Press the SET button.
• The OCTAVE TUNING for the specified type and key is automatically set.
■Settings for each key.
On the KEY SCALING display, you can adjust the tuning for each key.
After selecting a key with the KEY SELECT ◀ and ▶ buttons, the pitch can be adjusted using the TUNING ∧ and ∨ buttons.
- The pitch can be raised or lowered by a maximum of one half-tone.
- You can use the PART SELECT ∧ and ∨ buttons to switch the part.
- Use the ALL PARTS INITIAL button to return all parts to the flat tuning.
Part VIII Sound
■ ORIGINAL tuning
Each instrument of each sound has its own original tuning data. This setting affects the tuning curve that spans the entire keyboard. So, for example, the acoustic piano-type sounds duplicate those of a real piano, in that the high notes are tuned slightly higher and the low notes slightly lower.
You can specify for each part whether this original tuning is enabled or not.
- Use the PART SELECT ∧ and ∨ buttons to select a part.
- Use the ORIGINAL TUNING ON/OFF button to select ON or OFF.
Sound Load Option
The data for each individual sound is set with the most suitable effect settings, etc., but in some cases when switching from one sound to another and these settings are recalled, the setup is not the way you want it. By using the SOUND LOAD OPTION, you can adjust the settings so that specific data is not recalled.
- On the SOUND MENU display, select SOUND LOAD OPTION.
• The display looks similar to the following.

- Use the ▲ and ▼ buttons to select an item. Use the ∧ and ∨ button to set the filter to ON or OFF.

Part VIII Sound
APC Reverb Setting
Although an appropriate REVERB is applied for the automatic accompaniment parts depending on the rhythms by default, you can adjust the REVERB level for each part.
- On the SOUND MENU display, select APC REVERB SETTING.
• The display looks similar to the following.

- Use the PART ▲ and ▼ buttons to select the part, the DEPTH ∧ and ∨ buttons to set the value (PRESET IN RHYTHM, 0 - 127).
- PRESET IN RHYTHM is an optimal preset value for each rhythm for use with the APC Reverb Setting.
Sound
Part II Playing the rhythm
Selecting rhythms
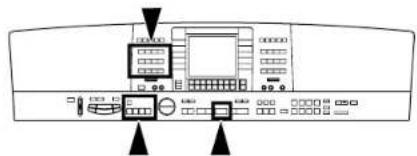
natural_image
Front view of a computer interface panel with buttons and ports (no visible text or labels)Many exciting rhythms are stored in the memory of this instrument. First select one of the rhythm groups and then choose the desired rhythm.
Select a rhythm
- In the RHYTHM GROUP section, select a rhythm group.

- MEMORY is the group in which you store the rhythms you create with the COMPOSER. (Refer to page 111.)
- Select the desired rhythm from the list on the display.

- If there is more than one page to the display, use the PAGE buttons to move from one screen page to another.
VARIATION
There are four variations available for each rhythm. Use the VARIATION buttons to select the desired variation.

- Confirm that the MUSIC STYLE ARRANGER button is off. (If it is on, press it once to turn it off.)
- The nuance of the pattern differs with each variation number.
- You can change to a different variation while the rhythm is playing.



Part II Playing the rhythm
Start the rhythm
There are two ways to start the rhythm.
■ Normal start
-
Select a rhythm.
-
Press the START/STOP button to turn it on.

• The selected rhythm pattern immediately begins to play.
- You can stop the rhythm by pressing the START/STOP button again to turn it off.
- The BEAT indicators above the START/STOP button light to indicate the beat.
■ Synchronized start
With the synchronized start feature, the rhythm pattern starts when you play a key on the keyboard.
- Select a rhythm.
- Press the SYNCHRO & BREAK button to turn it on.

- Play a key to the left of the keyboard split point.
• The rhythm pattern begins to play.
- You can use the synchronized start feature even when the keyboard is not divided into left and right sections. To start the rhythm, press a key to the left of the specified split point.
■ Adjust the tempo
The tempo of the rhythm pattern is adjusted with the TEMPO/PROGRAM buttons.

- The tempo is shown on the display as a numerical value ( = 40 to 300).
- When the TEMPO/PROGRAM indicator is lit, the TEMPO/PROGRAM cannot be used to adjust the tempo.
• To adjust the tempo during playback, refer to page 81.
■ TAP TEMPO
You can set the tempo of the rhythm by tapping this button few times with your finger at the tempo you wish to play.

- The tempo at which the button is tapped is detected, and the tempo automatically changes correspondingly.

Part II Playing the rhythm
Playing the rhythm

natural_image
Front panel of a computer interface with buttons and a play button (no visible text or symbols)Intro, fill-in and ending patterns fitting each different rhythm pattern are permanently recorded in your Keyboard, thus allowing a versatile rhythm performance.
INTRO
Begin the rhythm performance with an intro pattern.
- Press the INTRO & ENDING 1 or INTRO & ENDING 2 button to turn it on.

- Press the START/STOP button to start the rhythm.

- An intro pattern is played, after which the normal rhythm pattern begins.
COUNT INTRO
You can begin the rhythm performance with a spoken one-measure count.
- Press the COUNT INTRO (FILL IN 2) button to turn it on.

- Press the START/STOP button to start the rhythm.
- A spoken one-measure count is played, after which the normal rhythm pattern begins.
■ Mode setting
You can select the mode for the count sound.
- Press the MODE button in the AUTO PLAY CHORD section to turn it on.

• The display looks similar to the following.

- Use the COUNT INTRO button to select a mode.
VOICE: A spoken count (initialized setting). CLICK: A clicking sound for the count.
FILL IN
You can insert a fill-in pattern any time during the rhythm performance. Choose from two different fill-in patterns.
-
Select a rhythm and press the START/STOP button.
-
Press the FILL IN 1 or FILL IN 2 button.

- A fill-in pattern is heard immediately for the remainder of the measure.
- When a FILL IN button is pressed on the last beat of the measure, the fill-in pattern continues to the end of the following measure.
Part II Playing the rhythm
ENDING
Finish the rhythm performance with an ending pattern.
- Select a rhythm and press the START/STOP button.
- Press the INTRO & ENDING 1 or INTRO & ENDING 2 button to turn it on.

- An ending pattern is produced, and then the rhythm performance stops.
- If you accidentally press the INTRO & ENDING button in the middle of the tune, you can press the FILL IN 1 or FILL IN 2 button. The ending pattern stops, and a fill-in pattern is produced, after which the normal rhythm performance continues.
Auto Play Chord

natural_image
Front panel of a control panel with buttons and display (no visible text or symbols)Simply by playing a chord on the keyboard, the AUTO PLAY CHORD function automatically plays an accompaniment pattern which matches perfectly the selected rhythm. With a real accompaniment as a background, you can concentrate on playing the melody.
How the AUTO PLAY CHORD works
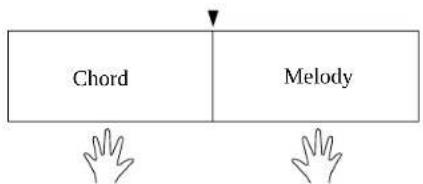
flowchart
graph TD
    A["Chord"] --> B["Melody"]
    C["Hand gesture"] --> D["Hand gesture"]
When an AUTO PLAY CHORD mode is selected, an automatic accompaniment which matches the rhythm you have chosen is played in the chord which you specify with your left hand. The melody is played with your right hand.
- The accompaniment pattern of the AUTO PLAY CHORD is composed of 8 parts: DRUMS 1, 2, BASS, ACCOMP 1–5.
- The volume of each part can be adjusted with the buttons below the display. (Refer to page 30.)


Part II Playing the rhythm
Playing chords
Choose from the 4 ways of playing chords.
■ BASIC mode
This mode lets beginners specify chords with just one finger. With this mode, chords can be specified either with one finger
In the
Example: C chord
Minor, seventh and minor seventh chords are also easily produced.
| minor chord seventh | chord minor seventh chord | |
| Play the root note plus a black key to the left of it. | Play the root note plus a white key to the left of it. | Play the root note plus a black key and a white key to the left of it. |
Example: Cm Example: C7 E | example: Cm7 |  |
- When three or more keys of a chord are pressed, it is recognized as a
In the
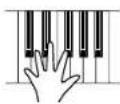
- Play at least three notes to specify the chord.
■ ADVANCED 1 mode
This mode accepts chords specified with
- It recognizes many more chords than the BASIC mode's
■ ADVANCED 2 mode
This mode accepts chords specified with
- It recognizes many more chords than the BASIC mode's
PIANIST mode
In the PIANIST mode, the entire keyboard can be used to specify chords
- When specifying chords, if you press a key a perfect 5th or more below the lowest note of the chord, the BASS part becomes a pattern based on that note.
If this function is assigned to the Foot Switch (sold separately), for example, pressing the Foot Switch will play the currently specified chord in that timing, allowing you to focus your performance on a solo melody.
- The accompaniment continues in the same chord as long as the Foot Switch is depressed, and it does not change even if other chords are played.
- To change the Foot Switch assignment, refer to page 172.

Part II Playing the rhythm
How to use the AUTO PLAY CHORD
- Select the desired rhythm and sound(s), and set the tempo.
- Press the AUTO PLAY CHORD'S OFF/ON button to turn it on.
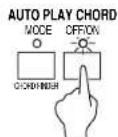
- Press the AUTO PLAY CHORD'S MODE button to turn it on.
• The display looks similar to the following.

- Select an AUTO PLAY CHORD mode.
• After a few seconds, the display returns to the previous display.
- If the BASIC or ADVANCED mode was selected, the keyboard automatically splits into right and left sections.
-
Press the START/STOP button to begin the rhythm.
-
You can start the rhythm by playing a key on the keyboard. (Refer to page 50.)
- Specify a chord.
- If the BASIC or ADVANCED mode was selected, specify the chord on the keyboard section to the left of the split point.
- An accompaniment pattern in the specified chord is automatically played. Play the melody with your right hand.
- When you use FILL IN, INTRO and ENDING, the automatic accompaniment is also used in these patterns.
- You can set the mode which determines how the LEFT part sounds during an AUTO PLAY CHORD performance. (Refer to the next page.)
-
In the initialized condition, when the rhythm is off, if an AUTO PLAY CHORD mode is on and a chord is specified, the specified root note (R. BASS part) and chord notes (CHORD part) are produced. The volumes of these notes can be adjusted. (Refer to page 30.)
-
To stop the automatic accompaniment, press the START/STOP button.
- If you wish the automatic accompaniment to begin and end the performance, set the OFF/ON button to off.
■ MEMORY
Press the MEMORY button and select either one of the following:
ON: Even when removing your finger from the keys, the present chord is retained until the next chord is specified.
OFF: When removing your finger, the chord is deleted.
AUTO: The chord is retained when auto accompaniment is playing but is not retained when stopped.
■ ON BASS
If the ON BASS button is ON, the BASS part is produced in the key of the lowest note of the played chord, thus making it possible to play chords such as C on G.
- For example, with the ON BASS button on, if you play a C chord by pressing the keys G, C and E, the BASS part is produced in the key of G.
Example of how to play a BASIC
Play the melody with your right hand.
Left hand



Part II Playing the rhythm
Left Hold
This setting determines how the LEFT part sounds when the LEFT button in the CONDUCTOR is on during a performance with the BASIC or ADVANCED mode.
- Press the MODE button to turn it on.
• The display changes to the following.
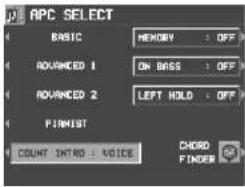
- Use the LEFT HOLD: ON/OFF button to set the mode to on or off.
OFF:
The LEFT part sounds from the pressed chord keys.
- When BASIC is selected, the LEFT part turns off. The LEFT part sounds if you turn it on, but
ON:
Specifying
- When BASIC is selected the LEFT part turns off, but it will sound if you turn it on.
- Touch response does not function for the LEFT part.
- When the mode is set to ON, during a rhythm performance, the LEFT part continues to play even when the keys are released.
CHORD FINDER
The CHORD FINDER can help, for example, when you do not know which keys to press to specify a given chord. When you input the chord name, the CHORD FINDER shows you which keys to press and even lets you hear the notes that make up.
- Press the AUTO PLAY CHORD's MODE button to turn it on.

• The display changes to the following.

- Select CHORD FINDER.
• The display changes to the following.

- Use the APC MODE button to select the automatic accompaniment mode you will use to specify chords (BASIC, ADVANCED 1).
- In the list column are shown the chords which can be specified in each mode.
(Continued on the next page)


Part II Playing the rhythm
- Use the ROOT buttons to select the root note of the chord. Use the TYPE buttons to select the type of chord.
- A typical way to finger the specified chord (TYPICAL) is illustrated on a keyboard diagram.
• Each time the INVERSION button is pressed, different INVERSION fingerings are illustrated in order. (If there is no INVERSION fingering for the specified chord, this button is not shown on the display.) - When the button with a picture of an ear is pressed, the notes of the chord sound. (The octave of the illustrated keys and that of the played tones may differ.)
- To exit the CHORD FINDER procedure, press the EXIT button.
BREAK function
With the break function, the rhythm starts when the left keyboard is played and stops when the fingers are removed from the keys.
- Select an AUTO PLAY CHORD mode.
- At this time, the MEMORY (APC SELECT) button should be OFF.
- Press the SYNCHRO & BREAK button to turn it on.
-
Specify a chord.
-
The automatic accompaniment begins to play (synchronized start).
-
For the PIANIST mode, play the keys to the left of the currently set split point.
-
Release the chord keys.
- The automatic accompaniment stops. When the keys are pressed again, the rhythm starts from the first beat.
Part II Playing the rhythm
Fade In/Fade Out
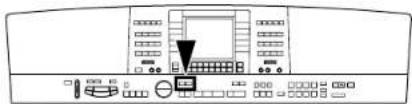
natural_image
Front panel of a computer interface with control buttons and a playhead (no visible text or symbols)Add interest to your performance by starting a part with a fade-in or ending it with a fade-out.
- KN2600: does not work for the SD-AUDIO data playback.
FADE IN
At the beginning of the song, the volume of each part rises slowly.
- Set up the panel settings for your performance.
- Turn on the FADE IN button.

- The indicator flashes. In this condition, the volumes for all parts change to 0 and no sound is produced from this instrument until the FADE IN is turned off or until step 3 is executed.
- Play the keyboard or press the START/STOP button.
• The volume slowly builds to its preset level. - For the fade-in effect for a rhythm part or when playing back a SEQUENCER performance, turn on the FADE IN button before pressing the START/STOP button.
- At the end of the fade-in, the FADE IN indicator goes out.
- During the fade-in, FADE IN is shown in the upper right part of the normal display.
FADE OUT
At the end of the song, the volume of each part gradually fades to nothing.
- Start the performance.
- Turn on the FADE OUT button at the point you want the fade-out to start.

• The volumes of all the parts slowly fade to 0.
- The indicator flashes to show that fade-out is completed, and then goes out. The volumes for all parts return to their specified settings.
- If you wish to interrupt the fade-out, press the FADE OUT button to turn it off.


Part II Playing the rhythm
FADE SET
Adjust the settings for the FADE IN and FADE OUT.
- Press and hold the FADE IN or FADE OUT button for a few seconds.

• The display looks similar to the following.

- Use the ▲ and ▼ buttons to select the item. Use the ∧ and ∨ buttons to change the setting.
FADE IN
Time:
Specify the time elapsed between 0 volume to the set volume (1 measure to 16 measure).
FADE OUT
Time:
Specify the time elapsed between the set volume and 0 volume (1 measure to 16 measure).
Auto Reset:
Specify whether the volume of each part automatically returns to its specified setting (ON, OFF).
Rhythm Auto stop:
Specify whether the rhythm turns off after fade-out is completed (ON, OFF).
SEQ Auto stop:
Specify whether the SEQUENCER play-back automatically stops after fade-out is completed (ON, OFF).
- The display returns to the previous display a few seconds after you have changed the settings.
- You can also access this display from the CONTROL MENU display. (Refer to page 171.)
Part II Playing the rhythm
Sound Arranger
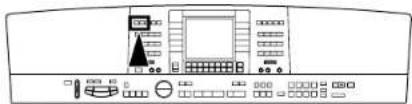
natural_image
Front view of a control panel with buttons and display (no visible text or symbols)The SOUND ARRANGER feature lets you select other sounds for the AUTO PLAY CHORD parts of each rhythm.
- Select the rhythm whose sound you wish to change.
- Do not select the MEMORY button.
- In the SOUND ARRANGER, press the SET button to turn it on.
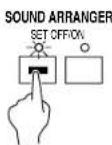
• The display looks similar to the following.

- Use the ▲ and ▼ buttons to select the part whose sound you wish to change.
-
Select the desired sound.
-
The DIGITAL EFFECT on/off status can also be specified (except for DRUMS part).
- For the DRUMS part, select sounds from the DRUM KITS group.
• The sound and on/off status of the DIGITAL EFFECT are shown on the display. -
The sounds marked with # cannot be changed.
-
Repeat steps 3 and 4 for the other parts as desired.
-
When you have finished selecting the sounds, press the SET button to turn it off.
Playing back the sounds
- In the SOUND ARRANGER, press the OFF/ON button to turn it on.

-
Start the rhythm (automatic accompaniment).
-
When the OFF/ON button is off, the factory-preset sounds are produced.
- This setting can be set separately for each rhythm.
- If you wish to modify the settings you specified, while the OFF/ON button is on, press the SET button to turn it on.



Part II Playing the rhythm
One Touch Play

natural_image
Front view of a control panel with buttons and display (no visible text or symbols)ONE TOUCH PLAY automatically sets a suggested combination of sounds and an appropriate tempo for your chosen rhythm style.
- Select a rhythm pattern.
-
Do not select the MEMORY button.
-
Press and hold the ONE TOUCH PLAY button for a few seconds.
-
Play the keyboard.
- When you specify a chord, the automatic rhythm begins to play immediately.

- During setting, the style name is shown on the display.
- The AUTO PLAY CHORD and the SYNCHRO & BREAK are automatically turned on, and the sounds and effects, volume balances, tempo etc. that are ideal for your selected rhythm are automatically set.
Music Stylist

natural_image
Front panel of a computer interface with control panels and buttons (no visible text or labels)MUSIC STYLIST sets up your instrument with a suitable registration for a specific style of music or tune.
Setup by music style
Select a style from the MUSICAL CATEGORY.
- Press the MUSIC STYLIST button to turn it on.

• The display looks similar to the following.

- Select MUSICAL CATEGORY. • The display looks similar to the following.
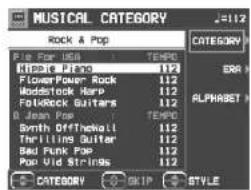
-
Use the CATEGORY ▲ and ▼ buttons to select a category.
-
Use the STYLE ▲ and ▼ buttons to select a music style.
- During the search, you can use the SKIP ∧ and ∨ buttons to skip to the previous or following subcategory.
Part II Playing the rhythm
- The AUTO PLAY CHORD and the SYNCHRO & BREAK turn on, and the sounds, effects, volume balances, rhythm and tempo etc. which are best suited for the selected music style are automatically selected.
- Play the keyboard.
- When you specify a chord, the automatic rhythm begins to play immediately.
Setup by era
You can select a style from a specific music era.
-
Press the MUSIC STYLIST button to turn it on.
-
Select MUSICAL ERA.
• The display looks similar to the following.

- Use the STYLE ▲ and ▼ buttons to select a style.
- You can use the SKIP ∧ and ∨ buttons to skip to the previous or following era.
- You can use the MORE button to view the next page of styles.
- The AUTO PLAY CHORD and the SYNCHRO & BREAK turn on, and the sounds, effects, volume balances, rhythm and tempo etc. which are best suited for the selected style are automatically selected.
- Play the keyboard.
- When you specify a chord, the automatic rhythm begins to play immediately.
Setup by alphabetical order
You can use alphabetical or numerical search to select a style name.
-
Press the MUSIC STYLIST button to turn it on.
-
Select ALPHABETICAL LIST.
• The display looks similar to the following.

- Use the STYLE ▲ and ▼ buttons to select a style.
- You can use the SKIP ∧ and ∨ buttons to skip to the previous or following alphabetical or numerical heading.
- You can use the MORE button to view the next page of styles.
- The AUTO PLAY CHORD and the SYNCHRO & BREAK turn on, and the sounds, effects, volume balances, rhythm and tempo etc. which are best suited for the selected style are automatically selected.
- Play the keyboard.
- When you specify a chord, the automatic rhythm begins to play immediately.
Part II Playing the rhythm
- On the MUSICAL CATEGORY, MUSICAL ERA, or ALPHABETICAL LIST (ALPHA-BET) display, you can move freely to each display using the buttons to the right of the display.
• After deciding on a style with the MUSIC STYLIST, if you record the settings in the PANEL MEMORY, the same style name is copied to the PANEL MEMORY (up to 16 characters). When you recall the PANEL MEMORY settings, this style name is shown at the top of the normal display.
• After selecting a style, turn the MUSIC STYLIST button off if you wish to have the normal display active during a performance.
Music Style Arranger

natural_image
Front panel of a computer interface with buttons, drive, and control panels (no visible text or labels)The MUSIC STYLE ARRANGER helps you to make professional registration changes during your performance. Select between four contrasting registrations at the push of a button, or let your instrument change the registration automatically for you when you use FILL IN 1 or 2. The MUSIC STYLE ARRANGER will also alter the accompaniment in character with the registration change creating a polished sounding arrangement.
How to use the MUSIC STYLE ARRANGER
- Select a rhythm pattern.
- Press the MUSIC STYLE ARRANGER button to turn it on.
- Use the VARIATION buttons to select a style (1 to 4).


- The nuance of the pattern differs with each number.
- The panel settings (including the tempo) change according to the selected rhythm and music style. The AUTO PLAY CHORD, the MEMORY button and the SYNCHRO & BREAK button are automatically turned on. When a key on the left section of the keyboard is pressed, the automatic rhythm begins to play immediately.
- During your performance, the style can be changed, but the tempo does not change.


Part II Playing the rhythm
How to change the music style during your performance
While you are playing the keyboard with the MUSIC STYLE ARRANGER on, press the FILL IN 1 or FILL IN 2 button.

- Each time the FILL IN 1 button is pressed, the FILL IN 1 pattern plays, and then the music style changes in the 4 3 2 1 order. And each time the FILL IN 2 button is pressed, the FILL IN 2 pattern plays, and then the style changes in the 1 2 3 4 order.
You can define which panel settings change by pressing a FILL IN button when the MUSIC STYLE ARRANGER is used.
- Press and hold the MUSIC STYLE AR-RANGER button for a few seconds.
• The display changes to the following.

- Select the mode.
RHYTHM:
Only the rhythm changes.
SOUND & RHYTHM:
The sound, effects, rhythms, etc. change.
PANEL MEMORY:
The PANEL MEMORY number (BANK A: 1 to 4) changes. You can store your desired panel settings in the PANEL MEMORY beforehand and switch from one to another quickly.
• After a few seconds, the display exits the setting mode.
- You can also access this setting display from the CONTROL MENU display. (Refer to page 171.)


Part II Playing the rhythm
Panel Memory

natural_image
Front panel of a computer interface with control panels and buttons (no visible text or labels)PANEL MEMORY stores all the current panel settings so you can recall them at the push of a button.
How to store the panel settings
By storing all the panel settings you use for a song in the same bank, for example, you can switch from one panel setup to the next in a flash.
- Set up the desired panel settings (sounds, volumes, etc.)
- Press the BANK VIEW button to turn it on.

• The BANK SELECT display appears.
3. Select the desired bank (A, B, C).
4. With the SET button held down, press one of the numbered buttons of the PANEL MEMORY (1 to 8).

- The panel settings are now stored in the specified bank and number.
■ BANK VIEW
After selecting a bank, you can use the PAGE buttons to go to the PAGE 2/2 page and confirm the memory names of that bank's 8 memories.

- You can use the BANK ∧ and ∨ buttons to view other banks.
- You can also access this display by pressing and holding any of the PANEL MEMORY number buttons (1 to 8) for a few seconds.


Part II Playing the rhythm
Assign a name to the bank/memory
You can assign names to the banks and memories.
- Select a bank or memory.
- Use the PAGE buttons to go to the PAGE 2/2 page on the display.

- Press the BANK NAMING button to assign a name to the bank, or the MEMORY NAMING button for the memory.
• The display looks similar to the following.
![PANEL MEMORY NAME [TRS] CLR DEL: Easy 8 Beat A B C D E F G H I J K L M N O P Q R S T U U M X Y Z _ 0 1 2 3 4 5 6 7 8 9 SPK POSITION REC. 123...](/content/2026/05/1106363/images/bf9933fd0fb1b543478c1d4c68825fd84df8db73d77db60b165f294728b6ec24.jpg)
- Use the buttons below the display to assign a name.
- Set the character input position with the POSITION buttons, select the characters with the alphanumeric buttons and repeat name assignment.
- Switch from upper to lower case letters with the ABC, abc button.
- Press the INS button to enter a space at the cursor position.
- Press the DEL button to erase the character at the cursor position.
- Press the CLR button to erase the entire name.
- Press the ← button to center the name.
- When you have finished assigning the name, press the OK button.
Recall the panel setup
-
Press the BANK VIEW button to turn it on. Select a bank.
-
Press the desired PANEL MEMORY number button (1 to 8).
- The panel setup changes to the one stored in the specified memory.
- You can then change the sound settings, etc. manually; however, the contents of the memory remain unchanged until you store them again.
- The "Control Preset" bank of the PERFORMANCE PADS or the Foot Switch (sold separately) can also be used to change from one PANEL MEMORY setup to another. (Refer to pages 64, 172.)
- The currently selected bank, memory number and memory name are shown in the top line on the normal display.
■ NEXT BANK
You can press the NEXT BANK button to switch to the next bank. This allows you to change banks without exiting the normal display.
• Each time the NEXT BANK button is pressed, the bank indication changes in order (A → B → C → A → B ...).
- The panel settings change when a PANEL MEMORY number button (1 to 8) is pressed.



Part II Playing the rhythm
PANEL MEMORY mode
You can define which panel settings are recalled when the PANEL MEMORY is used.
- Press and hold the SET button for a few seconds.
• The display changes to the following.

- Select the mode.
NORMAL:
The sounds and volume balance, and CONDUCTOR status are stored.
EXPAND:
All the instrument's settings are stored, including the rhythm (except for SOUND ARRANGER on/off status), TRANSPOSE, tempo, etc.
• After a few seconds, the display exits the setting mode.
■ EXPAND MODE FILTER
You can specify which data is stored in the EXPAND mode.
- Use the PAGE buttons to access the PAGE 2/3-3/3 EXPAND MODE FILTER display.
• The display looks similar to the following.

-
Use the ∧ and ∨ buttons to select the item.
-
Use the ON and OFF buttons to store the on or off status for the selected item.


Part III Performance Pads
Playing phrases

natural_image
Front panel of a computer interface with buttons and a monitor (no visible text or symbols)During your performance, you can insert a short recorded phrase or effect sounds by pressing a pad button. A different group of phrases is recorded in each bank.
- Press the BANK button.

- Select the desired bank from the display.
- The list of banks consists of three screen pages. Use the PAGE buttons to change the page.

- "User Bank" A, B and C are for storing your original phrases.
- "Compile Bank" 1 and 2 are for assigning phrases as you desire.
- Various functions are assigned to each pad button in "Control Preset". 1: ROTARY SLOW/FAST
2: PANEL MEMORY BANK INCREMENT
3: GLIDE
4: PANEL MEMORY DECREMENT
5: PANEL MEMORY BANK DECREMENT
6: PANEL MEMORY INCREMENT
- When using the "Control Preset" bank, set the AUTO SETTING button to OFF. When using the PANEL MEMORY, turn off the PERFORM. PADS BANK of the EXPAND MODE FILTER.
- Press a pad button (1 to 6).

- A different phrase is assigned to each pad button.
• Information about the phrase, such as its name and the measure number, is shown in the normal display. - The volume can be set with the buttons below the normal display (PADS).
- The selected phrase is played in the current tempo.
- To stop the phrase before it has ended, press the STOP button.
- Some phrases continue to play until the STOP button is pressed (the [Loop] indication appears).
- During a rhythm performance, some phrases may play in time with the measure count.
- When the automatic accompaniment is on, several phrases are played in the specified chord.
SOLO
Pad buttons 5 and 6 (SOLO) are phrases with chord progressions. Just by pressing one of these pad buttons, the phrase changes following a chord progression that is typical for the music genre of that bank.
- Use with the automatic accompaniment during your performance.
- Pad button 5 accesses a major chord progression, and pad button 6 a minor chord progression.
Part III Performance Pads
AUTO SETTING
When this button is set to on, the bank automatically changes according to the automatic setting functions in the ONE TOUCH PLAY, the MUSIC STYLE ARRANGER and the MUSIC STYLIST. When it is set to off, the bank does not automatically change according to these functions.

Copying phrases
You can copy the desired data, as phrases, from the SEQUENCER to each pad memory of a "User Bank".
- Chord data also can be copied to pad buttons 5 and 6 (SOLO).
PHRASE COPY
Copy a phrase from one pad to another.
- Press the PROGRAM MENUS button to turn it on.
• The display looks similar to the following.

- Select PERFORMANCE PADS.
• The display looks similar to the following.

flowchart
graph TD
    A["RECORDING BANK"] --> B["COMPILE SET"]
    A --> C["PHRASE COPY"]
    A --> D["SEO TO PAD COPY"]
- Select PHRASE COPY.
• The display looks similar to the following.

- Select the pad you wish to copy from.
- Use the buttons on the FROM side to set the desired settings.
BANK: Bank name PAD: Pad number (1 to 6)
- Select the pad you wish to copy to.
- Use the buttons on the TO side to set the desired settings. USER BANK: Bank name (USER A, B, C) PAD: Pad number (1 to 6)
- Only a SOLO phrase can be copied to the SOLO pads (5 and 6).
-
Press the OK button.
-
Press the PROGRAM MENUS button to turn it off.
- If you wish to modify a portion of the copied phrase, press the EDIT button to change to the recording display.
Part III Performance Pads
SEQ TO PAD COPY
- Record a phrase in the SEQUENCER, or load data from a disk.
• After this procedure, please do not change the song number. - For details about SEQUENCER operation, refer to page 73.
-
For information about loading data, refer to pages 120, 133.
-
Press the PROGRAM MENUS button to turn it on.
- Select PERFORMANCE PADS.
- Select SEQ TO PAD COPY.
• The display looks similar to the following.
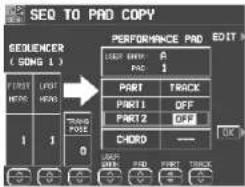
- Select the measures of SEQUENCER data you wish to copy from.
- On the SEQUENCER side, use the buttons to make the corresponding settings.
FIRST MEASURE:
The first measure of the phrase you wish to copy.
LAST MEASURE:
The last measure of the phrase you wish to copy.
TRANSPOSE:
The setting to transpose the chords when they are copied.
- The maximum that can be copied is 16 measures.
- When copying to pad button 5 or 6, the chord (STEP) track is automatically displayed, and the chord data is also copied. However, when chord data from step record input does not exist, the measures are blank.
-
If you wish to convert the chords during play-back, set TRANSPOSE to the key of C and then copy the phrase.
-
Select the pad button you wish to copy to.
- On the PERFORMANCE PAD side, use the buttons to make the corresponding settings.
USER BANK:
The name of the bank (A/B/C).
PAD:
Pad button number (1 to 6).
PART:
The part to copy to.
TRACK:
The track number to copy from.
- Press the OK button.
- A confirmation display appears. Press the YES button if you wish to copy the phrase, or press the NO button to cancel the procedure.
- When you have completed the procedure, press the PROGRAM MENUS button to turn it off.


Part III Performance Pads
Compile
You can assign desired phrases from different banks in "Compile Bank" 1 and 2.
- Press the PROGRAM MENUS button to turn it on.

• The display looks similar to the following.
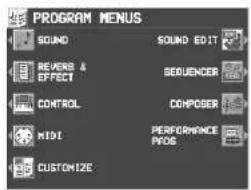
- Use the BANK and PHRASE ∧ and ∨ buttons to select the desired bank and phrase you wish to assign.
- The "Control" bank cannot be selected.
-
Repeat steps 5 and 6 to assign phrases to the other pad buttons.
-
When you have finished assigning the phrases, turn off the PROGRAM MENUS button.
-
Select PERFORMANCE PADS.
• The display looks similar to the following.
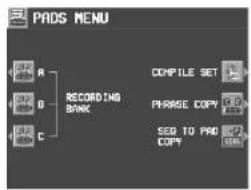
flowchart
graph TD
    A["RECORDING BANK"] --> B["COMPILE SET"]
    A --> C["PHRASE COPY"]
    A --> D["SEO TO PRO COPY"]
- Select COMPILE SET.
• The display looks similar to the following.

- You can press the NAMING button and assign a name to the bank.
-
Press the BANK button to select a bank (Compile Bank: 1/2).
-
Use the PADS ▲ and ▼ buttons to select the pad to which to assign the phrase.


Part III Performance Pads
Record a phrase
"User Bank" A, B and C are reserved for storing your original phrases.
- You can also copy phrases which are recorded in the SEQUENCER.
- Press the PROGRAM MENUS button to turn it on.
• The display looks similar to the following.

- Select PERFORMANCE PADS.
• The display looks similar to the following.

flowchart
graph TD
    A[" "] --> B[" "]
    B --> C[" "]
    D[" "] --> E[" "]
    E --> F[" "]
    G[" "] --> H[" "]
    H --> I[" "]
    J[" "] --> K[" "]
    K --> L[" "]
    M[" "] --> N[" "]
    N --> O[" "]
    P[" "] --> Q[" "]
    Q --> R[" "]
    S[" "] --> T[" "]
    T --> U[" "]
    V[" "] --> W[" "]
    W --> X[" "]
    Y[" "] --> Z[" "]
    Z --> AA[" "]
    AB[" "] --> AC[" "]
    AC --> AD[" "]
    AE[" "] --> AF[" "]
    AF --> AG[" "]
    AH[" "] --> AI[" "]
    AI --> AJ[" "]
    AK[" "] --> AL[" "]
    AL --> AM[" "]
    AN[" "] --> AO[" "]
    AO --> AP[" "]
    AQ[" "] --> AR[" "]
    AR --> AS[" "]
    AT[" "] --> AU[" "]
    AU --> AV[" "]
    AW[" "] --> AX[" "]
    AX --> AY[" "]
- Use the buttons to the left of the display to select a RECORDING BANK.
• The display changes to the RECORD PAD display.
- You can press the BANK NAMING button and assign a name to the bank.
- If the BANK CLR button is pressed, all the data in the bank is cleared (a confirmation display appears).
- Use the buttons below the display to select the pad number to record.
• The display changes to the PAD RECORDING display.
- You can press the PAD NAMING button and assign a name to the bank.
- To clear all the current data in the selected pad, press the CLEAR THE PAD button, and then press the YES button on the confirmation display.
-
Use the MEAS ∧ and ∨ buttons specify the number of measures in the phrase. Use the TIME SIGNATURE ∧ and ∨ buttons to specify the time signature of the phrase.
-
Press the OK button.
- For details about KEY SETTING, refer to page 111.
- For details about CHORD MODIFY CHANGE, refer to page 109.
- Select the part to record to.
- Press the button for PART 1 or PART 2.
- Two parts can be recorded (PAD 1–4).
• The display looks similar to the following.

- Proceed to record.
• The recording procedure is the same as for the COMPOSER. (Refer to page 104.)
- In the PLAY SETTING, if LOOP is set to OFF, LOOP recording is not possible.
Part III Performance Pads
PLAY SETTING
Select a playback mode.
- On the PAD RECORDING display, press the PLAY SETTING button.
• The display looks similar to the following.
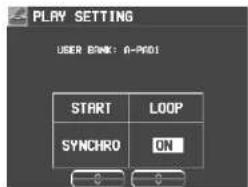
- Use the START ∧ and ∨ buttons to select a playback mode.
SYNCHRO:
During a rhythm performance, the phrase playback begins in time with the measure.
INSTANT:
The phrase starts to play immediately when the pad button is pressed, regardless of the rhythm.
- Use the LOOP ∧ and ∨ buttons to enable or disable loop playback.
ON:
Once the pad button is pressed, the phrase is played back repeatedly until the STOP button is pressed.
OFF:
The phrase is played back only once.
CHORD STEP RECORD
A chord progression can be stored in PAD 5 and PAD 6.
- On the REALTIME RECORDING display, press the CHORD STEP RECORD button.
• The display looks similar to the following.
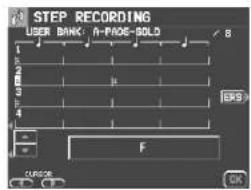
- Use the CURSOR buttons to move the cursor to the position you wish to input.
- The cursor moves in 1/8-note increments.
- Input the chord by playing it on the keyboard.
• The chord name is shown.
-
Press the OK button.
-
Repeat steps 2 to 4 to store the rest of the chord progression.
- To delete a chord which has been input, move the cursor to the specific chord and press the ERS button.
Part IV Sequencer
Outline of the Sequencer

natural_image
Front panel of a computer interface with control panels and buttons (no visible text or labels)A sequencer records your performance in a similar way to a tape recorder. This instrument's SEQUENCER allows you to record up to 10 performances in a variety of ways. You may want to record your entire performance in one go (especially if you are using AUTO PLAY CHORD to provide the accompaniment), or to build up a complex arrangement with several different parts playing together, like an orchestral score. This instrument's SEQUENCER has 16 tracks. This means that you can record 16 different parts. However, you don't have to use all 16 tracks. For some uses you may only need to use one or two tracks. This instrument's SEQUENCER enables you to edit your recorded performance. Unlike a tape recorder you can change the sound or the tempo during playback, or correct wrong notes or timing errors.
SEQUENCER features
■ You can change the tempo without changing the pitch
When you record your performance at a slow tempo and play it back at a faster tempo, the pitch stays the same.
■ Consistent sound
Your performance is reproduced by a sound module as it reads digital data. So, unlike a recorded tape, the sound never deteriorates no matter how many times you play back your performance.
■ Edit your recorded performance
Comprehensive editing functions allow you to modify your recorded performance. Data can easily be erased, corrected or copied, providing an especially convenient tool for creating your original tunes.
■ Instant search
A recorded tape has to be rewound, but digital action means you can return to the beginning of your performance, or find any measure, instantly.
Popular features
■ Simplified recording method
EASY RECORD is a feature that allows you to bypass the more complex recording procedures so you can record and play back your performance quickly and easily.
- You can also record an accompaniment from the AUTO PLAY CHORD.
■ Create a one-man ensemble
Use the REALTIME RECORD function to record your performance in up to 16 tracks and create your own orchestra or band.
■ Store individual data to create your song
For repeating patterns or those especially complicated phrases, the STEP RECORD feature is convenient for recording the notes one-by-one.
- This method can be used to store both the chord progression for the automatic accompaniment and the rhythm changes.
Memory capacity
Up to 10 songs can be stored in the SEQUENCER. Expressed in terms of notes, the total number of notes which can be stored in all the SEQUENCER songs and tracks is about 40,000. The remaining memory available for recording is shown on the display as a percentage (MEMORY= %).
- When "Memory full!" appears on the display, no more data can be stored in the SEQUENCER.
Part IV Sequencer
SEQUENCER menu
The configuration of the SEQUENCER setting display is as follows.
- Press the PROGRAM MENUS button to turn it on.

• The display looks similar to the following.

- Select SEQUENCER.
• The display looks similar to the following.

- The S∧GandN∨Buttons are used to select a song.
- You can press the NAMING button and assign a name to the song. (Refer to page 83.)
- You can press the PANEL WRITE button to store the current settings of the instrument at the beginning of the song. (Refer to page 83.)
- KN2600: Pressing the SD AUDIO SYNCHRO button will set the synchronization of the SEQUENCER playback and the sound data stored in the SD card. (Refer to page 103.)
- Select RECORD & EDIT, COPY & PASTE or RANGE SET, and follow the corresponding procedure.
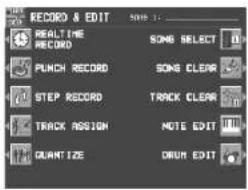


Part IV Sequencer
Summary of the SEQUENCER menu items
RECORD & EDIT
These functions are recording and editing operations used for creating a new performance.
REALTIME RECORD (page 78)
Record each part of your performance just as you play it on the keyboard.
Correct a selected portion of your recorded performance.
STEP RECORD (page 86)
Store the sounds note-by-note on the display.
- You can also store the chord or rhythm progression for the AUTO PLAY CHORD.
TRACK ASSIGN (page 91)
Assign parts to tracks.
QUANTIZE (page 92)
Correct the timing of your performance.
SONG SELECT (page 84)
Select a song.
SONG CLEAR (page 93)
Erase all the recorded data of a song.
TRACK CLEAR (page 93)
Erase the contents of a specific track.
NOTE EDIT (page 94)
Store and correct performance (NOTE) data on a piano roll display.
DRUM EDIT (page 95)
Store and correct DRUMS part data on a special display.
COPY & PASTE
Copy recording data and paste it to the desired location.
TRACK COPY (page 97)
Copy data of specific tracks.
SONG COPY (page 97)
Copy data of specific songs.
TRACK MERGE (page 98)
Merge the recorded contents of two tracks and store in a third track.
TRACK CLEAR (page 97)
Erase the contents of a specific track.
SONG CLEAR (page 97)
Erase all the recorded data of a song.
MEASURE COPY (page 98)
Copy the contents of specific measures.
MEASURE ERASE (page 99)
Erase the contents of specific measures.
MEASURE DELETE (page 99)
Delete specific measures from the performance.
MEASURE INSERT (page 100)
Insert additional measures in the performance.
APC TO SMF CONVERT (page 100)
Save automatic accompaniment patterns and pad performance data in a Standard MIDI File (SMF).
RANGE EDIT
Change the note position etc. in the recorded data.
QUANTIZE (page 96)
Correct the timing of your performance.
NOTE CHANGE (page 101)
Change the pitch of specific notes.
VELOCITY CHANGE (page 102)
Modify the recorded velocity (how hard the keyboard was played) of performance data.
TRANSPOSE (page 102)
Change the key of the performance data.
ADVANCE/DELAY (page 103)
Speed up or delay the sound production of performance data.
About the measure count
The measure count on the display corresponds to the time signature of the selected rhythm. However, if rhythm data is stored in the RHYTHM part and that part is played back, the measure count on the display corresponds to the stored rhythm data. (Refer to page 90.)
- If you wish to use a time signature not available in the preset rhythms, use the COMPOSER to create a new time signature. (Refer to page 106.)
Part IV Sequencer
Sequencer parts
The following summary explains what is stored in each SEQUENCER part.
| Part name[name on display] | Used for Recorded contents | |
| RIGHT1 [RT1]RIGHT2 [RT2]LEFT [LFT]PART1 [P 1]-PART9 [P 9]PART11 [P 11]-PART16 [P16] | Recording the performance of each part (REALTIME/STEP) | Sound and volume settingsPART EXPRESSIONContents of sound and effect settings that can be set on the MIXER display (Refer to page 150.)PITCH BEND wheel operationMODULATION wheel operation (KN2600) |
| DRUMS [DRM](PART 10) | Recording the drums performance with the DRUM KITS group sounds (REAL-TIME/STEP) | Sound and volume settingsPART EXPRESSIONContents of sound and effect settings that can be set on the MIXER display (Refer to page 150.) |
| CONTROL [CTL] Recording changes in the panel button status (REALTIME/STEP) | Rhythm setting and selection changesRHYTHM VARIATION 1-4 settingREVERB on/offAUTO PLAY CHORD status, volume balanceMUSIC STYLE ARRANGER statusFILL IN 1, 2, INTRO & ENDING 1, 2 onPANEL MEMORY selection changesTRANSPOSE statusTECHNI-CHORD statusSTART/STOP on/offTEMPO settingCONDUCTOR statusPERFORMANCE PADS settingFADE IN/OUT operationTOTAL EXPRESSION | |
| AUTO PLAY CHORD[APC] | Recording chords for the AUTO PLAY CHORD (REALTIME) | Chord progressionAUTO PLAY CHORD status, volume balanceSTART/STOP on/offFILL IN 1, 2, INTRO & ENDING 1, 2 on |
| CHORD [CHD] Recording chord progression for the AUTO PLAY CHORD (STEP) | Chord progressionFILL IN 1, 2, INTRO & ENDING 1, 2 on | |
| RHYTHM [RHY] Settings related to rhythm (STEP) | Rhythm settings and selection changesRHYTHM VARIATION 1-4 settingFILL IN 1, 2, INTRO & ENDING 1, 2 onSTART/STOP on/offTEMPO setting | |
- You can use the TRACK ASSIGN function to assign parts to tracks as you wish. (Refer to page 91.)
Part IV Sequencer
Easy Record
Suppose you are playing the Keyboard and you wish to record and play back your performance to hear how it sounds. You can bypass the set-up procedures of the full-scale sequencer and begin recording quickly and easily.
• Note that by executing EASY REC, the original data in the selected song number is erased.
Recording procedure
- Press the EASY REC button to turn it on.

• The display changes to the following.
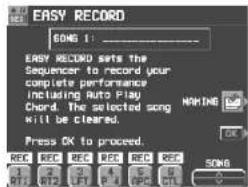
- Use the SONG ∧ and ∨ buttons to select the song number in which to record (1 to 10).
- If you press the NAMING button, you can assign a name to your song. (Refer to page 85.)
-
Set the desired sounds, effects, rhythms, etc.
-
Press the OK button.
• The display changes to the REALTIME RECORD display.
- Play the keyboard.
- Recording begins as soon as you start the rhythm or play the keyboard.
- When you have finished recording, press the EASY REC button to turn it off.
• The PLAY button turns on.
Playback
- Press the SEQUENCER RESET (FILL IN 1) button.

- Press the START/STOP button.
- Your recorded performance is played back automatically.
- When you are finished playing back your performance, press the SEQUENCER PLAY button to turn it off.




Part IV Sequencer
Realtime Record
With REALTIME RECORD, your performance is recorded with the timing exactly as you played it on the keyboard. Use this mode to record your performance in up to 16 tracks and create your own orchestra or band.
Recording procedure
- Press the PROGRAM MENUS button to turn it on.
• The display changes to the following.
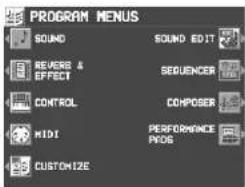
- Select SEQUENCER.
• The display looks similar to the following.

- When you press the PANEL WRITE button, the PANEL WRITE display appears. To store the currently active settings, such as the sounds, at the beginning of the song, press the OK button.
-
Use the SONG ∧ and ∨ buttons to select a song number in which to record. (The song number is shown on the display.)
-
Select RECORD & EDIT.
• The display looks similar to the following.

- Select REALTIME RECORD.
• The display looks similar to the following.

- Use the buttons below the display to turn on the "REC" indication above the track numbers you are going to record.
- While you are recording, you can play back tracks which are already recorded. Press the corresponding balance buttons to display "PLAY" above the track number you wish to have played back.
- For the RIGHT 1, RIGHT 2 and LEFT parts, you can select two or more tracks to record at one time; however, to record a performance part, the corresponding button in the CONDUCTOR must also be on. For parts that are not in the CONDUCTOR, multiple parts cannot be recorded at one time.
- To record AUTO PLAY CHORD (APC) parts, turn on the AUTO PLAY CHORD's OFF/ON button. In this case, press the START/STOP button when beginning recording.
- The track for the RHYTHM (RHY) part can be selected for recording only when STEP RECORD is active.
- Set the sounds, effects, volumes, etc. for the parts you are going to record.
- If you press the MIXER button, you can use the MIXER display to visually adjust the settings for each track.
- The LOCAL ON/OFF setting on the MIXER display is used to specify whether the part assigned to that track sounds when it is played on the keyboard during recording. For the LOCAL ON/OFF during playback, use the TRACK ASSIGN display to adjust the settings. (Refer to page 91.)
- If you are recording GM2 song data, select from the GM2 group in the SOUND EXPLORER.
- The panel settings which are active at the beginning of recording are stored.
Part IV Sequencer
- Use the TEMPO/PROGRAM to adjust the recording tempo.
• The tempo is shown on the display as ♪=.
- If you wish to record the tempo setting and tempo changes, store them in the control (CTL) part, or use the step record to store them in the rhythm (RHY) part.
- Turn the metronome on or off as desired with the ON/OFF button at the upper right of the display.
- The metronome selection alternates between ON and OFF each time the button is pressed.
- When set to ON, the metronome volume setting display is momentarily shown.
• The metronome sound is not recorded.
- Play the keyboard.
- Recording begins.
- You can also press the START/STOP button to start the rhythm and begin recording.
- If the metronome is on, when you press the START/STOP button, a two-measure count plays, after which recording automatically begins. In this case, the rhythm does not start. Recording does not start until the two-measure count is completed.
- The recording status is continuously updated on the display:
MEASURE= indicates the current measure. TIME SIG.= indicates the current time signature.
MEMORY= indicates the remaining memory (%) available for recording.
- If you wish to redo the recording, press the REC STOP button and then record again. To change the sounds and effects, etc. please set them again.
- If you make a mistake in recording, you can correct a specific portion of your performance without having to redo the whole part. (Refer to page 84.)
- When you have finished recording, press the REC STOP button on the display, or turn off the PROGRAM MENUS button.
- When the PROGRAM MENUS button is turned off, the ending command (END) is recorded. Note that, as long as the ending command is not recorded, blank recording continues even if you stop playing.
• The SEQUENCER PLAY button turns on.
■ Multi-track recording
Use the following procedure to record one track while listening to the track or tracks already recorded.
- Follow the procedure to record the first track, and press the REC STOP button at the end of the recording.
- The indication for the track just recorded changes from "REC" to "PLAY".
-
Turn on the "REC" indication for the track you wish to record next, and select the sounds and effects, etc.
-
Press the START/STOP button and begin recording.
- Tracks for which "PLAY" is shown are played back, and you can record in time with this.
- If you turn on the "REC" for the CONTROL track and begin recording, the rhythm start will not be recorded.
-
Press the REC STOP button at the end of the recording.
-
Repeat steps 2 to 4 for other tracks, as desired.
-
When multi-track recording is finished, turn off the PROGRAM MENUS button.
- If you wish to store part settings that you modified after recording as beginning song data, press the MIXER button and follow the PANEL WRITE procedure. (Refer to page 83.)


Part IV Sequencer
CYCLE RECORD
This mode allows you to have specified recording measures continuously repeated. Thus you can record measures by adding notes during any cycle.
- On the REALTIME RECORD display, specify "REC" for a track number you are going to record, and "PLAY" for track numbers you wish to have played back.
- Press the CYCLE: OFF button.
• The display looks similar to the following.

- Use the START MEASURE ∧ and ∨ buttons to specify the beginning measure number.
- Use the END MEASURE ∧ and ∨ buttons to specify the ending measure number.
- The measure in which the END command has been stored can also be specified.

CYCLE END MEASURE: 4
-
Press the START/STOP button.
-
If the metronome is on, cycle recording of the specified measures begins after a two-measure count.
-
Play the keyboard.
-
The specified measures are repeated, during which time you can record by adding notes little by little at the correct timing (over-dubbing).
- If you wish to erase all the performance data from the specified measures, press the CLEAR button.
- If the CYCLE: ON button is pressed, it changes to OFF. This button does not function during recording.
• To return to the REALTIME RECORD display, press the EXIT button. -
Cycle record can also be started from the REALTIME RECORD display whenever the CYCLE: ON indication is shown.
-
When you have finished recording, press the REC STOP button on the display, or turn off the PROGRAM MENUS button.
Part IV Sequencer
Sequencer Play
Play back your recorded performance.
- Press the SEQUENCER PLAY button to turn it on.
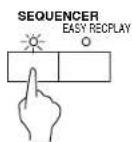
• The display looks similar to the following.

-
After pressing the SONG button, use the SONG ∧ and ∨ buttons to select a song number for playback.
-
Use the balance buttons below the display to show "PLAY" above the track numbers you wish to have played back.
- Highlighted track numbers indicate tracks that are already recorded. Only highlighted track numbers can be selected for playback.
- You can select two or more tracks to play back at one time.
- Press the SEQUENCER RESET (FILL IN 1) button.
- The SEQUENCER returns to the beginning of the song and the beginning panel settings are recalled.
- If you want to playback a song starting from a point other than the first measure, use the MEAS ∧ and ∨ buttons to specify the measure number.
- "MEASURE=" indicates the current measure number.
- Press the START/STOP button.
• The recorded performance is played back from the specified measure.
- When playback is begun from a measure in which an INTRO, COUNT INTRO, FILL IN or ENDING is recorded, the corresponding function does not work.
- You can press the MIXER button and modify the settings for each part.
- For information about LYRICS, refer to page 123.
- To stop playback, press the START/STOP button.
- If the START/STOP button is pressed again, playback will continue from the point it was interrupted.
- When you are finished playing back your performance, press the SEQUENCER PLAY button to turn it off.
If a rhythm progression has been recorded in the RHYTHM (RHY) part, the MEASURE display used in the STEP RECORD and EDIT displays conforms to the time signature data stored in the RHYTHM part.
Adjusting the playback tempo
Even with a song having recorded tempo data, you can use TEMPO/PROGRAM or TAP TEMPO to adjust the tempo to your liking.
- When the tempo is changed, all the tempo data of that song is automatically changed by the same ratio. Accordingly, even in song data in which tempo change data is stored, a single adjustment of the tempo produces a natural-sounding playback.
- To return to the original tempo, while the song is stopped press the SEQUENCER RESET button. Note that the tempo change is also canceled when you switch to another song or load a new song.
- The adjusted tempo is canceled when you begin the recording procedure and the original tempo data will be recorded.

Part IV Sequencer
CYCLE PLAY
You can have specified measures played back repeatedly.
-
On the SEQUENCER PLAY display, specify "PLAY" for track numbers you wish to have played back.
-
Press the CYCLE button.
• The display looks similar to the following.
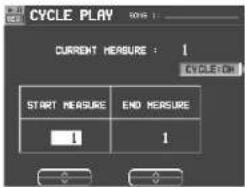
-
Use the START MEASURE ∧ and ∨ buttons to specify the beginning measure number.
-
Use the END MEASURE ∧ and ∨ buttons to specify the ending measure number.
- The measure in which the END command has been stored can also be specified.
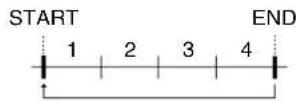
CYCLE END MEASURE: 4
- Press the START/STOP button.
- Cycle playback of the specified measures begins.
- Normally the rhythm pattern is not played back.
- To stop cycle playback, press the START/STOP button again.
- During playback stop, if the SEQUENCER RESET (FILL IN 1) button is pressed, the SEQUENCER returns to the measure number specified in step 3. If the SEQUENCER RESET button is pressed again, the SEQUENCER returns to measure 1.
- If you press the CYCLE: ON button to turn it OFF, cycle playback is not possible.
- To return to the SEQUENCER PLAY display, press the EXIT button.
- Cycle playback can also be specified on the SEQUENCER PLAY display whenever the CYCLE: ON indication is shown.
MEDLEY
Recorded songs can be played back in a medley.
- On the SEQUENCER PLAY display, press the MEDLEY button.
• The display looks similar to the following.

- Specify the order of songs in the medley.
- If ALL is pressed, all the files are selected, and the songs are played back in order in a medley. If ALL is pressed again, the files are deselected.
- You can use the buttons below the display to select a song to add to the song list, then press the ADD button to add it to the list. Repeat these steps to create your own list of songs to have played back. A M01, M02 etc. next to the file name indicates its order in the list.
- You can delete a marked file from the medley song list by selecting it and pressing the ADD button.
- Use the LOOP button to specify ON or OFF for repeat playback of the medley.
- Press the START button.
- During medley playback, you can use the SKIP button to skip to the next song.
82
QQTG0692
Part IV Sequencer
Naming
Here is the way to assign a name to your recorded song.
- On the SEQ MENU display use the SONG SELECT ∧ and ∨ buttons to select a song.
- Press the NAMING button.
• The display looks similar to the following.

-
Use the buttons below the display to assign a name.
-
Set the character input position with the POSITION buttons, select the characters with the alphanumeric buttons and repeat name assignment.
- Switch from upper to lower case letters with the ABC, abc button.
- Press the INS button to enter a space at the cursor position.
- Press the DEL button to erase the character at the cursor position.
- Press the CLR button to erase the entire name.
-
Press the ← button to center the name.
-
Press the OK button.
Panel Write
You can change the panel status which is in effect at the beginning of the song. These are the settings which are recalled when the SEQUENCER RESET button is pressed.
- On the SEQ MENU display, use the SONG ∧ and ∨ buttons to select the song number. Then select PANEL WRITE.
• The display looks similar to the following.
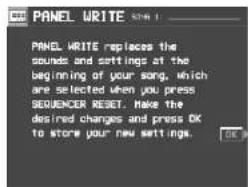
-
Press the OK button.
-
"COMPLETED!" is shown on the display.
- PANEL WRITE is automatically activated at the when you start to record.
-
For rhythm data, the data in the RHYTHM part has priority.
-
Use the panel buttons to change to the desired panel settings.



Part IV Sequencer
Song Select
You can select a desired song from the list of recorded songs.
- On the SEQ MENU display, select RECORD & EDIT.
- On the RECORD & EDIT display, select SONG SELECT.
• The display looks similar to the following.

-
Use the SONG SELECT ▲ and ▼ buttons to select a song.
-
The total amount of memory used for the current song is shown as a percentage (%) to the right of the song name.
- If the NAMING button is pressed, the NAMING display appears.
• To optimize memory, songs you do not wish to preserve should be deleted. (Refer to page 93.)
Punch Record
If you make a playing error during REALTIME RECORD or would like to change the recording for some other reason, you can use the punch recording feature to correct a selected portion of the performance without having to redo the whole part.

flowchart
graph TD
    A["Recording the performance"] --> B["Playing error"]
    B --> C["Punch in Punch out"]
    C --> D["Replay this portion"]
    D --> E["Recording mode"]
    style A fill:#f9f,stroke:#333
    style B fill:#ccf,stroke:#333
    style C fill:#cfc,stroke:#333
    style D fill:#fcc,stroke:#333
    style E fill:#ffc,stroke:#333
Sequencer
- On the SEQ MENU display, use the SONG SELECT ∧ and ∨ buttons to select the song number. Then select RECORD & EDIT.
- On the RECORD & EDIT display, select PUNCH RECORD.
• The display looks similar to the following.
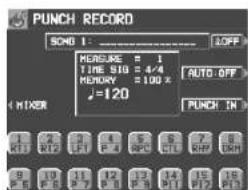
-
Select the track which contains the portion you want to correct.
-
You cannot select a track in which no data is stored.
-
On the display "REC" indicates tracks which are being recorded, and "PLAY" indicates tracks which are being played back.
-
Use the MEAS ∧ and ∨ buttons to specify the beginning measure of playback.
- "MEASURE=" indicates the current measure number.
- Press the START/STOP button to begin playback of the specified track.
84
QQTG0692


Part IV Sequencer
-
During playback, press the PUNCH IN button at the point you want to begin recording.
-
Recording begins as soon as the PUNCH IN button is pressed. Begin playing at this point.
• The REC indication changes to the PUNCH indication. - The PUNCH IN button switches to the REC STOP button.
- Press the REC STOP button at the point you want to stop recording.
- Punch recording stops immediately.
- You can also begin punch-in recording by playing the keyboard.
- You can specify the punch-in/punch-out points with the optional Foot Switch (sold separately). (Refer to page 172.)
■ AUTO PUNCH RECORD
You can also set the punch-in and punch-out points beforehand, so that recording automatically begins and ends at the specified points.
- On the PUNCH RECORD display, press the AUTO: OFF button.
• The display looks similar to the following.

- Use the FIRST MEASURE ∧ and ∨ buttons to specify the number of the punch-in measure.
- Use the LAST MEASURE ∧ and ∨ buttons to specify the number of the punch-out measure.
• The number of the LAST measure must be higher than the number of the FIRST measure.
• The specified measure is recorded.
- Use the COUNT IN MEASURE ∧ and ∨ buttons to specify the number of lead-in measures you wish to have played back before the punch-in measure.
-
Set the metronome to on or off with the ON or OFF button.
-
Press the EXIT button.
• The display changes to the PUNCH RECORD display.
-
Press the START/STOP button.
-
Playback begins from the measure indicated by CURRENT MEASURE on the display.
-
Pertinent information, such as the FIRST MEASURE, is shown in the upper section of the display.
-
Correct the performance.
• The mode changes automatically to the recording mode at the specified FIRST measure. Begin playing at this point. The mode automatically changes back to the playback mode at the specified LAST measure.
- To discontinue punch recording in the middle, press the CANCEL button. In this case, the recorded contents up to that point are erased.


Part IV Sequencer
Step Record
STEP RECORD is simply a method of making a tune by storing the sounds note-by-note on the display. Instead of playing the keyboard directly as in the REALTIME RECORD mode, you can take your time to input each single note. This is an especially effective method for storing complicated passages that are difficult to play or when the exact timing of a part is critical.
Recording procedure
Record the keyboard performance and panel changes.
-
On the SEQ MENU display, use the SONG SELECT ∧ and ∨ buttons to select the song number. Then select RECORD & EDIT.
-
On the RECORD & EDIT display, select STEP RECORD.
- The display changes to the PART SELECT display.
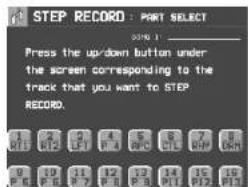
- Use the balance buttons below the display to specify the track for the part you are going to record (only one track can be selected at a time).
- The display changes to the STEP RECORD input display similar to the following.
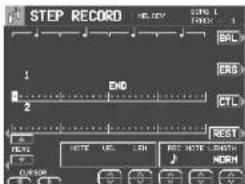
- If you selected the track to which the CHORD part has been assigned, the display changes to the STEP RECORD: CHORD display. (Refer to page 88.)
- If you selected the track to which the RHYTHM part has been assigned, the display changes to the STEP RECORD: RHYTHM display. (Refer to page 90.)
- If you selected the track to which the CONTROL part has been assigned, the display changes to the STEP RECORD: CONTROL display.
- Use the MEAS ∧ and ∨ buttons to select the measure.
- This step is not necessary if you are recording from measure 1 of a blank track.
- Use the CURSOR ◀ and ▶ buttons to move the cursor to the note position (dot) you are going to store.
• Each dot represents one-eighth of a quarter-note (a thirty-second note).
- When storing triplets, it may not be possible to match the timing exactly with the 1/32-note steps. However, if you select triplet-type notes for the note length (LENGTH) in step 6 below, the timing is automatically corrected.
- Use the left REC NOTE LENGTH ∧ and √ buttons to specify the note value. Select from ⏻3, ⏻, ⏻3, ⏻, ⏻3, ⏻, ⏻3, ⏻, ⏻, ⏻, ⏻ × 2 to 4. (A 3 denotes a triplet-type note.)
- For note values other than these, use the center REC NOTE LENGTH buttons to specify the note value to be added to that which you specified with the left buttons.
Example: To record a dotted quarter-note (♩)

- Use the right REC NOTE LENGTH ∧ and ∨ buttons to specify the actual length of the produced sound for the desired legato or staccato effect.
TENU (tenuto): Sound is produced for 95% of the note length.
NORM (normal): 80%
- Specify the pitch and velocity of the note by playing the keyboard.
- The dot on the display where the note is stored changes to a * mark.
- When recording chords, you can store multiple notes at one position.
Part IV Sequencer
- Any panel setting changes—for example changes in the sound selection, button operation, wheel operation, etc.—are recorded at the cursor position.
- When a wheel or dial is operated, the input value is indicated on the display. Confirm that this is the correct value and press the YES button to record the value or the NO button to cancel it.
REST:
To store a rest, after specifying the note LENGTH, press the REST button.
- Positions at which nothing is stored are read as rests.
ERS:
If you make a mistake, move the cursor to the error, and after displaying the data you wish to erase, press the ERS button.
BAL:
To specify the volume at the cursor position, after pressing the BAL button, use the VALUE buttons to set the volume (0 to 127).
- Repeat steps 4 through 8 to continue storing notes.
- To input data on another track, press the button for the desired track and repeat the procedure from step 2.
- When you have finished recording, press the PROGRAM MENUS button to turn it off.
■ Storing control data
Various control data can be stored at the cursor position.
- On the STEP RECORD: MELODY display, press the CTL button.
- Use the CTL ∧ and ∨ buttons to select the control data you wish to insert.
-
Select from PAN, KEY SHIFT (COARSE TUNE), TUNING (FINE TUNE), BEND SENS.
-
Use the VALUE ∧ and ∨ buttons to adjust the numerical value of the setting.
-
Press YES button.
■ Correcting the data
- In the STEP RECORD mode, specify the track you wish to correct.
- Use the MEAS buttons to go to the measure you wish to modify. Use the CURSOR buttons to move the cursor to the point (*) you wish to edit.
- The data stored at that point is shown on the display.
- When multiple data is stored at one point, different data is displayed in order each time a CURSOR button is pressed. When a chord is recorded, a different note in the chord is displayed each time a CURSOR button is pressed.
3. Correct the data.
There are three types of data:
Performance data
NOTE data (note pitch) and VEL data (how hard the key was played) and LEN data (1 = 1/96 of a quarter note [↓]) are displayed. Use the relevant buttons to correct the data as desired.
Sound data
The name of the sound is displayed. Change the sound as desired (the sound setting display is interposed on the current display).
Control data
The name of the function is displayed. Change the data as desired.
- Press the ERS button to erase the data which is displayed.
- You can also correct data which was stored in the REALTIME RECORD mode.
• Performance (NOTE) data can be recorded or edited on a piano roll display, and there is also a specialized display for recording and editing the DRUMS part data. (Refer to page 94.)



Part IV Sequencer
Store a chord progression
Store the chord progression for the AUTO PLAY CHORD in the track for the CHORD part. Then, when the AUTO PLAY CHORD is used during playback, even if you do not specify the chords with your left hand, the chords change automatically.
- The chord length is specified with the CHORD STEP RECORD keys on the keyboard.

Note value keys
Whole note
a. Dotted half-note
Half-note
. Dotted quarter-note
Quarter-note
Eighth-note
Reset key
F_2 — Press to begin storing from the beginning.
Correction keys
Move back one step.
▶ Move forward one step.
Repeat key
Press to end the chord-storing procedure and to specify automatic repeat playback of the stored progression.
End key
—Press after the whole chord progression has been stored.
DELETE key
DELETE Press to erase data.
- To erase all the data from the current track, while pressing the DELETE key, press the End key ( ).
■ Example of storing a chord progression
- On the SEQ MENU display, use the SONG SELECT ∧ and ∨ buttons to select the song number. Then select RECORD & EDIT.
- On the RECORD & EDIT display, select STEP RECORD.
- The display changes to the PART SELECT display.
- Using the balance buttons below the display, select the track to which the CHORD (CHD/APC) part has been assigned.
- The display changes to the STEP RECORD: CHORD input display similar to the following.
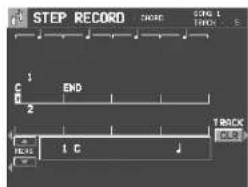
- STEP REC: CHORD can also be enabled by pressing on the EASY RECORD button continuously a few seconds. This will display the CHORD screen.
- Store the chords.
While playing a C chord with your left hand, press the • key one time with your right hand.

- A "beep" tone indicates that the chord has been successfully stored.
- The dot on the display where the chord is stored changes to a * mark and the cursor automatically moves forward, in accordance with the specified note value, to the next unrecorded position. The chord name is shown on the display.
Part IV Sequencer
(1) While playing an Am chord, press the key one time.

(2) While playing an F chord, press the key one time.

(1) While playing a D7 chord, press the key one time.
(2) While playing a G7 chord, press the key one time.
- You can press the INTRO & ENDING button or a FILL IN button on the panel to store the desired pattern at the cursor position. (An INTRO or COUNT INTRO can be stored only at the beginning.)
-
Store a rest by pressing a note value key without specifying a chord.
-
At the end of the chord progression, press the End key ( ).—H
• The Keyboard exits the recording mode.
- During playback, playback of the recorded chord progression stops at this point. For automatic repeat playback of the chord progression, press the Repeat key (.) instead of the End key (.)
- When you play back the track for the CHORD part, the chords of the automatic accompaniment change in accordance with the stored chord progression.
- To specify chords by the
mode, select the BASIC mode before entering the STEP RECORD mode. - If the ON BASS button is on, chords such as "C on G" can also be specified (except in the
mode). - The CHORD FINDER feature, which shows you how to finger a specified chord, is available. (Refer to page 55.)
■ Correct the recorded chord progression
- Follow the procedure to select the STEP RECORD: CHORD display.
- Use the MEAS buttons to go to the measure you wish to modify. Use the ◀ and ▶ Correction keys to move the cursor to the point (*) you wish to edit.
- The lengths of rests are indicated by the respective rest value × its multiplier.
Example:
1-beat rest (quarter rest)
7....1/2-beat rest (eighth rest)
× 1 + ? ....1-1/2-beat rest (dotted quarter rest)
× 10.....10 -beat rest
- To go to the end of the chord progression, while pressing the Reset key ( ) press the ◀ key.
- Correct the chord data.
Chord data
When the chord name is displayed at the cursor position, you can press the DELETE key to erase the data and then store a new chord.
- If you do not erase the displayed data before entering new chord data, the new data is inserted at this point, and the displayed data is merely shifted by the note value of the new chord.
- Rests can also be erased. Each time the DELETE key is pressed, the rest is erased in units of 12 × 1 . The rest is erased last.
- If you wish to cancel the REPEAT, enter an END command.
Control data
The name of the stored function (INTRO, FILL, etc.) is displayed. You can press the DELETE key to erase the data which is displayed.
■ TRACK CLEAR
To erase all data from the current track, press the CLR button, and then press the YES button on the confirmation display.
- If you wish to cancel the clear procedure, press the NO button.


Part IV Sequencer
Store a rhythm progression
Changes in the rhythm selection and tempo, as well as the intro, fill-ins and the ending, can be stored by measures with the step recording method.
- On the SEQ MENU display, use the SONG ∧ and ∨ buttons to select the song number. Then select RECORD & EDIT.
- On the RECORD & EDIT display, select STEP RECORD.
- The display changes to the PART SELECT display.
- Using the balance buttons below the display, select the track to which the RHYTHM (RHY) part has been assigned.
• The display changes to the STEP RECORD: RHYTHM input display similar to the following.
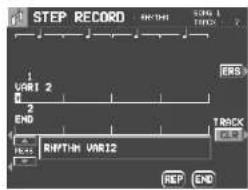
-
Use the MEAS ▲ and ▼ buttons to go to the measure you wish to record.
-
Store the rhythm data.
• Data which can be stored: START/STOP
Changes in the rhythm selection RHYTHM VARIATION 1–4.
COUNT INTRO, INTRO, FILL IN, ENDING
Tempo changes
- Be sure to store the START/STOP data in the measure in which the rhythm starts or stops.
- If you are storing a COUNT INTRO or INTRO, store this data before the START/STOP data.
- If the tempo is changed, the display changes to the confirmation display. After specifying the desired tempo, Press the YES button to store the specified tempo, or press the NO button to cancel the new tempo value.
-
Repeat steps 4 and 5 to continue storing the rhythm progression.
-
At the end of the rhythm progression, press the END button.
- If the REP button is pressed instead of the END button, during playback the recorded rhythm progression is repeated.
• The Keyboard exits the recording mode.
■ Correct the recorded rhythm progression
- Follow the procedure to select the STEP RECORD: RHYTHM display.
-
Use the MEAS buttons to go to the measure you wish to modify. (The * is highlighted.)
-
Correct the rhythm data.
-
Press the ERS button to erase data at the cursor position.
- If you wish to cancel the REPEAT, enter an END command.
- If you select a rhythm with a different time signature, the time signature of all subsequent measures will also change.
- If data has already been recorded in other tracks, you cannot select a rhythm with a different time signature.
■ TRACK CLEAR
To erase all data from the current track, press the CLR button, and then press the YES button on the confirmation display.
- If you wish to cancel the clear procedure, press the NO button.
Part IV Sequencer
Track Assign
Each SEQUENCER part is already assigned to a track number. However, you can use the TRACK ASSIGN function to assign parts to tracks as you wish.
- On the SEQ MENU display, use the SONG SELECT ∧ and ∨ buttons to select the song number. Then select RECORD & EDIT.
- On the RECORD & EDIT display, select TRACK ASSIGN.
• The display looks similar to the following.

- Use the TR ▲ and ▼ buttons to select the track.
- Use the TRACK ASSIGN ∧ and ∨ buttons to select the part for the specified track.
- When a part other than the CONTROL, APC, CHORD or RHYTHM part is assigned, the track assign procedure is completed at this point.
- Either the CHORD part or APC part can be assigned to a track, but not both.
- The CONTROL, APC, CHORD and RHYTHM parts cannot be assigned to more than one track.
- You can use the ON and OFF buttons for LOCAL CONT. to specify whether or not the sound of the part assigned to this track is generated. Because no sound is generated for this instrument's parts assigned to tracks set to OFF through this procedure, use this setting to generate sound from an external sound source through the MIDI connectors.
-
You can use the MIDI OUT ON and OFF buttons to specify whether or not the data of the part assigned to this track is sent as MIDI data. When set to OFF, the data is not sent, even if MIDI equipment is connected.
-
When assigning the CONTROL, APC, CHORD or RHYTHM part, press the OK button.
■ TRACK ASSIGN PRESETS
A preset track assignment can be selected.
- On the TRACK ASSIGN display, press the PRESET button.
• The display looks similar to the following.

- Use the SONG ∧ and ∨ buttons to select the song number for which the preset track assignment will be effective.
-
If ALL is selected, the track assignment is effective for all the songs.
-
Select the track assign mode.
INITIAL:
Factory-preset settings.
TECHNICS MULTI RECORDING:
The optimum track assignment for multiplex recording.
GM MULTI RECORDING:
The optimum track assignment for creating GENERAL MIDI data.
-
Press the OK button.
-
"COMPLETED!" is shown on the display and the selected track assign mode is enabled.
- You can confirm the track assignment settings on the TRACK ASSIGN display.


Part IV Sequencer
Quantize
The QUANTIZE function can correct the timing of your performance after it has been recorded. If the rhythm is slightly out of sync or inexact, it will automatically be corrected to the specified quantize level.
- On the SEQ MENU display, select RECORD & EDIT.
- On the RECORD & EDIT display, select QUANTIZE.
• The display looks similar to the following.
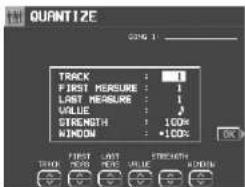
Rhythm as written in the score
Timing of actual performance
Quantized performance

-
Use the TRACK ∧ and ∨ buttons to specify the track number.
-
You cannot select the track for the CONTROL, RHYTHM or CHORD part.
• If ALL is selected, all the tracks are quantized. - Use the FIRST MEAS ∧ and ∨ buttons to specify the start point (measure number).
- Use the LAST MEAS ∧ and ∨ buttons to specify the end point (measure number).
- Use the VALUE ∧ and ∨ buttons to specify the quantize level.
-
Select from ♩, ♩, ♩3, ♩, ♩3, ♩, ♩3. (A 3 denotes a triplet-type note.)
-
Use the STRENGTH ∧ and ∨ buttons to select the amount of quantize (%).
- 100% is a convenient setting. When set to 100%, the performance data is quantized exactly to the level specified for the VALUE ("just"). For example, at 50%, the data is quantized to a point that is half that of the just level. By this setting, you can attain an effect that is very slightly off-beat from the rhythm.
- Use the WINDOW ∧ and ∨ buttons to specify the range (%) affected by the quantize setting.
- With the increment set to 100 for the VALUE, at a + setting, data close to the just point is corrected, and at a - setting, data far from the just point is corrected. For example, if set to -30% the quantize function affects data far from the just point, and if set to +30% the quantize function affects data close to the just point. +100% is usually a convenient setting.
- The +100% setting and the -100% setting are the same.
Example: When VALUE is set to ♪
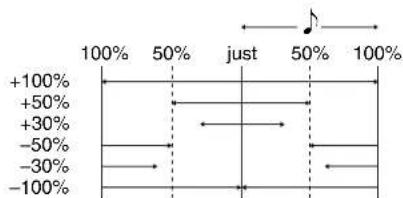
bar
| Change (%) | Value | |---|---| | +100% | 100 | | +50% | 50 | | +30% | 30 | | -50% | 20 | | -30% | 10 | | -100% | 0 |- Press the OK button.
- The confirmation display appears. Press the YES button to execute the function, or press the NO button to cancel the function.
Part IV Sequencer
Song Clear
Erase the recorded contents of all tracks.
- On the SEQ MENU display, select RECORD & EDIT.
- On the RECORD & EDIT display, select SONG CLEAR.
• The display looks similar to the following.

-
Use the SONG No./ALL ∧ and ∨ buttons to specify the number of the song to erase.
-
The data size (KB) and the total amount of SEQUENCER memory or current song memory used is shown as a percentage (%) to the right of the song name.
-
If ALL is selected, all the songs recorded in the SEQUENCER will be erased.
-
Press the OK button.
-
The confirmation display appears. Press the YES button to execute the function, or press the NO button to cancel the function.
- If the YES button is pressed, "COMPLETED!" appears on the display, the specified songs are erased.
Track Clear
Erase the contents of a specific track.
- On the SEQ MENU display, select RECORD & EDIT.
- On the RECORD & EDIT display, select TRACK CLEAR.
• The display looks similar to the following.
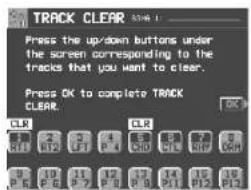
- Use the balance buttons to select the track or tracks you wish to clear.
-
A "CLR" mark is shown for the selected tracks.
-
Press the OK button.
-
The confirmation display appears. Press the YES button to execute the function, or press the NO button to cancel the function.
- If the YES button is pressed, the specified tracks are erased.
Part IV Sequencer
Note Edit
You can edit performance (NOTE) data on a piano roll display. This differs from the normal STEP RECORD edit procedure, and is a convenient way to check the data for each note.
- Data other than NOTE data cannot be corrected or recorded. To correct or record other types of data, use the STEP RECORD display. (Refer to page 86.)
- On the SEQ MENU display, select RECORD & EDIT.
-
On the RECORD & EDIT display, select NOTE EDIT.
-
On the PART SELECT display, select a track.
• The CHORD, RHYTHM and CONTROL tracks cannot be selected.
• The display looks similar to the following.

- Use the MEAS ▲ and ▼ buttons to select the measure you wish to edit.
- Use the CURSOR ◀ and ▶ buttons to move the cursor (▼) to the point you wish to edit.
- Recorded performance (NOTE) data is shown as horizontal bars. Data selected for editing is highlighted.
- You can use the INC ∧ and ∨ buttons to change the increment of cursor movement. The resolution can be set at ♩/96. However, if NOTE data is present between increments, the cursor will stop.
- Use the POS ▲ and ▼ buttons to change the value.
• Example: 10.2.48 indicates a point in measure 10, beat 2, point 48 (one point is 1/96 of a quarter note [ ♪]). -
is shown at the point where the END command is stored.
-
Select the data to edit (it changes to a highlighted horizontal bar). Edit the data.
- Use the POS ▲ and ▼ buttons to move the cursor, the NOTE ∧ and ∨ buttons to change the note number, the VEL ∧ and ∨ buttons to change the velocity (how hard the keys are played), and the LEN ∧ and ∨ buttons to change the note length (1 = 1/96 of a quarter note [♩]).
- Use the GRAPH ▲ and ▼ buttons to view a higher or lower section of the keyboard (in one-octave steps).
- If the ERS button is pressed, the selected NOTE data is erased.
- Repeat steps 4 to 6 to continue editing.
- Inserting note data
You can also store note data on this display.
-
Specify the point where the new note data will be stored.
-
Use the LEN ∧ and ∨ buttons to specify the note length.
• Examples of note lengths ( ♪ = 96) 91: tenuto (95%)
76: normal (80%)
48: staccato (50%)
24: cutting (25%)
- Play a key on the keyboard to specify the note pitch (NOTE NUMBER) and velocity (how hard the key is played).
- Repeat steps 1 to 3 to input more note data.
Part IV Sequencer
CYCLE PLAY
You can aurally check the data you are editing by accessing the CYCLE PLAY display from the NOTE EDIT display.
- If you wish other tracks to be played back, they should be selected beforehand on the SEQUENCER PLAY display. (Refer to page 81.)
- On the NOTE EDIT display, press the PLAY button.
• The display looks similar to the following.
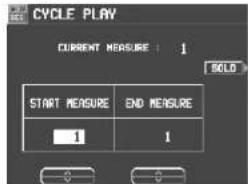
- Use the START MEASURE ∧ and ∨ buttons to select the beginning playback measure.
-
Use the END MEASURE ∧ and ∨ buttons to select the last playback measure.
-
Press the START/STOP button.
-
Cycle playback of the specified measures begins.
-
If the SOLO button is turned on, playback changes to that of the recording track only. If it is turned off, all the tracks specified on the SEQUENCER PLAY display are played back.
-
To stop cycle playback, press the START/STOP button again.
- During playback stop, if the SEQUENCER RESET (FILL IN 1) button is pressed, the SEQUENCER returns to the measure number specified in step 2. If the SEQUENCER RESET button is pressed again, the SEQUENCER returns to measure 1.
Drum Edit
The DRUMS part can be edited on a specialized display. This differs from the normal STEP RECORD edit procedure, and is a convenient way to check the data for each note.
- On the SEQ MENU display, select RECORD & EDIT.
- On the RECORD & EDIT display, select DRUM EDIT.
- On the PART SELECT display, select the track for the DRUMS part.
• The CHORD, RHYTHM and CONTROL tracks cannot be selected.
• The display looks similar to the following.
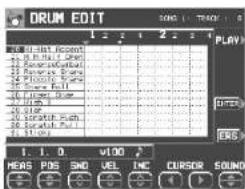
- Use the SOUND ∧ and ∨ buttons to select the percussion instrument you wish to edit.
- The number to the left of the instrument name is its MIDI NOTE NUMBER in the Technics arrangement.
-
If sounds other than percussion instrument sounds are assigned, they are not displayed.
-
Use the MEAS ▲ and ▼ buttons to select the measure you wish to edit.
-
Use the CURSOR ◀ and ▶ buttons to move the cursor (▼) to the point you wish to edit.
- Recorded performance data is shown as vertical bars. Data selected for editing is highlighted.
- You can use the INC ∧ and ∨ buttons to change the increment of cursor movement. The resolution can be set at ♩/96. However, if NOTE data is present between increments, the cursor will stop.
- Use the POS ▲ and ▼ buttons to change the value.
(Continued on the next page)
Part IV Sequencer
Example: 10.2.48 indicates a point in measure 10, beat 2, point 48 (one point is 1/96 of a quarter note [•]).
- is-shown at the point where the END command is stored.
- Select the data to edit (it changes to a long bar). Edit the data.
- Use the POS ▲ and ▼ buttons to move the cursor, the SND ∧ and ∨ buttons to change the percussion instrument sound, and the VEL ∧ and ∨ buttons to change the velocity (how hard the keys are played).
- If the ERS button is pressed, the selected NOTE data is erased.
- Repeat steps 4 to 7 to continue editing.
■ Inserting DRUMS data
You can also store DRUMS data on this display.
- Specify the point where the new note data will be stored.
- Use the VEL ∧ and ∨ buttons to specify the velocity (how hard the key is played).
- Press the ENTER button to store the data.
• Instead of the ENTER button, you can store data (including velocity data) by playing the keyboard. In this case, the instrument is that specified on the display, regardless of which key is played. - Repeat steps 1 to 3 to input more DRUMS data.
CYCLE PLAY
You can aurally check the data you are editing by accessing the CYCLE PLAY display from the DRUM EDIT display.
• The procedure is the same as for NOTE EDIT.
- If you wish other tracks to be played back, they should be selected beforehand on the SEQUENCER PLAY display. (Refer to page 81.)
Part IV Sequencer
Copy and paste the recorded data
You can copy and paste specific portions of the recorded data.
Select the function
- On the SEQ MENU display, use the SONG SELECT^ and ∨ buttons to select the number of the song. Then select COPY & PASTE.
• The display looks similar to the following.
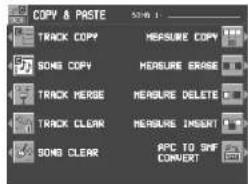
- On the COPY & PASTE display, select a function.
- Perform the editing procedures. (See below.)
- During the editing procedure, if the indicator for the TEMPO/PROGRAM is lit, you can use the TEMPO/PROGRAM for the editing function.
SONG COPY
Copy all the recording data of a song to a specific song memory.

- On the FROM side, use the SONG ∧ and ∨ buttons to select the song number you wish to copy from.
-
On the TO side, use the SONG ∧ and ∨ buttons to select the song number to copy to.
-
Press the OK button.
- The confirmation display appears. Press the YES button to execute the function, or press the NO button to cancel the function.
TRACK COPY
Copy the recorded data from specific tracks of a song.
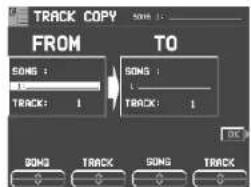
-
Specify the track you wish to copy from.
-
On the FROM side, use the SONG ∧ and ∨ buttons and TRACK ∧ and ∨ buttons to specify a track.
-
If ALL is selected, all the tracks of the specified song number will be copied.
-
Specify the track you wish to copy to (TO side).
-
Press the OK button.
-
The confirmation display appears. Press the YES button to execute the function, or press the NO button to cancel the function.
- The track assignment settings are also copied. Note that in some cases, the CONTROL, RHYTHM and CHORD part data in the destination tracks may be lost.


Part IV Sequencer
TRACK MERGE
Merge the recorded contents of two tracks (source tracks) and store the merged contents in a third track (destination track).
- When the TRACK MERGE function is executed, the data is erased from the two source tracks.
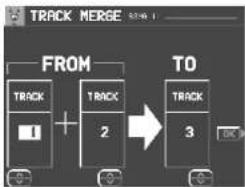
flowchart
graph LR
    A["TRACK 1"] --> C["TO"]
    B["TRACK 2"] --> C["TO"]
    D["Start"] --> E["OK"]
-
Select the two source tracks (FROM).
-
On the FROM side, use the TRACK ∧ and ∨ buttons to select the two source tracks.
- You cannot select the track to which the CONTROL, RHYTHM or CHORD part has been assigned.
-
If the part assigned to the left source track ("left" meaning its position on the TRACK MERGE display) is different from the part assigned to the right source track, when the parts are merged in the destination track, the new track is assigned the same part as the left track.
-
Select the destination track (TO).
- Use the TRACK ∧ and ∨ buttons to the right of the display to specify the track number.
- Press the OK button.
- The confirmation display appears. Press the YES button to execute the function, or press the NO button to cancel the function.
MEASURE COPY
Copy recorded data of specified measures to a specified point.
- On the destination track, the new data replaces the current measure contents.

flowchart
graph LR
    A["FROM TRACK"] --> B["TO TRACK"]
    B --> C["START MEASURE"]
    C --> D["REPERT"]
- Specify the measures you wish to copy from the source track (FROM).
- On the FROM side, specify the settings with the corresponding buttons.
TRACK:
Specify the track number you wish to copy the measures from.
- You cannot select the track for the RHYTHM part or CHORD part in which a repeat command has been stored.
- If ALL is selected, the specified measures are copied to all tracks at the same time.
FIRST MEAS:
Specify the first measure to copy.
LAST MEAS:
Specify the last measure to copy.
- Specify where you wish to copy the selected measures to.
- On the TO side, specify the settings with the corresponding buttons.
TRACK:
Specify the track number you wish to copy to.
- Measures in a track for the CONTROL, RHYTHM or CHORD part can be copied only to the same track.
START MEAS:
Specify the start point to copy the selected measures to.
REPEAT:
Specify the number of times the selected measures are to be repeated.
-
Press the OK button.
-
The confirmation display appears. Press the YES button to execute the function, or press the NO button to cancel the function.
- Note that if the END command is included in the source data, it is also copied. Any data following the END command is not copied.
Part IV Sequencer
MEASURE ERASE
Erase the recorded contents of specific measures. You can also specify which type of data is to be erased.
- Note that only the contents of the measures are erased, not the measures themselves; the length of the performance remains the same.

- Use the TRACK ∧ and ∨ buttons to specify the track number.
- This function does not work for the RHYTHM part or CHORD part in which a repeat command has been stored.
- If ALL is selected, data is erased from the specified measures of all the tracks at one time.
- Use the FIRST MEAS ∧ and ∨ buttons to specify the start point (measure number).
- Use the LAST MEAS ∧ and ∨ buttons to specify the end point (measure number).
- Use the ERASE DATA ∧ and ∨ buttons to specify the type of data to be erased.
ALL: All data is erased.
NOTE: Only note data is erased.
CONTROL: Only control data (volume, effect and other panel settings as well as selection changes) is erased.
- Press the OK button.
- The confirmation display appears. Press the YES button to execute the function, or press the NO button to cancel the function.
MEASURE DELETE
Delete specified measures from a track.
- The length of the performance accordingly decreases by the number of deleted measures.
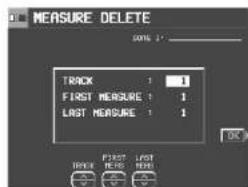
- Use the TRACK ∧ and ∨ buttons to select the track from which measures are to be deleted.
- This function does not work for the CHORD or RHYTHM track in which the repeat function has been stored.
-
If ALL is selected, the specified measures are deleted from all the tracks at one time.
-
Use the FIRST MEAS ∧ and ∨ buttons, to specify the first measure to delete.
-
Use the LAST MEAS ∧ and ∨ buttons to specify the last measure to delete.
-
Press the OK button.
- The confirmation display appears. Press the YES button to execute the function, or press the NO button to cancel the function.


Part IV Sequencer
MEASURE INSERT
Insert specified measures at a specified point.
- The length of the performance accordingly increases by the number of inserted measures.
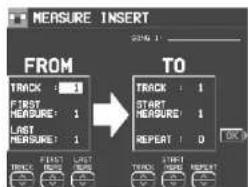
flowchart
graph LR
    A["TRACK : 1"] --> B["FIRST MEASURE : 1"]
    B --> C["LAST MEASURE : 1"]
    C --> D["REPEAT : 0"]
    D --> E["START MEASURE : 1"]
    E --> F["TO"]
    F --> G["REPEAT : 0"]
- Specify the measures you wish to copy from the source track.
- On the FROM side, specify the settings with the corresponding buttons.
TRACK:
Specify the track number you wish to copy the measures from.
- This function does not work for the CHORD or RHYTHM track in which the repeat function has been stored.
- If ALL is selected, the measures are inserted in all tracks at the same time.
FIRST MEASURE:
Specify the first measure to copy.
LAST MEASURE:
Specify the last measure to copy.
- Specify where you wish to insert the selected measures.
- On the TO side, specify the settings with the corresponding buttons.
TRACK:
Specify the track number.
• Measures from the CHORD, RHYTHM or CONTROL track can only be inserted in the same track.
START MEASURE:
Specify the start point to insert the selected measures.
REPEAT:
Specify the number of times the selected measures are to be repeated.
-
Press the OK button.
-
The confirmation display appears. Press the YES button to execute the function, or press the NO button to cancel the function.
- Note that if the END command is included in the source data, it is also inserted. Any data following the END command is not inserted.
100
QQTG0692
APC TO SMF CONVERT
This function converts data to Standard MIDI File (SMF) format, allowing you to play back song data created using this instrument's automatic accompaniment and/or PERFORMANCE PADS on an external sequencer or sound generator.

-
Use the TR ▲ and ▼ buttons to select the track you wish to convert.
-
In the PART column, the part name currently assigned is shown.
- In the DATA column, a check mark (√) indicates a track in which data is stored.
-
Tracks in which RHYTHM, CONTROL, APC and CHORD parts are stored cannot be selected (--- is shown).
-
Use the APC/PAD ∧ and ∨ buttons to select the parts you wish to convert.
- Parts that are set to OFF will not be converted.
-
Press the CONVERT button.
-
Note that after the conversion, the APC/CHORD part data is cleared; if necessary, save this data beforehand.
- A confirmation display appears. Press EXECUTE to continue with the conversion, or press the CANCEL button is you wish to discontinue.
• After the EXECUTE button is pressed, the conversion begins. Conversion takes the same length of time as playback. - If you wish to discontinue the conversion process midway, press the ABORT button.

Part IV Sequencer
Changing the note position etc. of the recorded data
You can change the note pitch and position etc. of recorded data.
Select the function
- On the SEQ MENU display, use the SONG ∧ and ∨ buttons to select the number of the song. Then select RANGE EDIT.
• The display looks similar to the following.

-
On the RANGE EDIT display, select a function.
-
Perform the editing procedures. (See below.)
- During the editing procedure, if the indicator for the TEMPO/PROGRAM is lit, you can use the TEMPO/PROGRAM for the editing function.
NOTE CHANGE
Change of pitch of specified notes.

- Use the TRACK ∧ and ∨ buttons to select the track you wish to edit.
- You cannot select the track for the CONTROL, RHYTHM or CHORD part.
- If ALL is selected, all tracks will be edited.
-
Use the FIRST MEAS ∧ and ∨ buttons to specify the start point (measure number) of the note change.
-
Use the LAST MEAS ∧ and ∨ buttons to specify the end point (measure number) of the note change.
-
Use the TARGET NOTE ∧ and ∨ buttons to specify the pitch of the note you wish to change.
• The number next to the note name is its note number.
-
Use the CHANGE TO ∧ and ∨ buttons to specify the pitch you wish to change to.
-
Press the OK button.
- The confirmation display appears. Press the YES button to execute the function, or press the NO button to cancel the function.


Part IV Sequencer
VELOCITY CHANGE
Modify the recorded velocity in specific measures of specific tracks.

- Use the TRACK ∧ and ∨ buttons to select the track you wish to edit.
- You cannot select the track for the CONTROL, RHYTHM or CHORD part.
• If ALL is selected, all tracks will be edited. - Use the FIRST MEAS ∧ and ∨ buttons to specify the start point (measure number) of the velocity change.
- Use the LAST MEAS ∧ and ∨ buttons to specify the end point (measure number) of the velocity change.
- Use the VELOCITY ∧ and ∨ buttons to specify the change in velocity.
- The value you select will be added to or deleted from the current velocity.
- Press the OK button.
- The confirmation display appears. Press the YES button to execute the function, or press the NO button to cancel the function.
TRANSPOSE
Change of key of specific measures of specific tracks.

- Use the TRACK ∧ and ∨ buttons to select the track you wish to edit.
- You cannot select the track for the CONTROL, RHYTHM or CHORD part.
-
If ALL is selected, all tracks will be edited.
-
Use the FIRST MEAS ∧ and ∨ buttons to specify the start point (measure number) of the transpose.
- Use the LAST MEAS ∧ and ∨ buttons to specify the end point (measure number) of the transpose.
- Use the TRANSPOSE ∧ and ∨ buttons to specify the change in pitch.
- Increments are in semitones. A value of 12 is one octave. A – value lowers the pitch, and a + value raises it.
- Press the OK button.
- The confirmation display appears. Press the YES button to execute the function, or press the NO button to cancel the function.
Part IV Sequencer
ADVANCE/DELAY
Speed up or delay the sound production of spec-ified performance data.

- Use the TRACK ∧ and ∨ buttons to select the track you wish to edit.
- You cannot select the track for the CONTROL, RHYTHM or CHORD part.
• If ALL is selected, all tracks will be edited.
-
Use the FIRST MEAS ∧ and ∨ buttons to specify the start point (measure number) of the change.
-
Use the LAST MEAS ∧ and ∨ buttons to specify the end point (measure number) of the change.
-
Use the ADVANCE/DELAY ∧ and ∨ buttons to accelerate or delay the timing of the sound production (-96 to +96).
- A + value causes the notes to sound later, and a - value causes the notes to sound earlier.
- Press the OK button.
- The confirmation display appears. Press the YES button to execute the function, or press the NO button to cancel the function.
SD Audio Synchro (KN2600)
The sound data on the SD card in the SD slot can be synchronized with SEQUENCER playback.
- On the SEQ MENU display, press the SD AUDIO SYNCHRO button.
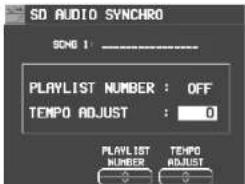
-
Use the PLAYLIST NUMBER ∧ and ∨ buttons to select the number you wish to synchronize from the PLAYLIST.
-
Play back the SEQUENCER song. (Refer to page 81.)
When creating SEQUENCER data that is synchronized with SD AUDIO data, the environment in which the SD AUDIO data was created may result in data that is slightly out of sync with the SEQUENCER. When this occurs use the TEMPO ADJUST feature to compensate for this timing discrepancy (-127 to +127).
THE FOLLOWING APPLIES ONLY IN THE U.S.A. AND CANADA
THE FOLLOWING APPLIES ONLY IN THE U.S.A.


CAUTION: TO REDUCE THE RISK OF ELECTRIC SHOCK, DO NOT REMOVE SCREWS. NO USER-SERVICEABLE PARTS INSIDE. REFER SERVICING TO QUALIFIED SERVICE PERSONNEL.

The lightning flash with arrowhead symbol, within an equilateral triangle, is intended to alert the user to the presence of uninsulated "dangerous voltage" within the product's enclosure that may be of sufficient magnitude to constitute a risk of electric shock to persons.

The exclamation point within an equilateral triangle is intended to alert the user to the presence of important operating and maintenance (servicing) instructions in the literature accompanying the appliance.
(for U.S.A. and Canada)
CAUTION: TO PREVENT ELECTRIC SHOCK MATCH WIDE BLADE OF PLUG TO WIDE SLOT, FULLY IN- SERT.
WARNING: TO REDUCE THE RISK OF FIRE, ELECTRIC SHOCK OR PRODUCT DAMAGE, DO NOT EXPOSE THIS APPARATUS TO RAIN, MOISTURE, DRIPPING OR SPLASHING AND THAT NO OBJECTS FILLED WITH LIQUIDS, SUCH AS VASES, SHALL BE PLACED ON THE APPARATUS.
THE FOLLOWING APPLIES ONLY IN THE U.S.A.
Notice:
This product has a fluorescent lamp that contains a small amount of mercury. It also contains lead in some components. Disposal of these materials may be regulated in your community due to environmental considerations. For disposal or recycling information please contact your local authorities, or the Electronics Industries Alliance: http://www.eiae.org
CAUTION:
This equipment has been tested and found to comply with the limits for a Class B digital device, pursuant to Part 15 of the FCC Rules. These limits are designed to provide reasonable protection against harmful interference in a residential installation. This equipment generates, uses and can radiate radio frequency energy and, if not installed and used in accordance with the instructions, may cause harmful interference to radio communications. However, there is no guarantee that interference will not occur in a particular installation. If this equipment does cause harmful interference to radio or television reception, which can be determined by turning the equipment off and on, the user is encouraged to try to correct the interference by one or more of the following measures:
- Reorient or relocate the receiving antenna.
- Increase the separation between the equipment and receiver.
- Connect the equipment into an outlet on a circuit different from that to which the receiver is connected.
- Consult the dealer or an experienced radio/TV technician for help.
FCC Warning:
To assure continued FCC emission limit compliance, use only the provided power supply cord and the shielded interface cable when connecting this device to the computer.
Also, any unauthorized changes or modifications to this equipment would void the user's authority to operate this device.
This device complies with Part 15 of the FCC Rules. Operation is subject to the following two conditions: (1) This device may not cause harmful interference, and (2) this device must accept any interference received, including interference that may cause undesired operation.
Responsible Party:
Matshshita Electric Corporation of America
One Panasonic Way
Secaucus, NJ, 07094 USA
Telephone No.: 1-800-211-7262
The model number and serial number are found underneath the keyboard. Please note the model and serial numbers in the space provided below and retain this sheet as a permanent record of your purchase to aid identification in the event of theft. MODEL NUMBER SERIAL NUMBER
THIS UNIT IS INTENDED FOR USE IN TROPICAL CLIMATES. DENNA ENHET ÄR AVSEDD FÖR ANVÄNDNING PÅ PLATSER MED TROPISKT KLIMAT. TÄMÄ LAITE ON TARKOITETTU KÄYTETTÄVÄKSI TROOPPISESSA ILMASTOSSA. DETTE APPARATET ER BEREGNET TIL BRUK UNDER TROPISKE KLIMAFORHOLD.
VAROITUS:
TULIPALO-, SÄHKÖISKUVAARAN TAI TUOTETTA KOHTAAVAN MUUN VAHINGON VÄHENTÄMISEKSI EI LAITETTA SAA ALTISTAA SATEELLE, KOSTEUDELLE, VESIPISAROILLE TAI ROISKEELLE, EIKÄ NESTETTÄ SISÄLTÄVIÄ ESINEITÄ, KUTEN ESIMERKIKSI MALJAKOITA, SAA ASETTAA LAITTEEN PÄÄLLE.
ADVARSEL:
FOR Å REDUSERE FAREN FOR BRANN, ELEKTRISK ST∅T ELLER SKADER PÅ PRODUKTET, MÅ DETTE APPARATET IKKE UTSETTES FOR REGN, FUKTIGHET, VANNDRÅPER ELLER VANNSPRUT. DET MÅ HELLER IKKE PLASSERES GJENSTANDER FYLT MED VANN, SLIK SOM BLOMSTERVASER, OPPÅ APPARATET.
OSTRZEŻENIE:
ABY OGRANICZYĆ NIEBEZPIECZEŃSTWO POŻARU, PORAŻENIA PRĄDEM LUB USZKODZENIA URZĄDZENIA, NIE NALEŻY WYSTAWIAĆ URZĄDZENIA NA DZIAŁANIE DESZCU, WILGOCI, KAPANIE LUB ZACHŁAPANIE; PONADTO NA URZĄDZENIU NIE NALEŻY USTAWIAĆ ŻADNYCH NACZYŃ ZAWIERAJĄCYCH PŁYNY, TAKICH JAK WAZONY,
WARNING:
FÖR ATT MINSKA RISKEN FÖR ELDSVÅDA, ELEKTRISKA STÖTAR OCH SKADOR PÅ PRODUKTEN FÅR DEN INTE UTSÄTTAS FÖR REGN, FUKTIGHET, VATTENDROPPAR ELLER VATTENSTÄNK, OCH INGA FÖREMÅL SOM ÄR FYLLDA MED VÄTSKA, SÅ SOM VASER, BÖR PLACERAS PÅ APPARATEN.
AVISO:
PARA REDUZIR O RISCO DE INCÊNDIO, CHOQUE ELÉCTRICO OU AVARIAS, NÃO EXPONHA O APA-RELHO À CHUVA, HUMIDADE, PINGOS OU SALPICOS NEM COLOQUE EM CIMA DELE OBJECTOS COM LÍQUIDOS COMO, POR EXEMPLO, UM JARRO.
CAUTION!
• DO NOT INSTALL OR PLACE THIS UNIT IN A BOOKCASE, BUILT-IN CABINET OR IN ANOTHER CONFINED SPACE. ENSURE THE UNIT IS WELL VENTILATED. TO PREVENT RISK OF ELECTRIC SHOCK OR FIRE HAZARD DUE TO OVERHEATING, ENSURE THAT CURTAINS AND ANY OTHER MATERIALS DO NOT OBSTRUCT THE VENTILATION VENTS.
- DO NOT OBSTRUCT THE UNIT'S VENTILATION OPENINGS WITH NEWSPAPERS, TABLECLOTHS, CURTAINS, AND SIMILAR ITEMS.
• DO NOT PLACE SOURCES OF NAKED FLAMES, SUCH AS LIGHTED CANDLES, ON THE UNIT.
• DISPOSE OF BATTERIES IN AN ENVIRONMENTALLY FRIENDLY MANNER.
VAROITUS!
• ÄLÄ ASENNA TAI LAITA TÄTÄ LAITETTA KABINETTITYPPISEEN KIRJAKAAPPIIN TAI MUUHUN SULJETTUUN TILAAN, JOTTA TUULETUS ONNISTUISI. VARMISTA, ETTÄ VERHO TAI MIKÄÄN MUU MATERIALI EI HUONONNA TUULETUSTA, JOTTA VÄLTETTÄISIIN YLIKUUMENEMISESTA JOHTUVA SÄHKÖISKU-TAI TULIPALOVAARA.
- ÄLÄ PEITÄ LAITTEEN TUULETUSAUKKOJA SANO-MALEHDELLÄ, PÖYTÄLIINALLA, VERHOLLA TAI MUULLA VASTAAVALLA ESINEELLÄ.
- ÄLÄ ASETA PALAVAA KYNTTILÄÄ TAI MUUTA AVOTULEN LÄHDETTÄ LAITTEEN PÄÄLLE.
- HÄVITÄ PARISTOT LUONTOA VAHINGOITTAMATTOMALLA TAVALLA.
ADVARSEL!
- APPARATET MÅ IKKE PLASSERES I EN BOKHYLLE, ET INNEBYGGET KABINETT ELLER ET ANNET LUKKET STED HVOR VENTILASJONSFORHOLDENE ER UTILSTREKKELIGE. S∅RG FOR AT GARDINER ELLER LIGNENDE IKKE FORVERRER VENTILASJONSFORHOLDENE, SÅ RISIKO FOR ELEKTRISK SJOKK ELLER BRANN FORÅRSAKET AV OVERHETING UNNGÅS.
- APPARATETS VENTILASJONSÅPNINGER MÅ IKKE DEKKES TIL MED AVISER, BORDDUKER, GARDINER OG LIGNENDE.
- PLASSER IKKE ÅPEN ILD, SLIK SOM LEVENDE LYS, OPPÅ APPARATET.
- BRUKTE BATTERIER MÅ KASSERES UTEN FARE FOR MILJ∅ET.
UWAGA!
• NINIEJSZEGO URZĄDZENIA NIE NAŁEŻY INSTALOWAĆ LUB UMIESZCAĆ W SZAFCE NA KSIĄŻKI, ZABUDOWANEJ SZAFCE LUB INNEJ OGRANICZONEJ PRZESTRZENI, W CELU ZAPEWNIENIA DOBREJ WENTYLACJI. NAŁEŻY SIĘ UPEWNIĆ, ŻE ZASŁONY I INNE MATERIAŁY NIE ZASŁANIAJA OTWORÓW WENTYLACYJNYCH TAK, ABY ZAPOBIEC RZYKYU PORAŻENIA PRADEM LUB POŻARU W WYNIKU PRZEGRZANIA.
• NIE ZASŁANIAJ OTWORÓW WENTYLACYJNYCH URZĄDZENIA GAZETAMI, OBRUSAMI, ZASŁONAMI I PODOBNYMI PRZEDMIOTAMI.
• NIE UMIESZCZAJ NA URZĄDZENIU ŻRÓDEŁ OTWARTEGO OGNIA, TAKICH JAK ZAPALONE ŚWIECE.
- POZBYWAJ SIĘ ZUŻYTYCH BATERII W SPOSÓB NIE ZAGRAŻAJĄCY ŚRODOWISKU NATURALNEMU.
WARNING!
• FÖR ATT APPARATEN SKA FÅ GOD VENTILATION, INSTALLERA ELLER PLACERA DEN INTE I EN BOKHYLLA, ETT INBYGGT SKÅP ELLER I ANDRA BEGRÅNSADE UTRYMMEN. FÖR ATT FÖREBYGGA RISK FÖR ELSTÖTAR OCH BRAND PÅ GRUND AV ÖVERHETTNING, KONTROLLERA ATT GARDINER ELLER ANDRA FÖREMÅL INTE FÖRHINDRAR APPARATENS VENTILERING.
- SE TILL ATT ENHETENS VENTILATIONSÖPPNINGAR INTE ÄR FÖRTÄPPTA AV TIDNINGAR, BORDSDUKAR, GARDINER ELLER LIKNANDE FÖREMÅL.
• STÄLL INGA FÖREMÅL MED ÖPPEN LÅGA, SÅ SOM ETT TÄNT STEARINLJUS, OVANPÅ ENHETEN.
• GÖR DIG AV MED BATTERIER PÅ ETT MILJÖVÄNLIGT SÄTT.
AVISO!
• NÃO INSTALE OU COLOQUE ESTE APARELHO DENTRO DE UMA ESTANTE, ARMÁRIO EMBUTIDO OU QUALQUER OUTRO ESPAÇO FECHADO. VERIFIQUE SE EXISTE UMA BOA VENTILAÇÃO PARA O APARELHO. PARA EVITAR O RISCO DE CHOQUE ELÉCTRICO OU INCÊNDIO PROVOCADO POR SOBREAQUECIMENTO, CERTIFIQUE-SE DE QUE AS ABERTURAS DE VENTILAÇÃO NÃO ESTÃO TAPADAS COM AS CORTINAS OU QUALQUER OUTRO MATERIAL.
- NÃO TAPE AS RANHURAS DE VENTILAÇÃO COM JORNAIS, TOALHAS, CORTINADOS OU OBJECTOS SEMELHANTES.
• NÃO COLOQUE OBJECTOS COM CHAMAS, COMO VELAS ACESAS, EM CIMA DO APARELHO.
- DEITE FORA AS PILHAS RESPEITANDO AS REGRAS DE DEFESA DO AMBIENTE.
只限於台灣
緊急處理方法
IMPORTANT SAFETY INSTRUCTIONS
Read these operating instructions carefully before using the unit. Follow the safety instructions on the unit and the safety precautions listed below. Keep these operating instructions handy for future reference.
Safety
- Power Source—Connect the unit to a power source of the type described in these instructions or as marked on the unit.
- Polarization—The unit is equipped with a polarized power plug where one blade is wider than the other. This safety feature ensures that the plug fits into your household AC outlet only one way. If the plug doesn't fit one way, try reversing it. If the plug still doesn't fit, contact an electrician to replace the obsolete outlet. Do not attempt to defeat the safety purpose of the plug.
- Power Cord protection—Route the AC power supply cord so that it will not be walked on or pinched by items placed on or against it. Never take hold of the plug or cord with wet hands. Always grasp the plug body firmly when connecting and disconnecting it.
- Overloading—When connecting the AC power supply cord, be careful not to overload the household AC outlet, extension cord, or outlet from any other device as this can result in fire or electric shock.
- Nonuse periods—Turn the unit off when it is not in use. Unplug the unit from the household AC outlet if it is not to be used for a long time. Unplug the unit during lightning storms.
- Attachments and accessories—Use only the attachments and accessories recommended in these operating instructions.
Installation
Placement
- Ventilation—Situate the unit so that it receives proper ventilation. Do not install in a confined space such as a bookcase or cabinet. Allow at least 10 cm (4 inches) clearance from the rear of the unit. To prevent the risk of electric shock or fire due to overheating ensure curtains and other materials do not obstruct the unit's ventilation.
- Foreign material—Ensure objects and liquids do not get into the unit. Avoid exposing the unit to excessive smoke, dust, mechanical vibration, and shock.
- Magnetism—Situate the unit away from equipment and devices that generate strong magnetic fields.
- Stacking—Do not place heavy objects on top of this unit.
-
Surface—Place the unit on a flat, level surface.
-
Carts and stands—Use the unit only with carts and stands recommended by the manufacturer. Move carts with care. Sudden stops, excessive force, and uneven surfaces can cause carts to overturn.

- Wall and ceiling mounting—Do not mount the unit on walls or ceilings unless specified in the instructions.
Environment
- Water and moisture—Do not use the unit near water, such as near a bathtub or swimming pool. Avoid damp basements.
- Heat—Situate the unit away from heat sources, such as radiators.
Do not situate where temperatures fall below 5^ C ( 41^ F) or rise above 35^ C ( 95^ F).
Maintenance
(See page 6 for details.)
Unplug the unit from the household AC outlet before cleaning.
Clean with a damp cloth.
Do not use abrasive pads, scouring powders, or solvents.
Service
- Damage Requiring Service—The unit should be serviced by qualified service personnel if:
(a) The AC power supply cord or the plug has been damaged; or
(b) Objects or liquids have gotten into the unit; or
(c) The unit has been exposed to rain; or
(d) The unit does not operate normally or exhibits a marked change in performance; or
(e) The unit has been dropped or the cabinet damaged.
- Servicing—Do not attempt to service the unit beyond that described in these operating instructions. Refer all other servicing to authorized servicing personnel.
- Replacement parts—When parts need replacing ensure the servicer uses parts specified by the manufacturer or parts that have the same characteristics as the original parts. Unauthorized substitutes may result in fire, electric shock, or other hazards.
- Safety check—After repairs or service, ask the servicer to perform safety checks to confirm that the unit is in proper working condition.
Cautions for safest use of this unit
Installation location
- A well-ventilated place.
Take care not to use this unit in a place where it will not receive sufficient ventilation, and not to permit the ventilation holes to be covered by curtains, or any similar materials. - Place away from direct sunlight and excessive heat from heating equipment.
- A place where humidity, vibration and dust are minimized.
Power source
- Be sure the line voltage selector is in accordance with local voltage in your area before connecting the plug to the socket.
- DC power cannot be used.
Handling the power cord
- Never touch the power cord, or its plug, with wet hands.
- Don't pull the power cord.
Metal items inside the unit may result in electric shock or damage.
Do not permit metal articles to get inside the unit.
Be especially careful with regard to this point if children are near this unit. They should be warned never to try to put anything inside.
If, nevertheless, some such article does get inside, disconnect the power cord plug from the electrical outlet, and contact the store where the unit was purchased.
If water gets into the unit
Disconnect the power cord plug from the electrical outlet, and contact the store where it was purchased.
As a precaution, it is suggested that flower vases and other containers which hold liquids not be placed on the top of this unit.
If operation seems abnormal
Immediately turn off the power, disconnect the power cord plug from the electrical outlet, and contact the store where it was purchased.
Discontinue using the unit at once. Failure to do so may result in additional damage or some other unexpected damage or accident.
- Because the power source is located inside the unit, it is normal for the cabinet to become warm.
A word about the power cord
If the power cord is scarred, is partially cut or bronken, or has a bad contact, it may cause a fire or serious electrical shock if used. NEVER use a damaged power cord for any appliance. Moreover, the power cord should never be forcibly bent.
Don't touch the inside parts of this unit.
Some places inside this unit have high voltage potential. Never try to remove the top or back panels of this unit, or to touch inside parts by hand or with tools.
Contact someone who is qualified in order to inspect the inside, or to replace a fuse, if such becomes necessary. Never attempt to do these things yourself.
Maintenance
The following suggestions will assist you in keeping the unit in top condition.
- Be sure to switch the instrument off after use, and do not switch the unit on and off in quick succession, as this places an undue load on the electronic components.
- To keep the luster of the surface and buttons, simply use a clean, damp cloth; polish with a soft, dry cloth. Polish may be used but do not use thinners or petro-chemical-based polishes.
-
A wax-based polish may be used on the cabinet, although you will find that rubbing with a soft cloth will suffice.
-
This product may receive radio interference caused by mobile telephones during use. If such interference is apparent, please increase separation between the product and the mobile telephone.
- Keep the SD Memory Card out of the reach of children to prevent them from swallowing it. (KN2600)
SVENSK:
Cautions for safest use of this unit....6
Controls and functions (KN2400).... 10
Controls and functions (KN2600)....12
BASIC FUNCTIONS
Getting started 14
See and listen to the demonstration 16
Add effects 17
Play back commercial song disks (DIRECT PLAY) (KN2400).... 18
Play back SD cards (SD-AUDIO PLAY) (KN2600) 19
Select the registration for a music style (MUSIC STYLIST) 20
Automatic panel settings (ONE TOUCH PLAY).... 22
Store your panel settings (PANEL MEMORY).... 24
Record your performance (SEQUENCER) 25
Save data on an SD card (KN2600) 27
Load rhythm data from a Technics pattern disk
(COMPOSER LOAD) (KN2400).... 29
PRACTICAL APPLICATIONS
About the display 30
Favorites 33
Part I Sounds and effects 35
Overview of sounds and effects.... 35
Selecting sounds.... 36
Digital Drawbar 37
Assigning parts to the keyboard.... 39
Effects 41
Controller 45
Transpose 46
Techni-chord 47
Part II Playing the rhythm 48
Overview of rhythm performance.... 48
Selecting rhythms 49
Playing the rhythm 51
Auto Play Chord....52
Fade In/Fade Out....57
Sound Arranger....59
One Touch Play 60
Music Stylist 60
Music Style Arranger....62
Panel Memory....64
Part III Performance Pads....67
Playing phrases 67
Copying phrases 68
Compile....70
Record a phrase 71
Part IV Sequencer 73
Outline of the Sequencer 73
Sequencer parts....76
Easy Record 77
Realtime Record 78
Sequencer Play....81
Naming....83
Panel Write 83
Song Select....84
Punch Record 84
Step Record 86
Track Assign 91
Quantize....92
Song Clear 93
Track Clear 93
Note Edit 94
Drum Edit 95
Copy and paste the recorded data....97
Changing the note position etc. of the recorded data 101
SD Audio Synchro (KN2600) 103
Part V Composer 104
Outline of the Composer 104
Simple recording method 106
Create a completely new rhythm 106
Chord Modify Change 109
Part Setting 110
Playback 111
Step Record 111
Measure Edit....112
Pattern Copy 115
Part VI Disk Drive (KN2400) 117
Outline of the Disk Drive function.... 117
Outline of the procedure 119
Loading data 120
Direct Play....122
Song Medley 124
Saving data 125
Disk management 128
Set the automatic display when a disk is inserted 130
Part VII SD Card (KN2600) 131
Outline of the SD card.... 131
Loading data 133
SD-Audio Play.... 136
SD-Sound Play 137
Playlist....138
SD Song Medley 139
Saving Data 140
Create an album of your favorite songs 143
SD card management 144
Set the priority of displays.... 145
Part VIII Sound 146
Outline of the Sound 146
Part Setting 147
Mixer 150
Master Tuning 152
Key Scaling 152
Sound Load Option 153
APC Reverb Setting.... 154
Part IX Reverb & Effect 155
Outline of the Reverb & Effect 155
Tone Control 156
Part X Sound Edit....157
Outline of the Sound Edit.... 157
Easy Edit.... 158
Tone Edit....159
Pitch Edit.... 162
Filter Edit.... 163
Amplitude Edit.... 165
LFO Edit....167
Effect Edit.... 168
Controller Edit 169
Store the new sound 169
Part XI Control 171
Outline of Control functions.... 171
Overall Touch Sensitivity 172
Foot Controllers 172
Part XII Customize 174
Outline of Customize functions 174
Display Time Out 175
Data Protection 176
MIDI Setting Load Option.... 176
Part XII MIDI 177
What is MIDI? 177
Outline of MIDI functions.... 179
Part Setting 180
Control Messages 181
Realtime Messages 181
Common Setting 182
Mode Setting.... 183
Input/output Setting.... 183
MIDI Presets 184
Computer Connection 185
Initialize....186
About the performance data....187
Separately sold options 187
Terminals....188
Symptoms which appear to be signs of trouble....189
Error messages....191
Index 193
Specifications 195
■ Supplied accessories
please check the supplied accessories.

□ Music stand
□ CD-ROM
□ AC cord
□ SD Card (KN2600)
Controls and functions (KN2400)

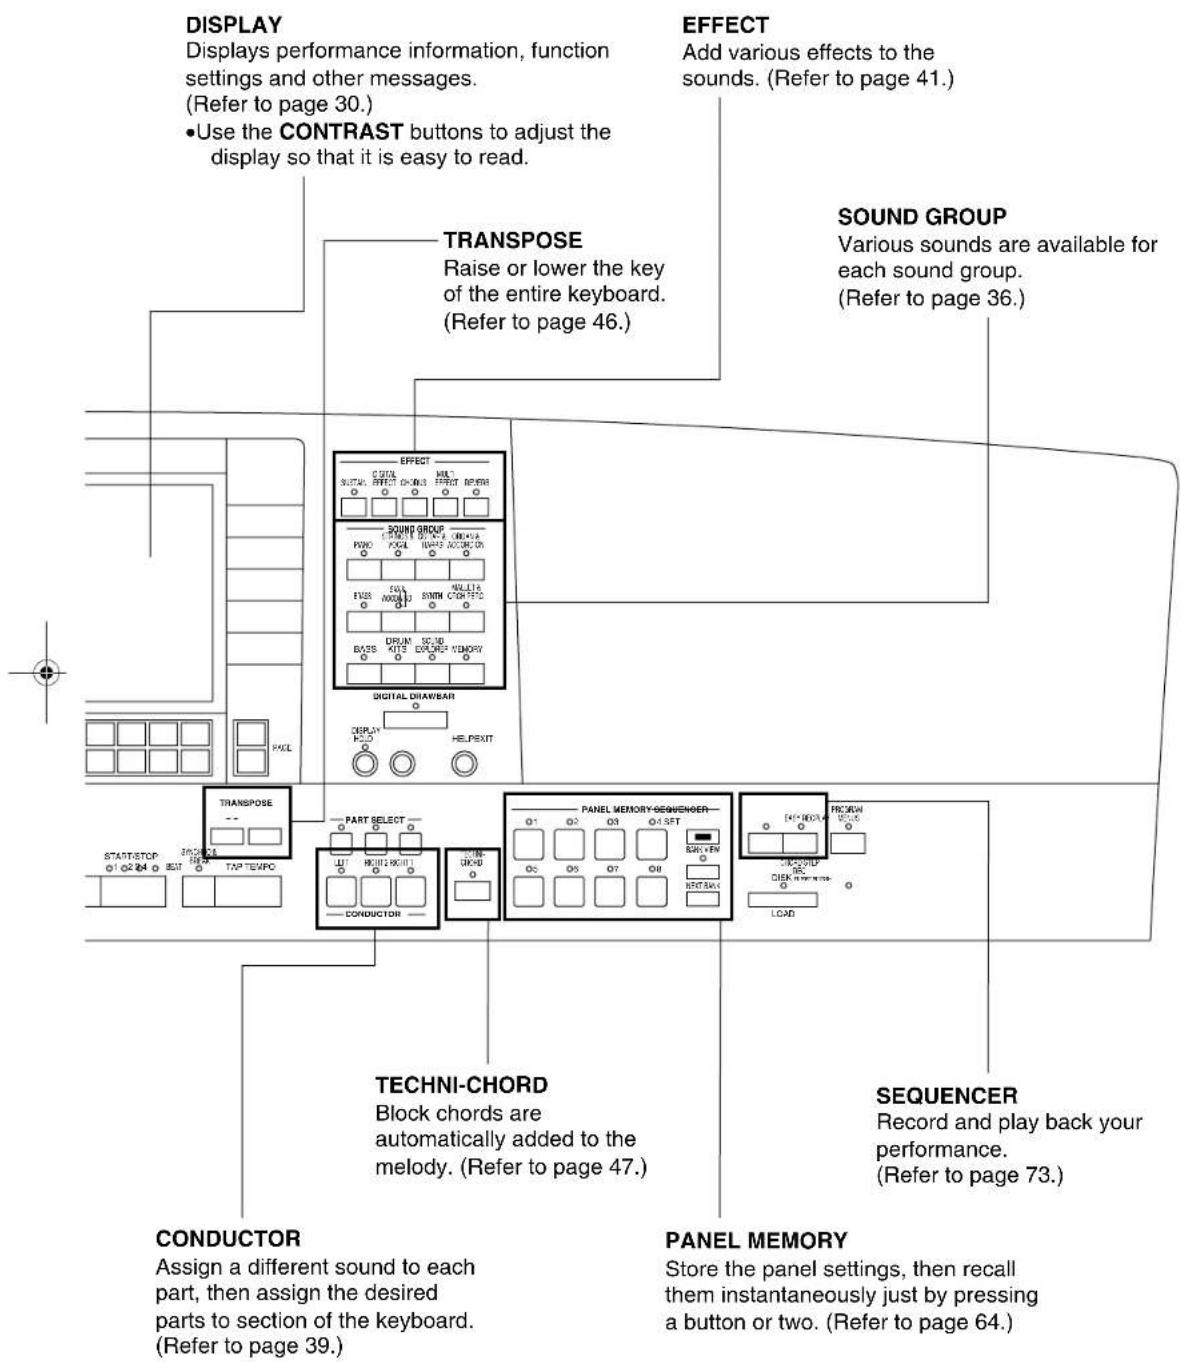
Controls and functions (KN2600)


Getting started
Before you play

natural_image
Pure electrical circuit lines without any symbols1 | Plug the power cord into an outlet.
21 Affix the music stand as shown.
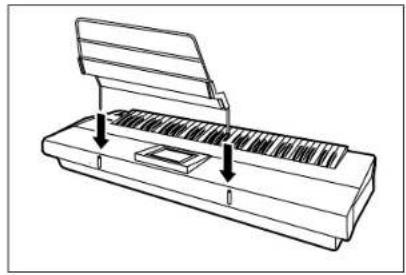
natural_image
Line drawing of a piano keyboard with an open lid and keyway, showing structural components (no text or symbols)3 | Press the POWER button to turn it on. (Located on the left of the keyboard)
- Headphones may be plugged into the PHONES terminal. (Rear panel) This will automatically switch off the speaker system, and sound is heard only through the headphones.
- The pitch of this instrument can be adjusted for when playing with other instruments. (Refer to page 152.)
- Under certain conditions, the functions and memories of this instrument may be initialized when the power is turned on.
14
QQTG0692
Playing
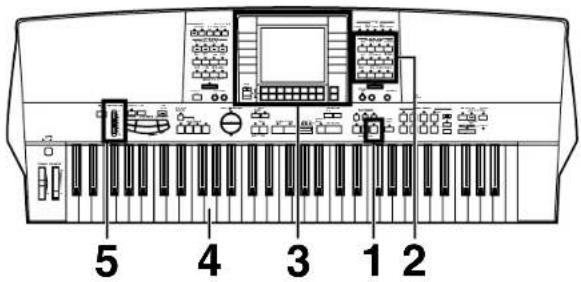
1
In the CONDUCTOR section on the panel, press the RIGHT 1 button to turn it on.
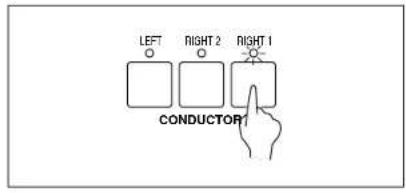
2
In the SOUND GROUP section, press one of the sound buttons.

3
Select a sound from the list of sounds shown on the display.
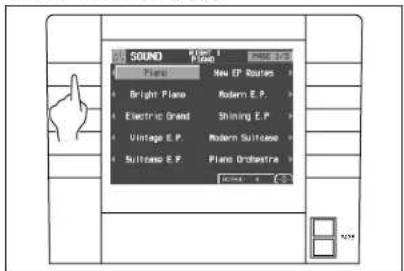
- The list of sounds is contained on two or more screen "pages". To see a different part of the list, press either PAGE button.
4
Play the keyboard.
- Your Keyboard features Touch Response. You control the volume by playing the keys harder or softer.
5
Set the MAIN VOLUME to an appropriate level with the sliding control.



See and listen to the demonstration
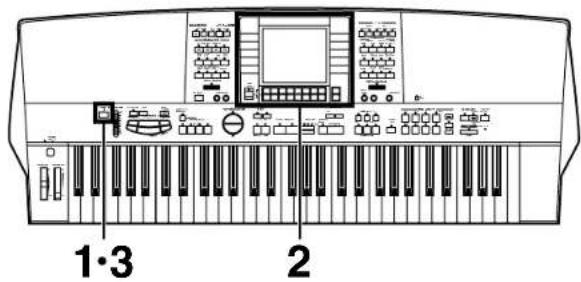
1
Press the DEMO button.

2
Use the buttons to the left and right the display to select the demonstration tune you wish to see and listen to.

- The demonstration performance and display corresponding to your selection will begin.
- To end the demonstration before it has finished, press the START/STOP button.
3
When you are finished listening to the demonstration tunes, press the DEMO button again.
- If you press and hold the DEMO button for a few seconds, or if you press first the DEMO button and then the START/STOP button, all demo tunes are demonstrated in order in a medley performance. The medley
performance continues until the START/STOP button or the DEMO button is pressed again.
- Some of the buttons do not function during the DEMO mode.


natural_image
Line drawing of a piano keyboard layout with control panel and keyboard (no text or symbols)A·B·C
Add breadth.
A
Press the CHORUS button to turn it on.

Add reverberation.
C
Press the REVERB button to turn it on.
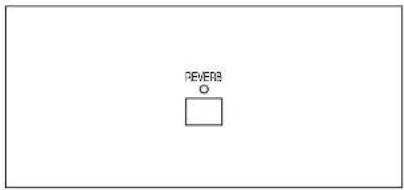
Add effect.
B
Press the MULTI EFFECT button to turn it on.

- You can modify the way in which the various effects are applied. (Refer to page 42.)




Play back commercial song disks (DIRECT PLAY) (KN2400)

natural_image
Line drawing of a piano keyboard layout with control panel and keyboard (no text or symbols)2·3·4
1
Insert the song disk into the Disk Drive slot.

natural_image
Line drawing of a piano keyboard with an inserted slot and a separate clip (no text or symbols)3
Use a the buttons below the display to select a song.

2
On the DISK MENU display, select DIRECT PLAY.

- For SMF songs, use the PLAY AS button to specify a sound arrangement mode.
4
Press the START button.
• The selected song is played back.
- DIRECT PLAY is possible from the following disks:
| Standard MIDI File |
| Standard MIDI File with Lyrics |
| DISK ORCHESTRA COLLECTIONTM (DOC) |
| PianoDiscTM |
* All product and company names are trademarks or registered trademarks of their respective owners.
* DISK ORCHESTRA COLLECTION is a trademark of the YAMAHA Corporation.
Play back SD cards
(SD-AUDIO PLAY) (KN2600)

natural_image
Line drawing of a vintage electronic instrument with keyframe keyboard layout (no text or symbols)5·6 1·2·3 4
1
Open the lid of the SD slot.

natural_image
Diagram showing a mechanical setup with an arrow indicating motion, no text or symbols present- Open it completely.
4
Press the SD button to turn it on.
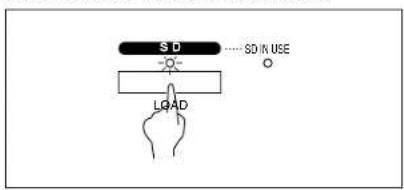
5
On the SD MENU display, select SD-AUDIO PLAY.
2
Insert an SD card with the stored songs into the SD slot.

natural_image
Diagram of a mechanical device with a handle and base, showing no text or symbols- Push the card until it locks.
6
Press the Playback button.

- Playback of the first song begins.
3
Close the lid.

natural_image
Diagram showing a mechanical component with a downward arrow indicating force or direction (no text or symbols present)- No operation is possible when the lid is open.
Select the registration for a music style (MUSIC STYLIST)

1
Press the MUSIC STYLIST button to turn it on.

3
Use the CATEGORY ▲ and ▼ buttons to select a category.
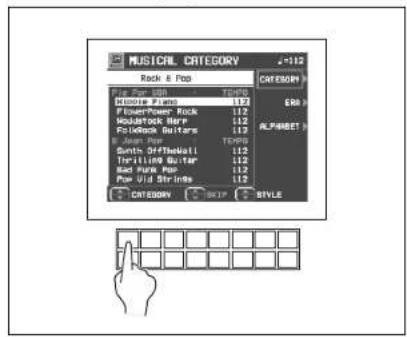
2
Select MUSICAL CATEGORY.
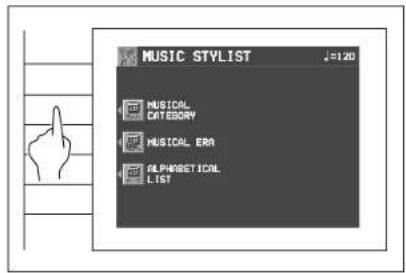
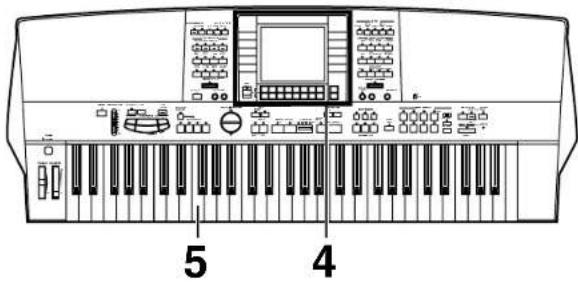
4
Use the STYLE ▲ and ▼ buttons to select a music style.

- You can use the SKIP^ and ∨ buttons to skip to the previous or following sub category.
- When you select a style, the sounds and rhythm which are best suited for the selected style are automatically selected.
5
Play the keyboard.
- When you specify a chord, an intro is played, after which the automatic rhythm starts.
- You can also search for a style alphabetically or by music era. (Refer to page 61.)
Automatic panel settings
(ONE TOUCH PLAY)

1
In the RHYTHM GROUP section, press the button for a desired rhythm.
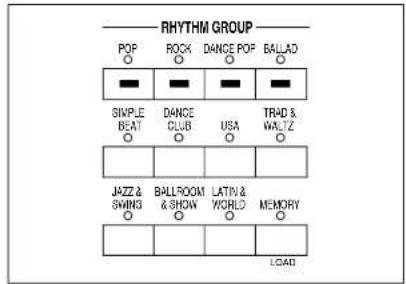
Select a rhythm from the list of rhythms on the display.
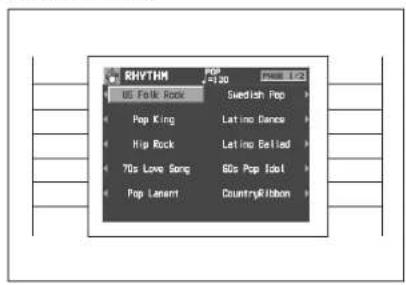
3
Press the AUTO PLAY CHORD'S OFF/ON button to turn it on..

4
Press the AUTO PLAY CHORD's MODE button to turn it on.
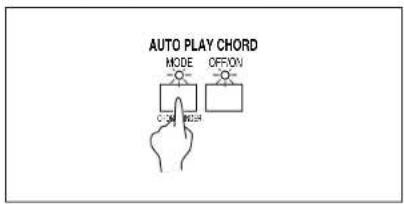
5
Select BASIC on the display.
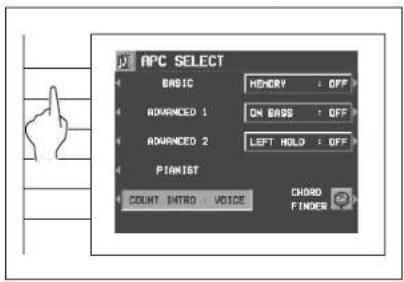
6
Press and hold the ONE TOUCH PLAY button for a few seconds.

- The sound, effects and tempo suitable for the selected rhythm are automatically selected. The tempo can be adjusted with the TEMPO/PROGRAM.

natural_image
Line drawing of a CD or audio workstation keyboard with control panel and keyboard layout (no text or labels)7 8

7 | Use your left hand to play the chords and your right hand to play the melody.
- Pressing a key on the left area of the keyboard will cause the automatic rhythm pattern to start playing (synchro start).
8 | At the end of your performance, press the INTRO & ENDING 1 or 2 button.

- An ending pattern is played, after which the automatic accompaniment stops.
- If the START/STOP button is pressed, the accompaniment stops immediately.


- In this example you played chords by pressing the keys for the "root notes" (ONE FINGER chords). But you can also specify the chord by playing all the notes in the chord. (Refer to page 52.)
- You can insert a fill-in pattern while the rhythm pattern is playing by pressing either the FILL IN 1 or FILL IN 2 button.



Store your panel settings
(PANEL MEMORY)

natural_image
Line drawing of a CD or audio workstation keyboard with control panel and keyboard layout (no text or labels)2·3
1 | Set up the desired panel settings (sounds, volumes, etc.)
2 | Use the NEXT BANK button to select a bank (A, B, C).

- The bank numbers are shown on the display.
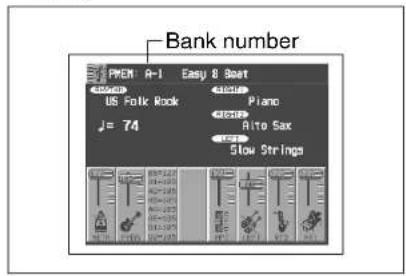
3 With the SET button held down, press one of the numbered buttons of the PANEL MEMORY (1 to 8).

- The current panel settings are now stored in the specified bank and number. When you select the same bank and number again, the stored panel settings are recalled.
- If you do not wish to recall the rhythm, tempo, etc. with the PANEL MEMORY, press and hold the SET button for a few seconds to show the PANEL MEMORY MODE display, and select NORMAL.
24
QQTG0692



Record your performance
(SEQUENCER)

Sonatina
Sound: Piano (RIGHT 1 part)


1 In the SEQUENCER section, press the EASY REC button to turn it on.

21 Press the OK button.

• The display changes to the REALTIME RECORD display.
(Continued on the next page)



natural_image
Front view diagram of a CD-ROM player with keyframe keyboard, control panel, and buttons (no text or labels)4A B3
3
Play the song on the keyboard.
4
When you have finished playing, press the EASY REC button again to turn it off.

• The PLAY button in the SEQUENCER section turns on.
Playing back your recorded performance
A
Press the SEQUENCER RESET (FILL IN 1) button.

B
Press the START/STOP button.
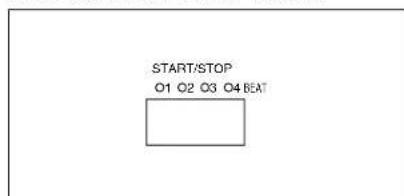
- Your performance is played back just as you recorded it.
- When you are finished playing back your performance, press the PLAY button in the SEQUENCER section to turn it off.
Save data on an SD card (KN2600)

1 Insert an SD card you wish to save to into the SD slot. (Refer to page 19)

natural_image
Line drawing of a mechanical device with a handle and control panel (no text or symbols)- Close the cover securely.
41 Select TECHNICS FORMAT.

21 Press the SD button.

5 | Specify the FOLDER and a SONG number to save to.
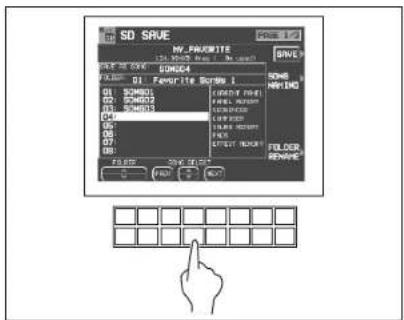
31 On the SD MENU display, select SAVE.

61 Press the SAVE button.

• The performance data of the song recorded in the SEQUENCER is saved on the SD card.


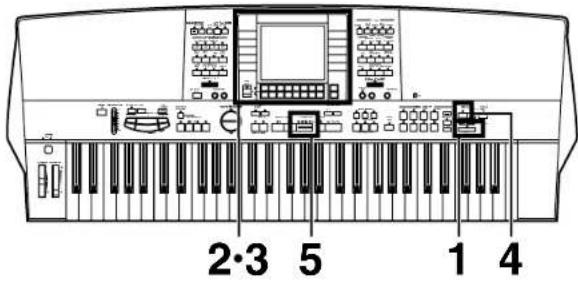
Recall data from an SD card
1 | Press and hold the SD button for a few seconds.

3 | Press the LOAD button. • The data is copied to the internal memory of this instrument.
4 | Press the PLAY button in the SEQUENCER section to turn it on.

21 Select the FOLDER and the SONG you wish to load.
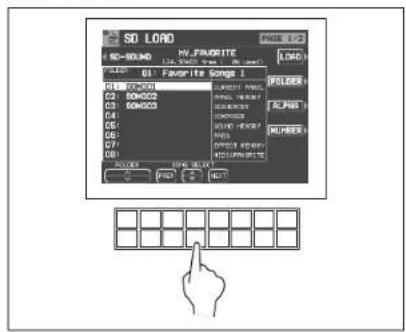
51 Press the START/STOP button.
• The recalled song is played back.
■The following data can be saved/loaded:
| PERFORMANCE | CURRENT PANEL (The current panel settings) |
| PANEL MEMORY | |
| SEQUENCER | |
| COMPOSER (MEMORY contents) | |
| SOUND MEMORY | |
| PERFORMANCE PADS (USER memories) | |
| EFFECT MEMORY | |
| BACKUP | MIDI (USER memories for the MIDI PRESETS) & FAVORITES |
- KN2400: The data can be saved in the disk. (Refer to page 125.)
Load rhythm data from a Technics pattern disk (COMPOSER LOAD) (KN2400)

natural_image
Line drawing of a CD or audio workstation keyboard layout (no text or labels)2 3·4
1 Insert a commercially sold Technics pattern disk into the Disk Drive slot.
2 In the RHYTHM GROUP section, press and hold the LOAD (MEMORY) button for a few seconds.

- Rhythm data is loaded to the COMPOSER memory (MEMORY). You can use the rhythms during your performance, just like the preset rhythms.
31 Select the name of the pattern to load.
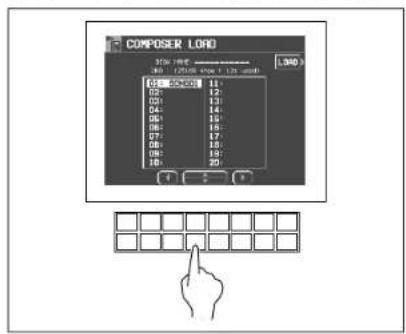
About the display
A large-size display, easy to operate with excellent readability, is used for displaying various information such as the names of the selected sounds and rhythms etc. and when setting the functions. Let's take a look.
- The display illustrations shown in this User's Manual are examples for the sake of clarification; the actual displays on your instrument may differ from the illustrations.
Normal display (HOME PAGE)
This is the kind of information you see on the display during a normal performance.
Selected rhythm
Tempo
RIGHT 1 part sound
RIGHT 2 part sound
LEFT part sound
Volume of each part
Volume balance
At the bottom half of the normal display, the volume balance of each part is represented in a fader illustration and by a number (0 to 127). You can use the balance buttons below the display to adjust the volumes.
OTHER PARTS/TR
MUTE
APC: AUTO PLAY CHORD PADS: PERFORMANCE PADS METR: METRONOME
When setting the volume balance, press the upper button to increase the volume and the lower button to decrease it.
- Hold a button down to scroll the volume quickly.
Pressing the OTHER PARTS/TR button will display the auto accompaniment part setting screen. - DRM: DRUMS ACP: ACCOMP
■ MUSIC
"MUSIC" pertains to the SEQUENCER's volume.
- Affects the sound of all parts except the keys.
- KN2600: does not affect SD-AUDIO data playback.
■ MUTE
To mute a part, press both the corresponding upper and lower buttons at the same time.
- The volume display for a muted part is shown as "MUTE."
- Pressing either balance button for a muted part will cancel the mute function.
By the pressing the OTHER PARTS/TR button, the screen sequentially switches to the respective volume balance screens of the play part, auto accompaniment part, playback part (1 to 8), and playback part (9 to 16). The playback part
(PT) is used to playback recording and song data.
- When there are other parts or tracks to access, the OTHER PARTS/TR indicator is lit.
PAGE
When there are additional parts to the current display, a page number indication, for example PAGE1/2, appears in the upper right corner of the screen. For example, 1/2 indicates that there are two pages of the display, and the current page is page 1. In this case, you can use the upper and lower PAGE buttons, to the right of the balance buttons, to view different "pages" of the display.
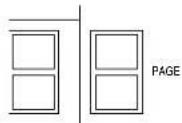
- Press the upper button to view the next page of the display, and the lower button to view the previous page of the display.
- On the last page of the display, pressing the upper button returns to the first page. And conversely, on the first page of the display, pressing the lower button will skip to the last page.
Menu display
The PROGRAM MENUS button controls multiple functions. Press the button to access its menu display.

■ Example of menu display: PROGRAM MENUS
Select a function from the menu display by pressing the corresponding button to the left or right of the display indicated by the ◀ and ▶ arrows.
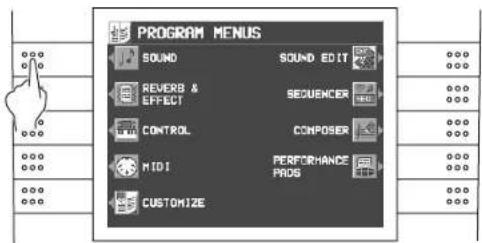
- In this manual, the steps describing how to select a function from a menu display are generally abbreviated as follows, for example: "On the PROGRAM MENUS display, select SOUND."

Setting display
When you select an item from the menu display, the setting display for the item is shown.
The buttons to the right, left and/or directly below the display are used to select and adjust the settings.
■ Example of setting display: MASTER TUNING

Press the button corresponding to the^ or v button on the display to change the value.
- In this manual, this procedure is written as follows: "Use the ∧ and ∨ buttons to adjust the pitch."
TEMPO/PROGRAM
If the TEMPO/PROGRAM indicator is lit while you are using the display to adjust the setting, it indicates that these buttons can be used to quickly change the displayed value or setting.

- The setting which can be adjusted is highlighted on the display.
EXIT
While the setting display is shown, press this button to go back to the previous display.

DISPLAY HOLD
Press this button to turn it on when you wish to maintain the current display. You can keep a display which is normally automatically canceled, for example, or even during a performance, you can monitor information which is not shown on the normal display.

- The indicator for this button may flash if the current display is one which is normally automatically canceled.
- If the PROGRAM MENUS button, for example, is pressed, the DISPLAY HOLD mode is canceled.
CONTRAST
Press the CONTRAST button and adjust the display's viewability using the ∧ and ∨ buttons on the screen.


- When adjusting the CONTRAST, the set value is shown shortly on the display.
HELP
You can find an explanation of each button's function on the display.
- Press the HELP button.
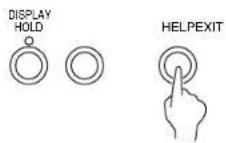
• The following display appears.

- Use the buttons below the display to select a language.
- Press the OK button.
- Press a button on the panel whose explanation you wish to read.
Favorites
With up to 9 types of sounds, rhythms, functions, etc., you can arrange them to make up your own unique screen pattern.
- Press the FAVORITES button to turn it on.

• The display looks similar to the following.
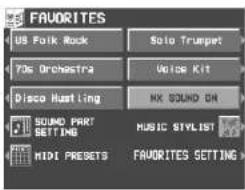
-
Press the FAVORITES SETTING button.
-
An explanation of the button's function is shown on the display.
- Press the HELP button again to exit the help mode.
- Attention display messages and error messages are also shown in the selected language.
- The appearance of the display on your instrument may be different from the illustrated display in this manual depending on the region in which your instrument was purchased and the selected display language.
• The display looks similar to the following.

-
Select the desired item.
-
Use the CATEGORY and buttons to specify a category, and then the ITEM and buttons to select an item.
• The MUTE KEYS function silences the sound of the keyboard keys. This is convenient when you wish to pretend to play the keyboard while playing back a recorded performance. - The PANIC function interrupts the sound, for example, when it fails to cease during a MIDI performance.
(Continued on the next page)


- While pressing the SET button, specify where you wish to paste (put) the item.
- While the SET button is depressed, the display appears as shown below. Use the buttons to the left and right of the display to specify where you wish to paste the item.
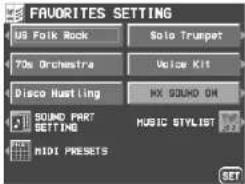
- Repeat steps 3 and 4 to create the display you want.
- There are nine settable items on the display.
- On the FAVORITES SETTINGS display, press the OK button.
- Your customized display is stored.
About the display
■ Recall a FAVORITES display
1. Press the FAVORITES button to turn it on.
2. Use the buttons to the left and right of the display to specify the ITEM you wish to recall.
- The FAVORITES settings can be saved to a disk/card.

Part I Sounds and effects
Overview of sounds and effects
The following is an overview of the sound parts of this instrument.
NX SOUND
NX SOUND is the Technics original sound generator format which evokes realtime performance quality and expressive power, and dramatically expands the number of sounds and effects generated. This format includes GM2 (General MIDI Level 2), and make various controls possible when data is created and reproduced by computer.
- For information about GM2, refer to page 118.
- Equipment with the logo shown below is compatible with NX SOUND song data.

Part
This instrument is organized into the following parts.
These are the parts the performer plays on the keyboard.
• These are independent from the playback parts. For example one can to perform on the keyboard while playing back a song disk with 16-part standard MIDI files (SMF).
PART1 to 16:
SMF song disk playback parts, or parts for MIDI receive.
ACCOMP1 to 5, BASS, DRUMS 1, 2:
Parts for the automatic accompaniment.
PADS:
Parts for the PERFORMANCE PADS
Part I Sounds and effects
Selecting sounds
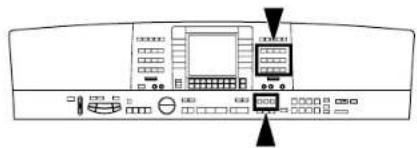
natural_image
Front view of a computer interface panel with buttons and ports (no visible text or labels)Select the sounds for the three parts you can play on the keyboard—RIGHT 1, RIGHT 2 and LEFT. After first selecting a part and a SOUND GROUP, choose the desired sound from the display.
Select a sound
- In the PART SELECT section, choose RIGHT 1, RIGHT 2 or LEFT.
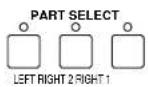
- The CONDUCTOR buttons are used to specify which part is heard. (Refer to page 39.)
-
For the RIGHT 1 and RIGHT 2 parts, when a CONDUCTOR button is selected, the corresponding PART SELECT button is also activated.
-
In the SOUND GROUP section, select a sound group.

- The sounds in DRUM KITS are percussion sounds that you play by striking the keyboard keys.
-
MEMORY is reserved for storing sounds you modify. (Refer to page 170.)
-
Select the desired sound from the list on the display.

- When you select a sound, the optimum effects for the sound are automatically applied. You can also choose to cancel this automatic feature. (Refer to page 153.)
- You can use the PAGE buttons to view a different page of the list.
- Use the OCTAVE ∧ and ∨ buttons to select the octave.
- The sound you select is memorized for the part you selected in step 1.
- The sounds that can be selected for the RIGHT 1, RIGHT 2 and LEFT parts and for PART 1-16 vary.
-
The illustrated display shows one example, and the actual display may be different.
-
Play the keyboard.
- This instrument features INITIAL TOUCH (the volume, for example, changes depending on how hard the keyboard is played).

Part I Sounds and effects
SOUND EXPLORER
This is a convenient feature for finding the sound you want from the many available sounds.
- In the PART SELECT section, choose RIGHT 1, RIGHT 2 or LEFT.
- Press the SOUND EXPLORER button to turn it on..


- Use the GRP ∧ and ∨ buttons to select a GROUP of sound.
-
Use the buttons on both side of the display to select the sound.
-
The numerical value that is displayed for each sound is the MIDI [BANK MSB, LSB]-PROGRAM CHANGE number.
• GM2 sounds are selected on this display.
ALPHABET
Press the CTG button to show the sound names in alphabetical order.
- Press the ALP button to return to the CATEGORY display.
Digital Drawbar

natural_image
Front panel of a computer interface with control buttons and a monitor (no visible text or symbols)You can play organ sounds while controlling the drawbars on the display.
- In the PART SELECT section, select a part.
- Press the DIGITAL DRAWBAR button to turn it on.

• The display looks similar to the following.

- Use the balance buttons below the display to adjust the volume of each drawbar.
• The volume of each drawbar is illustrated on the display and changes when you press the
corresponding balance buttons to adjust the volume.
- The DIGITAL DRAWBAR can not be selected for the ACCOMP and BASS parts of the COMPOSER, SOUND ARRANGER or PERFORMANCE PADS.
Press the DRAWBAR SETTING button.
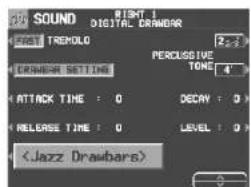
(Continued on the next page)
Part I Sounds and effects
■ Change the sound type
Use the
■ PERCUSSIVE TONE
PERCUSSIVE TONE adds a tone with a fast initial attack to the drawbar sounds. You can select two pitch levels of attack tones.
Use the PERCUSSIVE TONE 2 2/3' and 4' buttons to turn the respective tone on or off.
TREMOLO
Tremolo is a rapid oscillation in volume, like the effect of a rotating speaker. The tremolo speed can be changed while you are playing.
Use the TREMOLO button to switch between the SLOW and FAST rotating speeds.
- The tremolo setting is effective for each part in common.
• The TREMOLO is disabled if the MULTI EFFECT button is turned ON.
■ Other settings
Use the buttons on either side of the display to select a setting item, and use one of the^ and ∨ buttons, whichever is relevant for the selection, and set.

ATTACK TIME:
Use the ∧ and ∨ buttons to adjust the time it takes for the drawbar sound to sound after a key is played.
RELEASE TIME:
Use the ∧ and ∨ buttons to adjust the time it takes for the drawbar sound to die out after the keys are released.
DECAY:
Use the ∧ and ∨ buttons to adjust the time it takes for the percussive tone to die out.
LEVEL:
Use the ∧ and ∨ buttons to adjust the volume of the percussive tone.
- The above settings are effective for the RIGHT 1, RIGHT 2 and LEFT parts in common.
About foot marks
The foot indication (for example 8') refers to the pitch of a rank of pipes in a pipe organ. If 8' is used as the standard (the pitch as played on the keyboard), a 16' rank pitch will be one octave below the 8' rank pitch, and a 4' rank pitch one octave above.
When the C^3 key is pressed, the sounds of the different pitch ranks are as follows.

Part I Sounds and effects
Assigning parts to the keyboard

natural_image
Front panel of a computer interface with control panels and buttons (no text or symbols visible)The CONDUCTOR buttons are used to assign the parts (RIGHT 1, RIGHT 2, LEFT) to the keyboard in many different ways. For example, you can split the keyboard into right and left sections (SPLIT), and assign a different sound to each section.
CONDUCTOR
| CONDUCTOR settings | How sounds are assigned to the keyboard | |
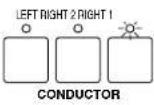 | All keys produce theRIGHT 1 sound.RIGHT 1 | |
 | All keys produce theRIGHT 2 sound.RIGHT 2 | |
 | All keys produce both theRIGHT 1 sound and theRIGHT 2 sound.RIGHT 1 + RIGHT 2 | |
 | The left keys produce theLEFTsound and the right keys produce theRIGHT 1 sound and theRIGHT 2 sound. | |
| LEFT RIGHT 1 + RIGHT 2 | ||
 | The left keys produce theLEFTsound and the right keys produce theRIGHT 1 sound. | |
| LEFT RIGHT 1 | ||
 | The left keys produce theLEFTsound and the right keys produce theRIGHT 2 sound. | |
| LEFT RIGHT 2 | ||
- The volume for each part can be adjusted independently. (Refer to page 30.)
- The following conditions are in effect when the AUTO PLAY CHORD is used. —BASIC, ADVANCED mode: You cannot assign sounds to all the keys. —PIANIST mode: The keyboard cannot be split.

Part I Sounds and effects
SPLIT POINT
When the keyboard is split into left and right sections, the split point is usually C3.

Sounds and effects
■ Customized split point
Use the following procedure if you wish to store a split point at a location other than C3.
- Press the SPLIT POINT button.

• The following display appears.

-
Press a key on the keyboard to specify the desired split point.
-
A split point is set at the location of the pressed key, and is indicated on the keyboard illustration on the display.
- The key at the split point is the lowest note of the right keyboard section.
• After a few seconds, the display exits the setting mode.


Part I Sounds and effects
Effects
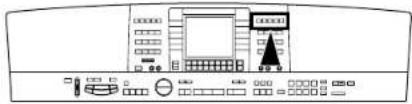
natural_image
Front view of a control panel with buttons and display (no visible text or symbols)SUSTAIN
SUSTAIN is the gradual fading out of musical tones after the key is released.
- In the CONDUCTOR or PART SELECT section, turn on the part to which this effect will be applied.
- Press the SUSTAIN button to turn it on.

- The SUSTAIN can be set to on or off for each part.
- This effect does not work for the sounds in the DRUM KITS sound group.
• This effect may not work for some sounds. - In the initialized state, the sustain can be turned on and off with the optional Foot Switch (sold separately).
DIGITAL EFFECT
DIGITAL EFFECT gives the sound richness and enhances your performance.
- In the CONDUCTOR or PART SELECT section, turn on the part to which this effect will be applied.
- Press the DIGITAL EFFECT button to turn it on.

- The on or off status of the DIGITAL EFFECT is preset for each sound.
- This effect does not work for the sounds in the DRUM KITS sound groups.
• This effect may not work for some sounds.
Part I Sounds and effects
MULTI EFFECT
The MULTI EFFECT works like a studio effects processor, providing effects such as CHORUS, PHASER, DELAY and DISTORTION.
- In the CONDUCTOR or PART SELECT section, turn on the part to which this effect will be applied.
- Press the MULTI EFFECT button to turn it on.

■ Type and parameter settings
- Press and hold the MULTI EFFECT button for a few seconds.
• The display changes to the following.
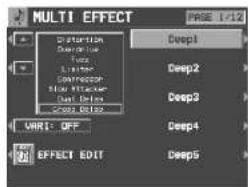
- Use the ▲ and ▼ buttons to select an effect group.
- The EFFECT MEMORY is for edited effects (see below).
- Use the buttons to the right of the display to select the type.
- If the types comprise more than one display "page," use the PAGE buttons to switch pages.
- Press the VARI button to enable the variation effect.
- This display can also be accessed from the REVERB & EFFECT MENU display. (Refer to page 155.)
■ EFFECT EDIT
The effects can be edited and then stored in a memory.
- Select an effect type to use as a base.
- Press the EDIT button.
• The display changes to the following.
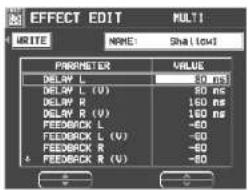
- Use the PARAMETER ▲ and ▼ buttons to select the parameter.
-
Use the VALUE ∧ and ∨ buttons to adjust the setting.
-
The parameters vary depending on the effect type selected as the base.
• (V) is the abbreviation of VARIATION. -
Press the WRITE button.
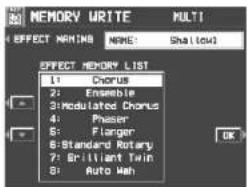
- Press the EFFECT NAMING button and assign a name to the effect, if necessary.
- Refer to page 65 for details about the NAMING procedure.
- Use the EFFECT MEMORY ▲ and ▼ buttons to specify the location in which to store the edited effect.
- Press the OK button.

Part I Sounds and effects
REVERB
REVERB applies a reverberation effect to the sound.
Press the REVERB button to turn it on.

■ Type and parameter settings
- Press and hold the REVERB button for a few seconds.
• The display changes to the following.

- Use the ▲ and ▼ buttons to select an effect group.
- The EFFECT MEMORY is an edited effect group.
- Use the buttons to the right of the display to select a type.
- If the types comprise more than one display "page," use the PAGE buttons to switch pages.
- Use the TOTAL DEPTH ∧ and ∨ buttons to set the depth of the effect.
- This display can also be accessed from the REVERB & EFFECT MENU display. (Refer to page 155.)
■ EFFECT EDIT
Your edited effect can be stored in a memory for later recall.
• The procedure is the same as for MULTI EFFECT. (Refer to page 42.)
CHORUS
Add breadth to the sound.
Press the CHORUS button to turn it on.

■ Type and parameter settings
- Press and hold the CHORUS button for a few seconds.
• The display looks similar to the following.
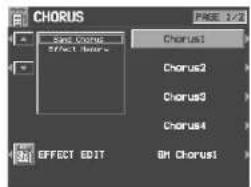
- Use the ▲ and ▼ buttons to select the name of the effect group.
- EFFECT MEMORY is an edited effect group.
- Use the buttons to the right of the display to select a type.
■ EFFECT EDIT
Your edited effect can be stored in a memory for later recall.
• The procedure is the same as for MULTI EFFECT. (Refer to page 42.)


Part I Sounds and effects
MIC
You can add reverb and other effects to sound from a connected microphone.
- Connect a microphone to this instrument. (Refer to page 188.)
- Set the PROGRAM MENUS button to ON.

• The display will appear as follows:
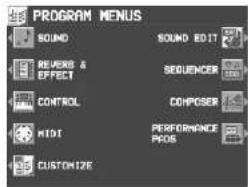
- Select REVERB & EFFECT.

- Select MIC REVERB & EFFECT.
• The display looks similar to the following.
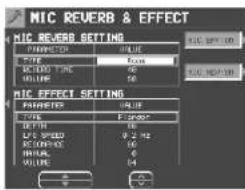
-
Set using the button on the left of the display. Select the effect name (MIC REVERB/MIC EFFECT).
-
Set the MIC REVERB.
-
Use the PARAMETER ▲ and ▼ buttons to select an attribute, and use the VALUE ∧ and ∨ buttons to adjust the corresponding setting.
-
You can specify whether or not to apply the reverb with the MIC REV ON/OFF button.
-
Set MIC EFFECT.
-
Use the PARAMETER ▲ and ▼ buttons to select an attribute, and use the VALUE ∧ and ∨ buttons to adjust the corresponding setting.
- Enable or disable the effect using the MIC EFF ON/OFF button.
Part I Sounds and effects
Controller
Use the controllers (left next to the keyboard) to change the nuance of the sound while you are playing.
PITCH BEND
The pitch of the instrument can be continuously changed with the PITCH BEND wheel at the left end of the keyboard. Using this control, you can produce the effect of bending the strings on a guitar.
While pressing a key on the keyboard, move the wheel up and down to control the pitch.

- When you release your hand from the wheel, it returns automatically to the center position and the pitch bend effect is turned off.
- The pitch bend effect does not function for the AUTO PLAY CHORD accompaniment pattern or during a normal performance for the sounds of the LEFT part.
- The amount of pitch bend can be set. (Refer to page 149.)
MODULATION (KN2600)
The MODULATION wheel is used to apply a vibrato effect, for example, to the sound. While pressing a key on the keyboard, move the wheel up to add the effect.

- When this effect is not needed, set the MODULATION wheel to the MIN position.
- This effect differs depending on the selected sound.
- The vibrato effect does not function for the AUTO PLAY CHORD accompaniment pattern or during a normal performance for the sounds of the LEFT part.



Part I Sounds and effects
Transpose

natural_image
Front panel of a computer interface with control buttons and a central display (no visible text or symbols)The TRANSPOSE buttons are used to change the key of the entire instrument in semi-tone steps across an entire octave.
Suppose you learn to play a song—in the key of C, for example—and decide you want to sing it, only to find that it's either too high or too low for your voice. Your choice is to either learn the song all over again in a different key, or to use the TRANSPOSE feature.
TRANSPOSE

Adjust the key with the + and - buttons.
- The key is changed in half-tone increments up to plus or minus one octave.
- If the two buttons are pressed at the same time, the key returns to C.
- When the TRANSPOSE function is active, the transposed key is shown on the HOME PAGE display.

Part I Sounds and effects
Techni-chord

natural_image
Front panel of a computer interface with control panels and buttons (no visible text or labels)TECHNI-CHORD turns your single note melodies into full chords and offers you a choice of different types from a simple duet which adds one harmony note to your melody note, to big band reeds which adds four harmony notes to your melody note. If TECHNI-CHORD is part of a ONE TOUCH PLAY or MUSIC STYLIST registration, a suitable TECHNI-CHORD type will be selected automatically.
Example:
Left hand (chord)
Right hand (melody)

-
Split the keyboard into left and right sections.
-
Press the TECHNI-CHORD button to turn it on.

- Play the keyboard.
• The melody you play with your right hand is automatically played in chords which are based on the chords you play with your left hand.
- This feature is very effective when used with the AUTO PLAY CHORD.
Type setting
- Press and hold the TECHNI-CHORD button for a few seconds.
• The display looks similar to the following.

- Use the ◀, ▲, ▼, ▶ buttons to select the harmony style.
- When the OCTAVE, HARD ROCK or FAN-FARE style is selected, the TECHNI-CHORD functions even when the keyboard is not split.
■ ORCHESTRATOR
You can specify which part is used for the harmony tones. Your TECHNI-CHORD performance is enhanced by selecting harmony sounds different from the sounds you play and the sounds produced by the automatic accompaniment.
- Use the ORCHESTRATOR ∧ and ∨ buttons to select the part for the harmony notes.
- If CONDUCTOR is selected, the harmony notes are produced in the sounds of the part which is currently selected in the CONDUCTOR (RIGHT 1, RIGHT 2). In other words, the harmony notes are produced in the same sound as the melody notes. If both RIGHT 1 and RIGHT 2 are on, the harmony notes are produced in the sound of the RIGHT 1 part.
- In the case of EASY RECORD (see page 77), when set to CONDUCTOR or a part other than PART 4, the TECHNI-CHORD sound is not recorded; so when you use EASY RECORD, please set to one or the other.
- Technics
- Caution for AC Mains Lead
- (For United Kingdom) (For the type as shown in figures A and B)
- CAUTION!
- IMPORTANT
- THIS PLUG IS NOT WATERPROOF — KEEP DRY.
- Before use
- How to replace the fuse
- Part II Playing the rhythm
- Overview of rhythm performance
- Rhythm and accompaniment pattern
- Rhythm and Style
- Part V Composer
- Outline of the Composer
- Rhythm components which can be stored
- Memory capacity
- ■ MEMORY
- Part IX Reverb & Effect
- Outline of the Reverb & Effect
- Summary of the REVERB & EFFECT menu items
- Tone Control
- Part X Sound Edit
- Outline of the Sound Edit
- Summary of the SOUND EDIT menu items
- Easy Edit
- Easy Edit items
- Tone Edit
- About tones
- TONE SELECT
- KEY ON:
- KEY OFF:
- LEGATO:
- NON LEG:
- PEDAL:
- CHORD:
- ■ TONE COPY
- KEY LAYER
- VELOCITY LAYER
- TONE DYNAMICS
- Pitch Edit
- KEY SHIFT & DETUNE
- KEYBOARD OCTAVE
- PITCH ENVELOPE
- PITCH ENVELOPE TOUCH & KEY FOLLOW
- Filter Edit
- FILTER & EQUALIZER
- RANGE
- FREQUENCY
- GAIN
- TOUCH & KEY FOLLOW
- FILTER ENVELOPE
- FILTER ENVELOPE TOUCH & KEY FOLLOW
- Amplitude Edit
- LEVEL
- ENVELOPE
- LFO Edit
- LFO
- SELECT
- SPEED
- KEYSYNC
- PHASE
- WAVE
- DELAY
- DEPTH
- TOUCH
- Effect Edit
- EFFECT
- ■ DIGITAL EFFECT
- Controller Edit
- CONTROLLER
- Store the new sound
- Procedure
- Select a new sound
- Part XI Control
- Outline of Control functions
- Overall Touch Sensitivity
- Foot Controllers
- ■ EXPRESS. PEDAL
- Part XII Customize
- Outline of Customize functions
- Display Time Out
- Data Protection
- MIDI Setting Load Option
- Part XIII MIDI
- What is MIDI?
- MIDI terminals
- OUT:
- Connection examples
- MIDI channels
- The following kinds of data can be transmitted/received.
- ■ NOTE data
- ■ PROGRAM CHANGE
- ■ CONTROL CHANGE
- ■ EXCLUSIVE data
- Outline of MIDI functions
- Summary of the MIDI menu items
- Part Setting
- Control Messages
- Realtime Messages
- REALTIME COMMANDS
- CLOCK
- Common Setting
- Mode Setting
- Input/output Setting
- DRUM PATTERN OUTPUT
- AUTO PLAY CHORD OUTPUT
- AUTO OCTAVE SHIFT OUTPUT
- MIDI Presets
- Notice
- ■ Storing user settings
- ■ Recalling the USER settings
- Computer Connection
- Initialize
- INITIAL
- About the performance data
- Separately sold options
- PLUG-IN feature
- Terminals
- Back panel terminals
- USB
- - Applications
- Audio Recorder:
- Song Manager:
- MIDI
- EXP PEDAL
- FOOT SW
- MIC
- LINE OUT
- PHONES
- Symptoms which appear to be signs of trouble
- Index
- A
- B
- C
- D
- E
- F
- Panasonic / Technics Musical Instrument Products Limited Warranty
- Limited Warranty Coverage
- Carry-In, Mail-In or In-Home Service
- Limited Warranty Limits And Exclusions
- Customer Services Directory
- Accessory Purchases:
- Summary of the COMPOSER menu items
- Three ways to record in the COMPOSER
- Simple recording method
- Create a completely new rhythm
- Prepare to record
- KEY SETTING
- Recording procedure
- ■ Button functions
- Chord Modify Change
- Playback
- Step Record
- Measure Edit
- Select the function you wish to edit.
- MEASURE COPY
- MEASURE ERASE
- MEASURE DELETE
- MEASURE INSERT
- Pattern Copy
- SEQ TO COMPOSER COPY
- Part VI Disk Drive (KN2400)
- Outline of the Disk Drive function
- Internal memory and Disk Drive
- BACKUP
- Main parts of the Disk Drive
- Eject button
- Using commercial song disks
- ■ Loading Technics File format disks
- ■ About Standard MIDI Files
- Playback of commercial song disks
- ■ SMF with LYRICS
- SMF LYRICS
- ■ GENERAL MIDI LEVEL 2 (GM2)
- Outline of the procedure
- ■ DISK IN USE
- ■About the menu
- Loading data
- LOAD
- ■ SINGLE LOAD
- ■ SMF LOAD
- Press the LOAD button.
- ■ COMPOSER LOAD
- Direct Play
- ■ Adjusting the playback tempo
- ■ The display during playback
- ■ MEDLEY PLAY
- Song Medley
- Saving data
- Disks
- SAVE
- ■ TECHNICS FORMAT
- ■ SMF FORMAT 0
- Disk management
- DISK TOOLS
- ■ FORMAT
- Set the automatic display when a disk is inserted
- PREFERENCES
- DISK INSERT OPTION:
- FILE TYPE PRIORITY:
- Part VII SD Card (KN2600)
- Outline of the SD card
- Management inner memory data
- Play an SD card
- SD-AUDIO
- SD-SOUND
- Attention
- SD LOAD
- FOLDER:
- ALPHABET (See page 134.)
- NUMBER (See page 134.)
- ■ FOLDER
- ■ ALPHABET
- ■ NUMBER
- SD-SOUND LOAD (SMF)
- SD-Audio Play
- SD-Sound Play
- Playlist
- PLAYLIST type
- MEMO
- PLAYLIST EDIT
- SD Song Medley
- ■ SD-SOUND (SMF) FORMAT
- Create an album of your favorite songs
- FAVORITE SONGS
- SD card management
- SD TOOLS
- ■ TECH TOOLS
- ■ SD-SOUND TOOLS
- Set the priority of displays
- SD PREFERENCES
- Part VIII Sound
- Outline of the Sound
- Summary of the SOUND menu items
- Selecting an attribute
- SOUND:
- VOLUME:
- PAN:
- SUSTAIN:
- KEY SHIFT:
- TUNING:
- REVERB:
- DIGITAL EFFECT:
- CHORUS:
- MULTI:
- EQ LOW:
- EQ HIGH:
- GLIDE PEDAL:
- SUSTAIN PEDAL:
- PART EXP PEDAL:
- ORIGINAL TUNING:
- FILTER RESONANCE:
- ATTACK TIME:
- DECAY TIME:
- RELEASE TIME:
- BRIGHTNESS:
- VIBRATO RATE:
- VIBRATO DEPTH:
- VIBRATO DELAY:
- MONO/POLY MODE:
- PORTAMENTO:
- MODULATION SENSITIVITY:
- BEND RANGE:
- Mixer
- MULTI DEPTH:
- CHORUS DEPTH:
- EQUALIZER HIGH:
- EQUALIZER LOW:
- MIDI CHANNEL:
- LOCAL CONTROL:
- EDIT MIXER
- Master Tuning
- Key Scaling
- ■Settings for each key.
- ■ ORIGINAL tuning
- Sound Load Option
- APC Reverb Setting
- Selecting rhythms
- Select a rhythm
- VARIATION
- Start the rhythm
- ■ Normal start
- ■ Synchronized start
- ■ Adjust the tempo
- ■ TAP TEMPO
- Playing the rhythm
- INTRO
- COUNT INTRO
- FILL IN
- ENDING
- Auto Play Chord
- How the AUTO PLAY CHORD works
- Playing chords
- ■ BASIC mode
- ■ ADVANCED 1 mode
- ■ ADVANCED 2 mode
- PIANIST mode
- How to use the AUTO PLAY CHORD
- ■ ON BASS
- Left Hold
- OFF:
- ON:
- CHORD FINDER
- BREAK function
- Fade In/Fade Out
- FADE IN
- FADE OUT
- FADE SET
- Sound Arranger
- Playing back the sounds
- One Touch Play
- Music Stylist
- Setup by music style
- Setup by era
- Setup by alphabetical order
- Music Style Arranger
- How to use the MUSIC STYLE ARRANGER
- How to change the music style during your performance
- RHYTHM:
- SOUND & RHYTHM:
- PANEL MEMORY:
- Panel Memory
- How to store the panel settings
- ■ BANK VIEW
- Assign a name to the bank/memory
- Recall the panel setup
- ■ NEXT BANK
- PANEL MEMORY mode
- NORMAL:
- EXPAND:
- ■ EXPAND MODE FILTER
- Part III Performance Pads
- Playing phrases
- SOLO
- AUTO SETTING
- Copying phrases
- PHRASE COPY
- SEQ TO PAD COPY
- Compile
- Record a phrase
- PLAY SETTING
- CHORD STEP RECORD
- Part IV Sequencer
- Outline of the Sequencer
- SEQUENCER features
- ■ You can change the tempo without changing the pitch
- ■ Consistent sound
- ■ Edit your recorded performance
- ■ Instant search
- Popular features
- ■ Simplified recording method
- ■ Create a one-man ensemble
- ■ Store individual data to create your song
- SEQUENCER menu
- Summary of the SEQUENCER menu items
- RECORD & EDIT
- COPY & PASTE
- RANGE EDIT
- About the measure count
- Sequencer parts
- Easy Record
- Realtime Record
- CYCLE RECORD
- Sequencer Play
- Adjusting the playback tempo
- CYCLE PLAY
- MEDLEY
- Naming
- Panel Write
- Song Select
- Punch Record
- ■ AUTO PUNCH RECORD
- REST:
- ERS:
- BAL:
- ■ Storing control data
- ■ Correcting the data
- Correct the data.
- Performance data
- Sound data
- Control data
- Store a chord progression
- Note value keys
- Reset key
- Correction keys
- Repeat key
- End key
- DELETE key
- ■ Correct the recorded chord progression
- Chord data
- ■ TRACK CLEAR
- Store a rhythm progression
- Track Assign
- ■ TRACK ASSIGN PRESETS
- Quantize
- Song Clear
- Track Clear
- Note Edit
- - Inserting note data
- Drum Edit
- ■ Inserting DRUMS data
- Copy and paste the recorded data
- Select the function
- SONG COPY
- TRACK COPY
- TRACK MERGE
- APC TO SMF CONVERT
- Changing the note position etc. of the recorded data
- NOTE CHANGE
- VELOCITY CHANGE
- TRANSPOSE
- ADVANCE/DELAY
- SD Audio Synchro (KN2600)
- Notice:
- CAUTION:
- FCC Warning:
- VAROITUS:
- ADVARSEL:
- OSTRZEŻENIE:
- WARNING:
- AVISO:
- VAROITUS!
- ADVARSEL!
- UWAGA!
- WARNING!
- AVISO!
- 只限於台灣
- 緊急處理方法
- IMPORTANT SAFETY INSTRUCTIONS
- Safety
- Installation
- Placement
- Environment
- Maintenance
- Service
- Cautions for safest use of this unit
- Installation location
- Power source
- Handling the power cord
- Metal items inside the unit may result in electric shock or damage.
- If water gets into the unit
- If operation seems abnormal
- A word about the power cord
- Don't touch the inside parts of this unit.
- SVENSK:
- BASIC FUNCTIONS
- PRACTICAL APPLICATIONS
- Part I Sounds and effects 35
- Part II Playing the rhythm 48
- Part III Performance Pads....67
- Part IV Sequencer 73
- Part V Composer 104
- Part VI Disk Drive (KN2400) 117
- Part VII SD Card (KN2600) 131
- Part VIII Sound 146
- Part IX Reverb & Effect 155
- Part X Sound Edit....157
- Part XI Control 171
- Part XII Customize 174
- Part XII MIDI 177
- ■ Supplied accessories
- Controls and functions (KN2400)
- Controls and functions (KN2600)
- Getting started
- Before you play
- Playing
- 1
- 2
- 3
- 4
- 5
- See and listen to the demonstration
- Add breadth.
- Add reverberation.
- Add effect.
- Play back commercial song disks (DIRECT PLAY) (KN2400)
- Play back SD cards
- (SD-AUDIO PLAY) (KN2600)
- 6
- Select the registration for a music style (MUSIC STYLIST)
- Automatic panel settings
- (ONE TOUCH PLAY)
- Store your panel settings
- (PANEL MEMORY)
- Playing back your recorded performance
- Save data on an SD card (KN2600)
- Recall data from an SD card
- Load rhythm data from a Technics pattern disk (COMPOSER LOAD) (KN2400)
- About the display
- Normal display (HOME PAGE)
- Volume balance
- APC: AUTO PLAY CHORD PADS: PERFORMANCE PADS METR: METRONOME
- ■ MUSIC
- ■ MUTE
- PAGE
- Menu display
- ■ Example of menu display: PROGRAM MENUS
- Setting display
- TEMPO/PROGRAM
- EXIT
- DISPLAY HOLD
- CONTRAST
- HELP
- Favorites
- Part I Sounds and effects
- Overview of sounds and effects
- NX SOUND
- Part
- PART1 to 16:
- ACCOMP1 to 5, BASS, DRUMS 1, 2:
- PADS:
- Selecting sounds
- Select a sound
- SOUND EXPLORER
- ALPHABET
- Digital Drawbar
- ■ Change the sound type
- ■ PERCUSSIVE TONE
- TREMOLO
- ■ Other settings
- DECAY:
- LEVEL:
- About foot marks
- Assigning parts to the keyboard
- SPLIT POINT
- Sounds and effects
- ■ Customized split point
- Effects
- SUSTAIN
- DIGITAL EFFECT
- MULTI EFFECT
- ■ Type and parameter settings
- ■ EFFECT EDIT
- REVERB
- CHORUS
- PITCH BEND
- MODULATION (KN2600)
- Techni-chord
- Type setting
- ■ ORCHESTRATOR
Brand : PANASONIC
Model : SX-KN2400
Category : Musical instrument